**
ESPAÑOL
**
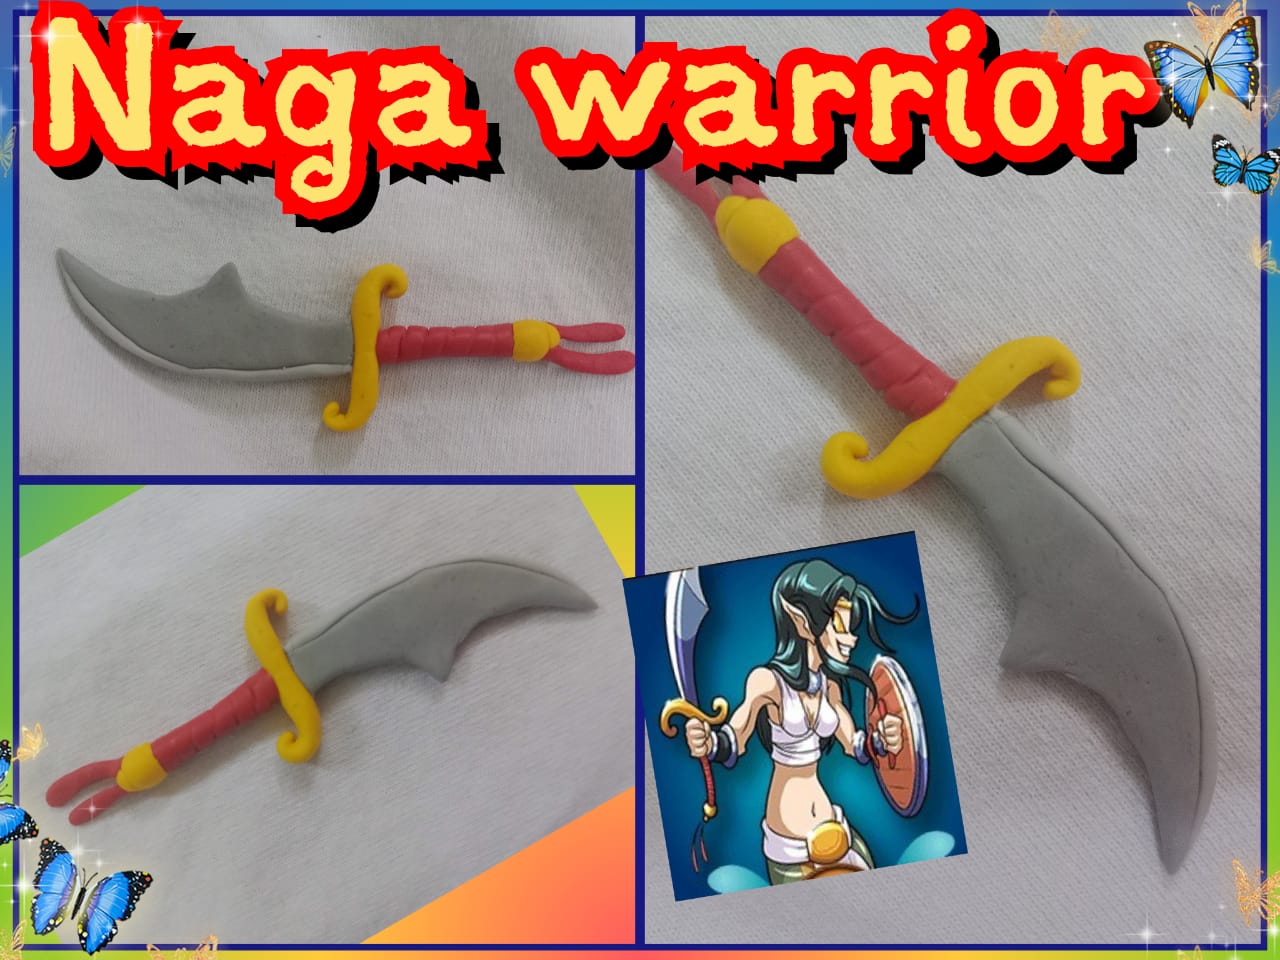
Saludos comunidad de @diyhub , les deseo una excelente semana, en unión de sus seres queridos, estoy aprovechando las vacaciones escolares para terminar varios proyectos de moldeado inspirados en los personajes de Splinterlands, hoy les comparto la elaboración de una espada que corresponde al personaje [Naga Warrior](https://www.splintercards.com/beta_core_naga-Warrior), continuo trabajando con uno de mis materiales preferidos para esculpir que es la masa flexible, la espada lleva los colores gris, rojo y dorado.
**
ENGLISH
**
Greetings @diyhub community, I wish you an excellent week, together with your loved ones, I am taking advantage of the school holidays to finish several molding projects inspired by the characters of Splinterlands, today I share with you the elaboration of a sword that corresponds to the character [Naga Warrior](https://www.splintercards.com/beta_core_naga-Warrior), I continue working with one of my favorite materials to sculpt which is the flexible dough, the sword has the colors gray, red and gold.


---
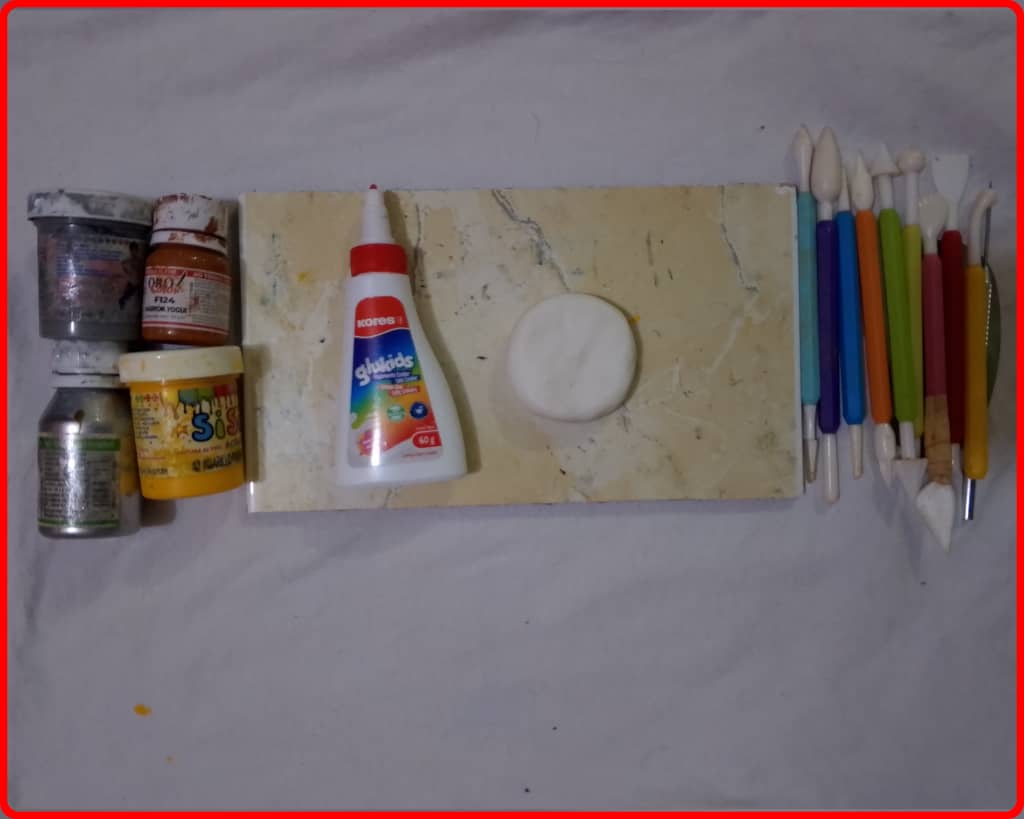
**Materiales**
Pintura al frío
Estecas
Crema para moldear
Pegamento
Masa flexible
Superficie plana para moldear
**Materials**
Cold paint
Cuttings
Modeling cream
Glue
Flexible compound
Flat surface for modeling

---
**Procedimiento**
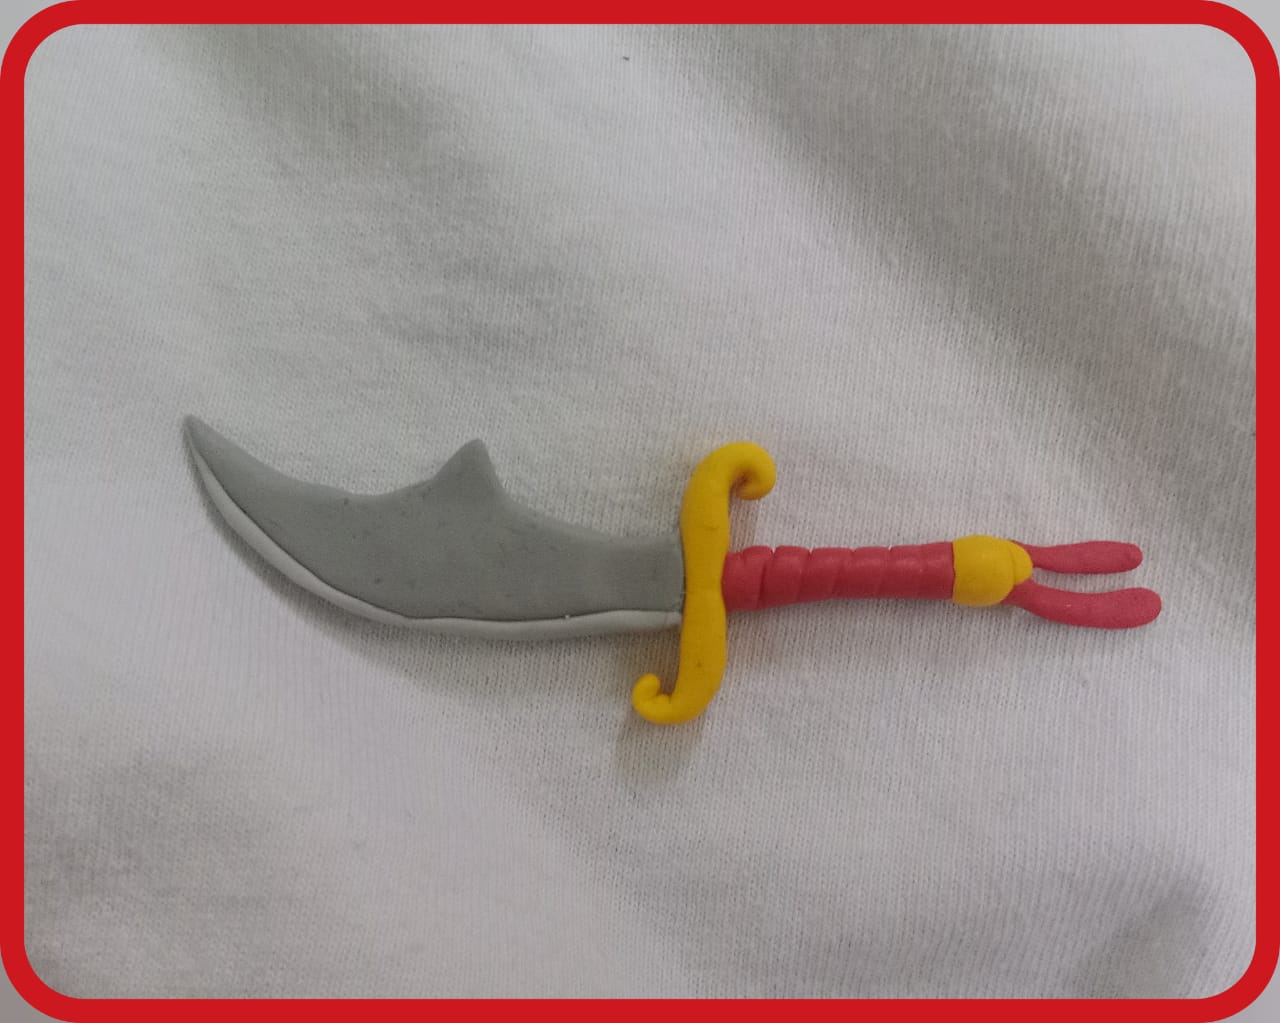
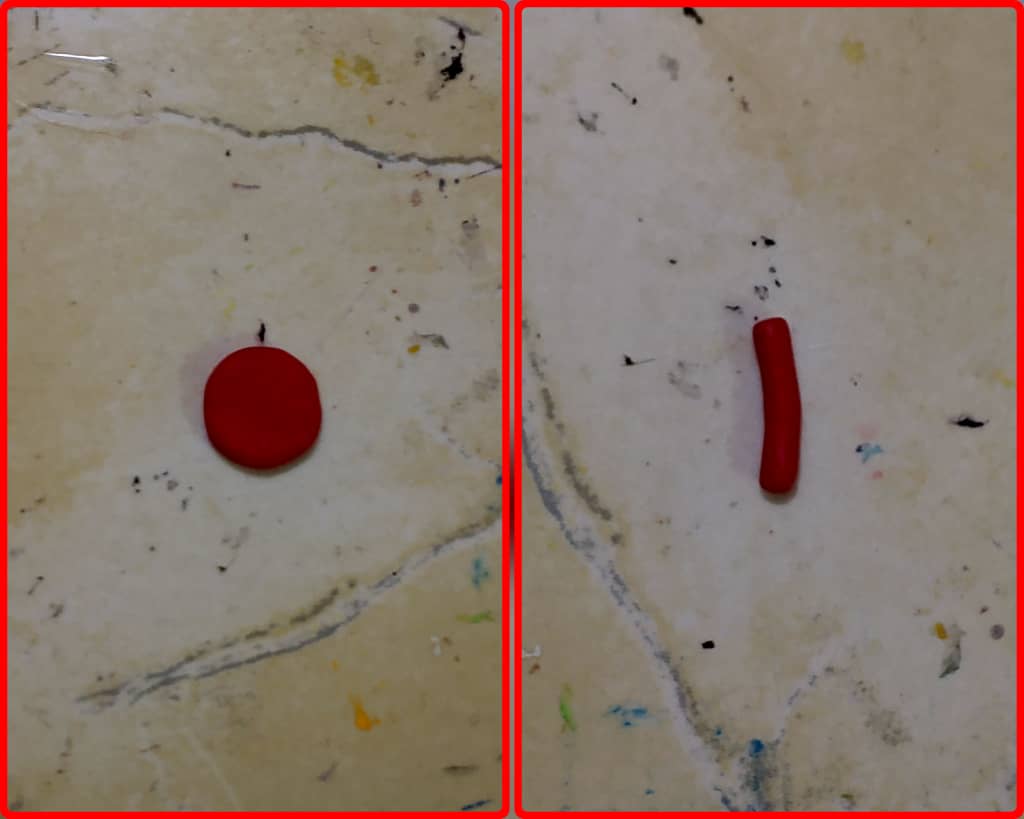
Para moldear la espada, iniciamos dividiendo la masa en pequeñas porciones, luego añadimos pintura y mezclamos hasta obtener el color deseado. La espada tiene los colores gris, dorado y rojo y negro. Después de mezclar las pinturas con la masa, formamos varias bolas una de cada color que usaremos, las aplanamos y a partir de allí haremos el mango que es de color rojo, moldeamos un cilindro y con la esteca agregamos varias líneas.
**Procedure**
To mold the sword, we start by dividing the dough into small portions, then add paint and mix until we get the desired color. The sword comes in gray, gold, red, and black. After mixing the paints with the dough, we form several balls, one of each color we'll use, flatten them, and from there, we make the handle, which is red. We shape a cylinder and use the spatula to add several lines.

---
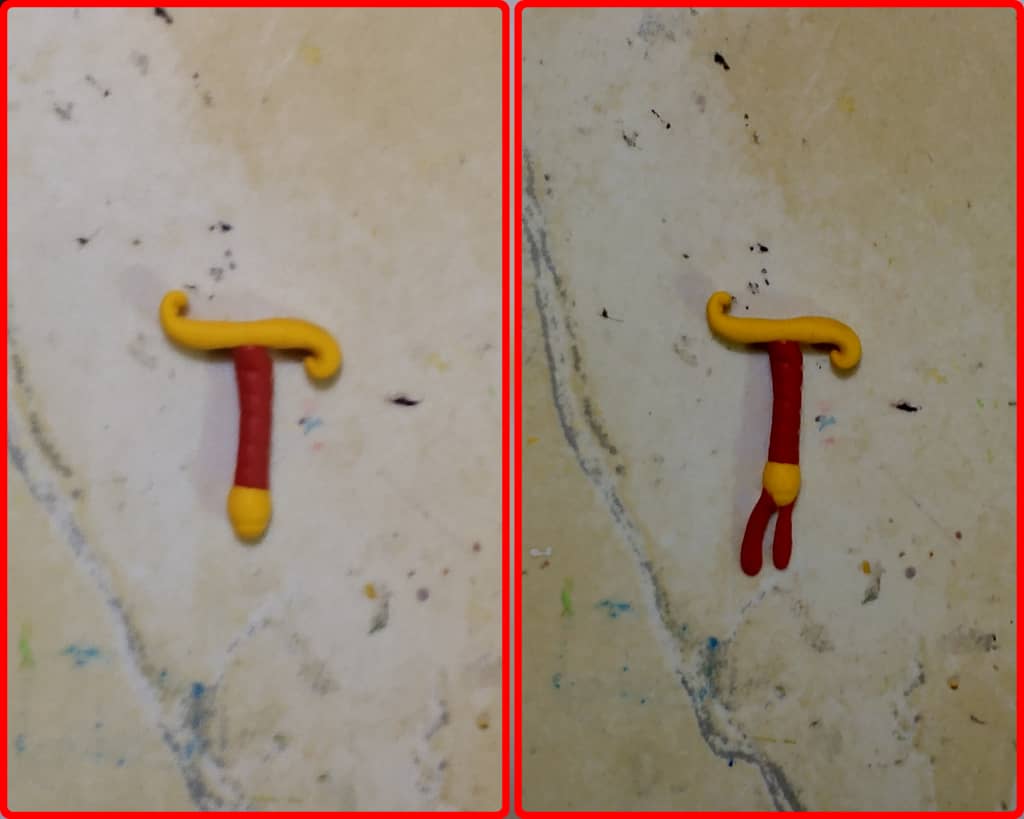
Luego con masa dorada moldeamos una gota, redondeamos la punta, aplanamos en la parte de arriba, con la esteca trazamos un círculo en la parte de abajo, luego la pegamos en la base del cilindro y doblamos el cilindro hasta formar un pequeño arco, que permitirá un mejor agarre, dejamos secar durante diez o veinte minutos, el proceso de secado al trabajar con masa flexible es muy importante porque las piezas quedan fijas y duran mucho más.
En un vídeo de youtube vi una técnica para trabajar con masa flexible, que me gustó, consiste en moldear todas las partes del proyecto a realizar, luego agregar pegamento, armar y dejar secar durante dos o tres días en un espacio libre de corrientes de aire, me pareció interesante porque puedo trabajar más rápido y ahorrar tiempo,ya no dejaría secar cada una de las partes que voy uniendo, armaría toda la pieza sin necesidad de hacer pausas en el moldeado.
Then, using golden dough, we mold a drop, round the tip, flatten the top, and draw a circle on the bottom with the tool. Then, we glue it to the base of the cylinder and bend the cylinder into a small arch, which will allow for a better grip. We let it dry for ten or twenty minutes. The drying process when working with flexible dough is very important because the pieces stay in place and last much longer.
In a YouTube video, I saw a technique for working with flexible dough that I liked. It consists of molding all the parts of the project to be made, then adding glue, assembling, and letting it dry for two or three days in a draft-free space. I found it interesting because I can work faster and save time. I wouldn't have to let each of the parts I'm joining dry; I could assemble the entire piece without having to pause while molding.


---
Continuamos trabajando con la masa amarilla, moldeamos un cilindro de aproximadamente cinco centímetros de largo, formamos una S alargada, afilamos los extremos y doblamos hacia adentro, agregamos pegamento, pegamos en la parte de arriba del mango y dejamos secar.
Con la masa roja, moldeamos una tira delgada, la cortamos en dos partes, aplanamos, redondeamos los extremos, pegamos en la parte amarilla del mango, una a cada lado y dejamos secar por un tiempo prolongado para que pegue completamente, al ser piezas delgadas y pequeñas, pueden desprenderse con facilidad, al no pegar correctamente.
We continue working with the yellow dough, molding a cylinder approximately five centimeters long, forming an elongated S, sharpening the ends and folding them inward, adding glue, gluing it to the top of the handle and letting it dry.
With the red dough, we shape a thin strip, cut it into two parts, flatten it, round the ends, stick it on the yellow part of the handle, one on each side and let it dry for a long time so that it sticks completely. Since the pieces are thin and small, they can easily come off if they do not stick properly.
---
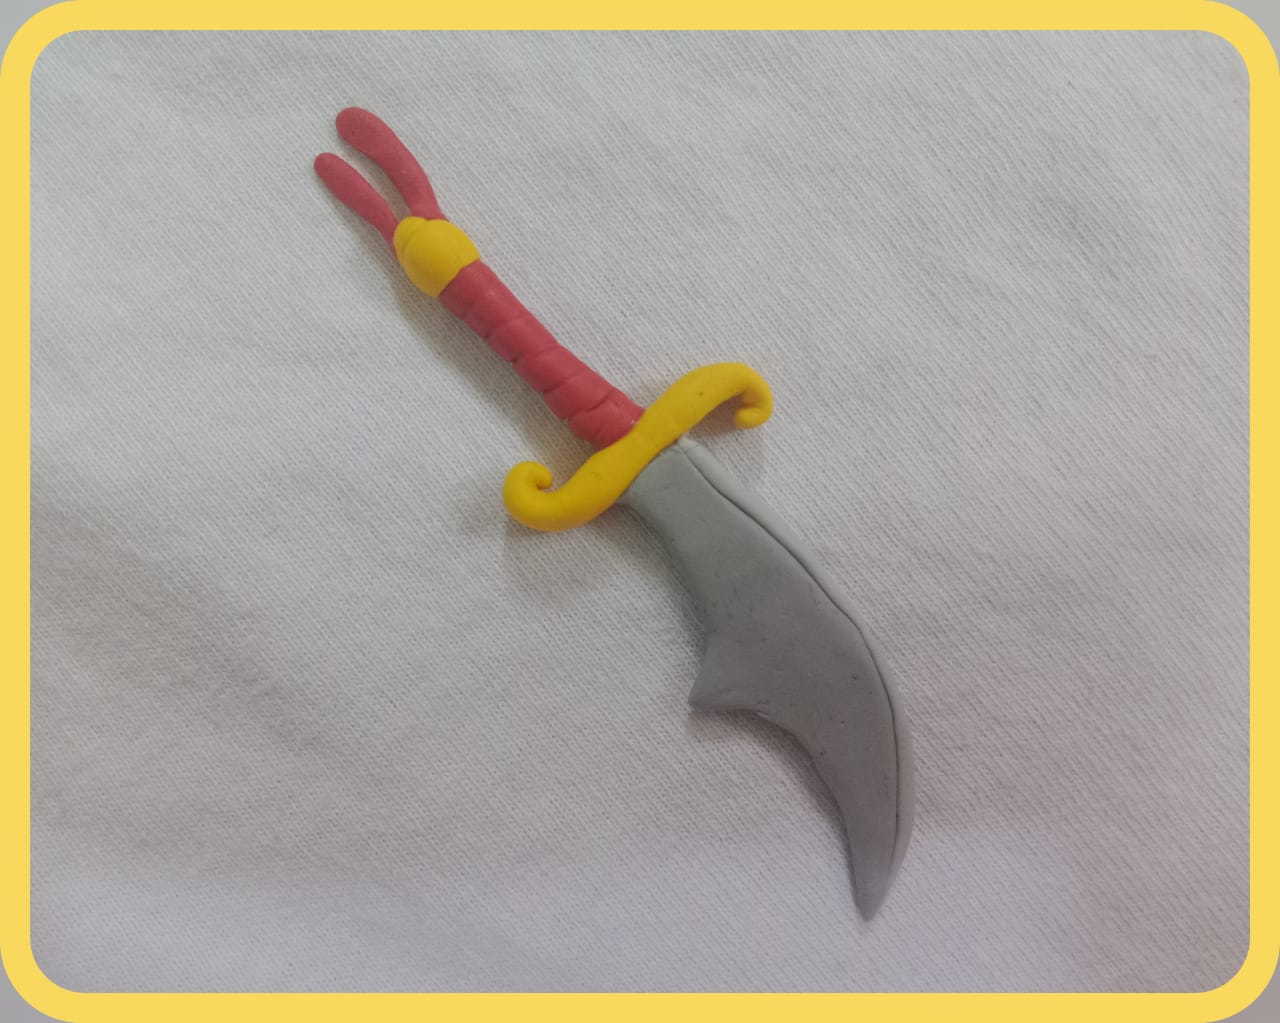
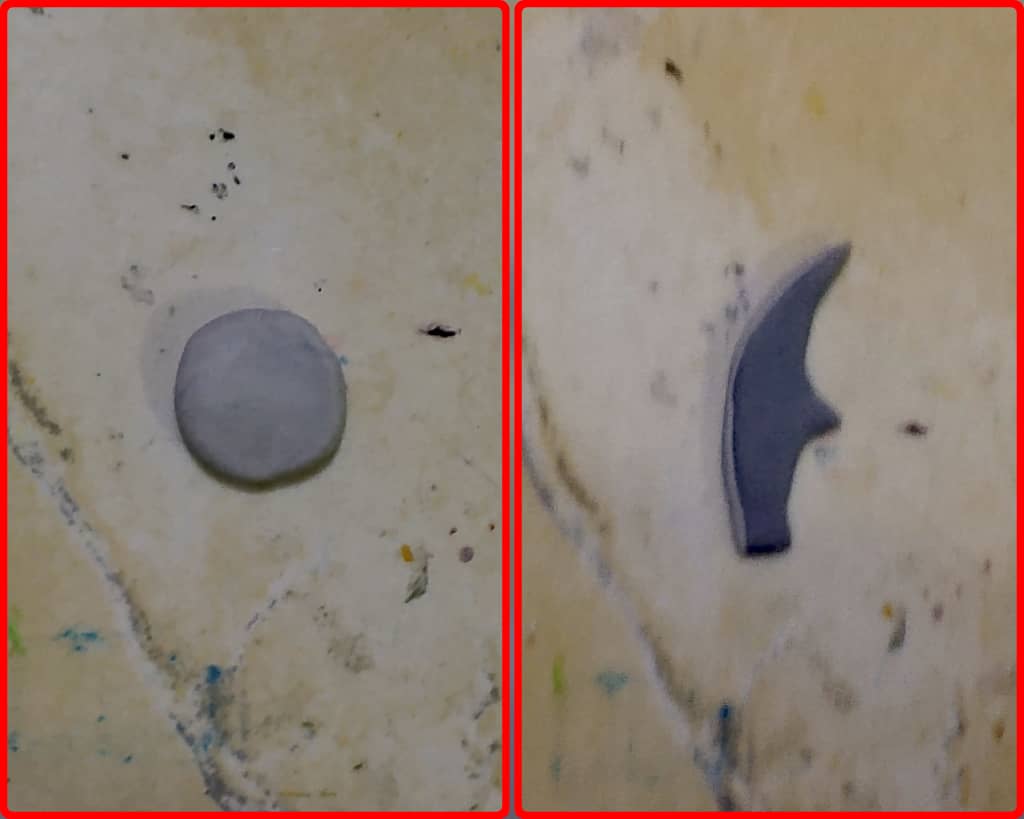
Para hacer la hoja de la espada tomamos masa de color gris oscuro, moldeamos una media luna afilamos en la parte de arriba y damos forma triangular en el centro.
To make the sword blade, we take dark gray dough, shape it into a half-moon shape, sharpen it at the top, and give it a triangular shape in the center.

---
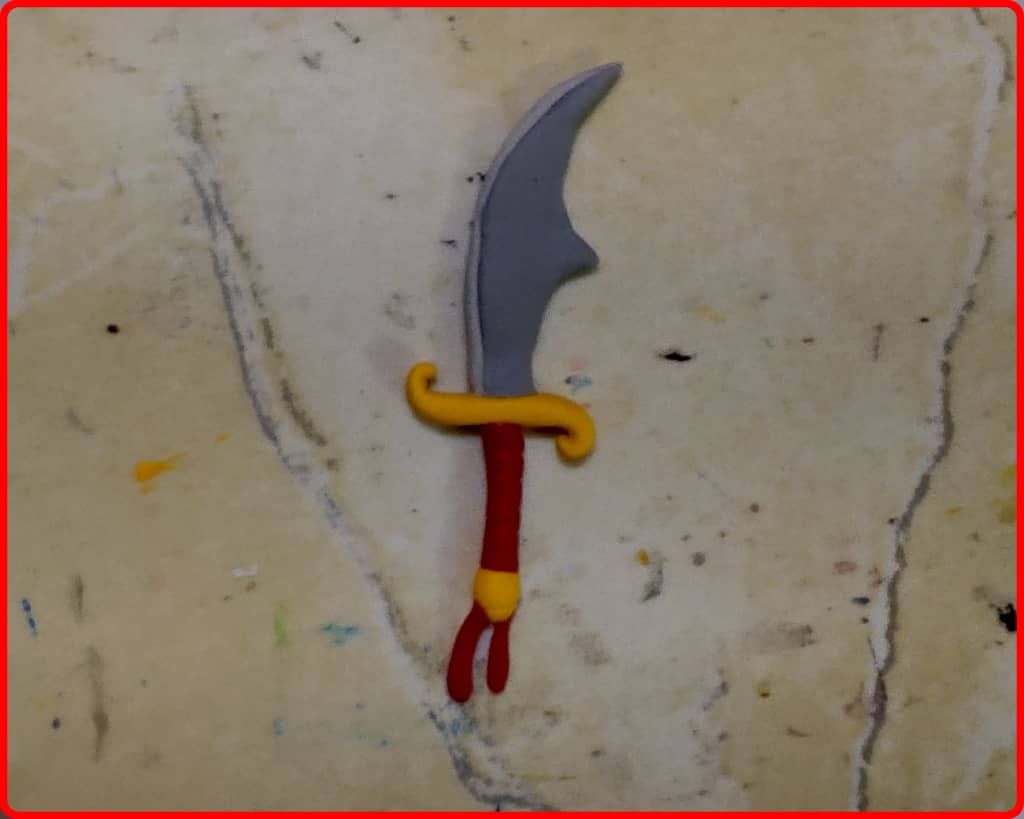
Con masa gris claro, formamos una tira delgada y la pegamos en el borde posterior de la espada, este paso tuvo un poco de complicación por lo delgado de la hoja de la espada, varias veces moldeé la tira gris,hasta lograr el grosor adecuado, al momento de pegarla tomó más tiempo de lo esperado, agregué pequeños puntos de pegamento y lentamente fui cubriendo el borde de la espada; luego unimos la hoja al mango agregando pegamento, dejamos secar y ya está terminada la espada inspirada en Splinterlands.
Los colores de la espada me gustaron, anteriormente elaboré el escudo del personaje usando cartulina y foami, proximamente quiero hacer nuevamente el escudo pero usando masa flexible, así tendré ambas armas de la guerrera en mi colección de trabajos y esculturas de masa flexible.
With light gray dough, we form a thin strip and glue it to the back edge of the sword, this step was a little complicated because of the thinness of the sword blade, I molded the gray strip several times until I achieved the right thickness, when gluing it it took longer than expected, I added small dots of glue and slowly covered the edge of the sword; then we join the blade to the handle adding glue, let it dry and the sword inspired by Splinterlands is finished.
I liked the colors of the sword. I previously made the character's shield using cardboard and foam. I want to make the shield again soon, but using flexible clay. This way, I'll have both of the warrior's weapons in my collection of flexible clay works and sculptures.
---
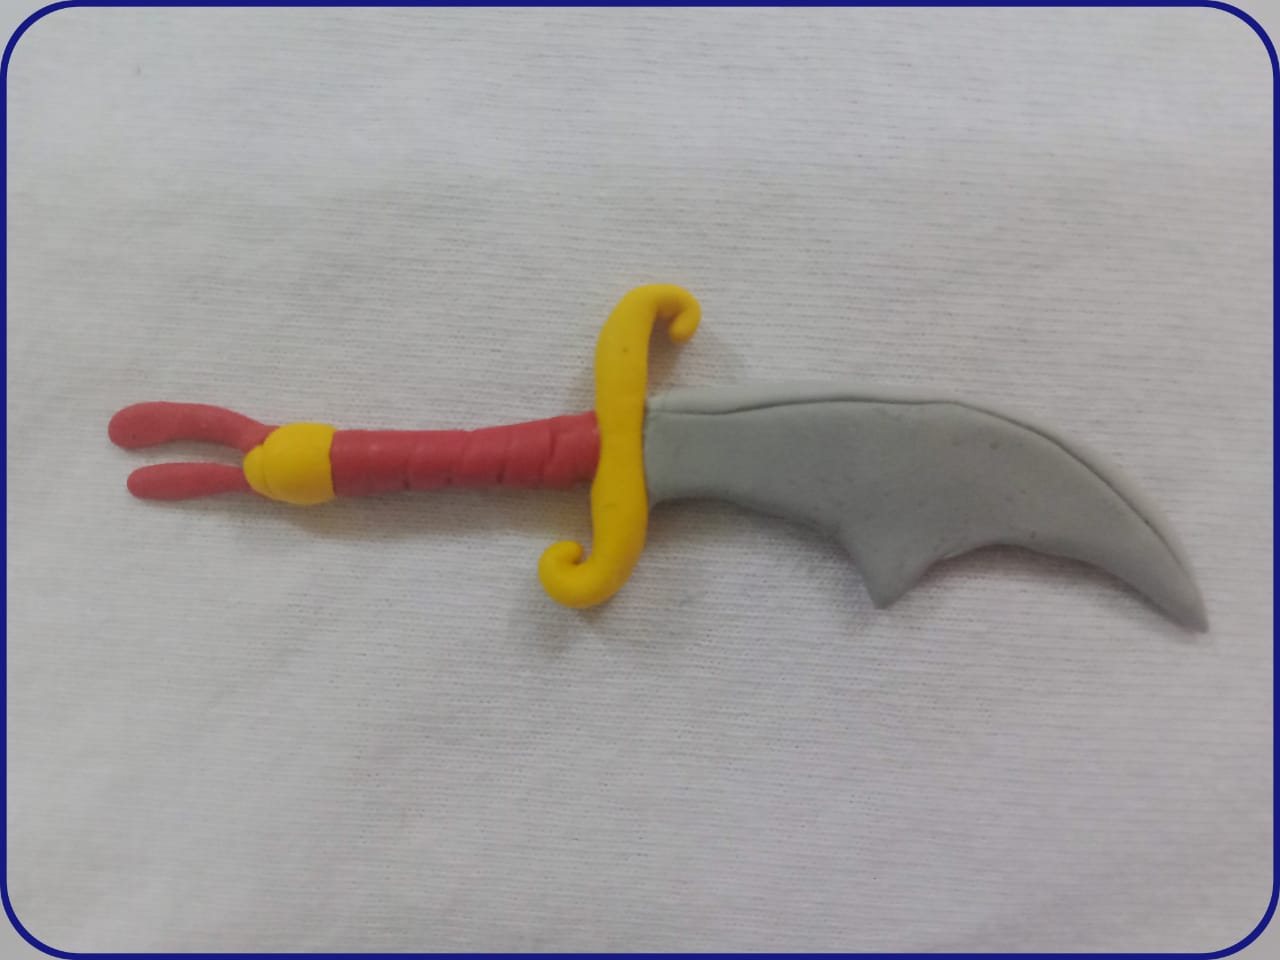
Les muestro el resultado.
I show you the result.
---
**Gracias por Leer.**
**Thank you for reading.**
---
**Hasta Luego!**
**See you later!**
---
---
Translated with https://www.deepl.com/translator
All images are of my authorship captured with an Alcatel phone.
Todas las imágenes son de mi autoría capturadas con un teléfono Alcatel.
---
#diy
#splinterlands
#creative
#neoxian
#spanish
#fanart
#crafting
#artwork
#handmade
#tutorial
Payout: 0.000 HBD
Votes: 285
More interactions (upvote, reblog, reply) coming soon.