**
ESPAÑOL
**
Saludos comunidad @hivediy, les deseo una excelente semana en unión de sus seres queridos, me siento feliz de compartir un nuevo proyecto creativo, se trata de un rifle de aire, que tiene los colores marrón claro, marrón oscuro y gris, según lo que pude leer fue usado en la época napoleónica, para hacerlo utilicé nuevamente mi material favorito; masa flexible, el proceso de elaboración resultó más difícil de lo que creía, porque lleva piezas pequeñas en la parte delantera y otra similar a una letra T en la parte trasera, para elaborarlo tomé como referencia la segunda imagen del siguiente [enlace](https://www.airgunsperu.com/foro/topic/historia-de-las-armas-de-aire-comprimido/), al estar formado por varias piezas cilíndricas delgadas, moldeé cada una lo más delgado que pude pero al momento de agregar pegamento, se derramó y cubrió toda la pieza, tuve dificultad para removerla y con ayuda de la esteca más fina lo logré, luego moldeé nuevamente otras tiras y retomé el trabajo.
**
ENGLISH
**
Greetings @hivediy community, I wish you an excellent week with your loved ones. I am happy to share a new creative project with you. It is an air rifle in light brown, dark brown, and gray. From what I have read, it was used during the Napoleonic era. To make it, I once again used my favorite material: flexible clay. The process was more difficult than I thought because it has small pieces on the front and another piece similar to a T on the back. To make it, I used the second image from the following [link](https://www.airgunsperu.com/foro/topic/historia-de-las-armas-de-aire-comprimido/), as a reference. Since it is made up of several thin cylindrical pieces, I molded each one as thin as I could, but when I added glue, it spilled and covered the entire piece. I had difficulty removing it, but with the help of the thinnest modeling tool, I managed to do so. Then I molded other strips again and resumed my work.


---
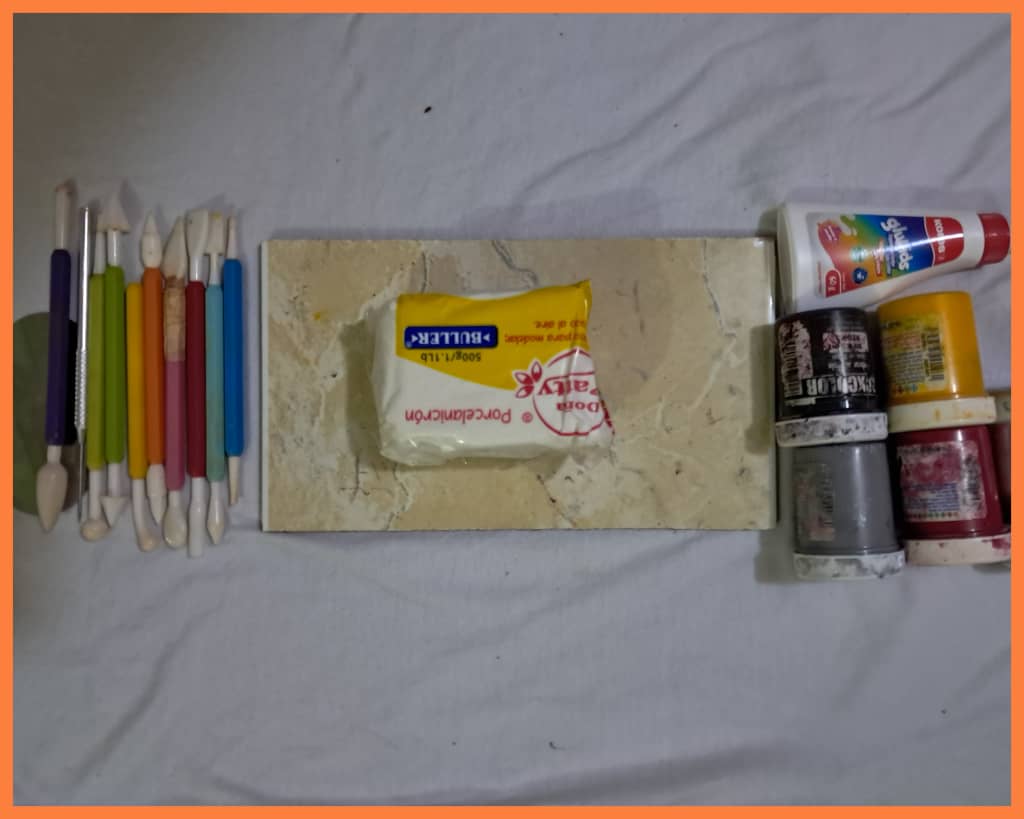
**
MATERIALES
**
Pintura al frío
Estecas
Crema para moldear
Pegamento
Masa flexible
**
MATERIALS
**
Cold paint
Cuttings
Modeling cream
Glue
Flexible compound
---
**
PROCEDIMIENTO
**
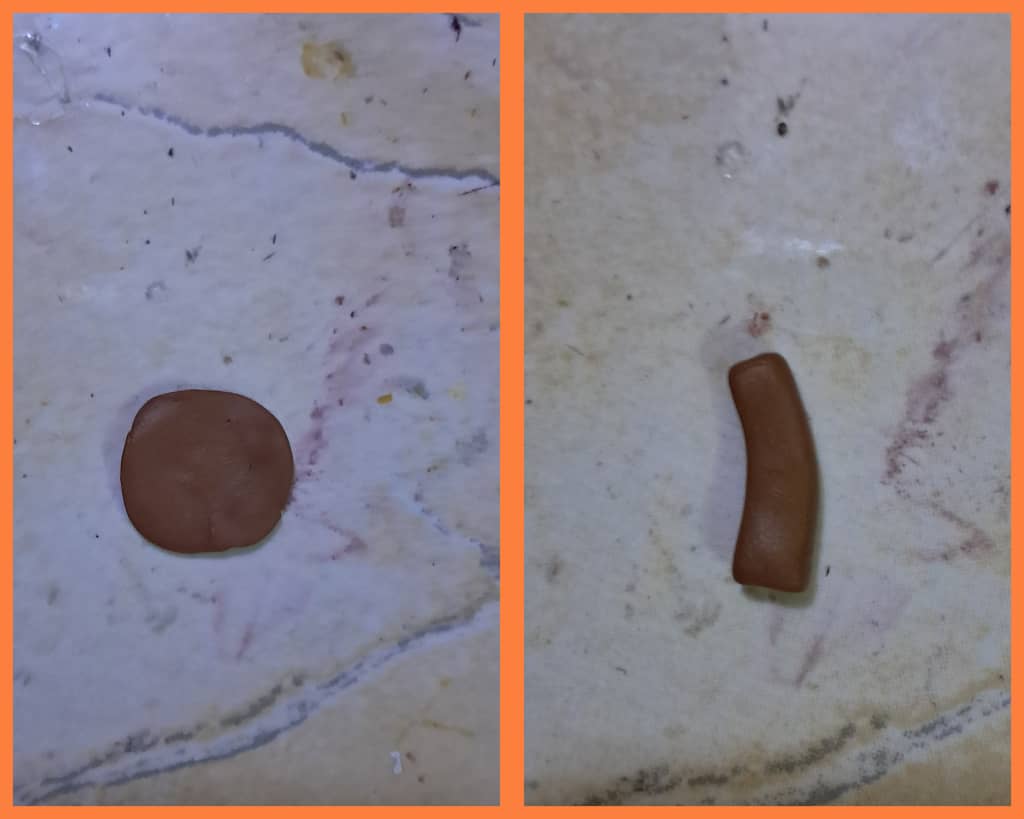
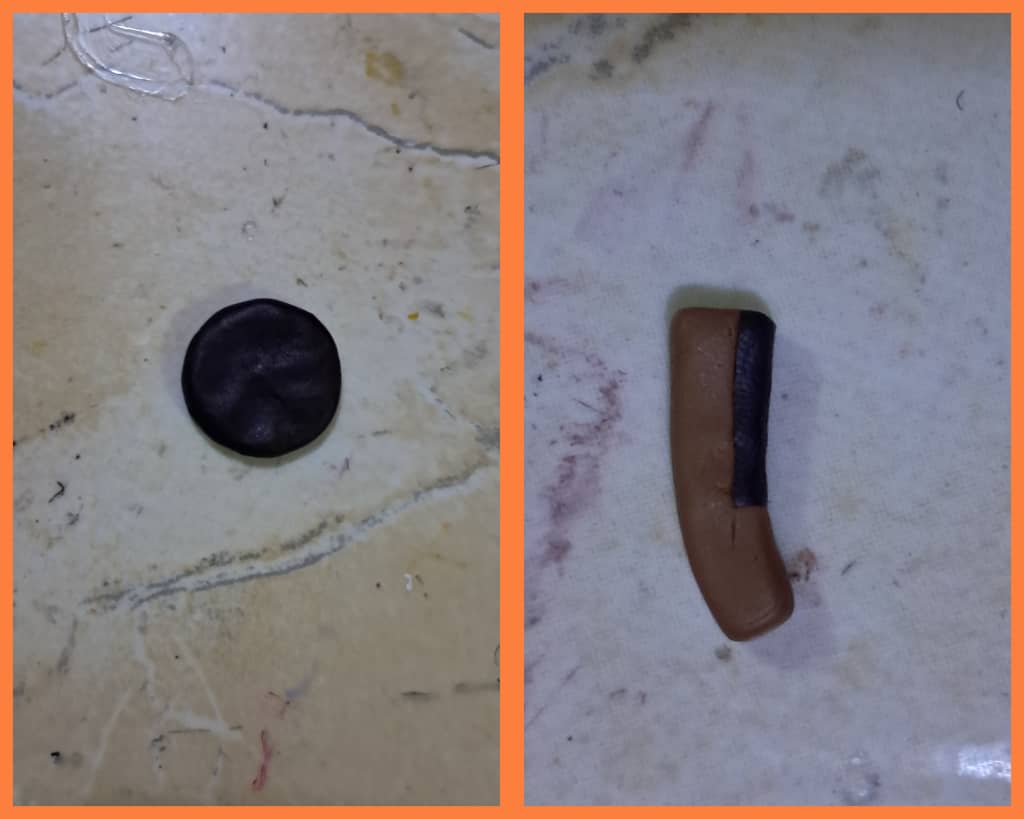
Para iniciar dividimos la masa en pequeñas porciones, luego agregamos pintura gris, marrón claro, marrón oscuro y un color más oscuro, el cual obtendremos al mezclar pintura marrón y negro, con la porción de masa marrón claro, comenzamos haciendo la base o contenedor de aire del rifle, como en todos los proyectos iniciamos con una bola, aplanamos y a partir de allí vamos dándole forma al contenedor, este tiene forma de semi arco en la parte interna y al otro lado es liso, aplanamos los extremos, alisamos con la esteca tratando que la parte de abajo quede más ancha que la de arriba.
Luego con la masa negra aplanamos un rectángulo, colocamos pegamento y lo unimos en la parte baja del contenedor, con ayuda de las estecas trazamos unas líneas y allí pegamos esta pieza de color negro y dejamos secar.
**
PROCEDURE
**
To start, we divide the dough into small portions, then add gray, light brown, dark brown, and a darker color, which we will obtain by mixing brown and black paint. With the light brown portion of dough, we begin by making the base or air container of the rifle. As in all projects, we start with a ball, flatten it, and from there we give it shape to the container. This has a semi-arch shape on the inside and the other side is smooth. We flatten the ends, smooth them with the stake, trying to make the bottom wider than the top.
Then, using the black dough, we flatten a rectangle, apply glue, and join it to the bottom of the container. Using the stakes, we draw some lines and then glue this black piece on it and let it dry.
---
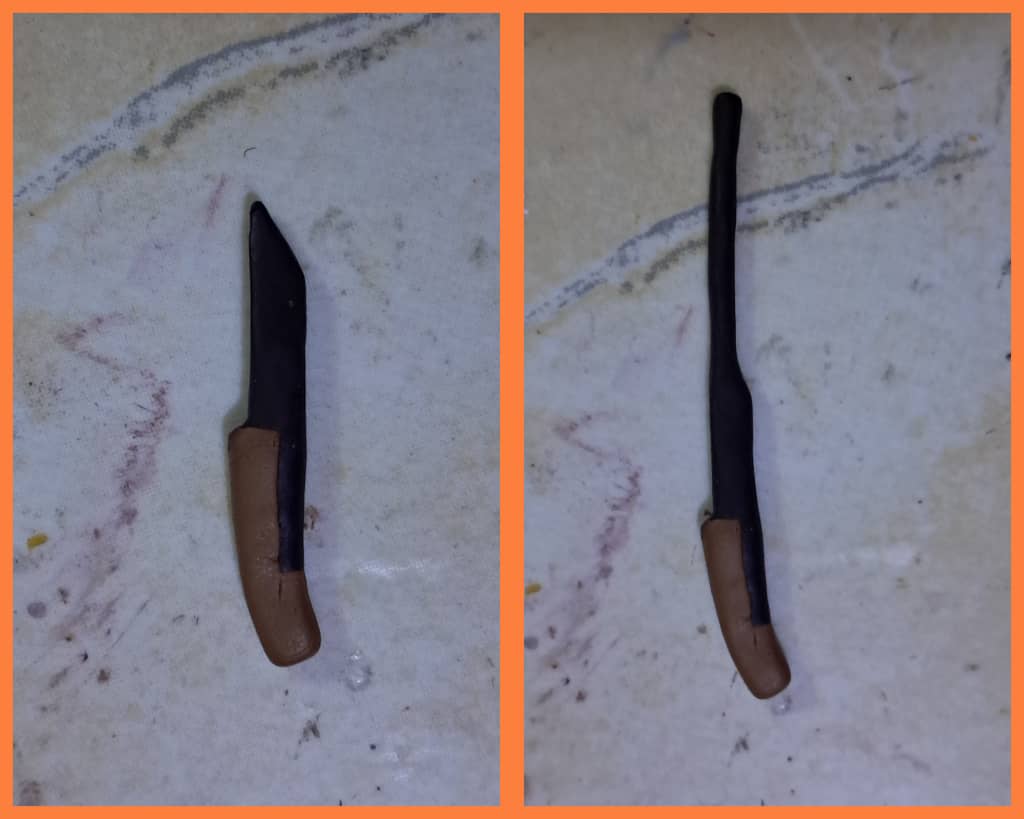
Continuamos con la masa negra y moldeamos una tira negra con un corte triangular en la parte de arriba y la unimos a la franja negra que pegamos anteriormente, nuevamente colocamos pegamento y dejamos secar, seguidamente moldeamos un cilindro también en masa negra y lo pegamos encima de la pieza anterior, con la esteca hacemos una abertura en la parte de arriba de este cilindro y dejamos secar.
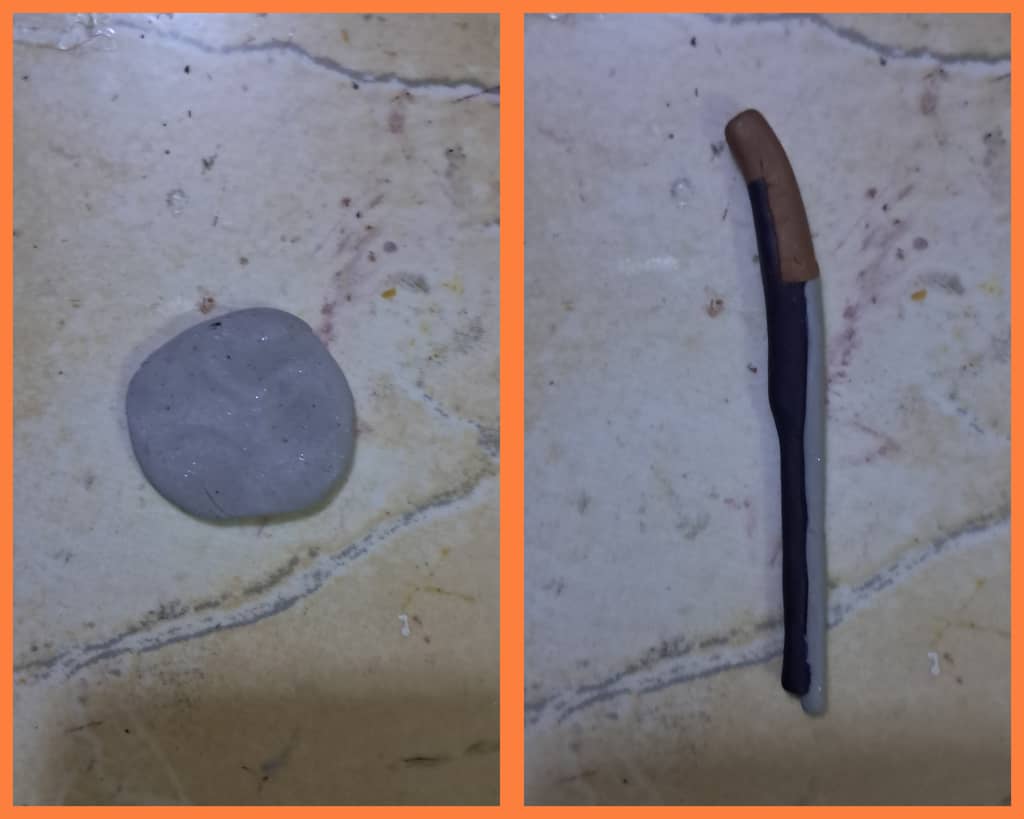
Luego con la masa gris moldeamos otro cilindro más grande que el que pegamos en el paso anterior, lo unimos al cilindro de color negro y también haremos un orificio en la parte delantera.
We continue with the black dough and mold a black strip with a triangular cut at the top and join it to the black strip that we glued previously, again we apply glue and let it dry, then we mold a cylinder also in black dough and glue it on top of the previous piece, with the stake we make an opening in the top of this cylinder and let it dry.
Then, with the gray dough, we mold another cylinder larger than the one we glued in the previous step. We join it to the black cylinder and we also make a hole in the front.
---
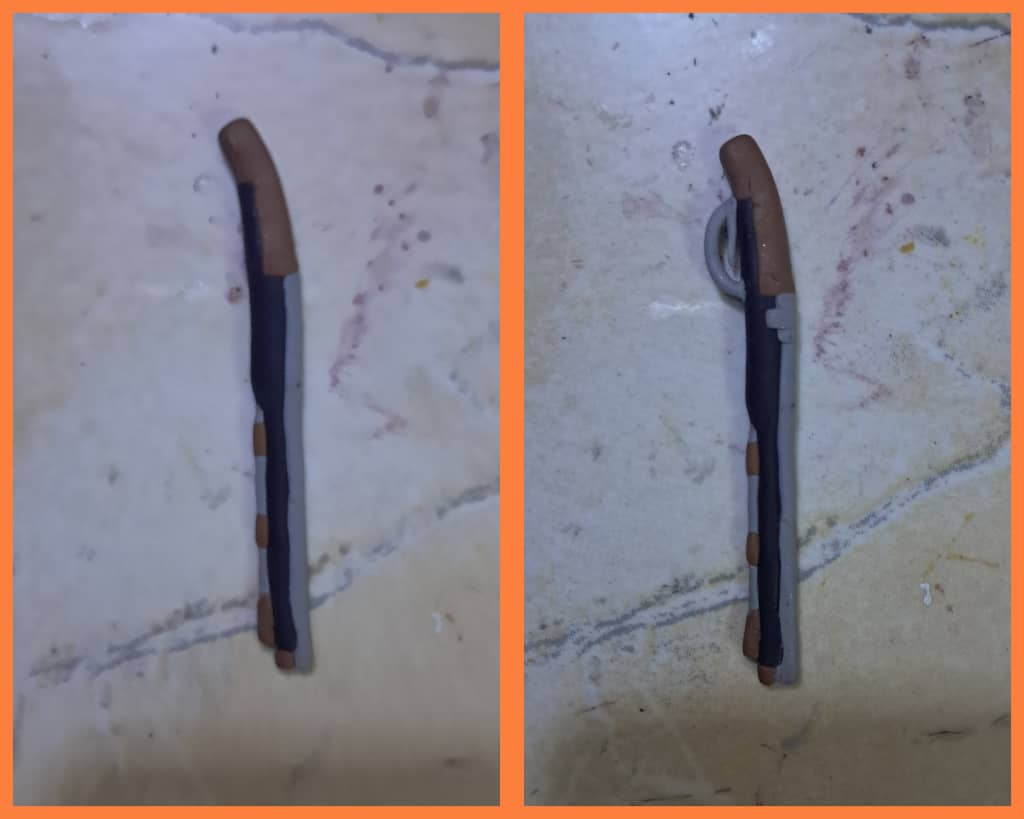
Seguimos moldeando y debajo del cilindro gris agregamos una varilla a la cual colocaremos tres anillos de color marrón, las unimos con pegamento y dejamos secar.
Con la masa gris moldeamos un arco y también una pieza más pequeña que es el gatillo, en la parte de arriba colocamos la pieza en forma de T que une al contenedor de aire con las piezas cilíndricas.
We continue molding, and below the gray cylinder, we add a rod to which we will place three brown rings. We join them with glue and let them dry.
With the gray dough, we mold an arch and a smaller piece, which is the trigger. On top, we place the T-shaped piece that connects the air container to the cylindrical pieces.
---
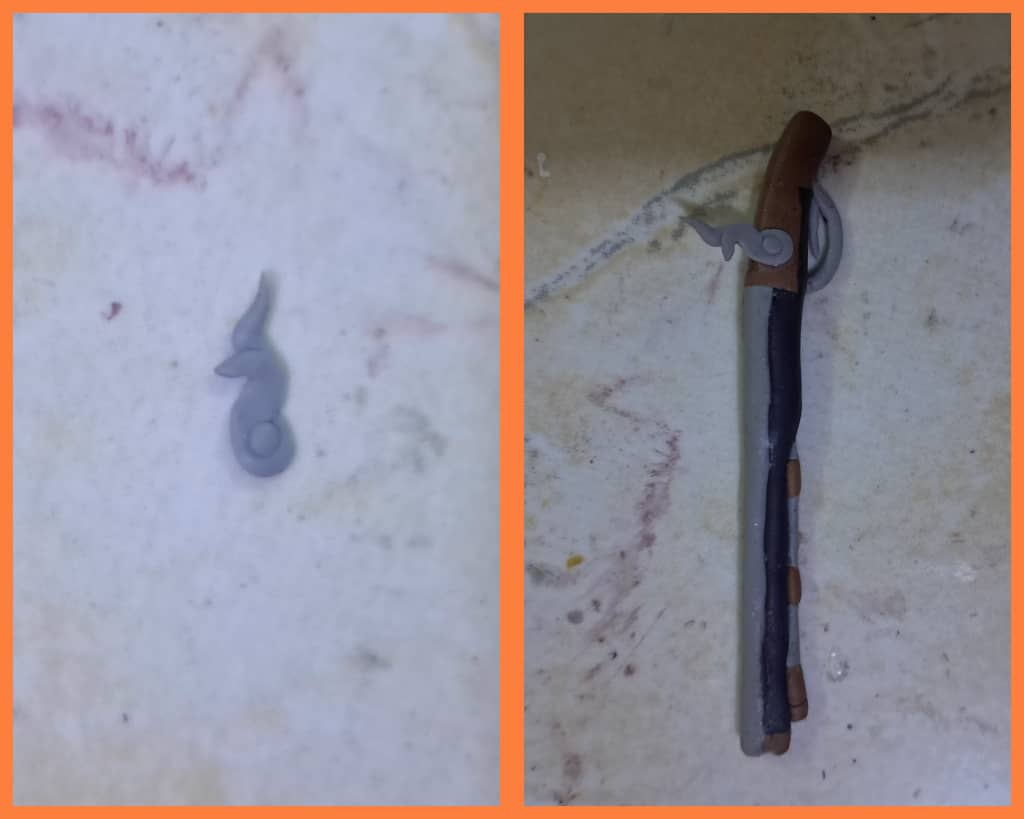
Para hacer el pedernal utilizamos masa gris, comenzamos haciendo una S, luego le afilamos hacia adelante colocamos un círculo en la parte de abajo y un pequeño cuerno en la parte de arriba, agregamos pegamento y dejamos secar luego la unimos al contenedor de aire.
To make the flint, we use grey clay. We start by making an S, then sharpen it forward, place a circle on the bottom and a small horn on the top. We add glue and let it dry, then attach it to the air container.
---
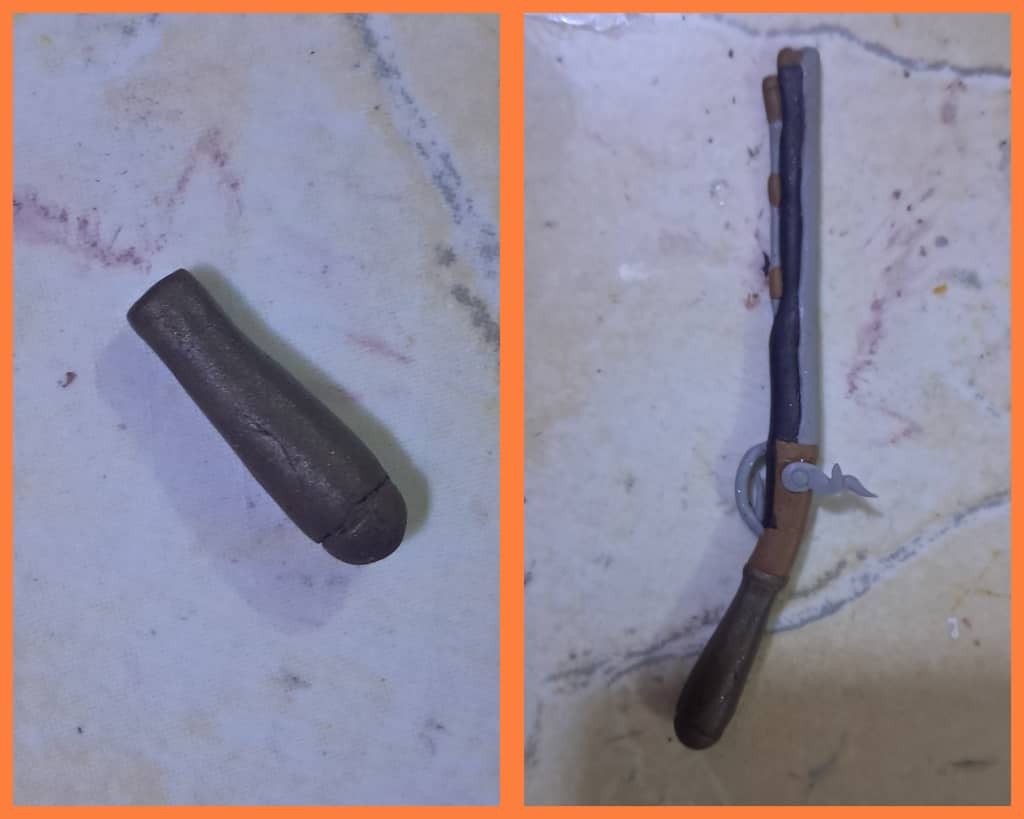
Finalmente con la masa marrón oscuro moldeamos la placa protectora del contenedor de aire, hacemos un cilindro que sea ancho en la parte de abajo, formamos un círculo con las estecas, colocamos pegamento y unimos al rifle, dejamos secar y así está terminado el proyecto.
Finally, with the dark brown dough, we mold the protective plate of the air container. We make a cylinder that is wide at the bottom, we form a circle with the stakes, we apply glue and attach it to the rifle, we let it dry and that's it, the project is complete.
---
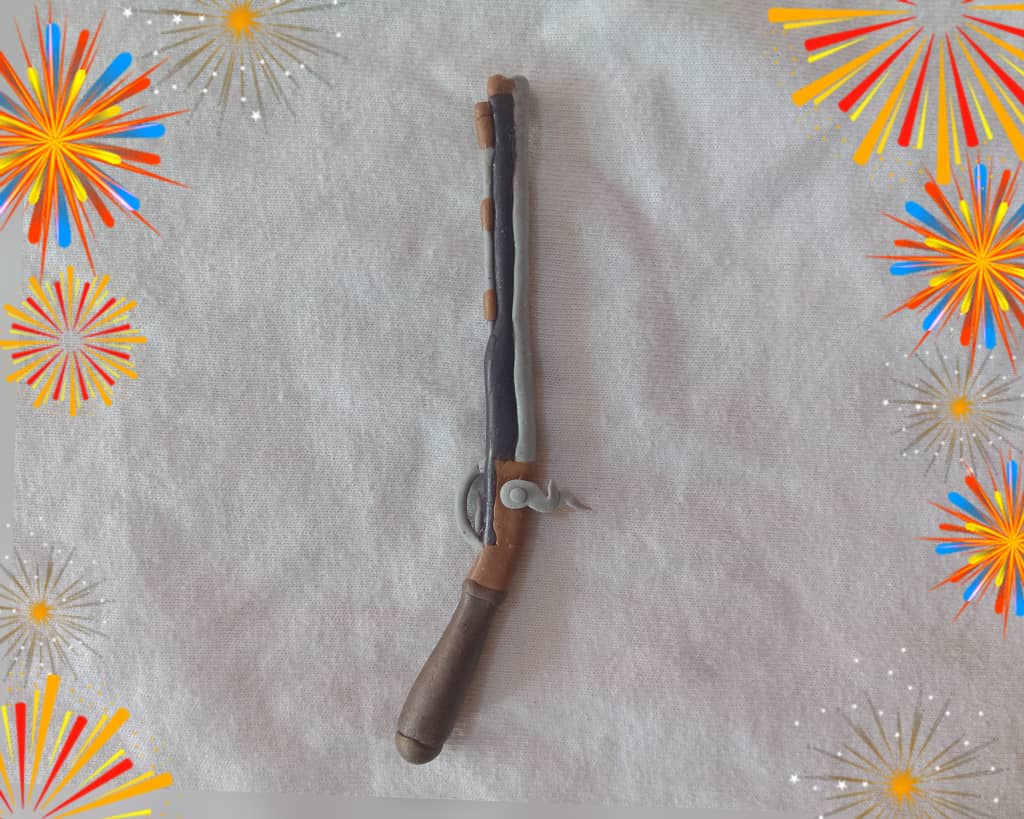
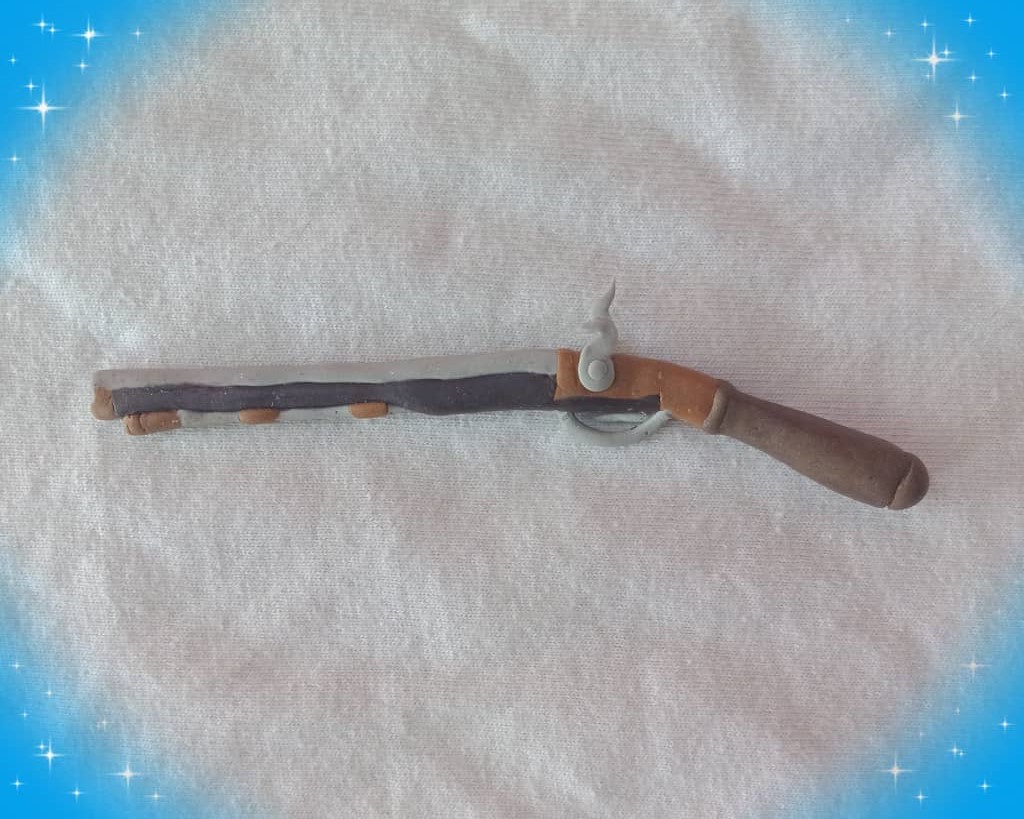
Les muestro el resultado
I show you the result


---
Gracias por Leer.
Thank you for reading.
---
Hasta Luego!
See you later!
---
---
Translated with https://www.deepl.com/translator
Todas las imágenes son de mi autoría capturadas con un teléfono Alcatel.
All images are of my authorship captured with an Alcatel phone.
---
#diy
#spanish
#manualidades
#handmade
#neoxian
#creativecoin
#crafts
#hivediy
#tutorial
Payout: 0.000 HBD
Votes: 294
More interactions (upvote, reblog, reply) coming soon.