
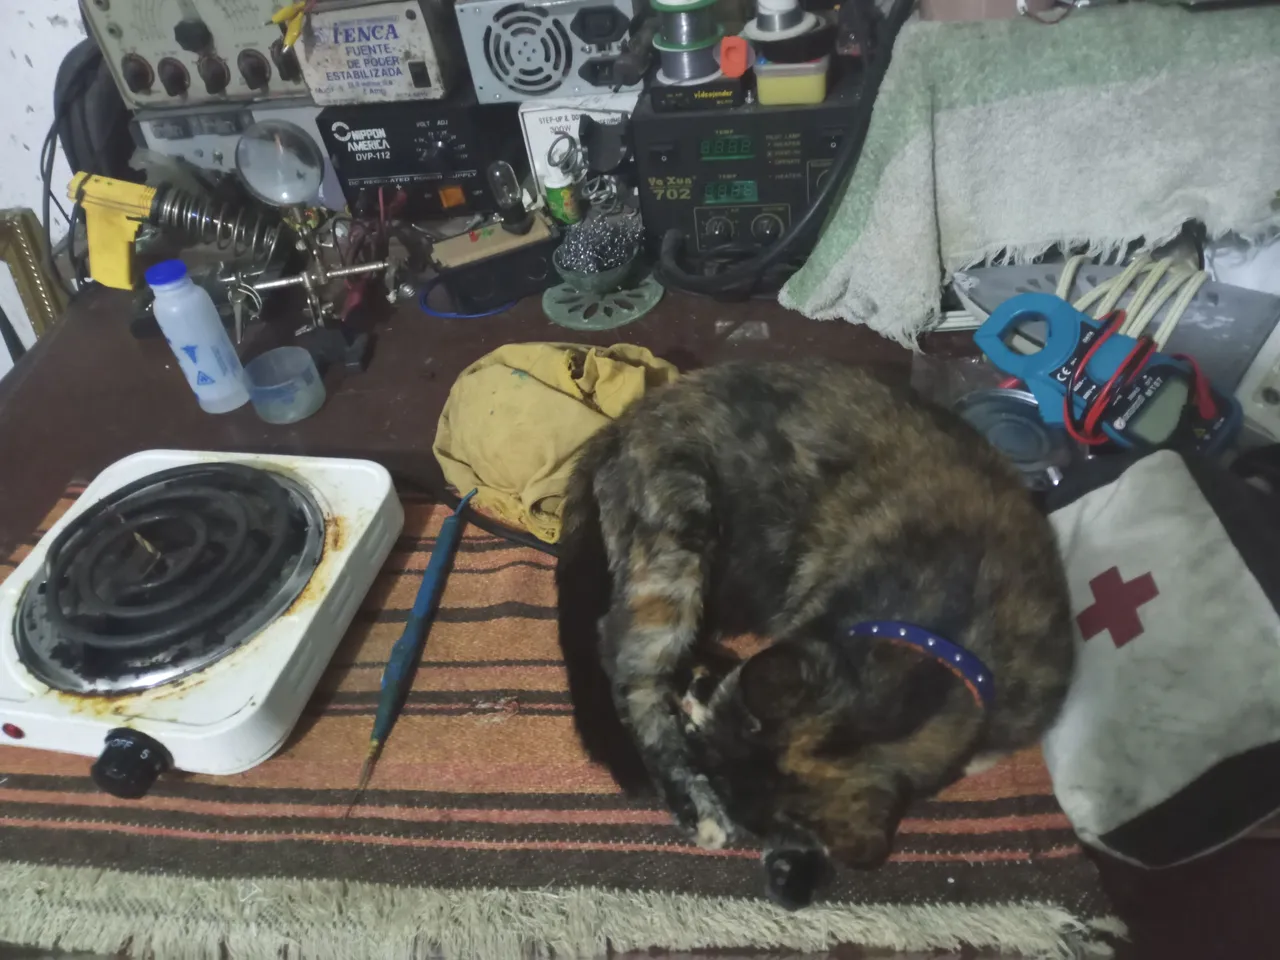
Greetings to the Hive DIY community, I'm happy to share this week with you again. This time, the topic will be servicing a conventional electric coil cooker. This is a cooker for occasional use, not for sustained use. Actually, this week I was hoping to share a service for a Singer sewing machine, which I need to get up and running, but the customer has been late bringing it to the shop. That post will be for next time. While this week's service is being overseen by the neighbor's cat, who has made herself a queen of the workshop.
This electric stove is intended for use as a backup or emergency cooker. It cannot withstand continuous use, but if you treat it carefully and follow certain procedures, it can have a much longer lifespan.

The kitchen power cord is damaged near the plug. I'm going to check it. If it's the entire cord that's damaged, I'll replace it with the power cord from a clothes iron that I recycled. If the cable is not that damaged, I will just cut off the broken part and put in a new plug.

I'll take this opportunity to perform maintenance on the rest of the kitchen. It's very simple in construction:
The metal covers that make up the chassis box are held together by a single screw placed in the center of the chassis, held in place by a nut at the bottom.

The wiring and internal components look in very good condition, which makes things much easier for me. It will only need a good cleaning and a simple inspection of the parts, which is something that never hurts.

The most common fault in these stoves is usually the thermostat, which is not made to last, but there is a trick to using it correctly, increasing its lifespan, and that is something they don't explain to people when they buy these disposable stoves:
When you turn on the stove, you have to turn the thermostat knob to the one position or a little before, stopping very close to one, just stop turning the knob when the power indicator light comes on.

And leave it in that position for about three or four minutes to preheat the thermostat.
After the required number of minutes for preheating, turn the knob to the three position, without going past the four position or setting the knob to the five position.
This thermostat is designed to break down after a short time of use if this procedure is not followed, and replacing it costs the same as buying a new stove, so it's worth taking care of it.
These stoves are wired to withstand high temperatures, so you can't install a general-purpose cable. The electrical connections appear to be in good condition. Cut off the damaged part of the power cable and use a tester to check that there are no shorts in the rest of the wires.
I do maintenance on the rest of the kitchen.

I put in an industrial-grade plug so it can handle the kitchen's electricity consumption.

As always, you have to solder the wire before inserting it into the socket, but it was a bit tricky. When a metal is exposed to heat for a long time, it's difficult for the solder to adhere, even after sanding and cleaning the copper wire surface with solvent.
So, I took a long strand of another 12-gauge copper wire and wound it over the wire I wanted to solder so the solder would set (the same procedure is used when soldering an aluminum wire to a copper wire).

Finally, I placed a piece of additional rubber cable cover over the cable where the plug's safety clamp goes, to ensure that the plug clamp would hold it firmly.

I check the neon light that serves as a pilot light or indicator light for the kitchen thermostat. These neon lights connect to a 110-volt or 220-volt line and work without problems. You just need to install a resistor of the appropriate value for use with 110 or 220 volts.

For use at 110 volts, which is the local voltage where I currently use it, I check my notebook. (For 220 volts, double the resistor value is used.)

For quick reference when looking for a resistor, I usually use a graphic table, which helps me locate the resistor quickly, of course I then verify the values with the tester.

The resistance of this neon light is secured and protected inside the cable. I'm not going to remove it because I checked it and it's working fine.

After cleaning the chassis covers and soaking the heating element support plate (the round chrome-plated plate) in vinegar for a day to remove the rust, all that's left to do is assemble and test the stove.

The resistor plate is secured to the metal case structure by slightly bending some tabs into the slots in the chassis. If you are not careful with the metal tabs, they can easily break.

If you are careful, you can assemble and disassemble the kitchen without any problems; it is a fairly simple construction.

I check the continuity of the electrical resistance coil before connecting the cables, and it has good continuity between its two connection terminals.

It's very important that there's no electrical continuity between the chassis and the electrical connection terminals. (This applies to any electrically powered device.)

All is well, place the neon light between the terminals of the resistance coil and connect the power supply wires, secure the neon light in the red protective cover, using the hot glue gun.

A simple and quiet job. I hope to keep it up to date with maintenance so it can work for a few more years.

I didn't expect this post to be so long. Although it has its tricks and secrets, it's a fairly simple topic.
Thank you so much for stopping by and reading.
Have a great week.
Peace.


-
I used Google Translate for the English language.
-
I used GifCam to create the GIF images.
-
I used TextStudio for the Spanish header.
-
I used NightCafe to create the electronic workshop layout.
-
The images, unless otherwise noted, are screenshots of my workshop work.

Saludos a la comunidad de Hive DIY, me alegra poder compartir nuevamente con ustedes en esta semana, en esta ocasión el tema será sobre el servicio a una cocina eléctrica de espiral convencional, esta es una cocina para uso eventual, no es para usar de manera sostenida. En realidad, esta semana, esperaba poder compartir el servicio a una máquina de coser Singer, que debo poner a tiempo y hacerle mantenimiento, pero el cliente se ha tardado en traerla al taller, esa publicación quedara para la próxima ocasión. Mientras la supervisión del servicio de esta semana, queda en manos de la gata del vecino, que se ha instalado como una reina en el taller.

Esta cocina es para usar como cocina de reserva o emergencia, no soporta del uso continuo, pero si la tratas con cuidado y siguiendo ciertos procedimientos pueden tener una vida útil mucho más larga.

El cable de alimentación eléctrica de la cocina, se dañó cerca del enchufe, voy a revisarlo: si es todo el cable que está dañado, lo cambiaré por el cable de alimentación eléctrica de una plancha de ropa que he reciclado. Si el cable no está tan dañado, solo le cortaré la parte rota y colocaré un enchufe nuevo.
Aprovecho para hacerle mantenimiento al resto de la cocina, es de una construcción muy simple:
Las tapas metálicas que hacen la caja del chasis, están unidas por un único tornillo colocado en el centro del chasis, sostenido por una tuerca en la parte inferior.
El cableado y los componentes internos se ven en muy buena condición, lo que me facilita mucho las cosas, solo necesitara una buena limpieza y una simple verificación de las partes, es algo que nunca está demás.
La falla más común en estas cocinas suele ser el termostato, que no está hecho para durar, pero tiene un truco para usarlo correctamente aumentando su vida útil, y eso es algo que no le explican a las personas cuando compran estas cocinas desechables:
Al encender la cocina, tienes que girar la perilla del termostato hasta la posición del uno o un poco antes, te detienes muy cercano al uno, justo dejar de girar la perilla cuando la luz indicador de encendido se active.
Y le dejas en esa posición unos tres o cuatro minutos, para precalentar el termostato.
Después de terminar los minutos necesarios para el precalentamiento, se lleva la perilla a la posición del tres, sin pasar del número cuatro ni colocar la perilla en el número cinco.
Este termostato está hecho para dañarse al poco tiempo de uso, si no se sigue este procedimiento, y el repuesto del termostato cuesta lo mismo que comprar una cocina nueva, así que vale la pena cuidarlo.
Estas cocinas llevan cable para resistir temperaturas altas, por lo que no se puede colocar un cable de uso general. Las conexiones eléctrica, se ven en buenas condiciones, corte la parte dañada del cable de electricidad y verifique con el tester que no hubiese cortocircuito en el resto de los cables.
Le hago mantenimiento al resto de la cocina.
Le coloco un enchufe de uso industrial para que pueda soportar el consumo de electricidad de la cocina.
Como siempre, hay que soldar el cable antes de colocar en las conexiones con el enchufe, pero estuvo un poco complicado, cuando un metal se expone al calor por tiempo prolongado es difícil que la soldadura se le adhiera, a pesar de lijar y limpiar con solvente la superficie a soldar del cable de cobre.
Así que tome una hebra larga de otro cable de cobre de un calibre número 12 lo arrolle sobre el cable que quería soldar para que la soldadura se pudiese fijar (se hace igual cuando se quiere soldar un cable de aluminio con un cable de cobre)
Finalmente, le coloqué un trozo de cubierta de goma de cable adicional, sobre el cable, en donde va la prensa de seguridad del enchufe, para asegurar que la prensa del enchufe lo sostuviera firmemente.
Verifico la lámpara de neón que sirve como luz piloto o luz indicadora del termostato de la cocina. Estas lamparitas de neón, se conectan a la línea de 110 volts o 220 volts y funcionan sin problemas, solo hay que colocar una resistencia del valor apropiado para el uso en 110 volts o en 220 volts.
Para el uso en 110 volts, que es el voltaje local de mi uso corriente, reviso el cuaderno de apuntes. (en uso para los 220 volts se usa el doble del valor de la resistencia.)
Para consultas rápidas cuando busco una resistencia, suelo usar una tabla gráfica, que me ayuda a ubicar la resistencia rápidamente, claro que luego verifico los valores con el tester
La resistencia de esta lamparita de neón, viene asegurada y protegida adentro del cable, no voy a sacarla, porque la verifique y está funcionando bien.
Después de la limpieza a las tapas del chasis y de dejar la lámina de soporte de la resistencia (la lámina redonda cromada) en vinagre durante un día, para remover el óxido, solo queda armar y probar la cocina.
La placa de la resistencia se asegura en la estructura de la caja metálica, doblando levemente, unas pestañas en las ranuras del chasis, si no se tiene cuidado con las pestañas metálicas, se rompen con facilidad.
Si se tiene cuidado se puede armar y desarmar la cocina sin problemas, es una construcción bastante simple.
Verifico la continuidad del espiral de la resistencia eléctrica antes de conectar los cables, y tiene buena continuidad entre sus dos terminales de conexión.
Es muy importante que no haya ninguna continuidad de electricidad entre el chasis y los terminales de conexión eléctrica. (Aplica para cualquier aparato que funcione con electricidad)
Todo va bien, coloque la lamparita de neón entre los terminales de la espiral de resistencia y conecte los cables de suministro eléctrico, asegure la lamparita de neón en la cubierta protectora roja, con la pistola de silicona caliente.
Un trabajo sencillo y tranquilo, espero tenerle siempre el mantenimiento al día, para que trabaje por unos años más.
No esperaba que la publicación me quedase tan larga, aunque tiene sus trucos y secretos, es un tema bastante sencillo.
Muchas gracias por pasar y leerme.
Que tengan una excelente semana.
Paz.
-
He usado el traductor de Google para el idioma inglés.
-
Use el programa GifCam para crear las imágenes GIF.
-
Use el programa de TextStudio para el encabezado en español.
-
Use NightCafe para crear la imagen del diseño de taller electrónico.
-
Las imágenes a menos que lo indique son capturas de mi trabajo en el taller.