Parte 2. Postproducción y presentación final
Screenshot del vídeo
This post is both in English and Spanish, you can go directly to english by clicking HERE
Saludos amigos de entrepreneur, hace unos días realicé la primera parte de este curso de producción audiovisual, contando sobre mi aprendizaje y los puntos más resaltantes de lo aprendido, hoy quiero culminar compartiendo los conocimientos y las anécdotas de las últimas sesiones, te recomiendo [leer la primera parte](https://peakd.com/hive-140971/@soyunasantacruz/taller-especializado-para-emprendedores-en) para entender bien el contexto.
##
Producción
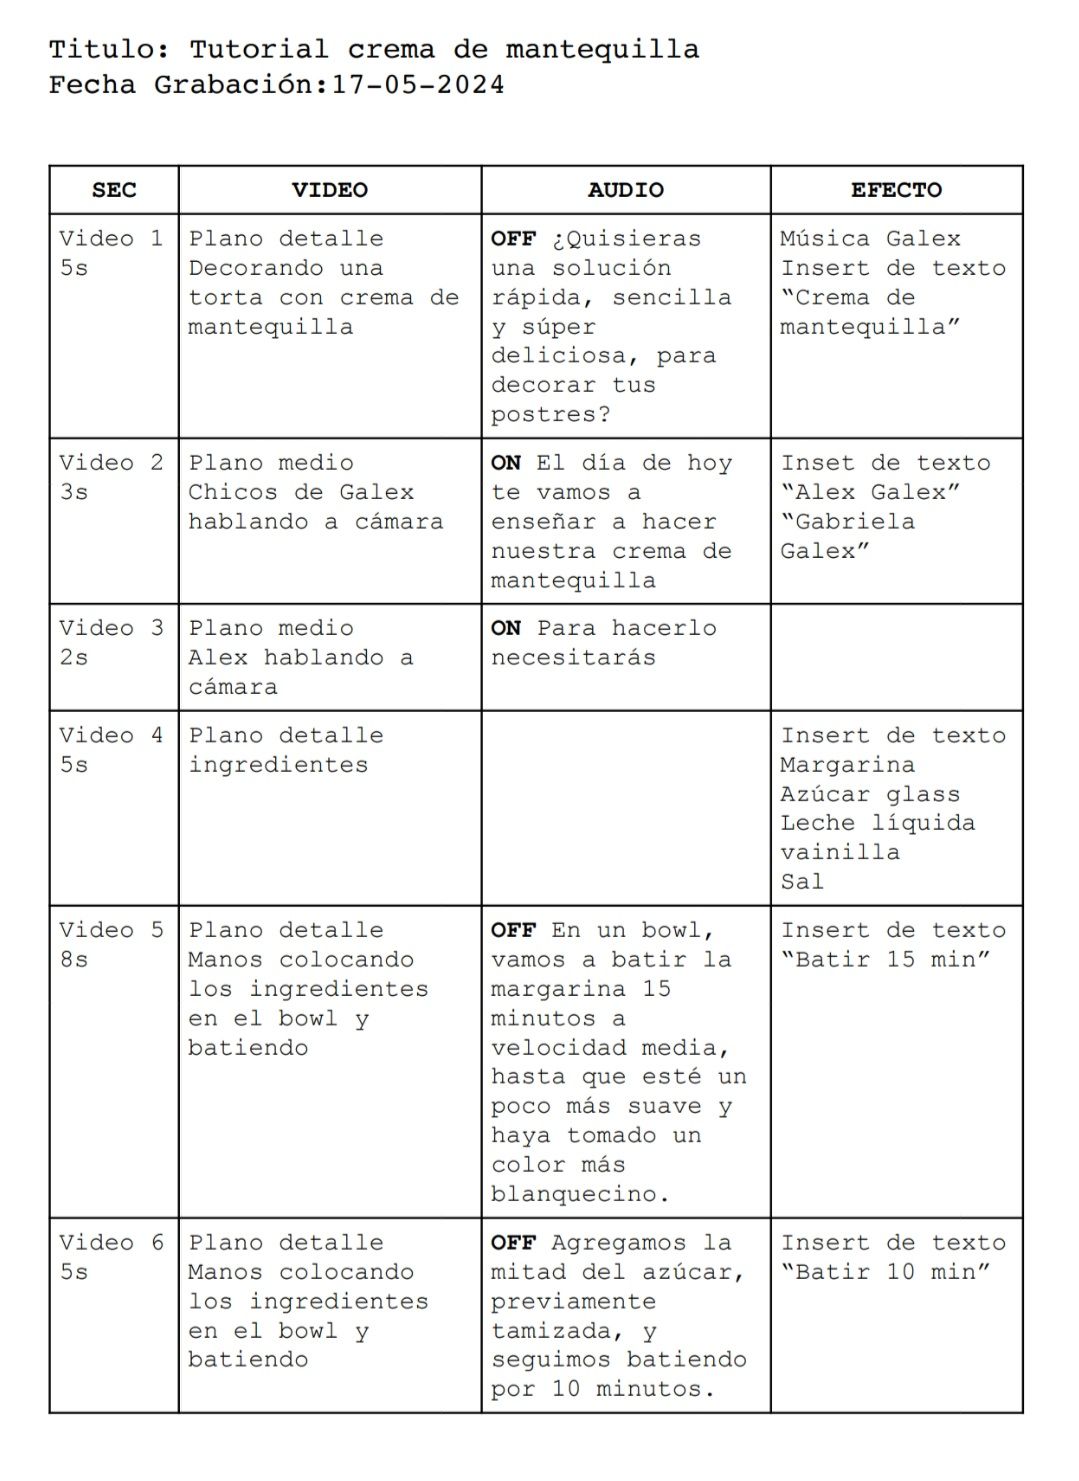
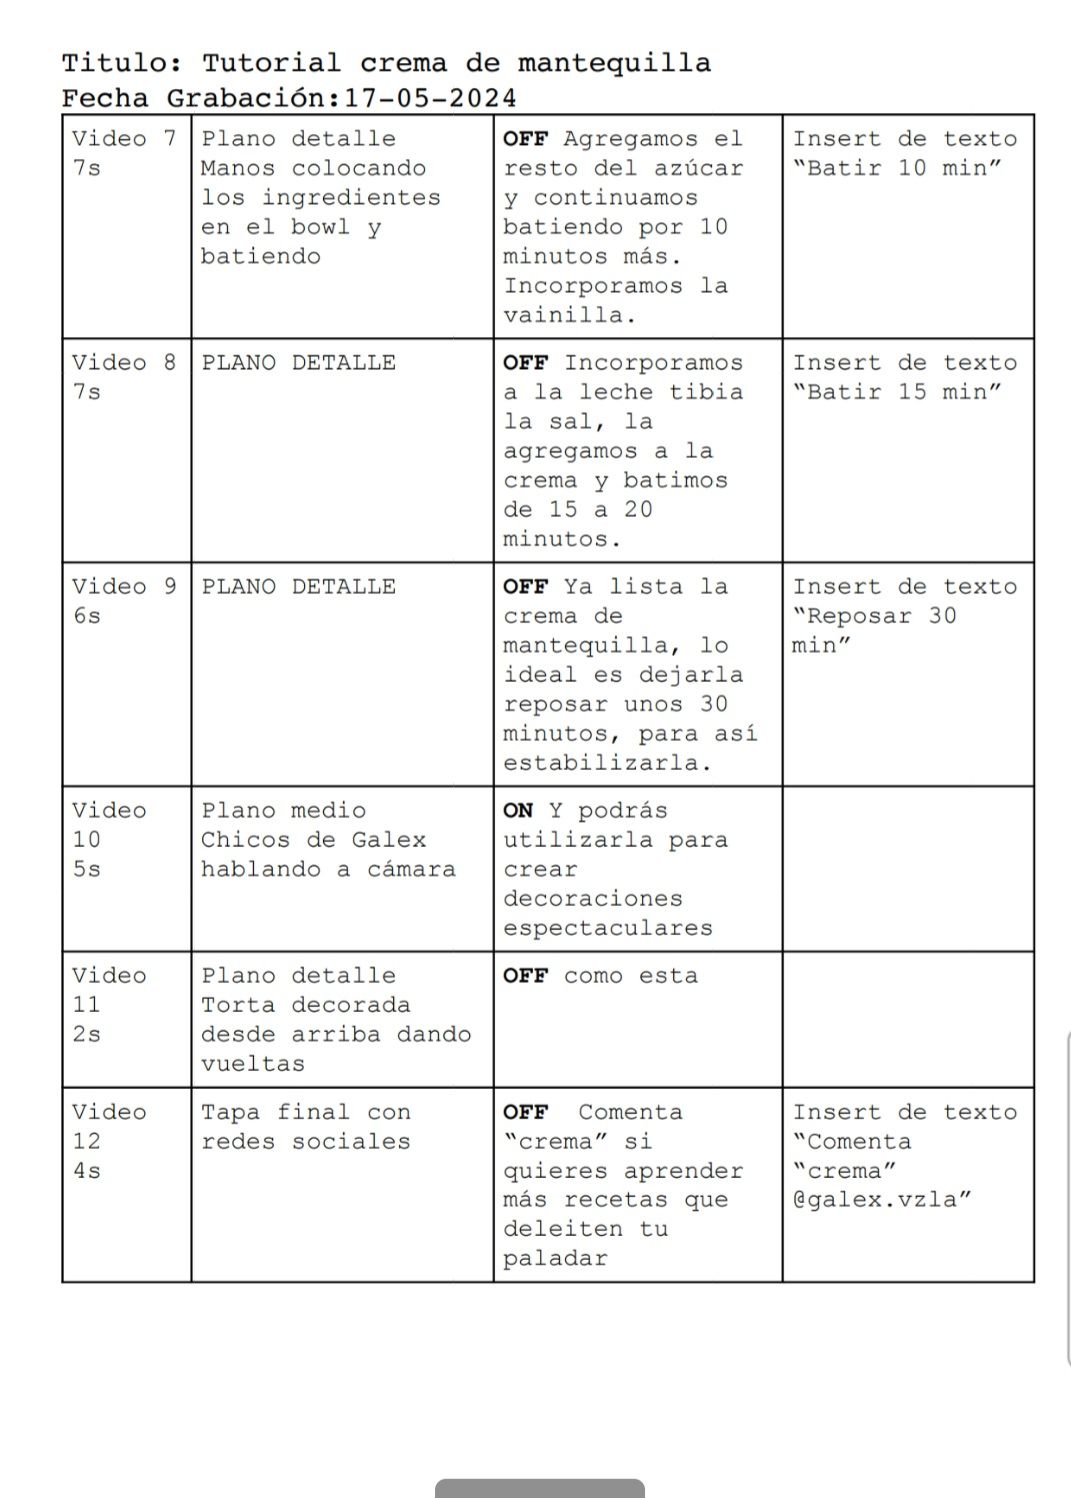
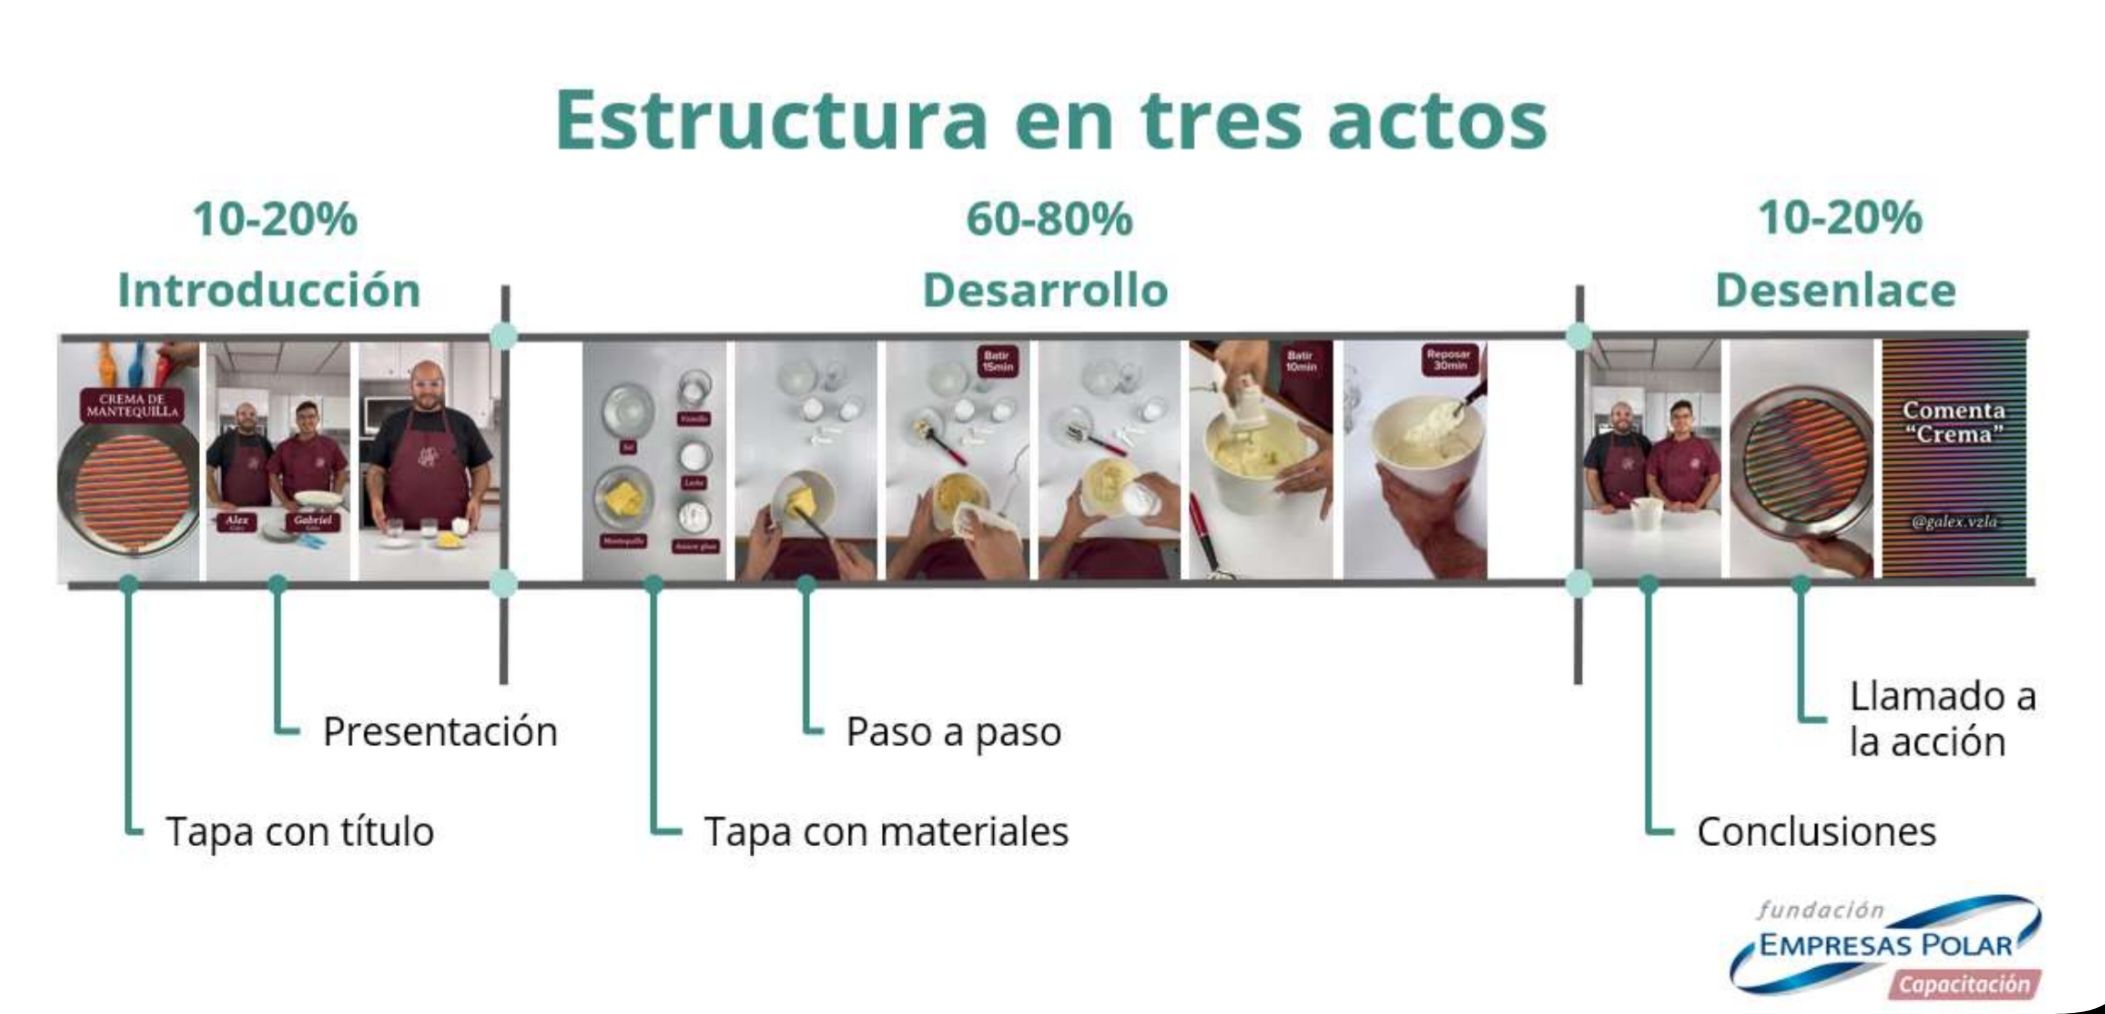
Una vez que se contextualiza la idea y se define el tipo de video, se debe realizar el guion del video, este nos permite planificar y organizar con claridad cada toma del video ganando tiempo. En mi caso era la primera vez que hacía un guion, de hecho no sabía cómo se estructuraba ni su uso, y después de realizar la práctica es que puedo reconocer su importancia.
El guion es una guía detallada de la creación del video, donde se describe el tipo de plano, el diálogo, el audio, el tiempo, los efectos especiales, la acción, absolutamente todo y se presenta en una hoja con sus columnas y filas de forma clara para que cualquier persona que lo lea, lo pueda entender. En el guion debe ir el gancho inicial, la información del producto y su llamado de acción.
La importancia del guion radica en la organización de la producción del video, la optimización de los recursos y asegurar que la narrativa del video sea clara y efectiva para el público.
Ejemplo de guión
##
Lenguaje audiovisual
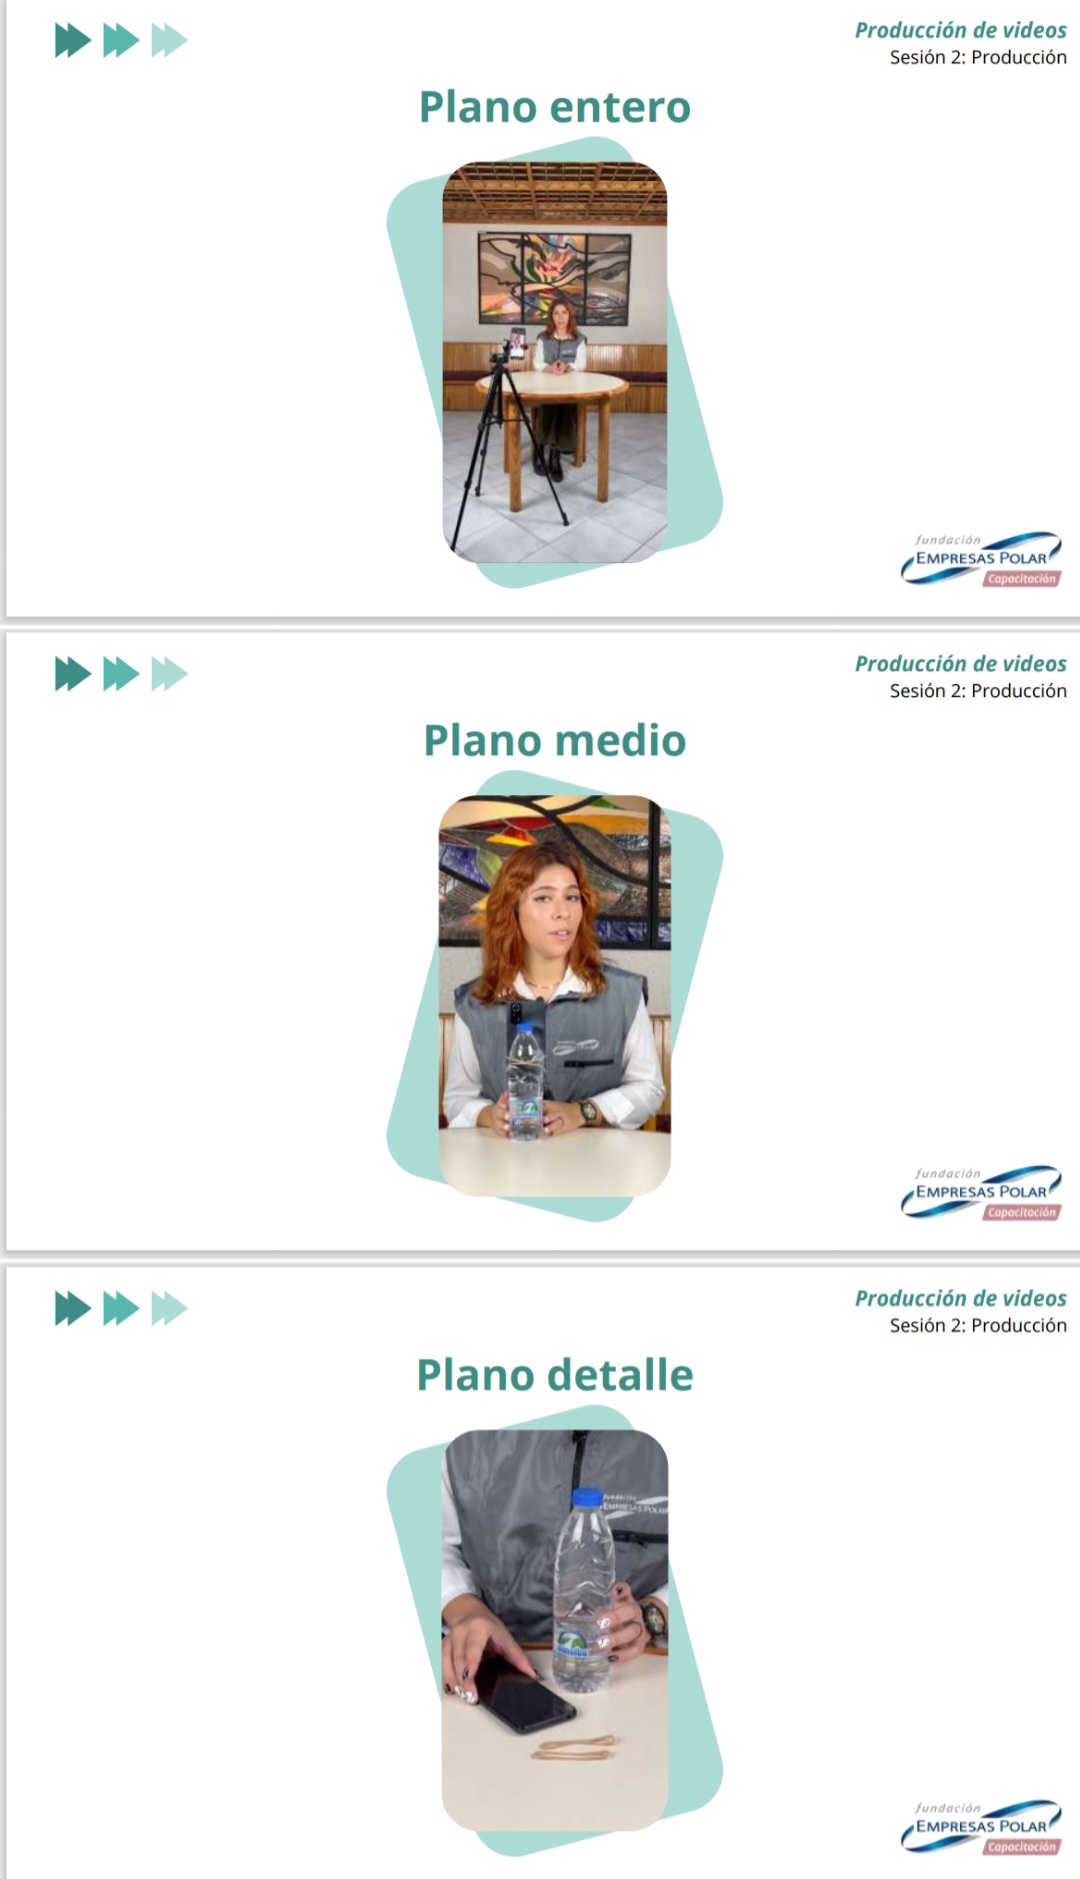
Es la forma de comunicarnos a través de elementos visuales y auditivos, si queremos crear un video que transmita emociones y cuente una historia debemos trabajar con distintos planos, estos son los que dan perspectivas al espectador, para hacer que el video sea más atractivo y mantenga la retención del mismo. Hay muchos tipos de planos, pero solo explicaré los más usados, entre ellos están:
Plano entero: Es cuando toda la imagen de una persona, animal o cosa queda completa en pantalla sin que se le corte ninguna de sus partes.
Plano Medio: Va desde la cabeza hasta la cintura, sin que falten sus brazos o salgan cortados. En ese plano deben salir los brazos completos.
Plano detallé: Es el que enfoca directo una zona del cuerpo, puede ser un ojo, una mano, un anillo, para resaltar su importancia o crear un impacto narrativo. Este plano es común en los videos de bisutería y comida.
##
Mi experiencia en la producción de mi video derribando obstáculos
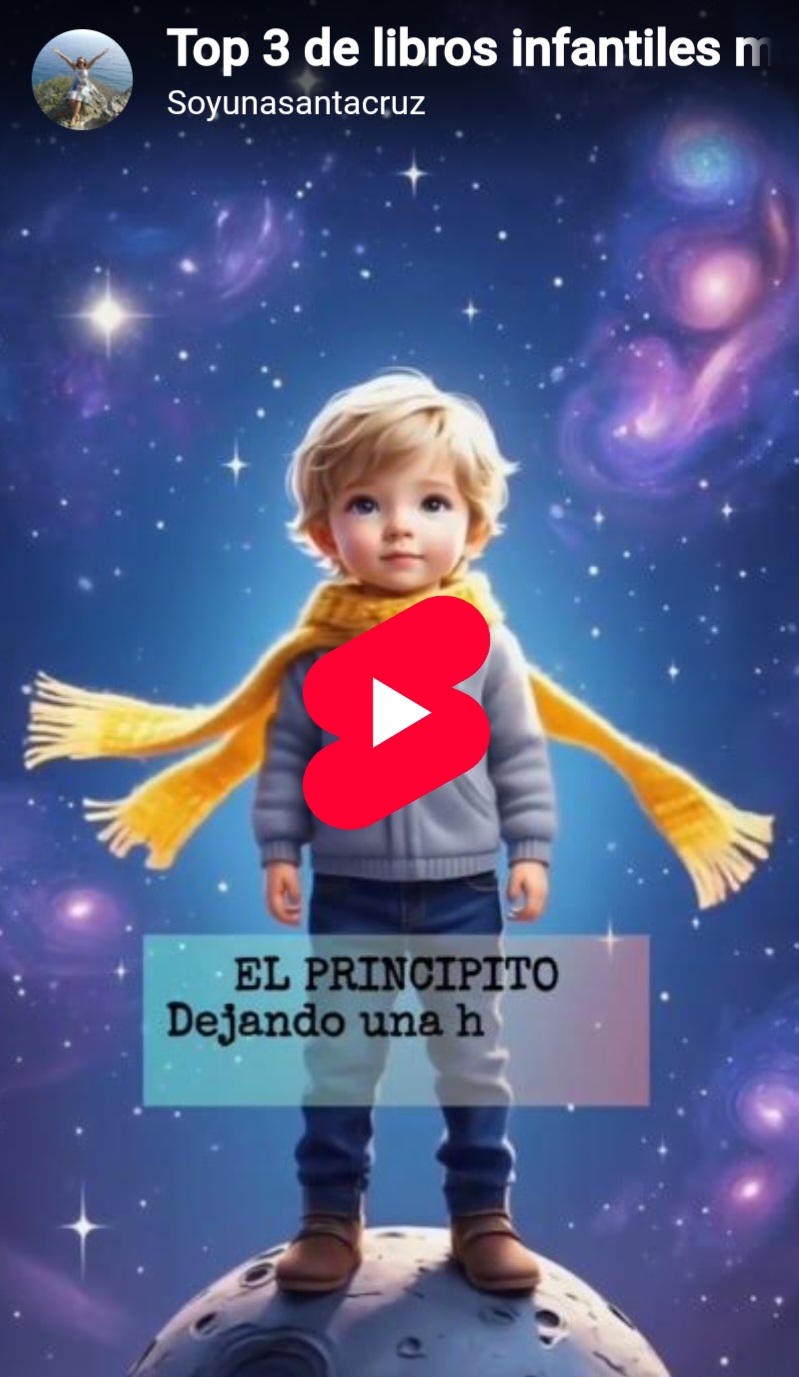
Mi idea era dar a conocer los libros infantiles, más famosos y vendidos del mundo, enfocado a los padres de niños pequeños y con la intención de crear un vínculo entre mis clientes potenciales y mi marca personal y que me asociaran con la literatura infantil.
Los primeros obstáculos a los que me enfrenté fue que no tenía ninguno de los libros que iba a mencionar, por lo que tuve que recurrir a la inteligencia artificial, solucionada esa parte quería arrancar con una imagen que desconcertara y aparecer de espaldas en un lugar natural, nada de bibliotecas o espacios cerrados, ya que la idea es romper esquemas y tenía el ambiente perfecto para esa primera toma, en el patio de la casa con las hojas secas de los árboles que daban la impresión de bosque, pero casualmente el día que había apartado para grabar, llovió desde temprano y todo estaba lleno de lodo, agua y oscuridad, por lo que al final tuve que improvisar la sala de mi casa para grabar.
Una vez que me organicé en la sala, ubique algunos muebles y plantas, y mi maquillaje ya estaba horrible, me dispuse a grabar, pero en ese mismo momento el vecino del frente se dispuso a soldar su puerta de entrada 😪 el sonido de la máquina de soldar no se puede limpiar con edición, simplemente grabar así era imposible y antes de hacerlo ya tenía ganas de llorar. 😭
La única forma fue adivinar los momentos cortos en que mi vecino descansaba o revisaba la soldadura para poder grabar, lo que me dejó muchas tomas desenfocadas y hablando extremadamente rápido. Como no tenía más tiempo, tuve que relajarme y pensar que estaba jugando. La motivación volvió y terminé de grabar.
##
Postproducción
En esta parte se enlazan todos los cortos y se unen para formar el vídeo final, aquí se usan los programas editores de vídeo, en el curso se centraron en explicar uno de los más populares como es CapCut, gracias a la experiencia que he tenido en hive, no se me hizo difícil comprender lo que explicaron, pero terminé editando en el editor que más uso InShot.
La edición es una de las cosas que más tiempo lleva, ya que encajar varios videos y su audio no es tan fácil, se necesita práctica para eso. Yo estaba acostumbrada hacer tomas de un solo plano y un video sin cortes así hablara con contará por varios minutos, por eso editar el video de este curso final me llevó varias horas y estuve dos días haciendo este trabajo.
Los cortos que son generados por la realidad virtual también me llevaron muchos minutos, primero porque no fue fácil encontrar programas que realizará videos a partir de textos gratis, la mayoría tienen este servicio pago, y después de encontrarlos tenía que realizar un prompt bien detallado para que el sistema me entendiera y realizará lo que yo quería, la mayoría de los cortos los hice dos veces porque no podía repetirlos más.
Estos videos vienen sin sonidos, por lo que buscar el audio que se adaptara a cada uno fue otro proceso, sobre todo porque debía ser libre de derechos autor, pero yo quería que cuando la persona viera el video si había leído el libro o lo había escuchado lo asociará a su imagen y sonido original.
También me tomé el tiempo de descargar uno de los libros que no había leído para poder hablar con propiedad a la hora de recomendarlos.
El proceso de producción y postproducción fue muy enriquecedor y divertido para mí, espero que les gusté el resultado final.
https://youtube.com/shorts/5F4F7XD72OM?si=GZA0qLaWr72eI7RT
##
Presentación final
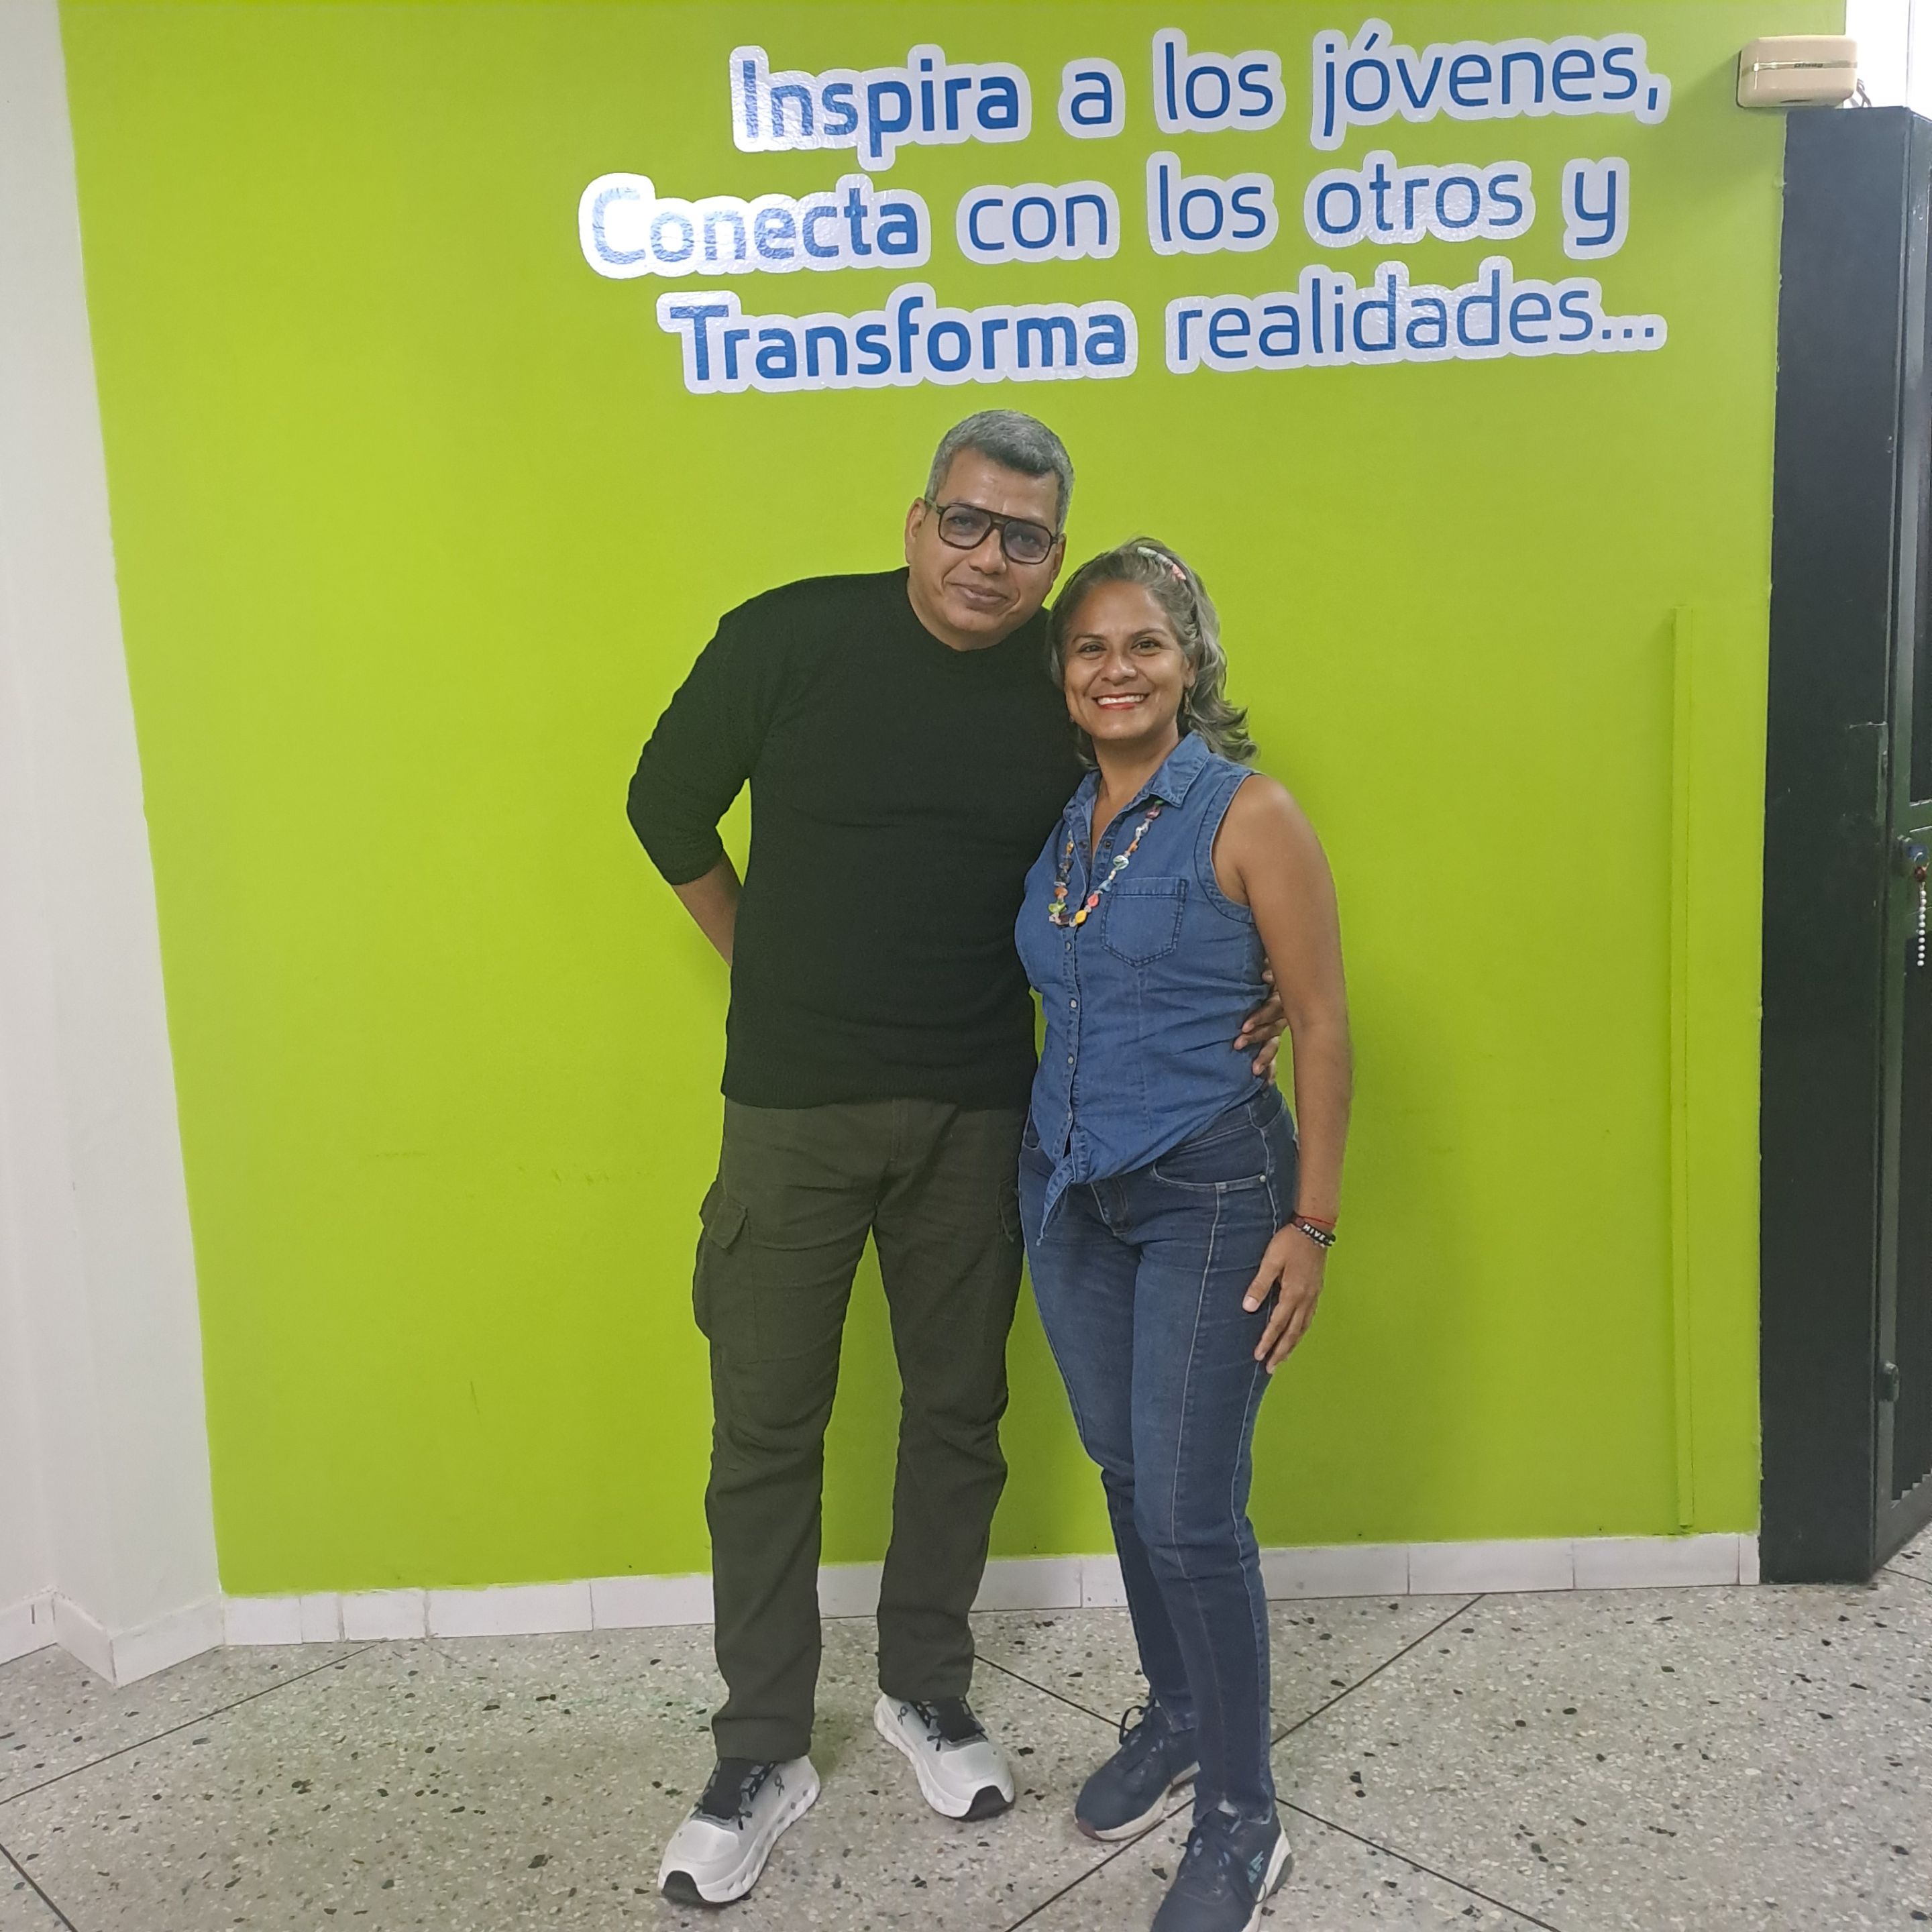
La cuarta clase fue la presentación de cada uno de los videos de los participantes del curso, ese día nos sentamos en círculo y visualizamos nuestros trabajos, donde cada una fue dando sus puntos de vista positivos y negativos para poder mejorar y avanzar.
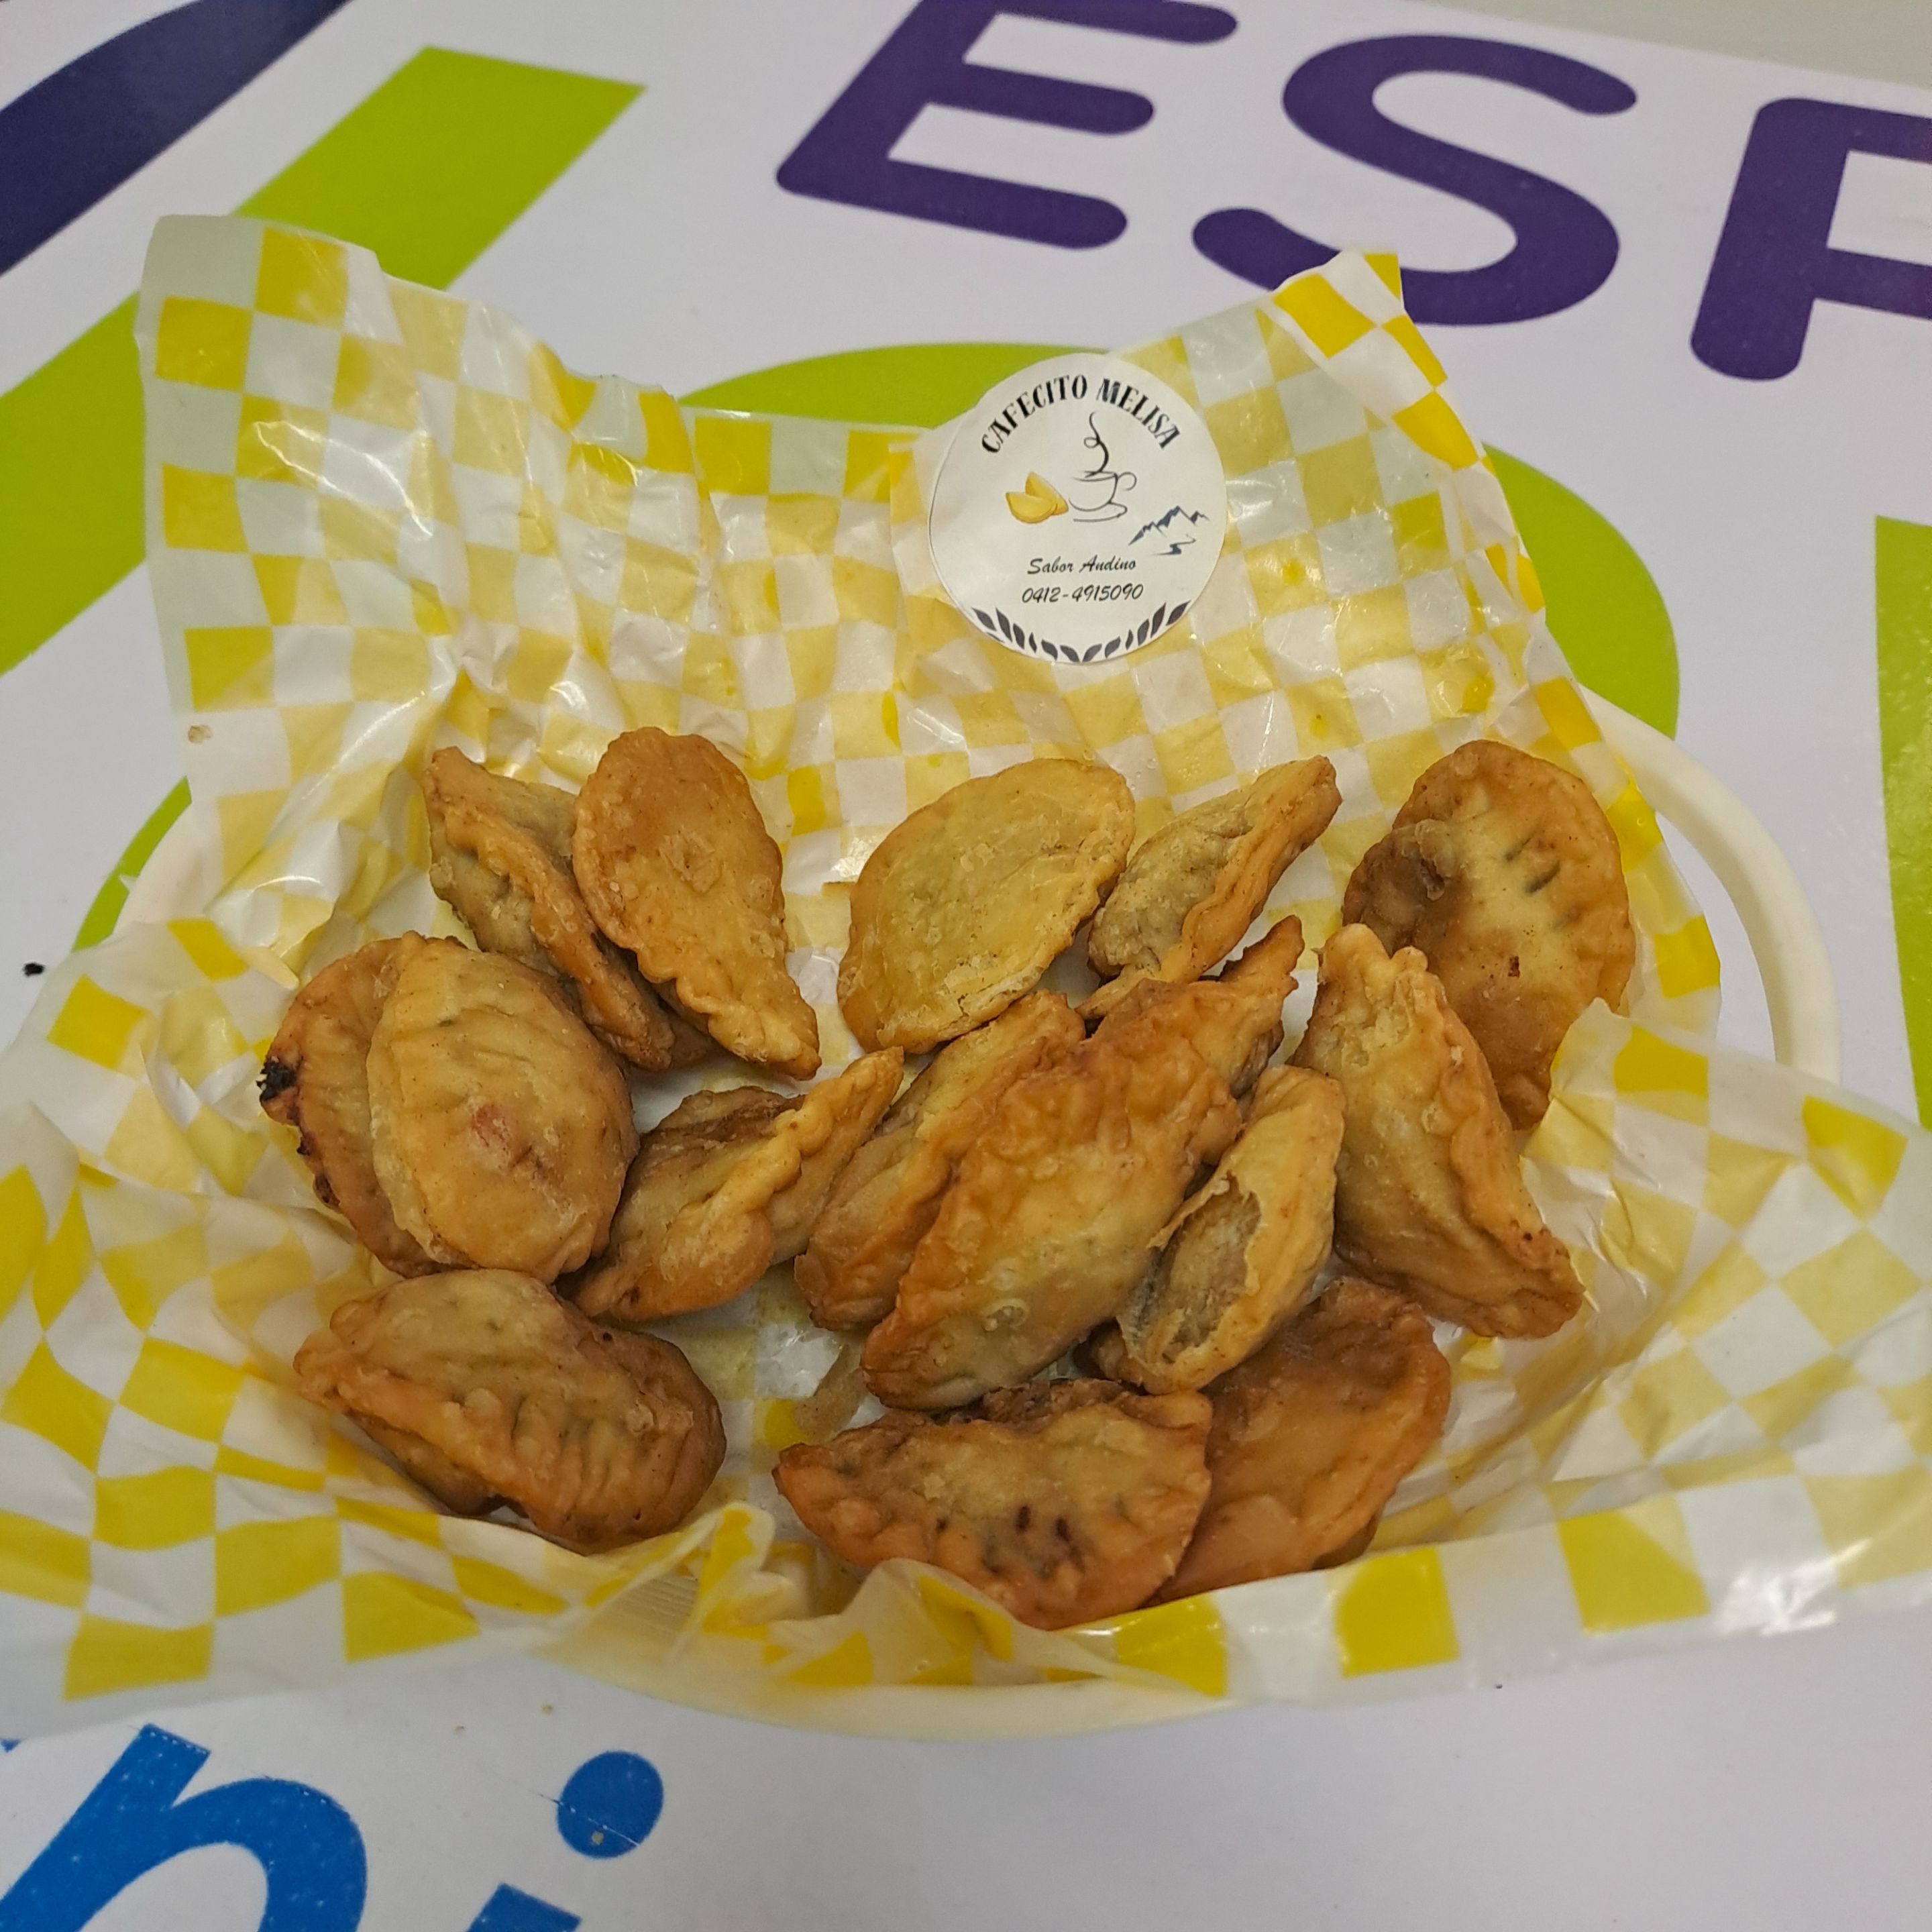
Todos los videos estuvieron llenos de creatividad, esfuerzo y trabajo, incluso una de las emprendedoras llevó muestras de su comida, pastelitos andinos que son un tipo de empanada de una zona de Venezuela, muy ricos, porque de eso trata su emprendimiento, es de comida autóctona y en su video sale cantando una música folclórica como eslogan de su producto.
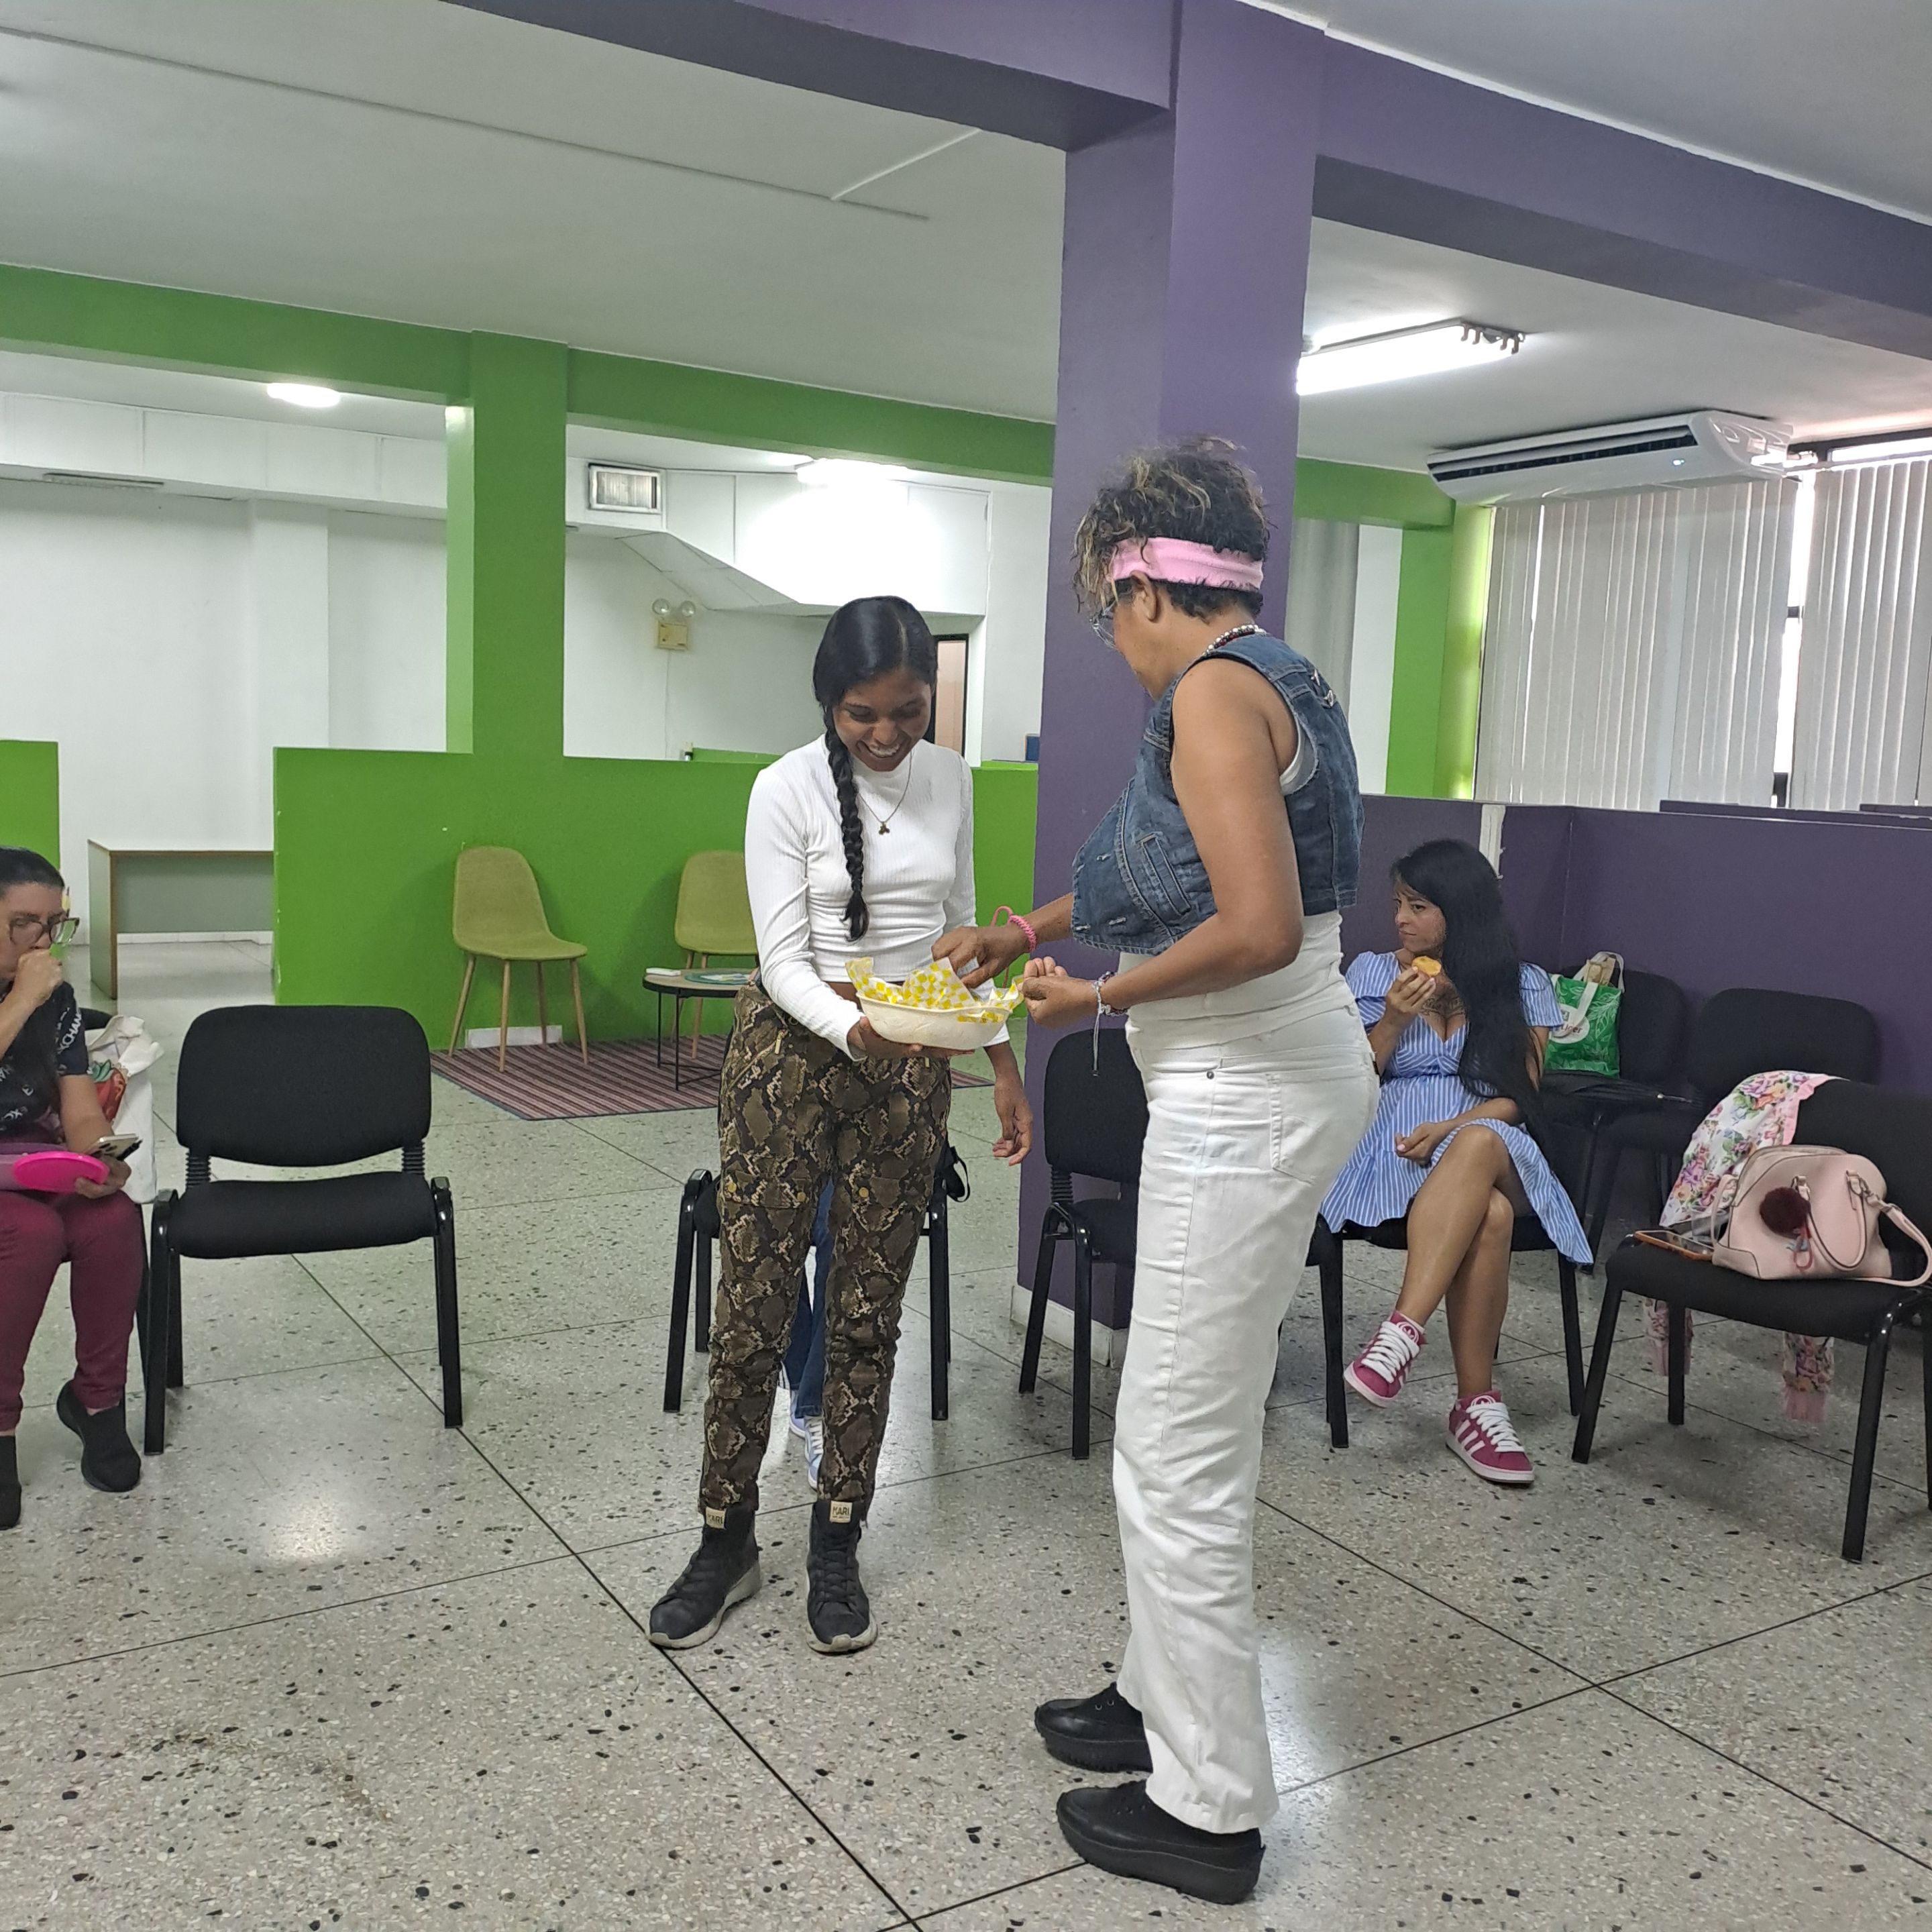

Ese día fue muy divertido y provechoso para mí, quise mencionar en estos dos post lo más importante de este curso, espero que le hayan gustado.
English
#
Specialised workshop for entrepreneurs in the production of tutorial videos 🎬 [Esp - Eng]
##
Part 2. Post-production and final presentation

Screenshot del vídeo

Greetings, fellow entrepreneurs! A few days ago, I completed the first part of this audiovisual production course, sharing what I learned and the most important points. Today, I want to finish by sharing the knowledge and anecdotes from the last few sessions. [I recommend reading the first part](https://peakd.com/hive-140971/@soyunasantacruz/taller-especializado-para-emprendedores-en) to fully understand the context.
##
Production
Once the idea has been contextualised and the type of video defined, the video script must be written. This allows us to plan and organise each shot of the video clearly, saving time. In my case, it was the first time I had written a script. In fact, I didn't know how it was structured or how to use it, and it was only after doing the practical exercise that I recognised its importance.
The script is a detailed guide to the creation of the video, describing the type of shot, dialogue, audio, timing, special effects, action, absolutely everything, and is presented on a sheet with columns and rows in a clear format so that anyone who reads it can understand it. The script should include the opening hook, product information, and call to action.
The importance of the script lies in organising the video production, optimising resources, and ensuring that the video's narrative is clear and effective for the audience.
Example of a script


##
Audiovisual language
This is the way we communicate through visual and auditory elements. If we want to create a video that conveys emotions and tells a story, we must work with different shots, which give the viewer perspective, to make the video more attractive and maintain their attention. There are many types of shots, but I will only explain the most commonly used ones, which include:
Full shot: This is when the entire image of a person, animal or object is shown on screen without any parts being cut off.
Medium shot: This shot ranges from the head to the waist, without cutting off the arms. In this shot, the arms must be shown in their entirety.
Close-up: This shot focuses directly on a specific area of the body, such as an eye, a hand, or a ring, to highlight its importance or create a narrative impact. This shot is common in videos featuring jewellery and food.

##
Mi experiencia en la producción de mi video derribando obstáculos
My experience in producing my video overcoming obstacles.
My idea was to promote the world's most famous and best-selling children's books, focusing on parents of young children and with the intention of creating a link between my potential customers and my personal brand so that they would associate me with children's literature.
The first obstacles I faced were that I did not have any of the books I was going to mention, so I had to resort to artificial intelligence. Once that part was solved, I wanted to start with an image that would be disconcerting and appear with my back turned in a natural setting, nothing like libraries or enclosed spaces, since the idea was to break the mould, and I had the perfect setting for that first shot in the courtyard of the house with dry leaves from the trees that gave the impression of a forest. But coincidentally, on the day I had set aside for filming, it rained early and everything was covered in mud, water and darkness, so in the end I had to improvise and film in my living room.
Once I got organised in the living room, I arranged some furniture and plants, and my make-up was already terrible, I set out to record, but at that very moment, the neighbour across the street set out to weld his front door 😪. The sound of the welding machine cannot be cleaned up with editing, so it was simply impossible to record like that, and before I even started, I already felt like crying. 😭
The only way was to guess the short moments when my neighbour was resting or checking the welding so I could record, which left me with many out-of-focus shots and talking extremely fast. As I didn't have any more time, I had to relax and think I was playing a game. My motivation returned and I finished recording.
##
Post-production

In this part, all the short films are linked together to form the final video. Video editing programmes are used here. The course focused on explaining one of the most popular ones, CapCut. Thanks to my experience at Hive, I didn't find it difficult to understand what they explained, but I ended up editing in the editor I use most, InShot.
Editing is one of the most time-consuming tasks, as fitting several videos and their audio together is not that easy and requires practice. I was used to shooting single shots and uncut videos, even if I was talking for several minutes, so editing the final video for this course took me several hours and I spent two days doing this work.
The short films generated by virtual reality also took me many minutes, first because it was not easy to find programmes that would make videos from text for free, as most of them charge for this service, and after finding them, I had to make a very detailed prompt so that the system would understand me and do what I wanted. I made most of the short films twice because I could not repeat them any more.
These videos have no sound, so finding audio that would suit each one was another process, especially because it had to be copyright-free, but I wanted people who had read the book or listened to it to associate it with its original image and sound when they saw the video.
I also took the time to download one of the books I hadn't read so that I could speak knowledgeably when recommending them.
The production and post-production process was very enriching and fun for me, and I hope you like the final result.
https://youtube.com/shorts/5F4F7XD72OM?si=GZA0qLaWr72eI7RT
##
Final presentation
The fourth class was the presentation of each of the videos made by the course participants. That day, we sat in a circle and watched our work, and each of us gave our positive and negative points of view in order to improve and move forward.
All the videos were full of creativity, effort and hard work. One of the entrepreneurs even brought samples of her food, Andean pastries that are a type of empanada from a region of Venezuela. They were delicious, because that is what her business is about: local food. In her video, she sings a folk song as a slogan for her product.


That day was very enjoyable and beneficial for me. I wanted to mention the most important aspects of this course in these two posts. I hope you enjoyed them.
* * *
### Algunas imágenes son capturas de pantalla del curso de Fundación Polar - Some images are screenshots from the Polar Foundation course.

Translated with || traducido con: Deepl Translator. Own pictures || Imágenes propias : Huawei Honor Cell Phone. Video editing: Edición del video: InShot | Sound Effect by freesound_community from Pixabay Harry Potter Music by Ievgen Poltavskyi from Pixabay El principito Music by VOS_Studio from Pixabay Donde viven los monstruos Music by LudoSoundX from Pixabay
Posted Using INLEO