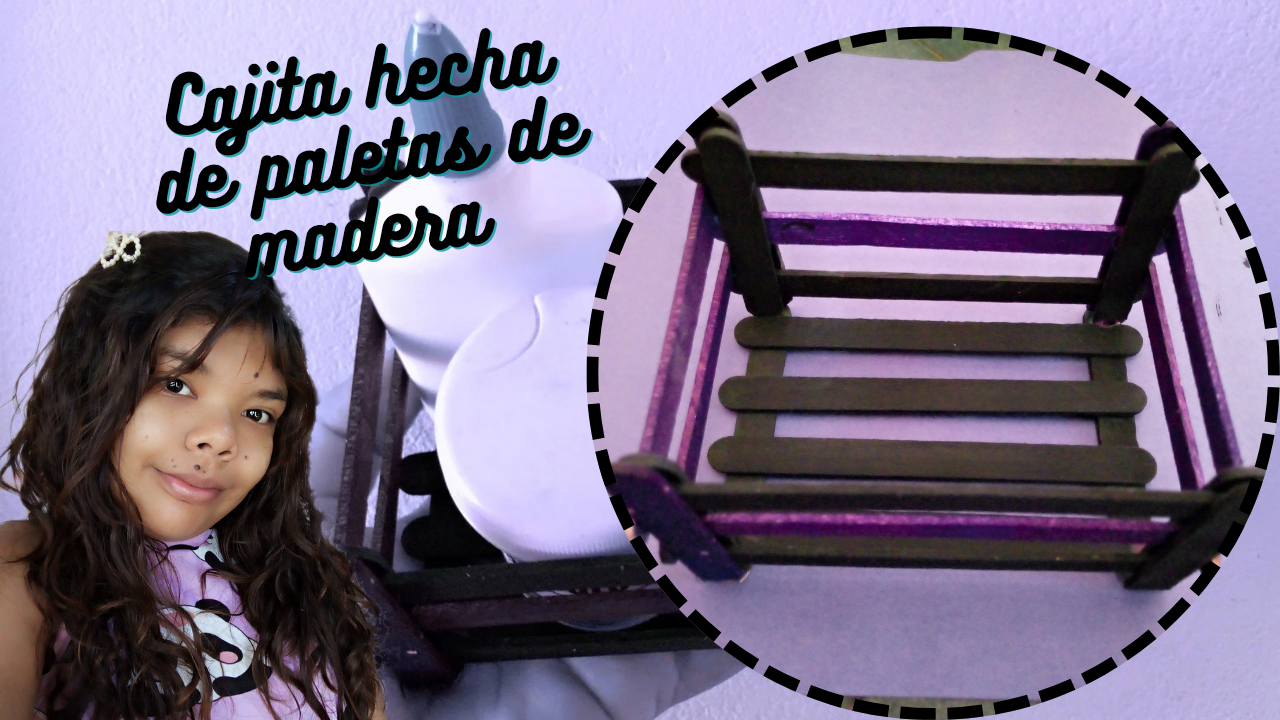
Formato miniatura de YouTube en canva®.
Hello, hello, grateful to be here today to share with you tonight how I made a little box out of wooden pallets to store some things I have around, and since I like to keep my things in order, and there's nothing like making my own decorations and accessories. Since I was also a little discouraged, I needed to change my mood and distract myself by doing something productive to keep my mind free from those demotivating thoughts. Now talking more about this little box, the inspiration came when I was looking at Pinterest, by the way, there are some really nice crafts on Pinterest. Well, there I saw how they made a little box out of wooden pallets, and I liked it, and it seemed like such a good idea to make your own little boxes. Since I had the materials, I got to work.
I was also inspired to make my little box in one of my favorite colors, purple and black, now the moment I saw that I didn't have any black wooden palettes I thought they don't sell those, and I tried painting, I had black paint and I painted all the palettes I needed, I did have the purple palettes because it was a pack of colored palettes, something I'm going to try this time is to use white glue to glue everything, the only thing it's going to take is for it to dry but I trust that everything will turn out well.
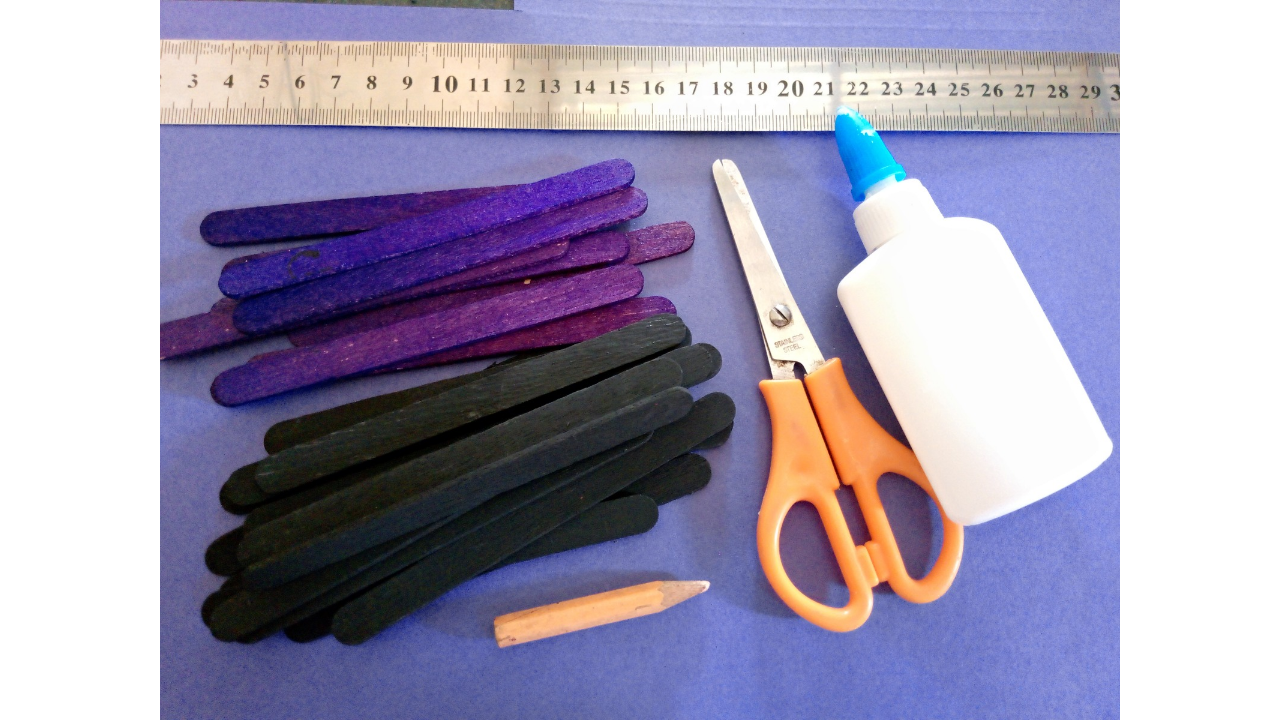
(Materiales a usar:)(Materials to use:)
- Paletas de madera de color negro y morado
- Tijeras
- Regla
- Lápiz
- Pega blanca
- Lija
- Black and purple wooden palette knives
- Scissors
- Ruler
- Pencil
- White glue
- Sandpaper
(Procedimiento:)(Procedure:)
-
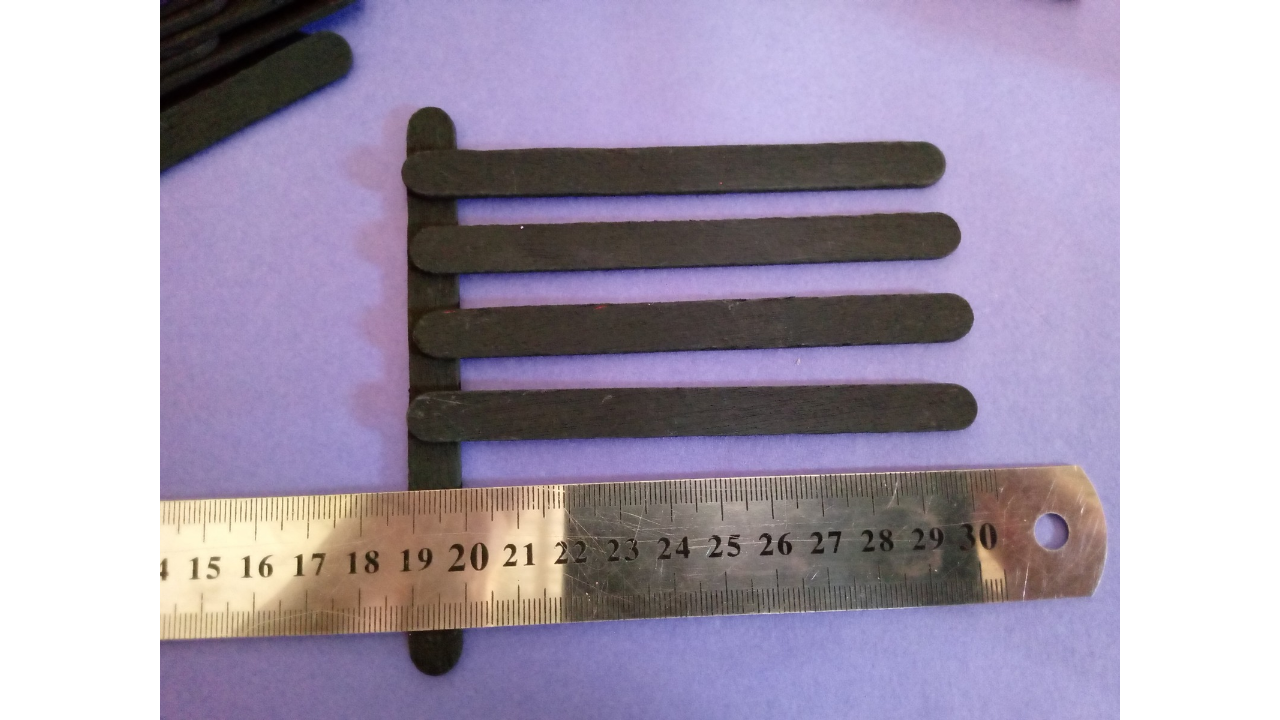
Paso nro 1
Paso nro 1
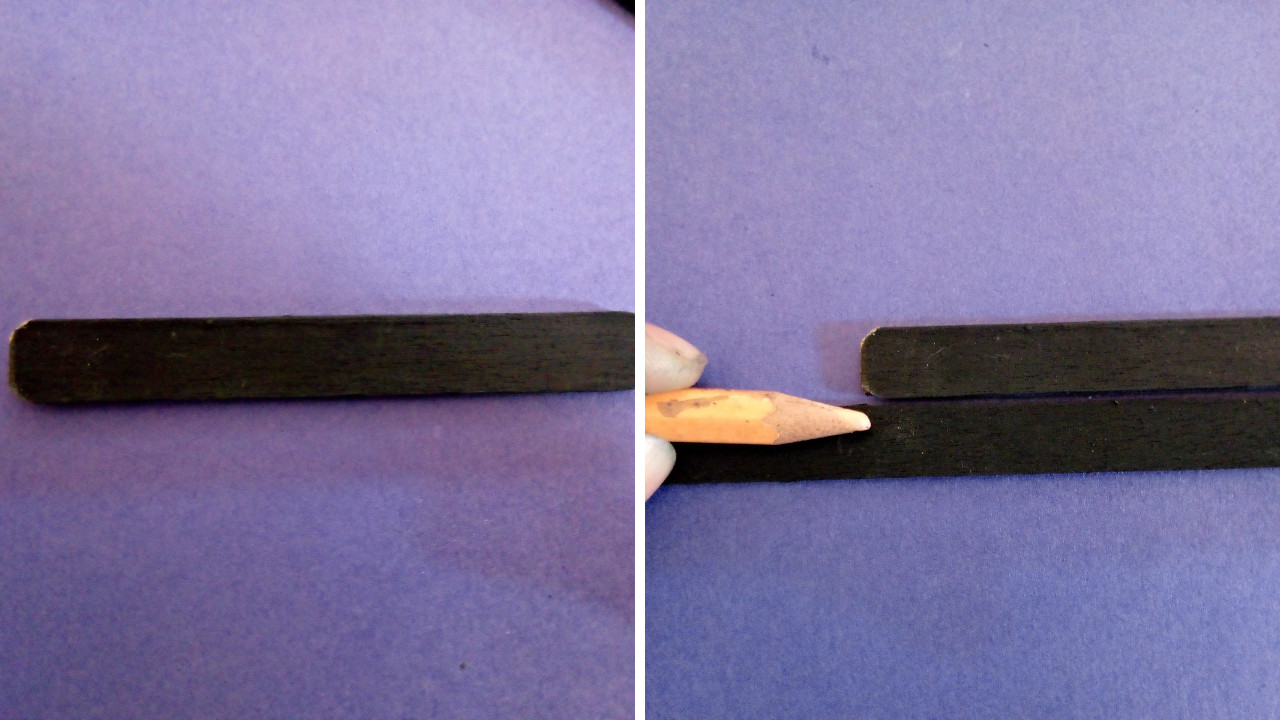
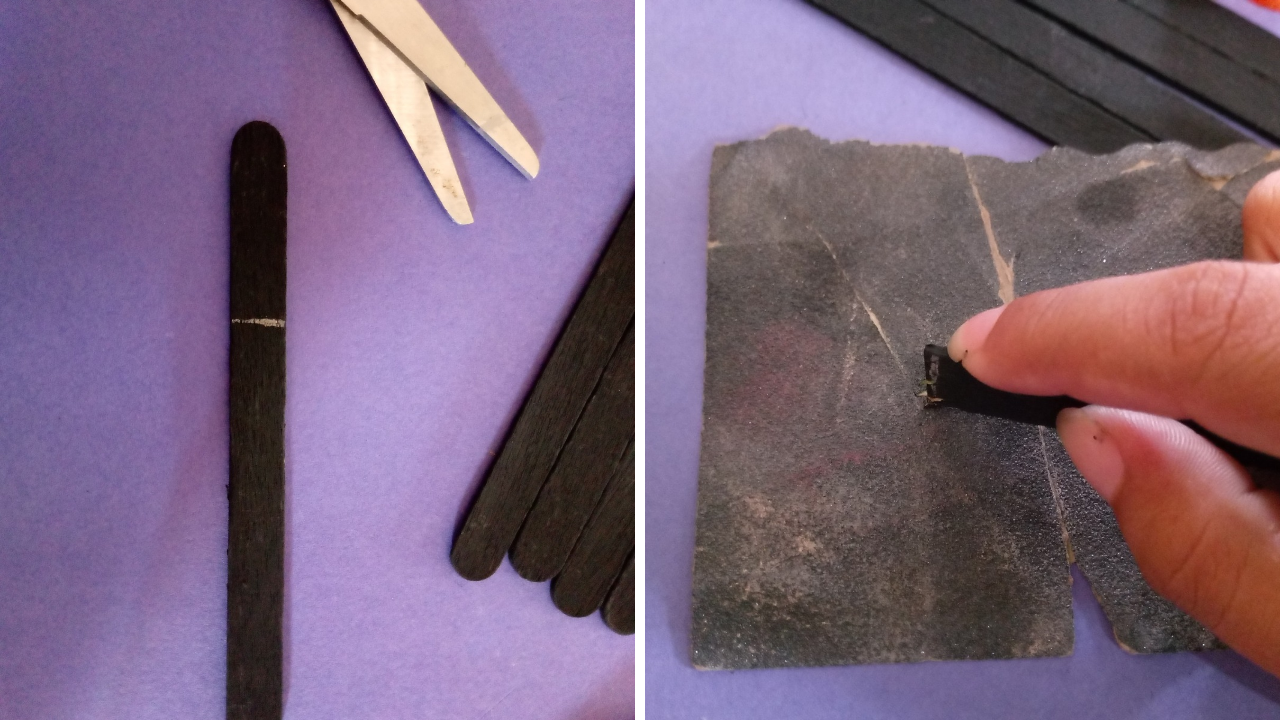
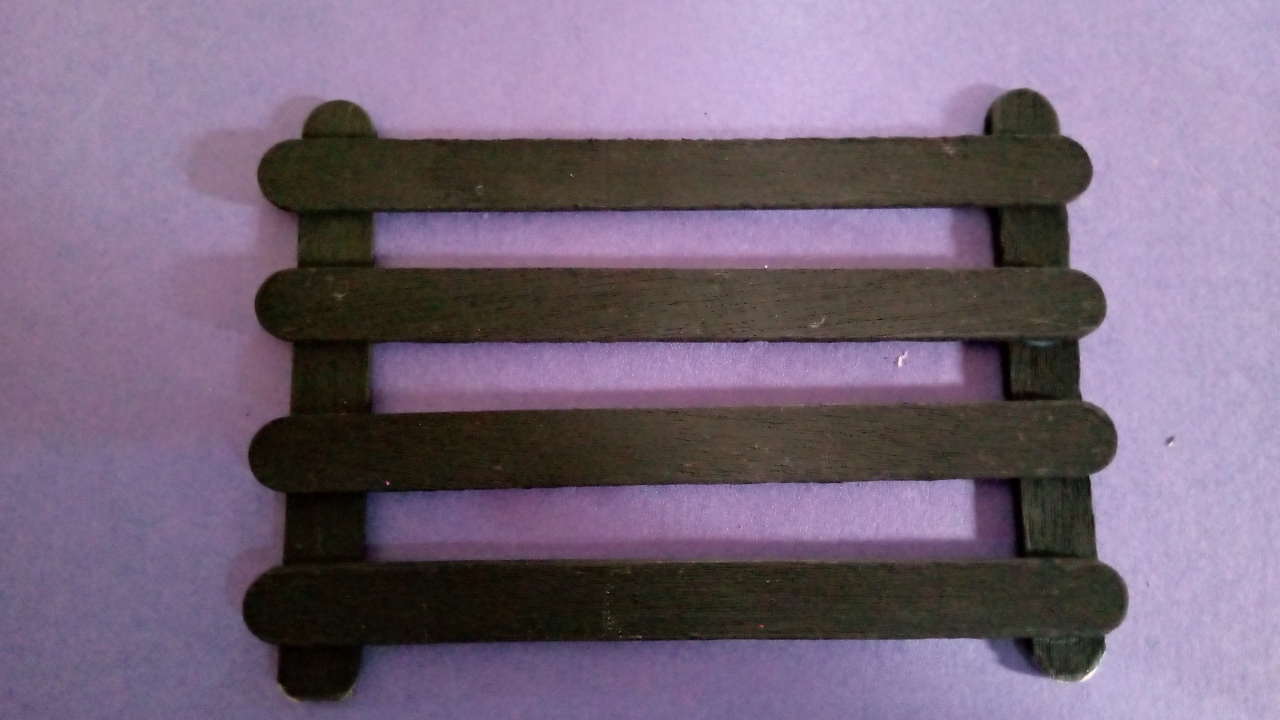
In the first step to start, I'm going to make the bottom of the box first and then see the size that I'm going to use for the sides, the bottom will have four complete pallets, and the sides where the pallets will be glued, will be two pallets that will be 9 cm, what I did was mark where I was going to cut, I sanded the part that I cut, and so I already have the piece that will go on the sides, I glued the four pallets and let it dry.
-
Paso nro 2
Paso nro 2
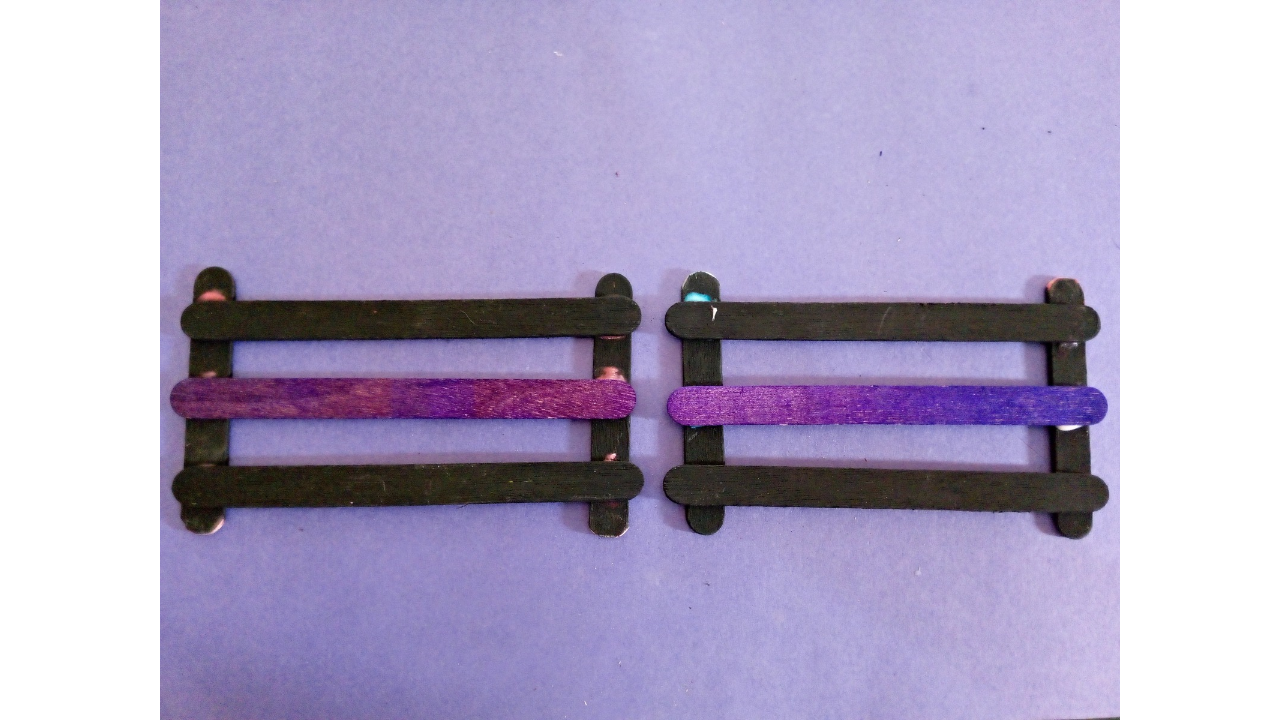
Now I'm going to make the part that goes in front, I'm going to use two black palettes and one purple one, this will be to make two pieces, I'm also going to glue the palettes to another palette that I'm going to cut to the measurement of 8cm long and nothing more, for this I only needed 4 palettes of that measurement, while I glued the other palettes at once since I needed time for the glue to dry.

-
Paso nro 3
Paso nro 3
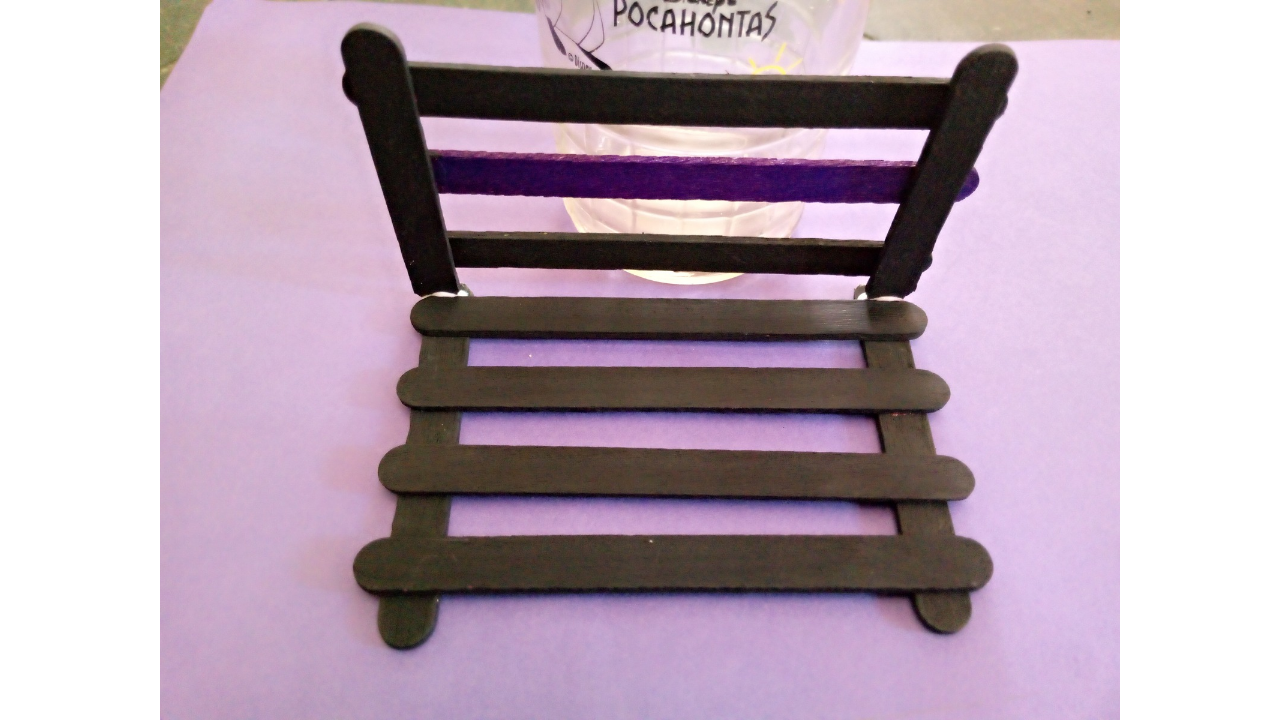
For this part, I was already placing the pieces that go on the front, since I wanted to see how much measurement I would need for the rest of the box. The part I'm missing is the side pieces. As I was gluing them, I was holding the pieces with a glass to help keep them stable, and now I just let it dry. Once it was dry, I glued two of the side sticks together; the sticks also measure 9 cm.
-
Paso nro 4
Paso nro 4
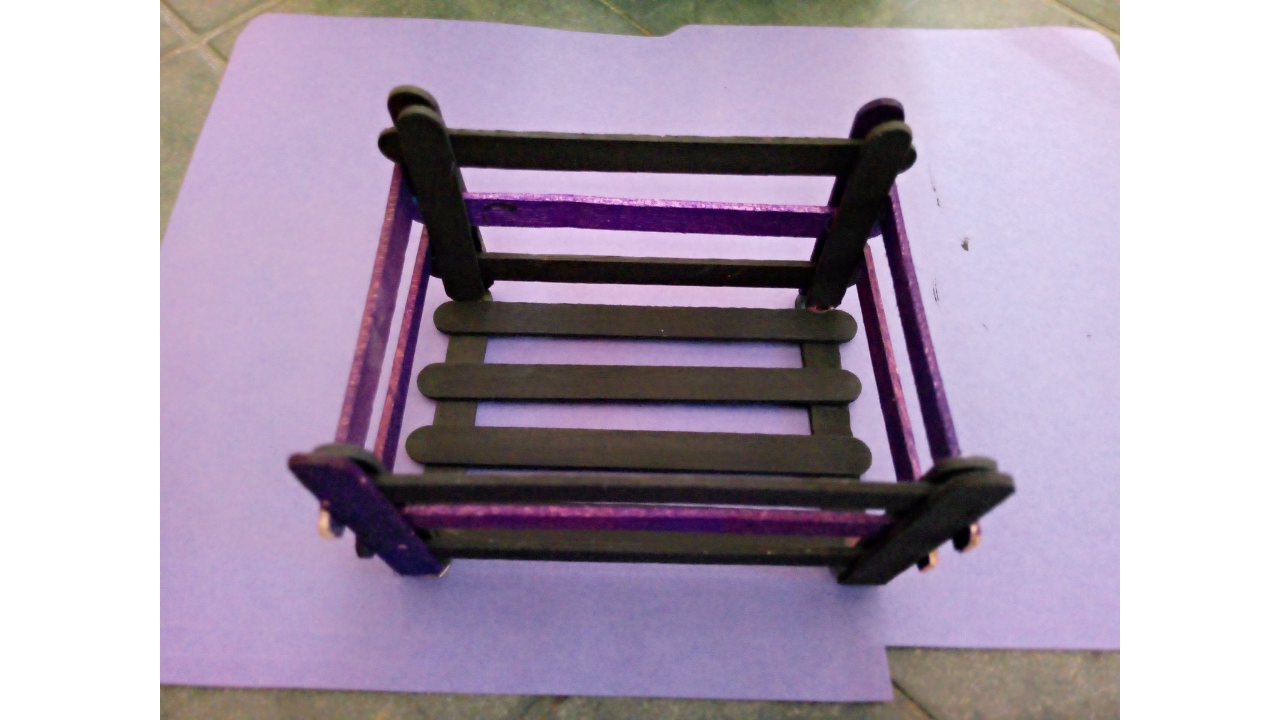
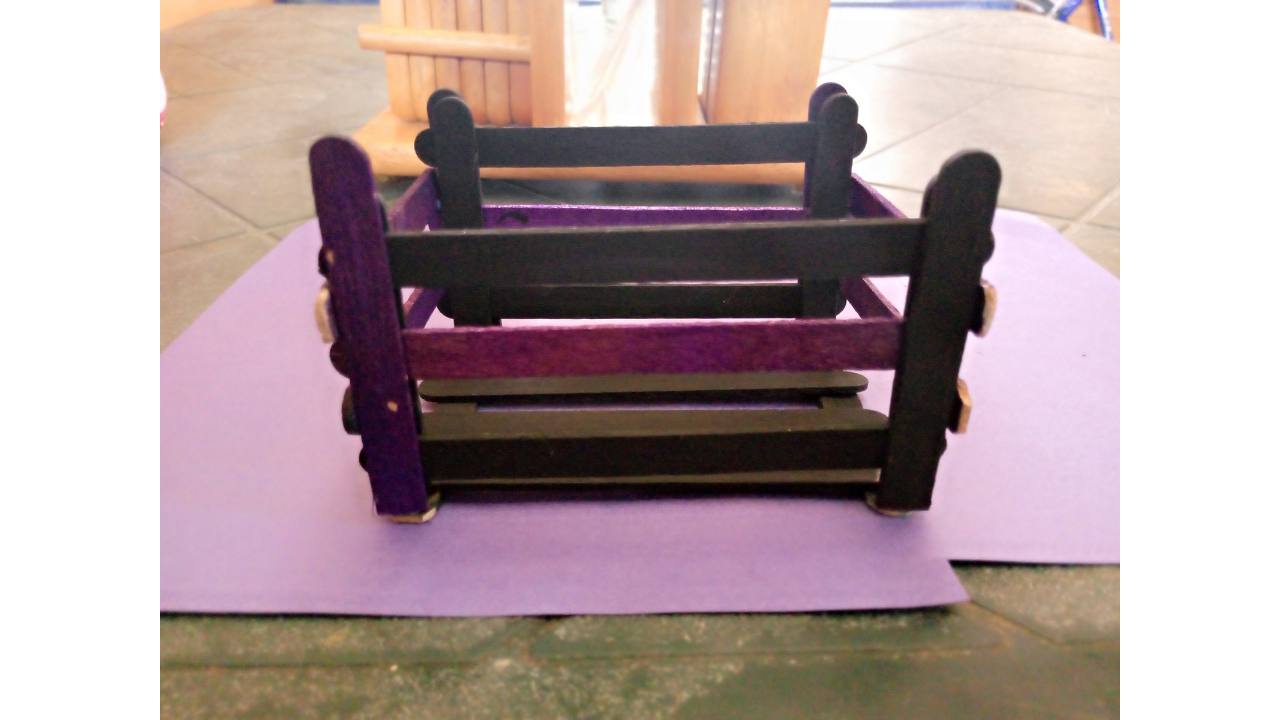
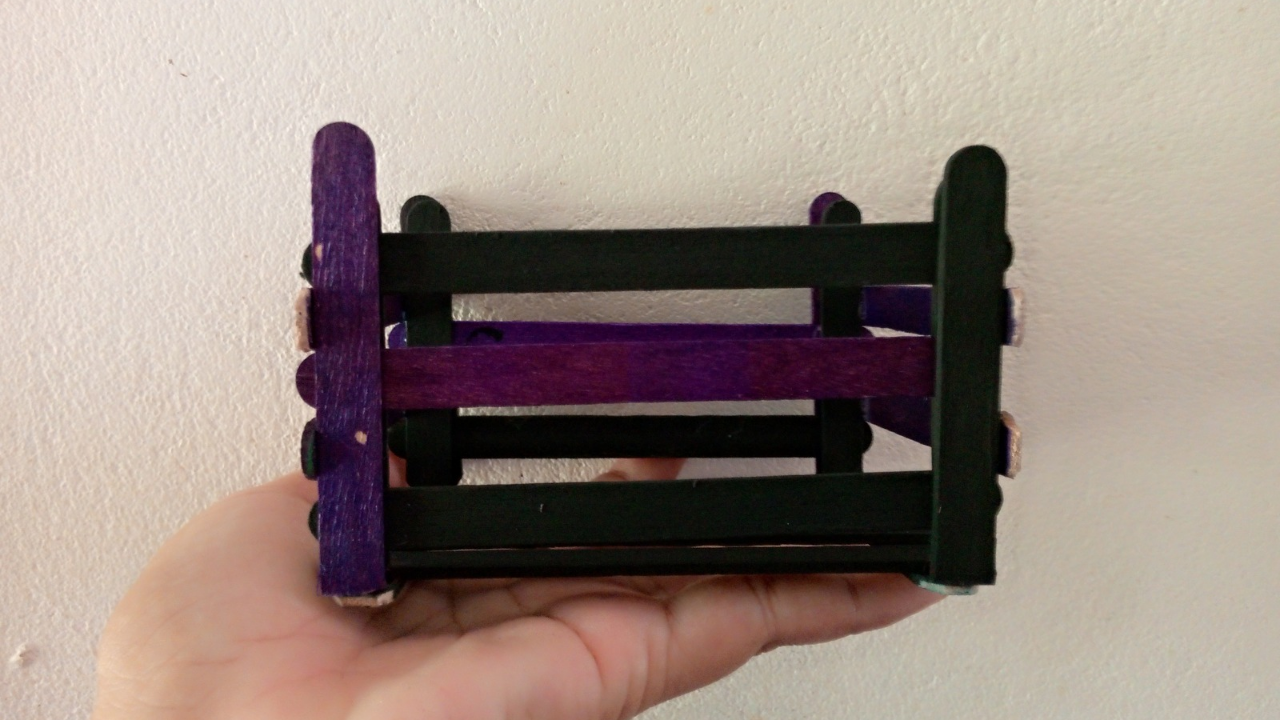
After gluing the sides of the box, let it dry well, and finally, just apply a layer of glue to give it a shiny and long-lasting touch, and that's how my box turned out.
(Resultado final:)(Bottom line:)
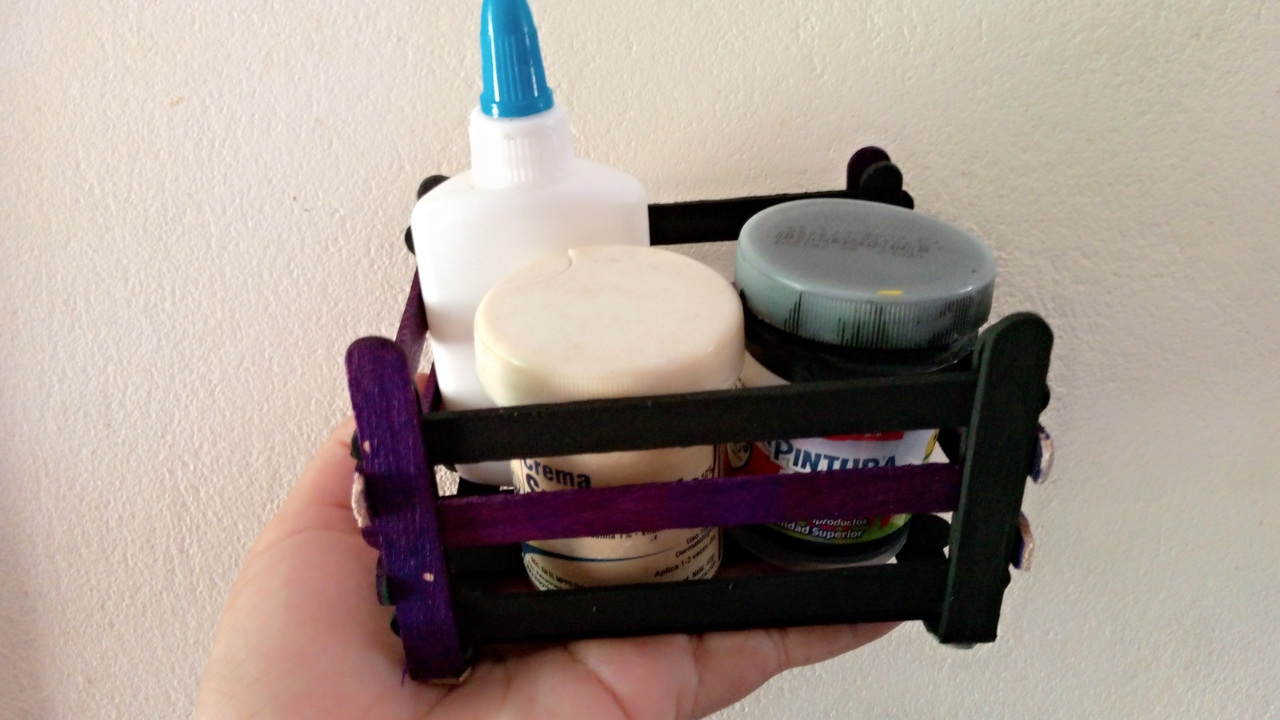
And that's all, that's how the little box turned out. I hope you like it. Once again, I've made a nice craft. I tried it with a few things to see how durable it was, and it's not bad at all. It will be very useful. Thank you for joining me, and I'll say goodbye. I hope to return soon with another craft.
La escritura es de mi autoría|Las imágenes editadas tomadas y personalizadas por mí|Las fotos del procedimiento fueron tomadas desde mi teléfono infinix Smart 7|El texto lo traduci en el traductor de Firefox|Imagen editada en canva y picsart.
The writing is my own | The edited images were taken and customized by me | The photos of the procedure were taken from my Infinix Smart 7 phone | The text was translated in Firefox Translate | Image edited in Canva and PicsArt.