


Hola bienvenid@s a un nuevo Blog.
Hello, welcome to a new blog.
Hello, hello, Jewelry friends. I'm happy to see you again and share a new project with you: how I made a beautiful choker-style necklace inspired by Vincent Van Gogh! This necklace is not only a charming accessory, but it also has a special meaning for me. I decided to make it to pair with a bracelet I made previously, also inspired by Van Gogh's works. In particular, I wanted to capture the essence of his famous sunflowers, using yellow flowers that evoke the beauty of his painting. Although I only made three flowers, I did so intentionally so that they were small details that complemented the design without overwhelming it.

(Materiales:)||(Materials:)
- Cuentas de color,azul(varios tonos de azul) amarillo y marrón.
- Perlas plateadas
- Hilo nilón
- Tijeras
- Seguro fecho rosca
- Mostacillas de color tornazul
- Colored beads, blue (various shades of blue), yellow, and brown.
- Silver pearls
- Nylon thread
- Scissors
- Screw-on safety pin
- Teal seed beads
(Procedimiento:)||(Procedure:)


-
Paso nro 1
Paso nro 1
Now, let's move on to the flowers. To make them, I used yellow beads that represent Van Gogh's sunflowers. I took several yellow beads and strung them as follows: I placed six of each yellow beads on the nylon thread and then added a brown bead in the center, making sure the thread went through the ends of the nylon and entered the middle of the brown bead. Next, I passed each side of the thread back through the yellow beads, making sure the thread went through the top and out the other way. This will form the base of the flower. To close each flower, I took two additional yellow beads and passed the thread through the middle, making sure each side of the thread came out the opposite way. This interlacing method creates a three-dimensional effect that makes the flowers look more realistic and vibrant. I repeated this process for the three flowers I wanted to include in the necklace, making sure they were positioned correctly in the center.


-
Paso nro 2
Paso nro 2
Once I finished making the flowers, I moved on to assembling the necklace. First, I placed seed beads, which will serve as the base for the next step. Then, I added a second, screw-like clasp, making sure everything was secure. I used the seed beads to apply more pressure and tied a small knot to ensure the necklace wouldn't unravel.

-
Paso nro 3
Paso nro 3
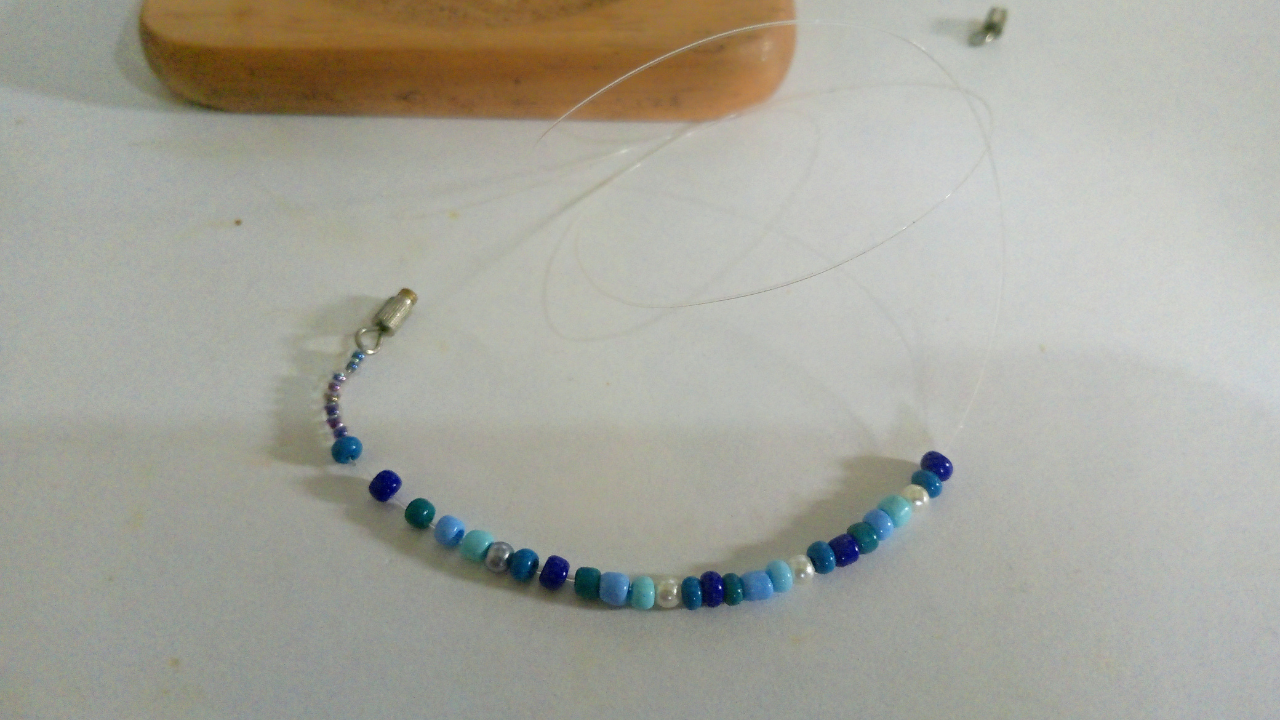
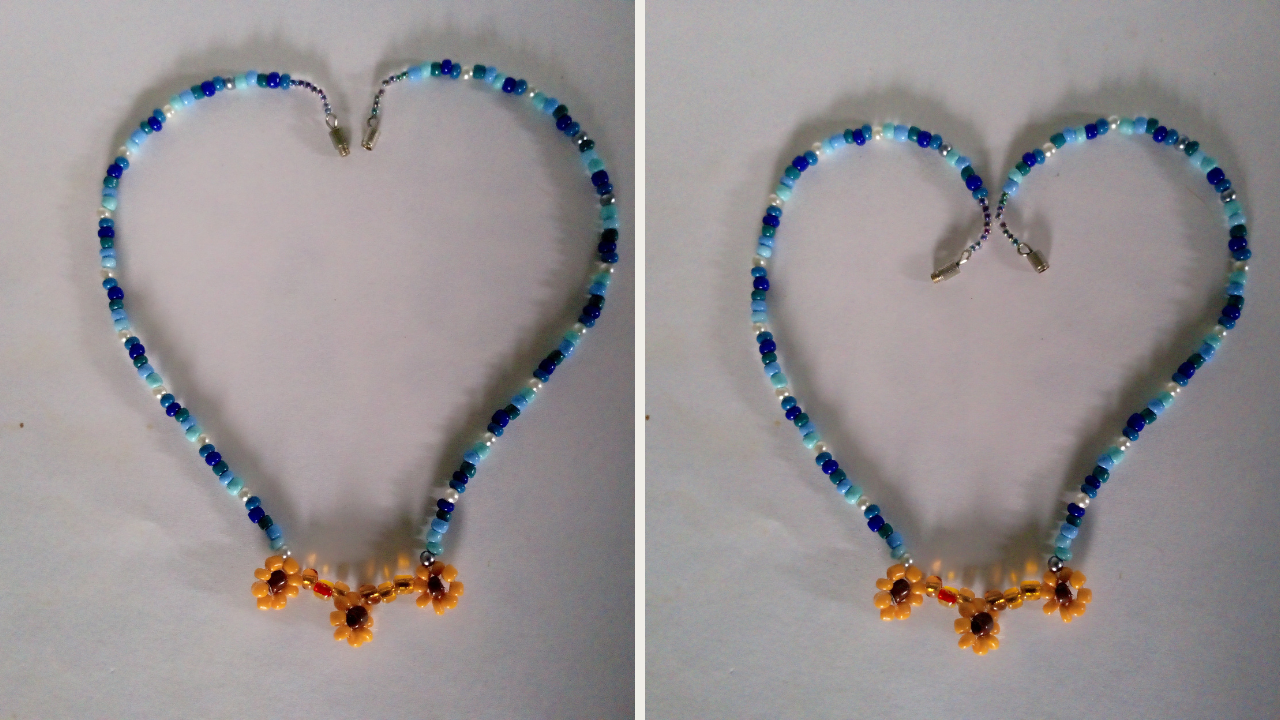
After securing the necklace, I began placing the blue beads in a specific sequence. First, I placed blue beads, then dark blue, followed by turquoise, light blue, and light turquoise. Between each of these colors, I included a silver pearl for a touch of elegance. I continued this sequence until I reached the middle, where the flowers would go. Once I reached the center of the necklace, I placed the three yellow flowers I had made, making sure they were well positioned and balanced. After the flowers, I continued with the same sequence of blue beads, repeating the pattern I had used previously until the necklace was complete. Finally, it was time to attach the safety pin. I did the same thing as in the beginning. This is essential to ensure the necklace stays secure and doesn't come undone. After attaching the safety pin, I cut off the excess thread, leaving a small margin to prevent it from unraveling. I tied a firm knot to secure the necklace and prevent it from coming loose.
(Resultado final:)||(Bottom line:)
This choker necklace is perfect for complementing a variety of outfits. It looks especially good with soft-colored blouses or summer dresses, adding a cheerful and feminine touch. It also makes a lovely gift for friends or family on special occasions, such as birthdays or anniversaries. You can also combine it with other bracelets or necklaces in different styles to create a more bohemian and fun look. Personally, I chose light, vibrant colors for my necklace because I found them more delicate and cheerful. The yellow tones of the flowers and the blues of the beads evoke the freshness of spring and the creativity of Van Gogh. However, you can also experiment with darker colors if you're looking for a bolder effect. The choice of colors can completely transform the look of the necklace, so feel free to play with different combinations until you find the one you like best. I want to thank you for joining me in this process and for your constant support. I love sharing my creations with you, and I hope you feel inspired to make your own choker necklace. Until next time, friends! I hope to see you soon with more creative projects. Take care!

**
Las fotos de este blog son de mi propiedad|Las imágenes son editadas en canva|Fotografías tomadas en mi celular infinix Smart 7|El contenido está traducido en el traductor de Firefox.
**
**
The photos on this blog are my property | The images are edited in Canva | Photos taken on my Infinix Smart 7 cell phone | The content is translated in Firefox Translate.
**