


**
Hola bienvenid@s a un nuevo Blog.
**
**
Hello, welcome to a new blog.
**
Hello, hello, Jewelry friends. I hope you're all doing well. It's been a while since I've had anything interesting to show you. However, today I'm excited to share a new project with you: how I made a beautiful flower bracelet! I discovered this bracelet on Pinterest, and just imagining having a similar one made me want to create my own version. There's a wide variety of flower bracelets on Pinterest, each one prettier than the last. I love how these bracelets can add a touch of freshness and delicacy to any outfit. The process of making the bracelet may seem a little confusing at first, but don't worry; I'm here to guide you. With a little patience and dedication, I'm sure jewelry and costume jewelry lovers will be able to achieve it without any problems.

(Materiales:)||(Materials:)
- Hilo nilón transparente
- Tijeras
- Perlas blancas pequeñas
- Perlas plateadas
- Mostacillas transparentes
- Una cuenta de Swarovski
- Diamante de Swarovski de color verde
- Transparent nylon thread
- Scissors
- Small white pearls
- Silver pearls
- Clear seed beads
- One Swarovski bead
- Green Swarovski diamond
(Procedimiento:)||(Procedure:)


-
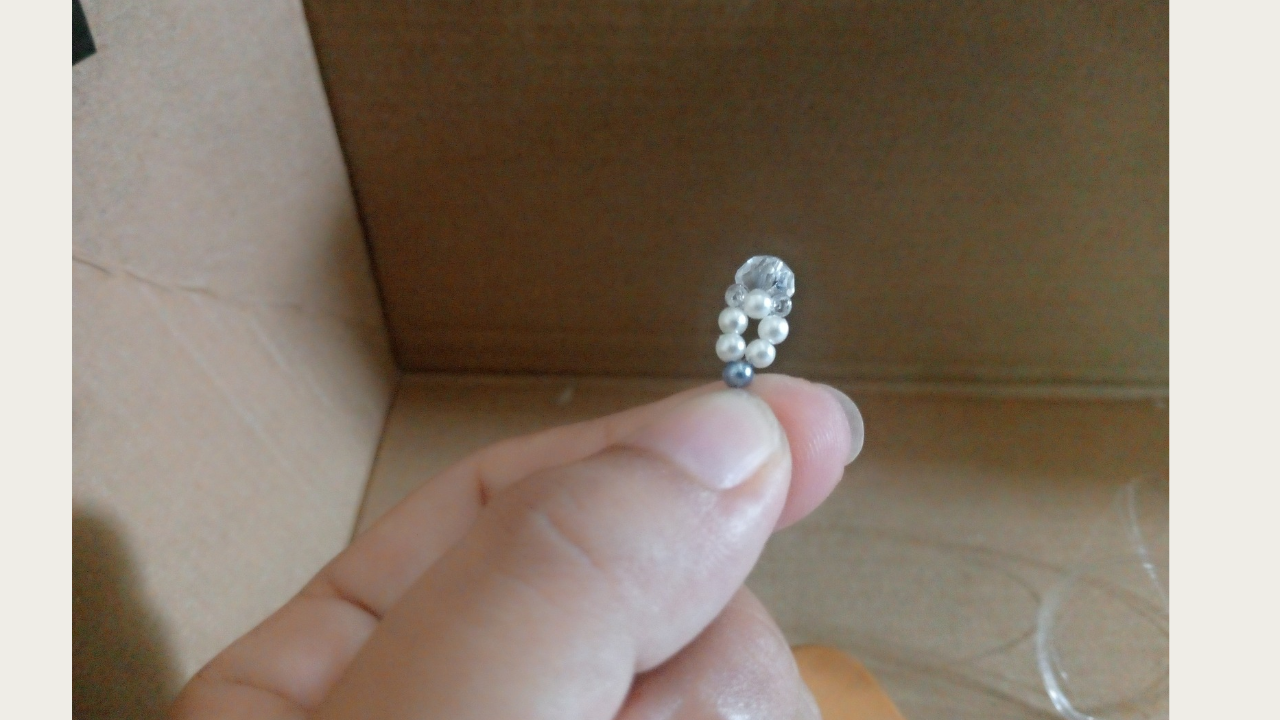
Paso nro 1
Paso nro 1
I cut a meter of nylon thread, as I always say it's better to be safe than sorry, and this way I have enough material to make the bracelet. I started by placing a seed bead and the Swarovski bead at the beginning of the thread. This will help me secure the bracelet, since it won't have a jump ring or a beak lock. Then, I placed two seed beads on each side of the nylon.


-
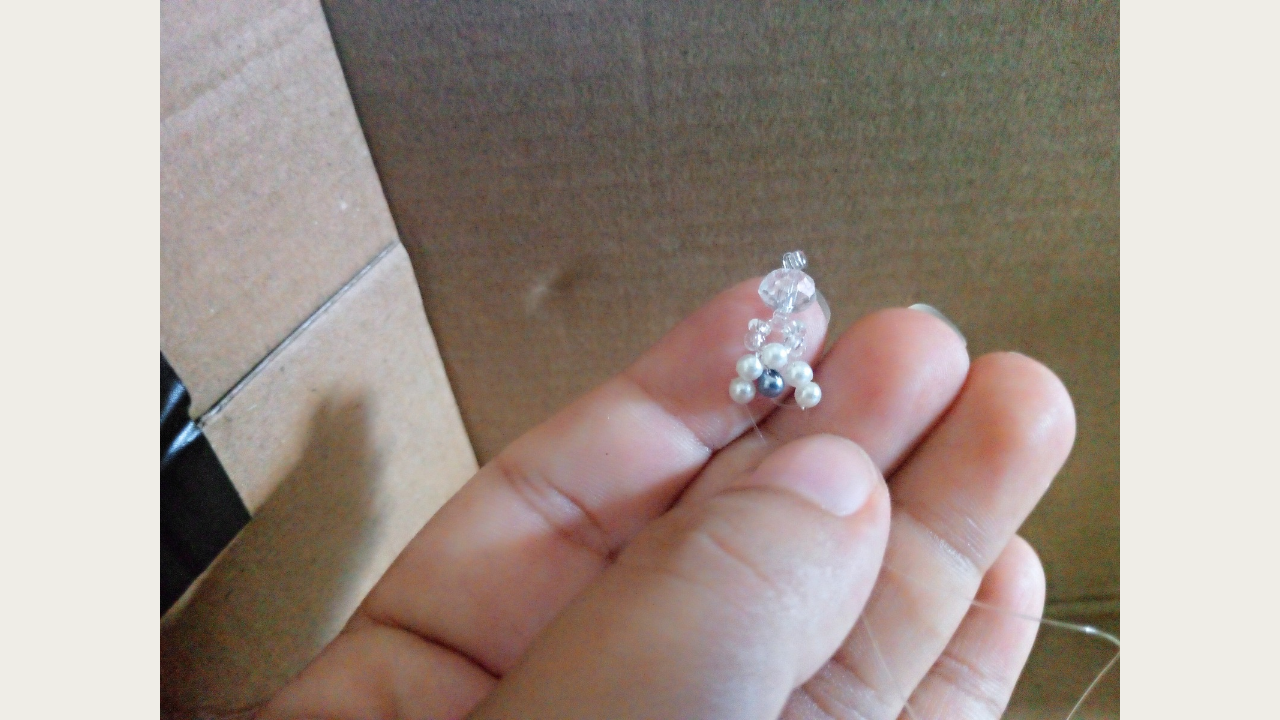
Paso nro 2
Paso nro 2
Next, I took a white pearl and threaded the nylon through the middle of the pearl, so that one side of the nylon was on one end and the other on the opposite side. Now it's time to make the flower. I placed two white pearls on each side of the nylon thread and then added a silver pearl in the center, making sure the thread went through the ends of the nylon and into the middle of the silver pearl. Next, I threaded each side of the thread back through the white pearls, making sure the thread went through the top and out the other way. To complete the flower, I took a sixth pearl (it can be white or another color of your choice) and threaded the thread through the middle, making sure each side of the thread came out on the opposite side. I repeated this same process two more times to create a total of three flowers to wear in a sequence on the bracelet.


-
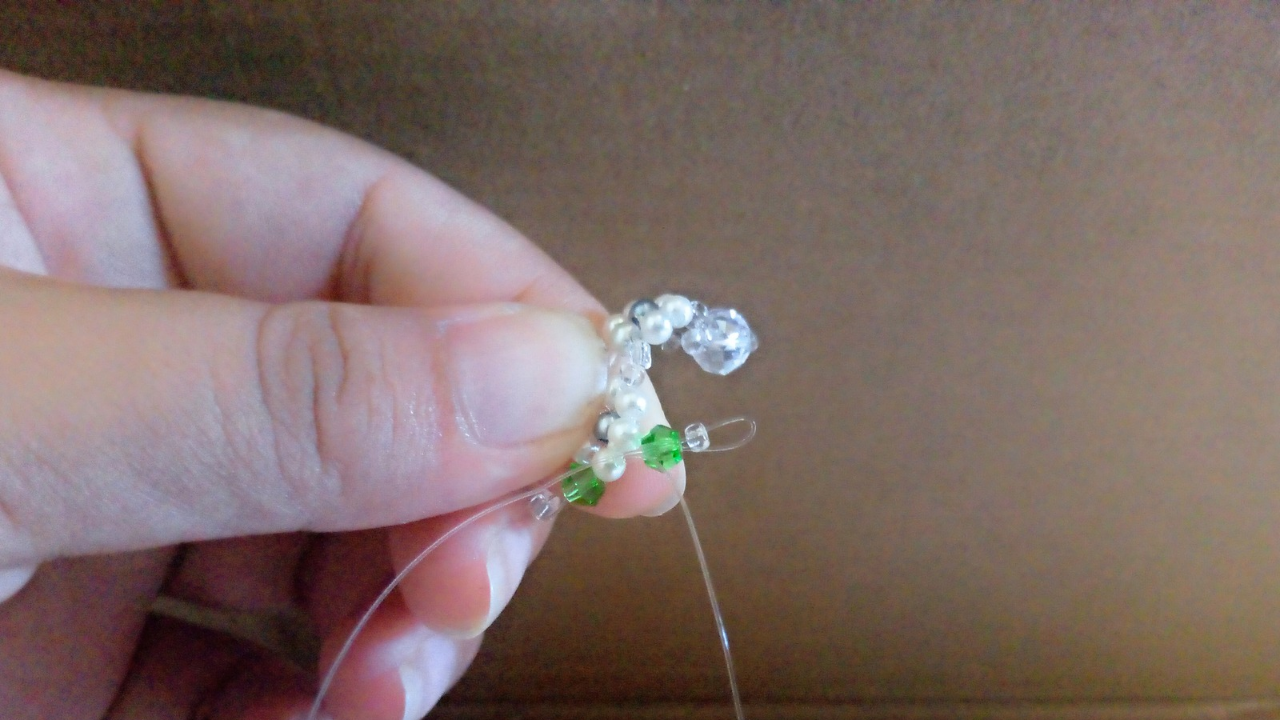
Paso nro 3
Paso nro 3
For the third flower, I decided to add leaves using the green Swarovski. I placed the green Swarovski diamond on the thread first, then added a seed bead after the Swarovski. I looped the nylon through the Swarovski, making sure it was tight, and used a little resistance when pulling the thread so it wouldn't come loose.


-
Paso nro 4
Paso nro 4
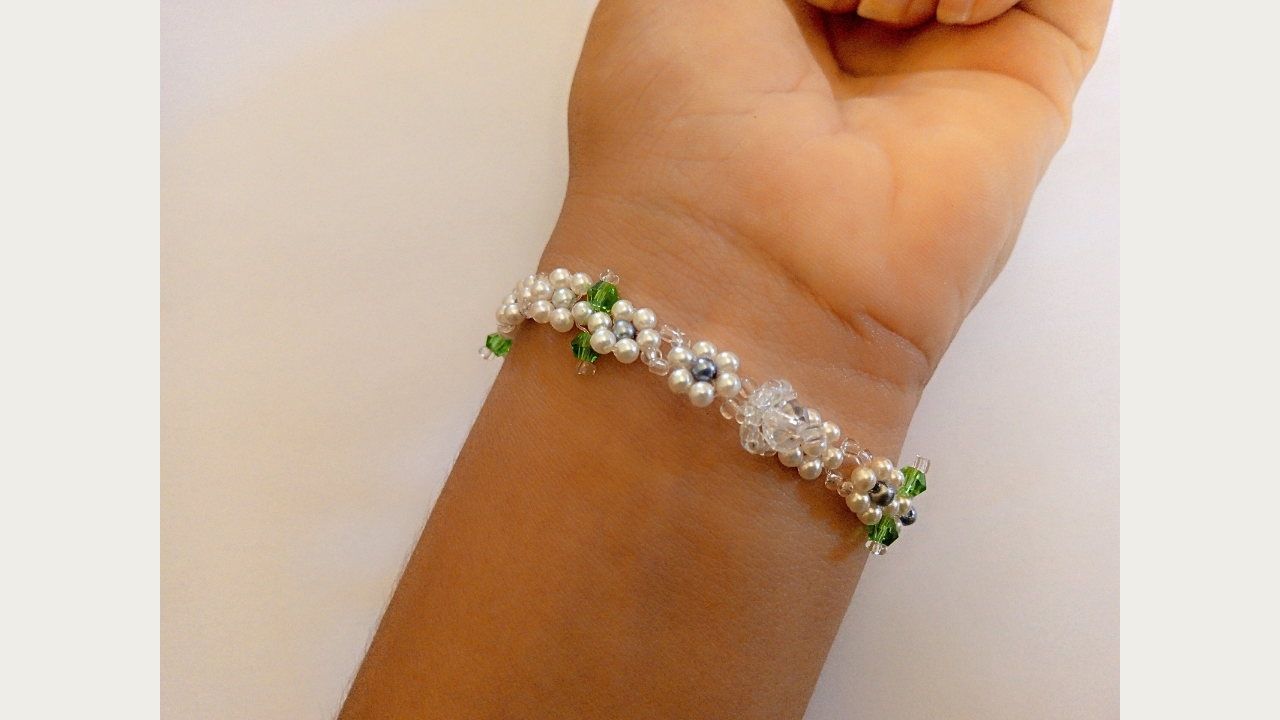
I continued making three more flowers, repeating the same process as before. After each flower, I added leaves using the green Swarovski, as explained above. I alternated between flowers and leaves until I reached the size I wanted for the bracelet. Once I reached the right size, I closed the bracelet, making sure the thread was tight and all the flowers and leaves were in place. I cut off the excess thread, leaving a small margin to prevent it from unraveling. I tied a firm knot to secure the bracelet and prevent it from coming undone. If possible, I threaded the excess thread through some of the pearls or seed beads to hide it before cutting it.
(Resultado final:)||(Bottom line:)
This flower bracelet is perfect for complementing a variety of outfits. It looks especially good with soft-colored blouses or summer dresses, adding a cheerful and feminine touch. It also makes a lovely gift for friends or family on special occasions, such as birthdays or anniversaries. You can also combine it with other bracelets in different styles to create a more bohemian and fun look. Flower bracelets are also ideal for outdoor events, such as picnics or festivals, where you can enjoy nature and show off your personal style at the same time. Personally, I chose light colors for my bracelet because I found them more delicate and elegant. Soft tones add an air of freshness and lightness, perfect for spring and summer. However, you can also experiment with more vibrant colors if you're looking for a bolder effect. Your choice of colors can completely transform the appearance of the bracelet, so feel free to play with different combinations until you find the one you like best. If you ever feel stuck or short on ideas, remember that jewelry is a form of self-expression. Don't be afraid to experiment with different colors, materials, and designs. Each bracelet you make will be unique and reflect your personality. I hope this tutorial has been helpful and that you'll be encouraged to try it.
I want to thank you for joining me in this process and for your constant support. I love sharing my creations with you, and I hope you feel inspired to make your own flower bracelet. See you next time, friends! I hope to see you soon with more creative projects. Take care!


*
Las fotos de este blog son de mi propiedad|Las imágenes son editadas en canva|Fotografías tomadas en mi celular infinix Smart 7|El contenido está traducido en el traductor de Firefox.
*
*
The photos on this blog are my property | The images are edited in Canva | Photos taken on my Infinix Smart 7 cell phone | The content is translated in Firefox Translate.
*