


Hola bienvenid@s a un nuevo Blog.
Hello, welcome to a new blog.
Hello, how are you, dear friends of DIY Hub? Today I'm going to show you how to make a bee drinker using recycled materials and also materials we probably have at home. So, come on, let's learn how we can help the bees in their pollination mission. Let's get to work!
To put it into context, the bee drinker is very useful because the way it is made is tailor-made so that the bees can enjoy water, also especially during the dry season and also in winter, during the dry season it is due to the lack of water and in winter because in some areas when it is winter there are no plants flowering until it is spring, in the case of winter the water has to be a little sweetened to make the bees continue pollinating and survive the winter, and I think that also in drought it would be good to put in sweetened water, I also read that there is a low number of bees, meaning there are not enough and that would be a problem. Now the drinker is tailor-made because it is made with a container that is like a flat plate or one that is not so deep, and then some materials such as stones, marbles or seashells are placed in it, this is because the bees tend to drown but thanks to these materials that will be at the bottom of the container they can stand on them without having to drown. A curious idea is that the water fountain can be made decorative so that it can be part of a garden decoration.

(Materiales:)||(Materials:)
- Tijeras
- Paletas de colores
- Silicón caliente
- Lápiz
- Envase de plástico de mantequilla
- Canicas
- Scissors
- Color palettes
- Hot glue
- Pencil
- Plastic butter container
- Marbles
(Procedimiento:)||(Procedure:)

-
Paso nro 1
Paso nro 1
To begin, first cut the container to a size that wouldn't be too deep. With the help of a pencil, I made an opening and then cut it with scissors.
-
Paso nro 2
Paso nro 2
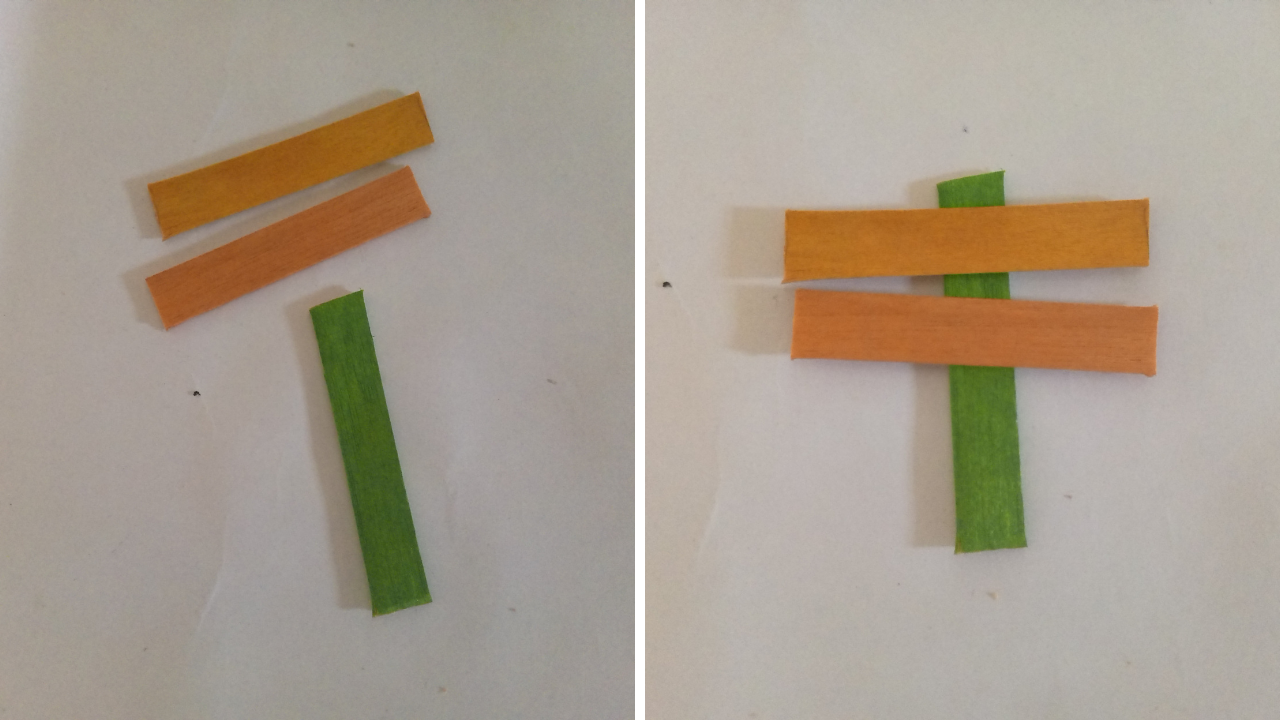
In this part, I'm preparing a small sign that I'm going to place on the water fountain. It's just for decoration, since I think it will look nicer in my garden. I cut three equal pieces. Now, with hot silicone, I glued two popsicle sticks onto a popsicle stick that will be the base, and that's how the sign is ready.

-
Paso nro 3
Paso nro 3
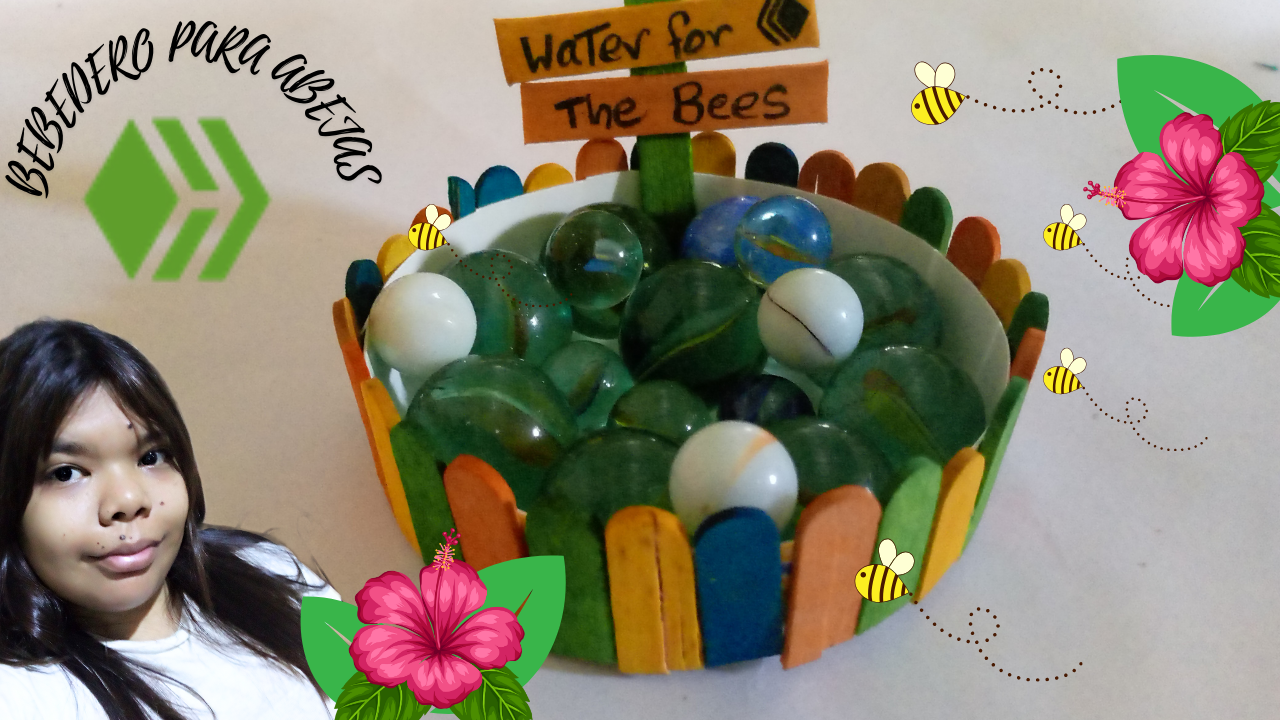
Now I'm going to decorate the drinker, I'm going to place the corner part of the popsicles, so what I did was cut as many as I could to decorate the entire container, with hot silicone I glued each one, and I did it in such a way that the colors were not in an order but in the way that they fall there, and that's how the drinker was decorated.


-
Paso nro 4
Paso nro 4
For this step, I'm just going to explain the most important step, which is placing the marbles, since that's what I had. On one side, I placed a sign and a message in English, "Water for the bees." And so the waterer is ready. Now, all that's left is to add enough water to cover just the marbles. After that, don't add any more water. It will now be placed in the garden.
(Resultado final:)||(Bottom line:)
If you liked the way the water fountain turned out, I will look forward to your comments. I really appreciate hearing your opinions. I hope it helps you with future ideas. Let's all help the bees, my friends, with this idea in your garden. Before I go, the water fountain also helps butterflies, hummingbirds, and ants, so we will be helping a variety of small animals. Thank you for joining me, thank you for reading. See you another time.


Las fotos de este blog son de mi propiedad|Las imágenes son editadas en canva|Fotografías tomadas en mi celular infinix Smart 7|El contenido está traducido en el traductor de Firefox.
The photos on this blog are my property | The images are edited in Canva | Photos taken on my Infinix Smart 7 cell phone | The content is translated in Firefox Translate.