¡Hola queridos amigos, de Hive y de Hive Diy una vez más! Espero que estén muy bien, muchas bendiciones para ustedes❤️
>Hello dear friends, from Hive and from Hive Diy once again! I hope you are very well, many blessings to you ❤️
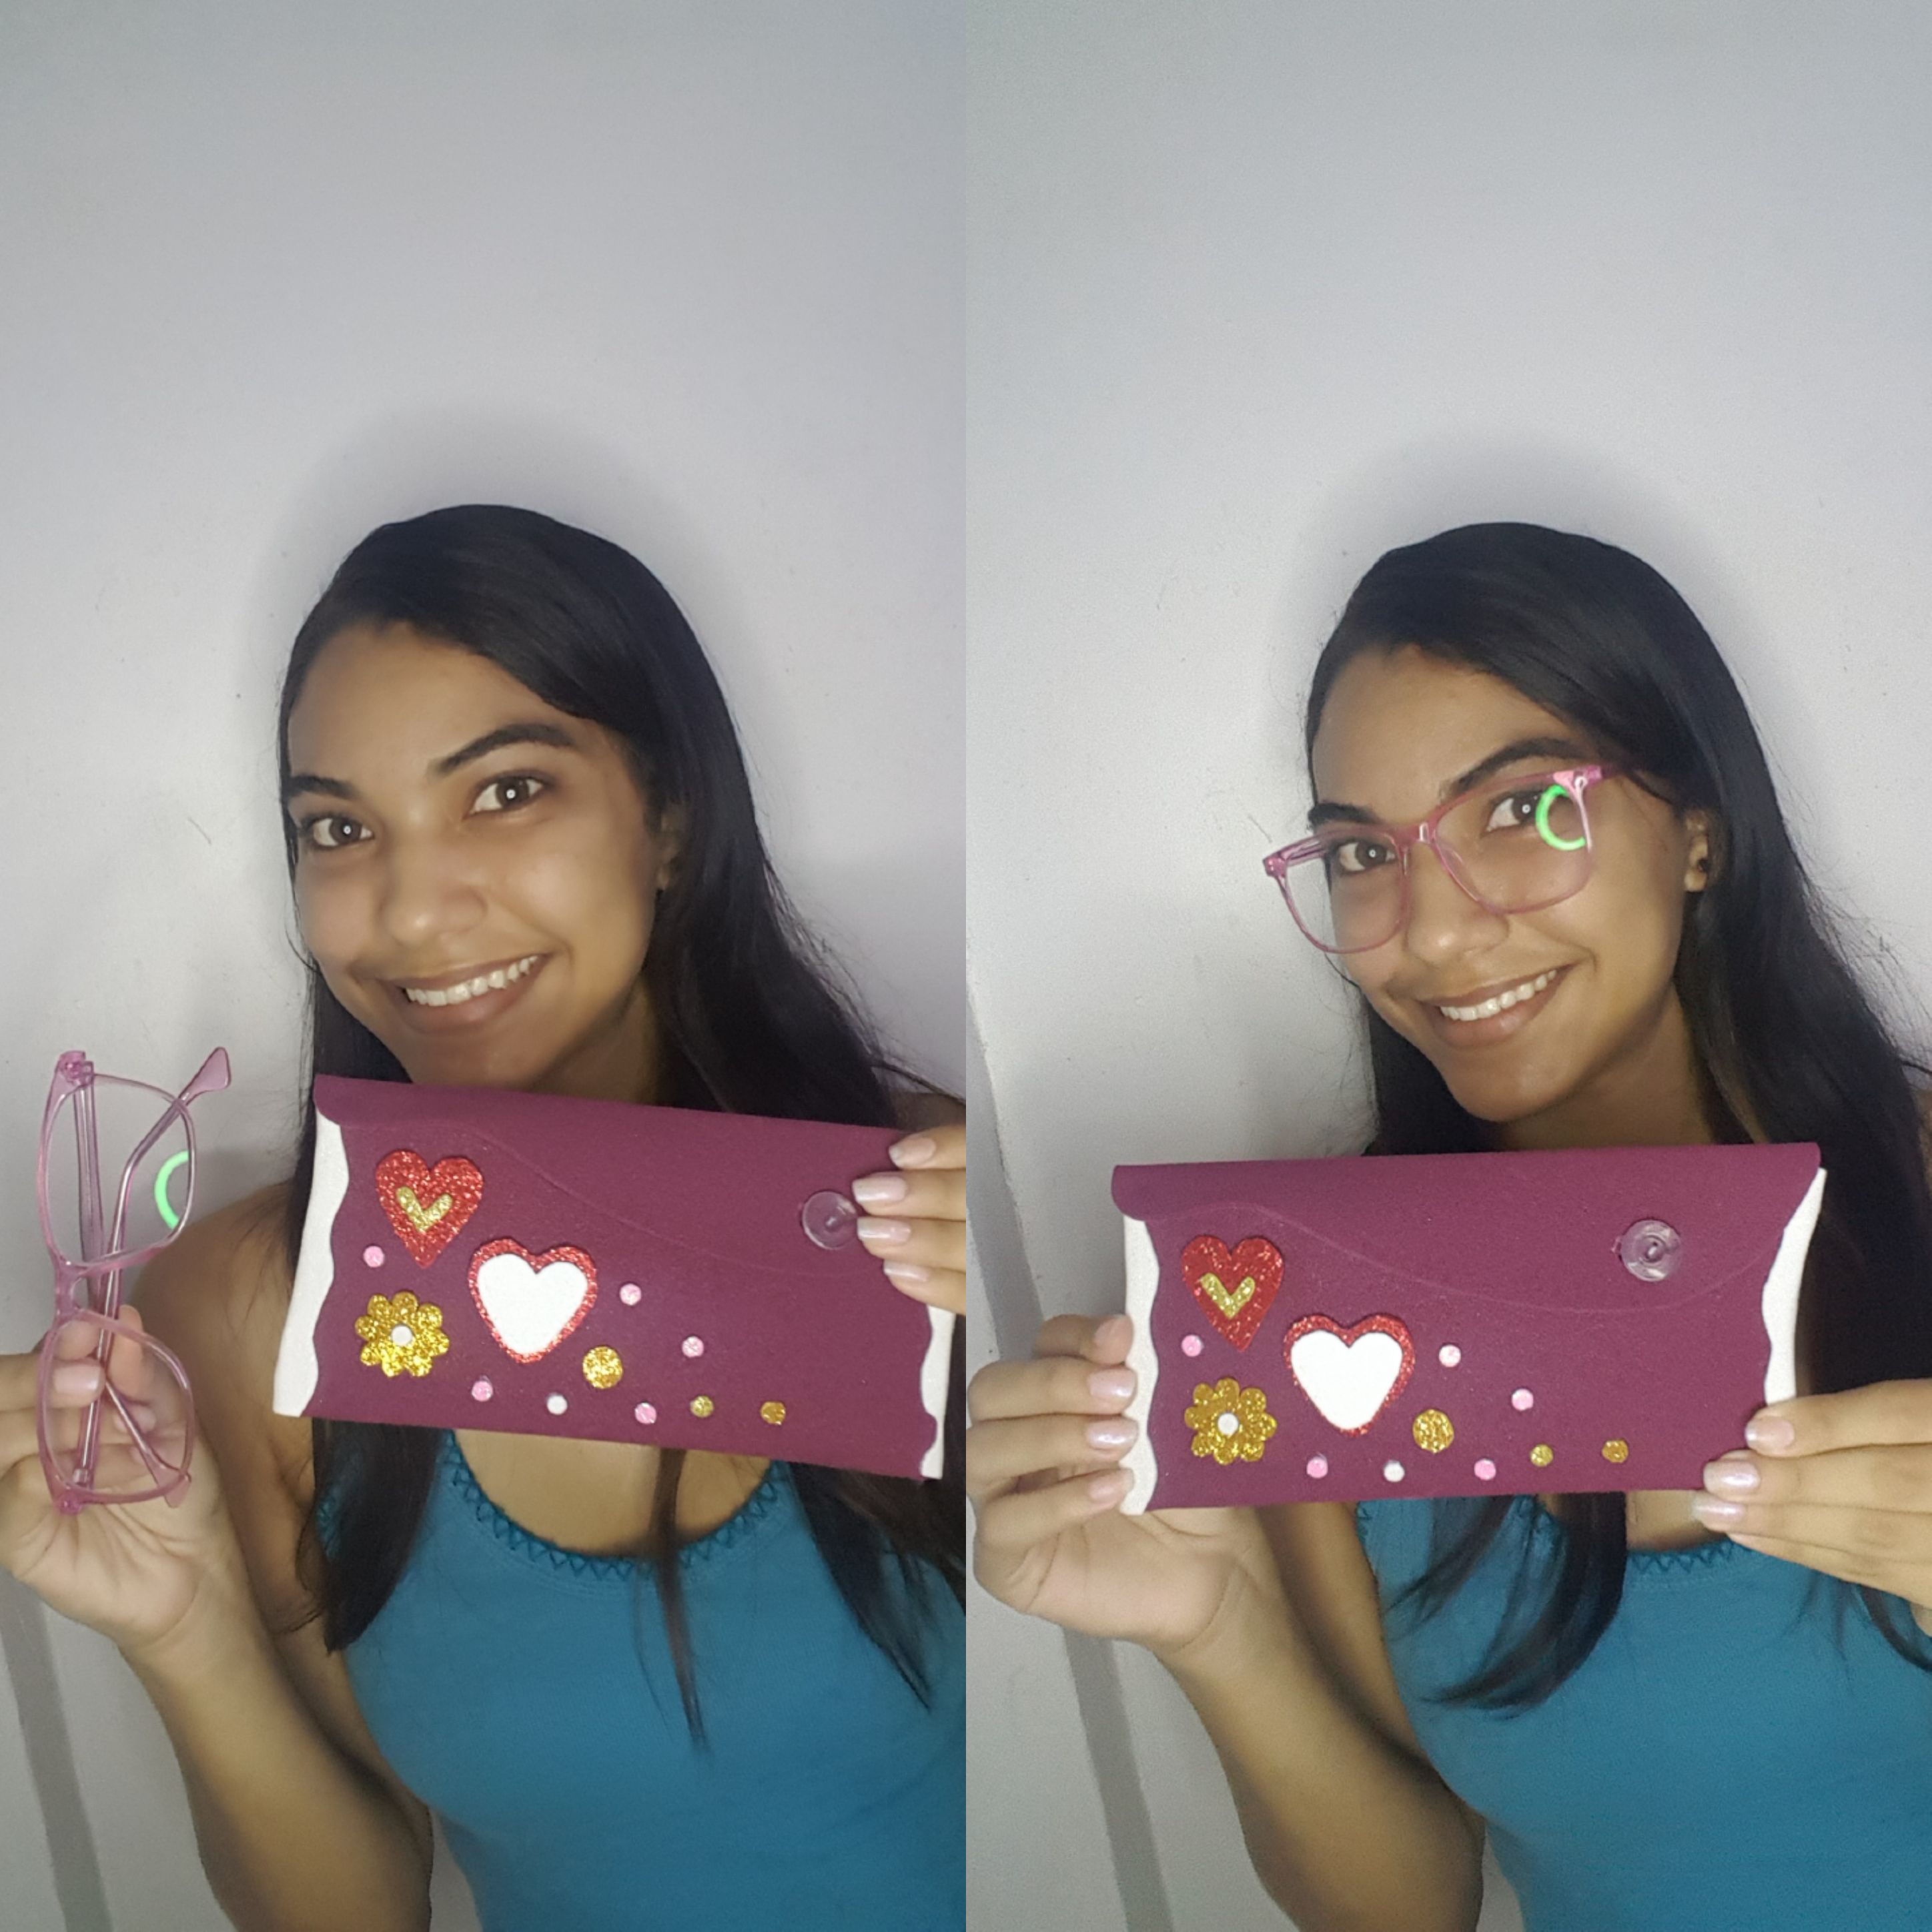
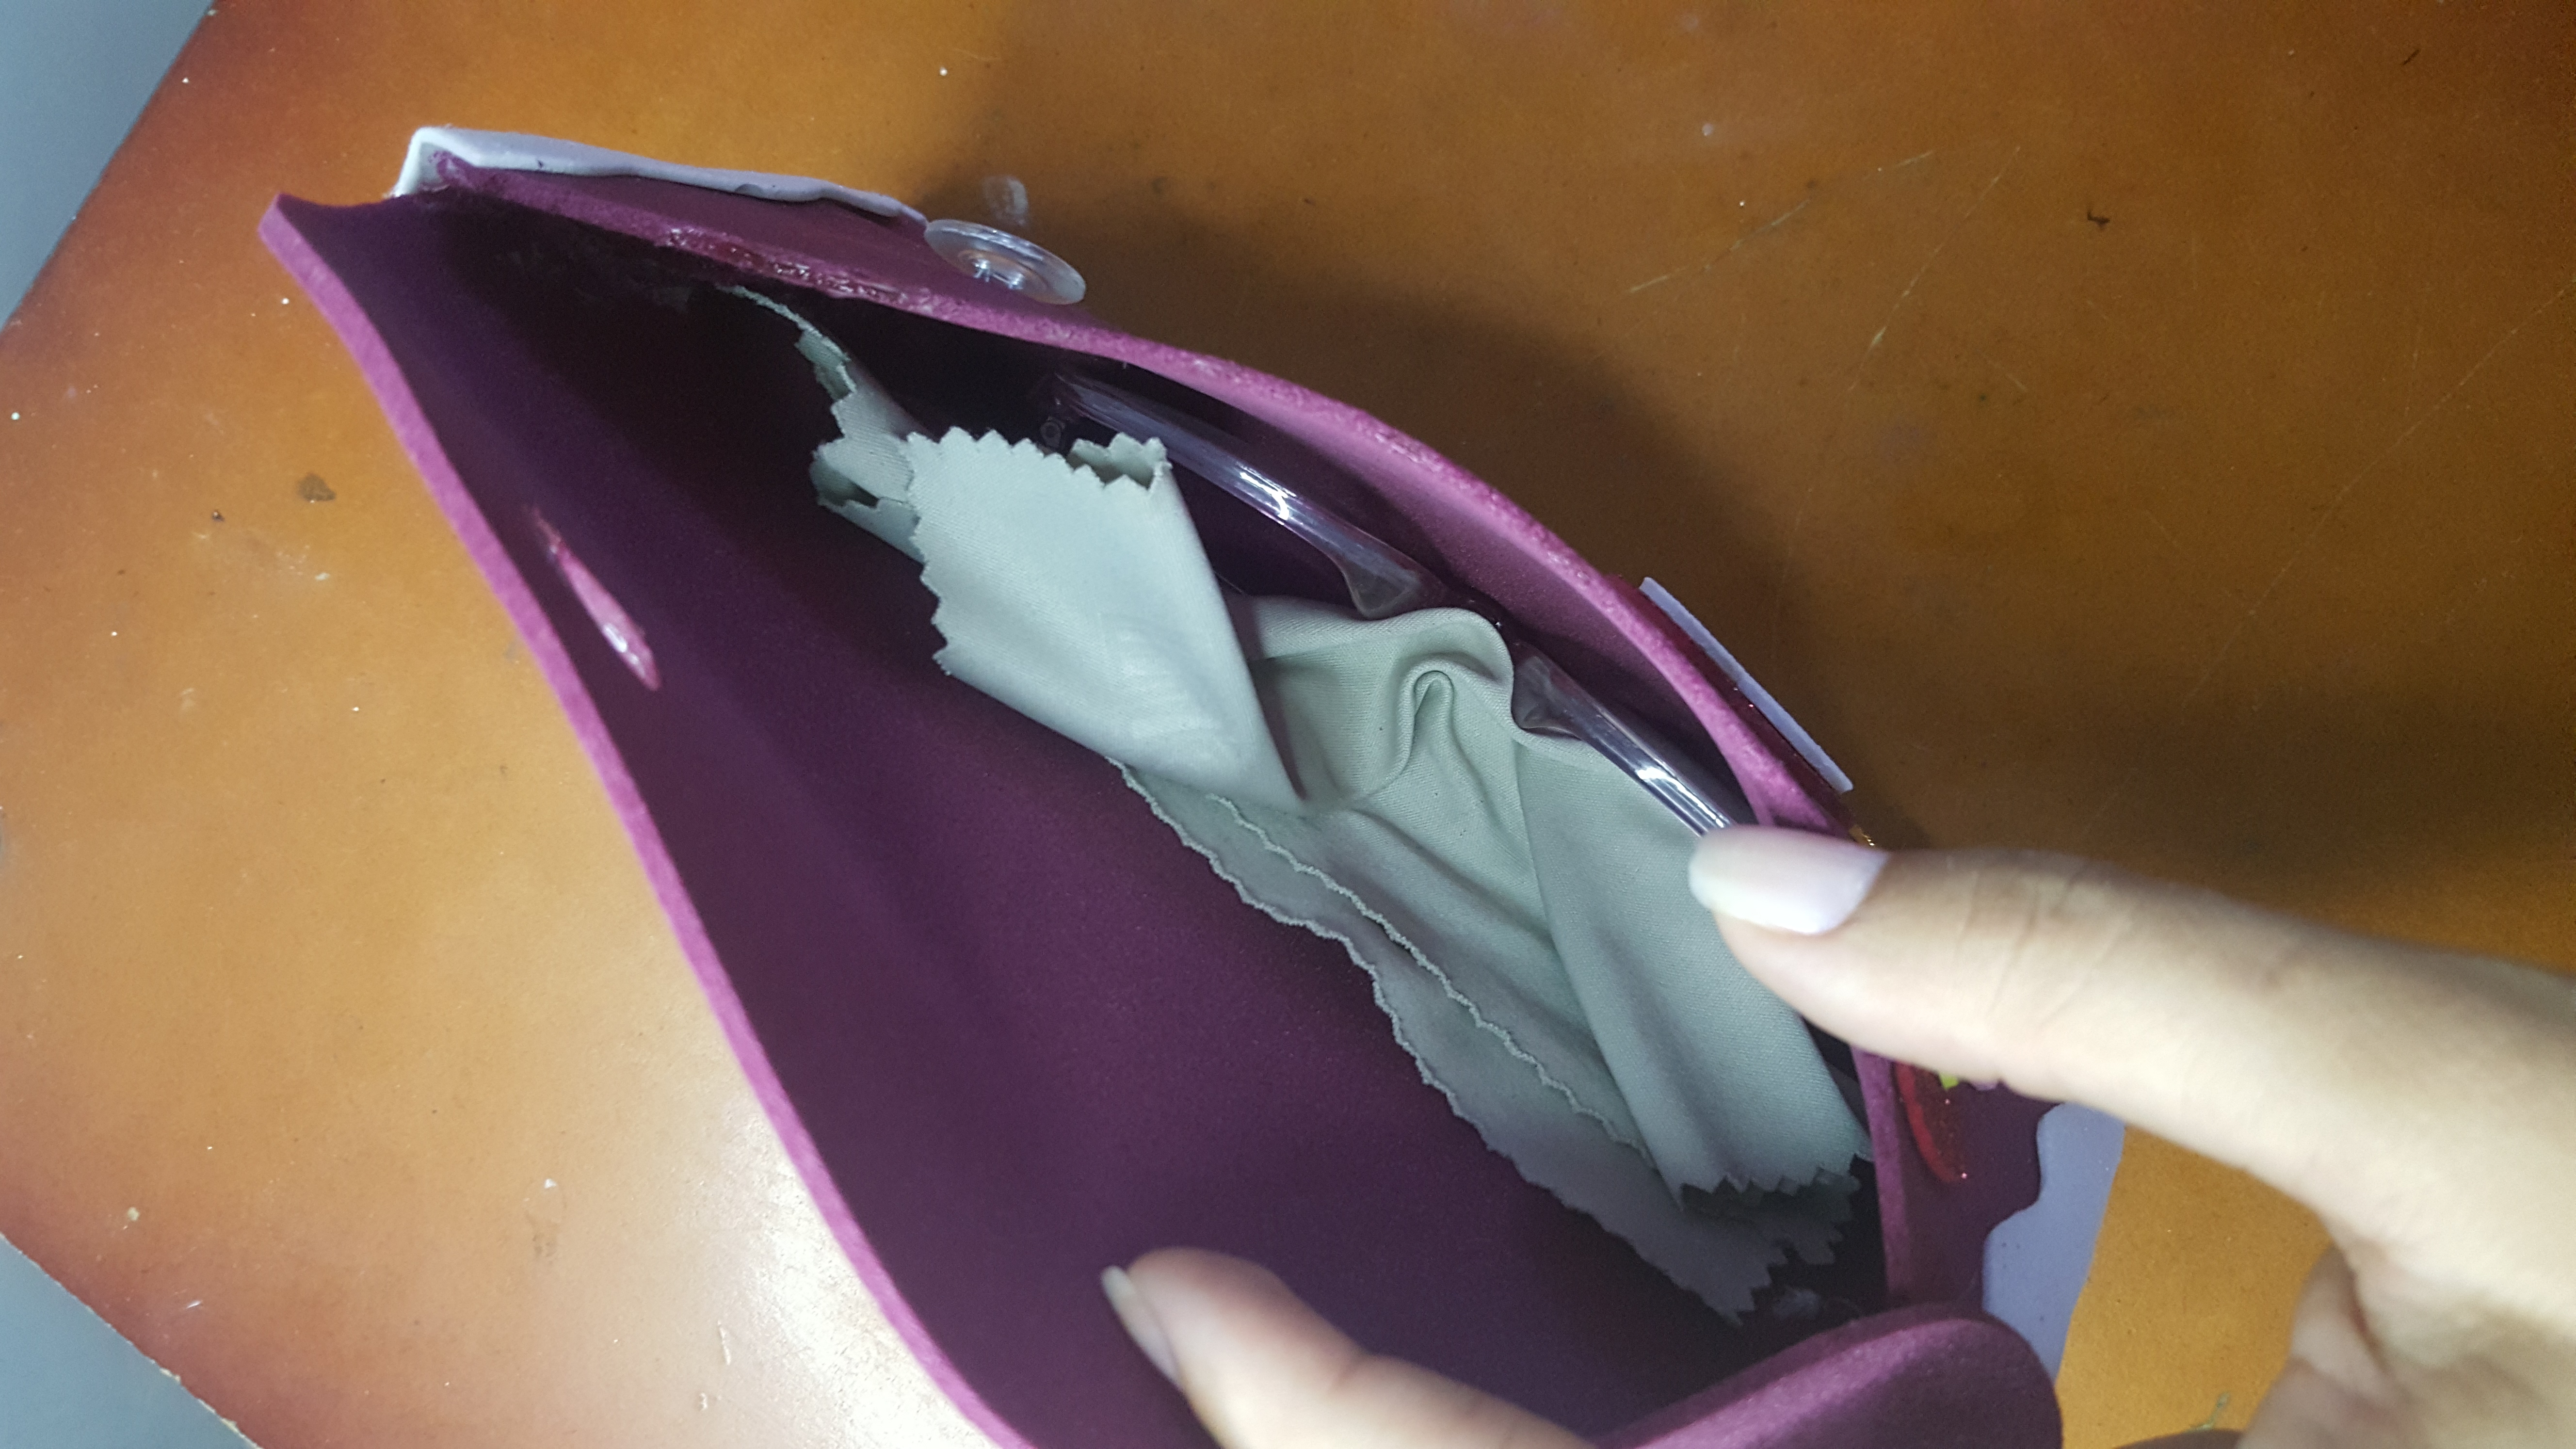
Como de costumbre, feliz de poder compartir con ustedes, cada día algo distinto, haciendo y aprendiendo cosas nuevas, siempre es bueno. Desde los 9 años utilizo lentes, y la mayor parte del tiempo se me rompe la funda o las pierdo, en esta ocasión donde los mandé hacer me dieron una funda de tela muy fea por lo que quise hacerme unas nuevas. Disfruté mucho durante el proceso y el resultado me enamoró, ojalá a ustedes también.
>As usual, happy to be able to share with you, something different every day, doing and learning new things, it's always good. I've been wearing glasses since I was 9 years old, and most of the time the case breaks or I lose them. On this occasion, when I had them made, they gave me a very ugly cloth case, so I wanted to make new ones. I really enjoyed the process and I fell in love with the result, I hope you do too.
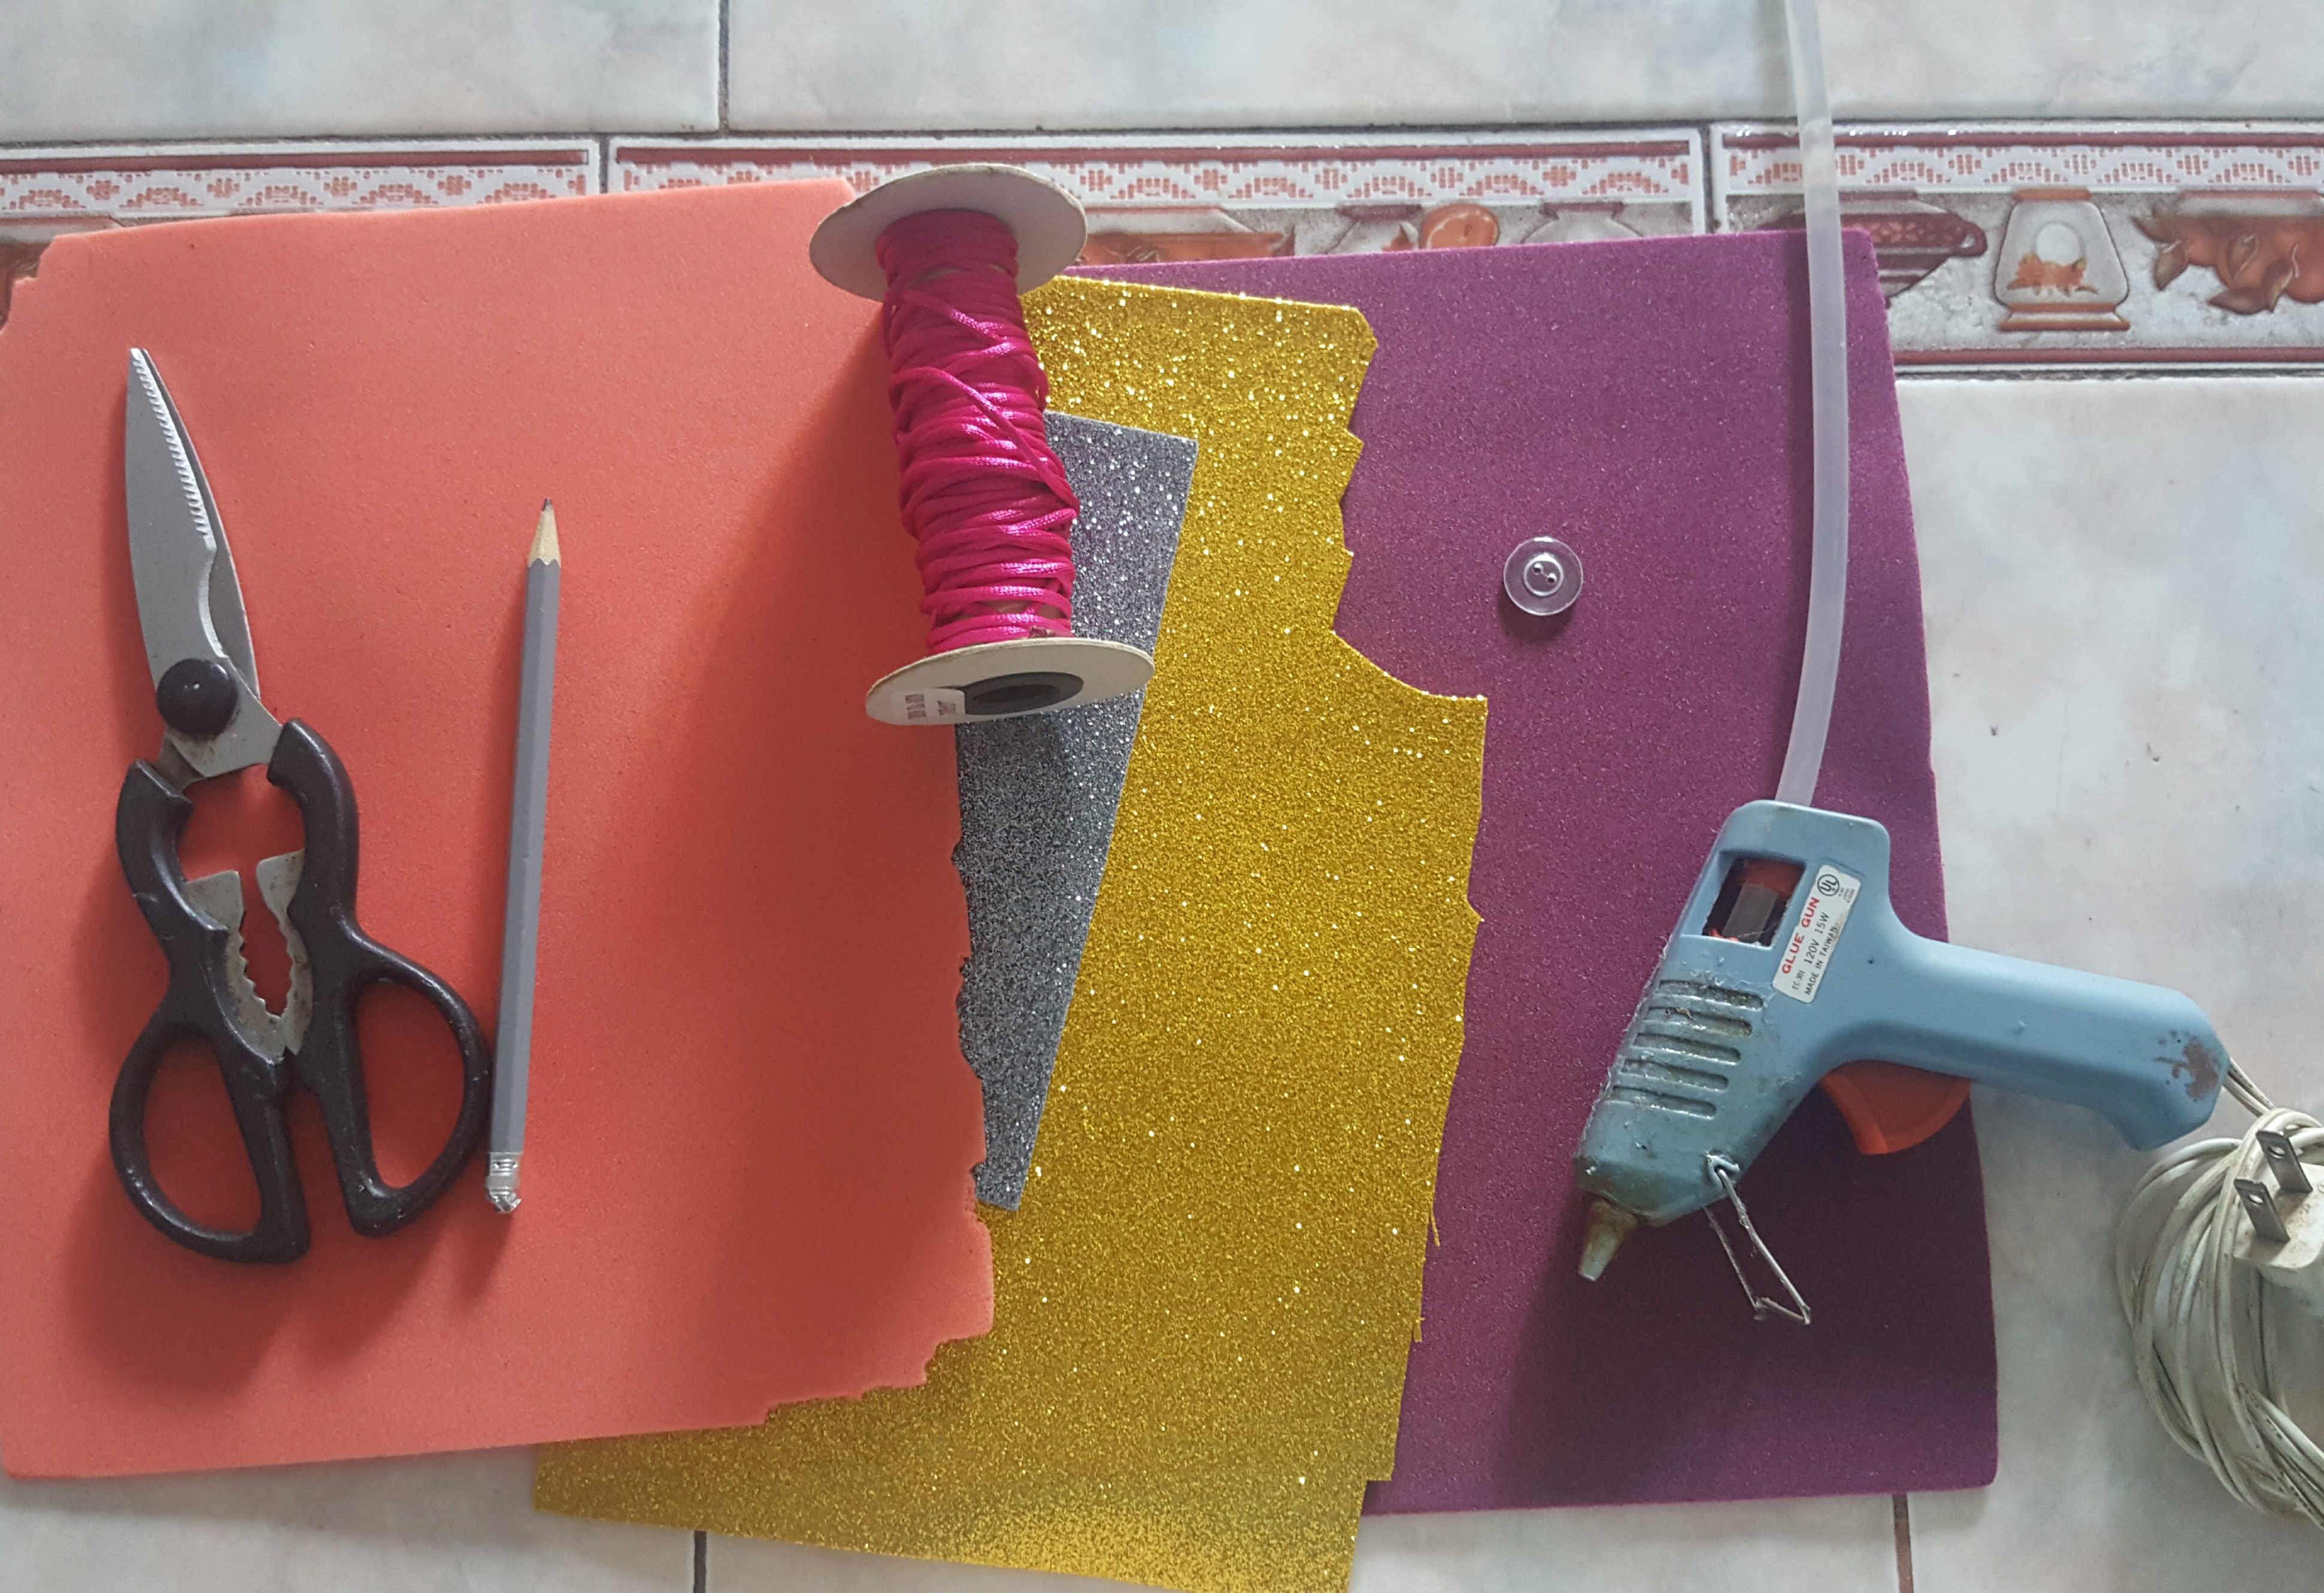
Materiales:
✂️Foamis de varios colores
✂️Tijeras
✂️Pistola con barra de silicón
✂️Lápiz
✂️Botón
✂️Rabo de ratón
✂️Aguja con hilo
>Materials:
✂️Foams of various colors
✂️Scissors
✂️ Gun with silicone bar
✂️Pencil
✂️Button
✂️Mouse tail
✂️Needle with thread
¿Cómo lo hice? - Fácil, síganme y verán un pequeño tutorial:
>As I did? - Easy, follow me and you will see a small tutorial:
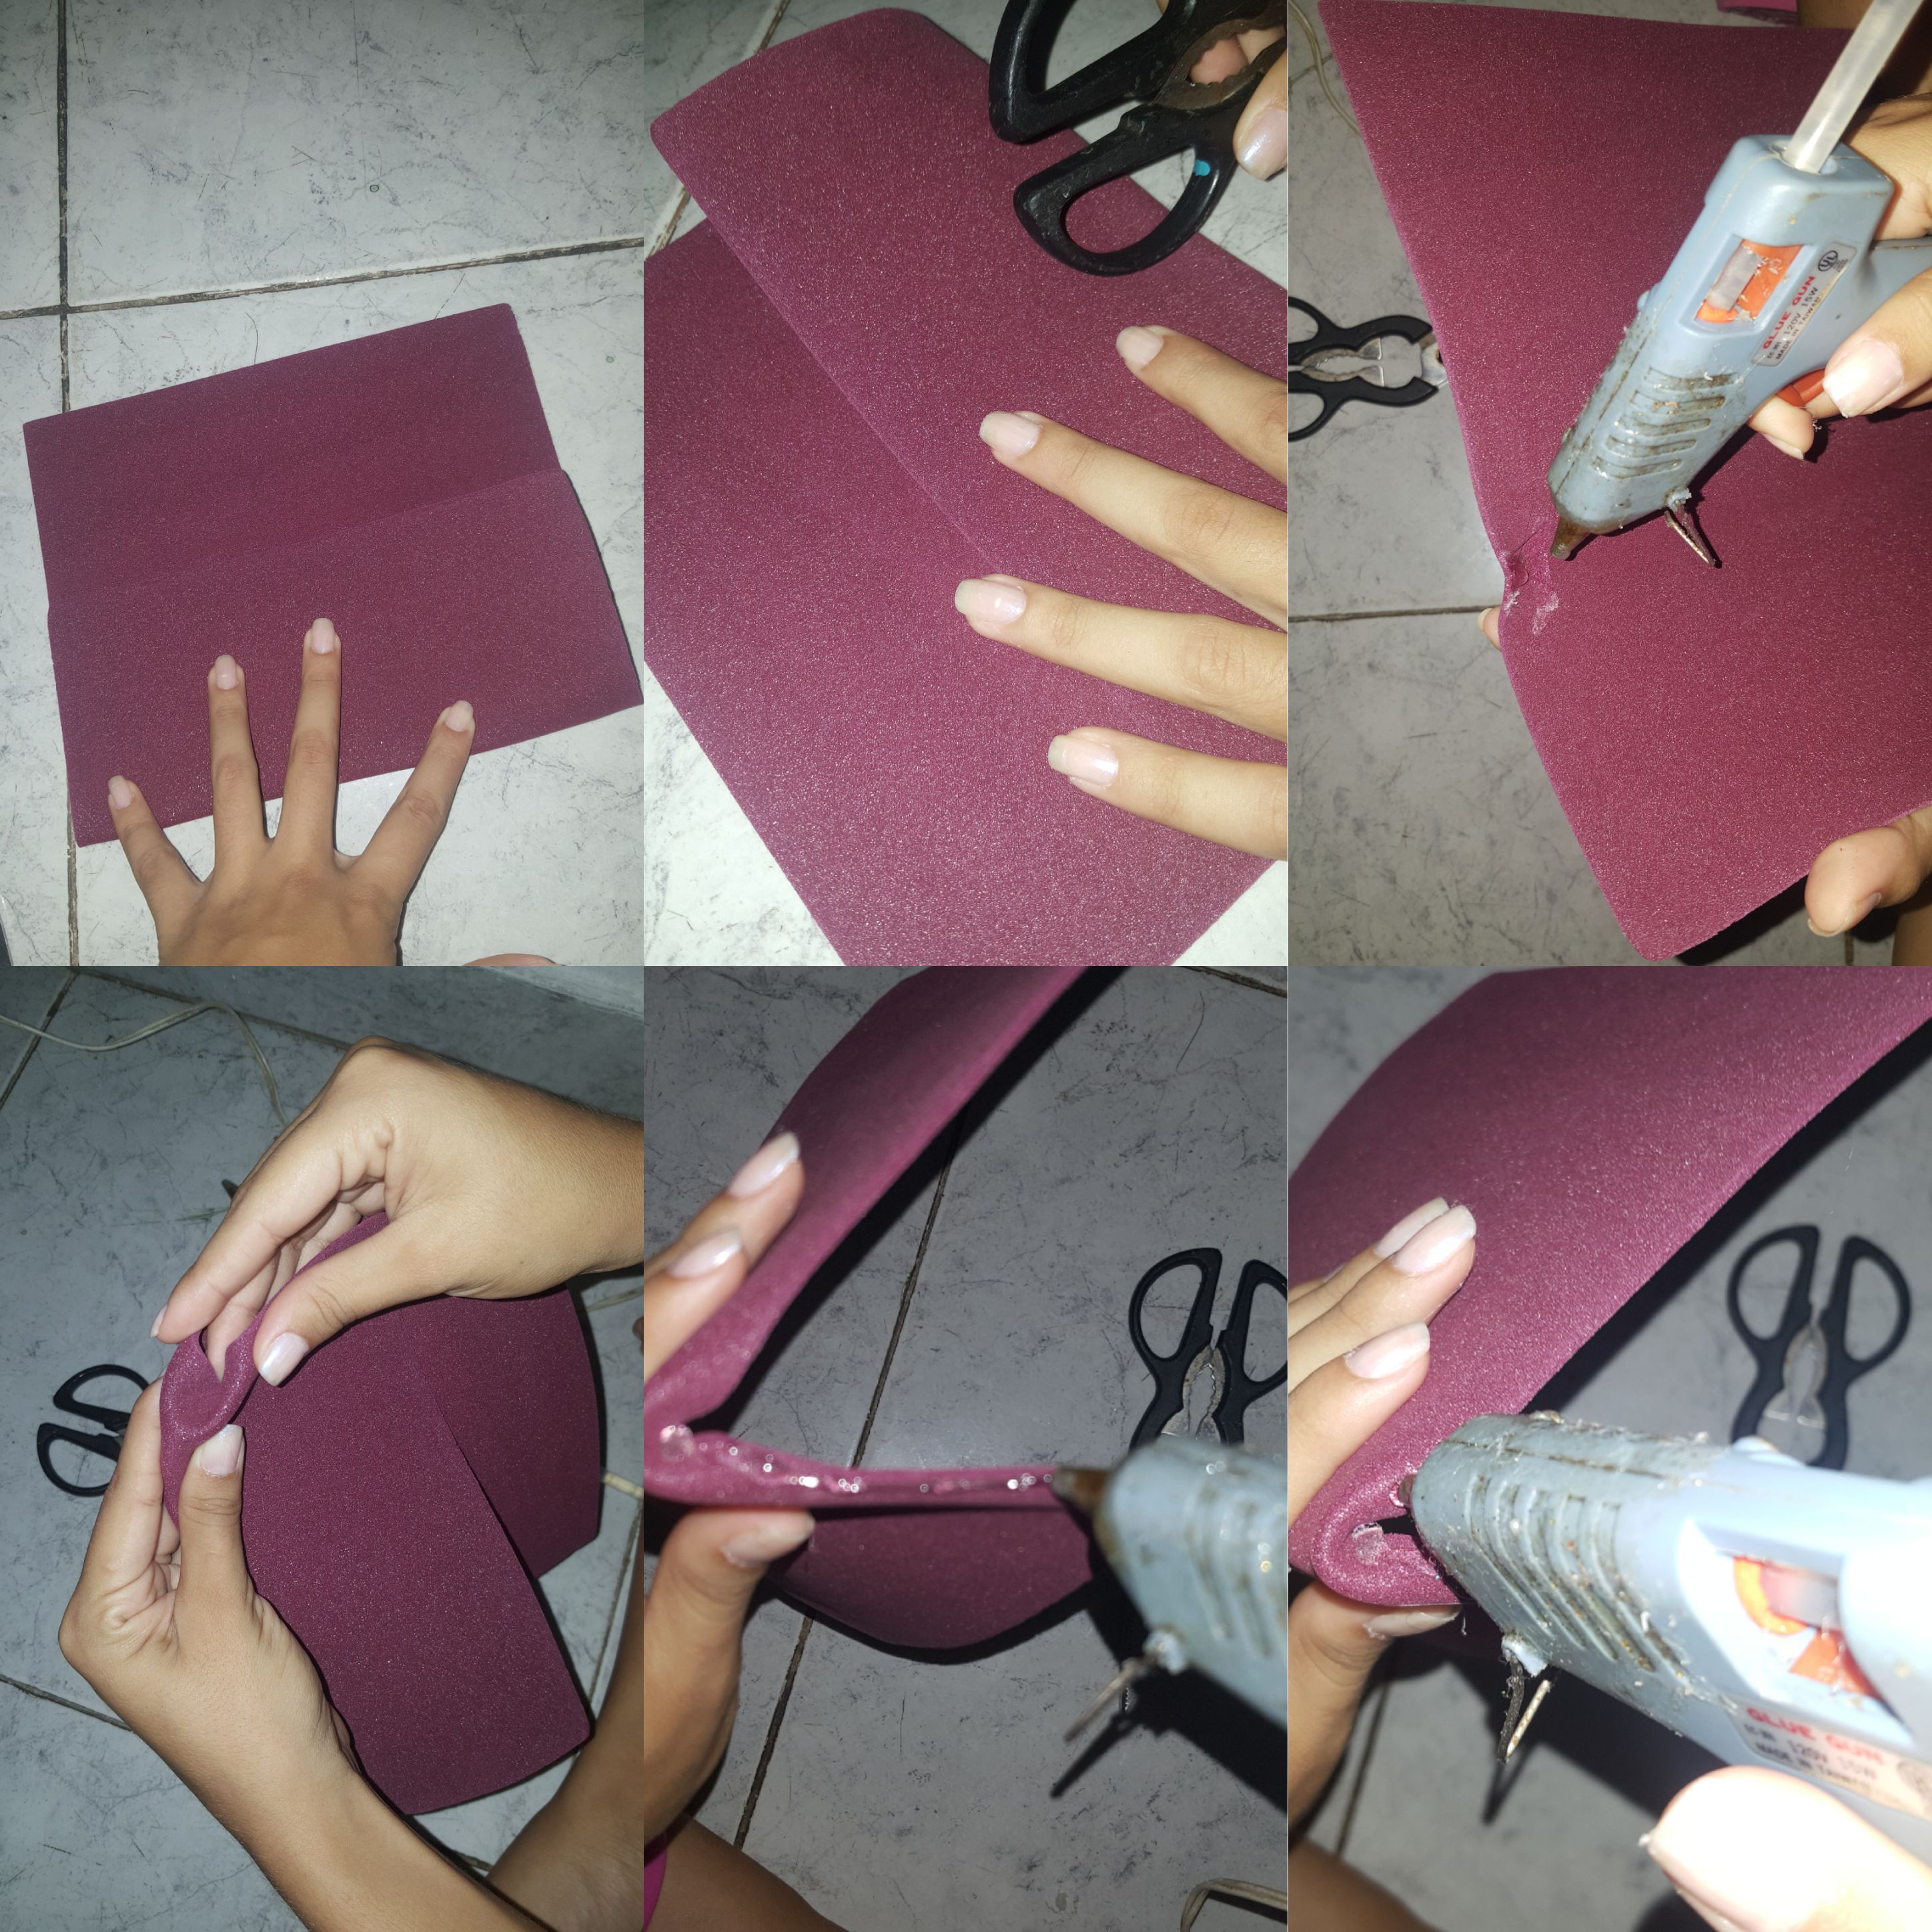
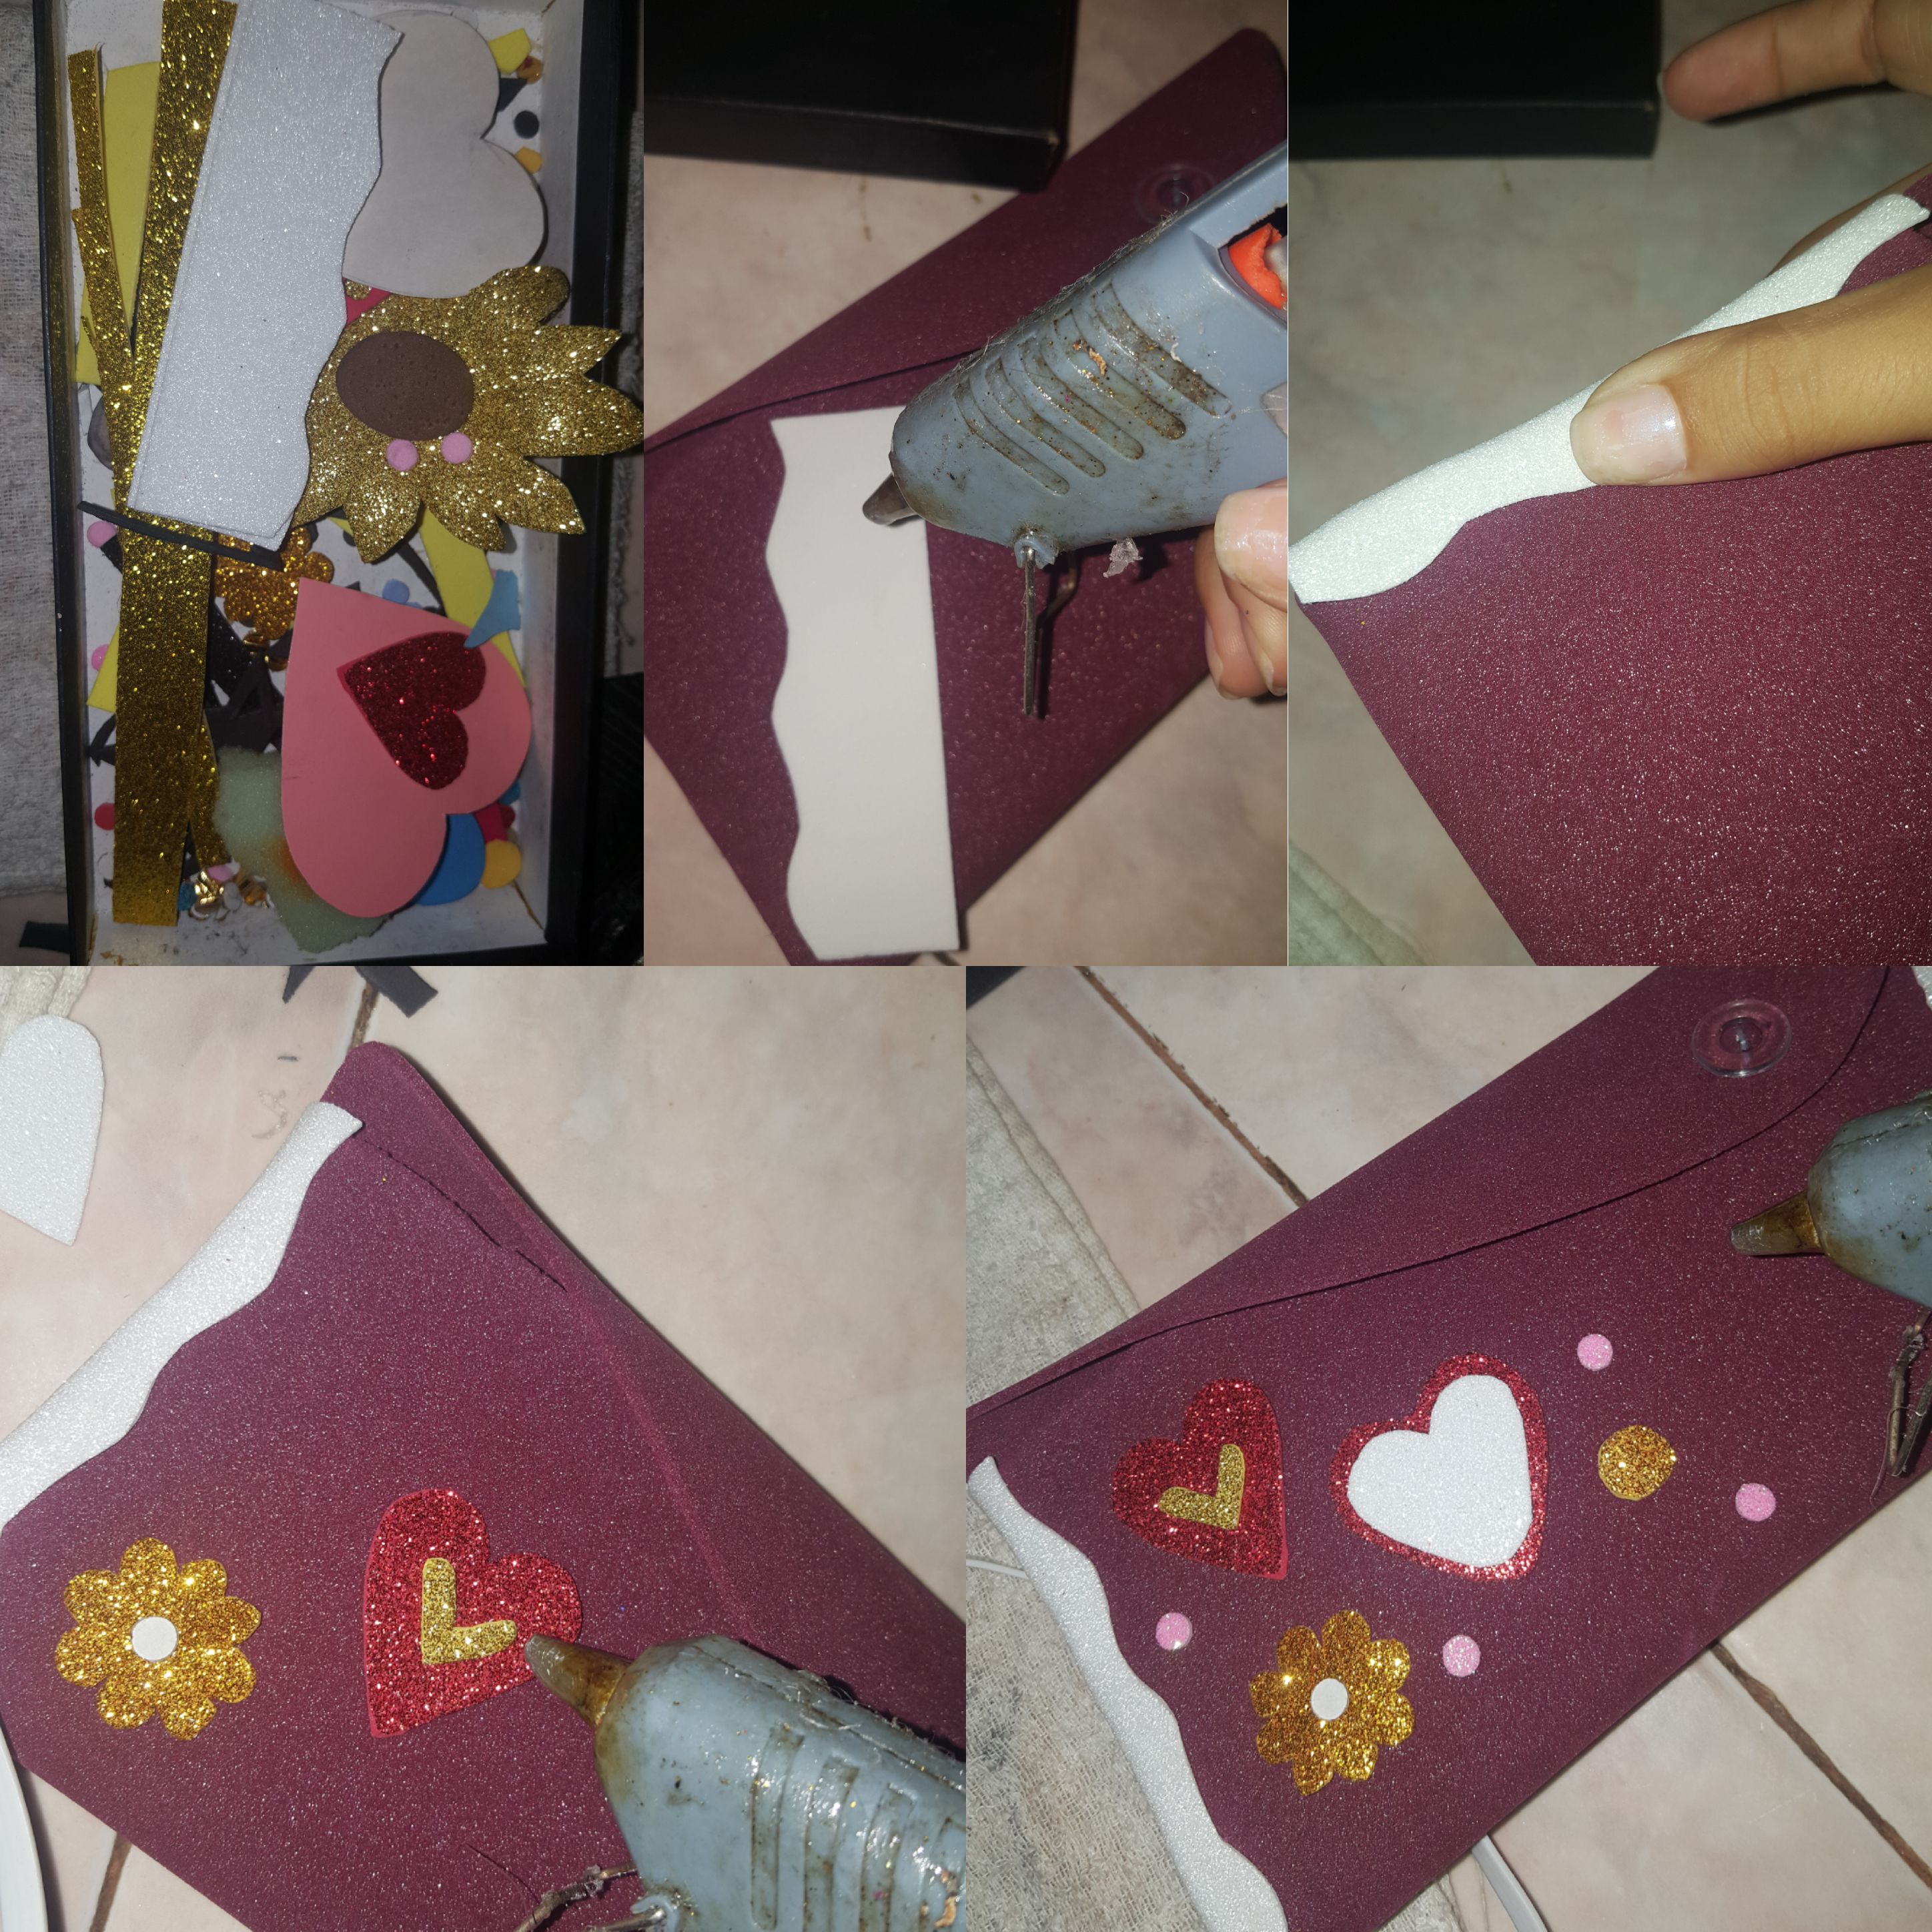
Primero tomé el foami entero, estos son reciclados de mis cosas de manualidades, lo medí y con el pata de una tijera hice un poquito de fuerza en la zona donde quería marcar el tamaño, luego en la parte del lado, justo en la zona de abajo, coloqué silicón y pegué hacia adentro, escondiendo esa esquina y fui doblando hasta pegar todo en los dos lados, para sellar el estuche.
>First I took the whole foami, these are recycled from my craft things, I measured it and with the leg of a pair of scissors I made a little force in the area where I wanted to mark the size, then in the side part, right in the area of below, I placed silicone and glued inward, hiding that corner and I was folding until everything was glued on both sides, to seal the case.
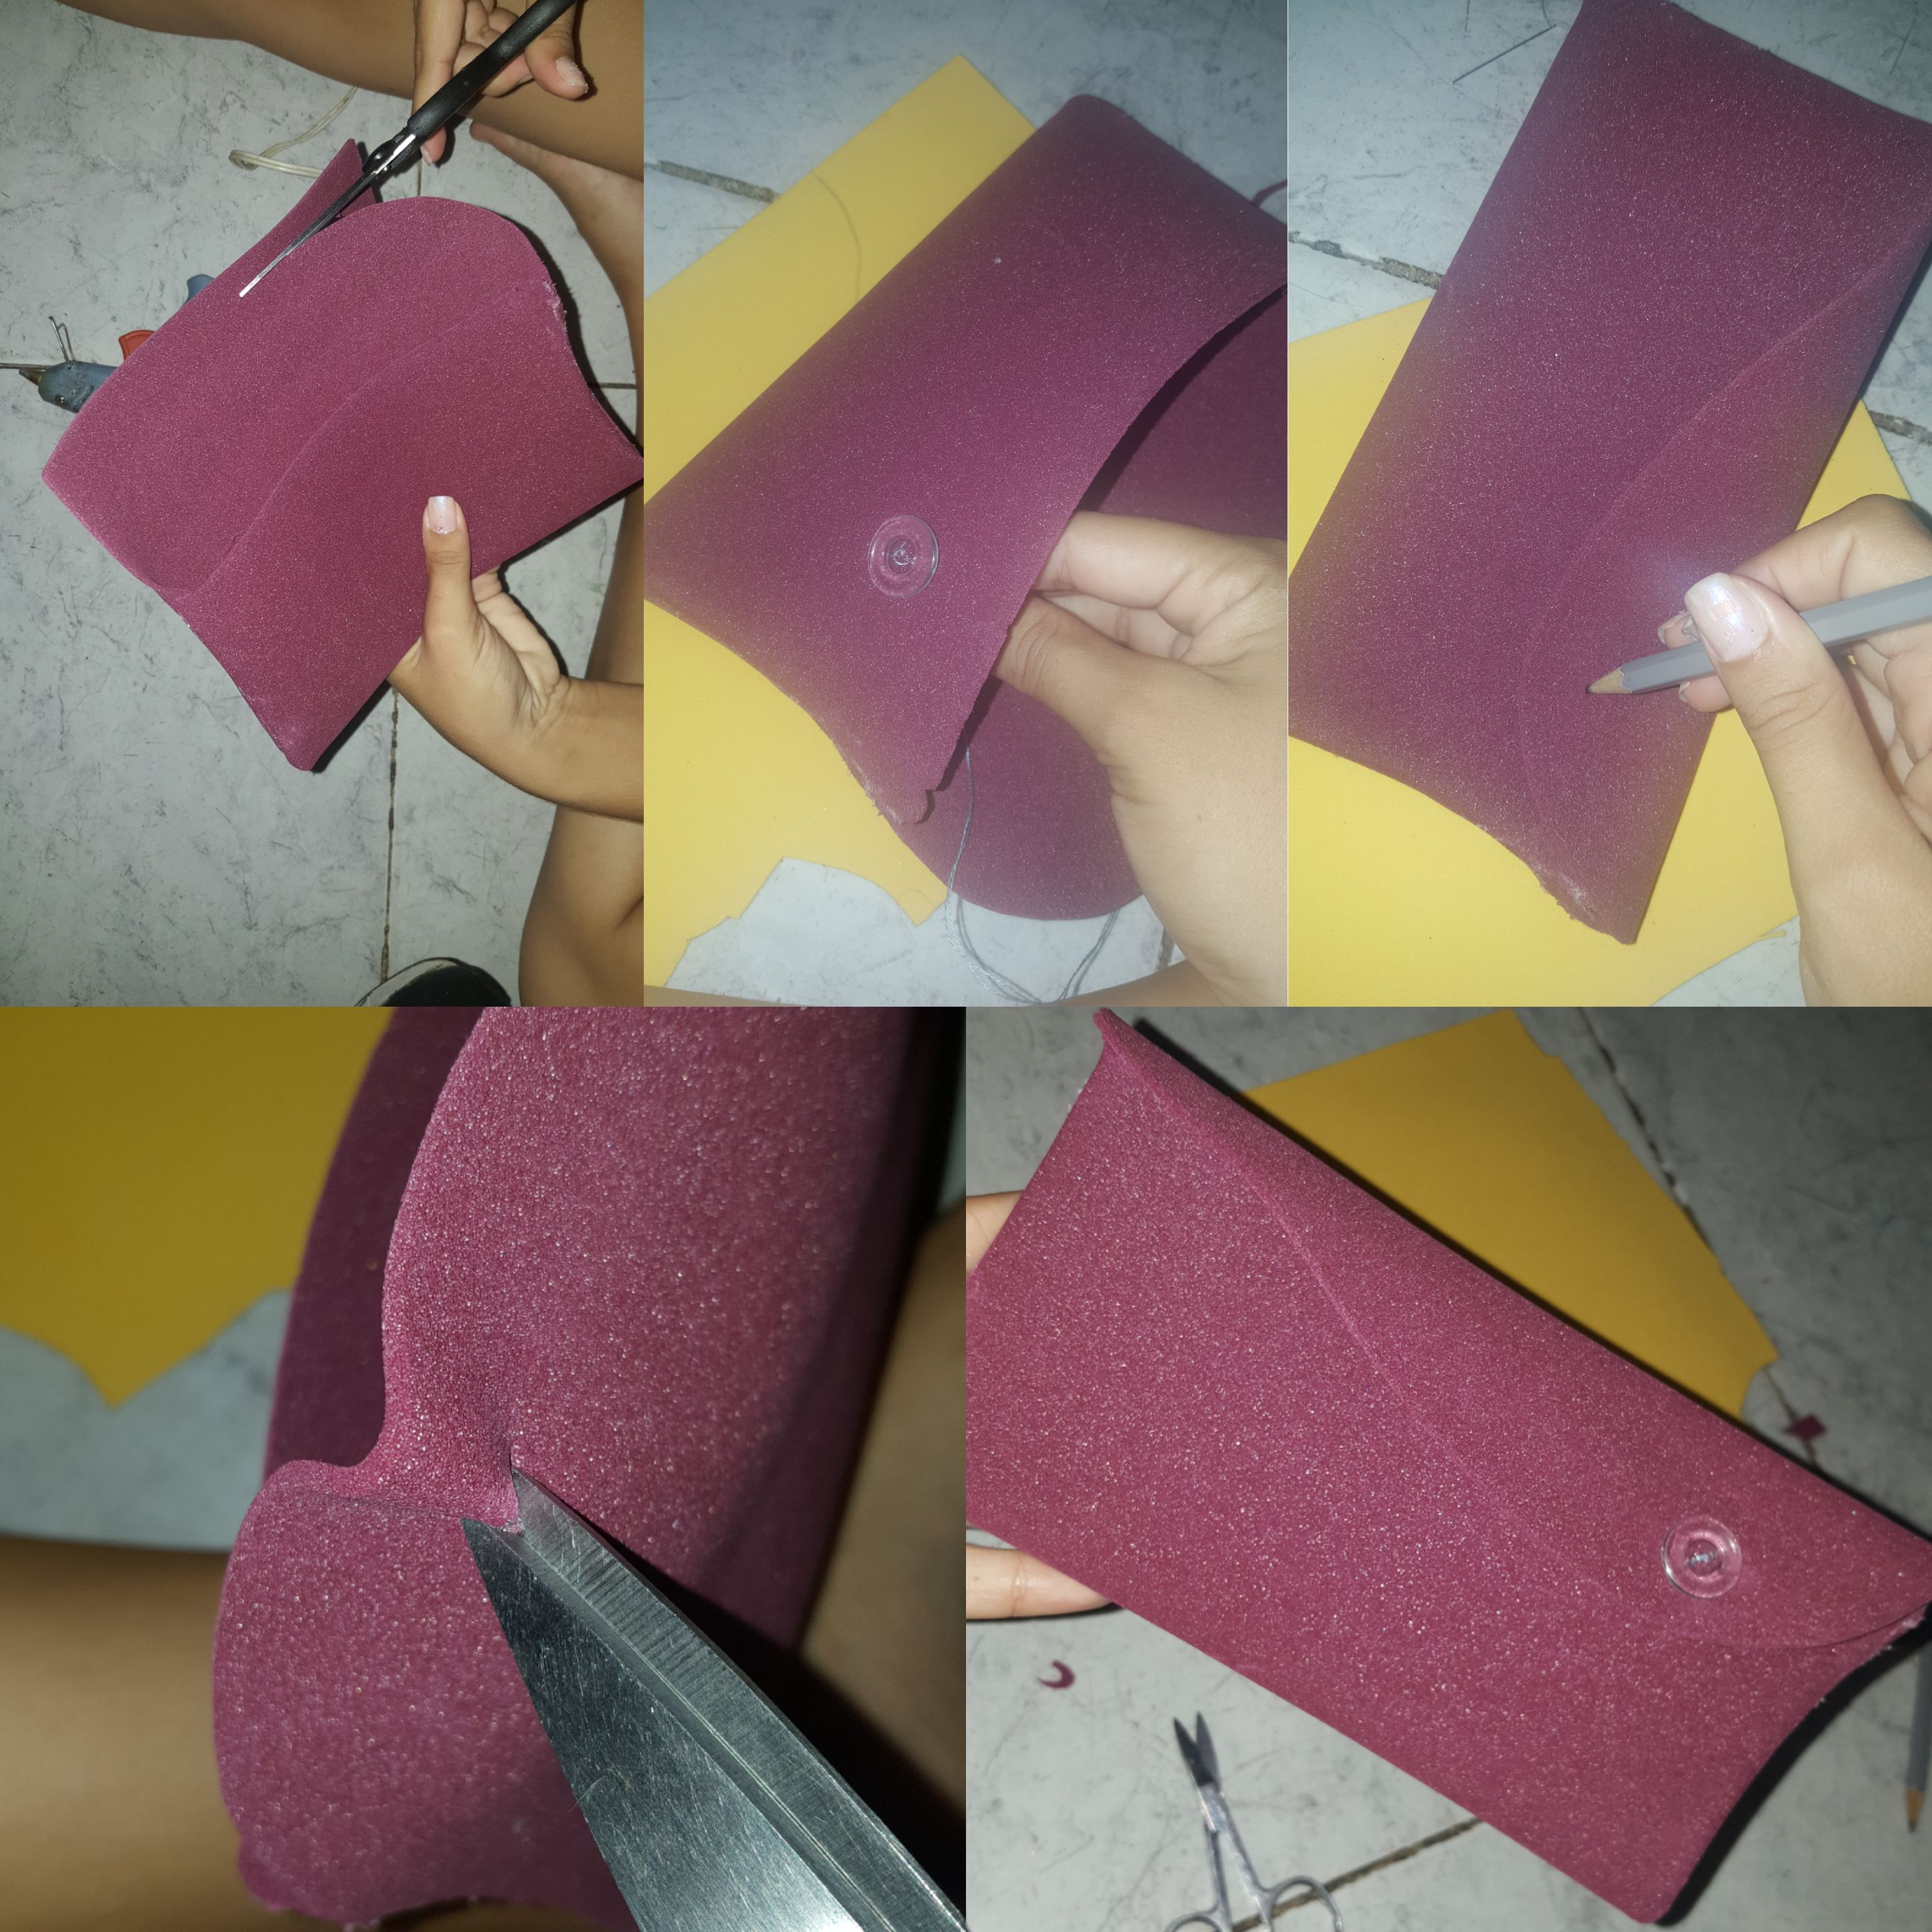
Una vez listo eso, corté la tapa al ojo porciento, una forma que me surgió, marqué donde llegaba la tapa y tomé el botón, con una aguja e hilo fijé el botón al sitio para que sea nuestra cerradura, volví a marcar en la tapa donde llegaba el botón, hice una raya y corté con mucho cuidado con la tijera, prácticamente lo tenemos listo.
>Once that was ready, I cut the cover to the eye percent, a shape that came to me, I marked where the cover came and took the button, with a needle and thread I fixed the button to the place so that it would be our lock, I marked again on the cover where the button came, I made a line and cut very carefully with the scissors, we practically have it ready.
Por último, saqué una cajita donde tenía corazones, florecita y tiras de foami que me quedaban de cualquier otro trabajo y busqué para decorar, lo hice colocando una tira blanca con ondas en ambos lados y terminé aplicando puntos, flores y corazones.
¡Listo!
>Finally, I took out a little box where I had hearts, a flower and foami strips that I had left from any other job and I looked to decorate, I did it by placing a white strip with waves on both sides and I ended up applying dots, flowers and hearts.
Ready!

La idea la google y la fuente es la siguiente: https://pin.it/3EsZAXa
>The idea the google and the source is as follows: https://pin.it/3EsZAXa
Texto traducido por Deepls
>Text translated by Deepls
Espero que les guste, acepto sugerencias y nos vemos en el próximo post. Gracias por estar al pendiente, espero que podamos seguir compartiendo conocimientos✂️❤️
>I hope you like it, I accept suggestions and see you in the next post. Thanks for being on the lookout, I hope we can continue sharing knowledge✂️❤️
[Esp-Eng] Step by step lens case🤓✂️
@sugliannysg22
· 2022-04-29 22:42
· Hive Diy
#hive-130560
#spanish
#manualidades
#ocd
#tutorial
#creativecoin
#crafts
#palnet
Payout: 0.000 HBD
Votes: 12
More interactions (upvote, reblog, reply) coming soon.