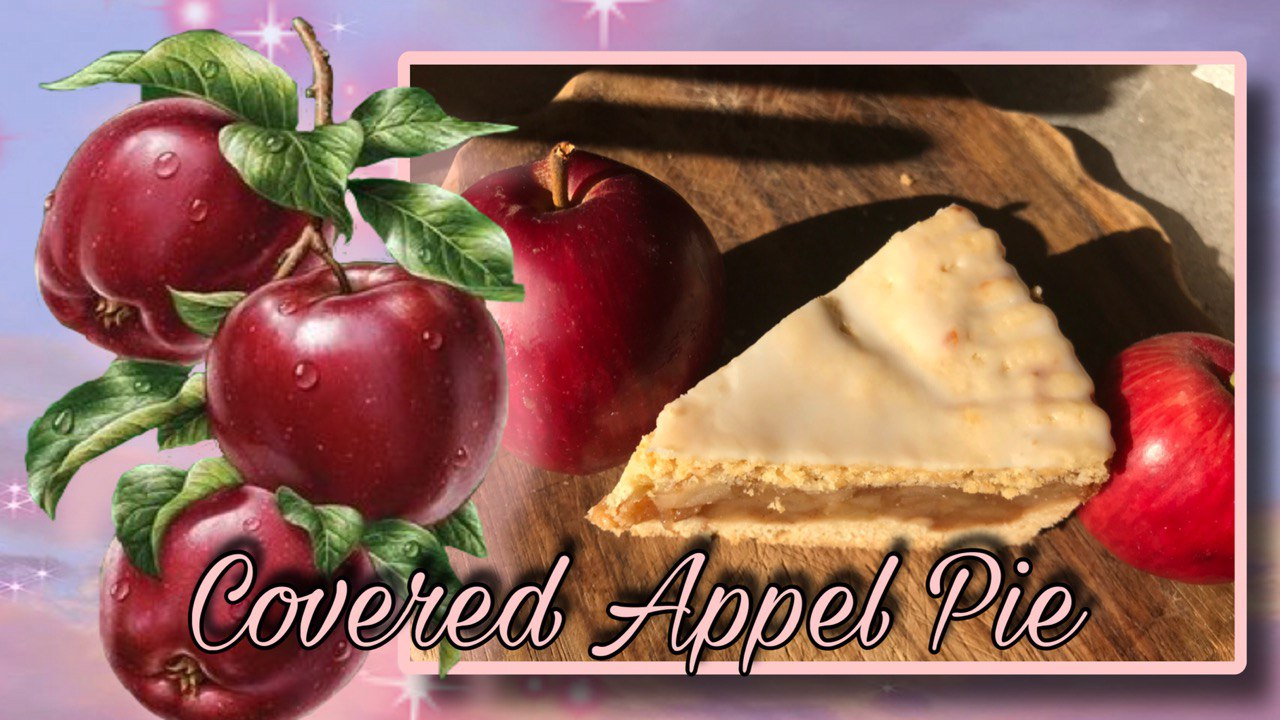
 Hello lovelies, today I'm going to show you one of my favourite treats: apple pie 🍎🥧.
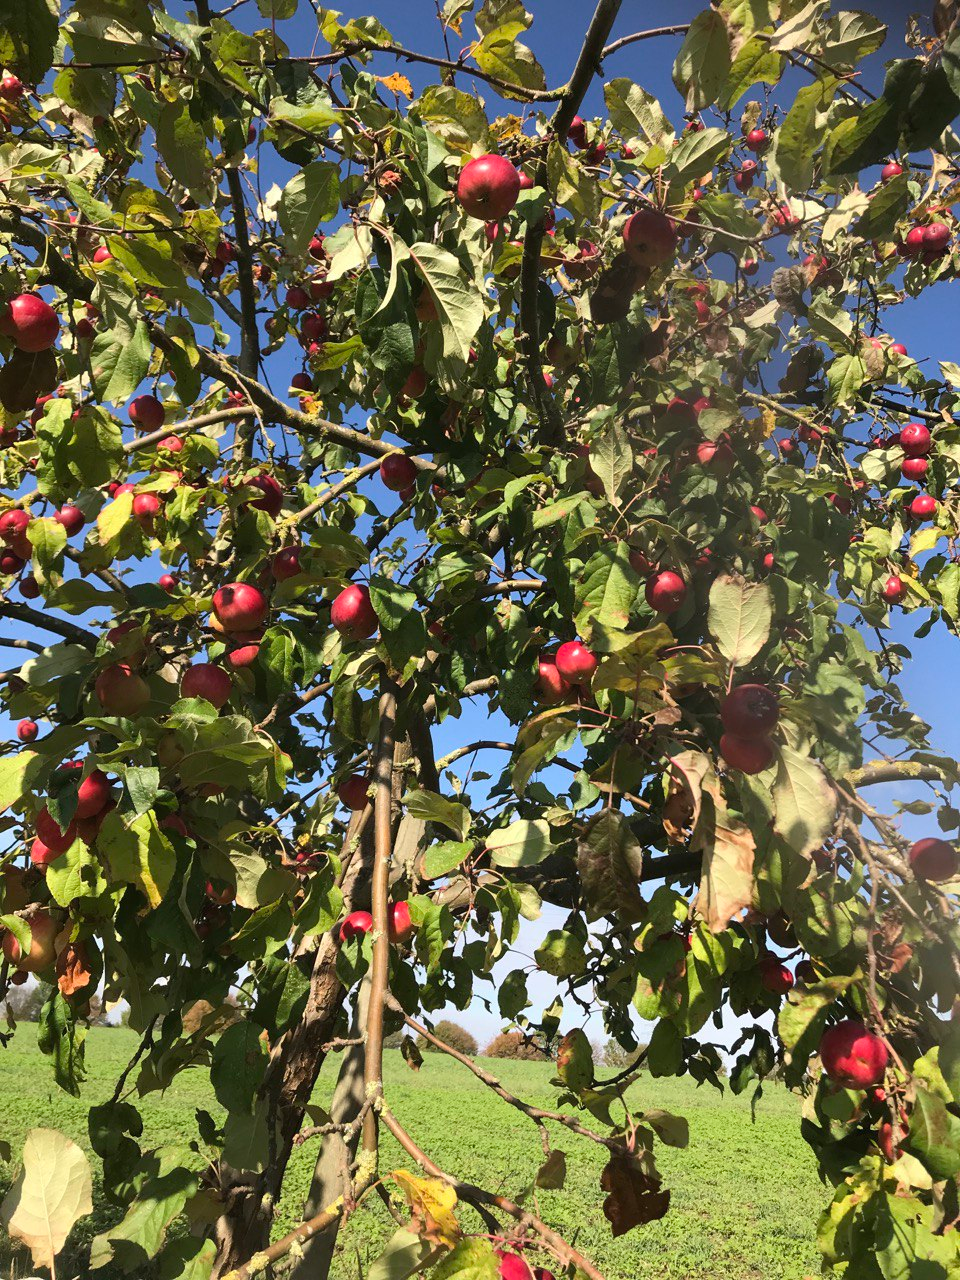
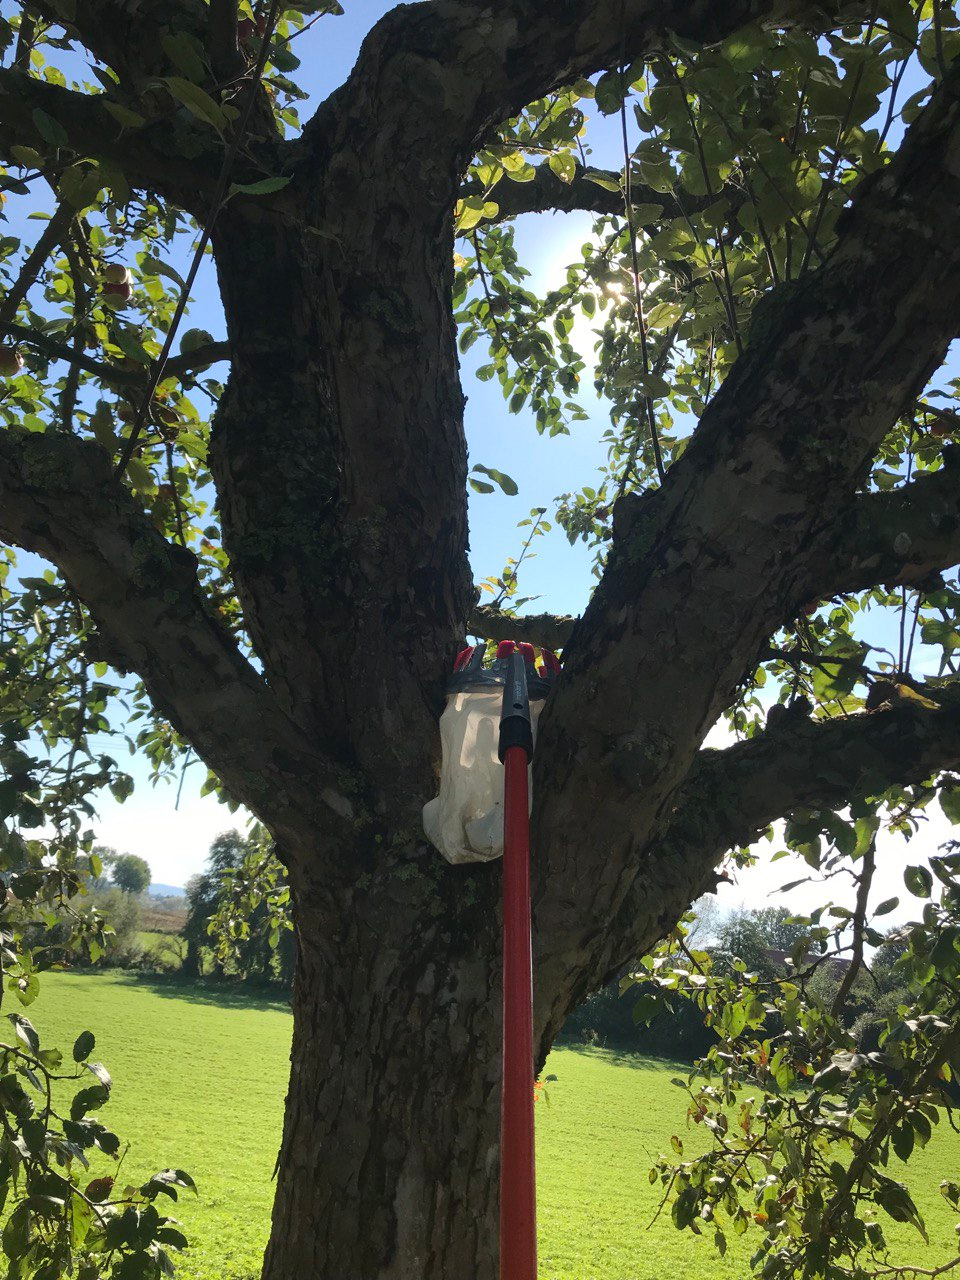
When the first cool morning mist rolls over the meadows and the sun shines golden through the treetops, I know it's apple season. This year, the apple trees have been particularly bountiful – plump, sweet and sour fruits that glistened in the sun like little gems. I couldn't resist and went out to pick them myself. Every apple I held in my hand was like a little promise: ‘Make something delicious out of me.’
Hello lovelies, today I'm going to show you one of my favourite treats: apple pie 🍎🥧.
When the first cool morning mist rolls over the meadows and the sun shines golden through the treetops, I know it's apple season. This year, the apple trees have been particularly bountiful – plump, sweet and sour fruits that glistened in the sun like little gems. I couldn't resist and went out to pick them myself. Every apple I held in my hand was like a little promise: ‘Make something delicious out of me.’
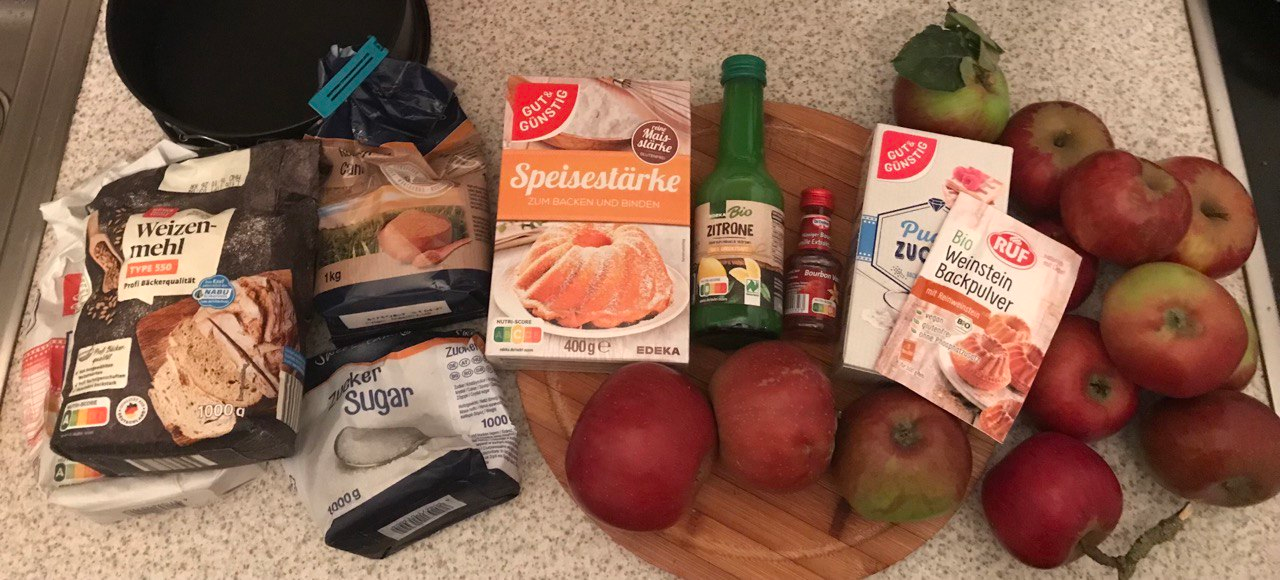
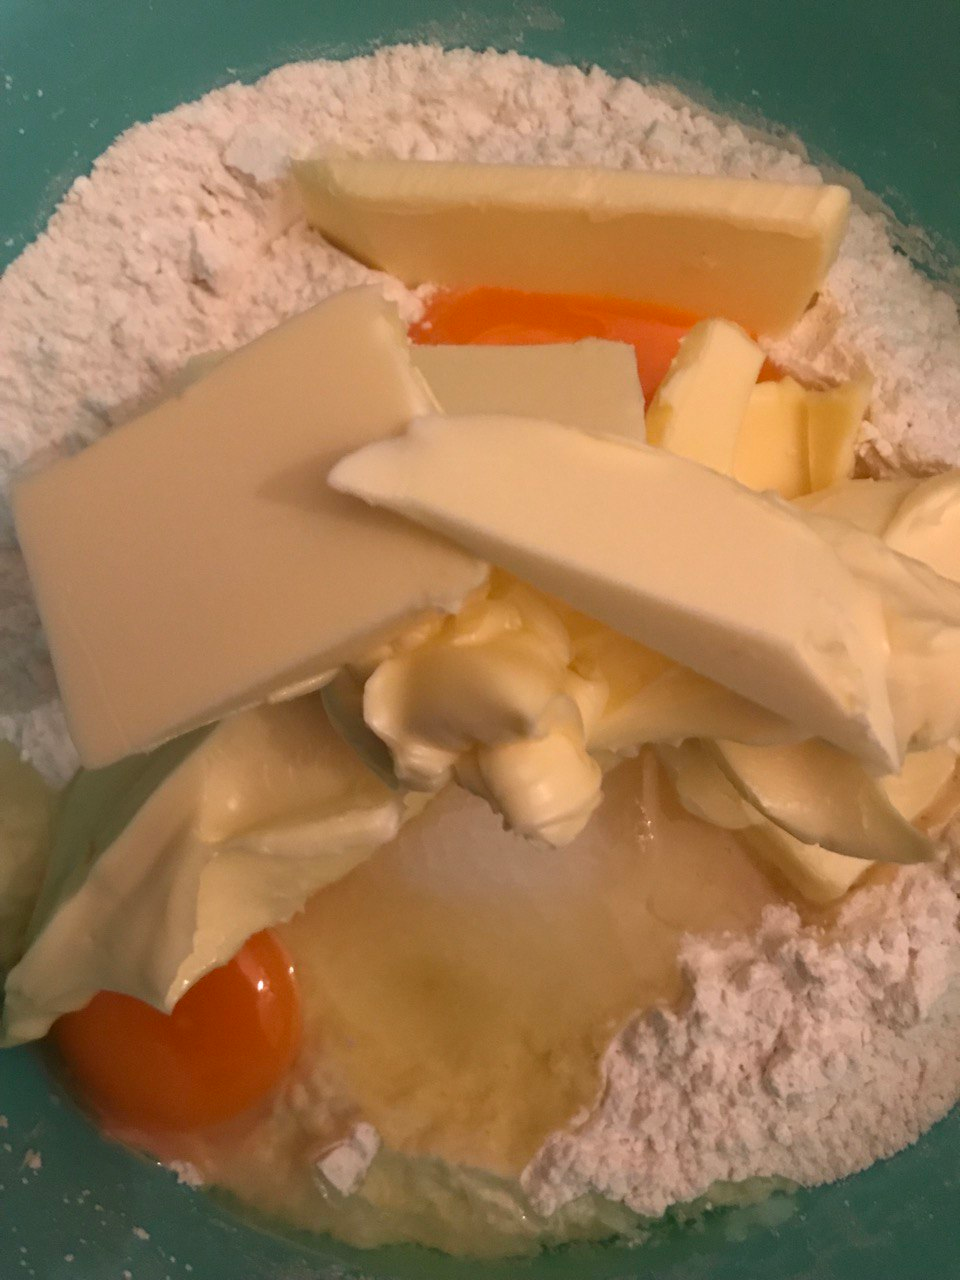
And that's what I did. What do you need for this cake? Ingredients for the shortcrust pastry: • 250 g flour • ½ packet baking powder • 80 g sugar • 125 g butter • 1 egg • 1 pinch of salt • A dash of vanilla For the filling: • 1 kg apples • 300 g apple sauce • 30–50 g sugar (depending on the sweetness of the apples) • 15 g starch • Cinnamon to taste
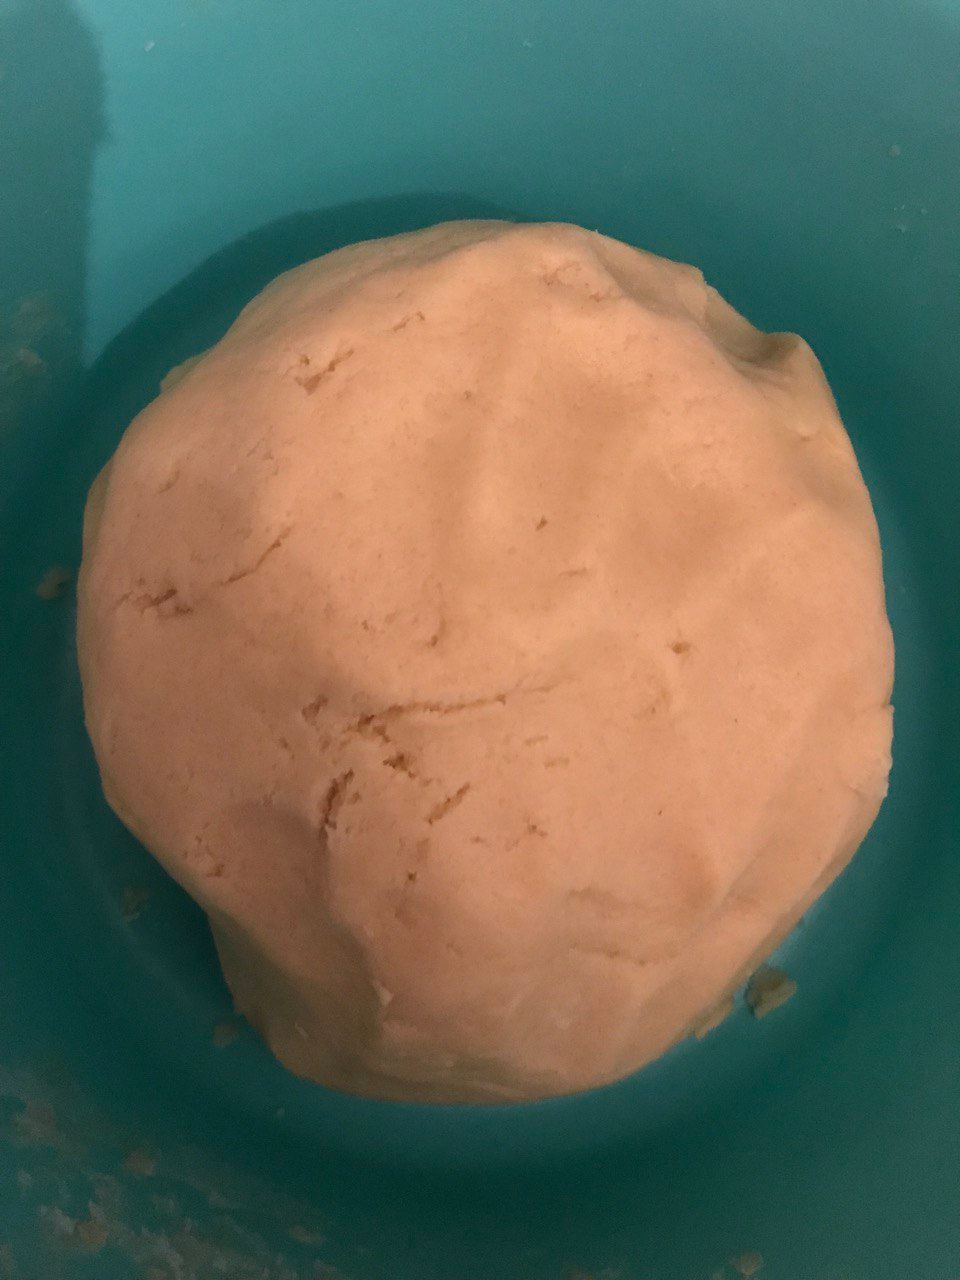
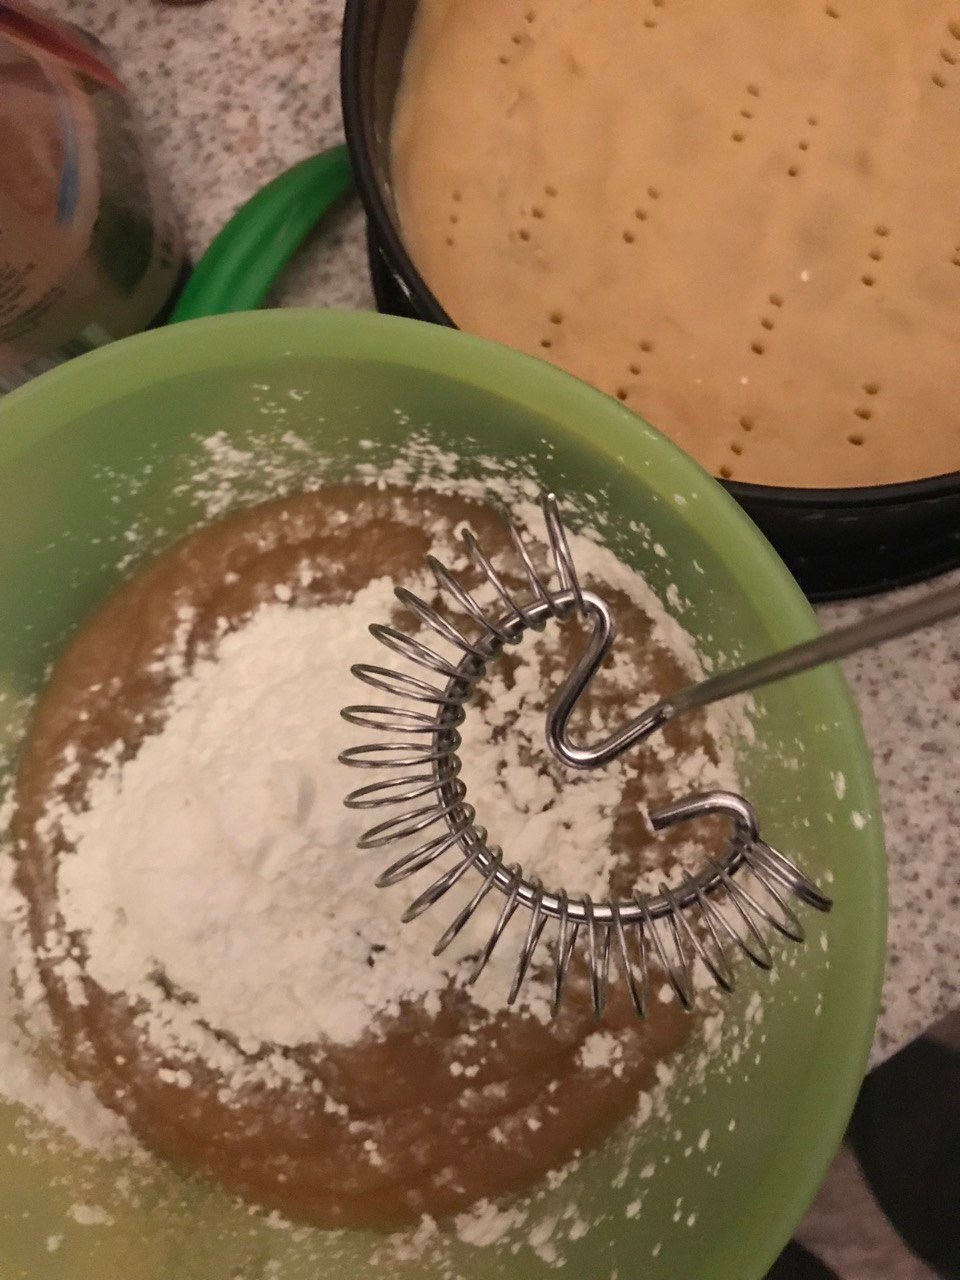
Let's get started! My covered apple pie – a poem of shortcrust pastry and cinnamon scent The base is a classic shortcrust pastry – beautifully buttery, crumbly and yet stable enough to hold the juicy filling. I've refined it with a hint of vanilla, as this really brings out the fruitiness of the apples. Put all the ingredients in a bowl and knead.
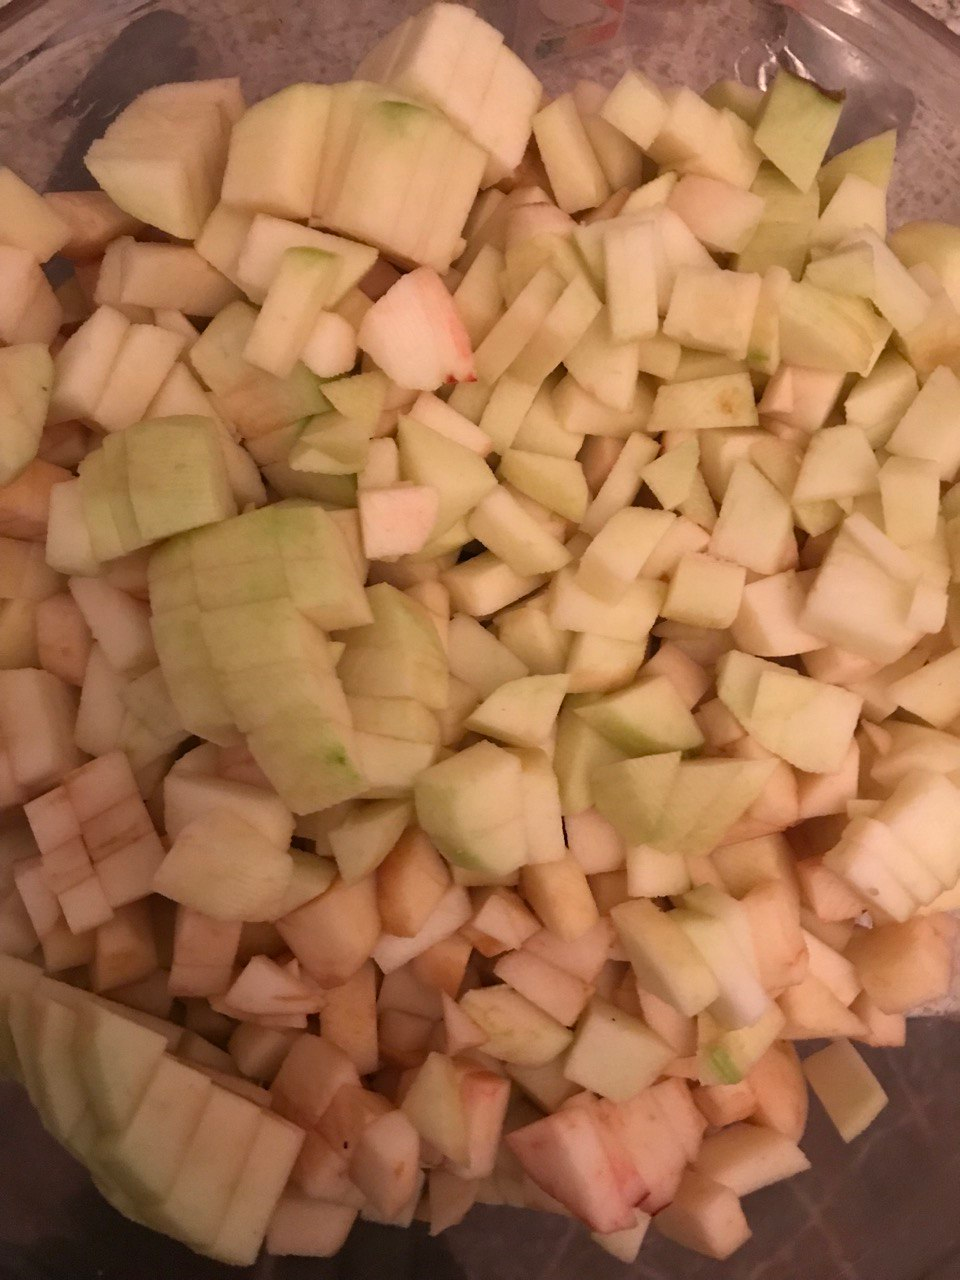
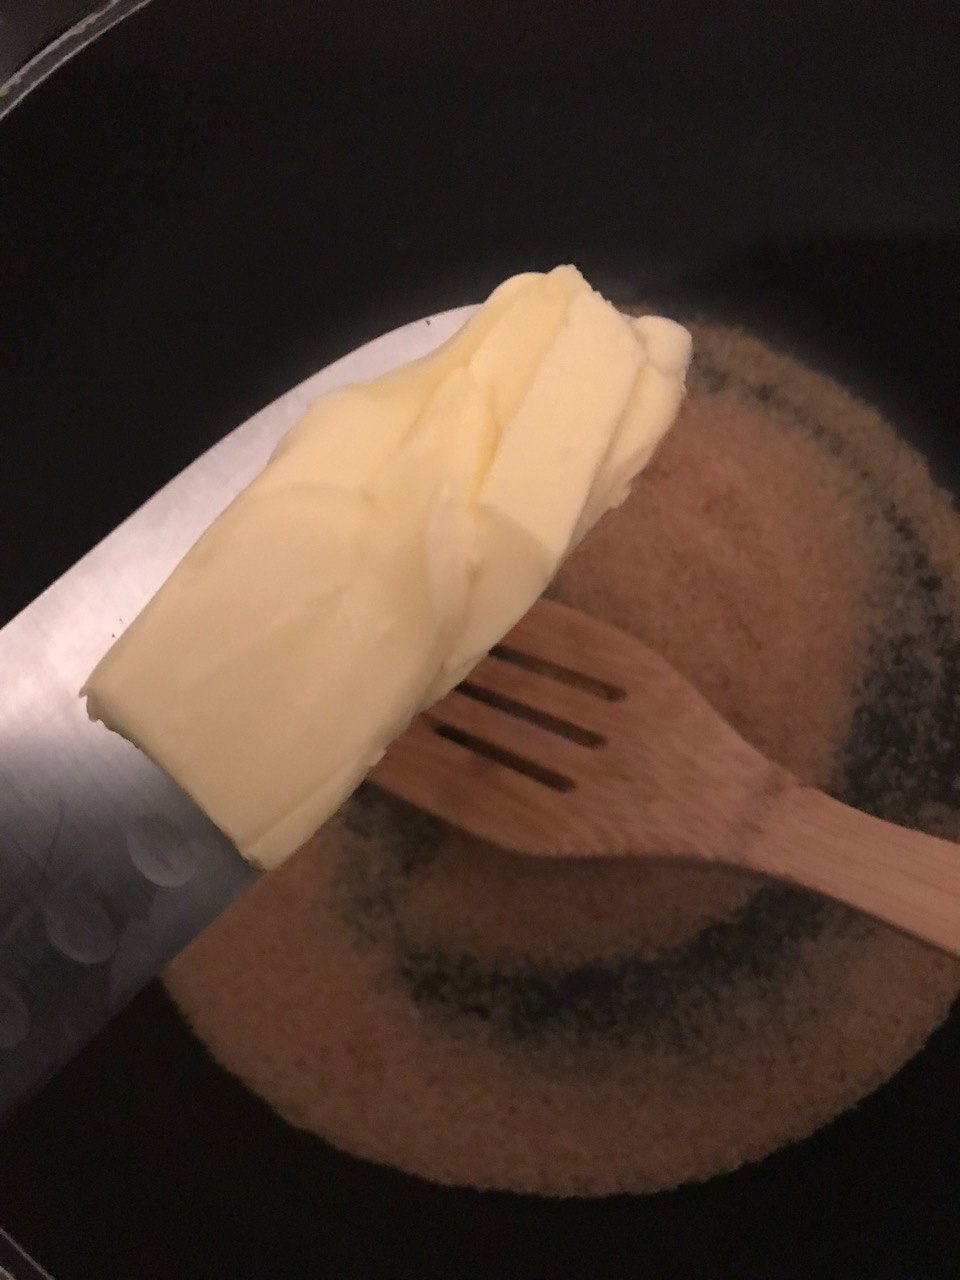
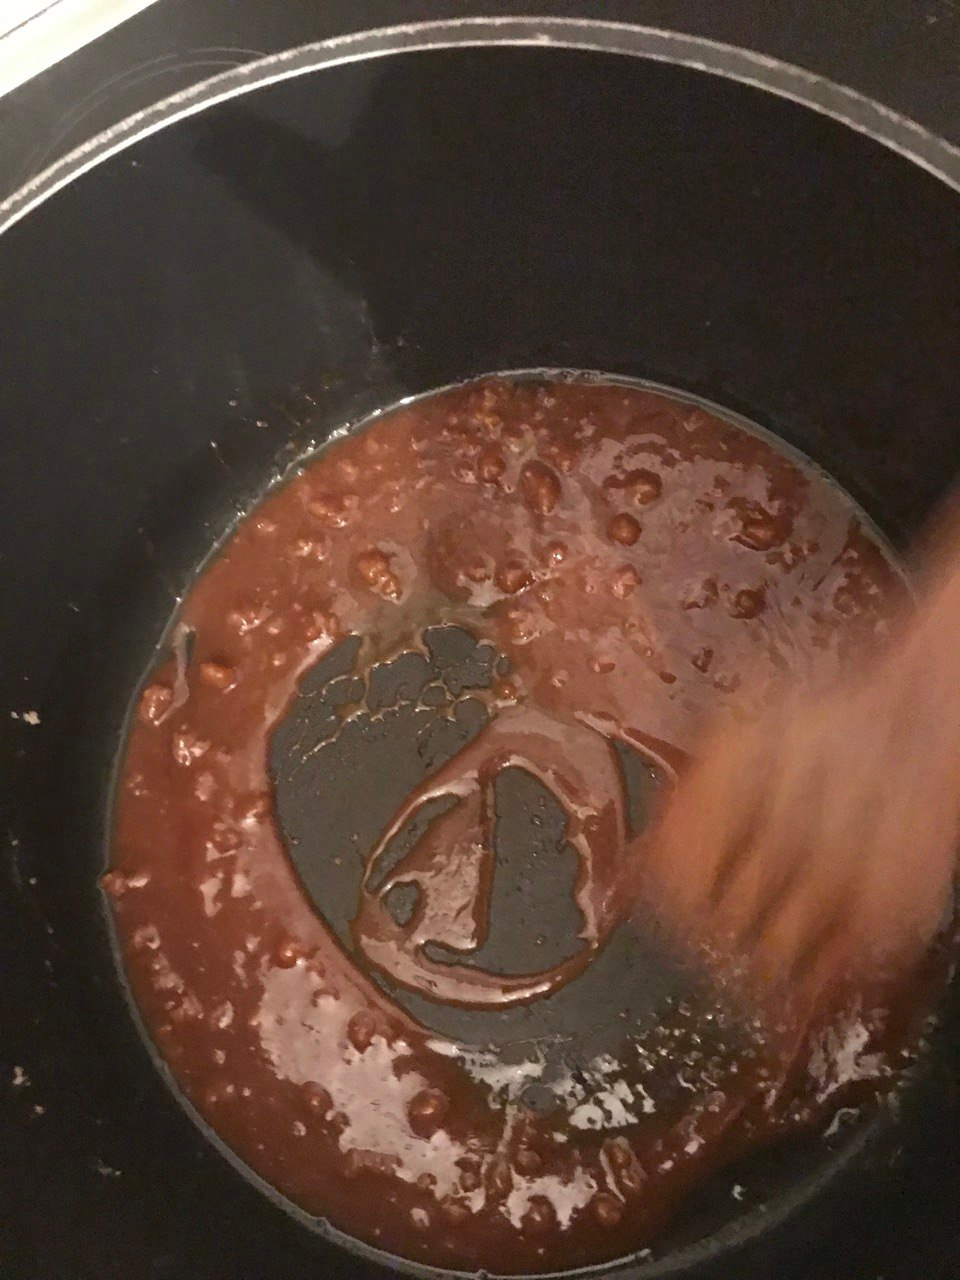
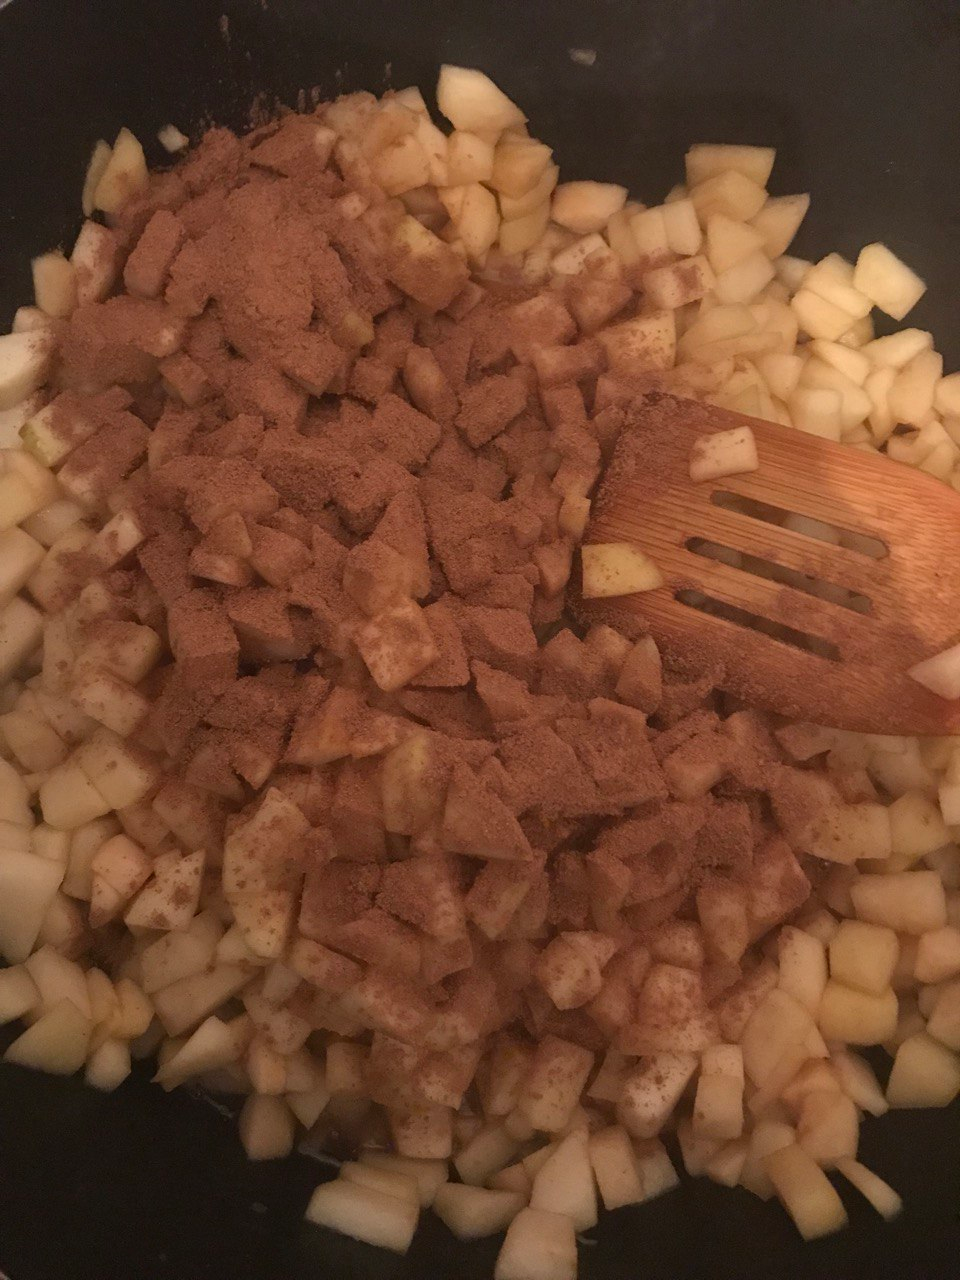
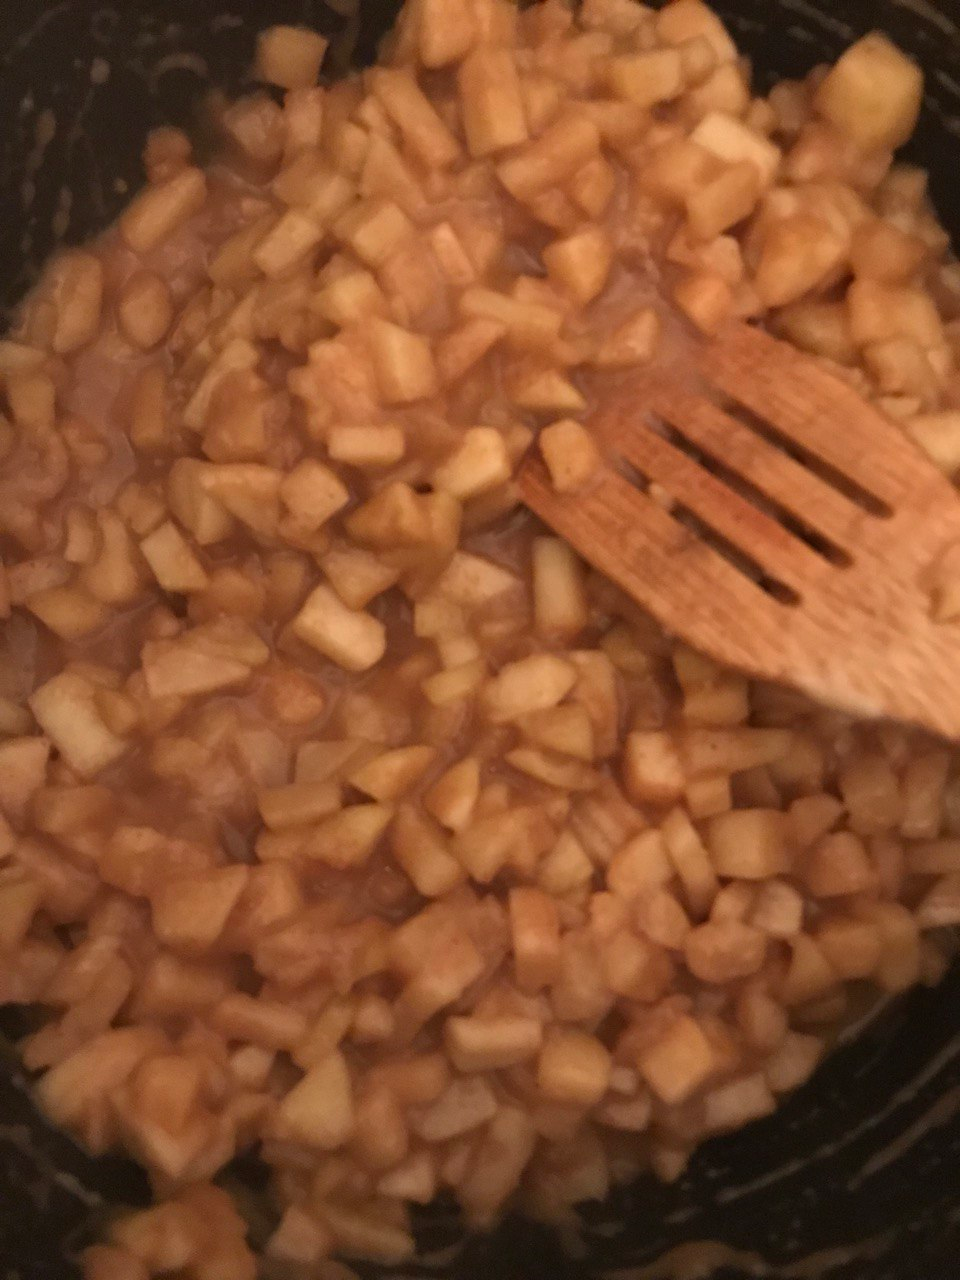
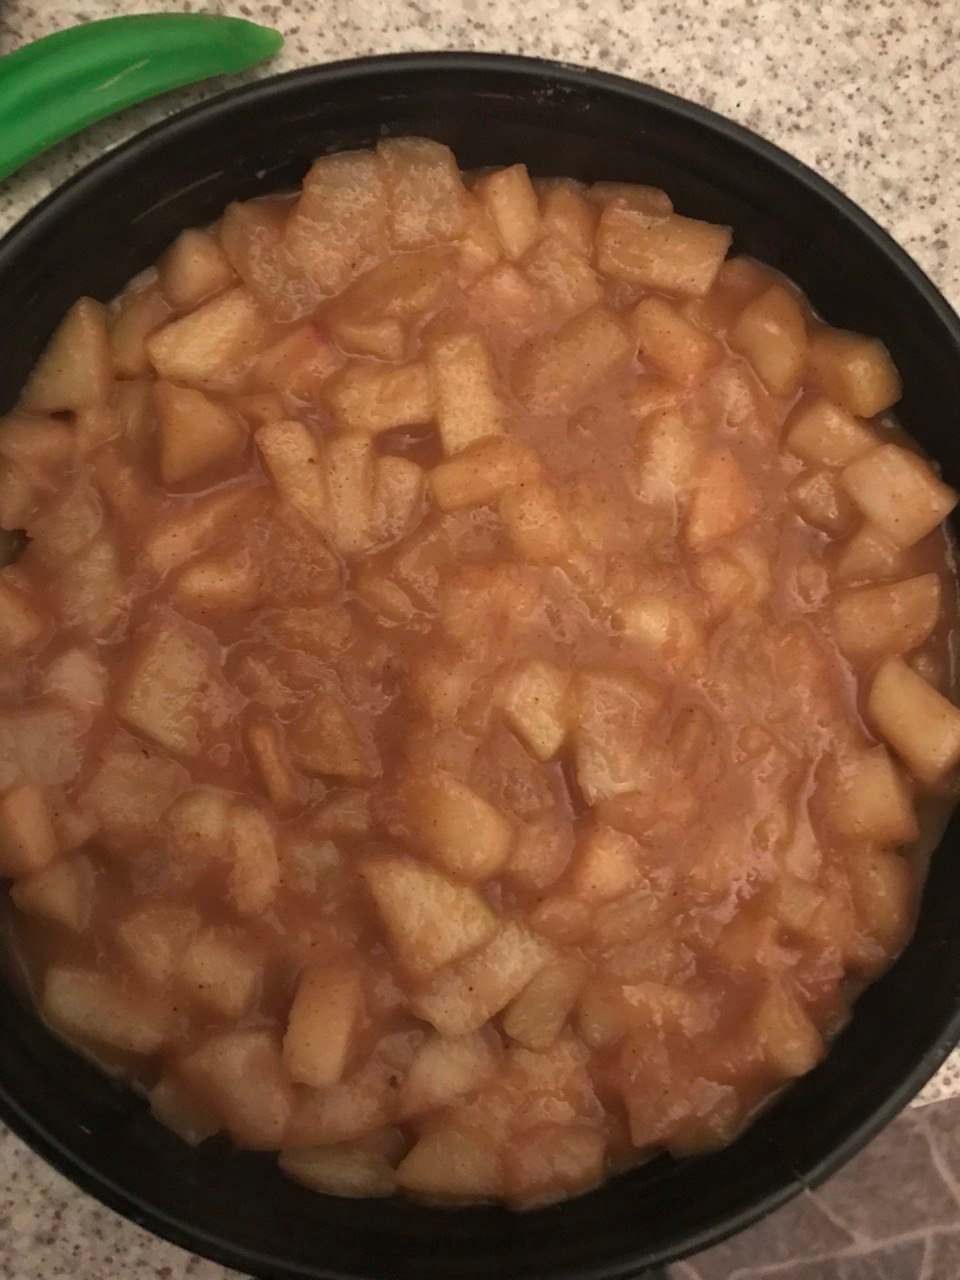
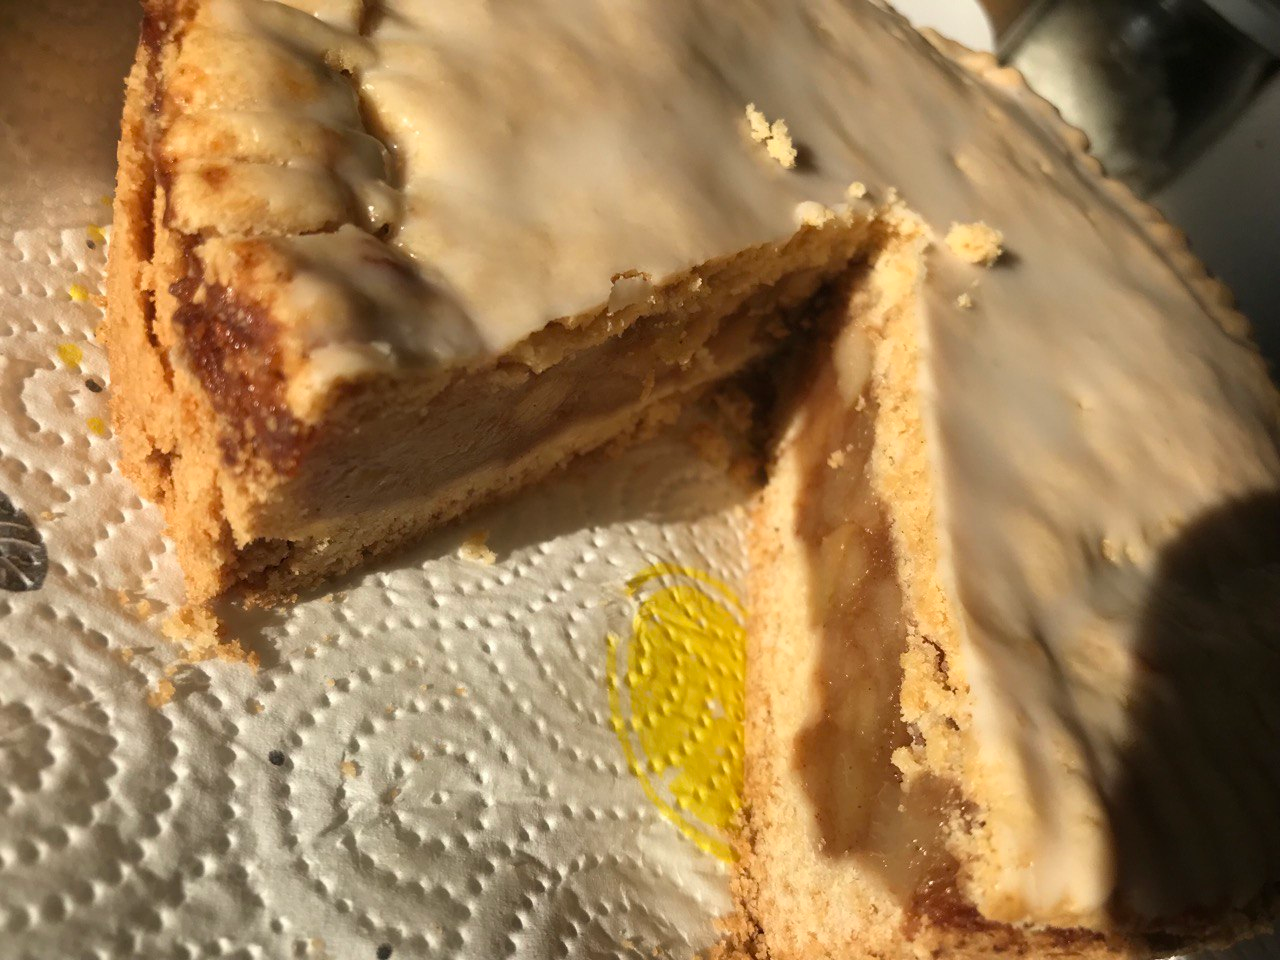
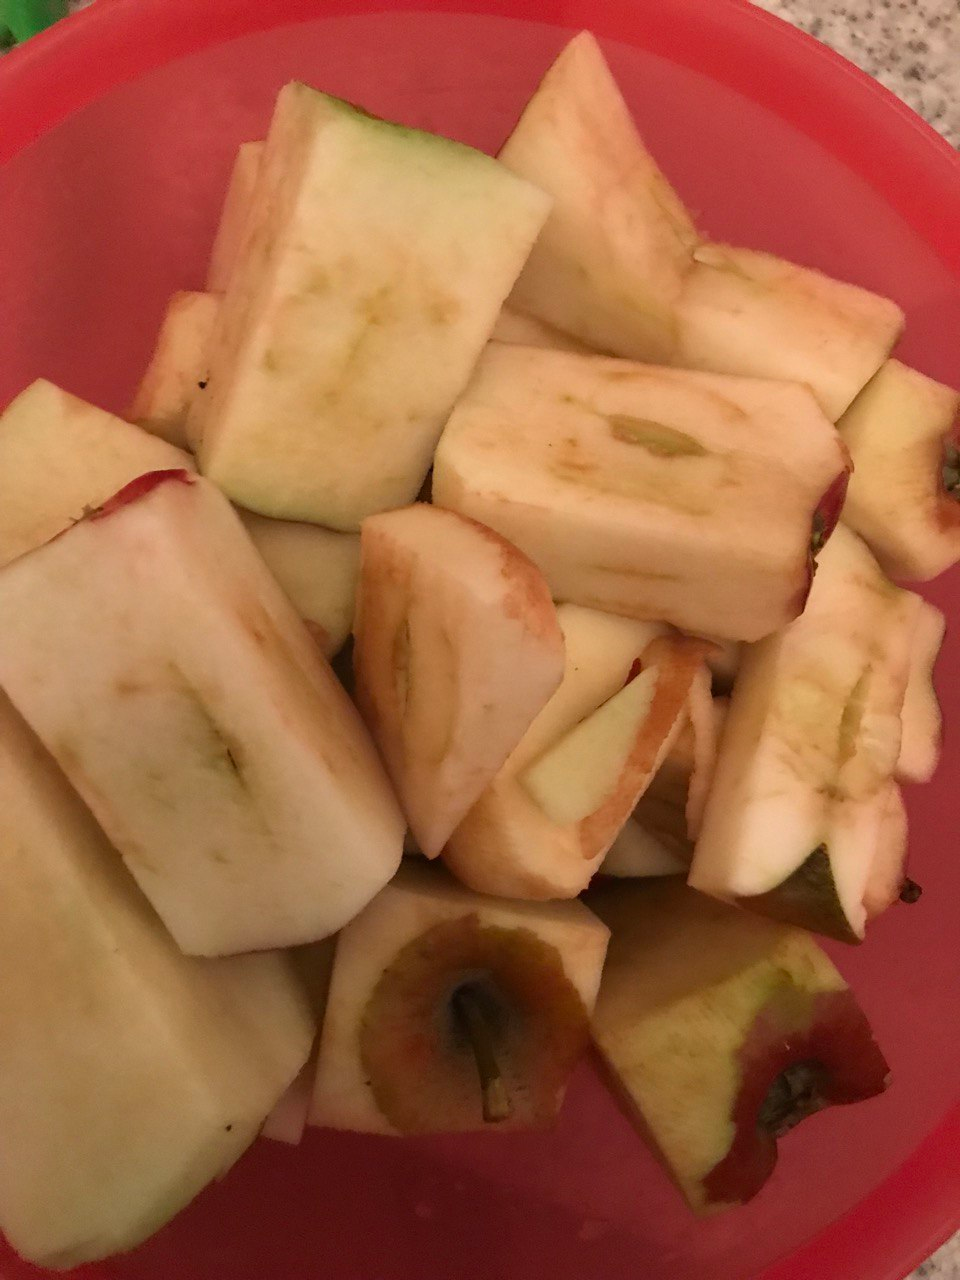
For the filling, I peeled and cored my freshly picked apples and cut them into fine cubes. Then I put them in a pan – together with a generous spoonful of brown sugar, a dash of lemon juice and a little butter to caramelise everything slightly. Finally, I added cinnamon. Lots of cinnamon. Then I mixed the apple sauce with 15 g of starch and added it to the apple mixture. After all, what would an apple pie be without that warm, spicy aroma that instantly brings back childhood memories?
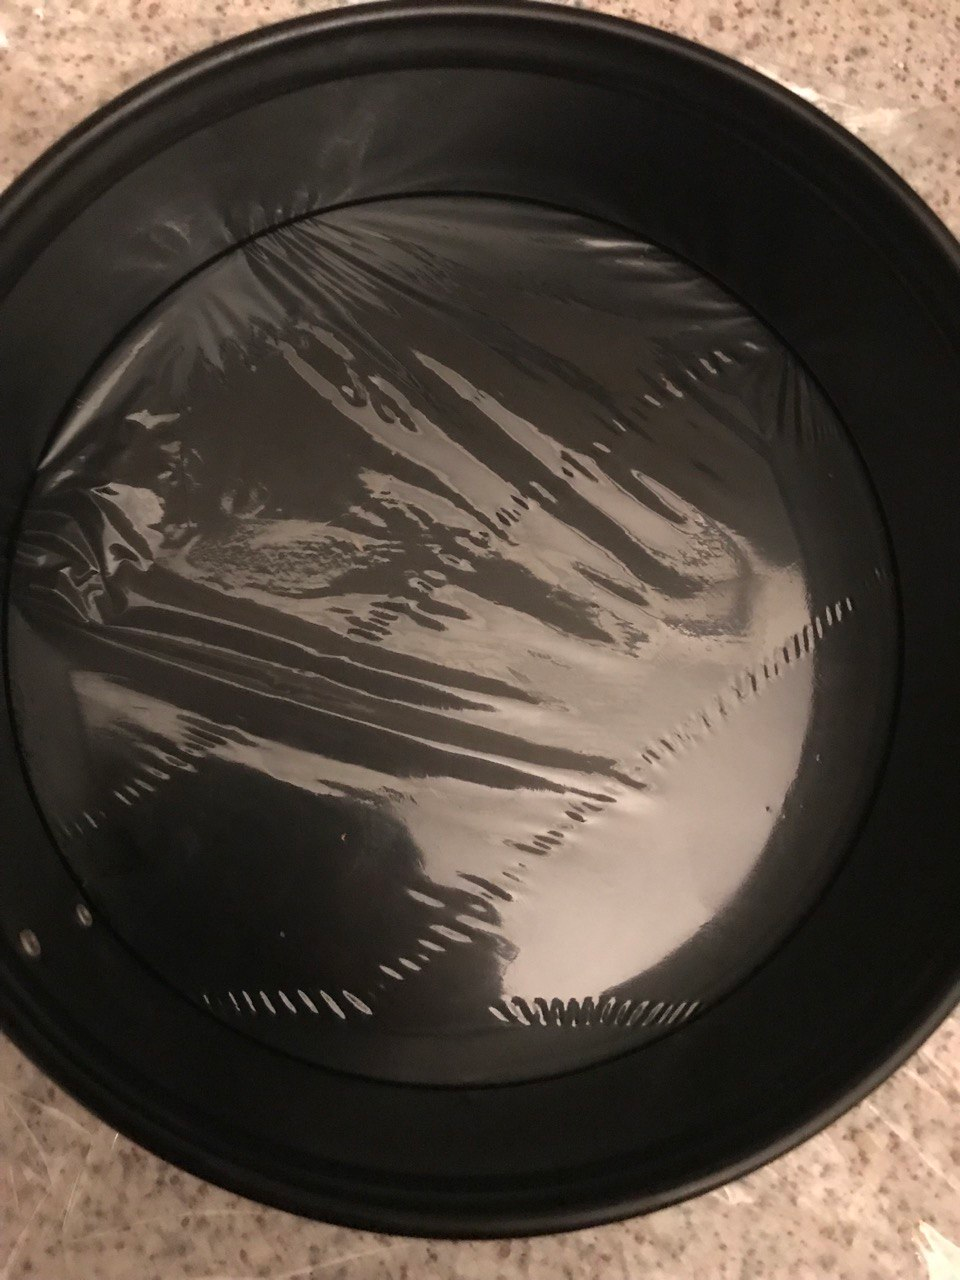
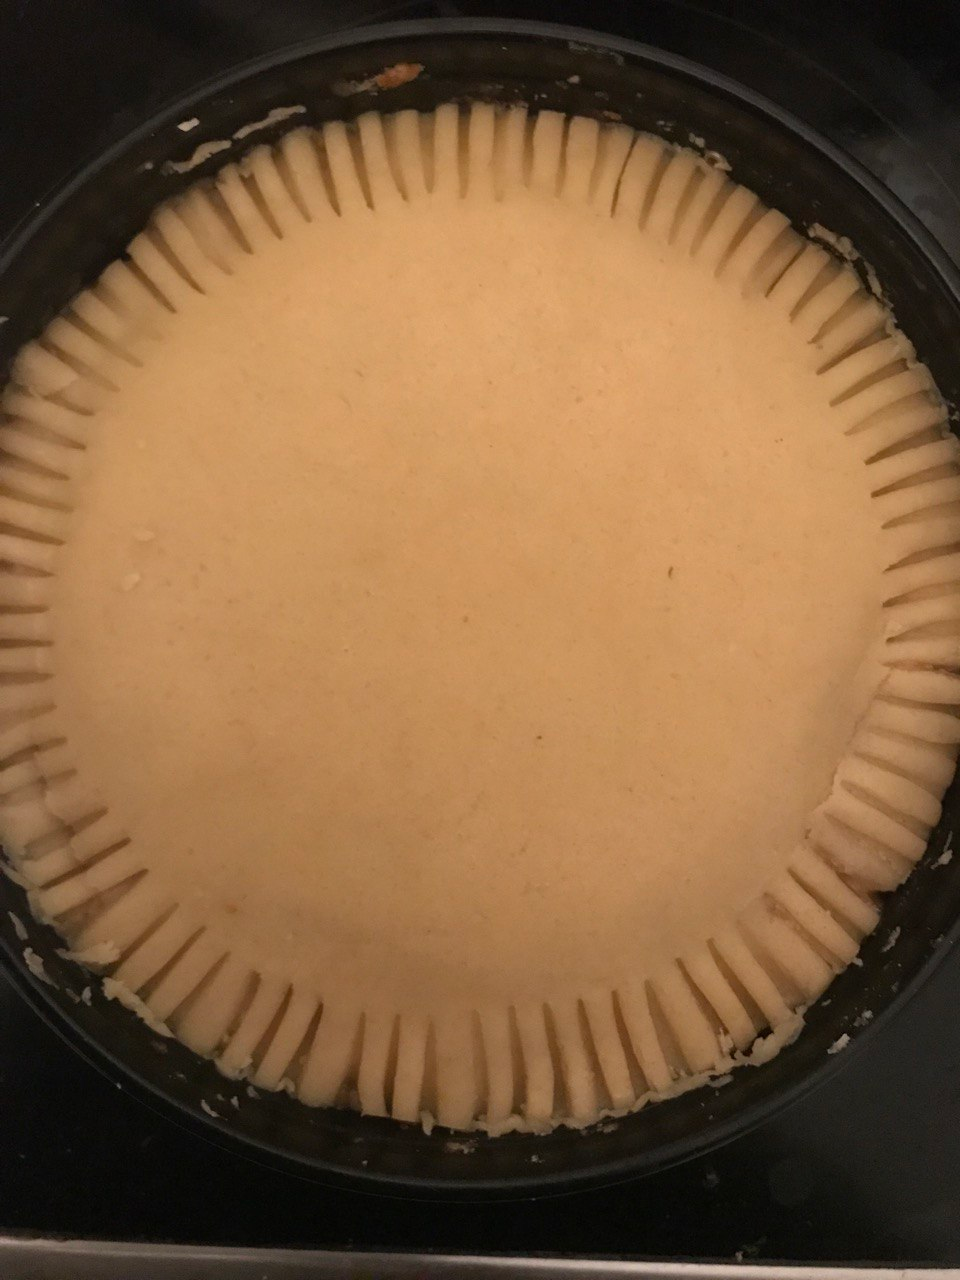
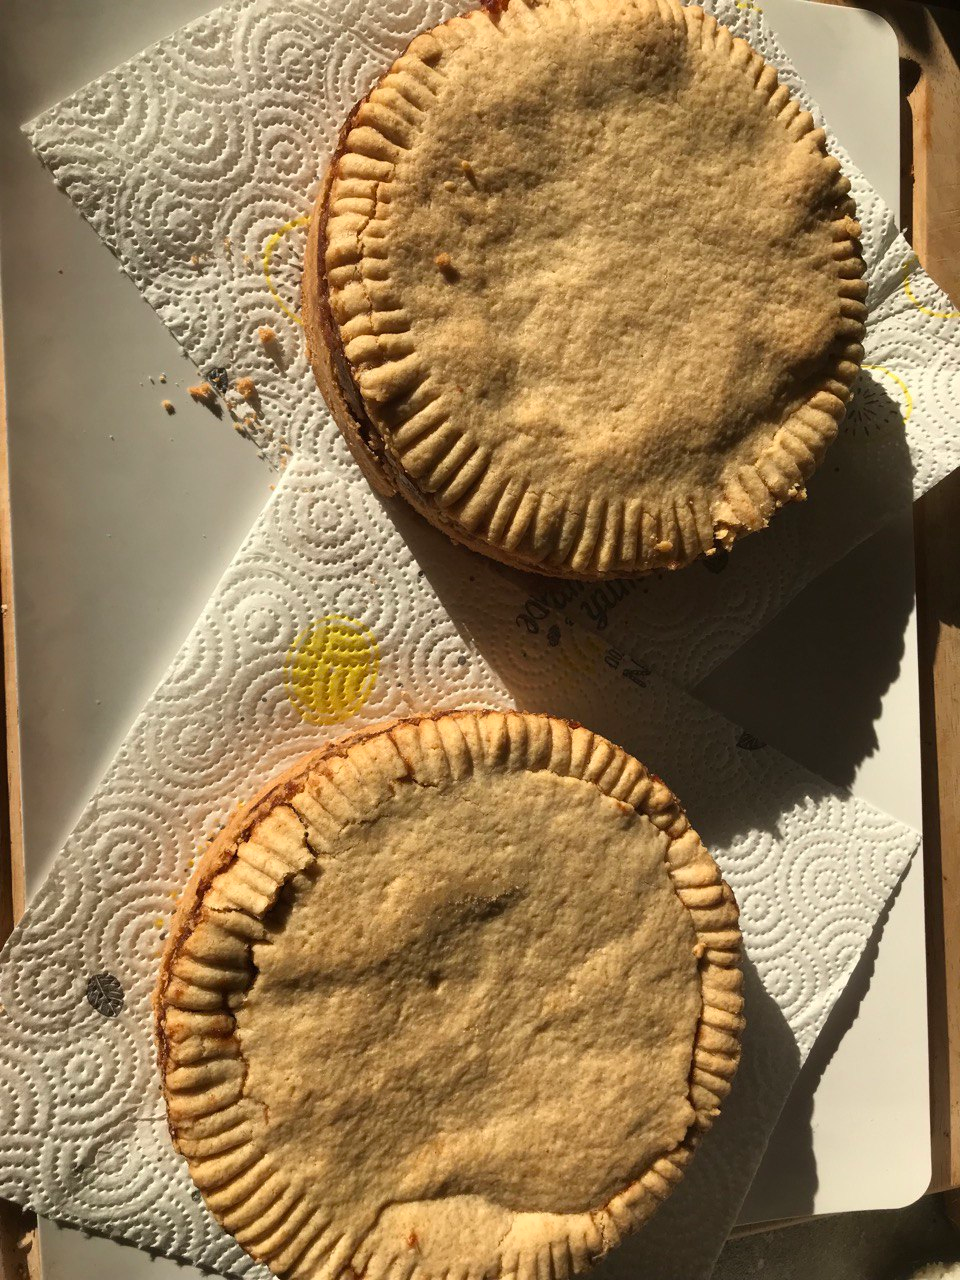
Once the apple mixture had caramelised slightly, I spread it over the rolled-out pastry in the cake tin. Then I added the lid – also made from shortcrust pastry. I had rolled this out beforehand in a tin lined with cling film, turned it out and lovingly decorated the edges with a fork. This allows the steam to escape and the cake to keep its shape nicely during baking.
I set the lid aside for the time being – in warmer temperatures, it is advisable to place it in the refrigerator for a short time so that it retains its shape. I then lined the bottom of the cake tin: to do this, press the dough evenly and form a nice, high rim so that the lid fits well later and the filling is securely enclosed.
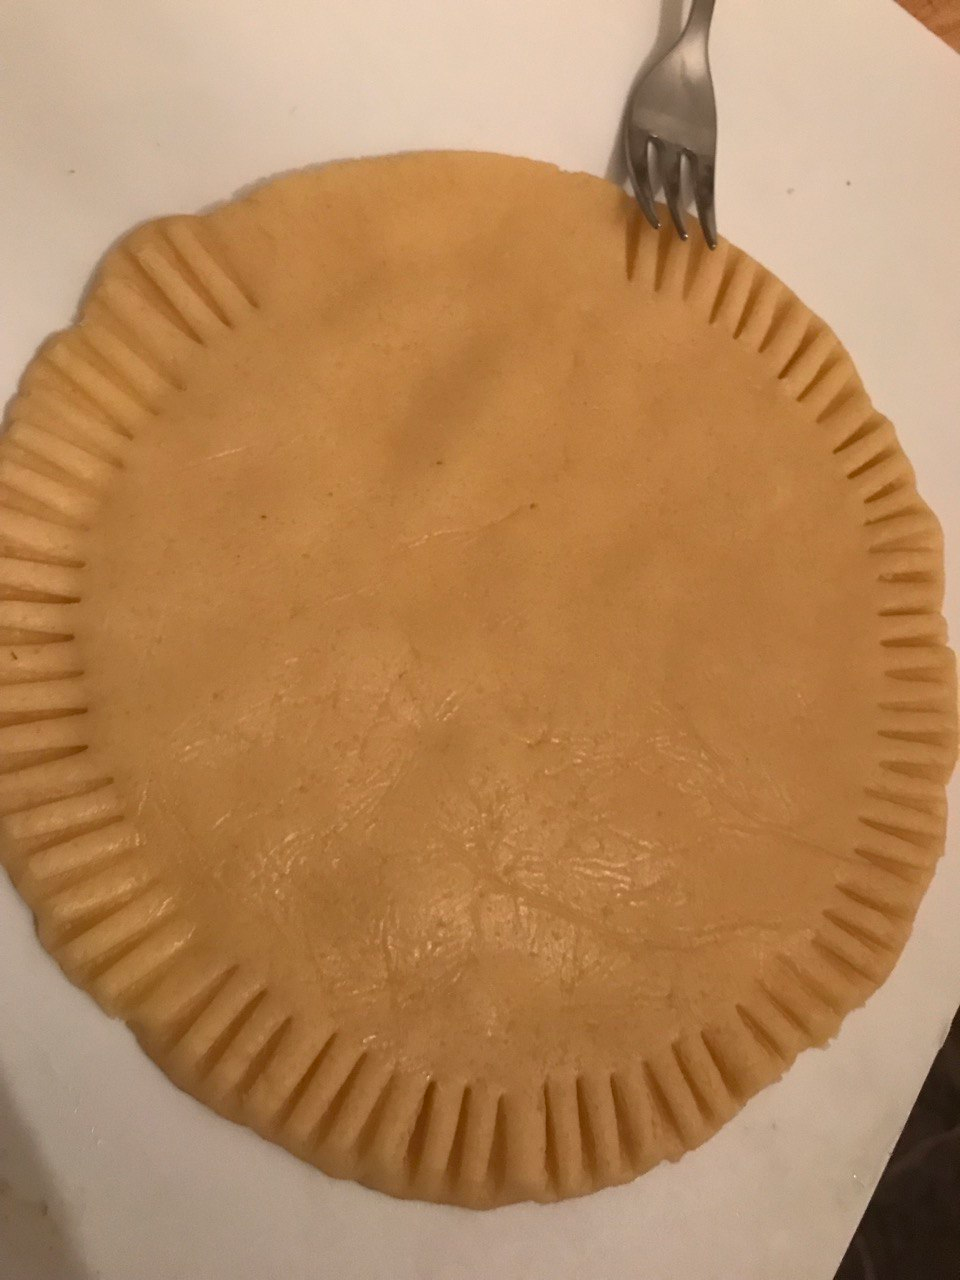
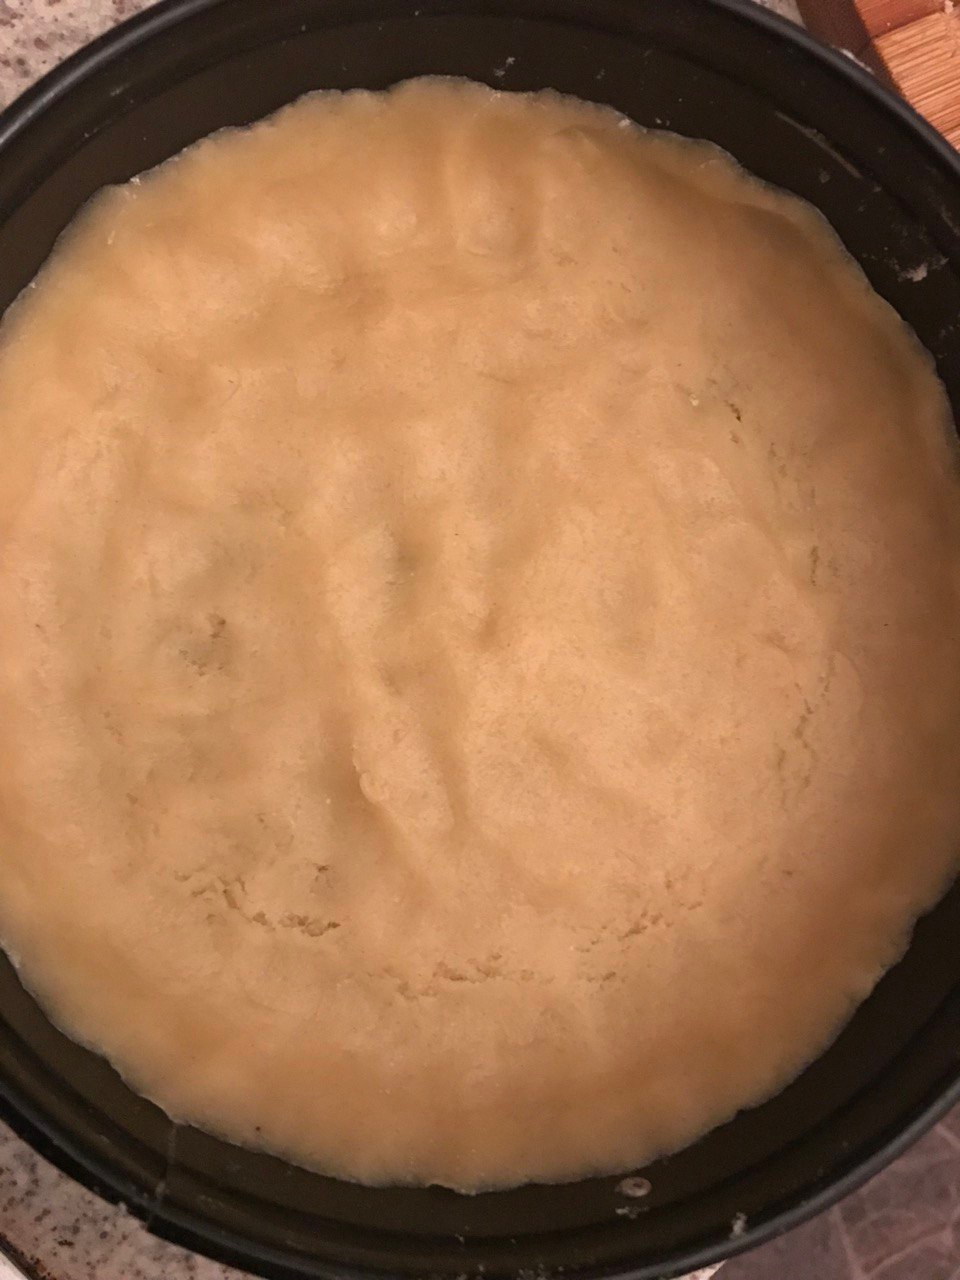
Prick the bottom of the cake tin a few times with a fork to prevent bubbles from forming during baking. Then pour in the apple mixture up to the raised edge. Next, place the prepared shortcrust pastry lid on top. If it has expanded slightly due to the fork decoration, simply trim it carefully around the edge – but do so gently so that the beautiful decoration is preserved and the lid fits neatly.
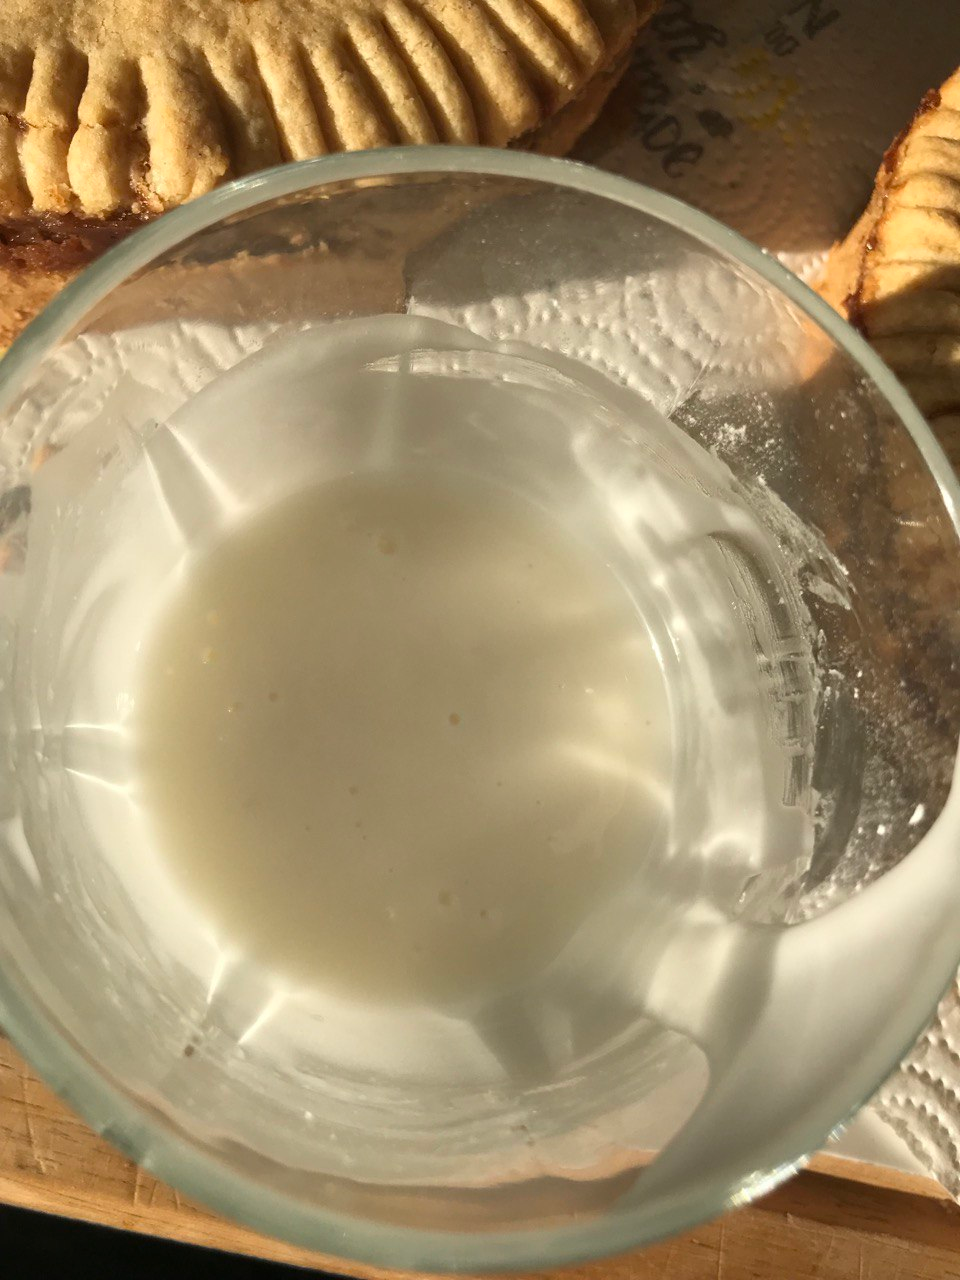
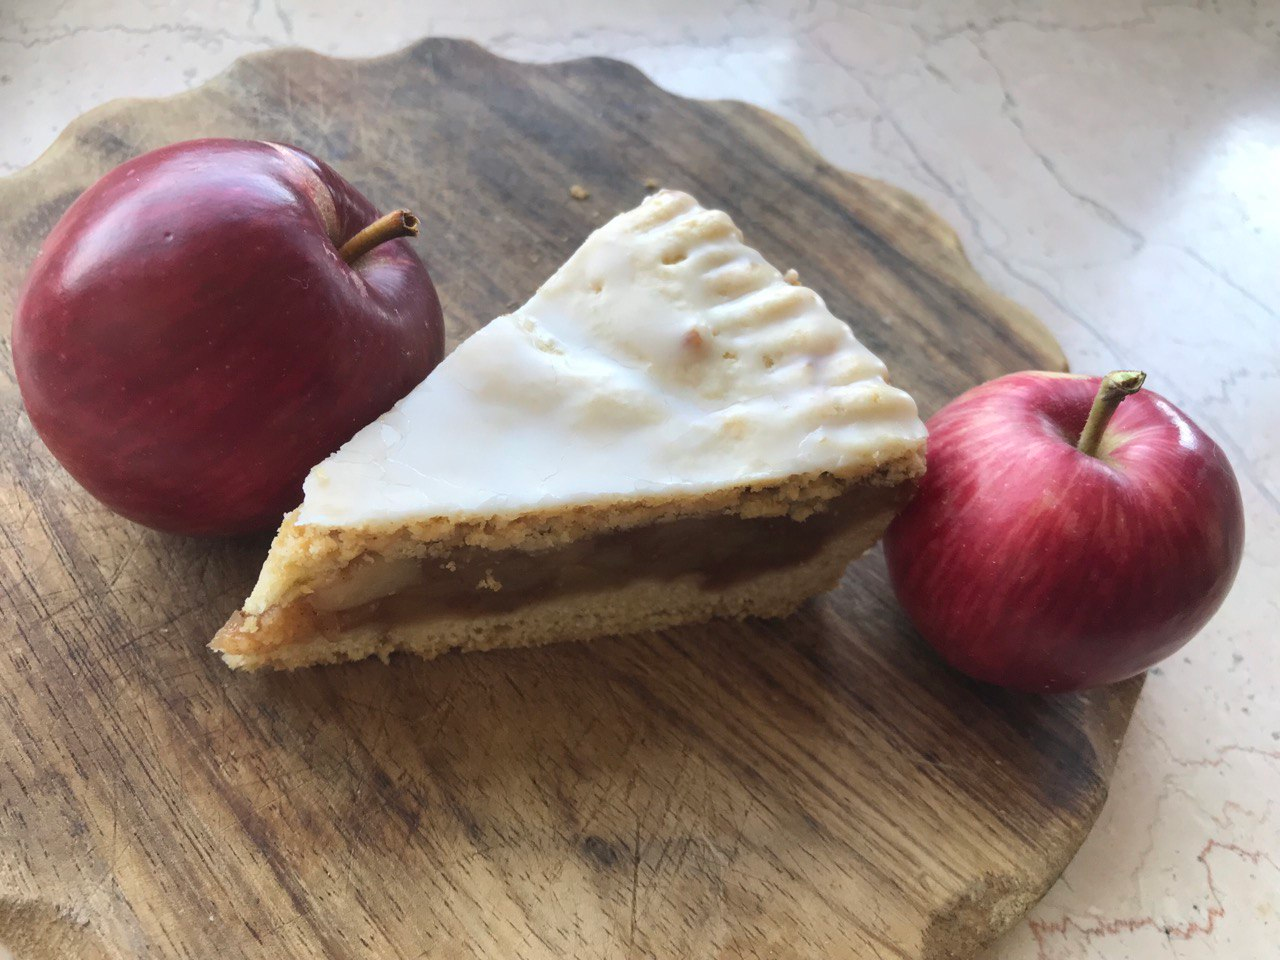
The cake went into the oven at 160 °C for about 60 minutes. After just a few minutes, the whole house began to smell wonderful – it was as if autumn had arrived in person: warm, spicy, inviting. After it had cooled down, I mixed together a lemon juice and icing sugar glaze and spread it generously over the top of the cake. And voilà – the delicious treat was ready!
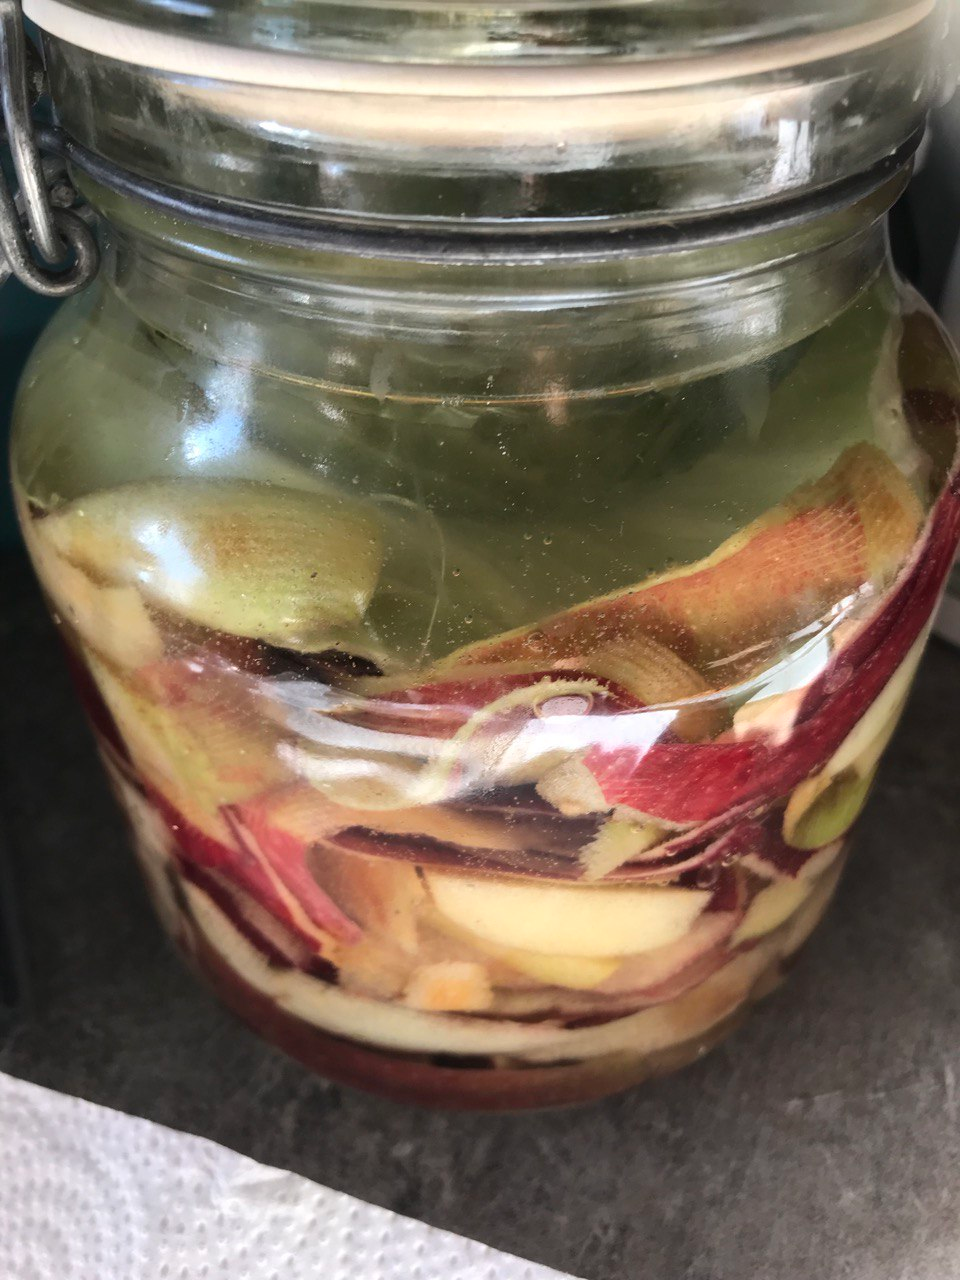
I'm telling you: this cake is absolutely amazing! I love eating it, and it was more than worth the effort. Of course, I didn't throw away the leftovers either: I put the core in the juicer and used the peel to make new apple cider vinegar. This way, every part of the apple is used – and gets another delicious use in a completely natural way.
I wish you a wonderful day – may it bring you everything you need. Be blessed and have a good day. Until next time 🌿
 Thank you for your support and for reading my post. 😘

DE
Hallo ihr Lieben, heute zeige ich euch eines meiner Lieblingsköstlichkeiten: den gedeckten Apfelkuchen 🍎🥧. Wenn der erste kühle Morgennebel über die Wiesen zieht und die Sonne sich golden durch die Baumkronen schiebt, weiß ich: Es ist Apfelzeit. Dieses Jahr haben die Apfelbäume besonders üppig getragen – pralle, süßsäuerliche Früchte, die in der Sonne glänzten wie kleine Edelsteine. Ich konnte nicht widerstehen und bin losgezogen, um sie selbst zu pflücken. Jeder Apfel, den ich in der Hand hielt, war wie ein kleines Versprechen: „Mach etwas Köstliches aus mir.“ Und das habe ich getan.
Was braucht ihr für diesen Kuchen? Zutaten für den Mürbeteig:
• 250 g Mehl • ½ Päckchen Backpulver • 80 g Zucker • 125 g Butter • 1 Ei • 1 Prise Salz • Ein Hauch Vanille
Für die Füllung:
• 1 kg Äpfel • 300 g Apfelmus • 30–50 g Zucker (je nach Süße der Äpfel) • 15 g Stärke • Zimt nach Geschmack
Und los geht’s!
Mein gedeckter Apfelkuchen – ein Gedicht aus Mürbeteig und Zimtduft Die Basis bildet ein klassischer Mürbeteig – schön buttrig, mürbe und doch stabil genug, um die saftige Füllung zu halten. Ich habe ihn mit einem Hauch Vanille verfeinert, denn das hebt die Fruchtigkeit der Äpfel besonders hervor. Alle Zutaten in eine Schüssel geben und durch kneten.
Für die Füllung habe ich meine frisch gepflückten Äpfel geschält, entkernt und in feine Würfel geschnitten. Dann habe ich sie in eine Pfanne gegeben – zusammen mit einem großzügigen Löffel braunem Zucker, einem Schuss Zitronensaft und etwas Butter, um alles leicht zu karamellisieren. Zum Schluss habe ich noch Zimt hinzugefügt. Viel Zimt. Dann habe ich das Apfelmus mit 15 g Stärke vermischt und zur Apfelmischung gegeben. Denn was wäre ein Apfelkuchen ohne dieses warme, würzige Aroma, das sofort Kindheitserinnerungen weckt?
Nachdem die Apfelmasse leicht karamellisiert war, durfte sie sich auf dem ausgerollten Teig in der Kuchenform ausbreiten. Dann kam der Deckel – ebenfalls aus Mürbeteig. Diesen hatte ich zuvor in einer mit Frischhaltefolie ausgelegten Form ausgerollt, gestürzt und am Rand mit einer Gabel liebevoll verziert. So kann der Dampf entweichen, und der Kuchen bleibt beim Backen schön in Form.
Den Deckel habe ich zunächst zur Seite gestellt – bei wärmeren Temperaturen empfiehlt es sich, ihn kurz in den Kühlschrank zu legen, damit er schön formstabil bleibt. Anschließend habe ich den Boden der Kuchenform ausgekleidet: Dafür den Teig gleichmäßig andrücken und einen schönen, hohen Rand formen, damit der Deckel später gut abschließt und die Füllung sicher eingeschlossen ist.
Den Boden der Kuchenform ein paar Mal mit einer Gabel einstechen, damit sich beim Backen keine Blasen bilden. Anschließend die Apfelmasse bis zum hochgezogenen Rand einfüllen. Dann kommt der vorbereitete Deckel aus Mürbeteig darauf. Falls er sich durch die Gabelverzierung etwas ausgedehnt hat, einfach vorsichtig am Rand zurechtschneiden – aber mit Gefühl, damit die schöne Verzierung erhalten bleibt und der Deckel sauber abschließt.
Der Kuchen wanderte für etwa 60 Minuten bei 160 °C in den Ofen. Schon nach wenigen Minuten begann das ganze Haus zu duften – es war, als würde der Herbst persönlich Einzug halten: warm, würzig, einladend.
Nach dem Abkühlen habe ich einen Zuckerguss aus Zitronensaft und Puderzucker angerührt und ihn großzügig über den Deckel des Kuchens verteilt. Und voilà – fertig ist die Köstlichkeit!
Ich sage euch: Dieser Kuchen ist ein echter Hammer! Ich esse ihn unglaublich gerne, und jede Mühe hat sich mehr als gelohnt. Auch die Reste habe ich natürlich nicht weggeworfen: Den Strunk habe ich in den Entsafter gegeben, und die Schalen habe ich angesetzt für neuen Apfelessig. So wird wirklich alles vom Apfel verwertet – und bekommt auf ganz natürliche Weise einen weiteren, köstlichen Nutzen.
Ich wünsche euch einen wundervollen Tag – möge er euch reich beschenken mit allem, was ihr braucht. Seid gesegnet und kommt gut durch den Tag. Bis zum nächsten Mal 🌿
Vielen Dank für Ihre Unterstützung und dafür, dass Ihr meinen Beitrag gelesen habt. 😘 💚