**
ESPAÑOL
**
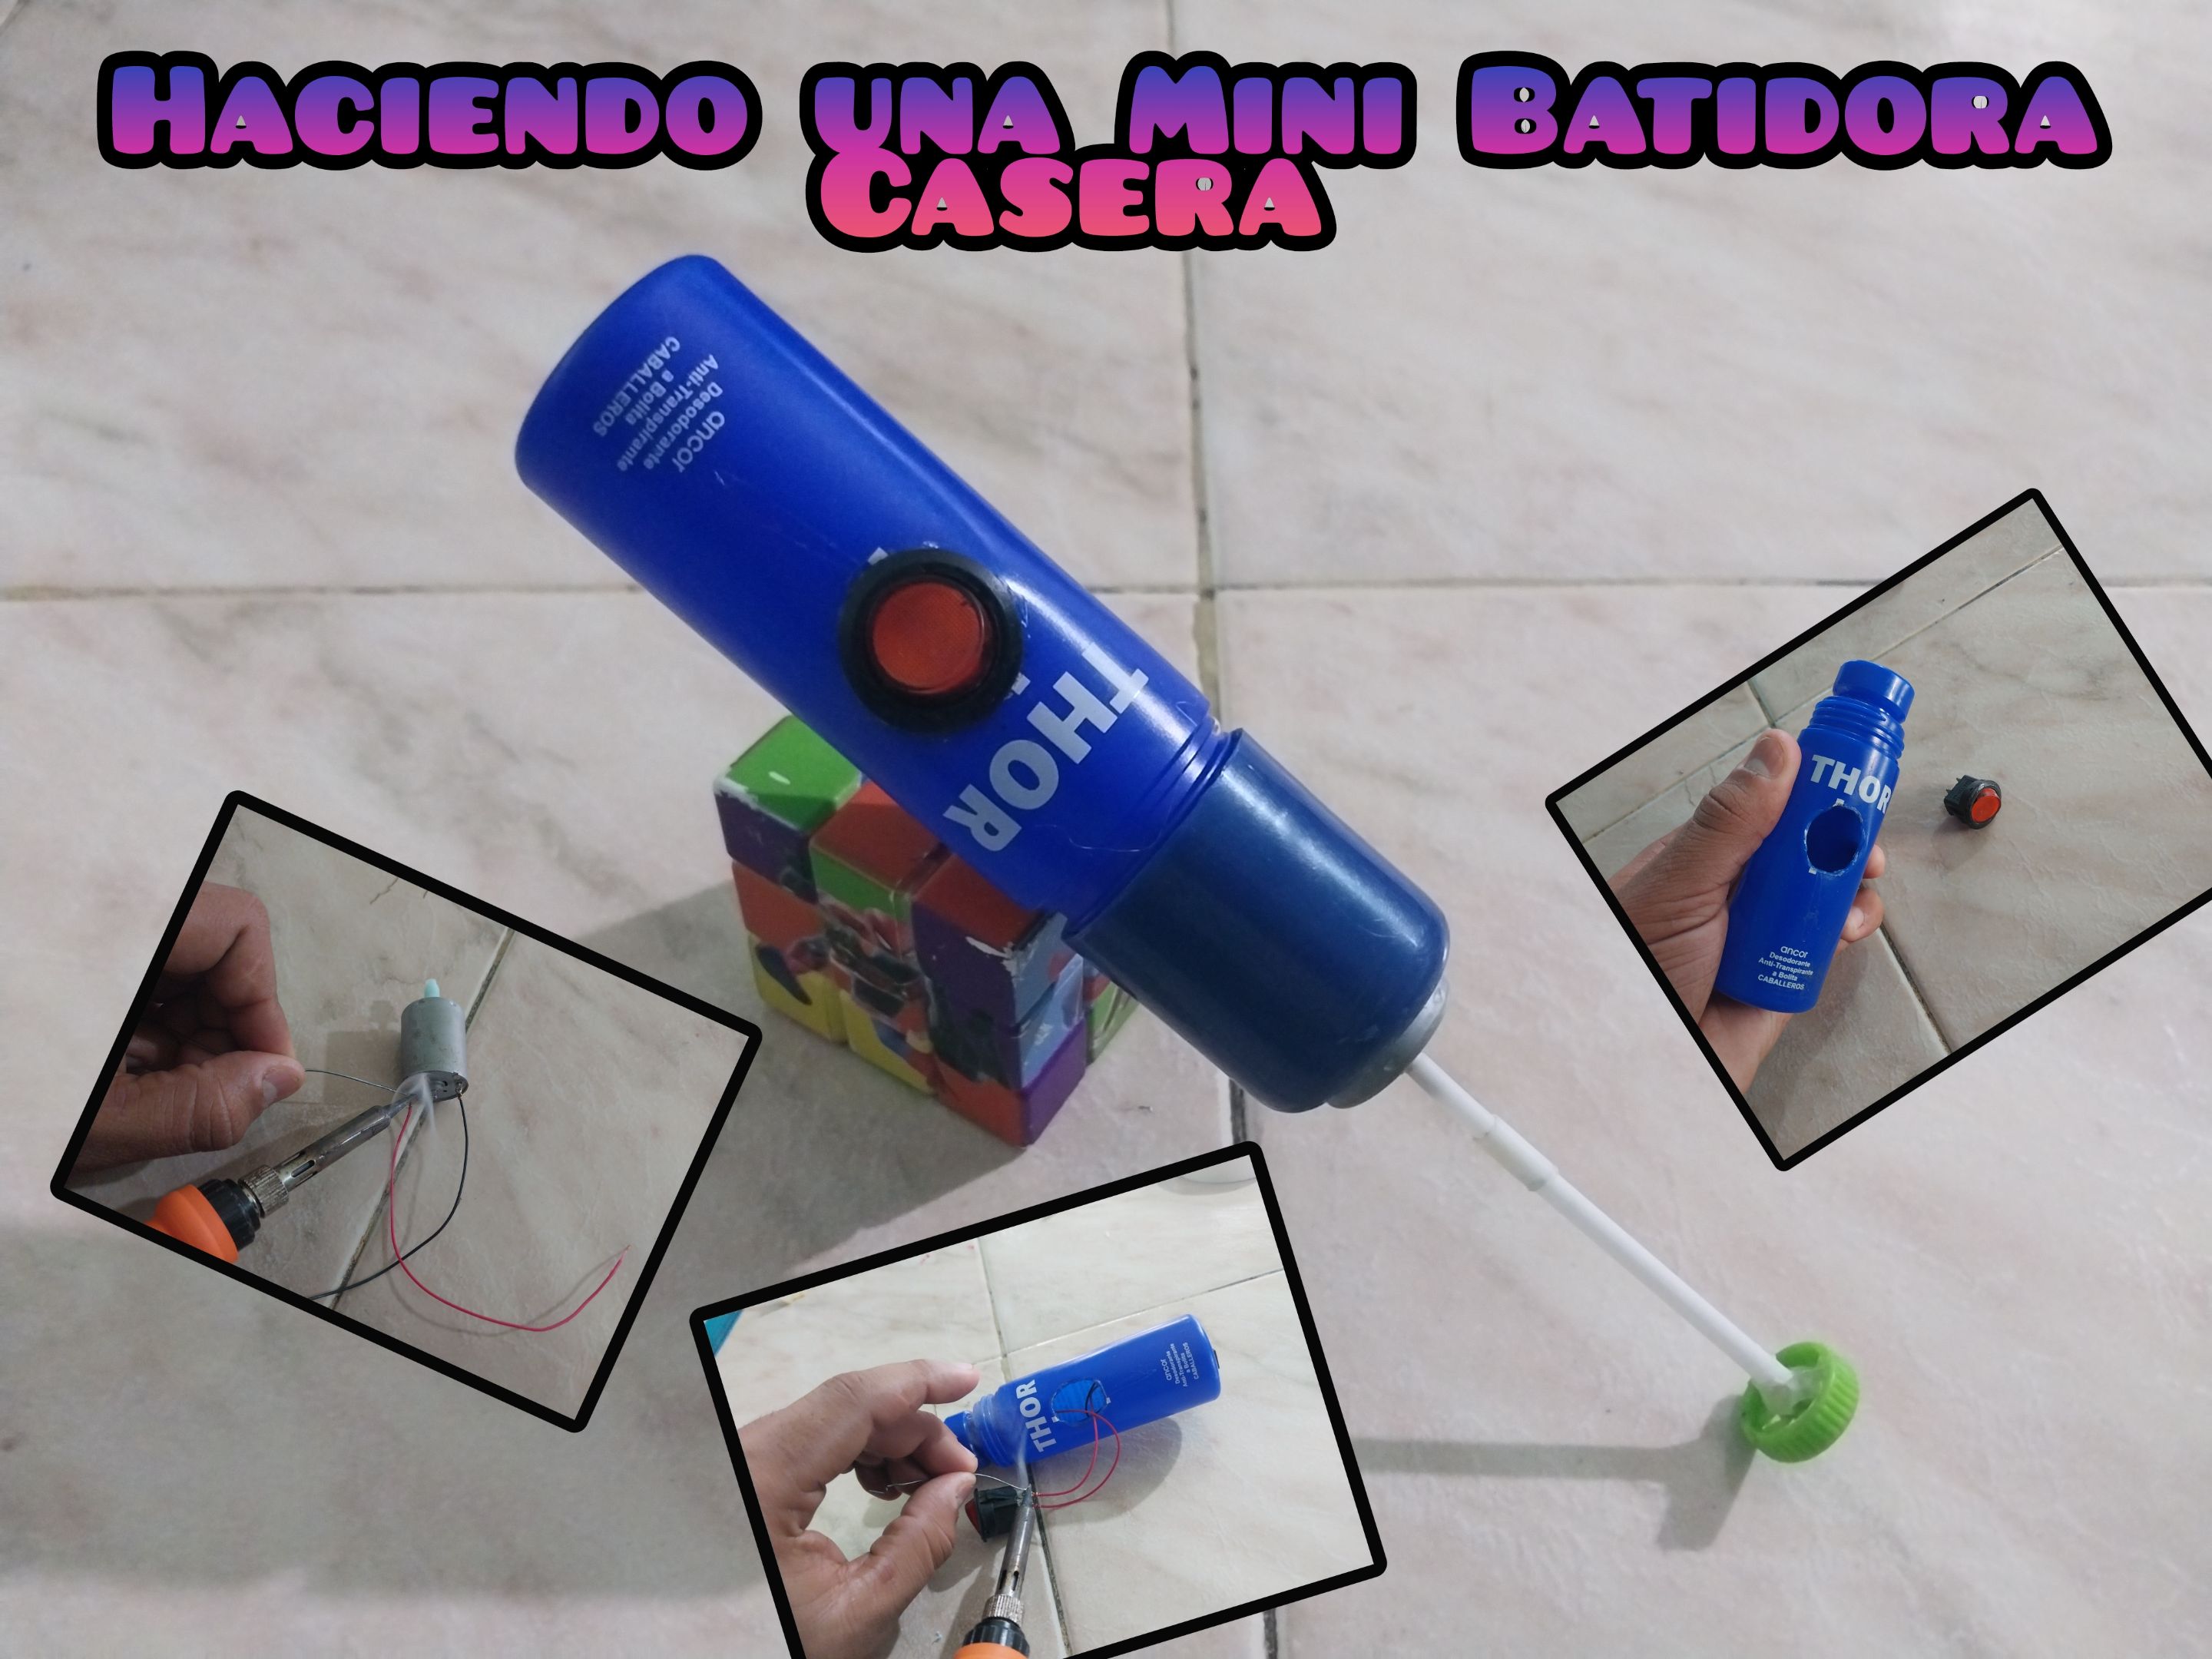
Hola amigos de la comunidad de Diyhub, ¿cómo están? Dios les bendiga. Espero que se encuentren muy bien y que la estén pasando increíble. En esta oportunidad les quiero compartir algo que hice recientemente, y bueno, la verdad me pareció una idea muy creativa, muy fácil y práctica de hacer, y sin duda algo que puede ser muy útil en cada hogar. Se trata de una "Mini Batidora Casera". Y bueno, antes de explicarles el paso a paso, les quiero compartir los materiales que utilicé...
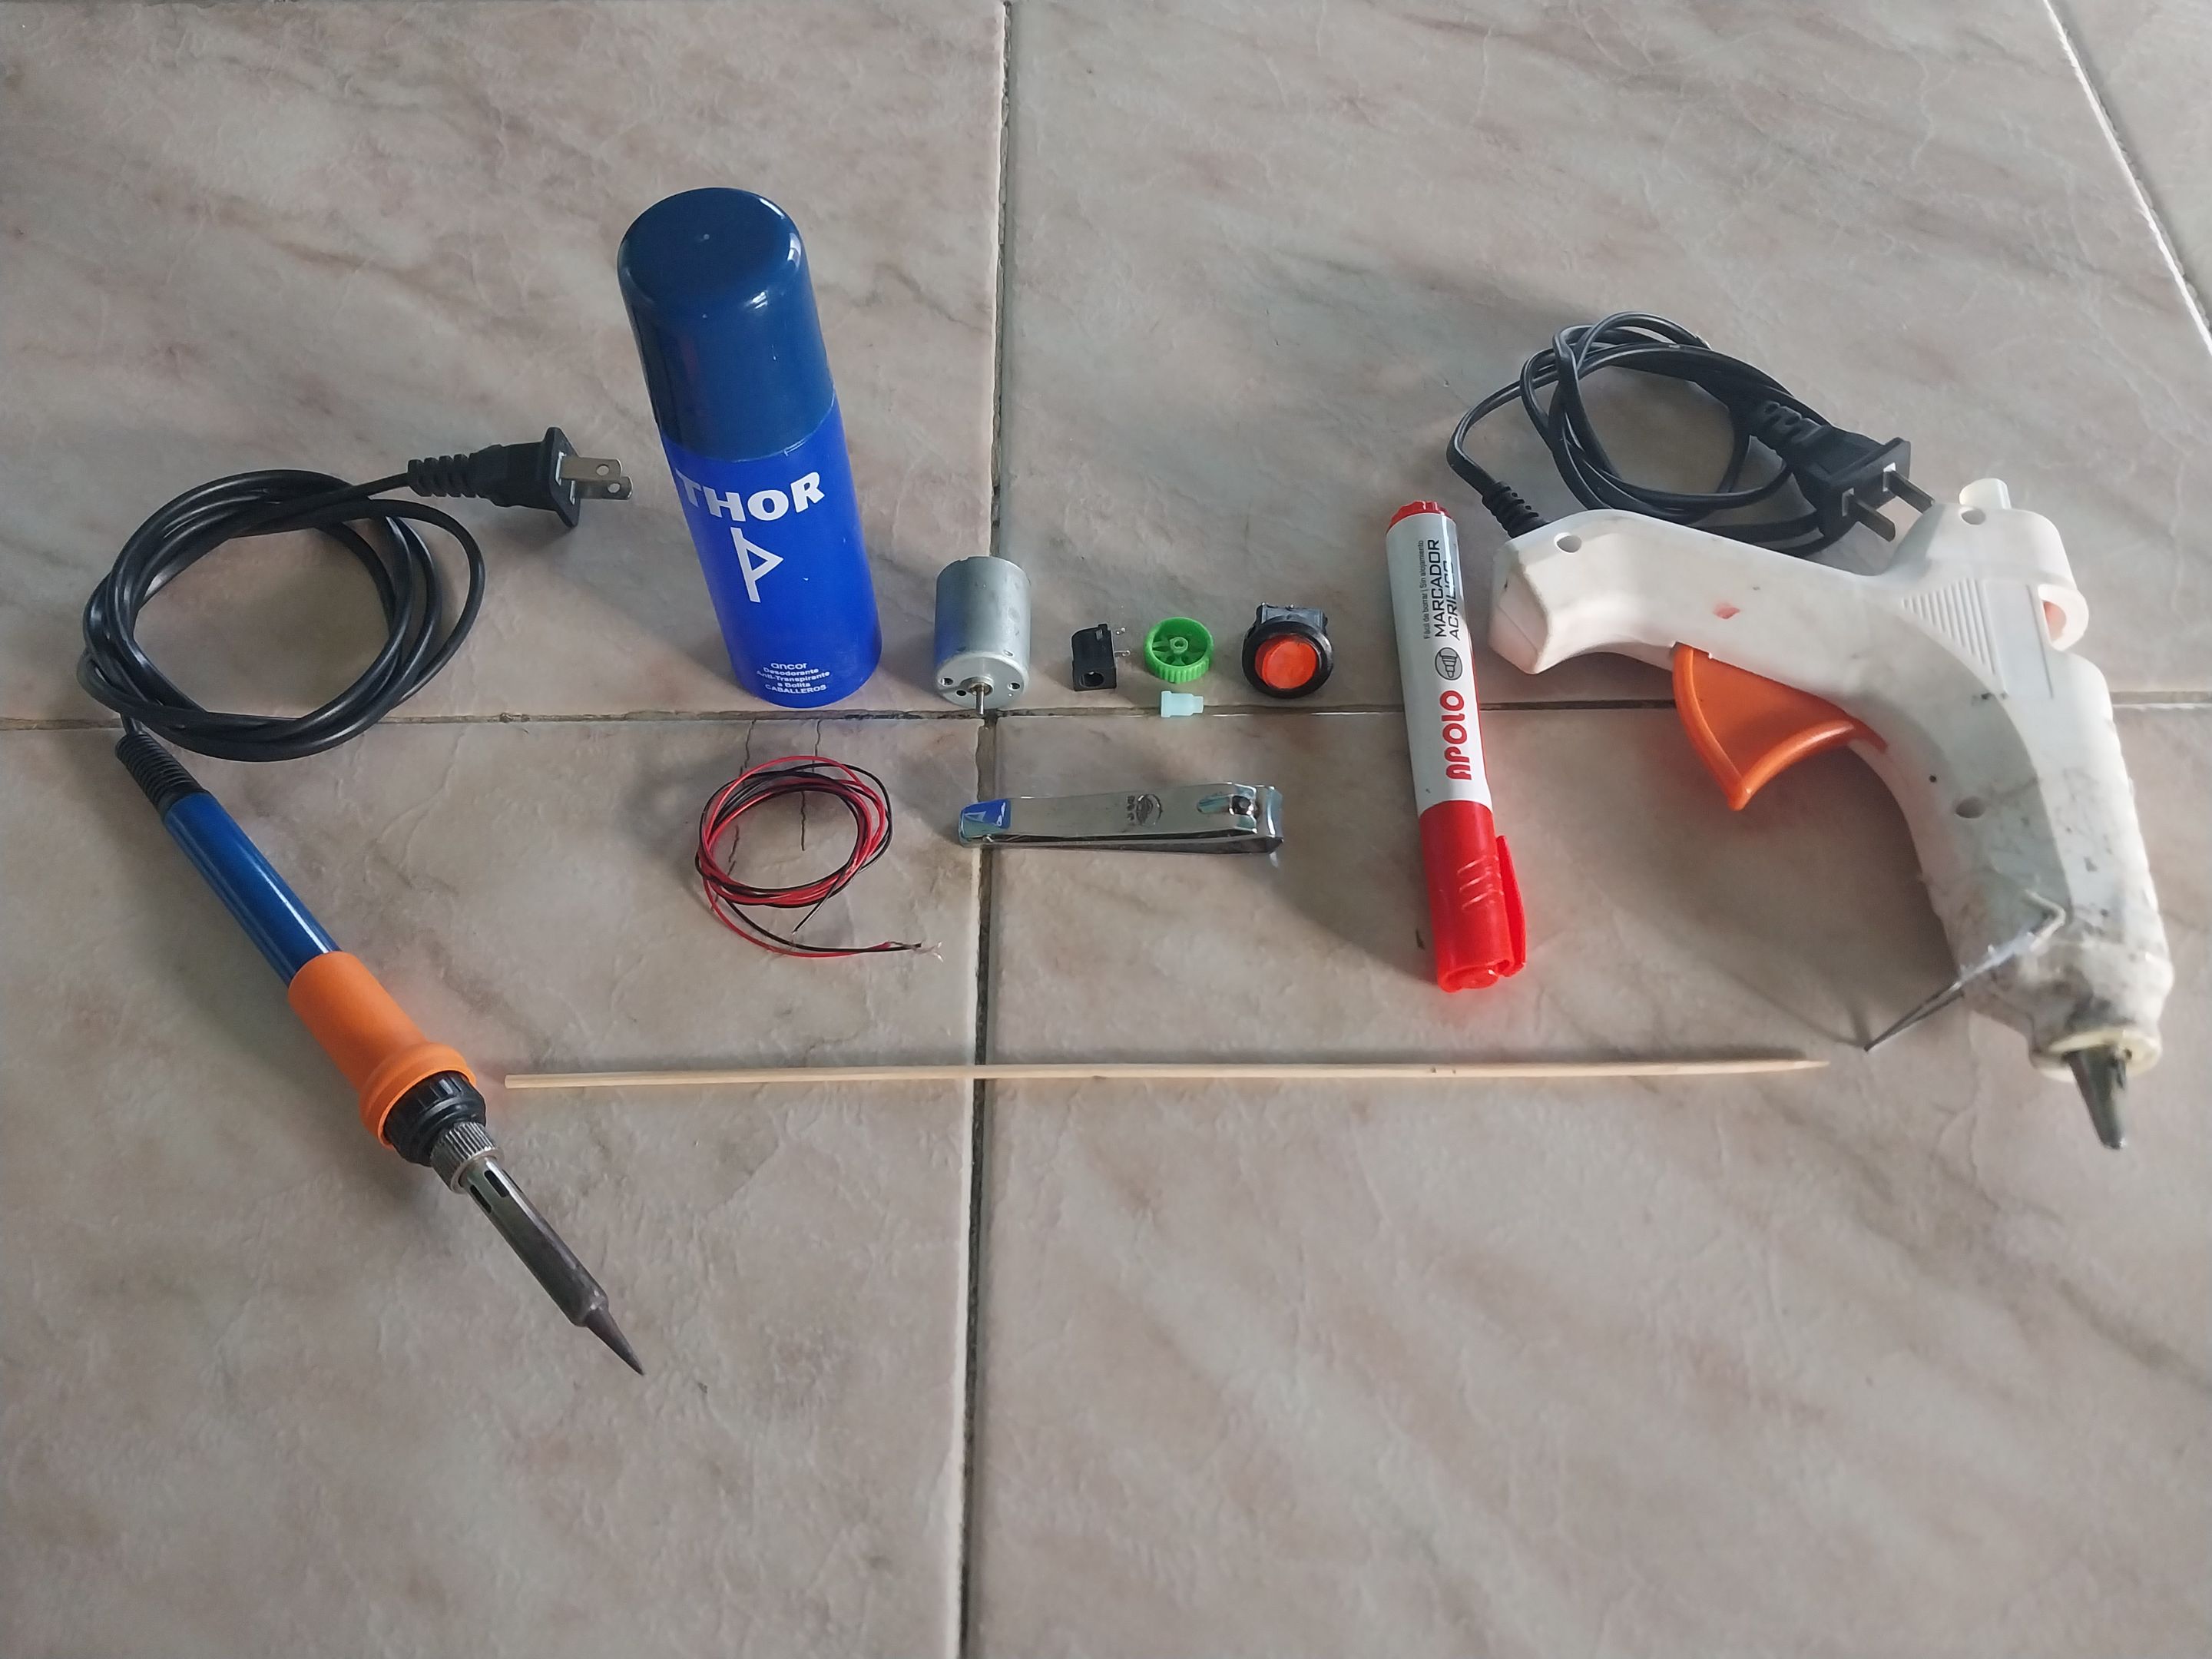
Utilice un cautín, un poco de estaño, una pistola de silicón, un envase de desodorante vacio, un poco de cable, un motorcito, un conector hembra de entrada de 9 voltios, un cortauñas, una pequeña rueda, un encendedor, un marcador, un mini adaptador, y un palillo.
**
ENGLISH
**
Hello friends of the Diyhub community, how are you? God bless you. I hope you're all doing well and having a wonderful time. This time, I want to share something I made recently. I thought it was a very creative idea, very easy and practical to make, and definitely something that can be very useful in every home. It's a "Homemade Mini Mixer." Well, before explaining the step-by-step instructions, I want to share the materials I used...
I used a soldering iron, some solder, a hot glue gun, an empty deodorant container, some wire, a small motor, a 9-volt female connector, nail clippers, a small wheel, a lighter, a marker, a mini adapter, and a toothpick.
---
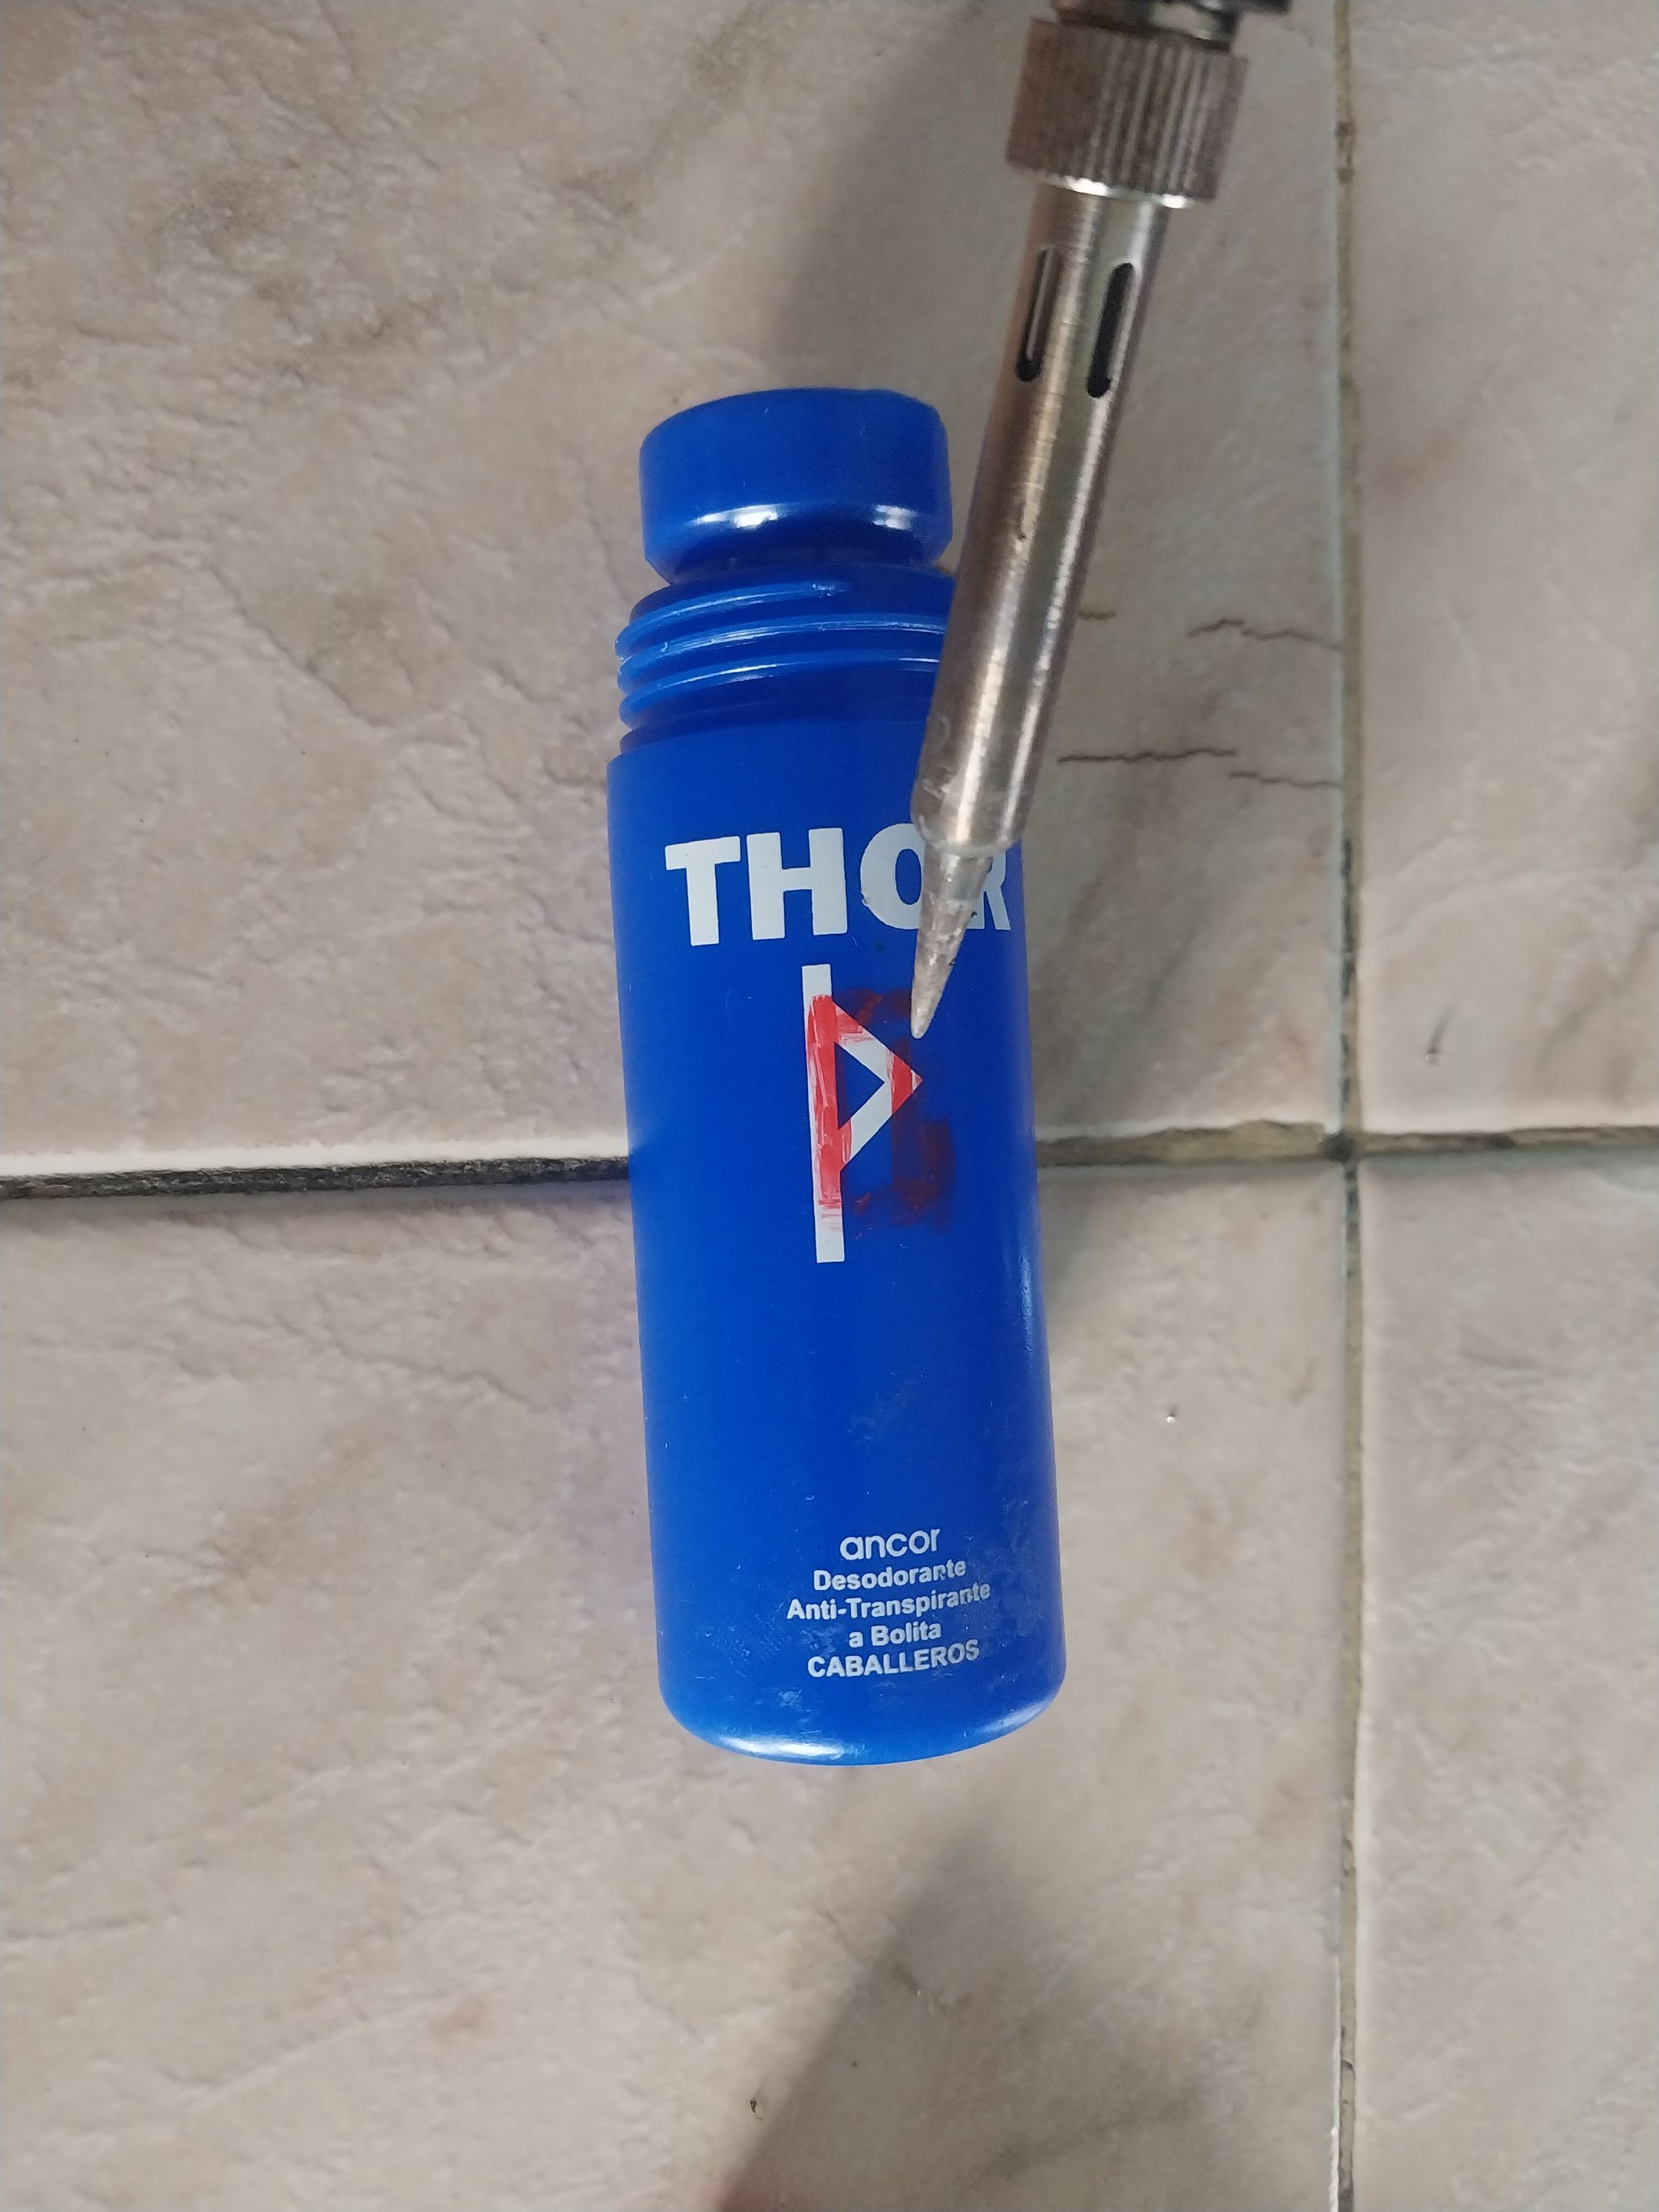
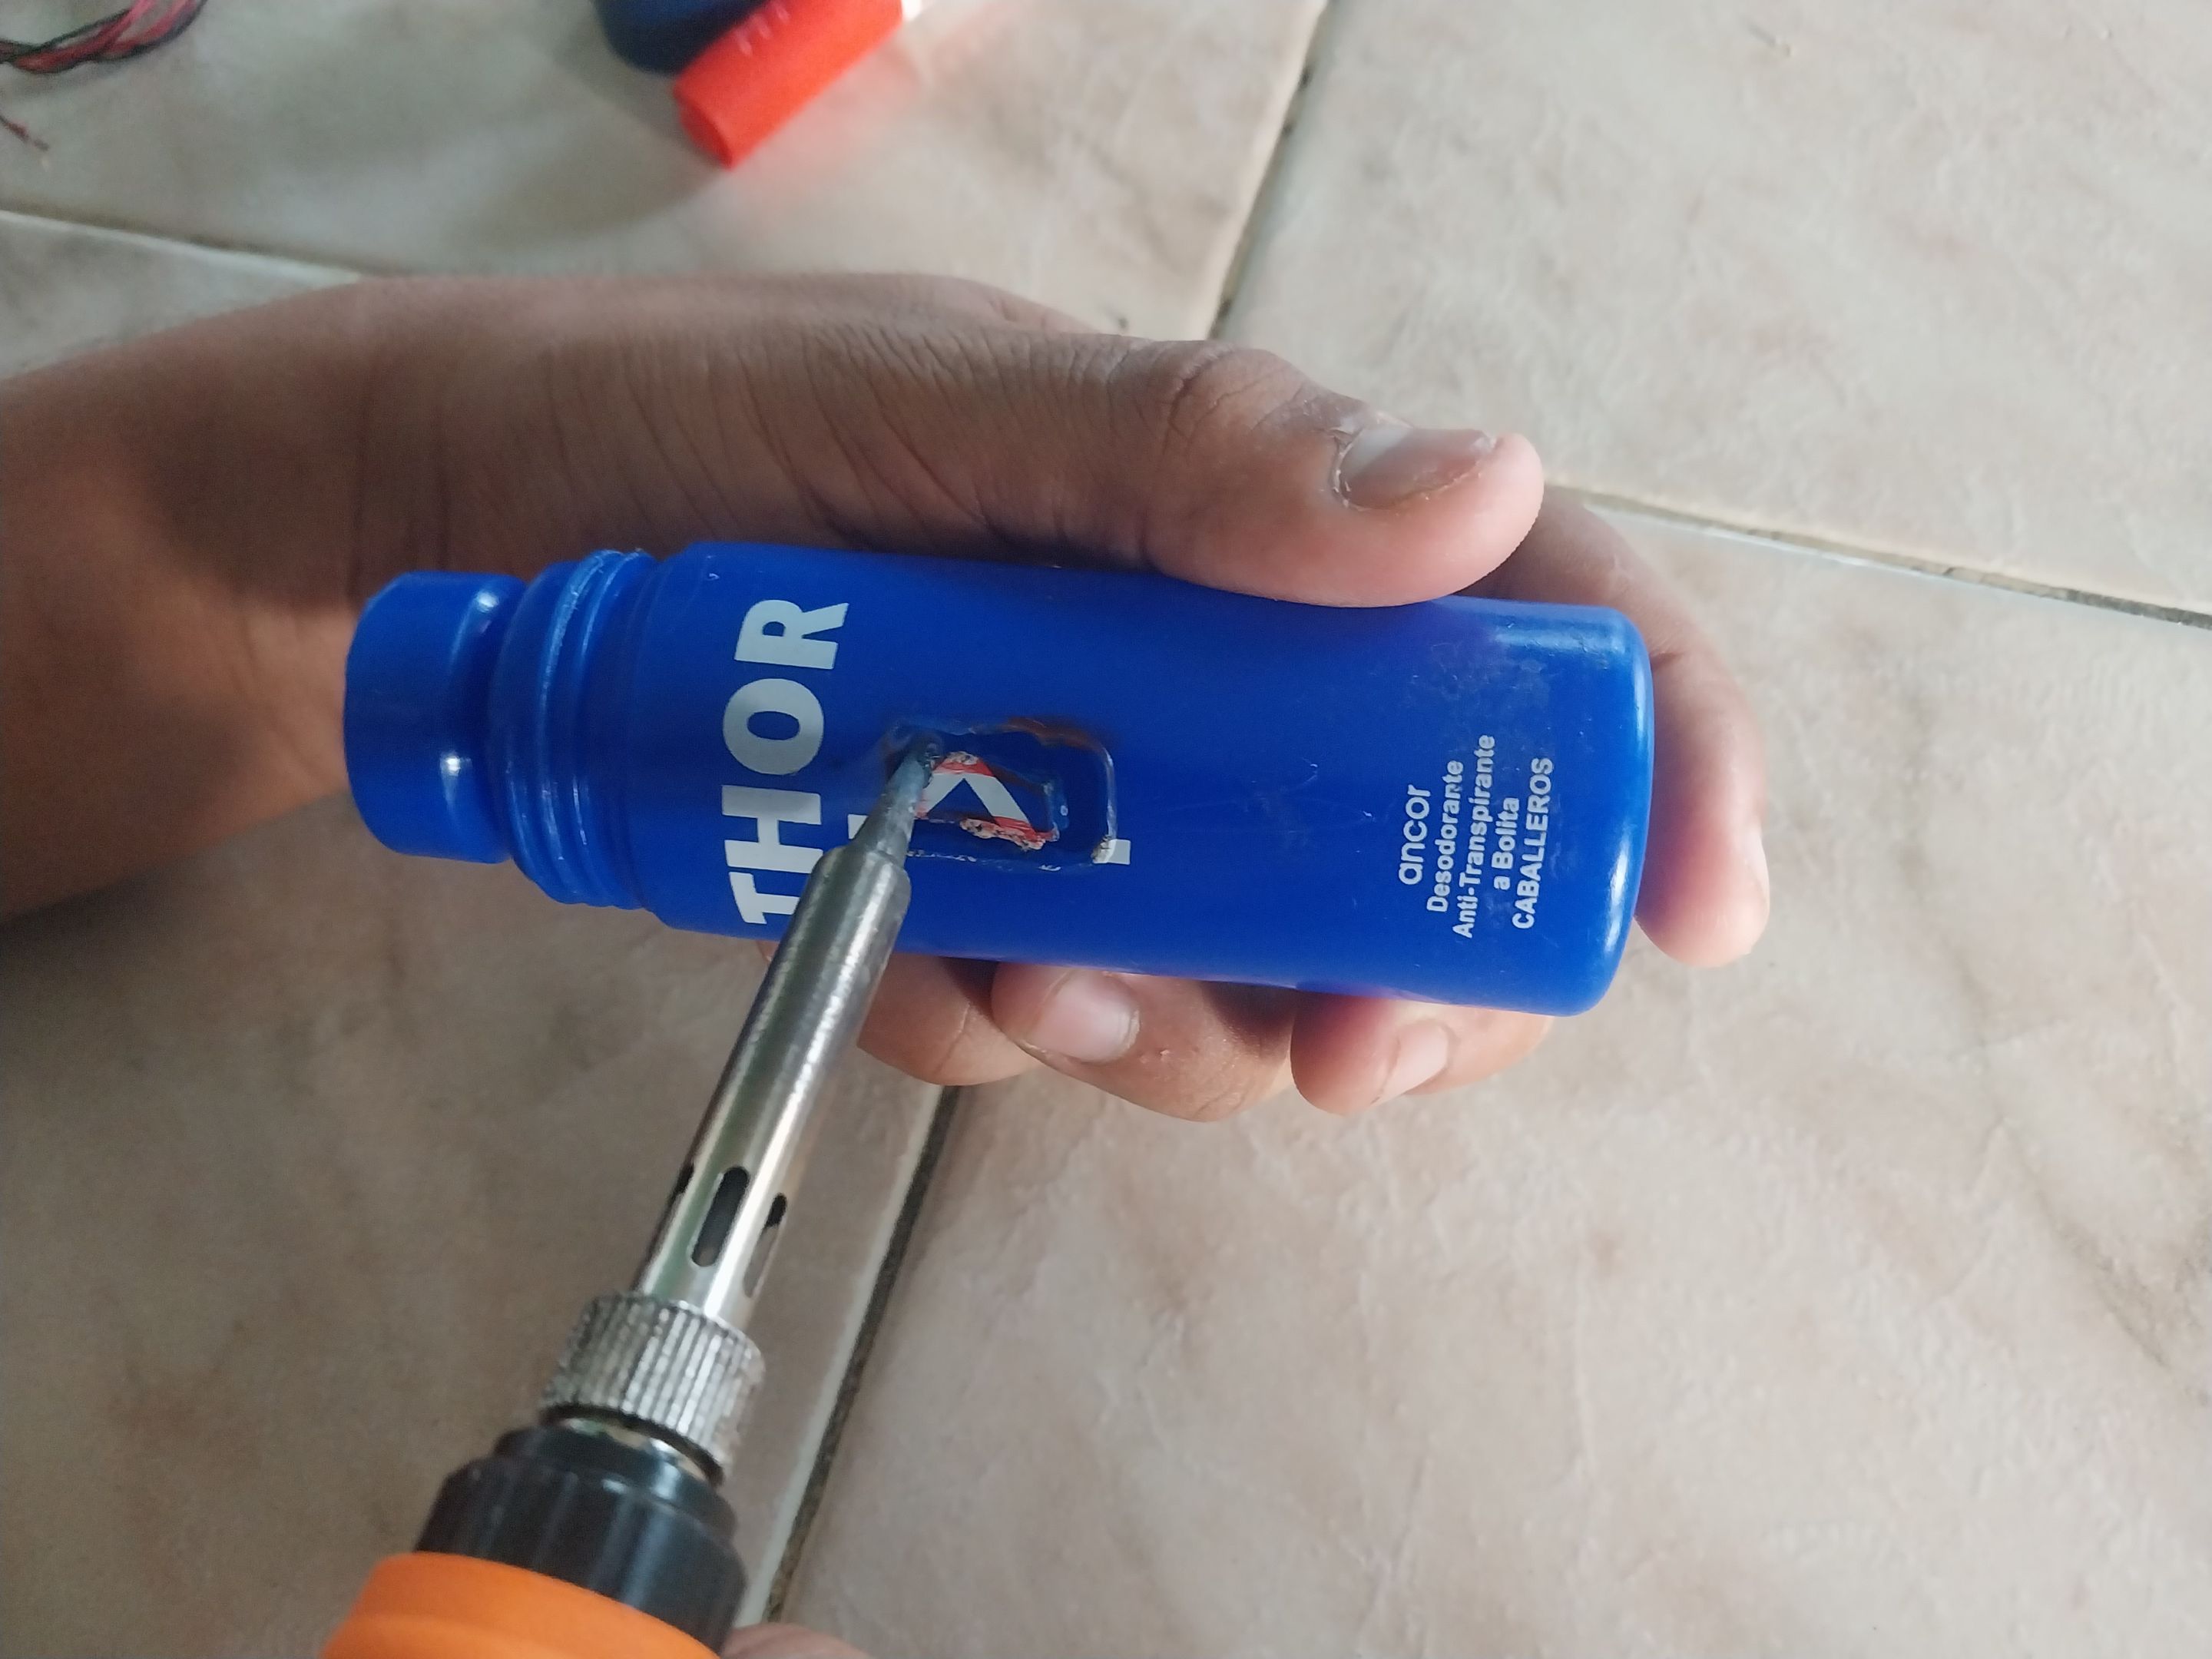
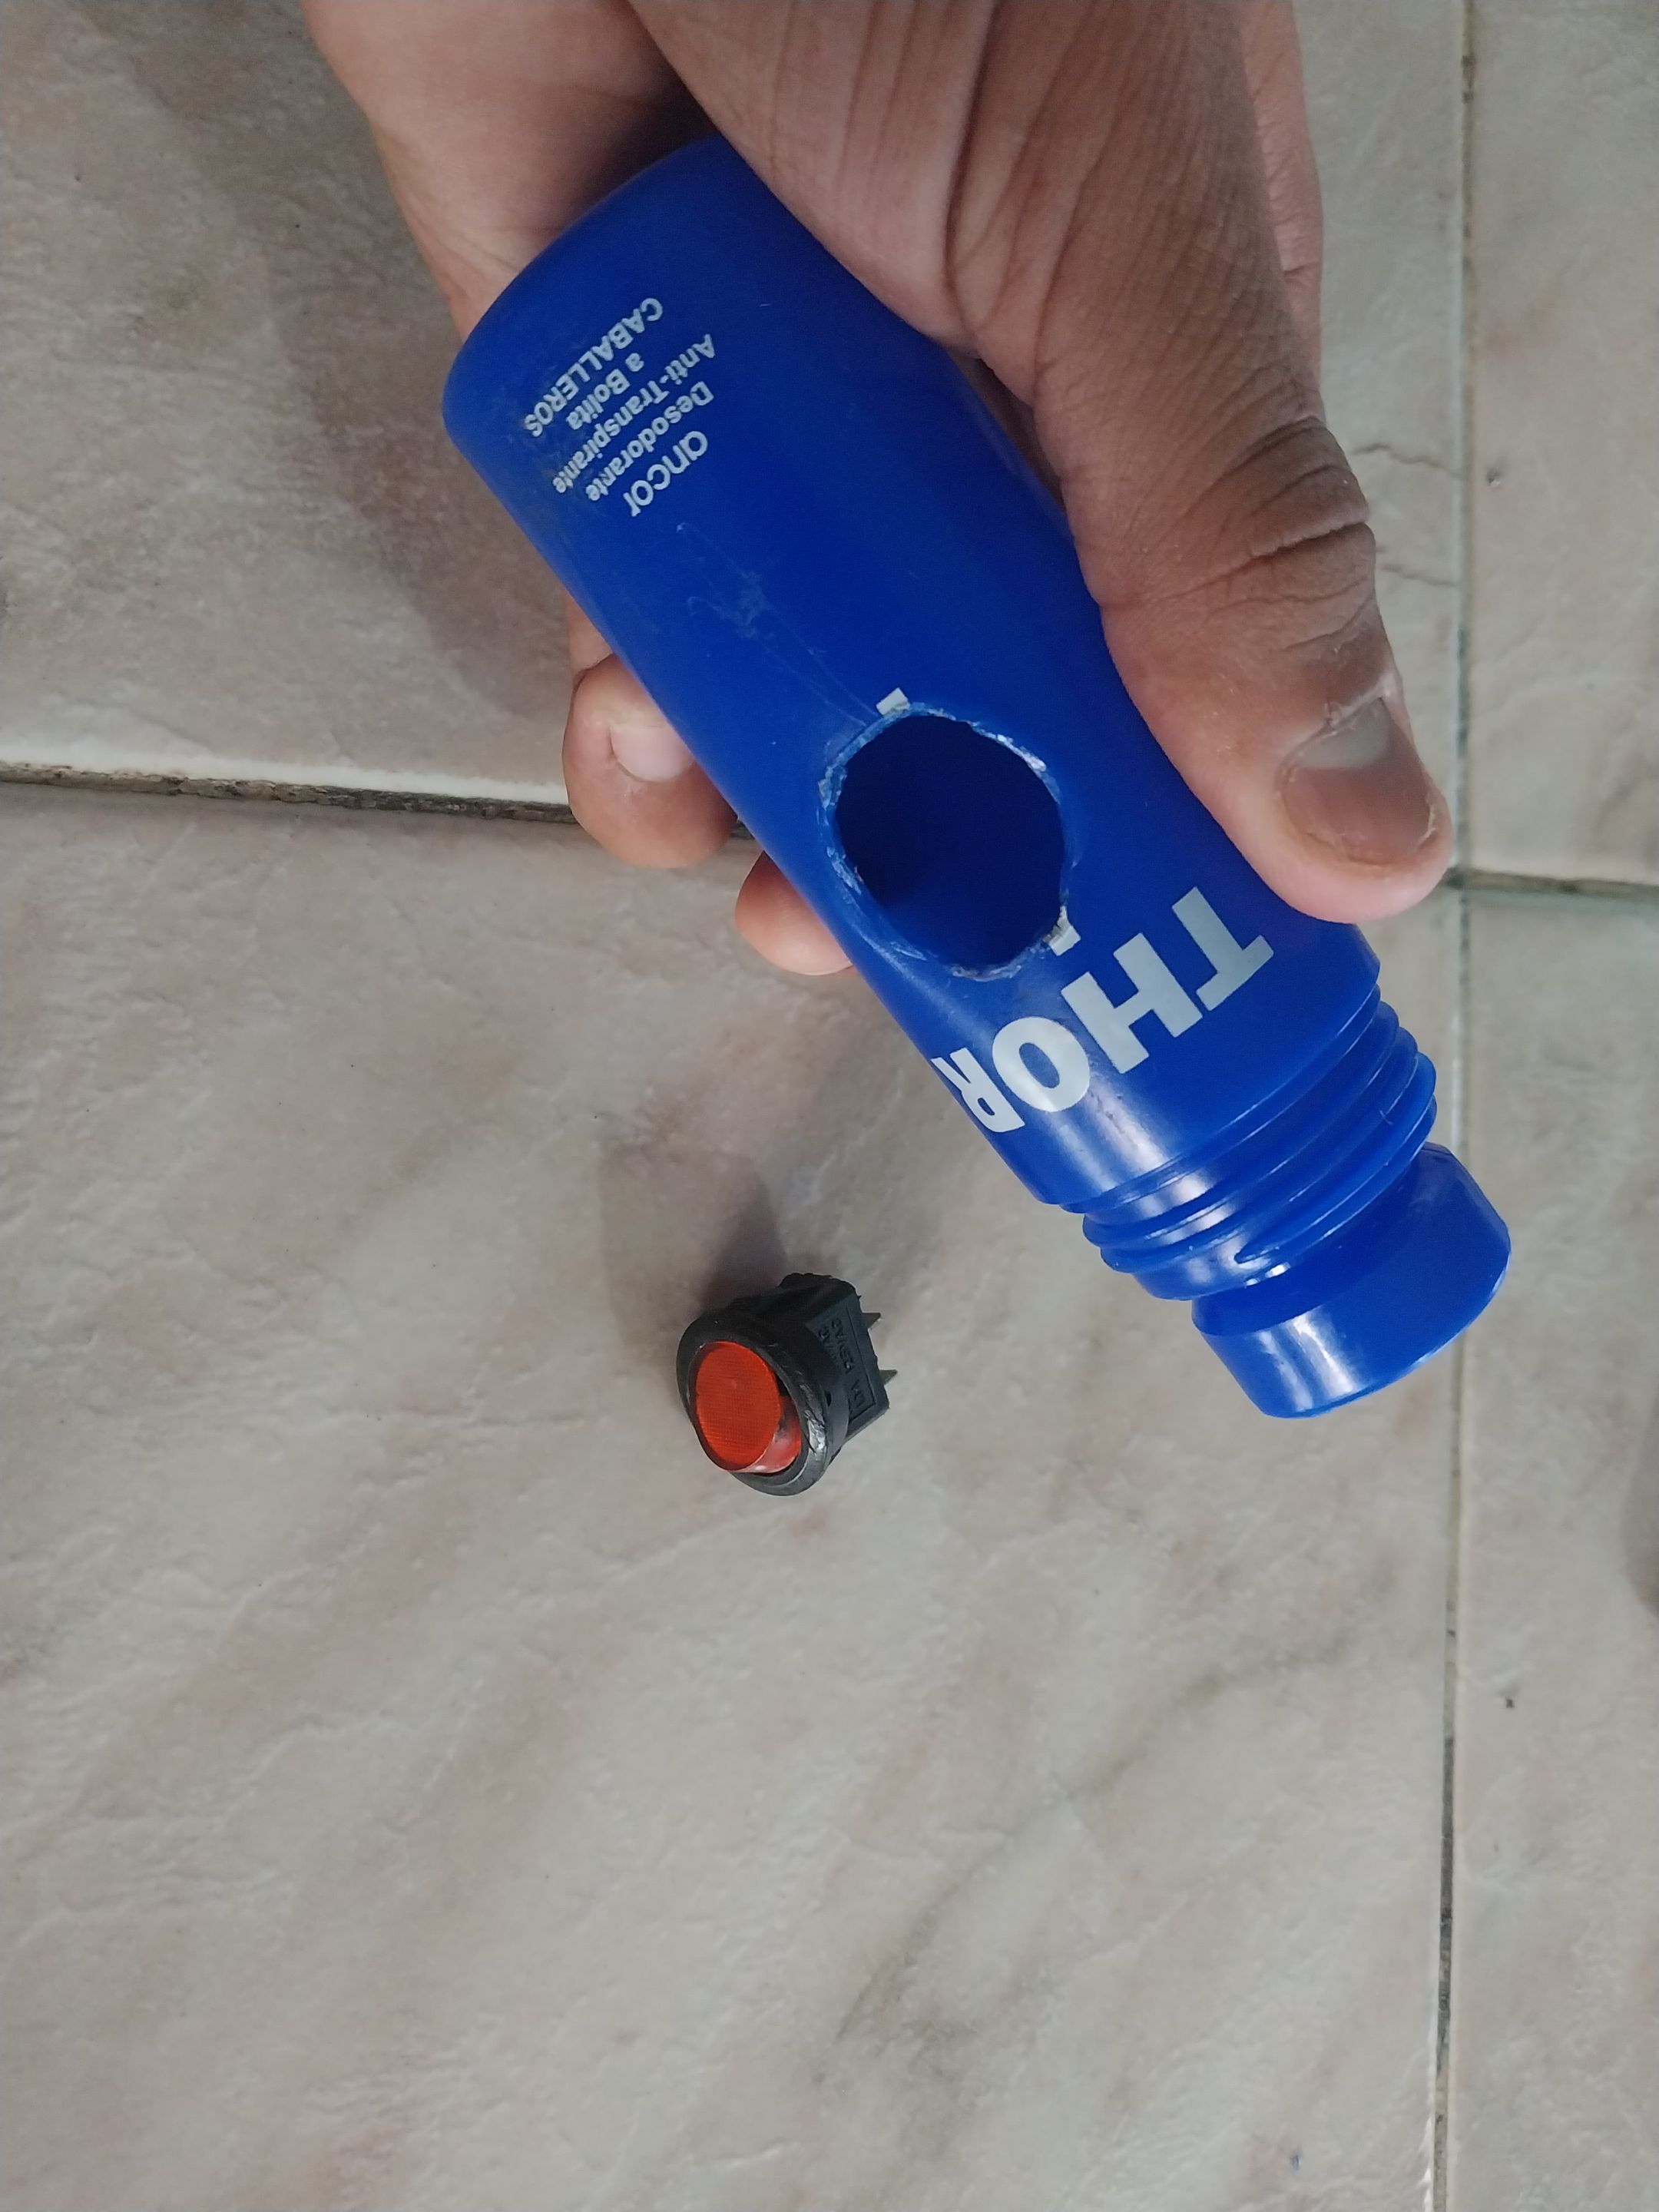
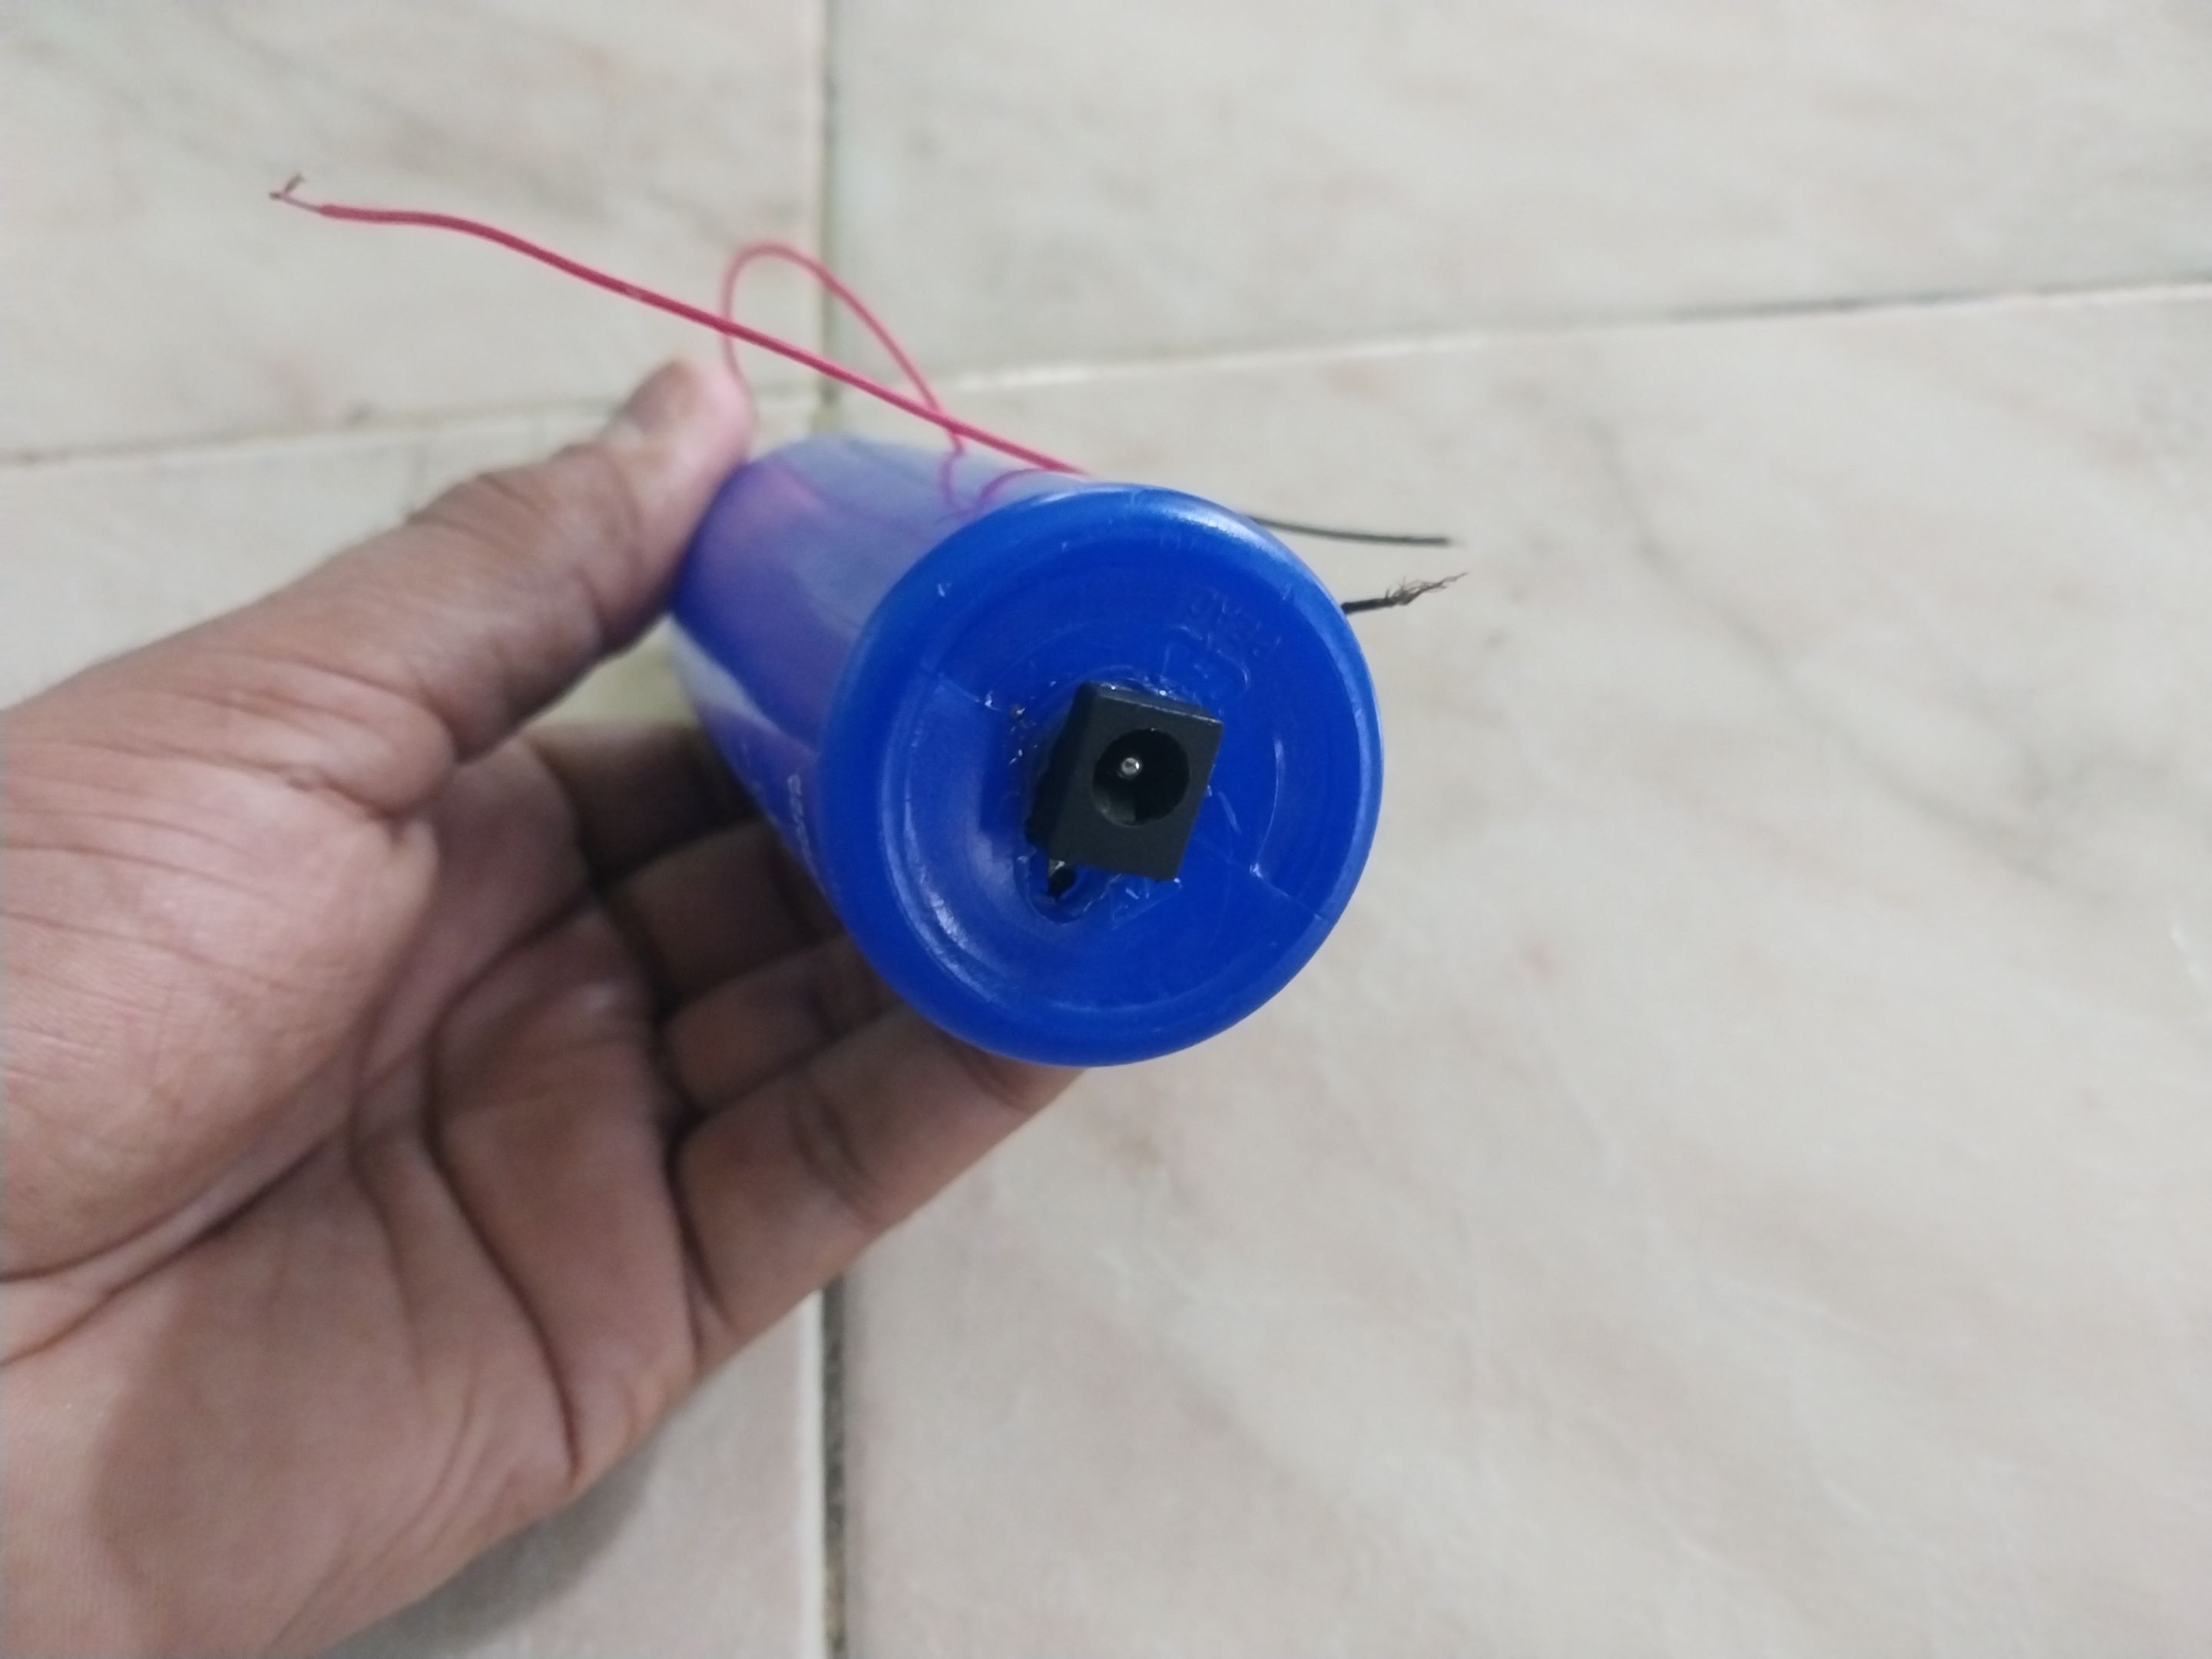
Ya con todos los materiales a la mano, procedí a empezar mi trabajo... Lo primero que hice fue tomar mi envase de desodorante, quitarle la tapa, y con ayuda del marcador marqué una pequeña guía en una de las partes superiores del envase, y con ayuda del cautín hice el orificio en donde iba a insertar el encendedor, luego lo redondie un poco hasta que quedo listo; luego procedí a hacer lo mismo en la parte de abajo del envase, hice una guía con el marcador, y hice un orificio con ayuda del cautín, y en ese orificio iba a insertar el conector hembra de 9 voltios.
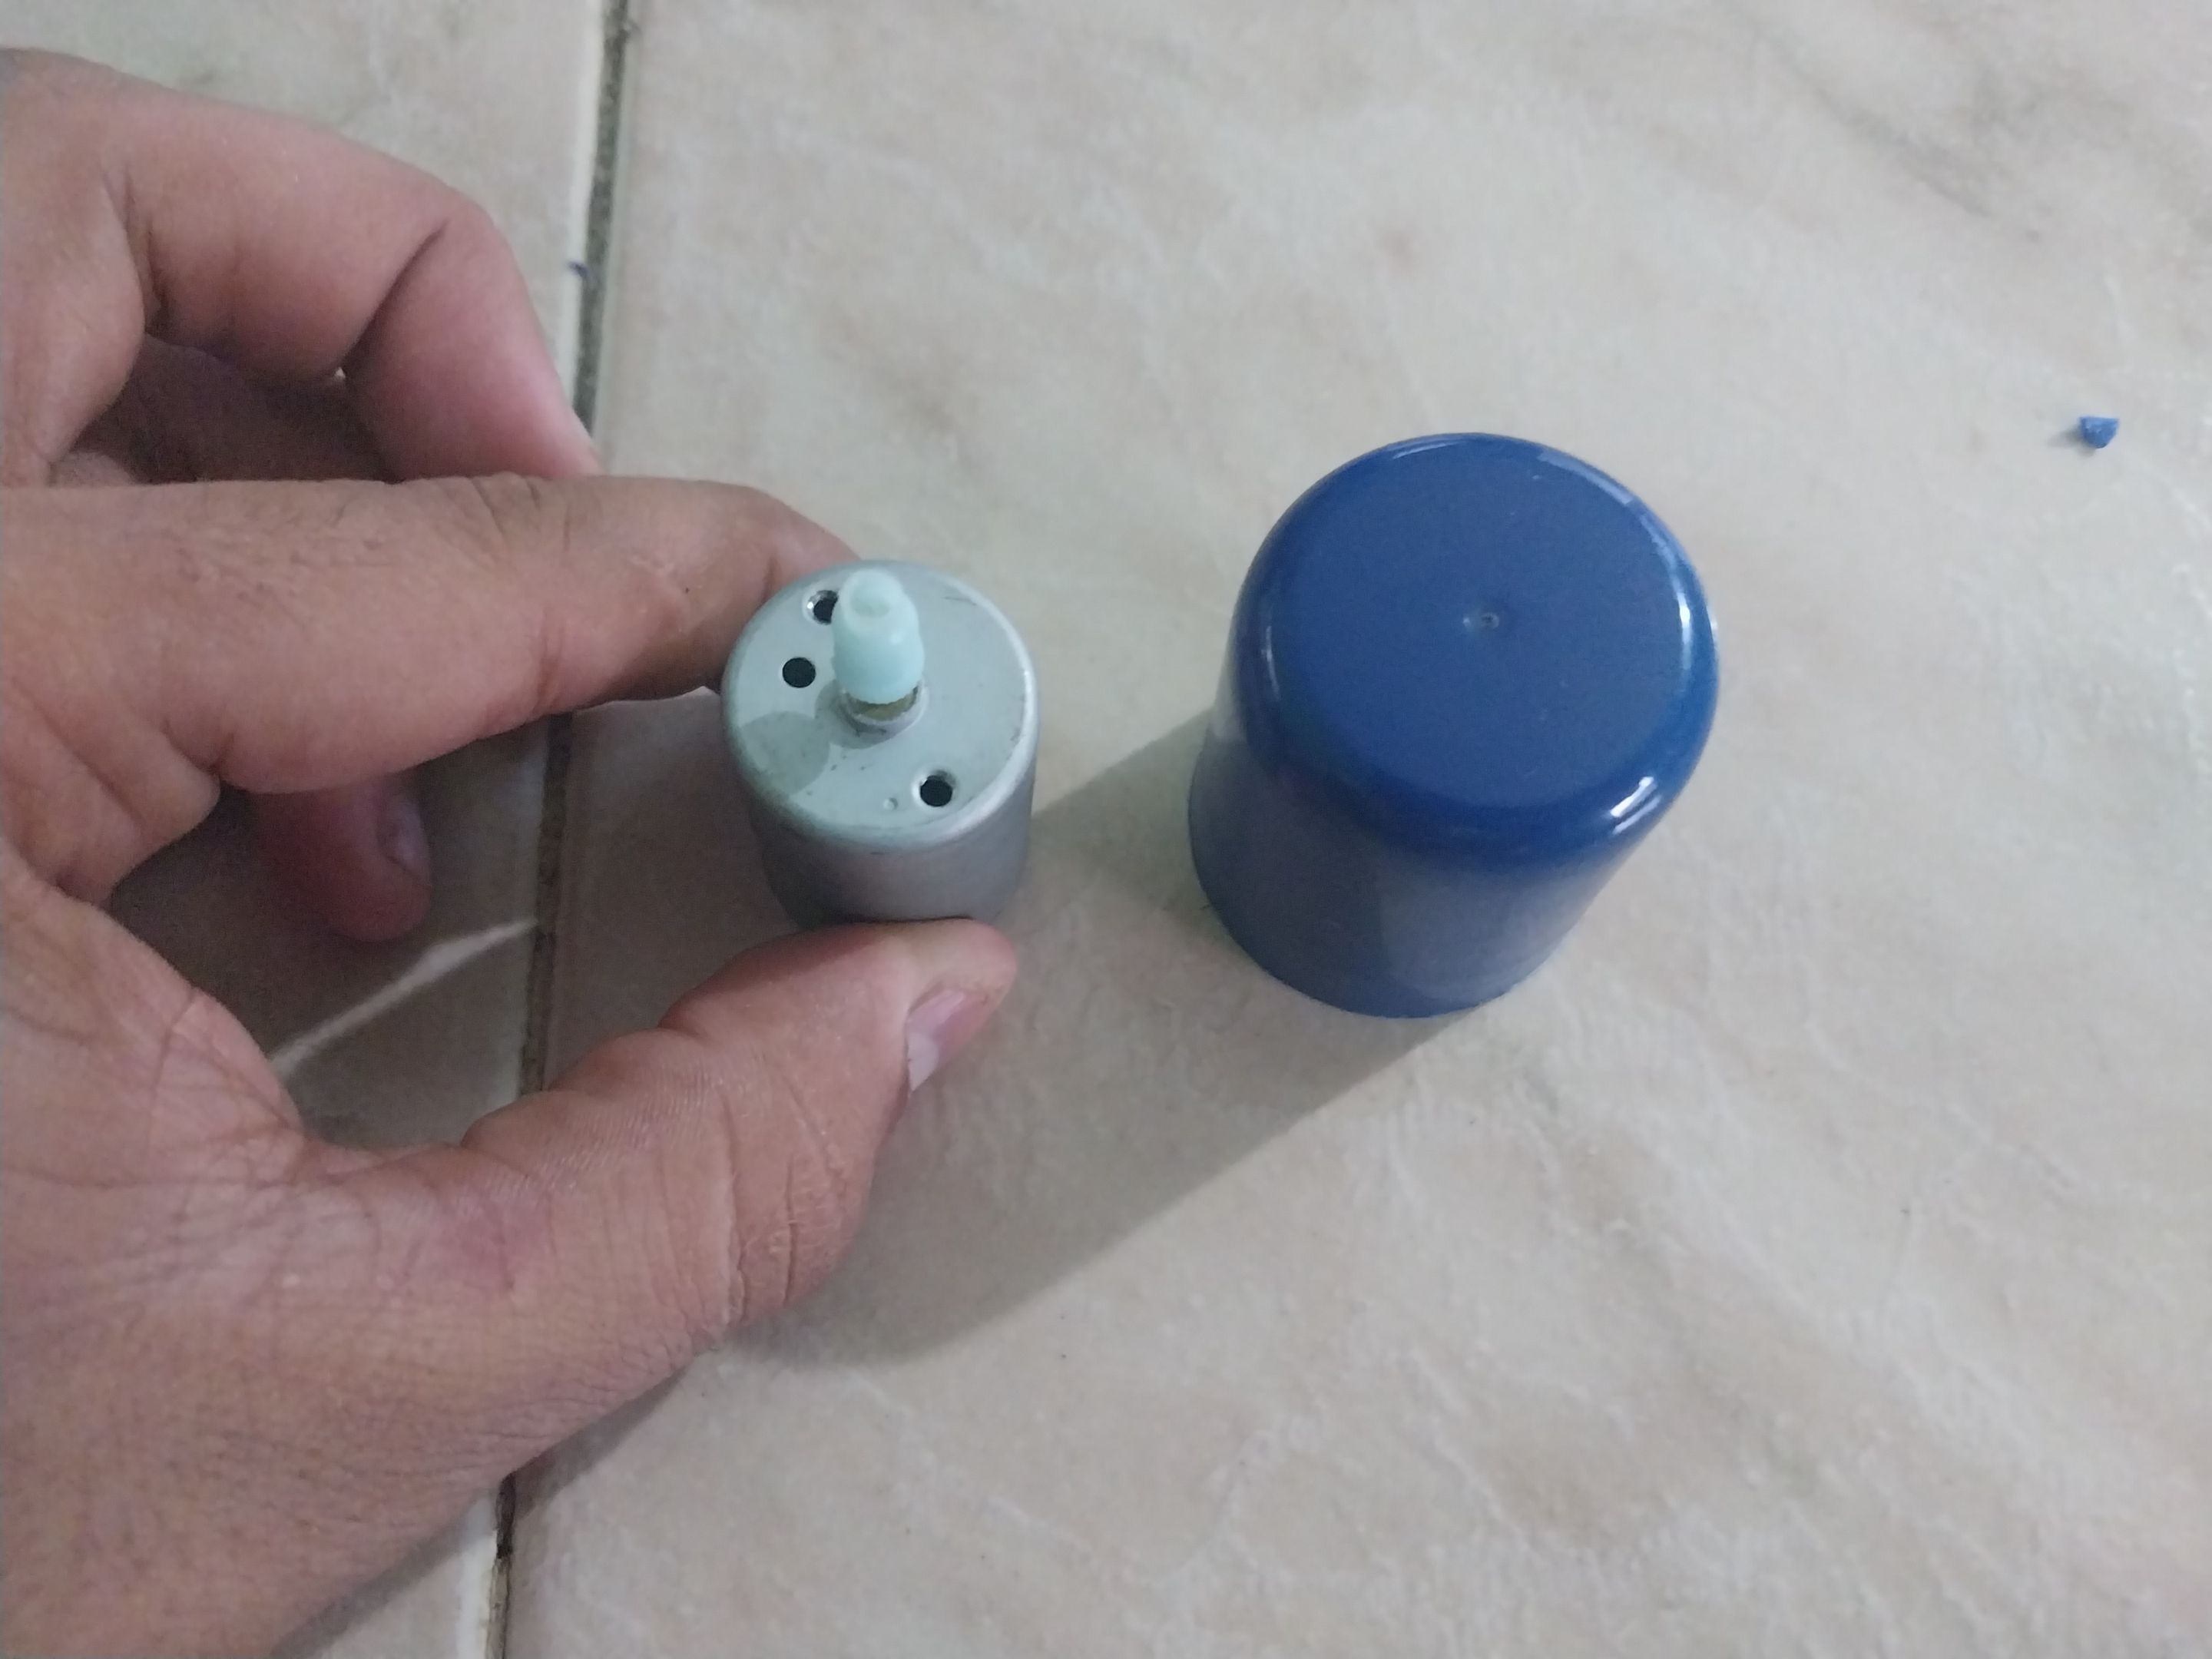
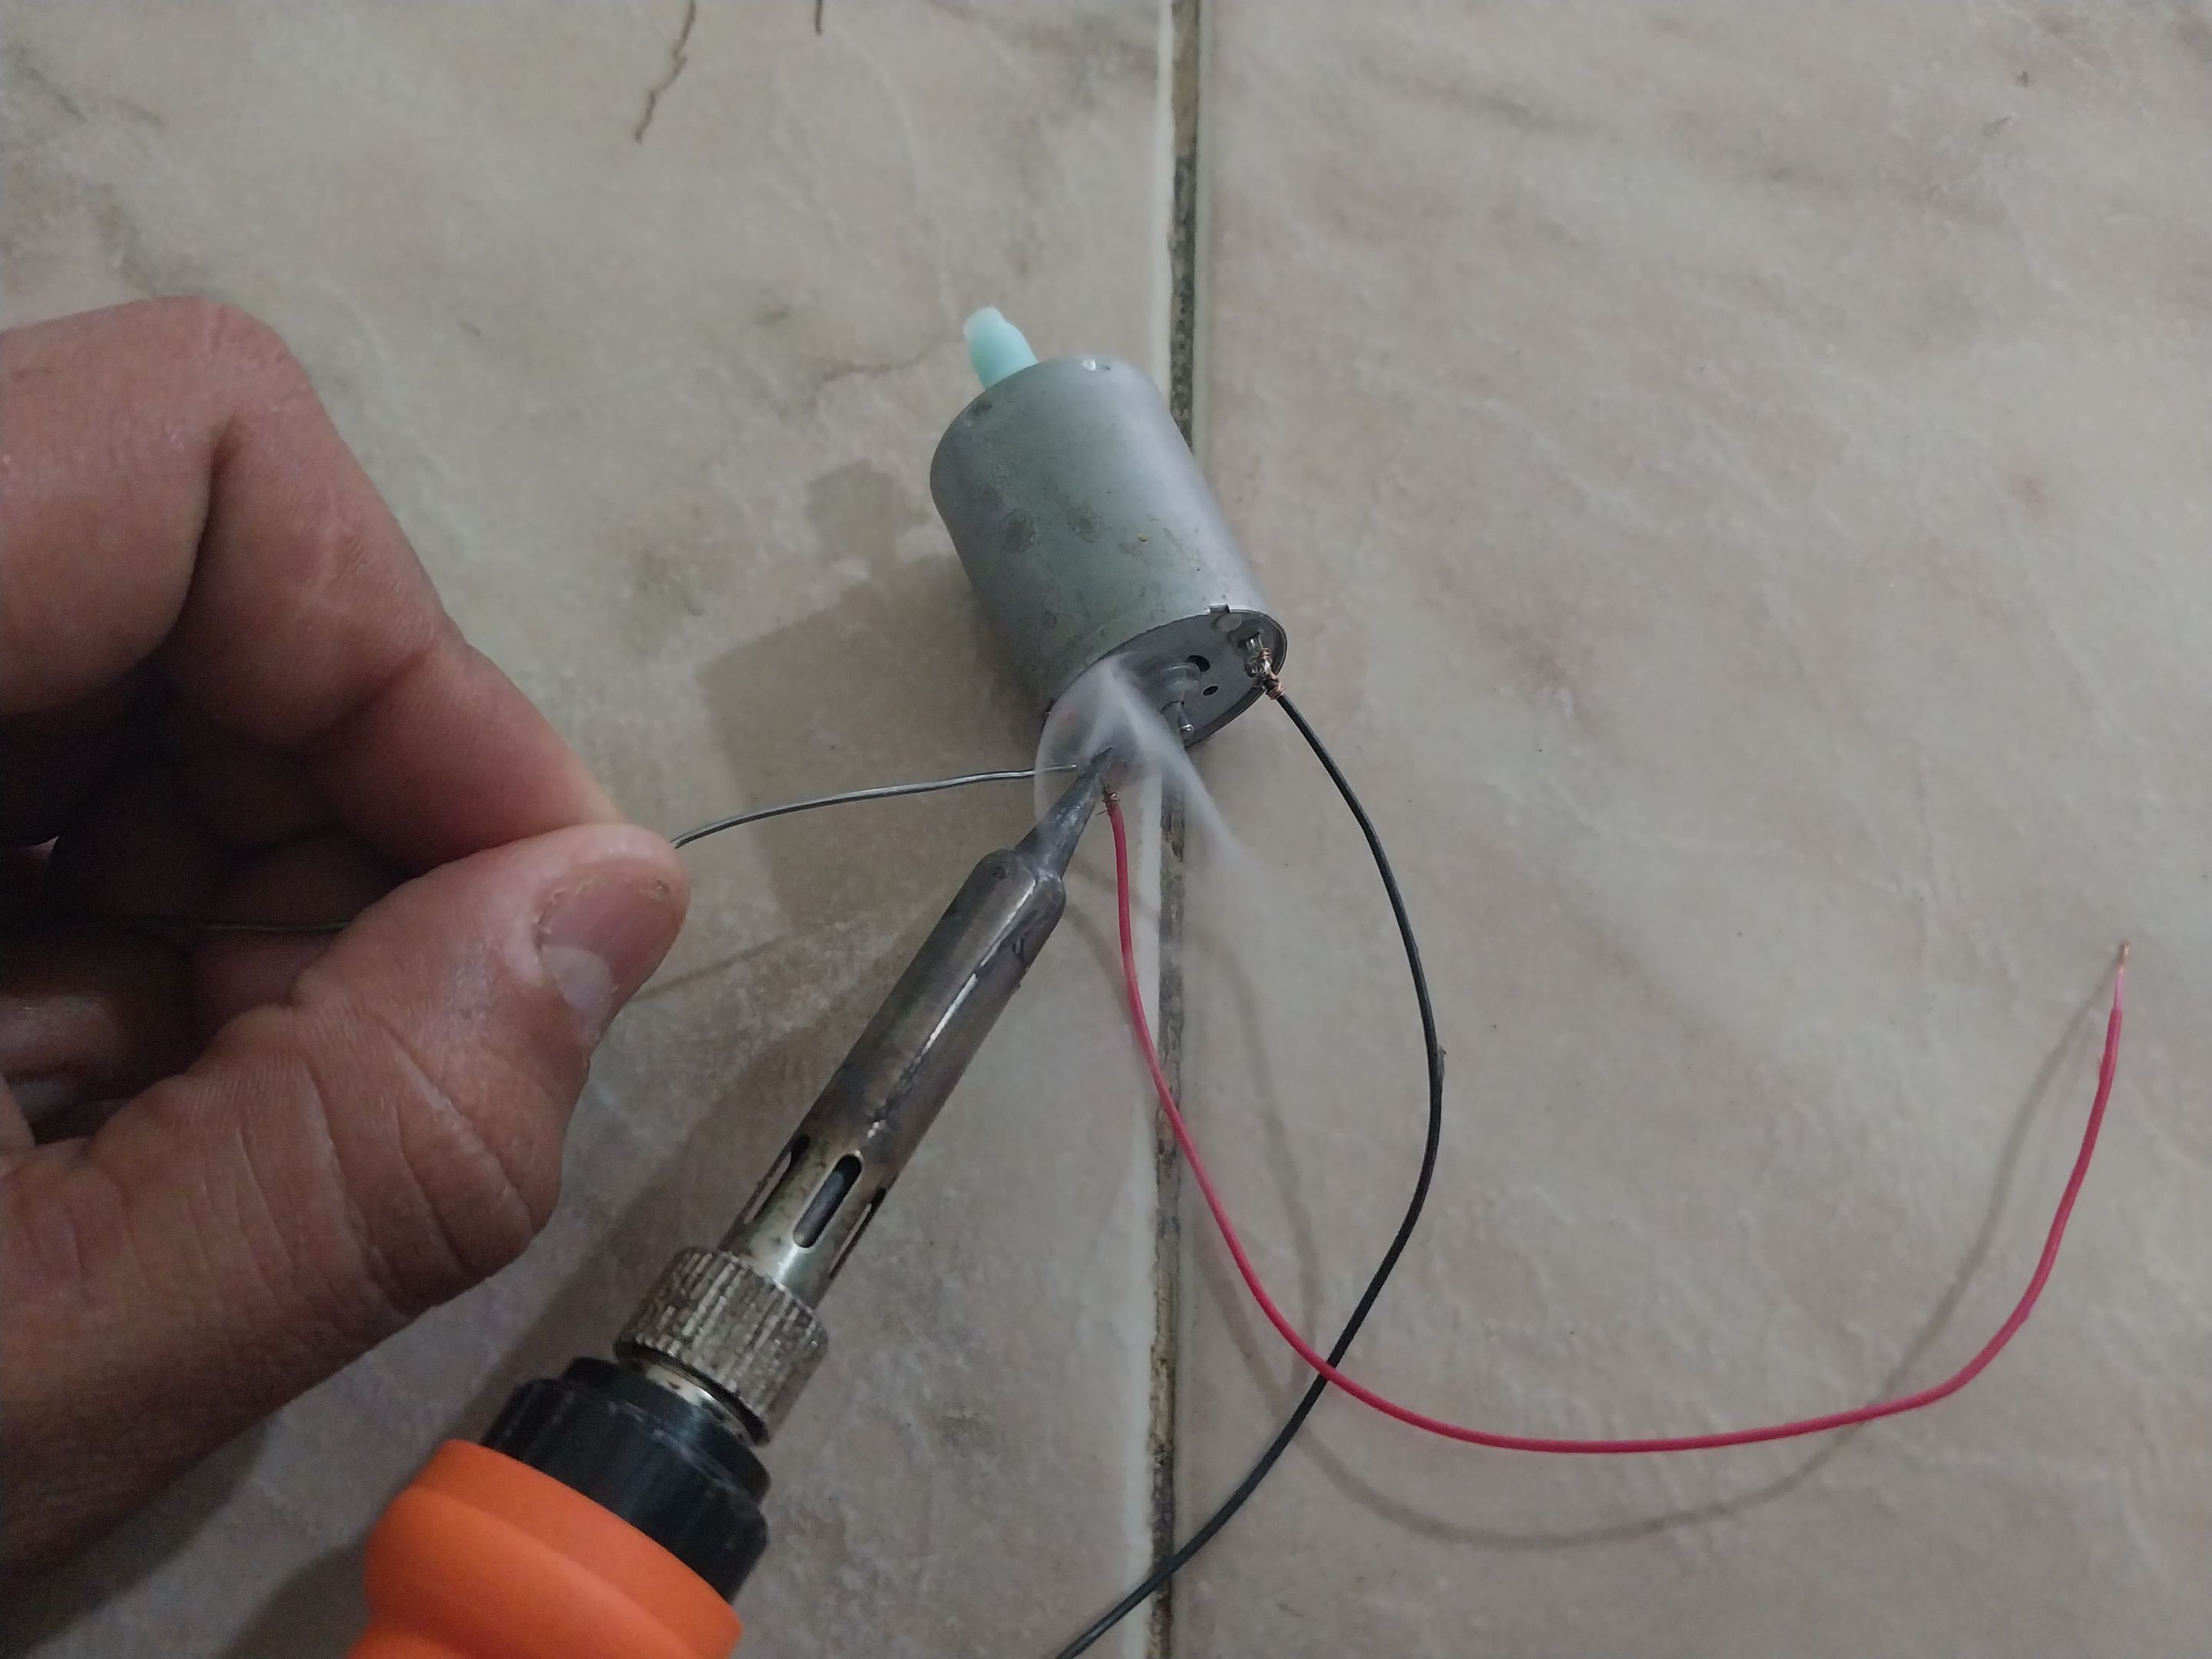
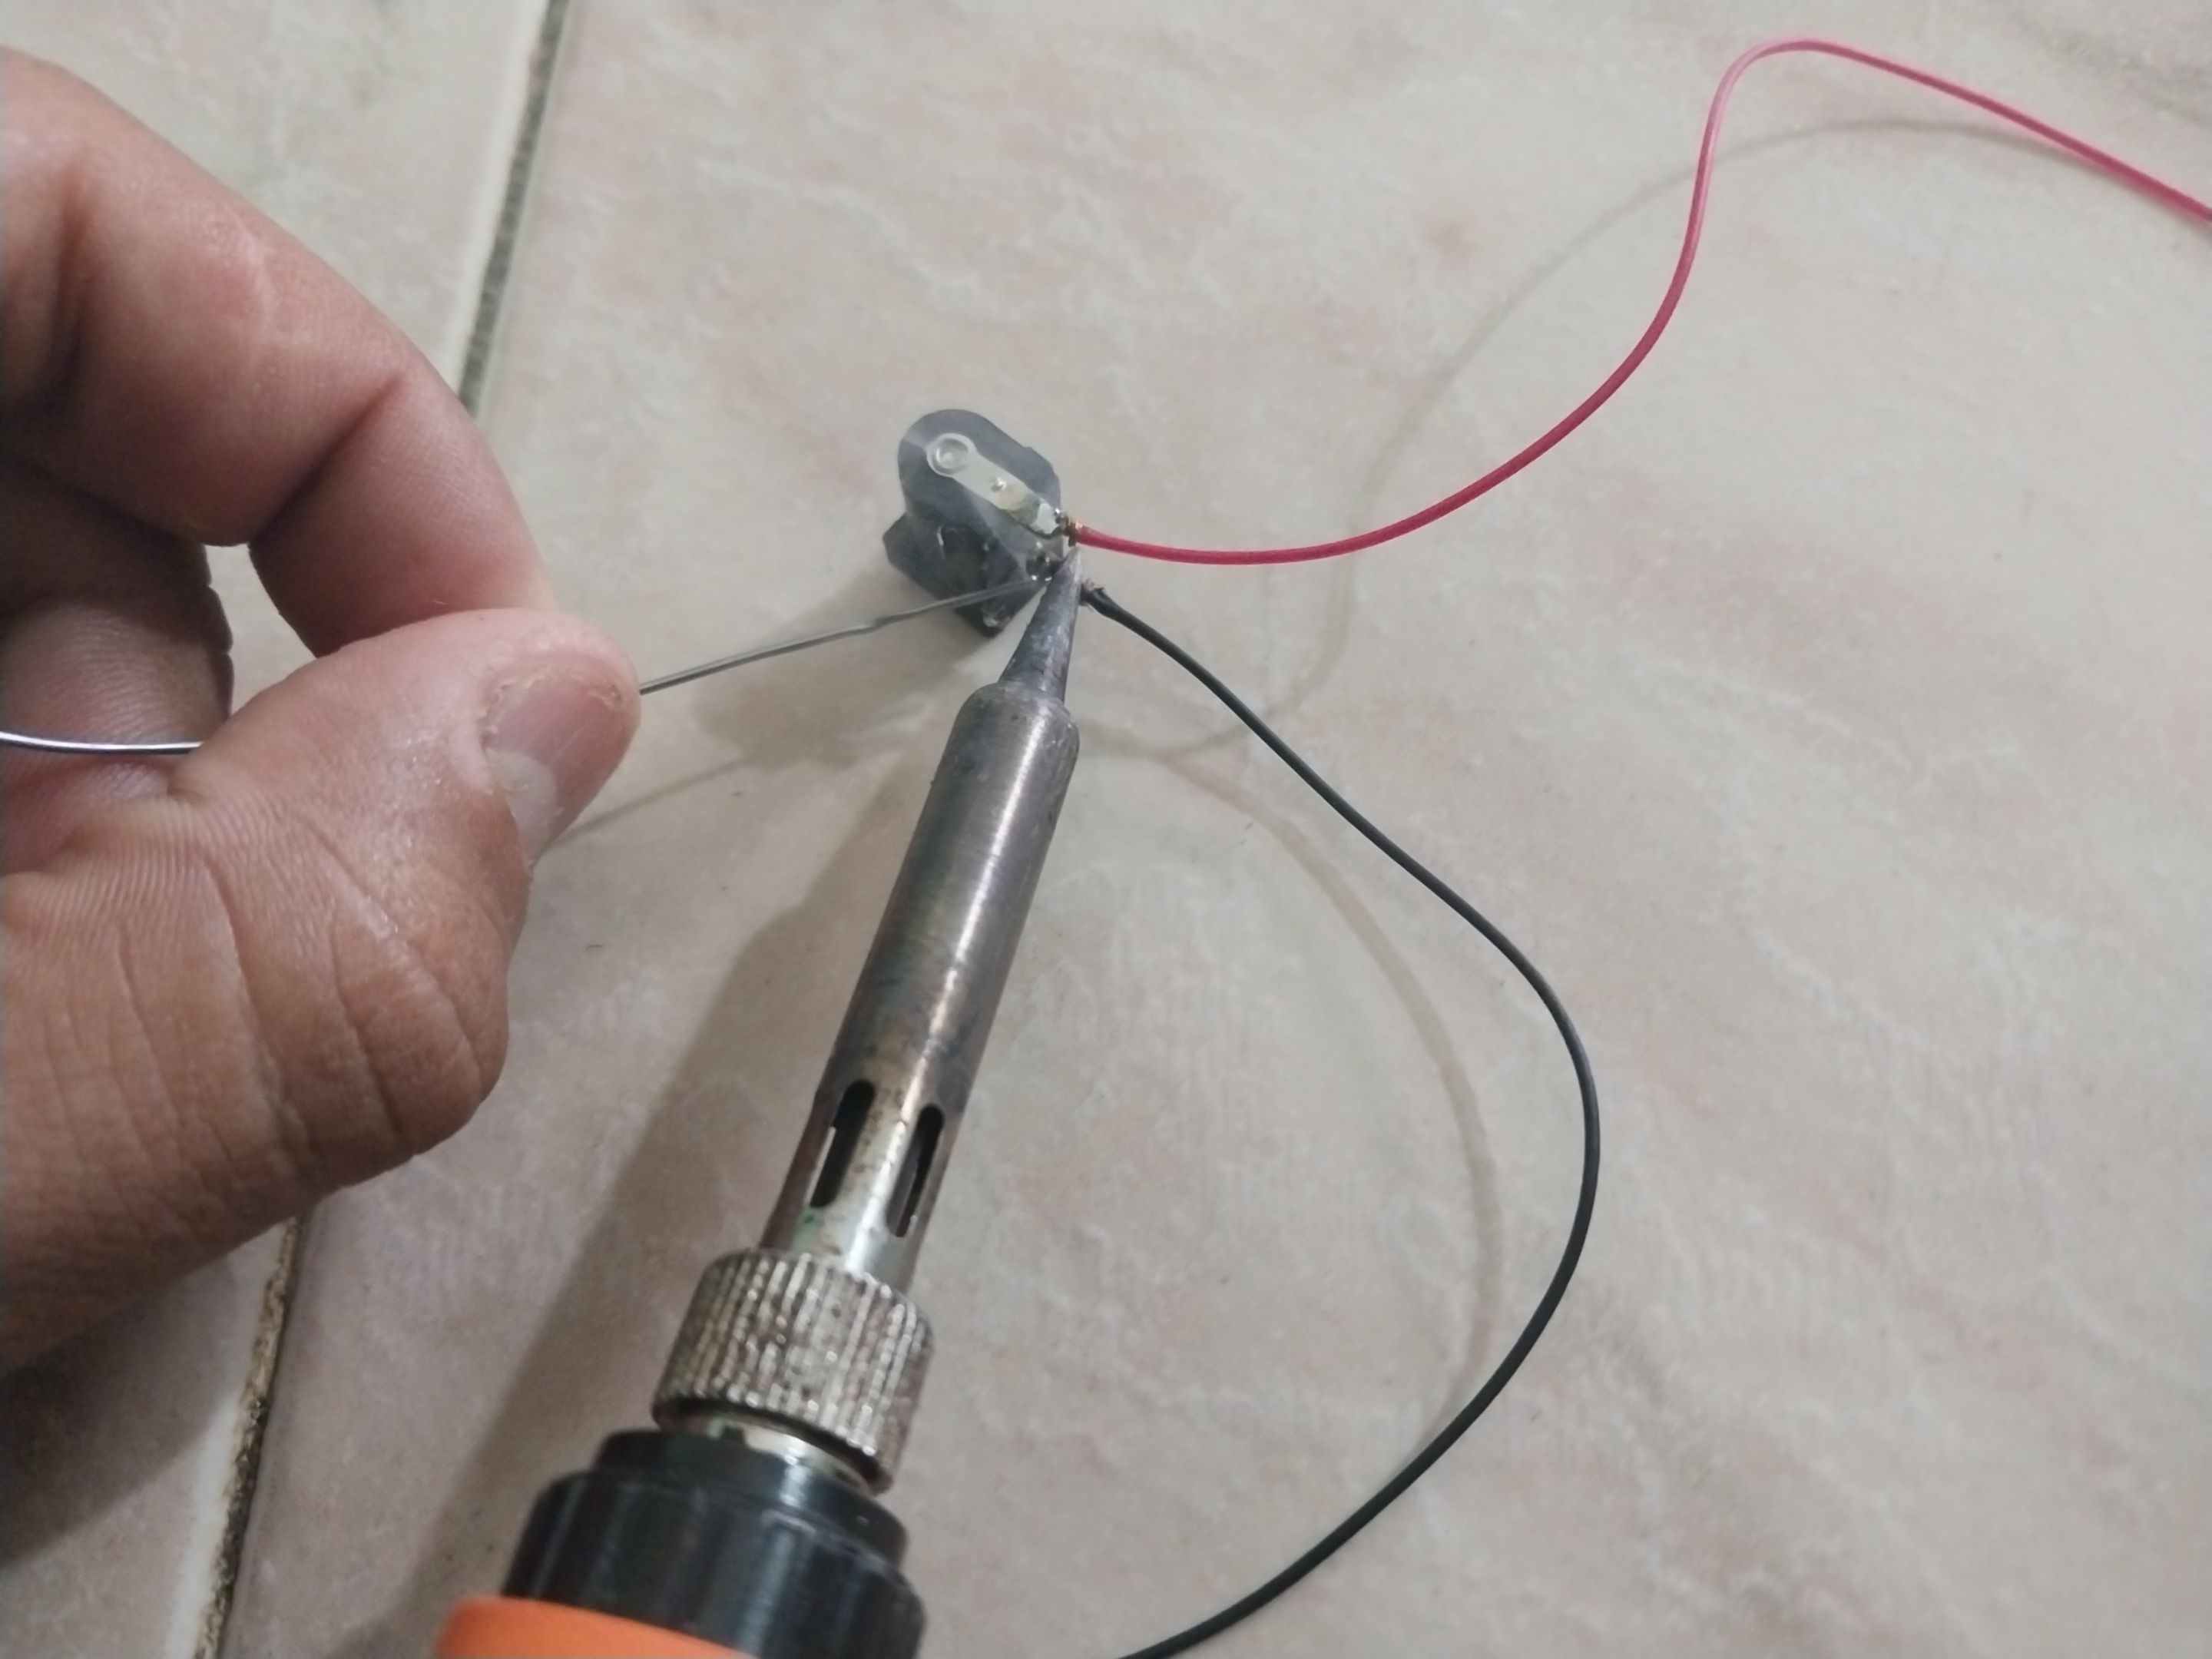
Luego tome el motorcito y le puse el mini adaptador en la punta, que ya más adelante verán para qué sirve; después tome la tapa del envase de desodorante y le abri un orificio de manera que entrara en él el motorcito, hecho eso lije el orificio y listo. Luego de eso tomé los cables; ya que solo tenia 2 pero eran un poco largos, los piqué, de manera que me quedaron cuatro cables. Los primeros dos cables los solde al motorcito con ayuda del cautín y del estaño, y puse uno en cada vía del motor, mientras que los otros dos cables los solde a las vías del conector hembra de 9 voltios.
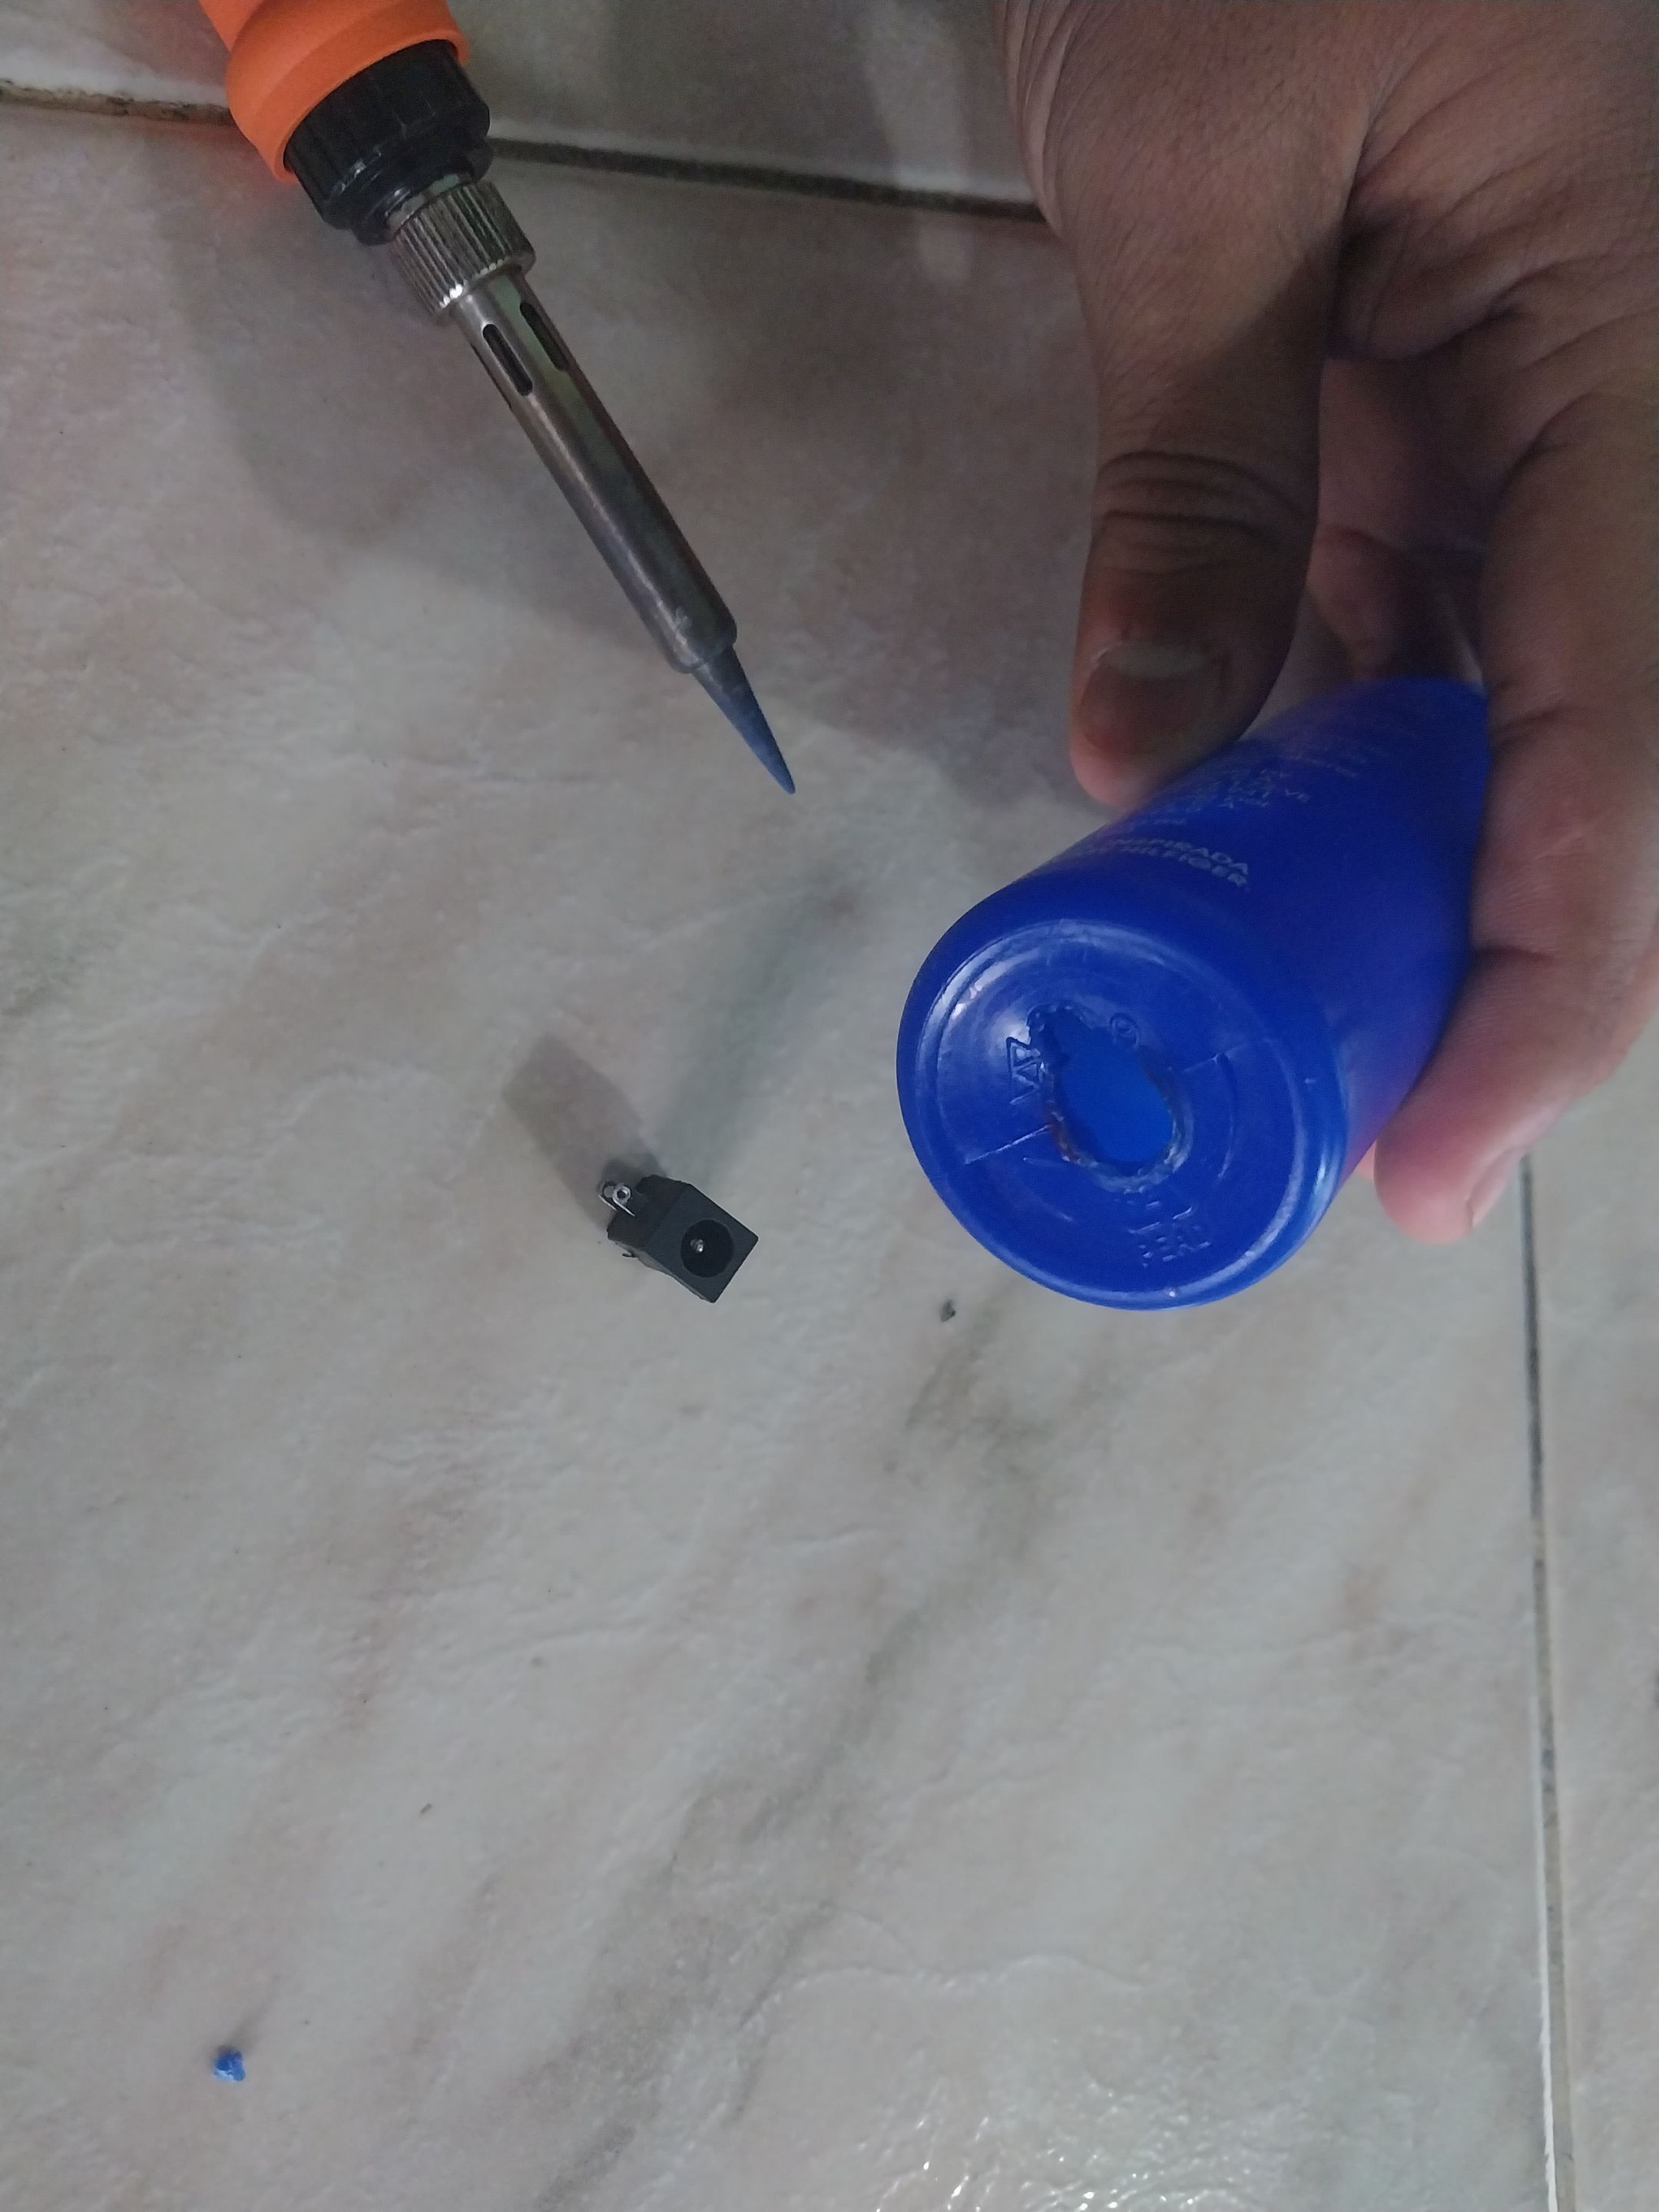
Ya hecho eso, procedí a insertar el motorcito en la boca del envase de desodorante y saque los cables por el orificio que habia hecho en la parte de arriba, luego procedí a insertar el conector hembra de 9 voltios por el orificio que había hecho en la parte de atrás, e igualmente saqué los cables por la parte de arriba. Una vez hecho eso uní una de las vías del motor con una de las vias del conector hembra directamente, les hice un empalme, y las reforce con un poco de estaño y teipe; y las otras dos vías que me quedaron libres las soldé una vía a cada pata del encendedor, para que no fuese a trabajar de forma directa la mini batidora, sino que tuviese un encendedor. Después procedí a insertar bien el encendedor en el orificio de la parte de arriba, de manera que quedara ajustado y no se fuera a soltar ningún cable.
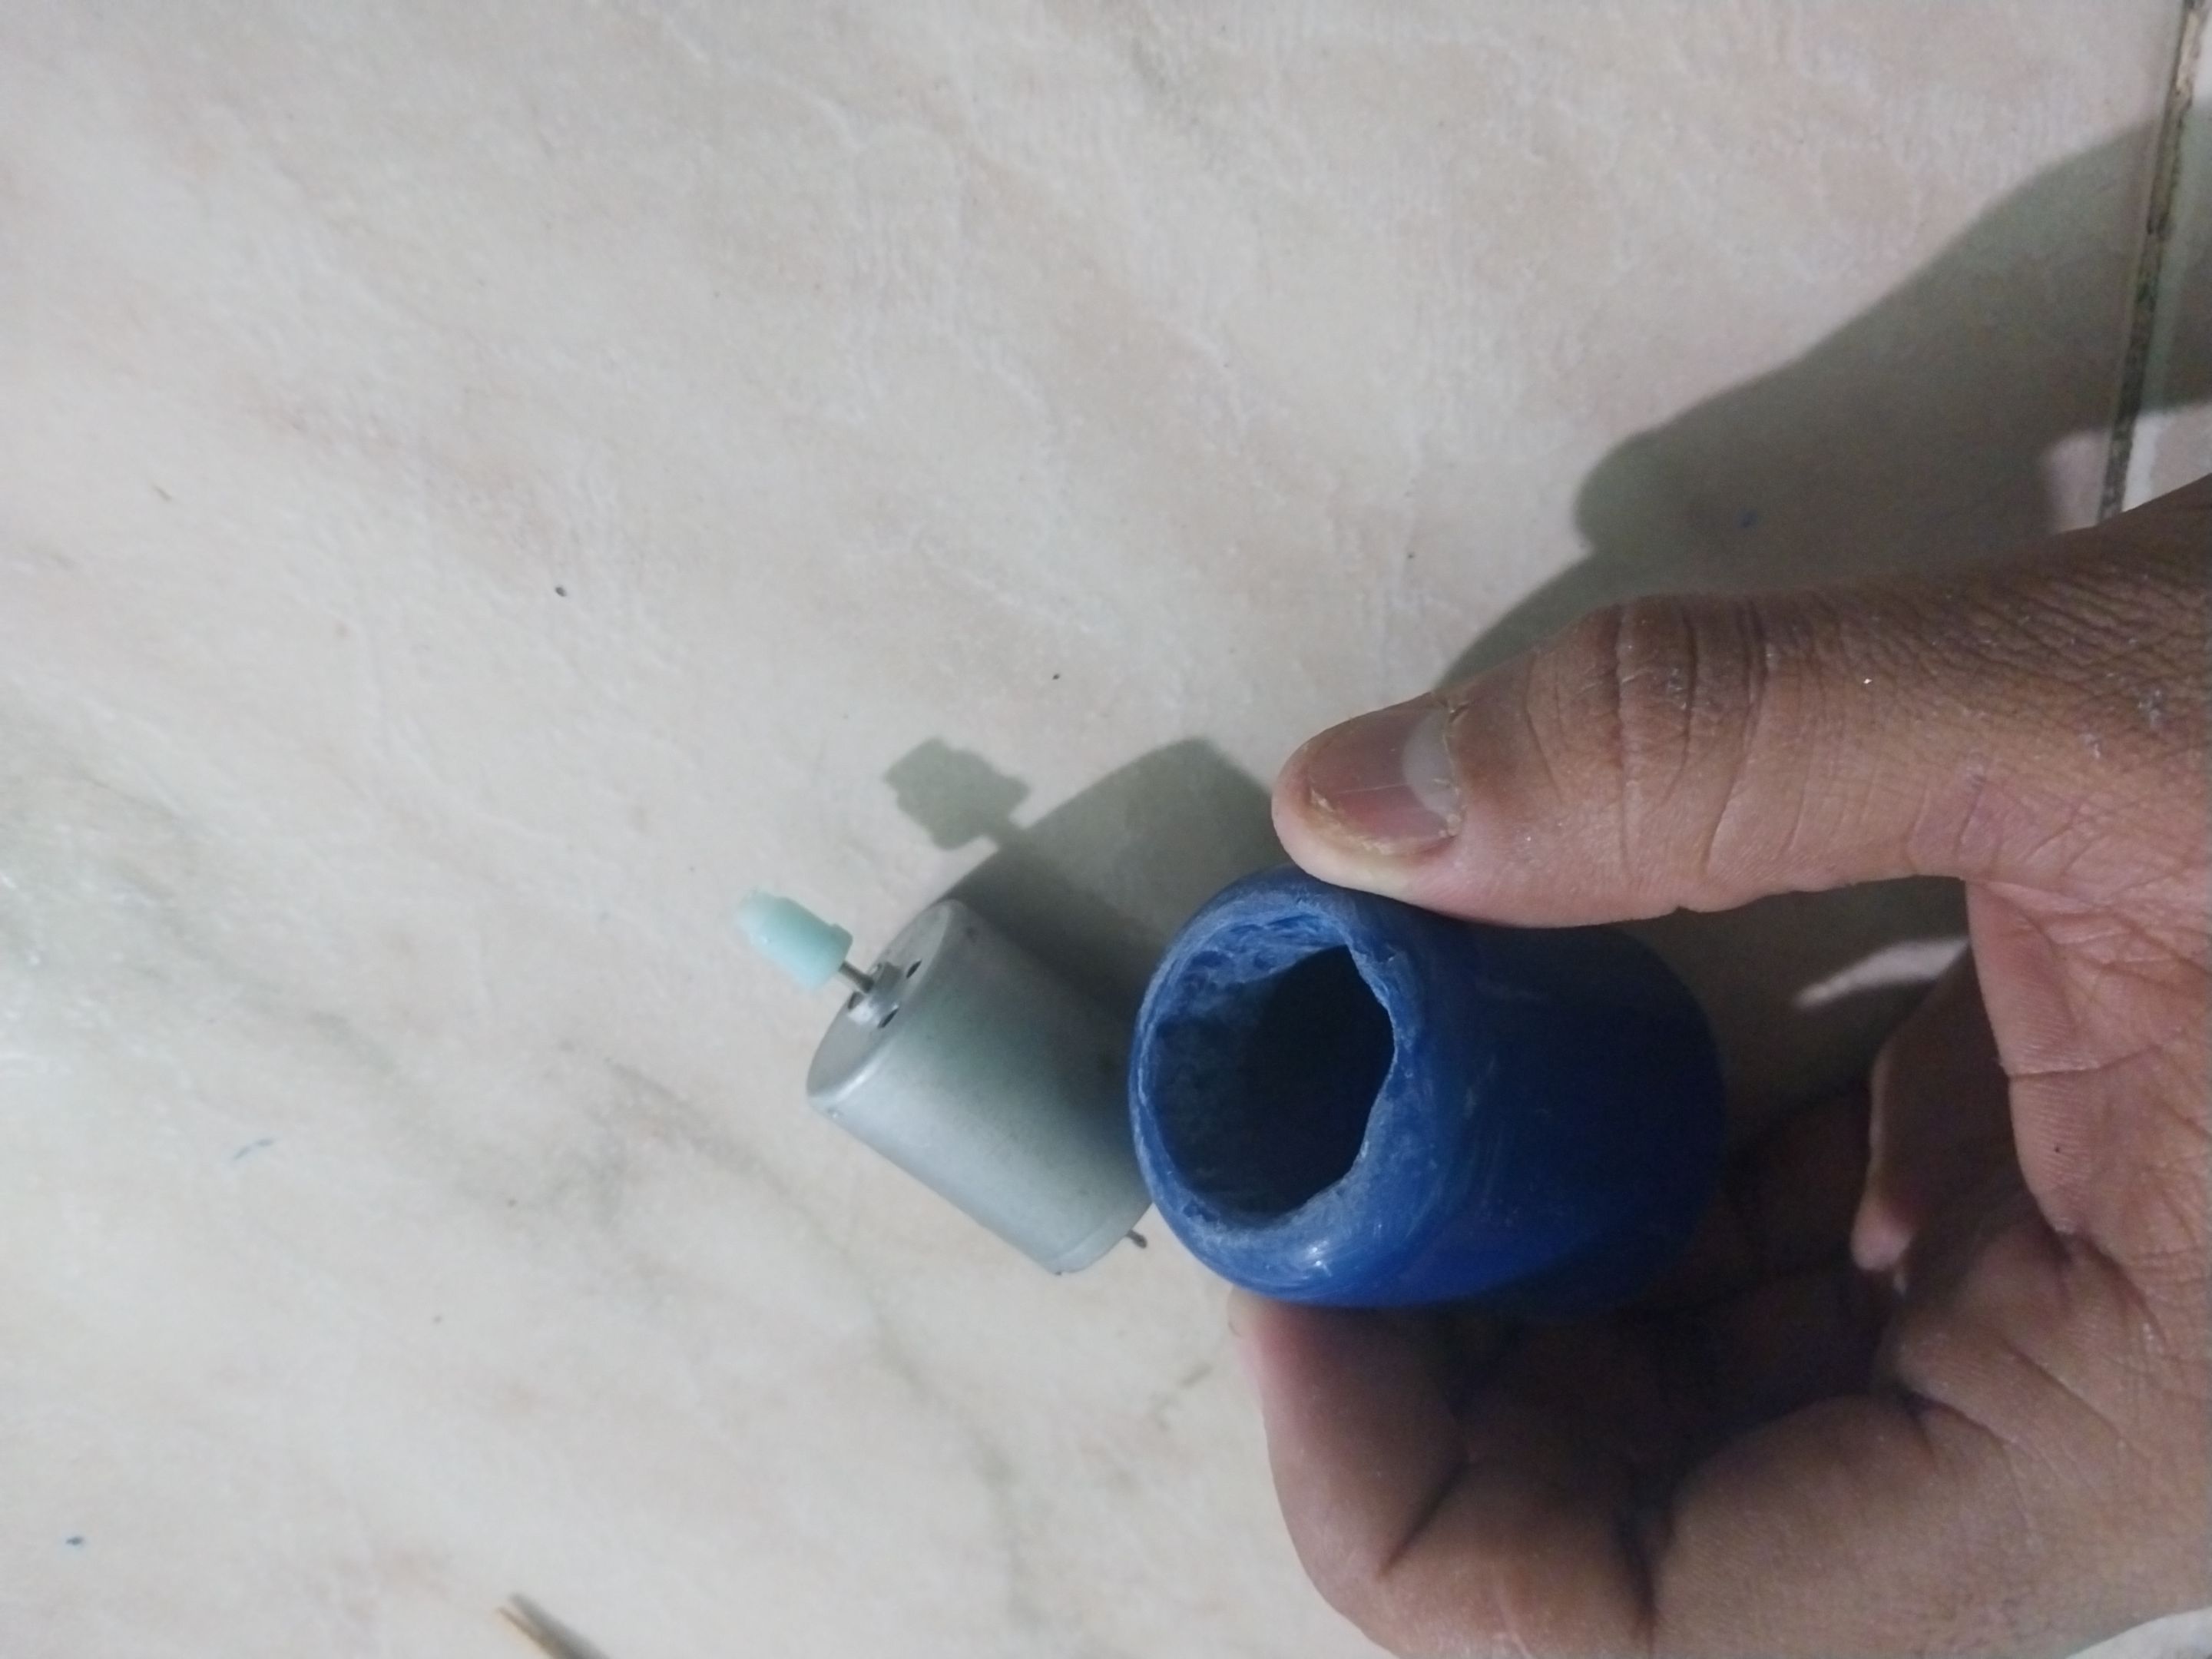
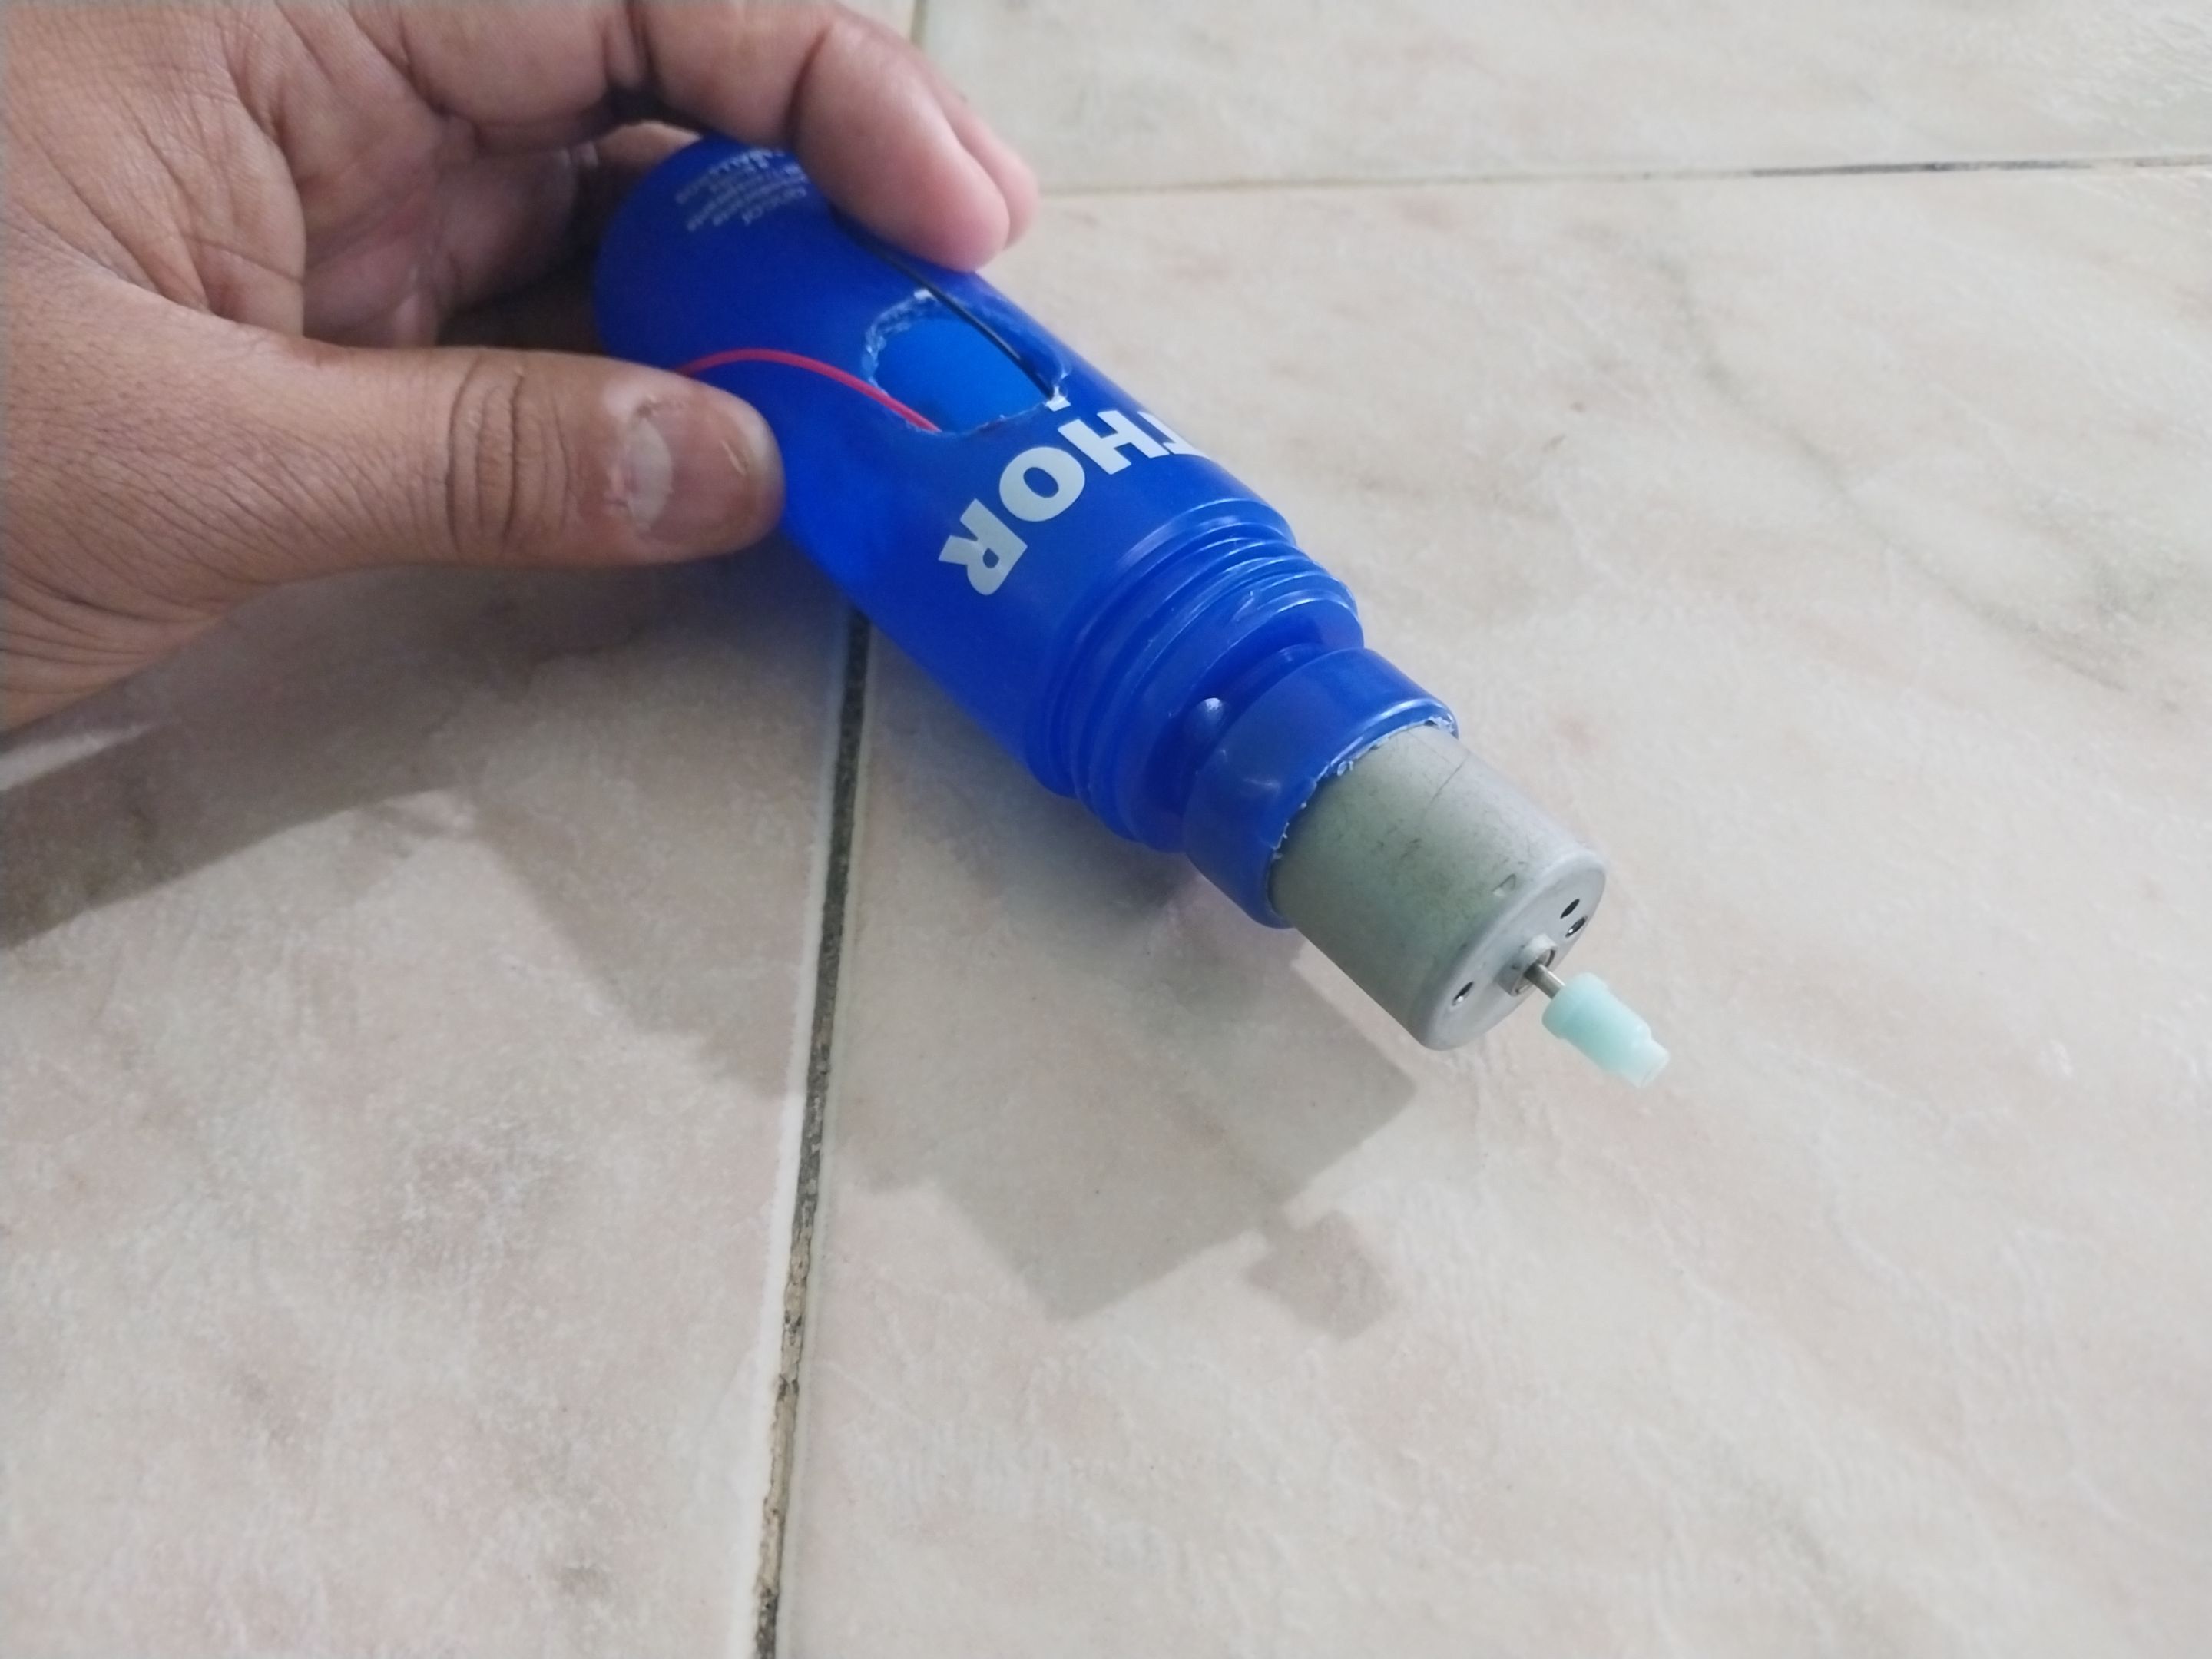
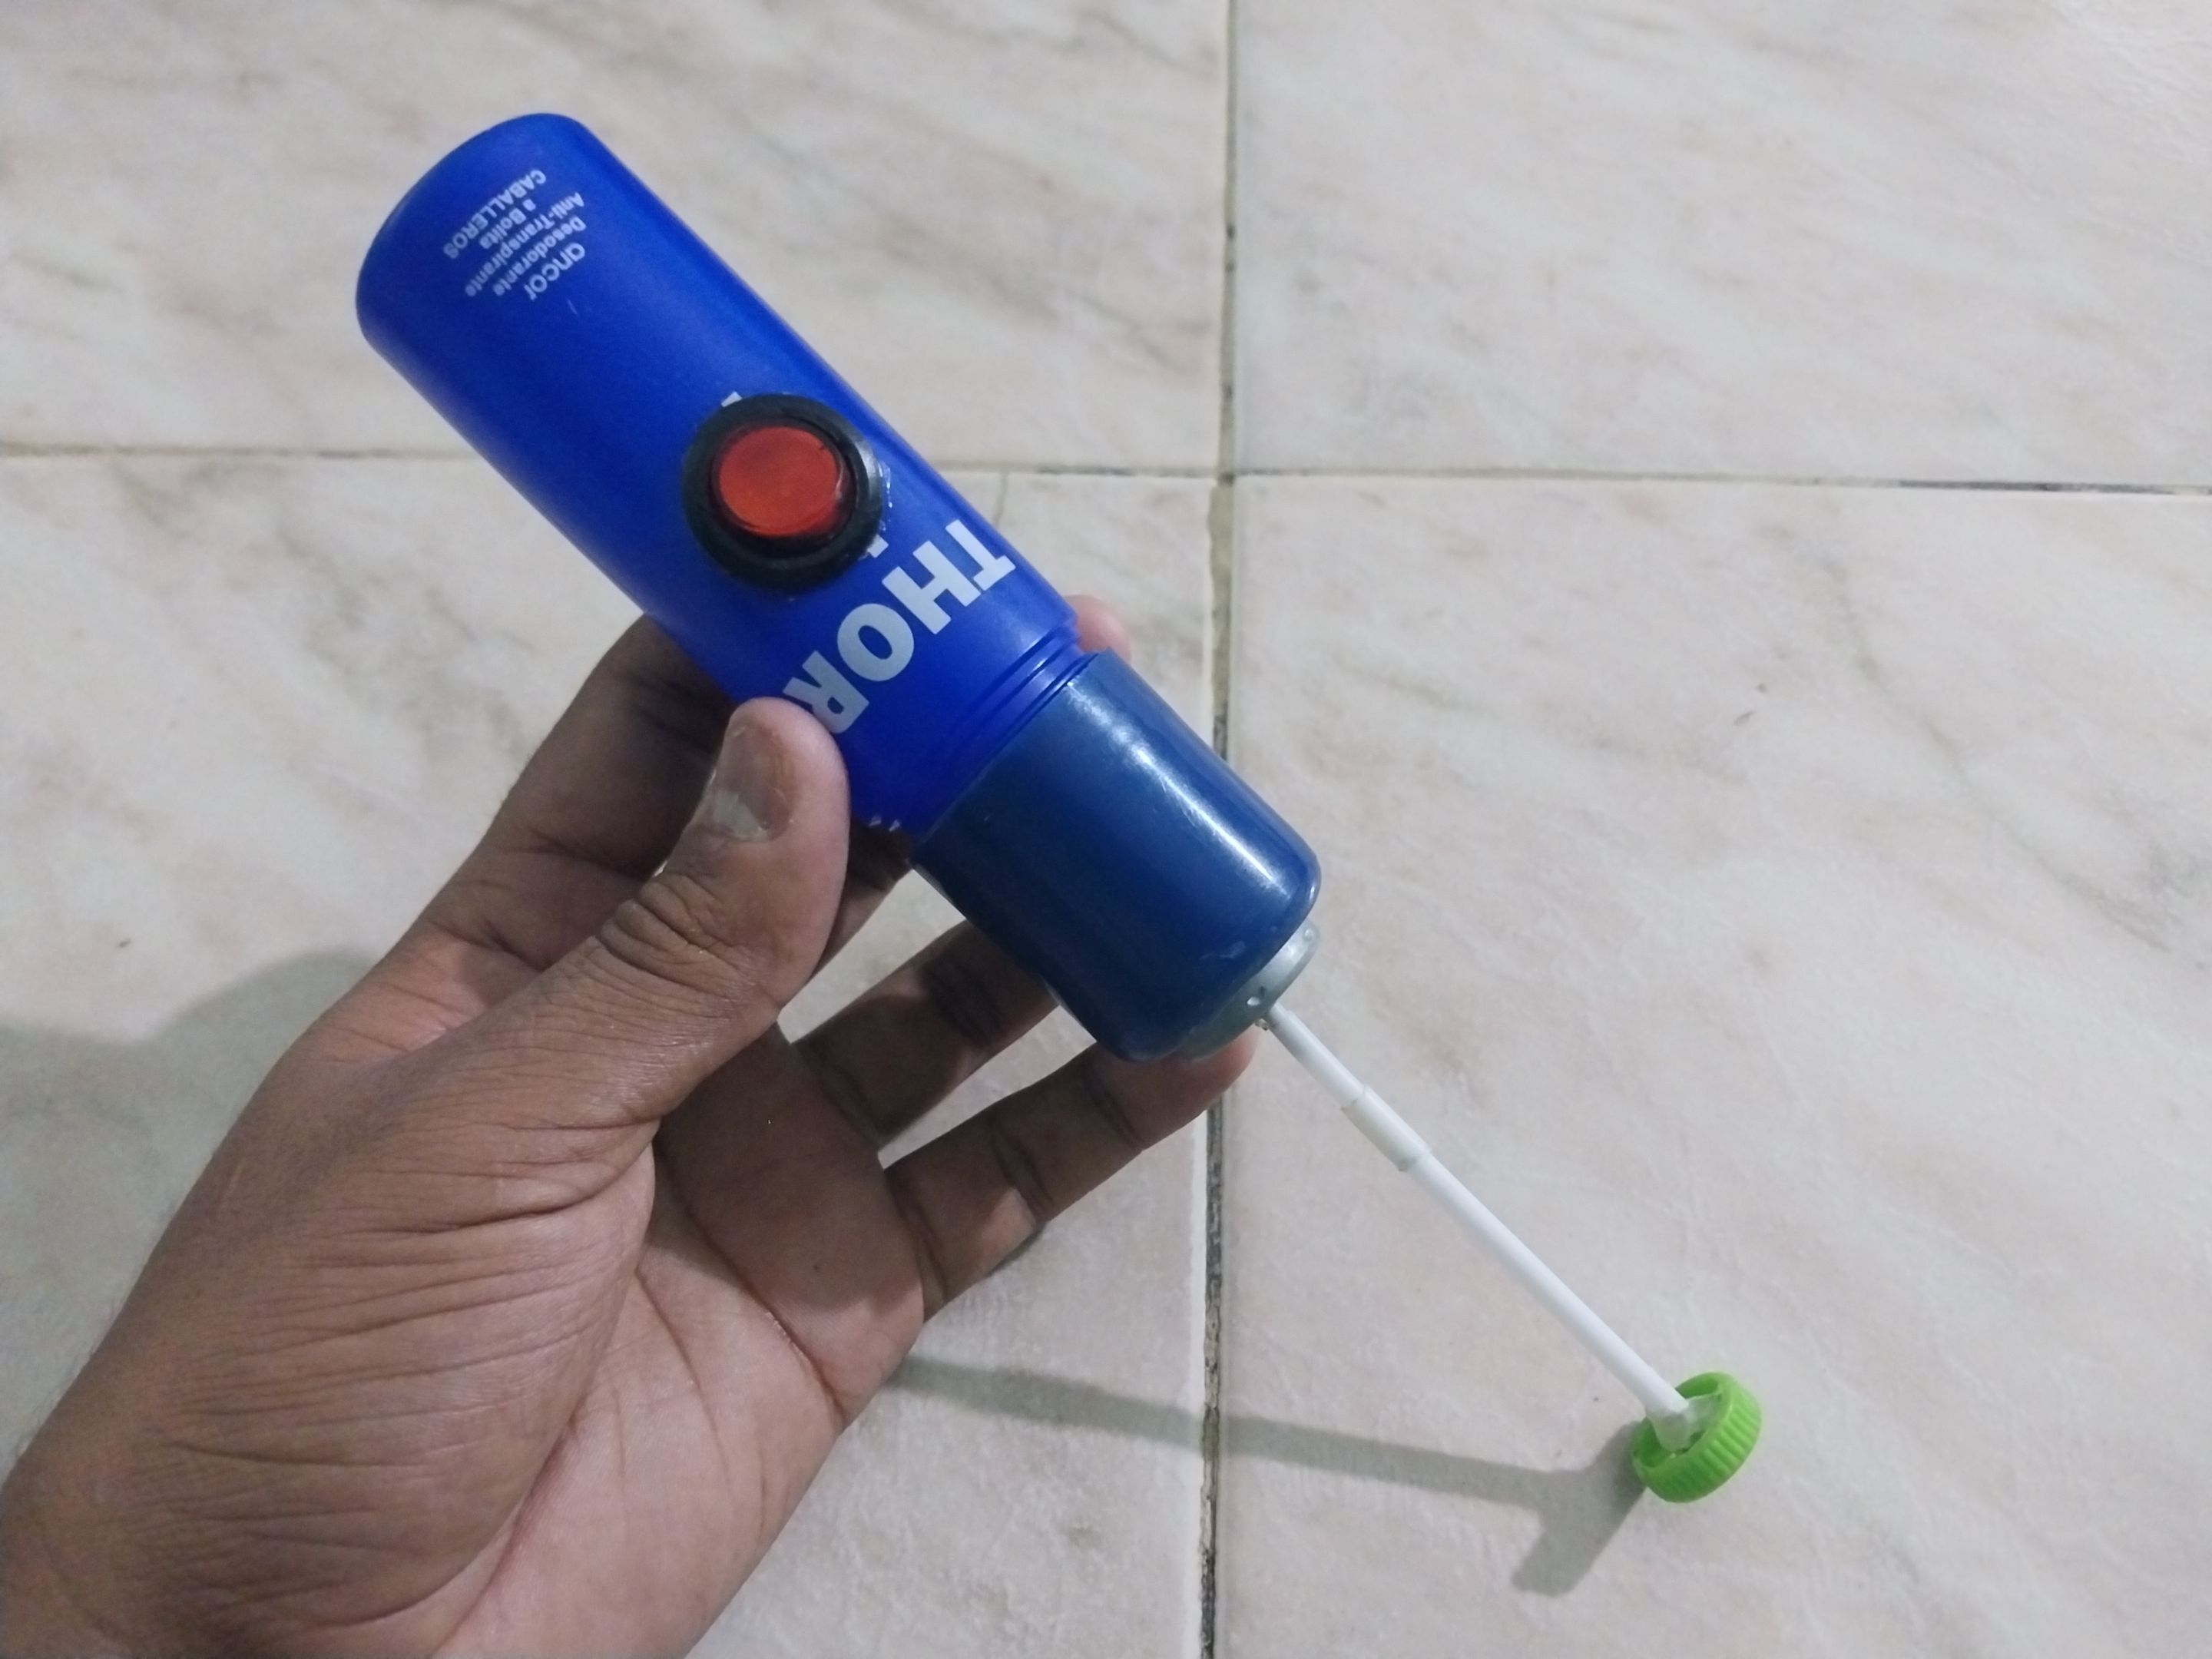
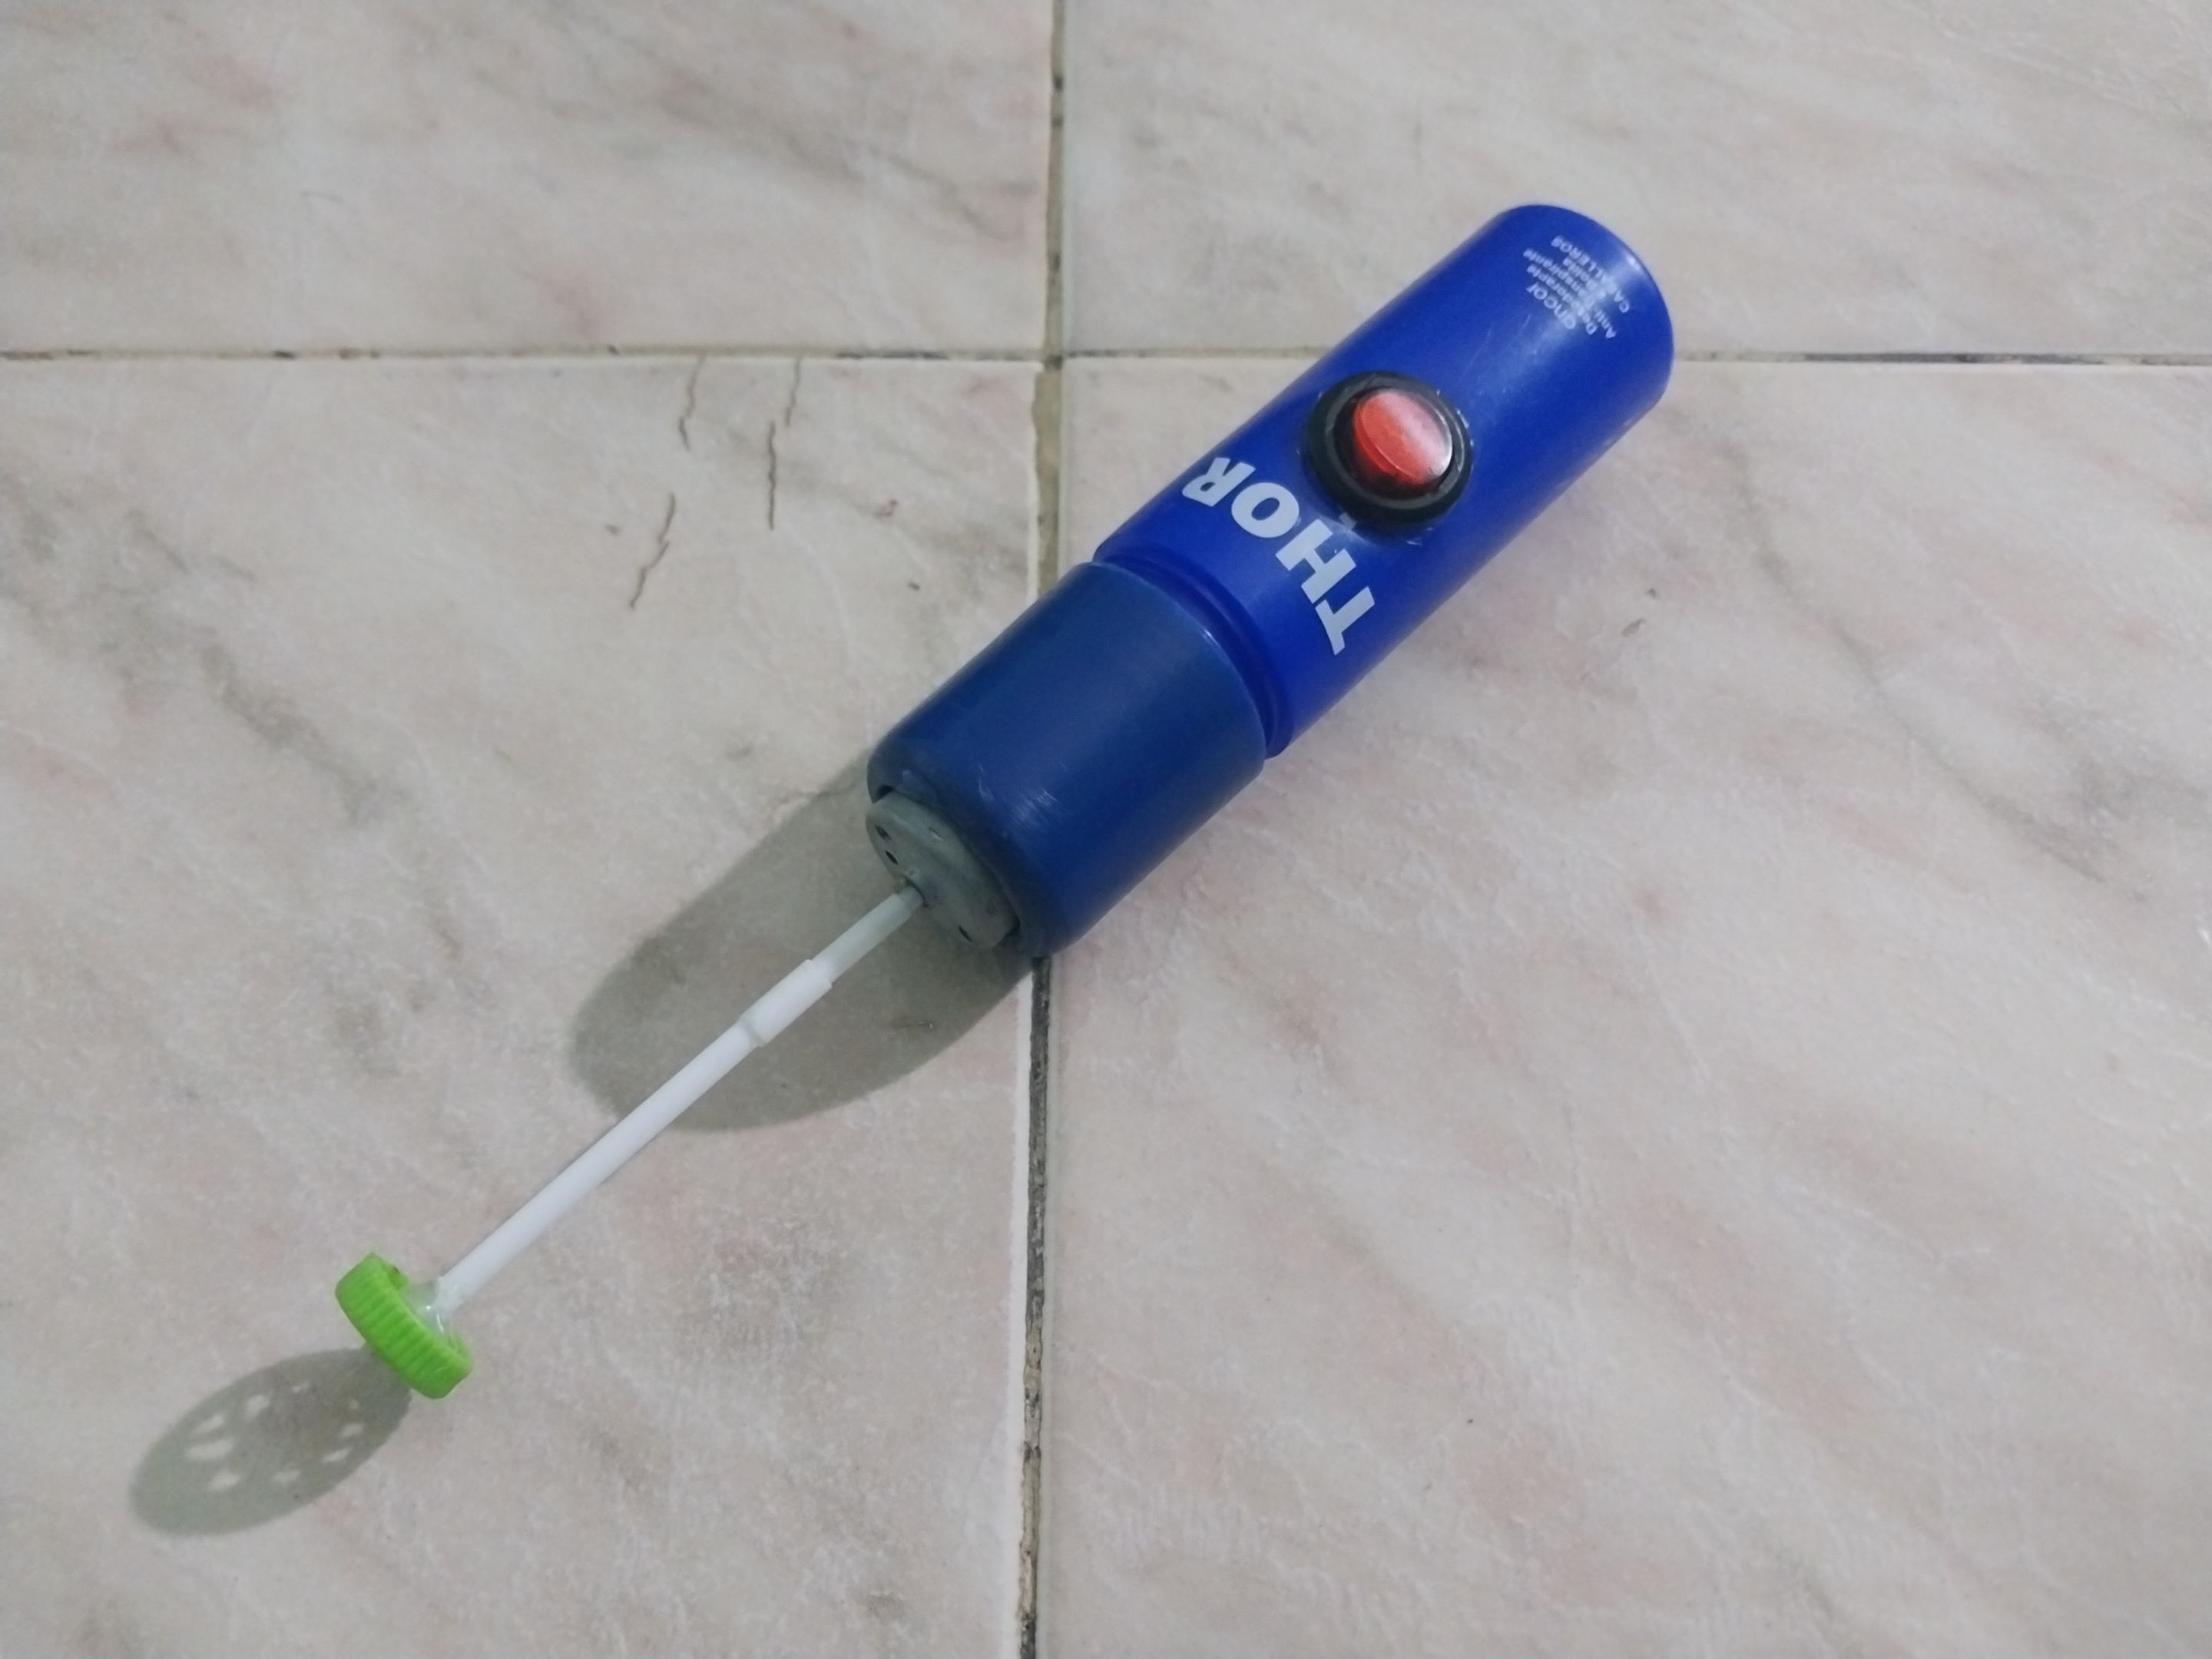
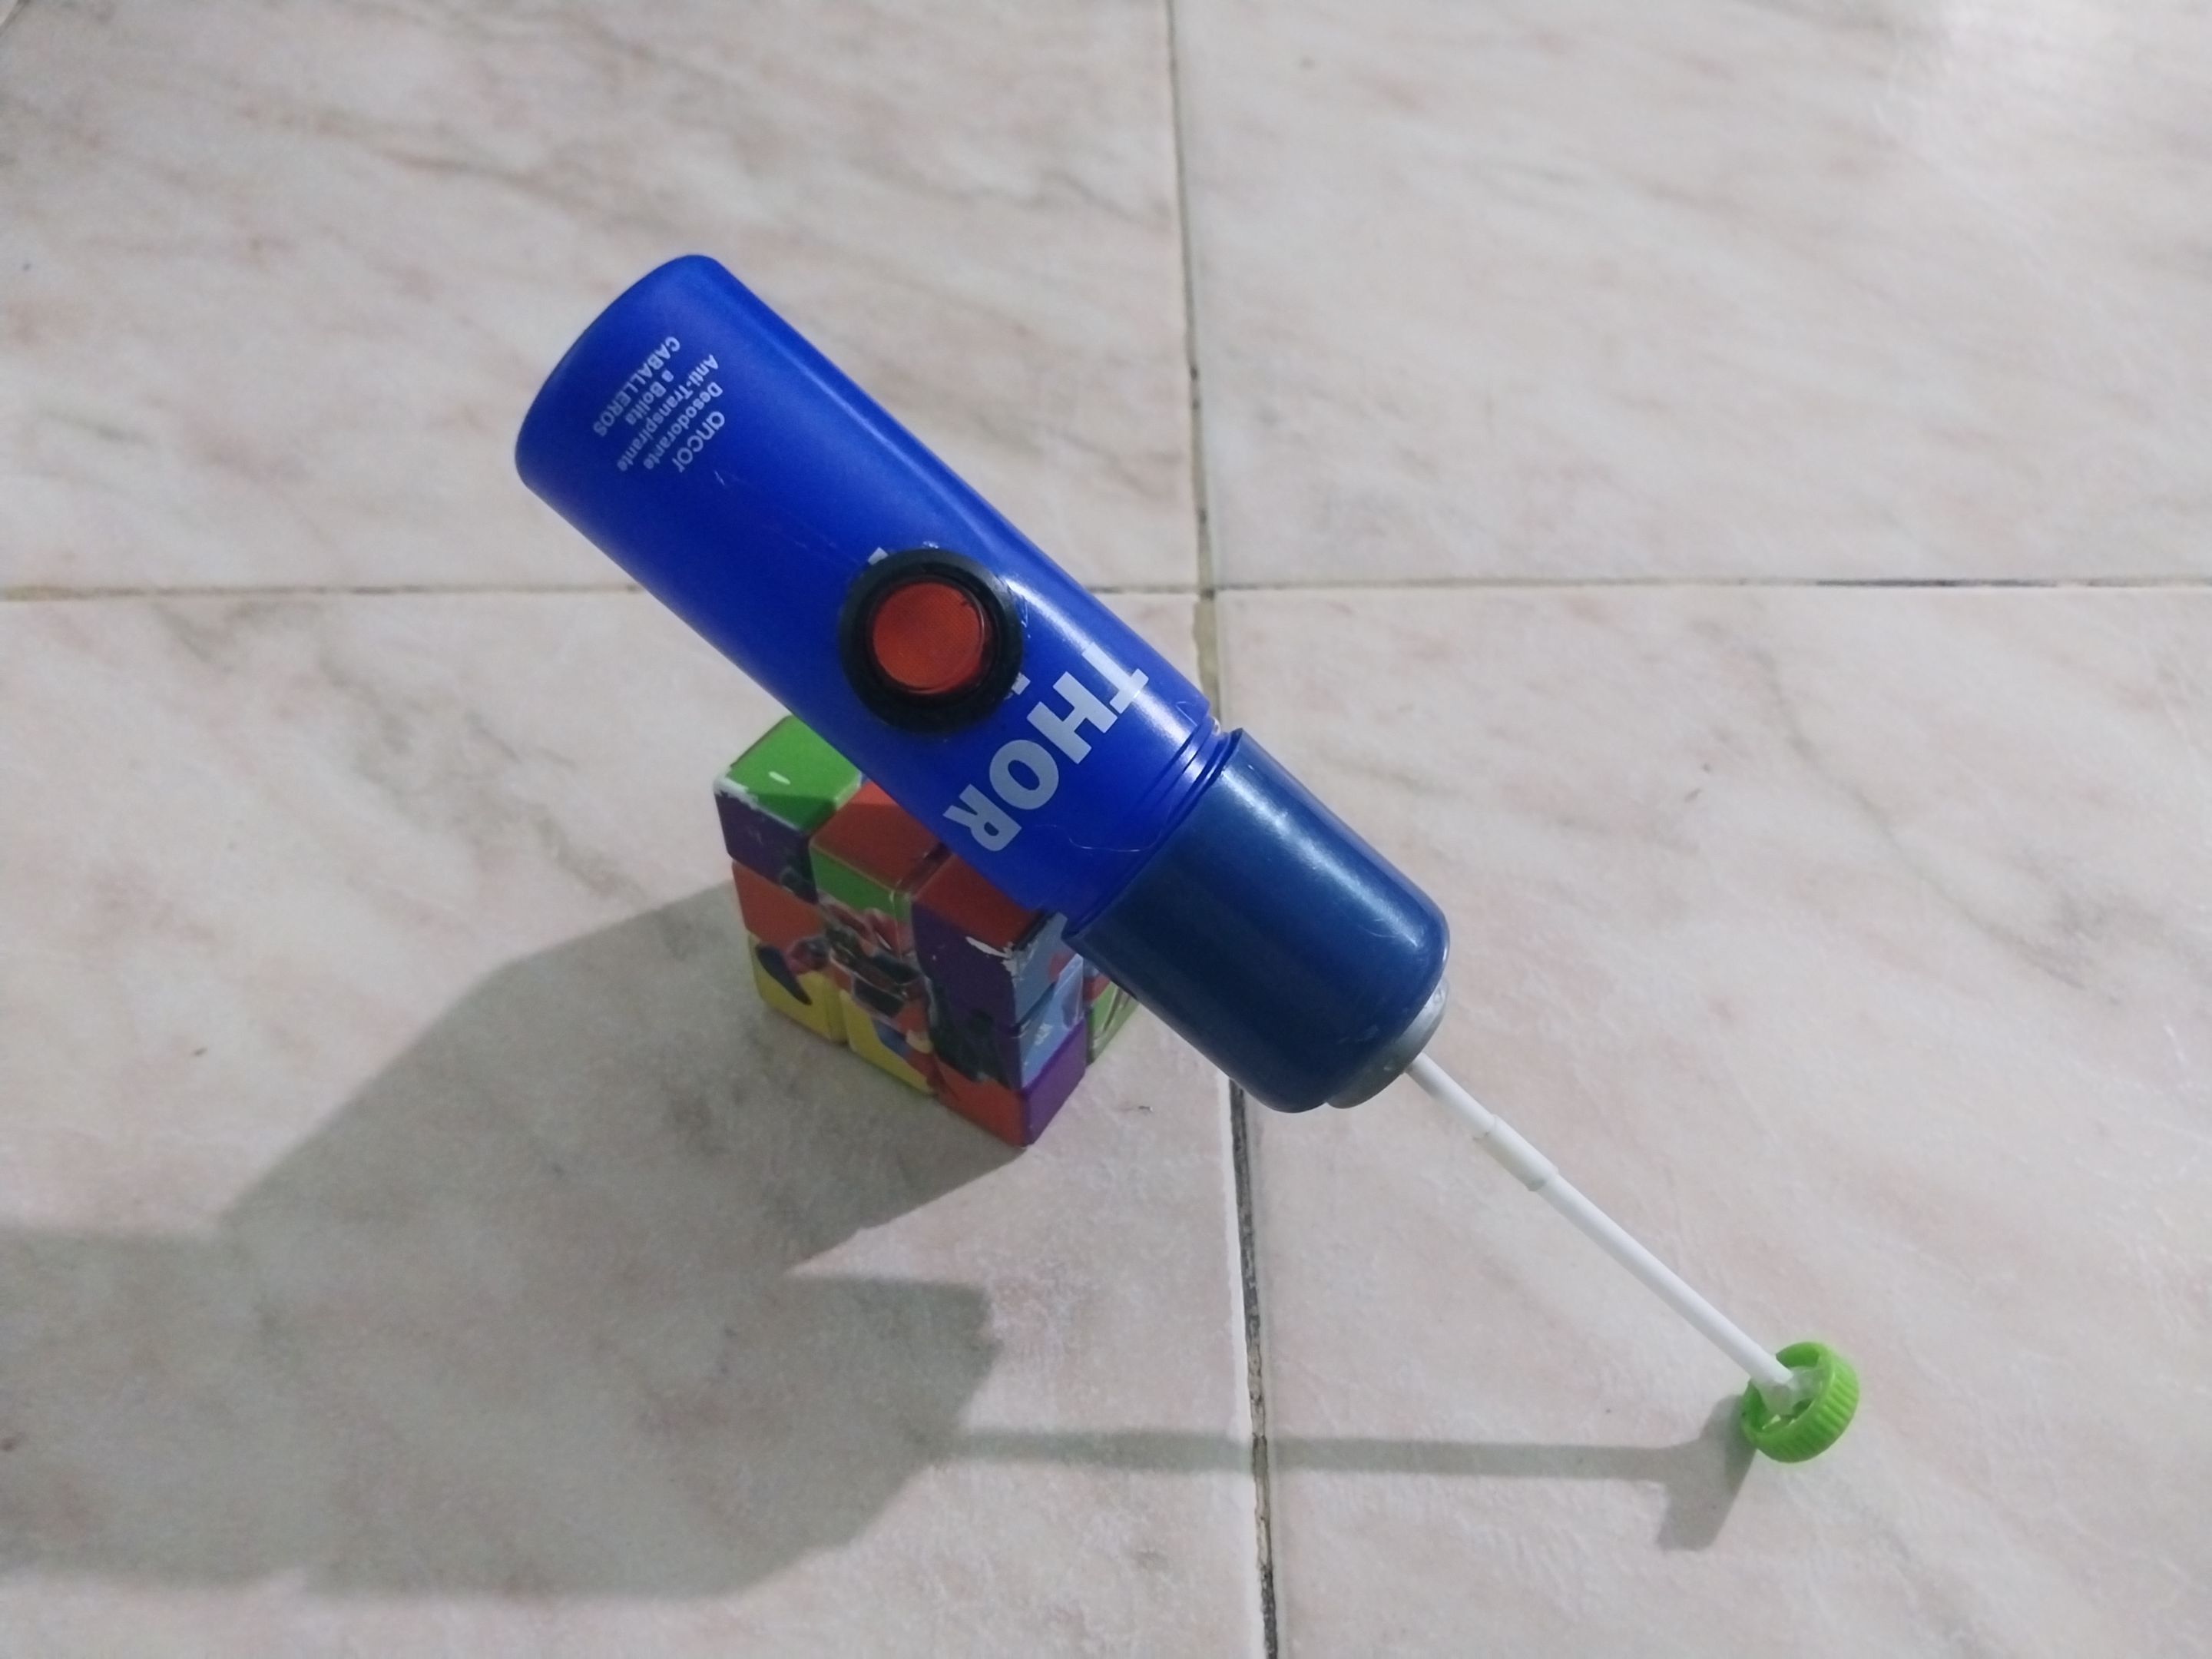
Luego de eso tomé el palillo que tenía y con ayuda del cautín abrí un pequeño orificio en la ruedita que tenía y allí inserté el palillo, de manera que me quedara firme y derecho. Hecho eso, tomé la tapa que tenía del envase de desodorante y procedí a ponérsela para que me ayudara a ajustar más el motorcito y le diera una mejor estética. Despues, tomé el palillo con la ruedita y lo inserté en el adaptador que le habia puesto a la punta del motor; y una vez hecho eso, listo. La Mini Batidora hecha en casa estaba 100% funcional.
también cabe recalcar que es una batidora que trabaja directamente con energía y ese motor trabaja a 9 voltios por lo que para utilizarla solamente tuve que conectarle un adaptador de 9 voltios, encenderla, y listo, a batir!
With all the materials at hand, I began my work... The first thing I did was take my deodorant container, remove the lid, and with the help of a marker, I marked a small guideline on one of the top parts of the container. Using a soldering iron, I made the hole where I would insert the lighter. Then I rounded it off a bit until it was ready. Then I proceeded to do the same on the bottom of the container. I made a guideline with the marker and made a hole with the help of the soldering iron, and in that hole I would insert the 9-volt female connector.
Then I took the small motor and attached the mini adapter to the end, which you'll see later what it's for. Then I took the deodorant container lid and made a hole so the motor would fit. After that, I sanded the hole, and that was it. After that, I took the wires. Since I only had two, but they were a bit long, I cut them, so I was left with four wires. I soldered the first two wires to the small motor using a soldering iron and solder, placing one wire on each track of the motor, while I soldered the other two wires to the tracks of the 9-volt female connector.
Once that was done, I inserted the small motor into the mouth of the deodorant bottle and pulled the wires through the hole I had made in the top. Then I inserted the 9-volt female connector through the hole I had made in the back, and likewise pulled the wires through the top. Once that was done, I connected one of the motor's tracks directly to one of the female connector's tracks, splice them together, and reinforced them with a bit of solder and tape. I soldered the other two free wires to each leg of the cigarette lighter, so that the mini blender wouldn't be powered directly, but would have a cigarette lighter. Next, I proceeded to insert the lighter firmly into the hole at the top, so that it would fit snugly and no wire would come loose.
After that, I took the toothpick I had and, using the soldering iron, made a small hole in the wheel I had and inserted the toothpick into it, so that it would fit firmly and straight. Once that was done, I took the cap I had from the deodorant bottle and proceeded to put it on to help me adjust the motor more and give it a better aesthetic. Then, I took the toothpick with the wheel and inserted it into the adapter I had attached to the end of the motor; and once that was done, it was ready. The homemade mini blender was 100% functional.
It's also worth noting that this blender runs directly on electricity, and that motor runs on 9 volts. To use it, I just had to connect a 9-volt adapter, turn it on, and that's it, blend!

---
Y bueno, eso fue todo por ahora, de verdad espero que lo hayan disfrutado y que le saquen provecho. Saludos, Bendiciones, y hasta la próxima.
Well, that's all for now. I truly hope you enjoyed it and find value in it. Best regards, blessings, and see you next time.

---
---
Translated with https://www.deepl.com/translator
#diyhub
#diy
#tutorial
#spanish
#crafting
#creative
#electronics
#creativecoin
#ocd
#neoxian
Payout: 0.000 HBD
Votes: 137
More interactions (upvote, reblog, reply) coming soon.