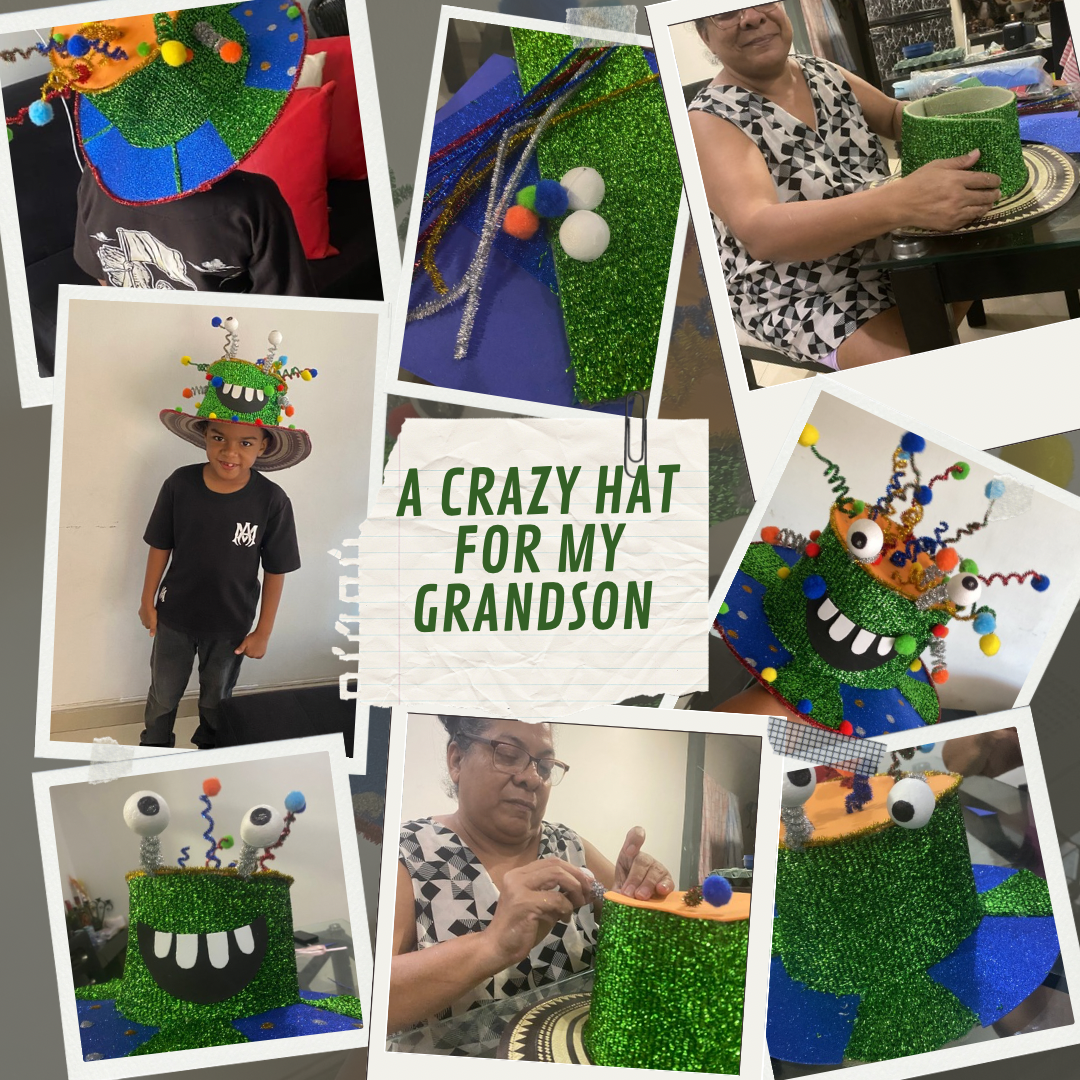

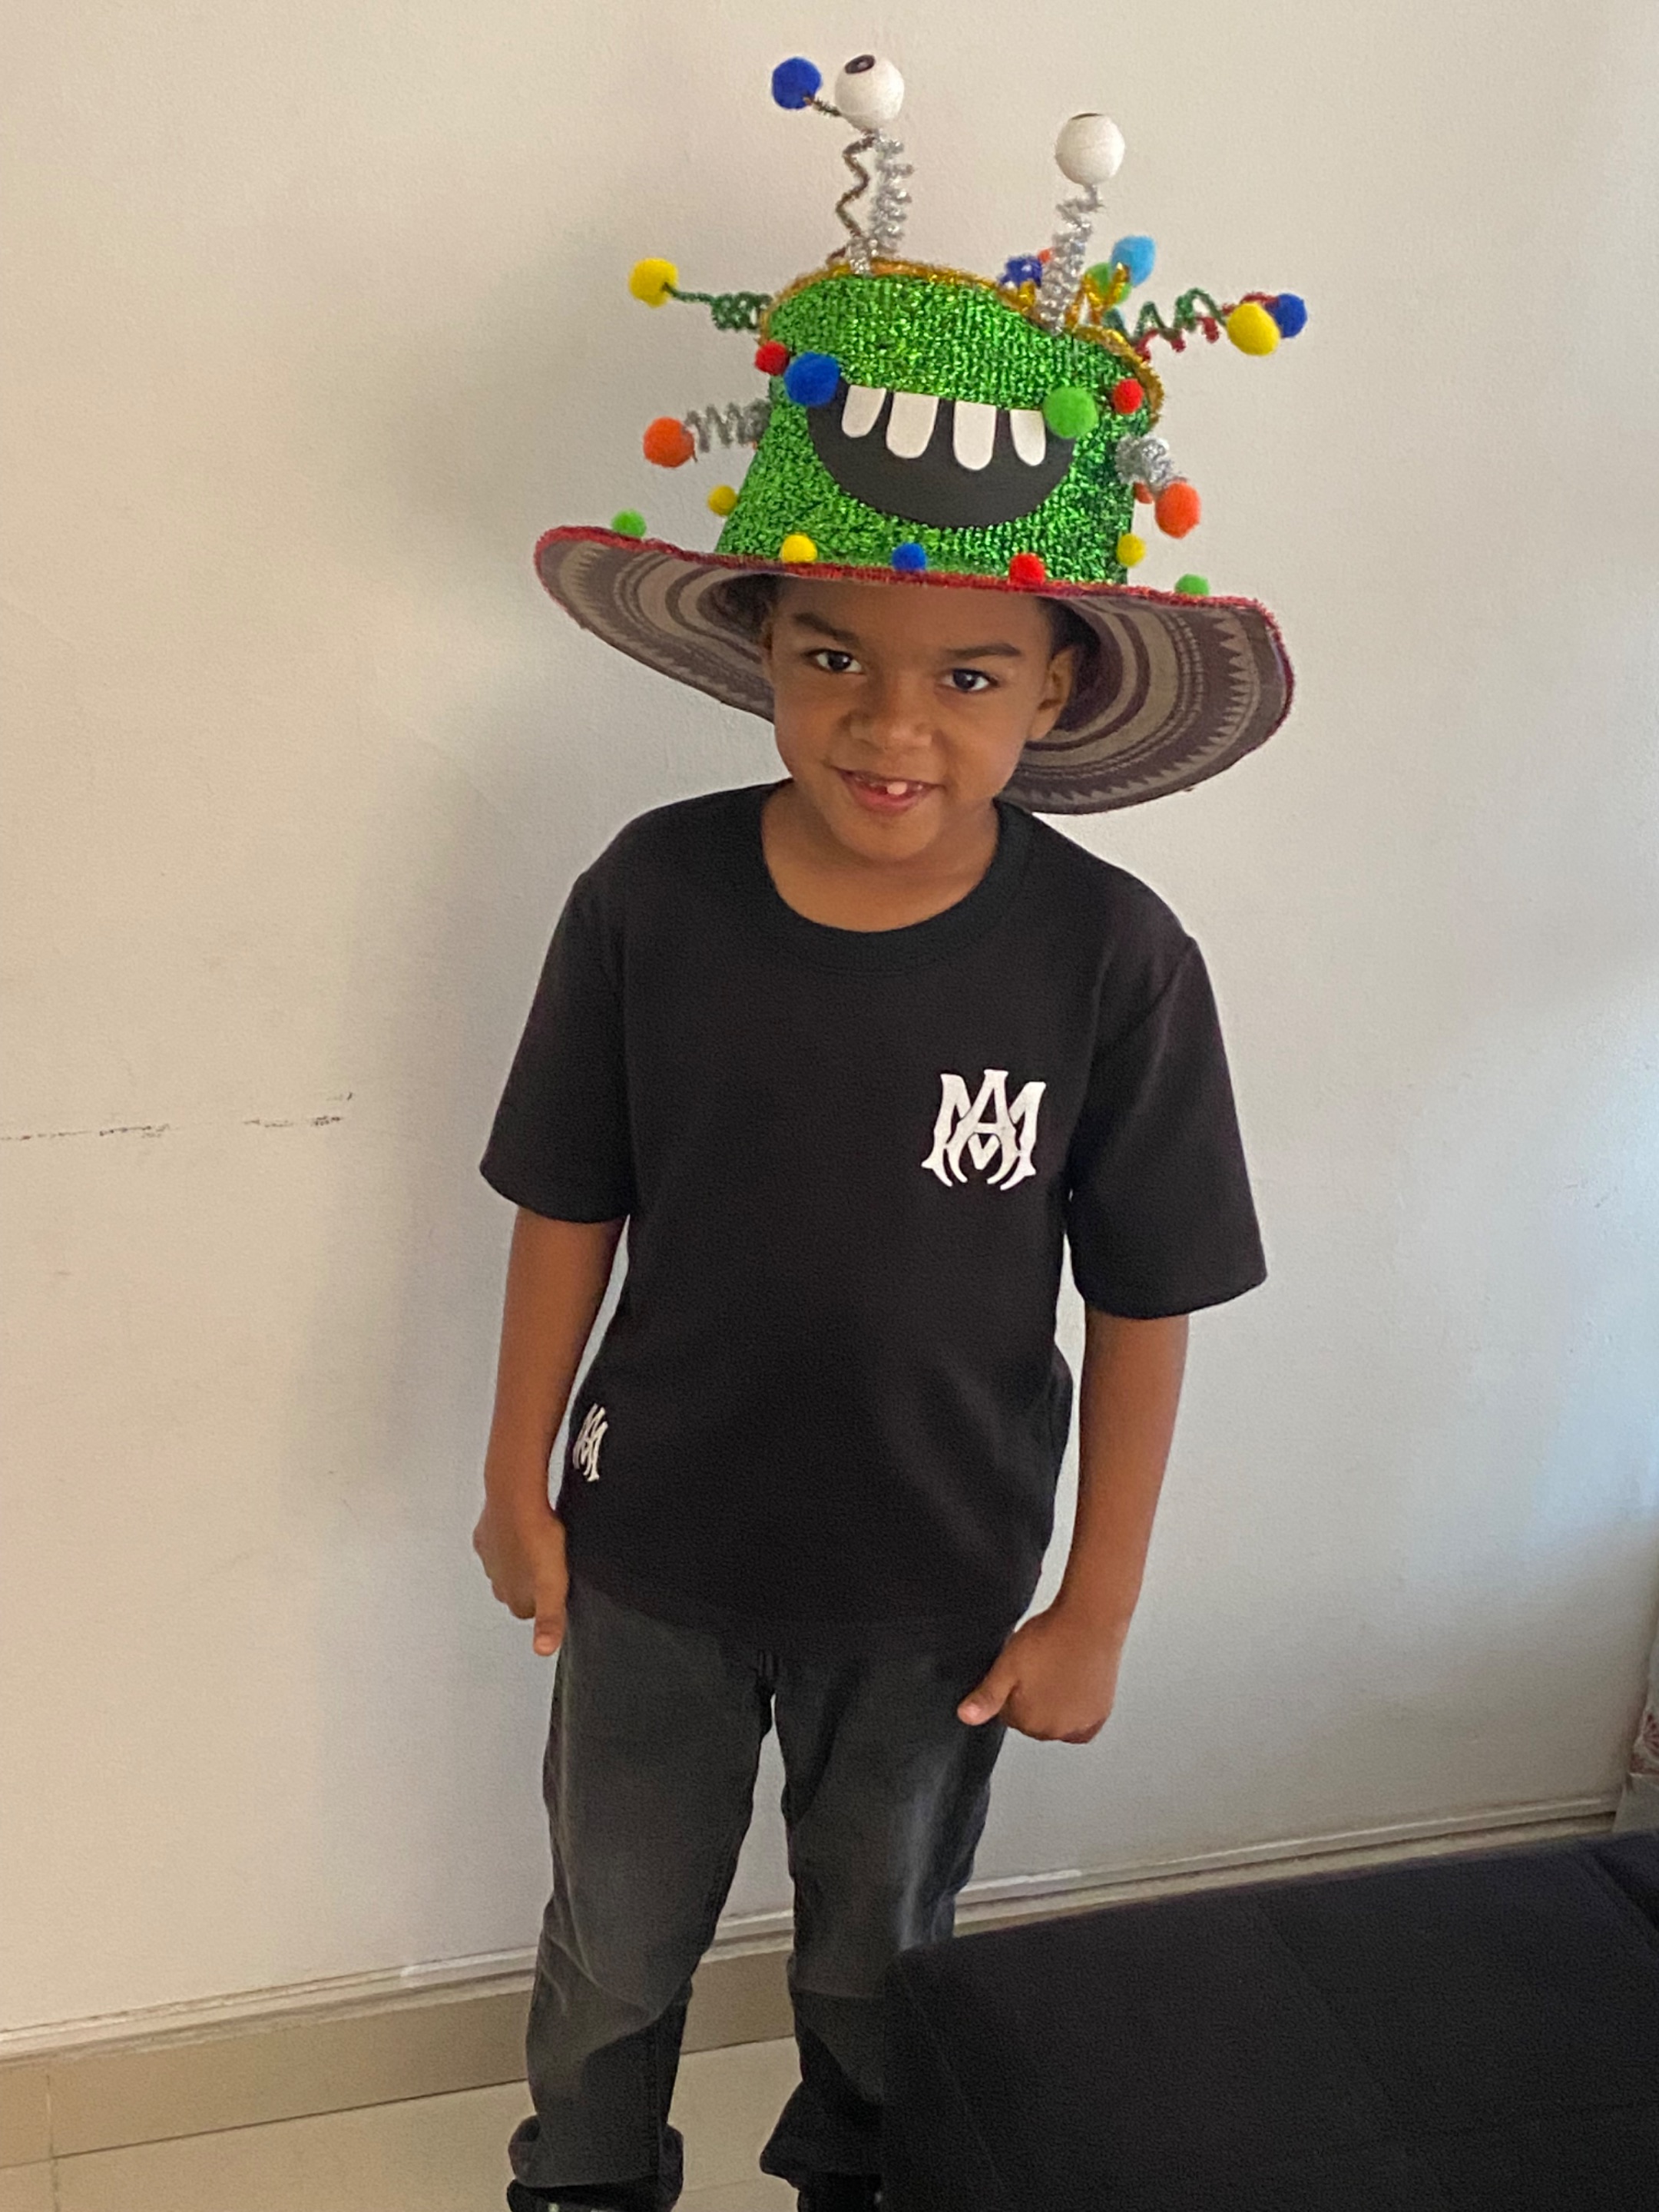
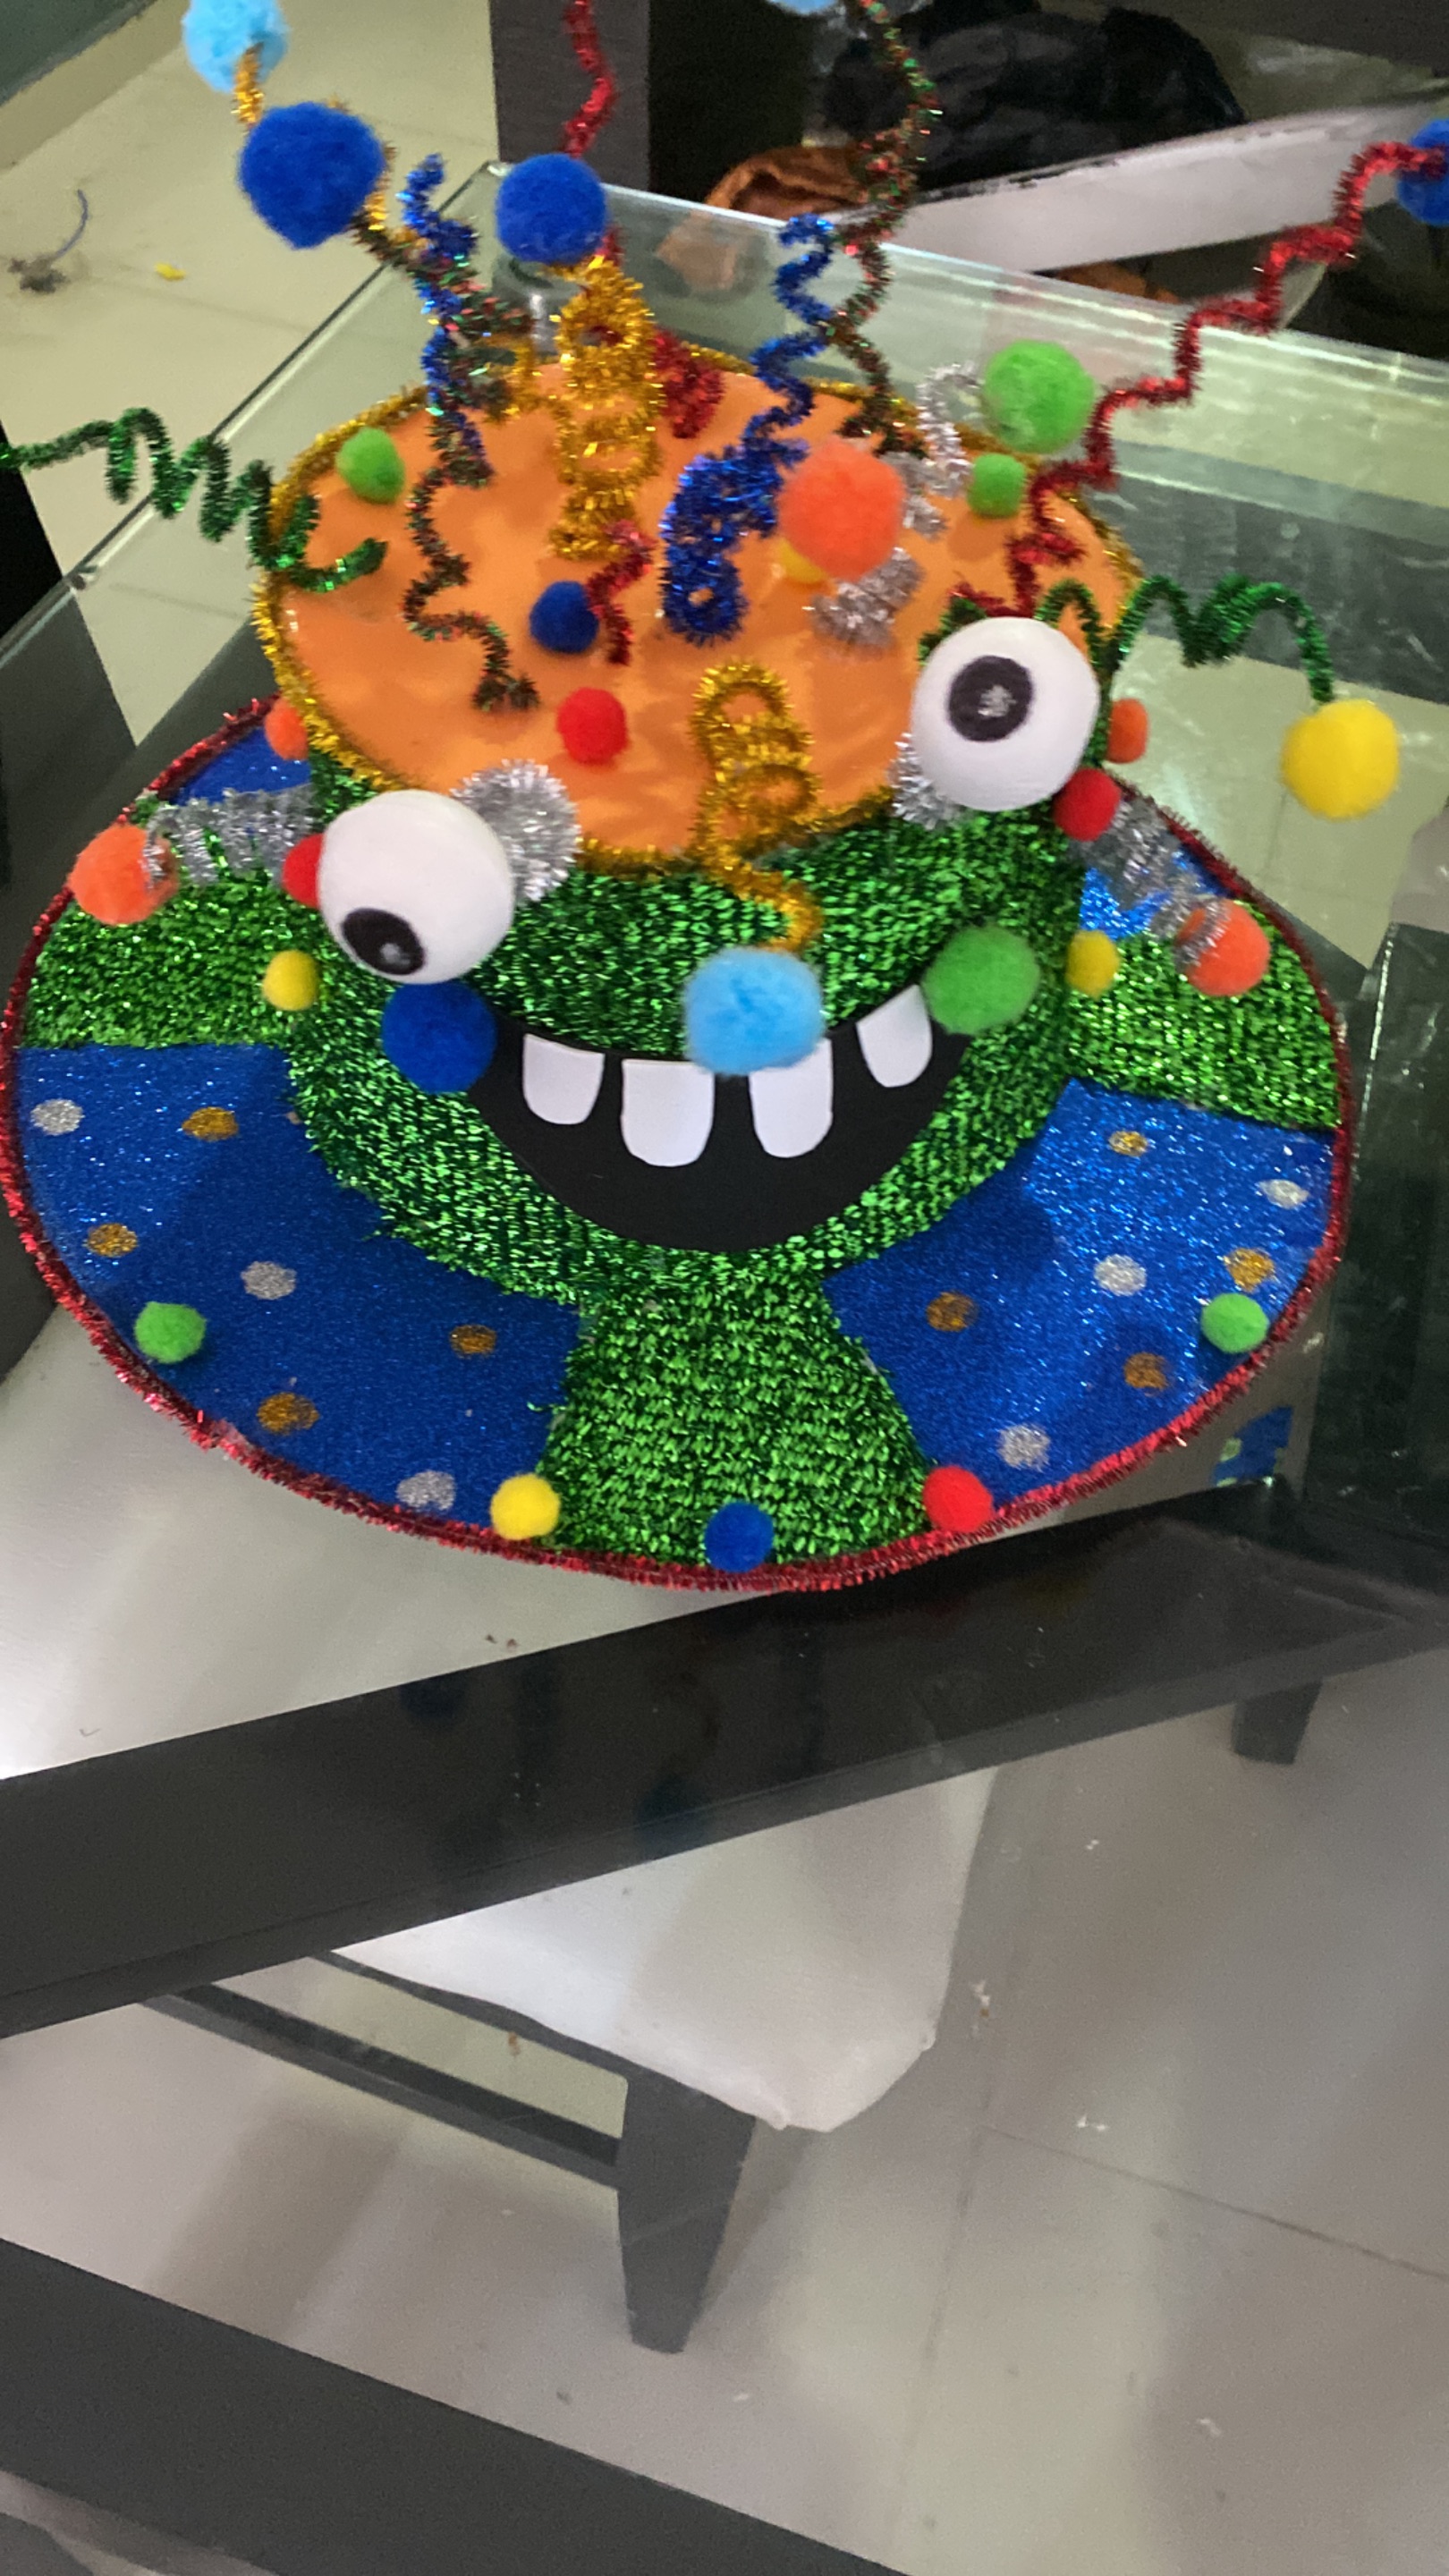
Hello to this lovely #diyhub community. Today I'm sharing with you how I made a crazy hat for my grandson for his school's Crazy Hat Day celebration, so I got to work looking for the materials I needed.
VERSIÓN EN ESPAÑOL
Hola a esta linda comunidad de #diyhub hoy comparto con ustedes la realización de un sombrero loco que le realice a mi nieto por motivo de esta celebración del día de los sombreros locos en el colegio así que me puse manos a la obra para buscar los materiales a necesitar

 |
 |
 |
 |
 |
|---|---|---|---|---|
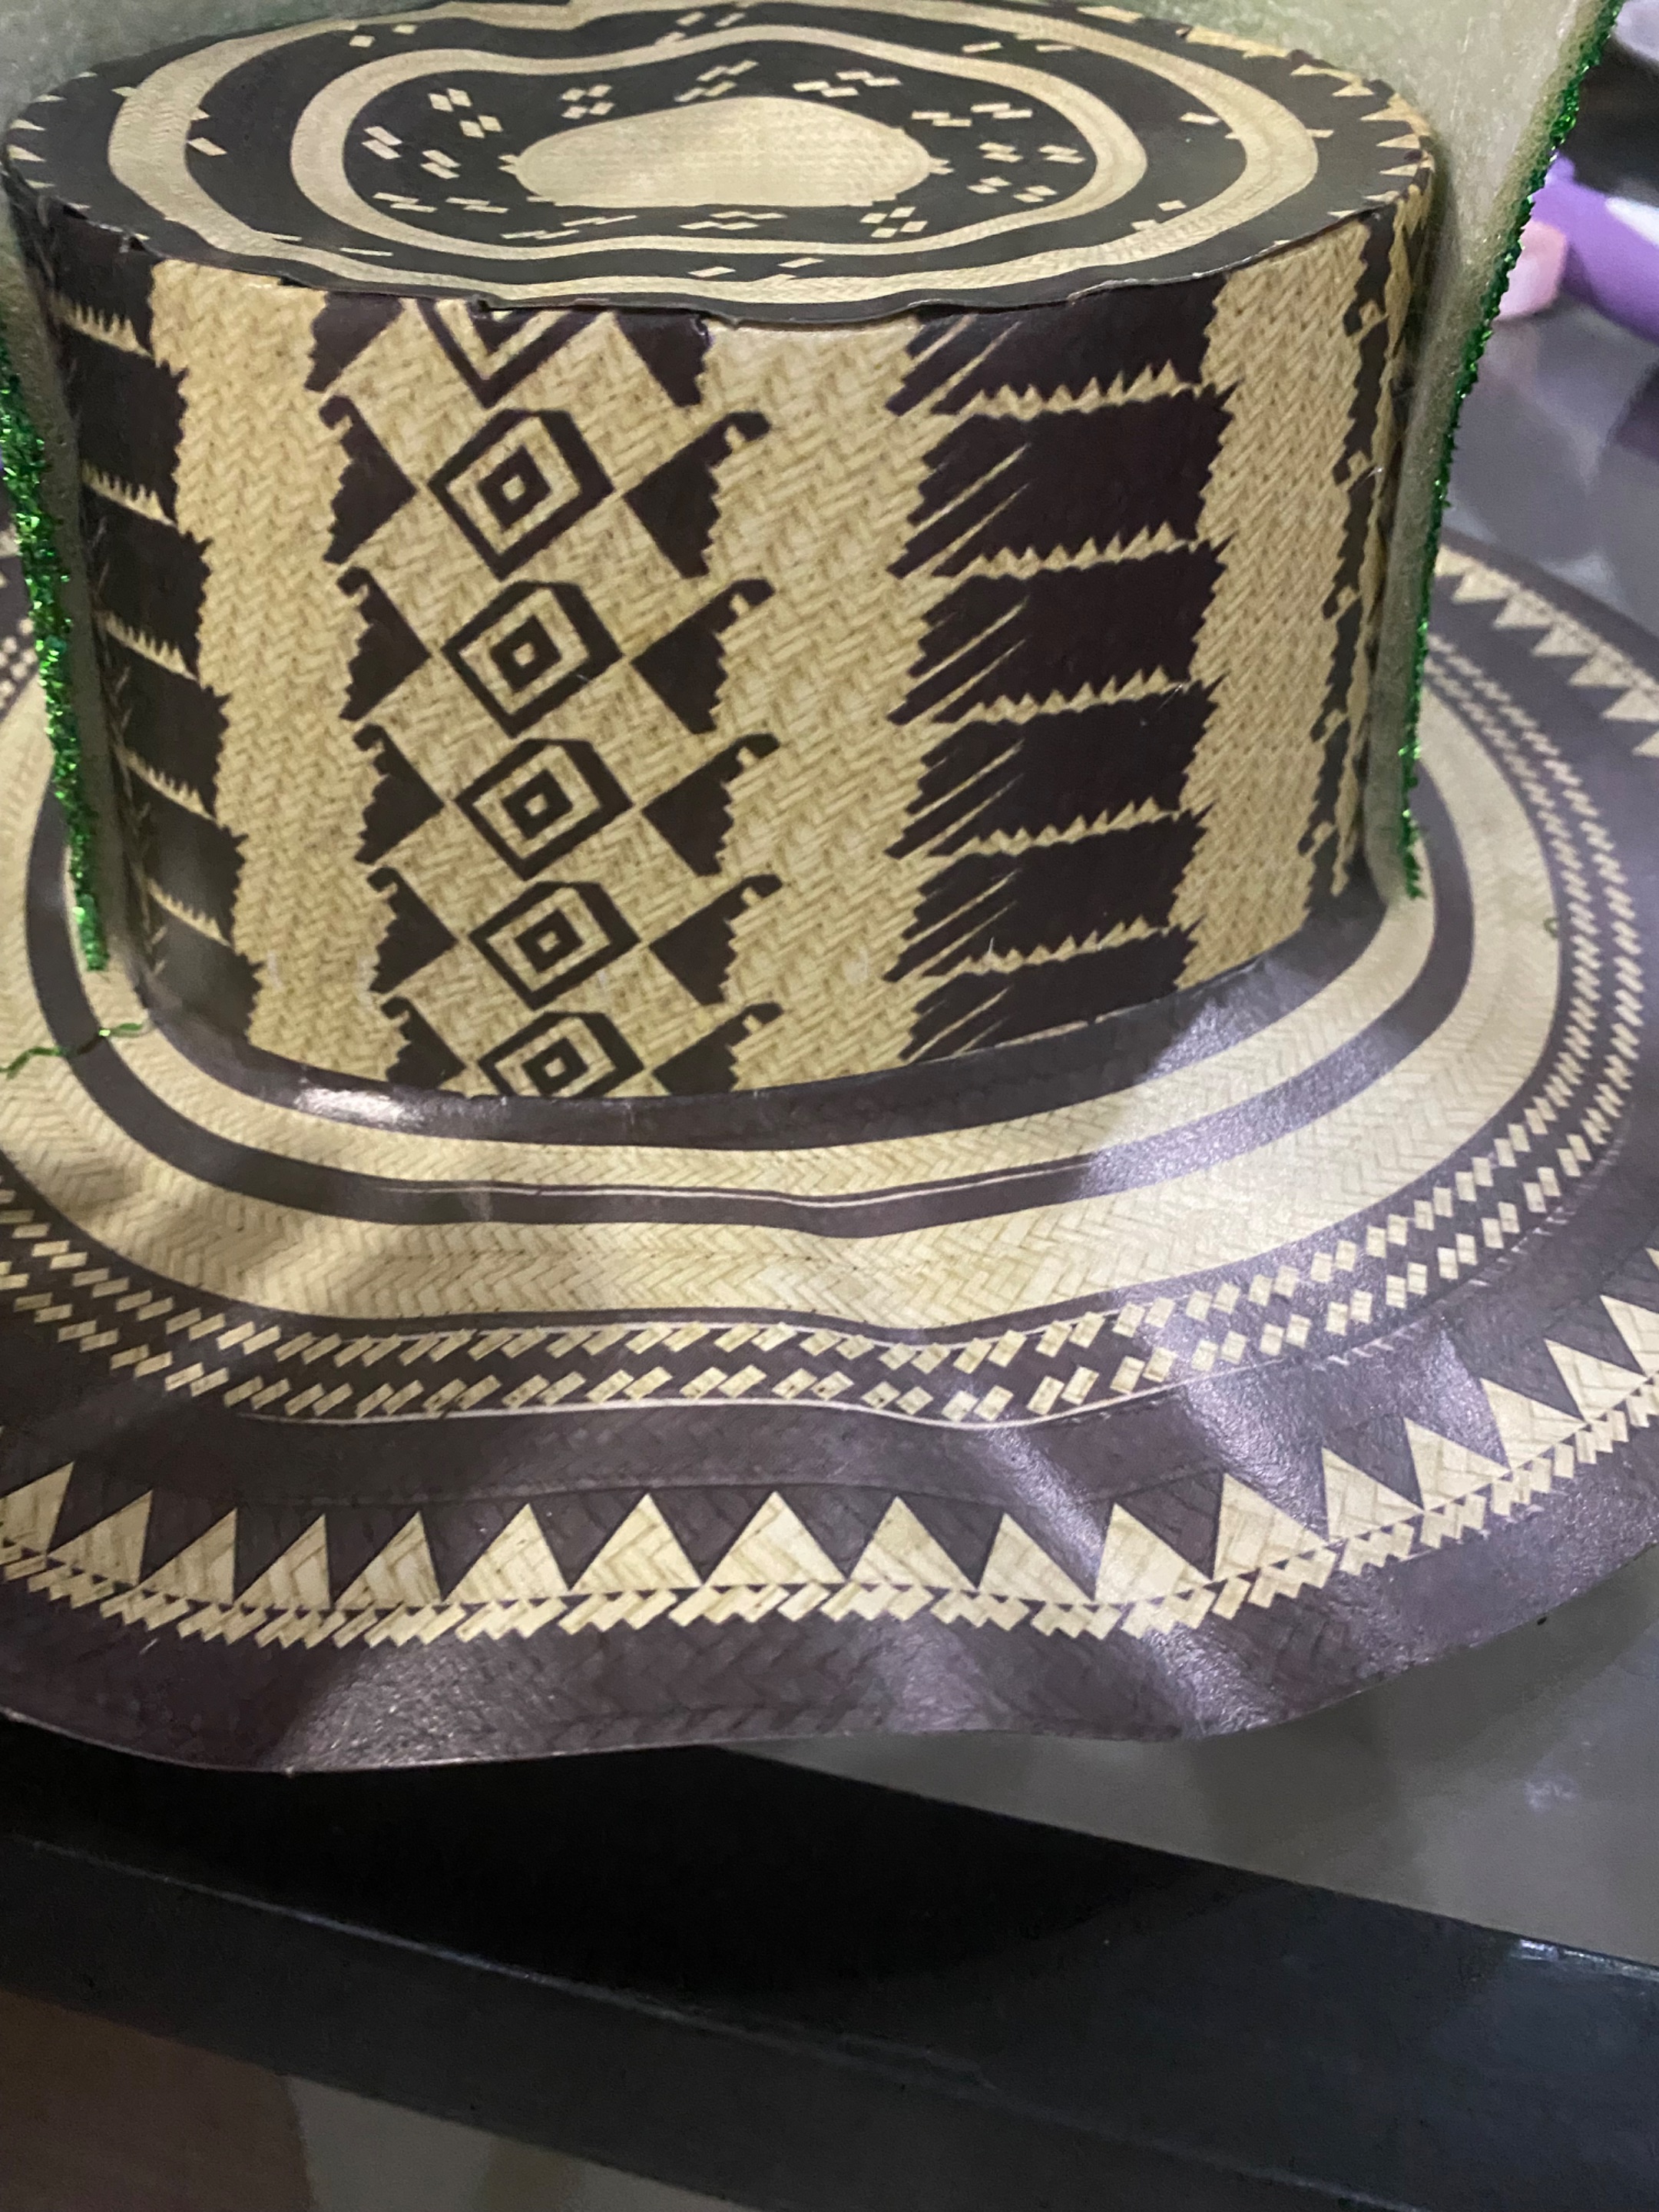
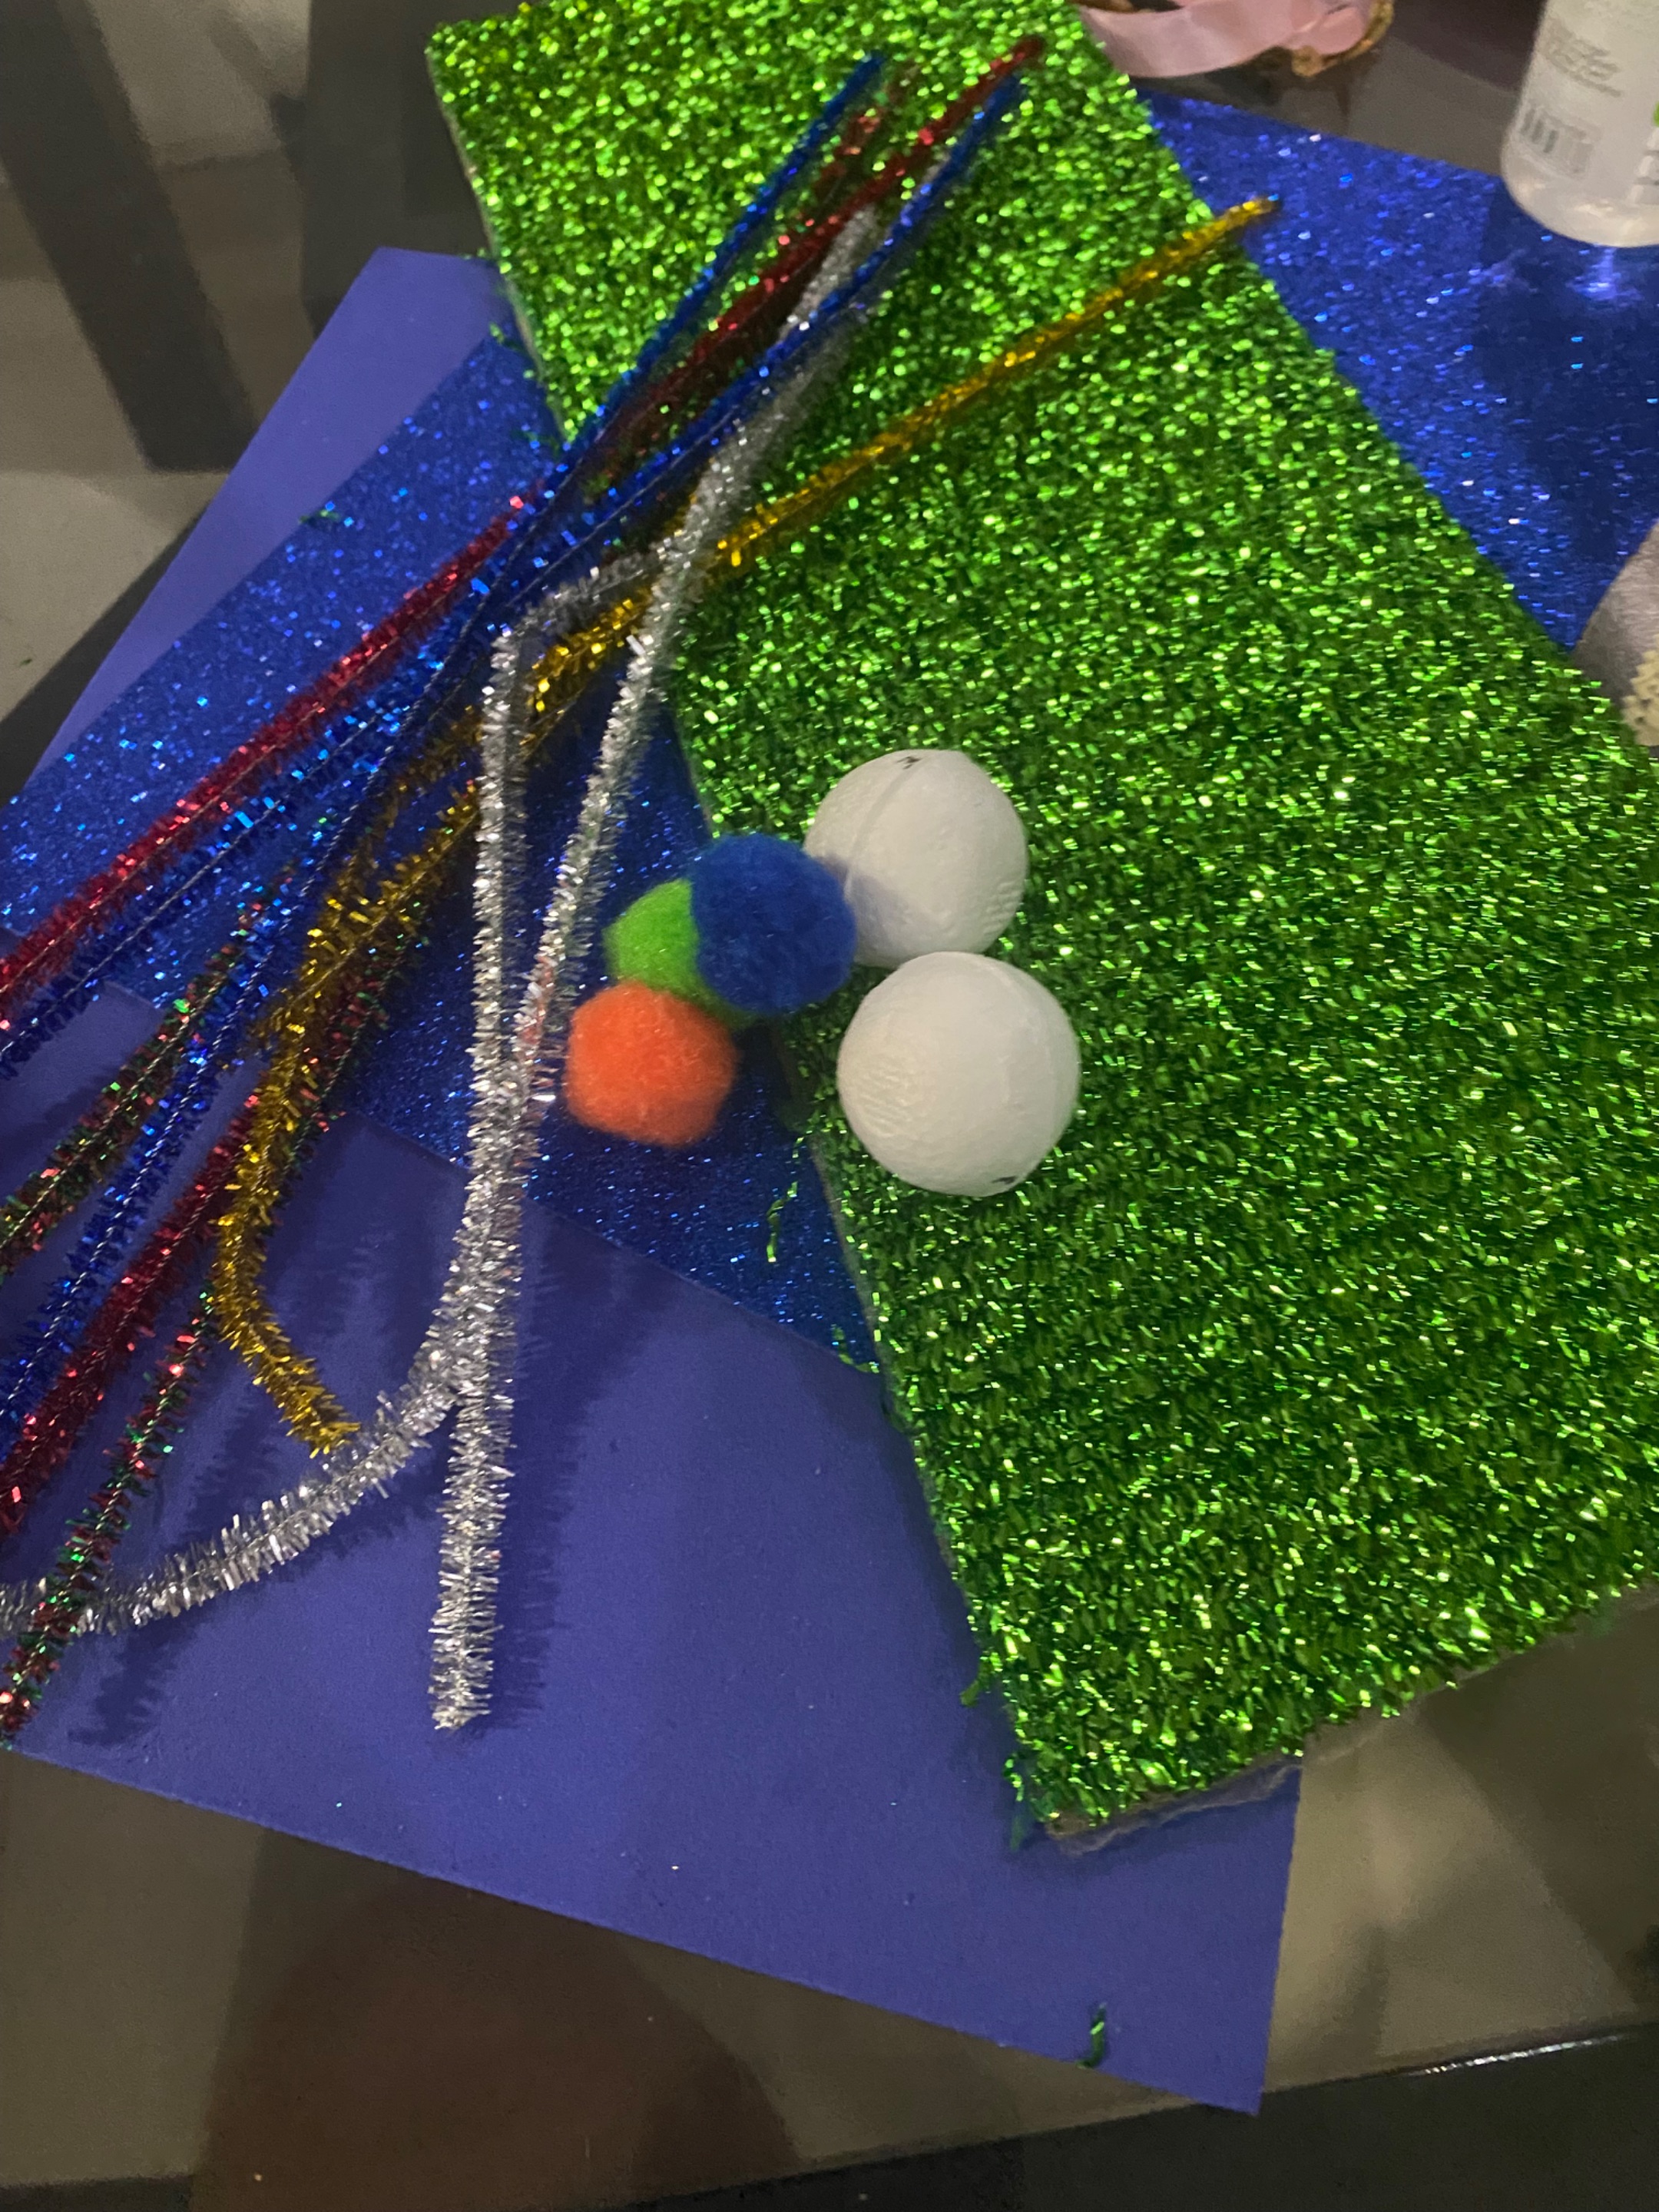
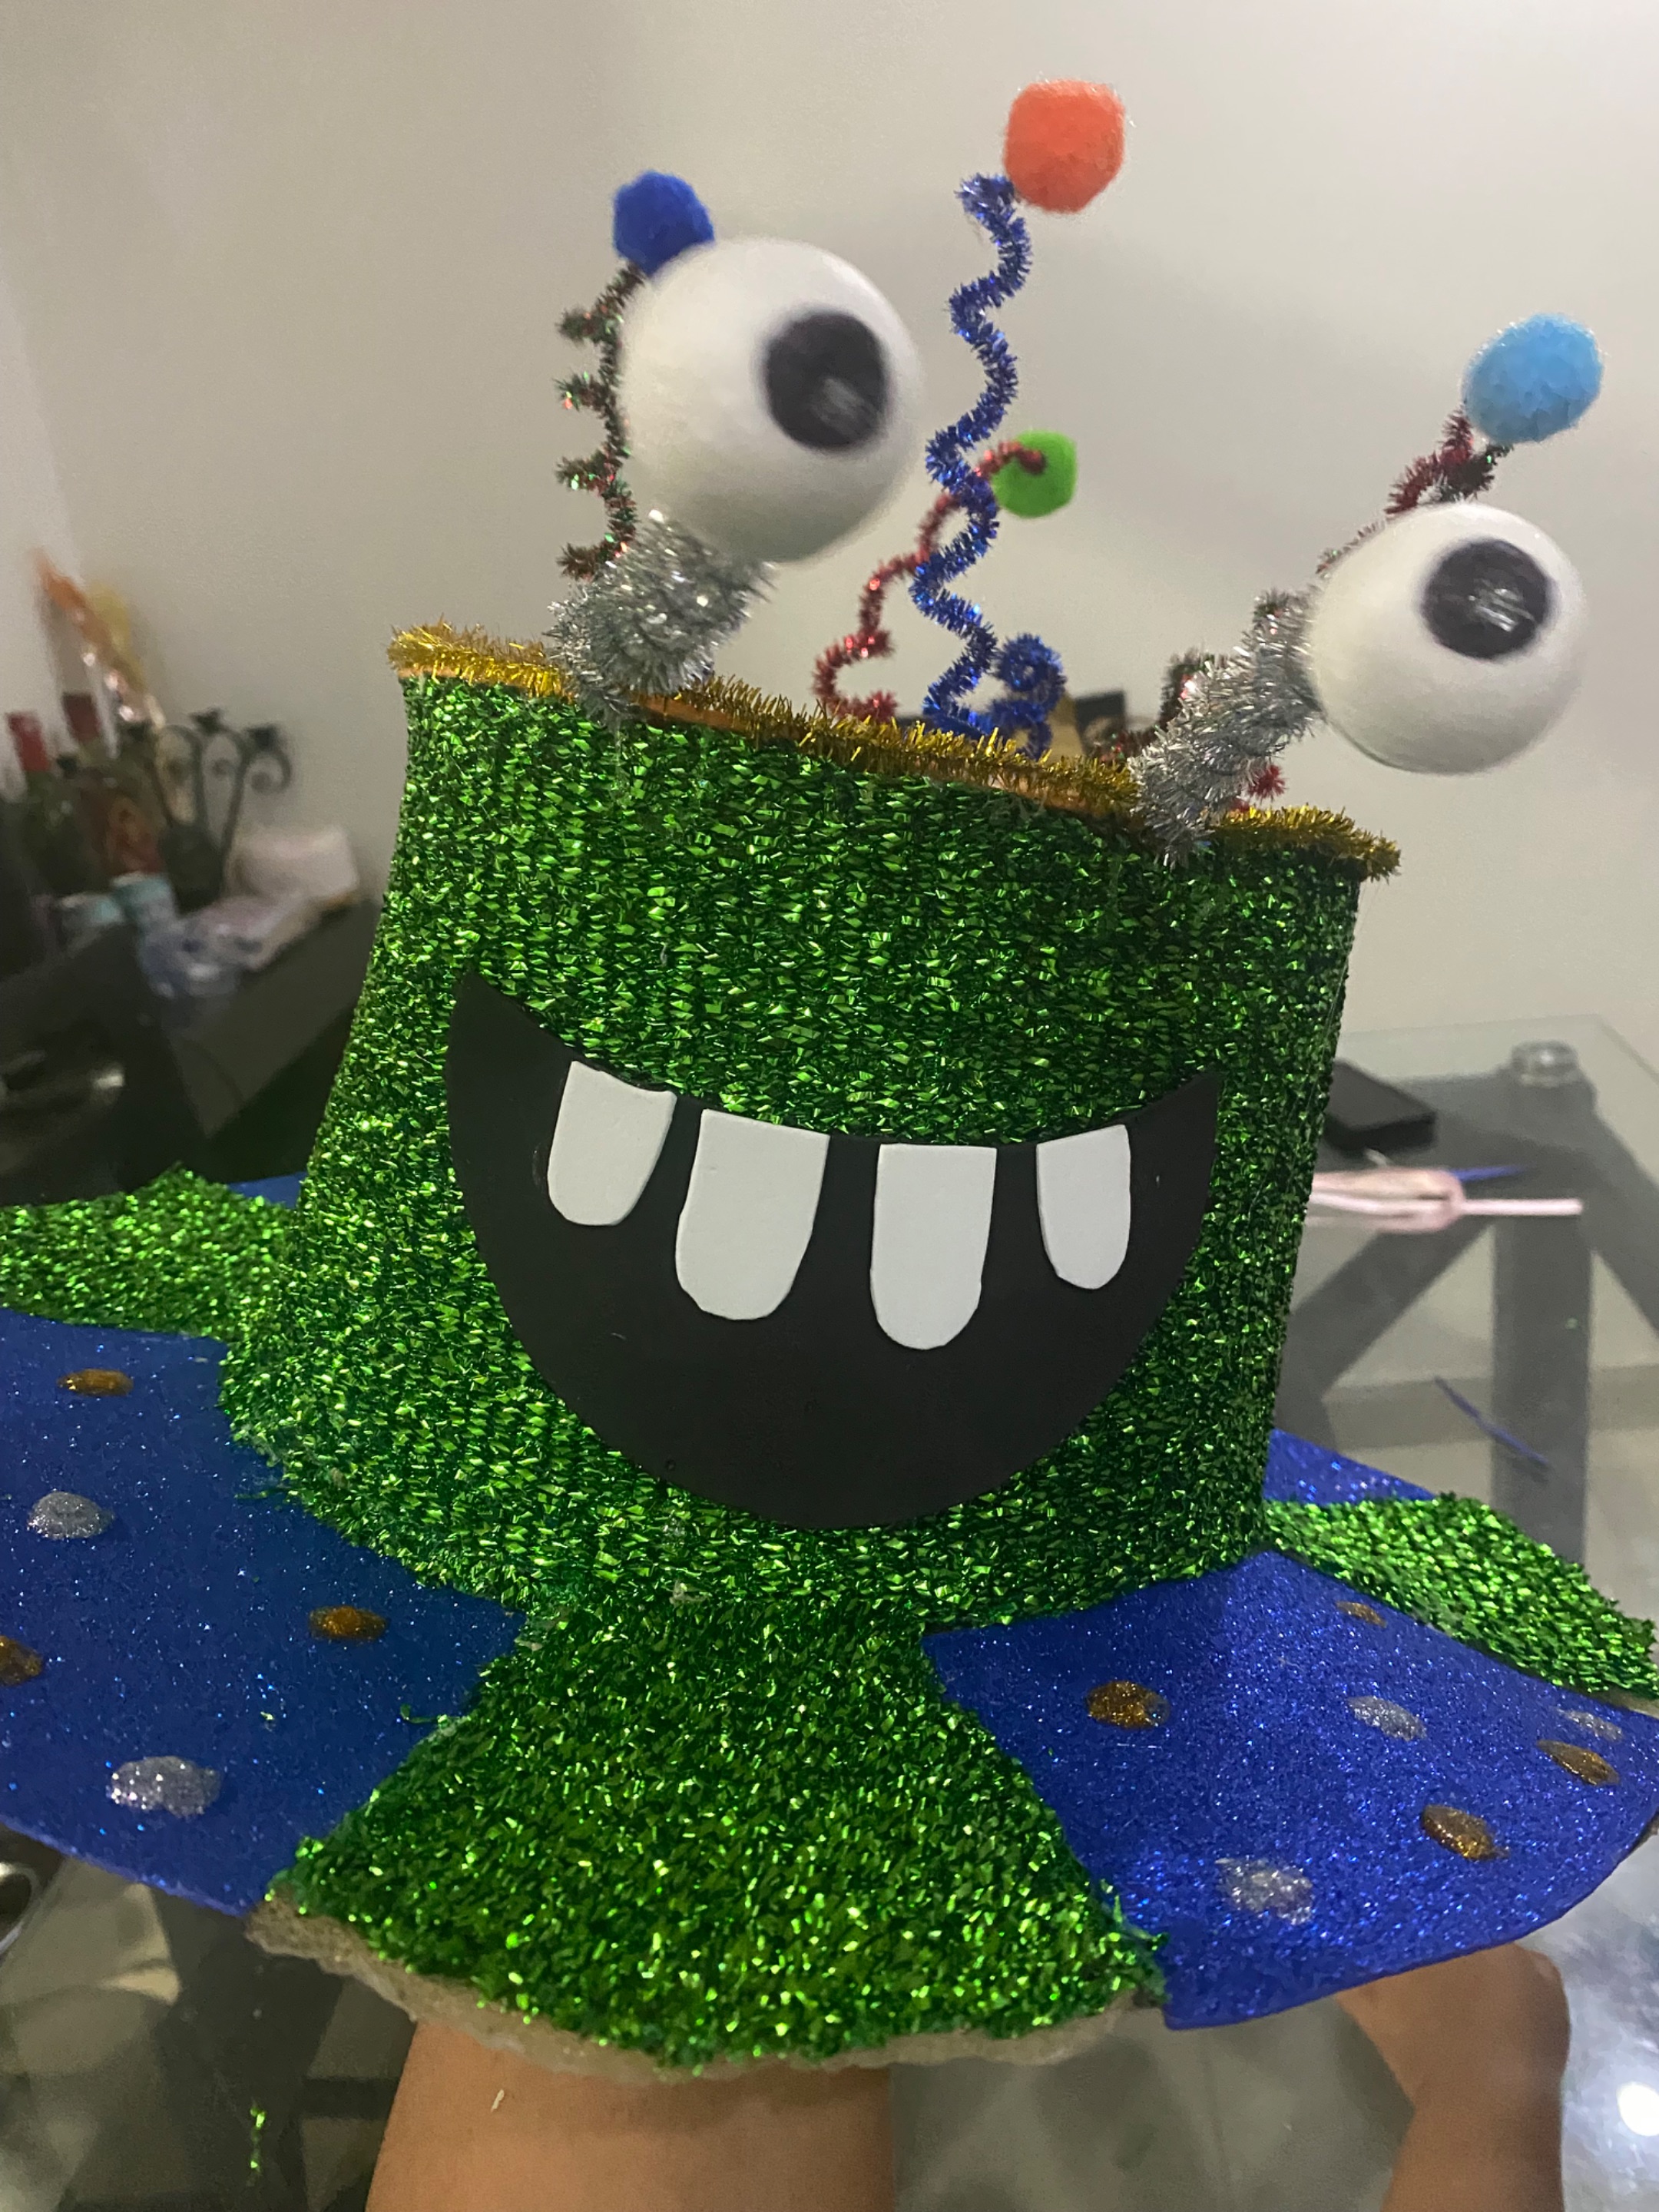
These consisted of: 4 sheets of blue glitter foam 1 sheet of bright green fabric 15 colored balls in two sizes 2 small anime balls 20 assorted colored chenille stems scissors, liquid silicone, a cardboard hat base Once I had gathered enough materials to make it, I got to work.
VERSIÓN EN ESPAÑOL
En los cuales consistió en: 4 pliegos de fomi escarchado azul 1 pliego de tela verde brillante 15 bolas de colores en dos tamaños, 2 bolas de anime pequeñas 20 cheniles de colores surtidos, tijeras, silicona líquido una base de cartón de sombrero una vez conseguido el material suficiente para su realización me puse manos a la obra
 |
 |
 |
 |
|---|---|---|---|
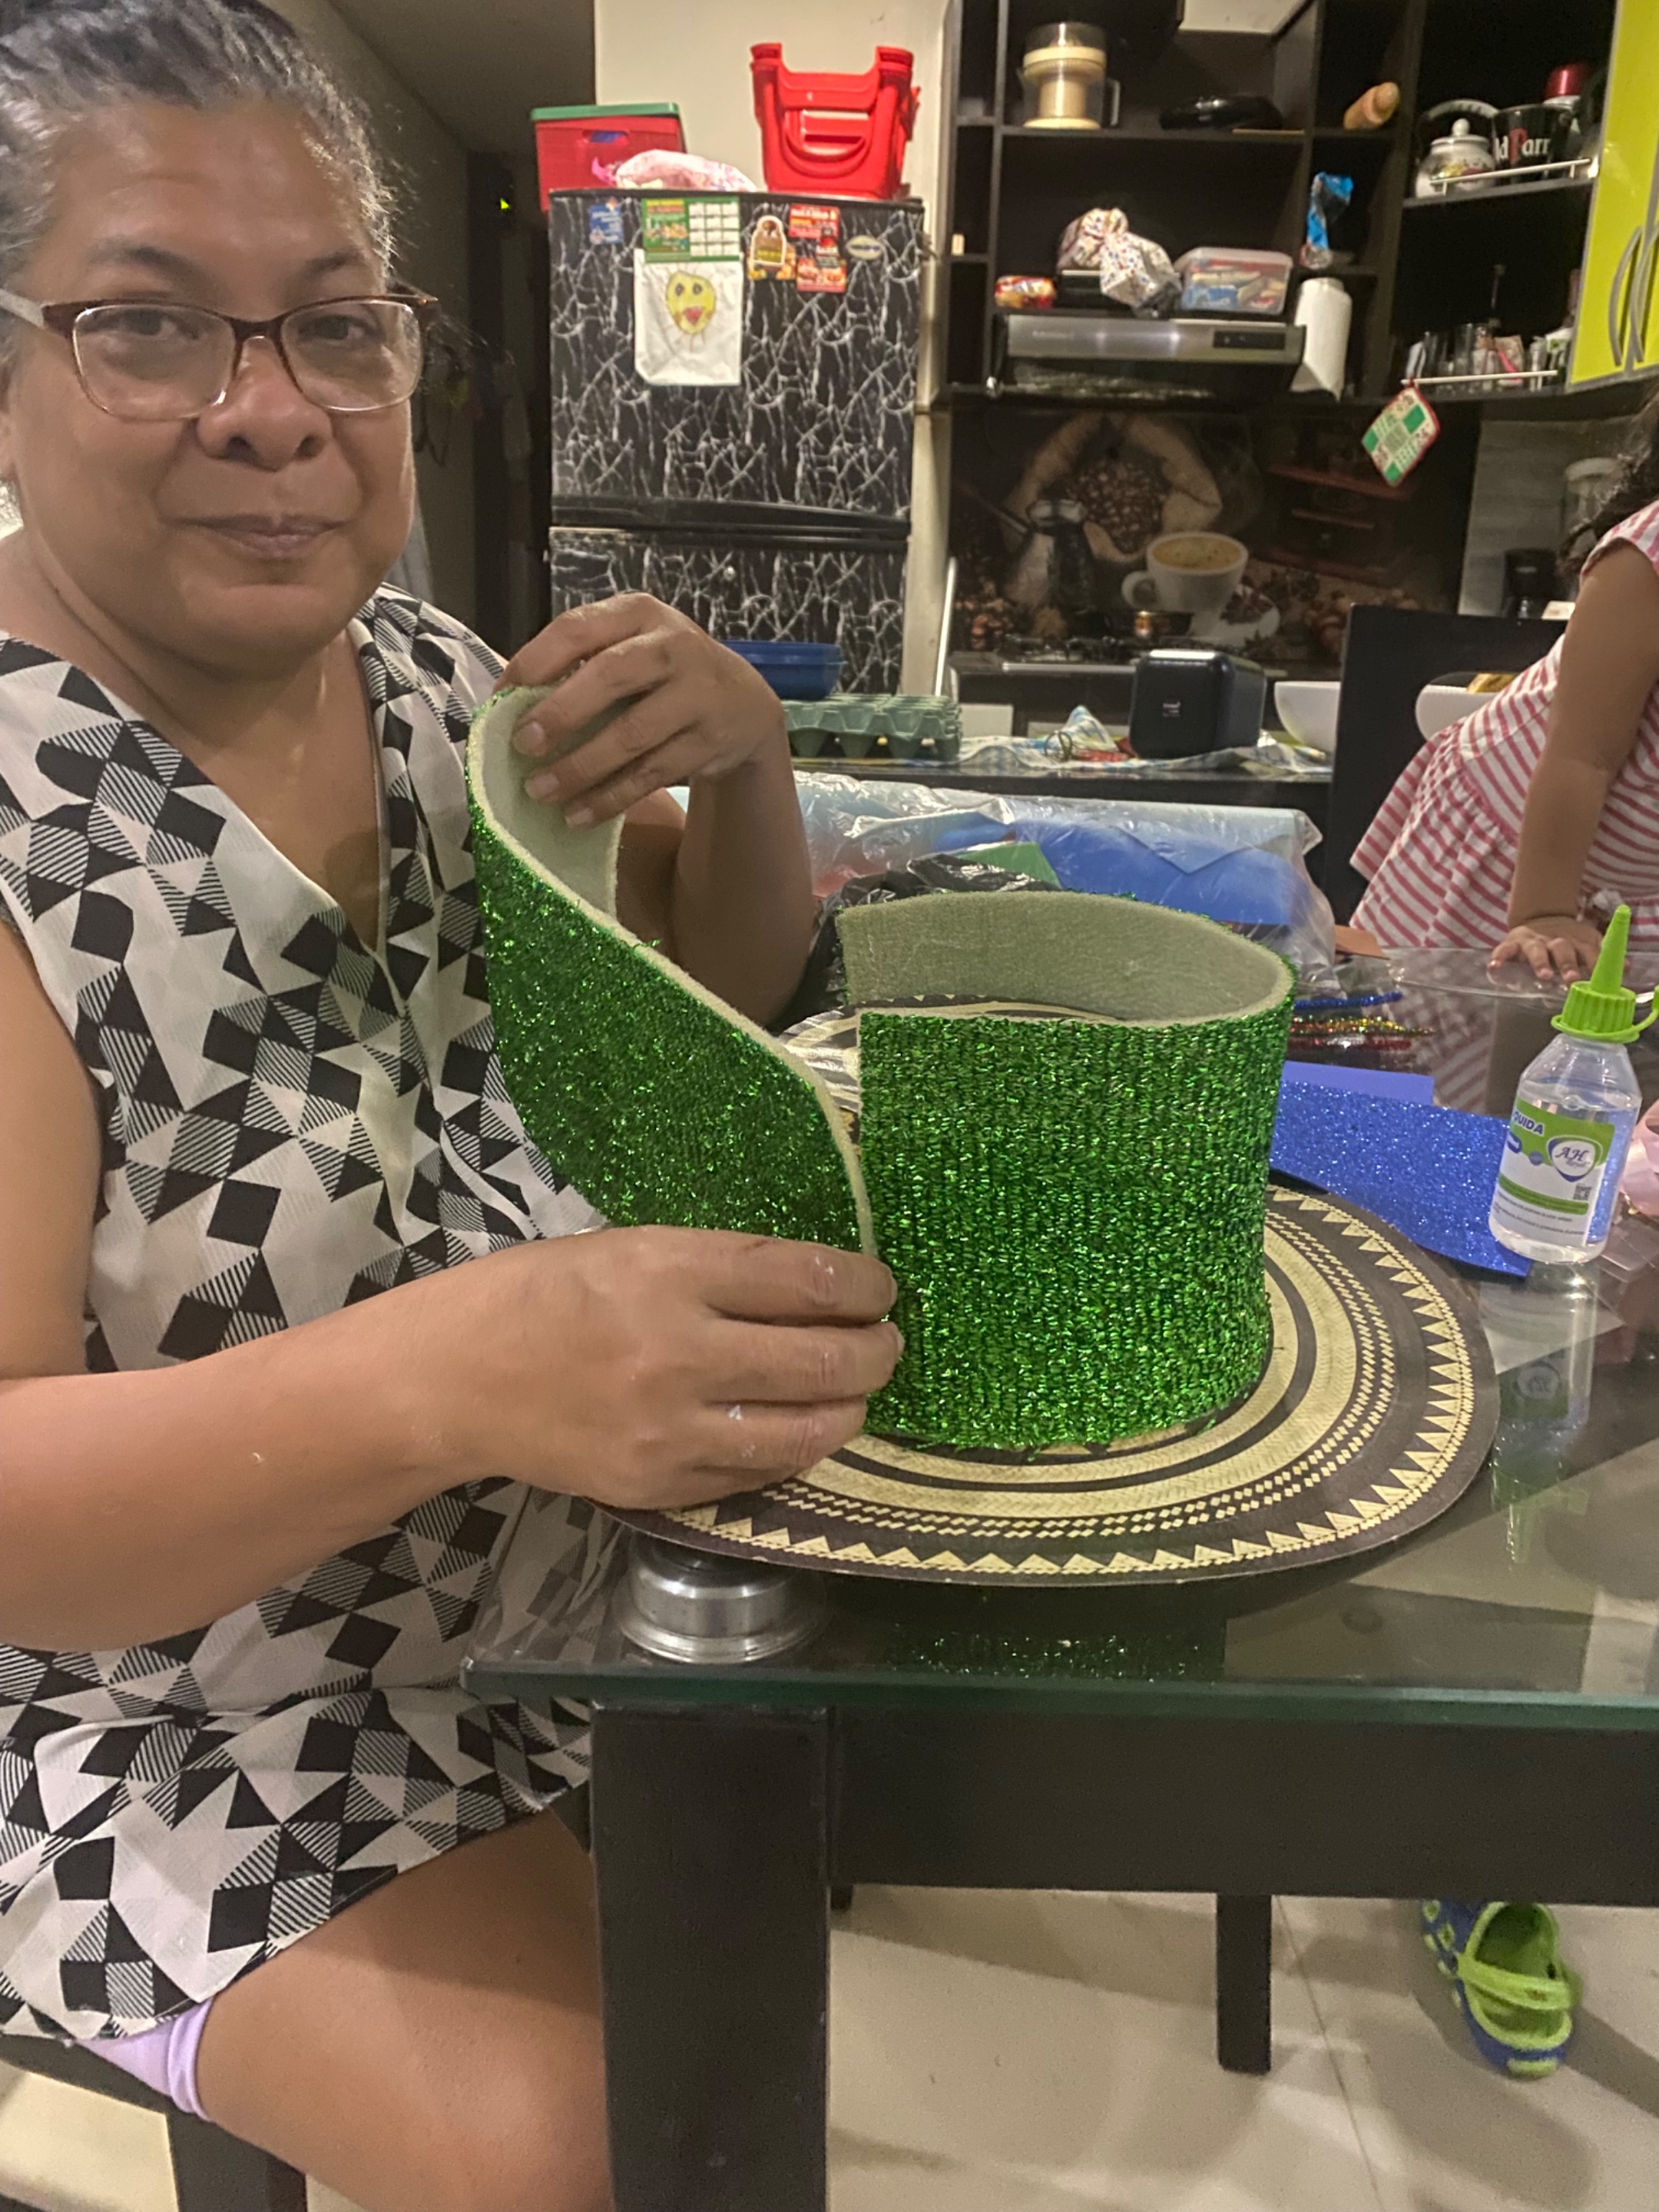
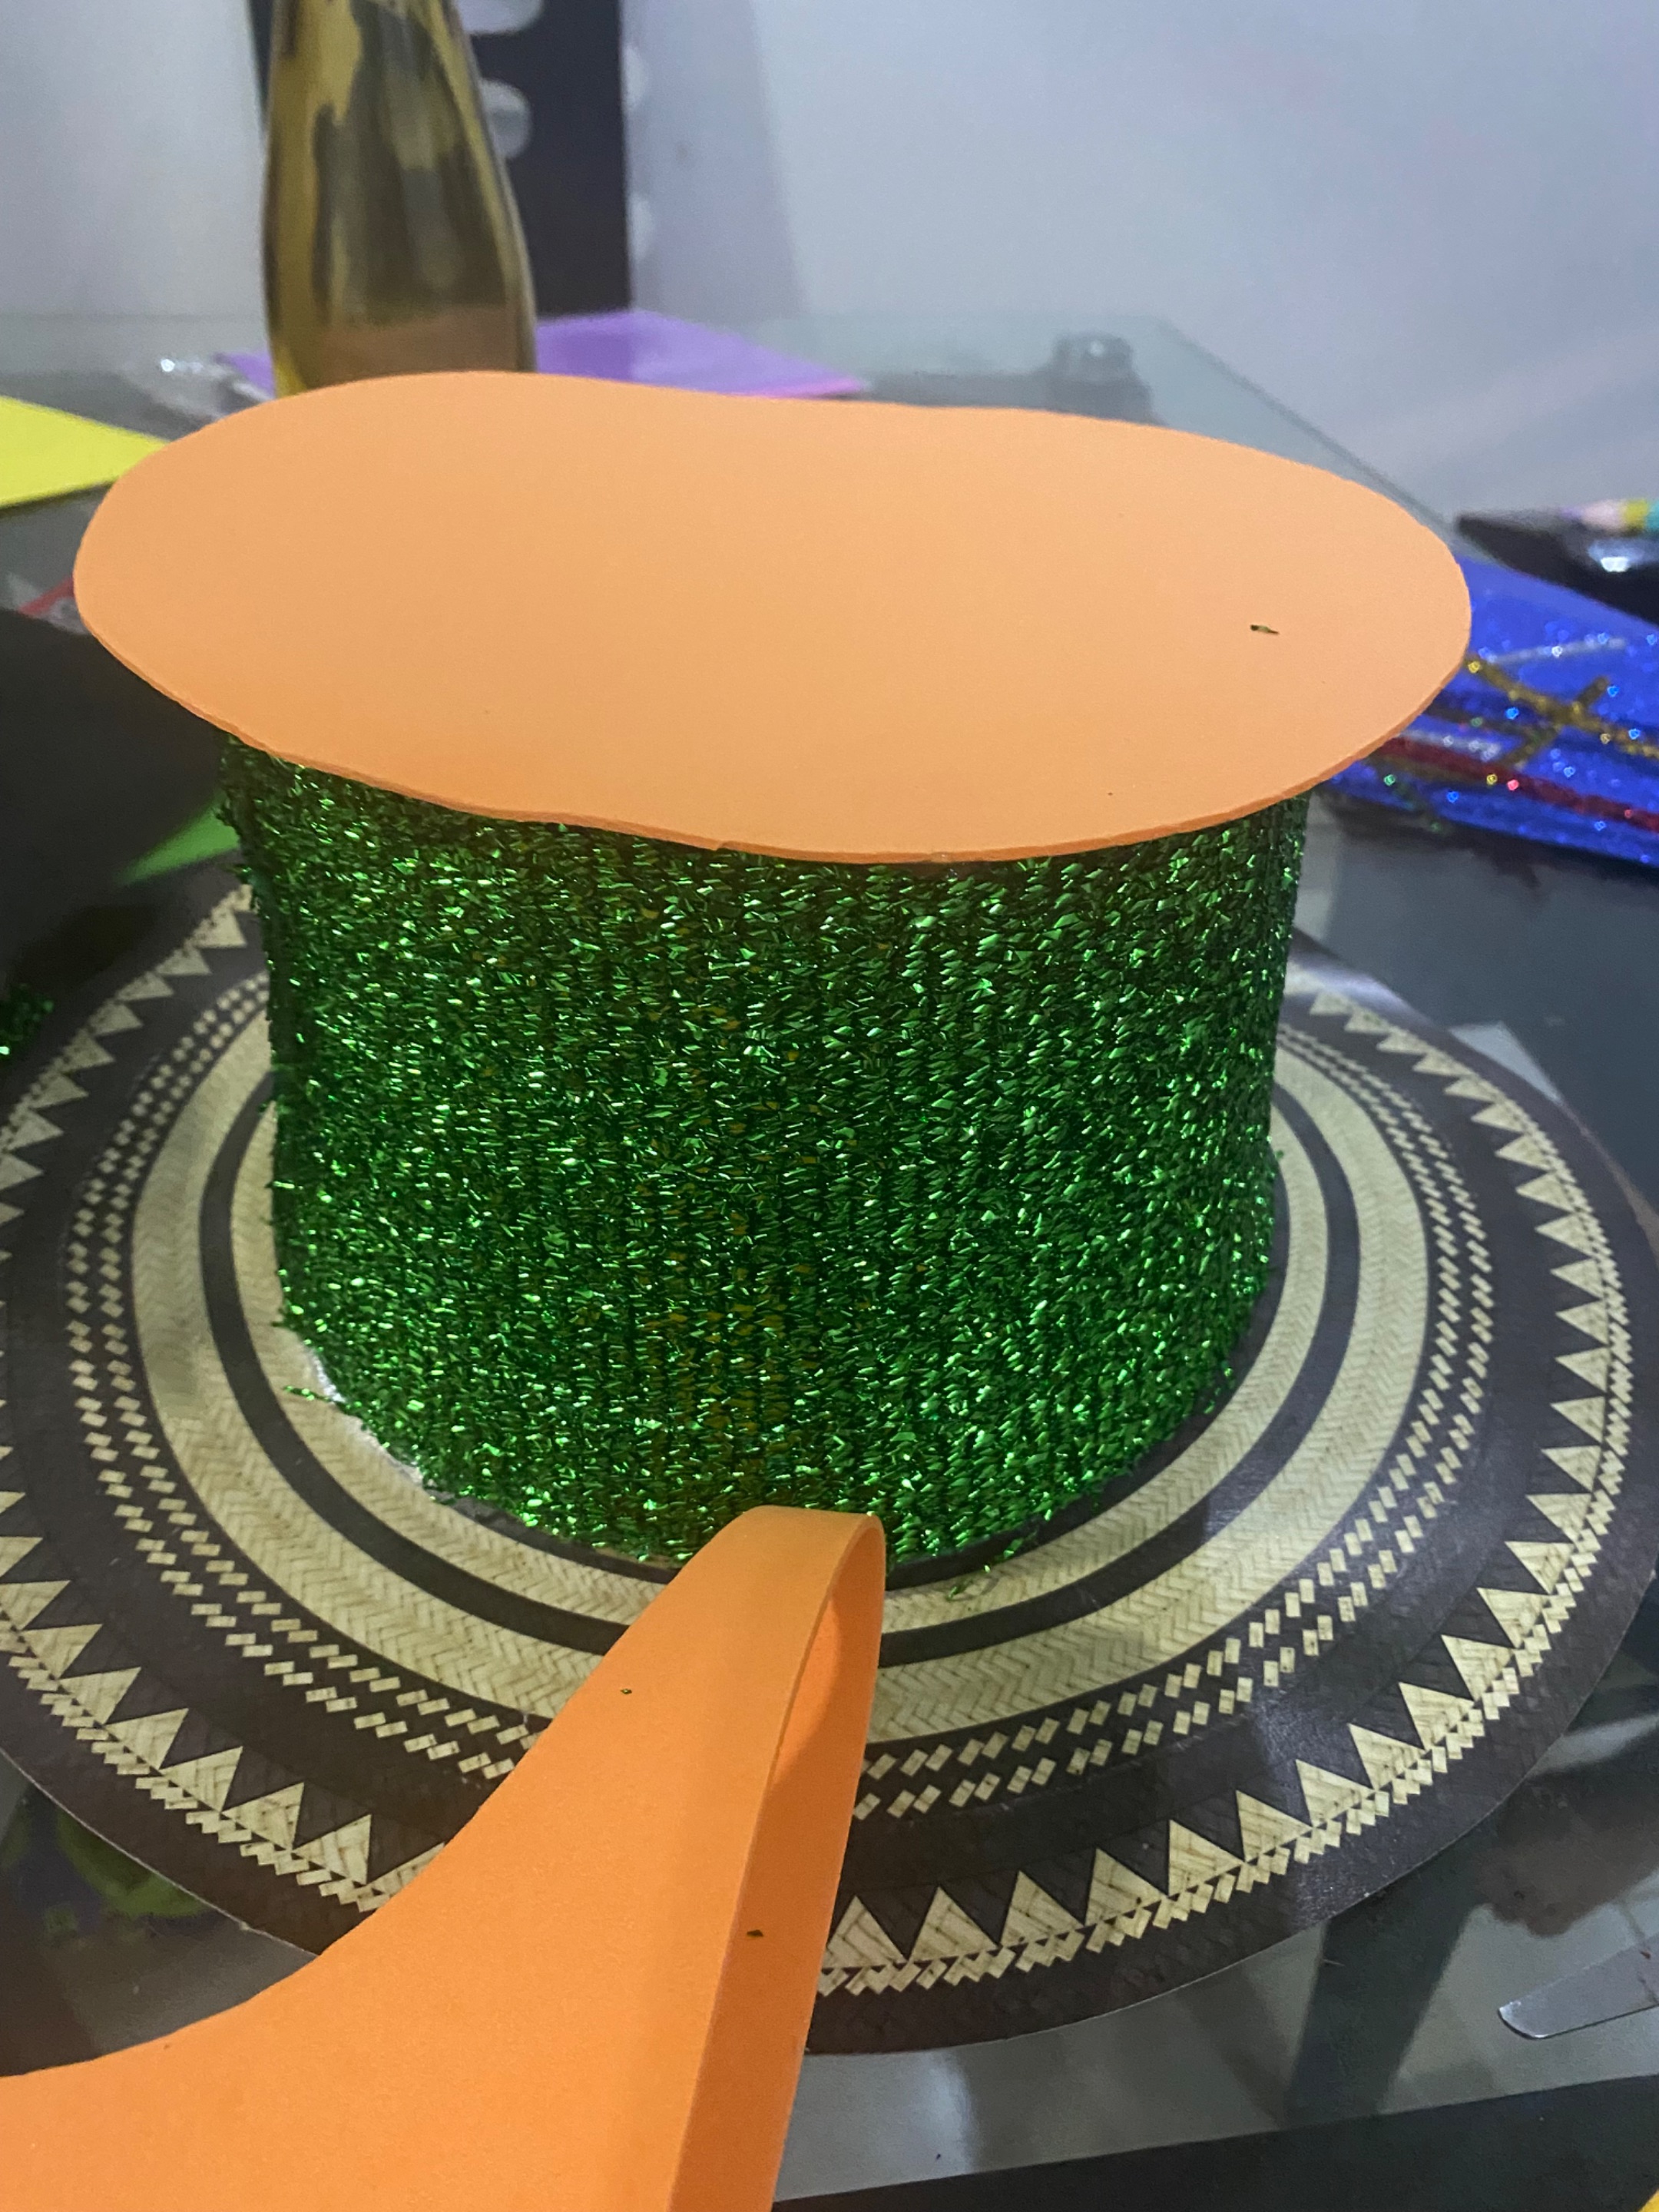
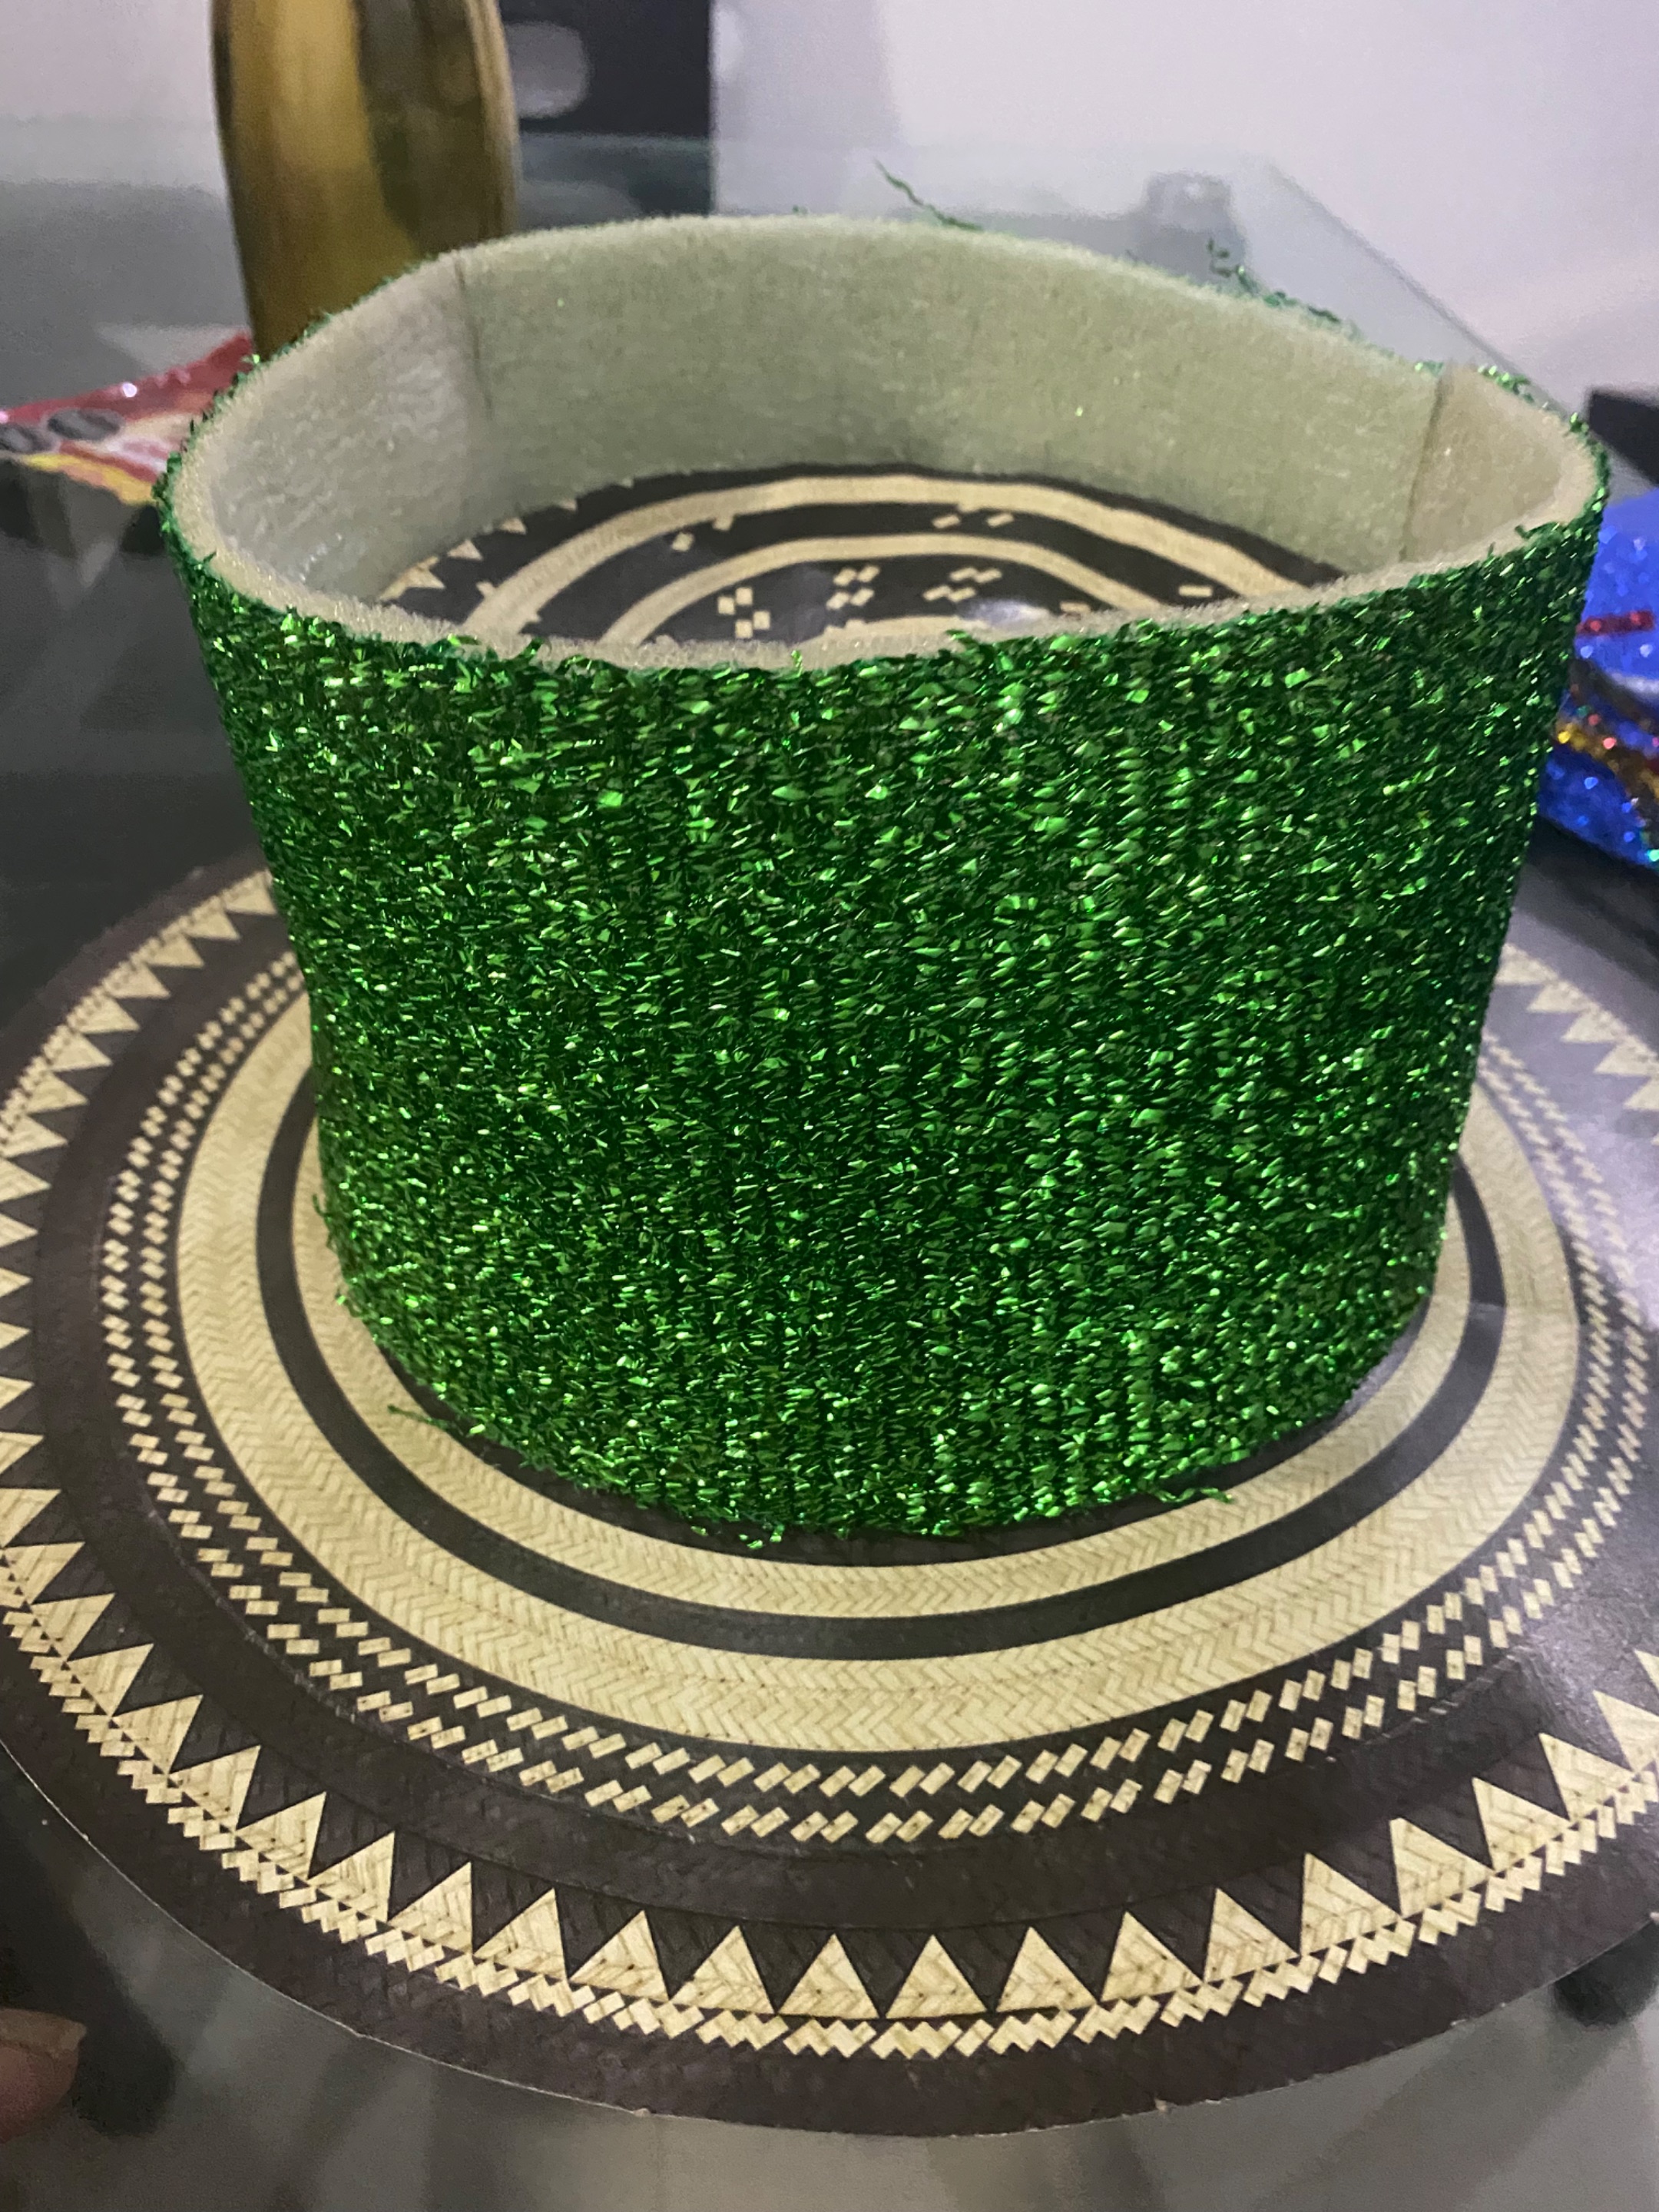
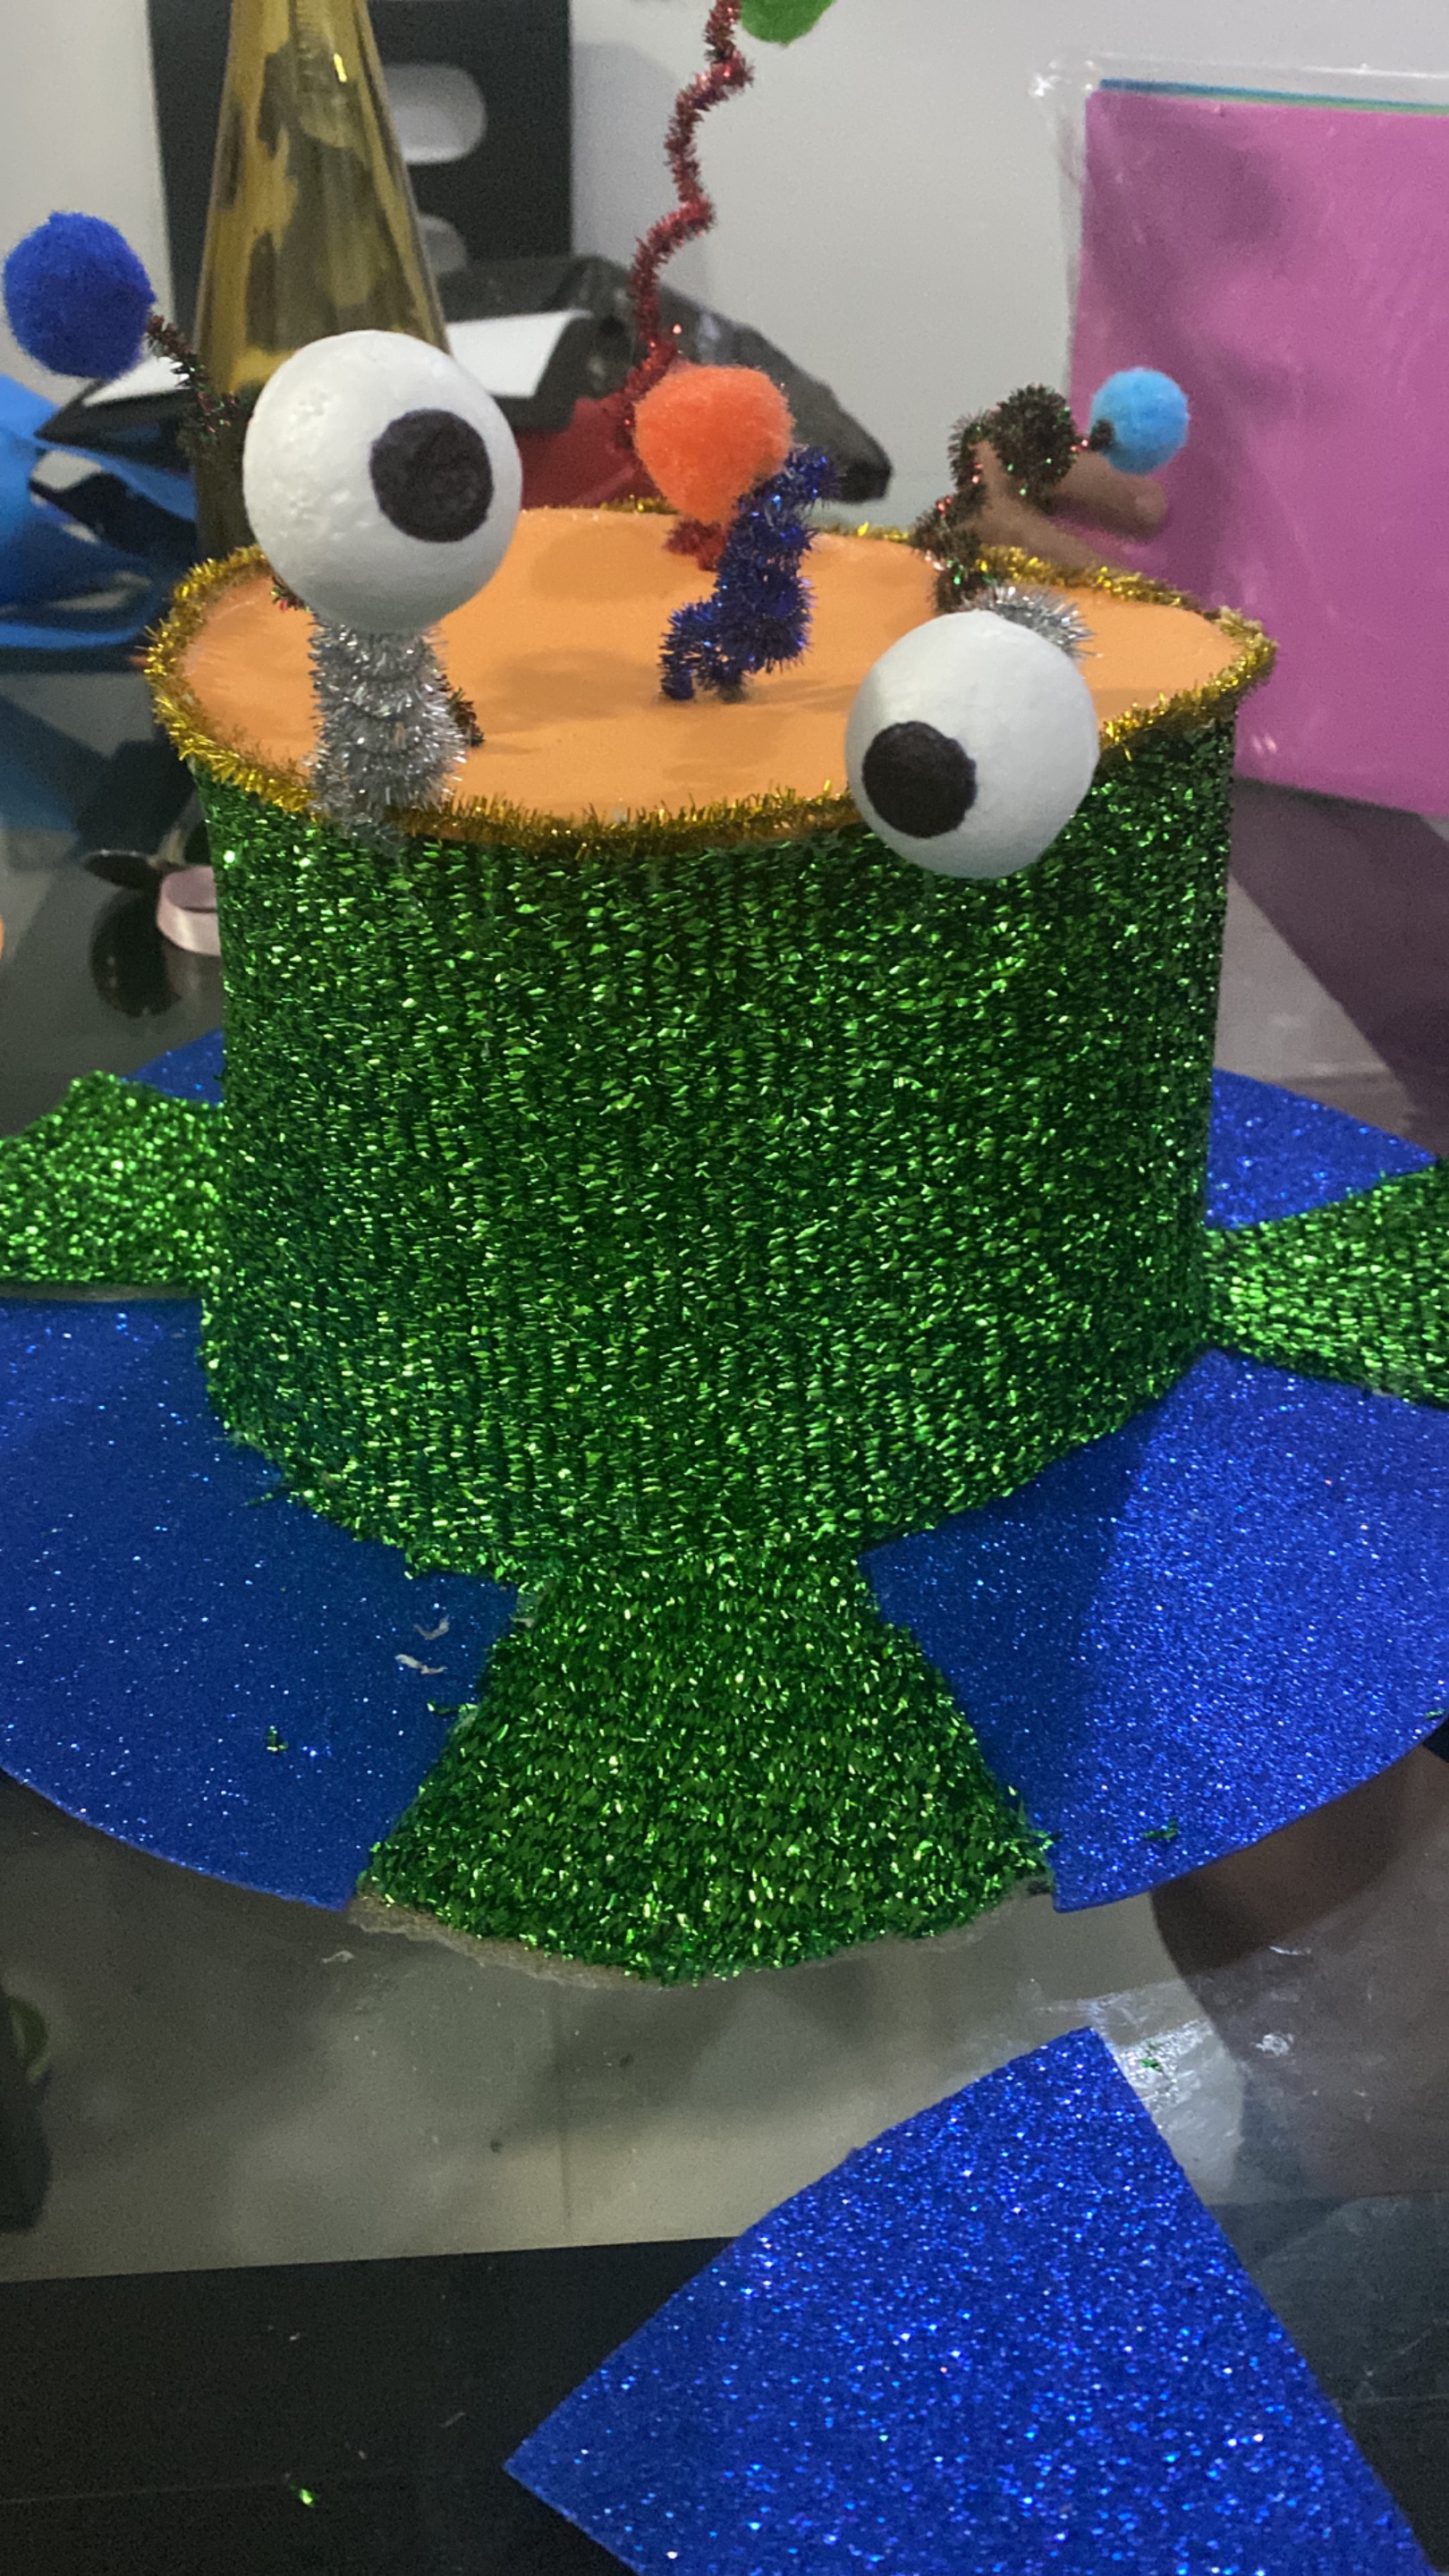
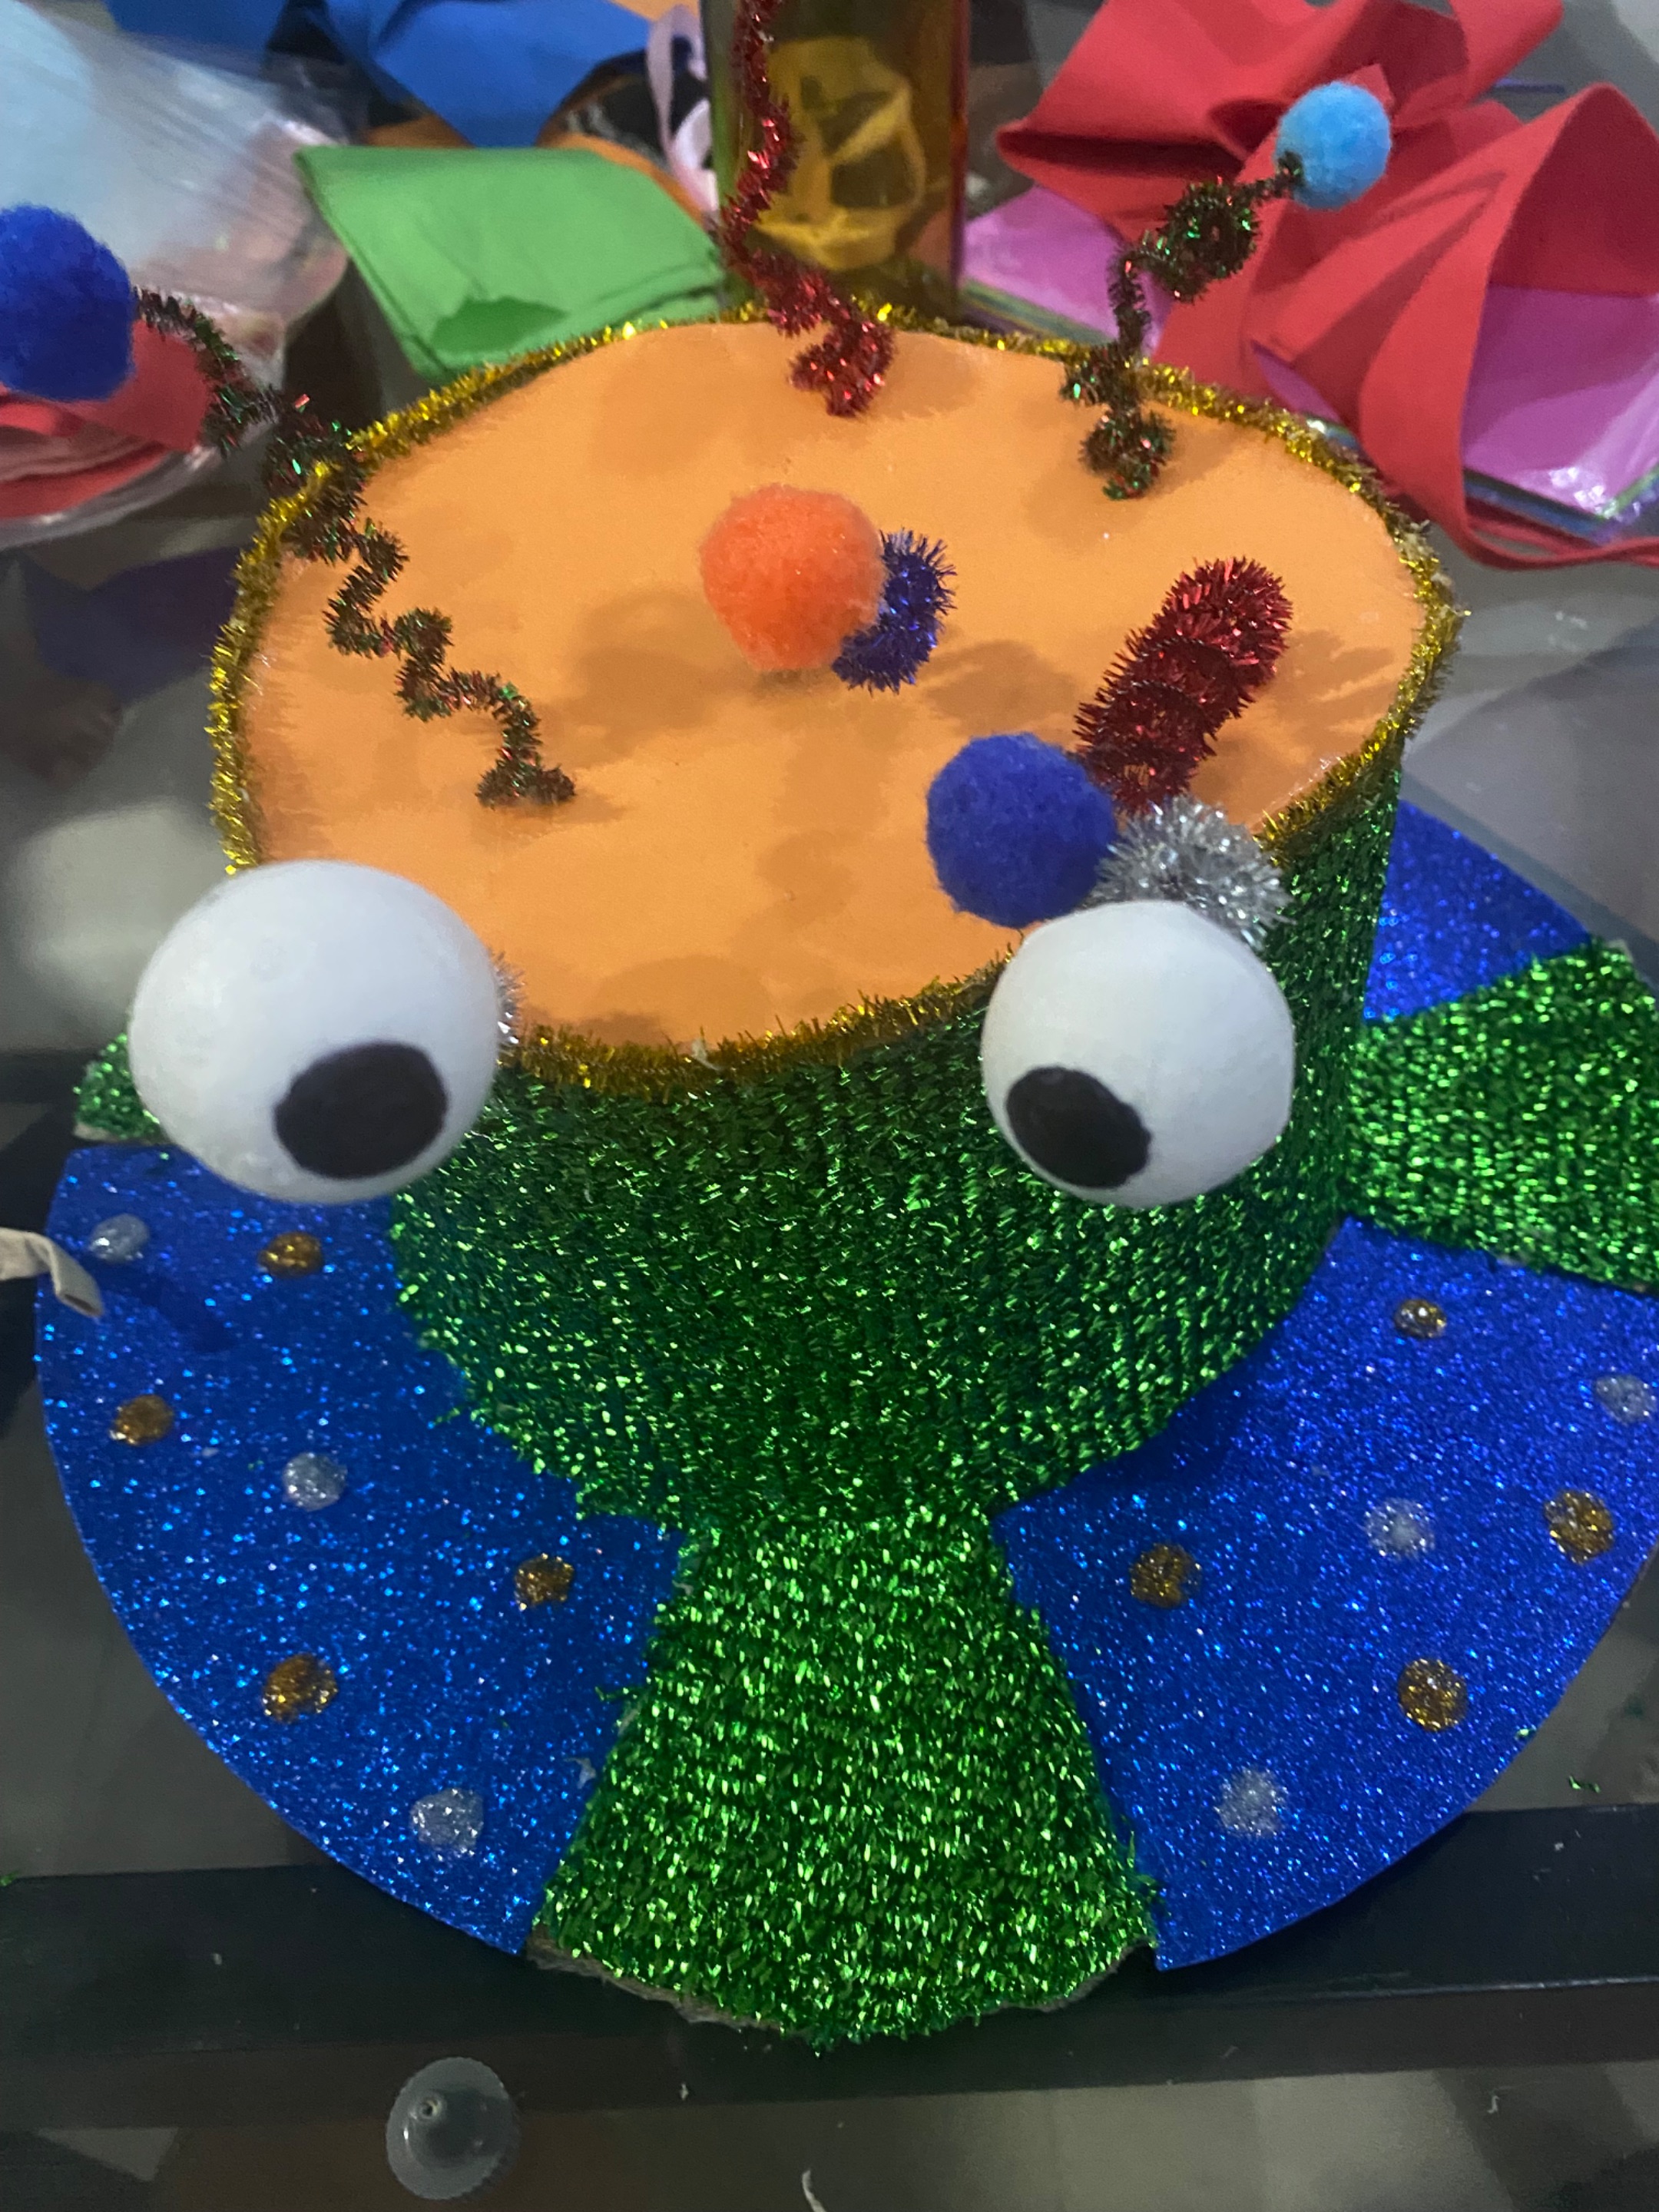
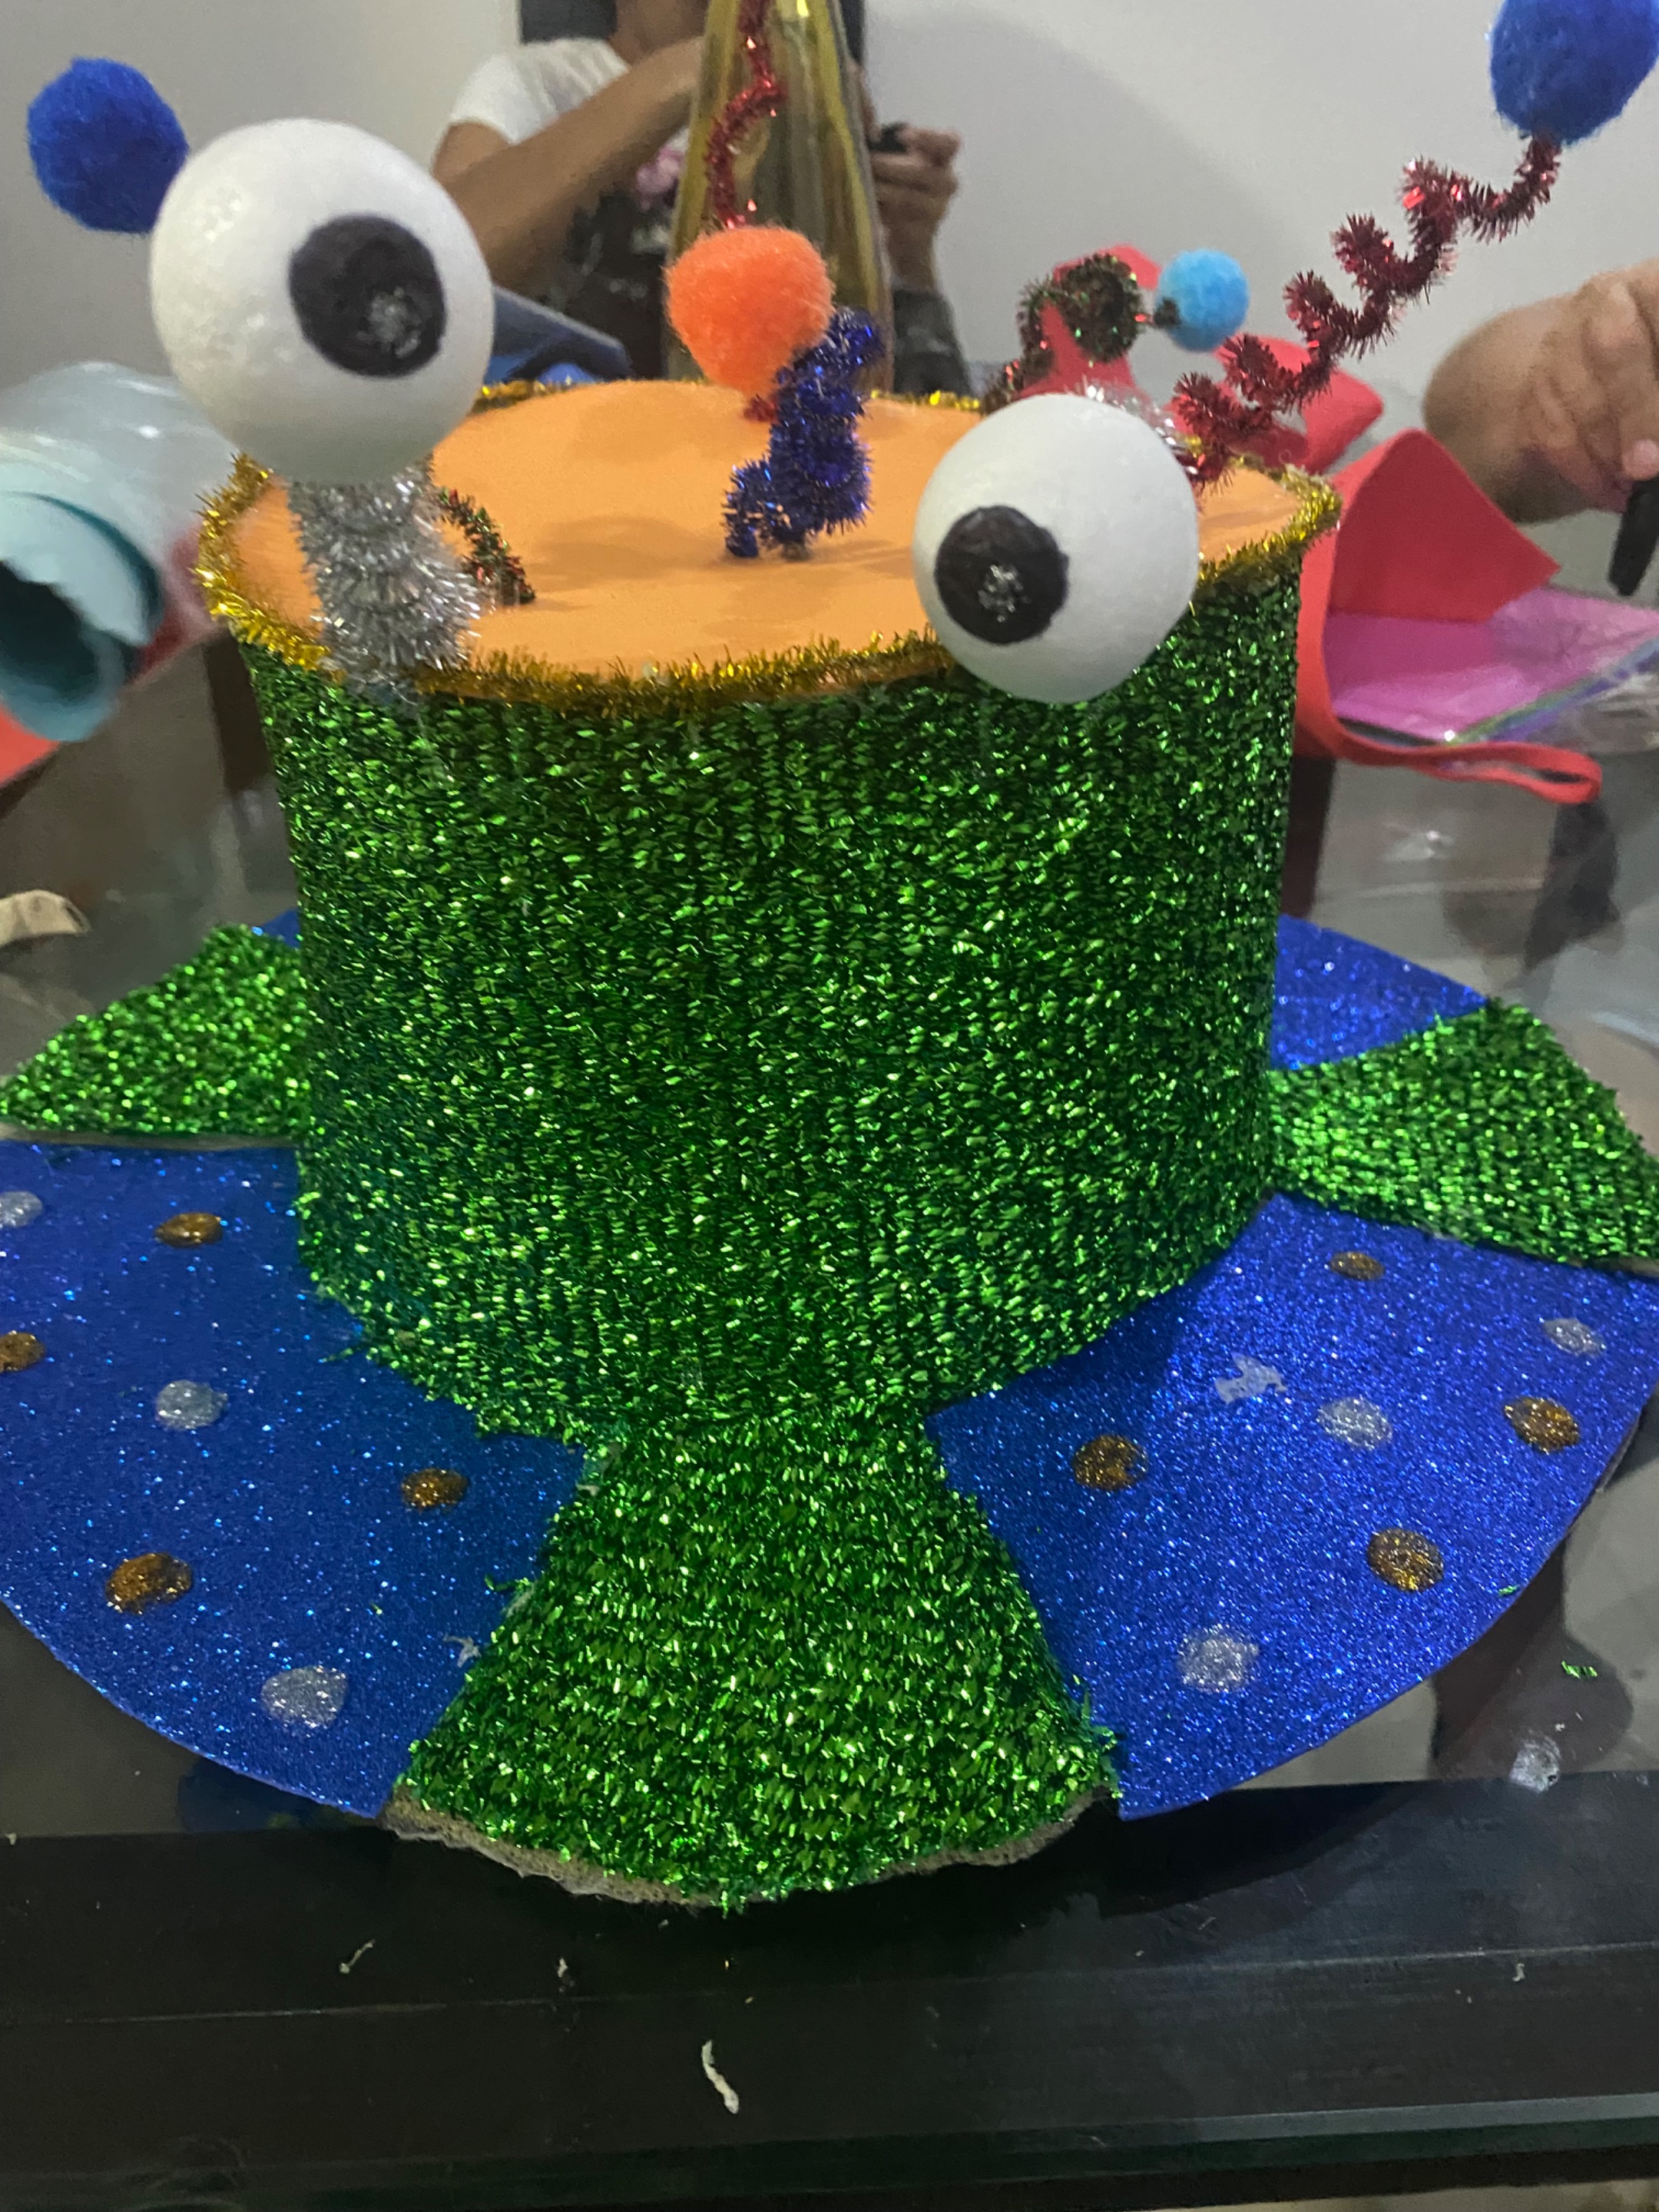
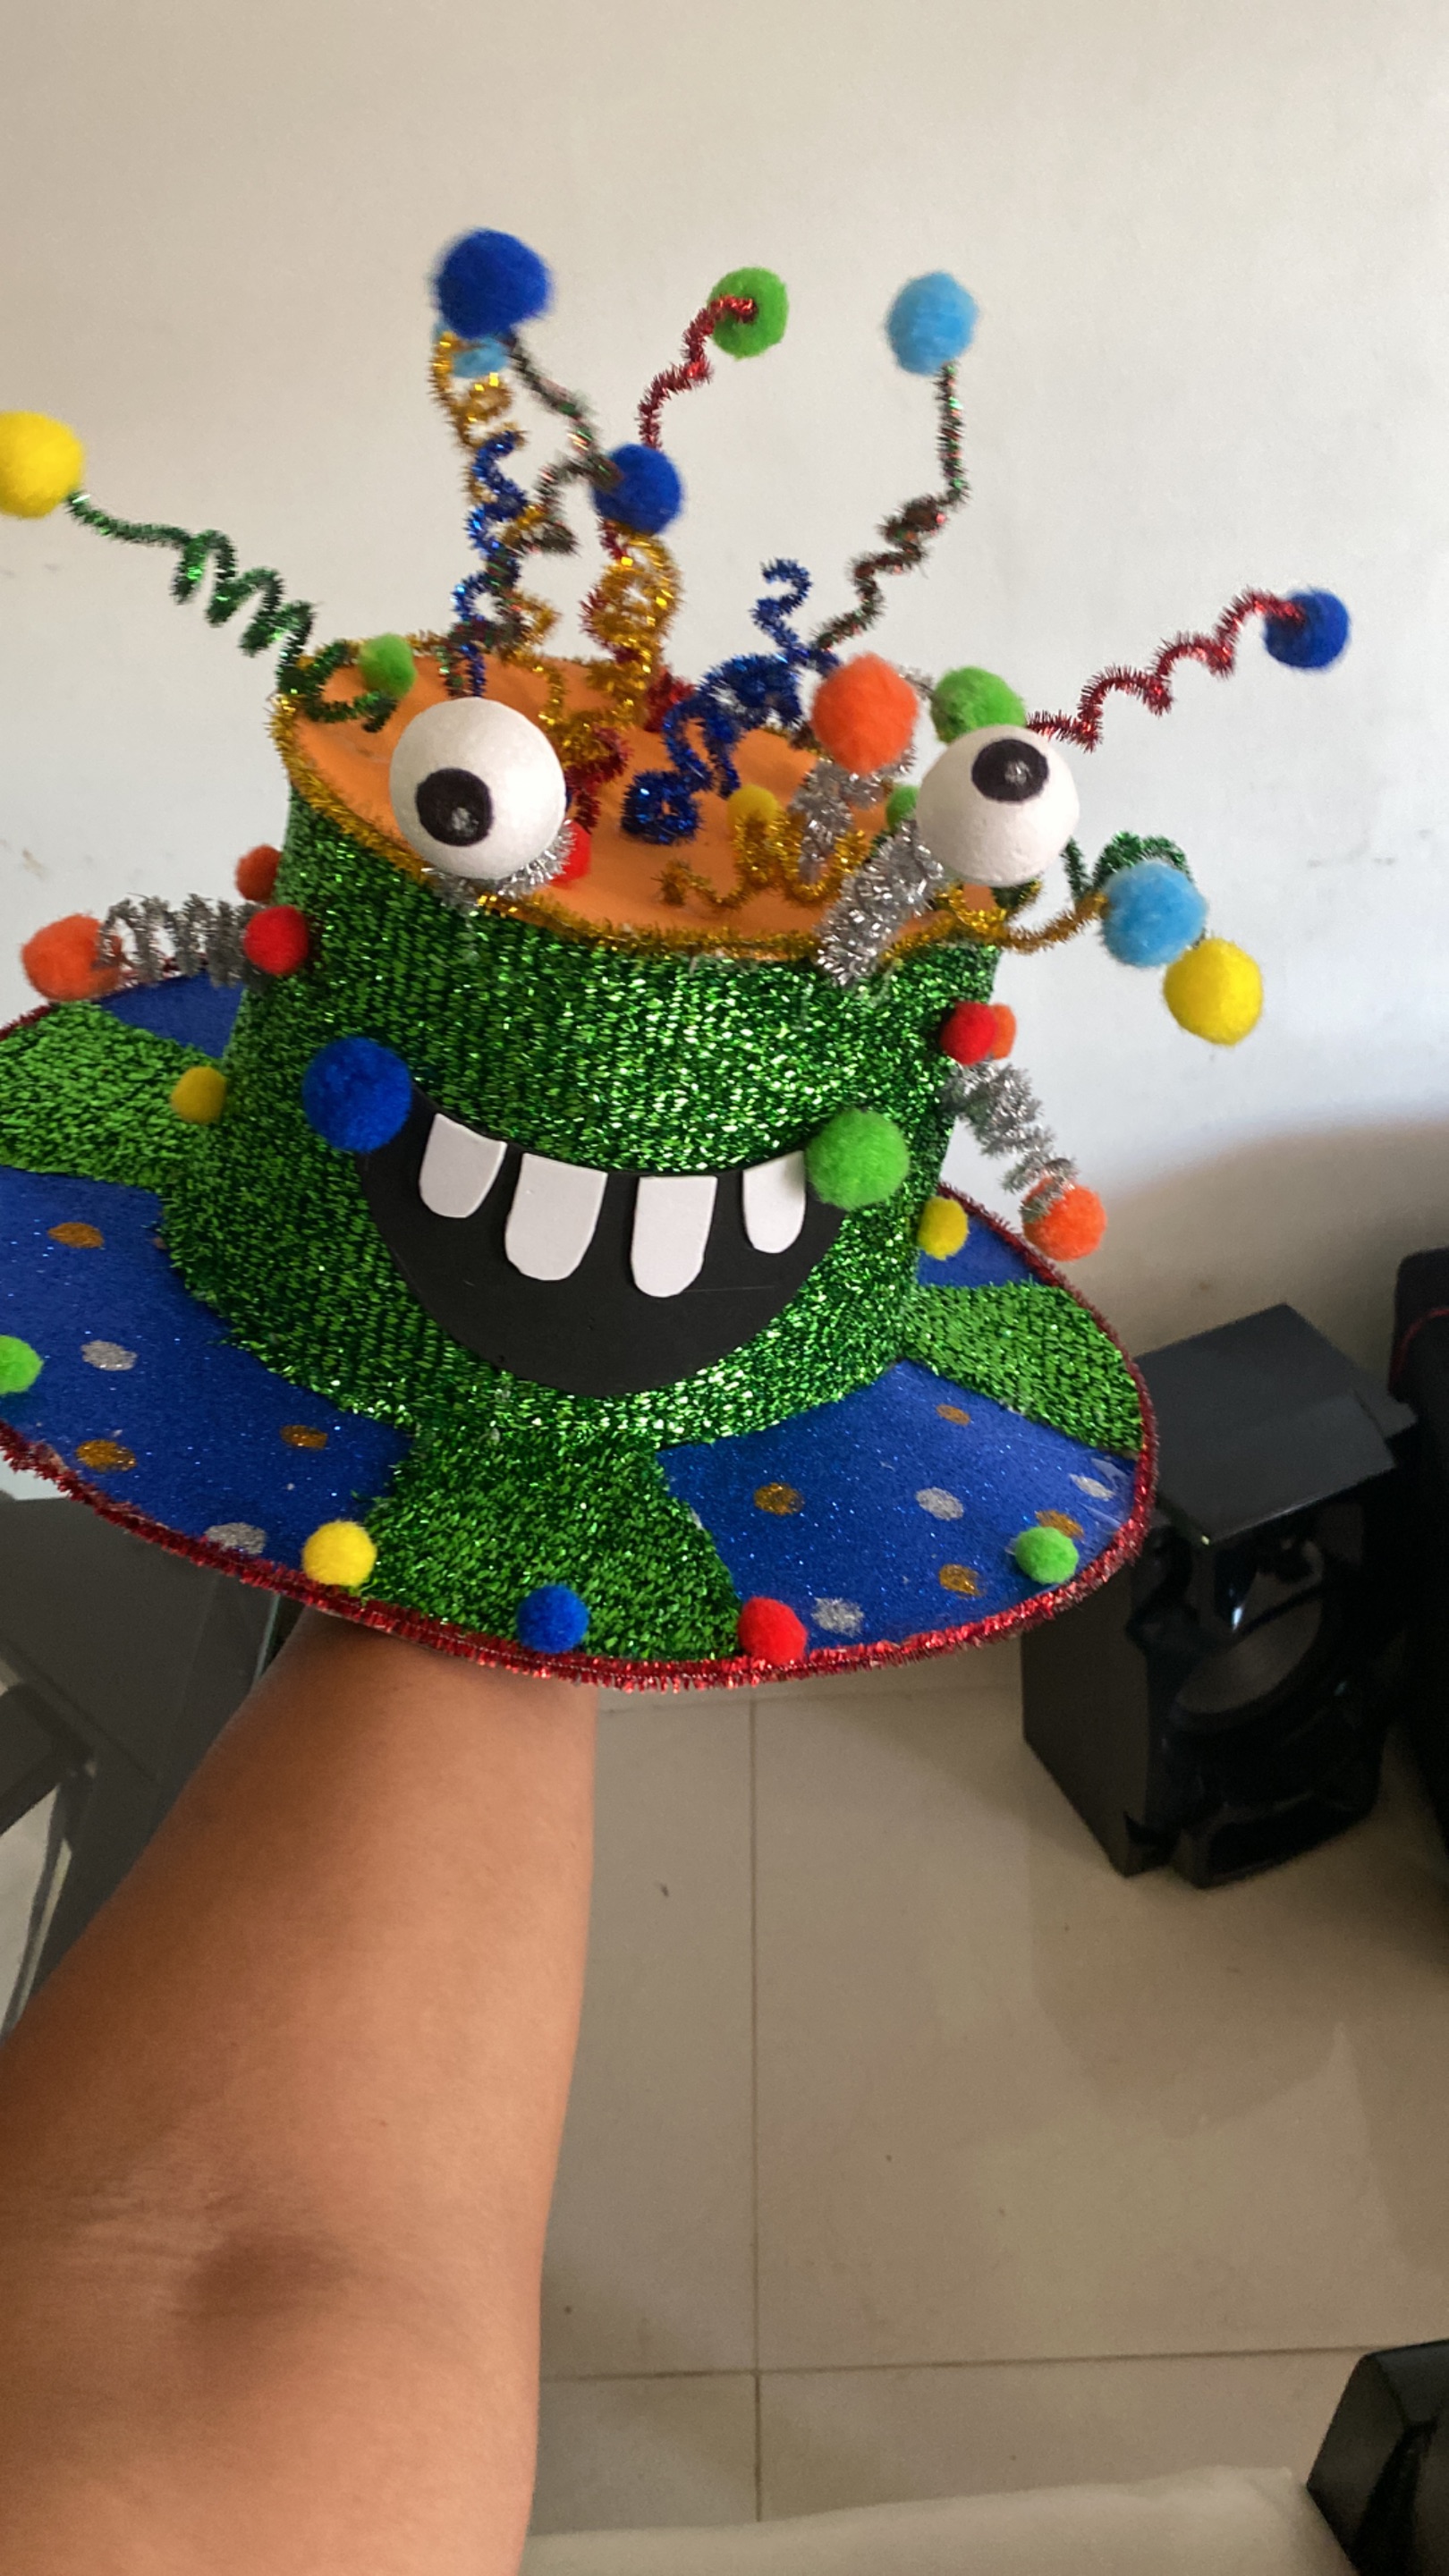
So I started by cutting the green fabric and began to cover the hat, cutting it larger than its shape to give it height and make it prettier. Once I had finished covering the hat, I began to decorate it by twisting the chenille and shaping it into a spring, as well as gluing long colored balls to it. I continued decorating until I had finished each one, then I proceeded to shape the anime ball by painting them to look like bulging eyes, then the small ones on the hat. I ended up with a beautiful piece of work and a spectacular crazy hat for my grandson to wear to school, and he was very happy with his hat.
VERSIÓN EN ESPAÑOL
Así que empecé por picar la tela verde y empecé a forrar el sombrero picándola más grande de su forma para darle altura y así hacerlo más bonito una ver terminado de forrar el sombrero empecé a decorarlo enroscado los cheniles y dándole forma de resorte además de pegarle en largo puntas las bolas de colores y así fui decorando hasta terminar con cada uno luego procedí a darle forma a la bola de anime pintándolos para que parecieran unos ojos saltones luego los pequeños en el sombrero y obtuve un lindo trabajo y un espectacular sombrero loco para que mi nieto lo luciera en el colegio y estaba muy feliz por su sombrero.
 |
 |
 |
 |
|---|---|---|---|
THANKS TO SEPARATOR AND BANNER/GRACIAS A SEPARADOR Y PANCARTAS
https://peakd.com/hive-148441/@ikasumanera/eng-es-i-made-hive-free-use-art-of-for-all-of-you-part-1-dividers-and-banners-or-hice-arte-de-libre-uso-para-todos-parte