### **Translated by [ChatGPT](https://chat.openai.com/ "chatgpt")**.
It’s just before the Brawls end this week in **[Splinterlands](https://splinterlands.com?ref=underlock)** and I still haven’t sent any of my teams to the battlefield, so it’s only fair that I keep sharing with you my full process of analyzing the Rule Sets, mana, and available elements, aiming to build a team with the best possible chance of victory based on predicting what the opponent might choose.
Splinterlands is a game with a huge element of prediction and anticipation, where you’re always trying to stay one step ahead of your opponent to surprise them and secure victory. However, that’s not easy, and it’s common to make simple mistakes that can cost you the match. That’s why it’s so important to keep studying to make your analysis more precise. This is done through constant self-evaluation, but it can also be learned by observing the mistakes and successes of others. That’s why I’m here to share both my successes and failures so you can learn from my situations and avoid mistakes in your own battles 😆.
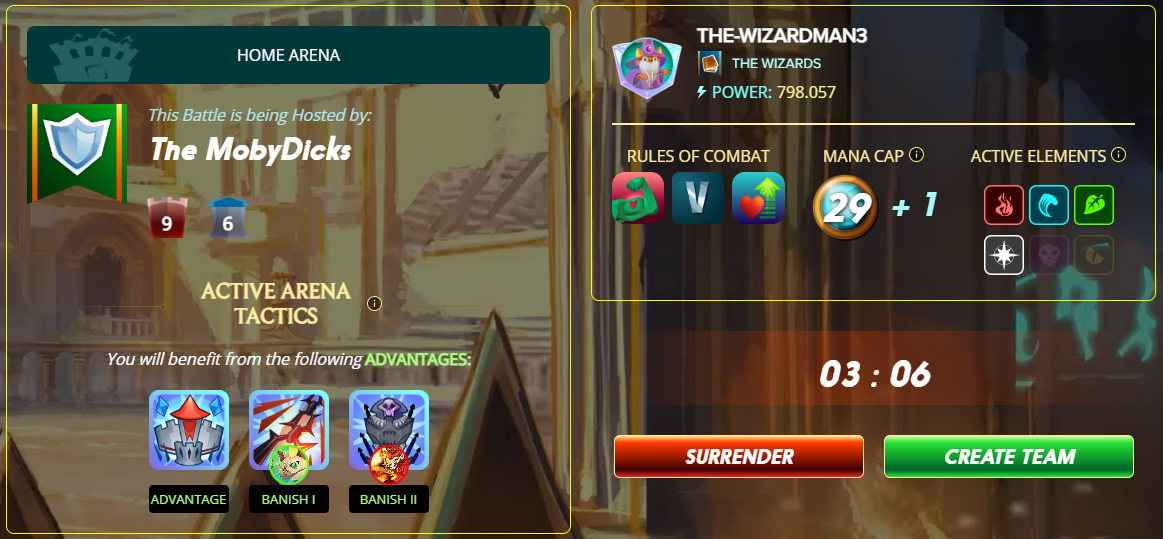
This is the match I’ll be sharing today. I was at home arena, so my opponent had two summoners banned. The Rule Sets were quite interesting because, despite the limitation of only being able to choose cards with 5 or more health, the **Equalizer** https://static.wikia.nocookie.net/splinterlands/images/9/95/Combat-rule_equalizer.png/revision/latest/scale-to-width-down/25?cb=20210209075101 opens up possibilities for a strong composition built with low-cost cards. In situations like this, I would usually choose **Yodin Zaku** as summoner, but unfortunately, the rental price is too high right now and I don’t have him available. So I went for a different strategy focused on evasion.
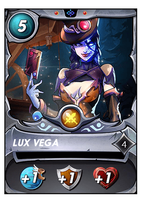
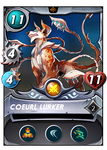
For that, I chose the summoner **Conqueror Jacek** with his amazing +2 Speed and started searching for cards to build the team. My immediate choice for Tank was **Coeurl Lurker**, since his skill set allows him to dodge all types of attacks, but relying only on Speed and **Dodge**  is risky. So I looked for support units to help with this. I went with two choices: **Spirit Miner**, who provides **Swiftness**  and also applies **Blind**  to enemies, and **Scavo Chemist** to apply **Slow**  while also helping the Lurker against debuffs with **Cleanse** https://imgur.com/bU5XReT.png. All that was left was a strong source of damage, and my obvious pick was **Fina Voxom**, who deals great damage and can snowball through **Bloodlust** https://i.imgur.com/NkdHb8h.png.
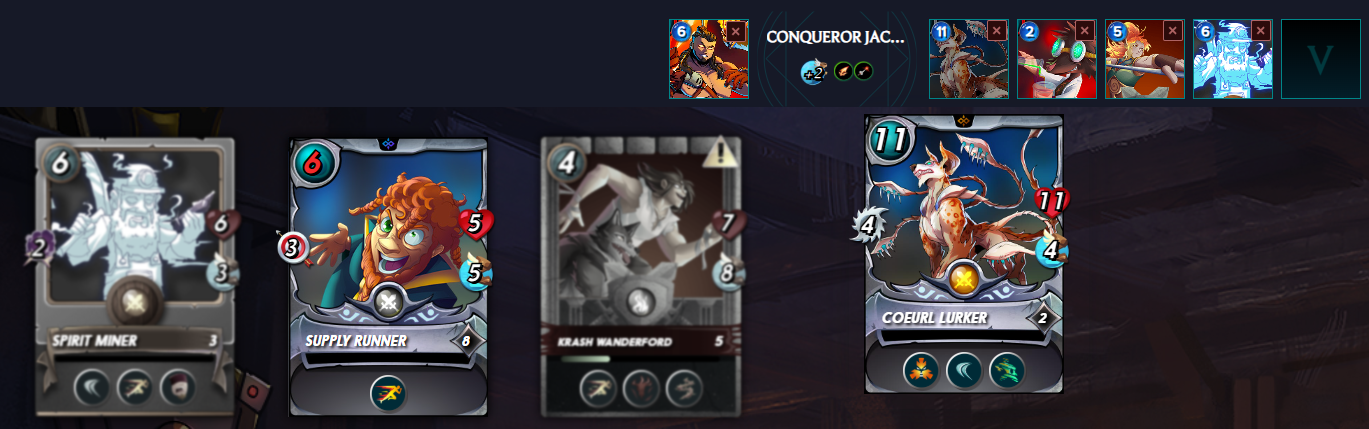
Even though I liked this composition, there were two major problems here:
* **Lack of damage** in the team, since Chemist has no attack and Spirit Miner would attack randomly due to the **Scattershot**  from the Archmage.
* **I couldn’t fill 5 slots** because of the Rule Set **Beefcakes** https://images.hive.blog/25x25/https://files.peakd.com/file/peakd-hive/underlock/ALHQg1yu9AwS6G1WCUk79YShMSQiVcb67DnXckhQYjhME6m6WR4qSSy3NB9bscY.png, which really limited my options. Having a full team is ideal in **Equalizer** https://static.wikia.nocookie.net/splinterlands/images/9/95/Combat-rule_equalizer.png/revision/latest/scale-to-width-down/25?cb=20210209075101, because no matter what the card is, it still gets the same boosted HP.
Even with these issues, I was confident in the evasion strategy, so it was time to watch the battle.
[](https://splinterlands.com/battle/sm_1nXun7J1bbmbS79R7uFv?ref=underlock)
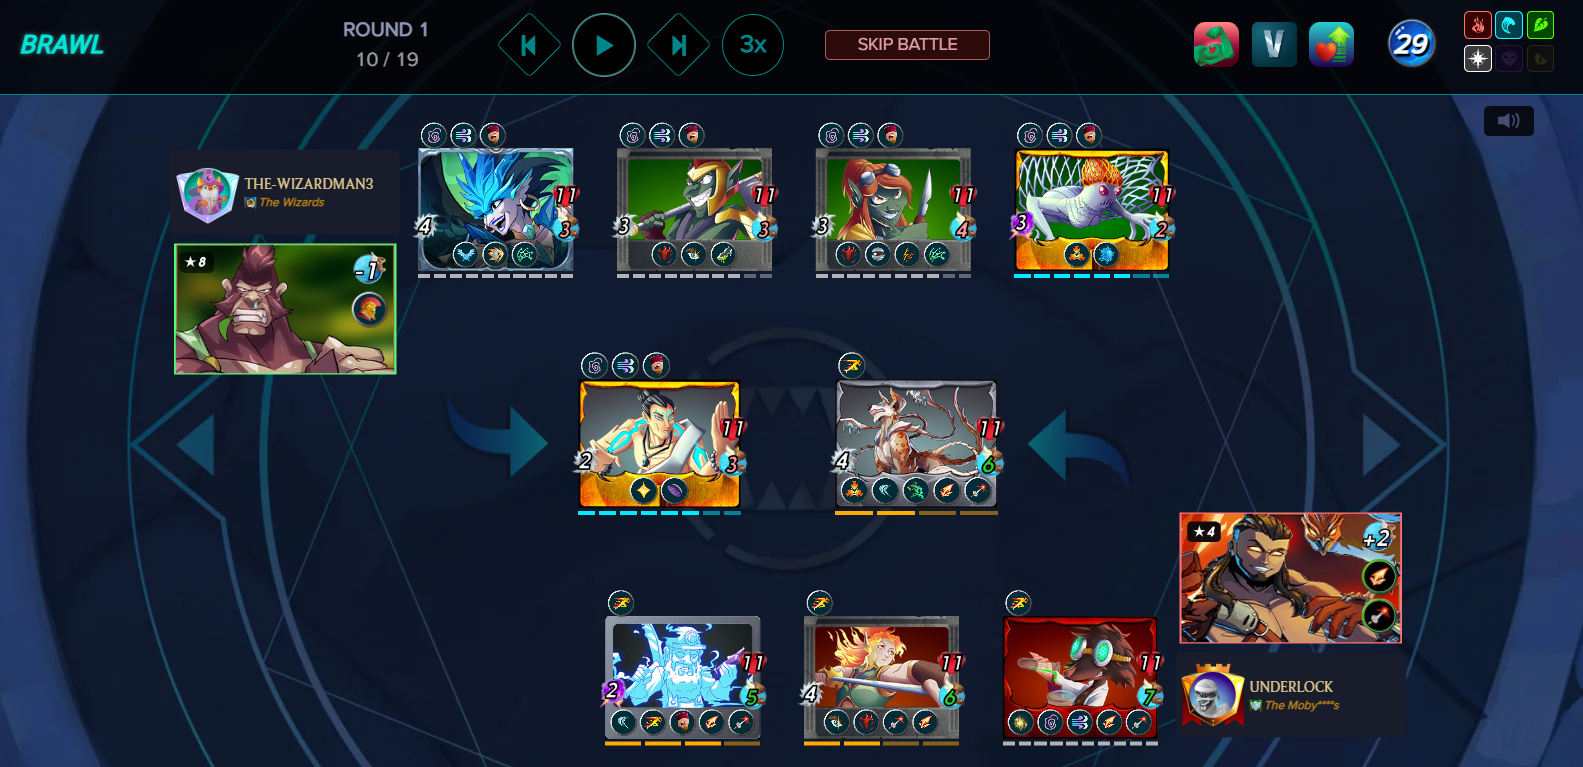
I was lucky that Fina only had 4 Attack instead of 5, otherwise **Forcefield**  would’ve been a huge problem for my team. Still, **Mycelic Slipspawn** was a real nuisance, because instead of focusing on the opponent’s frontline, my two damage sources were forced to split their hits, weakening my already low damage output. On top of that, the enemy frontline had constant **Heal** https://d36mxiodymuqjm.cloudfront.net/website/abilities/small/ability_heal.png. It wasn’t until Round 3 that I managed to take down Slipspawn and activate Fina Voxom’s buff, but by then my Lurker’s health was already heavily reduced.
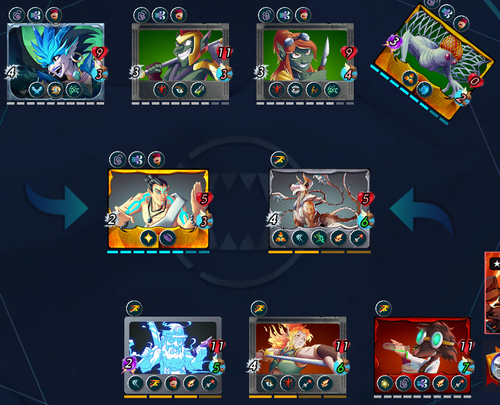
By Round 4, after the **Xenith Monk** was eliminated and the path was clearer, bad luck struck and my Coeurl Lurker went down. Sadly, the one to finish him off was **Katrelba Gobson**, and that’s where my fate was sealed. With her **Bloodlust**  active, her attack jumped from 3+3 to 4+4, enough to quickly secure another kill on my Spirit Miner, stacking even more buffs.
At that point, the match was lost. What was left for me was to analyze my mistakes and think about how to improve for next time. The first problem was relying too much on luck for my Tank’s survival. In cases like this, it would’ve been important to have some backup strategy, like a card with **Tank Heal**  to prolong the Lurker’s life—but unfortunately, no valid card fit the minimum health requirement.
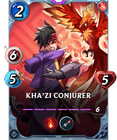
Another issue was my team’s lack of damage. I could’ve skipped picking **Conqueror Jacek** to build a much stronger brute force team, using cards like **Kha’Zi Conjurer** and **Sarius**, creating a lineup with more raw power while also filling all 5 slots to make full use of **Equalizer** https://static.wikia.nocookie.net/splinterlands/images/9/95/Combat-rule_equalizer.png/revision/latest/scale-to-width-down/25?cb=20210209075101. Just these few changes could’ve completely shifted the outcome of this match. My team would’ve looked like this:
With a lineup like this, I wouldn’t have the same evasion effectiveness, but before my Tank fell, my team’s raw power would’ve taken down at least two of the opponent’s cards, potentially wiping their lineup before Sarius even reached the frontline. Next time, I’ll try shifting from a defensive strategy to a more offensive one. Let’s see if it works!
Thank you so much to everyone who read this far, I hope you enjoyed it. If you like my content, I ask you to send your vote on the post and follow my profile so you can read future posts.
[](https://inleo.io/profile/underlock "inleo")
[](https://twitter.com/Underllock "twitter x")


Faltam algumas horas para finalizar as Brawls dessa semana no **[Splinterlands](https://splinterlands.com?ref=underlock)** e eu ainda não enviei nenhum dos meus times para o campo de batalha, então nada mais justo do que continuar compartilhando com vocês na integra o meu processo de análise das Rule Sets, mana e elemento disponíveis, visando montar um time com a melhor chance de vitória possível com base na previsão do que o oponente poderá escolher.
Splinterlands é um jogo com enorme processo de previsão e antecipação, onde você sempre tentará ficar um passo à frente do seu adversário para conseguir surpreendê-lo e obter a vitória, entretanto fazer isso não é fácil e é comum que você cometa erros simples mas que te custarão a vitória, por isso é tão importante manter seus estudos para tornar suas análises cada vez mais precisas, e isso é feito através da constante auto avaliação, mas também pode ser adquirido aprendendo com os erros e acertos dos outros, por isso eu estou aqui para compartilhar com vocês esses erros e acertos para que vocês aprendam com as minhas situações e evitem falhas durante as suas batalhas 😆.

Essa será a partida que compartilharei hoje com vocês. Eu estava na arena da casa, então meu adversário estava com dois invocadores banidos. As Rule Sets vieram bem interessantes, pois apesar da limitação de poder escolher apenas cartas com 5 ou mais de vida, ter o **Equalizer** https://static.wikia.nocookie.net/splinterlands/images/9/95/Combat-rule_equalizer.png/revision/latest/scale-to-width-down/25?cb=20210209075101 abre portas para uma composição muito forte formada com cartas de baixo custo. Em situações como essa eu sempre escolhia o **Yodin Zaku** como invocador, mas infelizmente o aluguel dessa carta está muito elevado e eu não estou com ele disponível, então optei por uma estratégia diferente com foco na esquiva.
Para isso escolhi o invocador **Conqueror Jacek** com seus incríveis +2 de Velocidade e comecei a buscar cartas para formar esse time. De cara a minha escolha como Tank foi o **Coeurl Lurker** pois o conjunto de habilidades dessa carta permite que ela consiga se esquivar de todos os tipos de ataque, mas confiar apenas em sua velocidade e no **Dodge**  é um grande risco, então procurei alguma unidade que pudesse auxiliar nesse objetivo. Foram duas escolhas de suporte, o **Spirit Miner** que fornece **Swiftness**  e também aplica o **Blind**  nos adversário, e o **Scavo Chemist** para aplicar **Slow**  e auxiliar o Lurker contra eventuais status negativos com o **Cleanse** https://imgur.com/bU5XReT.png. Agora tudo que está faltando é uma boa fonte de dano, e a minha escolha óbvia foi a **Fina Voxom** que causa bastante dano e ainda pode se potencializar com abates ao ativar o **Bloodlust** https://i.imgur.com/NkdHb8h.png.

Apesar de ter gostado dessa composição, existem dois problemas principais aqui:
- **Falta dano no time**, pois o Chemist não possui ataque e o Spirit Miner irá atacar aleatoriamente devido ao **Scattershot**  do Arconte.
- **Não consegui colocar 5 cartas no time** por causa da Rule Set **Beefcakes**  que limitou bastante as minhas escolhas. Montar um time completo é ideal em situações de **Equalizer** https://static.wikia.nocookie.net/splinterlands/images/9/95/Combat-rule_equalizer.png/revision/latest/scale-to-width-down/25?cb=20210209075101, pois independente da carta que fosse, eu teria mais 11 de Vida para aguentar ataques.
Apesar desses problemas, eu ainda estava confiante no poder da esquiva, então chegou a hora de assistir a batalha.
[](https://splinterlands.com/battle/sm_1nXun7J1bbmbS79R7uFv?ref=underlock)
Eu dei a sorte da Fina possuir apenas 4 de Ataque e não 5, se não a habilidade **Forcefield**  seria uma problema gigantesco para o meu time. De qualquer forma o **Mycelic Slipspawn** me atrapalhou bastante, pois ao invés das minhas duas cartas focarem na linha de frente do adversário, meus ataques acabaram ficando divididos entre duas unidades e isso prejudicou bastante a minha capacidade de dano *(que já era bem fraca)*, sem falar no **Heal**  constante da Front line inimiga. Somente na Rodada 3 eu consegui eliminar o Slipspawn e ativar o buff da Fina Voxom, porém apesar da alta velocidade e chance de esquiva, a vida do Lurker já estava bem prejudicada.

Quando finalmente o **Xenith Monk** foi derrotado na Rodada 4 e o caminho estava livre dos dois principais problemas, o azar começou a tomar conta e o Coeurl Lurker também acabou sendo eliminado, e infelizmente a realizadora do abate foi a **Katrelba Gobson**, e aqui que o meu destino foi selado. Com seu **Bloodlust**  ativo, seu ataque aumentou de 3+3 para 4+4, dano suficiente para rapidamente conseguir pegar seu segundo abate no Spirit Miner e novamente receber seus buffs.
Nessa hora a partida já estava perdida. O que me restou foi analisar onde eu errei e como melhorar para as próximas batalhas. Começando pela dependência de relativa sorte na sobrevivência do Tank. Em situações como essa seria importante ter alguma estratégia de backup, como alguma carta com **Tank Heal**  para prolongar a vida do Lurker, mas infelizmente não existe nenhuma carta que poderia ser utilizada por causa da limitação de vida mínima exigida.
Outro ponto problemático foi a falta de dano do meu time. Eu poderia ter abdicado de escolhar o **Conqueror Jacek** para montar um time com muito mais força bruta, escolhendo cartas como o **Kha'Zi Conjurer** e a **Sarius**, formando um time com muito mais poder e ao mesmo tempo completando todas as 5 unidades do time para otimizar o uso da **Equalizer** https://static.wikia.nocookie.net/splinterlands/images/9/95/Combat-rule_equalizer.png/revision/latest/scale-to-width-down/25?cb=20210209075101. Apenas essas poucas alterações poderiam ter mudado completamente o resultado dessa partida, e o meu time teria ficado assim:

    
Com um time assim, eu não teria a mesma eficácia de esquiva, porém até o meu Tank ter sido eliminado, a força bruta do meu time já teria derrubado no mínimo duas cartas do adversário, com potencial de limpar o seu time antes mesmo da Sarius cair na primeira posição. Na próxima eu tentarei mudar o meu foco defensivo para uma estratégia mais ofensiva, espero que dê certo!
Muito obrigado a todos que leram até aqui, espero que tenham gostado. Se vocês curtirem meus conteúdos, peço que deixem o seu voto na postagem e sigam o meu perfil para poderem acompanhar as futuras postagens.
[](https://inleo.io/profile/underlock "inleo")
[](https://twitter.com/Underllock "twitter x")