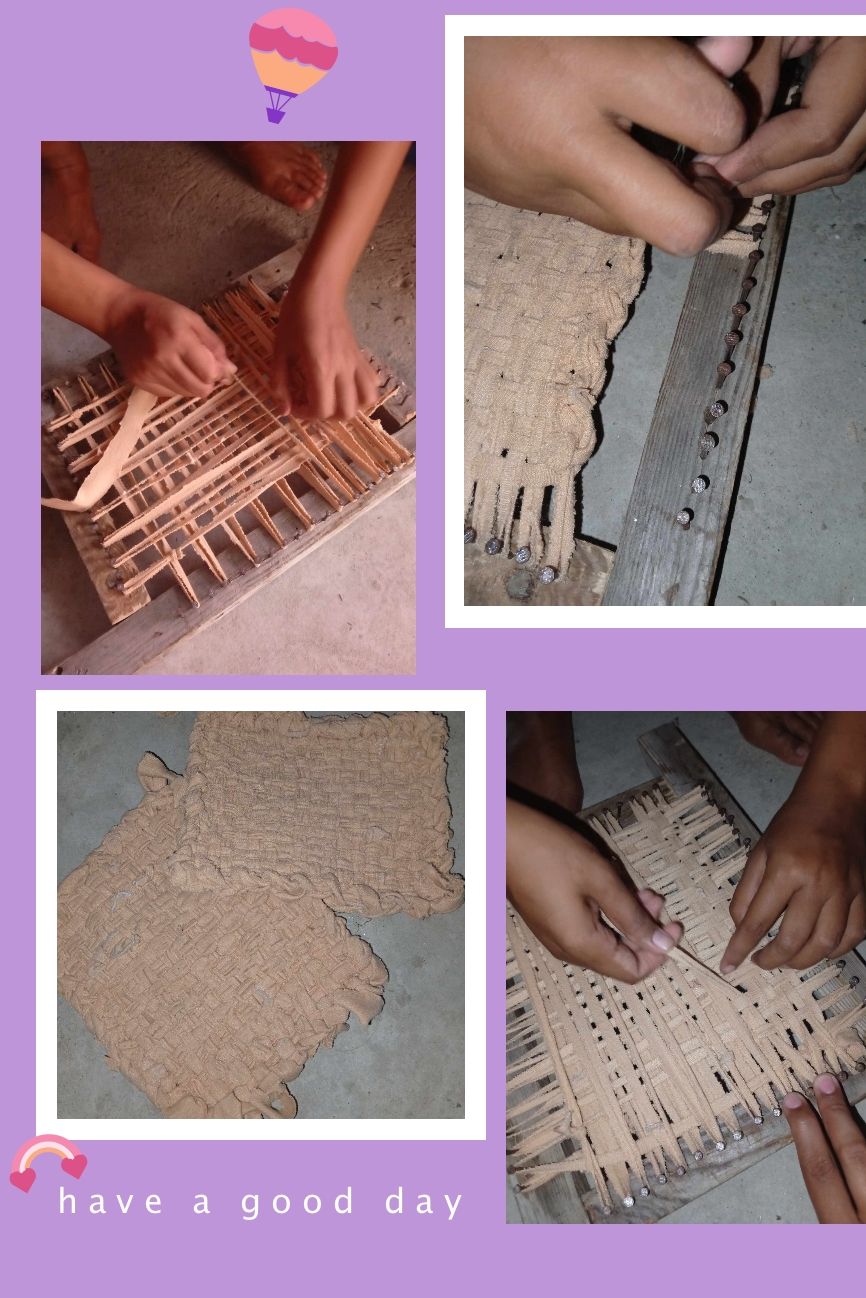
Hello Hive Diy, it's been a while. Because of the endless floods, my children always have modular learning. So even their projects can't be done. I just thought that it's more important for children to do projects because they're at home more often. While waiting for a new project I saw these pictures of @katsuki29 and her cousin turning an old cloth to a new one.
Materials
-
Small wooden frame or board (about 30 × 30 cm for a small cloth)
-
Nails (20–30 per long side) or wood pegs
-
Old T-shirts, sheets, or fabric scraps (cut into strips ~1–2 cm wide) — these are your warp and weft
-
A shuttle (cardboard strip) or a stick to pass the weft through
-
Hammer, scissors, ruler, pencil, and a comb or fork to push down the rows
Procedure
Step 1 Prepare the frame. Mark even nail positions along the top and bottom edges of your board (about 1–1.5 cm apart). Hammer nails in so about half of each nail sticks out—enough to wrap fabric around.
Step 2 Cut fabric into strips. Slice old shirts or sheets into long strips about 1–2 cm wide. Stretch cotton loops (from T-shirts) to make smooth, slightly rounded strips.
Step 3. Make the warp (vertical threads). Tie the end of a fabric strip to the first top nail. Stretch it straight down and loop it around the corresponding bottom nail. Continue across the board, keeping even spacing. Warp should be reasonably taut but not overstretched.
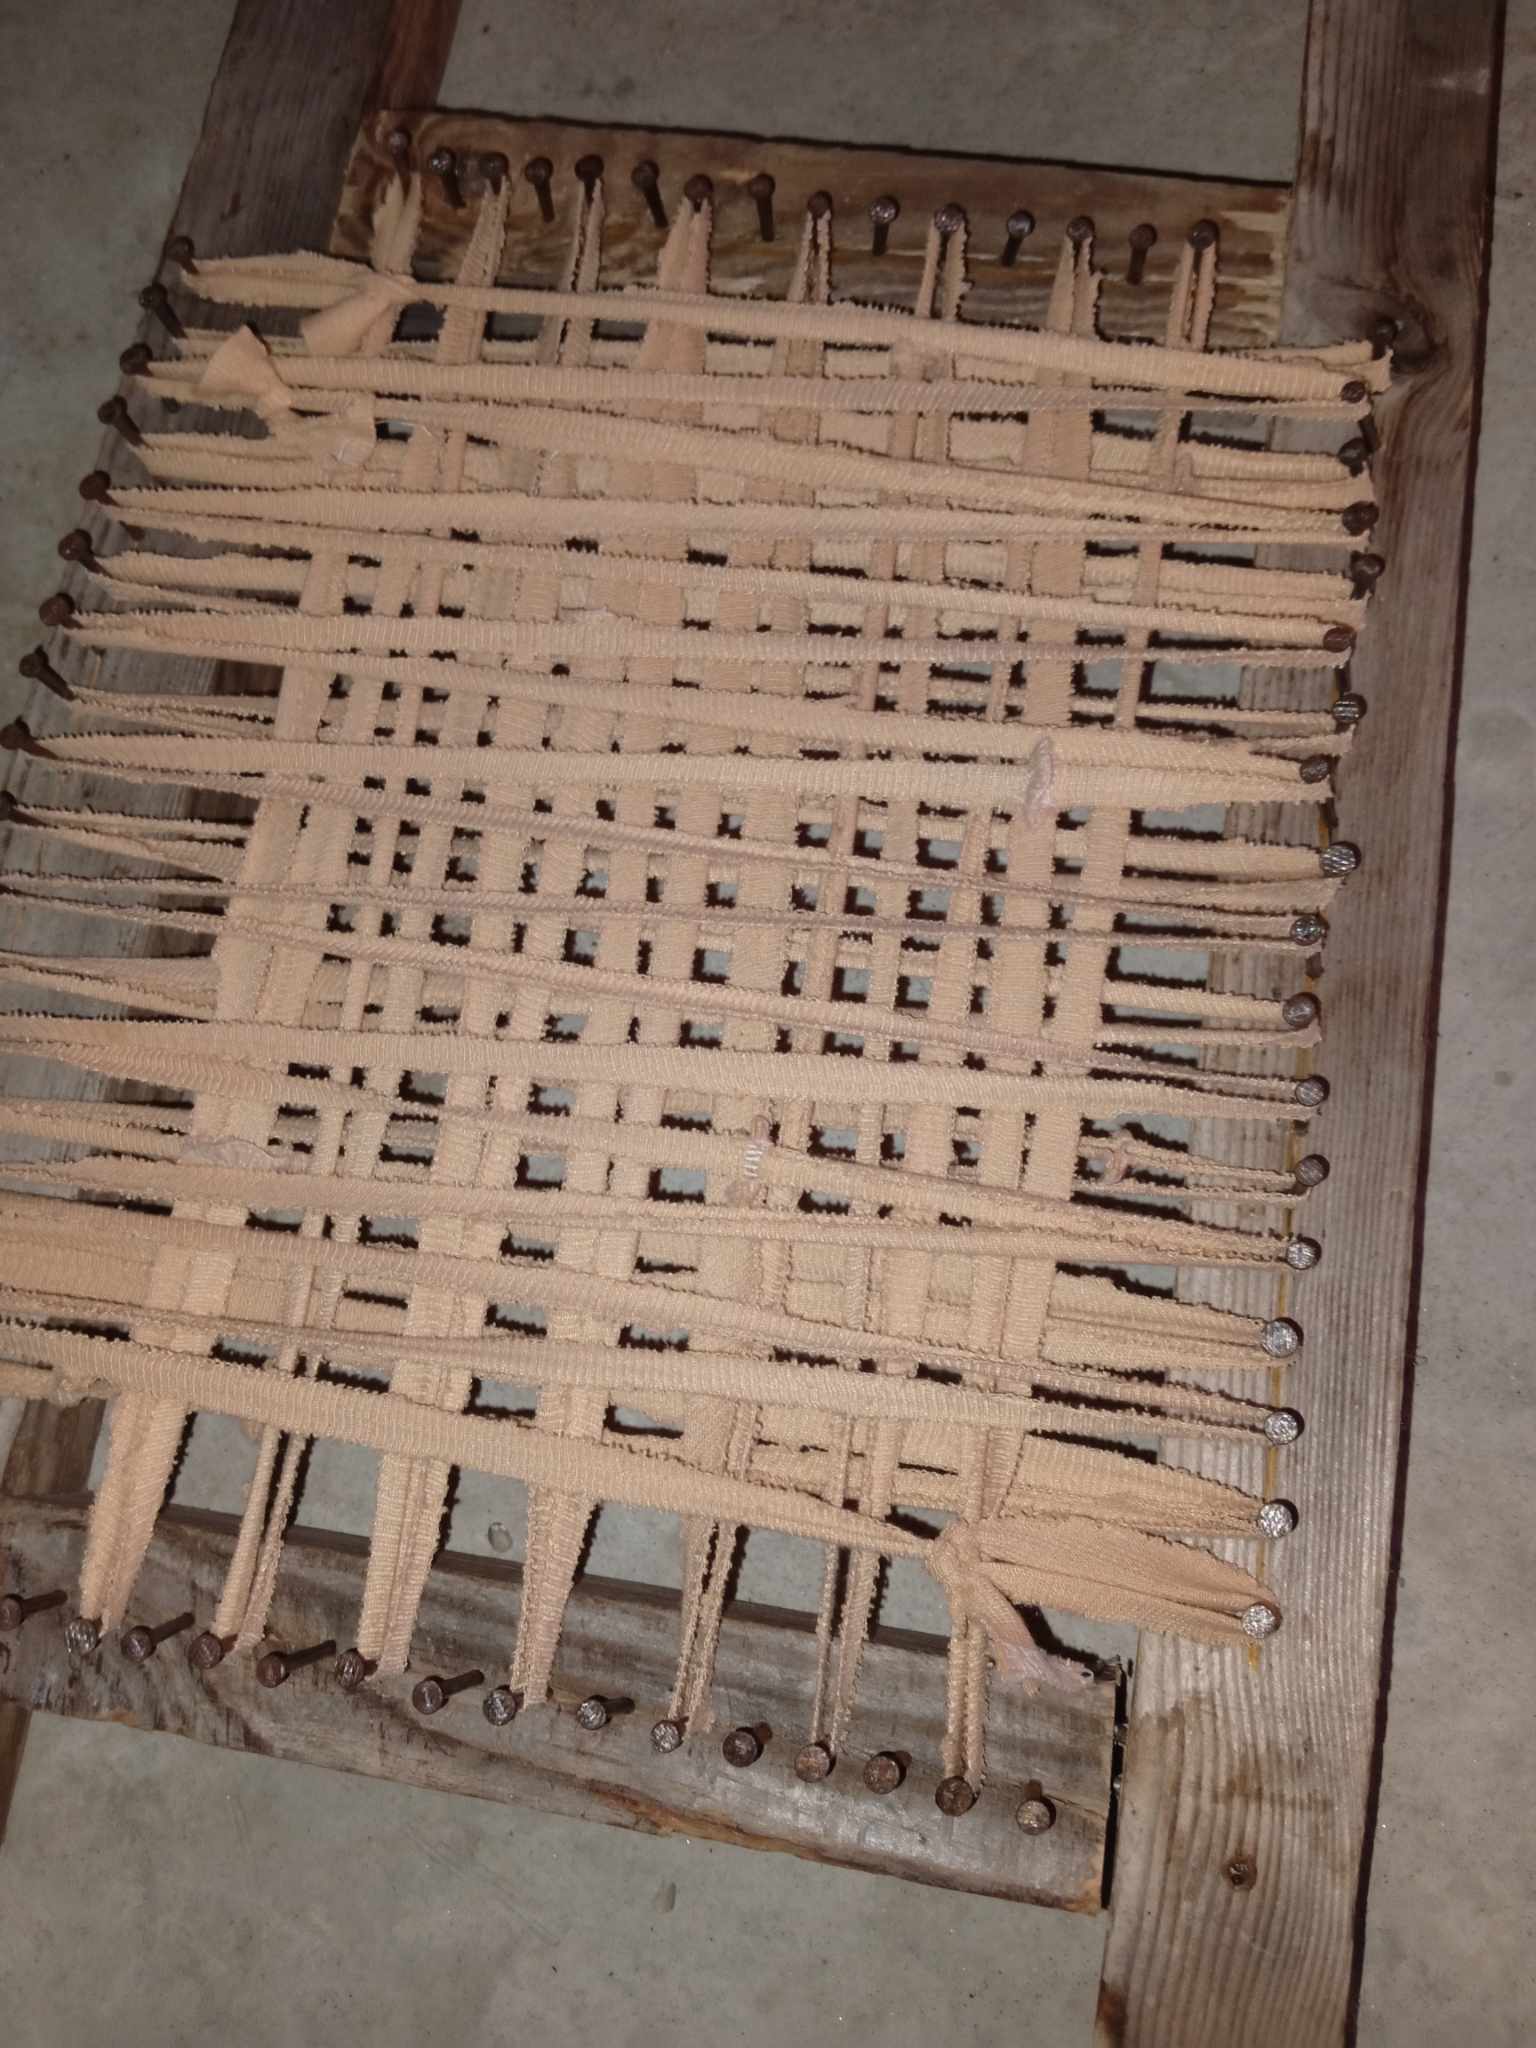
Step 4. Secure the warp ends. When you reach the last nail, tie off the strip. If a strip is too short, tie a small flat knot and continue—keep knots on the back side so they’re less visible.
Step 5. Prepare your weft (horizontal strips). Wind a long fabric strip onto a cardboard shuttle or hold it ready. You’ll pass it over-and-under across the warp.
Step 6. Start weaving (first row). At the front, pass the shuttle over the first warp, under the next, then over, alternating across. For the next row, reverse the pattern (if first row started over, next row starts under).
Step 7. Beating down rows. After each weft pass, push the strip down firmly with your fingers or a comb/fork so the weave is tight and even.
Step 8. Continue weaving. Keep alternating over-under each row. Change colors or fabric types for patterns by joining another strip with a flat knot and hiding the knot between rows.
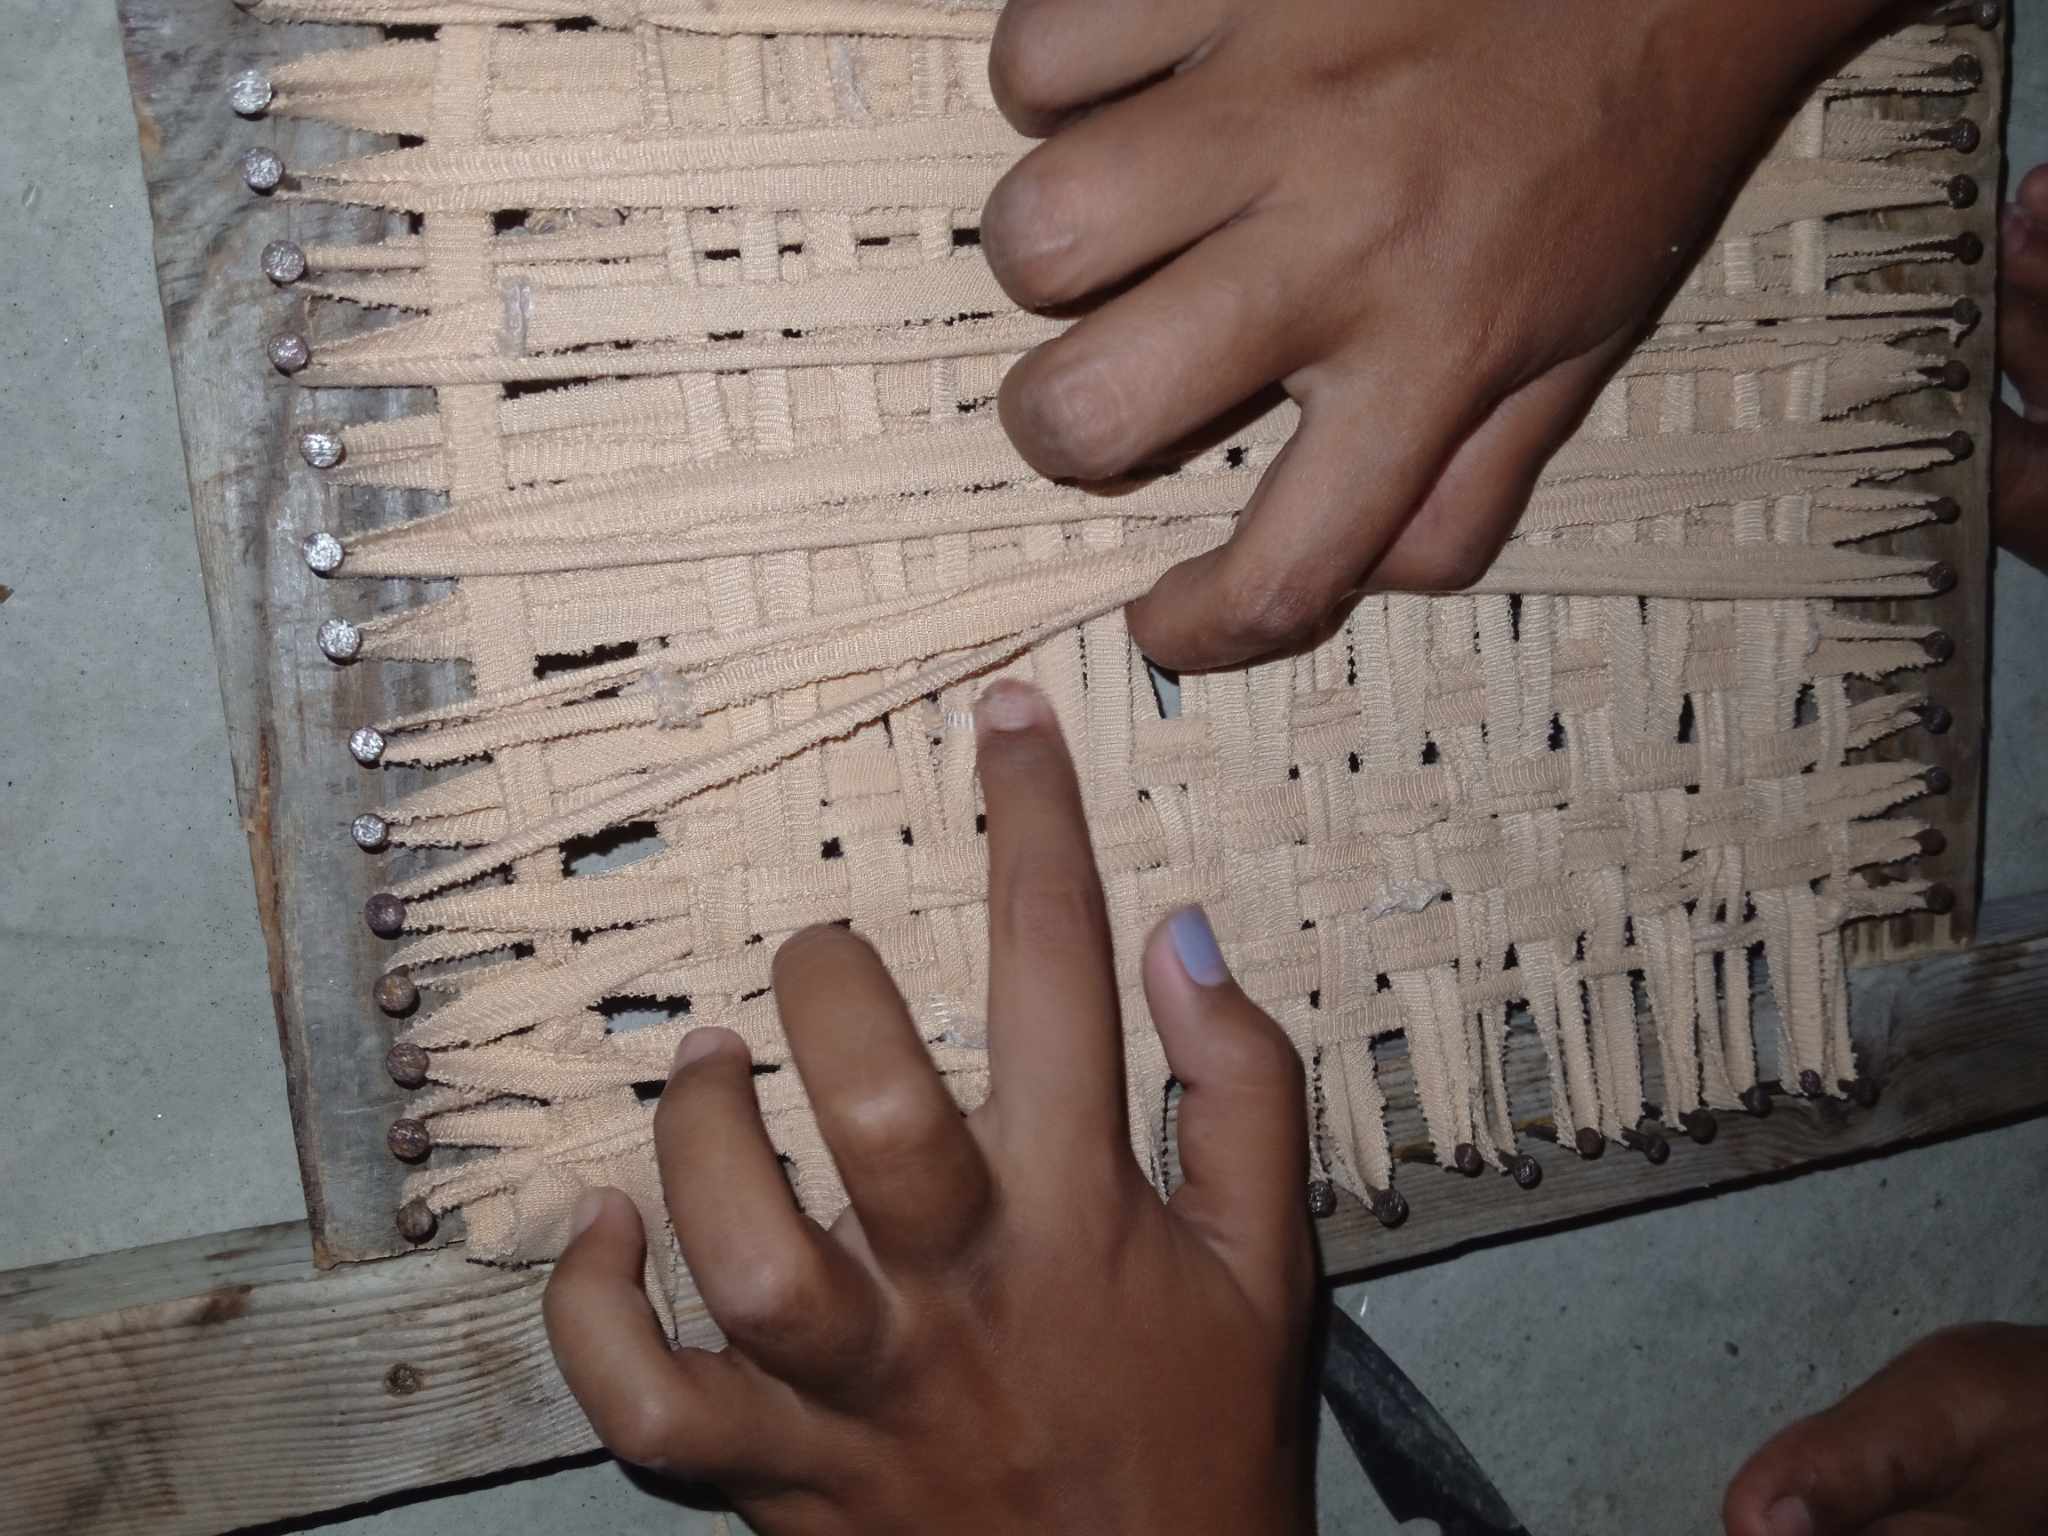
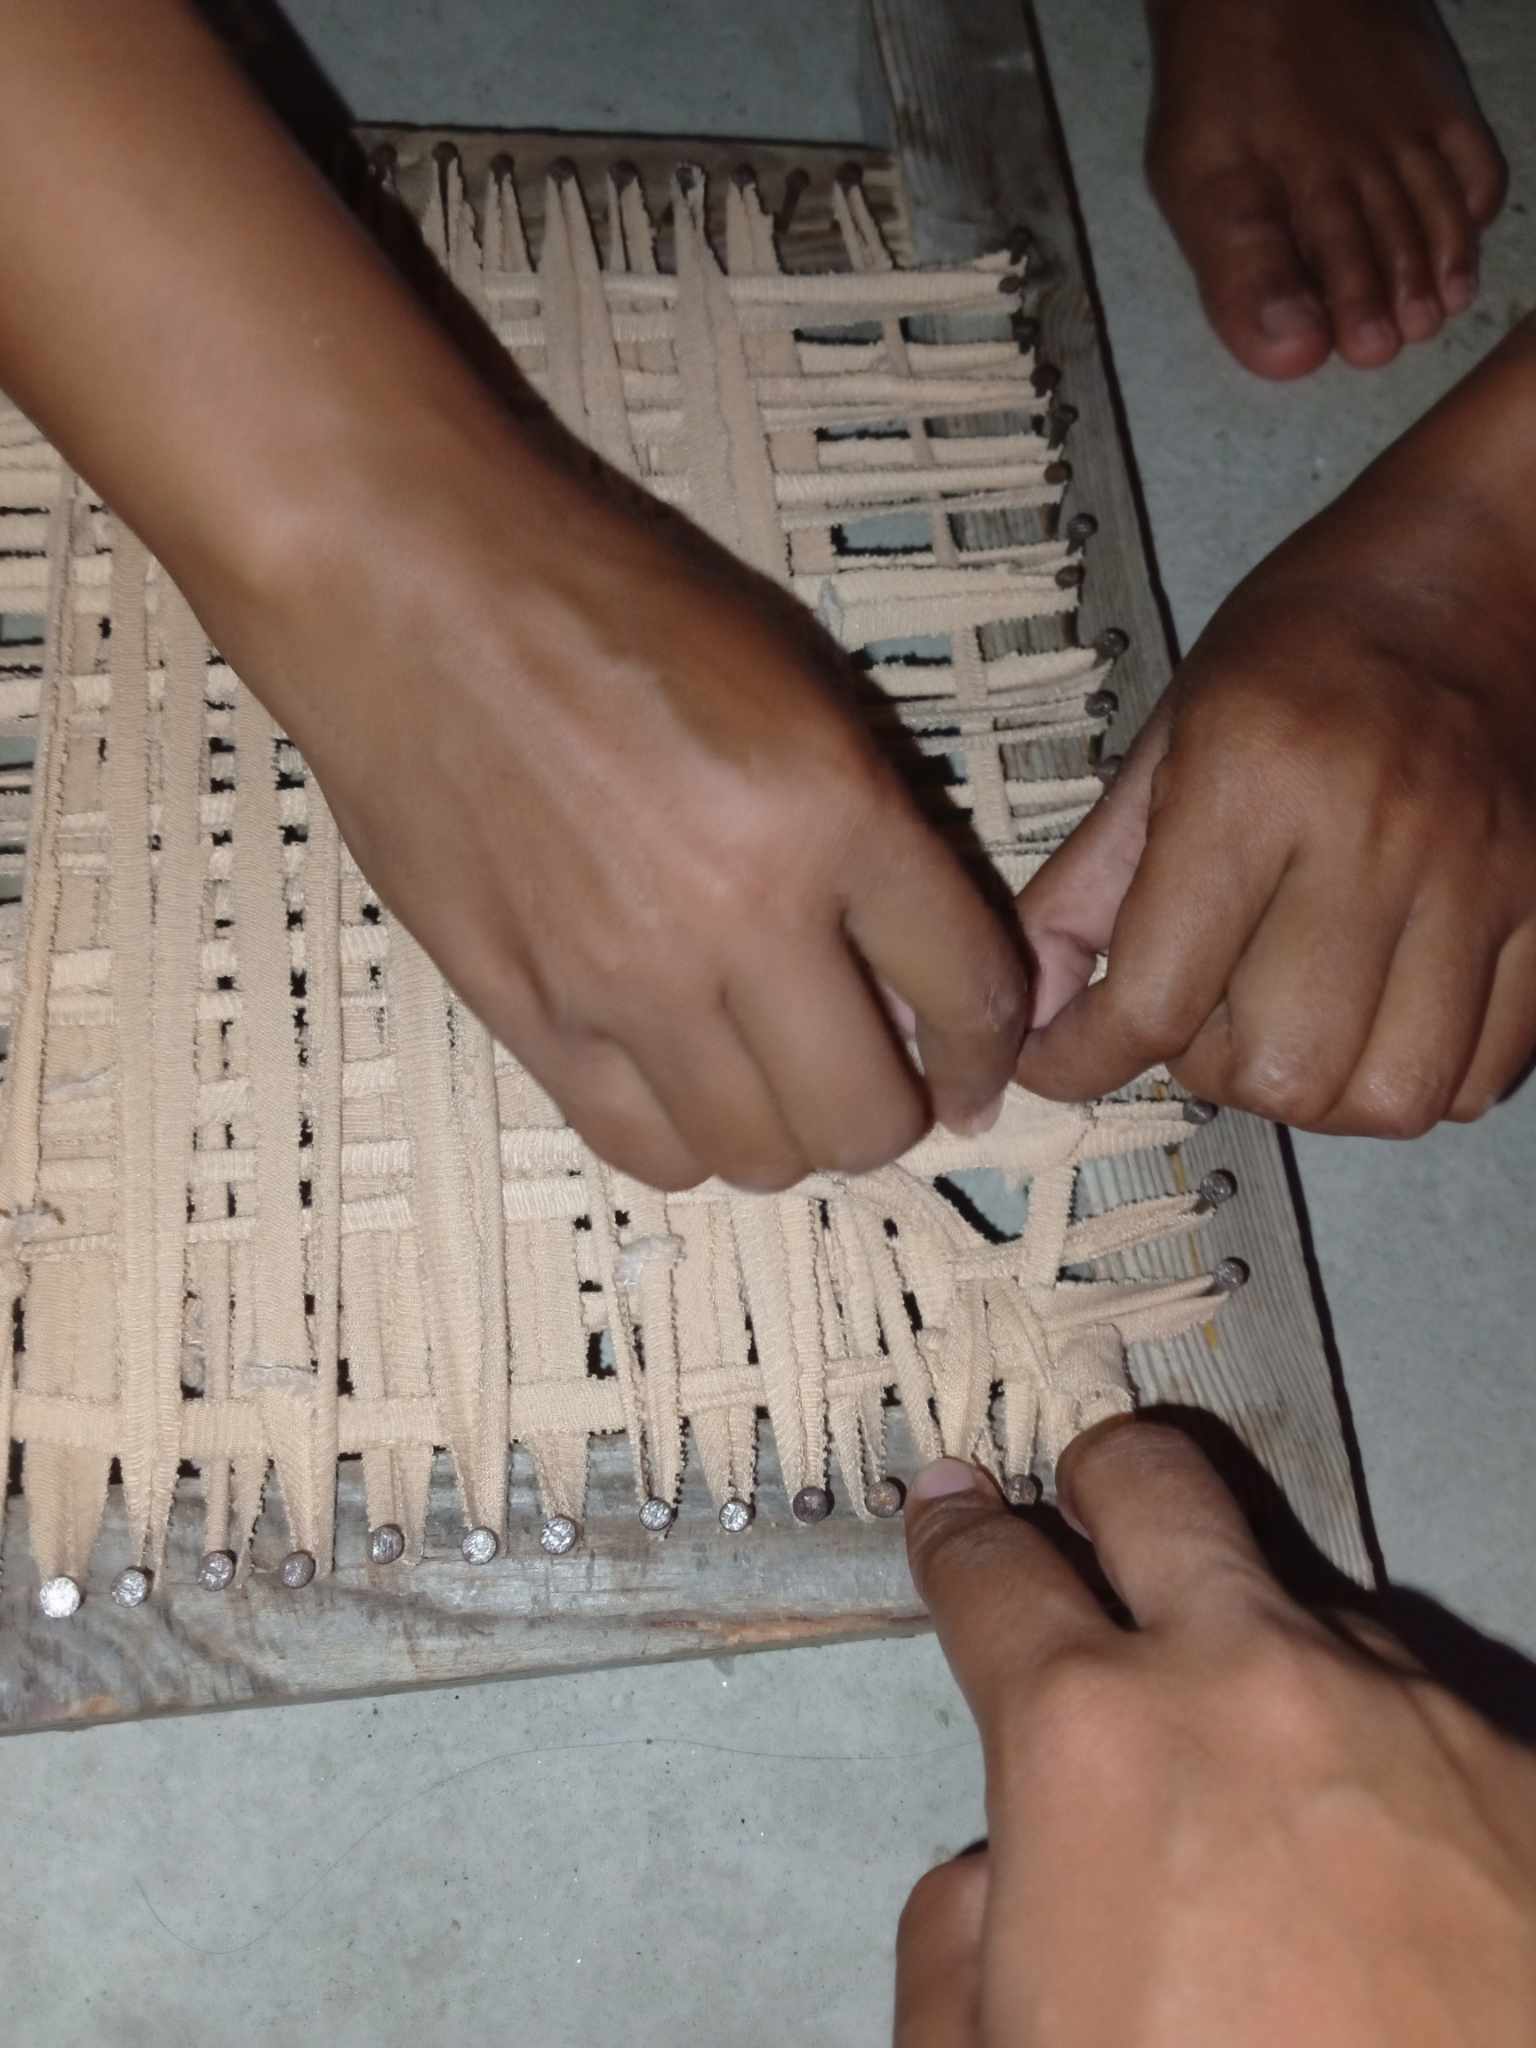
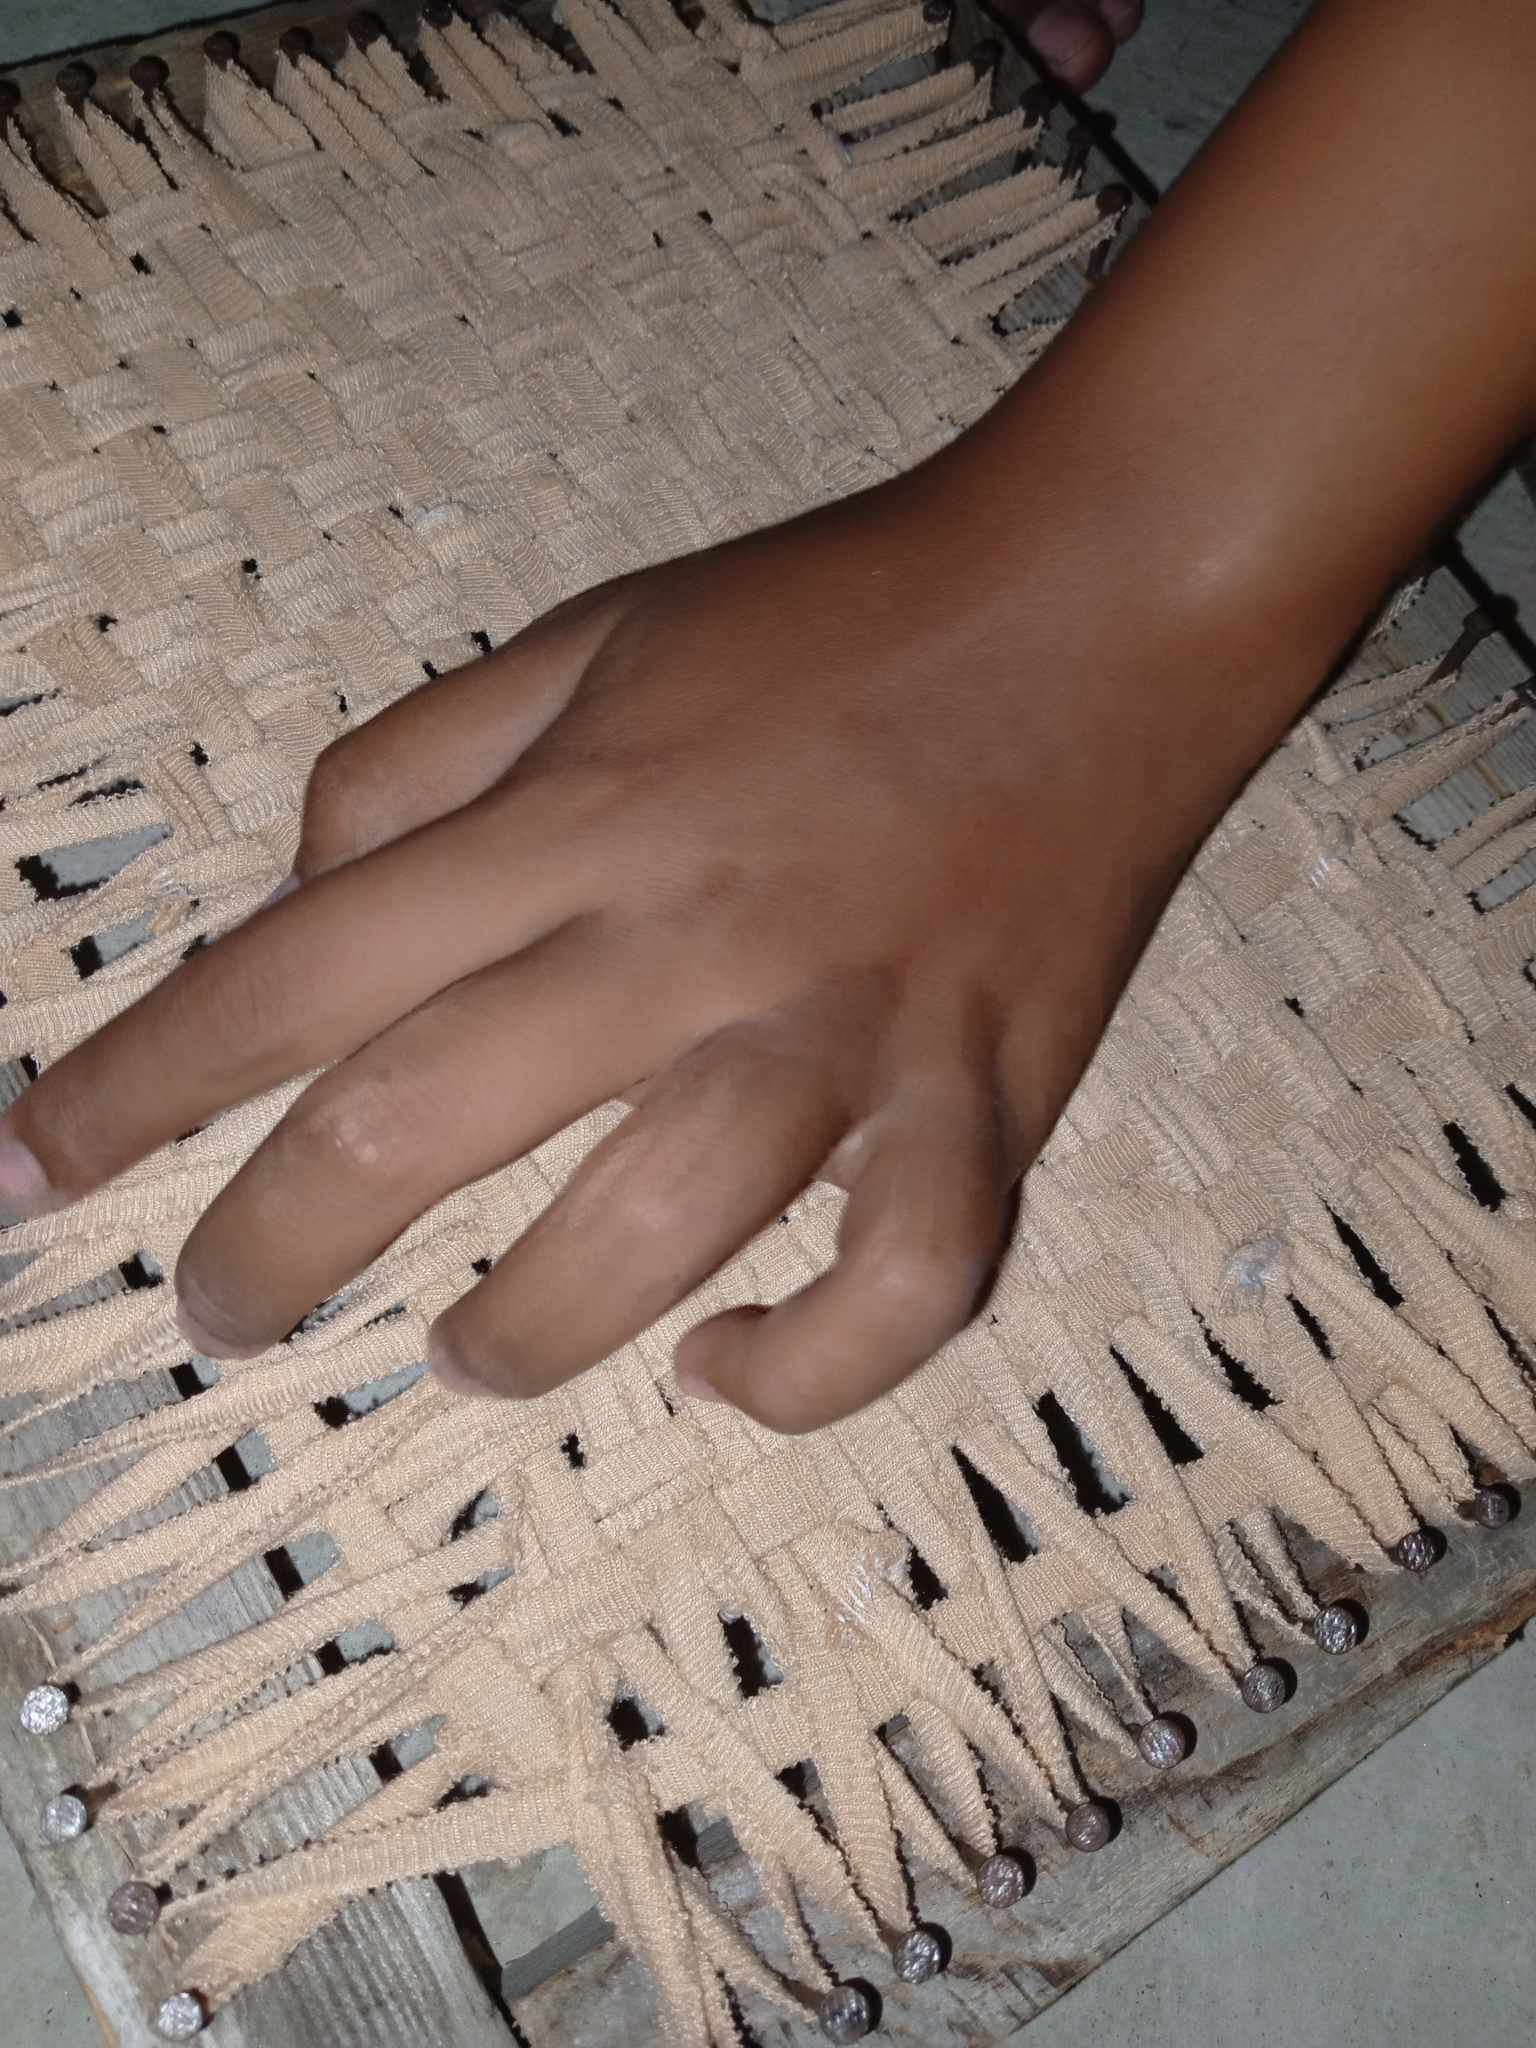
Step 9. Maintain even tension. Make sure rows are similar tightness. If some gaps appear, squeeze the weft tighter next rows to even it out.
Step 10. Finish the weaving. When the cloth reaches the desired height, leave a small margin of warp at top and bottom. Cut the warp loops from nails (careful!) and tie small groups of adjacent warp threads together in knots to secure the weft.
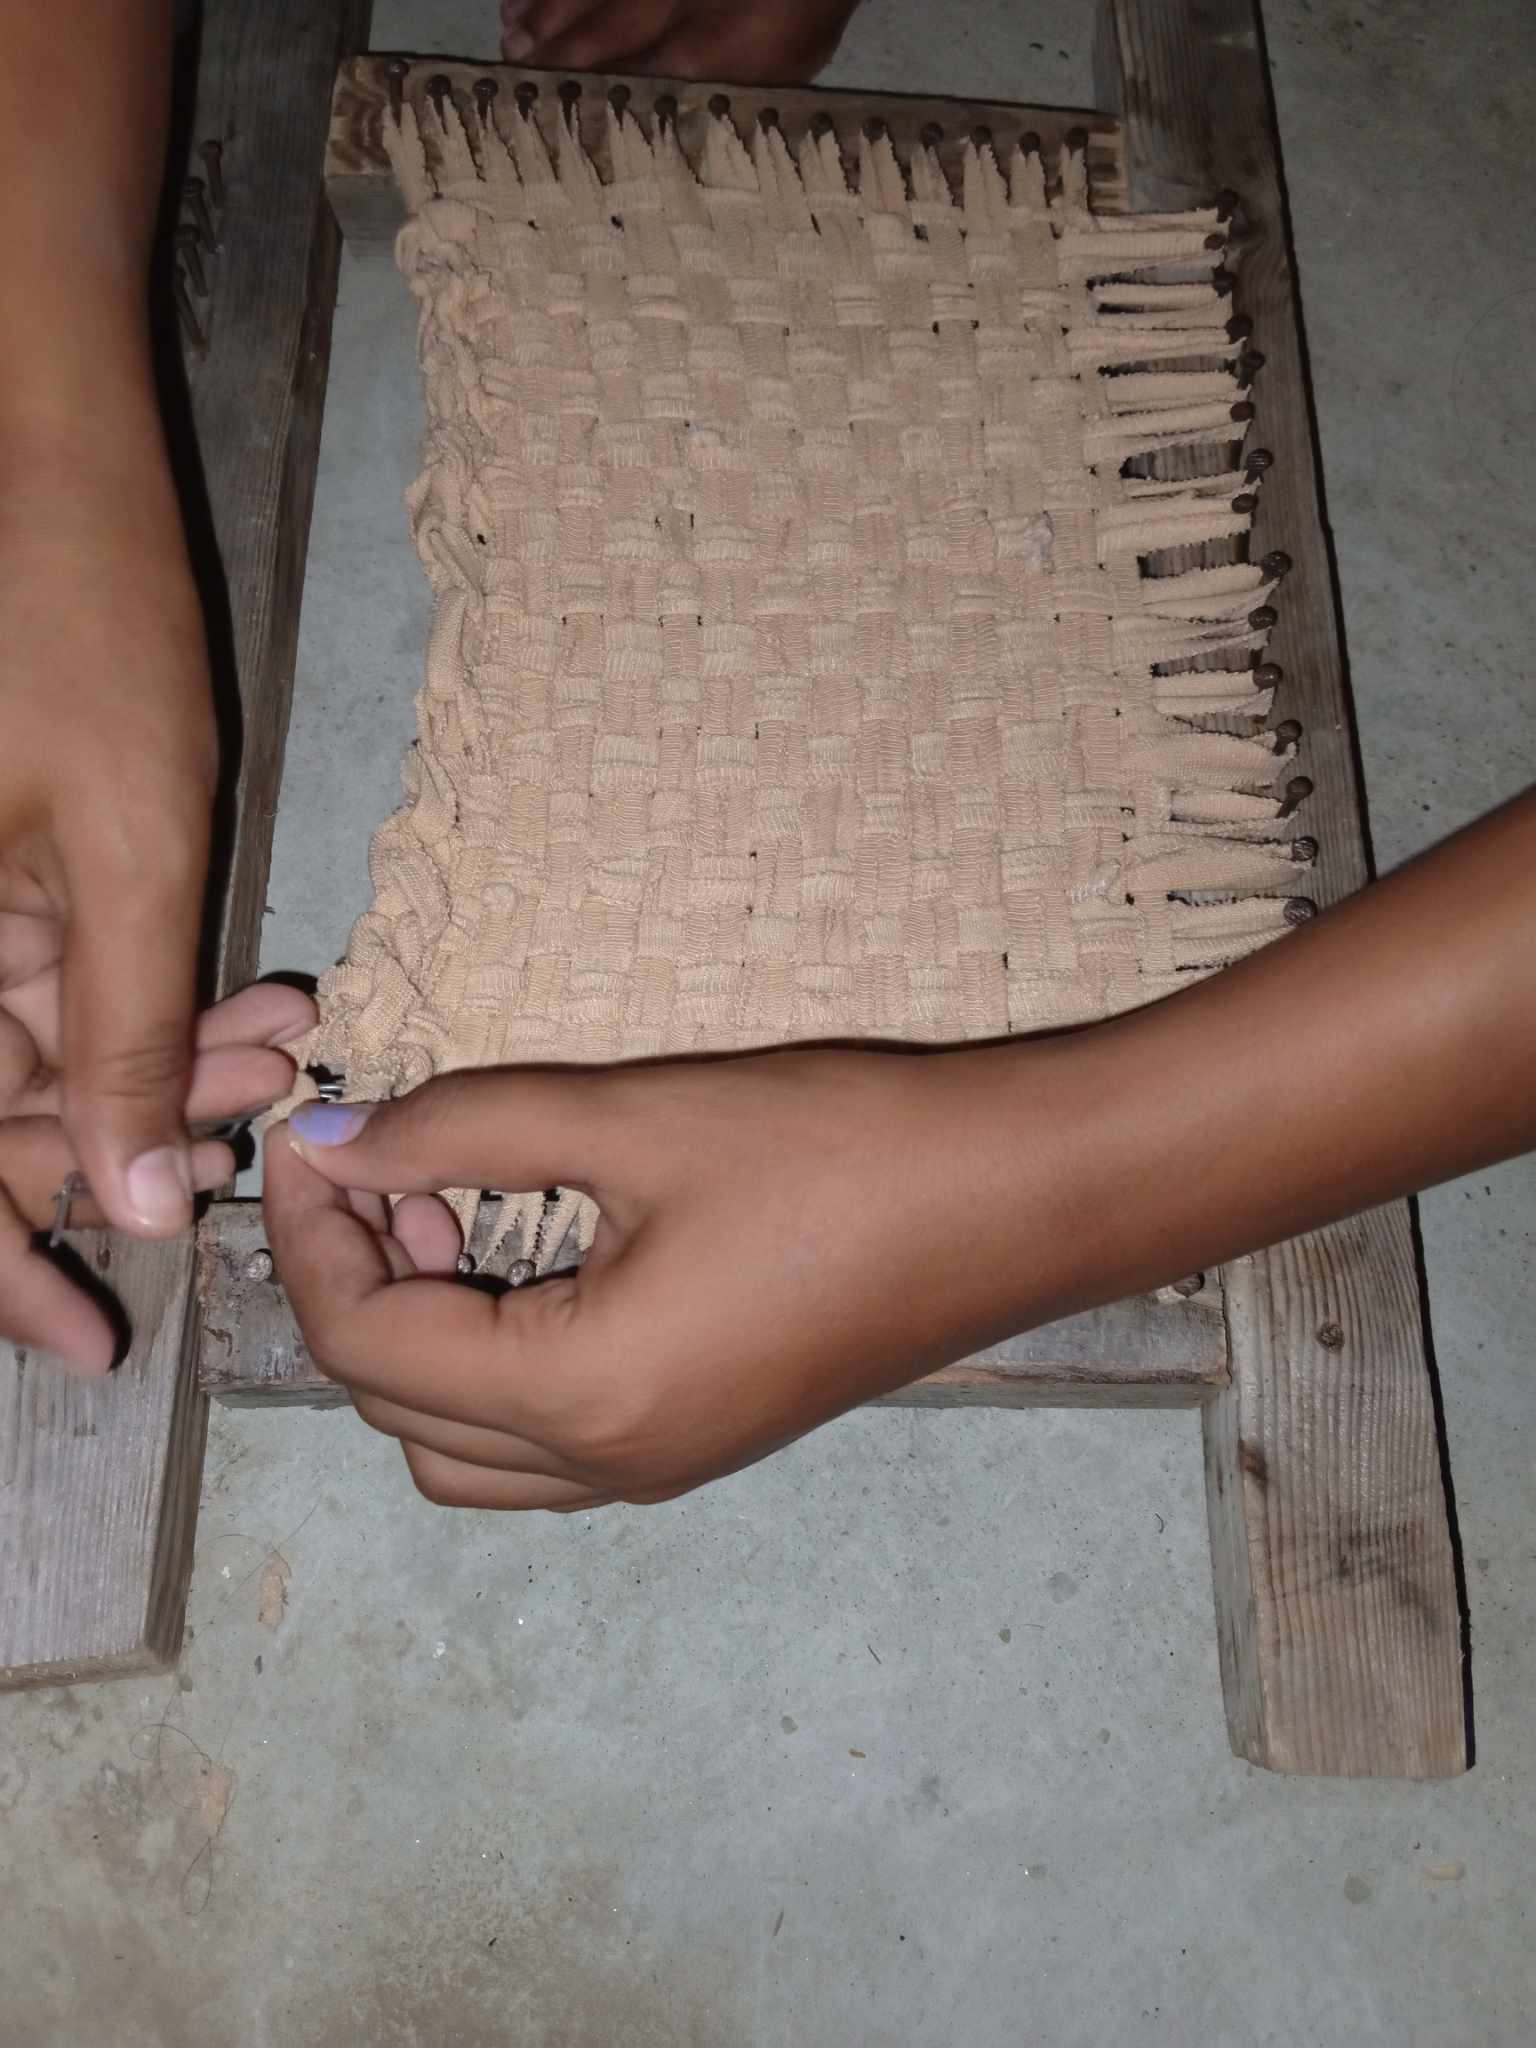
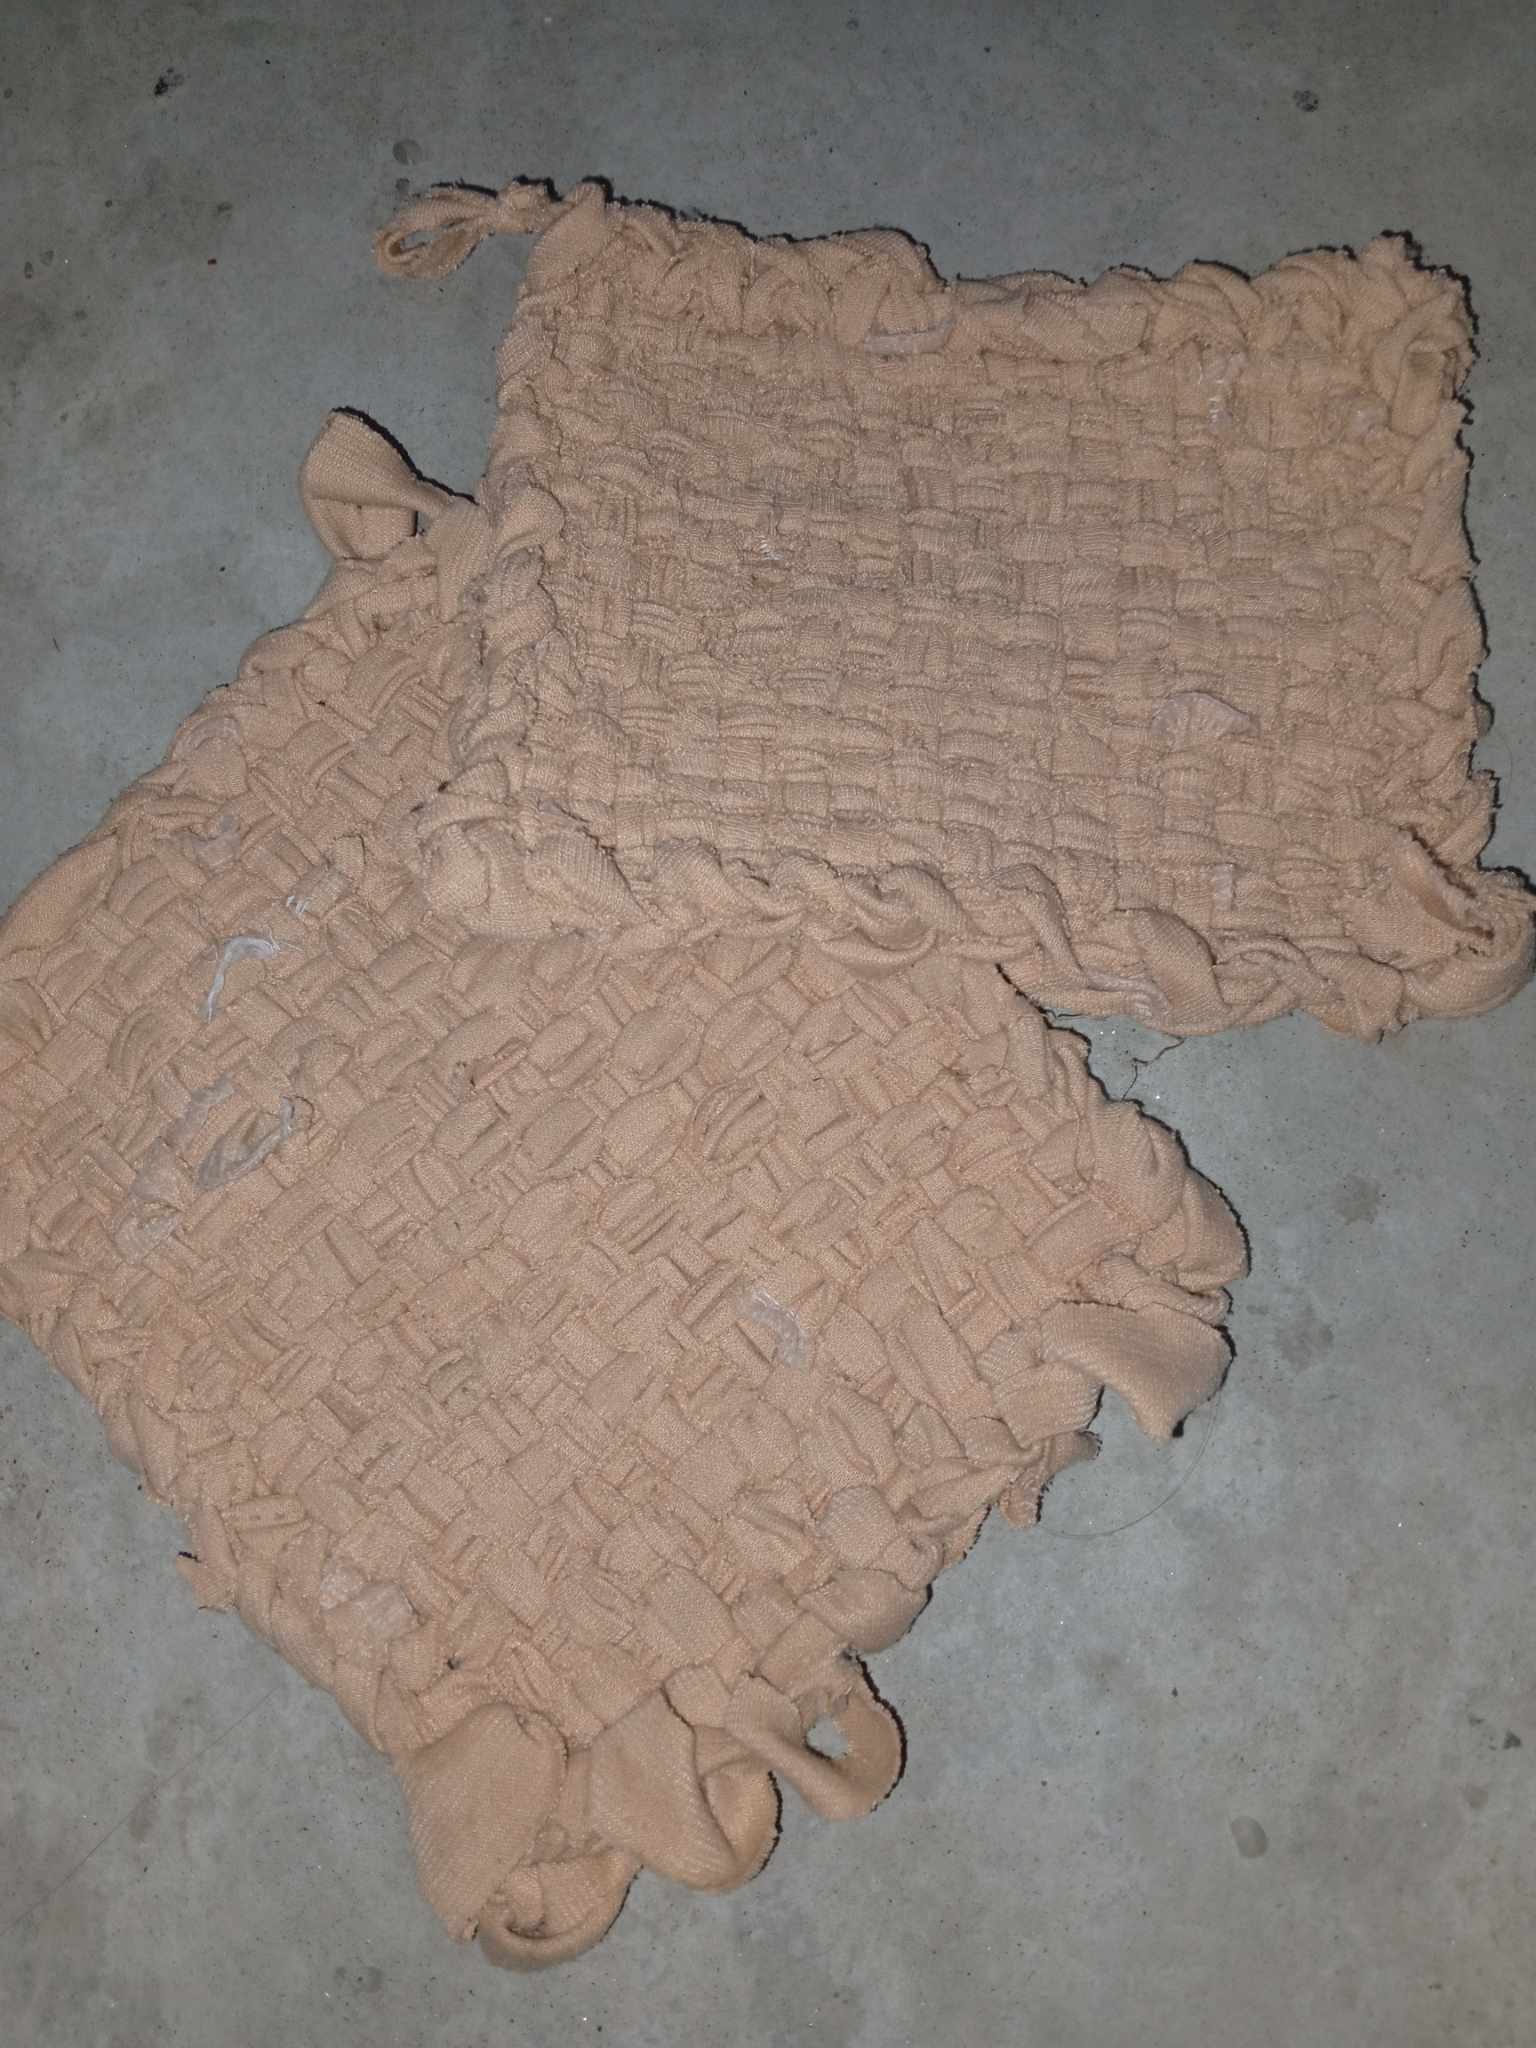
Step 11. Neaten the edges. Trim loose ends. For a cleaner finish, sew a simple hem along top/bottom or glue a fabric backing. You can also braid the fringe or add tassels. And here's the finished product. They just couldn't believe their fruit of hard work. It's like a brand new one.
Step 12. Wash and press (optional). Lightly wash the finished piece (if fabrics are washable) and press flat to help it settle.
- Optional: needle & thread or hot glue for finishing
Tips & variations
Spacing: closer nails = tighter, denser cloth; wider spacing = more open weave.
Use different fabrics (silky, cotton, denim) to get varied textures.
Make it bigger by using a larger frame or by sewing finished panels together.
Tool idea: an old comb or fork makes a great beater.
Safety: be careful with nails and hammering, and keep scissors away from kids.
Thank you for reading
@usagigallardo015
@usagigallardo015