######
✨¡Hola amigos amantes de la creatividad! Espero que estén todos bien.✨
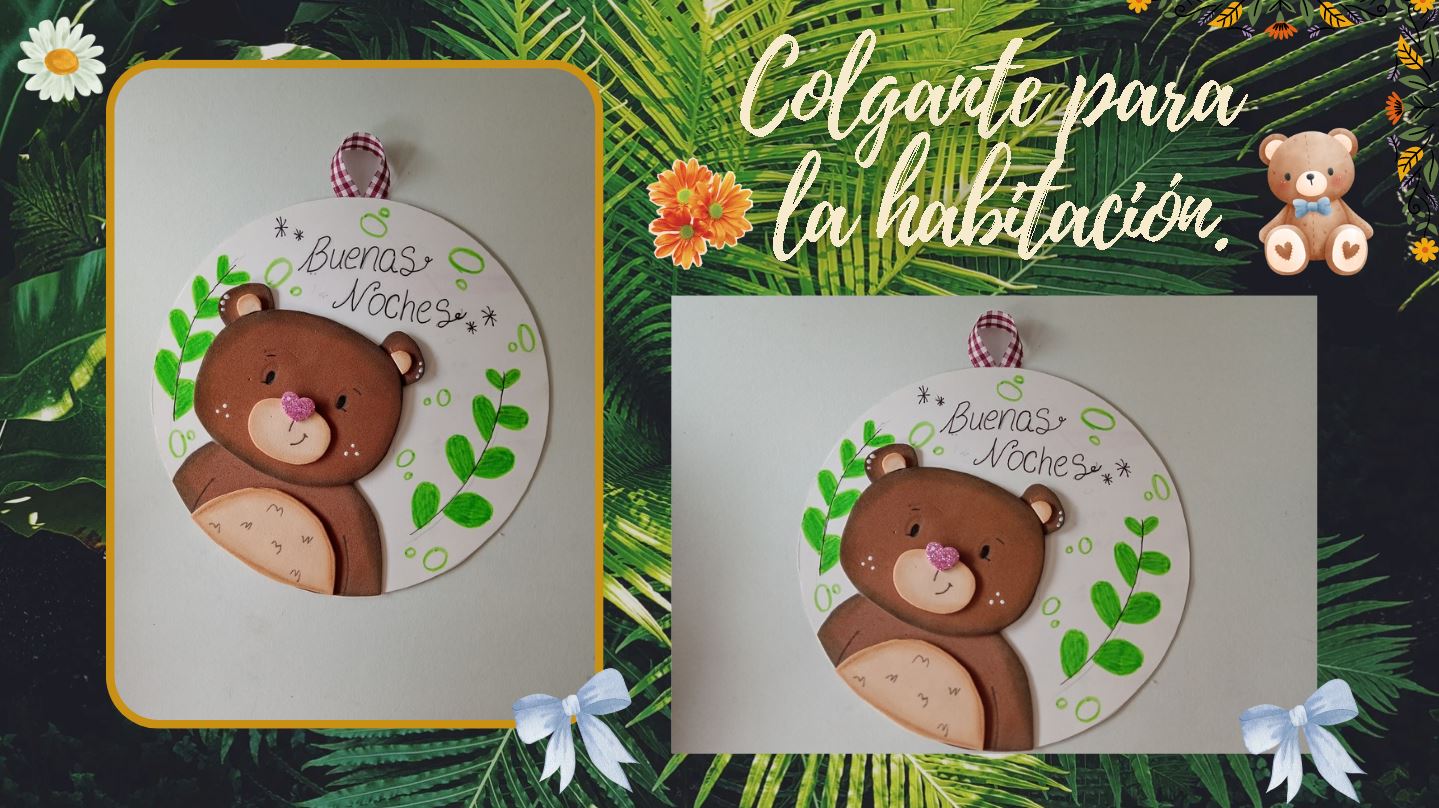
¡Buenas tardes, amigos! Espero que estén pasando una excelente semana. Por mi parte, estoy contenta de pasar por acá a compartir una linda idea con ustedes. En esta ocasión les comparto el paso a paso para elaborar un lindo colgante para la habitación. Como dije en el post anterior, me encanta elaborar colgantes, pues uno puede echar a volar la imaginación y crear cualquier personaje o criatura que queramos y dejar un lindo o gracioso mensaje.
Esta vez, pensé en centrarme en un colgante para la habitación de los pequeños y obviamente pensé en algún animalito tierno como puede ser un oso, algunas hojas pintadas y escribir "buenas noches" a un lado.
**🔸Sin más que añadir, a continuación los dejo con el paso a paso:**
> ######
✨¡Hello friends who love creativity! I hope you are all well.✨
>
Good afternoon, friends!I hope you're having a great week. For my part, I'm happy to stop by to share a lovely idea with you. This time, I'm sharing the step-by-step instructions for making a cute pendant for the room. As I said in the previous post, I love making pendants because you can let your imagination run wild and create any character or creature you want and leave a cute or funny message.
>
This time, I thought about focusing on a pendant for the little ones' rooms, and obviously, I thought of a cute animal like a bear, some painted leaves, and writing "good night" on the side.
> **🔸Without more to add, then I leave you with the step by step:**
**♥️ESPERO QUE TE GUSTE,
¡Empecemos!**
**♥️I HOPE YOU LIKE IT,
Let's start!**

# ✂️ MATERIALES | ✂️ MATERIALS
- Cartulina escolar blanca.
- Foami escarchado rosa.
- Foami marrón.
- Foami crema.
- Pinturas y marcadores.
- Tela o cinta delgada.
- Pegamento.
- Tijeras.
- Regla.
- Hoja blanca.
- Lápiz.
- White school cardstock.
- Pink frosted foam.
- Brown foam.
- Cream foam.
- Paints and markers.
- Fabric or thin ribbon.
- Glue.
- Scissors.
- Ruler.
- White paper.
- Pencil.
# 🌟 PROCEDIMIENTO | 🌟 PROCESS
###### ✨PASO 1:
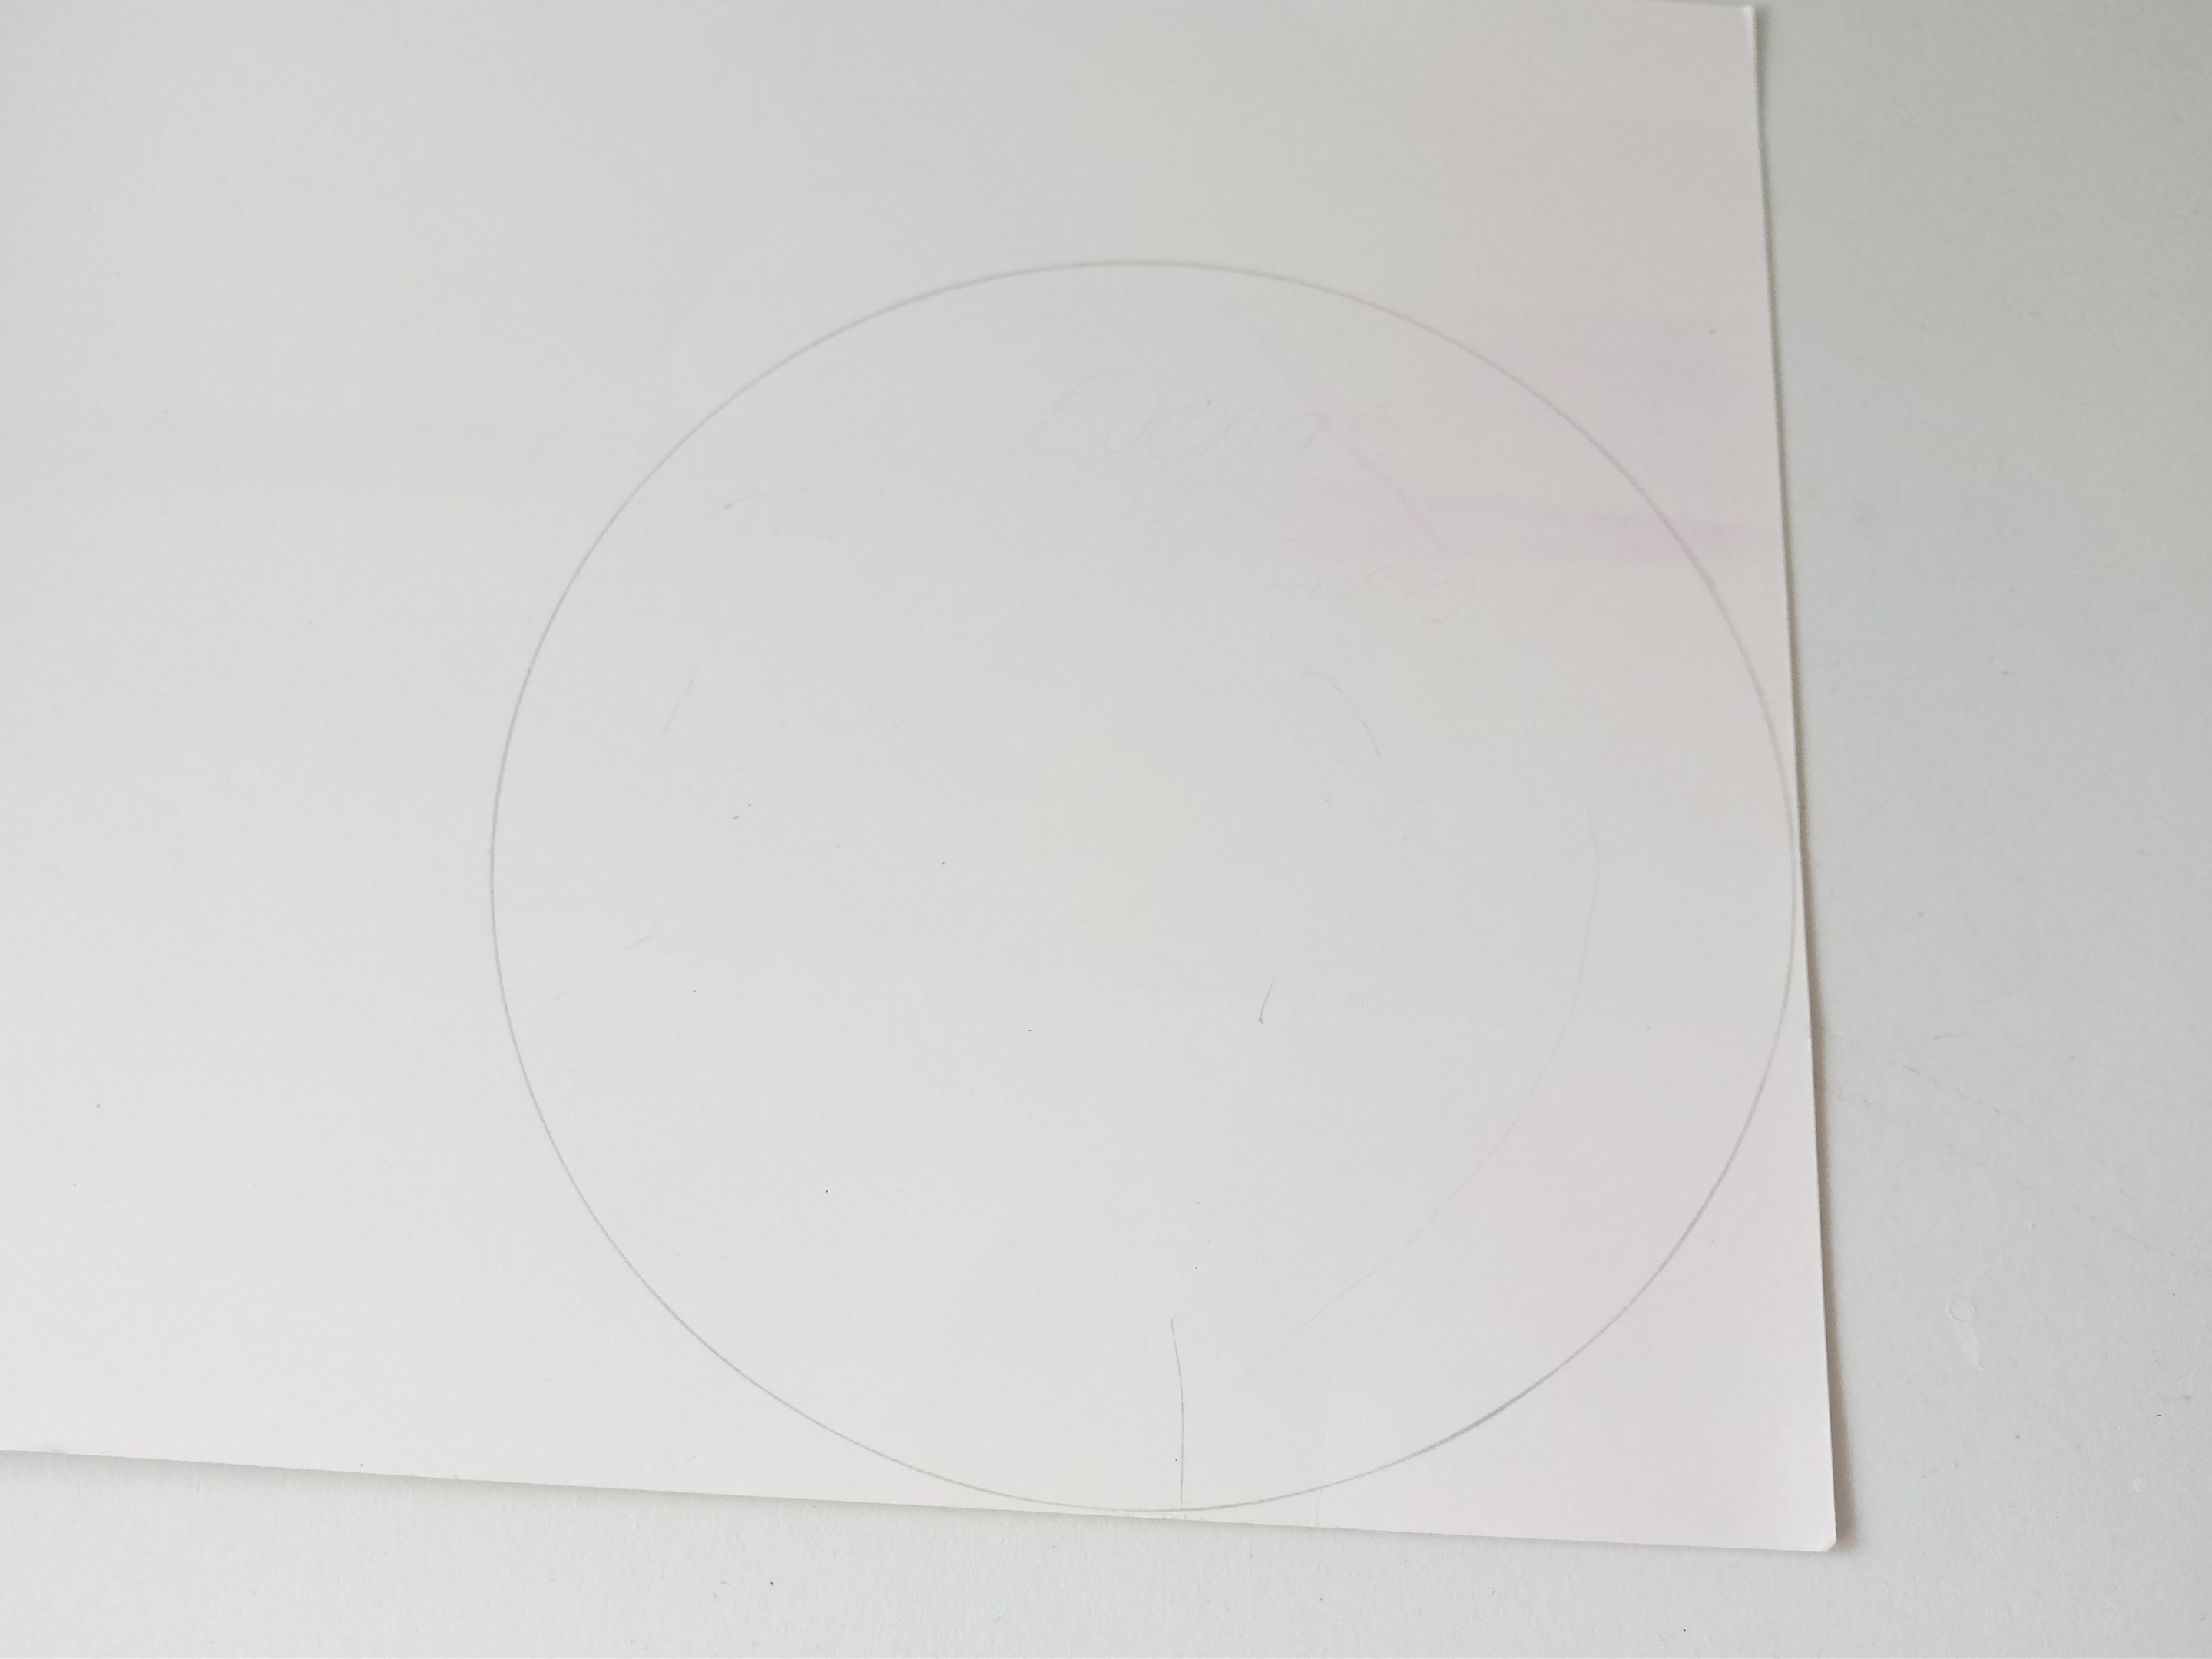
Lo primero que hice fue tomar la cartulina o cartón delgado e hice un círculo de 16 cm de circunferencia y recorté. En mi caso, estas medidas fueron trazadas de un plato pequeño, para que fuera más fácil para mí, ya que no tengo un compás. Luego de esto, recorté una tira de 1 cm para que fuera la cinta del colgante y pegué en la parte trasera de la cartulina.
###### ✨STEP 1:
The first thing I did was take the cardstock or thin cardboard and cut out a circle with a circumference of 16 cm. In my case, these measurements were taken from a small plate, to make it easier for me since I don't have a compass. After this, I cut a 1 cm strip to be the ribbon for the pendant and glued it to the back of the cardstock.
 |
 |
|---|---|
###### ✨PASO 2:
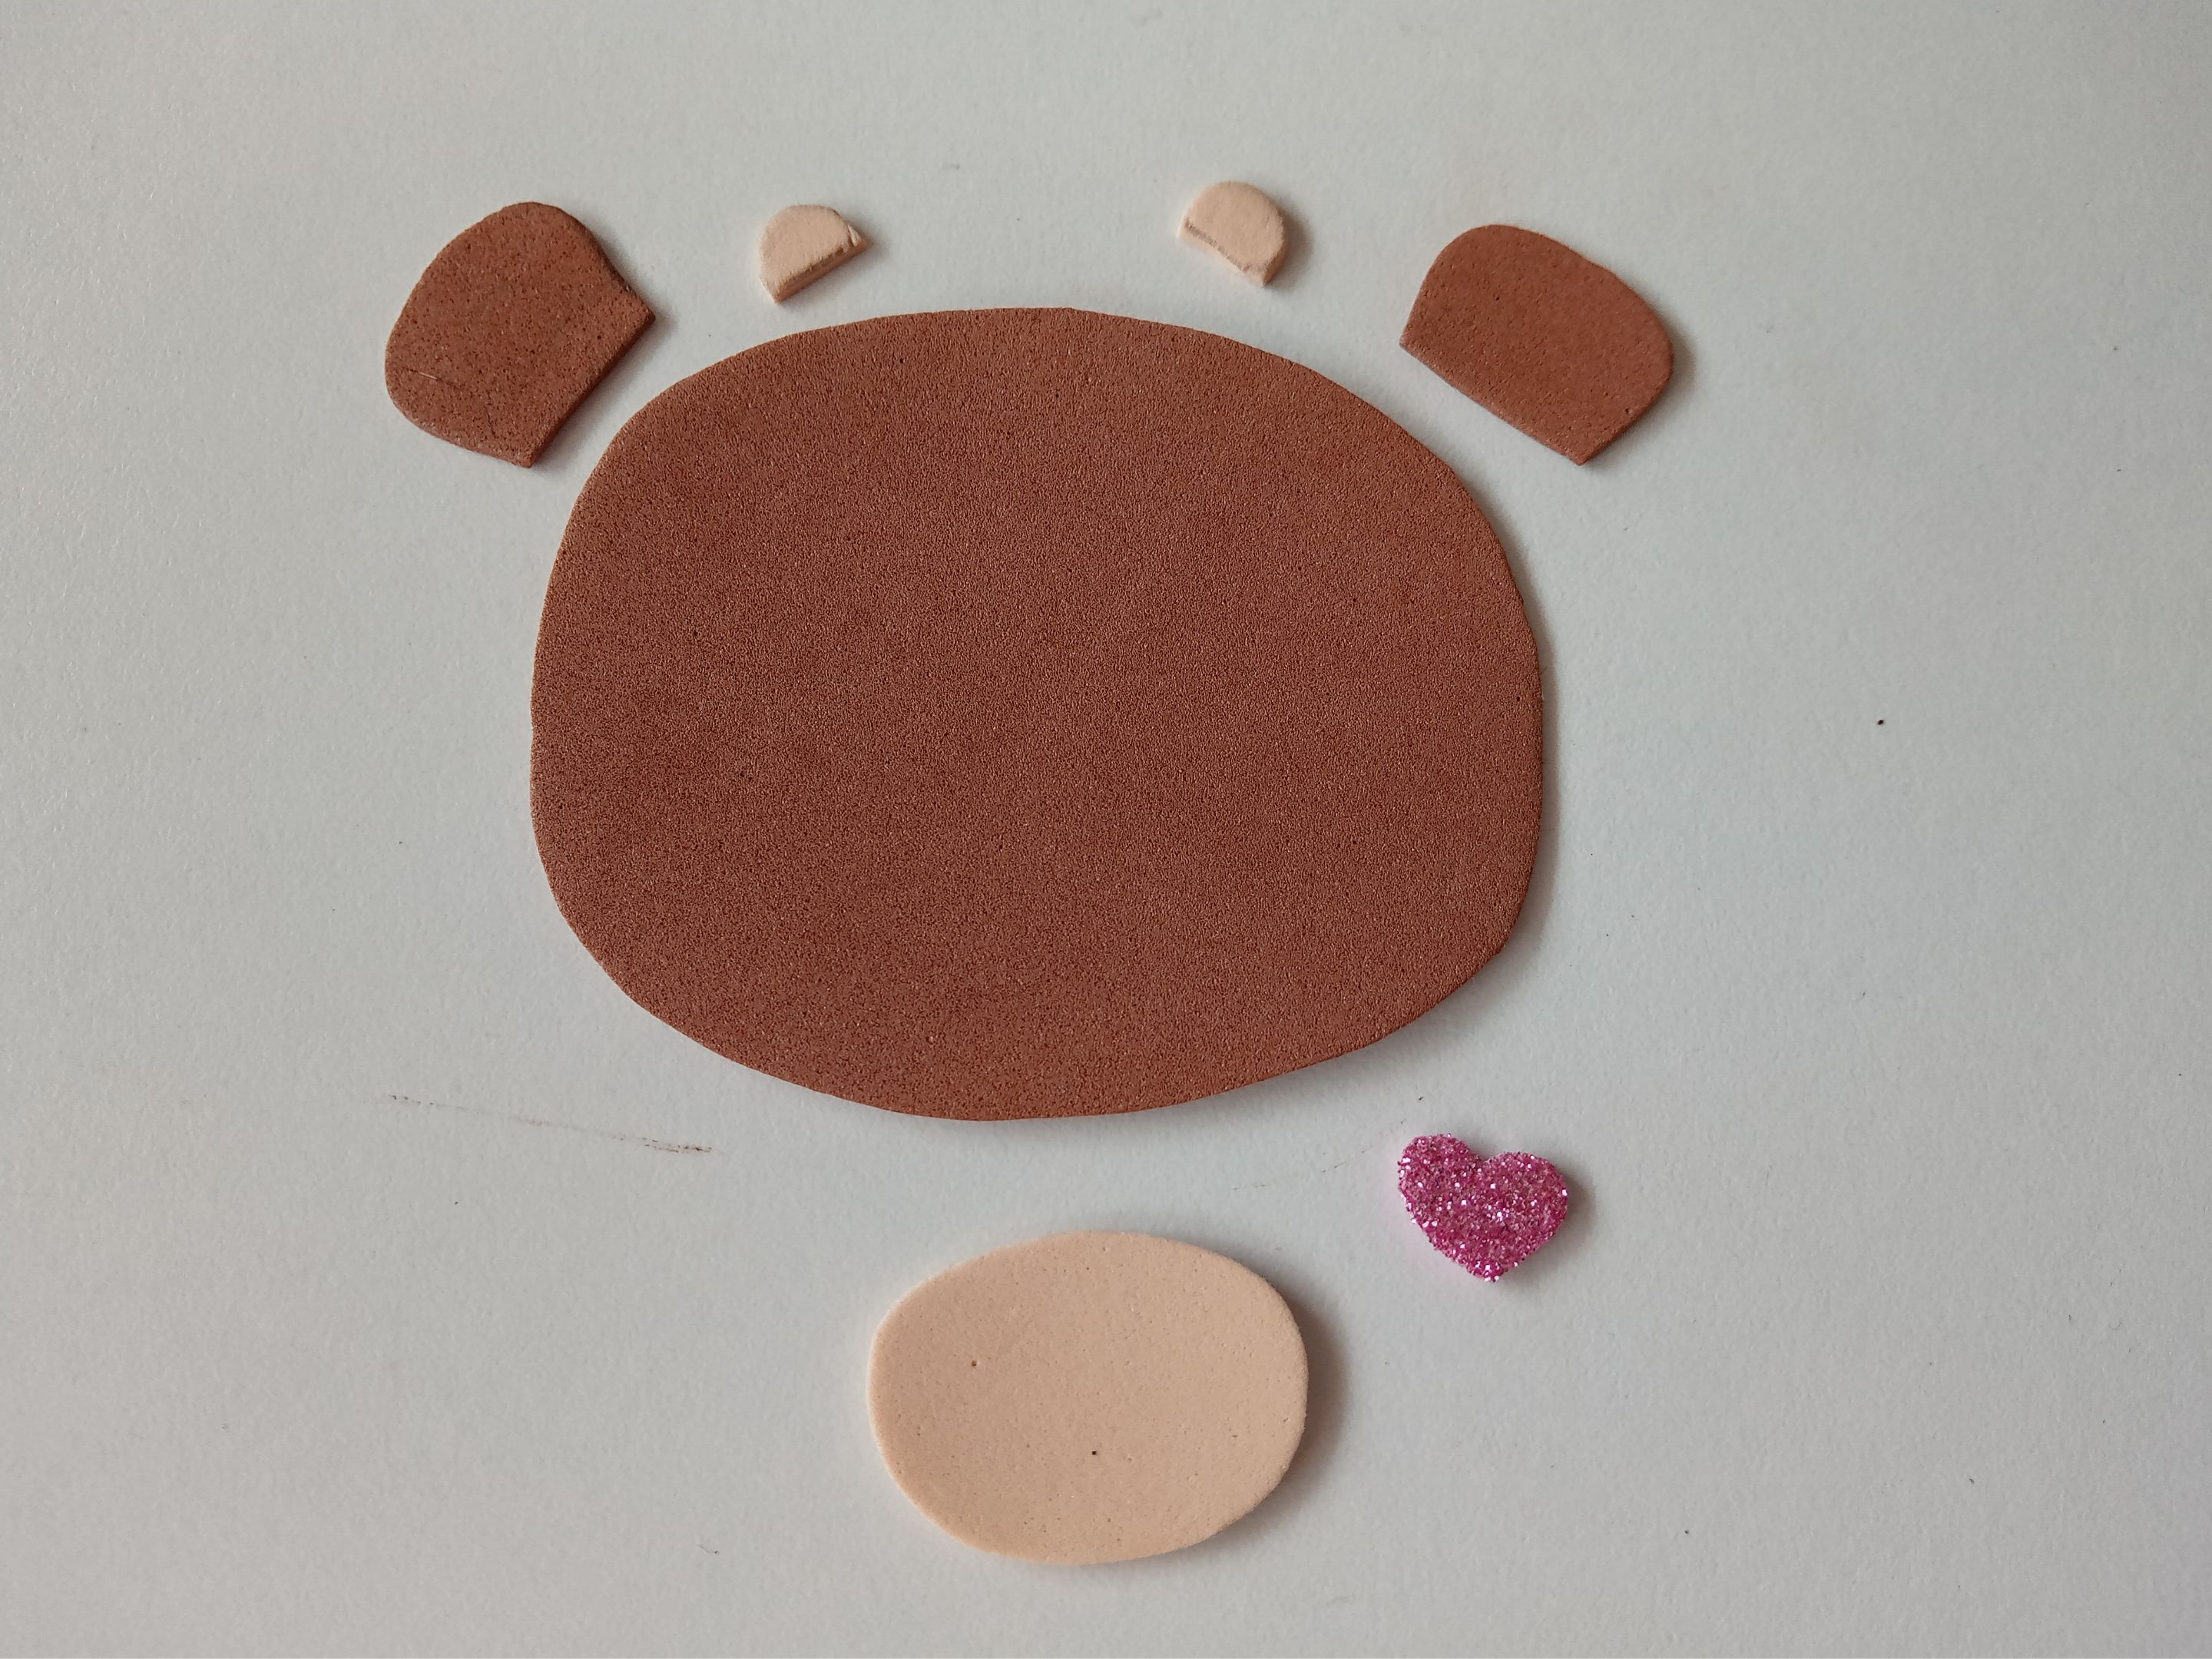
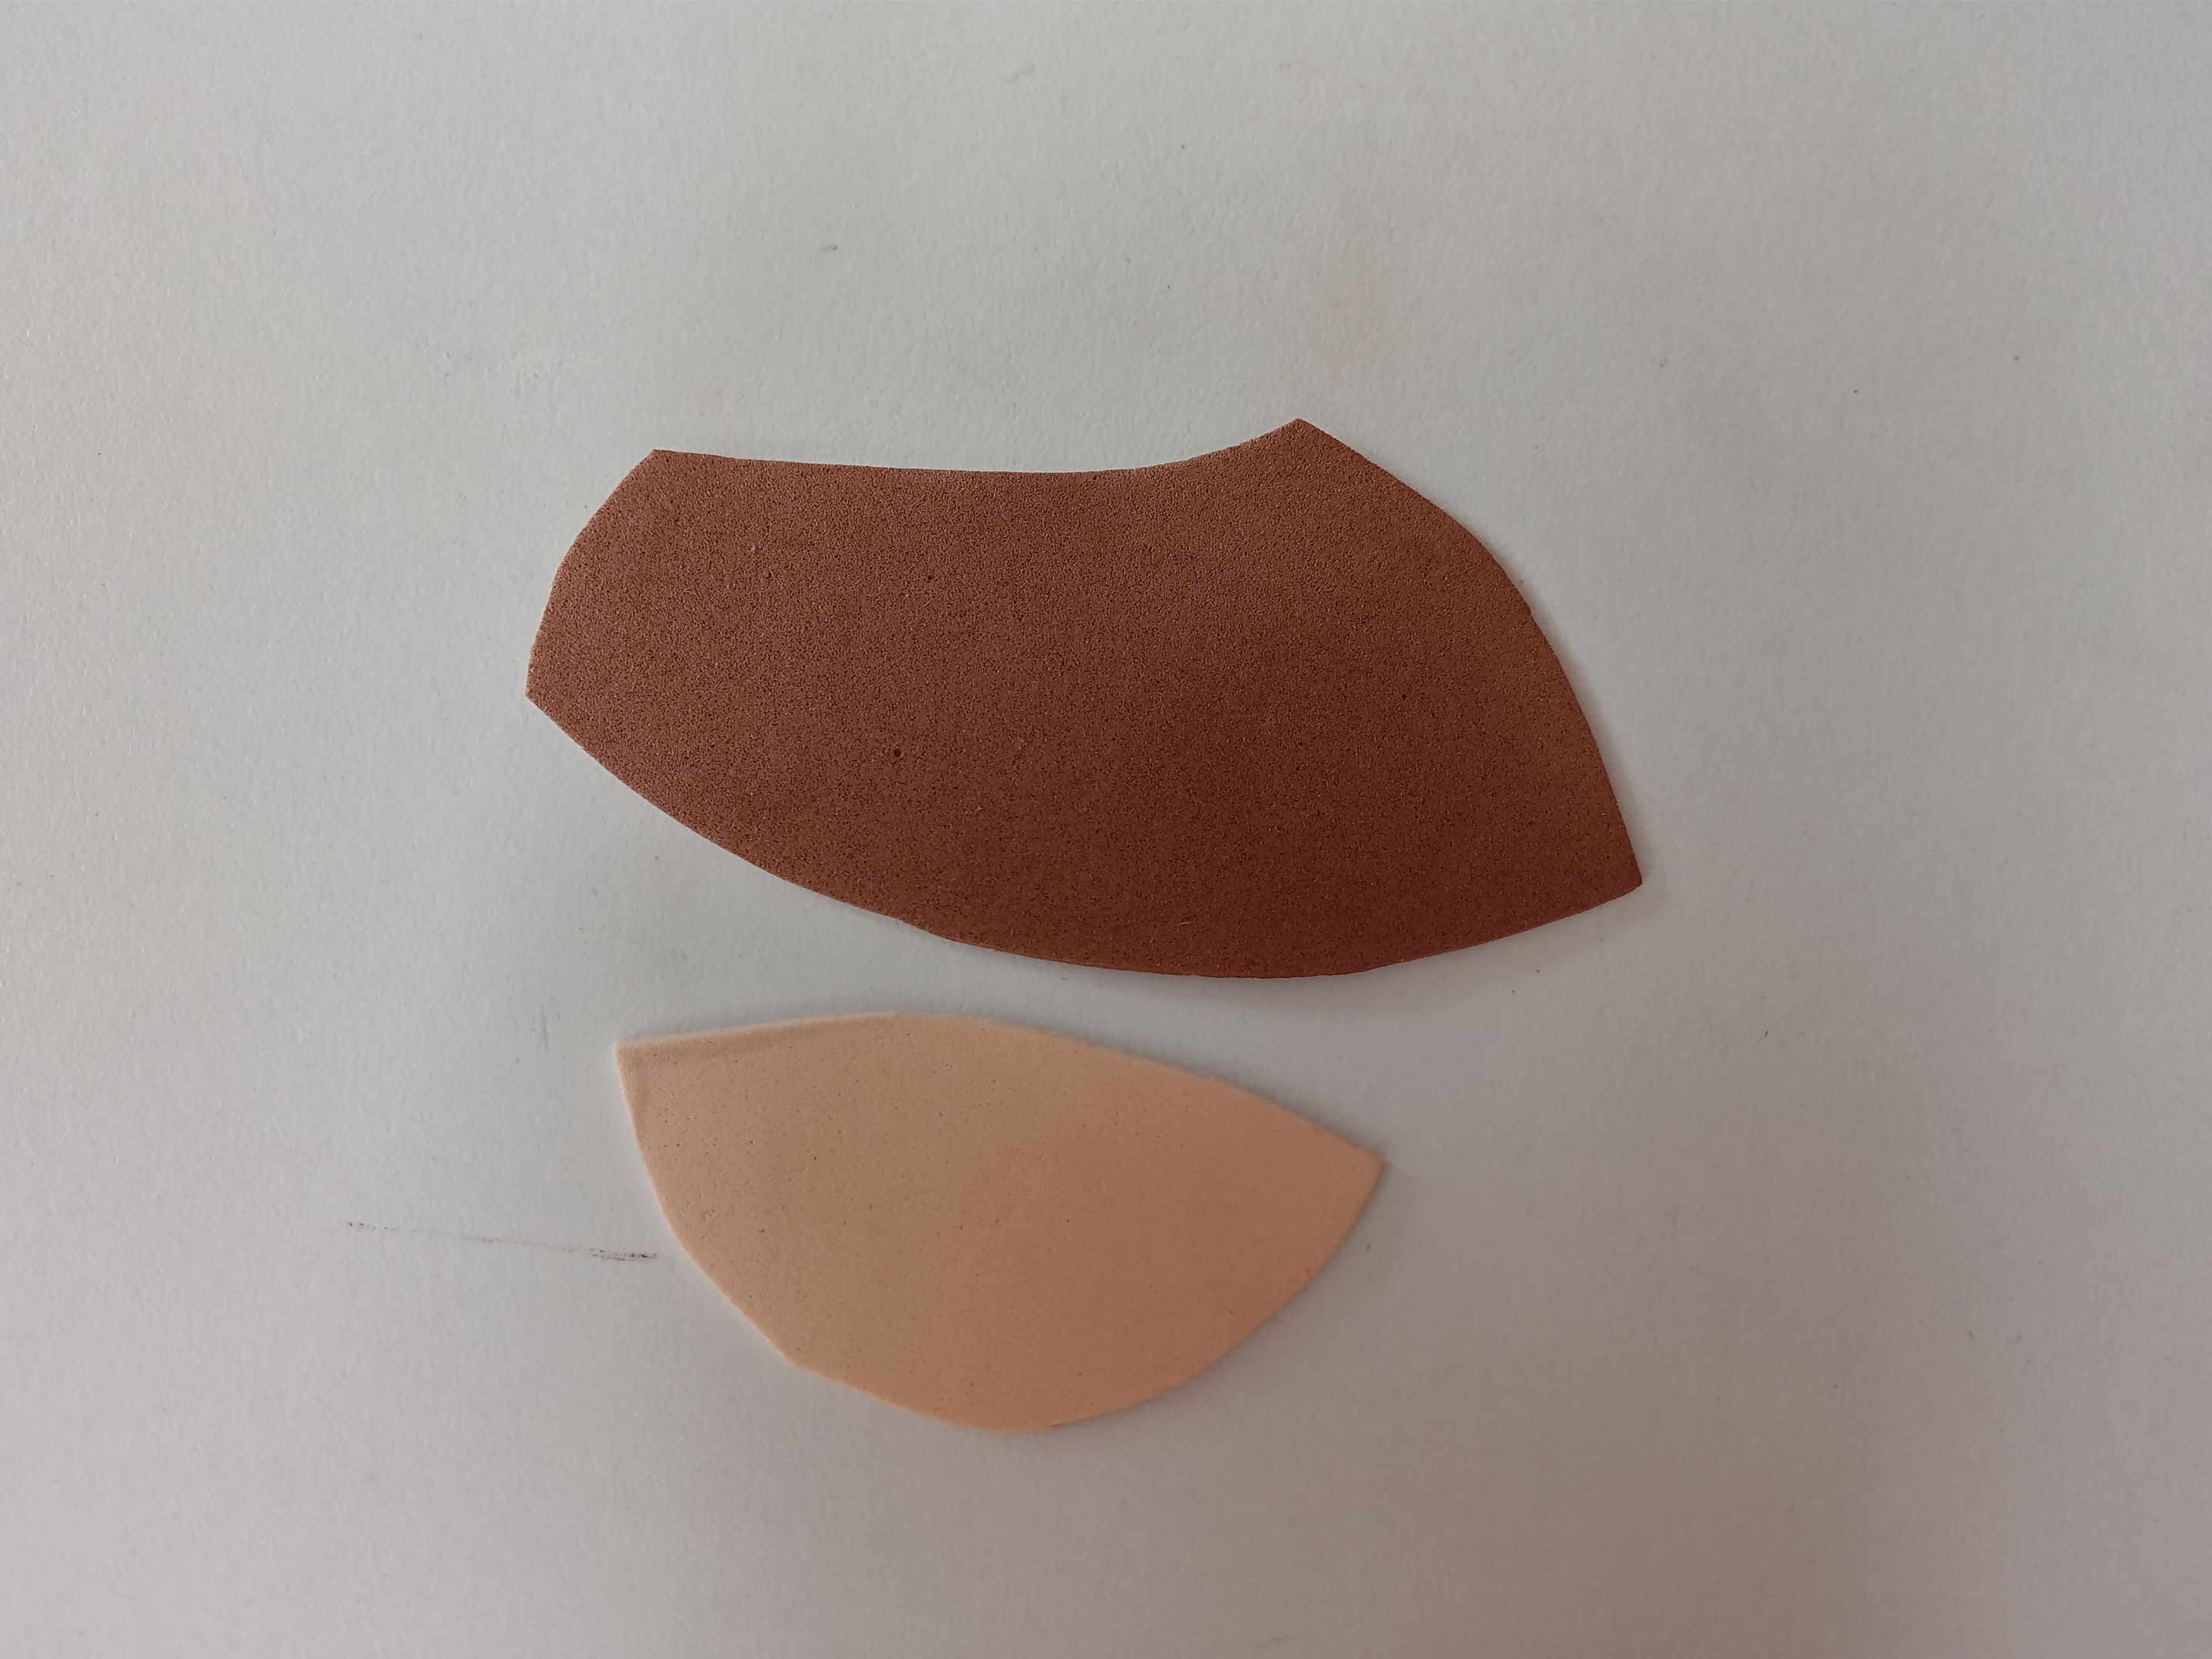
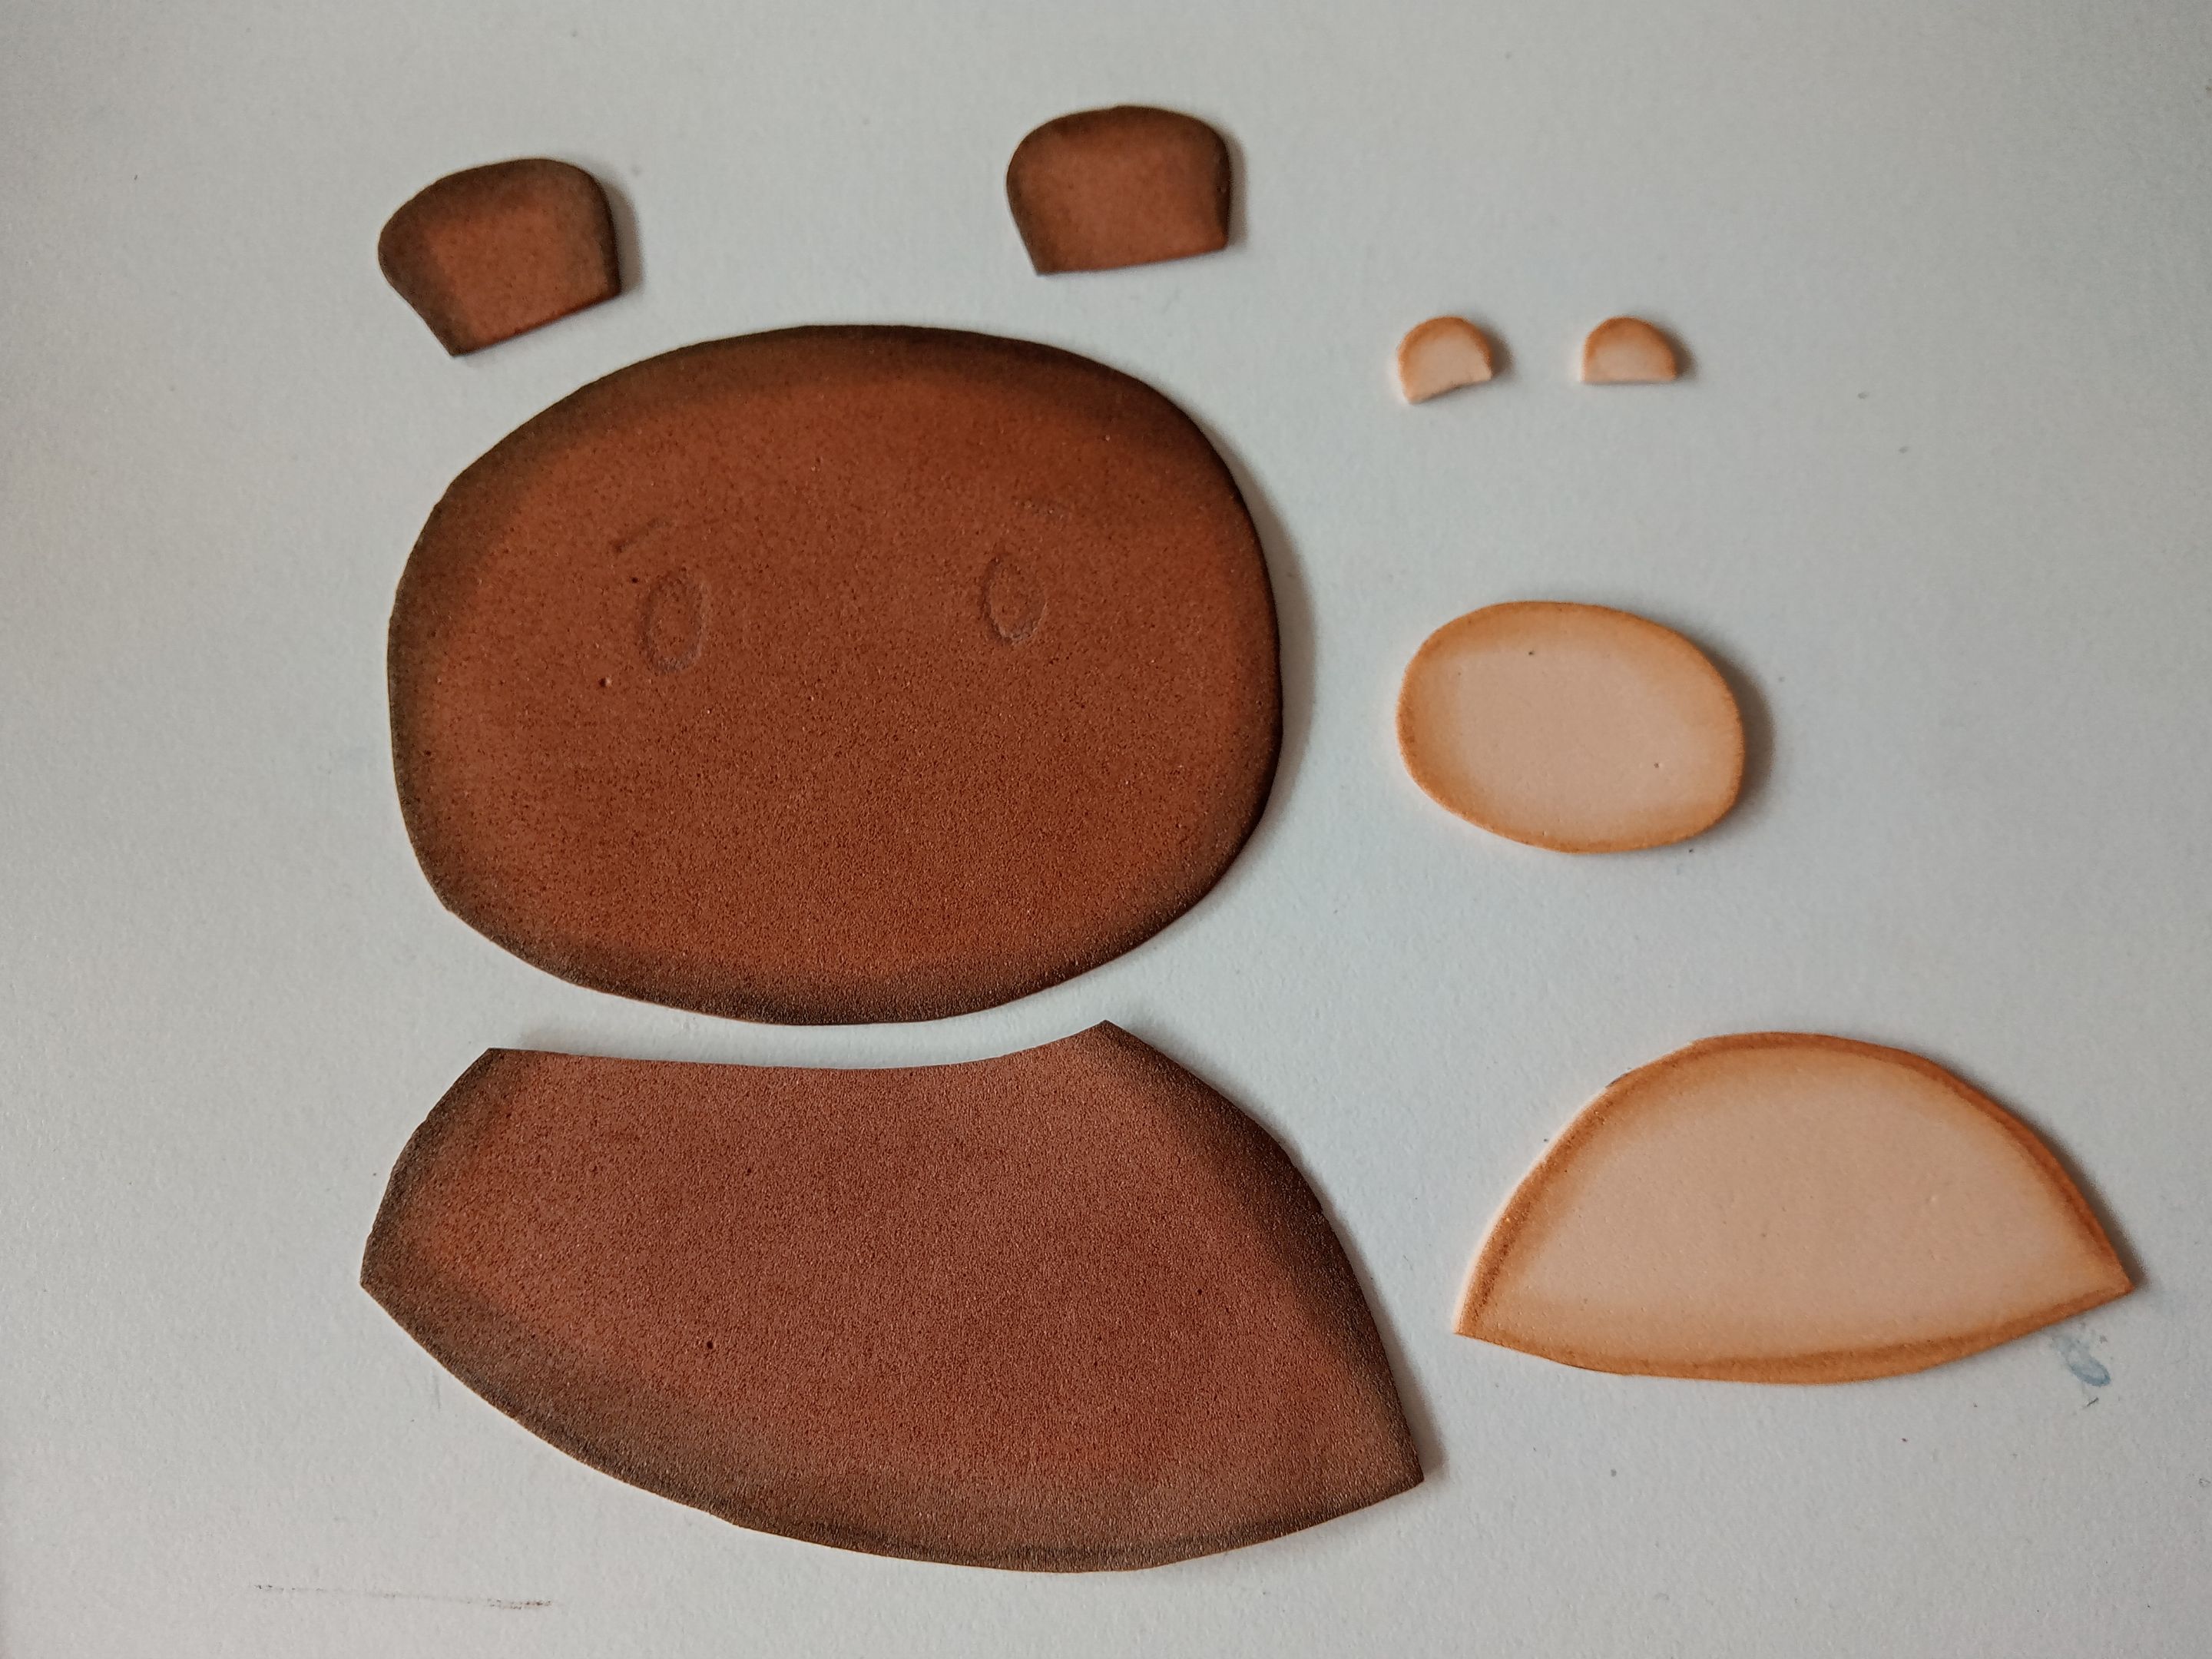
Seguidamente, dibujé en una hoja blanca el diseño que quería para el oso, guiándome de la circunferencia que hice, para que el cuerpo encajara perfectamente con esta forma. Al tenerlo listo, transferí a los colores correspondientes de foami, como explico a continuación:
✨Cabeza en foami marrón de 8 cm x 6.5 cm.
✨Cuerpo en foami marrón de 8 cm x 4.5 cm.
✨Orejas en foami marrón de 2 cm.
✨Hocico en foami crema de 3.5 cm x 2.5 cm.
✨Parte central del cuerpo en foami marrón de 6 cm x 5 cm.
✨Parte interna de las orejas en foami crema de 0.5 cm.
✨Nariz en foami escarchado rosa de 1 cm.
###### ✨STEP 2:
Next, I drew the design I wanted for the bear on a white sheet of paper, using the circumference I made as a guide so that the body would fit perfectly with this shape. Once I had it ready, I transferred it to the corresponding colors of foam, as explained below:
✨Head in brown foam, 8 cm x 6.5 cm.
✨Body in brown foam, 8 cm x 4.5 cm.
✨Ears in brown foam, 2 cm.
✨Snout in cream foam, 3.5 cm x 2.5 cm.
✨Center of the body in brown foam, 6 cm x 5 cm.
✨Inner part of the ears in cream foam, 0.5 cm.
✨1cm pink frosted foam nose.
 |
 |
|---|---|
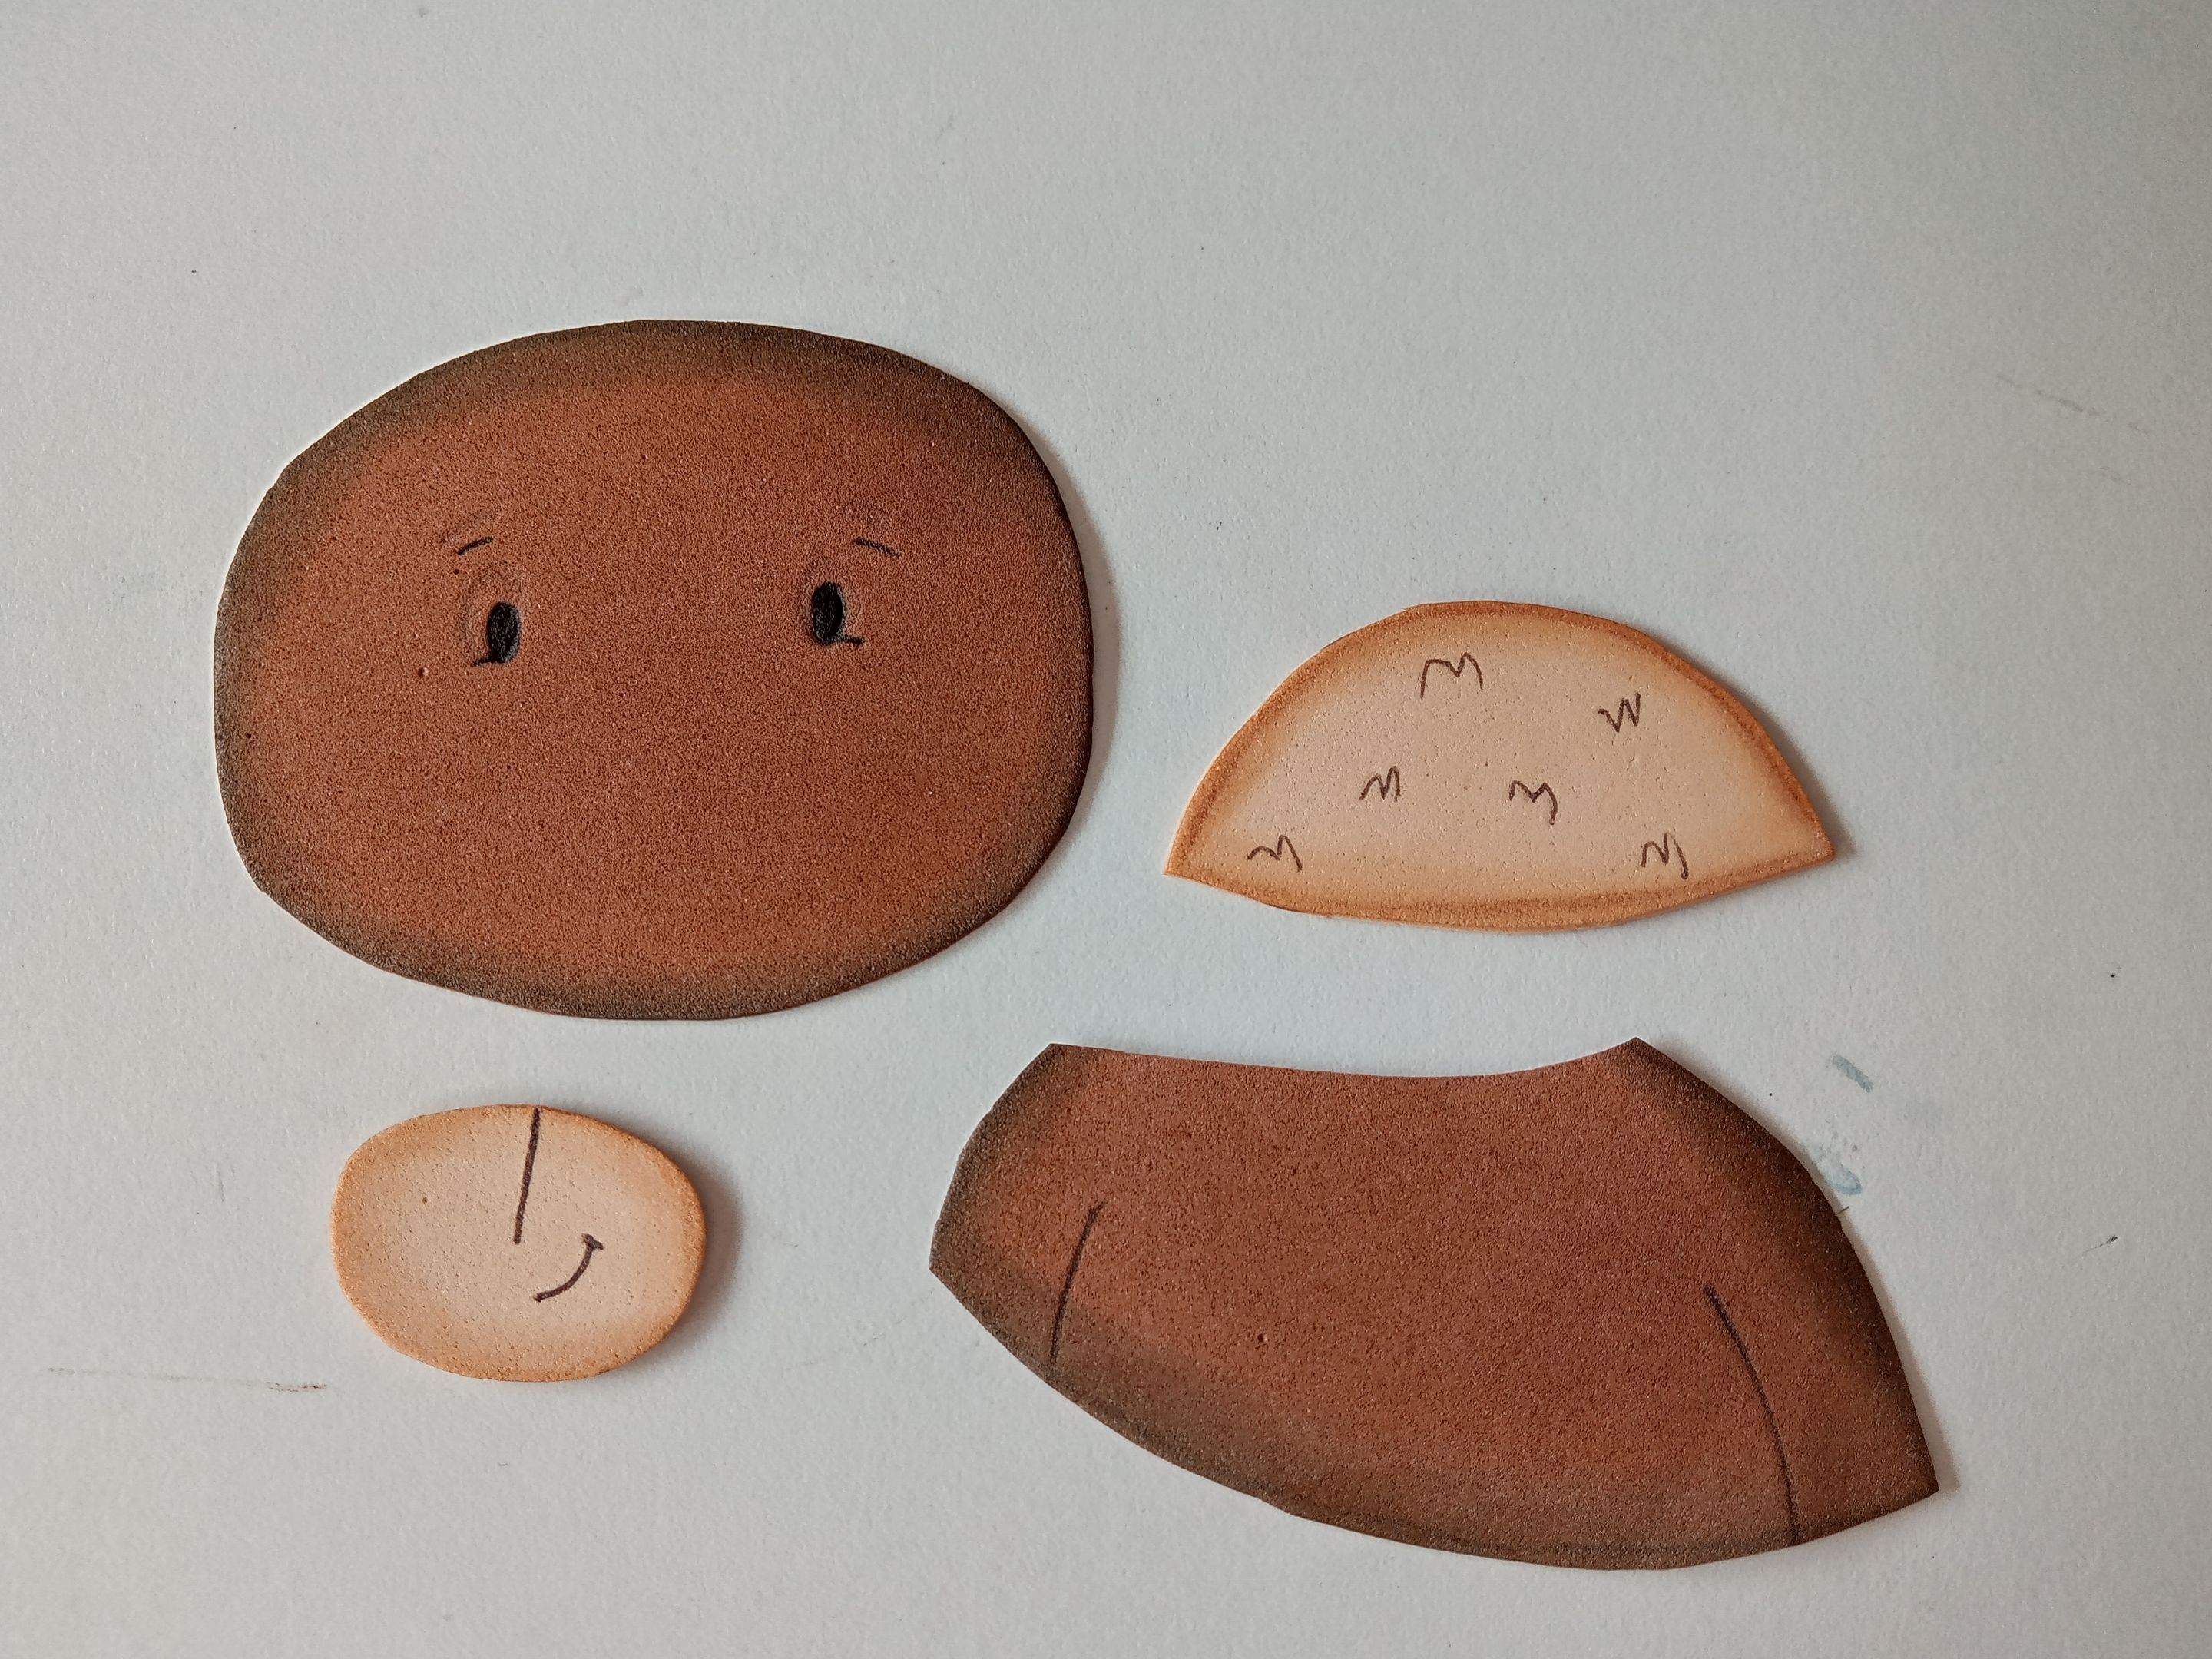
###### ✨PASO 3:
Al tener todas las piezas recortadas, es momento de comenzar a dar color a los bordes, ya sea con pinturas o marcadores. En mi caso, esta vez quise volver a utilizar pinturas para que se vea un poco más saturada la pintura. En el caso de las piezas en marrón, utilicé un color negro para los bordes y, para las piezas en foami crema, utilicé pintura marrón. Al estar secas todas las piezas, le di más detalles como ojos, cejas, boca y pelaje, con un marcador de punta fina.
###### ✨STEP 3:
Once all the pieces are cut out, it's time to start coloring the edges, either with paints or markers. In my case, I wanted to use paints again this time to make the paint look a little more saturated. For the brown pieces, I used black for the edges, and for the cream foam pieces, I used brown paint. Once all the pieces were dry, I added more details like eyes, eyebrows, mouth, and fur with a fine-tipped marker.
 |
 |
|---|---|
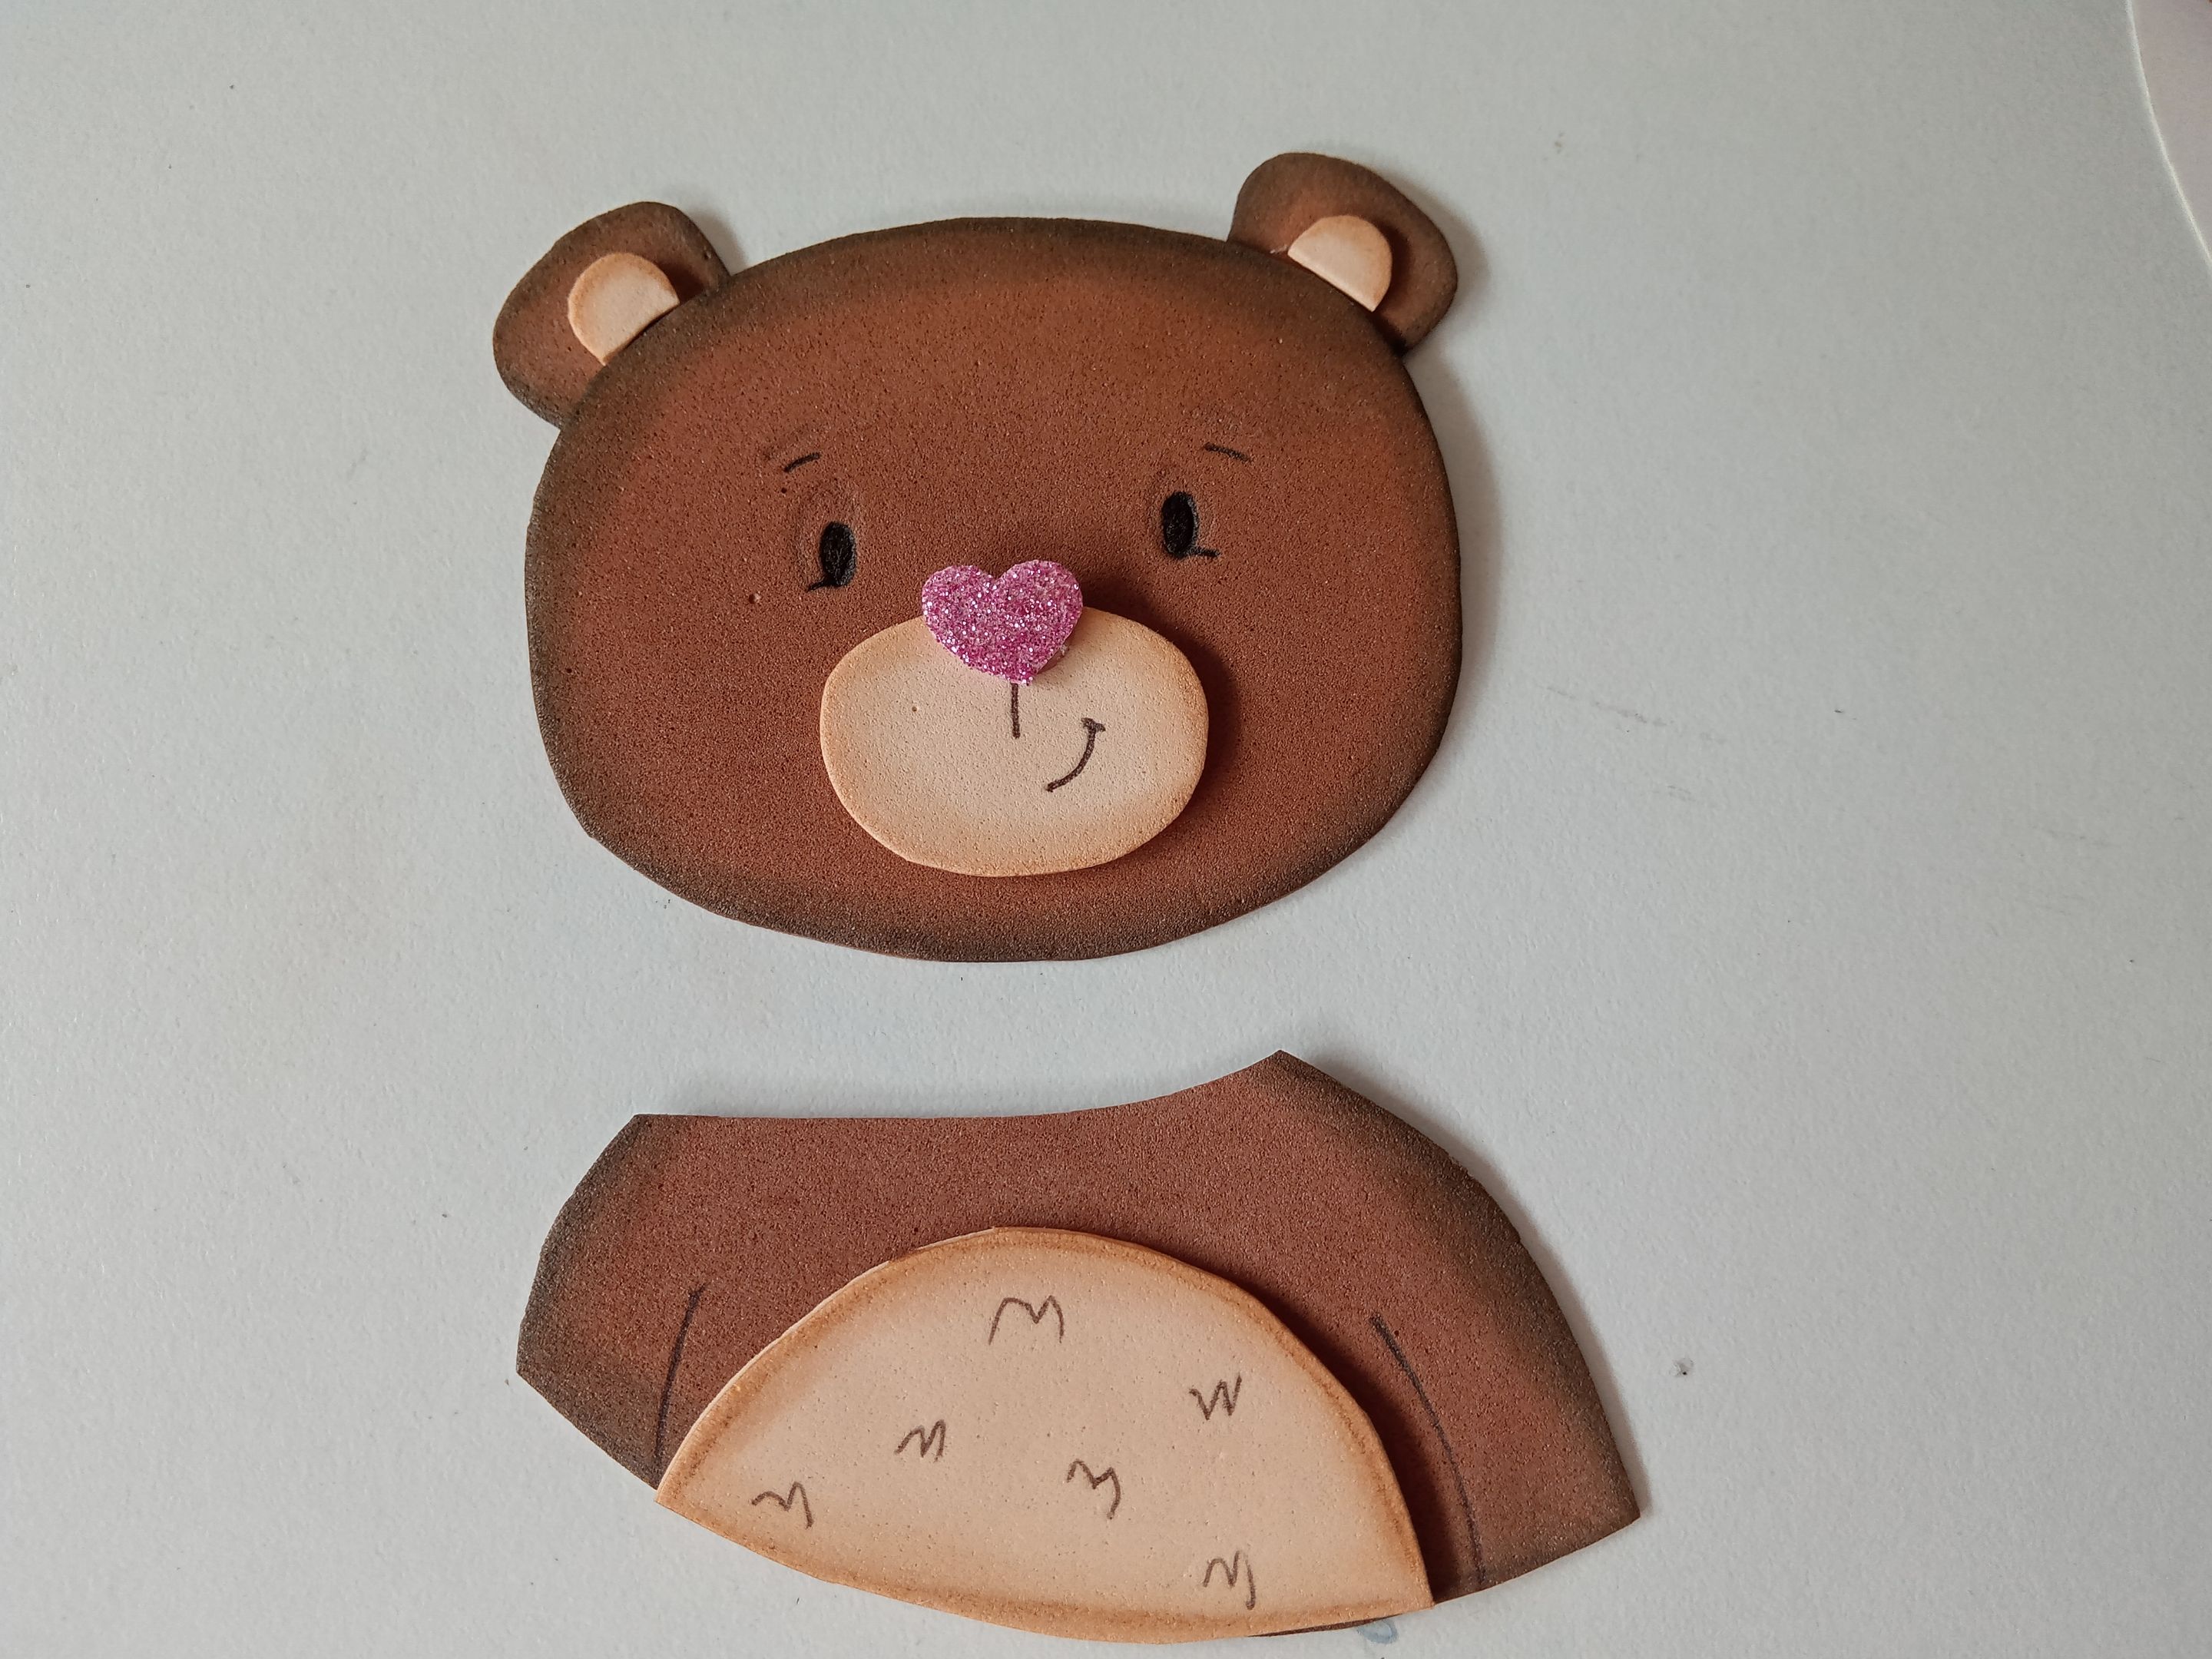
###### ✨PASO 4:
Seguidamente, comencé a pegar las piezas, hasta armar al oso, comenzando por la cabeza, hocico, nariz, orejas y luego la parte baja, que es el cuerpo, centro del cuerpo, y uní para terminar de armar.
###### ✨STEP 4:
Next, I began gluing the pieces together until the bear was assembled, starting with the head, snout, nose, ears, and then the lower part, which is the body, the center of the body, and joining them together to finish the assembly.
 |
 |
|---|---|
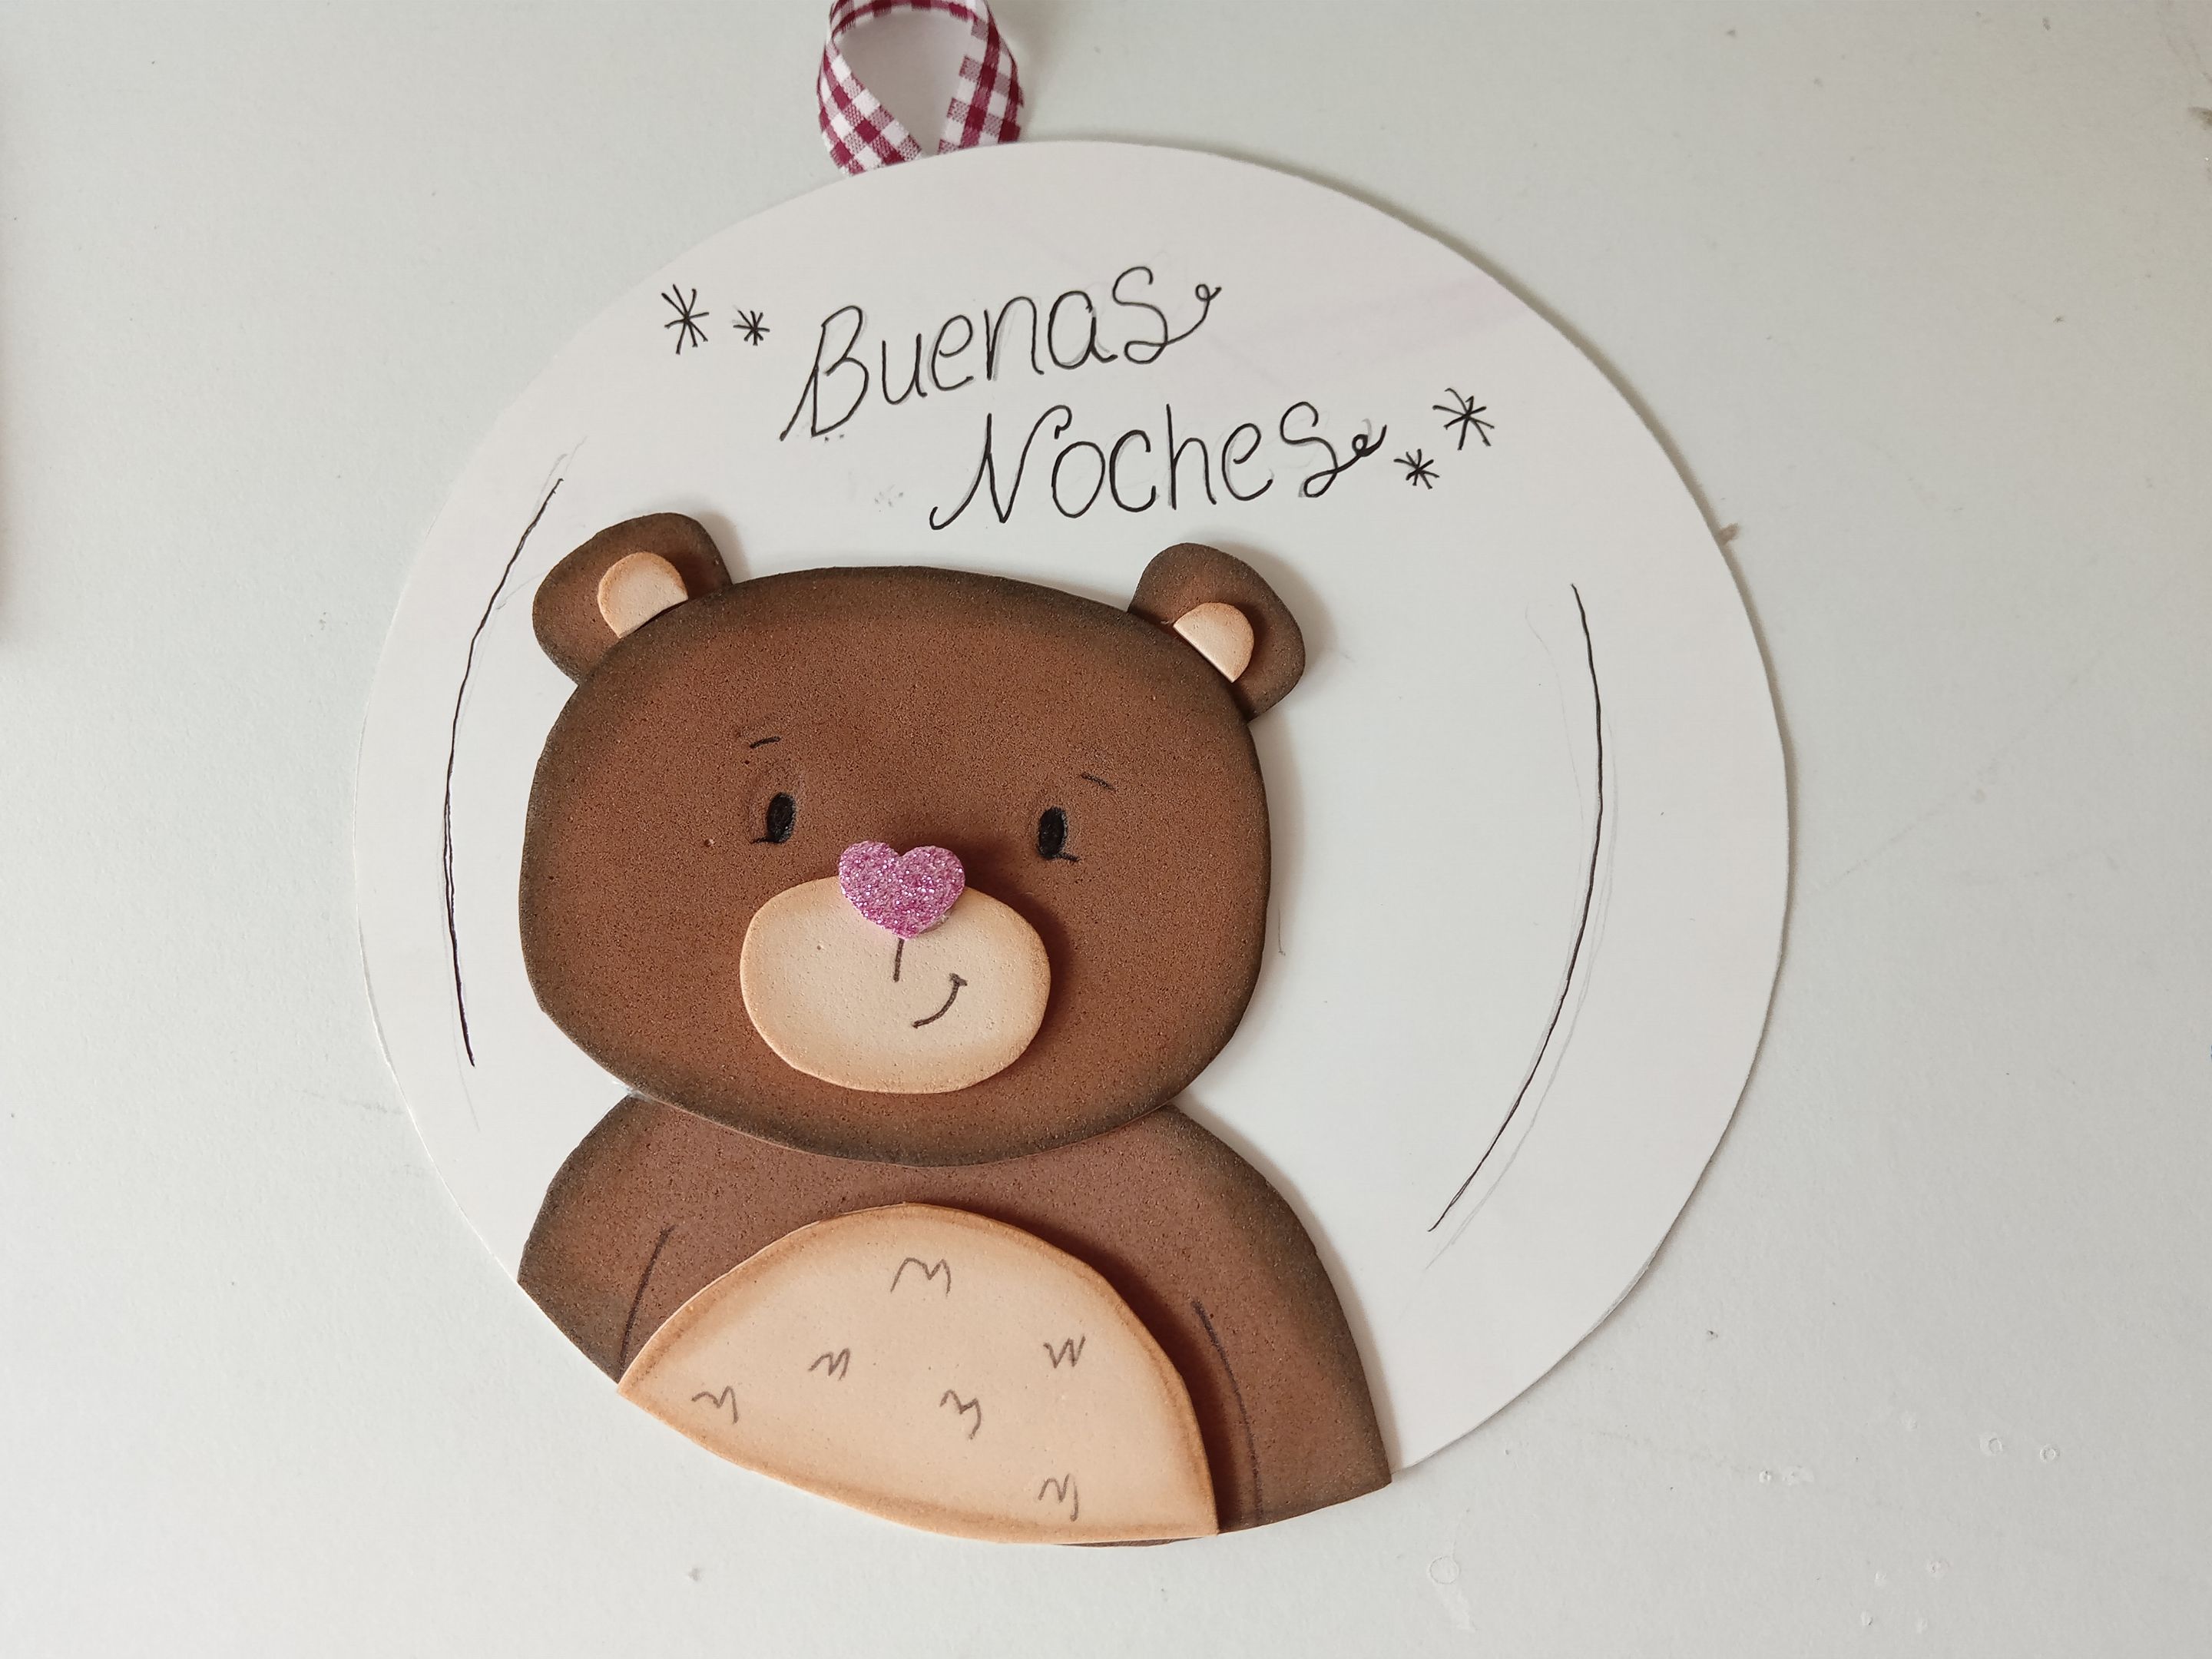
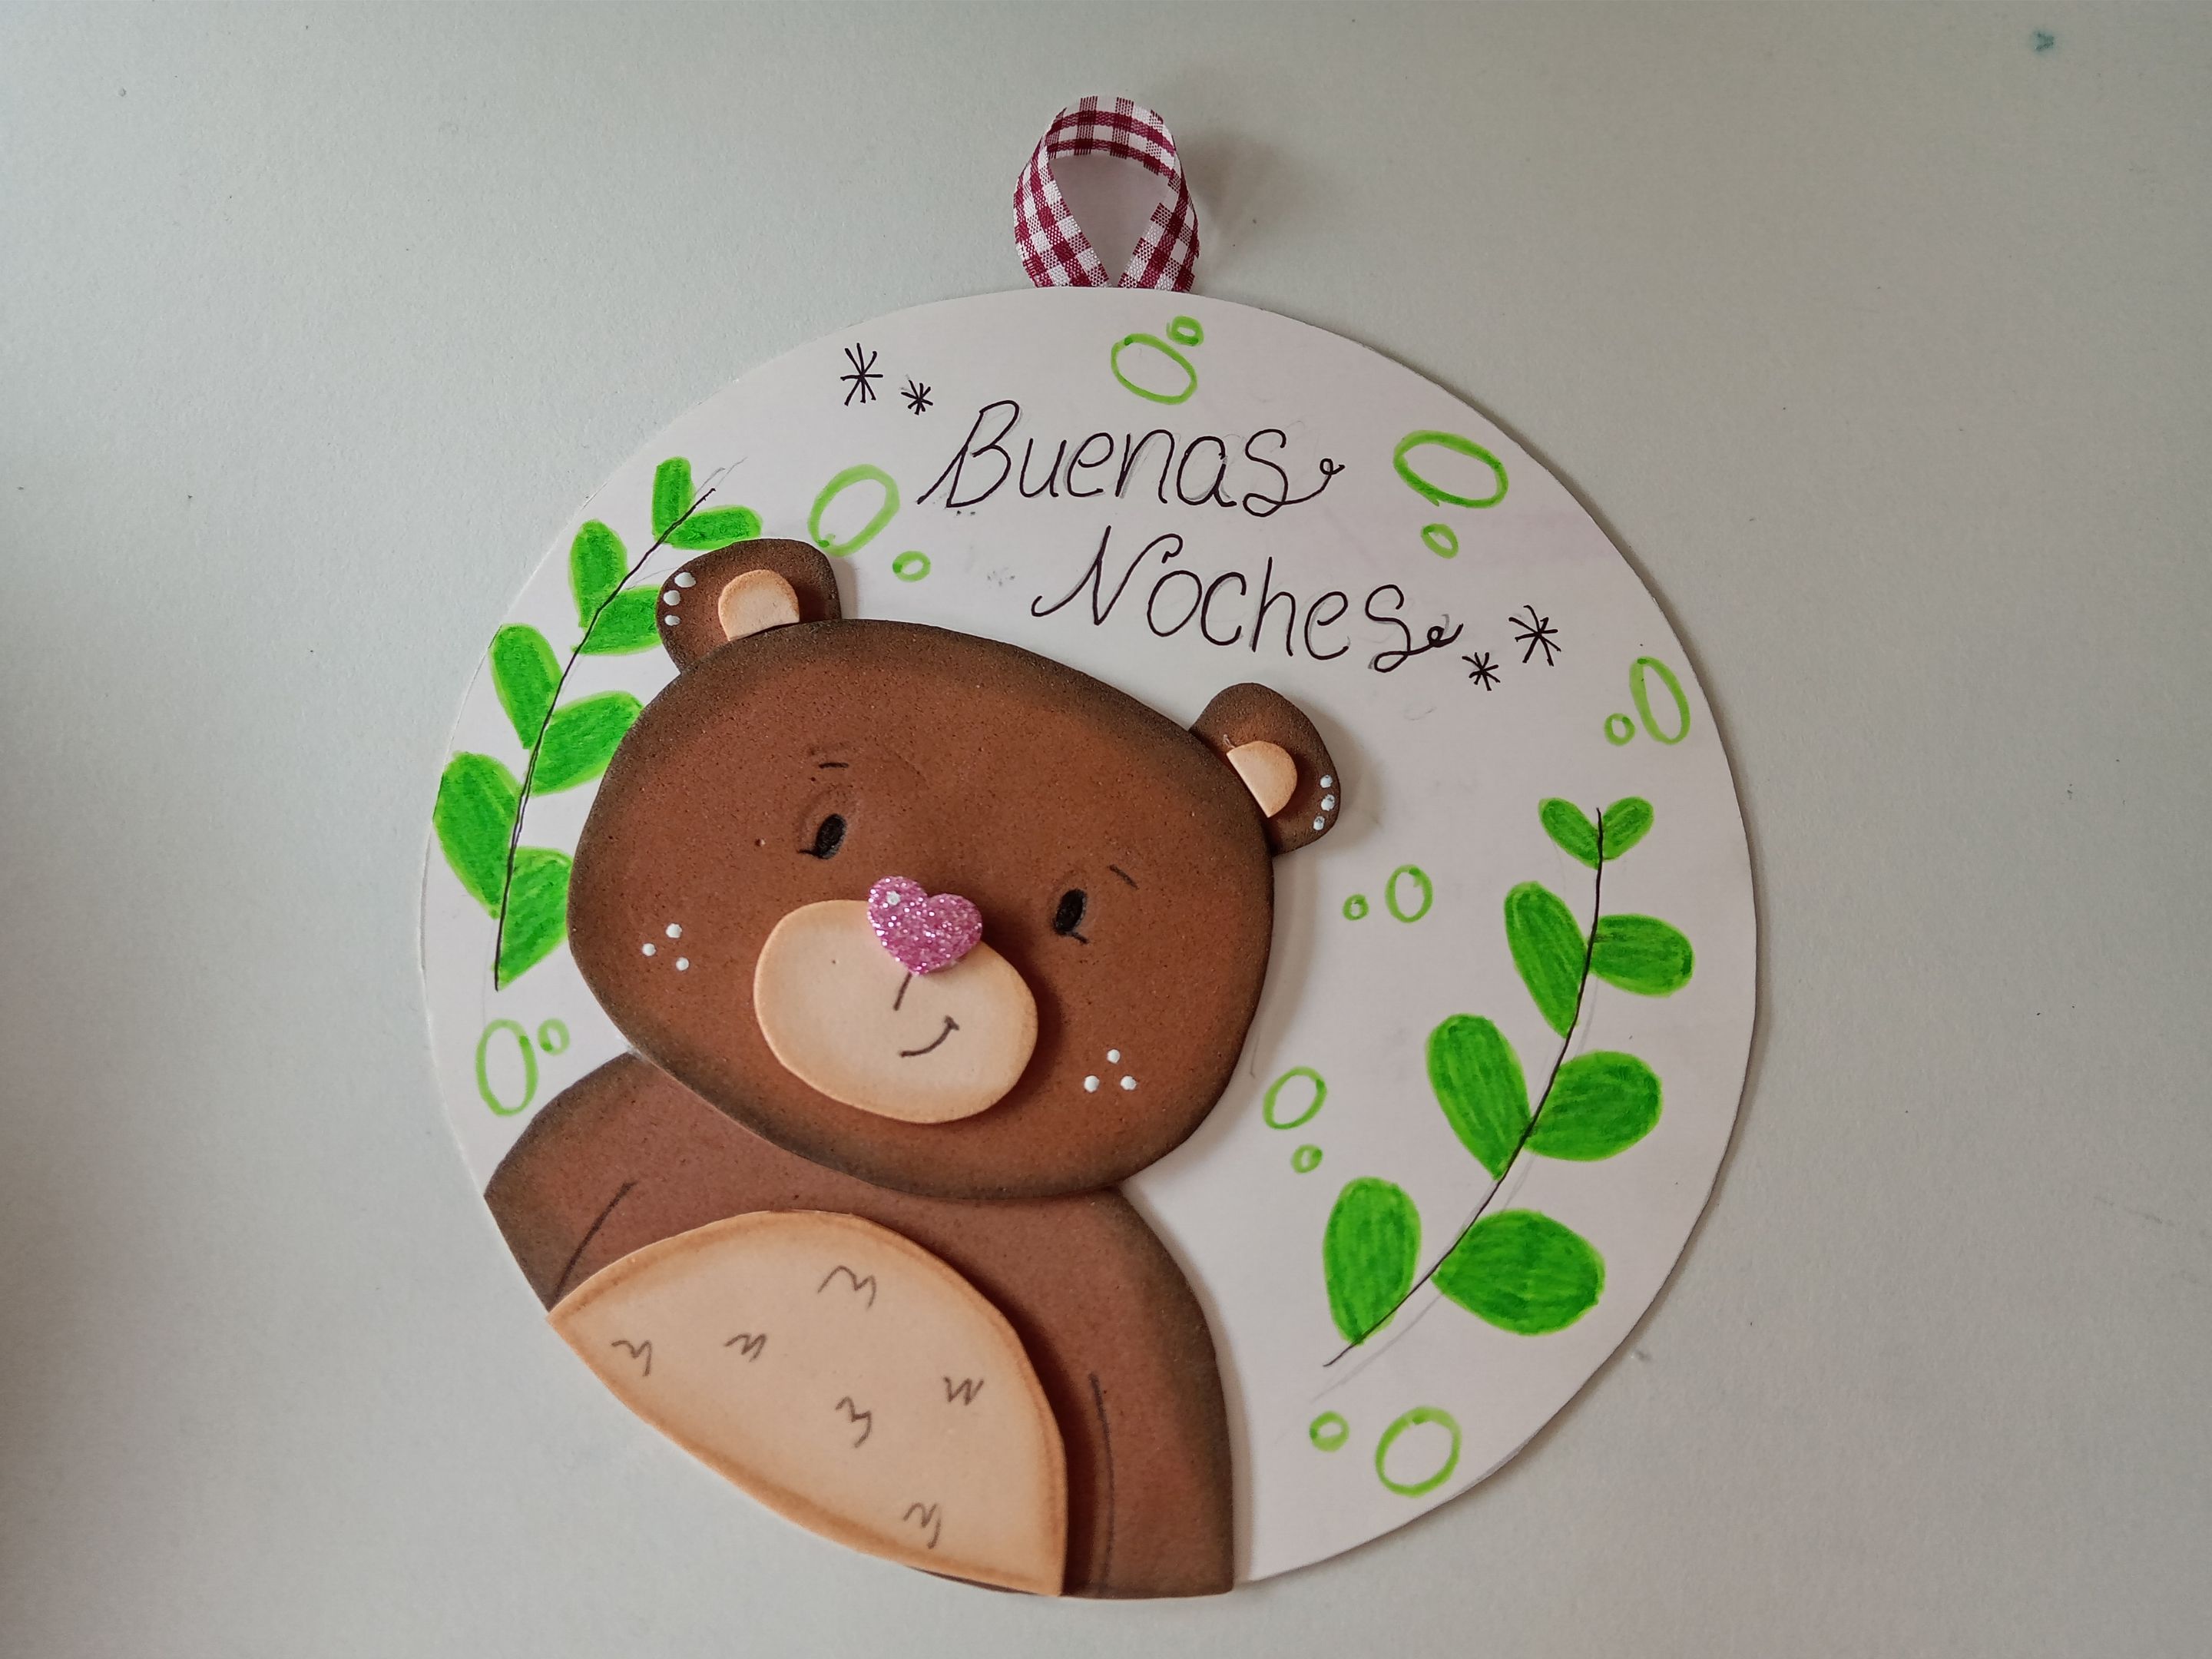
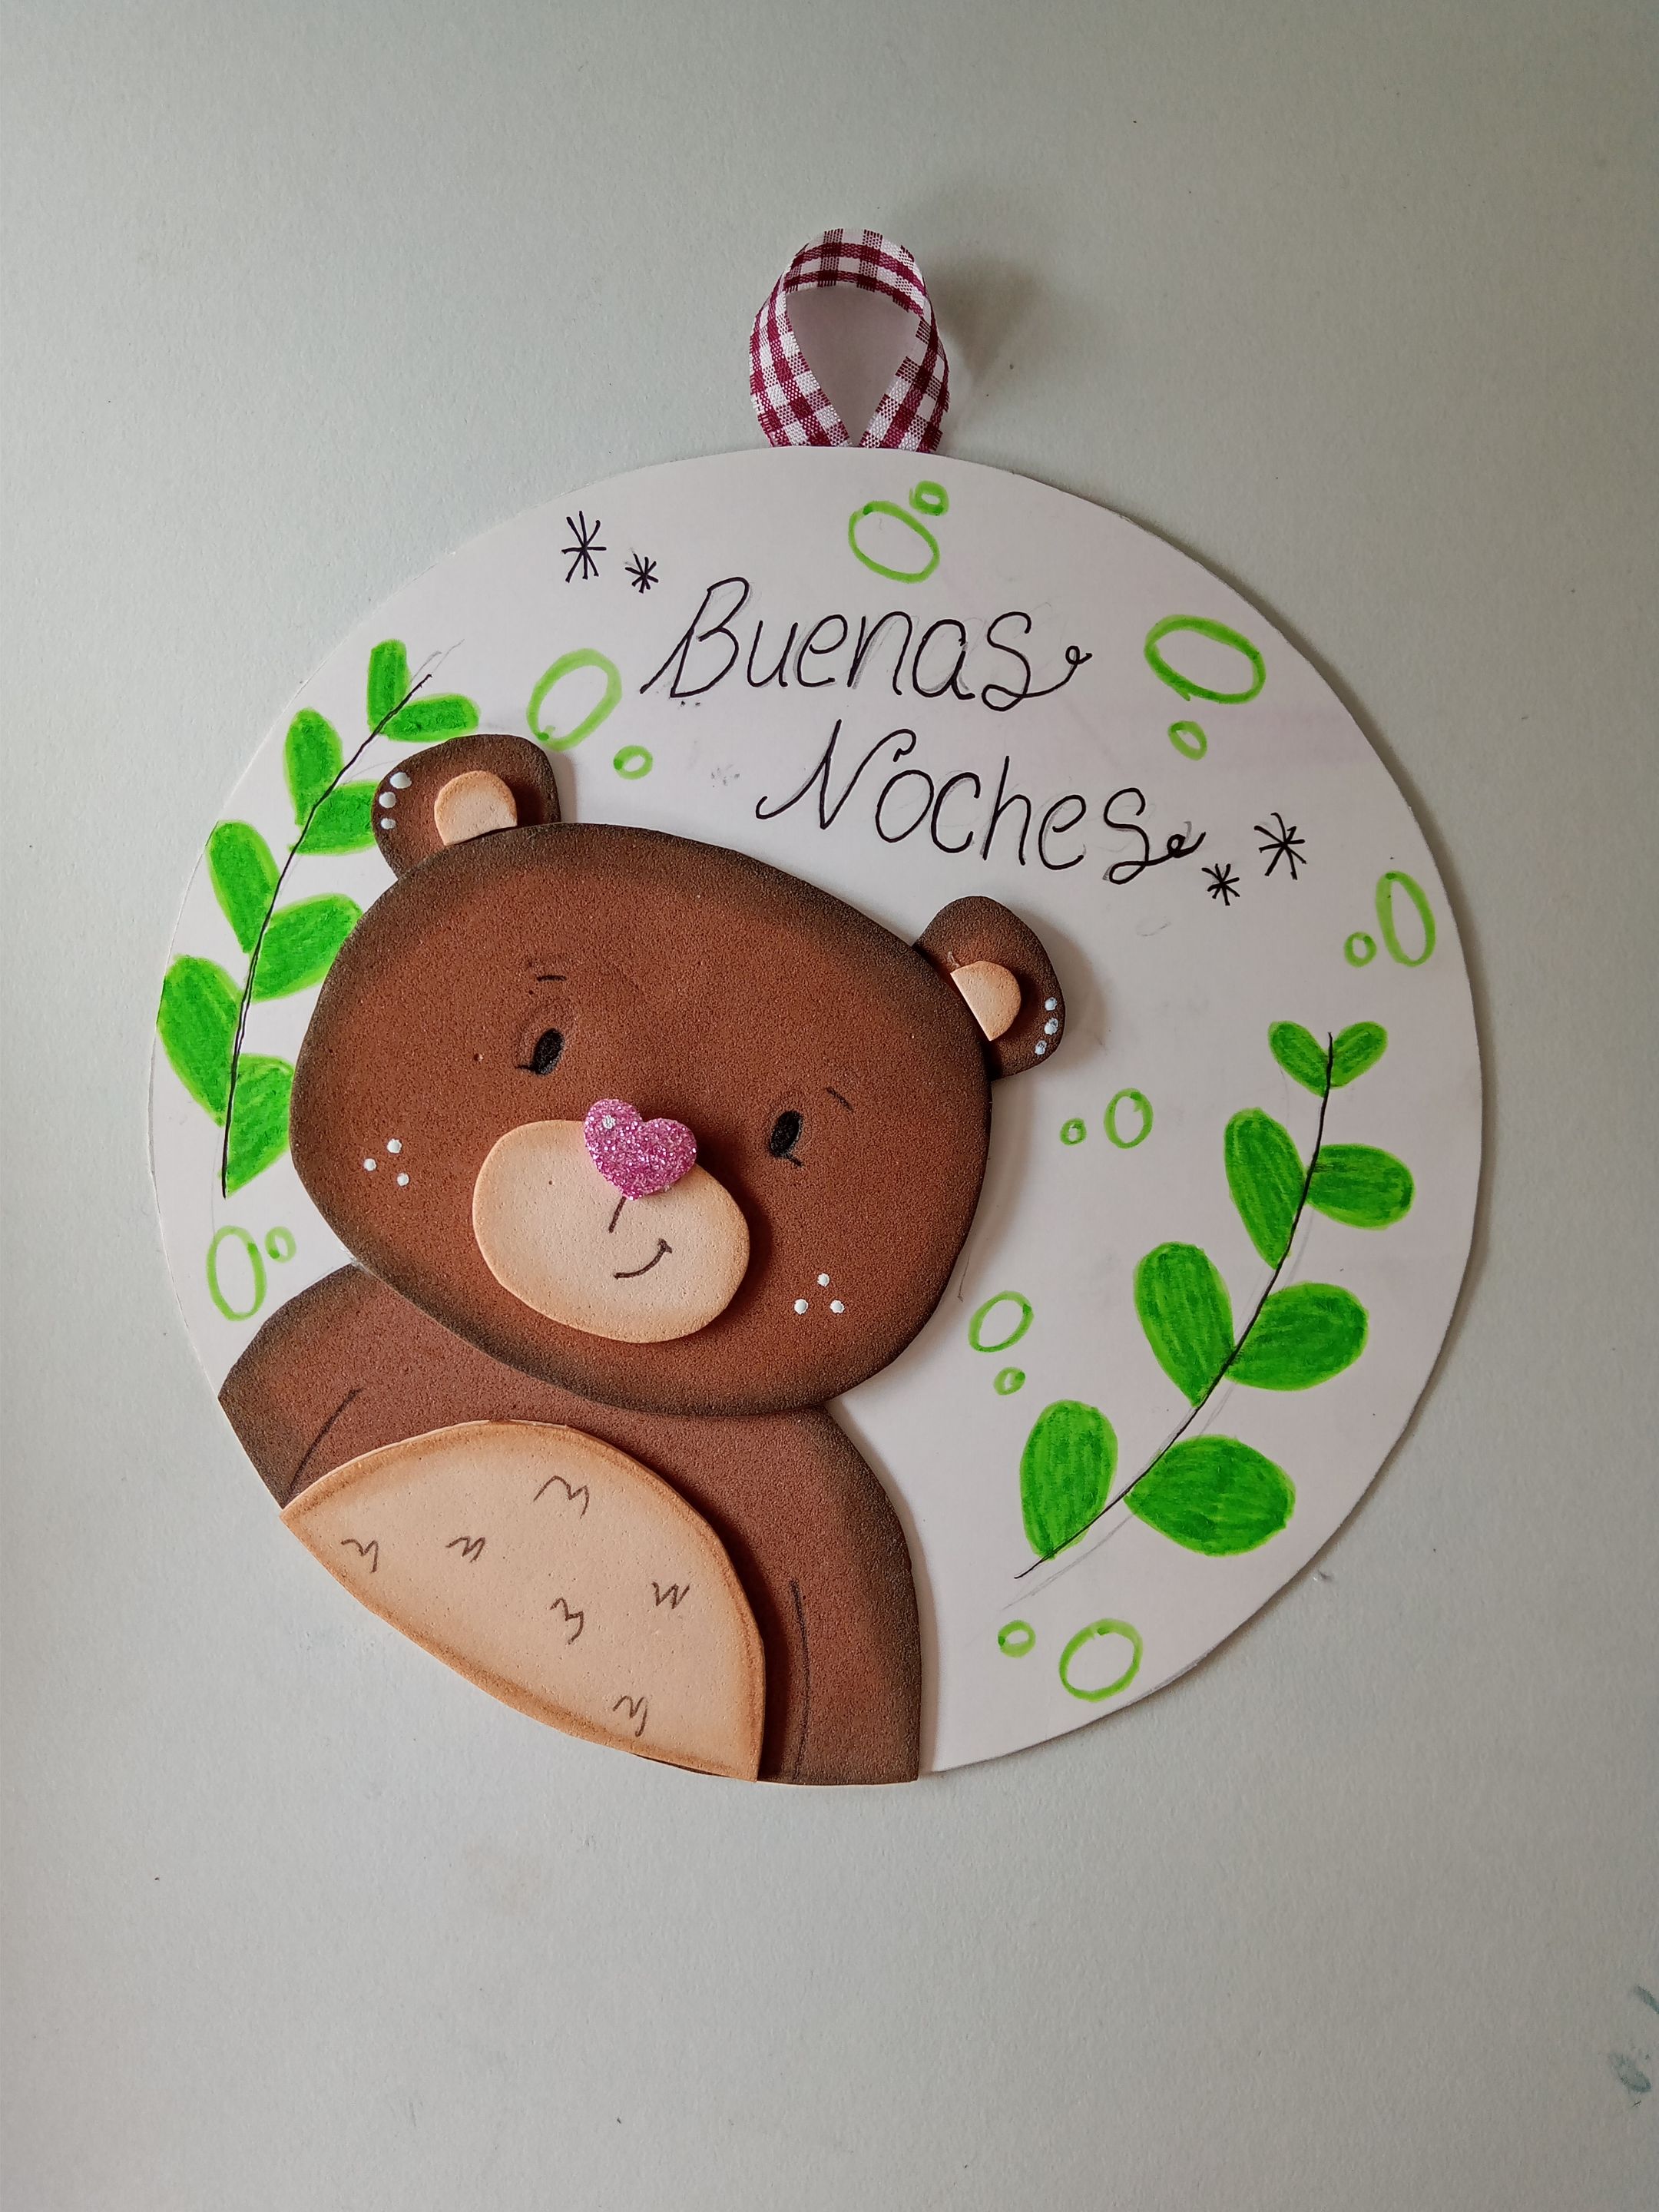
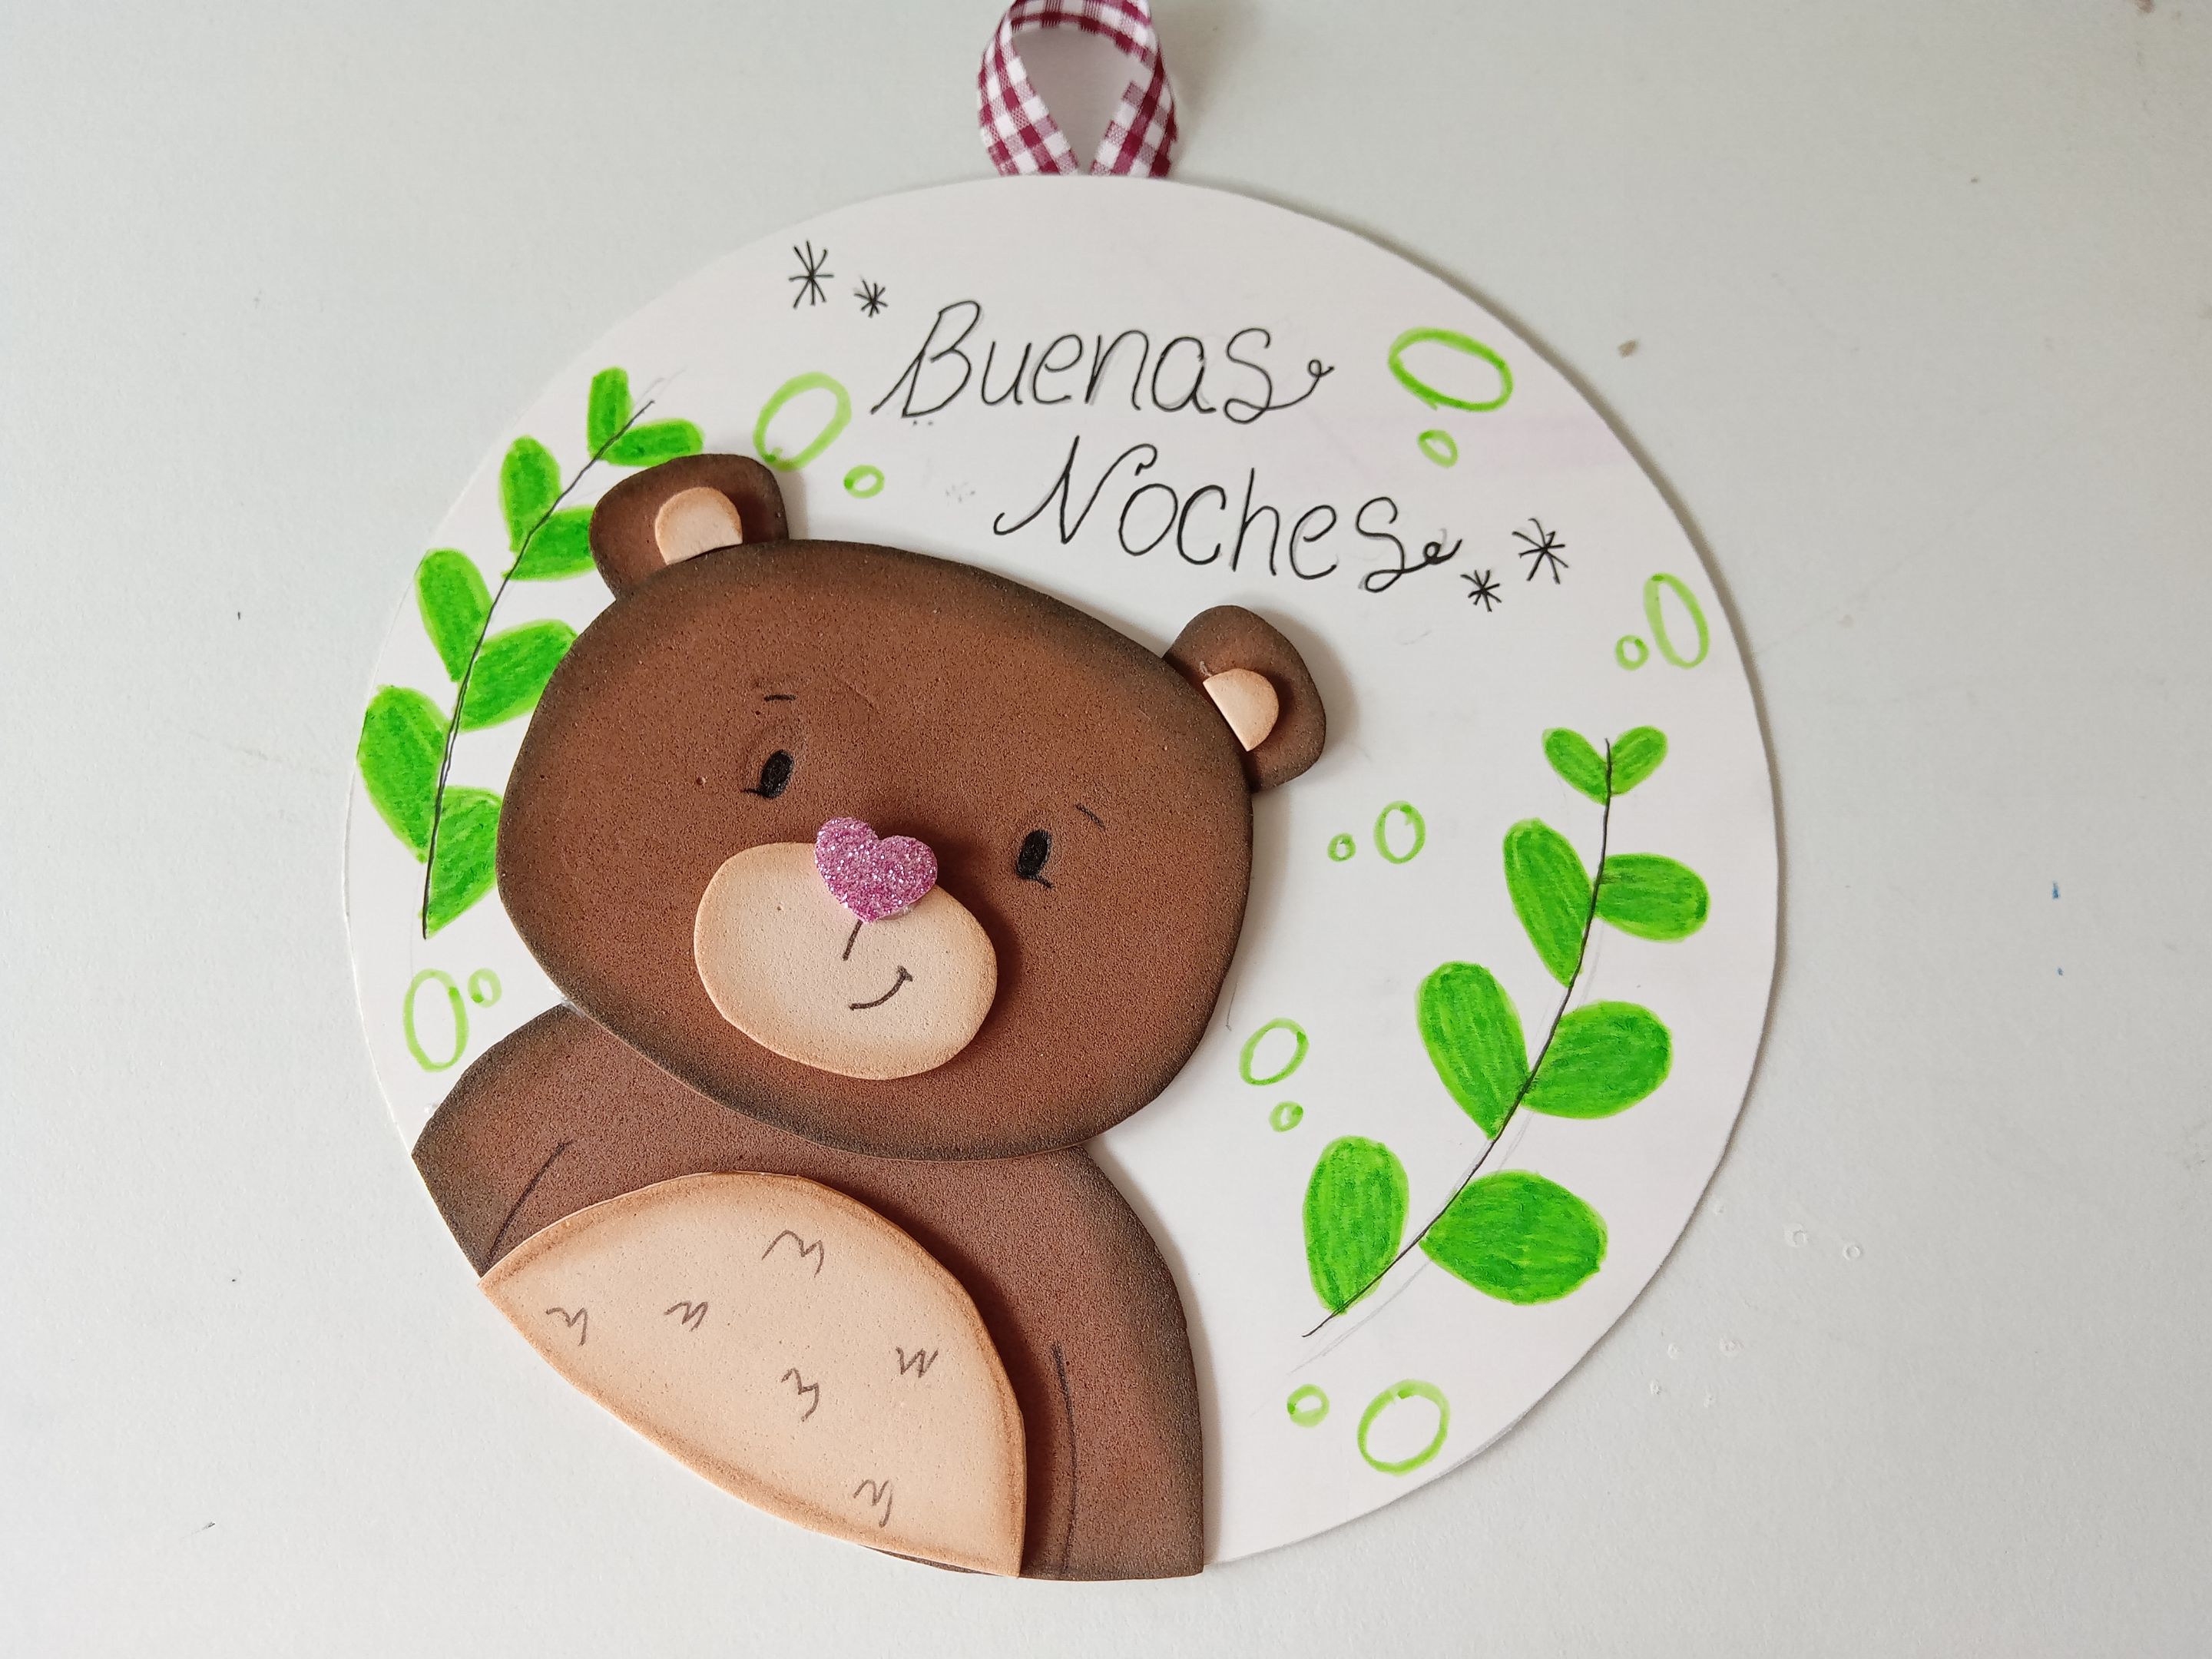
###### ✨PASO 5:
Pegué al oso en uno de los laditos de la base en cartulina y con un marcador negro, escribí “Buenas noches” con algunas estrellitas a los lados. Además, hice dos líneas curvas en los espacios vacíos a los cuales les dibujé hojas y en el resto óvalos o círculos con el mismo marcador.
###### ✨STEP 5:
I glued the bear to one of the sides of the cardstock base and, with a black marker, wrote "Good Night" with some stars on the sides. I also drew two curved lines in the empty spaces, where I drew leaves, and ovals or circles in the rest with the same marker.
 |
 |
|---|---|
✨Así es como pueden elaborar un lindo, fácil y sencillo colgante para la habitación de los más pequeños o algún otro lugar de la casa. Además, puedes elaborarlo con la temática de preferencia. Espero les haya gustado el tutorial y que se animen a elaborarlo.
❤️Hasta la próxima publicación.
✨This is how you can make a cute, easy, and simple pendant for your little one's room or anywhere else in the house. You can also create it with any theme you prefer. I hope you enjoyed the tutorial and that you'll be inspired to try it.
❤️Until the next post.
# ✨RESULTADO: | ✨RESULT:
 |
 |
|---|---|

!TE DESEO UN GRAN DÏA¡ Todas las fotografías son de mi propiedad. Separador y Fotos editadas en Canva
!I WISH YOU A GOOD DAY All photographs are my property. Photos edited in Canva