######
✨¡Hola amigos amantes de la creatividad! Espero que estén todos bien.✨
¡Buenas tardes, amigos! Espero estén pasando una excelente semana. Por mi parte, contenta de pasar por acá a compartir una nueva creación con ustedes. En esta ocasión les comparto el paso a paso para elaborar una linda decoración o colgante para el hogar. Este colgante en particular lo quise colocar al lado del árbol, ya que desde hace mucho tiempo que tenía uno que me encanta, pero esta vez quise hacer un cambio, aunque finalmente puse ambos jaja, porque me pareció que quedaban bonitos juntos. Pero puede que más adelante cambié de idea y los coloque por separado en otro lugar de la casa.
**🔸Sin más que añadir, a continuación los dejo con el paso a paso:**
> ######
✨¡Hello friends who love creativity! I hope you are all well.✨
>
Good afternoon, friends! I hope you are having a great week. For my part, I am happy to stop by here to share a new creation with you. On this occasion I am sharing with you the step by step to make a nice decoration or pendant for the home. I wanted to place this particular pendant next to the tree, since I have had one for a long time that I love, but this time I wanted to make a change, although I ended up putting both haha, because I thought they looked nice together. But maybe later I changed my mind and placed them separately in another place in the house.
> **🔸Without more to add, then I leave you with the step by step:**
---

---

|||
|-|-|


|||
|-|-|


||||
|-|-|-|


|||
|-|-|


|||
|-|-|

✨Y listo amigos, de esta manera es como pueden elaborar un lindo colgante o decoración para el hogar y así poder decorar espacios con esta temática tan hermosa de Navidad y así tener todos los rincones decorados jaja. Por otra parte, pueden elaborarlos de un tamaño más pequeñito como idea para colgar en el árbol. Espero que les haya gustado y se animen a elaborar el paso a paso.
❤️Hasta la próxima publicación.
>
✨And that's it, friends, this is how you can make a nice pendant or decoration for the home and thus be able to decorate spaces with this beautiful Christmas theme and thus have all the corners decorated haha. On the other hand, you can make them in a smaller size as an idea to hang on the tree. I hope you liked it and are encouraged to do it step by step.
>
❤️Until the next post.

**♥️ESPERO QUE TE GUSTE,
¡Empecemos!**
**♥️I HOPE YOU LIKE IT,
Let's start!**
---

# ✂️ MATERIALES | ✂️ MATERIALS

- Foami escarchado cobrizo.
- Foami marrón.
- Foami rojo.
- Foami verde.
- Foami blanco.
- Pinturas y marcadores.
- Pegamento.
- Cinta.
- Tijeras.
- Lápiz.
- Copper frosted foam.
- Brown foam.
- Red foam.
- Green foam.
- White foam.
- Paints and markers.
- Glue.
- Tape.
- Scissors.
- Pencil.

# 🌟 PROCEDIMIENTO | 🌟 PROCESS

###### ✨PASO 1:
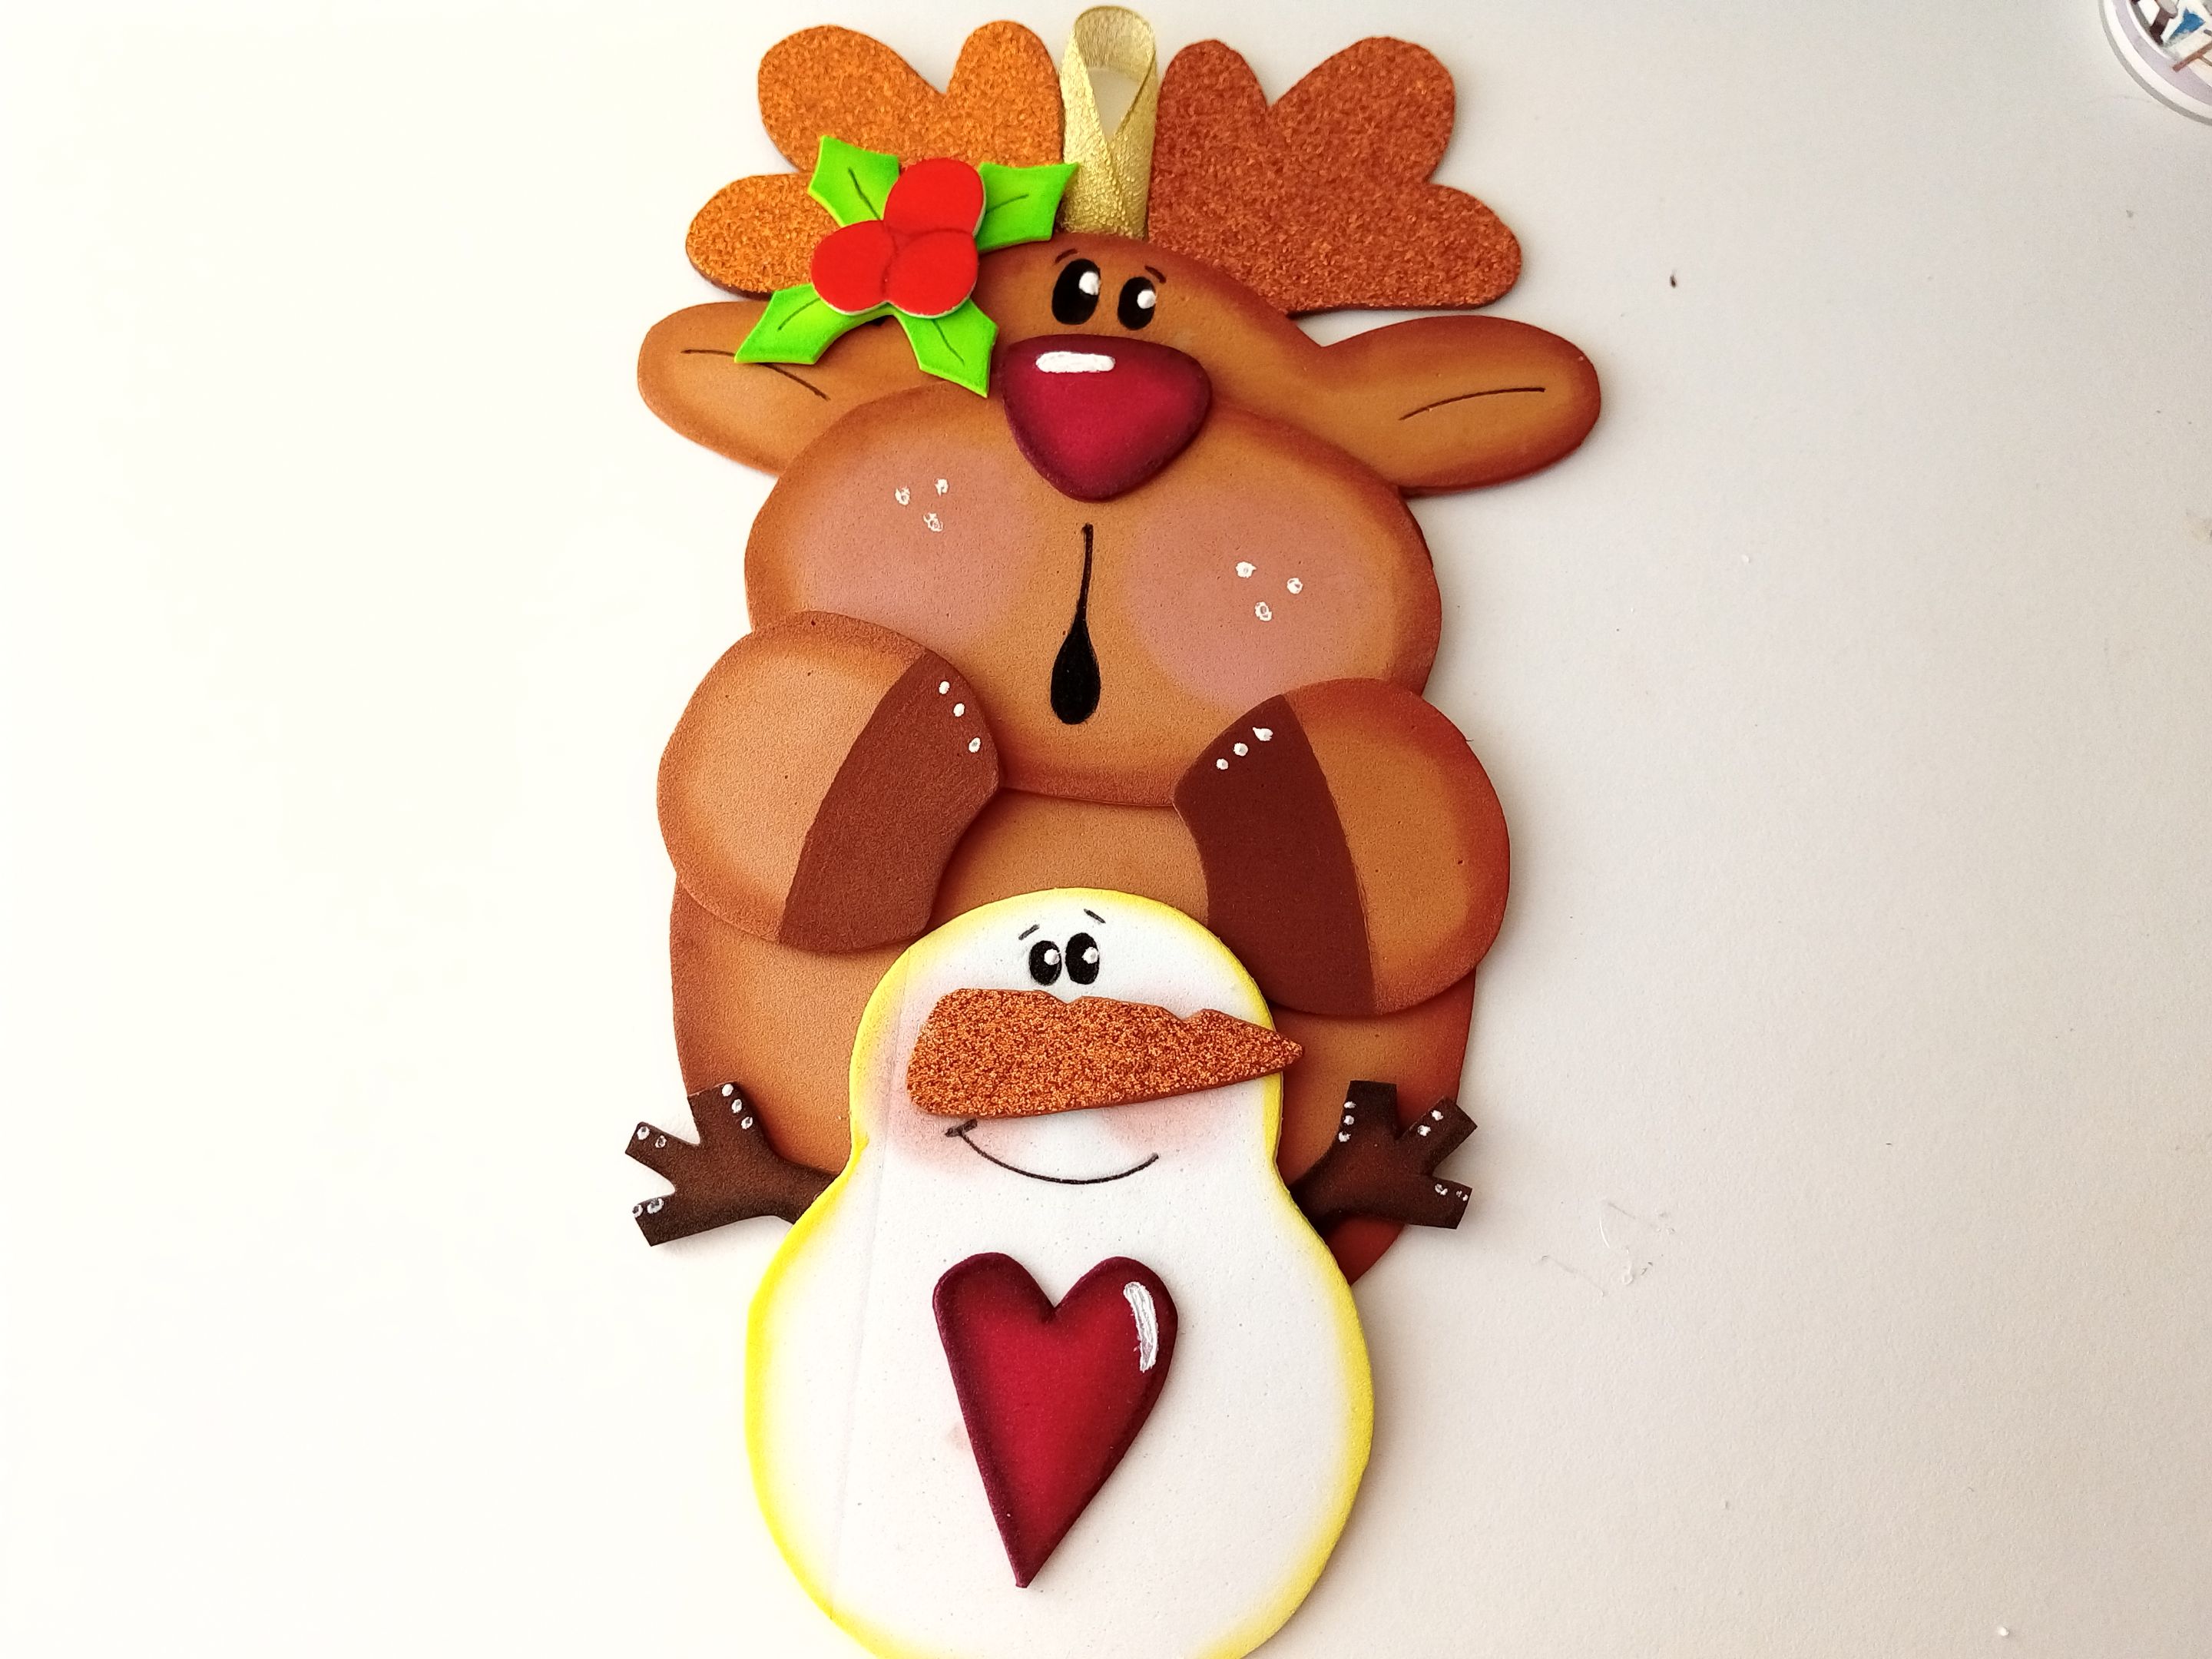
Lo primero que hice fue dibujar a los personajes que en este caso era un reno y un muñeco de nieves, así que en una hoja blanca dibujé cada pieza o parte del cuerpo por separado para los patrones y luego, transferí a los colores correspondientes de foami, como explico a continuación:
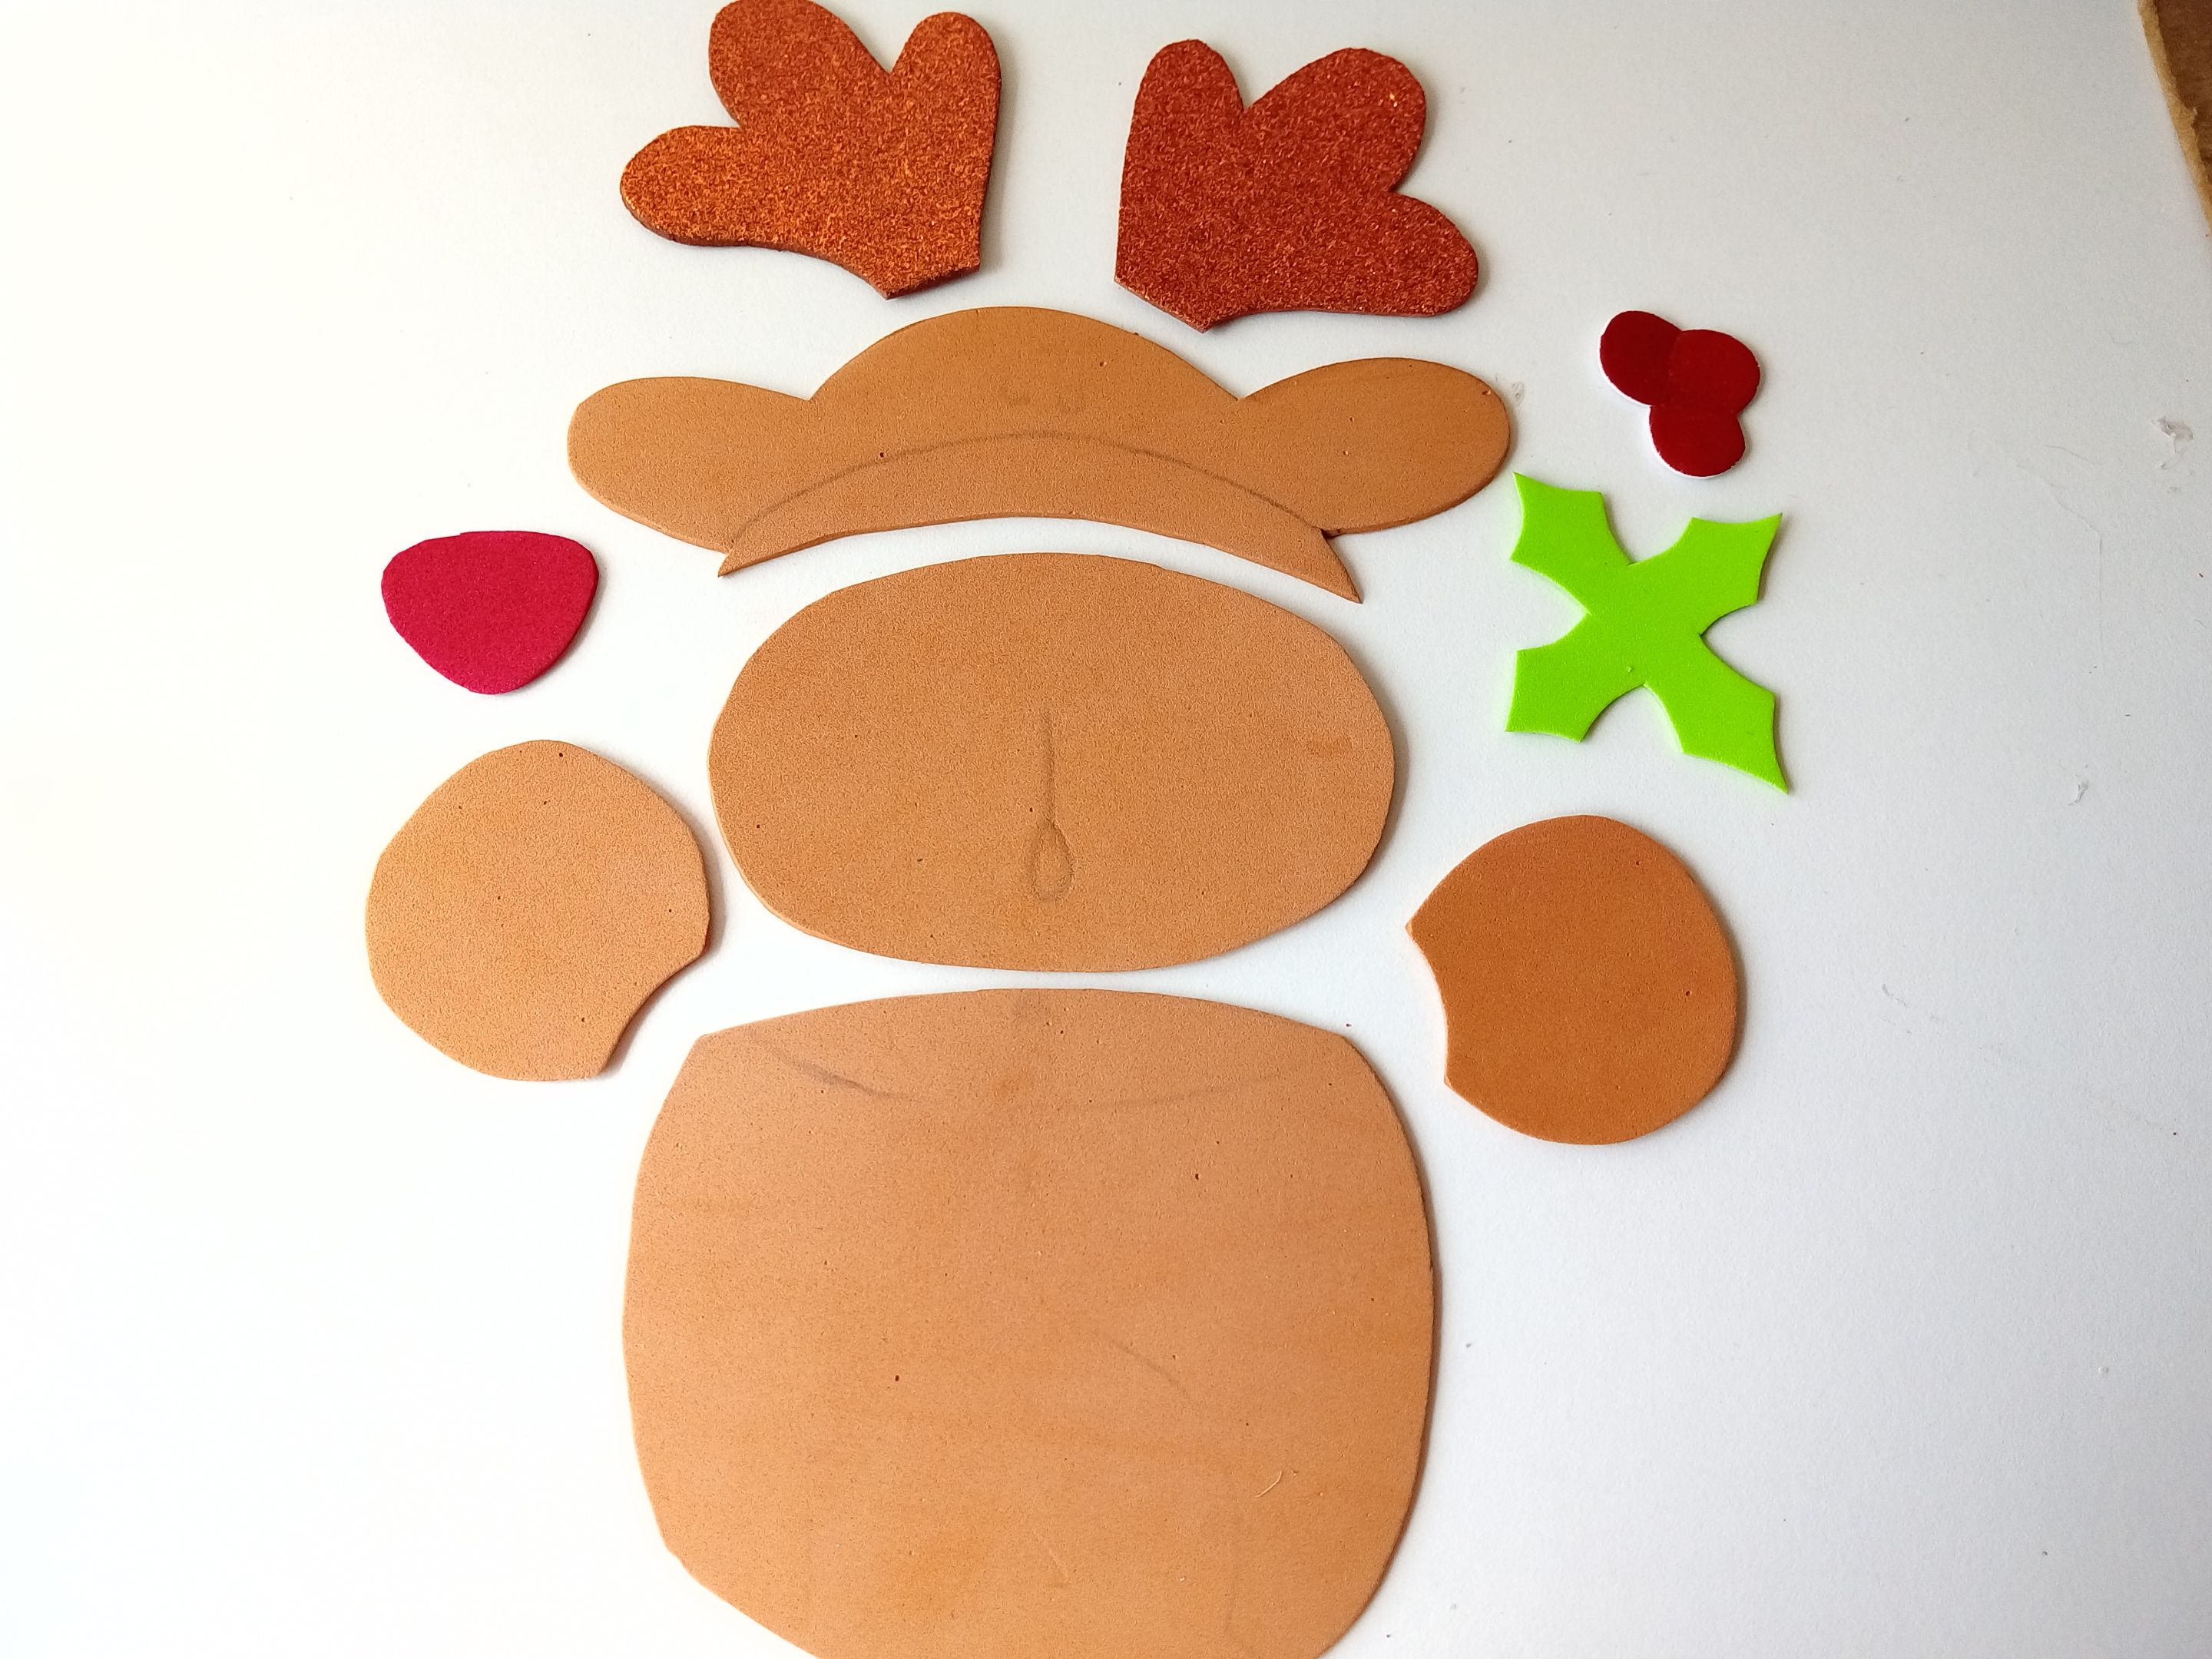
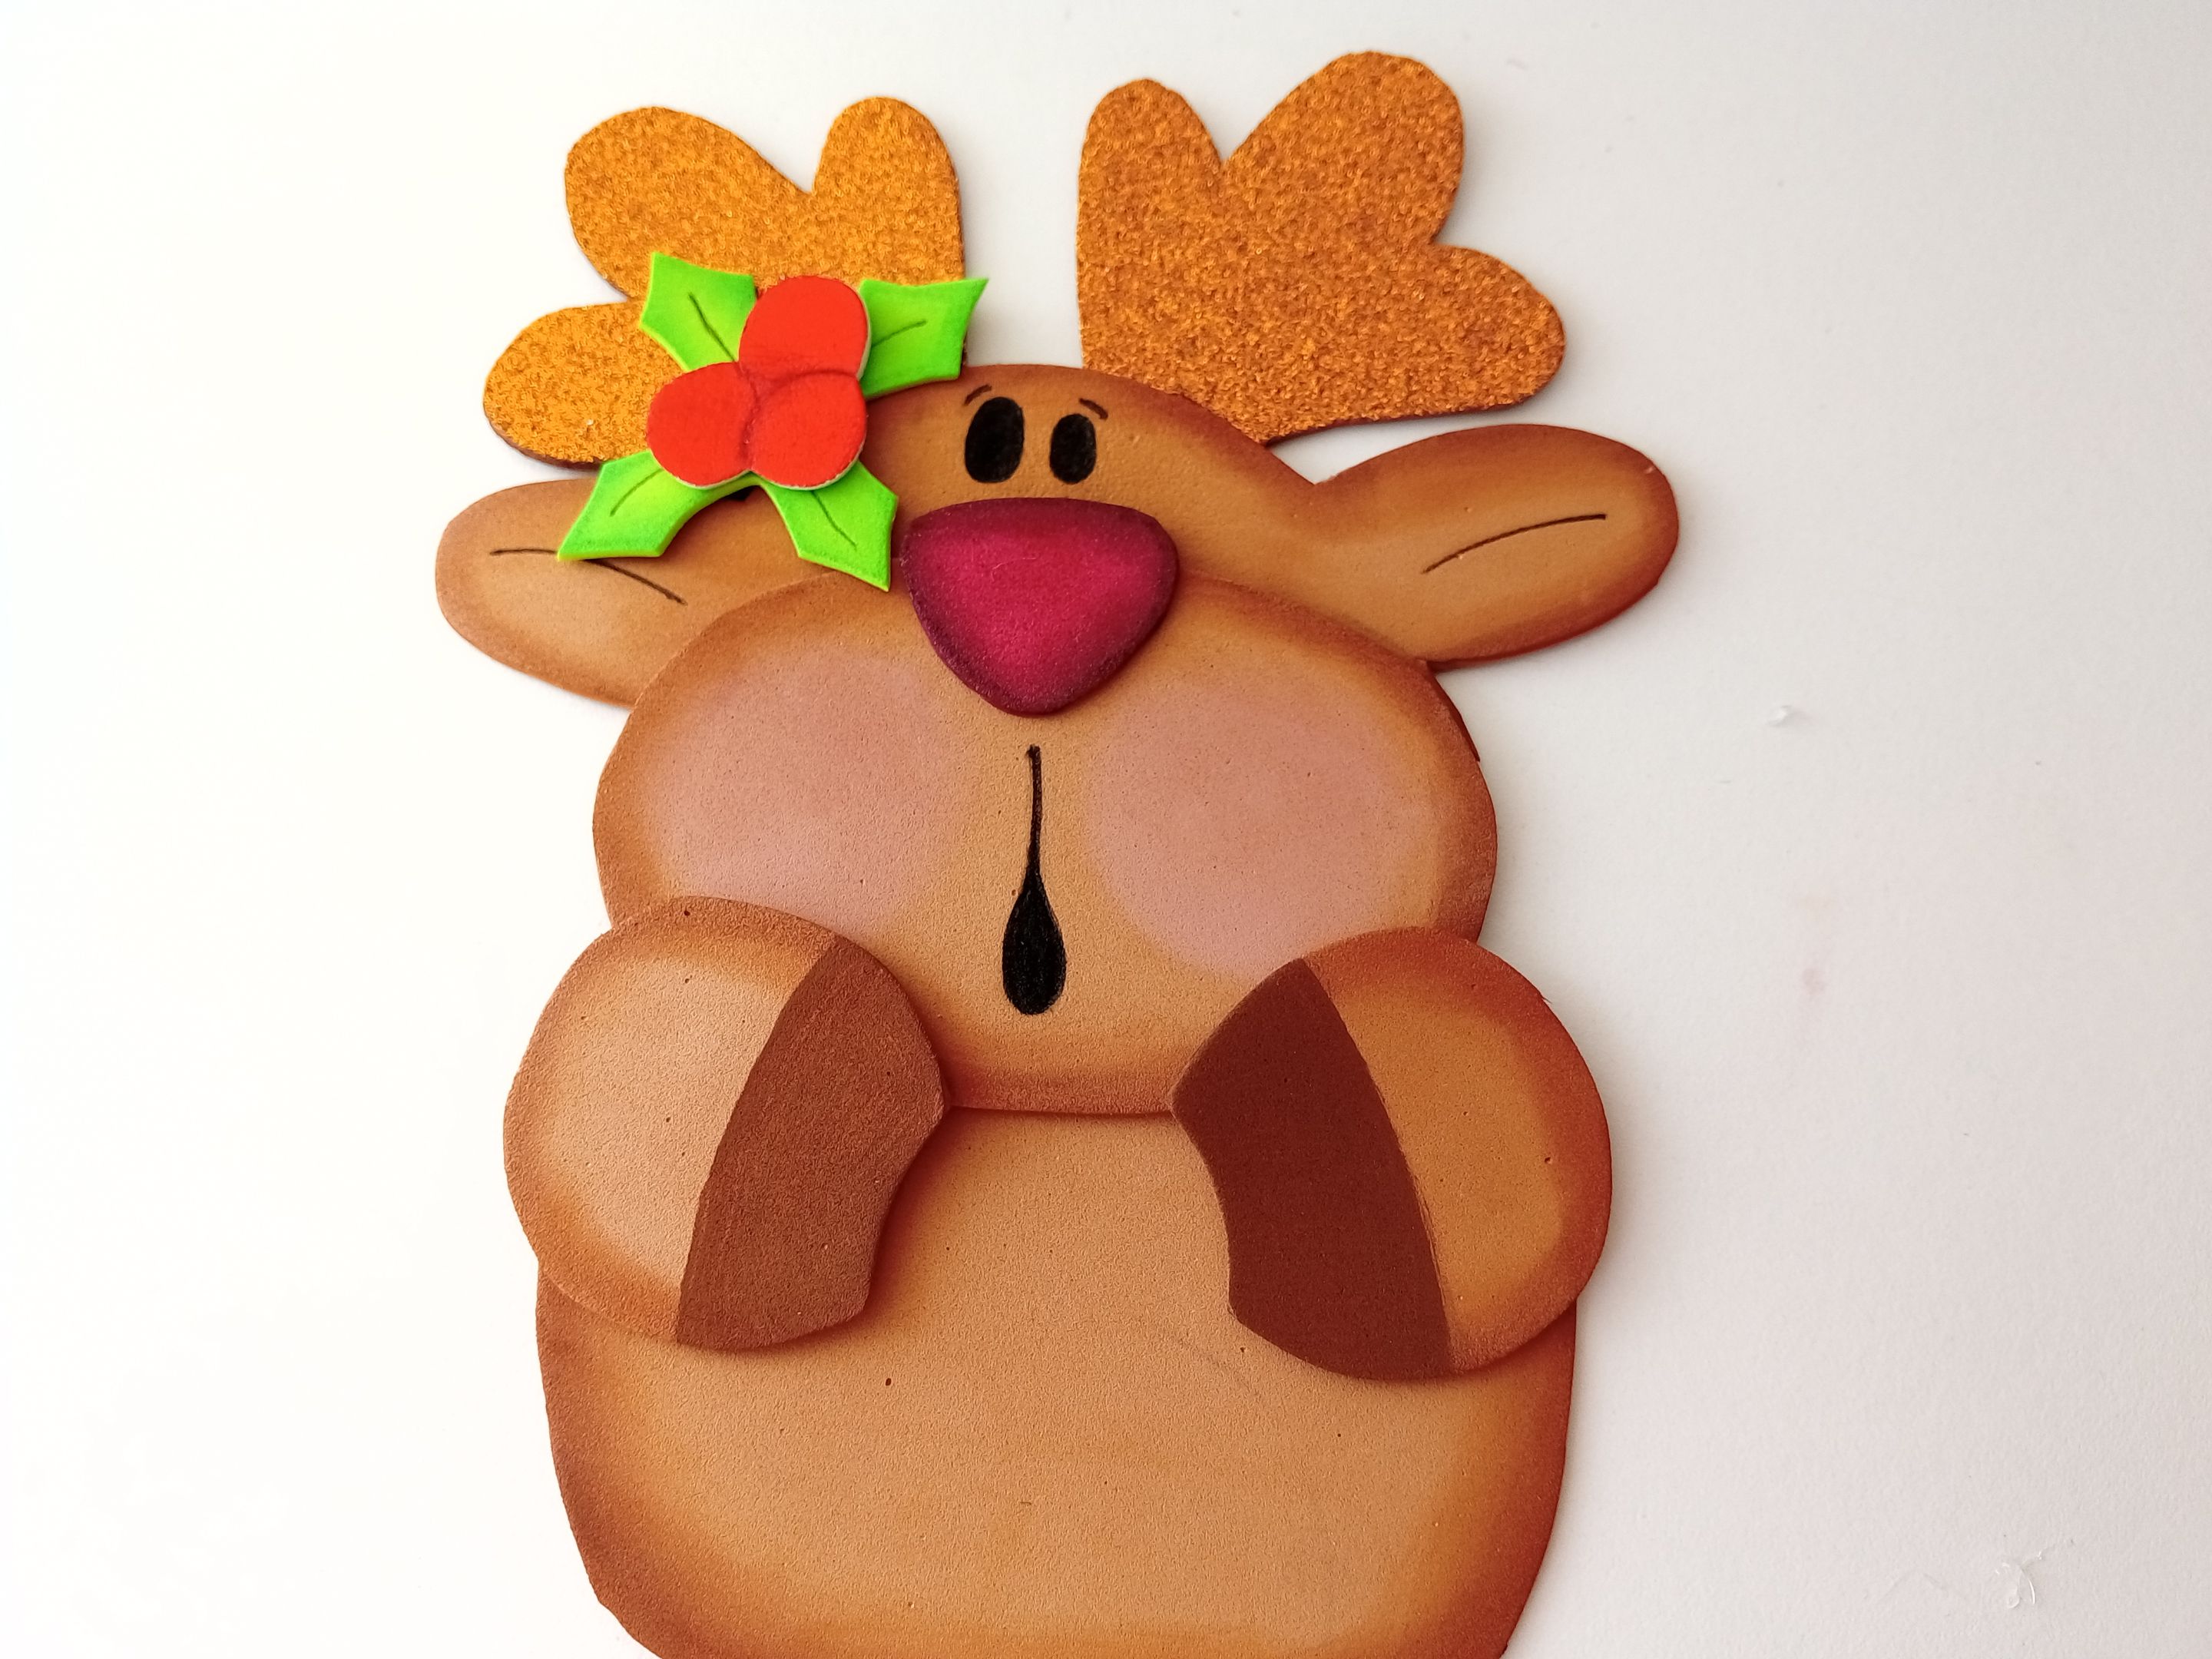
**Para el reno:**
- La cabeza, cuerpo y hocico en foami marrón.
- Cuernos en foami escarchado cobrizo.
- Nariz y frutos en foami rojo.
- Hojas en foami verde.
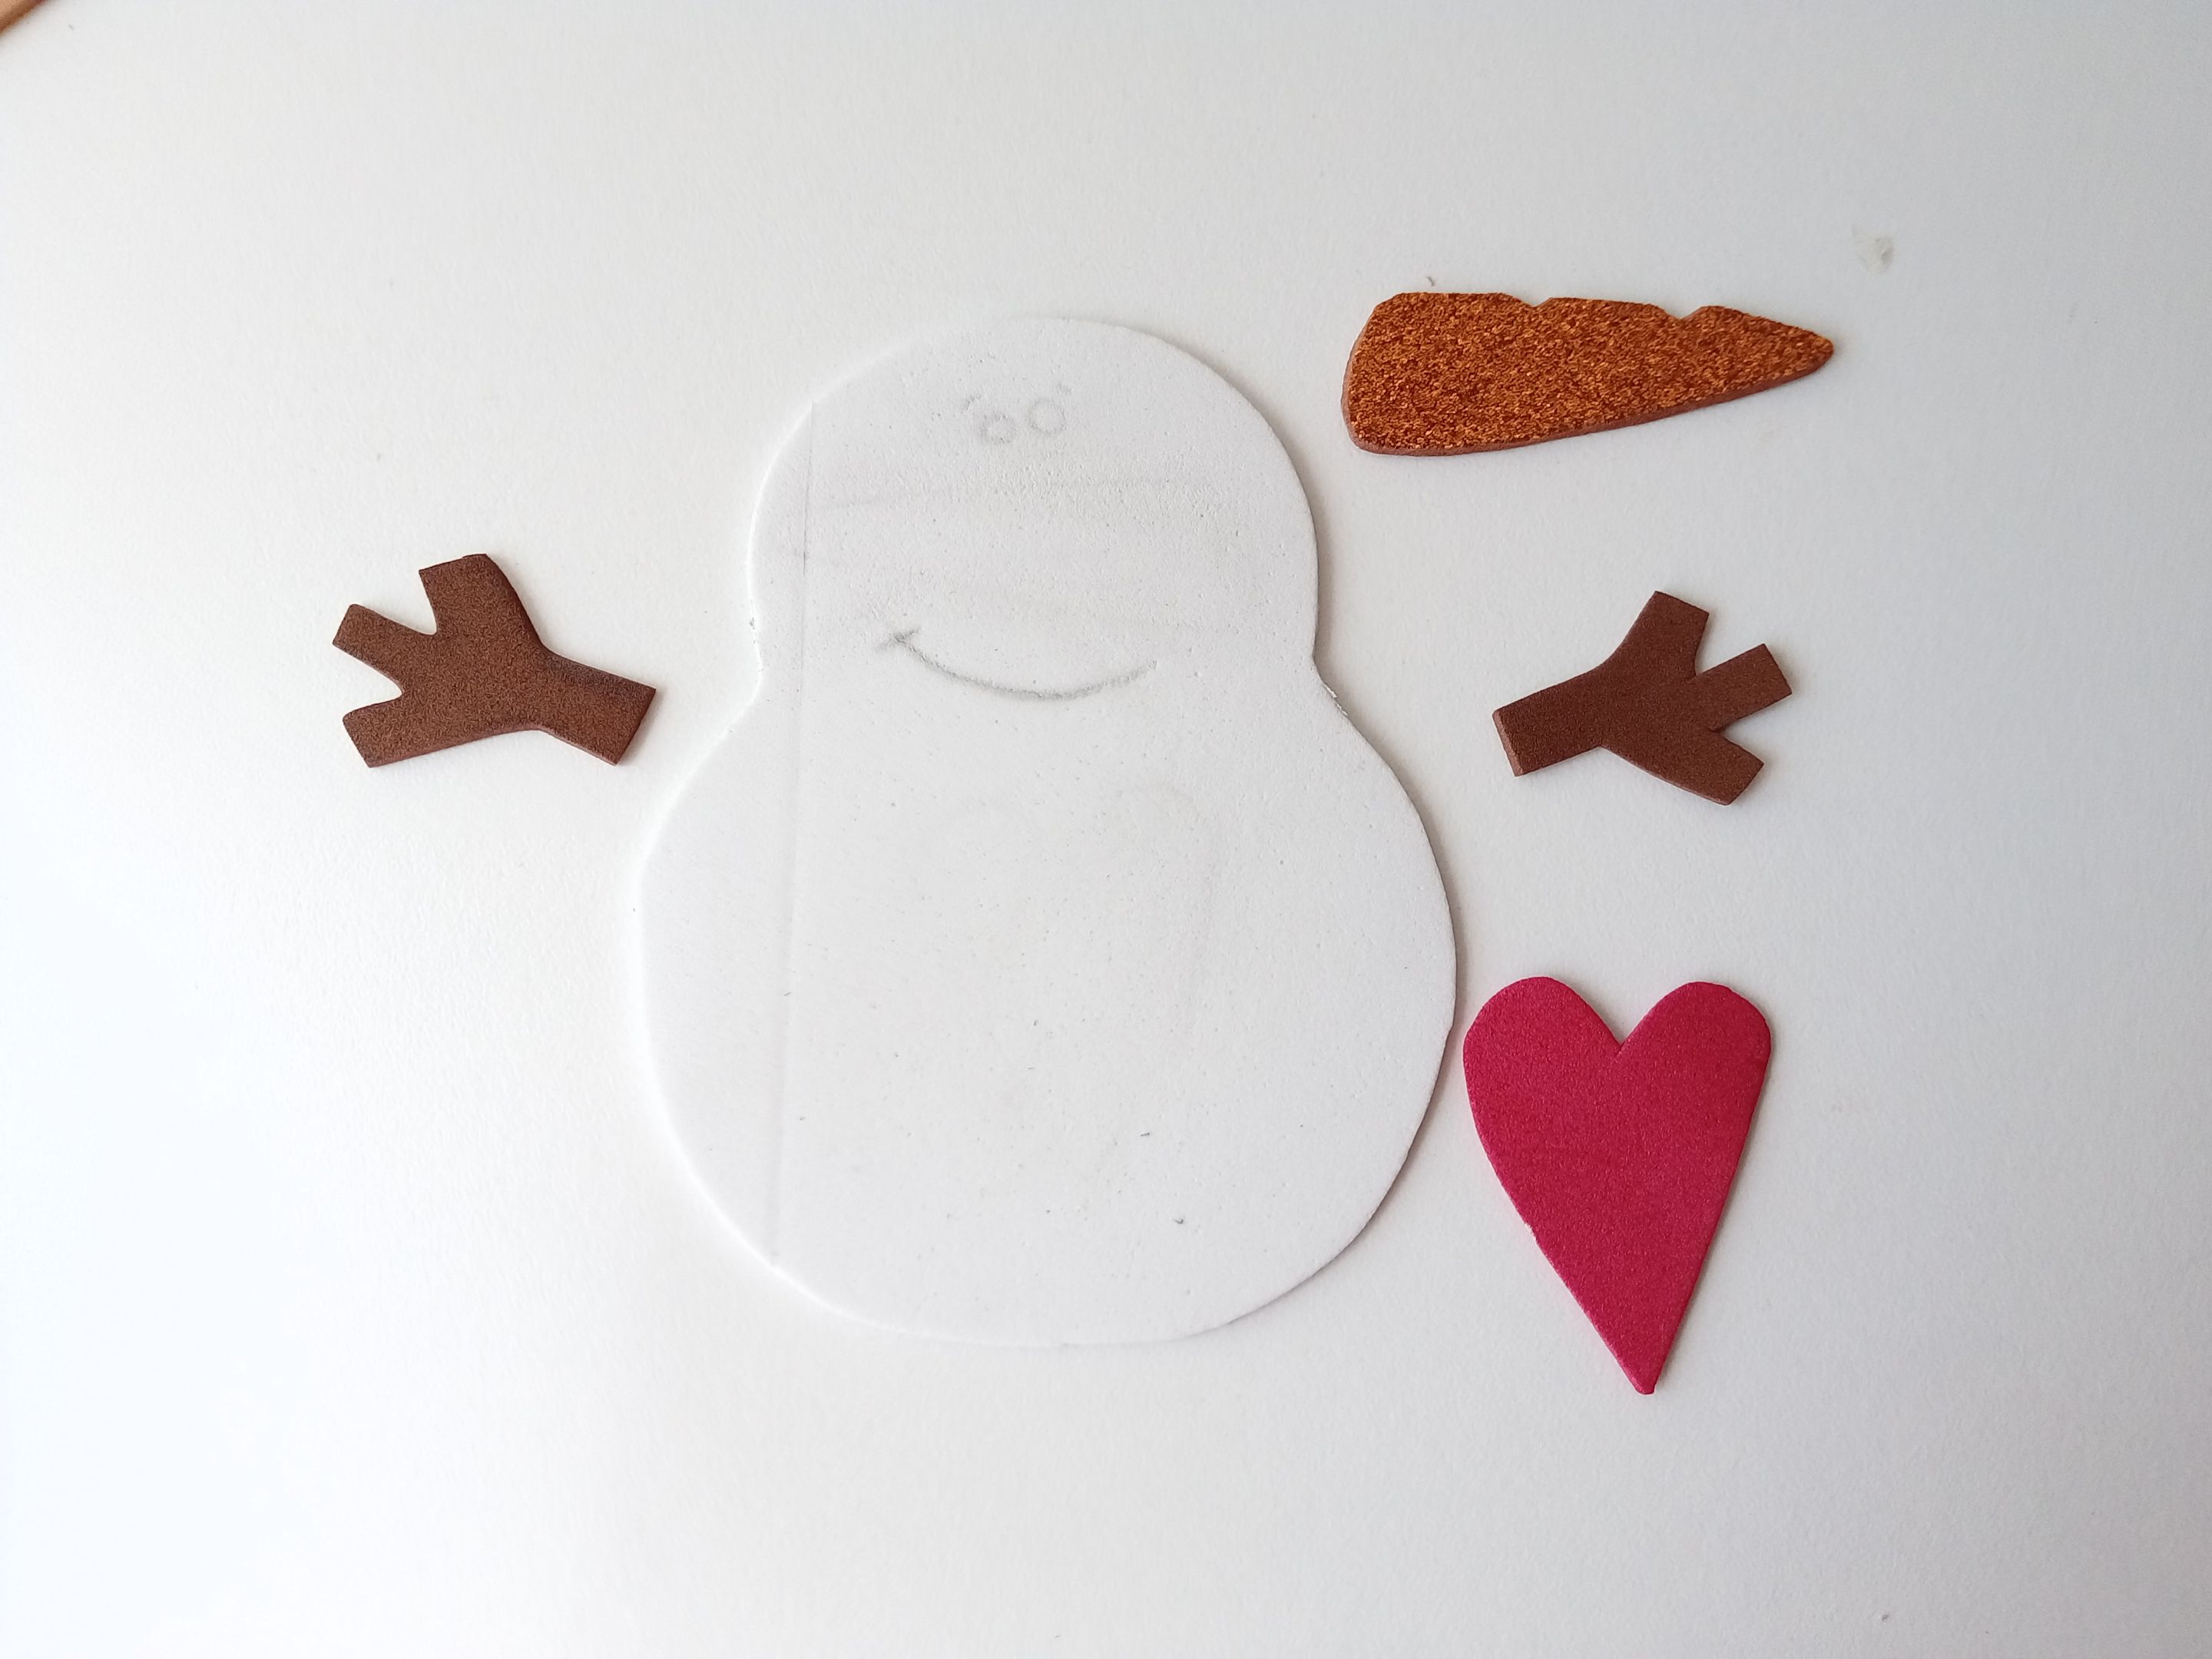
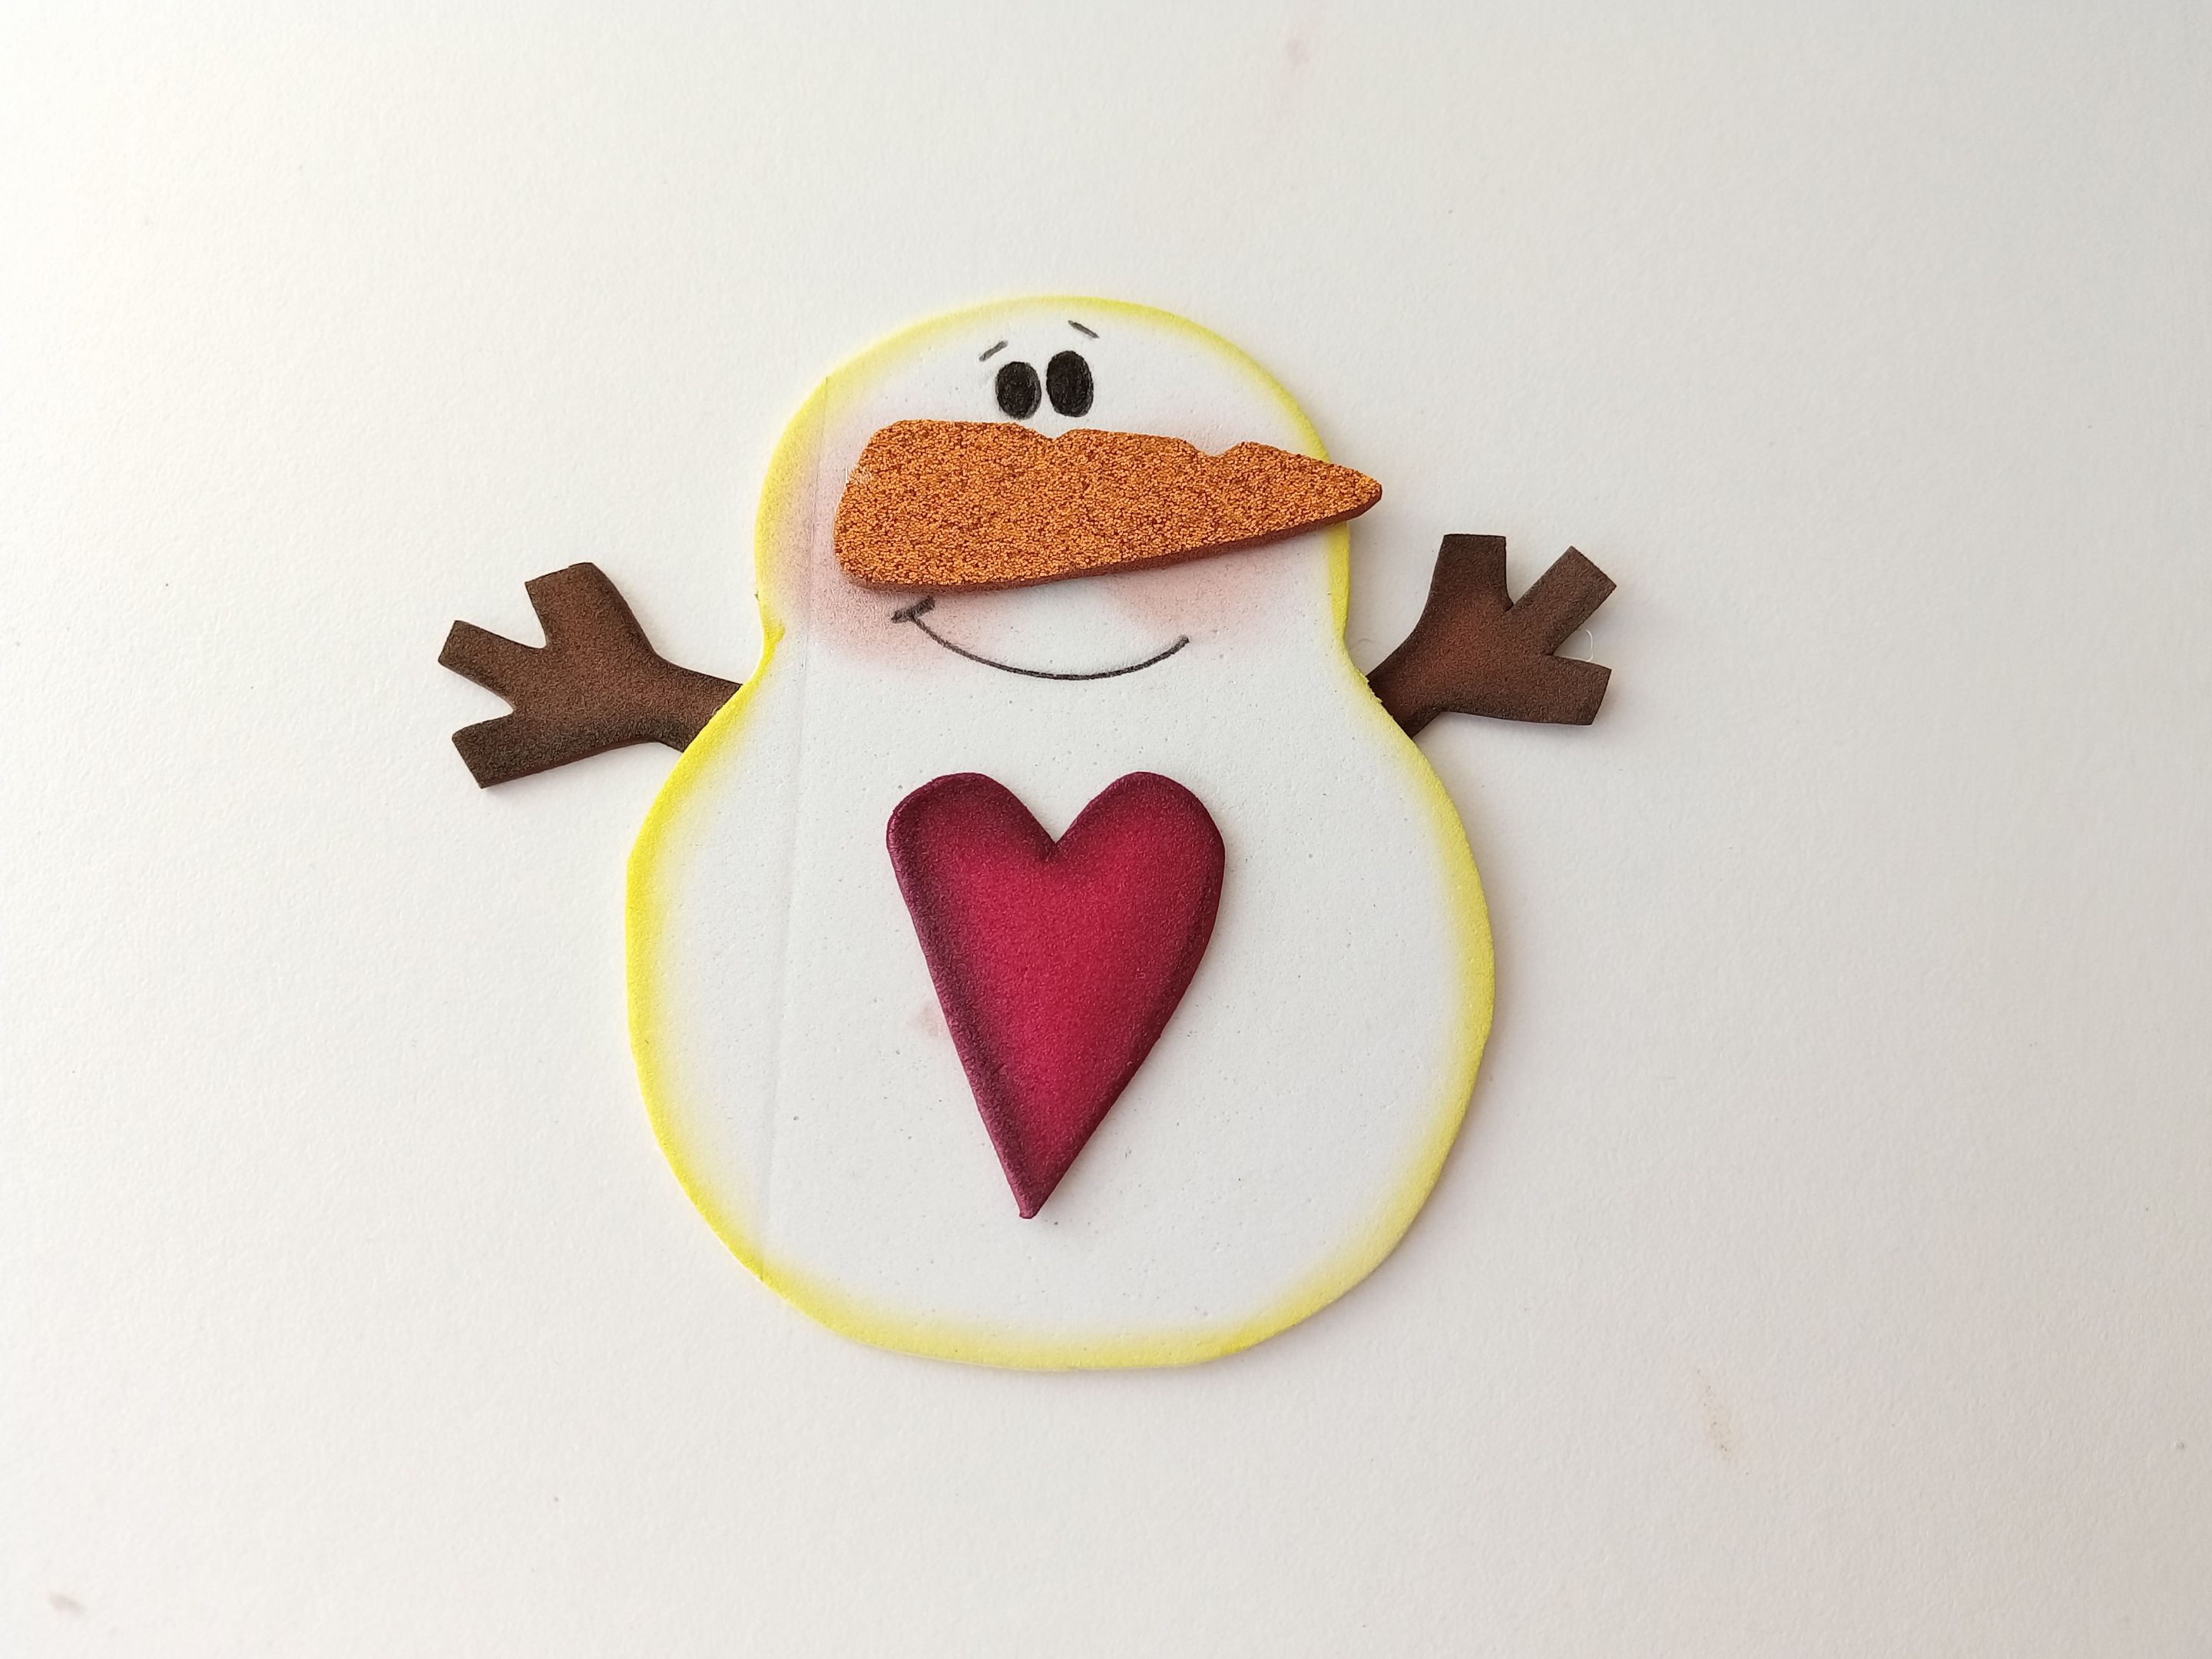
**Para el muñeco de nieves:**
- Cuerpo en foami blanco.
- Brazos en foami marrón.
- Nariz en foami cobrizo.
- Corazón en foami rojo.
###### ✨STEP 1:
The first thing I did was draw the characters, which in this case were a reindeer and a snowman, so on a white sheet I drew each piece or body part separately for the patterns and then, I transferred them to the corresponding colors of foam, as I explain below:
**For the reindeer:**
- The head, body and snout in brown foam.
- Antlers in frosted copper foam.
- Nose and fruits in red foam.
- Leaves in green foam.
**For the snowman:**
- Body in white foam.
- Arms in brown foam.
- Nose in copper foam.
- Heart in red foam.
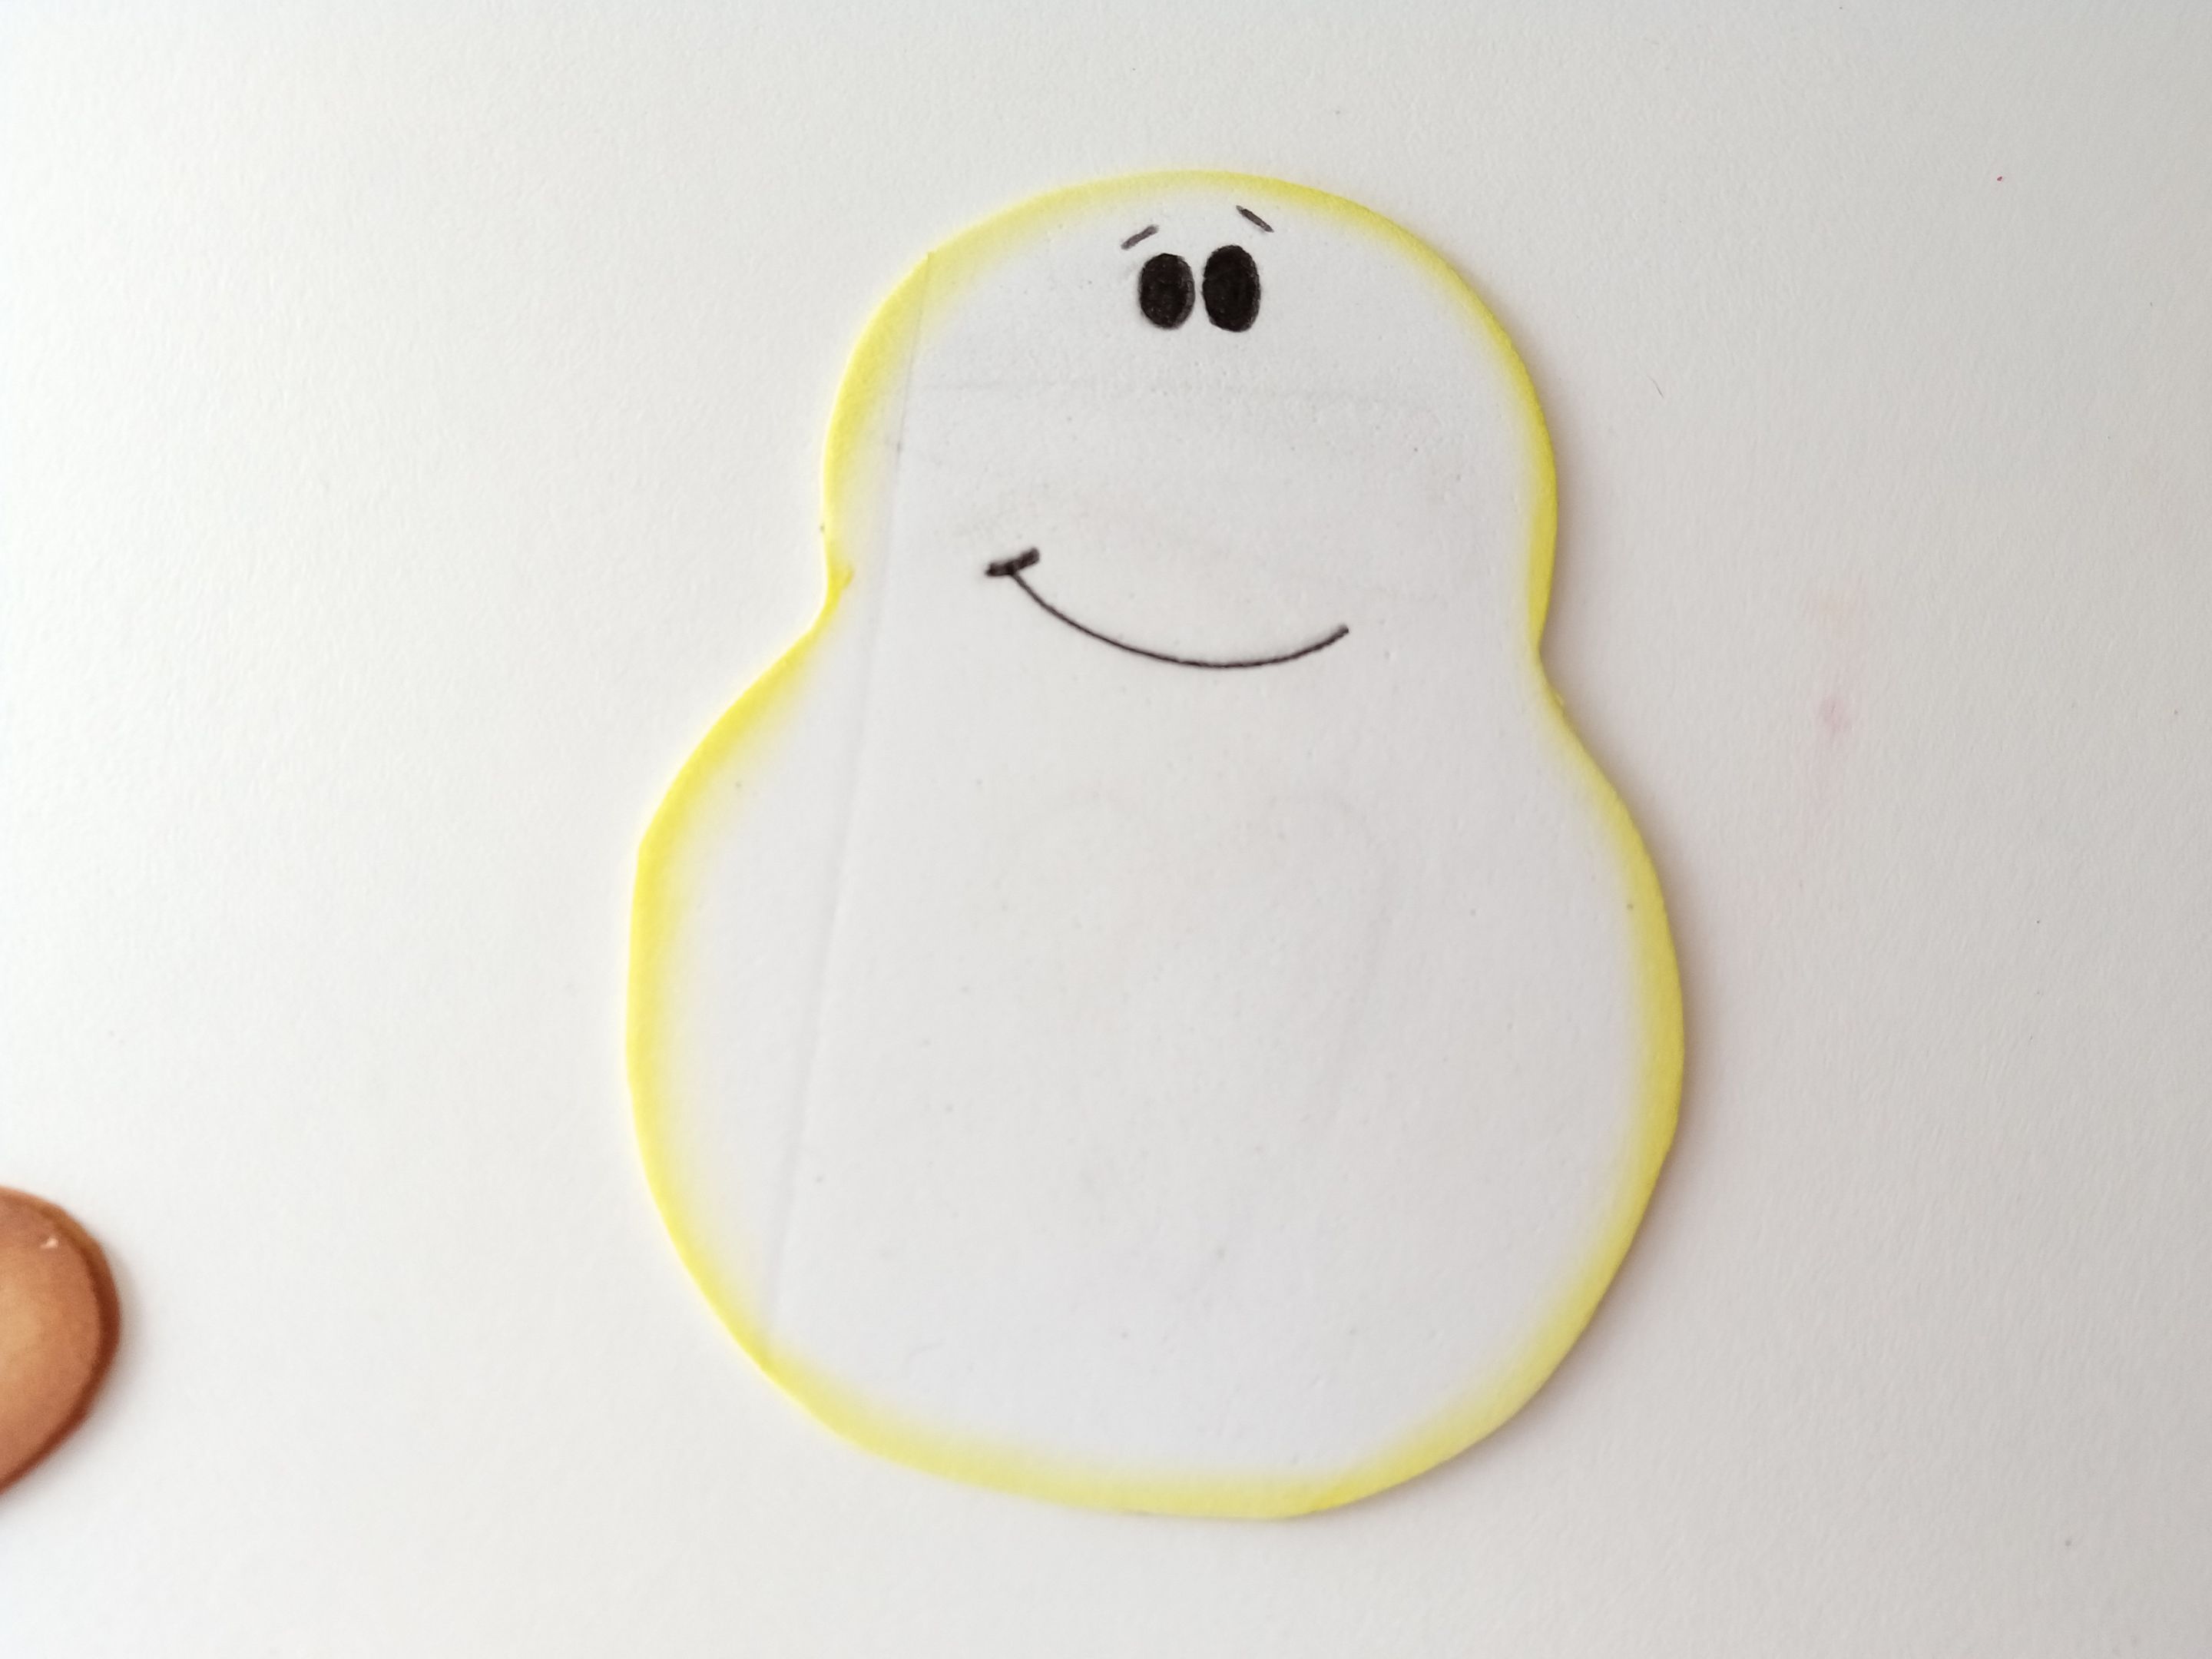
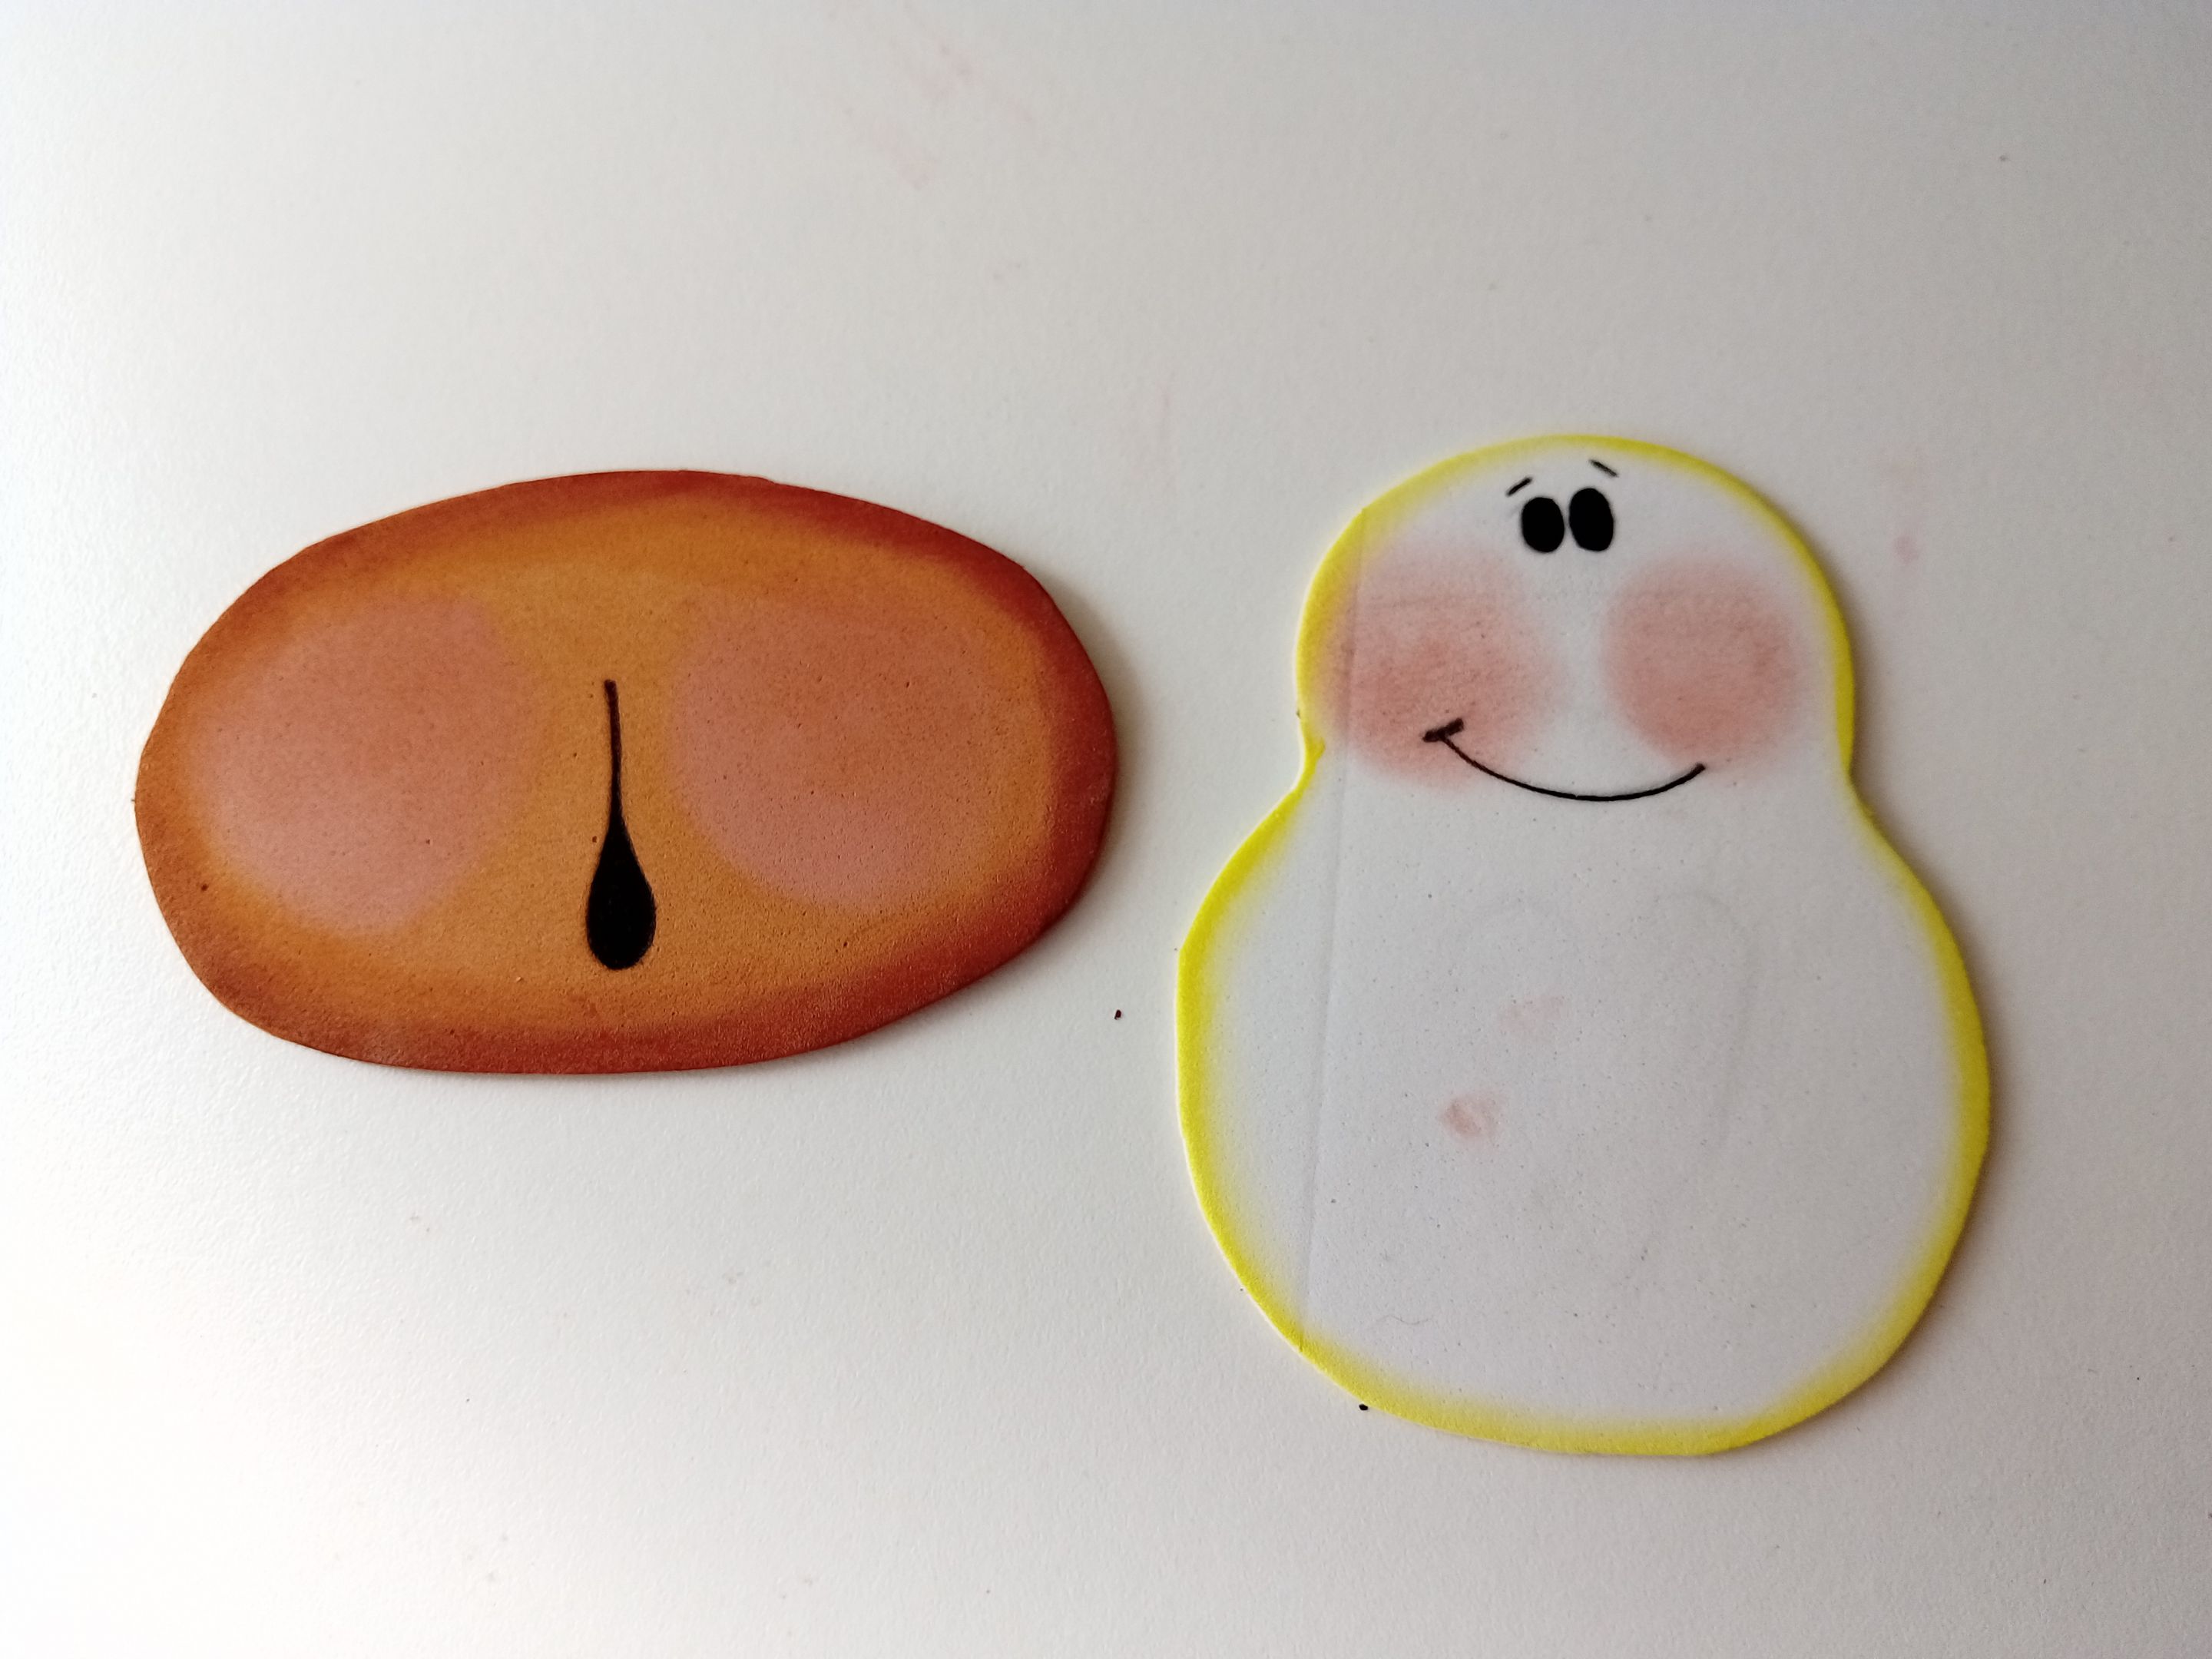
###### ✨PASO 2:
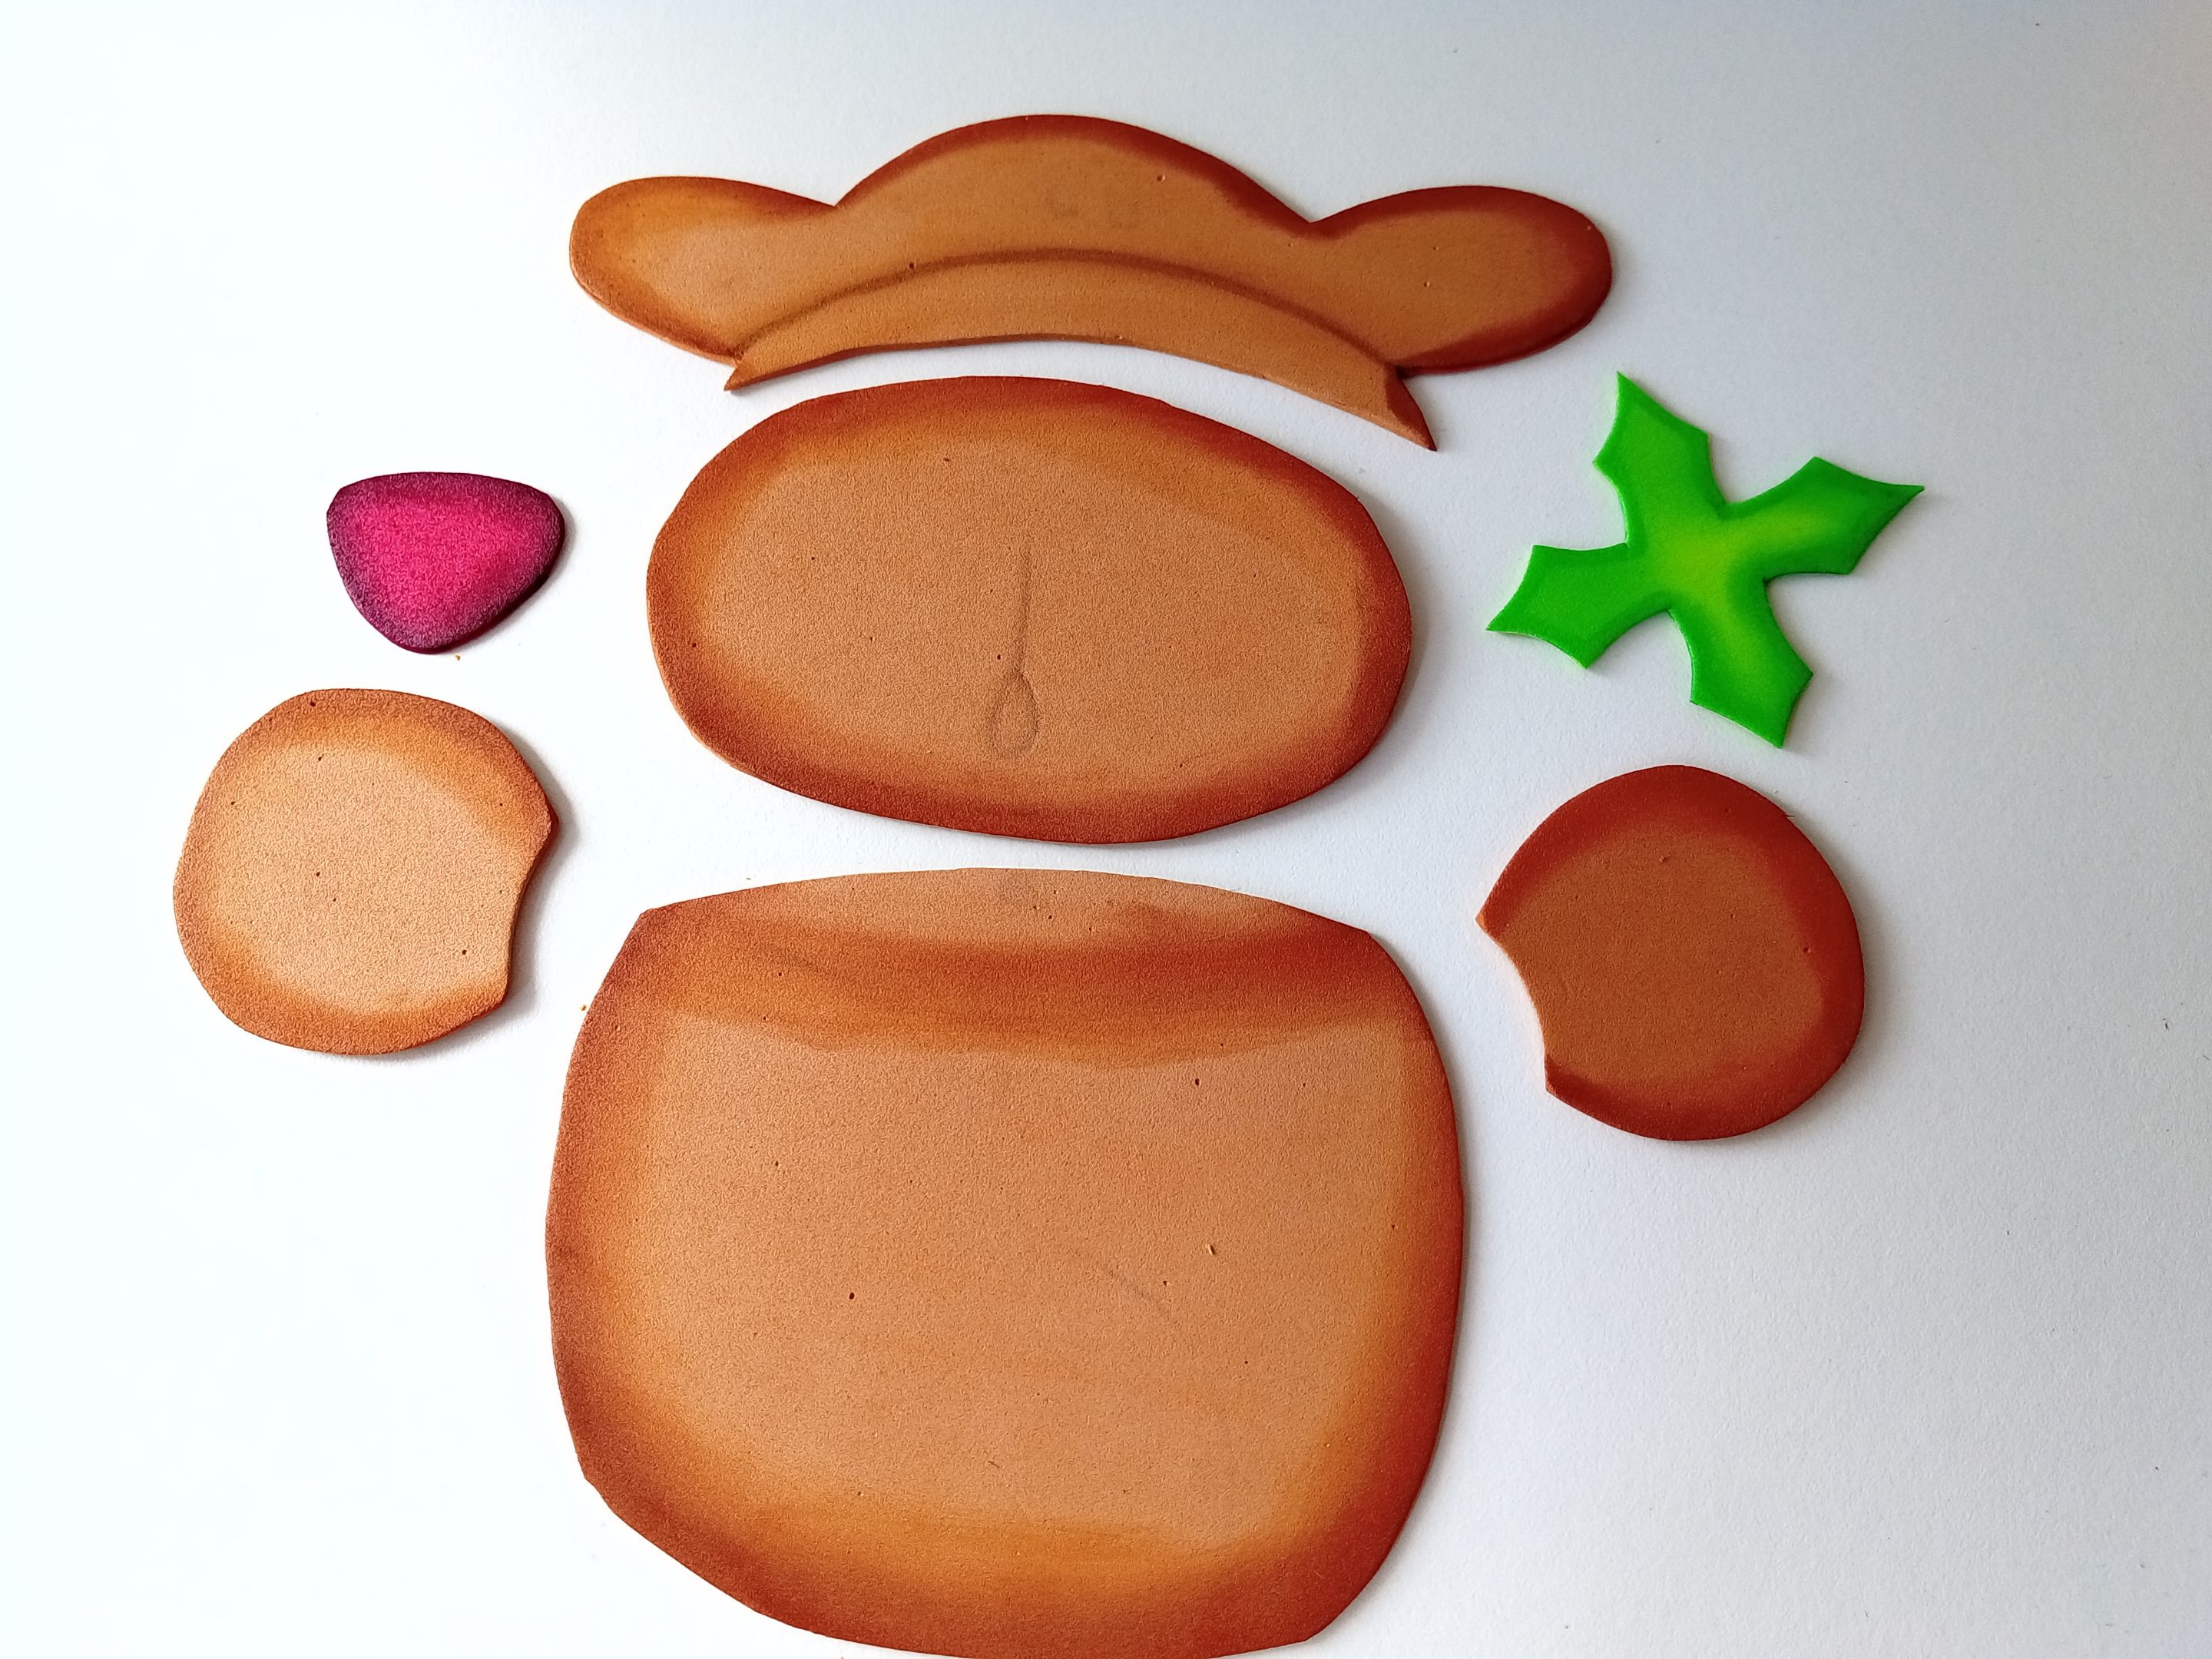
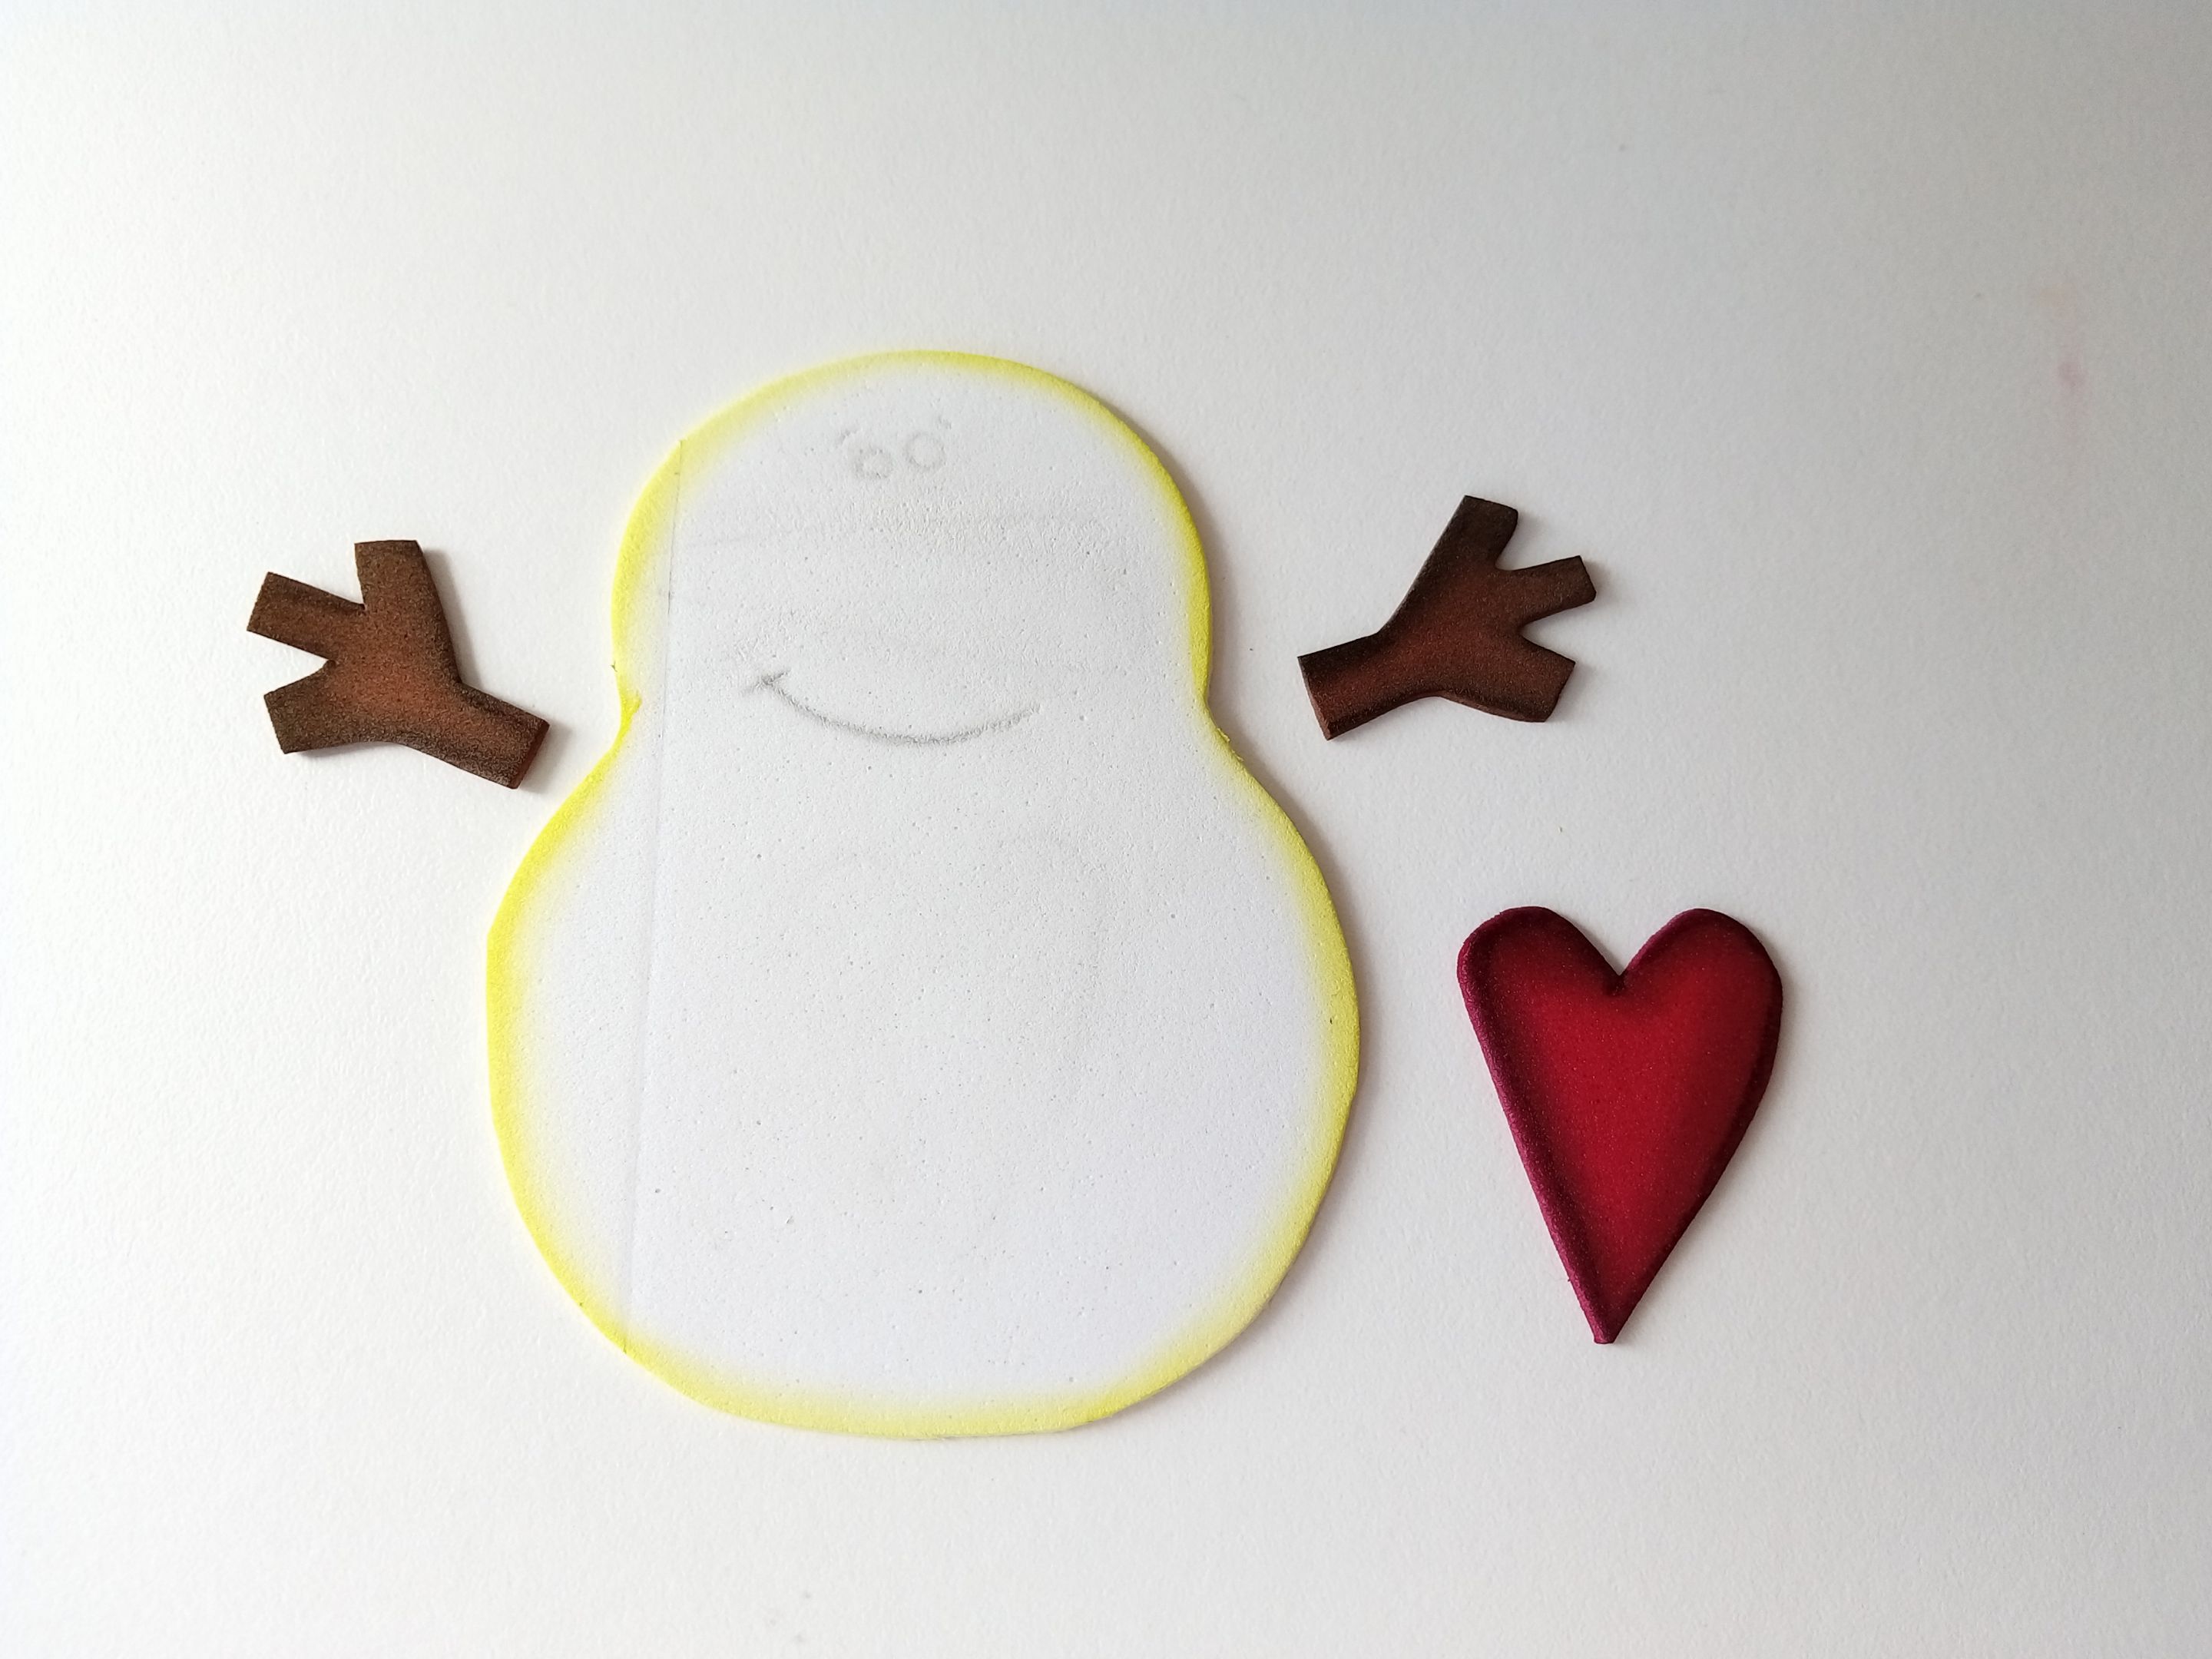
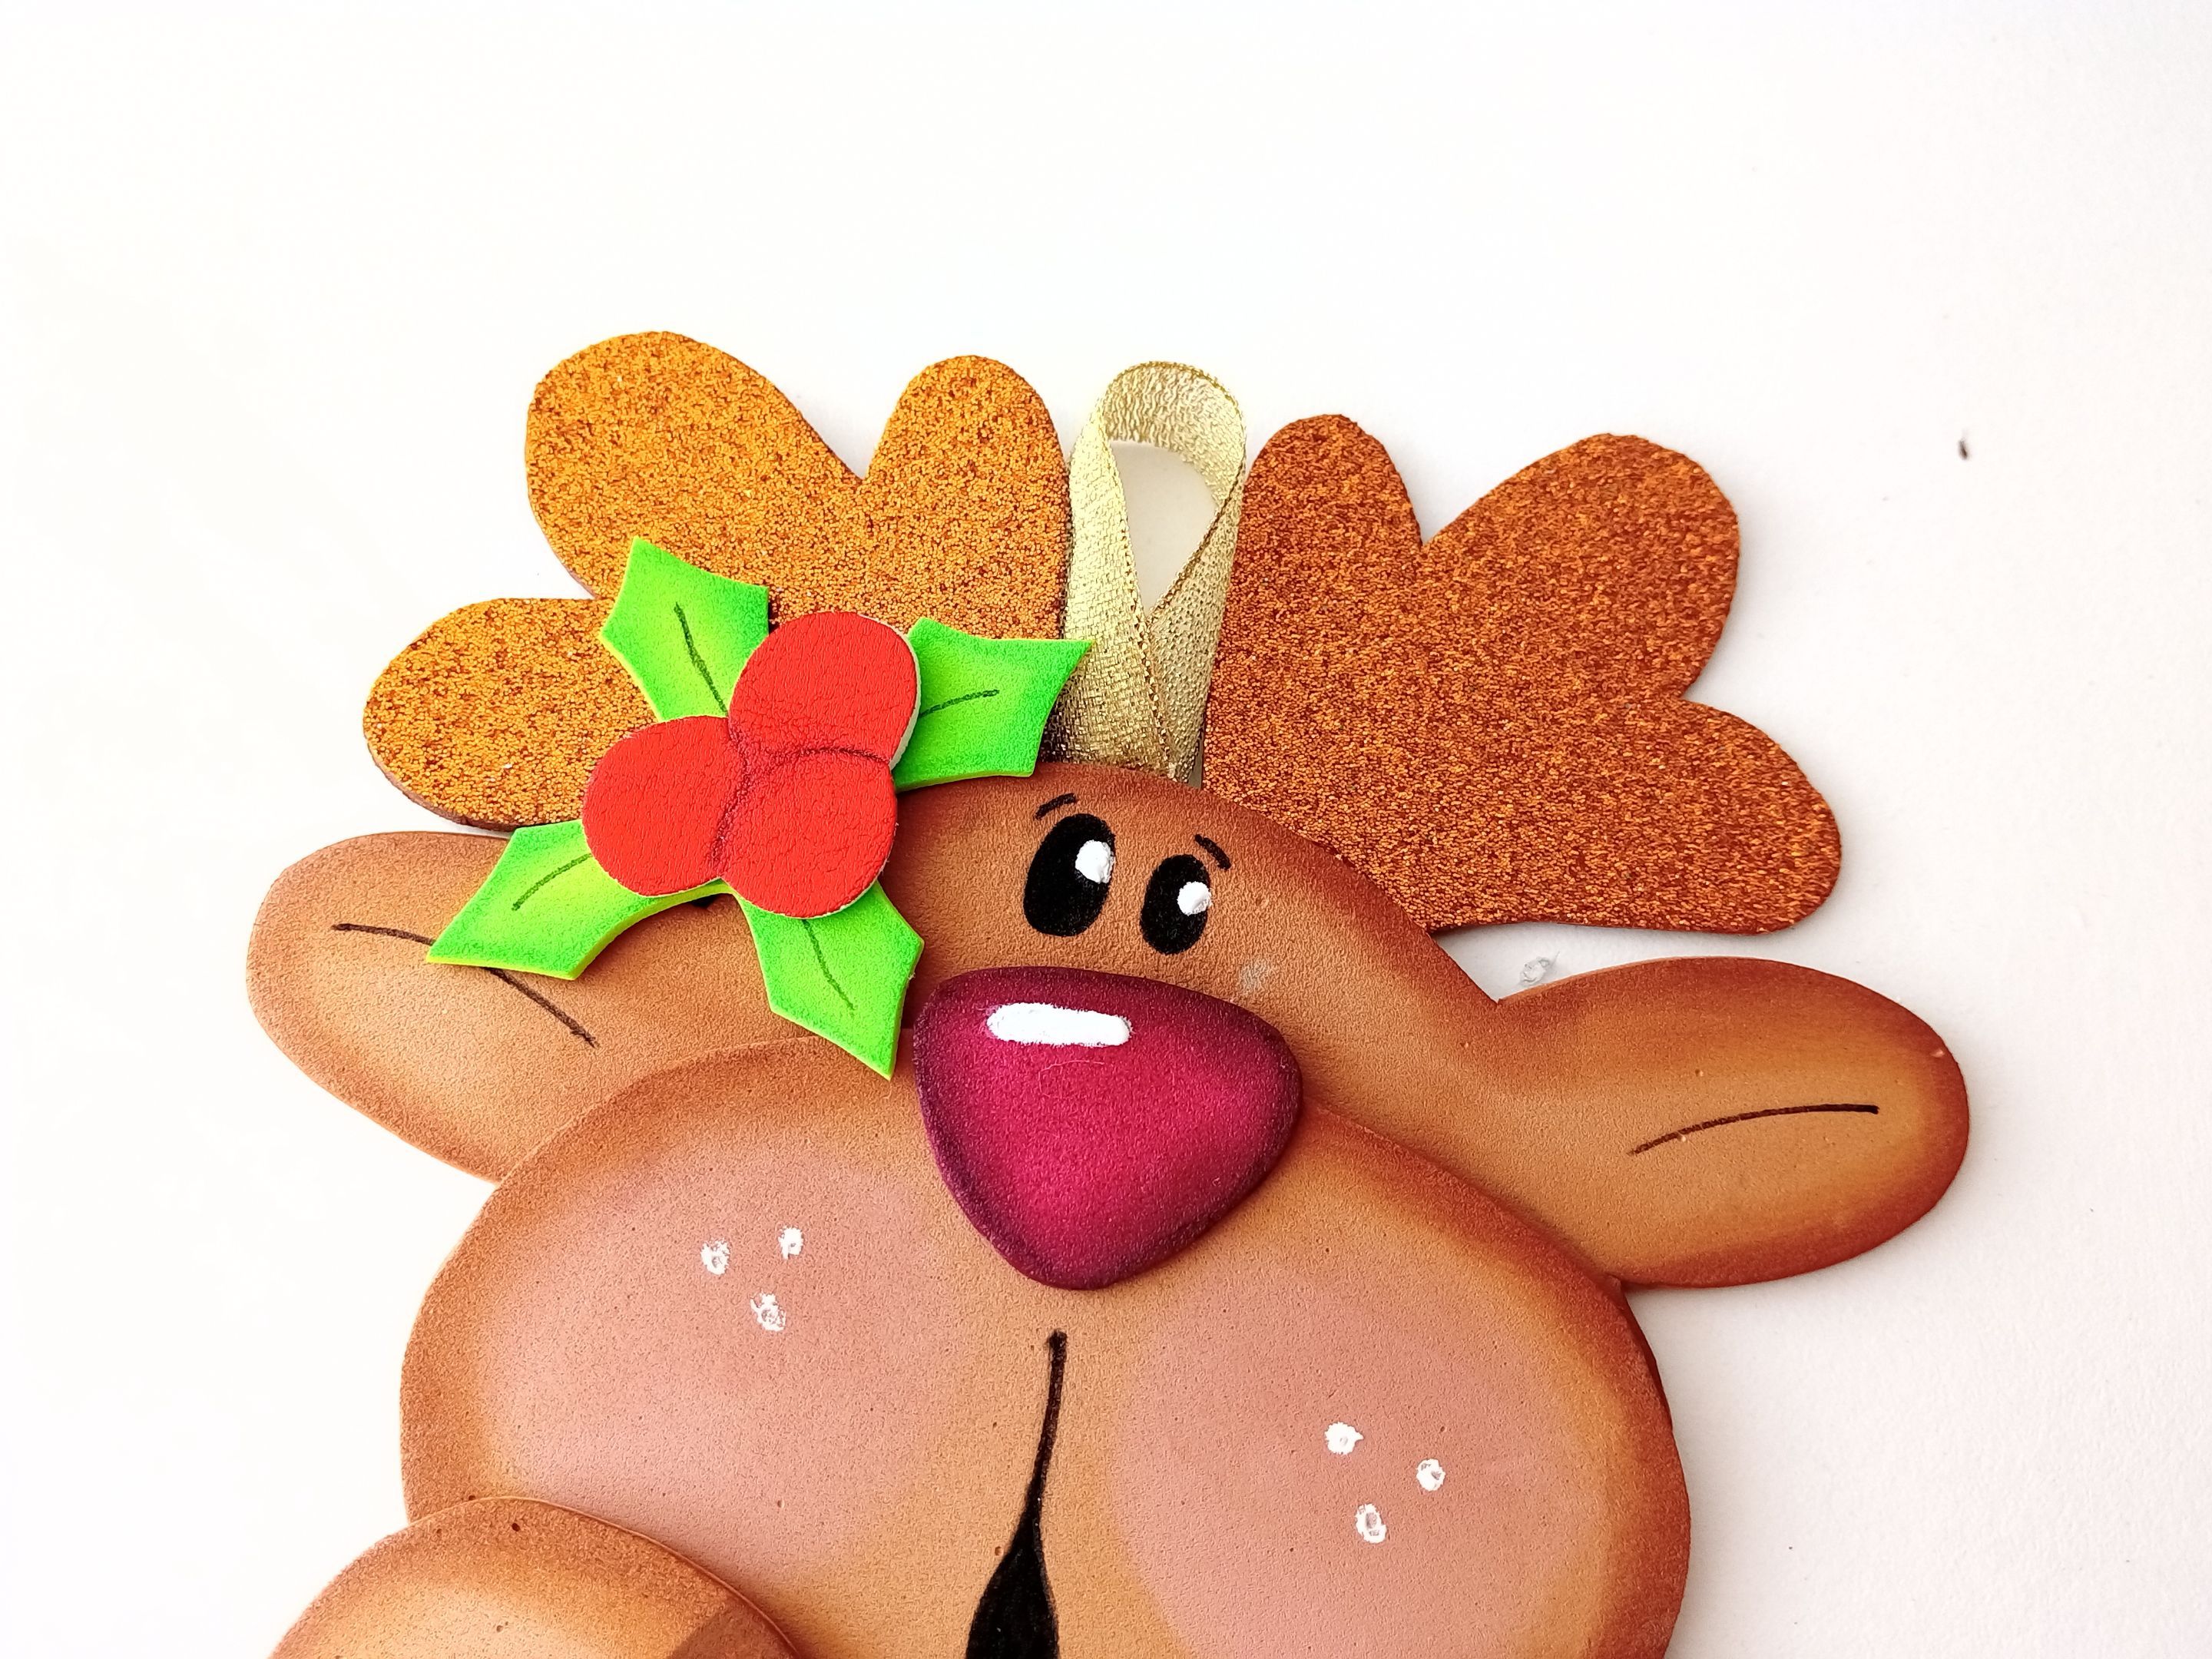
Una vez listas y recortadas todas las piezas en sus colores correspondientes, es momento de dar color a los bordes para dar más detalle, así que a todas las piezas de foami les difuminé un poco de pintura por los bordes, que hicieran contraste con cada una de las piezas en foami liso de ambos personajes.
###### ✨STEP 2:
Once all the pieces were ready and cut out in their corresponding colors, it was time to color the edges to give more detail, so I smudged a little paint on all the foam pieces around the edges, so they would contrast with each of the smooth foam pieces of both characters.
###### ✨PASO 3:
Luego, para dar más detalles, tomé un marcador negro y comencé a dibujar los ojos, bocas, detalles a las hojas y a los frutos. Además, con rubor y un pincel, pinté las mejillas.
###### ✨STEP 3:
Then, to give more details, I took a black marker and began to draw the eyes, mouths, details on the leaves and fruits. Also, with blush and a brush, I painted the cheeks.
###### ✨PASO 4:
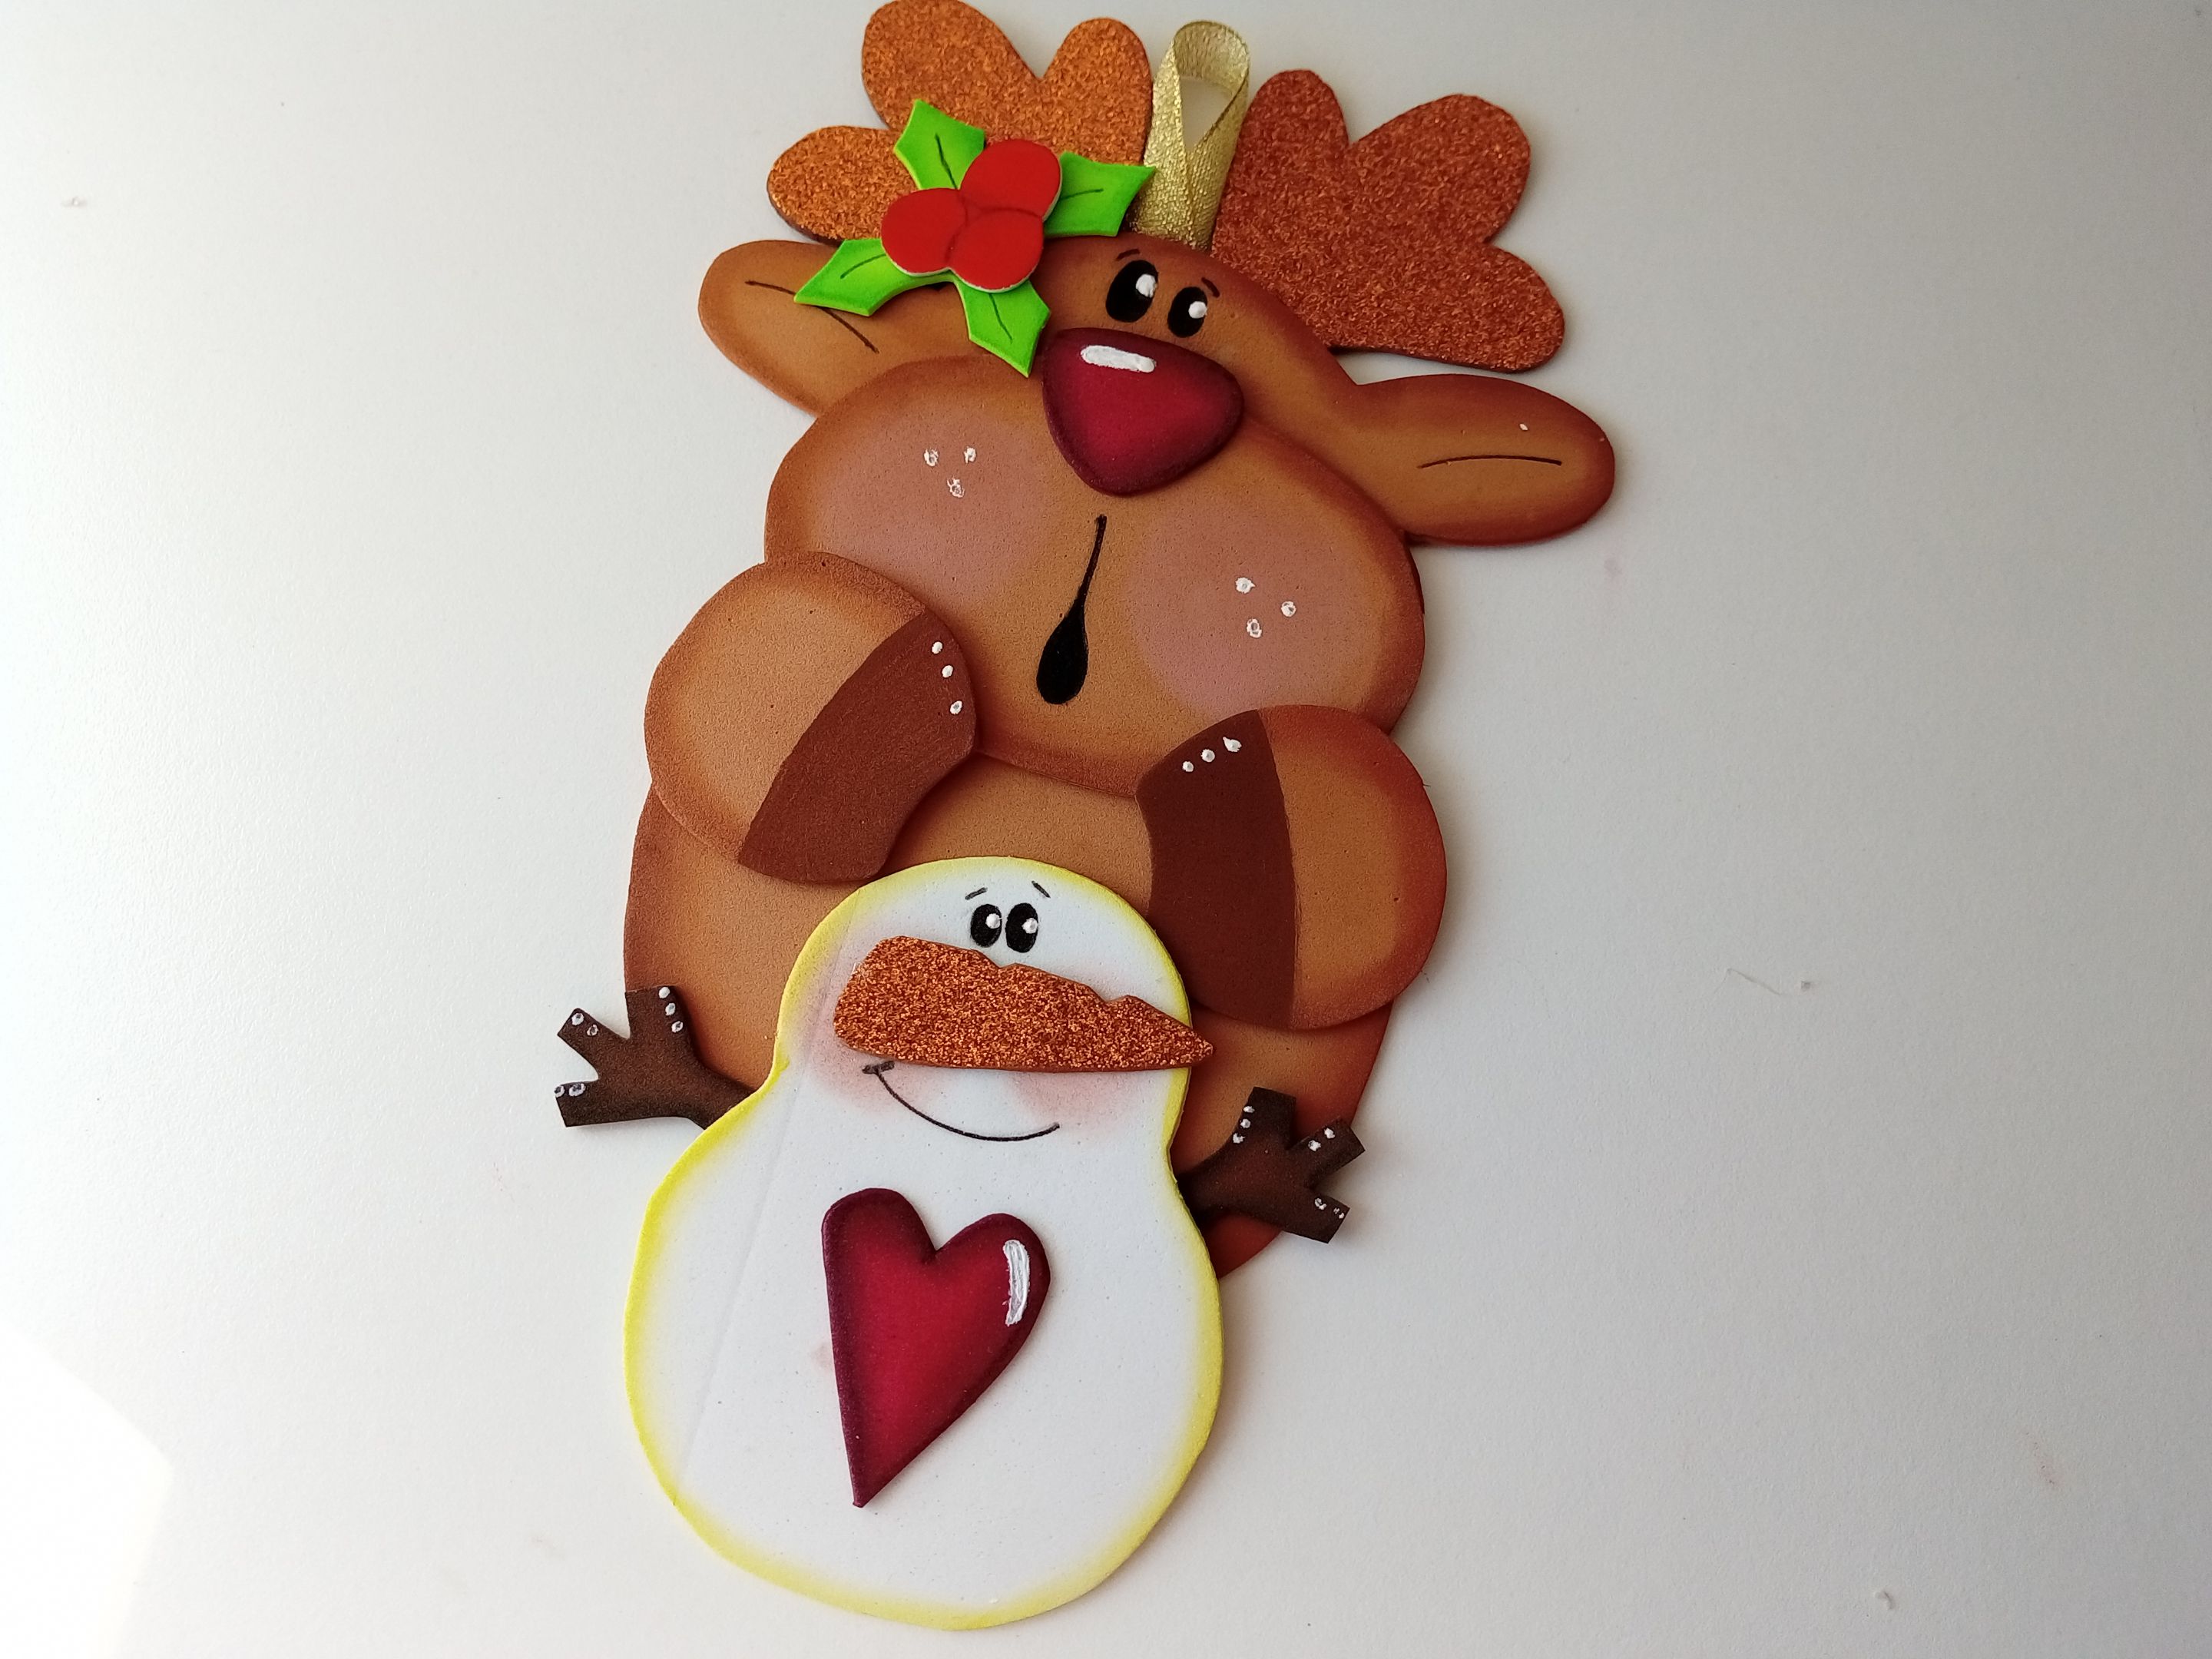
Al estar todo seco, comencé a pegar las piezas del reno junto con los detalles extras que tenía y aproveché de pintar las pezuñas del reno con pintura marrón. También, pegué todas las piezas del muñeco de nieves.
###### ✨STEP 4:
Once everything was dry, I began to glue the reindeer pieces together with the extra details I had and I took advantage of painting the reindeer's hooves with brown paint. I also glued all the snowman pieces.
###### ✨PASO 5:
Seguidamente, di puntos de luz con pintura blanca en los lugares que creí que se verían mejor en ambos personajes, como patas, mejillas, nariz y obviamente en los ojos para dar vida a los personajes. Para finalizar, tomé un trozo de cinta, y la pegué en la parte trasera de la cabeza para poder colgar.
###### ✨STEP 5:
Next, I gave points of light with white paint in the places that I thought would look best on both characters, such as legs, cheeks, nose and obviously the eyes to give life to the characters. To finish, I took a piece of ribbon and glued it to the back of the head so I could hang it.
# ✨RESULTADO: | ✨RESULT:

---

---
**!TE DESEO UN GRAN DÏA¡**
Todas las fotografías son de mi propiedad.
Separador y Fotos editadas en [Canva](https://www.canva.com/)
**!I WISH YOU A GOOD DAY**
All photographs are my property.
Photos edited in [Canva](https://www.canva.com/)