###### ✨¡Hola amigos amantes de la creatividad! Espero que estén todos bien.✨
¡Buenas tardes, amigos!Espero que estén pasando una excelente semana. Por mi parte, contenta de pasar por acá a compartir una linda idea con ustedes. En esta ocasión, les comparto el paso a paso para elaborar una linda caja de regalo. Mi creación favorita es elaborar cajas de regalo; de hecho, si no mal recuerdo, la primera vez que compartí una de mis creaciones con ustedes fue una caja de regalo con lazo y algunos corazones, pues mi razón para crear siempre fue para dar un detalle, casi nunca hacía detalles o decoraciones.
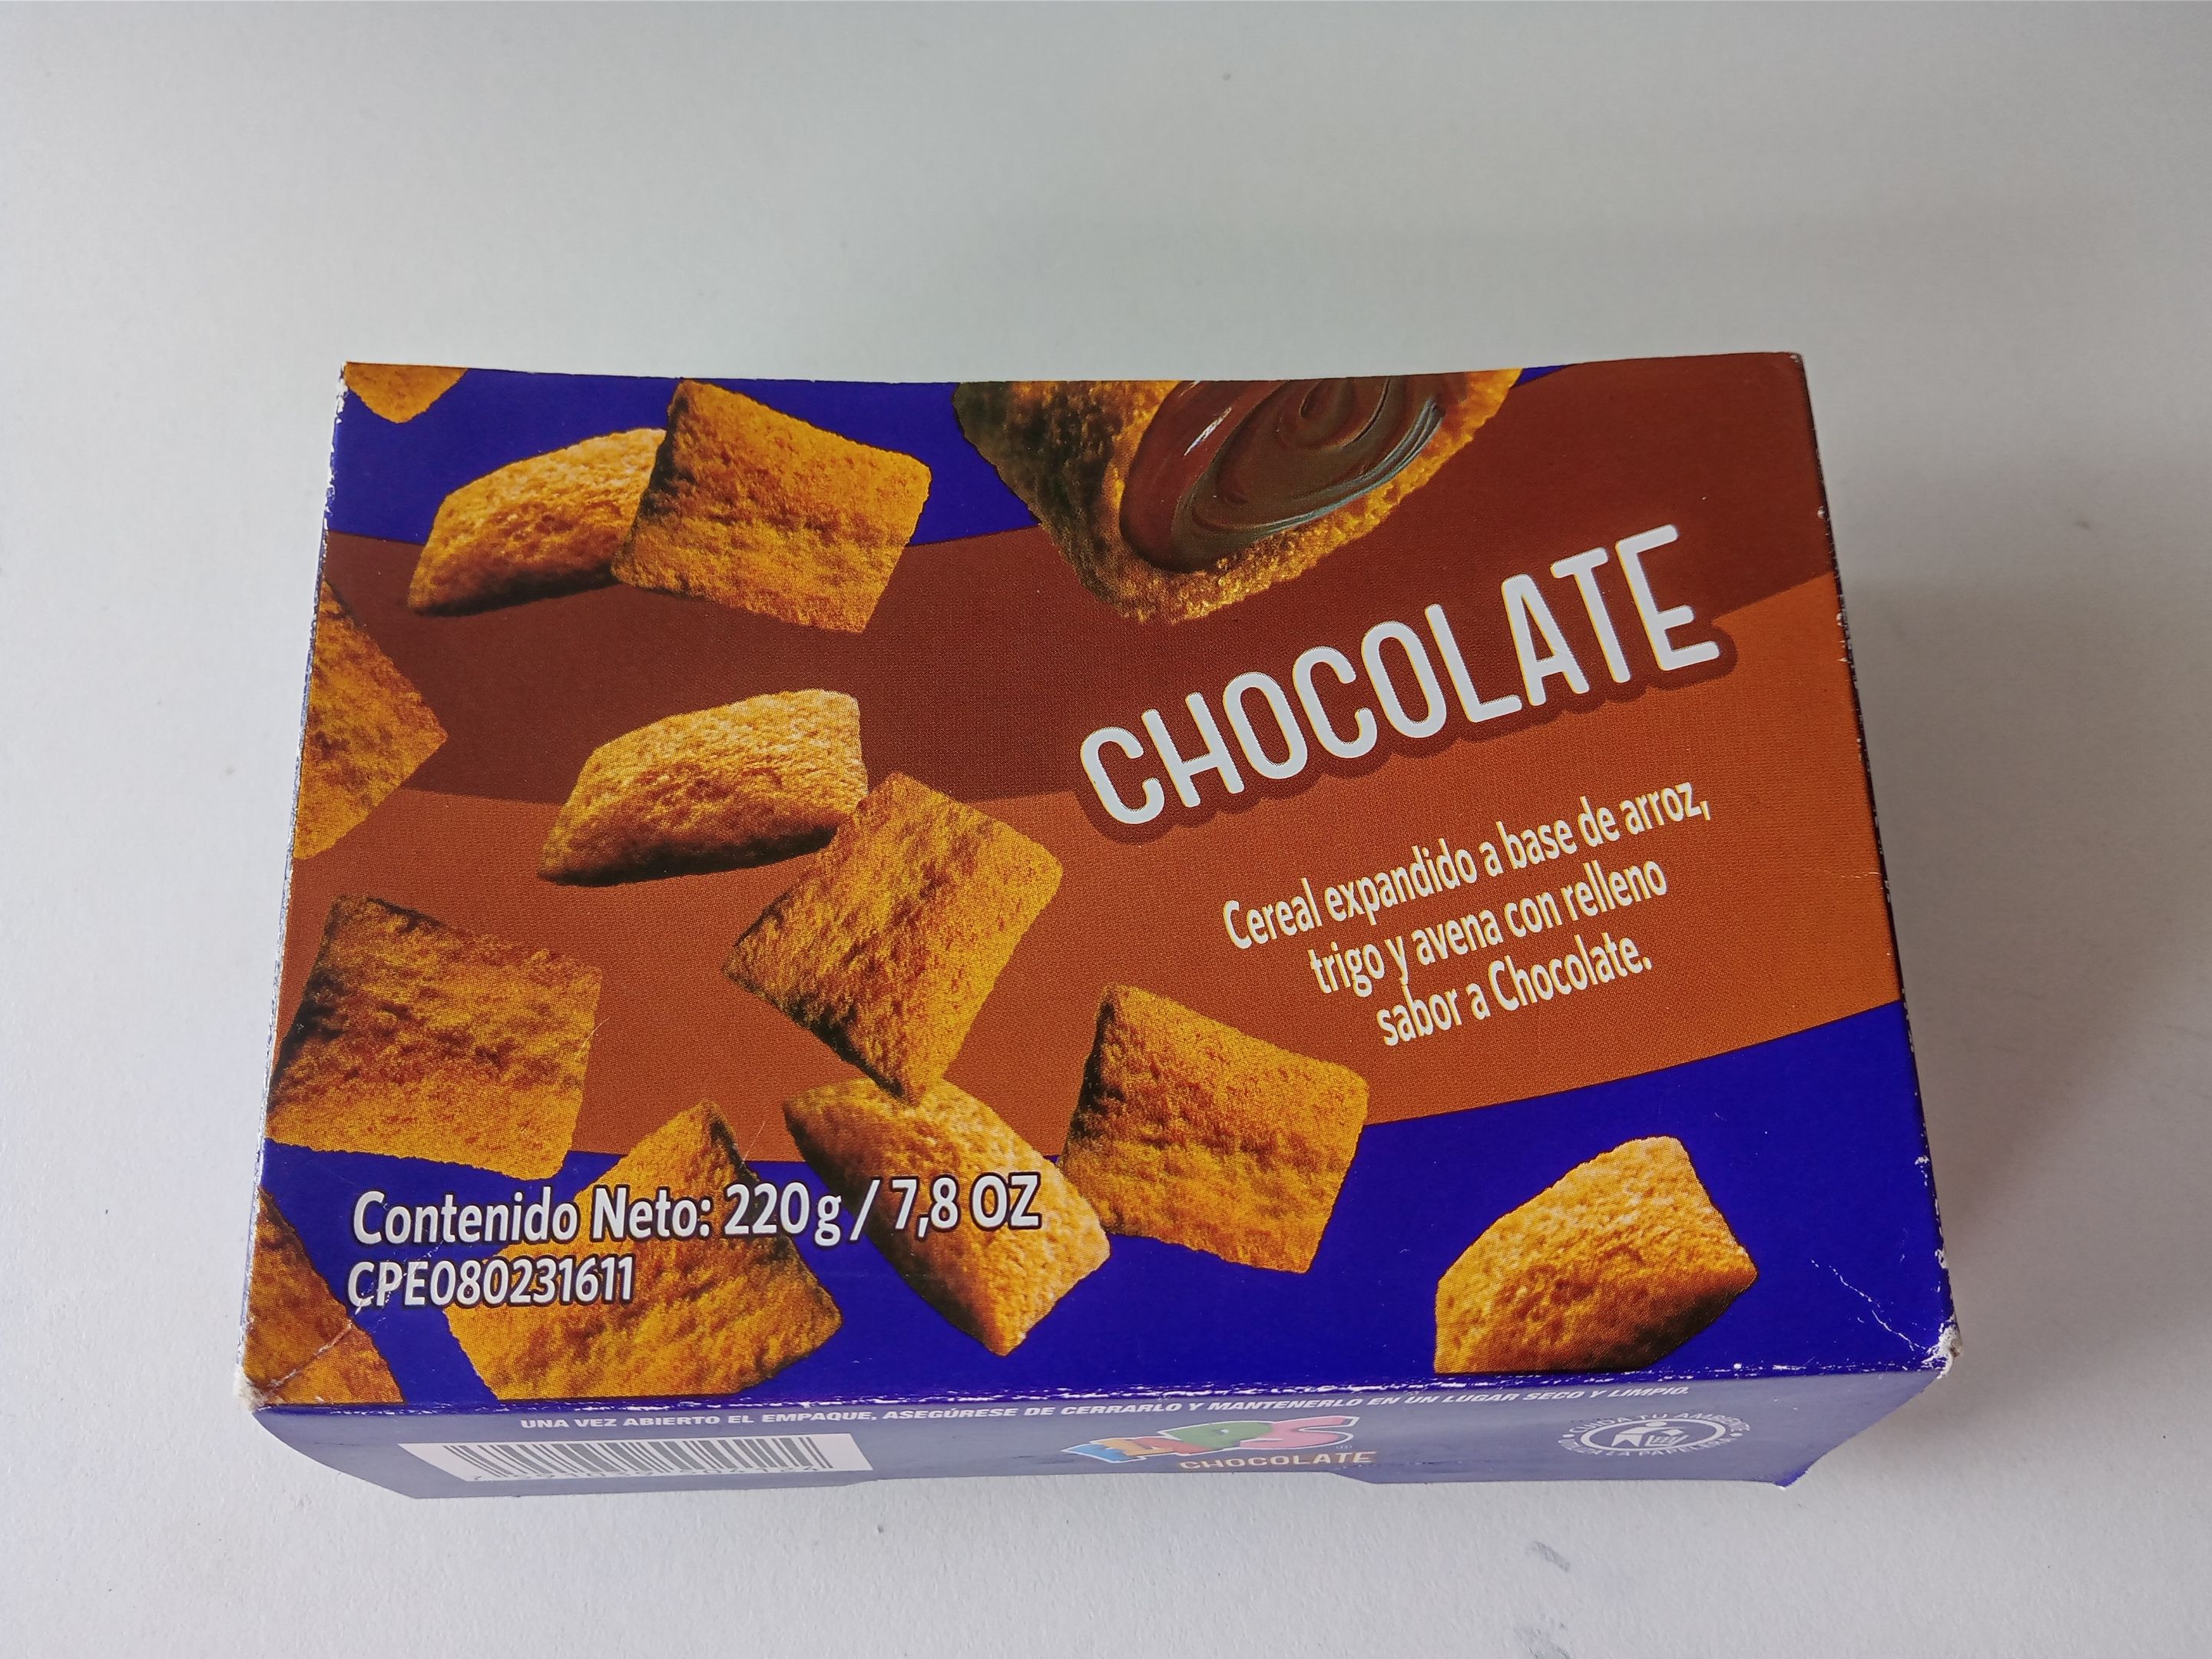
Ya era hora de volver a mis inicios, ¡jaja!, y compartir una linda caja de regalo mientras reciclamos una caja de Flips con una tapa y linda decoración.
**🔸Sin más que añadir, a continuación los dejo con el paso a paso:**
> ###### ✨¡Hello friends who love creativity! I hope you are all well.✨
> Good afternoon, friends! I hope you're having a great week. For my part, I'm happy to stop by to share a lovely idea with you. This time, I'm sharing the step-by-step instructions for making a cute gift box. My favorite creation is making gift boxes. In fact, if I remember correctly, the first time I shared one of my creations with you was a gift box with a bow and some hearts, because my reason for creating was always to give a thoughtful touch; I almost never made details or decorations.
It was time to go back to my roots, haha!, and share a cute gift box while we recycled a Flips box with a lid and cute decorations.
> **🔸Without more to add, then I leave you with the step by step:**
---
https://img.leopedia.io/DQmVgFxqNMQpEZr5ogT9X5r7wKp3yqG52nxoWaeW7aMVqhL/portada%20defi.jpg
---


|||
|-|-|


|||
|-|-|


|||
|-|-|


|||
|-|-|


|||
|-|-|


|||
|-|-|

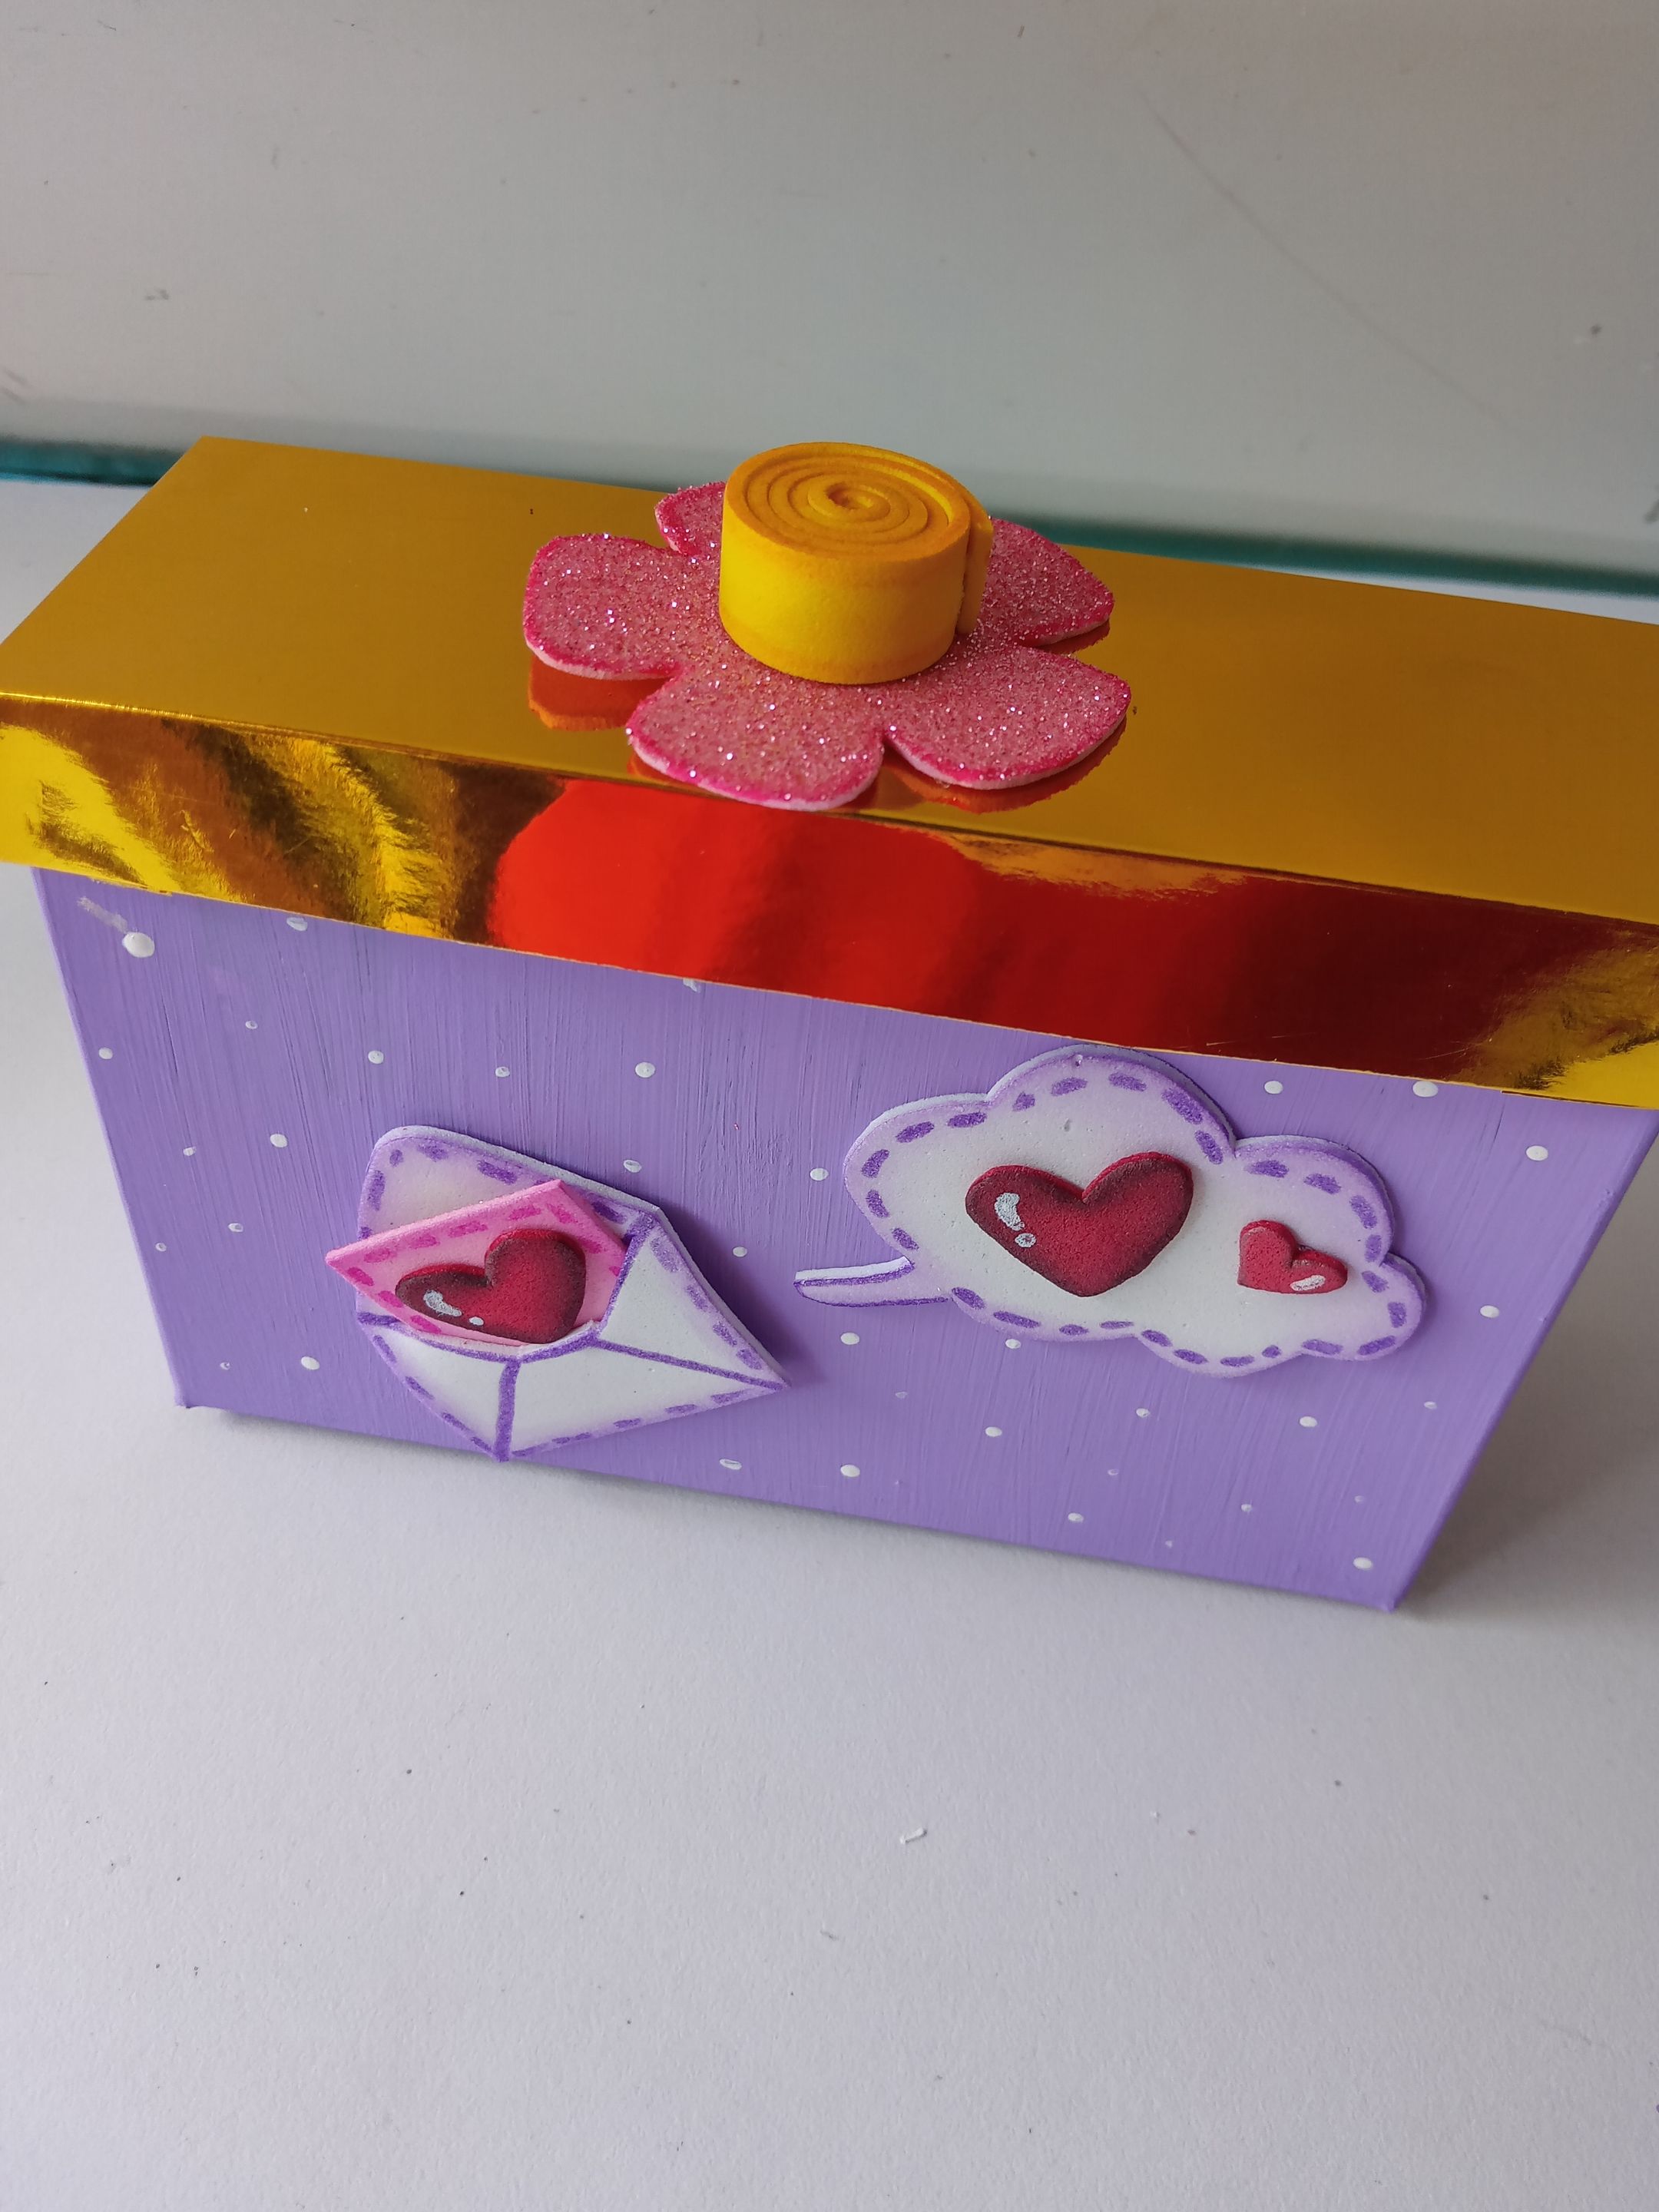
✨Así es como pueden elaborar una linda caja de regalo ustedes mismos. Aparte, es perfecto para personalizarla a gusto, ya sea con una decoración específica o con algún personaje que le guste a la persona a quien se lo van a regalar. Espero que les haya gustado el paso a paso y se animen a elaborarlo.
❤️Hasta la próxima publicación.
> ✨This is how you can make a cute gift box yourself. It's also perfect for personalizing it to your liking, either with a specific decoration or a character that the person you're giving it to will like. I hope you enjoyed the step-by-step instructions and are encouraged to try it out.
> ❤️Until the next post.


|||
|-|-|
---
https://img.inleo.io/DQmUT3hN2sUD6hkDacVDeWh6cxJbEXreWY9qypQ1qJJTLGT/gracias%20por%20leer.png
---
**!TE DESEO UN GRAN DÏA¡**
Todas las fotografías son de mi propiedad.
Separador y Fotos editadas en [Canva](https://www.canva.com/)
**!I WISH YOU A GOOD DAY**
All photographs are my property.
Photos edited in [Canva](https://www.canva.com/)
**♥️ESPERO QUE TE GUSTE,
¡Empecemos!**
**♥️I HOPE YOU LIKE IT,
Let's start!**
---
# ✂️ MATERIALES | ✂️ MATERIALS
- Caja de cartón.
- Cartulina metalizada dorada.
- Foami escarchado rosa.
- Foami blanco.
- Foami rojo.
- Foami rosa.
- Foami amarillo.
- Pinturas y marcadores.
- Pegamento.
- Tijeras.
- Regla.
- Hoja blanca.
- Lápiz.
- Cardboard box.
- Gold metallic cardstock.
- Pink frosted foam.
- White foam.
- Red foam.
- Pink foam.
- Yellow foam.
- Paints and markers.
- Glue.
- Scissors.
- Ruler.
- White paper.
- Pencil.
# 🌟 PROCEDIMIENTO | 🌟 PROCESS
###### ✨PASO 1:
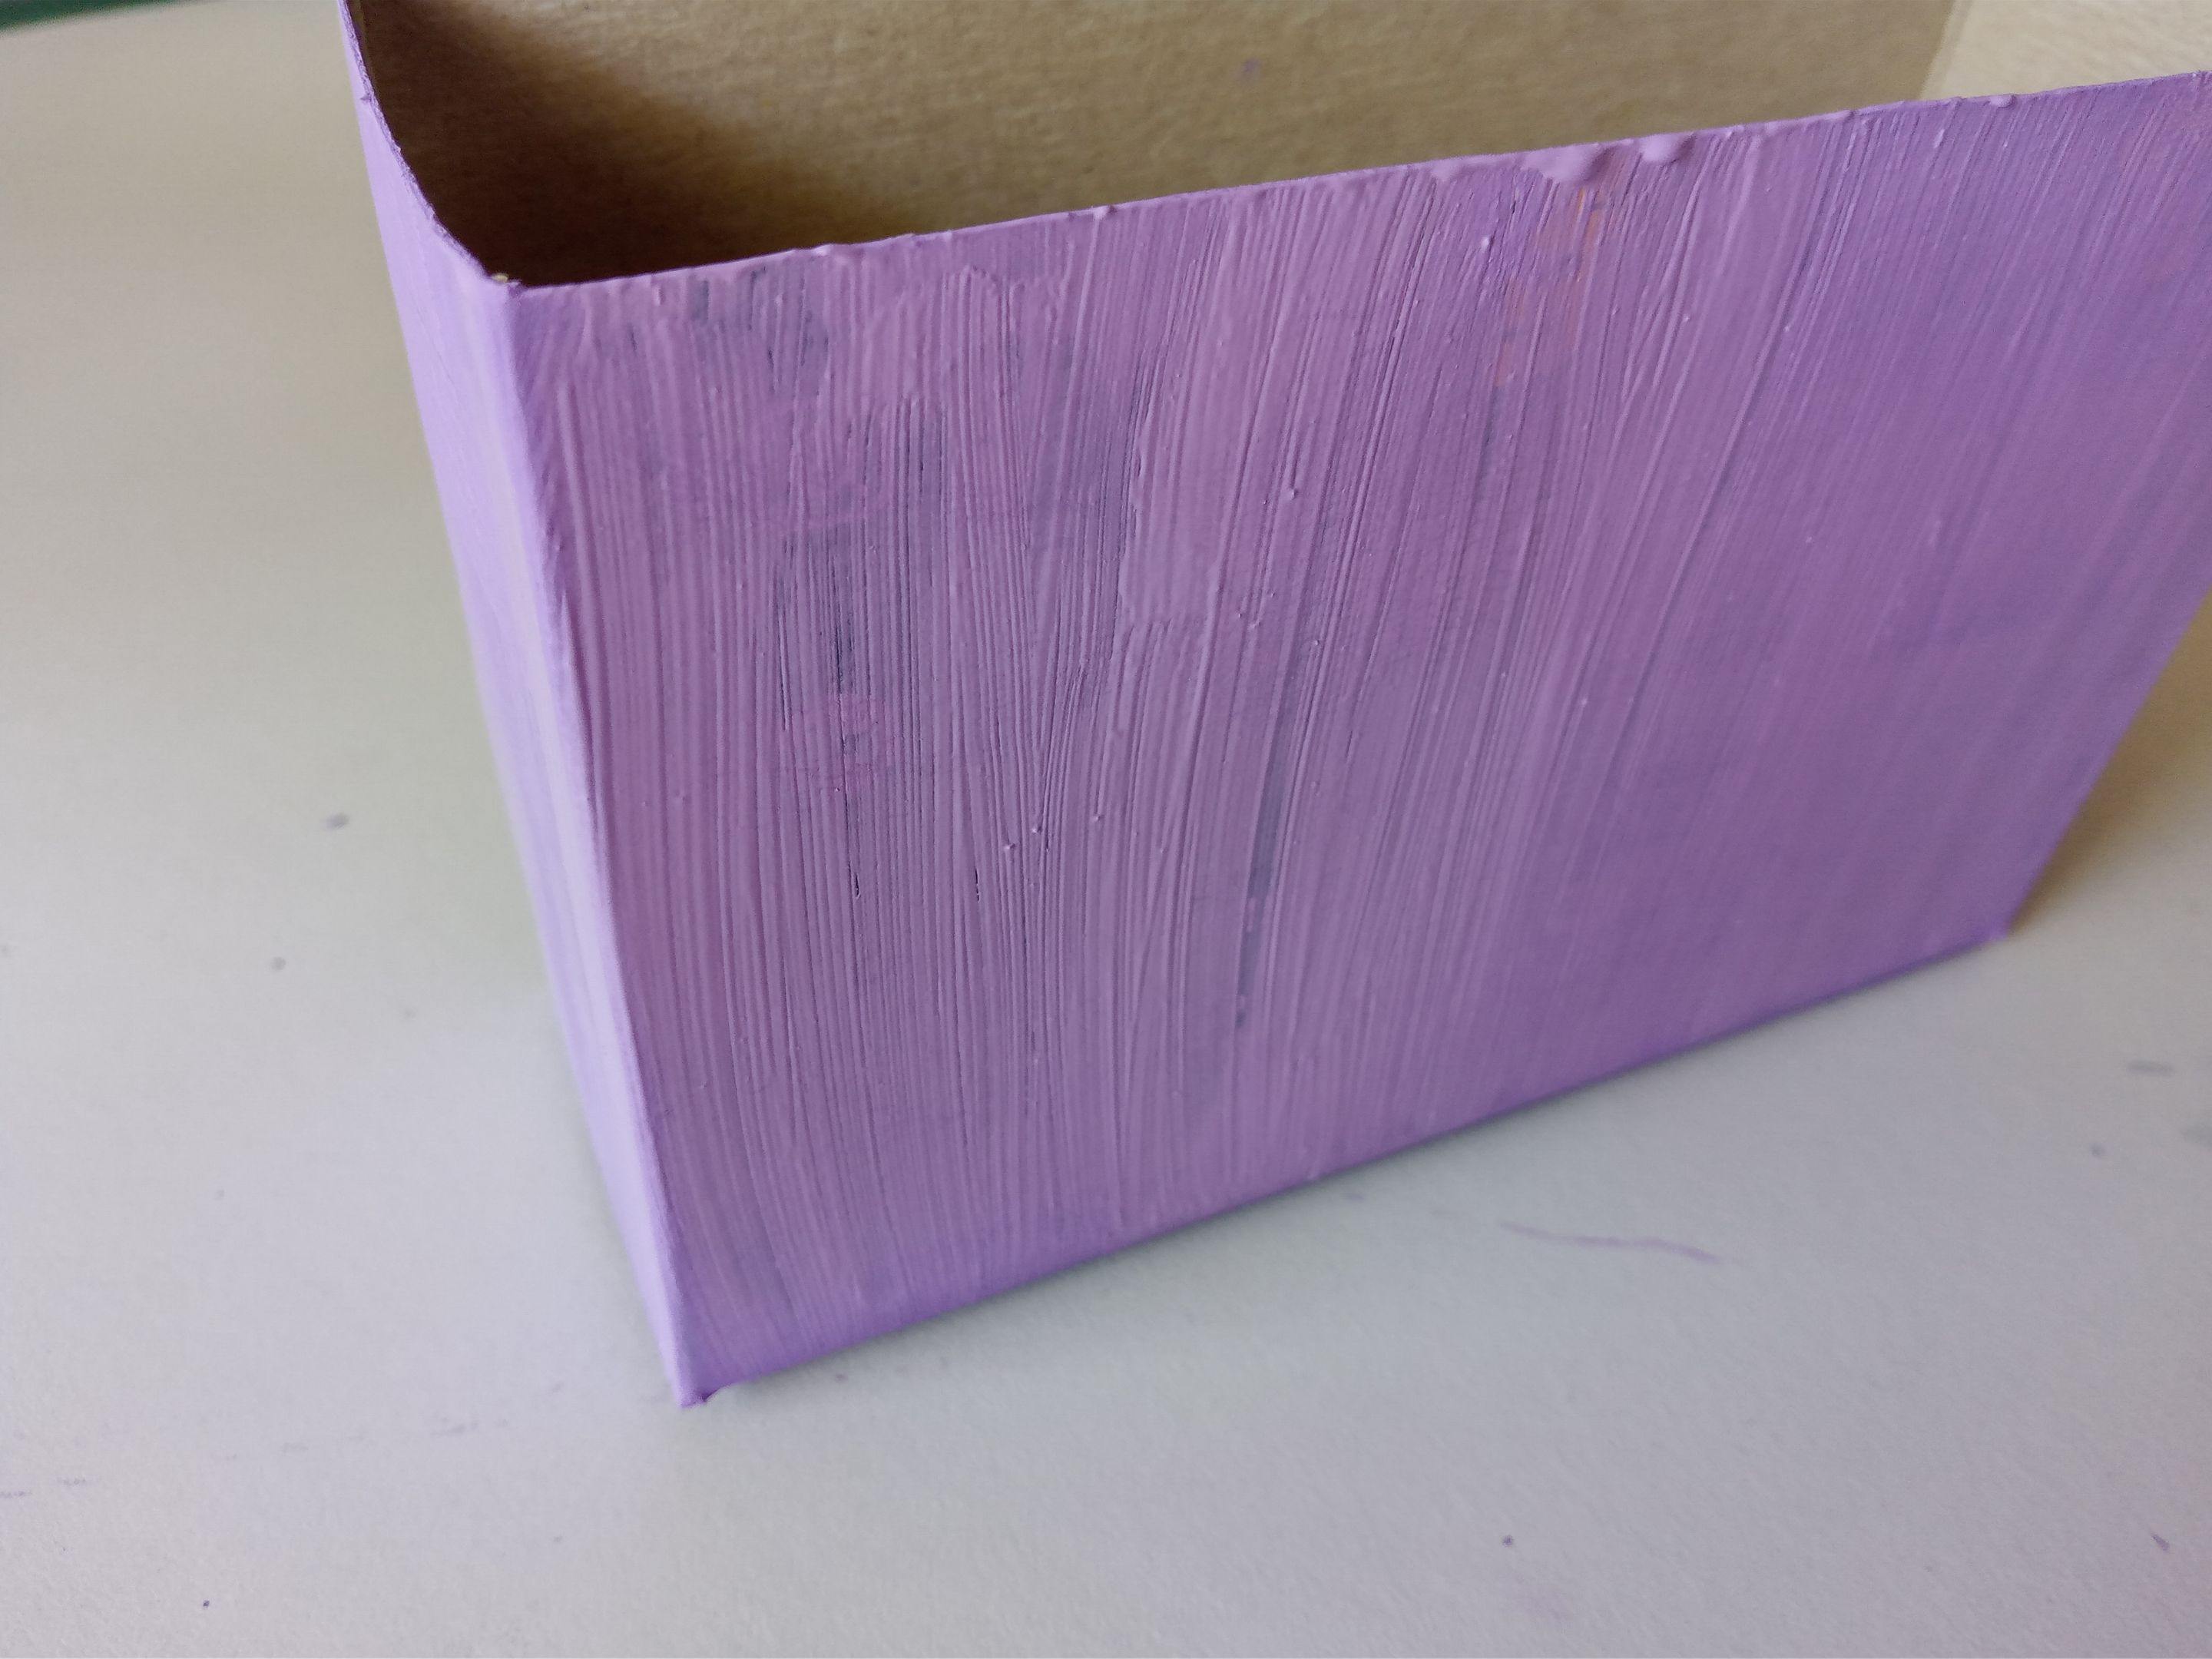
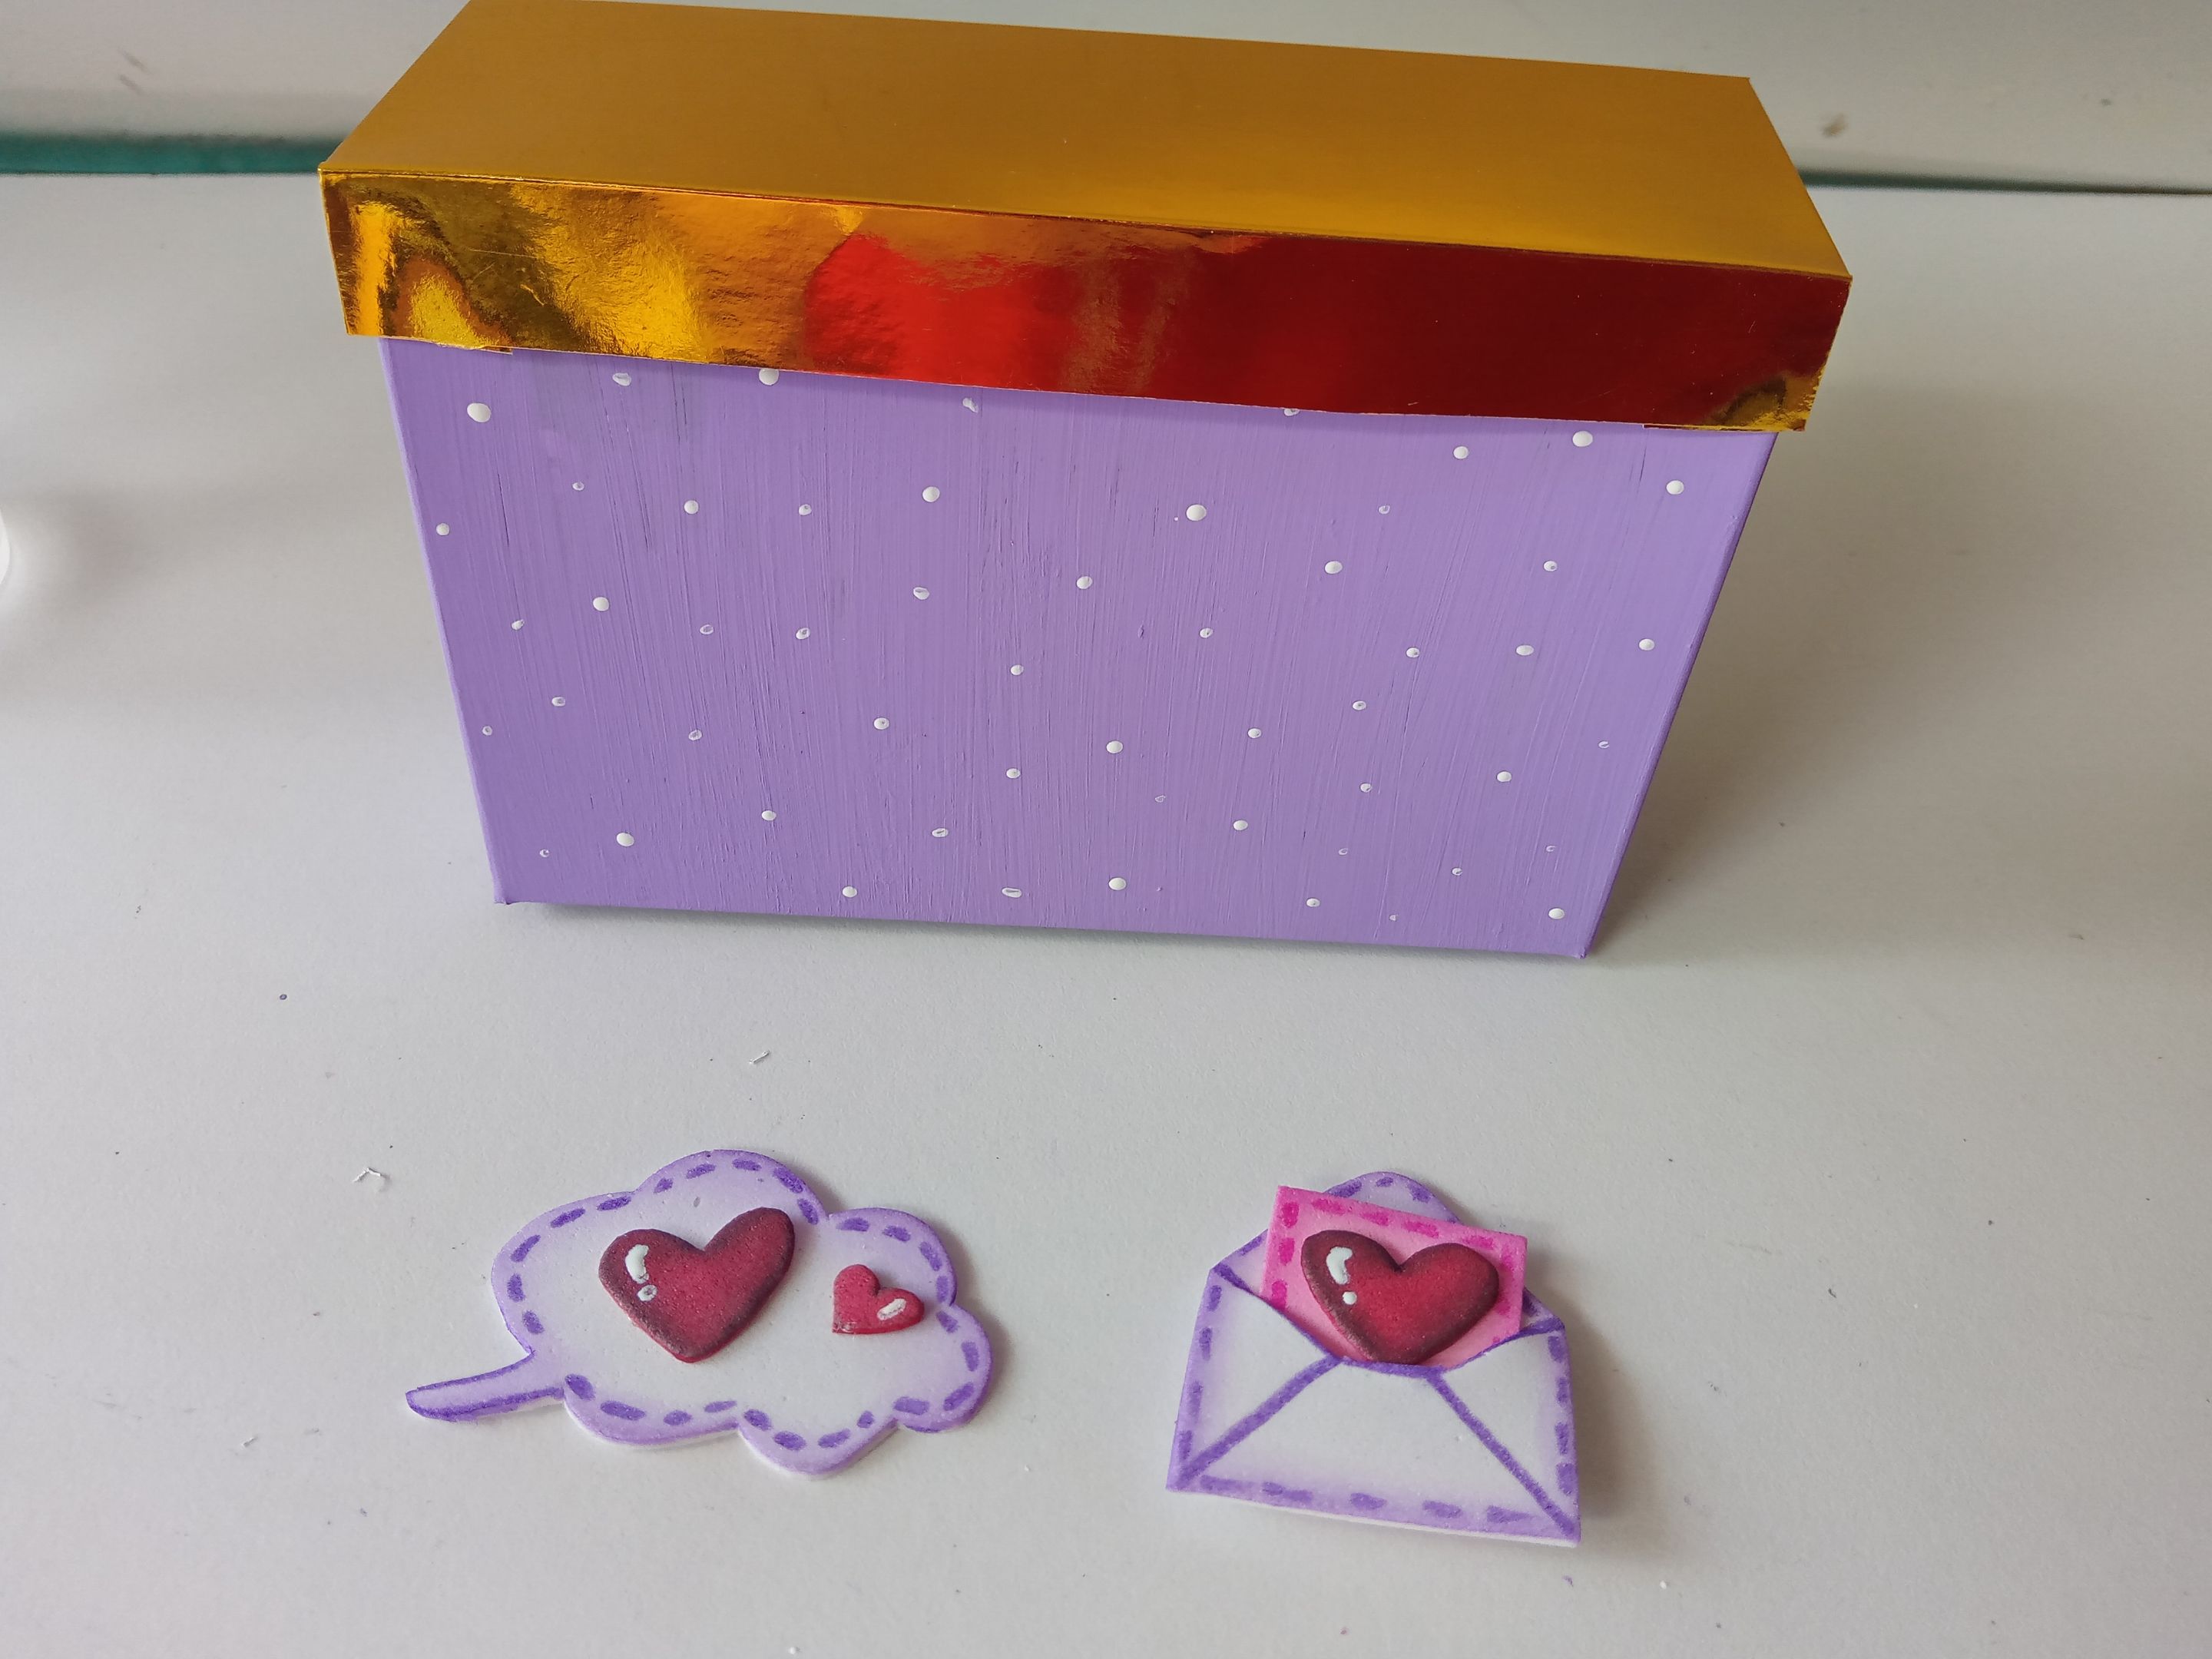
Lo primero que hice fue tomar la caja de cartón, medir y recortar del largo que la quería. En este caso, las medidas de mi caja quedaron en 14 cm x 9.5 cm. Seguidamente, tomé pintura color lila y comencé a pintar la caja con una capa delgada de pintura y luego pasé otra un poco más recargada para terminar de cubrir muy bien y dejé secar.
###### ✨STEP 1:
The first thing I did was take the cardboard box, measure it, and cut it to the length I wanted. In this case, my box measurements were 14 cm x 9.5 cm. Next, I took lilac paint and began painting the box with a thin layer of paint, then applied a slightly heavier layer to completely cover it. I let it dry.
###### ✨PASO 2:
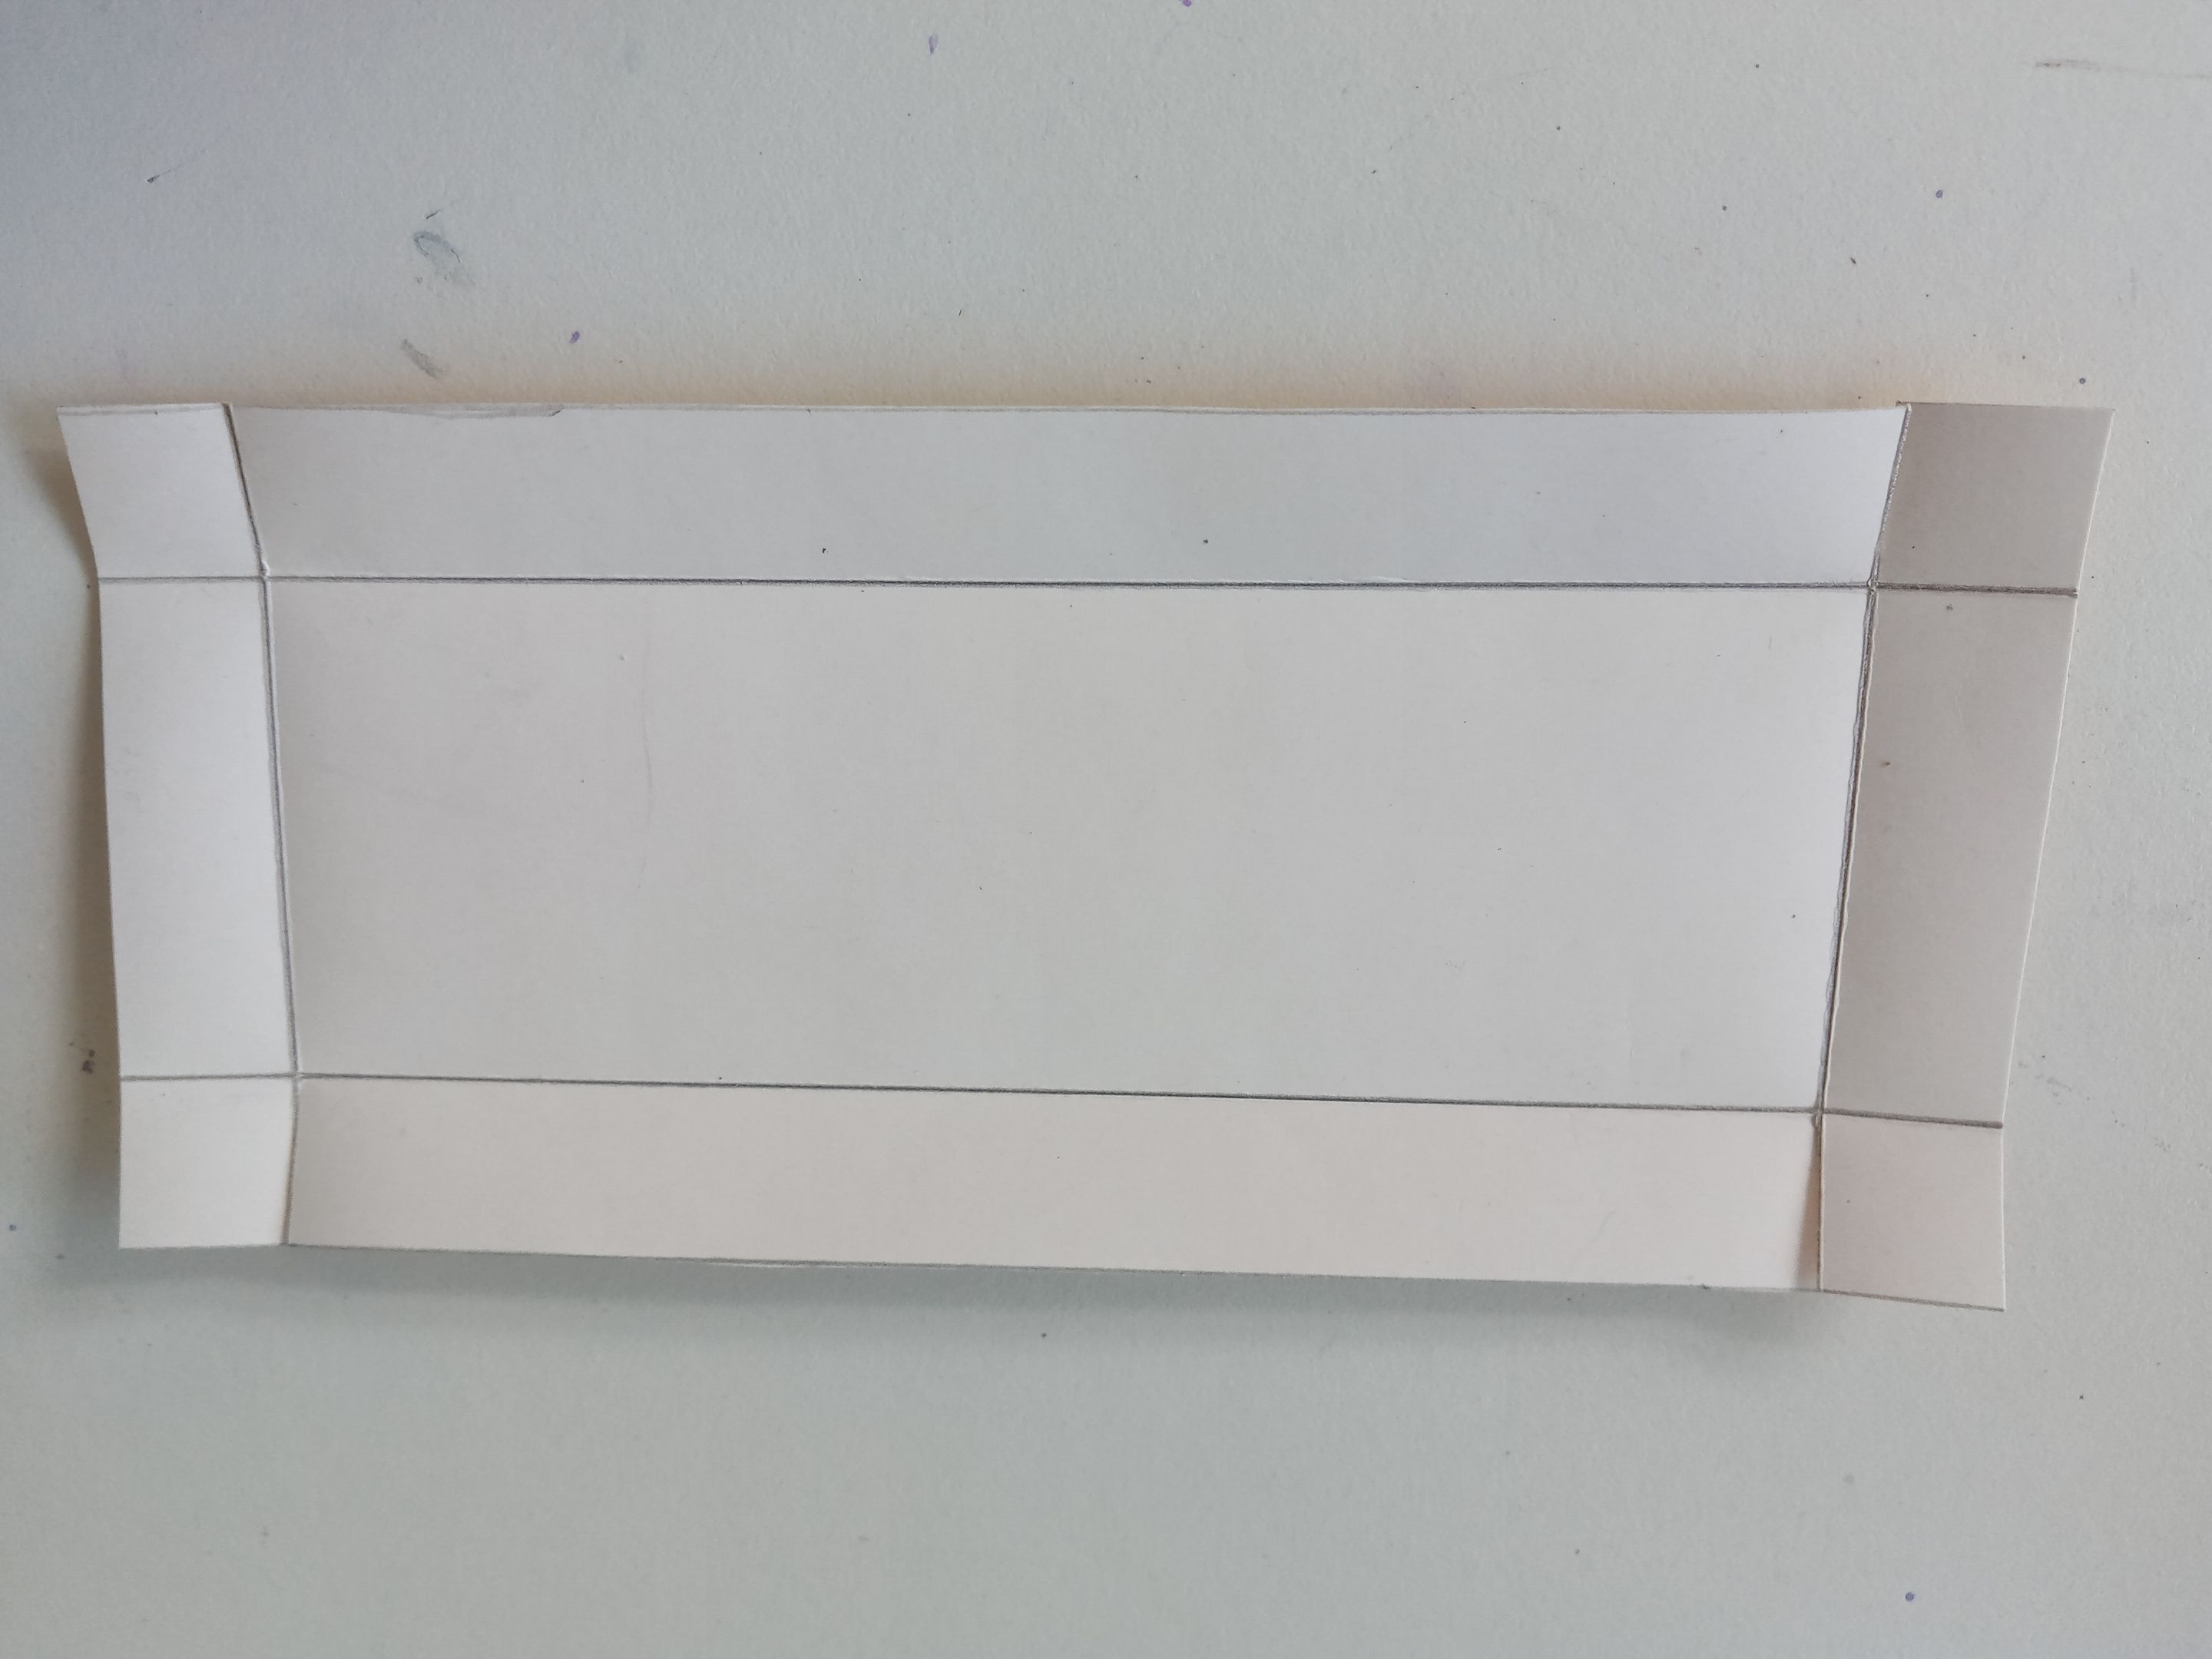
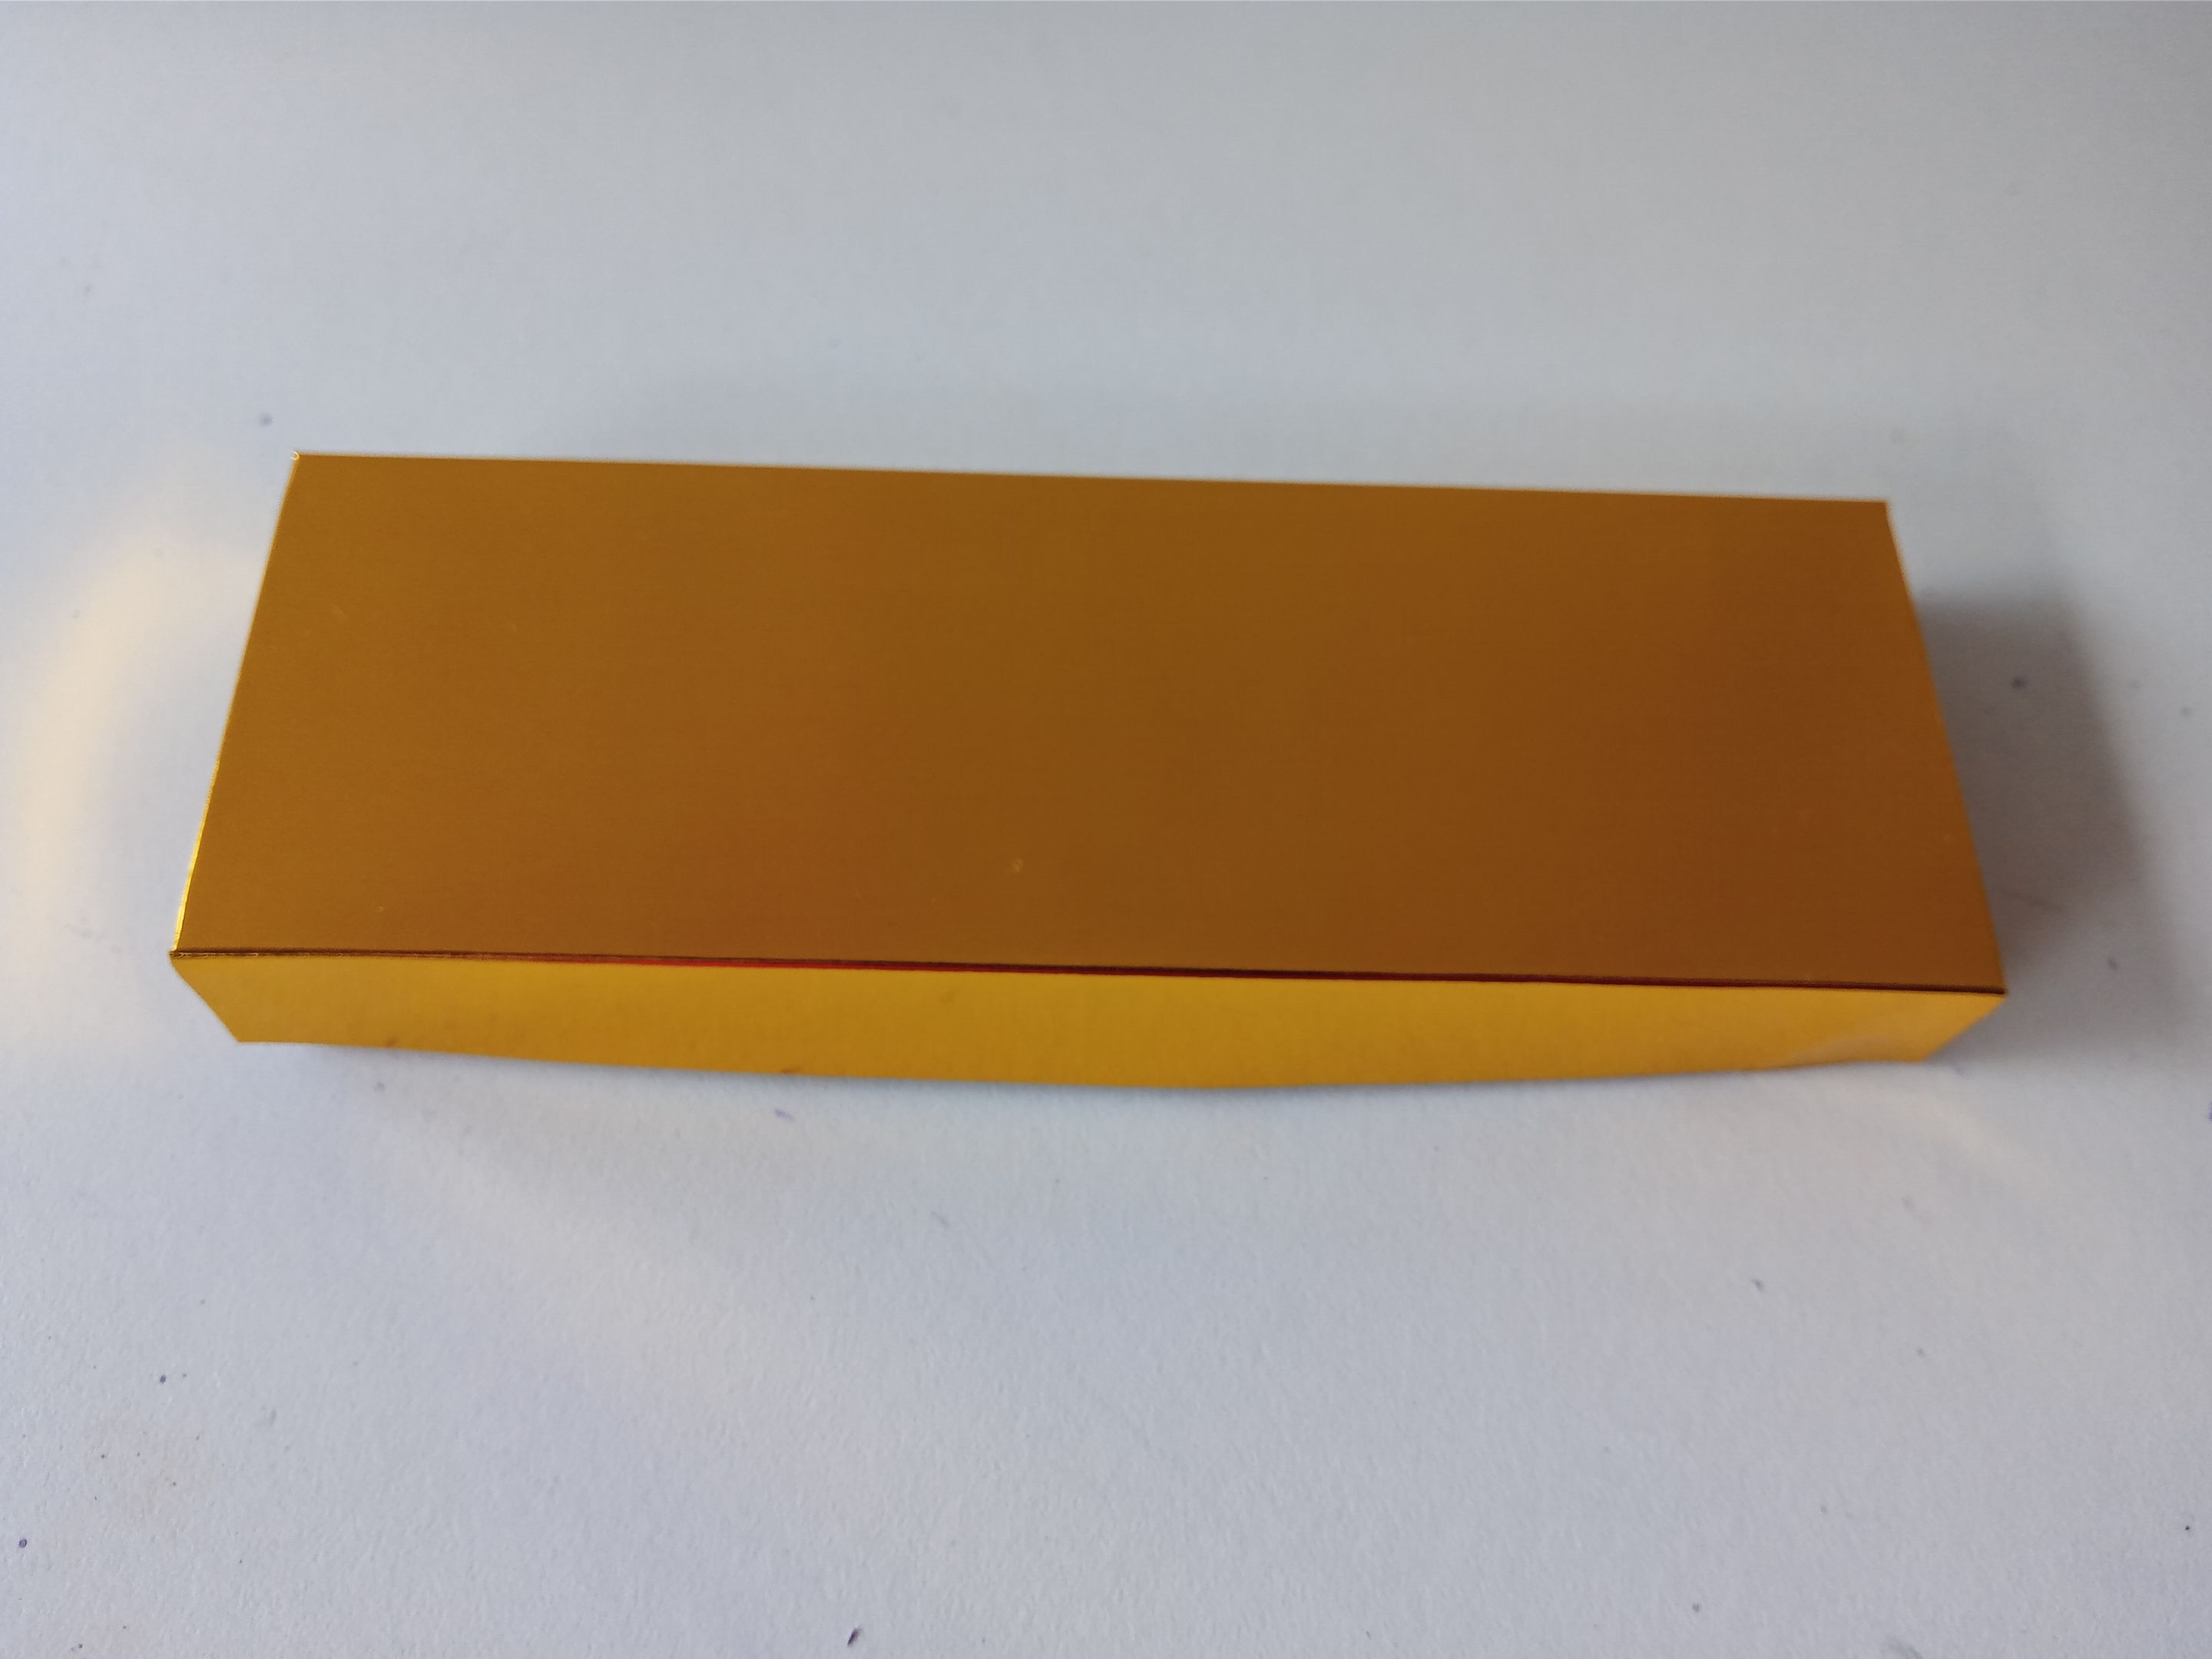
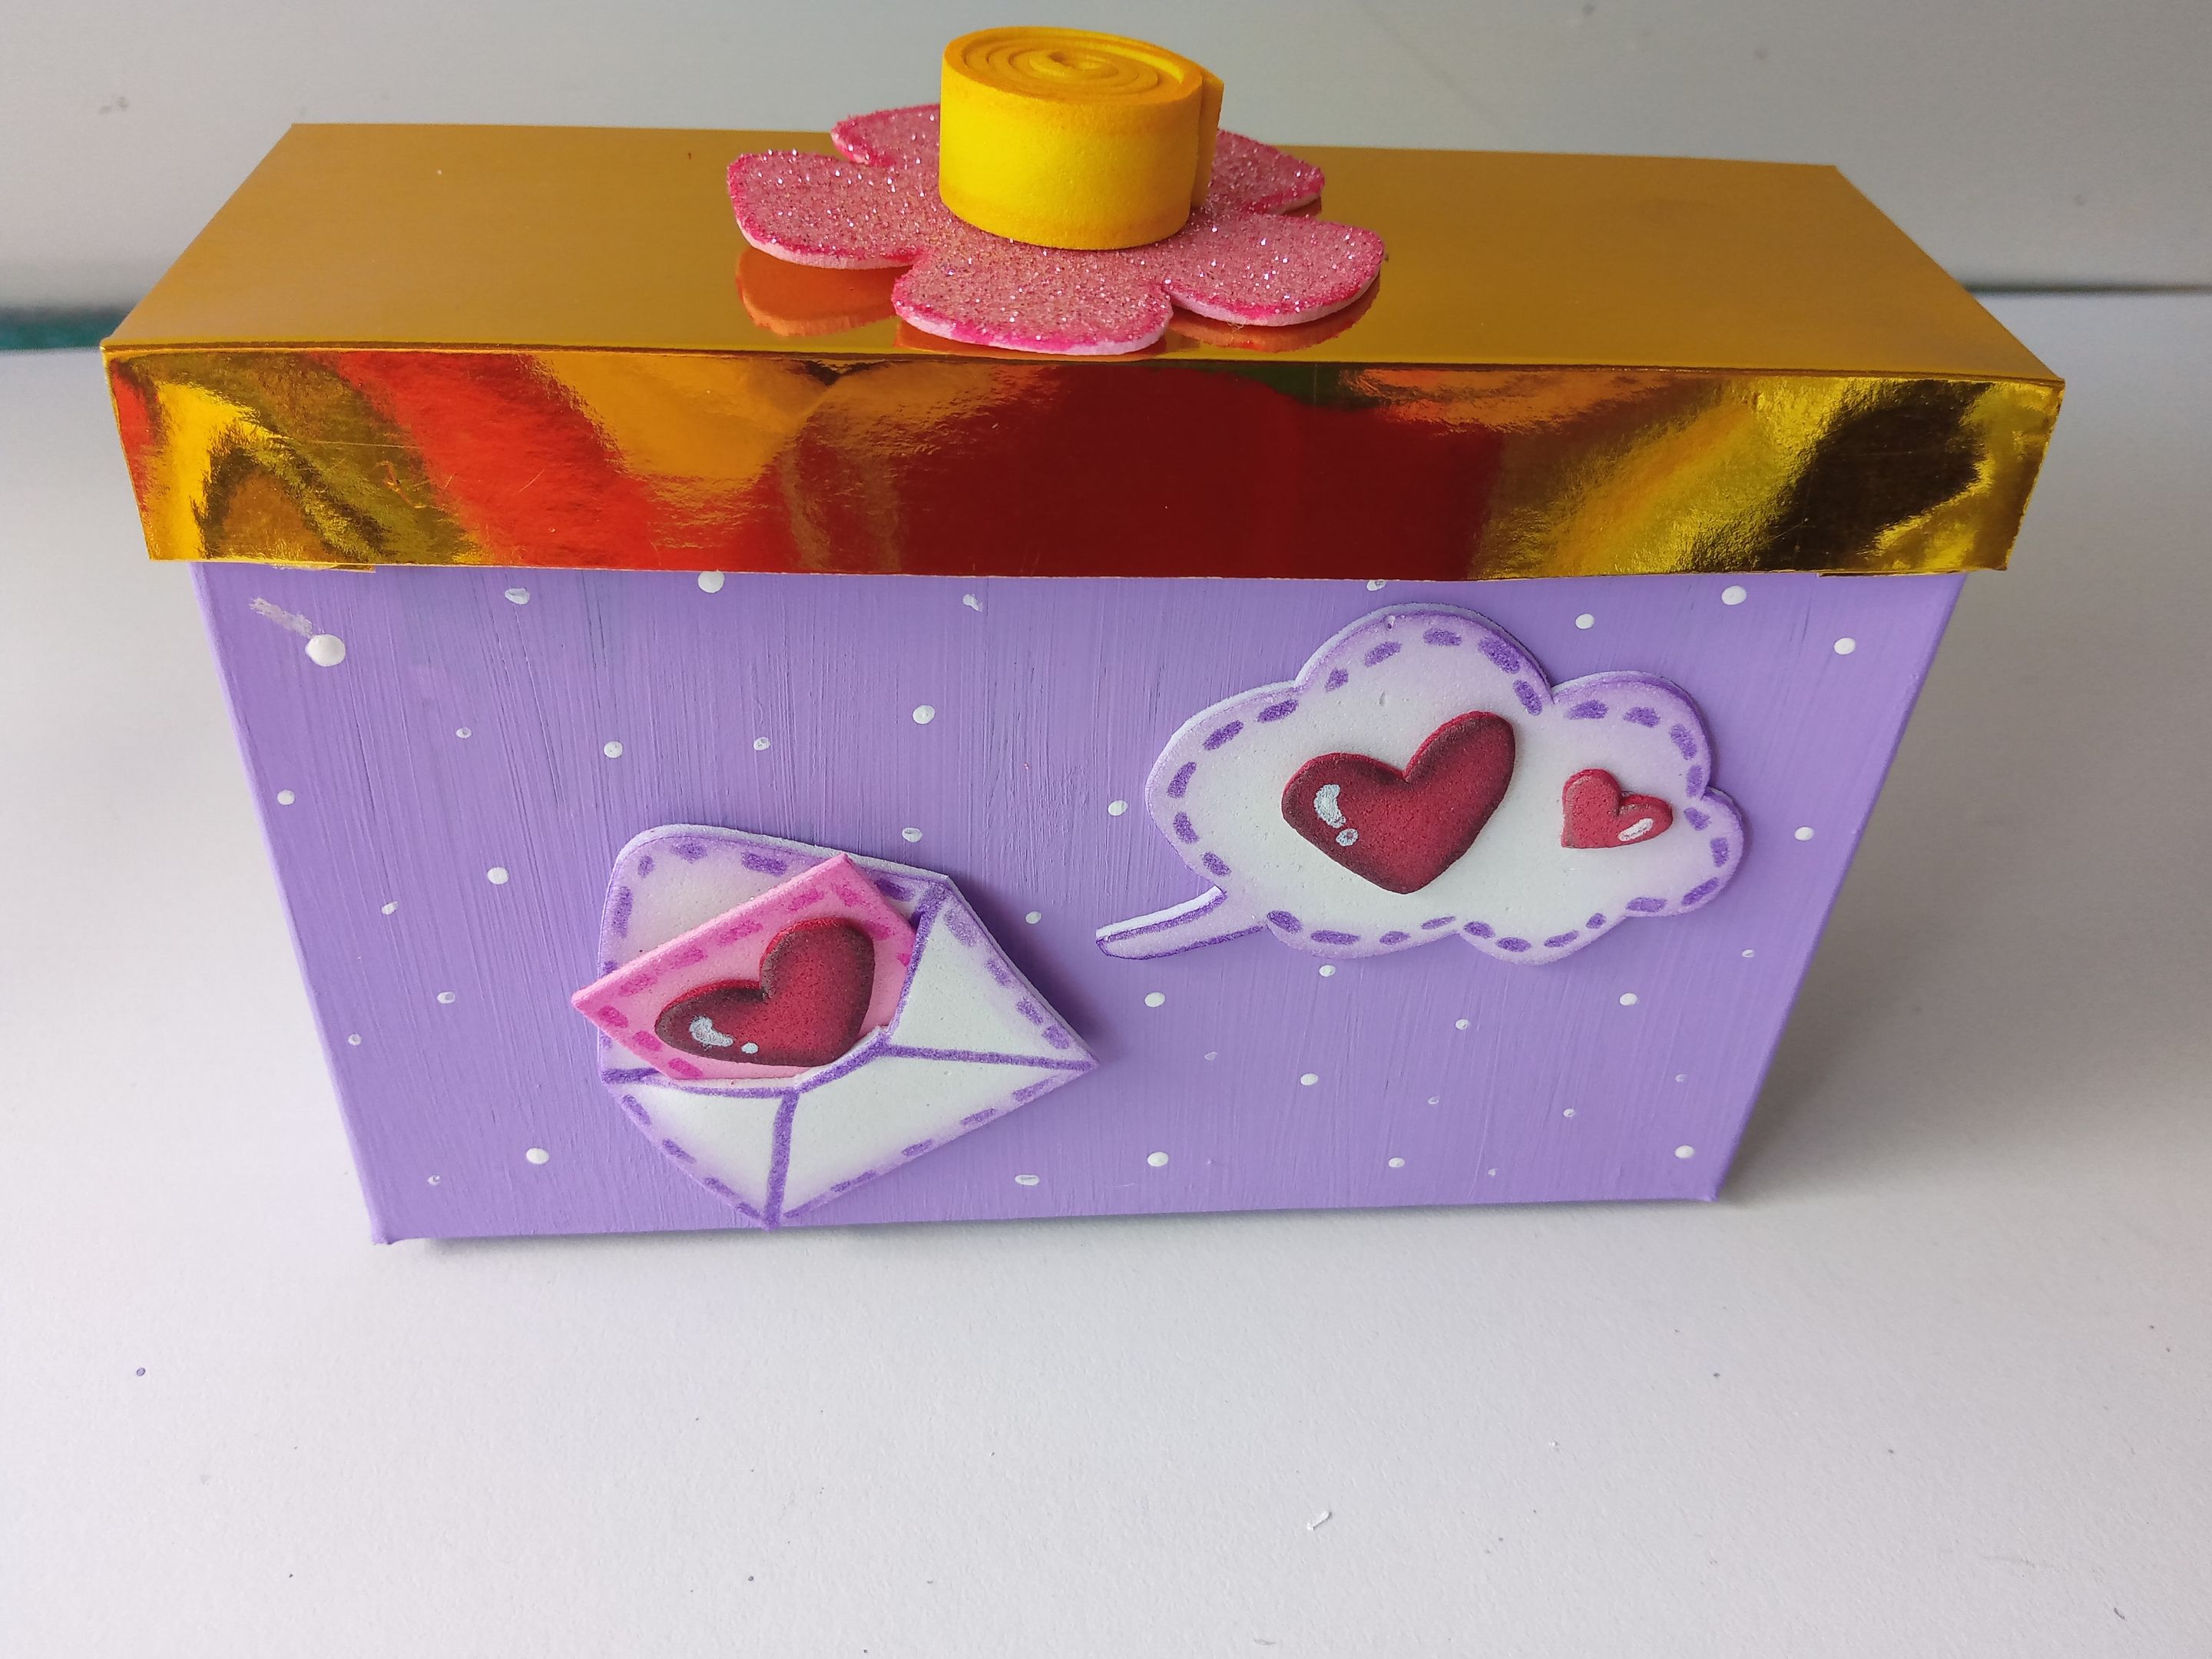
Mientras la caja se secaba, tomé la cartulina metalizada dorada y comencé a trazar las medidas para la tapa, que en este caso la parte central tuvo una medida de 14.5 cm x 4.8 cm, las paredes más pequeñas de 4.8 cm x 1.8 cm, las paredes más largas de 14.5 cm x 1.8 cm y los dobles de 1.8 cm. Al estar listo, remarqué muy bien las líneas para poder doblar las paredes y, finalmente, pegué los dobles para formar la tapa.
###### ✨STEP 2:
While the box was drying, I took the gold metallic cardstock and began tracing the measurements for the lid. In this case, the center measured 14.5 cm x 4.8 cm, the smaller sides 4.8 cm x 1.8 cm, the longer sides 14.5 cm x 1.8 cm, and the folds 1.8 cm. Once I was ready, I carefully outlined the lines so I could fold the sides and, finally, glued the folds together to form the lid.
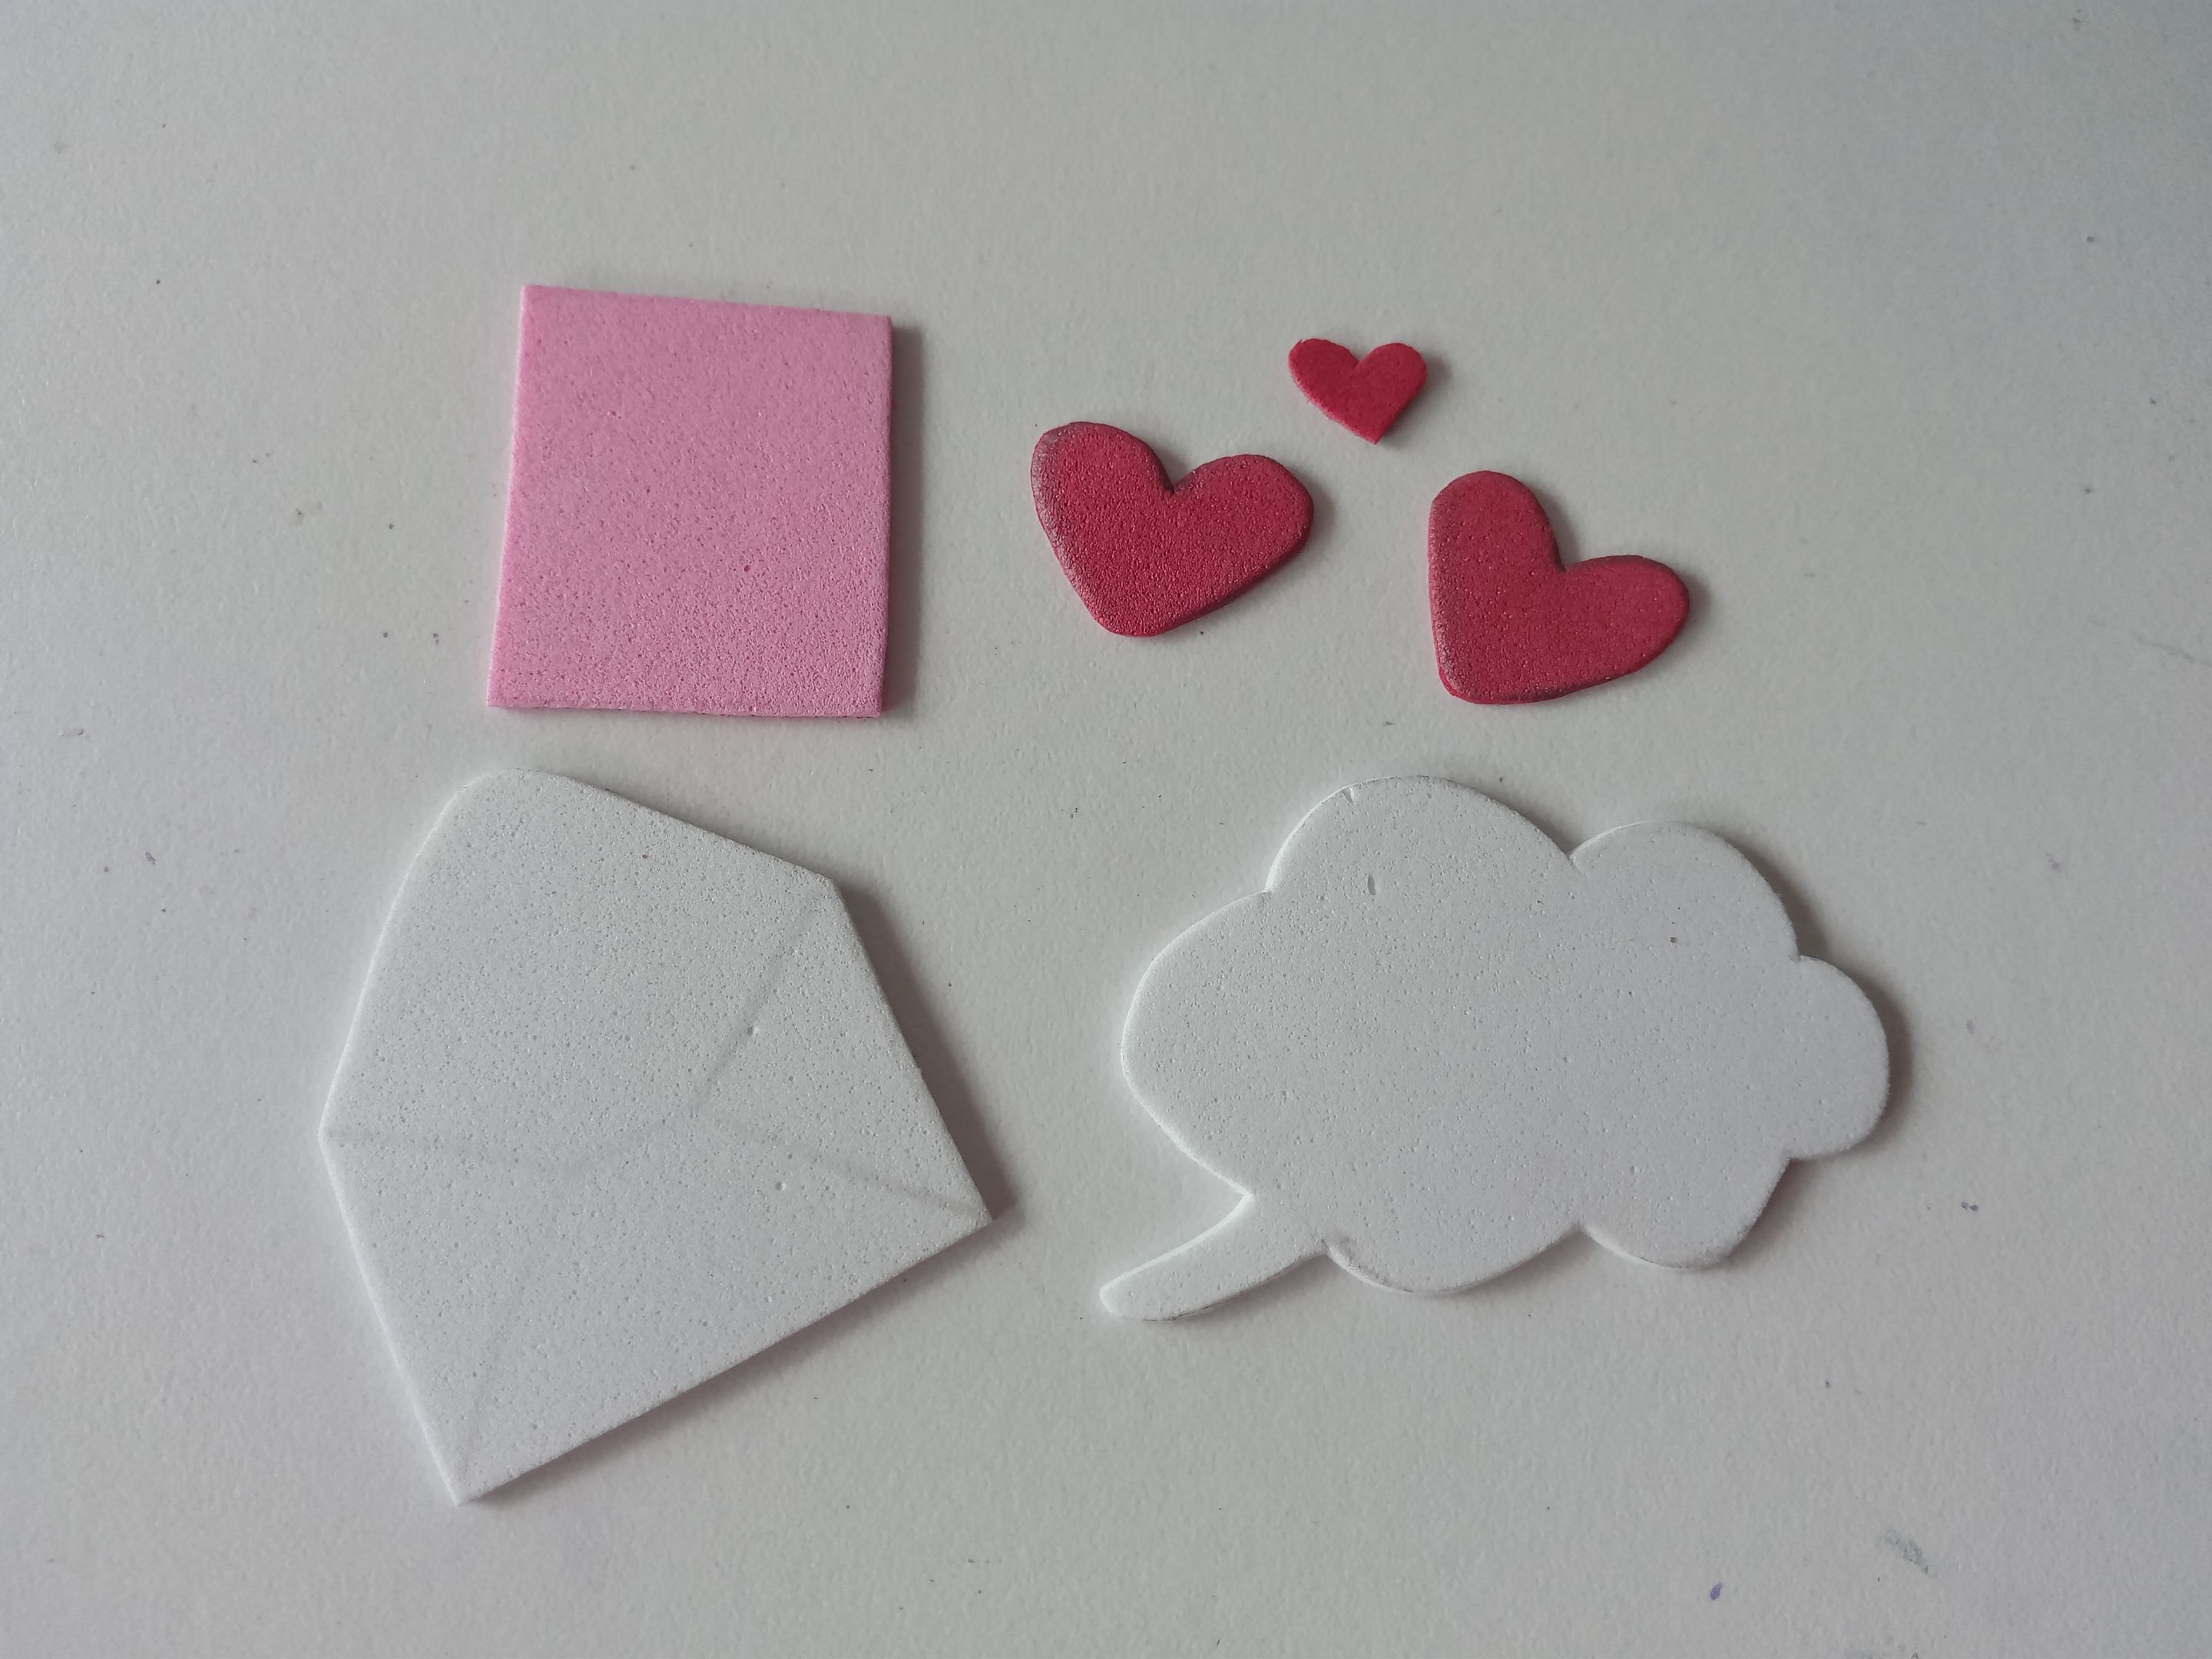
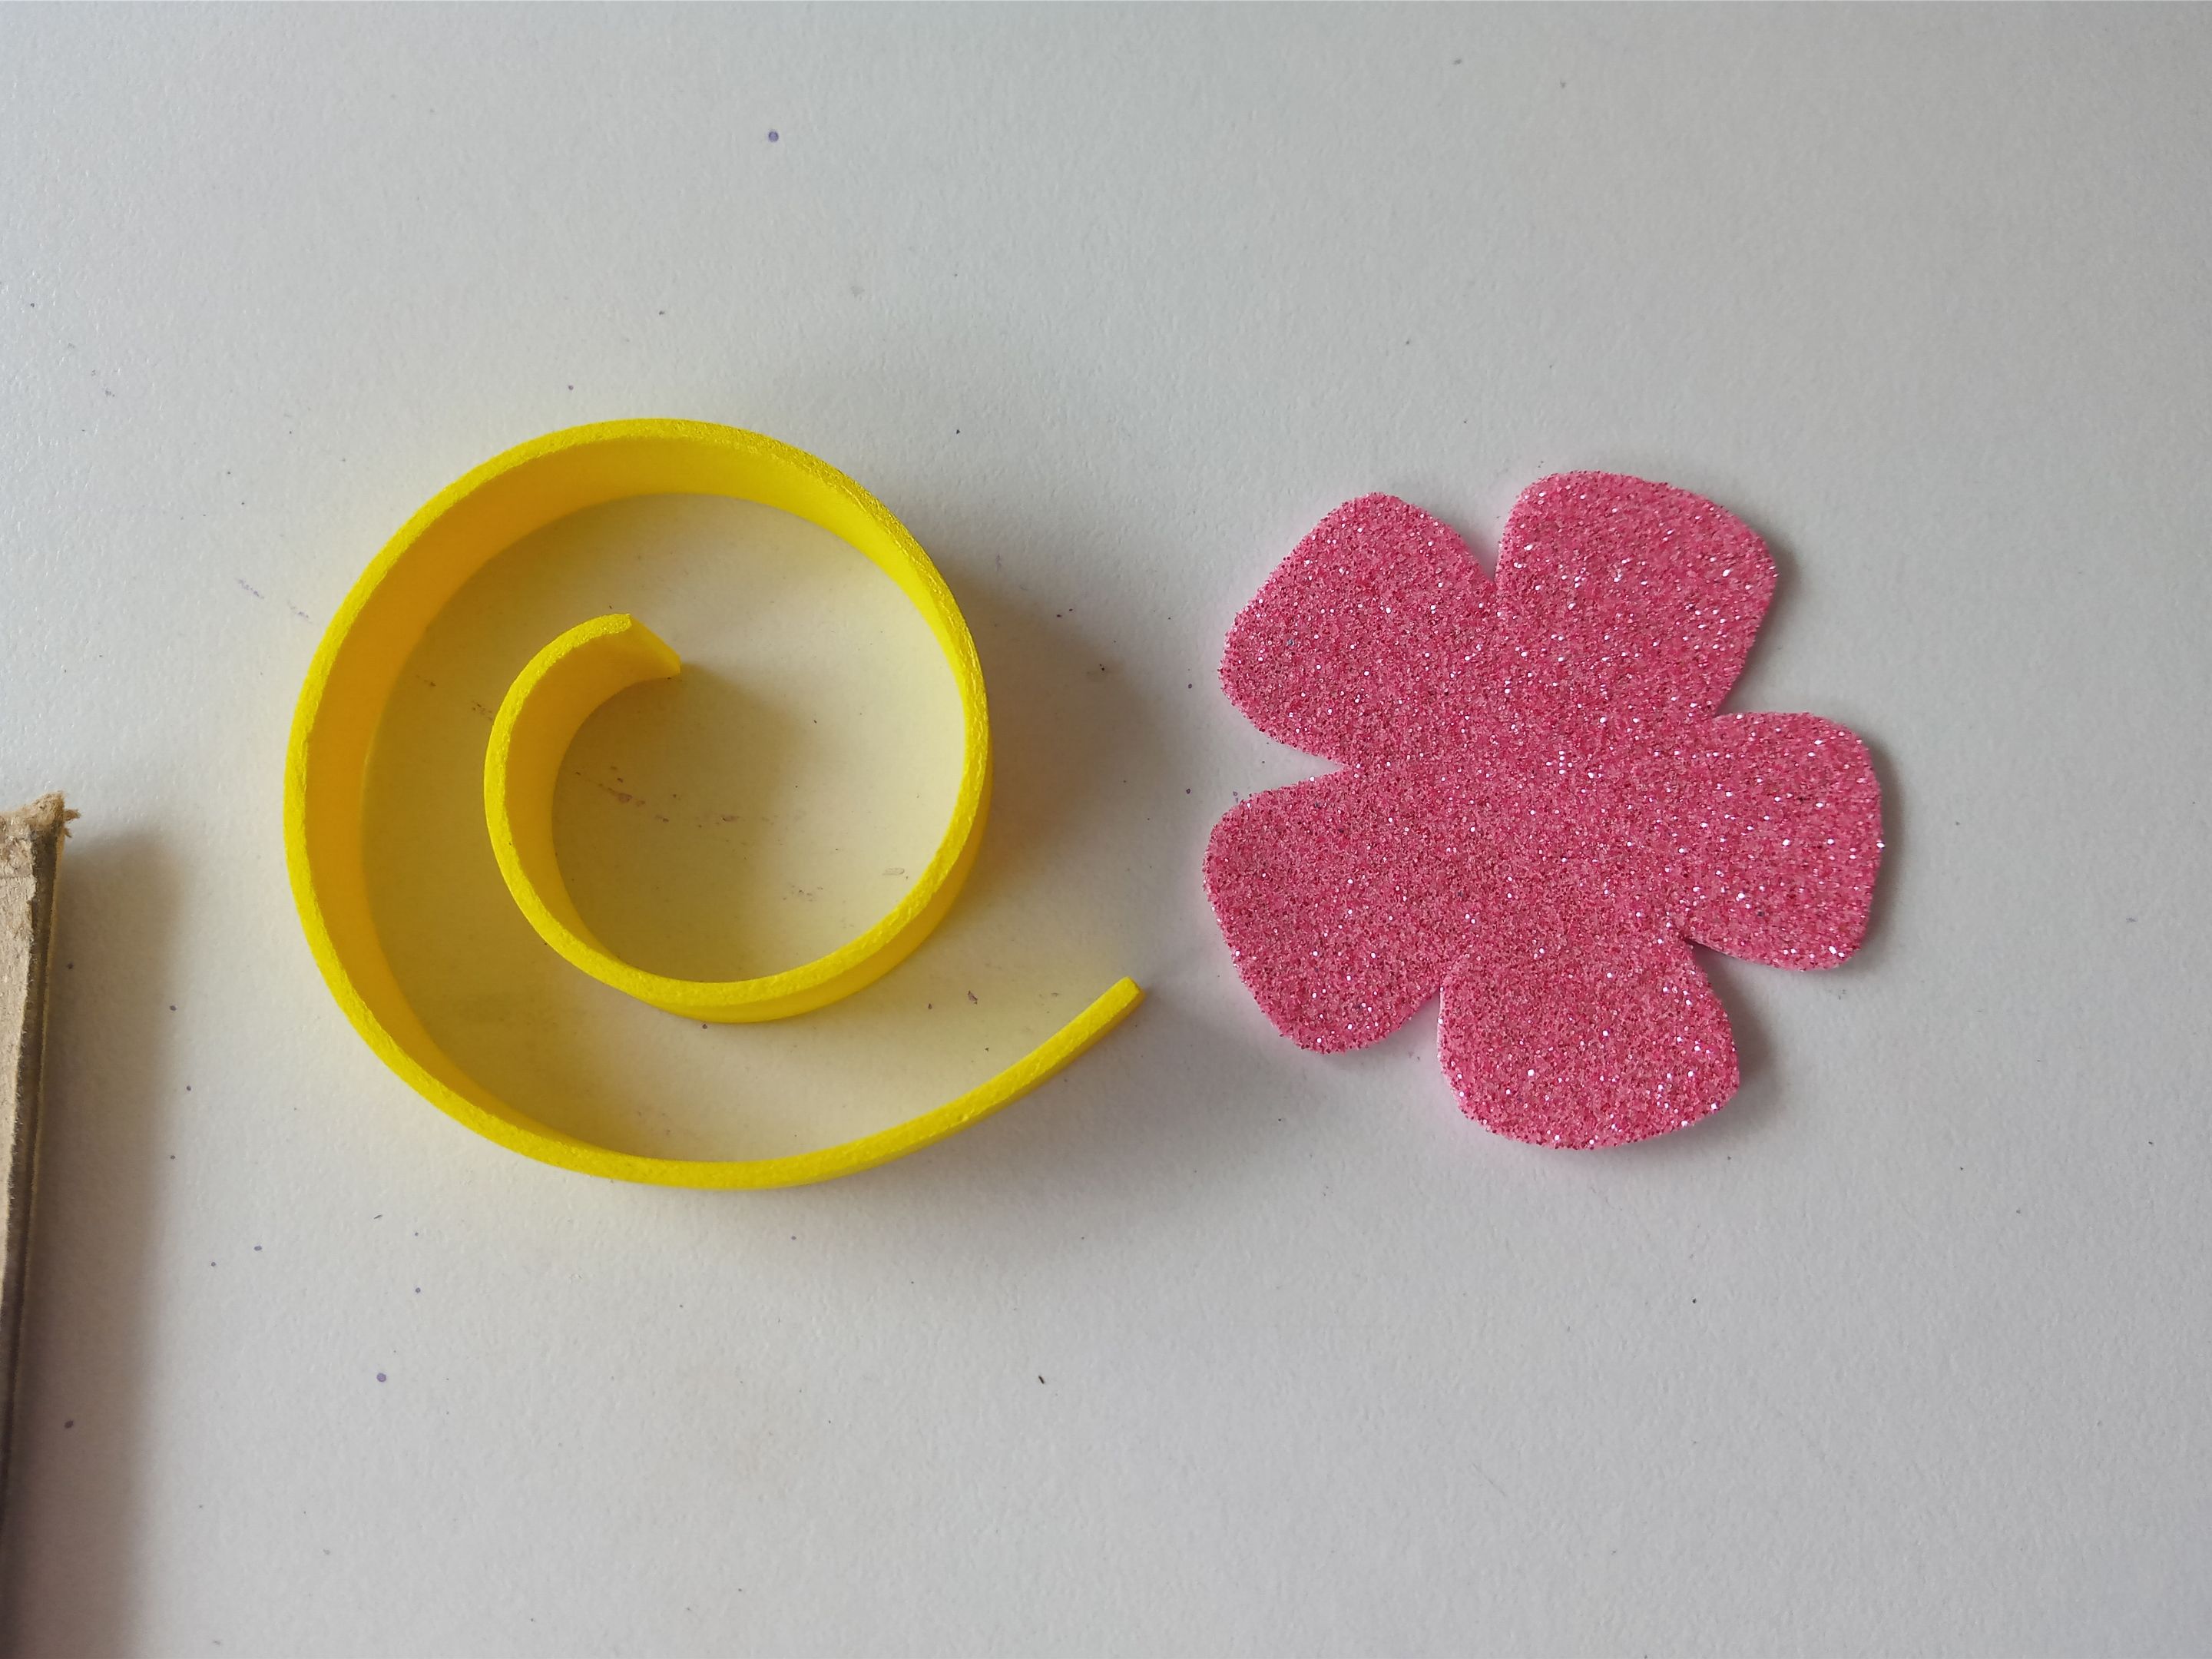
###### ✨PASO 3:
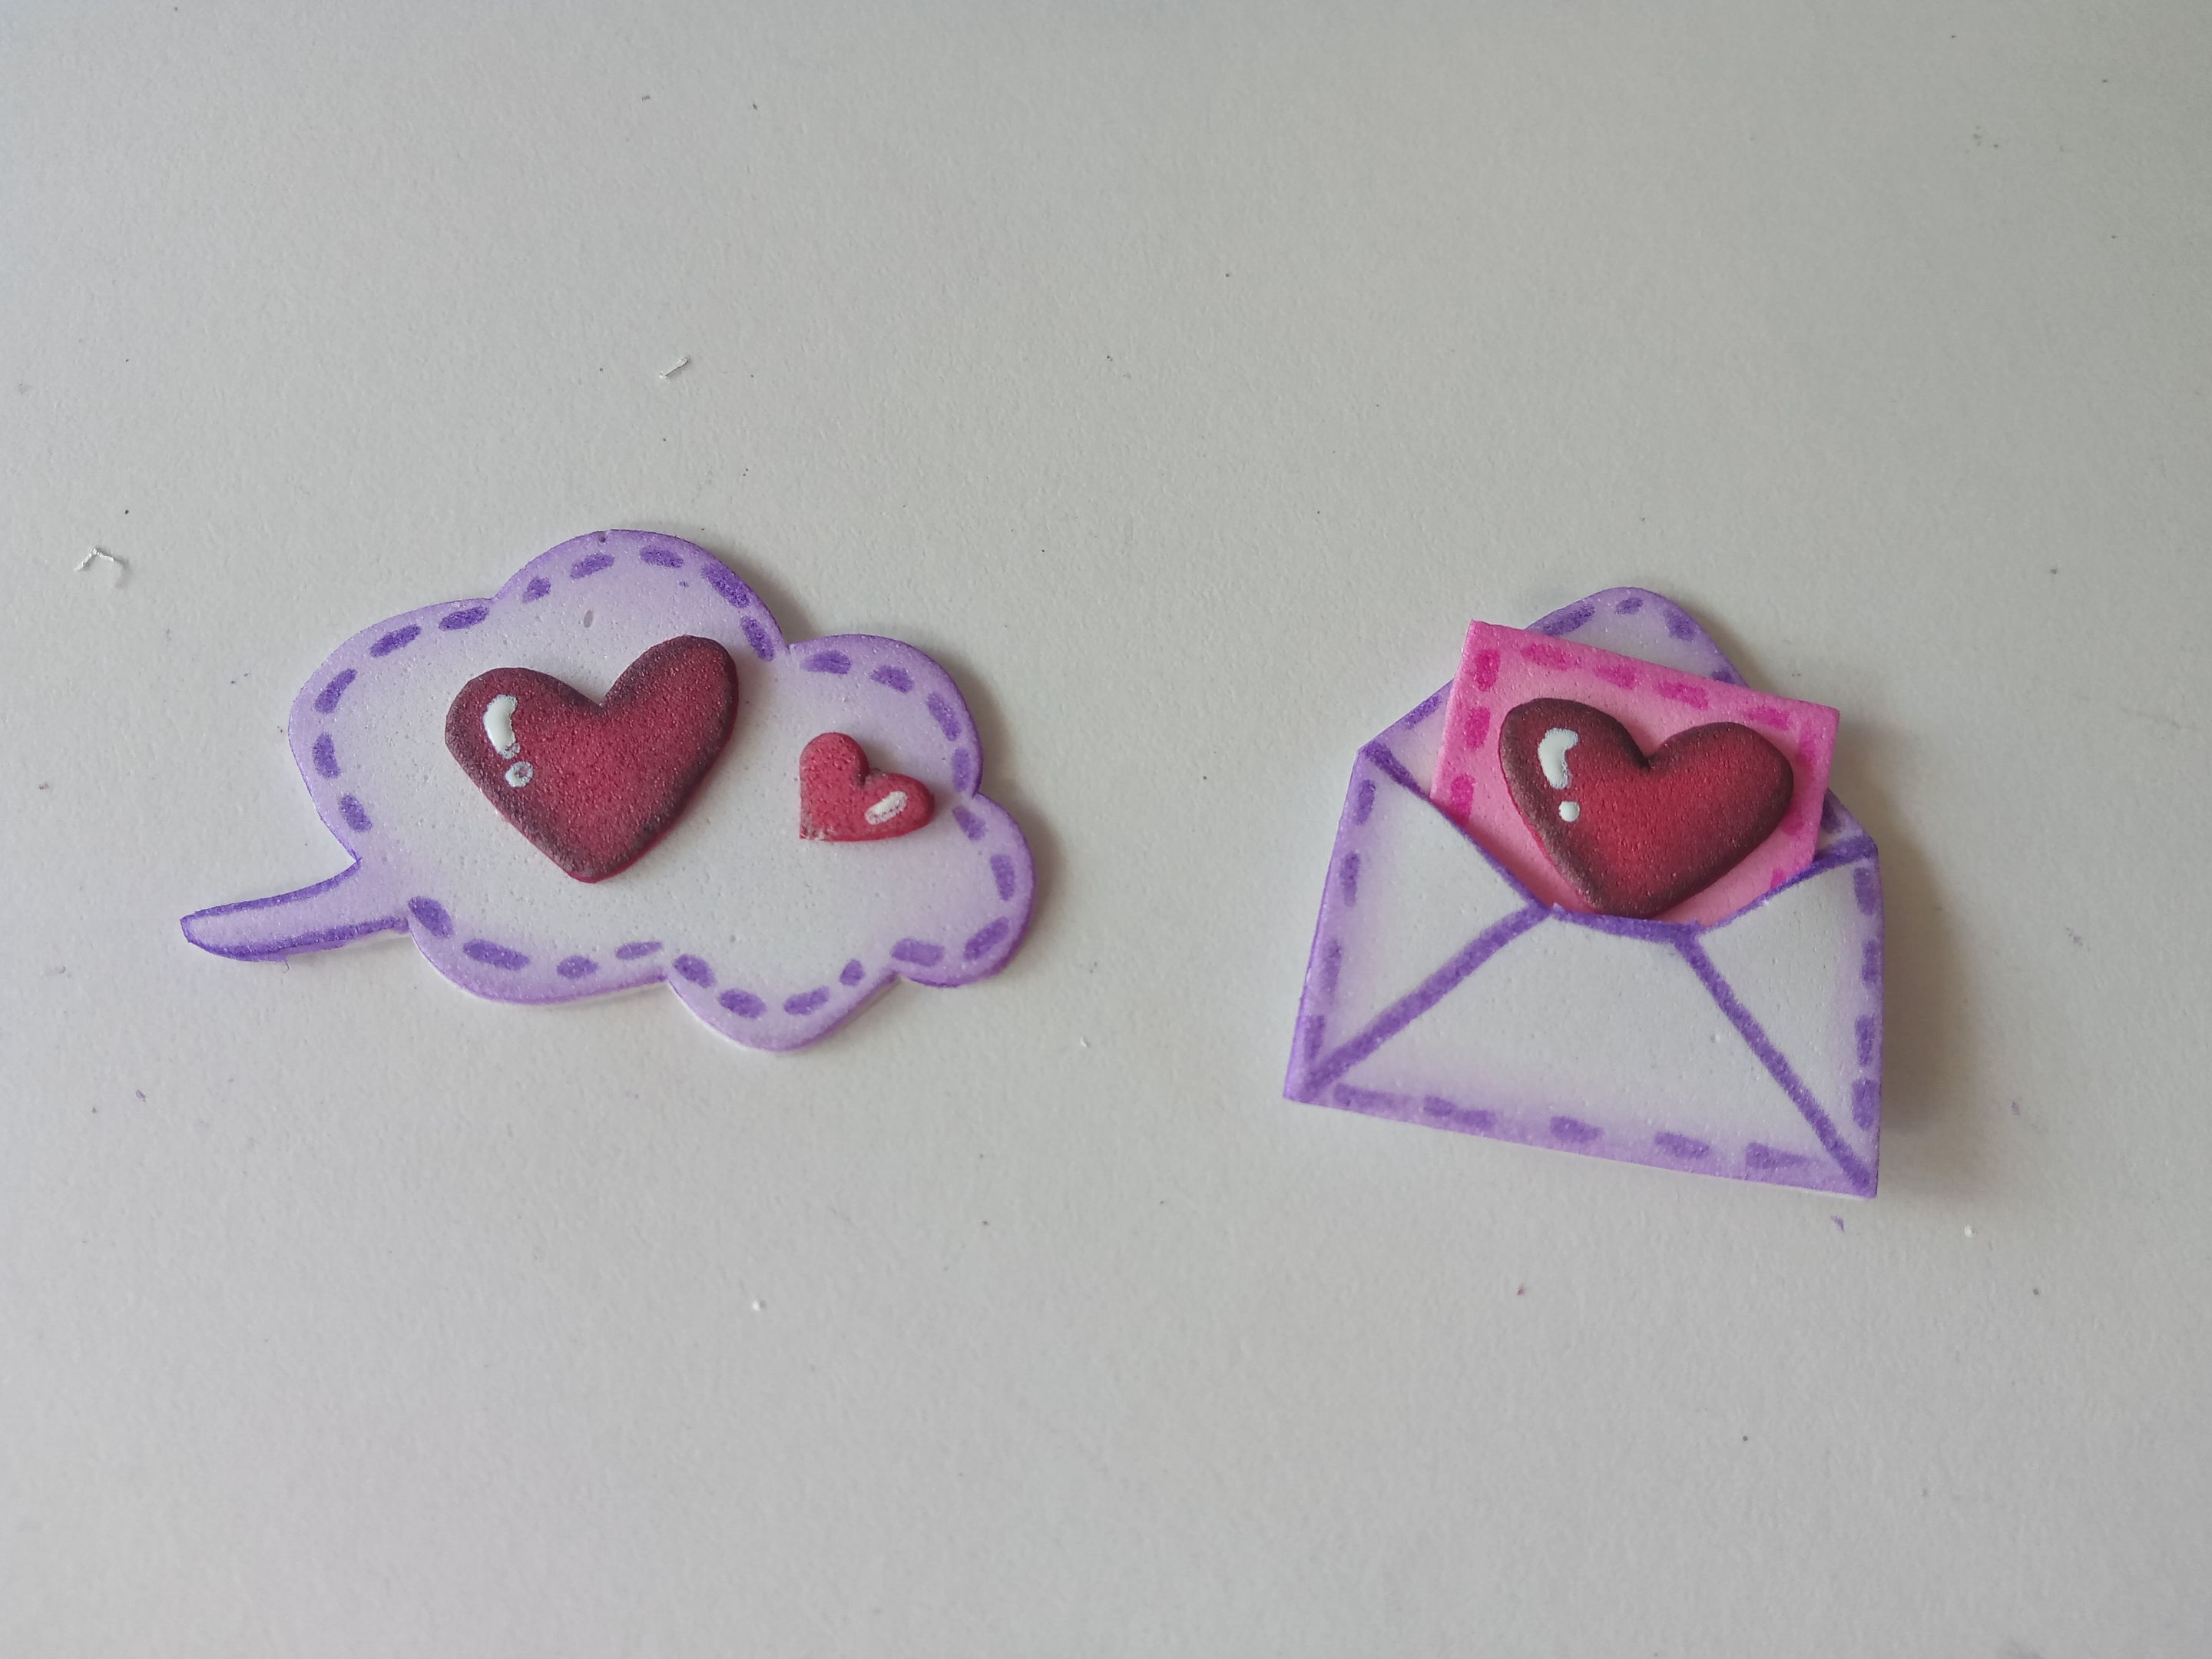
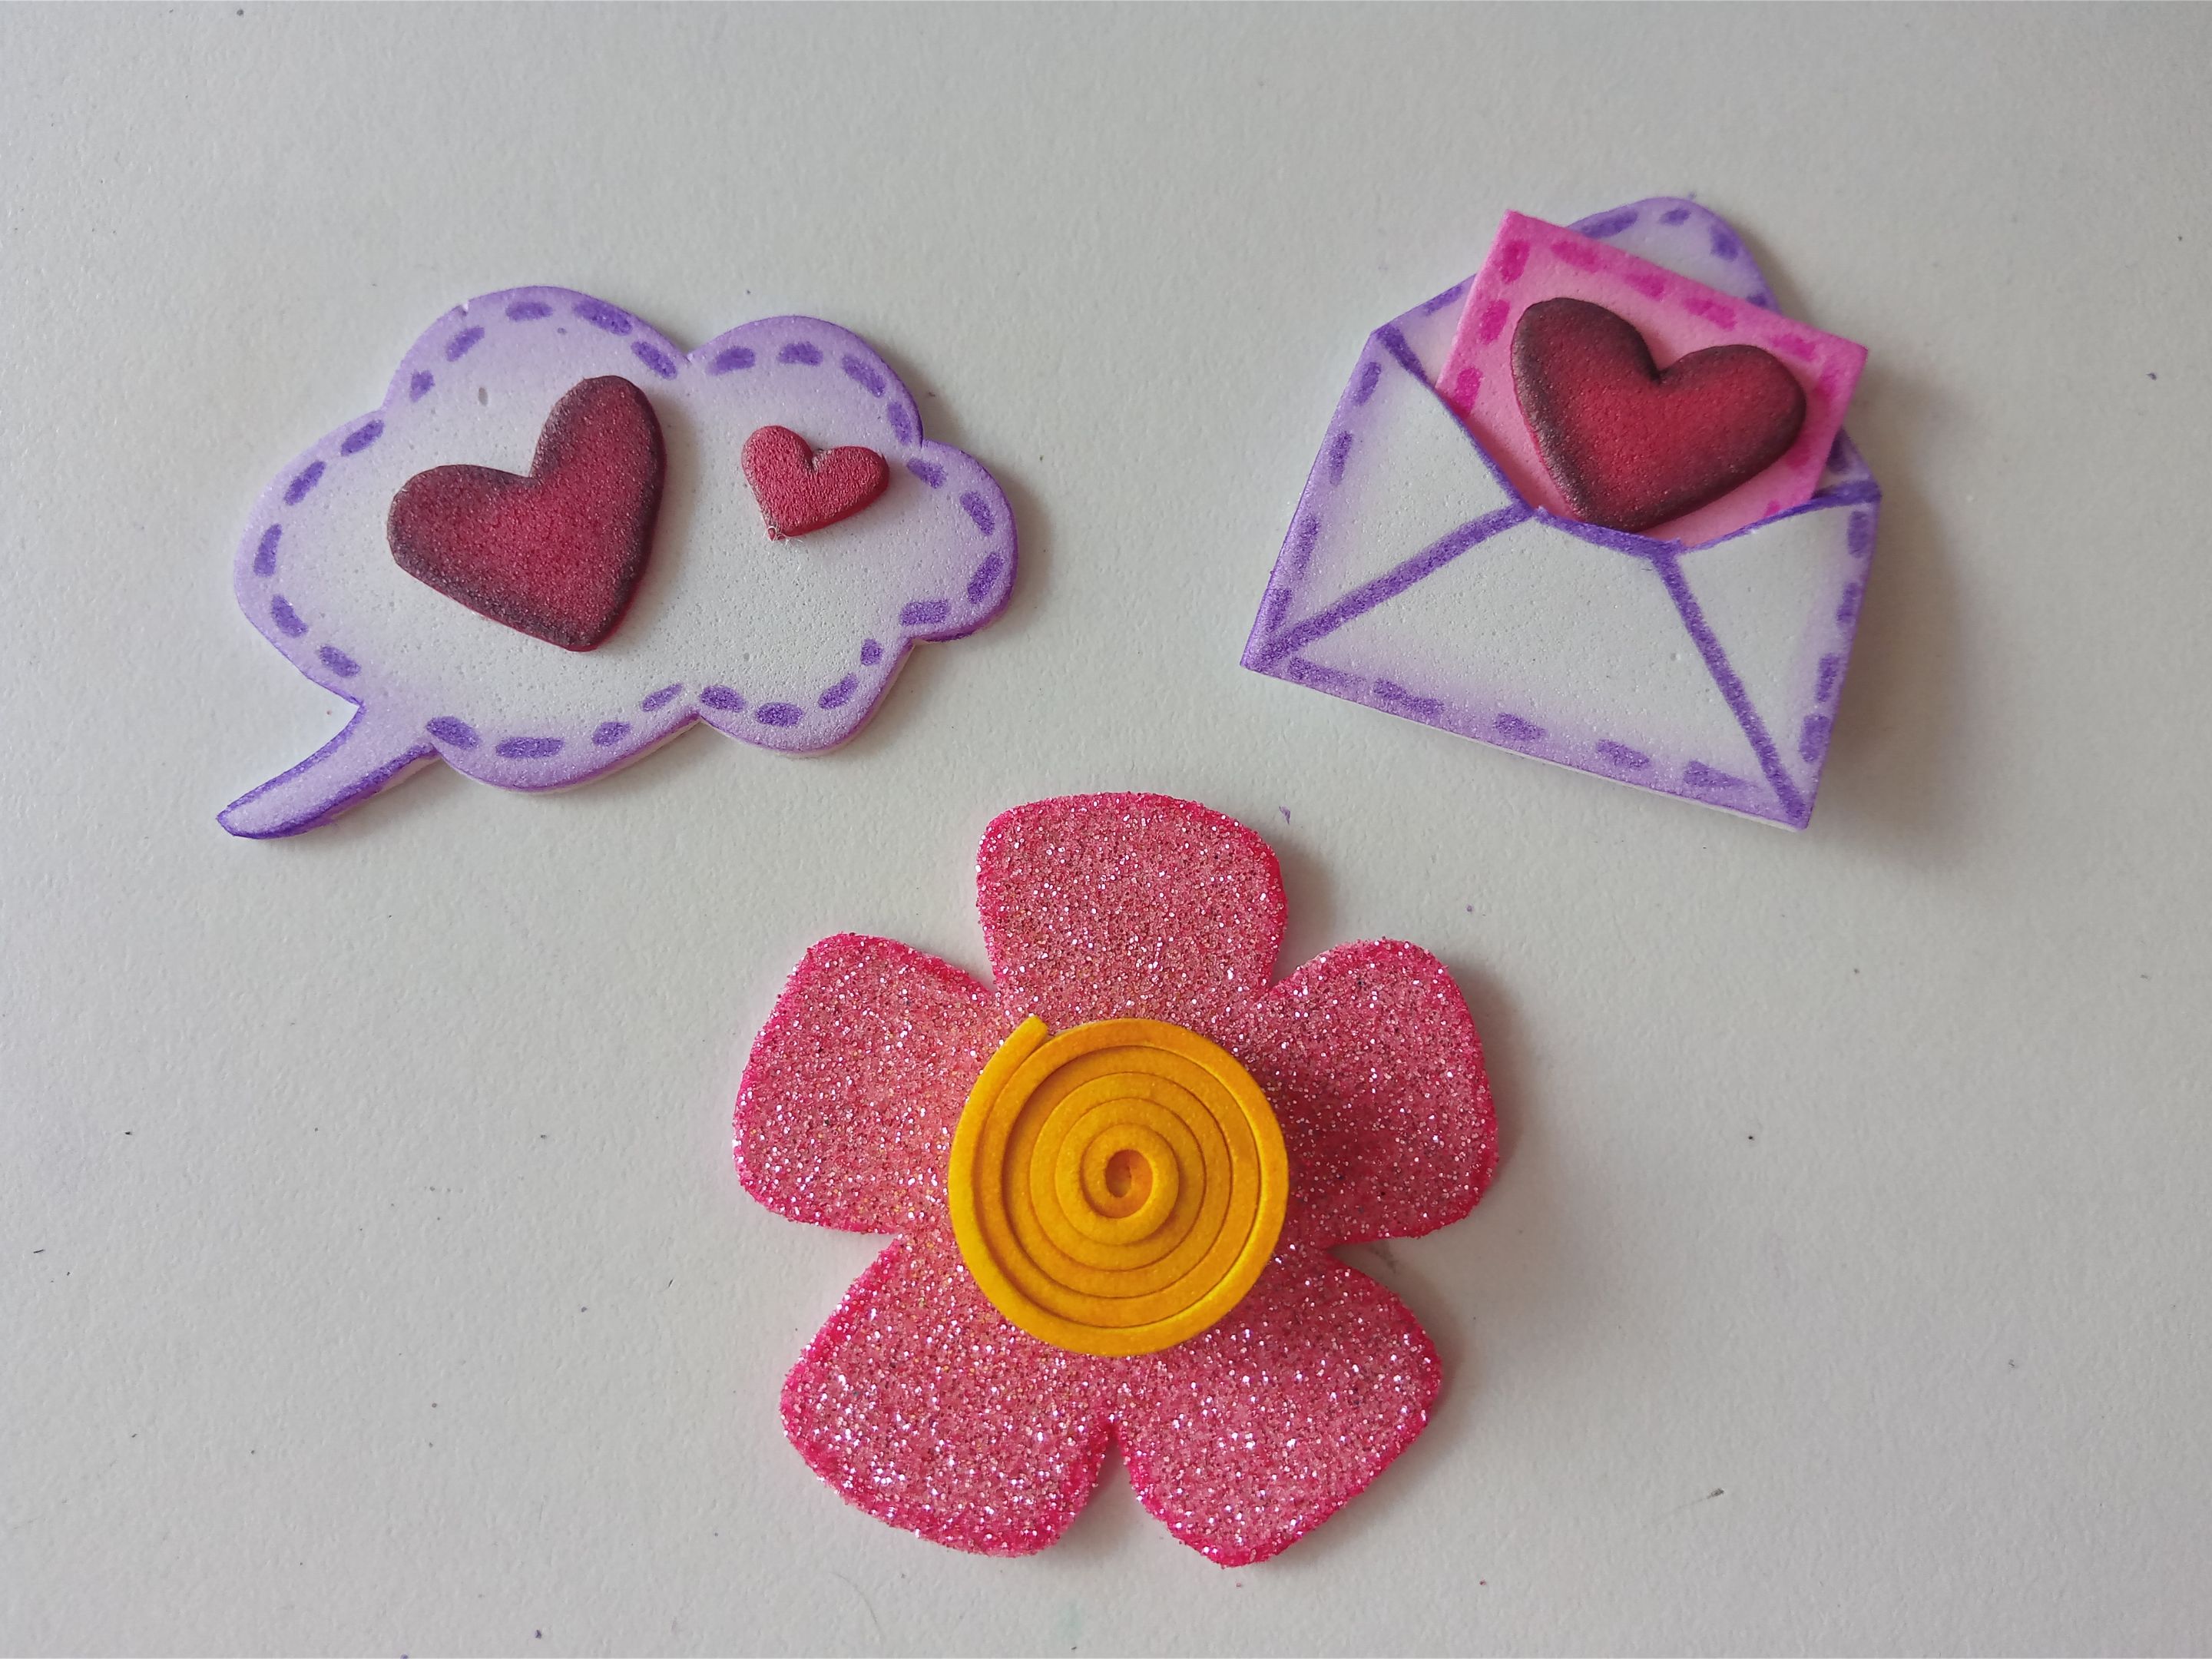
Ahora sí, es momento de dibujar la decoración que quería darle a la caja, así que al tener listo el dibujo o patrón en una hoja blanca, es momento de transferir las piezas a los colores correspondientes de foami, como explico a continuación:
✨Sobre: 4.5 cm x 4cm en foami blanco.
✨Hoja de carta: 3 cm x 2.8 cm en foami rosa.
✨Corazones: 2 cm y 1 cm en foami rojo.
✨Flor: 5.5 cm en foami escarchado rosa.
✨Parte central de la flor: 13 cm x 1 cm en foami amarillo.
###### ✨STEP 3:
Now it's time to draw the decoration I wanted to give the box. Once I have the drawing or pattern ready on a white sheet of paper, it's time to transfer the pieces to the corresponding colors of foam, as explained below:
✨Envelope: 4.5 cm x 4 cm in white foam.
✨Letterhead: 3 cm x 2.8 cm in pink foam.
✨Hearts: 2 cm and 1 cm in red foam.
✨Flower: 5.5 cm in pink frosted foam.
✨Flower center: 13 cm x 1 cm in yellow foam.
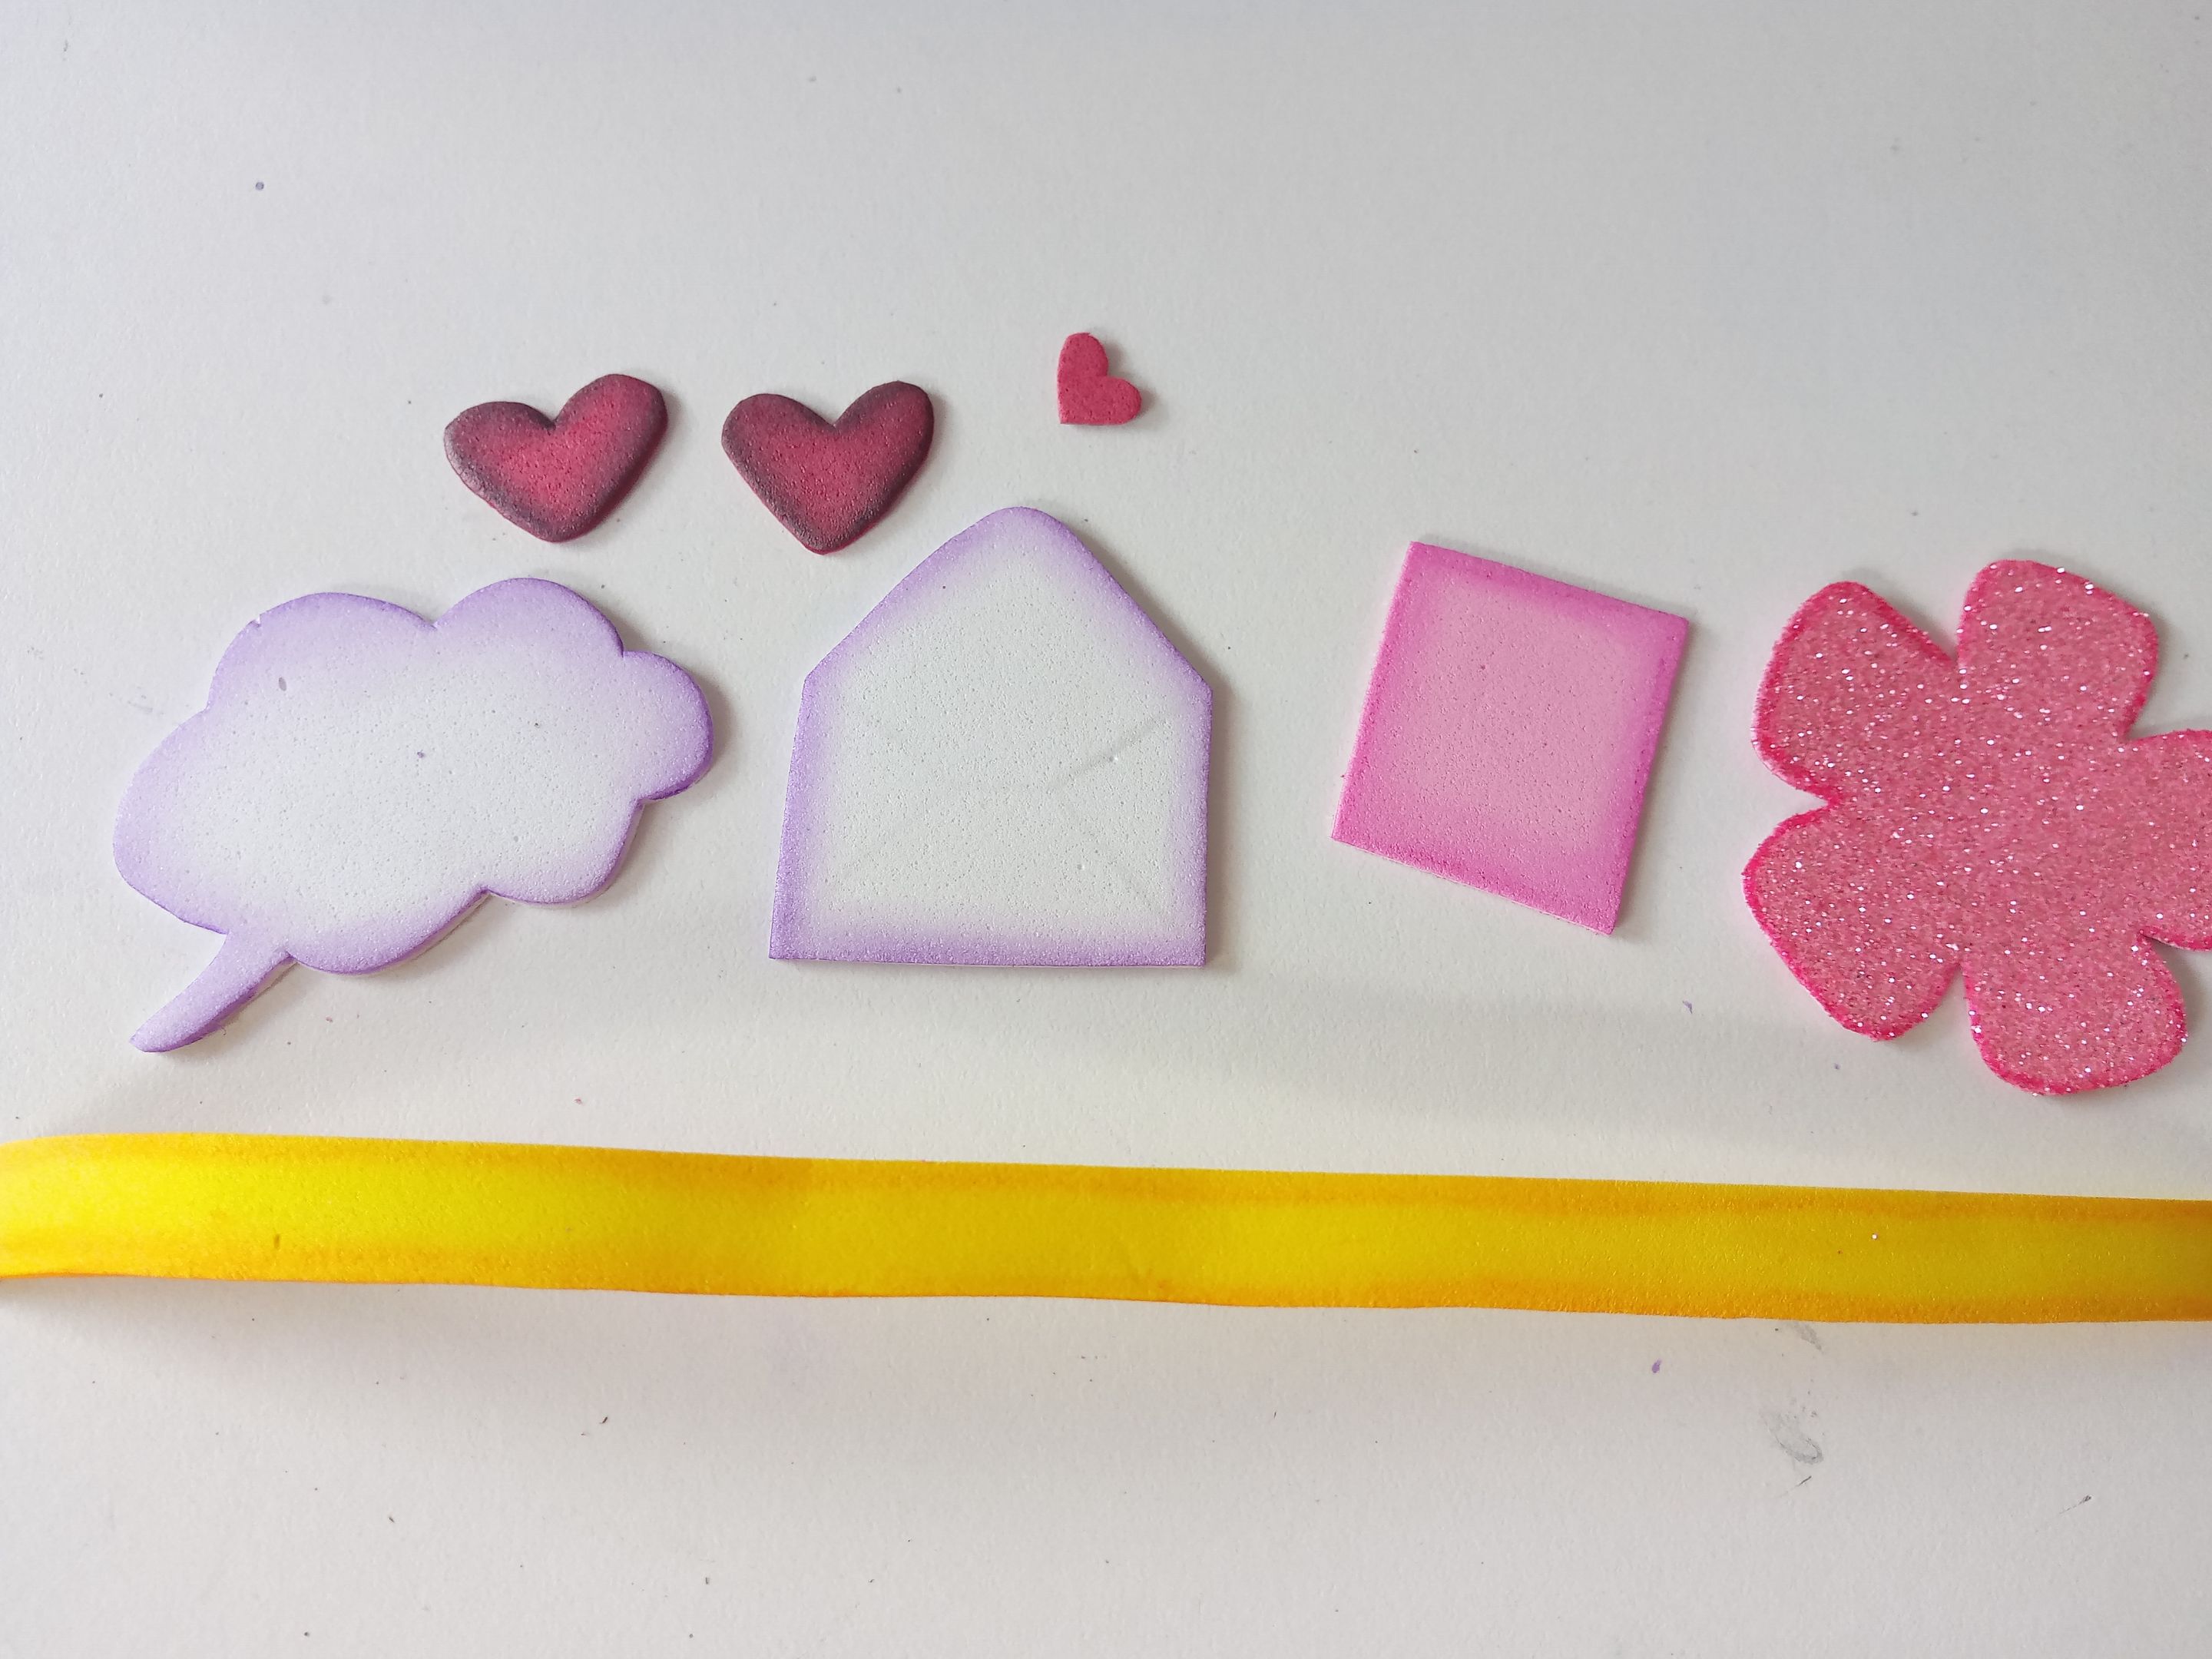
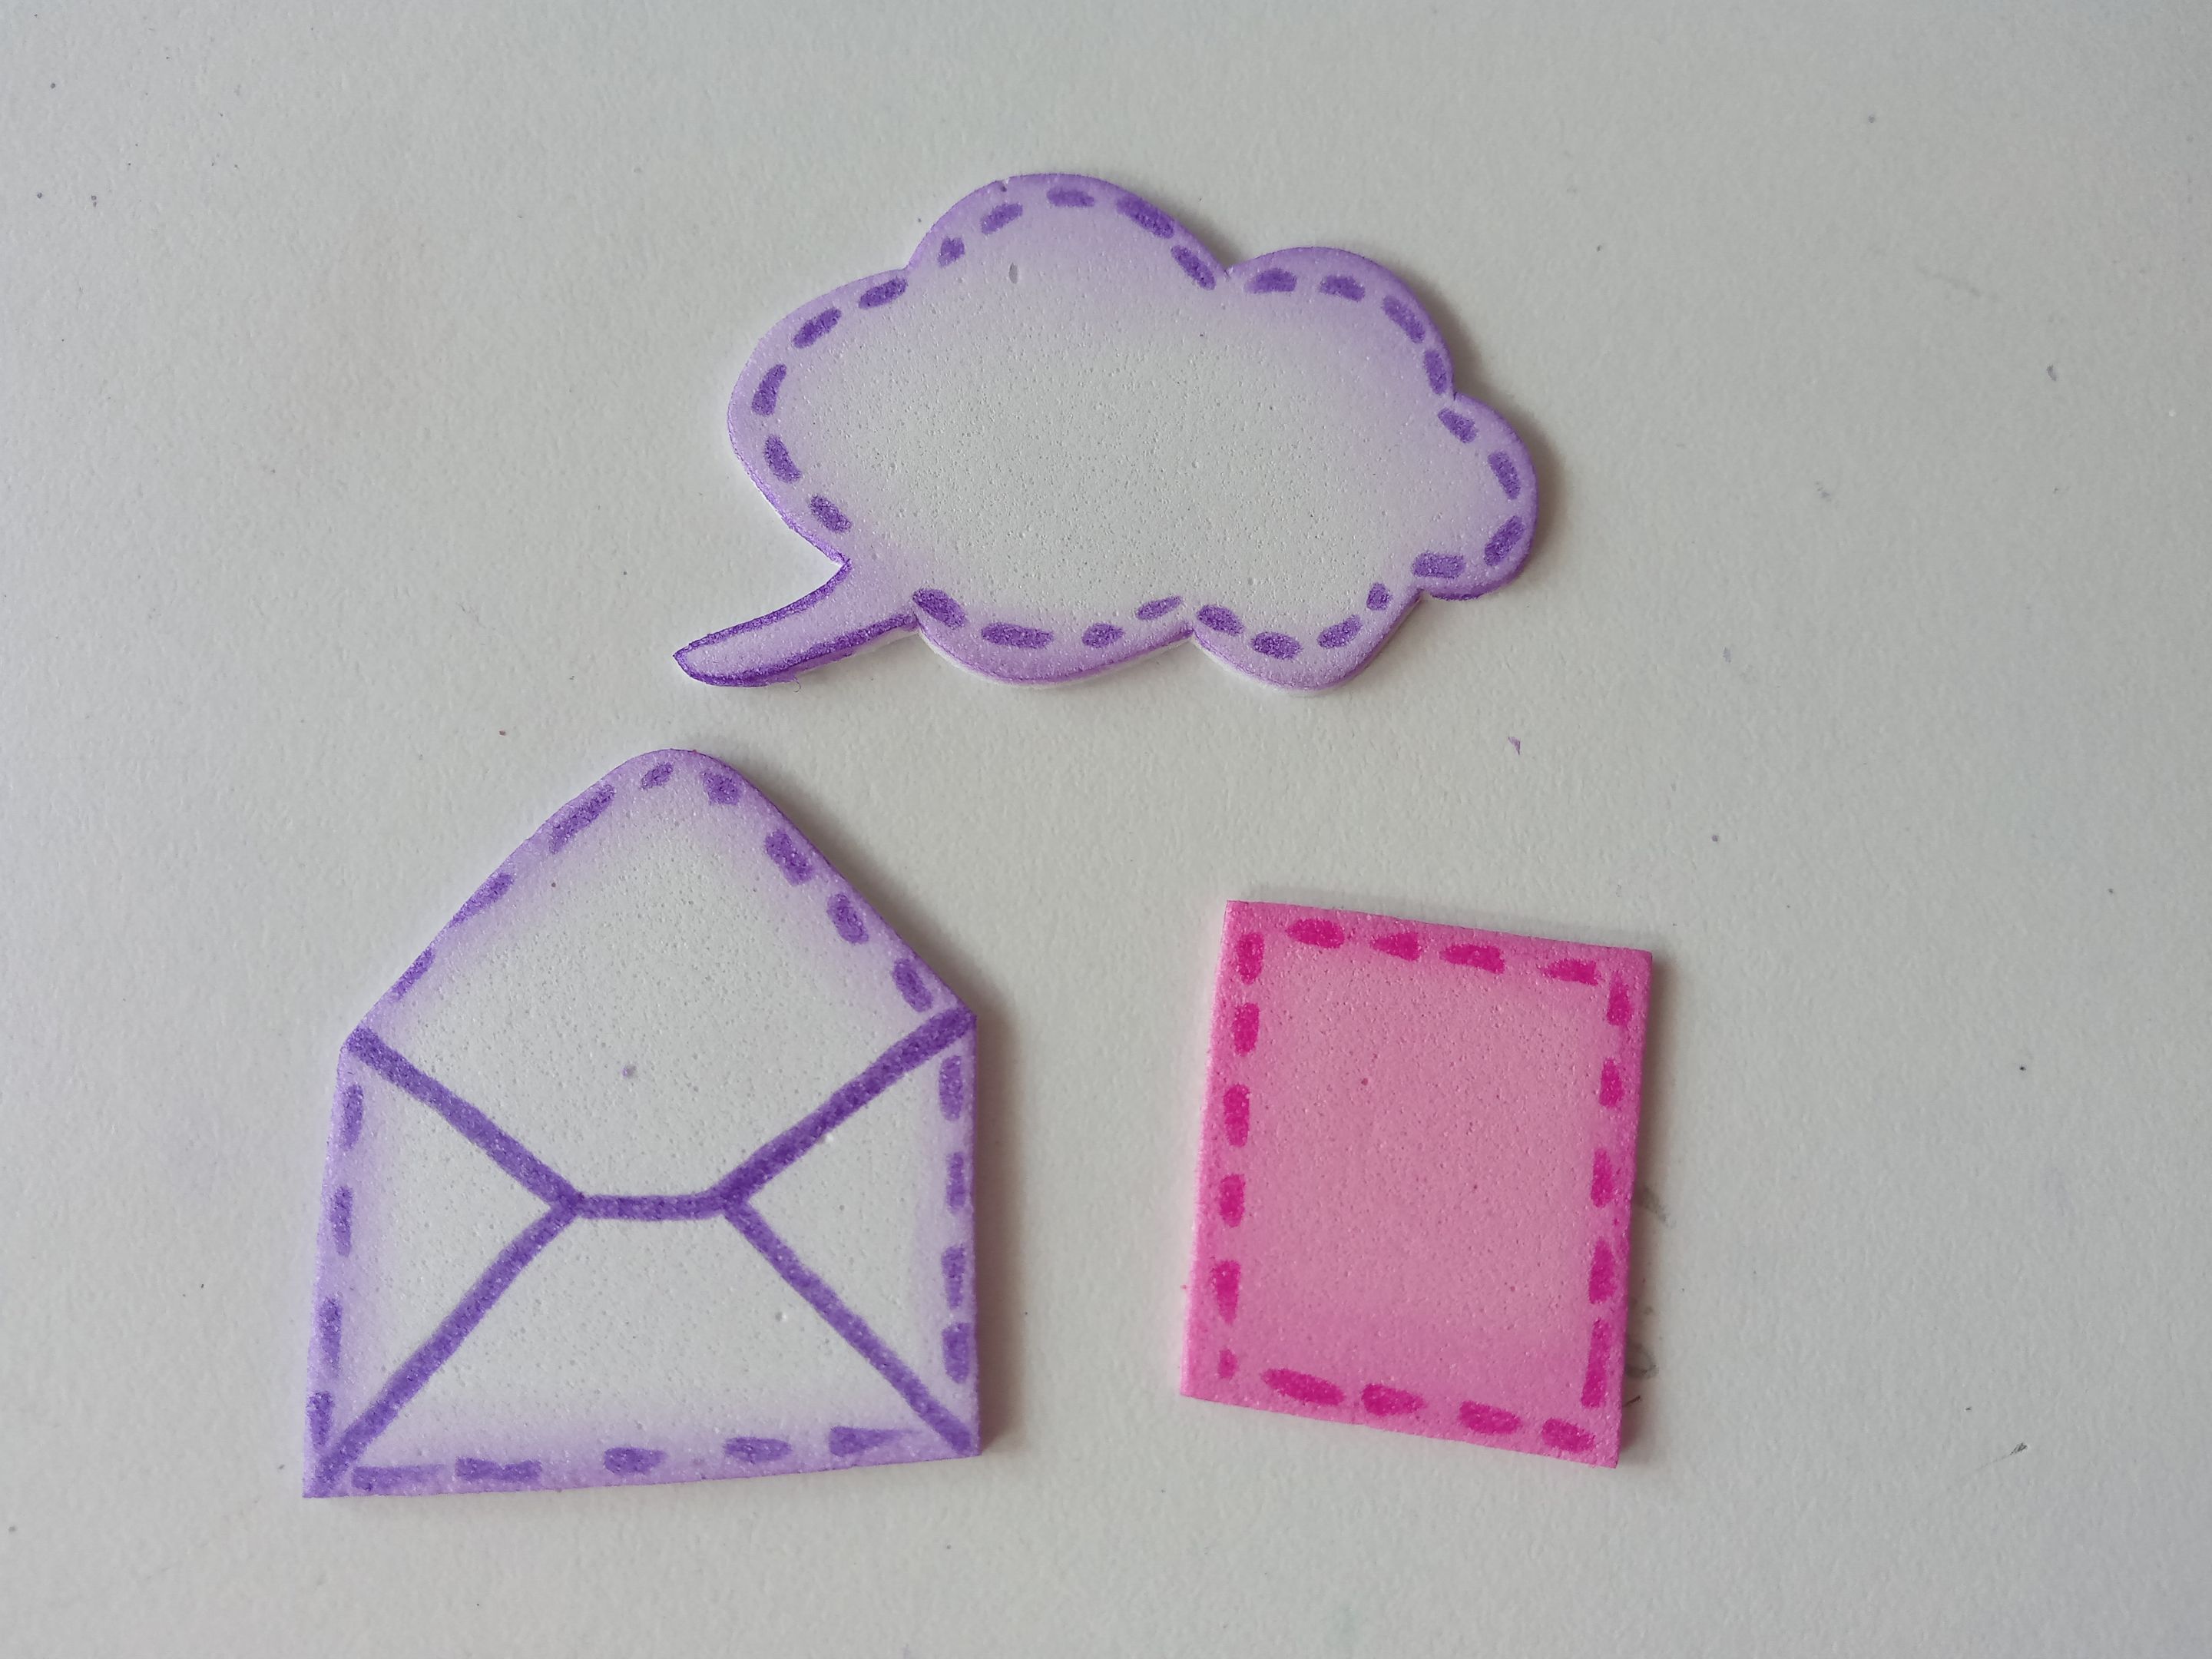
###### ✨PASO 4:
Al estar listas todas las piezas de la decoración, es momento de dar color a los bordes, utilizando pinturas o marcadores de un tono más oscuro que la pieza. En este caso, sí le di un poco de color al borde de la flor, así fuera en foami escarchado, para que no se viera tan sencilla. Seguidamente, di detalles para definir cada pieza. En este caso, quise hacer algunas líneas tipo costura en el borde de la nube, el sobre y la carta.
###### ✨STEP 4:
Once all the decoration pieces are ready, it's time to color the edges, using paints or markers in a darker shade than the piece itself. In this case, I did add a little color to the edge of the flower, even if it was frosted foam, to make it look less plain. Next, I added details to define each piece. In this case, I wanted to make some seam-like lines on the edge of the cloud, the envelope, and the letter.
###### ✨PASO 5:
Al estar secas todas las piezas, es momento de comenzar a pegar, así que pegué un corazón grande y uno pequeño a la nube, el otro corazón a la carta; con ayuda de un cúter corté en medio del sobre para que la carta encajase por ese espacio y, para la flor, simplemente enrollé la tira y la pegué en medio de la flor.
###### ✨STEP 5:
Once all the pieces are dry, it's time to start gluing, so I glued one large and one small heart to the cloud, and the other heart to the letter. Using a box cutter, I cut in the middle of the envelope so the letter would fit through that space, and for the flower, I simply rolled the strip and glued it in the middle of the flower.
###### ✨PASO 6:
Seguidamente, tomé pintura blanca e hice pequeños puntos por toda la caja y, finalmente, pegué el sobre y la nube en medio, mientras que la flor la pegué en medio de la tapa.
###### ✨STEP 6:
Next, I took white paint and made small dots all over the box. Finally, I glued the envelope and cloud in the middle, while I glued the flower to the middle of the lid.
# ✨RESULTADO: | ✨RESULT: