######
✨¡Hola amigos amantes de la creatividad! Espero que estén todos bien.✨
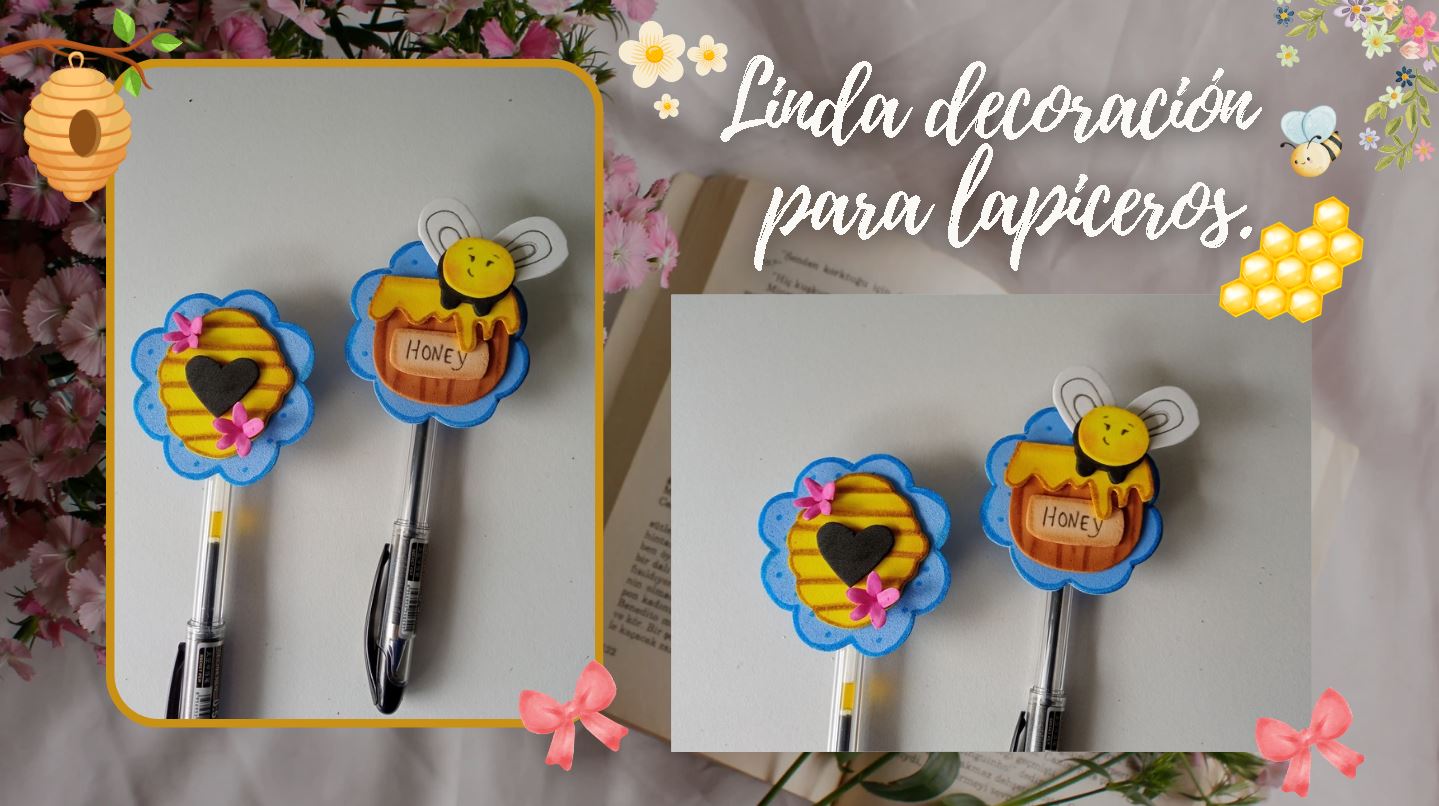
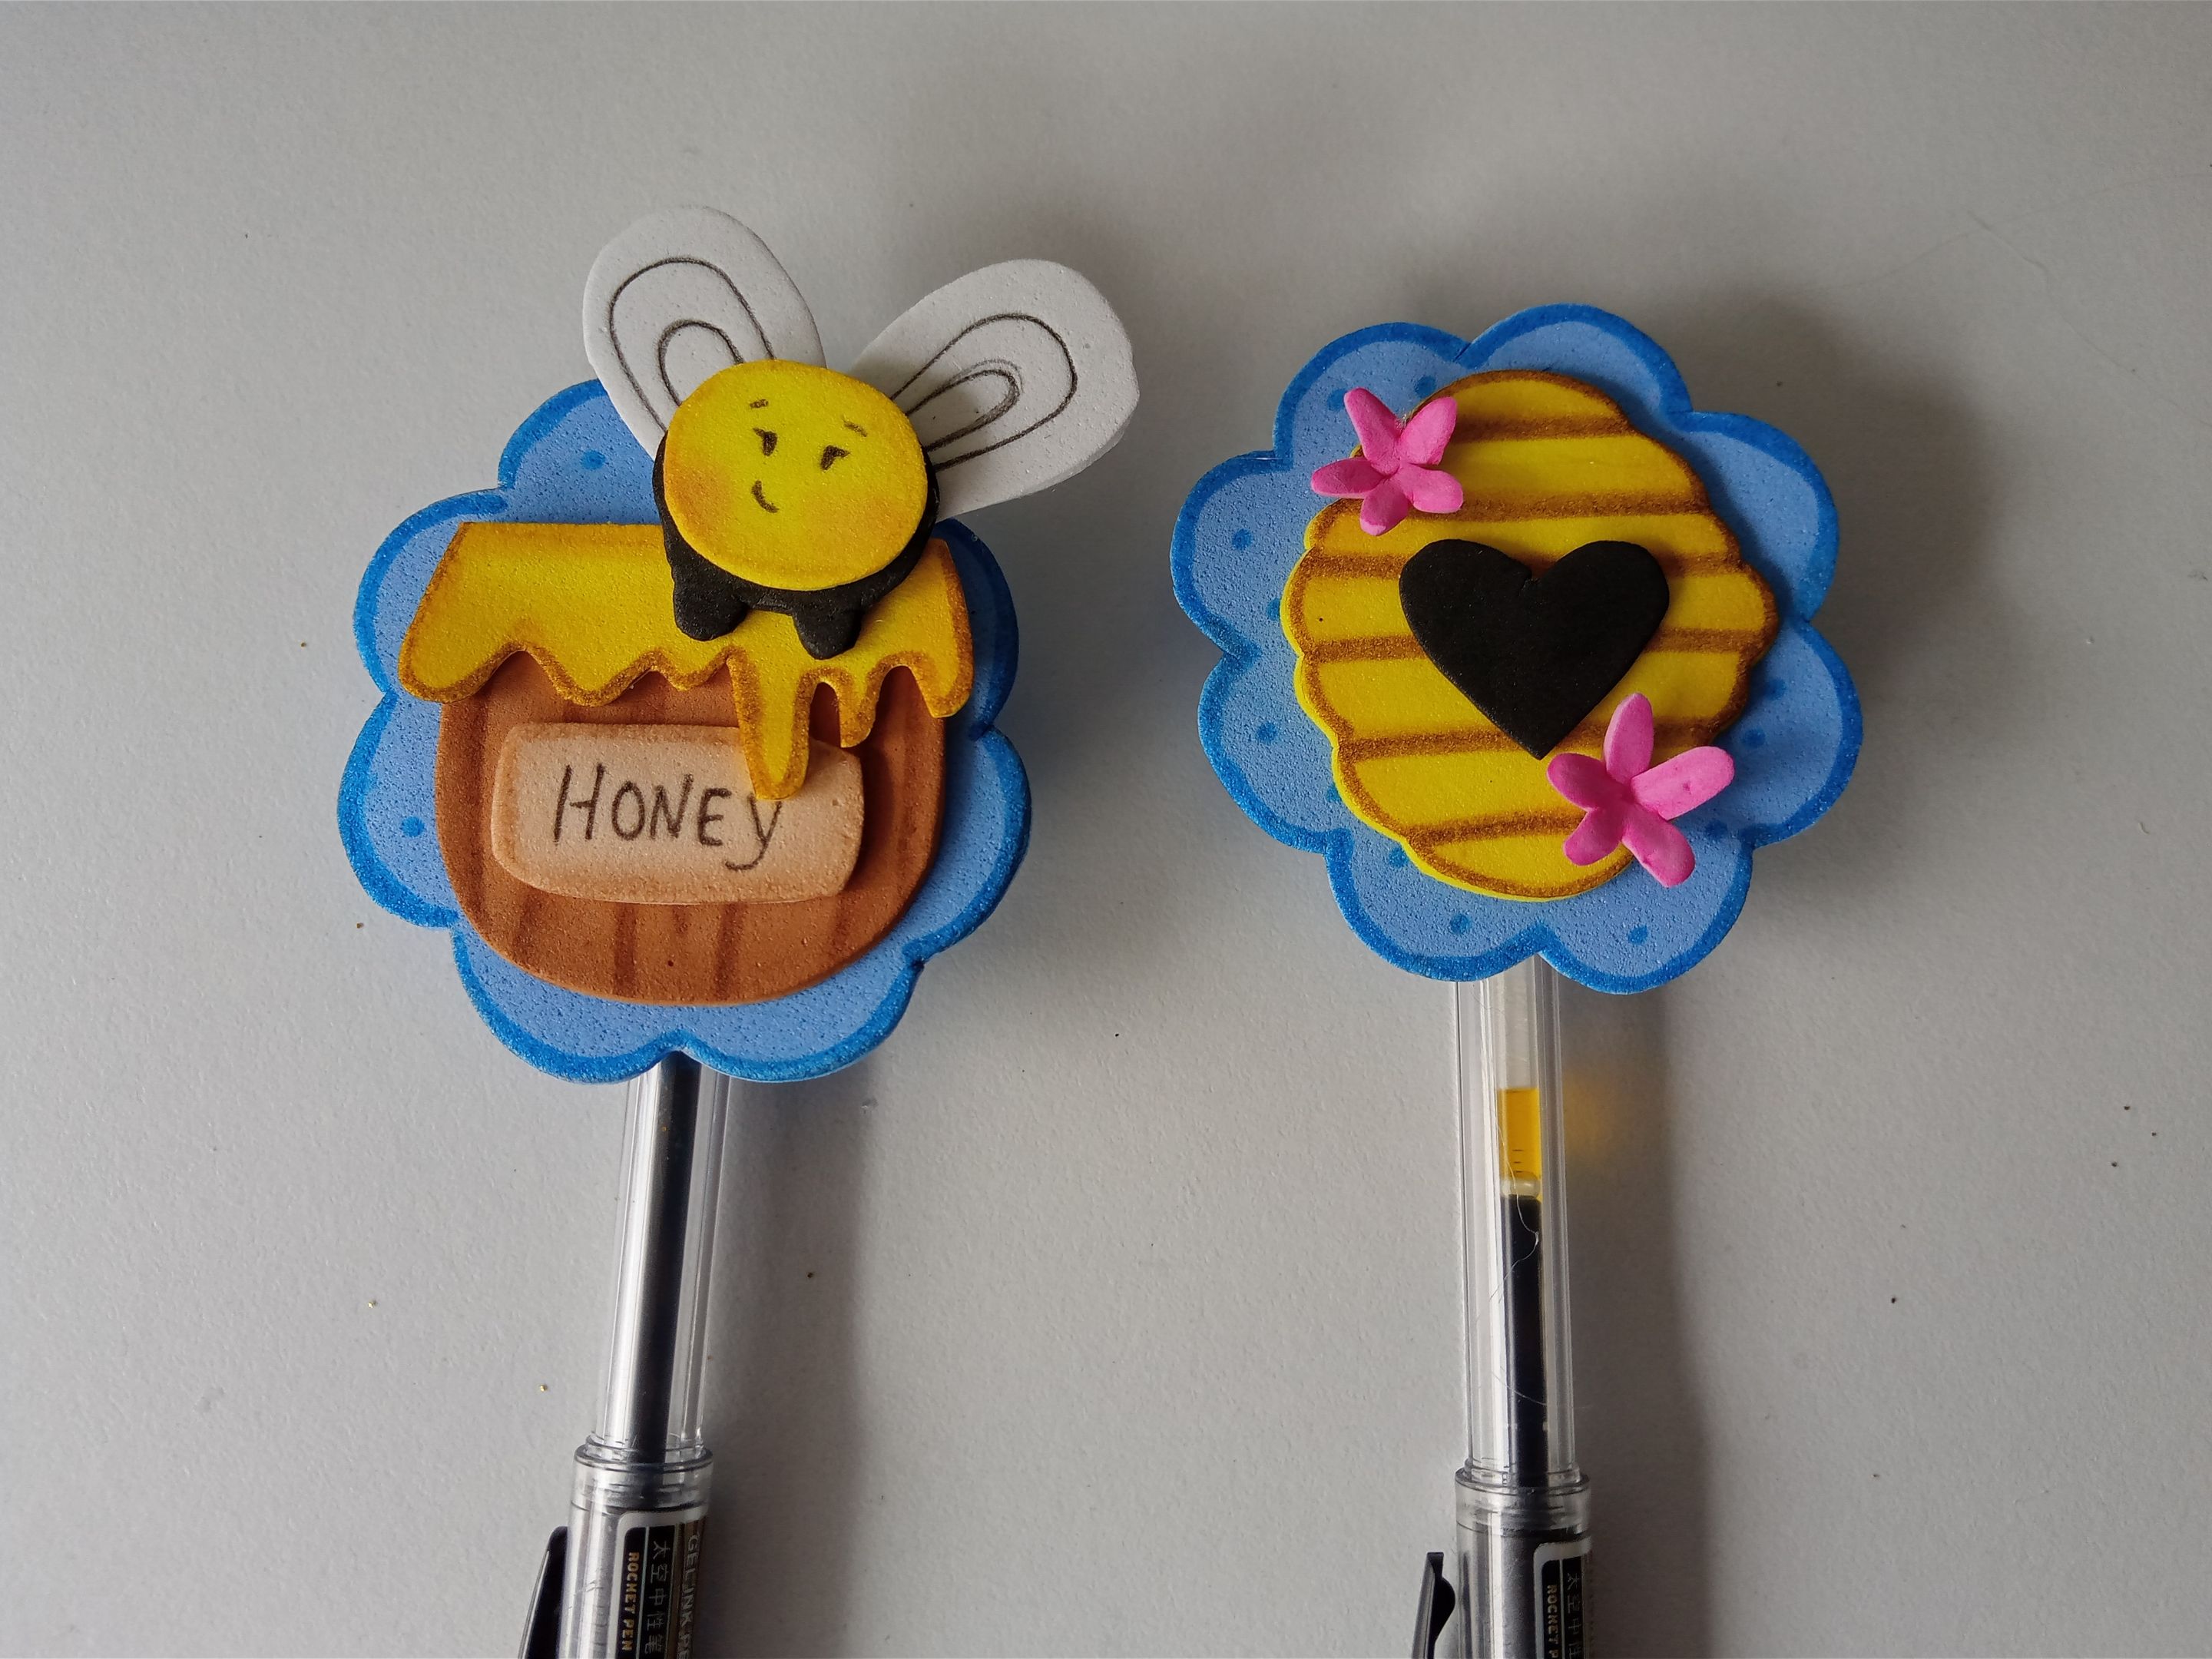
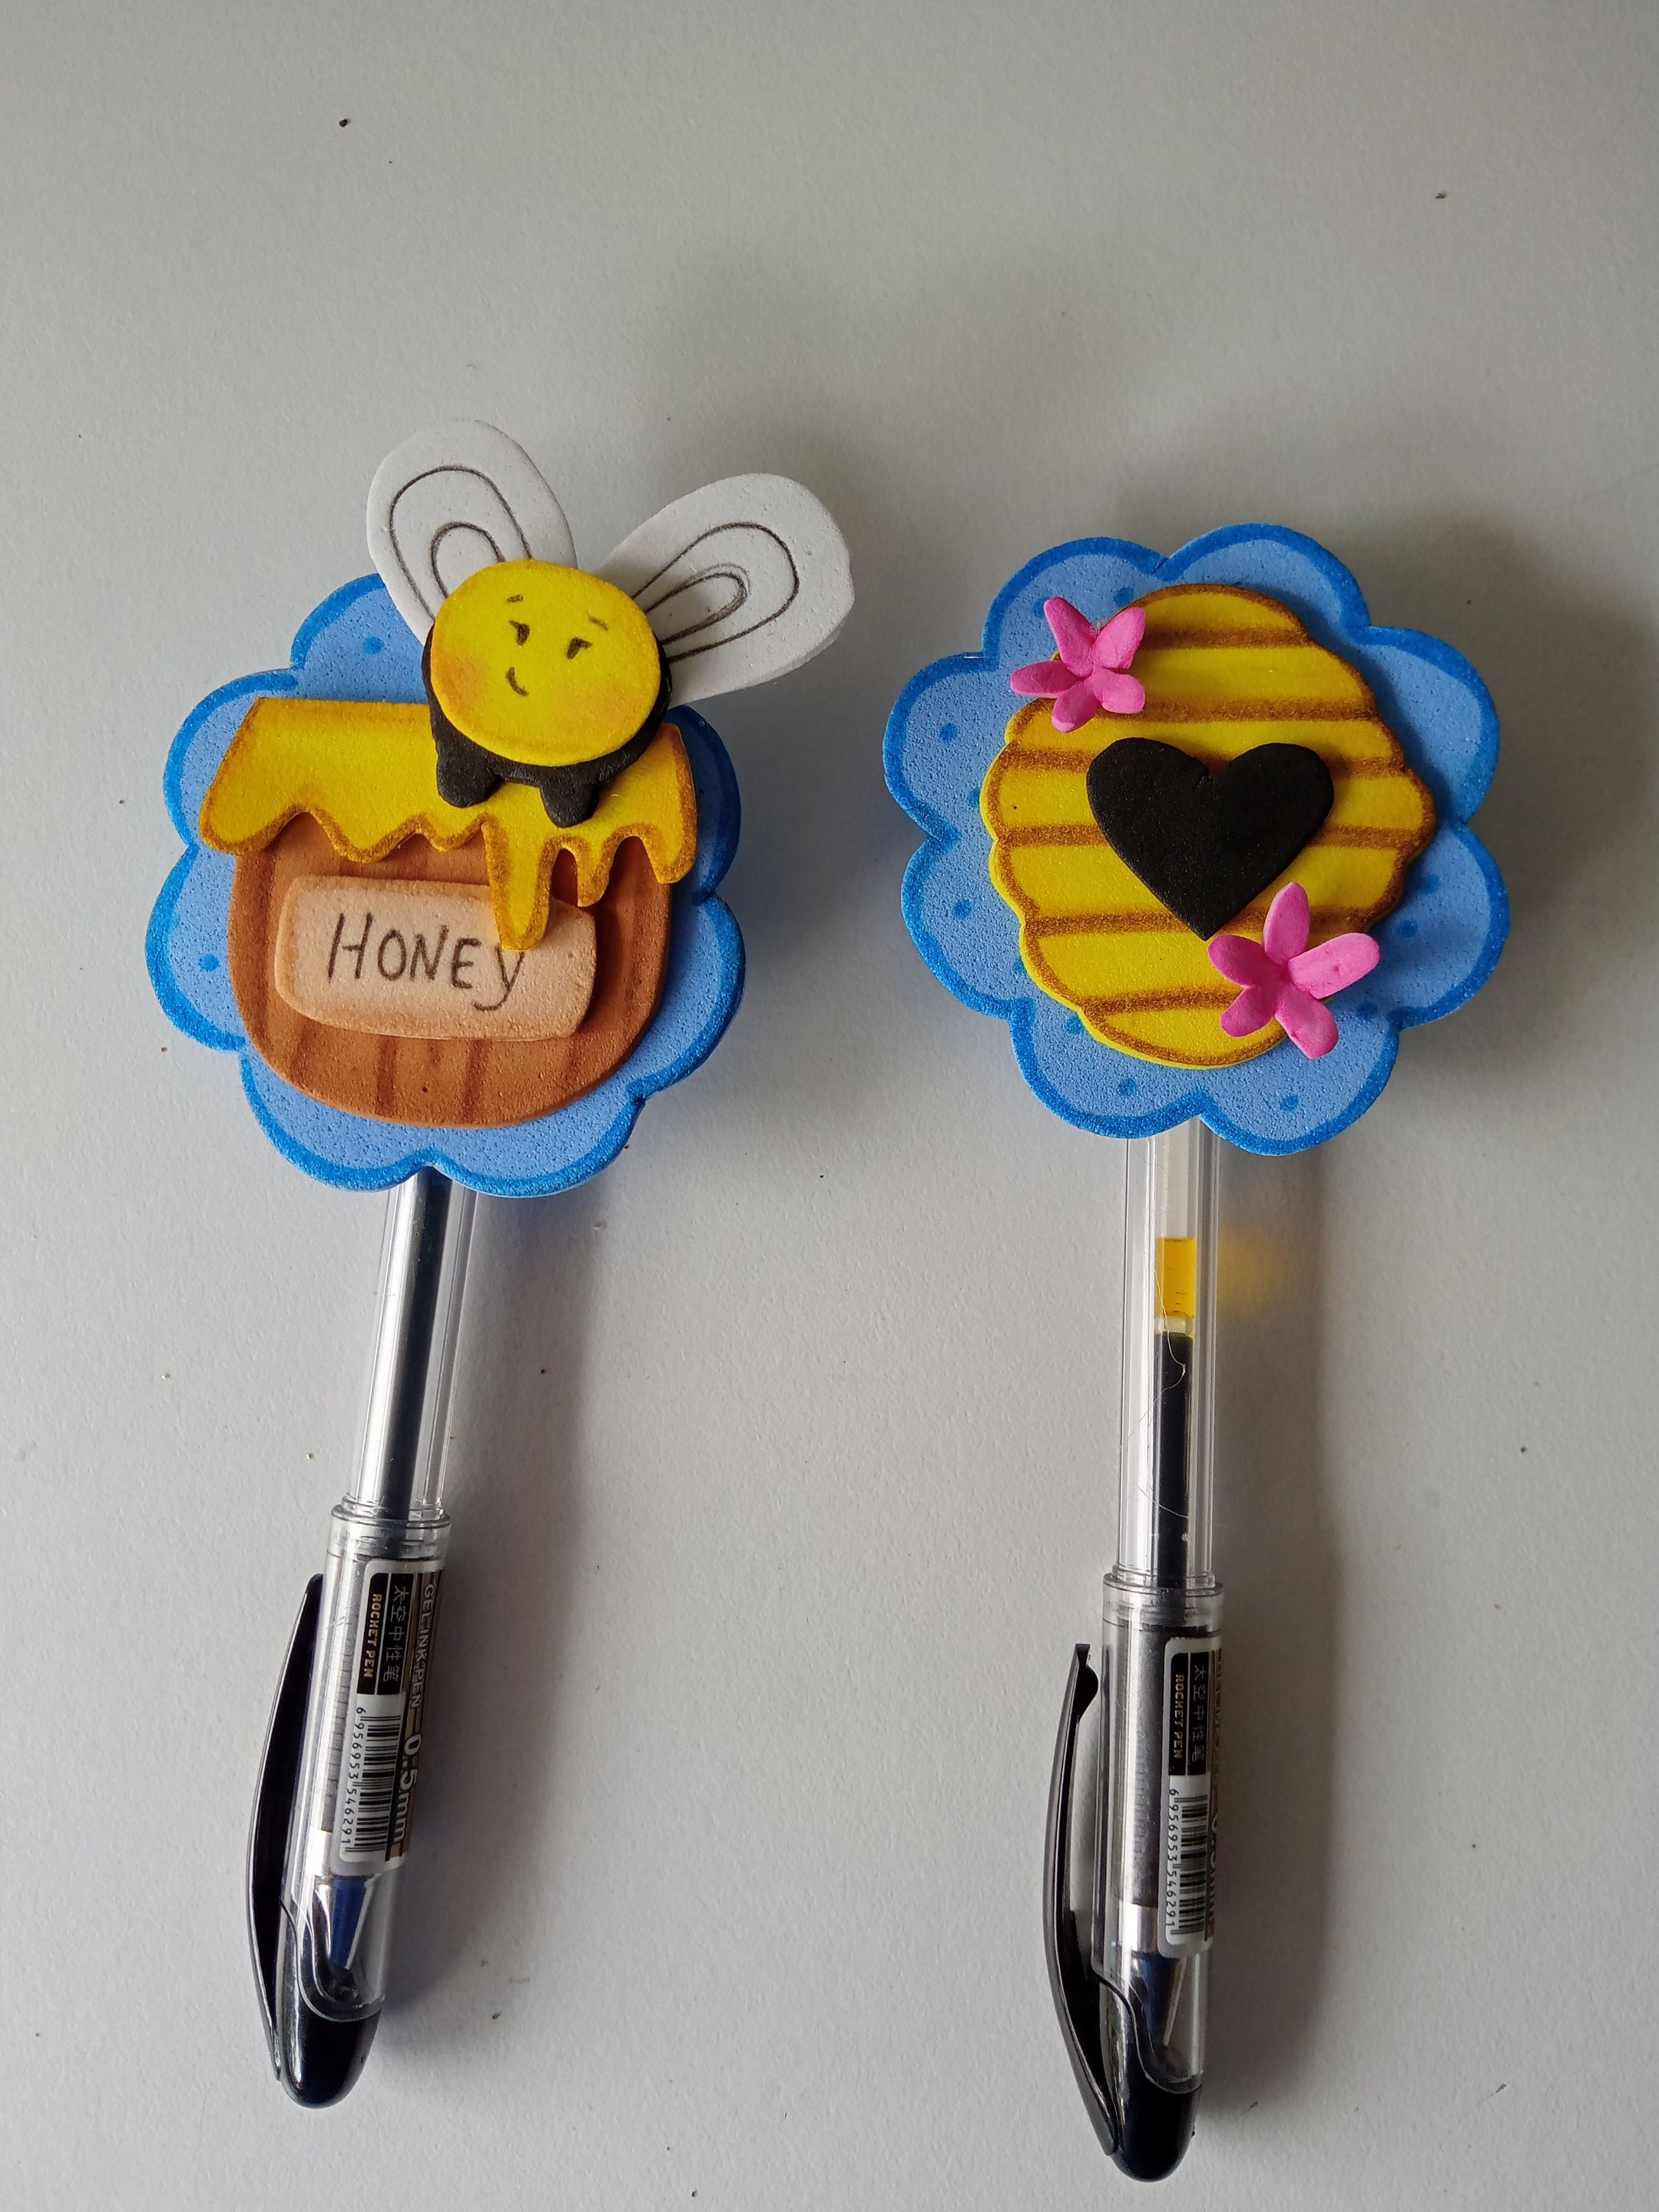
¡Buenas tardes, amigos! Espero que estén pasando una excelente semana. Por mi parte, estoy contenta de pasar por aquí a compartir una linda idea con ustedes. En esta ocasión, les muestro el paso a paso para elaborar una linda decoración para lapiceros. Me encanta traer creaciones de abejitas a mis posts porque, además de ser una linda decoración, son perfectas para Hive, ya que siempre imagino una pequeña colmena de abejitas. Claro que en esta ocasión y como siempre, me gusta compartir con ustedes dos ideas con la misma temática, así que elaboré la abejita con un tarro de miel y la otra con una bonita colmena.
**🔸Sin más que añadir, a continuación los dejo con el paso a paso:**
> ######
✨¡Hello friends who love creativity! I hope you are all well.✨
>
Good afternoon, friends! I hope you're having a great week. For my part, I'm happy to stop by to share a lovely idea with you. This time, I'm showing you the step-by-step instructions for making a cute pencil holder decoration. I love featuring bee creations in my posts because, in addition to being a cute decoration, they're perfect for Hive, since I always imagine a small beehive. Of course, this time, and as always, I like to share two ideas with you on the same theme, so I made one bee with a honey pot and the other with a cute beehive.
> **🔸Without more to add, then I leave you with the step by step:**
---
---

|||
|-|-|


|||
|-|-|


|||
|-|-|


|||
|-|-|


||||
|-|-|-|

✨Y listo, amigos, así es como pueden elaborar unas bellas decoraciones, con la temática de preferencia, ya sea para los pequeños o para el que quiera tener una linda lapicera decorada, jaja. A mí me parece que quedan hermosos; además, pueden inventar decorando la lapicera en sí con alguna cinta de color alrededor. Espero que les haya gustado el paso a paso y se animen a elaborarlo.
❤️Hasta la próxima publicación.
>
✨And that's it, friends, this is how you can make some beautiful decorations, with any theme you prefer, whether for the little ones or for anyone who wants a nice decorated pencil case, haha. I think they look beautiful; plus, you can get creative decorating the pencil case itself with some colored ribbon. I hope you enjoyed the step-by-step instructions and are inspired to try it out.
>
❤️Until the next post.

**♥️ESPERO QUE TE GUSTE,
¡Empecemos!**
**♥️I HOPE YOU LIKE IT,
Let's start!**
---

# ✂️ MATERIALES | ✂️ MATERIALS

- Foami escarchado dorado.
- Foami amarillo.
- Foami marrón.
- Foami rosa.
- Foami blanco.
- Foami negro.
- Foami azul.
- Pinturas y marcadores.
- Pegamento.
- Tijeras.
- Regla.
- Hoja blanca.
- Lápiz.
- Gold frosted foam.
- Yellow foam.
- Brown foam.
- Pink foam.
- White foam.
- Black foam.
- Blue foam.
- Paints and markers.
- Glue.
- Scissors.
- Ruler.
- White paper.
- Pencil.
-

# 🌟 PROCEDIMIENTO | 🌟 PROCESS

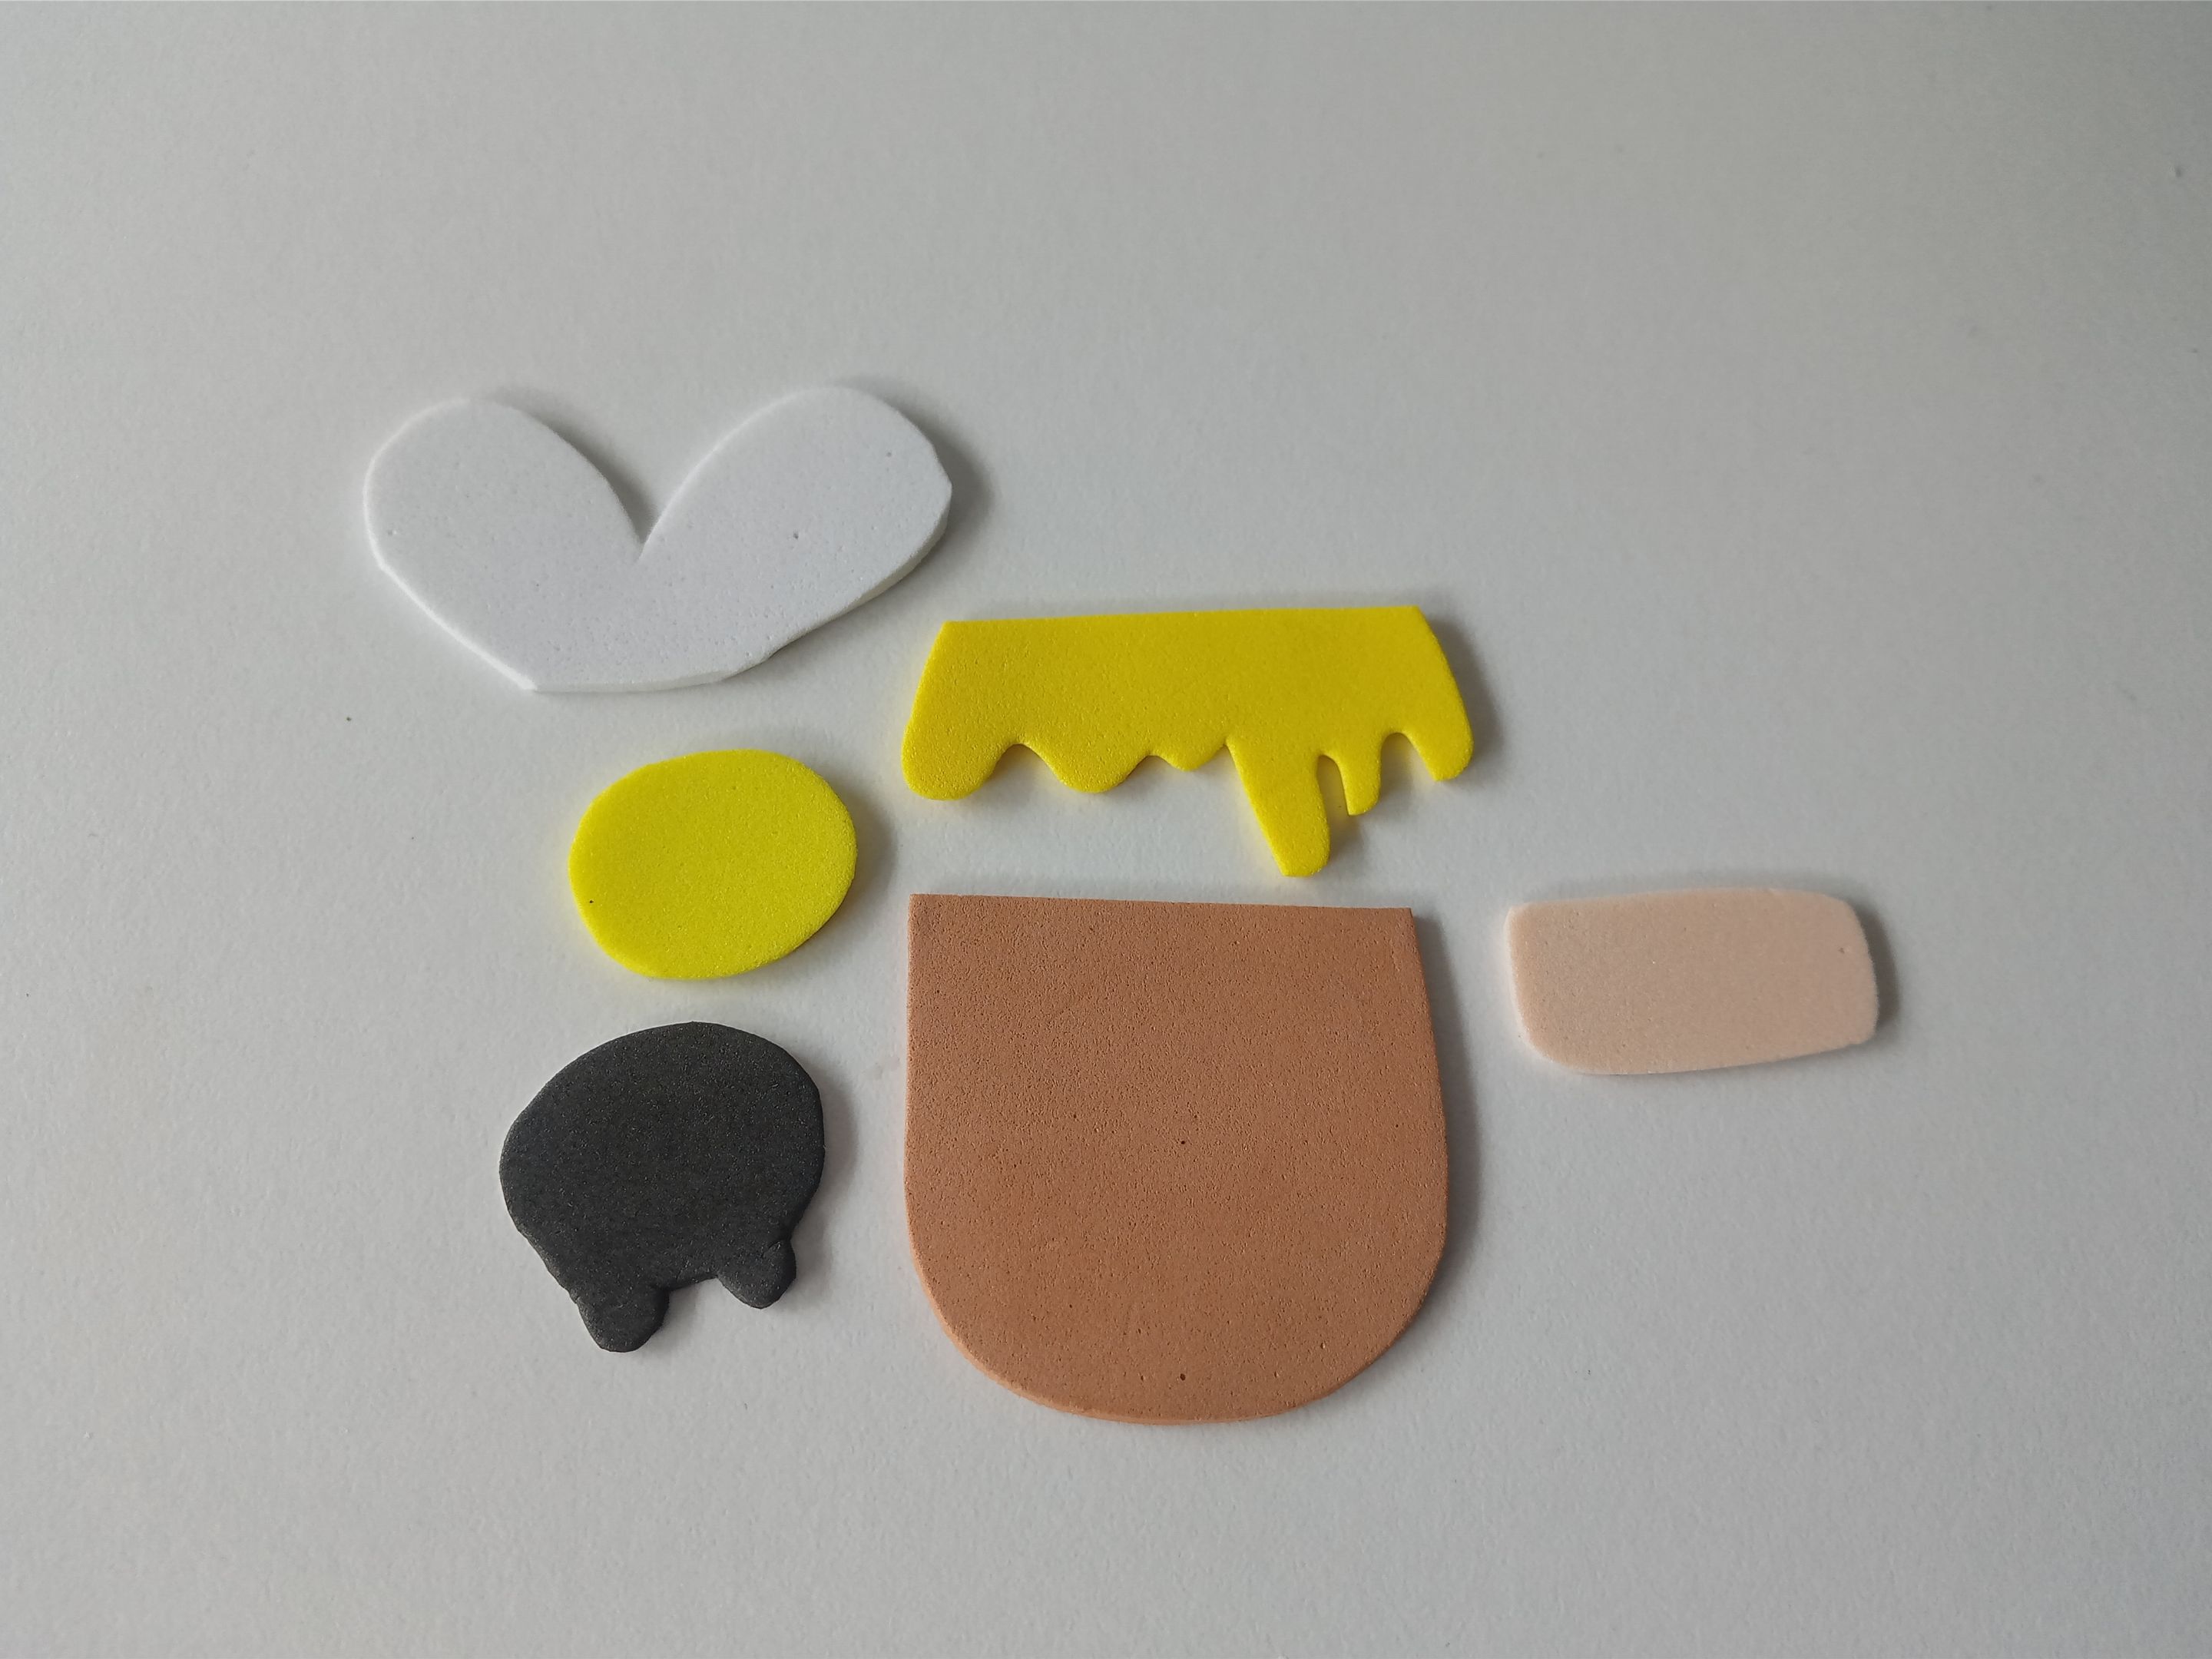
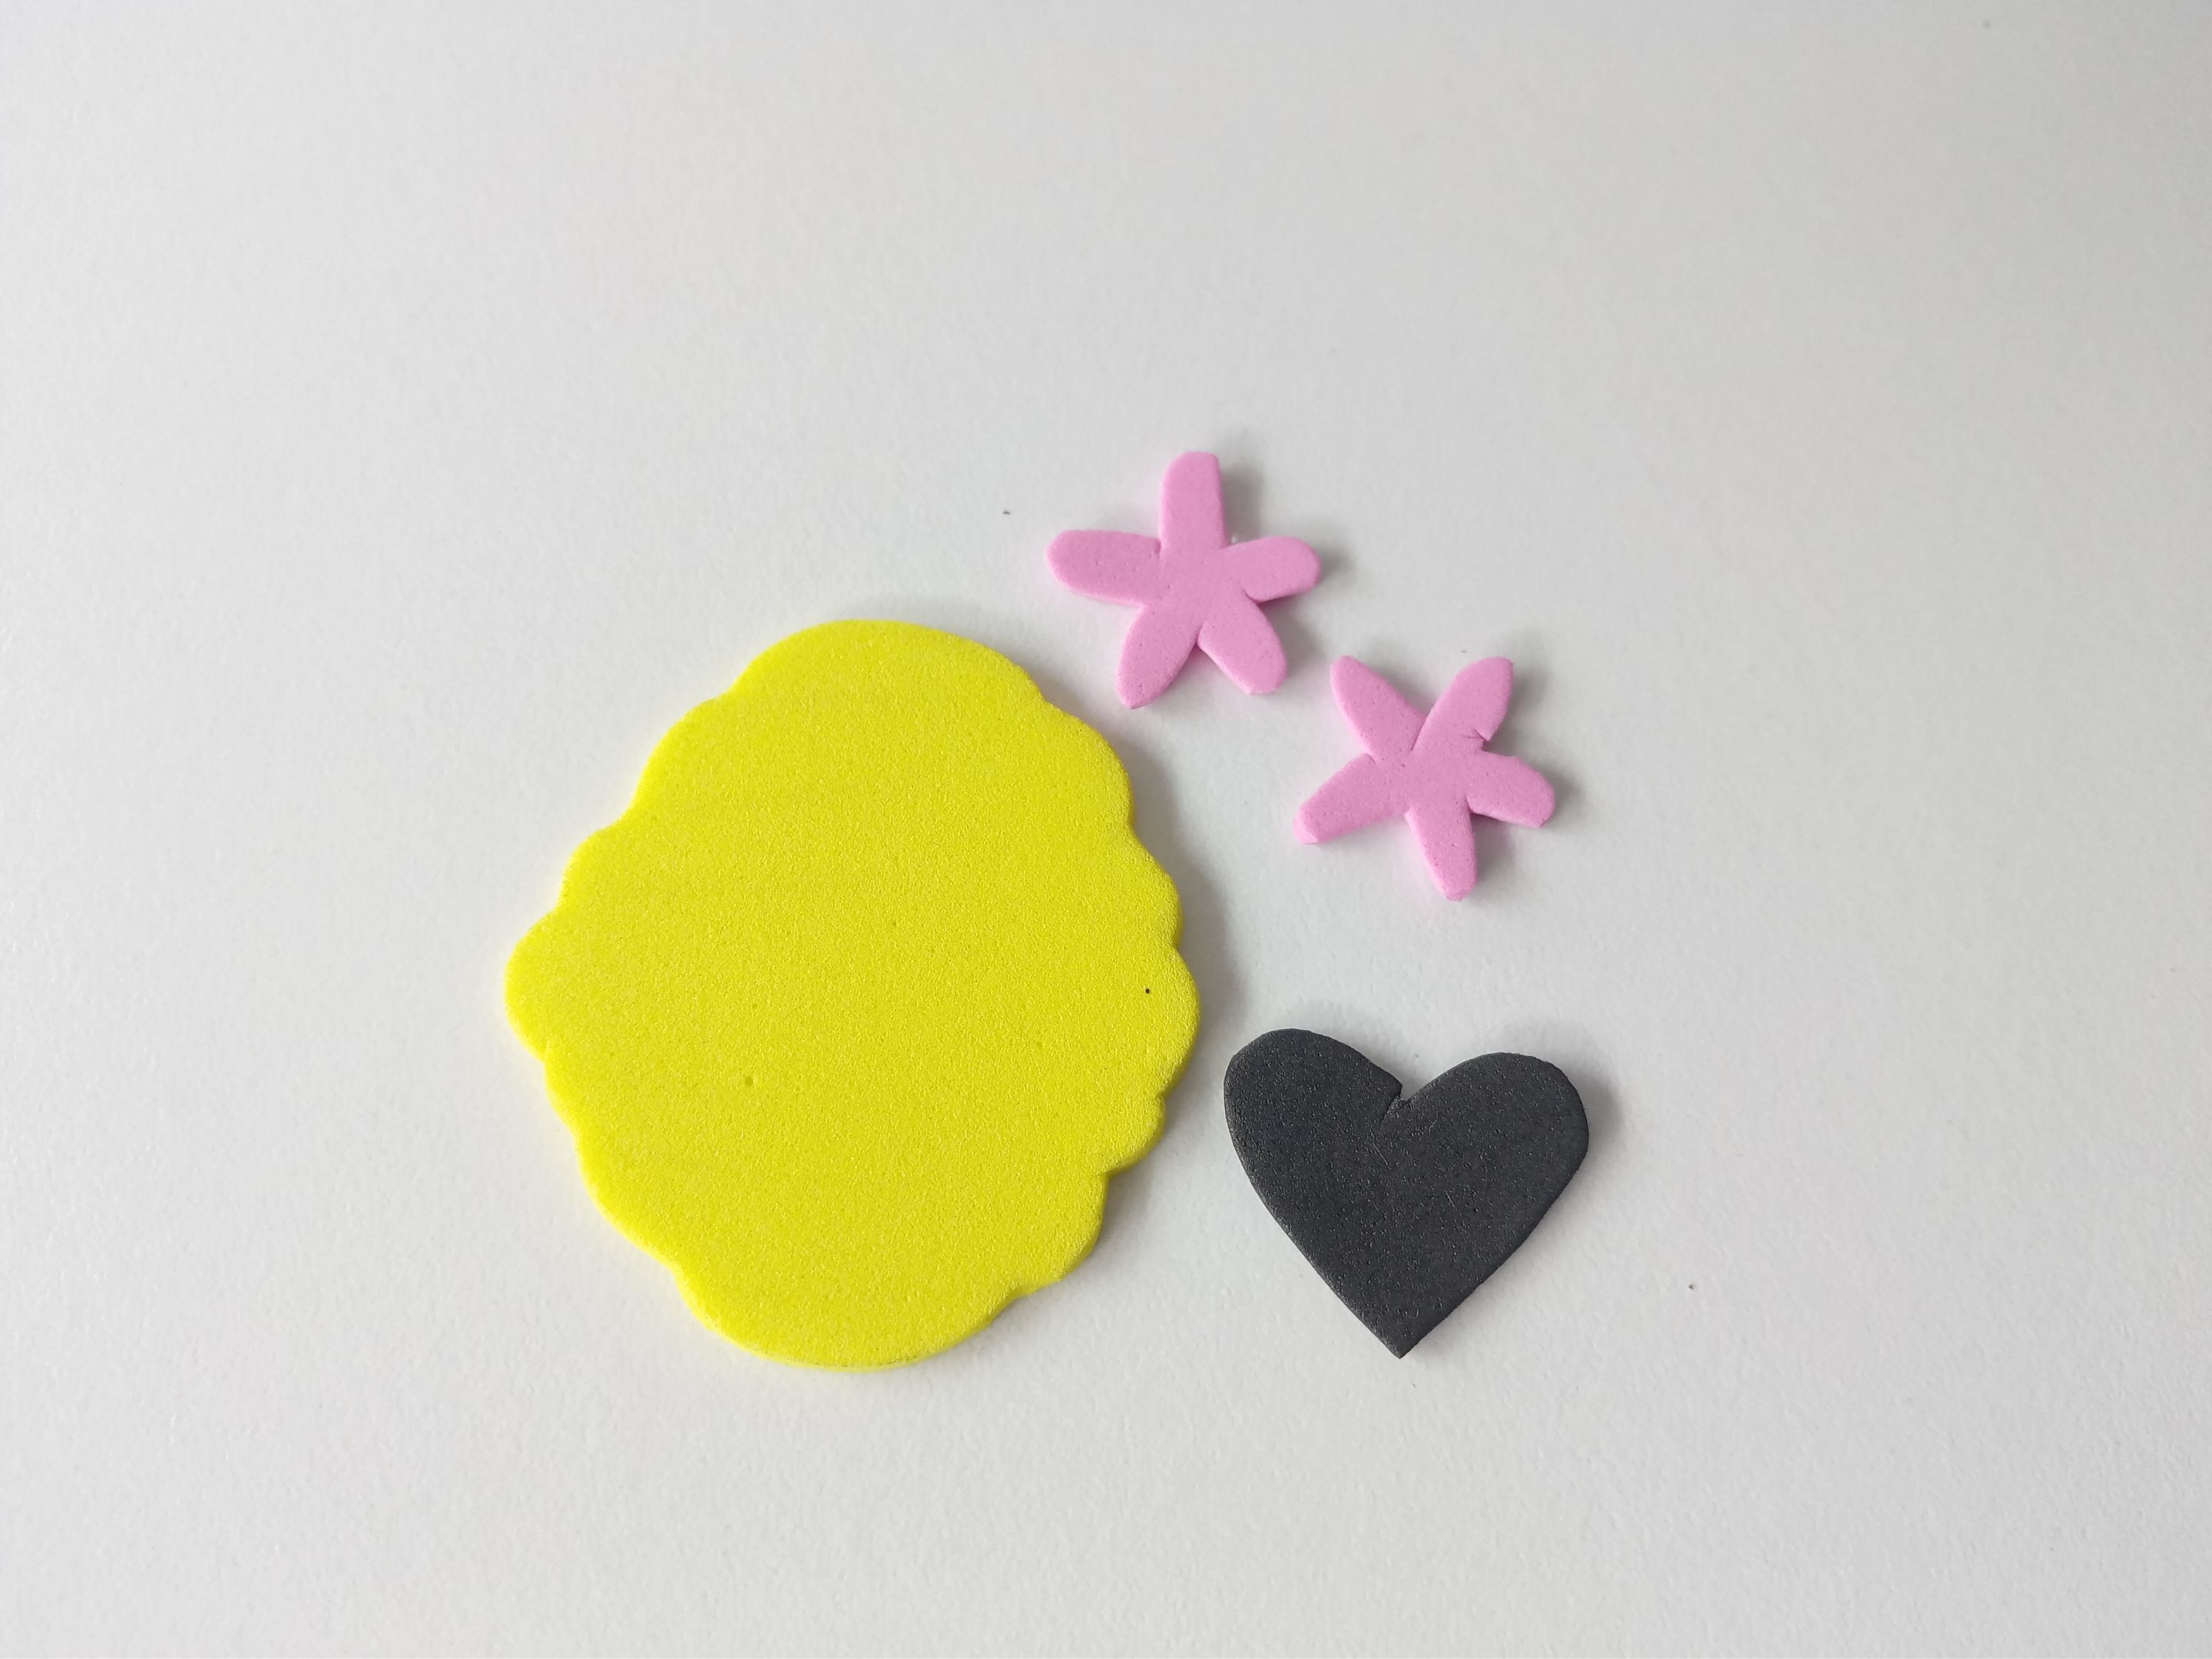
###### ✨PASO 1:
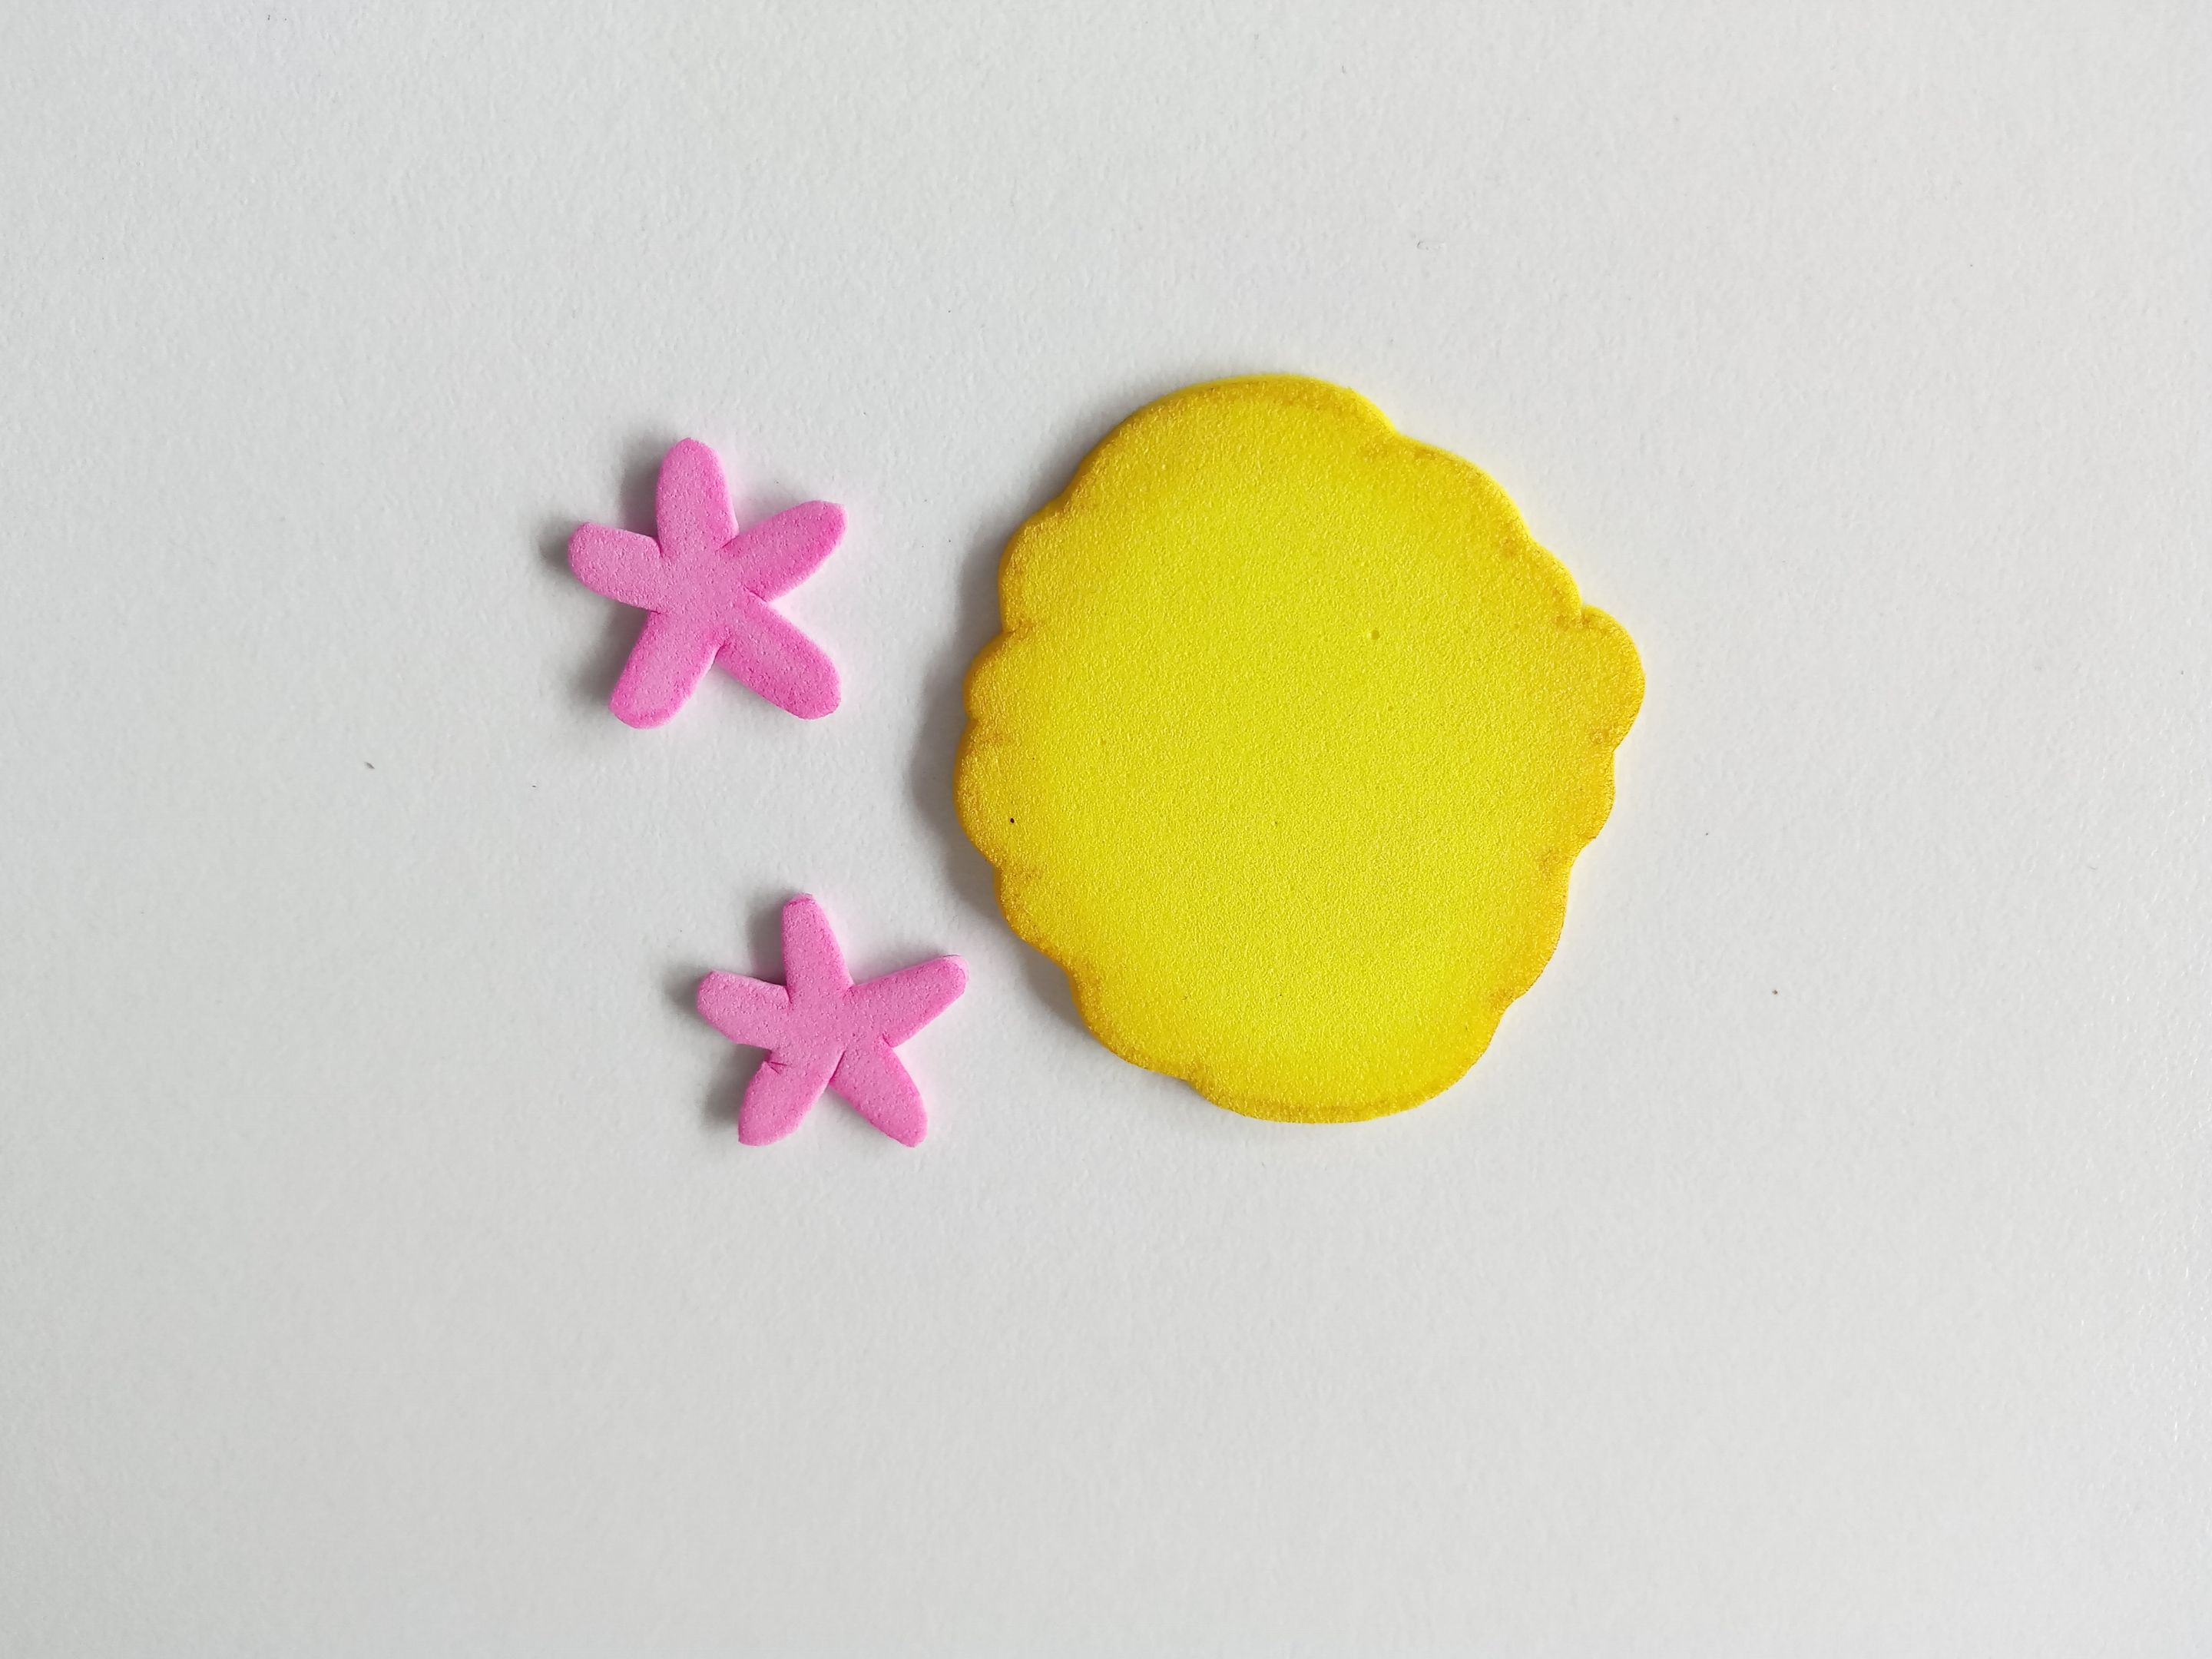
Lo primero, como siempre, es dibujar el patrón o diseño que deseamos en una hoja blanca. En mi caso, como dije al inicio, quería una abejita sobre un tarrito de miel, y para el segundo diseño quería un panal con algunos detalles florales. Al tener listos los diseños en la hoja blanca, es momento de transferir a los colores correspondientes de foami, como explico a continuación:
✨Alas: 5 cm x 3 cm en foami blanco.
✨Cabeza: 2.8 cm x 2.5 cm en foami amarillo.
✨Miel: 5 cm x 1.5 cm en foami amarillo.
✨Tarro: 4.5 cm x 4 cm en foami marrón.
✨Etiqueta: 3.2 cm x 1.5 cm en foami crema.
✨Colmena: 5 cm x 4 cm en foami amarillo.
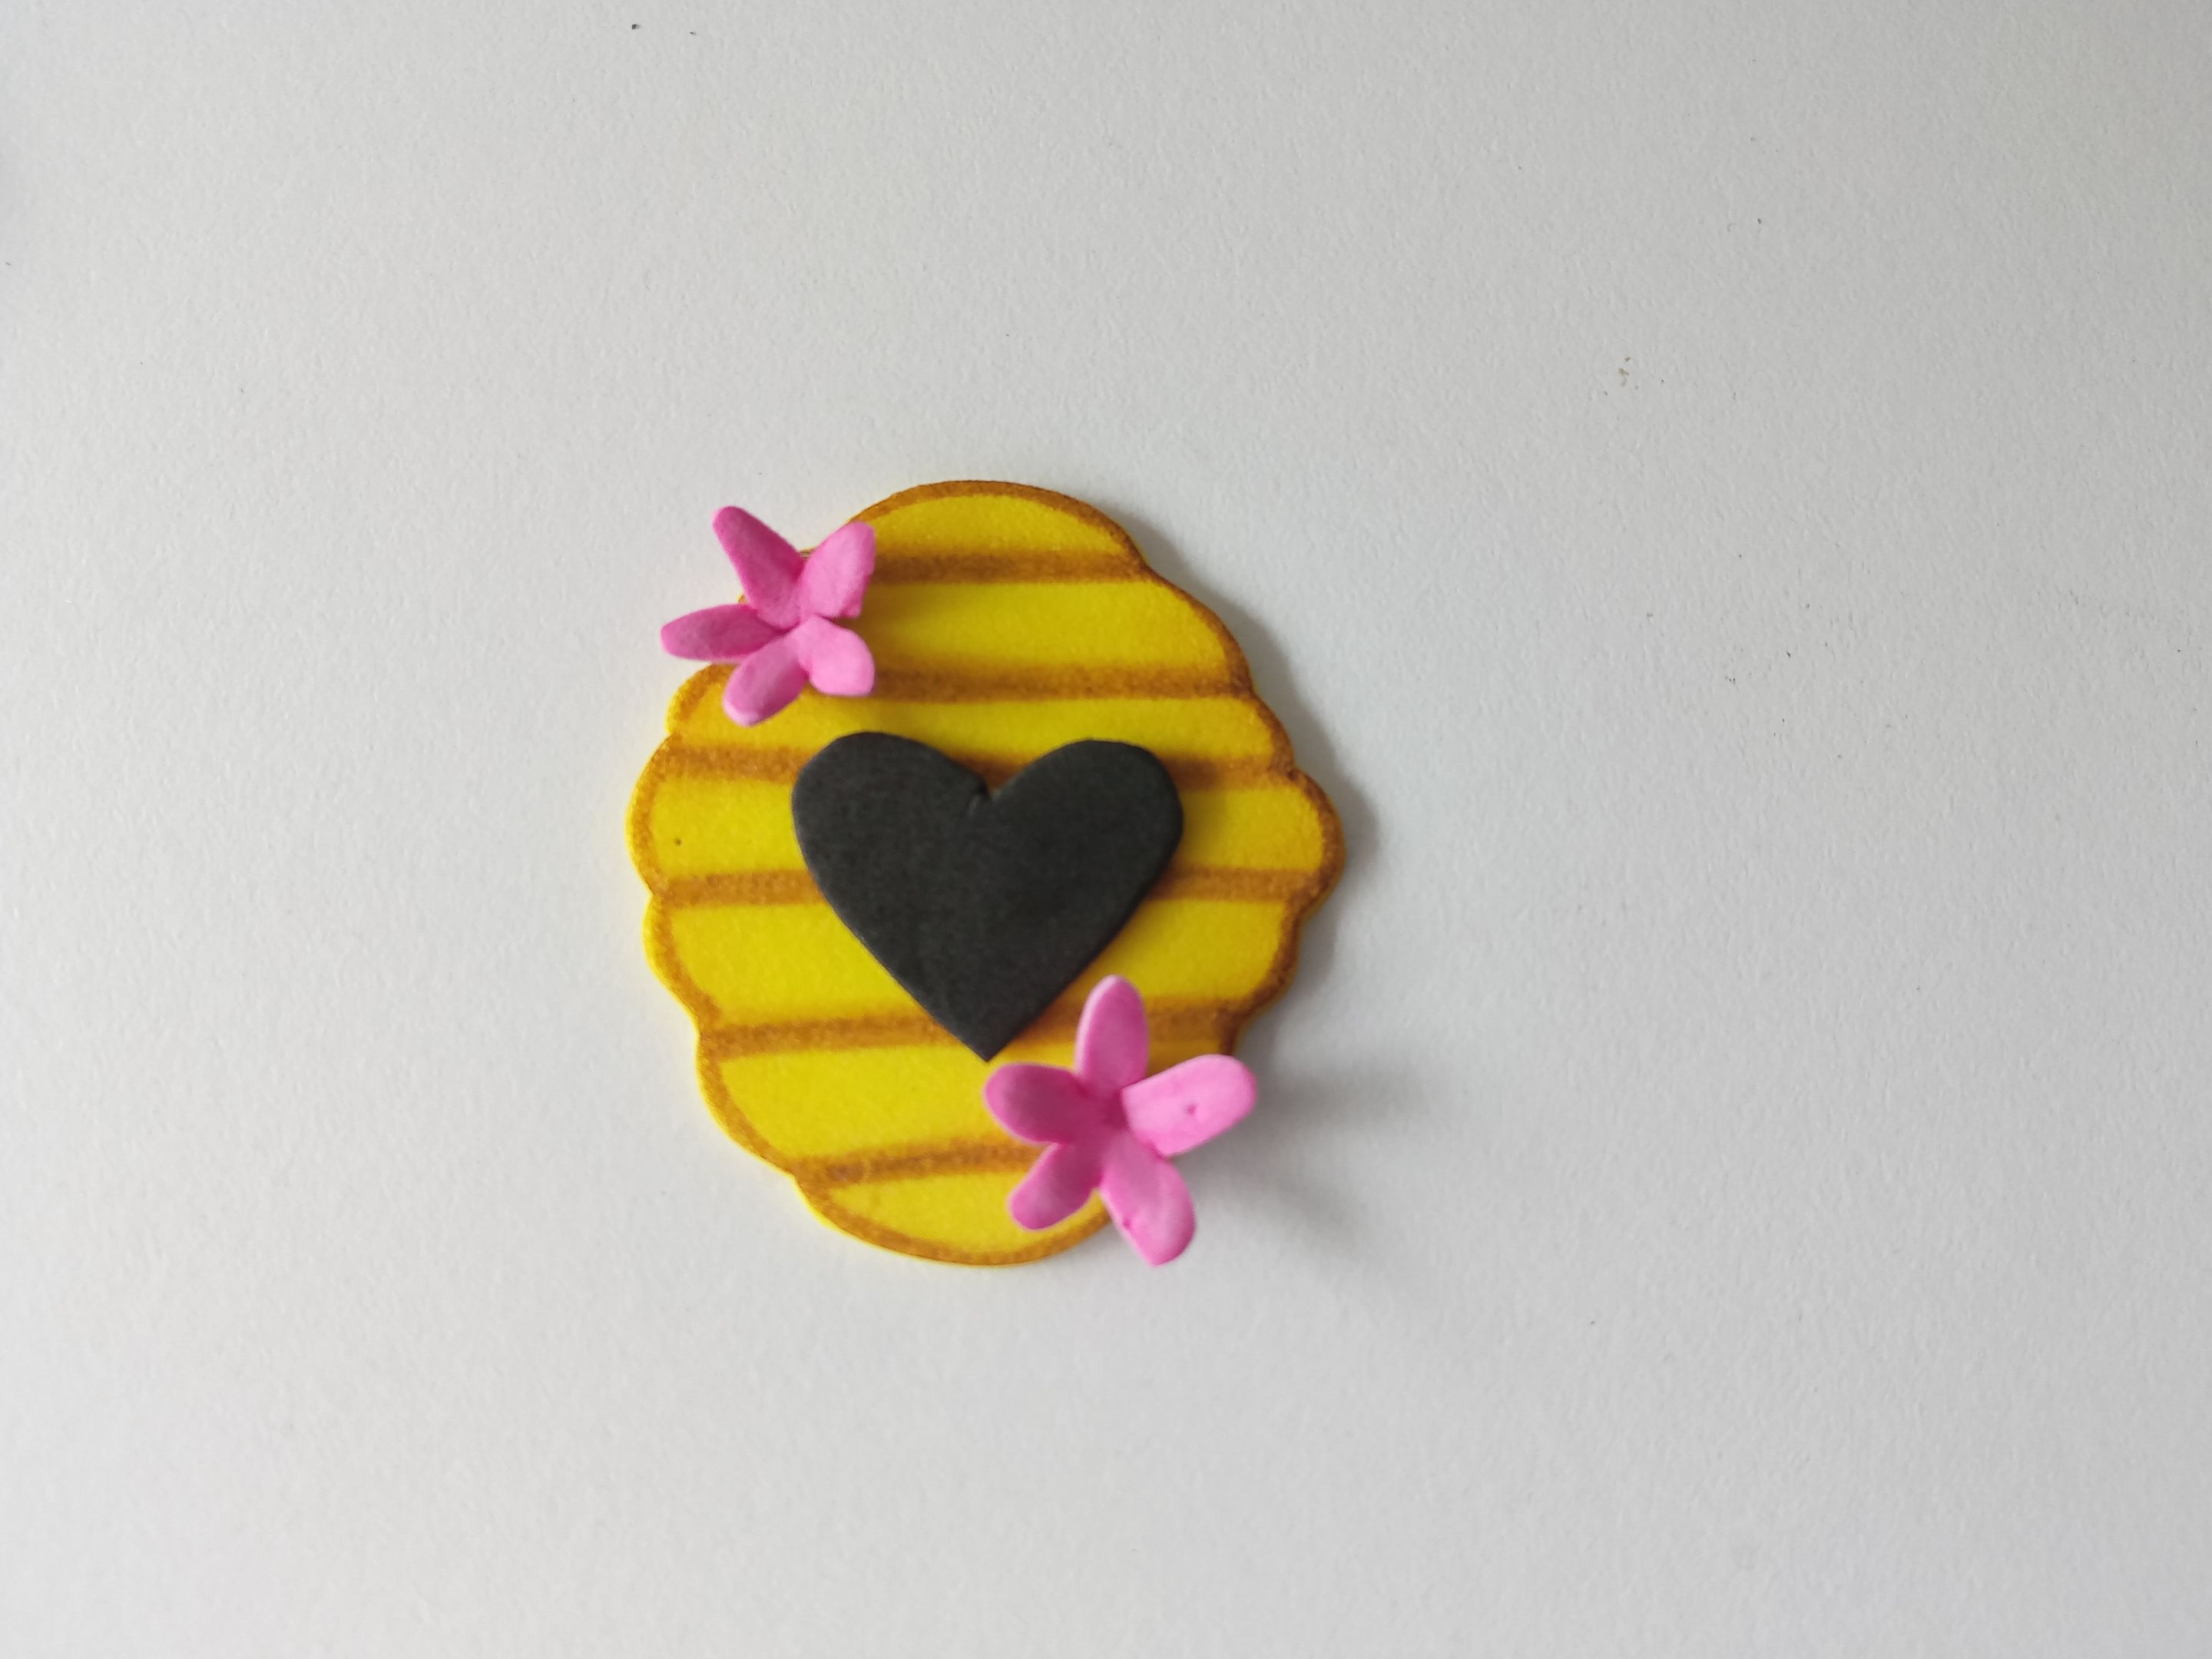
✨Entrada de corazón: 2.5 cm x 2 cm en foami negro.
✨Flores: 1.5 cm en foami rosa.
###### ✨STEP 1:
The first step, as always, is to draw the pattern or design you want on a white sheet of paper. In my case, as I mentioned at the beginning, I wanted a bee on a jar of honey, and for the second design, I wanted a honeycomb with some floral details. Once you have the designs ready on the white sheet, it's time to transfer them to the corresponding colors of foam, as explained below:
✨Wings: 5 cm x 3 cm in white foam.
✨Head: 2.8 cm x 2.5 cm in yellow foam.
✨Honey: 5 cm x 1.5 cm in yellow foam.
✨Jar: 4.5 cm x 4 cm in brown foam.
✨Label: 3.2 cm x 1.5 cm in cream foam.
✨Beehive: 5 cm x 4 cm in yellow foam.
✨Heart entrance: 2.5 cm x 2 cm in black foam.
✨Flowers: 1.5 cm in pink foam.
###### ✨PASO 2:
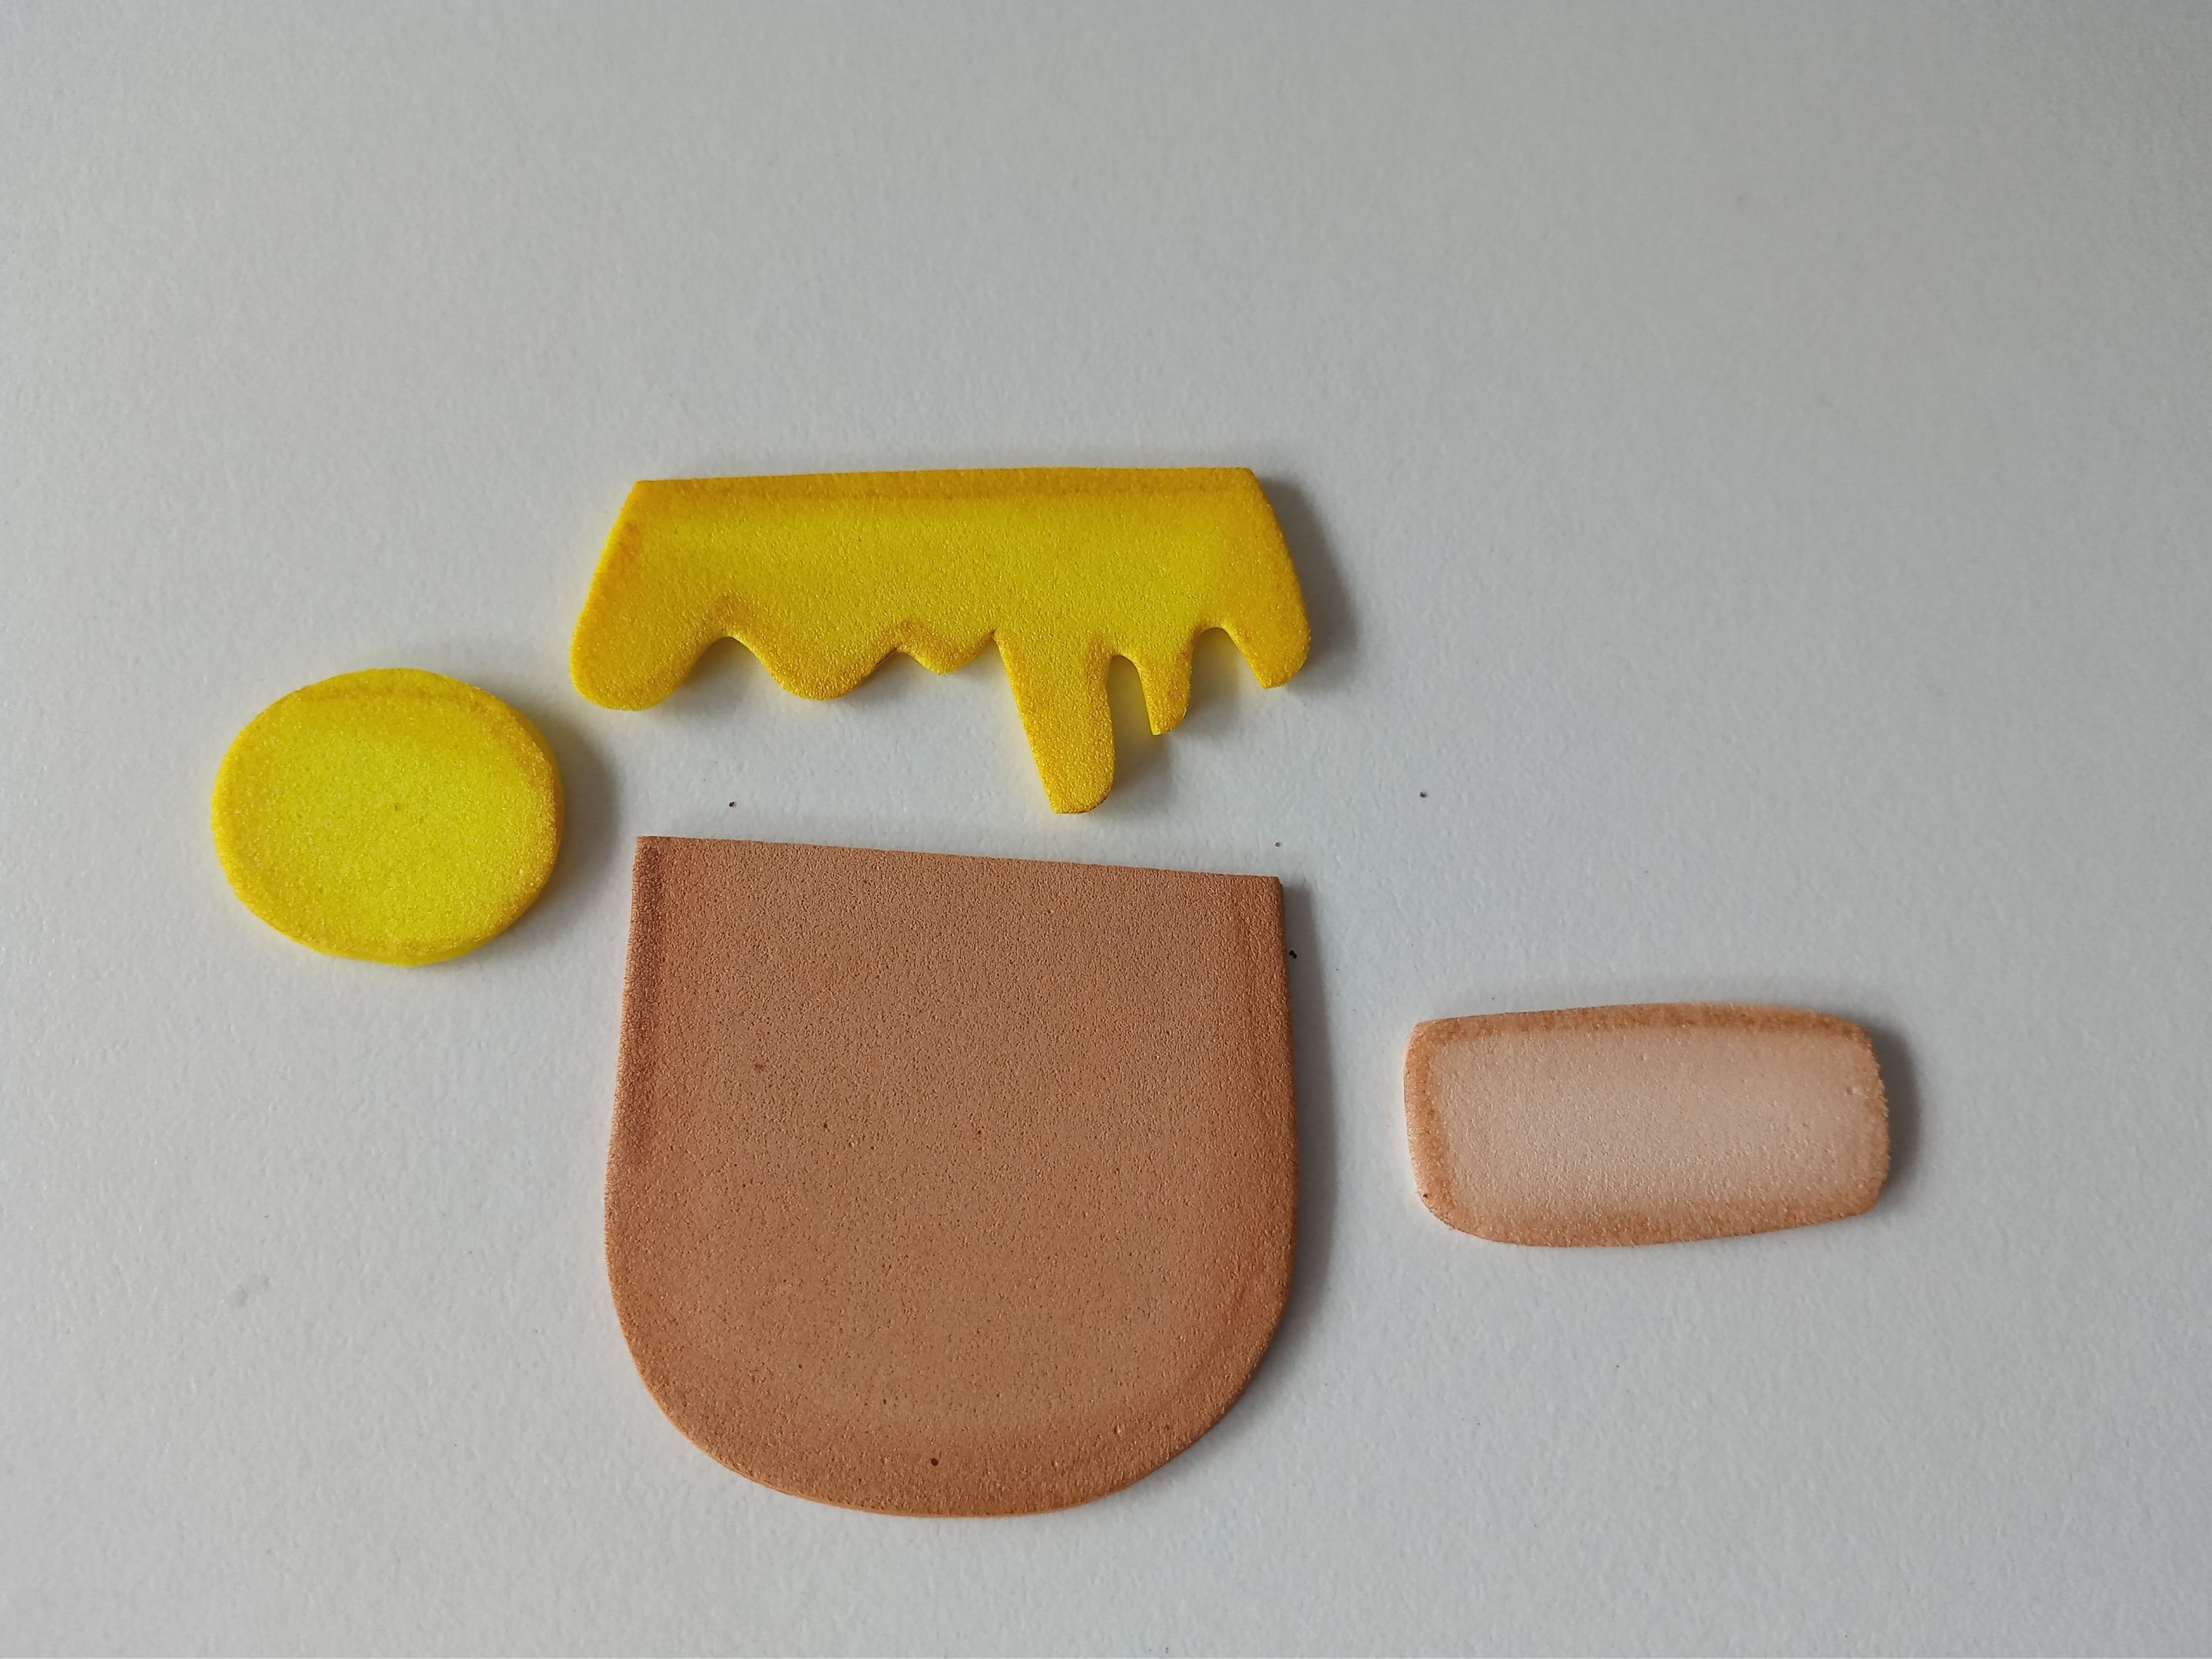
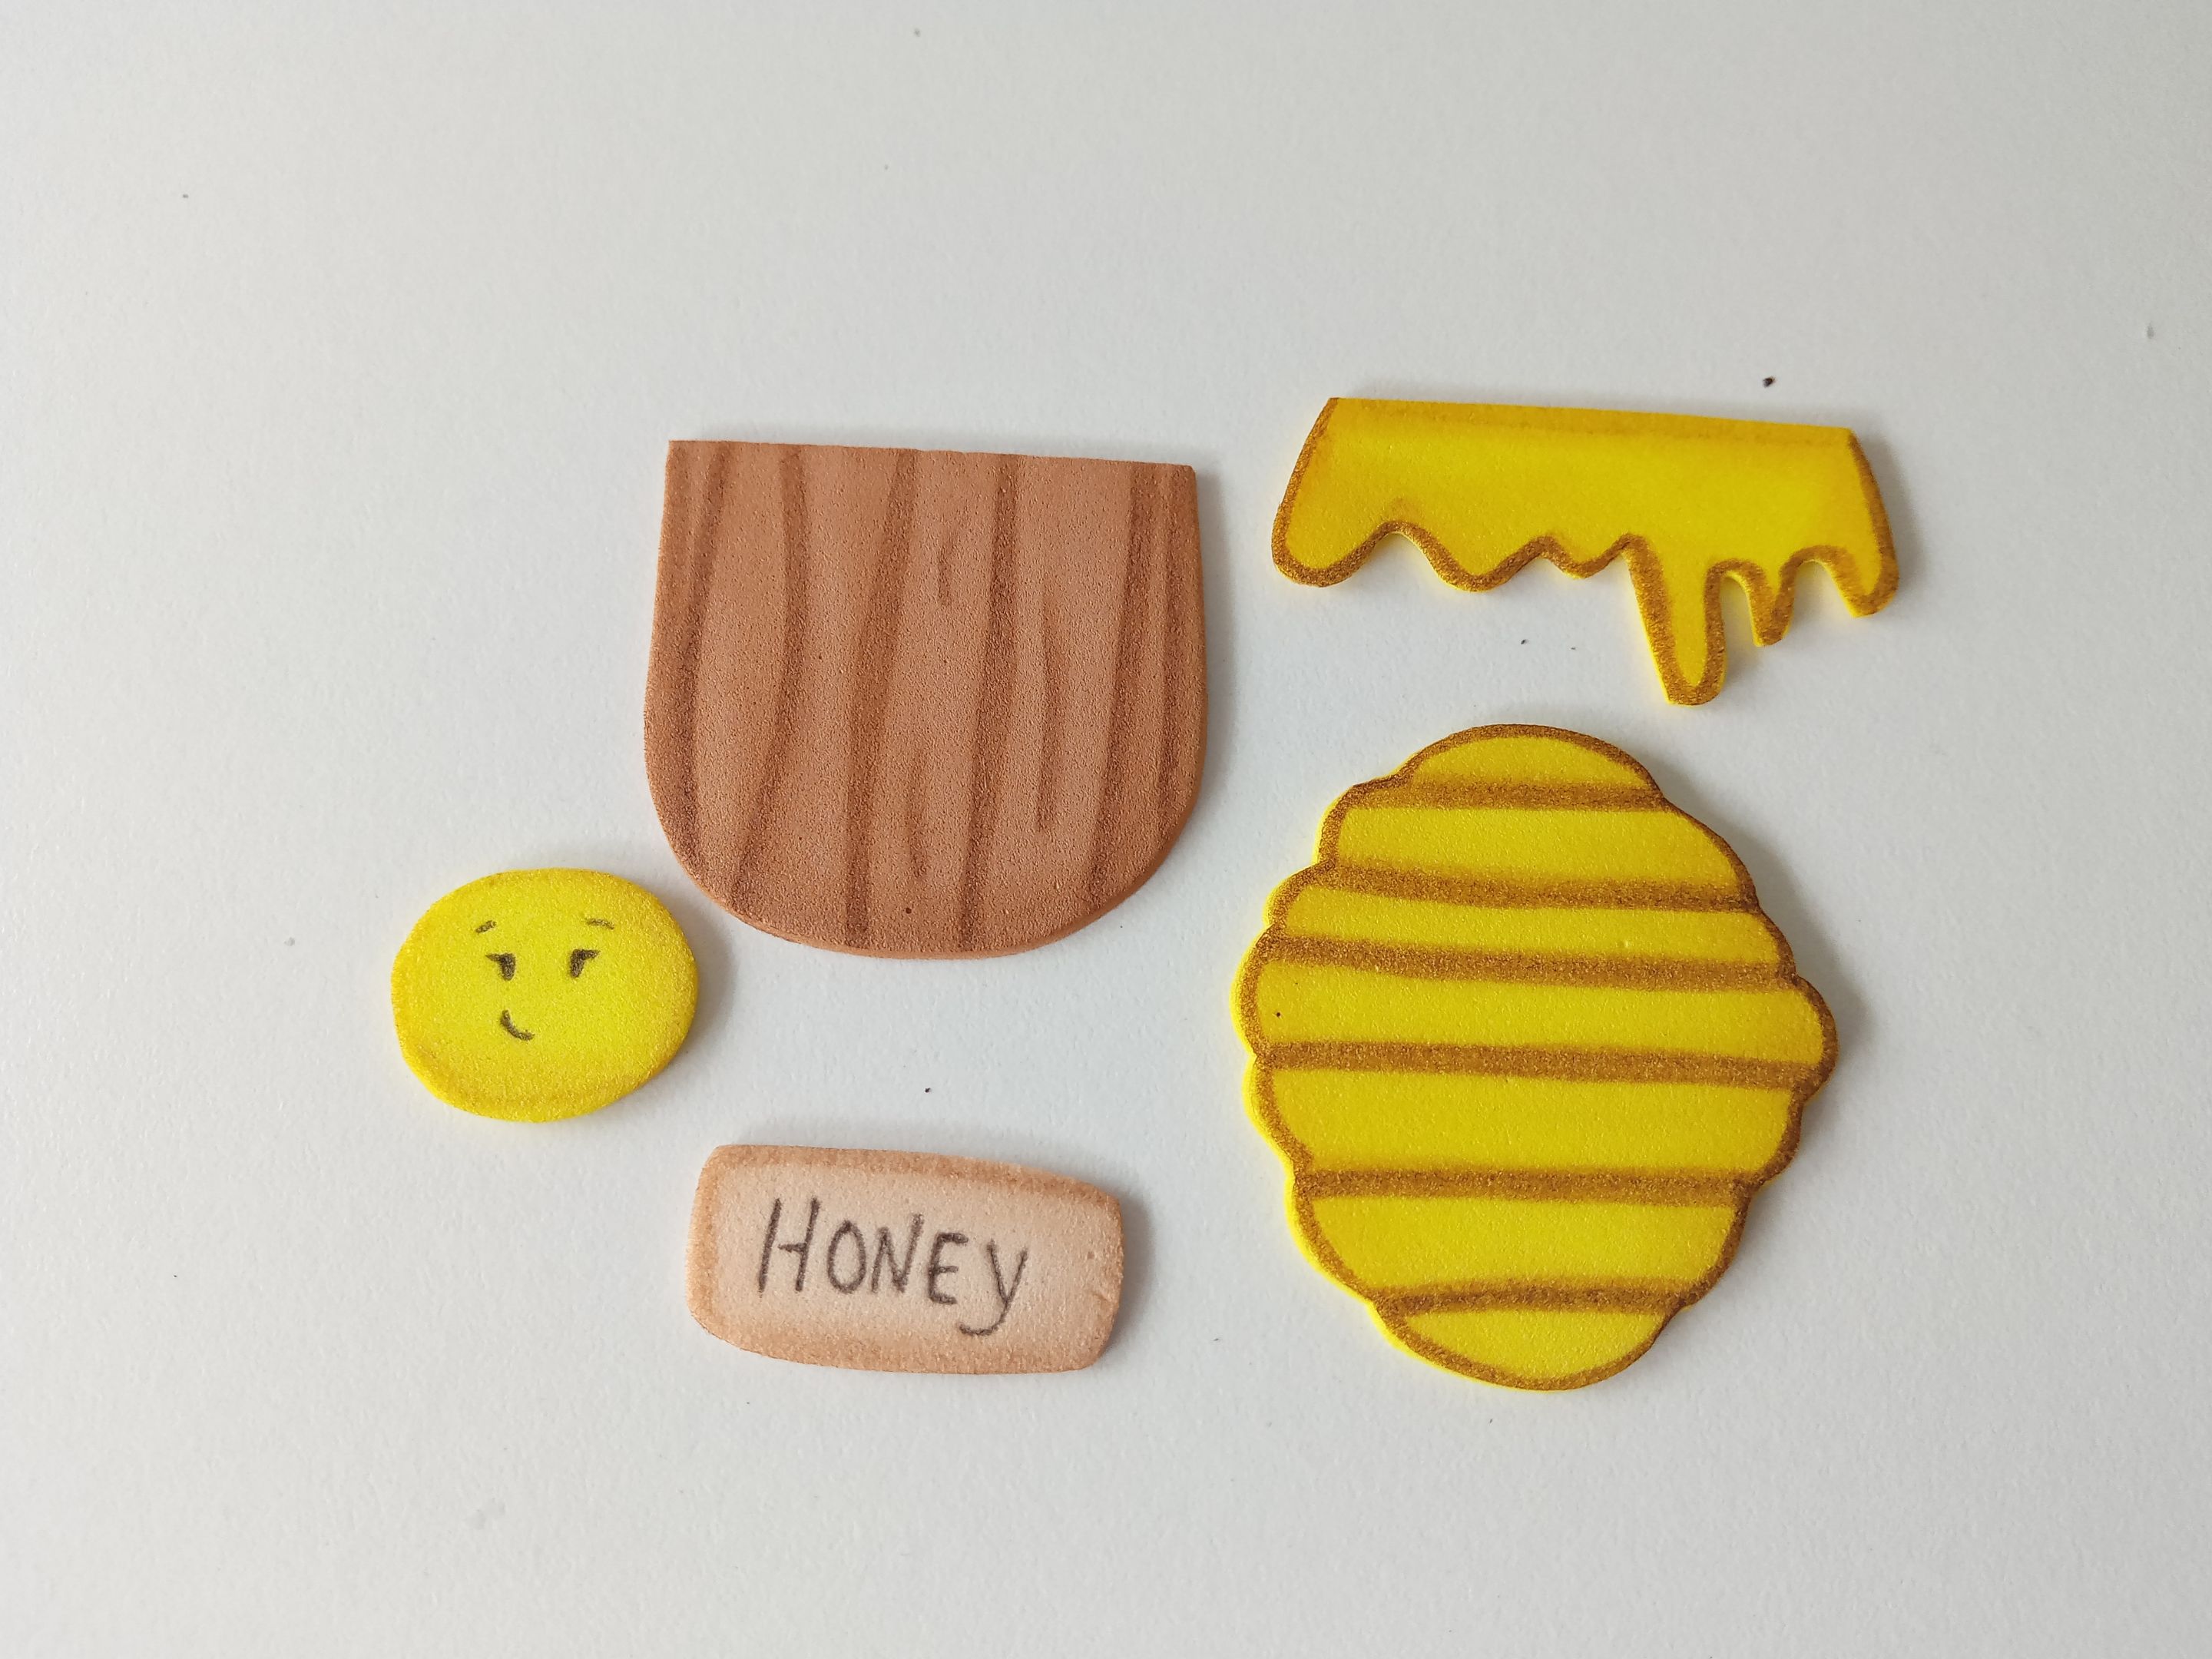
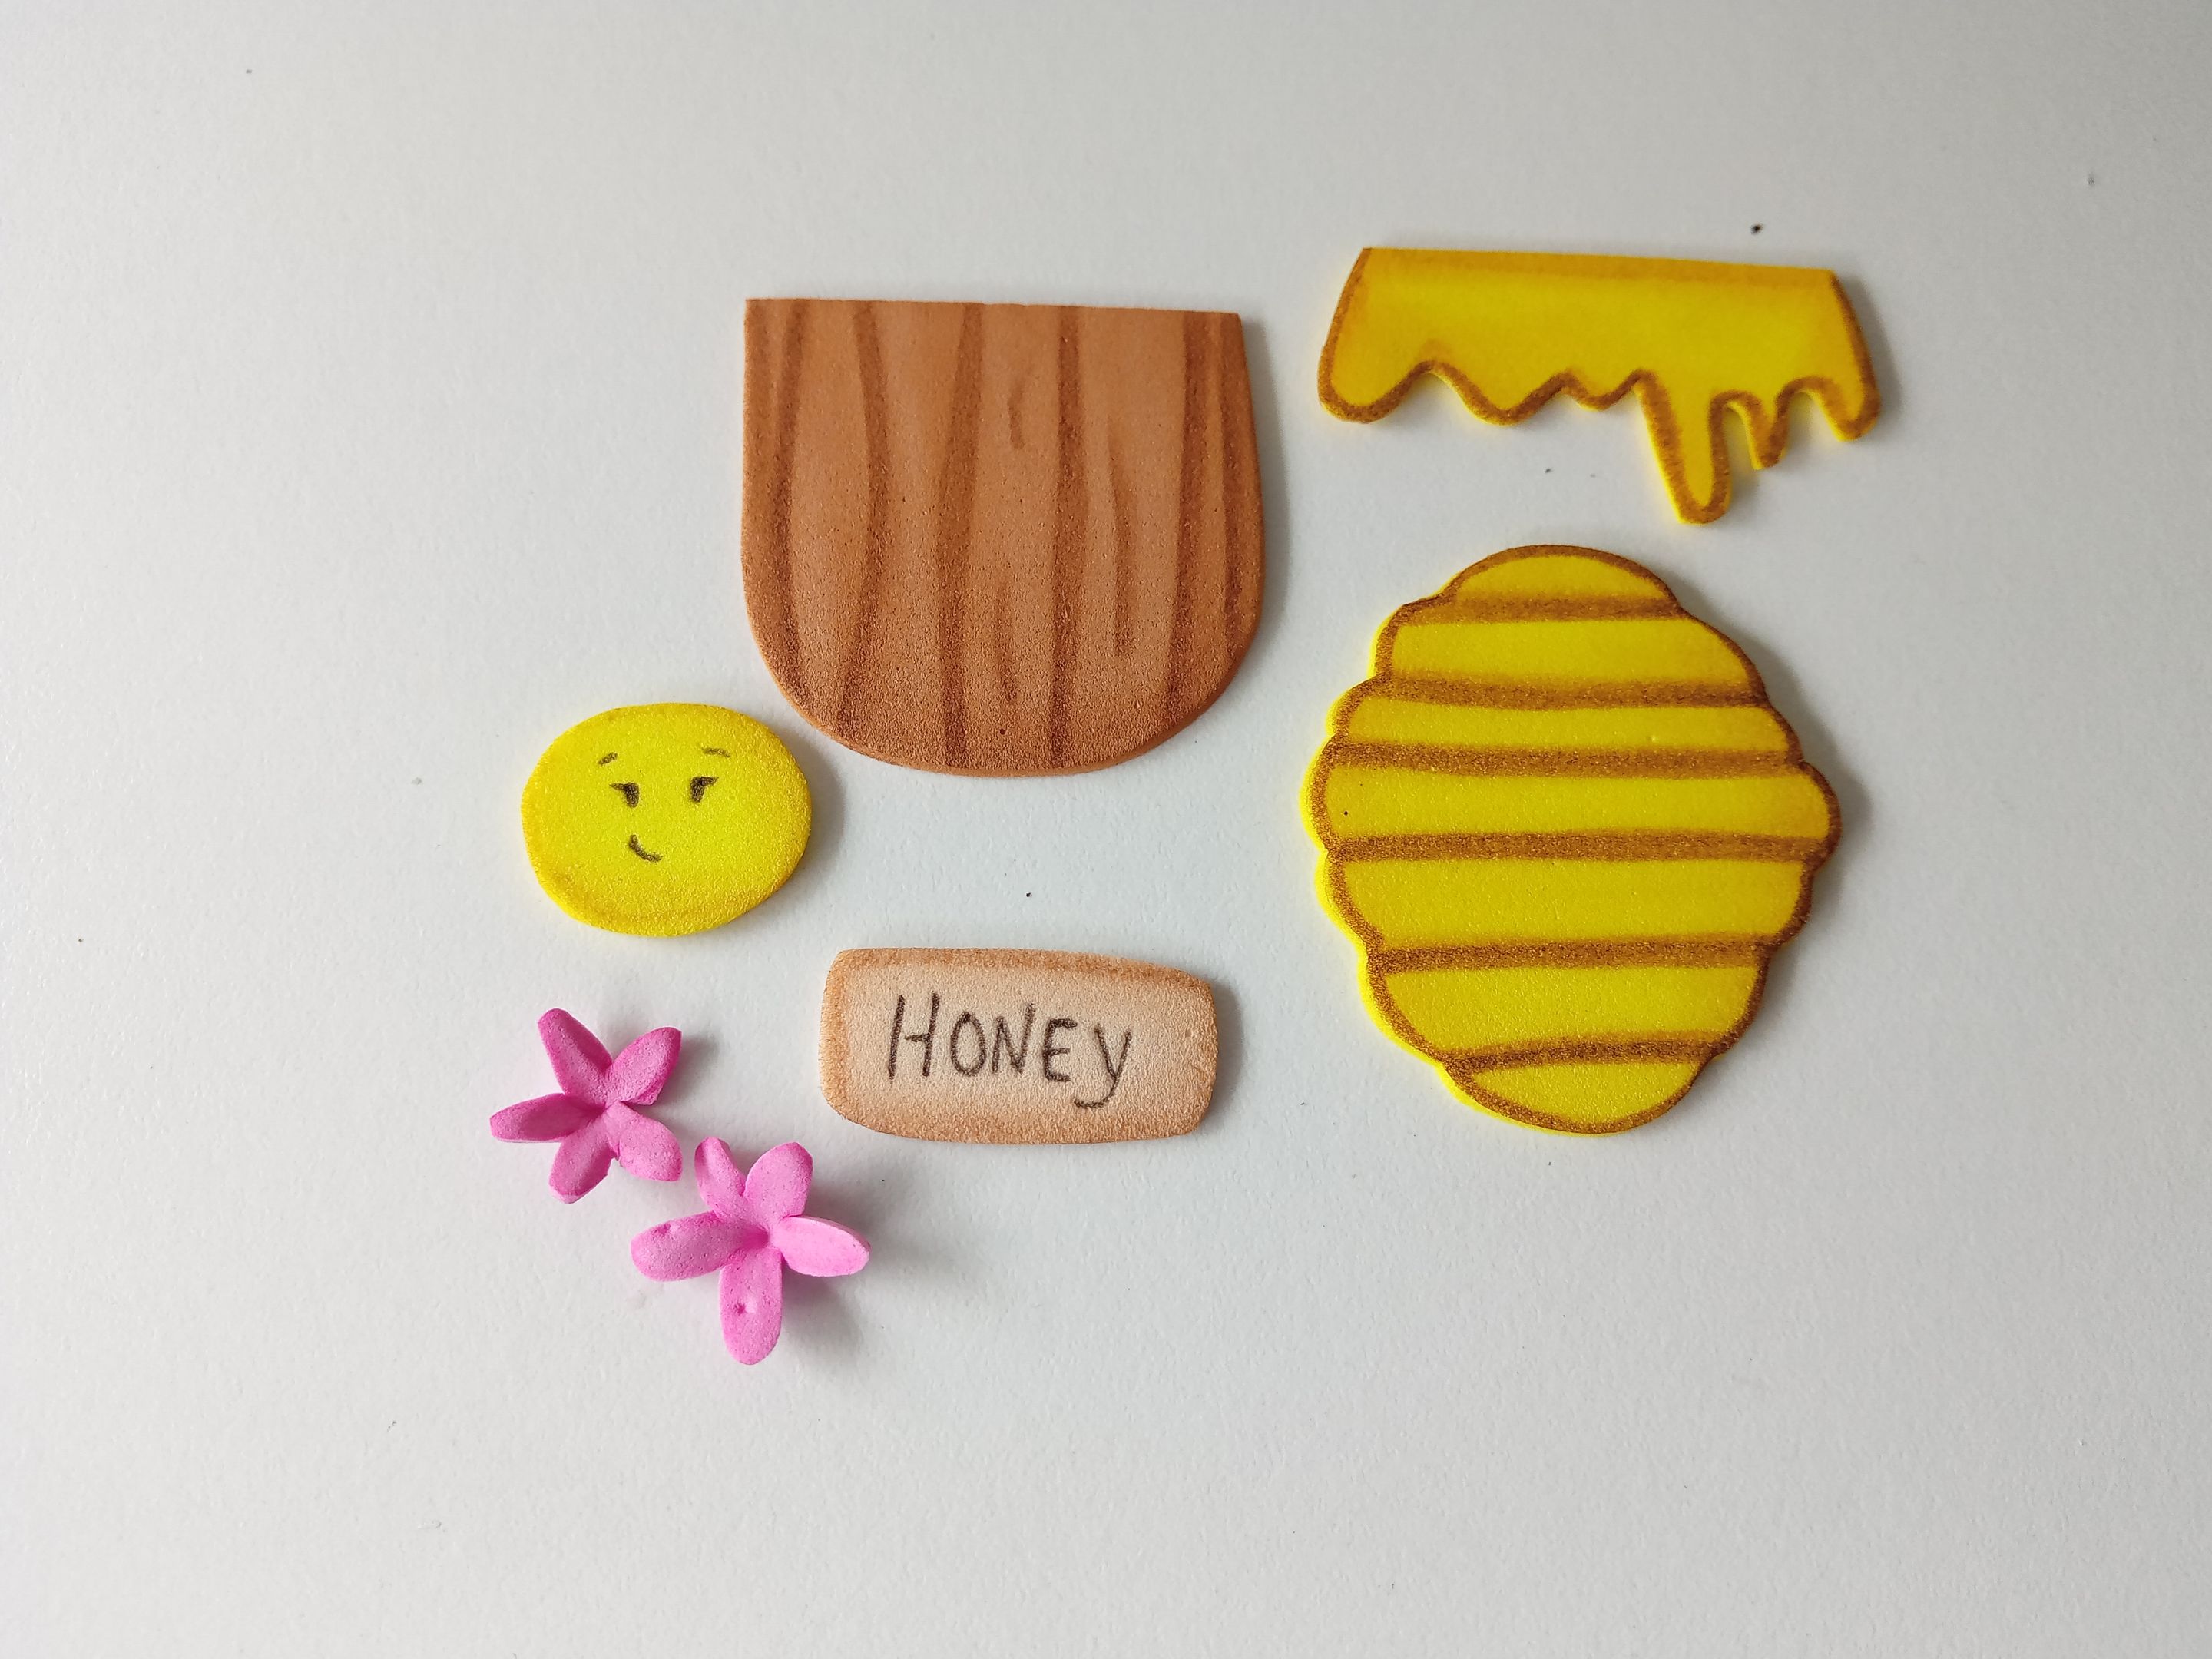
Al tener listas y recortadas las piezas en foami, es momento de dar color y vida, utilizando pinturas o marcadores por los bordes de cada una de las piezas y difuminamos. Recuerden utilizar colores que hagan contraste o den calidez a las piezas. En mi caso, utilicé pintura marrón para las piezas de foami amarillo, al igual que para la etiqueta, pero para el tarro, utilicé un tono un poco más oscuro de marrón. Por otra parte, para las flores solo utilicé el mismo color, pero un tono más oscuro.
###### ✨STEP 2:
Once the foam pieces are ready and cut, it's time to add color and life, using paints or markers along the edges of each piece and blending them. Remember to use colors that contrast or add warmth to the pieces. In my case, I used brown paint for the yellow foam pieces, as well as for the label, but for the jar, I used a slightly darker shade of brown. For the flowers, I used the same color, but a darker shade.
###### ✨PASO 3:
Al estar secas las piezas, es momento de dar detalles más específicos, con marcadores. En este caso, hice los detalles del rostro de la abejita, los detalles de las alas, remarqué un poco más los bordes de la miel, escribí Honey en la etiqueta, hice los detalles de líneas en la colmena y remarqué los bordes de las pequeñas flores, además de hundirlas un poco en medio para que se vieran mejor formadas y no planas.
###### ✨STEP 3:
Once the pieces are dry, it's time to add more specific details with markers. In this case, I added details to the bee's face and wings, highlighted the edges of the honey a little more, wrote "Honey" on the label, added lines to the hive, and highlighted the edges of the small flowers. I also indented them slightly in the middle so they looked more formed and not flat.
###### ✨PASO 4:
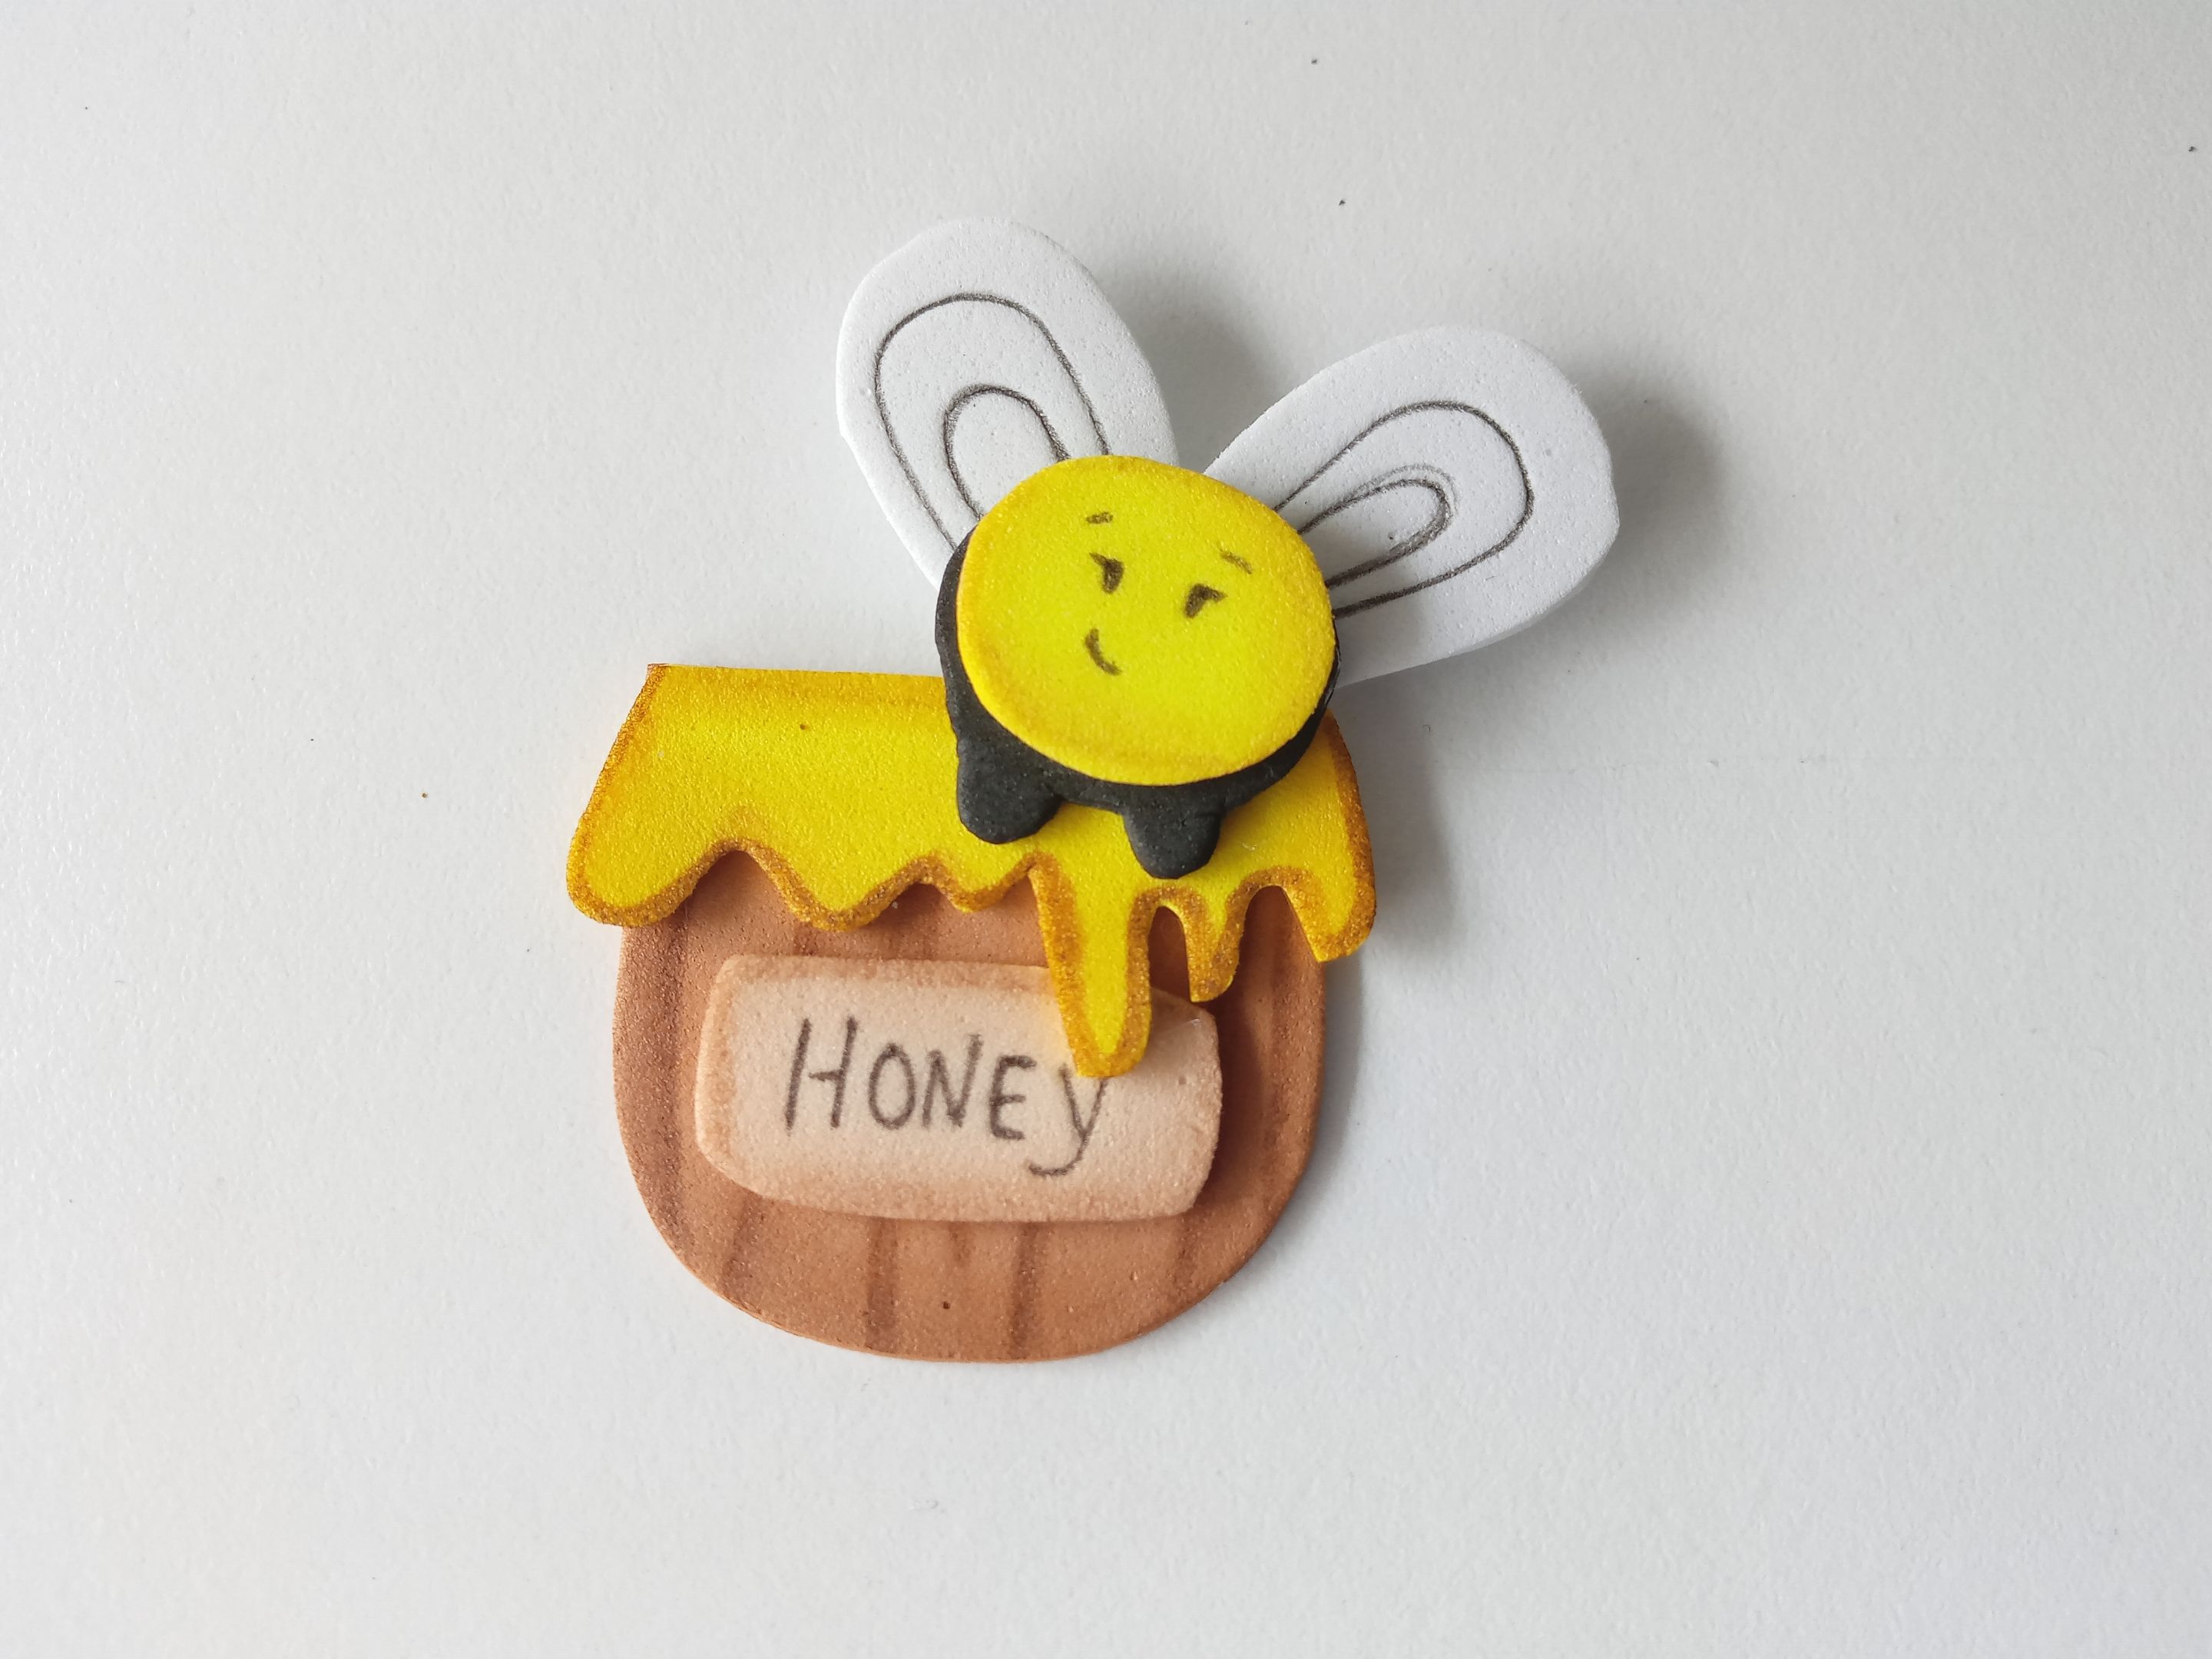
Al estar secas las piezas, llegó el momento de unir, hasta formar las decoraciones. Así que con pegamento, fui pegando la miel al tarro, la etiqueta en medio del tarro, luego el cuerpo de la abeja sobre la miel, seguido de la cabeza y, por último, las alas. En cuanto a la otra decoración, simplemente pegué la entrada en forma de corazón en medio del panal y las pequeñas flores en esquinas contrarias.
###### ✨STEP 4:
Once the pieces were dry, it was time to join them together, forming the decorations. So, using glue, I glued the honey to the jar, the label in the middle of the jar, then the bee's body on top of the honey, followed by the head, and finally, the wings. As for the other decorations, I simply glued the heart-shaped entrance in the middle of the honeycomb and the small flowers in opposite corners.
###### ✨PASO 5:
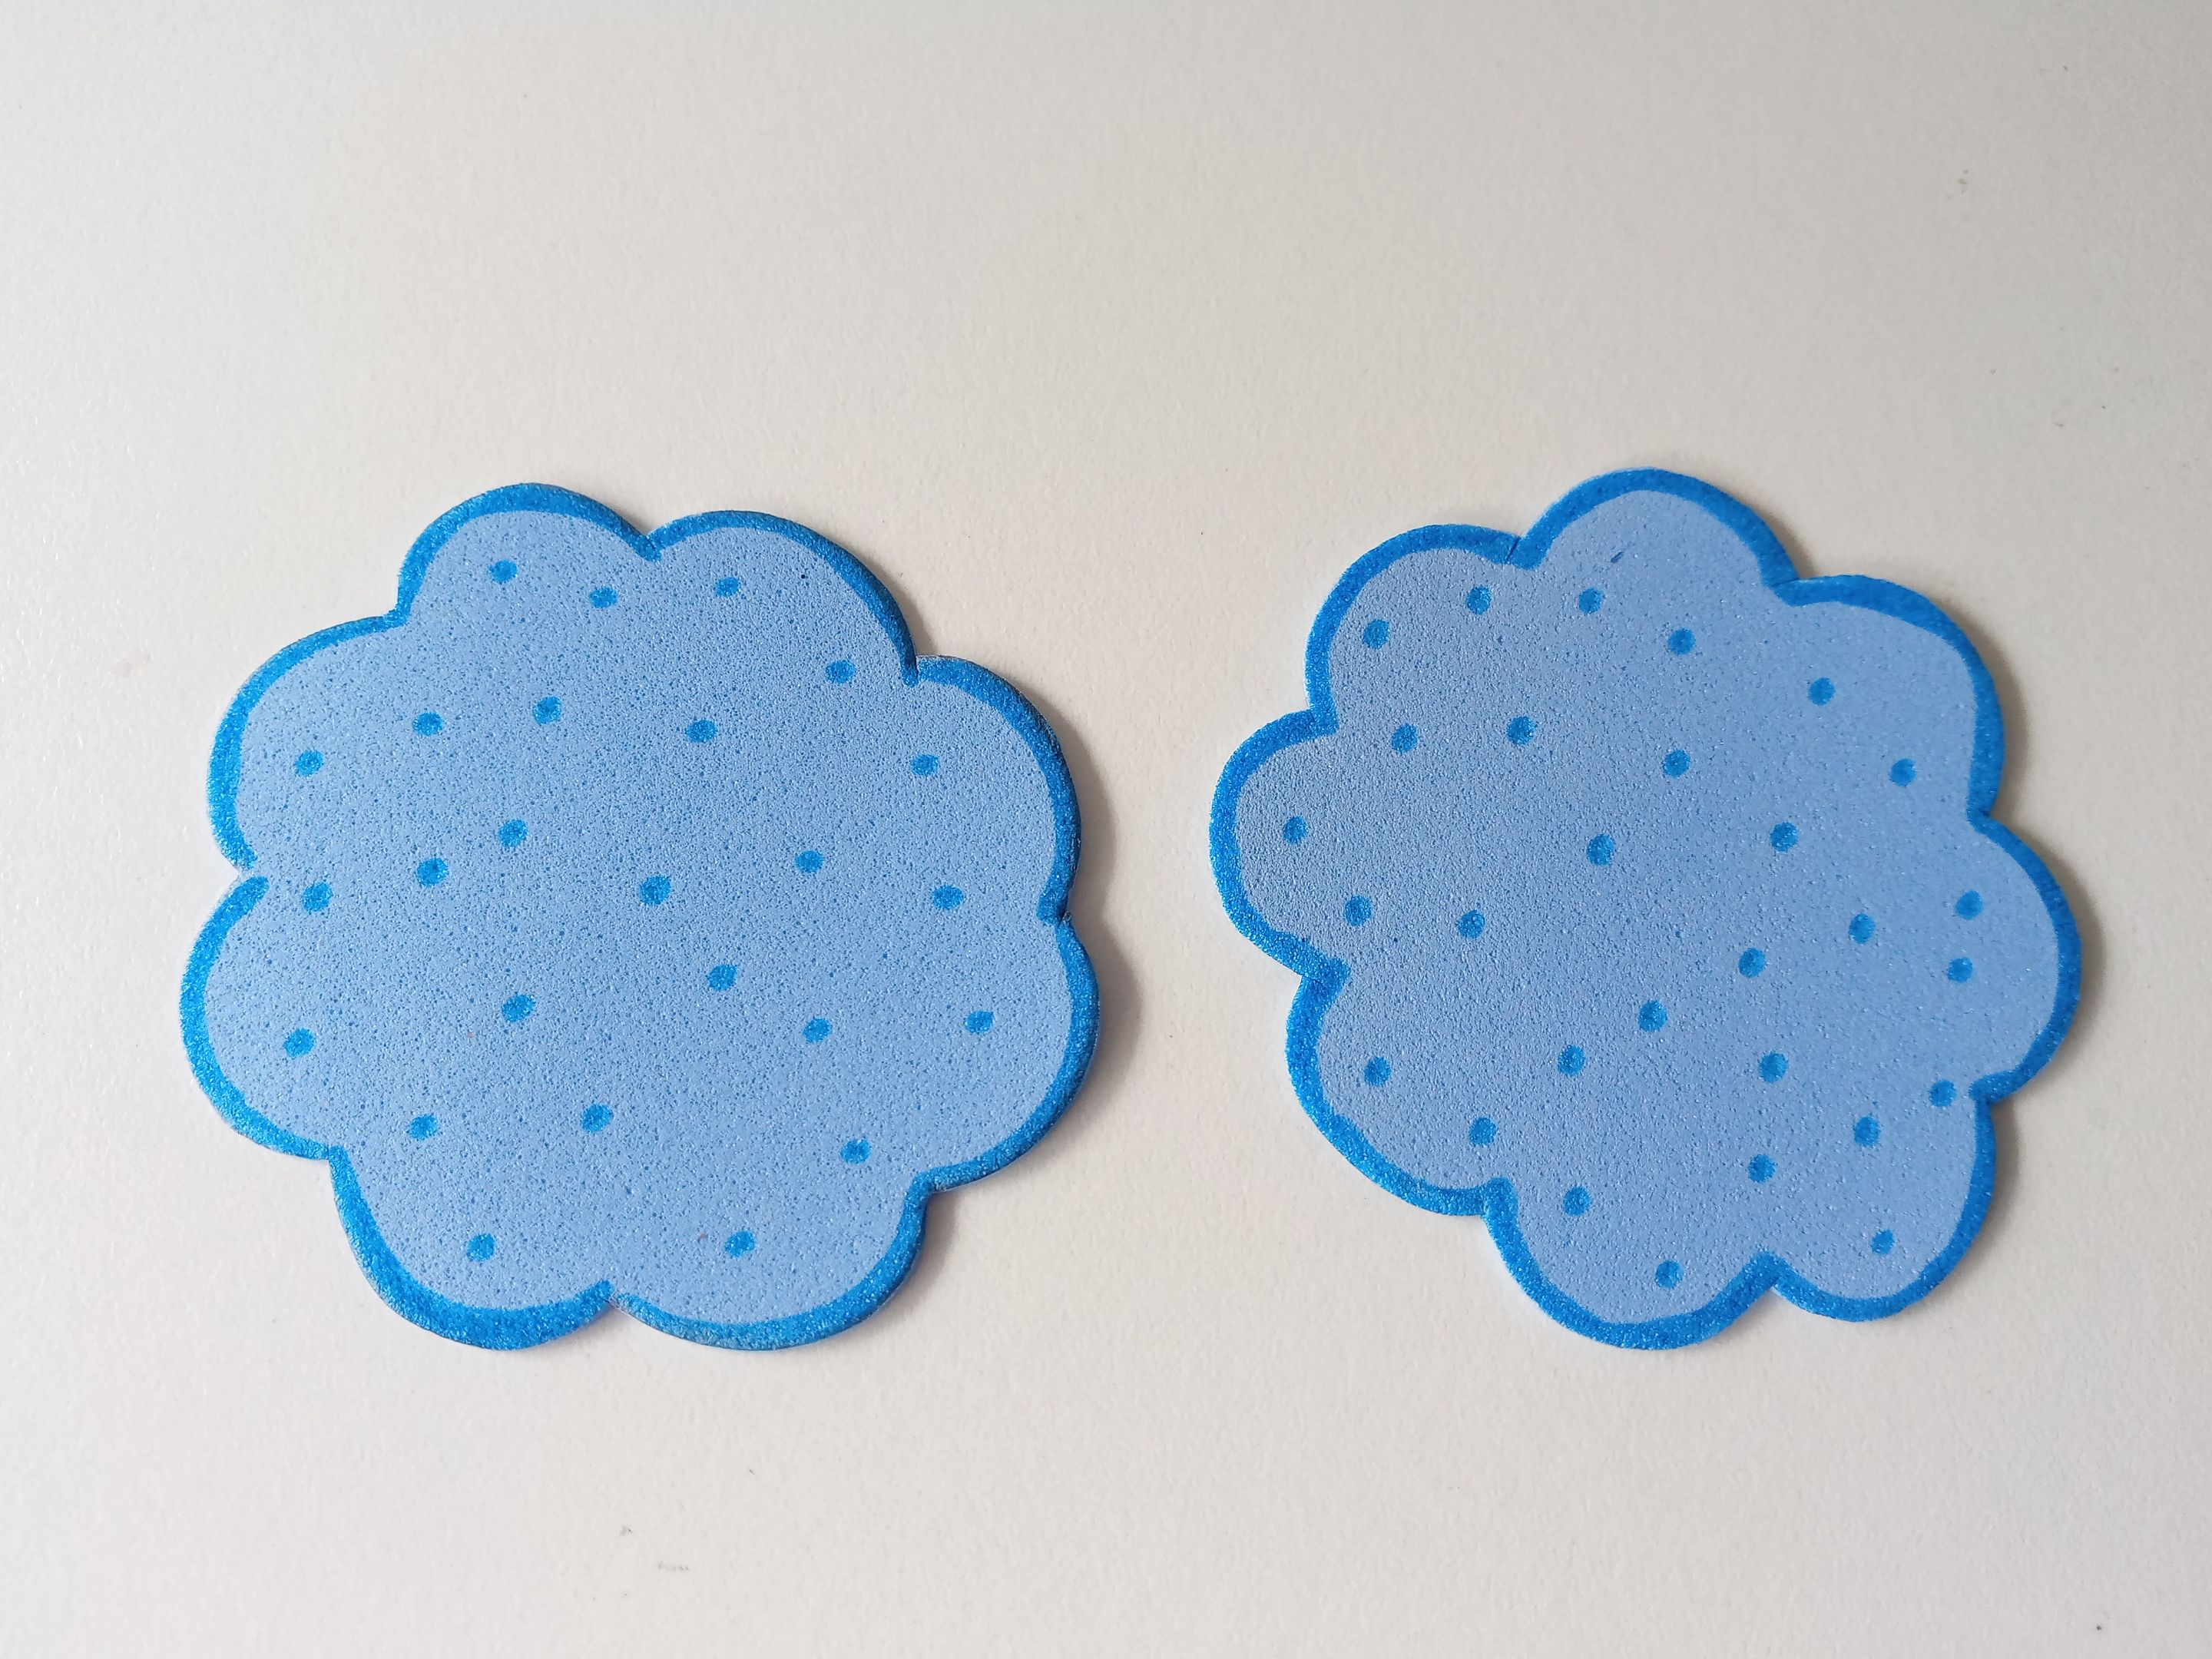
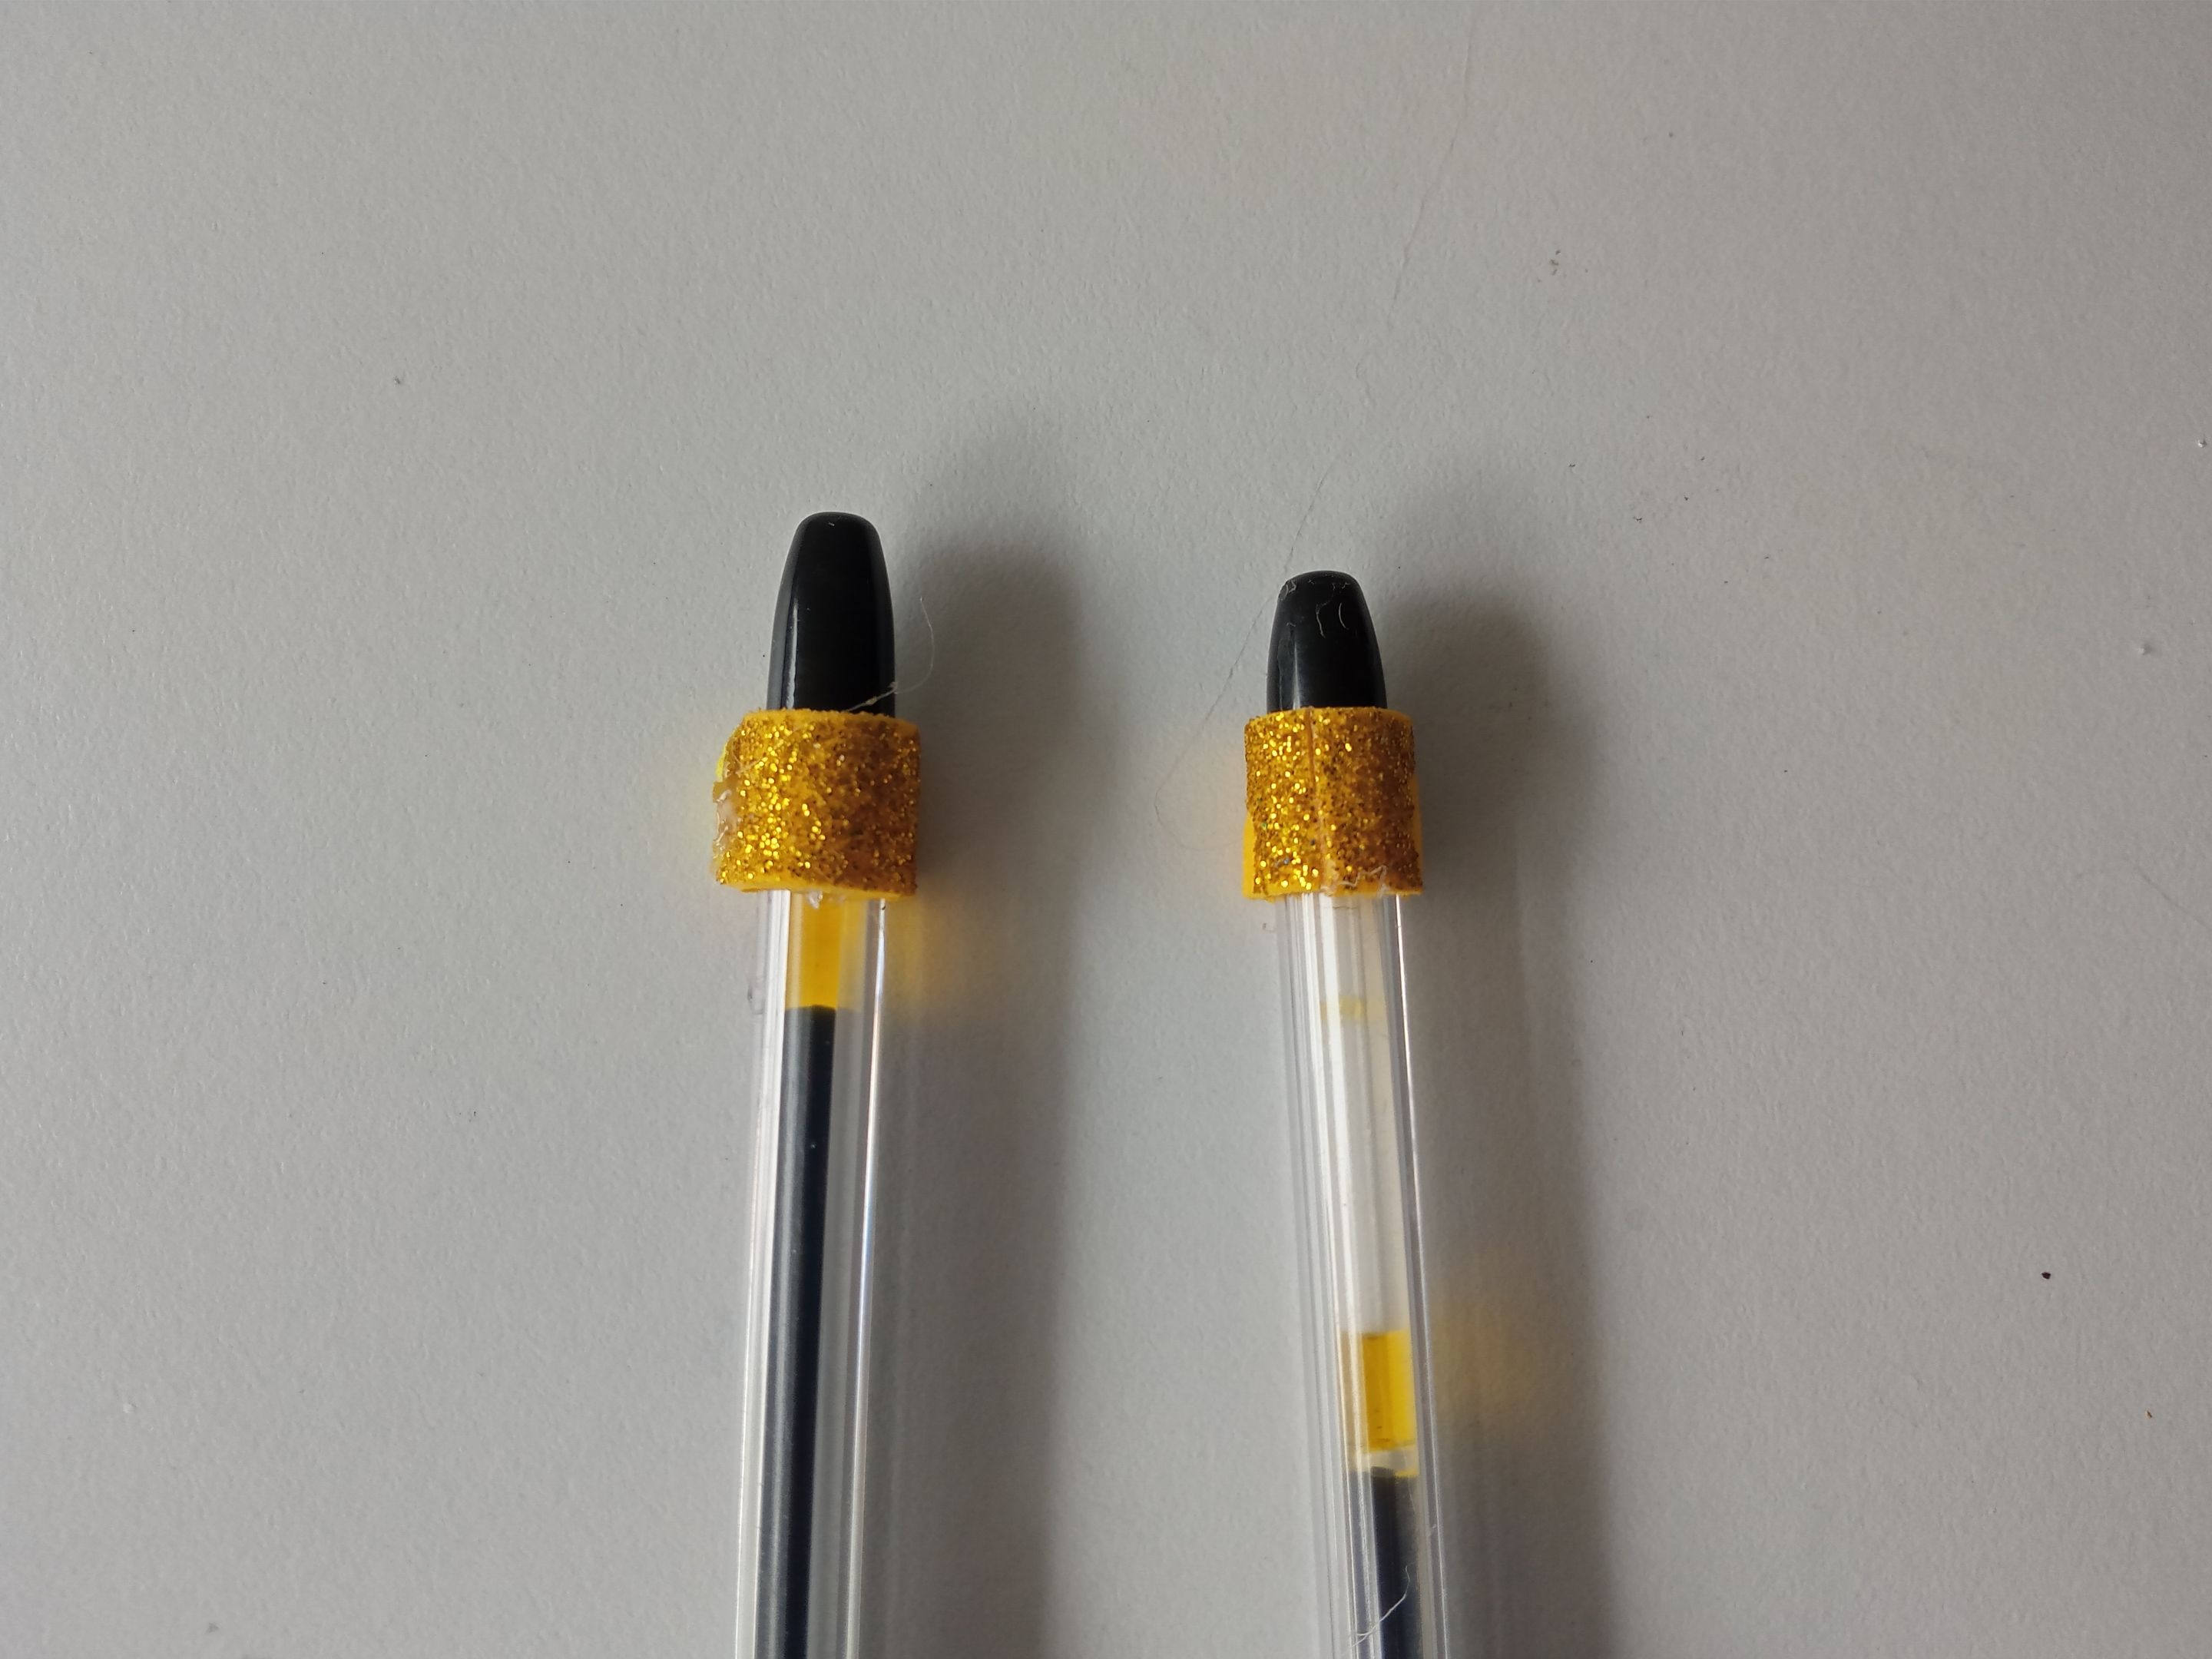
Ya casi para finalizar, recorté dos piezas circulares, pero con bordes ovalados tipo nubes en color azul de 6 cm, a los cuales les di color al borde, remarcando con un marcador azul más oscuro algunos puntos por el resto de las piezas con el mismo marcador y pegué las decoraciones en medio. Seguidamente, recorté dos tiras de 4 cm x 1 cm en foami escarchado dorado, pegué enrollado a la parte superior de las lapiceras y encima las decoraciones.
###### ✨STEP 5:
To finish, I cut out two circular pieces with 6 cm blue cloud-like oval edges. I colored the edges, highlighted some dots on the rest of the pieces with a darker blue marker, and glued the decorations in between. Next, I cut out two 4 cm x 1 cm strips of gold glitter foam, glued them rolled to the top of the pencil holders, and then glued the decorations on top.
# ✨RESULTADO: | ✨RESULT:

|||
|-|-|
---

---
**!TE DESEO UN GRAN DÏA¡**
Todas las fotografías son de mi propiedad.
Separador y Fotos editadas en [Canva](https://www.canva.com/)
**!I WISH YOU A GOOD DAY**
All photographs are my property.
Photos edited in [Canva](https://www.canva.com/)
Posted Using [INLEO](https://inleo.io/@valenpba/espeng-linda-decoracin-para-lapiceros-nice-decoration-for-pencil-holders-5ua)