######
✨¡Hola amigos amantes de la creatividad! Espero que estén todos bien.✨
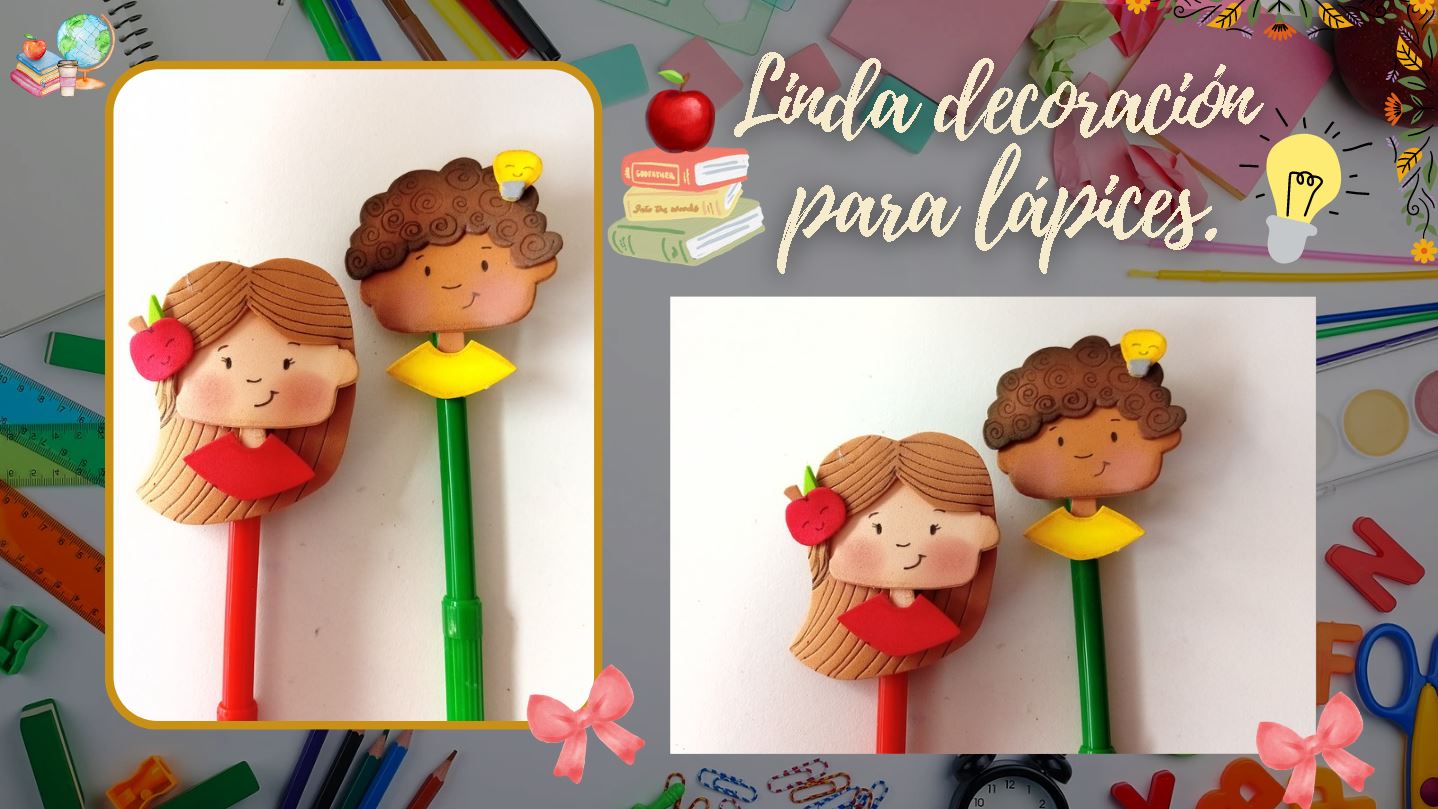
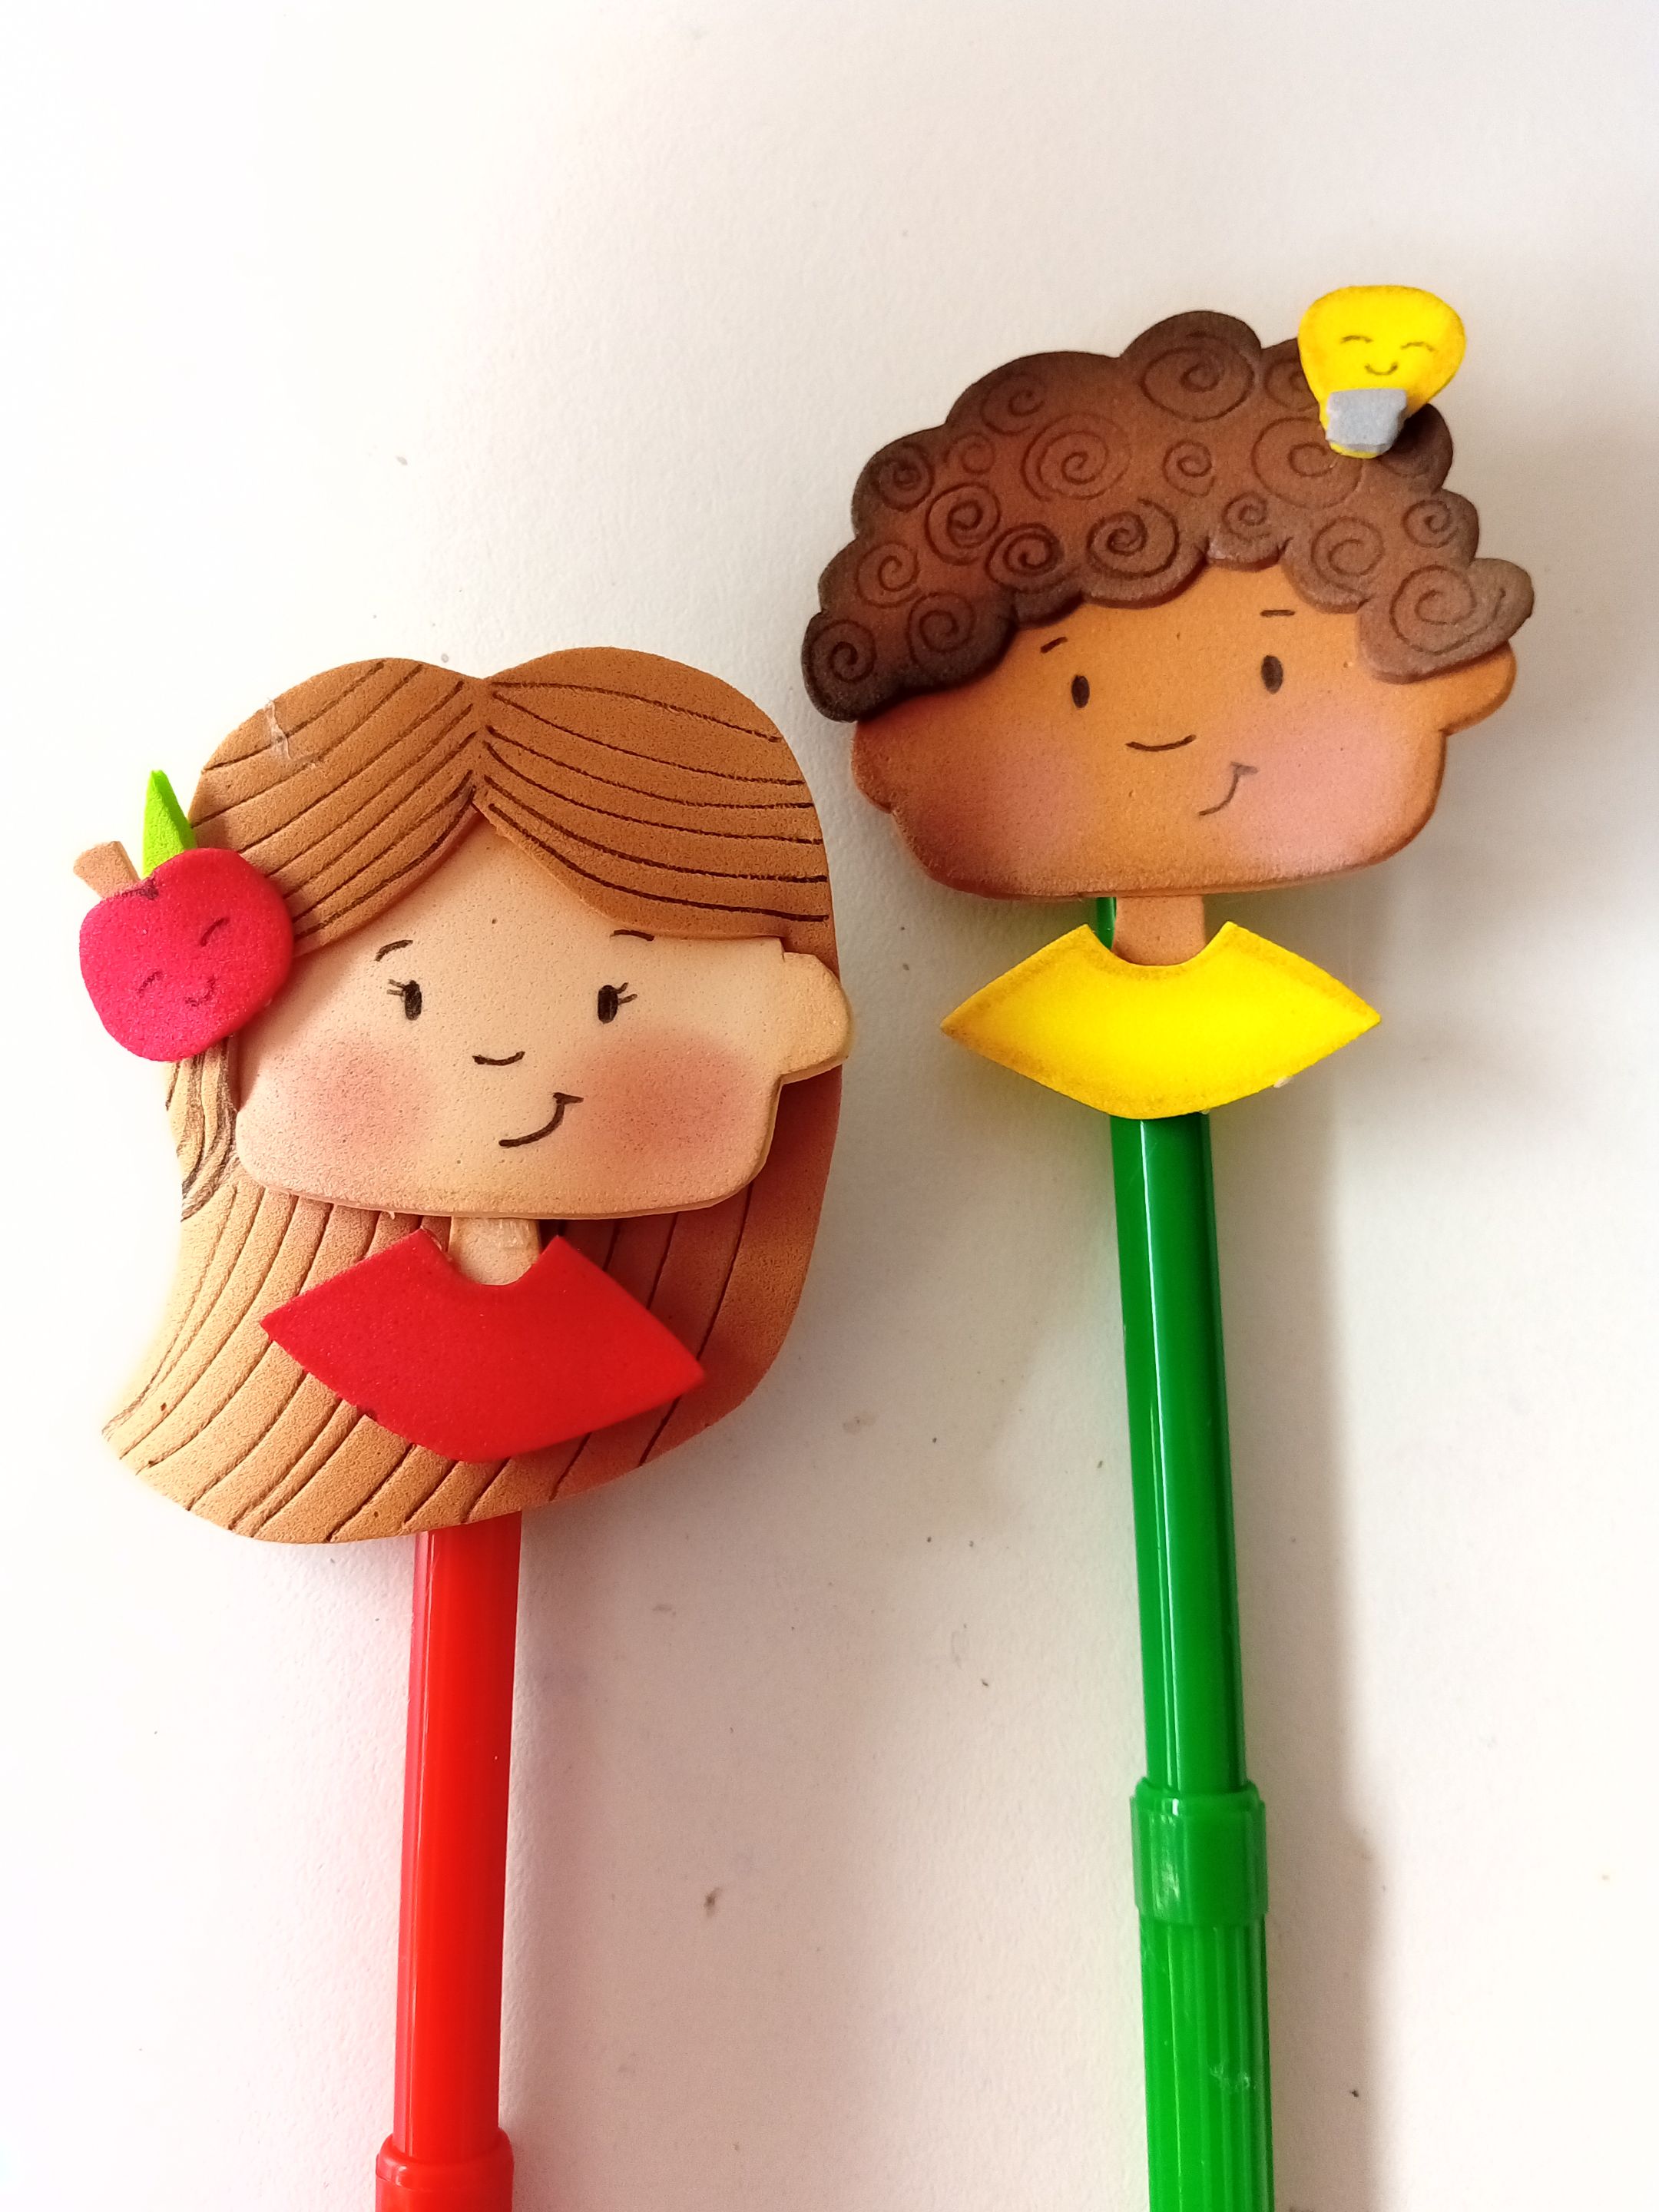
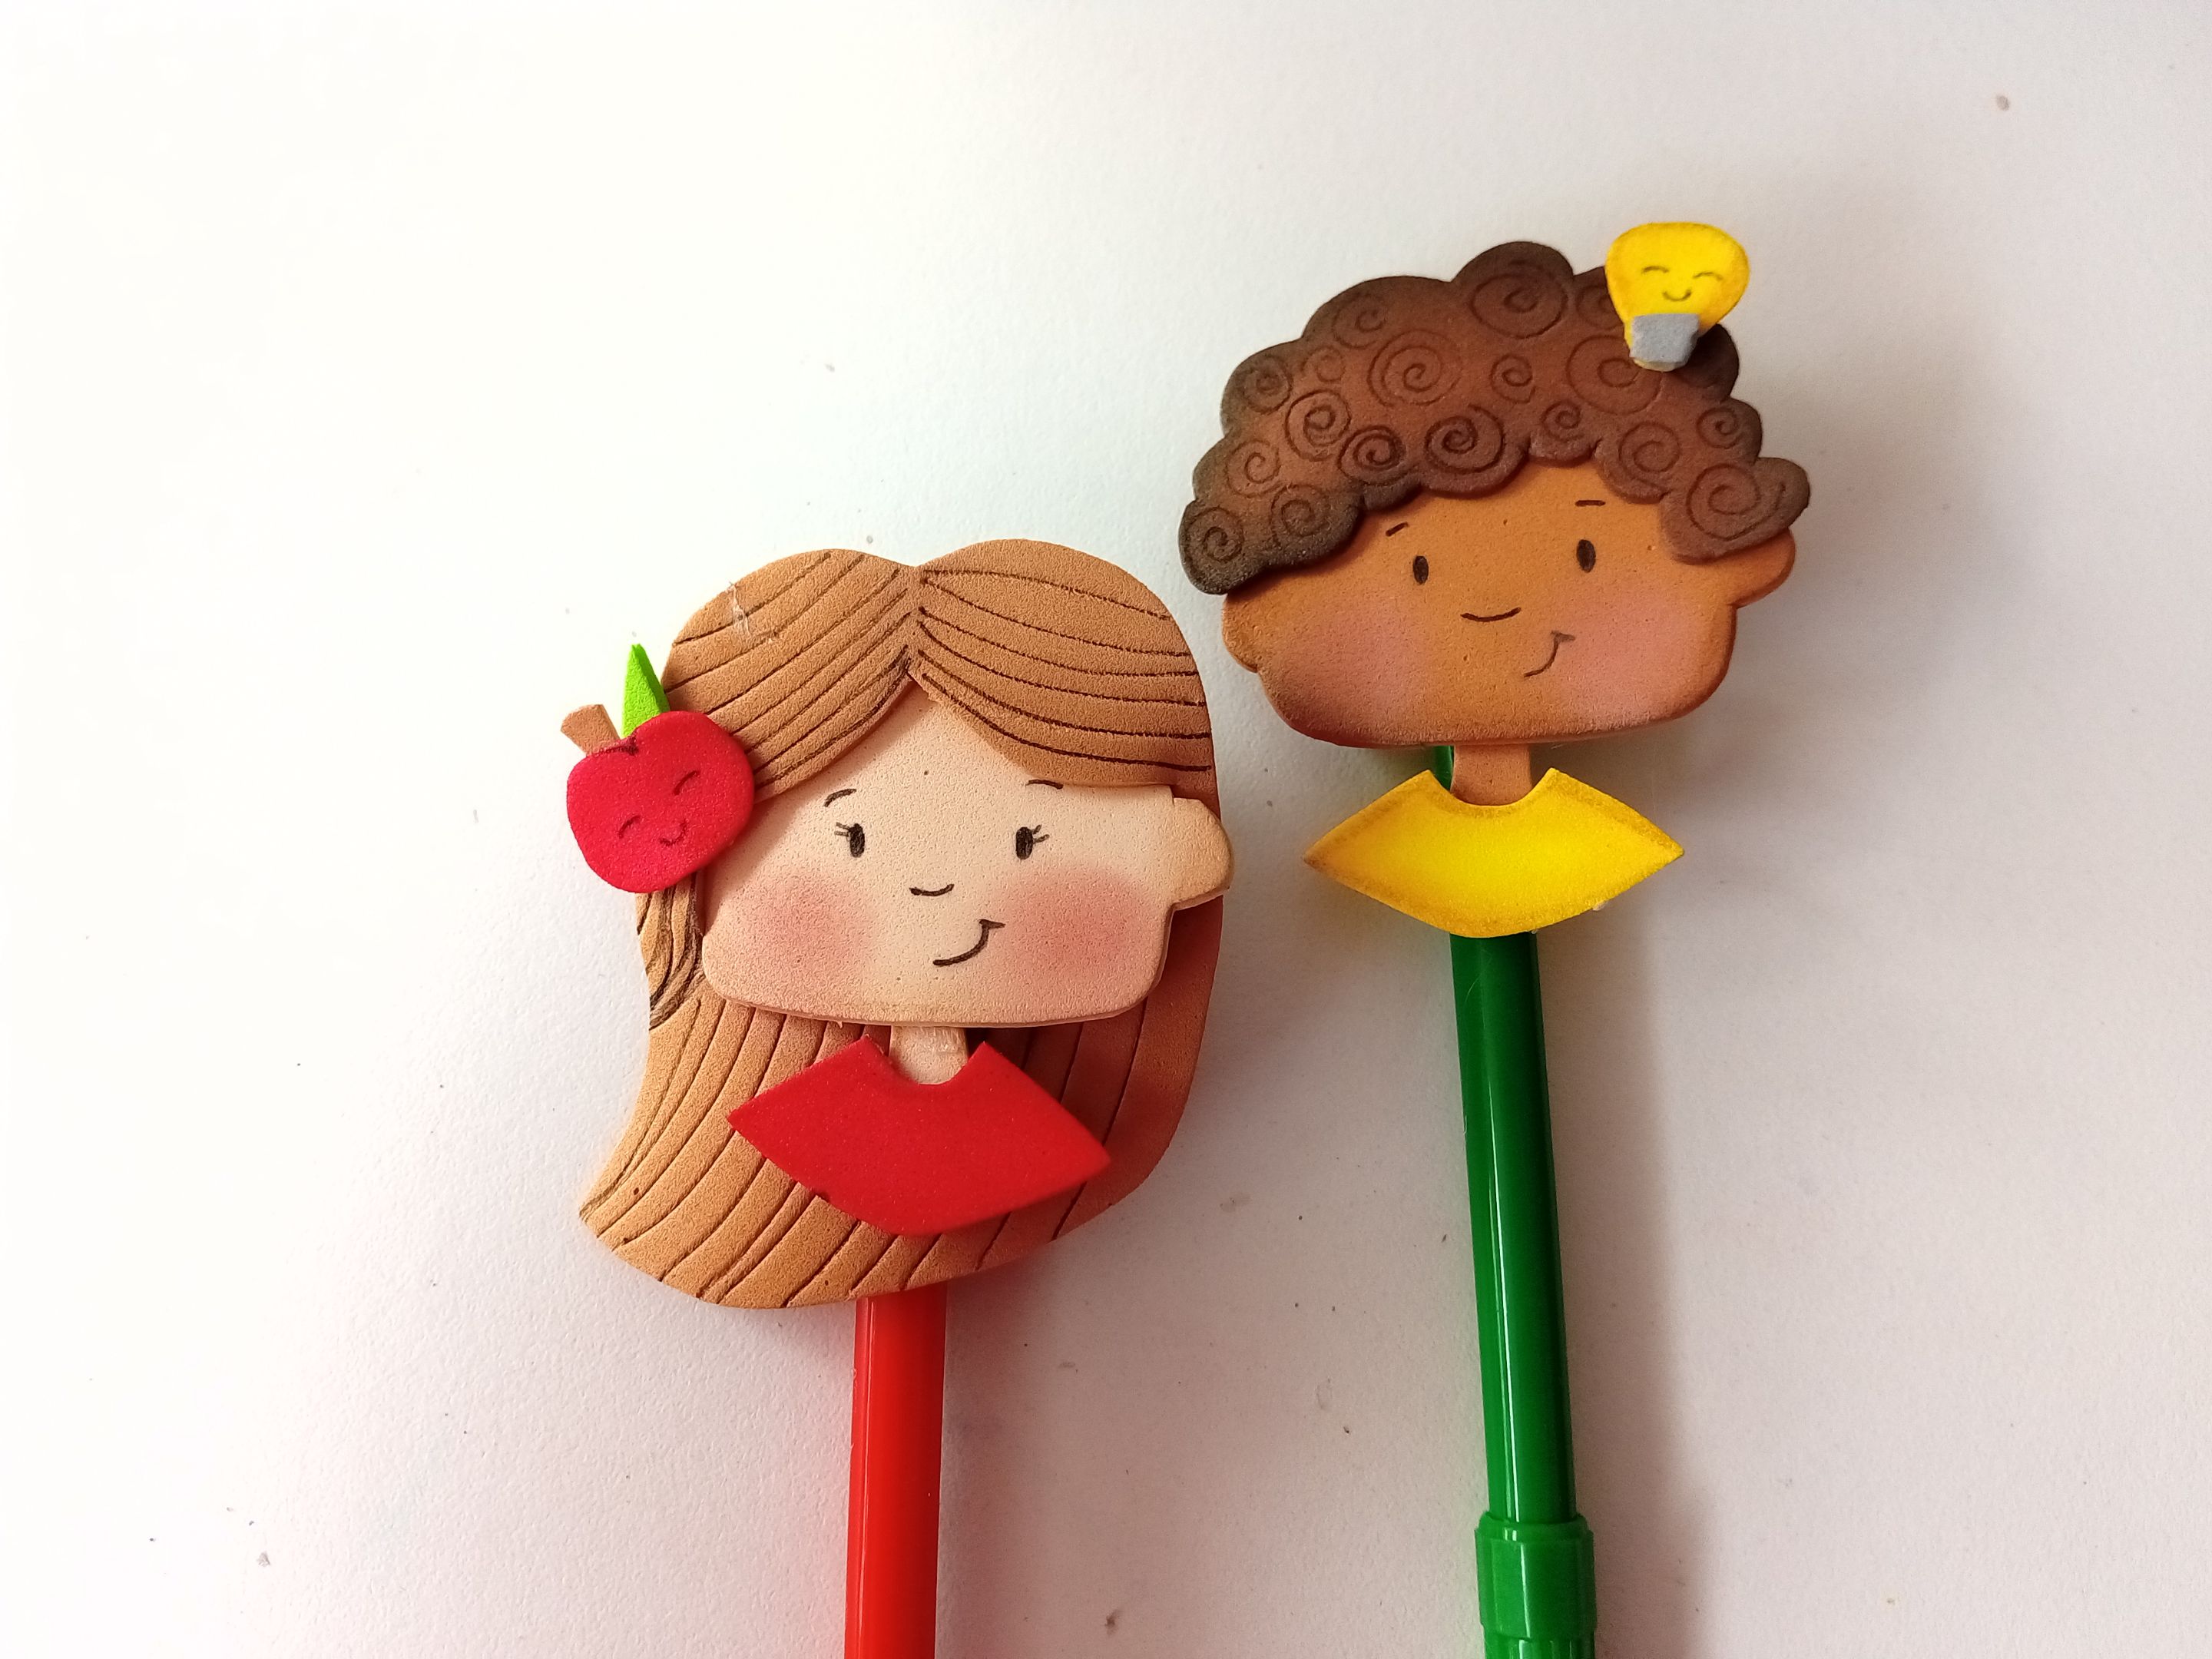
¡Buenas tardes, amigos! Espero que estén pasando una excelente semana. Por mi parte, estoy contenta de pasar por aquí para compartir una linda idea con ustedes. En esta ocasión, les comparto el paso a paso para elaborar una linda decoración para lápices. Hace unos días elaboré esta idea para cuando los más pequeños de la casa comiencen las clases. Se me ocurrió hacer un niño con un bombillo de ideas en la cabeza y, para la niña, una manzanita. Son dos decoraciones sencillas, pero perfectas para decorar un lápiz.
**🔸Sin más que añadir, a continuación los dejo con el paso a paso:**
> ######
✨¡Hello friends who love creativity! I hope you are all well.✨
>
Good afternoon, friends! I hope you're having a great week. For my part, I'm happy to stop by to share a lovely idea with you. This time, I'm sharing the step-by-step instructions for making a cute pencil topper. A few days ago, I created this idea for when the little ones in the house started school. I thought of making a boy with a lightbulb on his head and, for the girl, an apple. They're two simple decorations, but perfect for decorating a pencil.
> **🔸Without more to add, then I leave you with the step by step:**
---
---

|||
|-|-|


|||
|-|-|


|||
|-|-|


||||
|-|-|-|

✨Así es como pueden elaborar sus lindas decoraciones para lápices o lapiceros con la temática de preferencia. Yo siempre pienso en estas ideas para los niños, pero pueden utilizarlas en sus trabajos también. Espero que les haya gustado el tutorial y se animen a elaborarlo.
❤️Hasta la próxima publicación.
>
✨This is how you can make your own cute pencil or pen holder decorations with your favorite theme. I always think of these ideas for children, but you can use them in your own projects as well. I hope you enjoyed the tutorial and are inspired to try it out.
>
❤️Until the next post.

**♥️ESPERO QUE TE GUSTE,
¡Empecemos!**
**♥️I HOPE YOU LIKE IT,
Let's start!**
---

# ✂️ MATERIALES | ✂️ MATERIALS

- Foami crema.
- Foami amarillo.
- Foami rojo.
- Foami marrón (tonos diferentes).
- Foami gris.
- Foami verde.
- Foami escarchado plateado.
- Pinturas y marcadores.
- Pegamento.
- Tijeras.
- Regla.
- Hoja blanca.
- Lápiz.
- Cream foam.
- Yellow foam.
- Red foam.
- Brown foam (different shades).
- Gray foam.
- Green foam.
- Silver frosted foam.
- Paints and markers.
- Glue.
- Scissors.
- Ruler.
- White paper.
- Pencil.

# 🌟 PROCEDIMIENTO | 🌟 PROCESS

###### ✨PASO 1:
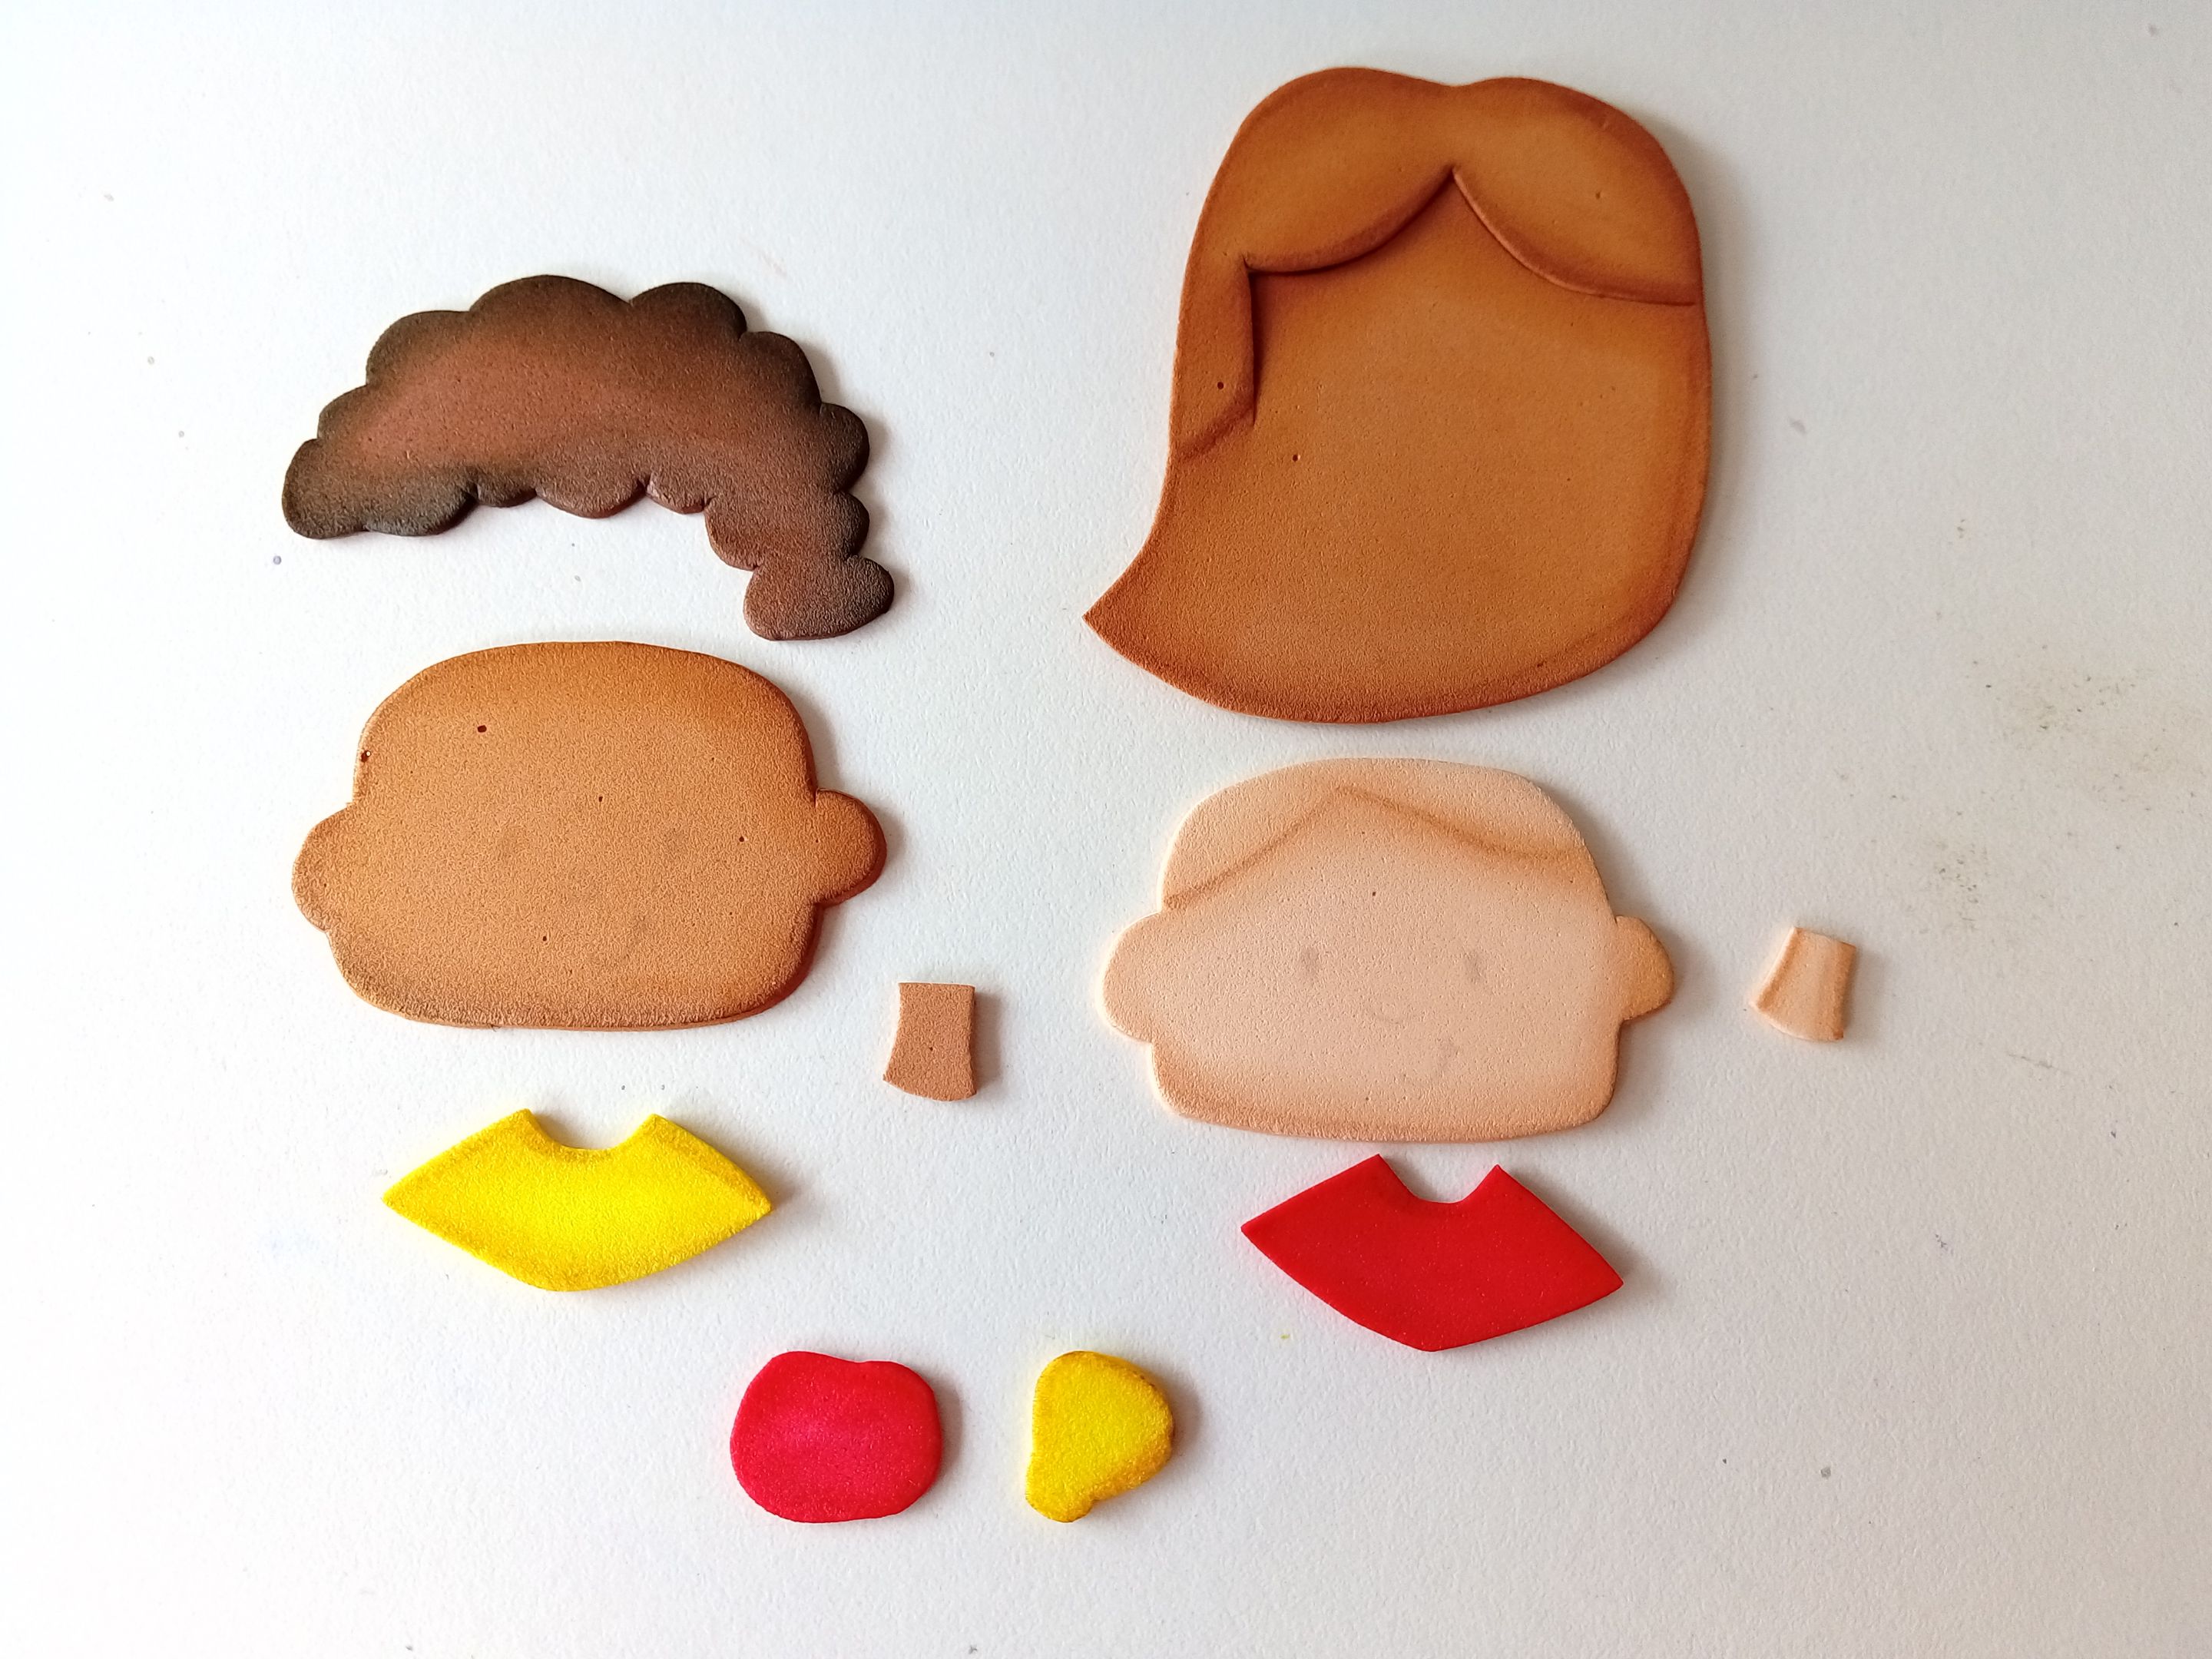
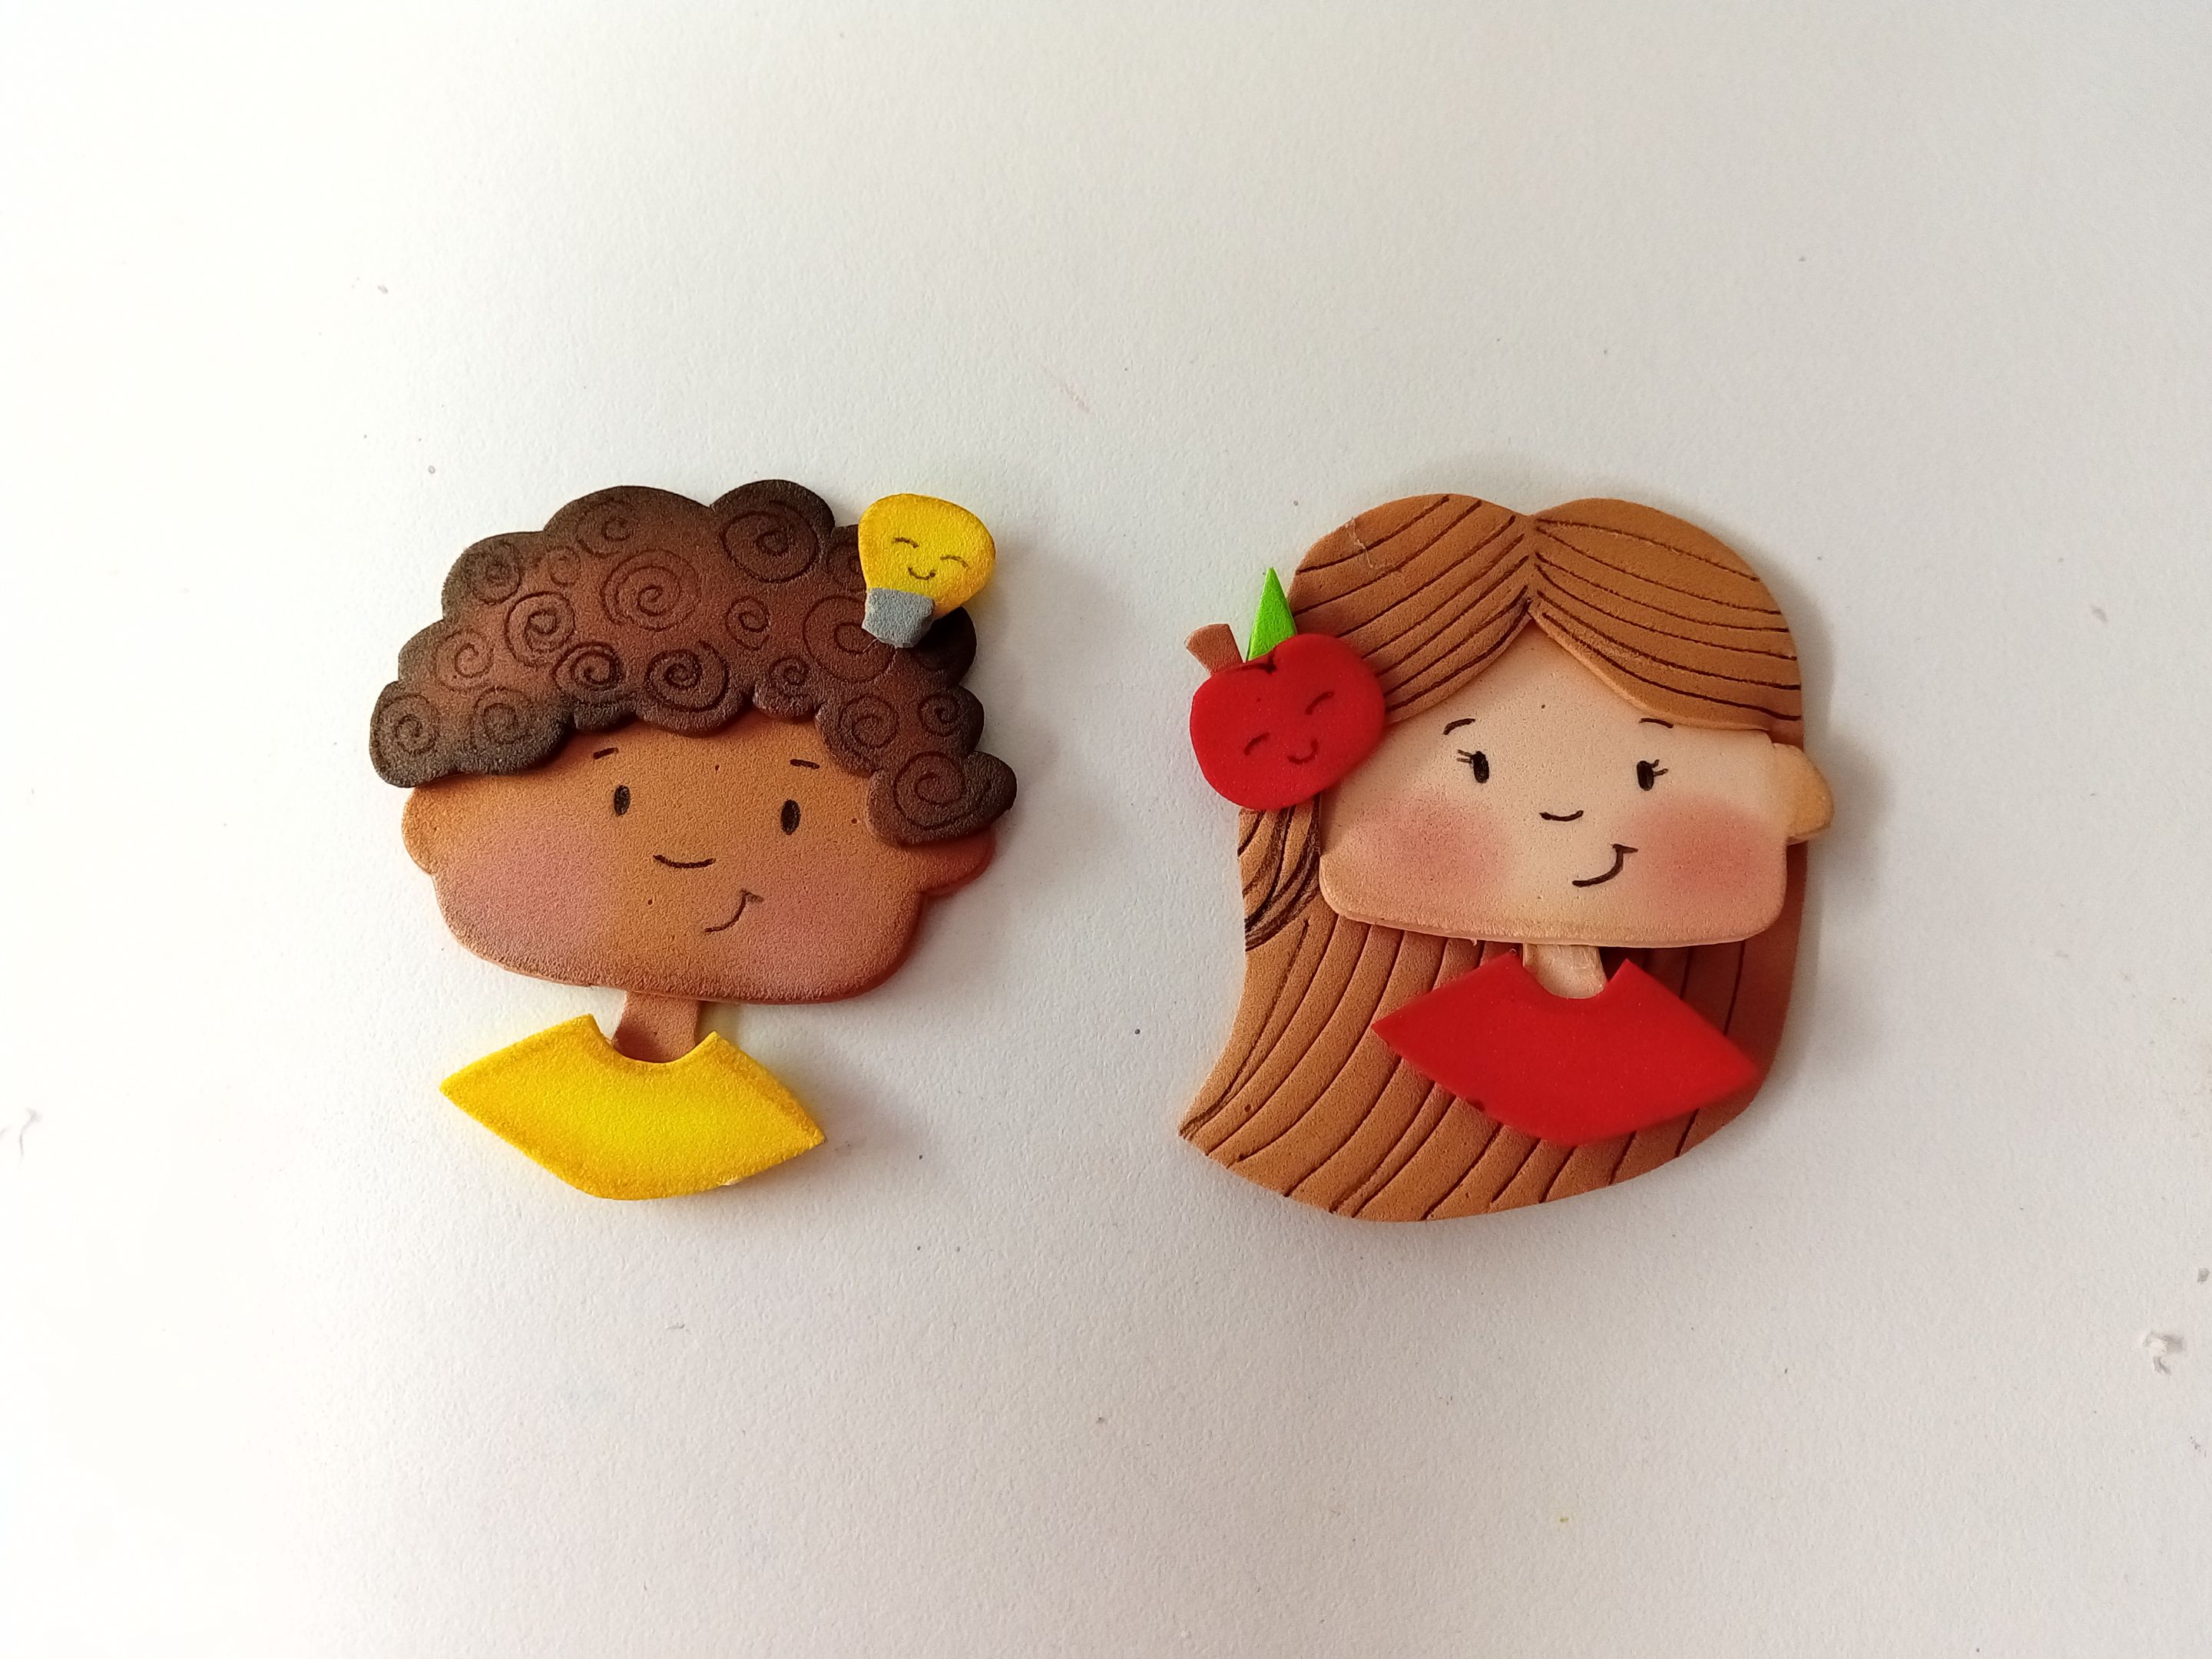
Lo primero que hice fueron los diseños de ambos personajes; quise que uno fuera niño y otro niña para que puedan elegir el que más les guste para sus pequeños. Además, quise agregar detalles extras, como lo dije al inicio, de una manzana y un bombillo. Al tener el diseño listo en la hoja blanca, es momento de transferir a los colores correspondientes de foami, como explico a continuación:
**Para la niña:**
✨Cabello: 7 cm x 5.5 cm en foami marrón claro.
✨Cabeza: 5.5 cm x 4 cm en foami crema.
✨Cuello: 1 cm x 0.5 cm en foami crema.
✨Ropa: 3.5 cm x 1.5 cm en foami rojo.
**Para el niño:**
✨Cabello: 6 cm x 2.5 cm en foami marrón oscuro.
✨Cabeza: 5.5 cm x 4 cm en foami marrón.
✨Cuello: 1 cm x 0.5 cm en foami marrón.
✨Ropa: 3.5 cm x 1.5 cm en foami amarillo.
**Decoración extra:**
✨Manzana: 2 cm x 1.5 cm en foami rojo.
✨Tallo y hoja: 0.7 cm en foami marrón y verde.
✨Bombillo: 1.5 cm x 1 cm en foami amarillo.
###### ✨STEP 1:
The first thing I did were the designs for both characters; I wanted one to be a boy and one a girl so you can choose the one you like best for your little ones. Additionally, I wanted to add extra details, as I mentioned at the beginning, of an apple and a light bulb. Once you have the design ready on the white sheet, it's time to transfer it to the corresponding colors of foam, as explained below:
**For the girl:**
✨Hair: 7 cm x 5.5 cm in light brown foam.
✨Head: 5.5 cm x 4 cm in cream foam.
✨Neck: 1 cm x 0.5 cm in cream foam.
✨Clothes: 3.5 cm x 1.5 cm in red foam.
**For the boy:**
✨Hair: 6 cm x 2.5 cm in dark brown foam.
✨Head: 5.5 cm x 4 cm in brown foam.
✨Neck: 1 cm x 0.5 cm in brown foam.
✨Clothes: 3.5 cm x 1.5 cm in yellow foam.
**Extra decoration:**
✨Apple: 2 cm x 1.5 cm in red foam.
✨Stem and leaf: 0.7 cm in brown and green foam.
✨Light bulb: 1.5 cm x 1 cm in yellow foam.
###### ✨PASO 2:
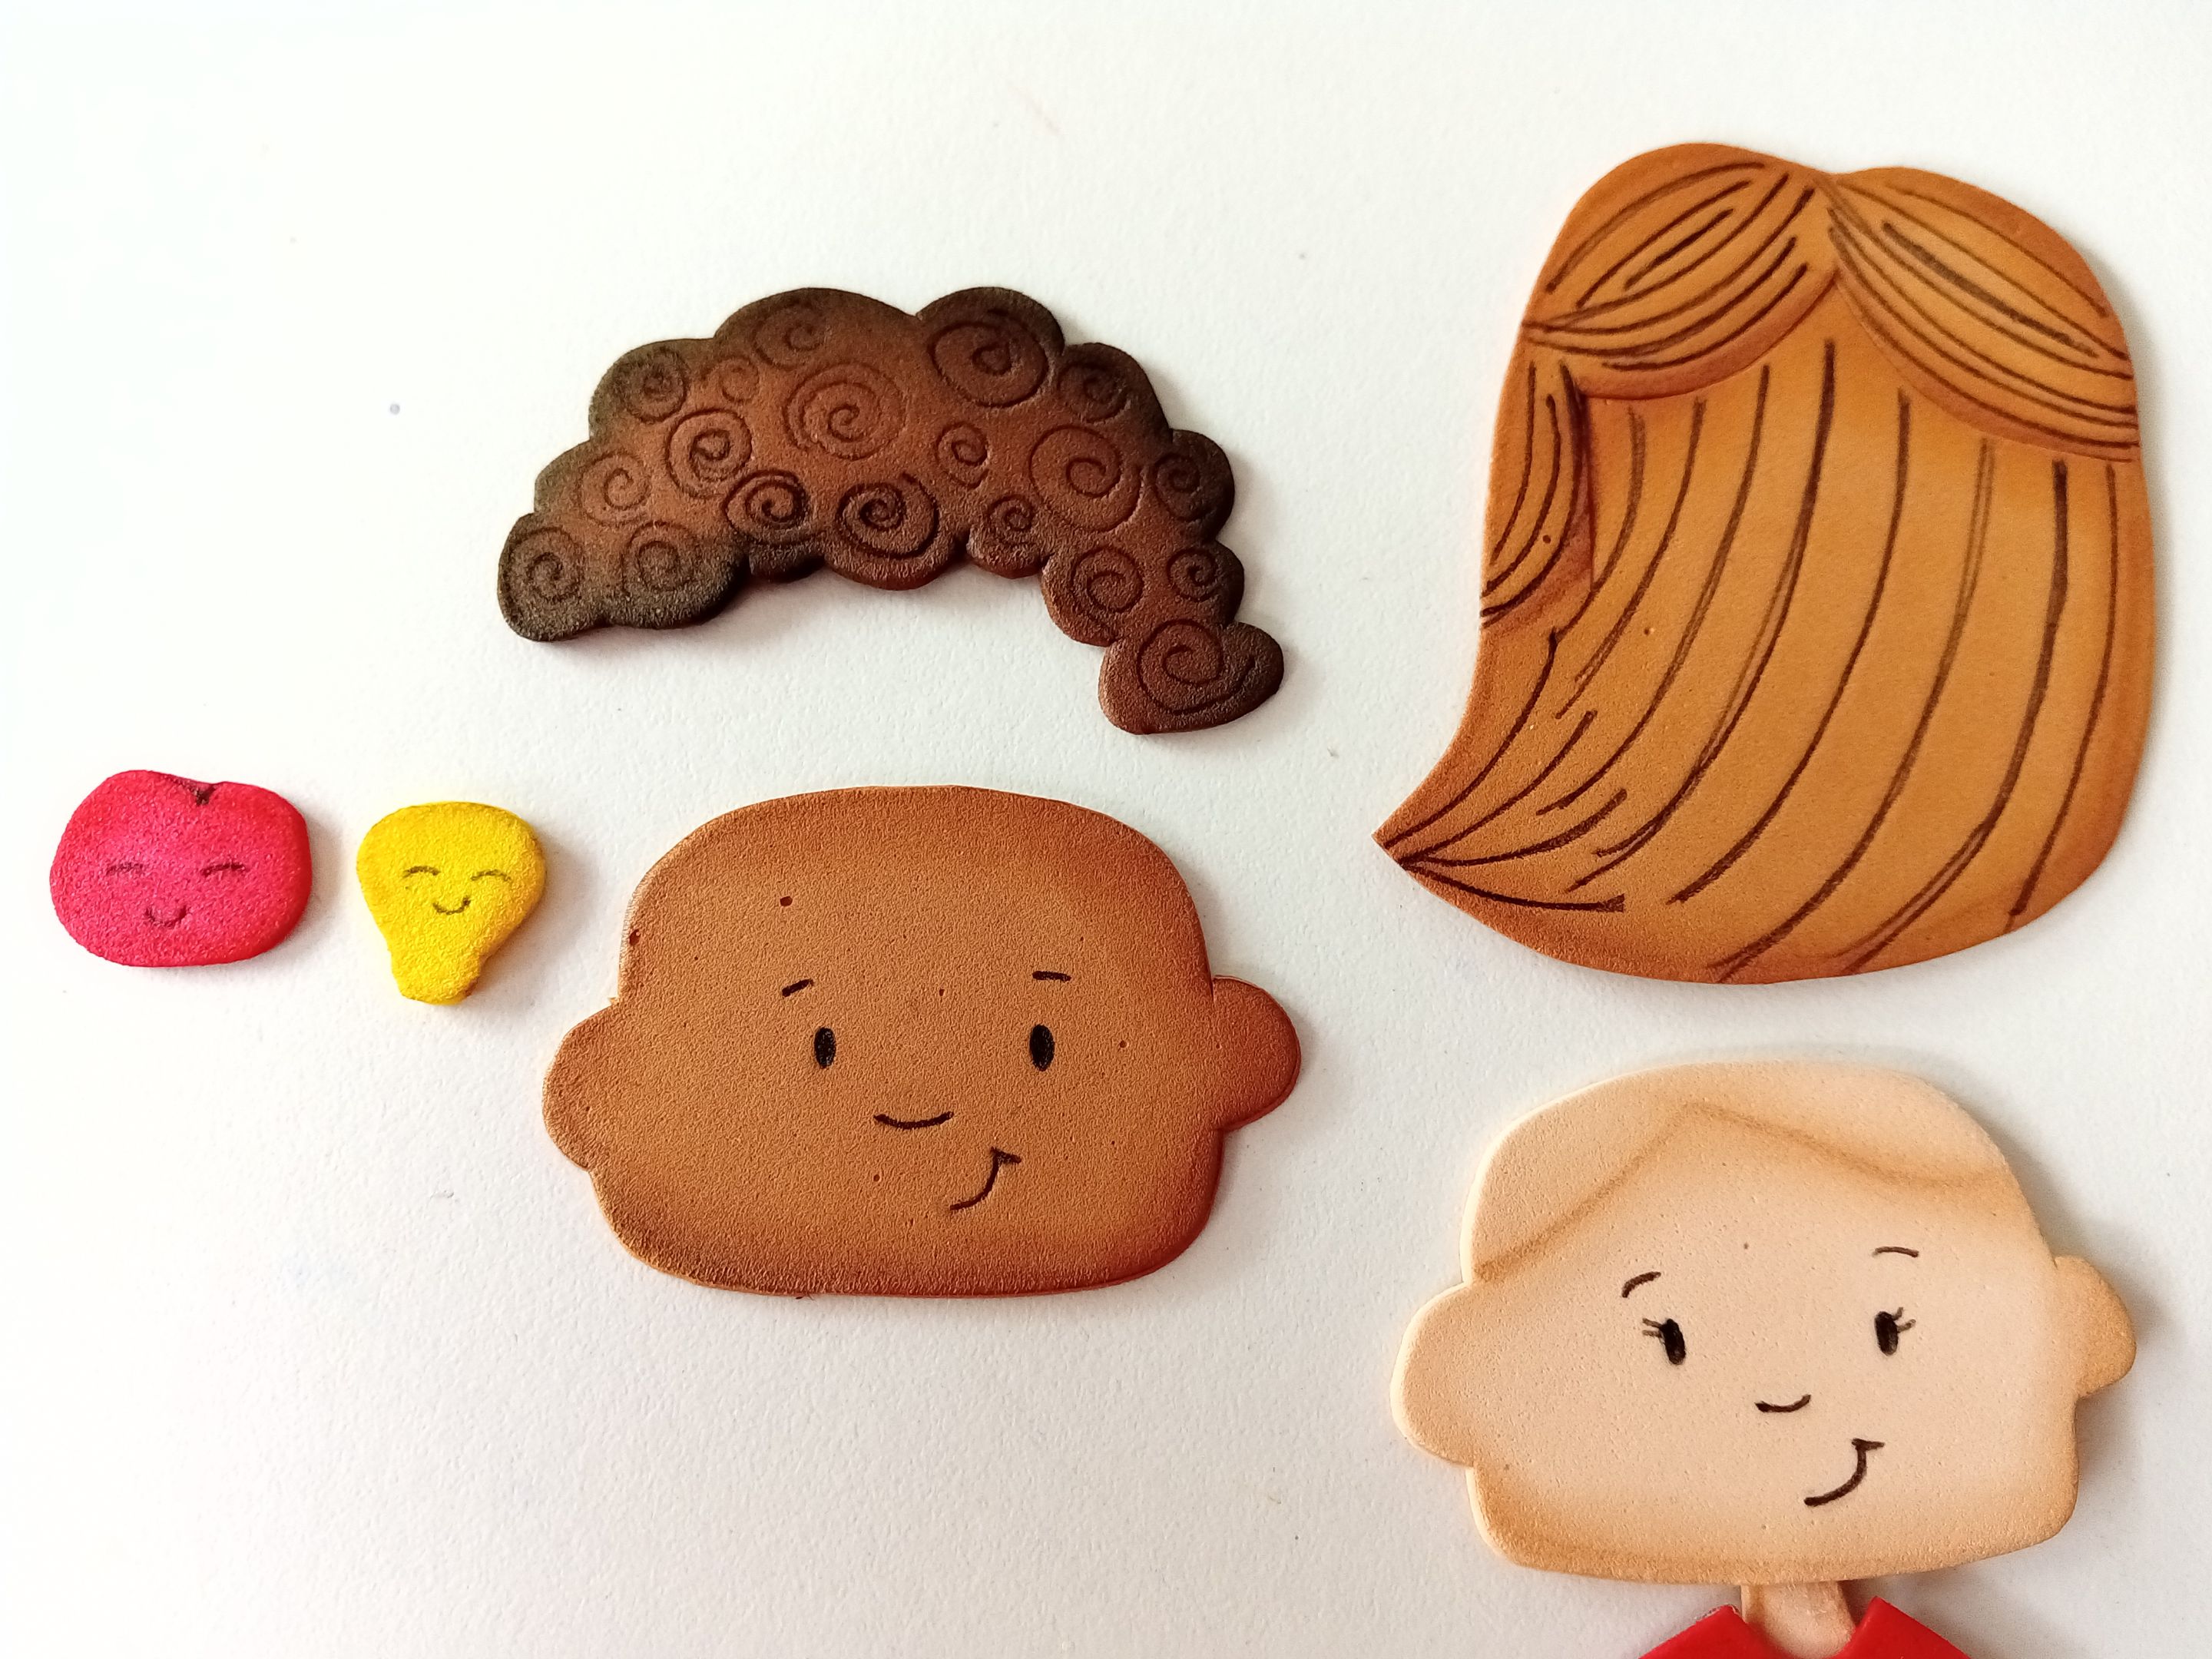
Al tener listas todas las piezas, es momento de dar color a los bordes con pinturas o marcadores, utilizando un tono más oscuro que el color de cada pieza, pero en el caso de la piel suelo utilizar colores marrones y, en el caso del cabello marrón oscuro, un tono negro. Luego difumino con un pañito y dejo secar. Al estar secas las piezas, es momento de dar detalles más específicos, como al rostro, cabellos y a las decoraciones extras.
###### ✨STEP 2:
Once all the pieces are ready, it's time to color the edges with paints or markers, using a shade darker than the color of each piece. However, for the skin, I usually use brown, and for the dark brown hair, a black shade. Then, I blend with a cloth and let it dry. Once the pieces are dry, it's time to add more specific details, such as the face, hair, and additional decorations.
###### ✨PASO 3:
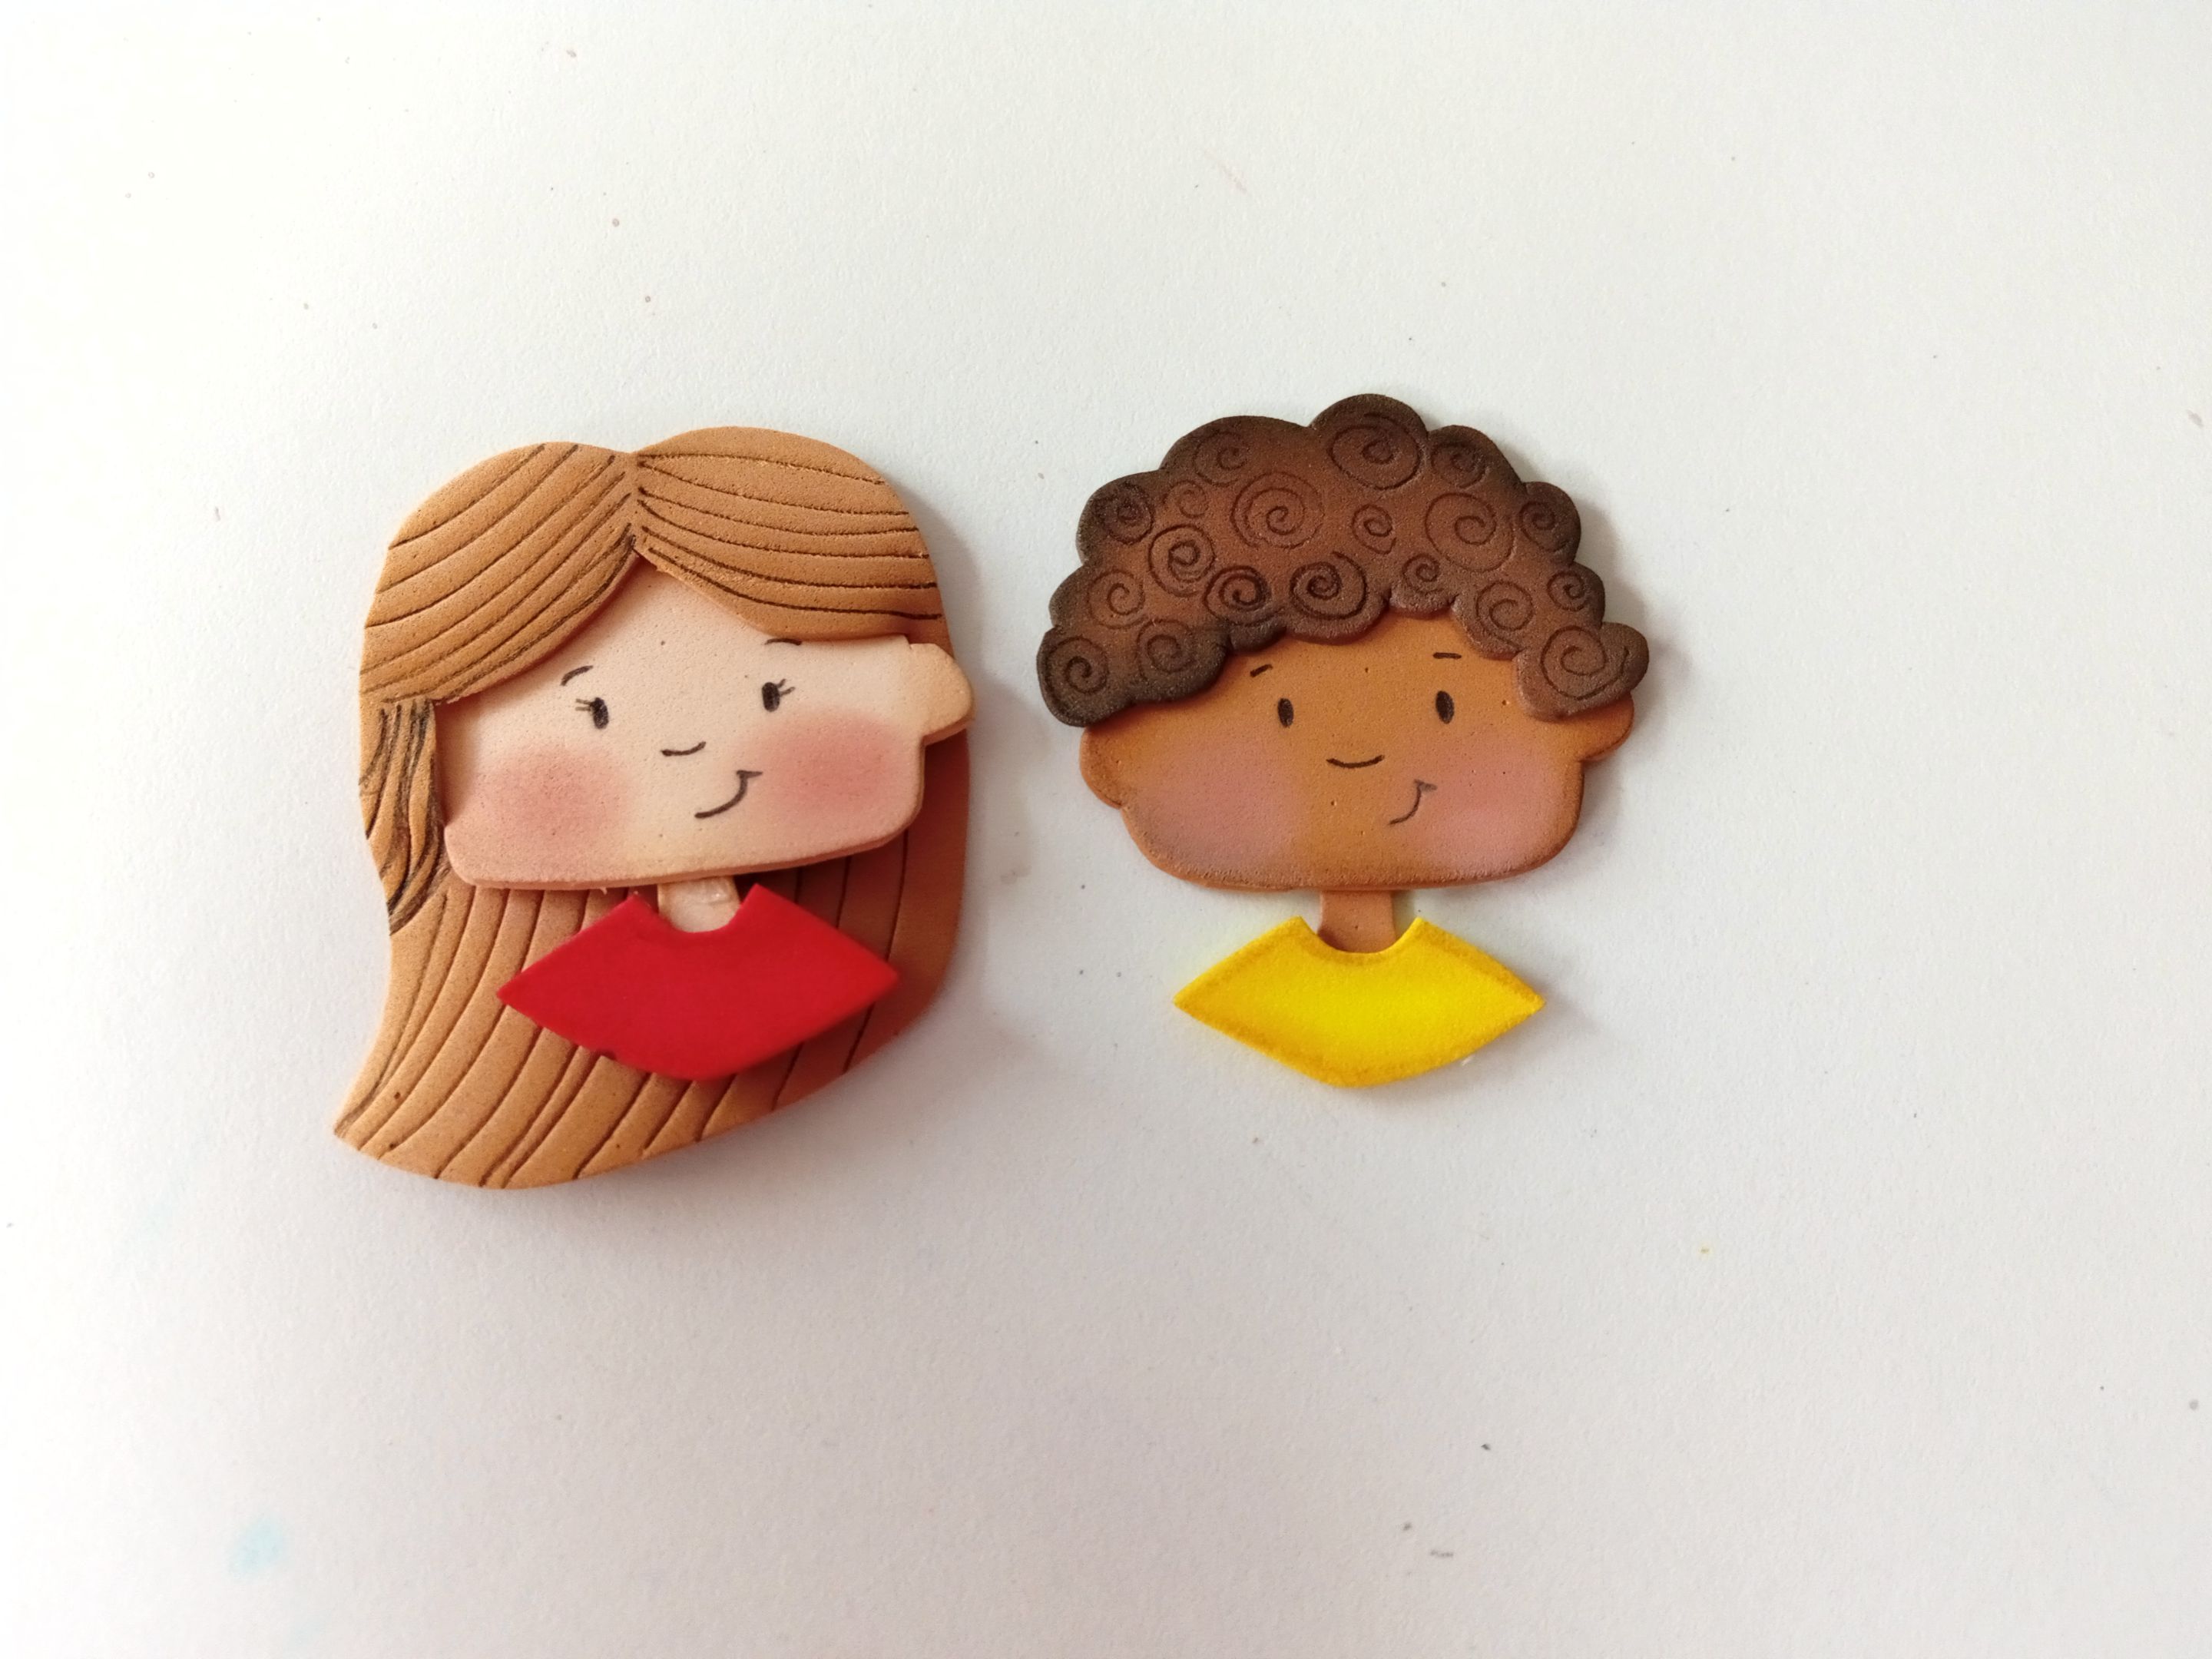
Seguidamente comenzamos a pegar las piezas de los niños, comenzando por la cabeza, el cabello, los cuellos y, por último, la ropa. Además, aprovechamos para agregar un poco de color a las mejillas con rubor y difuminamos con una brocha. Luego, unimos las piezas de las decoraciones extras y pegamos en los cabellos de ambos niños.
###### ✨STEP 3:
Next, we begin gluing the children's pieces, starting with the heads, hair, necks, and finally, the clothes. We also take the opportunity to add a little color to the cheeks with blush, blending with a brush. Then, we join the additional decoration pieces together and glue them to both children's hair.
###### ✨PASO 4:
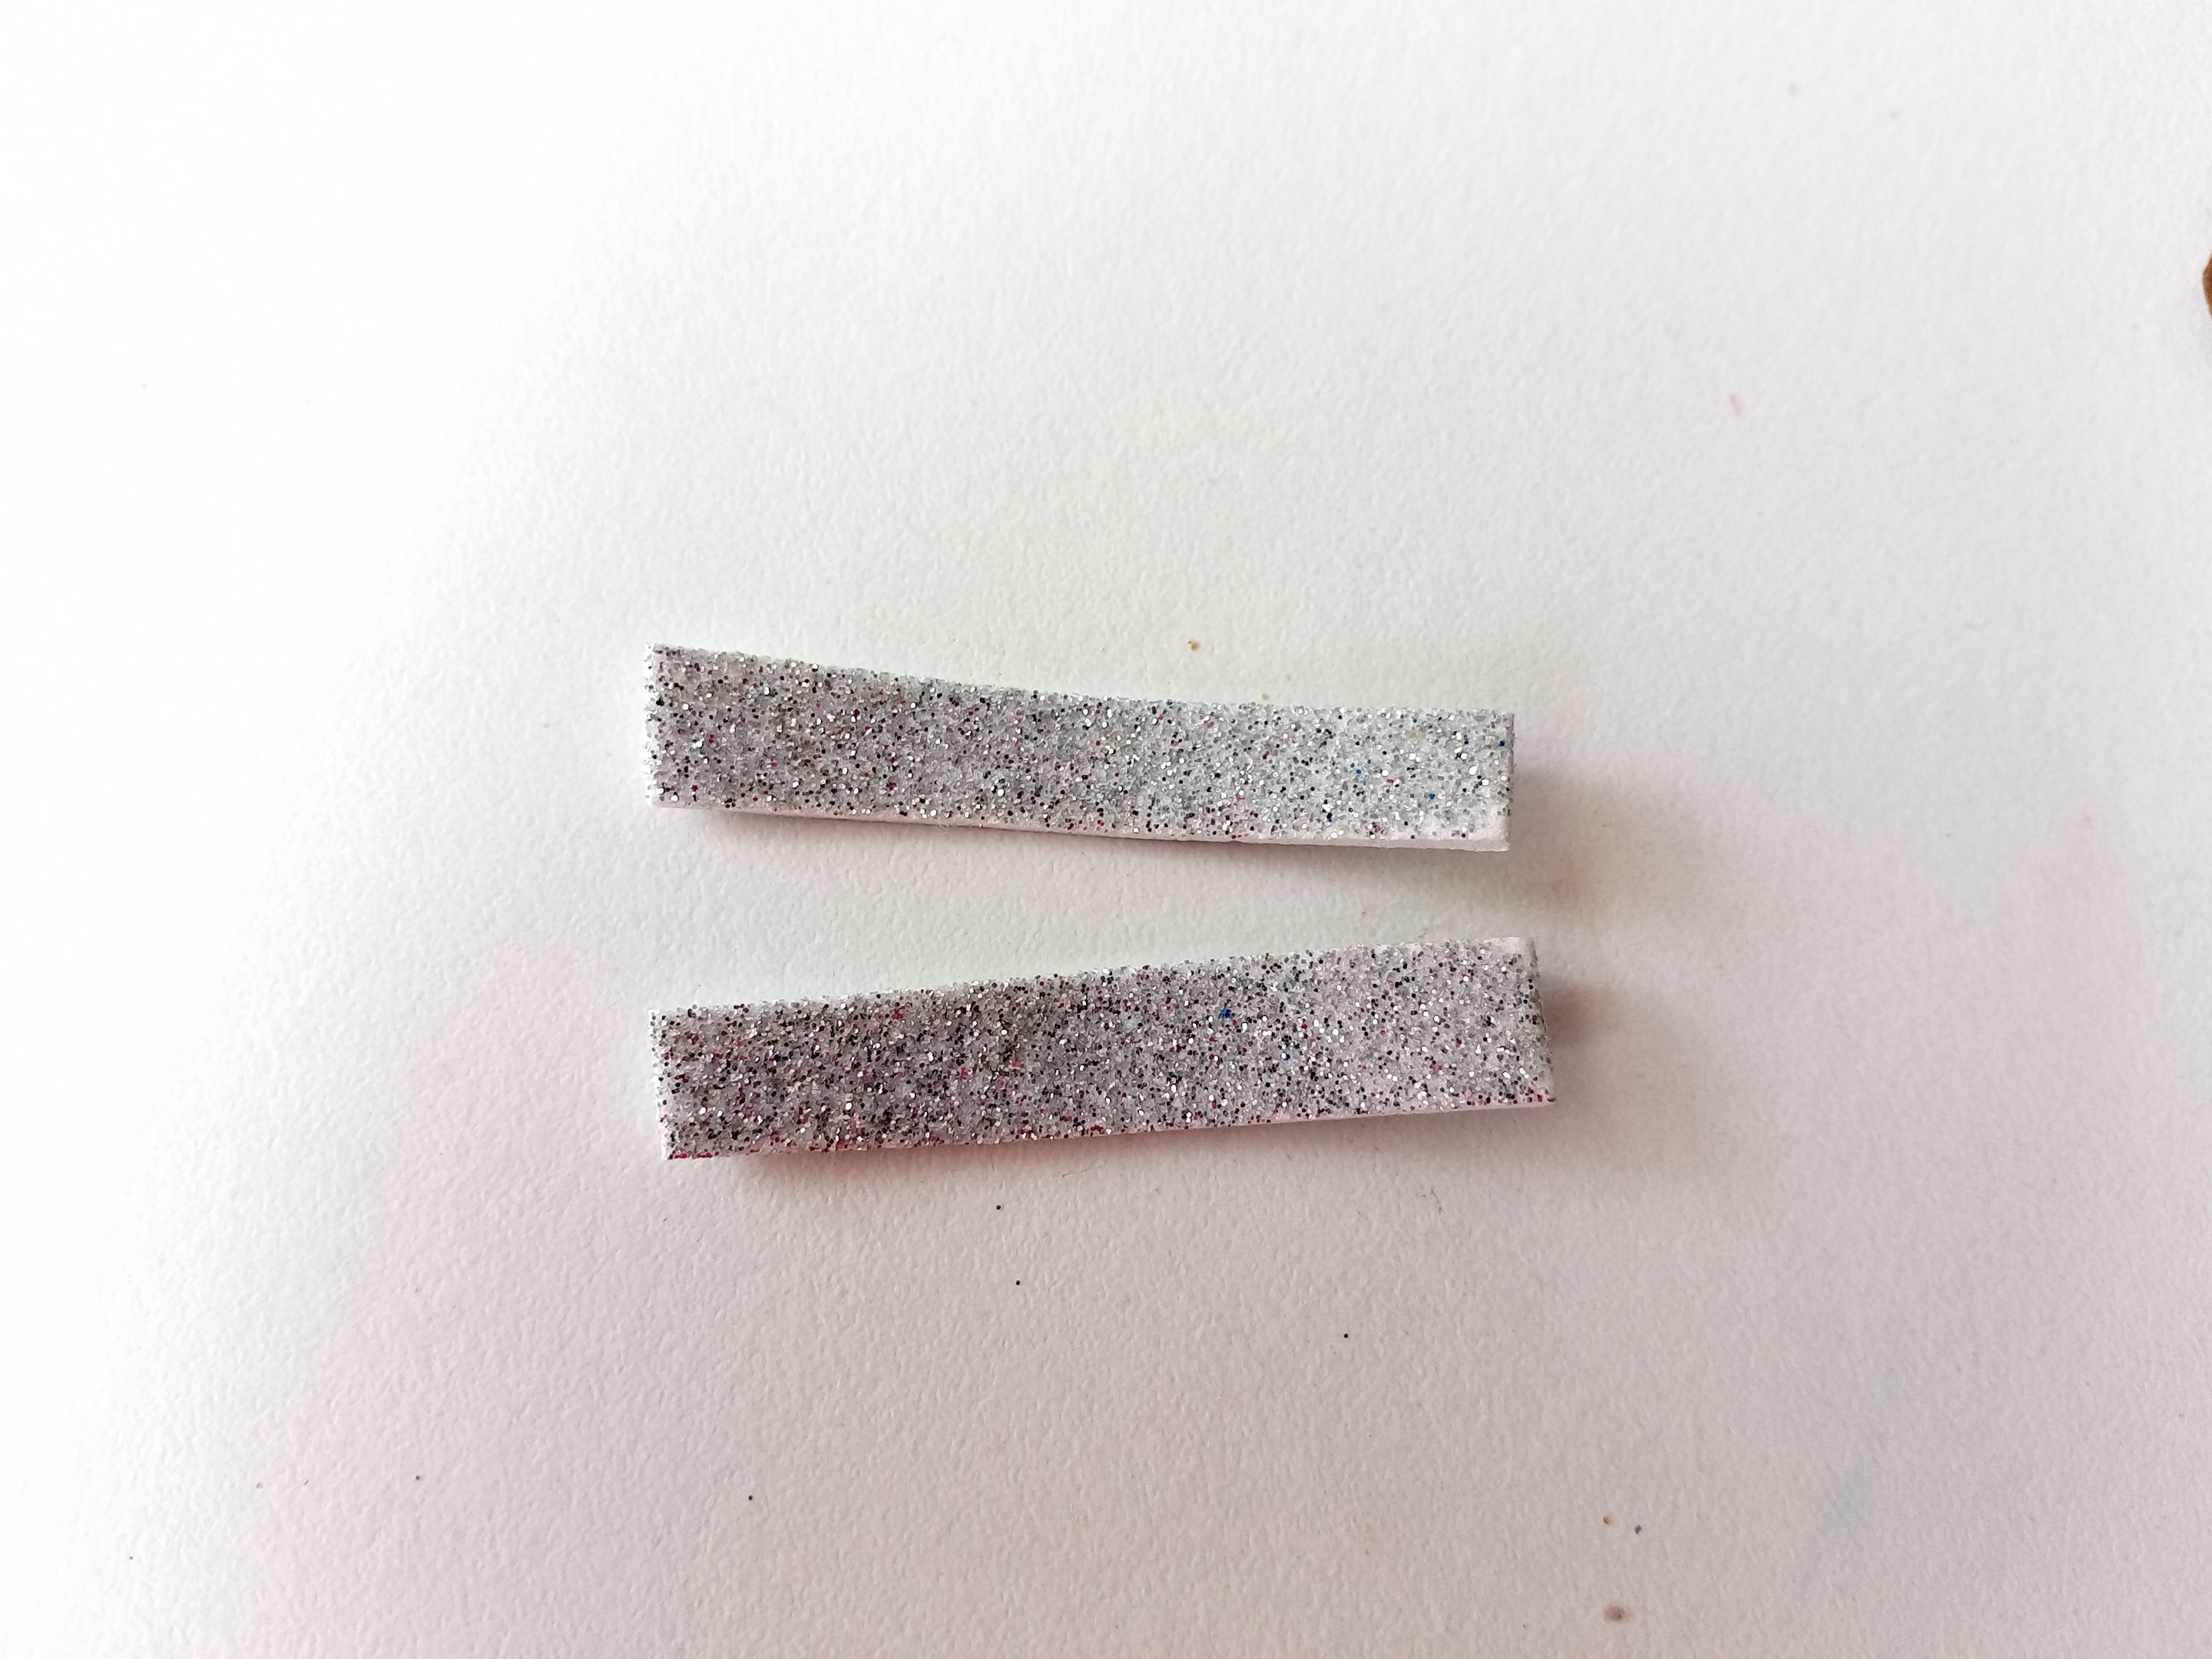
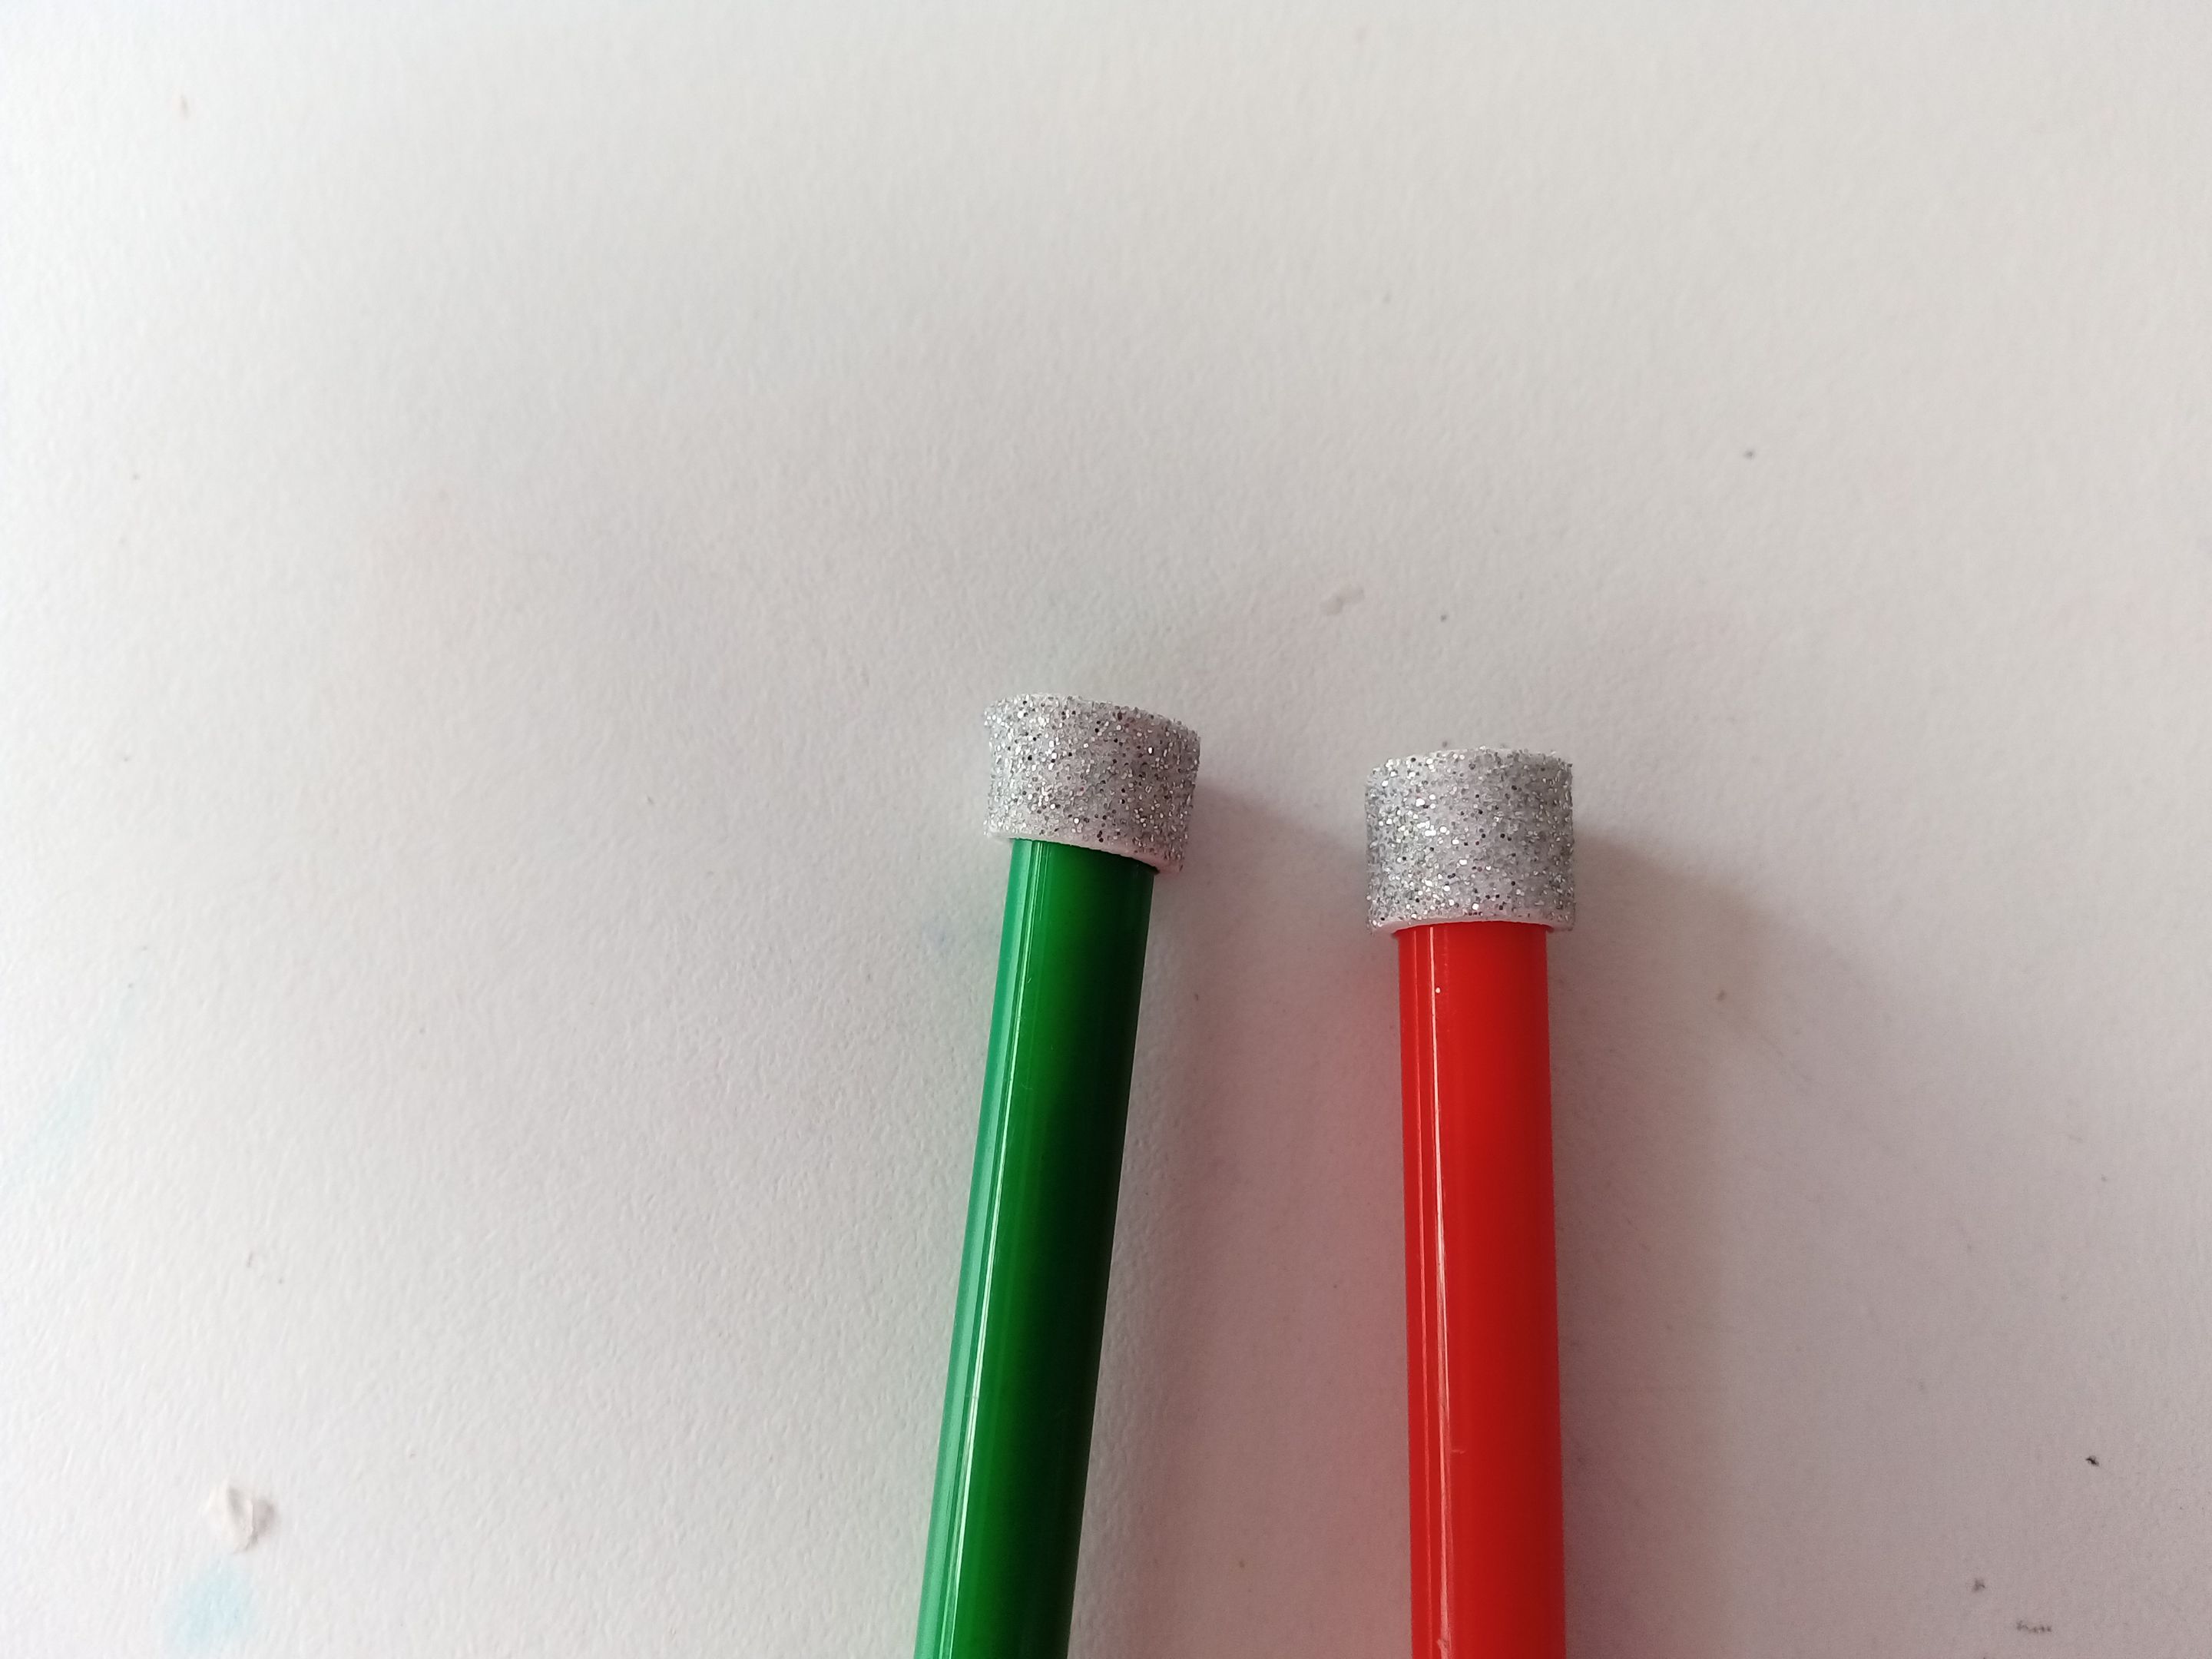
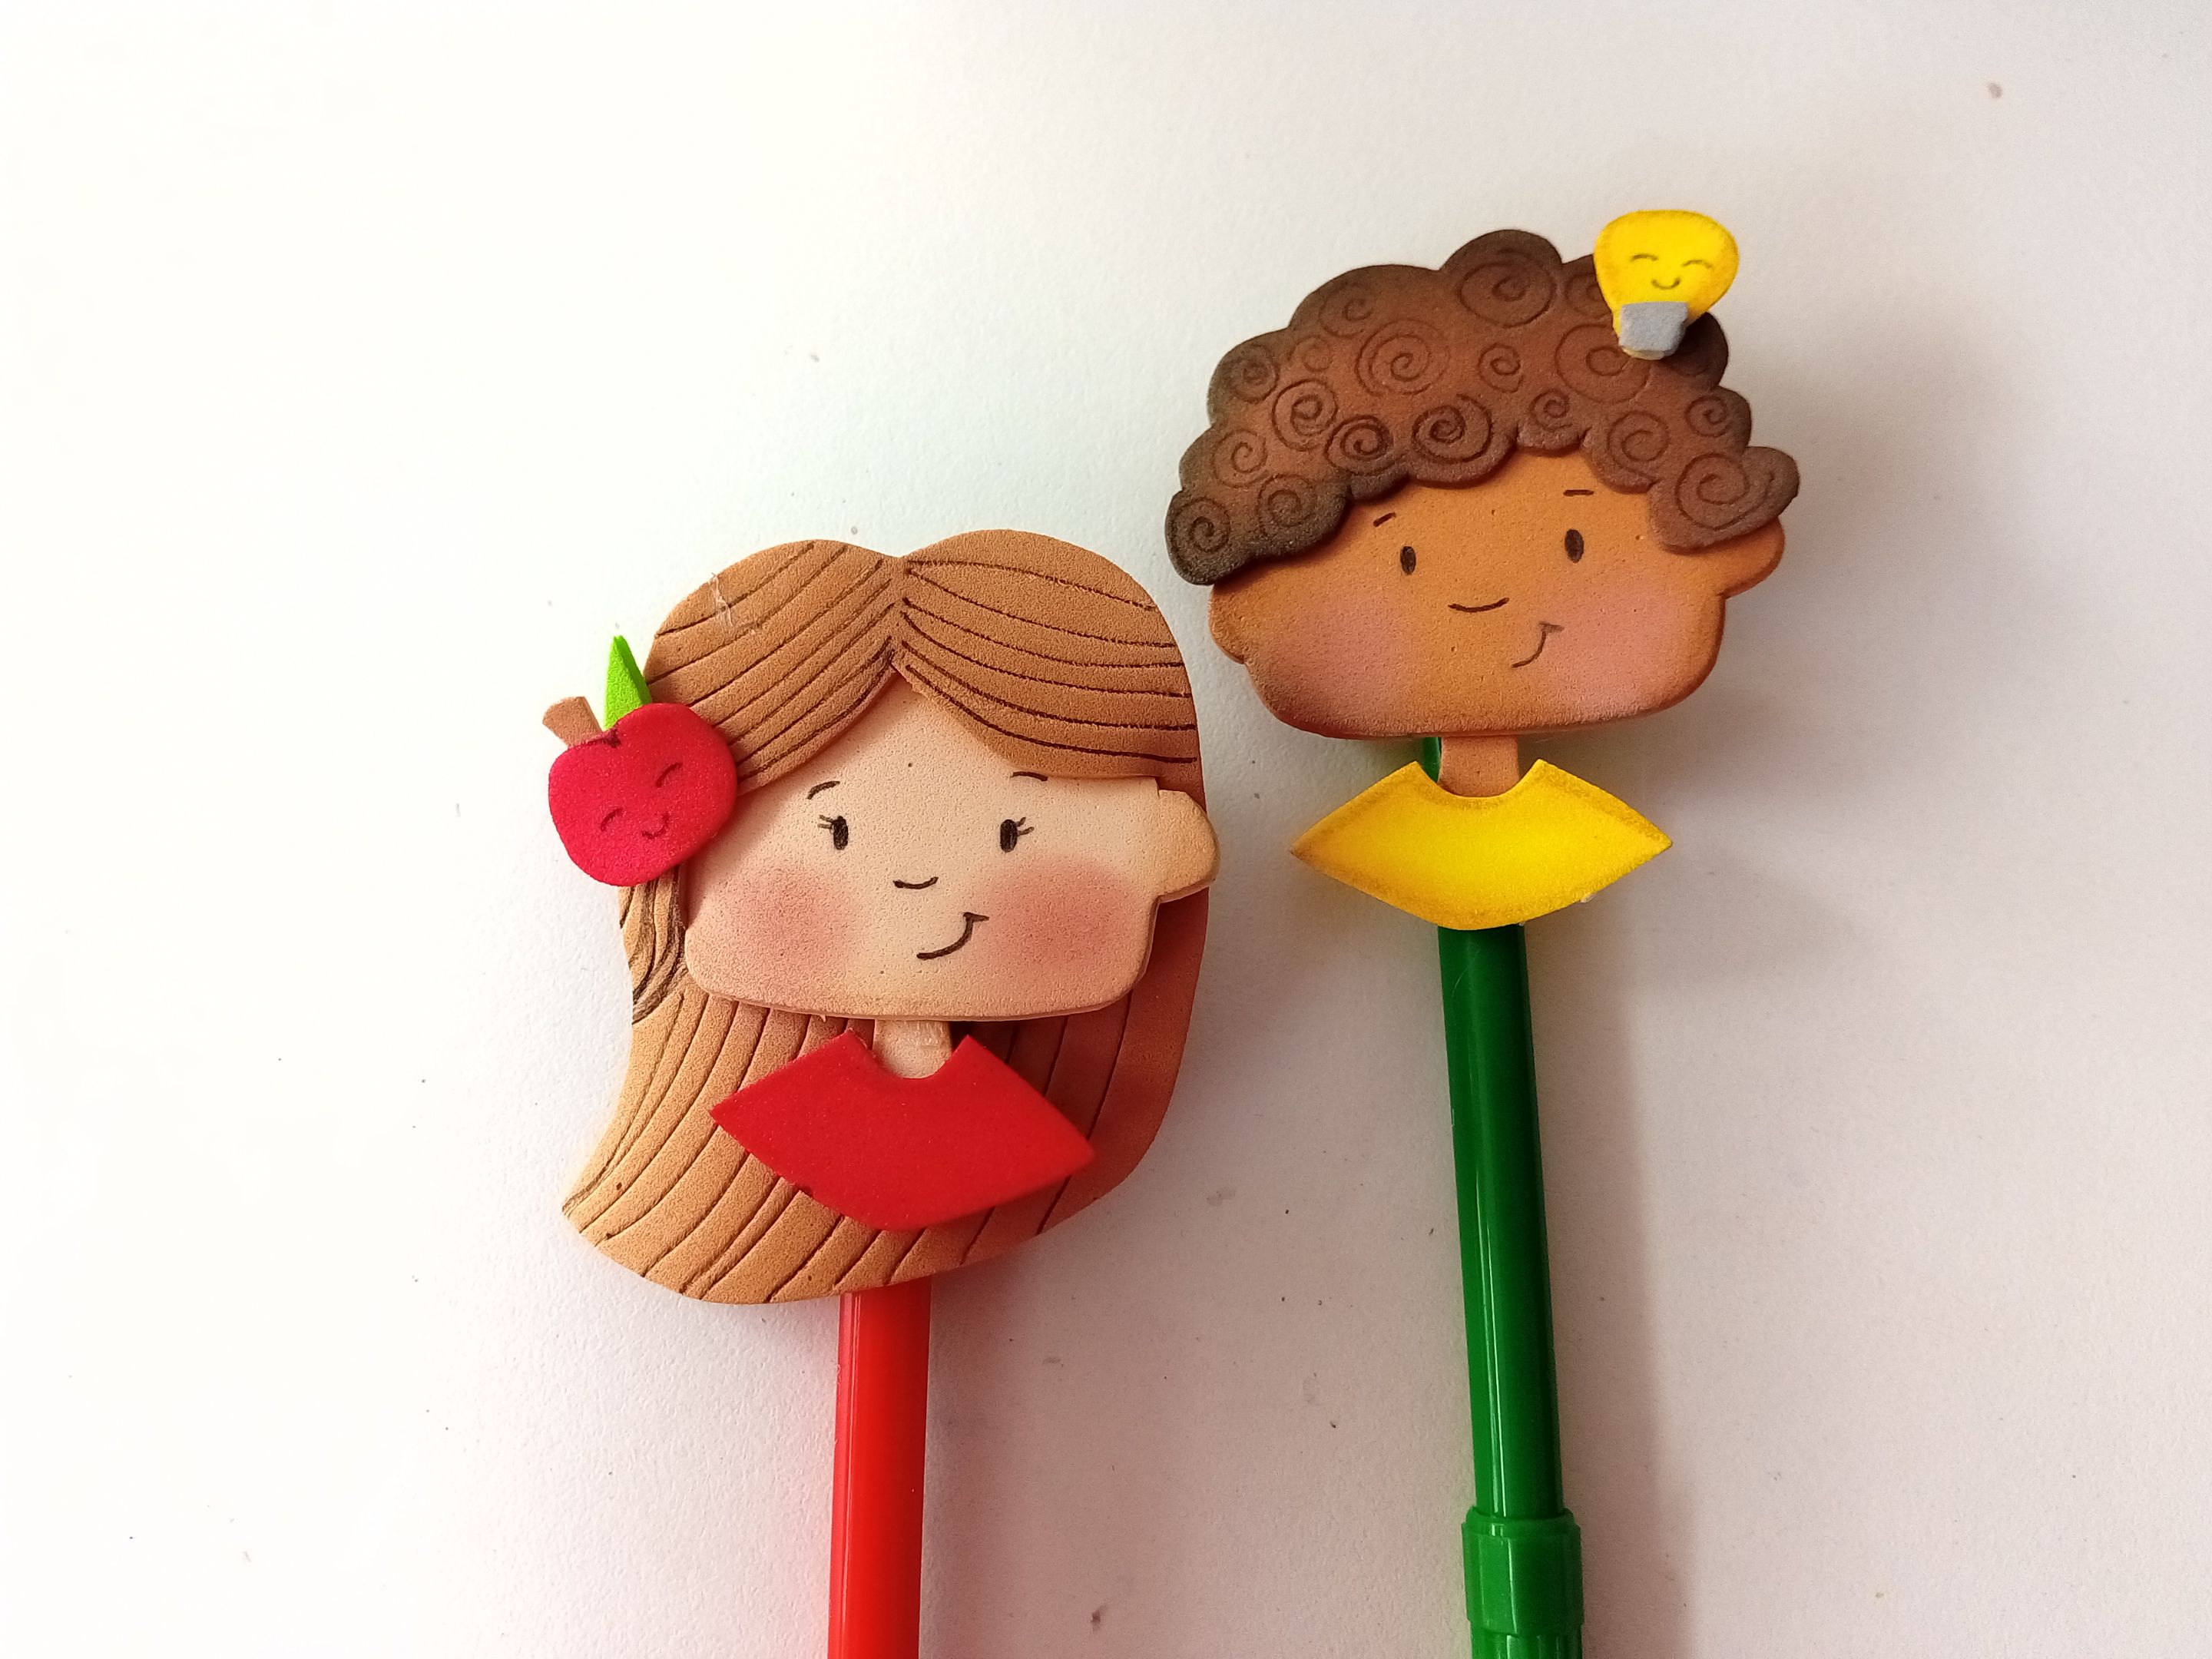
Para finalizar, recortamos dos tiras de 4 cm x 1 cm en foami escarchado metalizado (también pueden utilizar un foami liso, dar color a los bordes y algún diseño de preferencia). Tomamos los lápices, pegamos rodeando el borde superior y encima de las tiras las figuras de los niños.
###### ✨STEP 4:
To finish, we cut two 4 cm x 1 cm strips of metallic frosted foam (you can also use plain foam, color the edges, and add any design of your choice). We took the pencils and glued the children's figures around the top edge of the strips.
# ✨RESULTADO: | ✨RESULT:

|||
|-|-|
---

---
**!TE DESEO UN GRAN DÏA¡**
Todas las fotografías son de mi propiedad.
Separador y Fotos editadas en [Canva](https://www.canva.com/)
**!I WISH YOU A GOOD DAY**
All photographs are my property.
Photos edited in [Canva](https://www.canva.com/)
Posted Using [INLEO](https://inleo.io/@valenpba/espeng-linda-decoracin-para-lpices-cute-pencil-decoration-kxw)