######
✨¡Hola amigos amantes de la creatividad! Espero que estén todos bien.✨
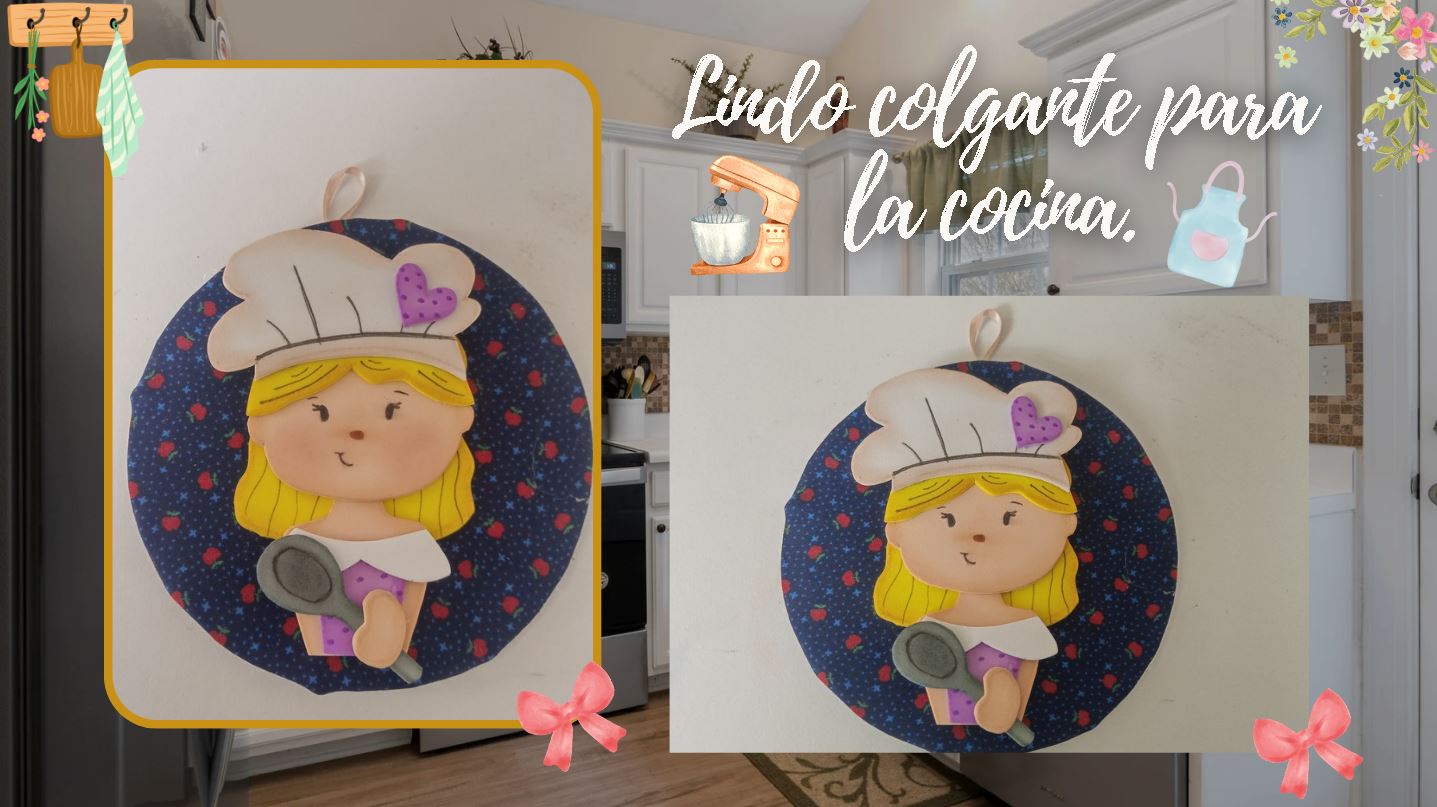
¡Buenas tardes, amigos! Buenas noches, amigos. Espero que estén pasando una excelente semana. Por mi parte, contenta de pasar por acá a compartir una linda idea con ustedes. En esta ocasión, les comparto el paso a paso para elaborar un lindo colgante para la cocina. Ya saben que me encanta elaborar colgantes y que son mi creación favorita; es lo que más disfruto planear en mi cabeza, pues lo veo como una especie de rompecabezas.
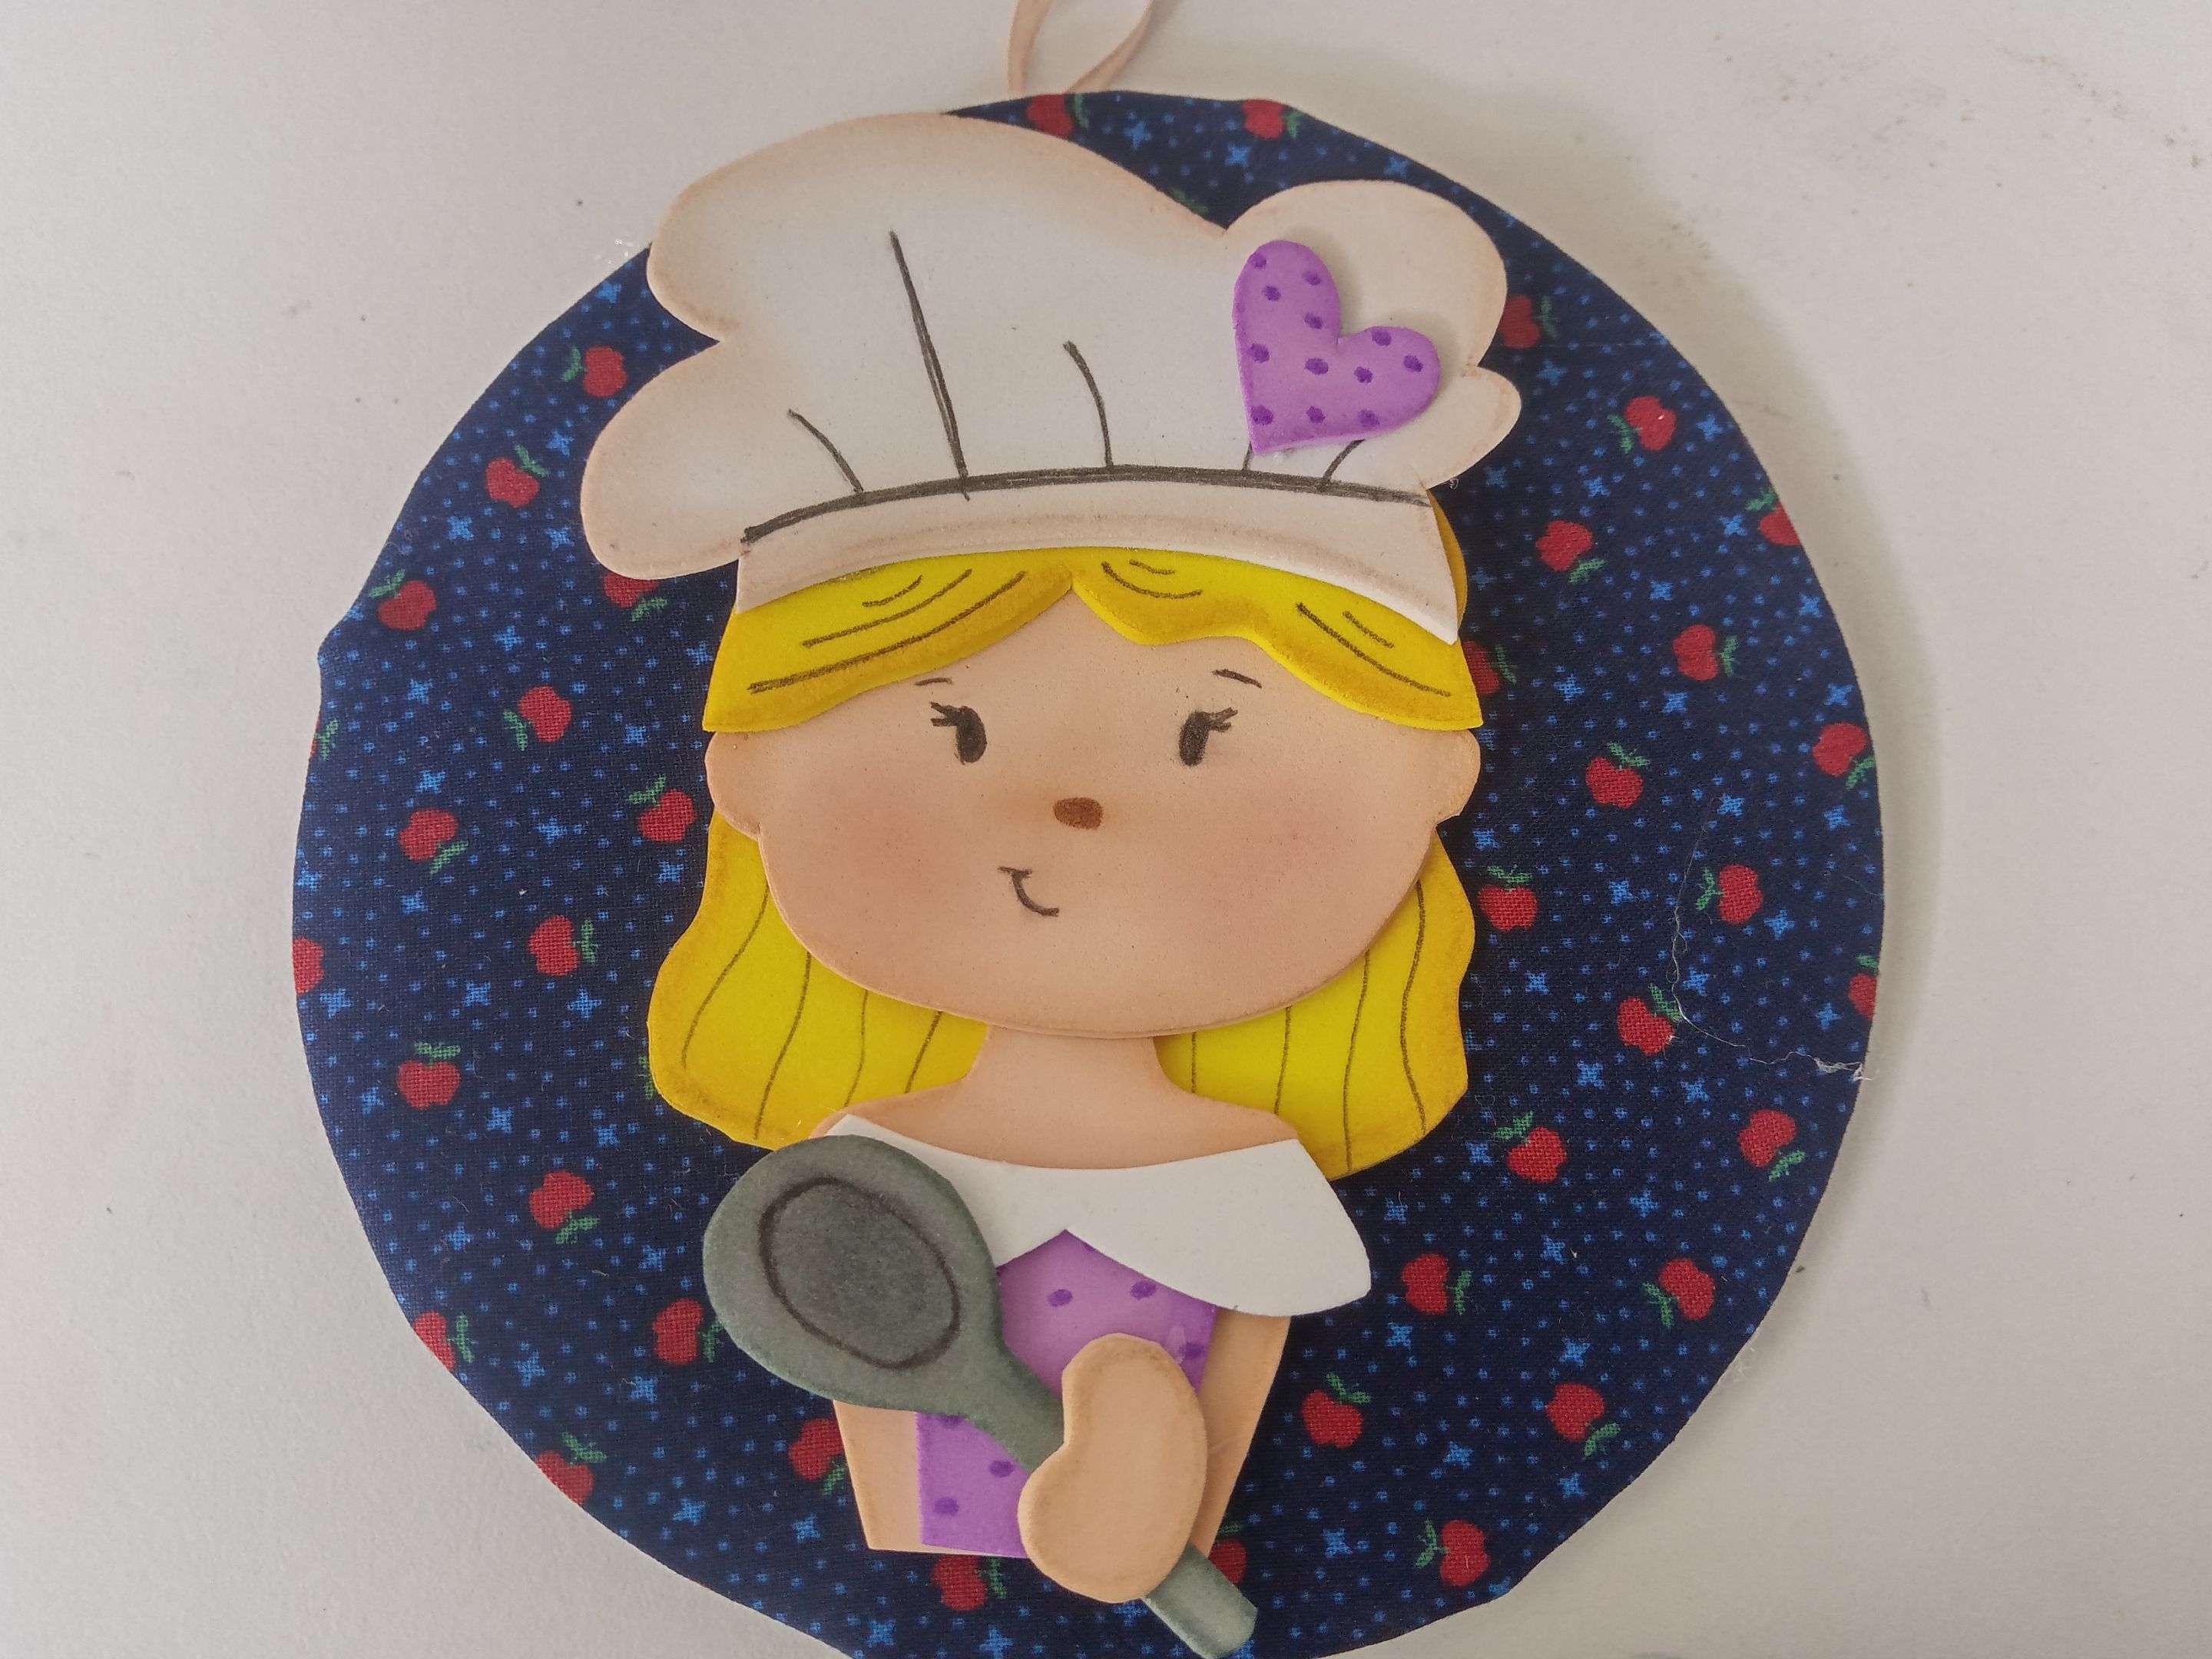
Esta vez pensé en la idea de una niña con un gorro de chef, sosteniendo una cuchara lista para cocinar. Además, utilicé tela y cartón para esta creación.
**🔸Sin más que añadir, a continuación los dejo con el paso a paso:**
> ######
✨¡Hello friends who love creativity! I hope you are all well.✨
>
Good afternoon, friends! I hope you're having a great week. For my part, I'm happy to stop by to share a lovely idea with you. This time, I'm sharing the step-by-step instructions for making a cute pendant for the kitchen. You already know that I love making pendants and that they're my favorite creation; it's what I most enjoy planning in my head, as I see it as a kind of puzzle.
This time, I came up with the idea of a girl wearing a chef's hat, holding a spoon ready to cook. I also used fabric and cardboard for this creation.
> **🔸Without more to add, then I leave you with the step by step:**
---
---

|||
|-|-|


||||
|-|-|-|


||||
|-|-|-|


||||
|-|-|-|

✨Así es como pueden elaborar un lindo colgante para decorar un poco más la cocina y que esta se vea acogedora. A mí me gustó mucho el diseño y colores que utilicé, pero recuerden que pueden elaborarlo como deseen, totalmente a gusto. Espero que les haya gustado la receta y se animen a elaborarla.
❤️Hasta la próxima publicación.
>
✨This is how you can make a cute pendant to decorate your kitchen a little more and make it look cozy. I really liked the design and colors I used, but remember that you can design it however you want, completely up to you. I hope you enjoyed the recipe and are inspired to try it.
>
❤️Until the next post.

**♥️ESPERO QUE TE GUSTE,
¡Empecemos!**
**♥️I HOPE YOU LIKE IT,
Let's start!**
---

# ✂️ MATERIALES | ✂️ MATERIALS

- Foami amarillo.
- Foami lila.
- Foami crema.
- Foami blanco.
- Foami gris.
- Tela con el diseño deseado.
- Pinturas y marcadores.
- Cartón.
- Cinta.
- Pegamento.
- Tijeras.
- Regla.
- Hoja blanca.
- Lápiz.
- Yellow foam.
- Lilac foam.
- Cream foam.
- White foam.
- Gray foam.
- Fabric with the desired design.
- Paints and markers.
- Cardboard.
- Tape.
- Glue.
- Scissors.
- Ruler.
- White paper.
- Pencil.

# 🌟 PROCEDIMIENTO | 🌟 PROCESS

###### ✨PASO 1:
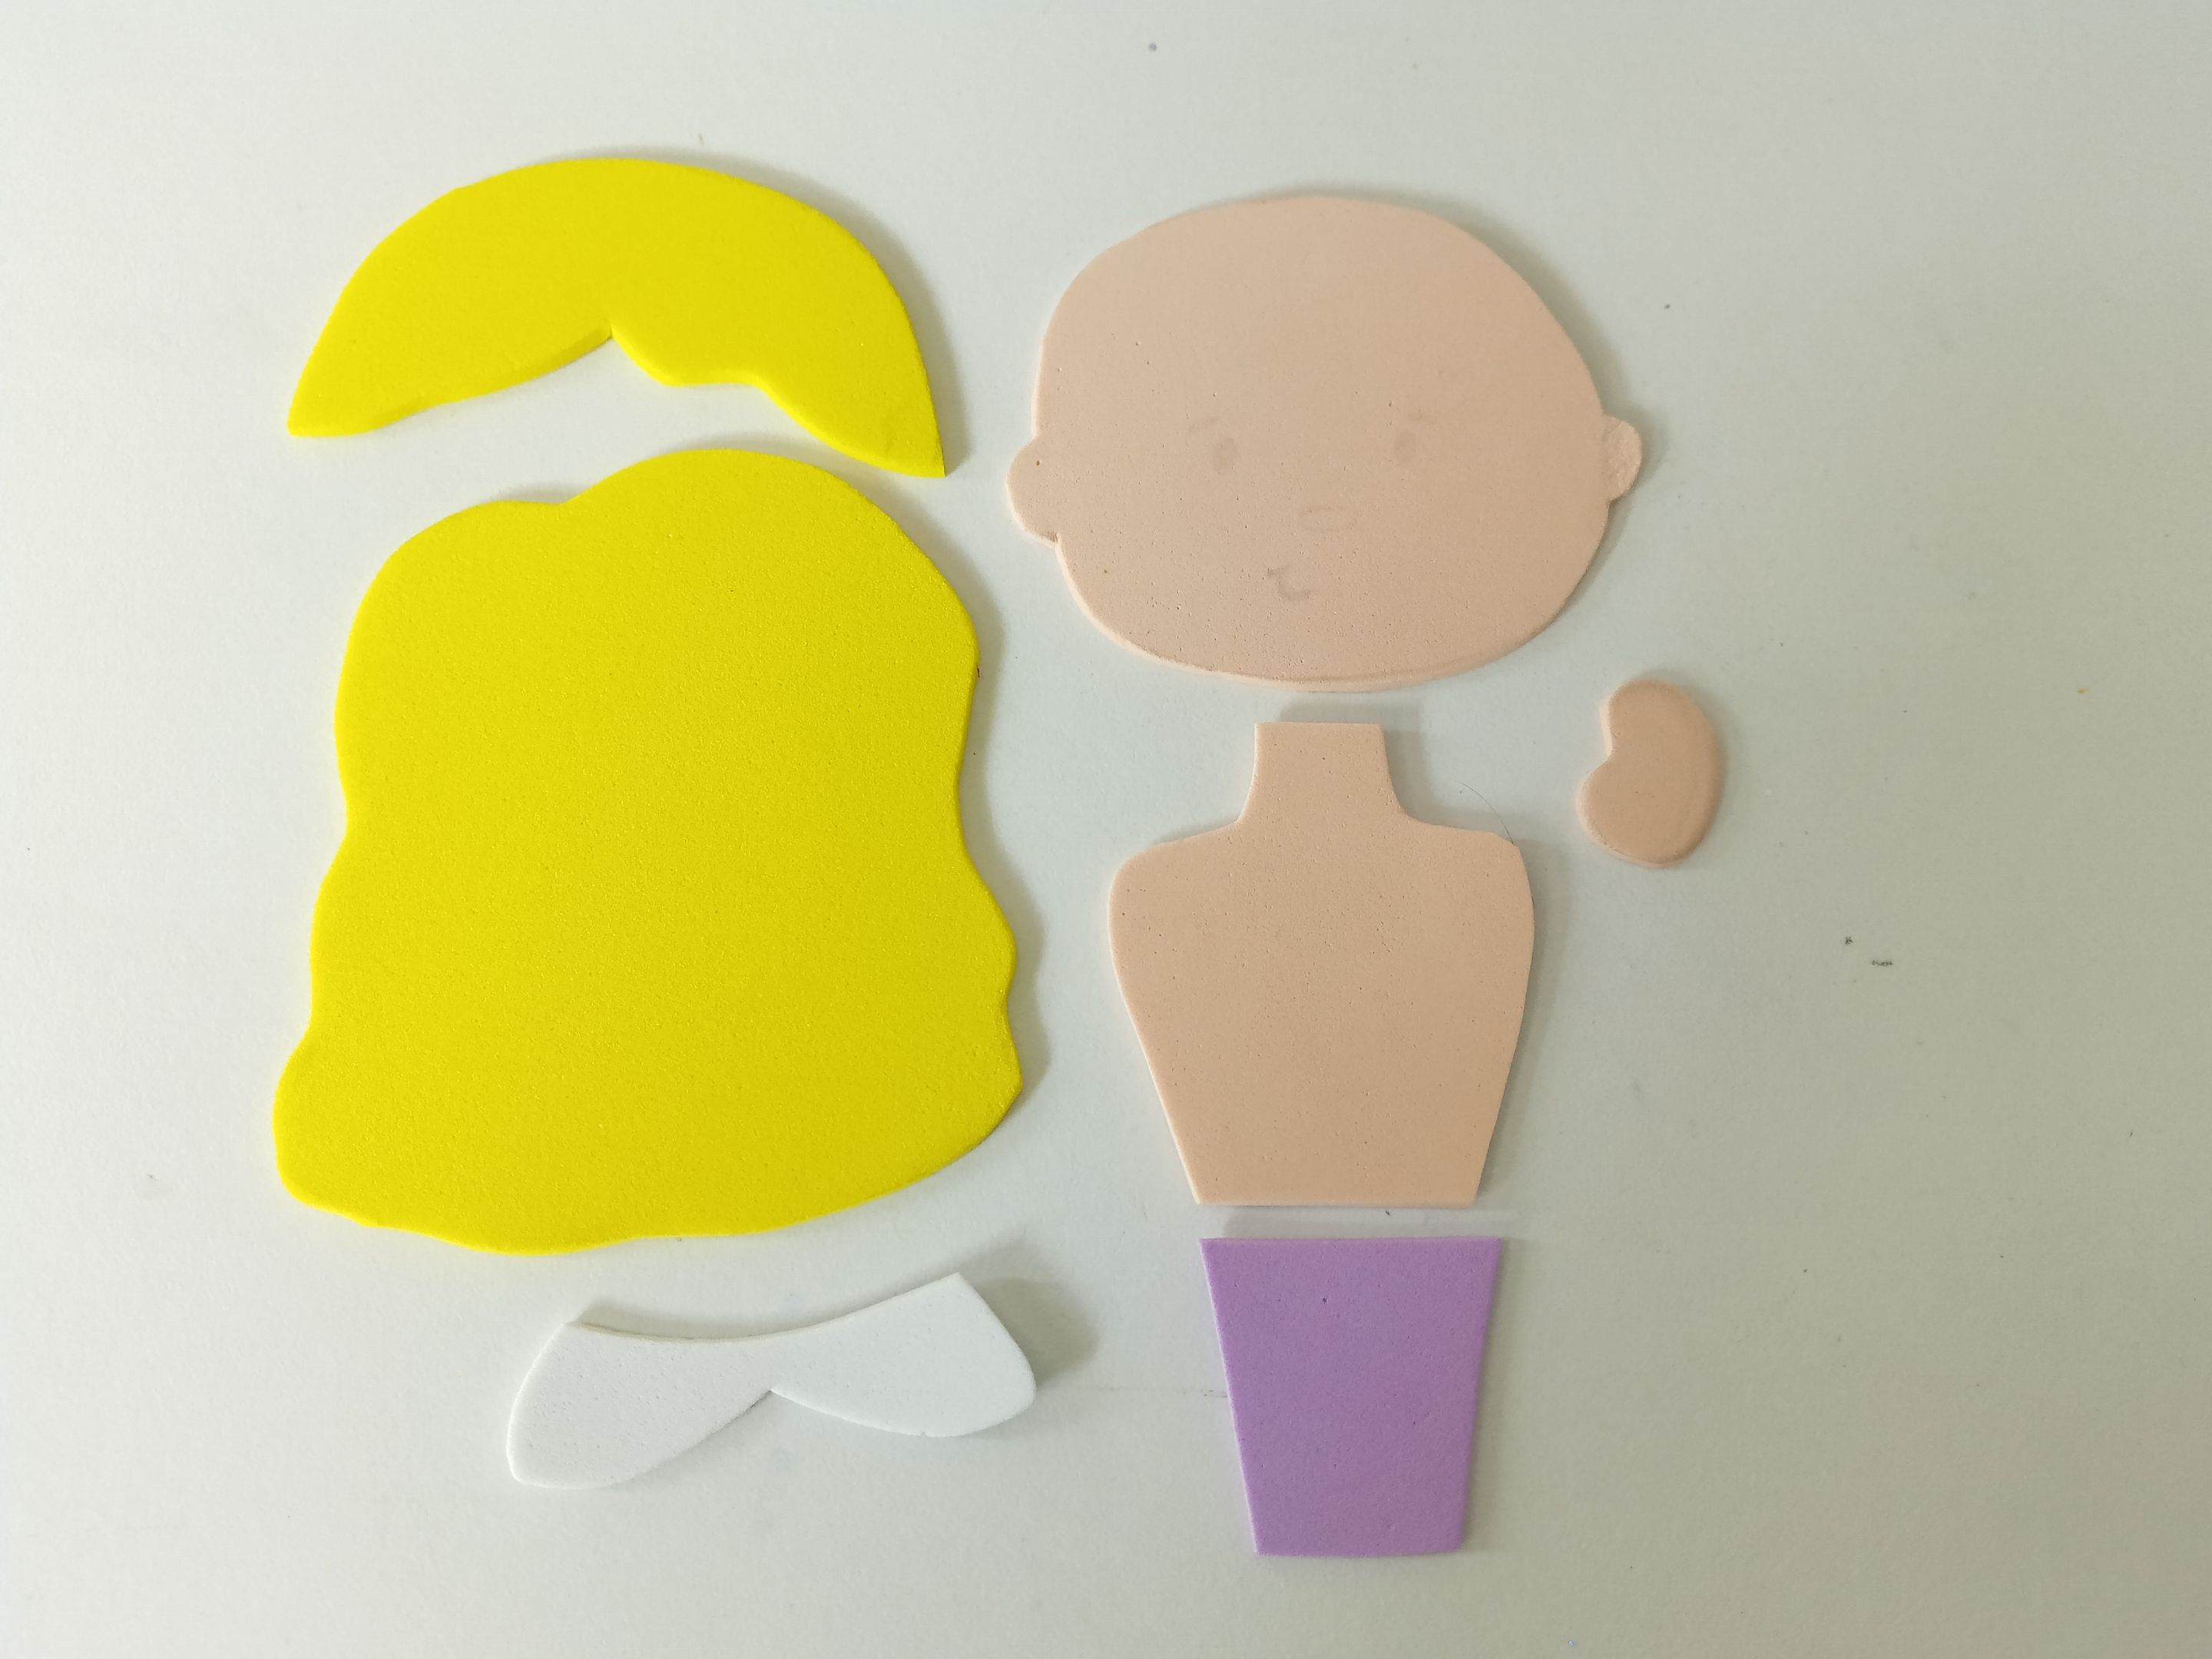
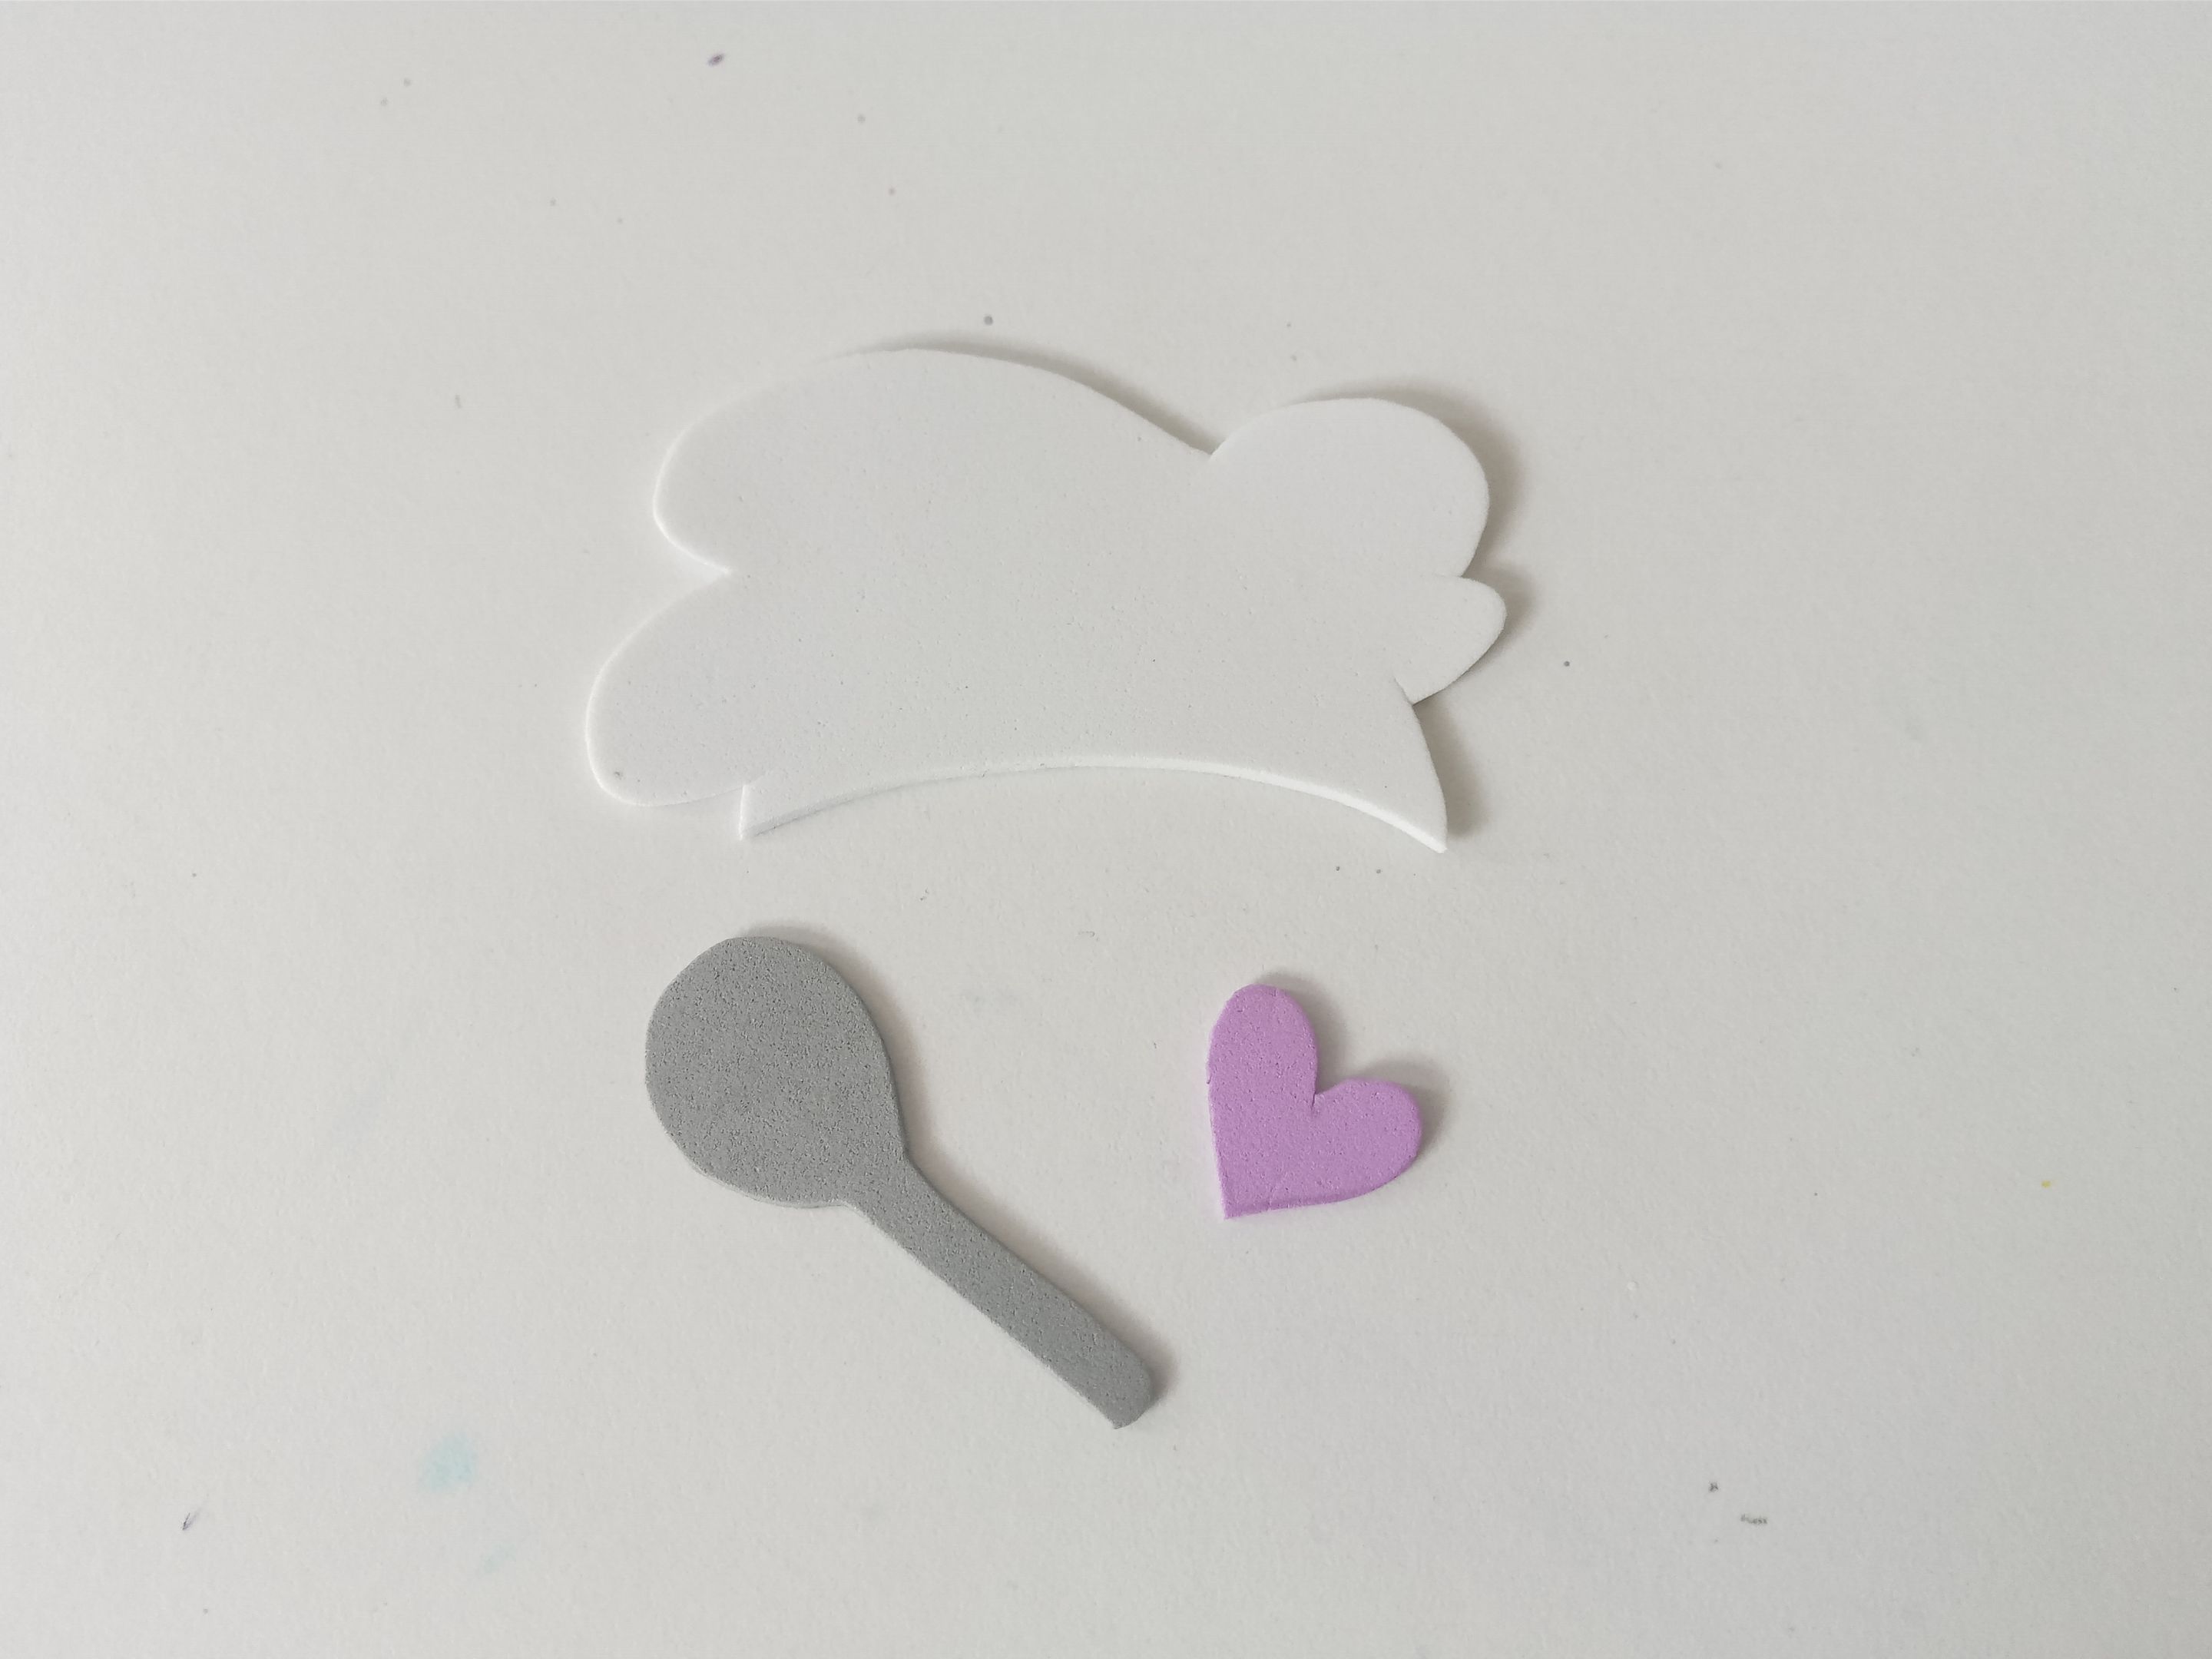
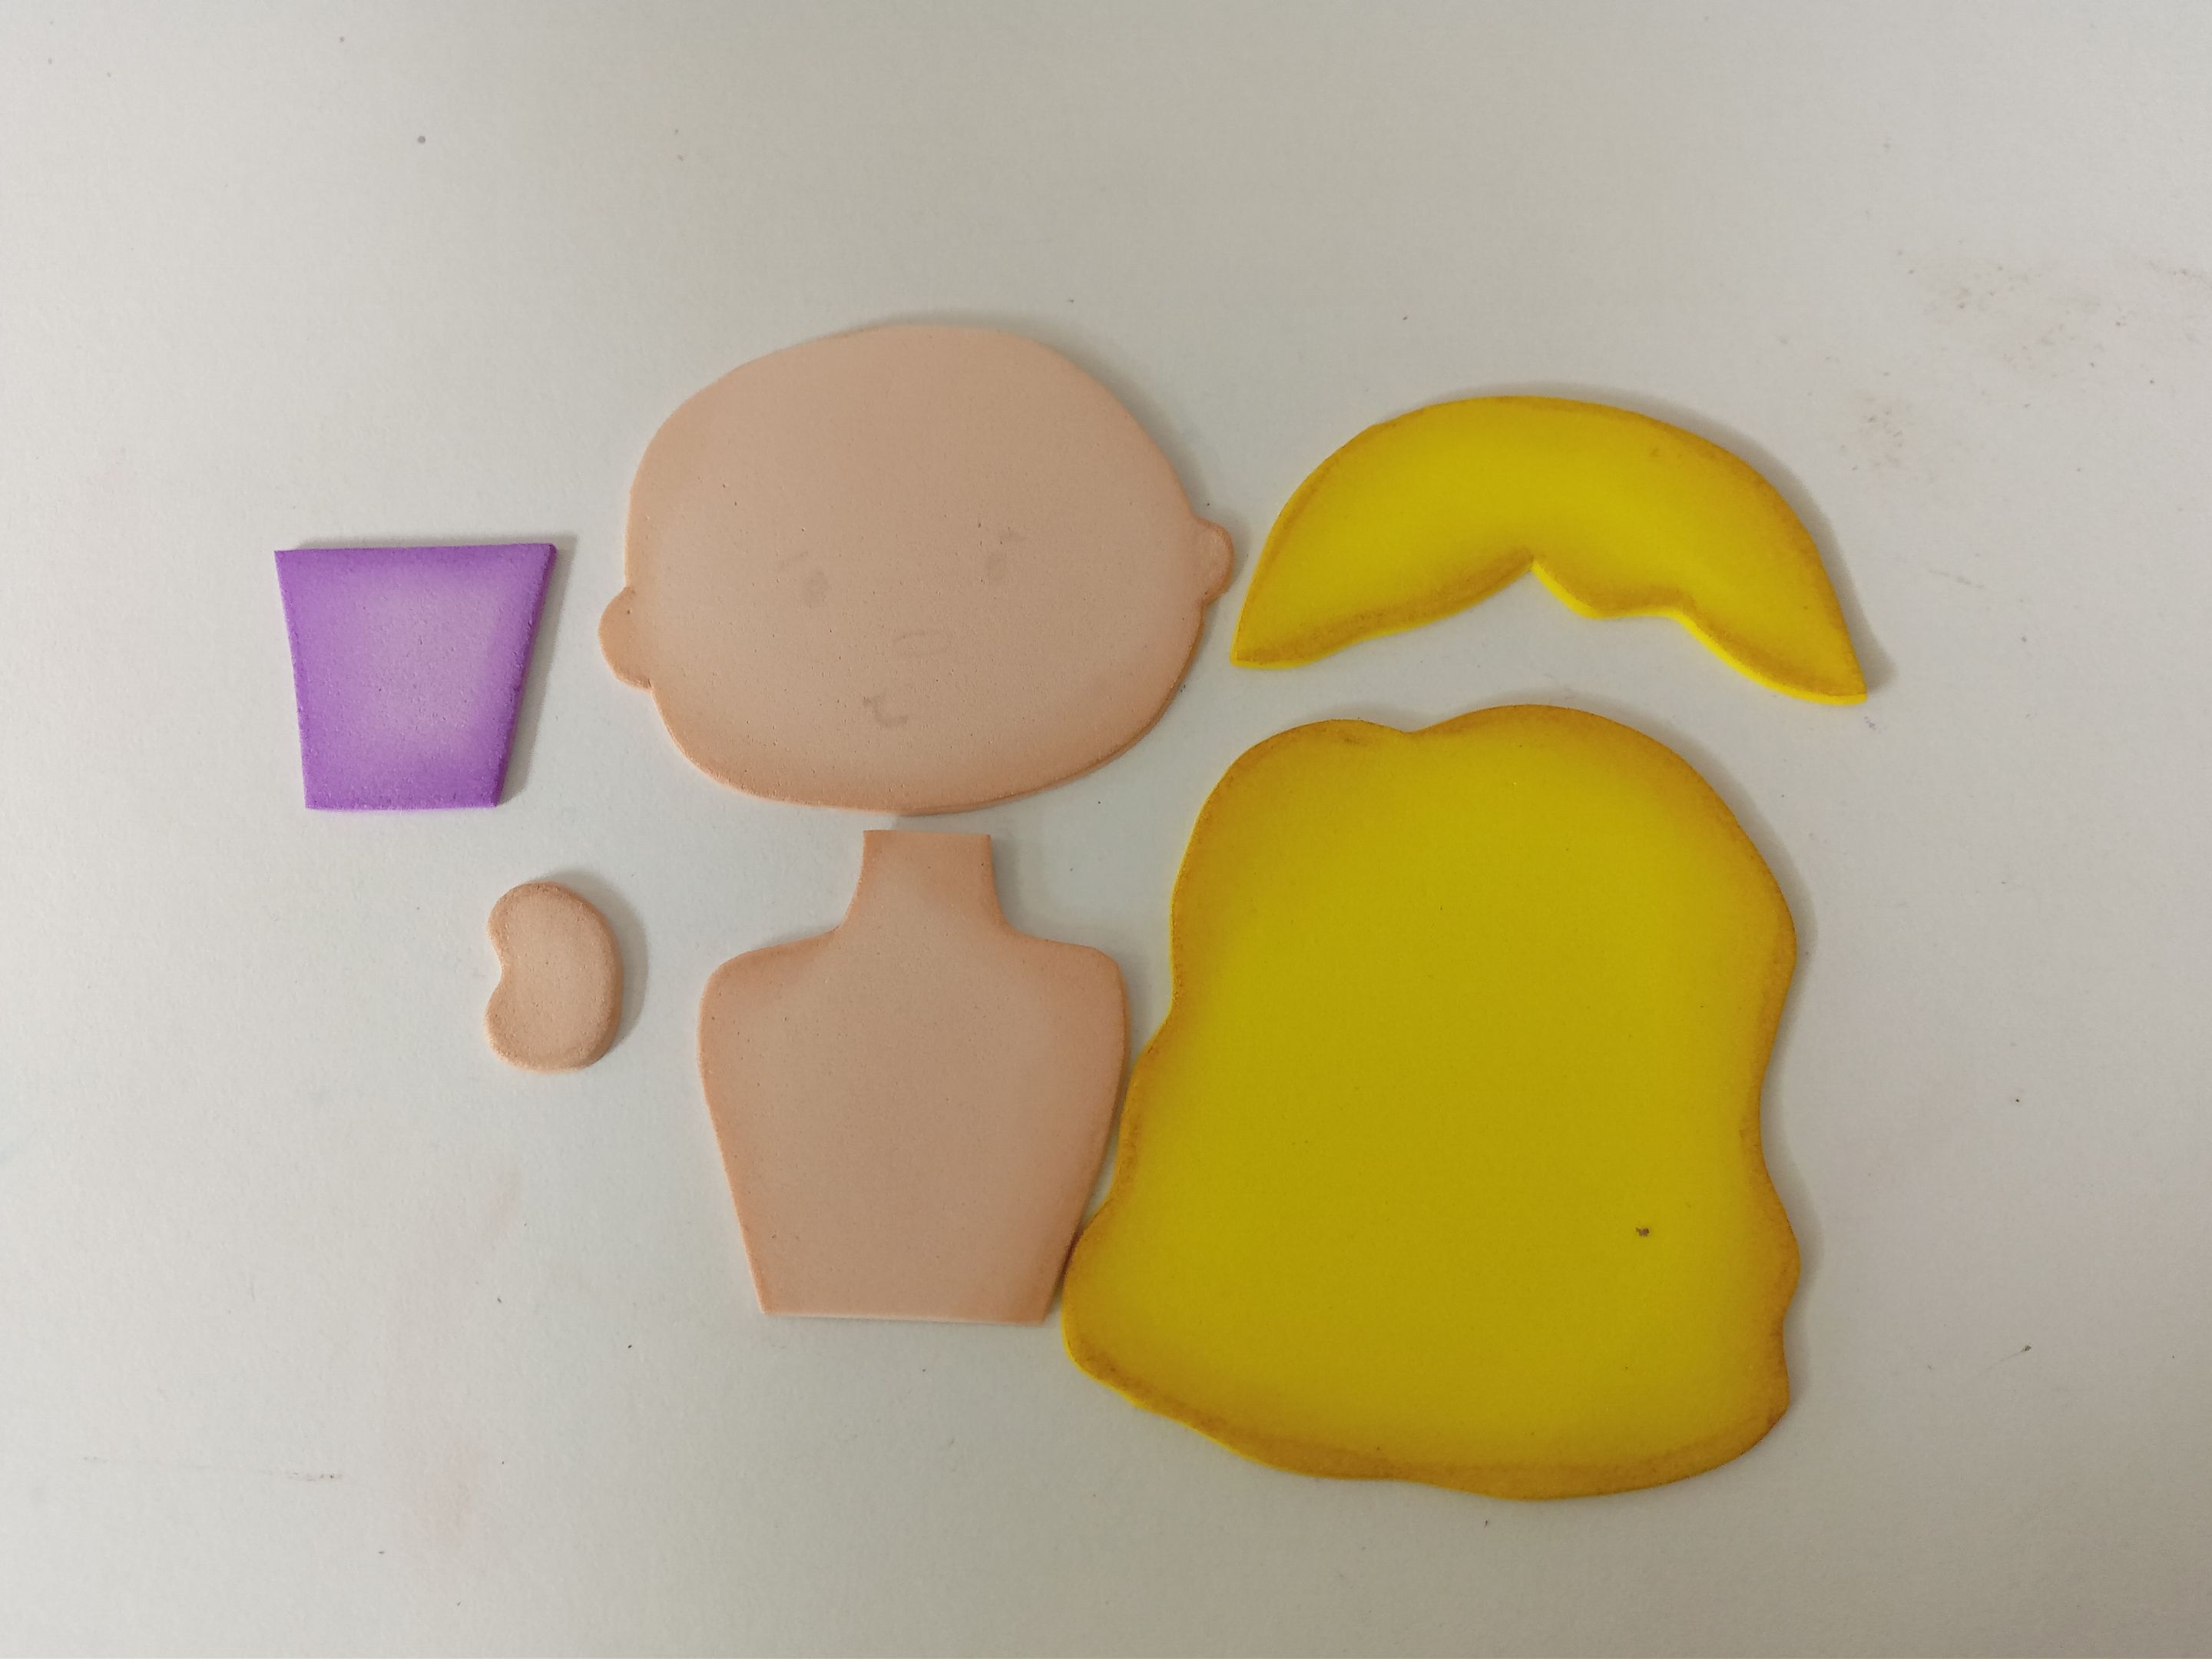
Lo primero que hice fue elaborar el diseño de la cocinera que quería en una hoja blanca, junto con todos los accesorios extras, como la cuchara y el sombrero. Al tener la idea lista en la hoja blanca, es momento de transferir a los colores correspondientes de foami, como explico a continuación:
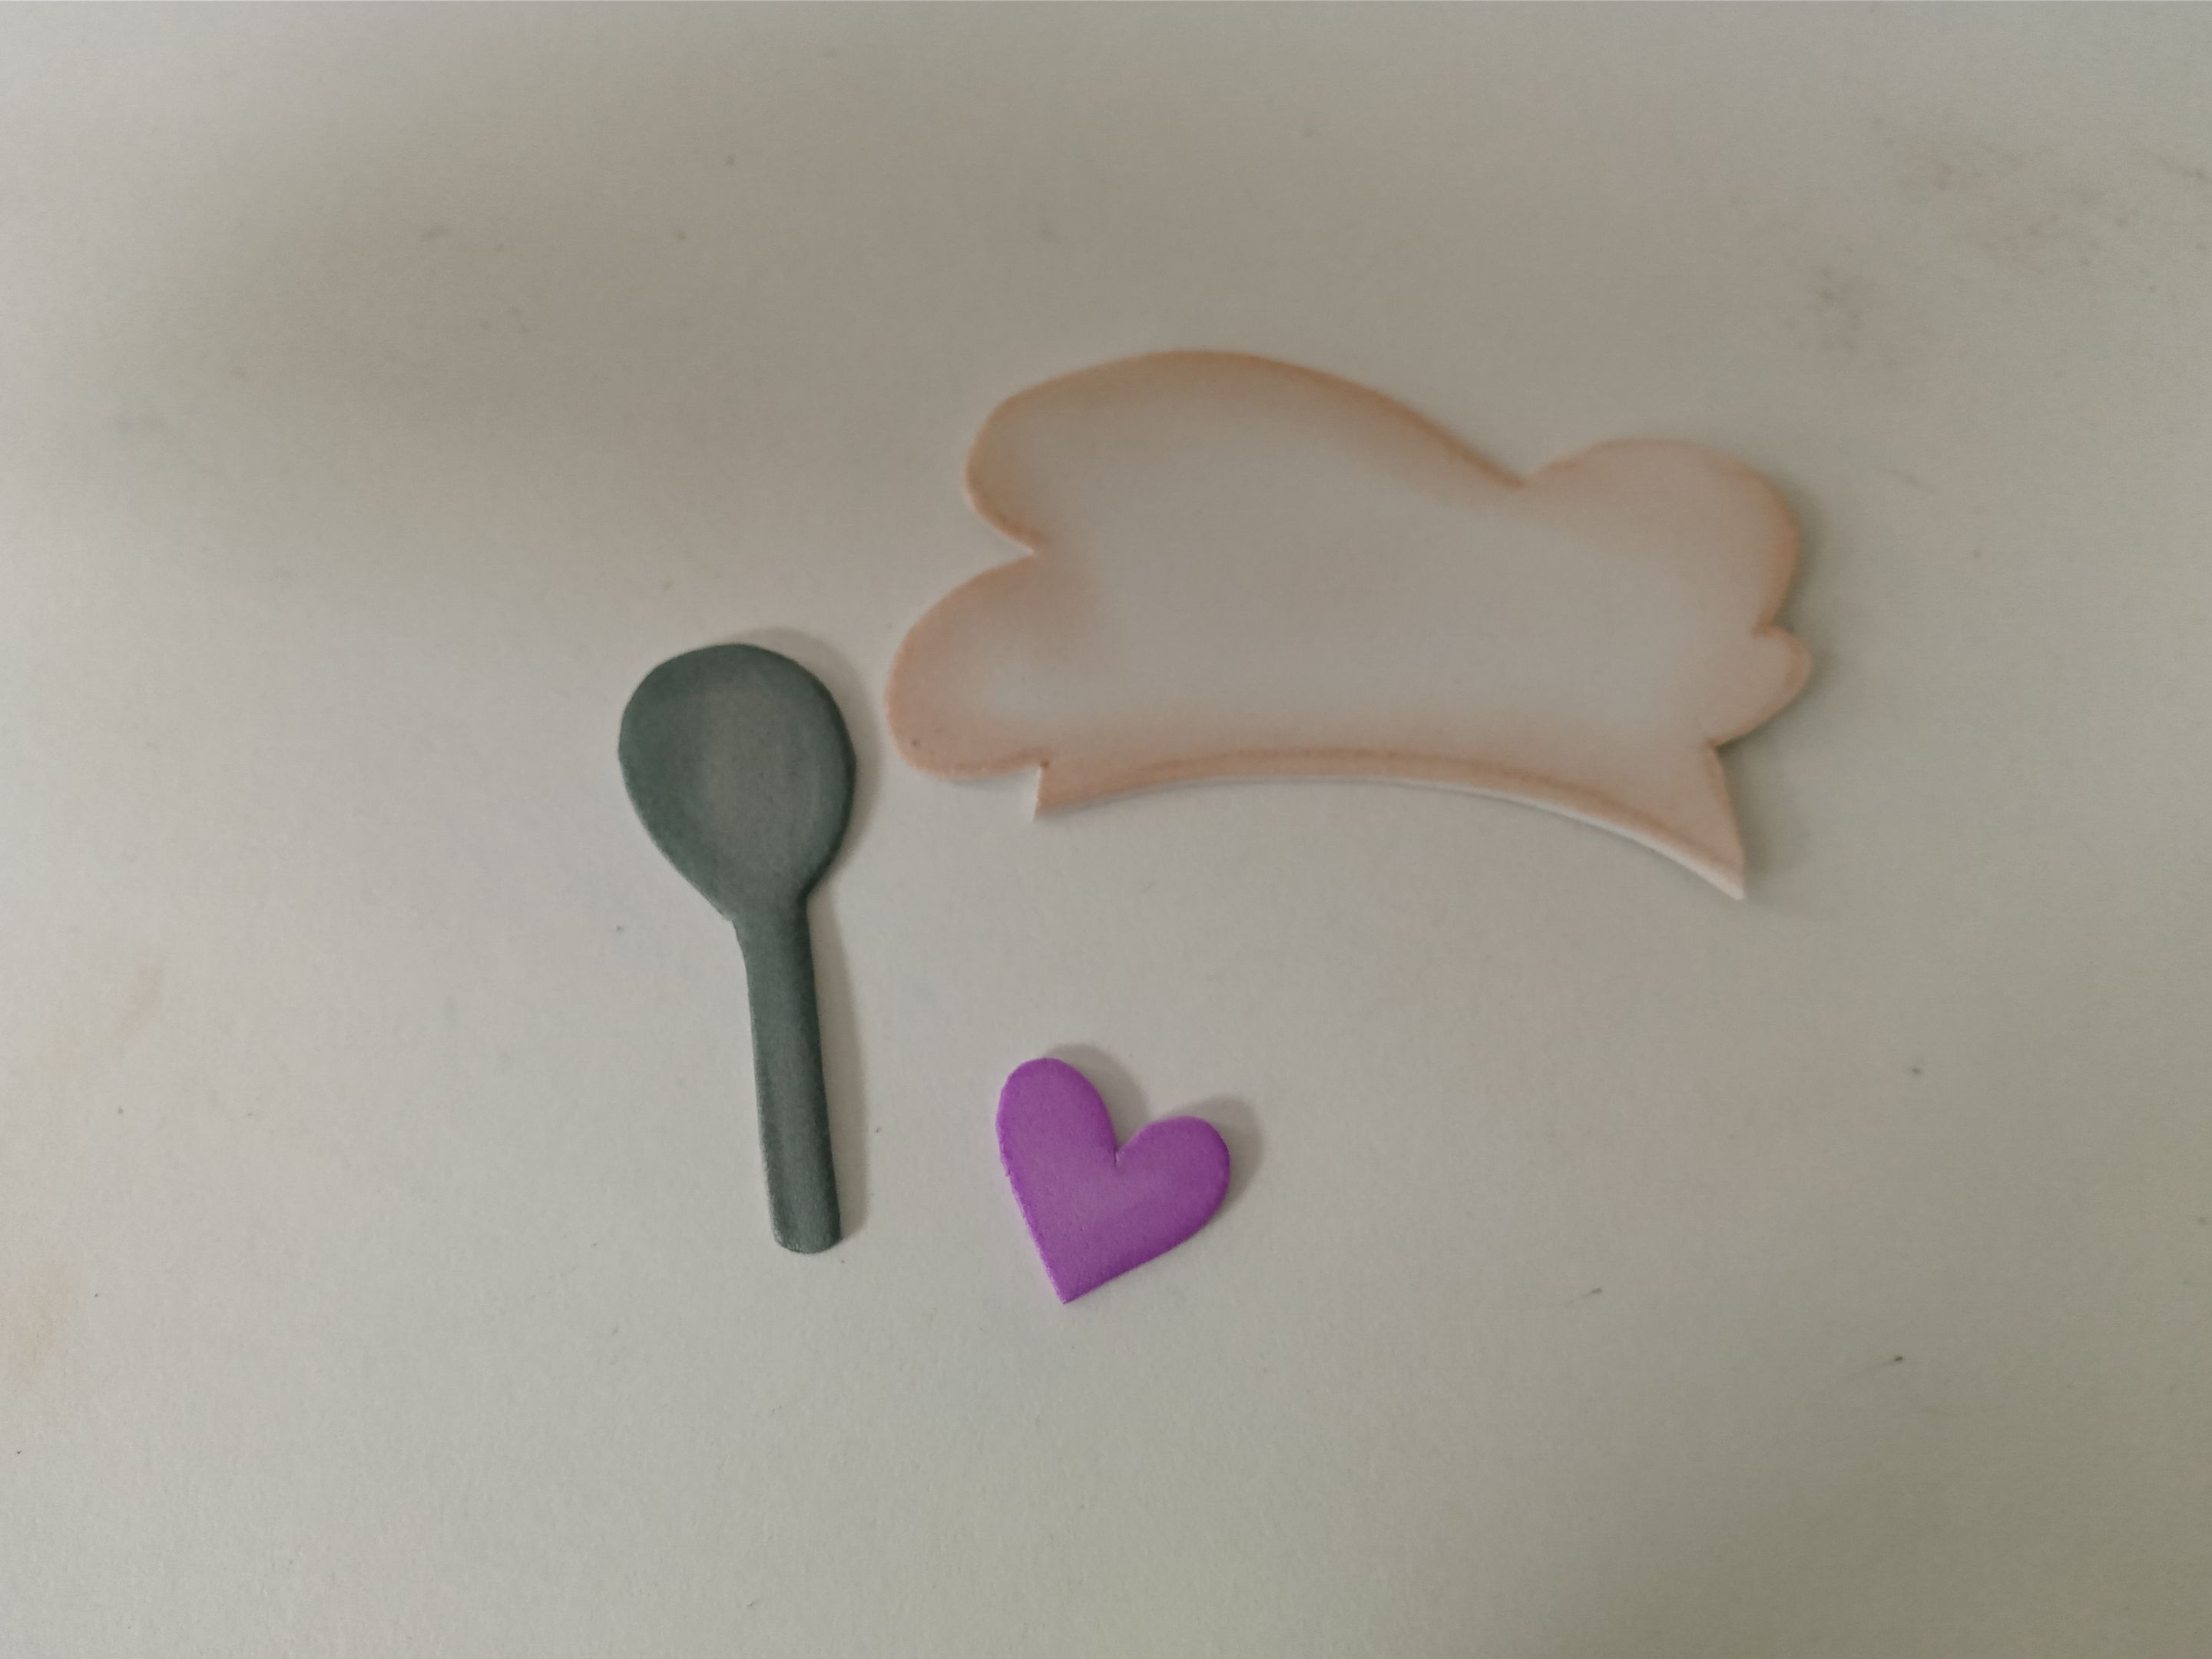
Gorro de chef: 8 cm x 4 cm en foami blanco.
Cabello: 8 cm x 6.5 cm y 6.5 cm x 3 cm en foami amarillo.
Cabeza: 7 cm x 6 cm en foami crema.
Cuerpo: 5 cm x 4.5 cm en foami crema.
Vestimenta: 3.7 cm x 3 cm en foami lila y 4.5 cm x 1.3 cm en foami blanco.
Mano: 2 cm x 1.5 cm en foami crema.
Cuchara: 5.5 cm x 2 cm en foami gris.
Corazón: 2 cm x 2 cm en foami lila.
###### ✨STEP 1:
The first thing I did was draw the design of the cook I wanted on a white sheet of paper, along with all the extra accessories, like the spoon and hat. Once you have the idea ready on the white sheet, it's time to transfer it to the corresponding colors of foam, as explained below:
Chef's hat: 8 cm x 4 cm in white foam.
Hair: 8 cm x 6.5 cm and 6.5 cm x 3 cm in yellow foam.
Head: 7 cm x 6 cm in cream foam.
Body: 5 cm x 4.5 cm in cream foam.
Clothing: 3.7 cm x 3 cm in lilac foam and 4.5 cm x 1.3 cm in white foam.
Hand: 2 cm x 1.5 cm in cream foam.
Spoon: 5.5 cm x 2 cm in gray foam.
Heart: 2 cm x 2 cm in lilac foam.
###### ✨PASO 2:
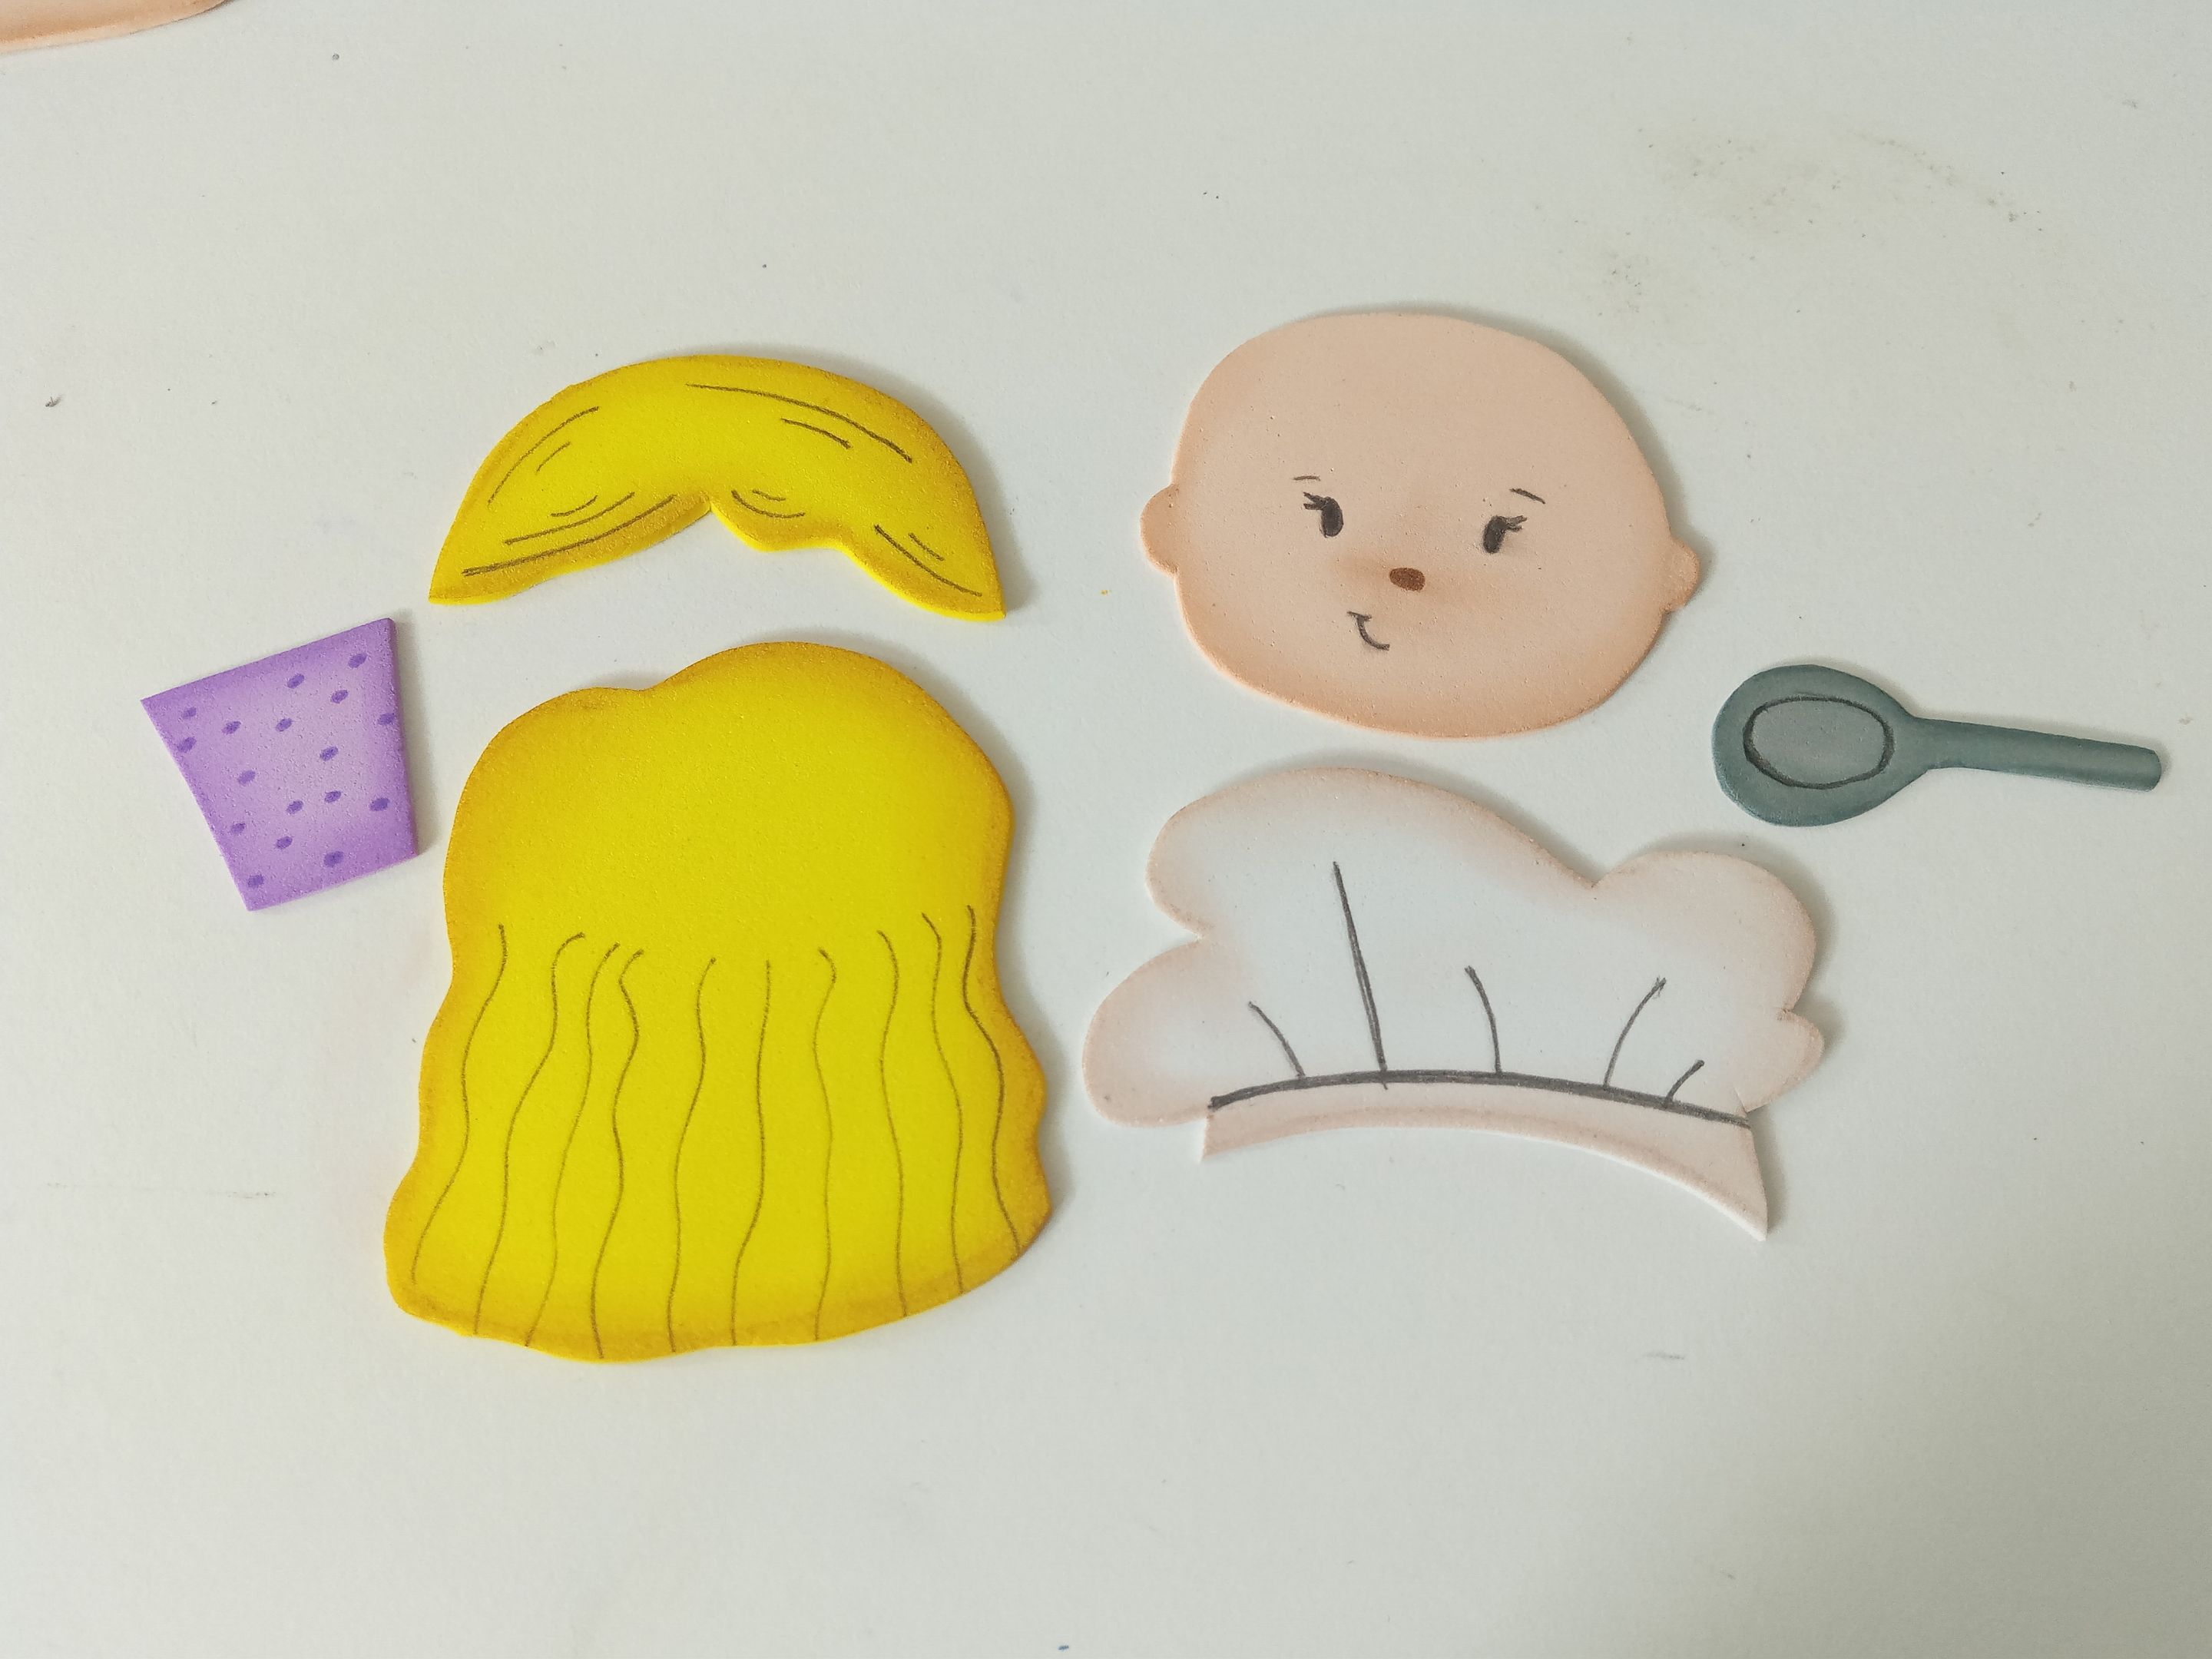
Al tener las piezas recortadas, es momento de mi parte favorita, que es darle color a los bordes con pinturas o marcadores para definir un poco o dar profundidad y siempre, utilizando pinturas de un tono más oscuro o que contrasten con el color de las piezas, y dejamos secar muy bien. Seguidamente, es momento de dar detalles más específicos con marcadores de punta fina, como los ojos, ceja, boca, nariz, cabello, cuchara, gorro de chef, cuchara y, a la vestimenta lila, le hice algunos puntos como al corazón.
###### ✨STEP 2:
Once the pieces are cut out, it's time for my favorite part: coloring the edges with paints or markers to define or add depth. Always use darker shades or paints that contrast with the pieces. Let them dry thoroughly. Next, it's time to add more specific details with fine-tipped markers, such as the eyes, eyebrows, mouth, nose, hair, a spoon, a chef's hat, and a spoon. I made some dots on the purple outfit, like the heart.
###### ✨PASO 3:
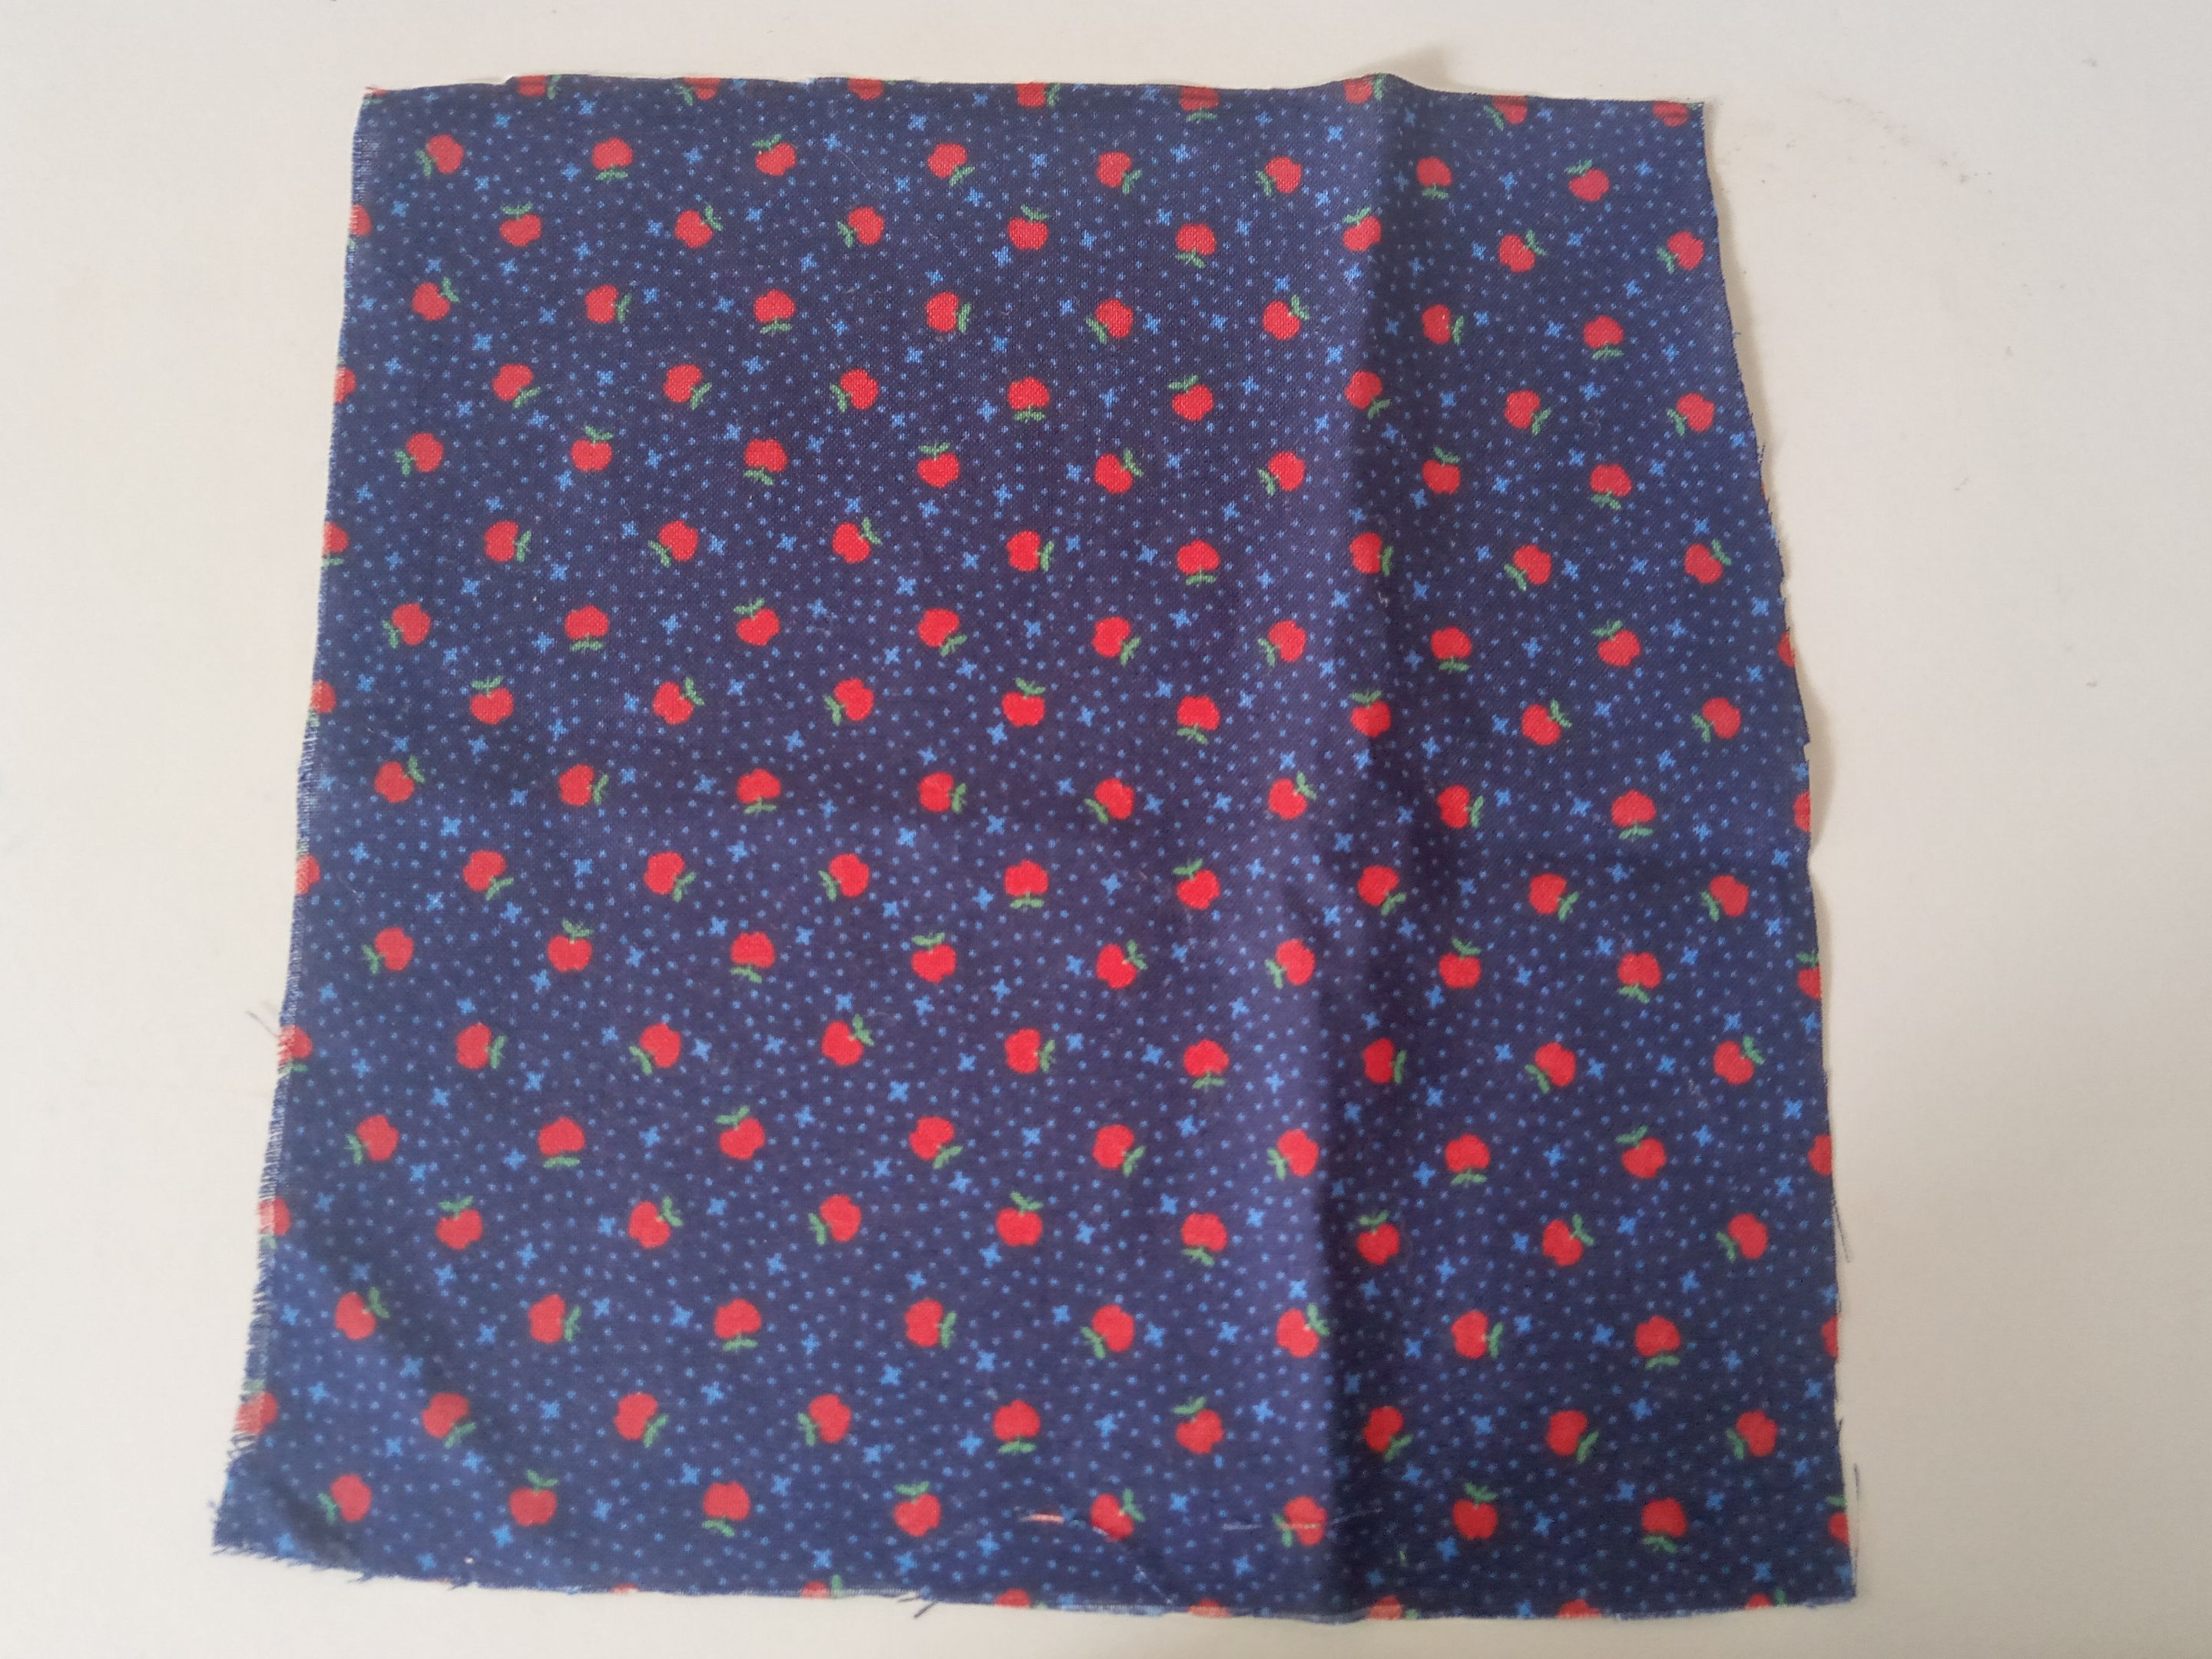
Mientras las piezas terminan de secar, es momento de hacer la base, así que tomé el cartón, tracé y recorté un círculo de 14 cm de circunferencia. Seguidamente, recorté un retazo de tela 1 cm más grande que la circunferencia de cada lado y forré el cartón con la tela muy bien, pegando por la parte trasera.
###### ✨STEP 3:
While the pieces are finishing drying, it's time to make the base. So, I took the cardboard, traced, and cut out a circle with a 14 cm circumference. Next, I cut out a piece of fabric 1 cm larger than the circumference on each side and tightly covered the cardboard with the fabric, gluing it on the back.
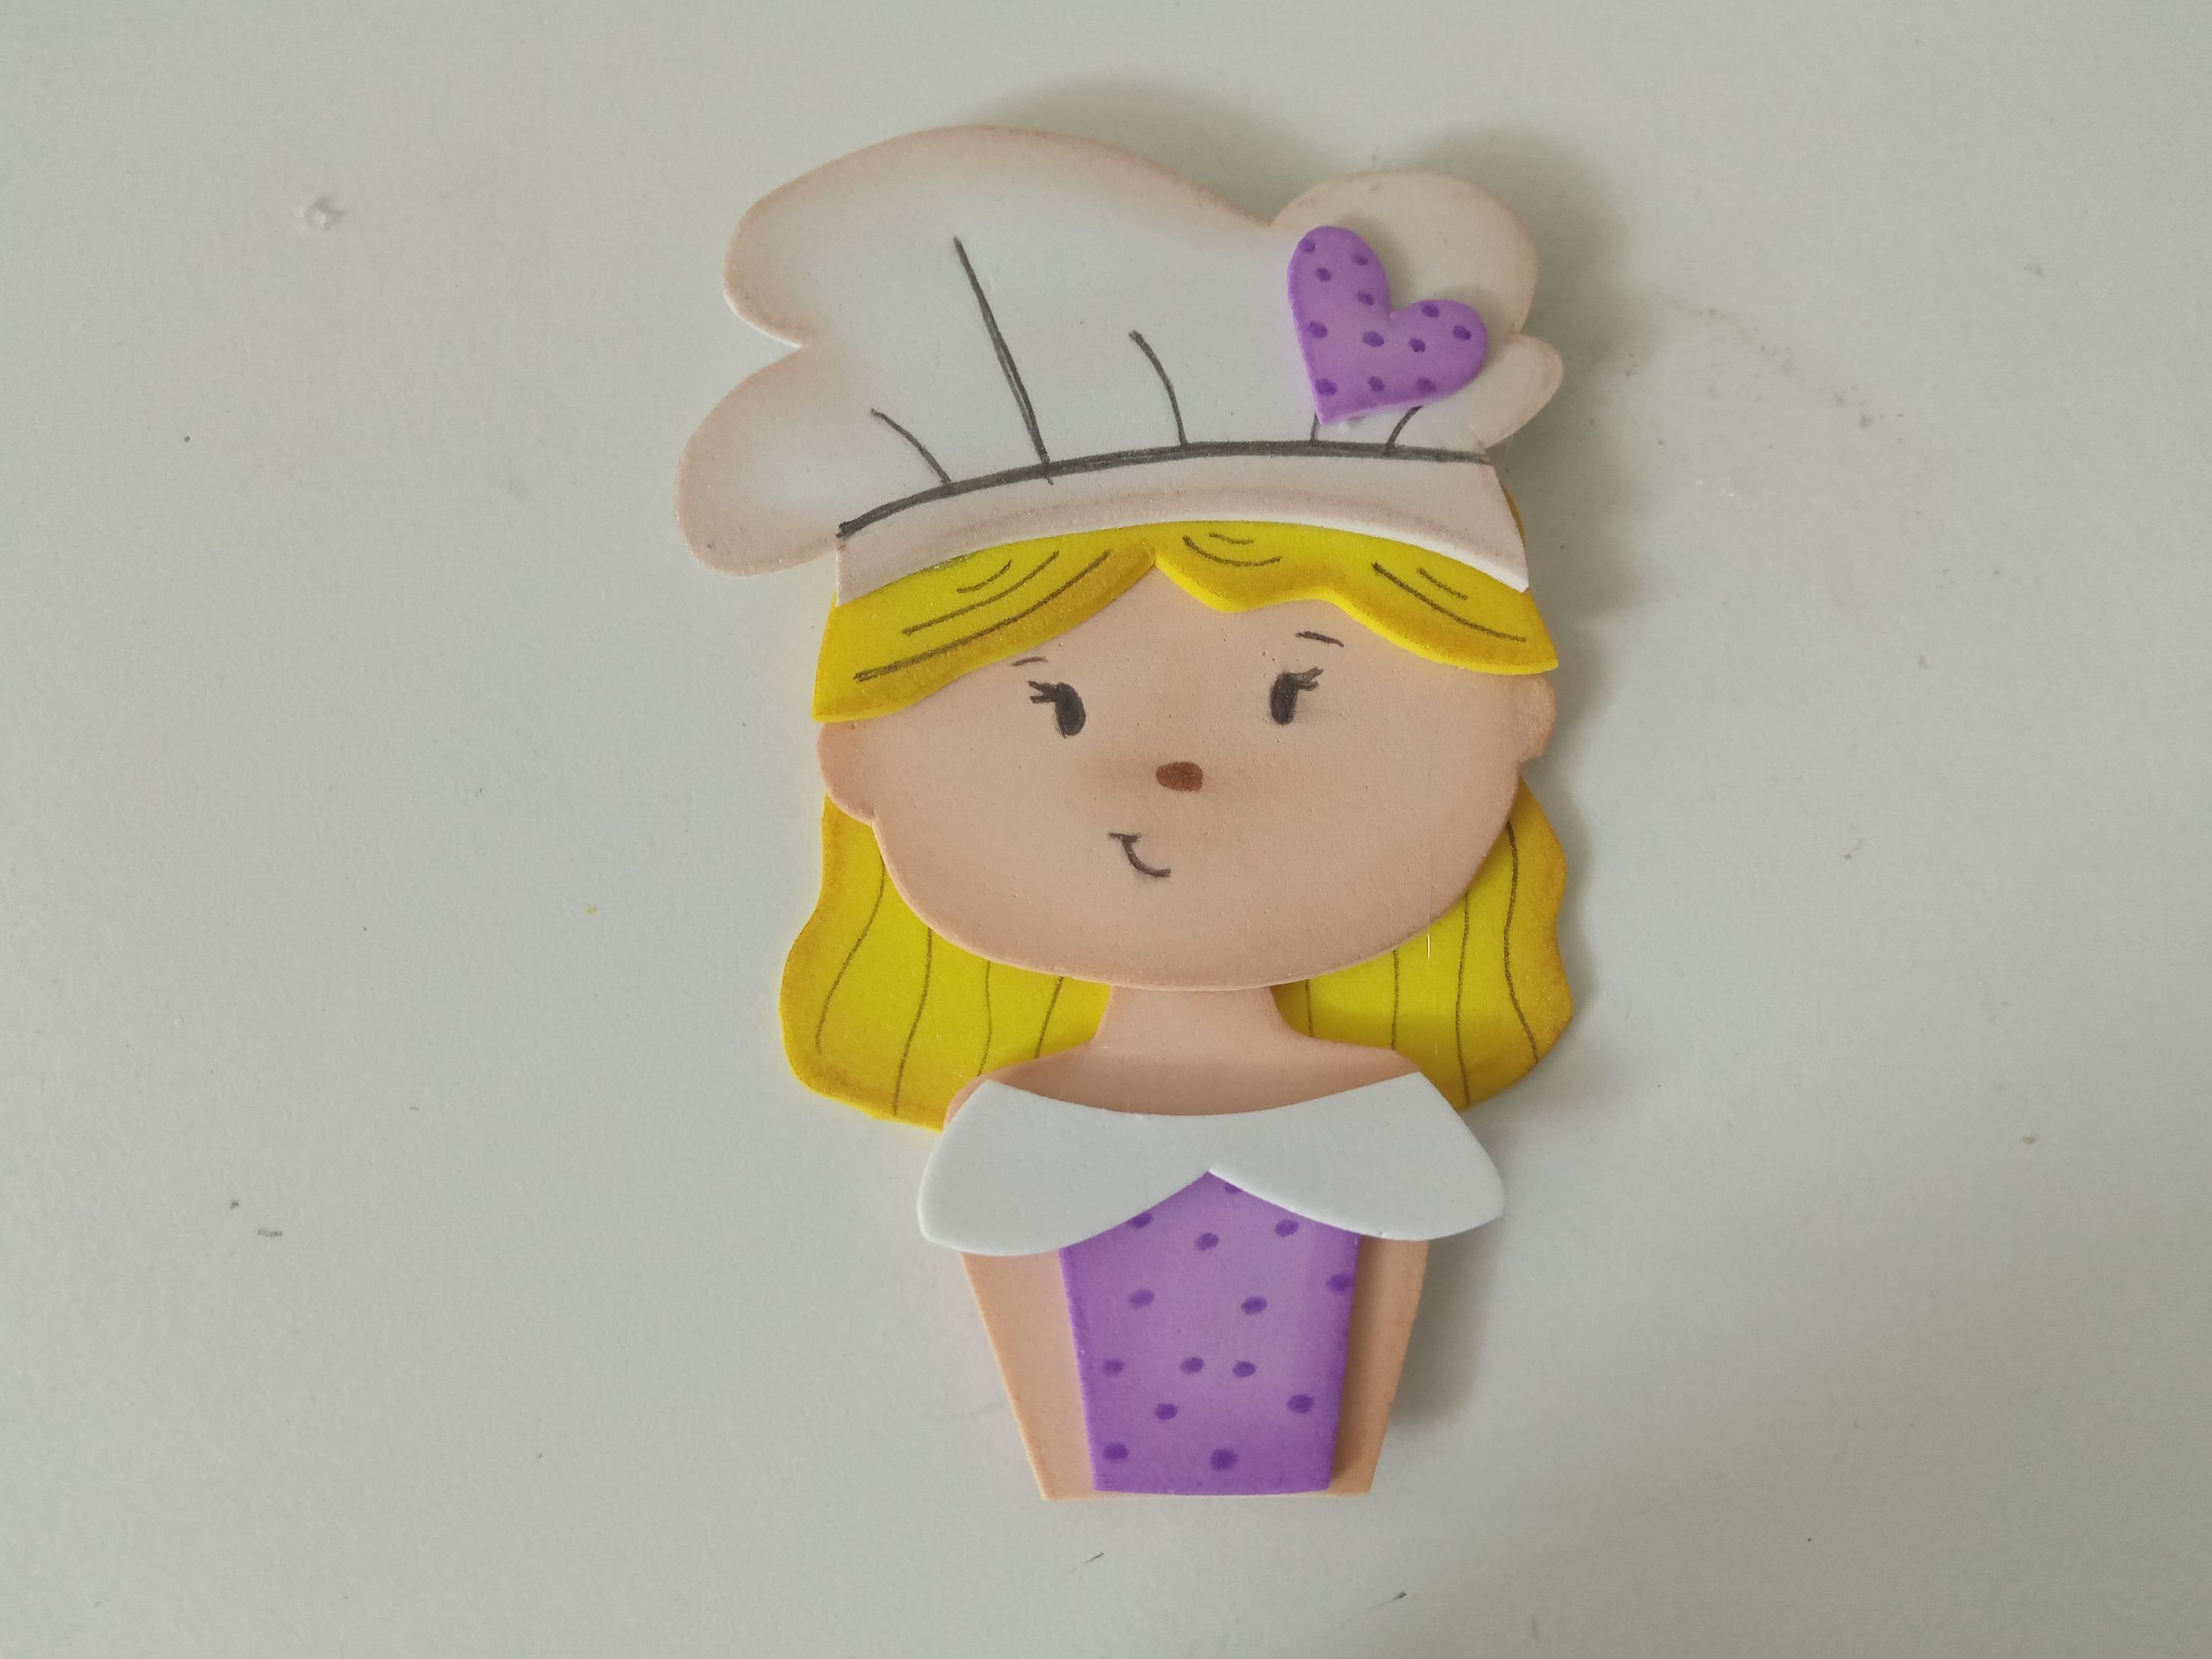
###### ✨PASO 4:
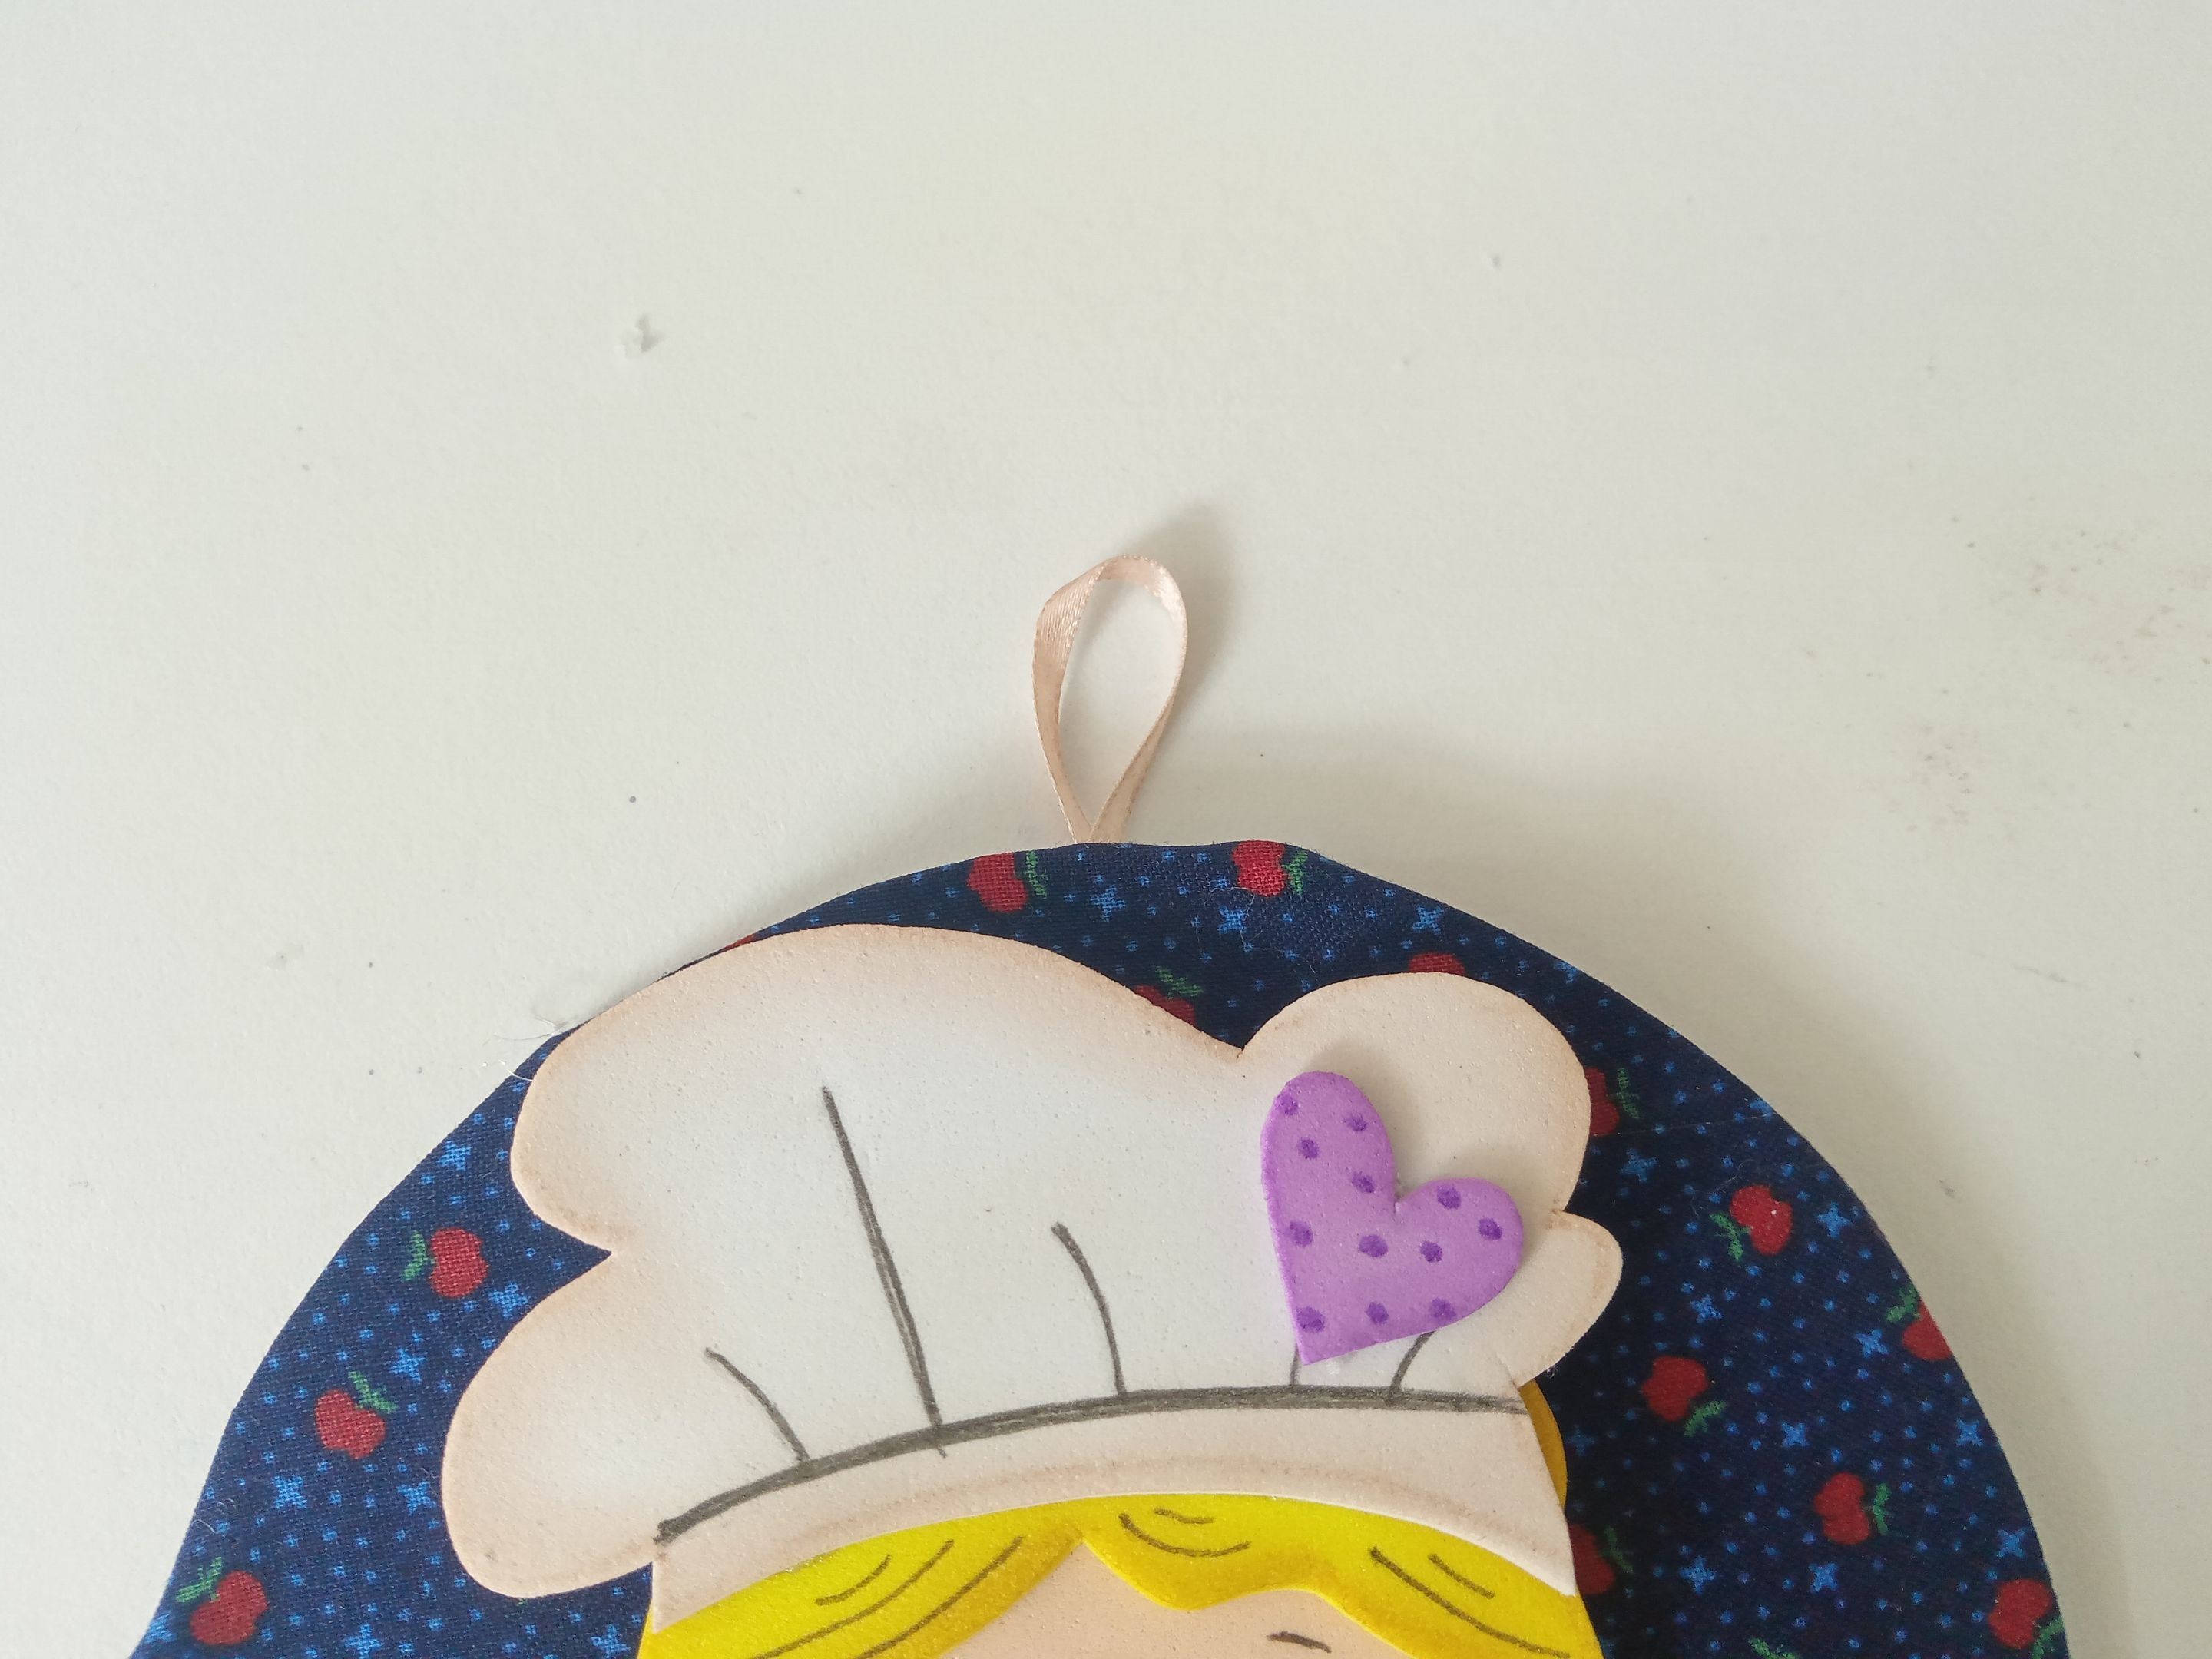
Luego, comencé a pegar las piezas de la cocinera poco a poco, comenzando por el cabello, la cabeza junto con el cuerpo, la parte superior del cabello, para luego pegar la ropa, el gorro de chef y la mano junto con la cuchara, para luego pegar en el centro de la base y la cinta en la parte superior para poder colgarla en la pared.
###### ✨STEP 4:
Then, I began gluing the chef's pieces little by little, starting with the hair, the head along with the body, and the top part of the hair. Then, I glued the clothes, the chef's hat, and the hand along with the spoon. Then, I glued the center of the base and the ribbon on top so I could hang it on the wall.
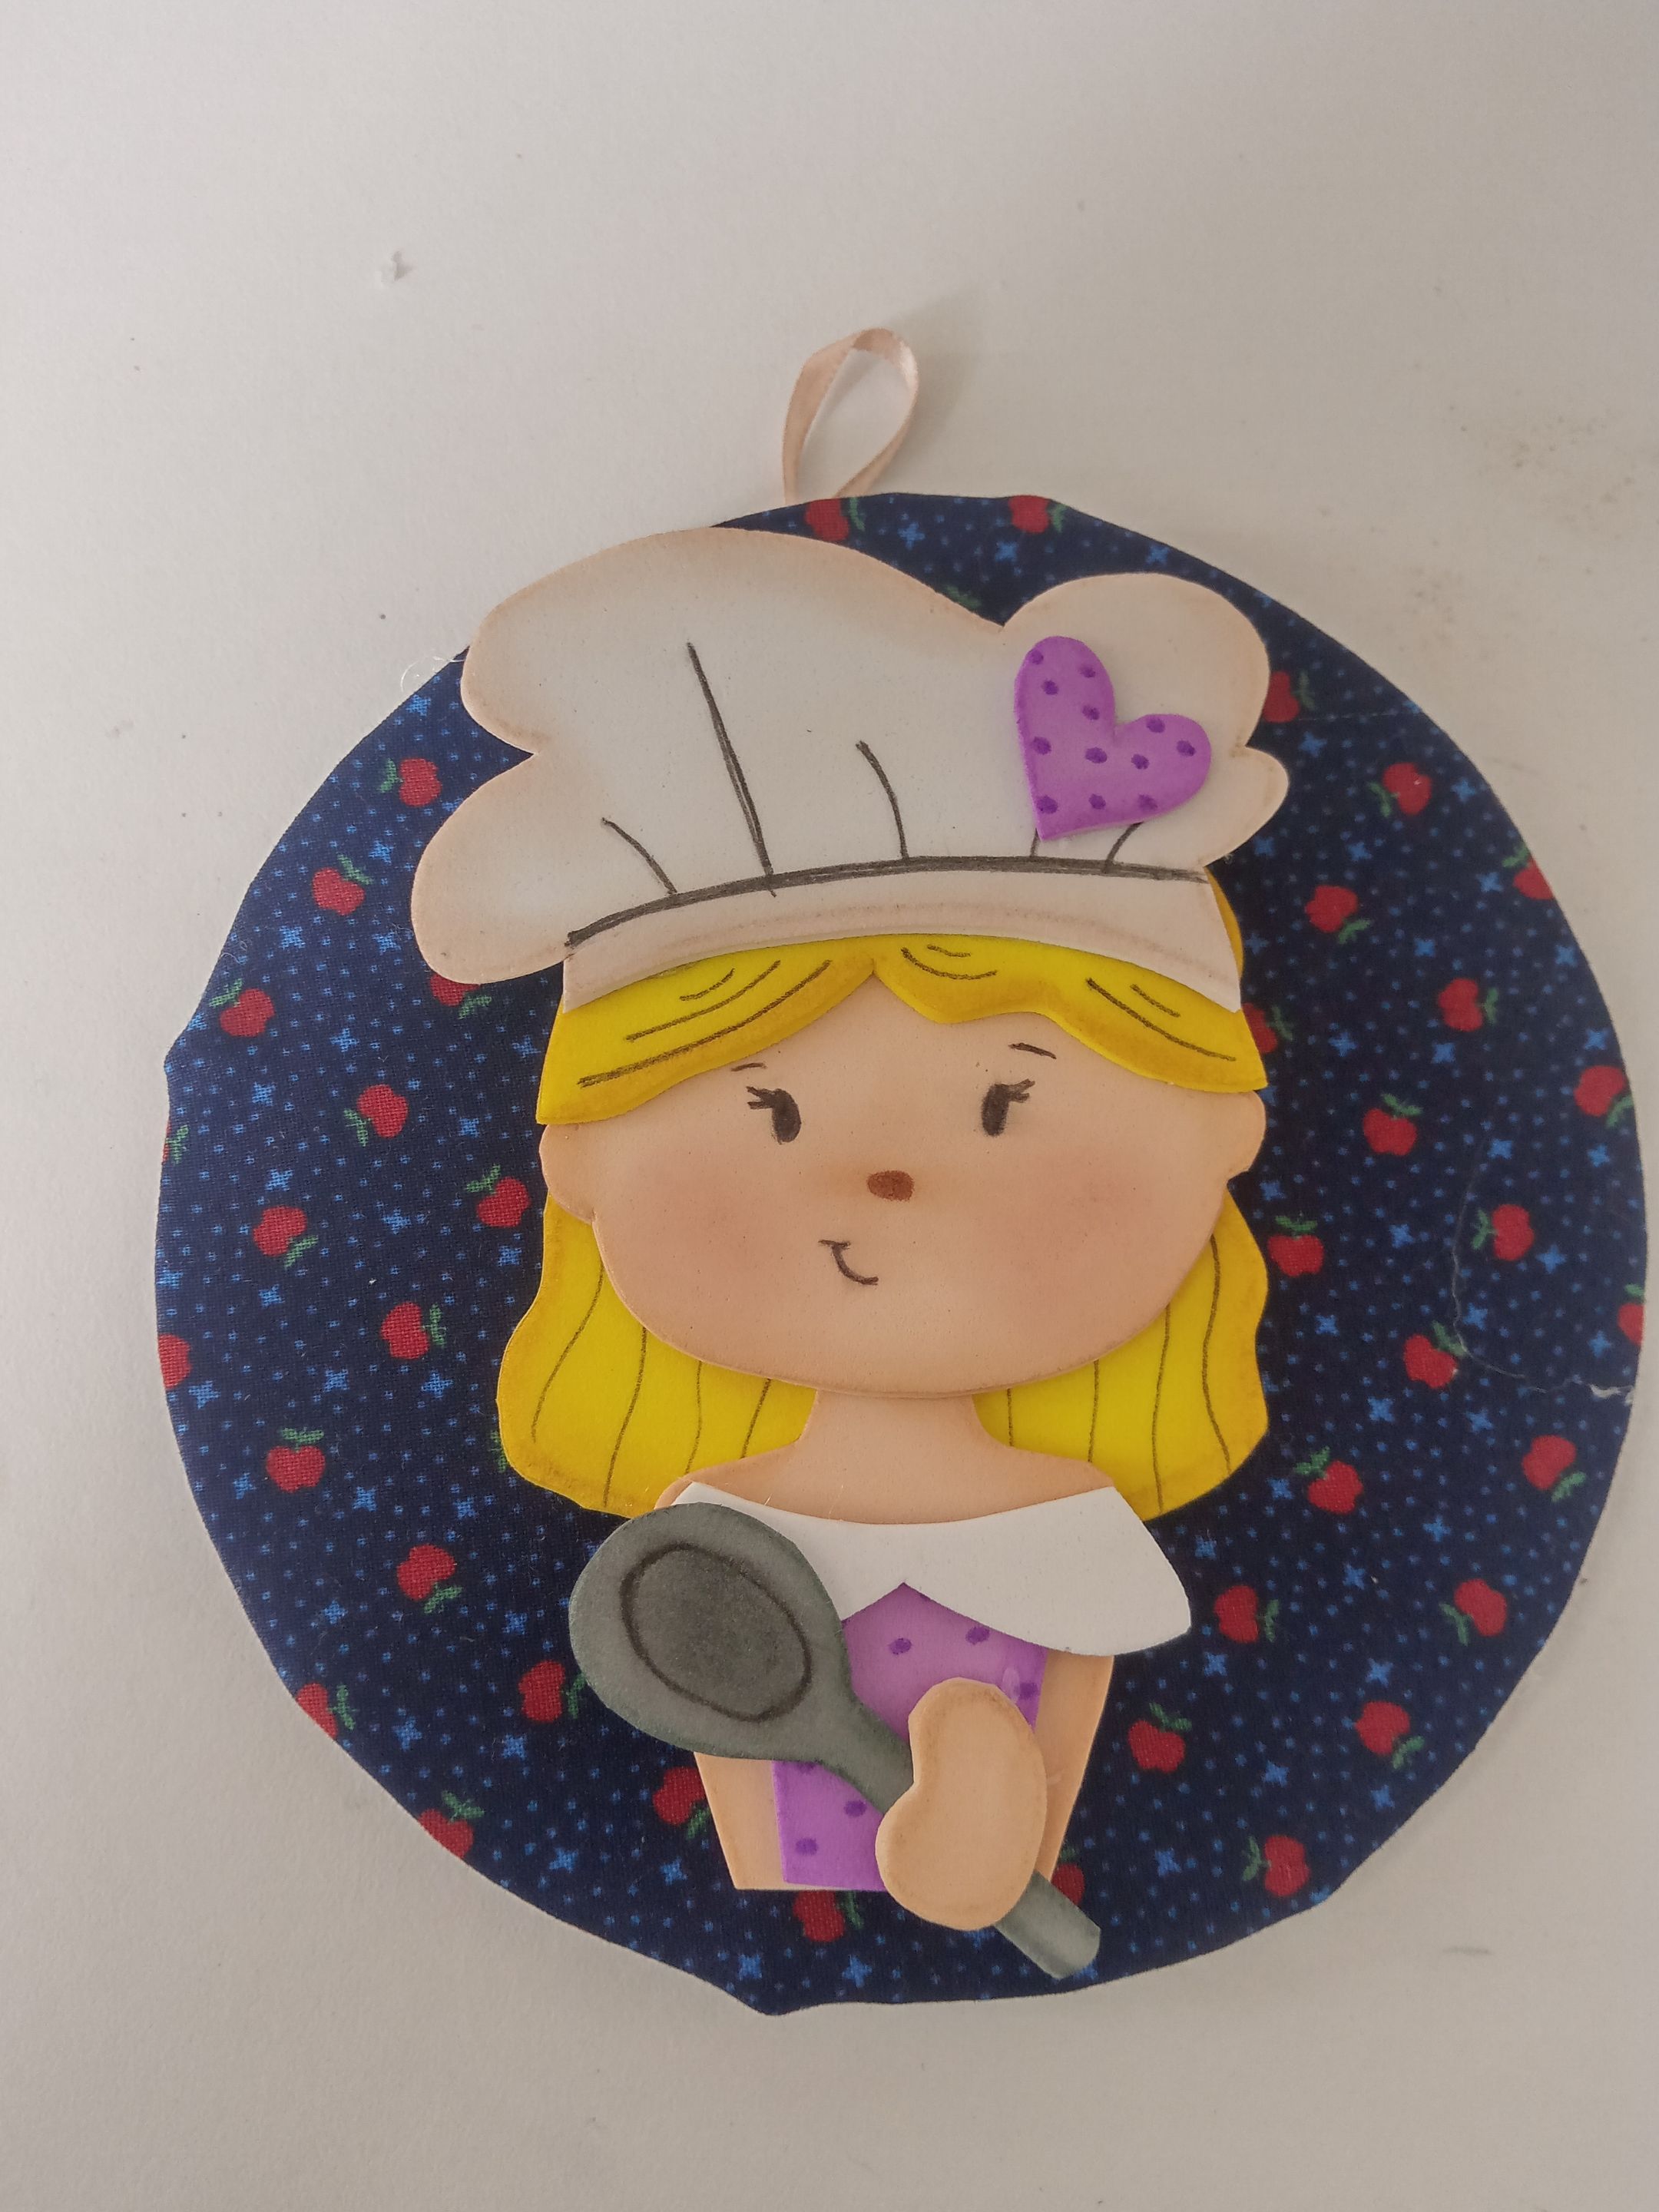
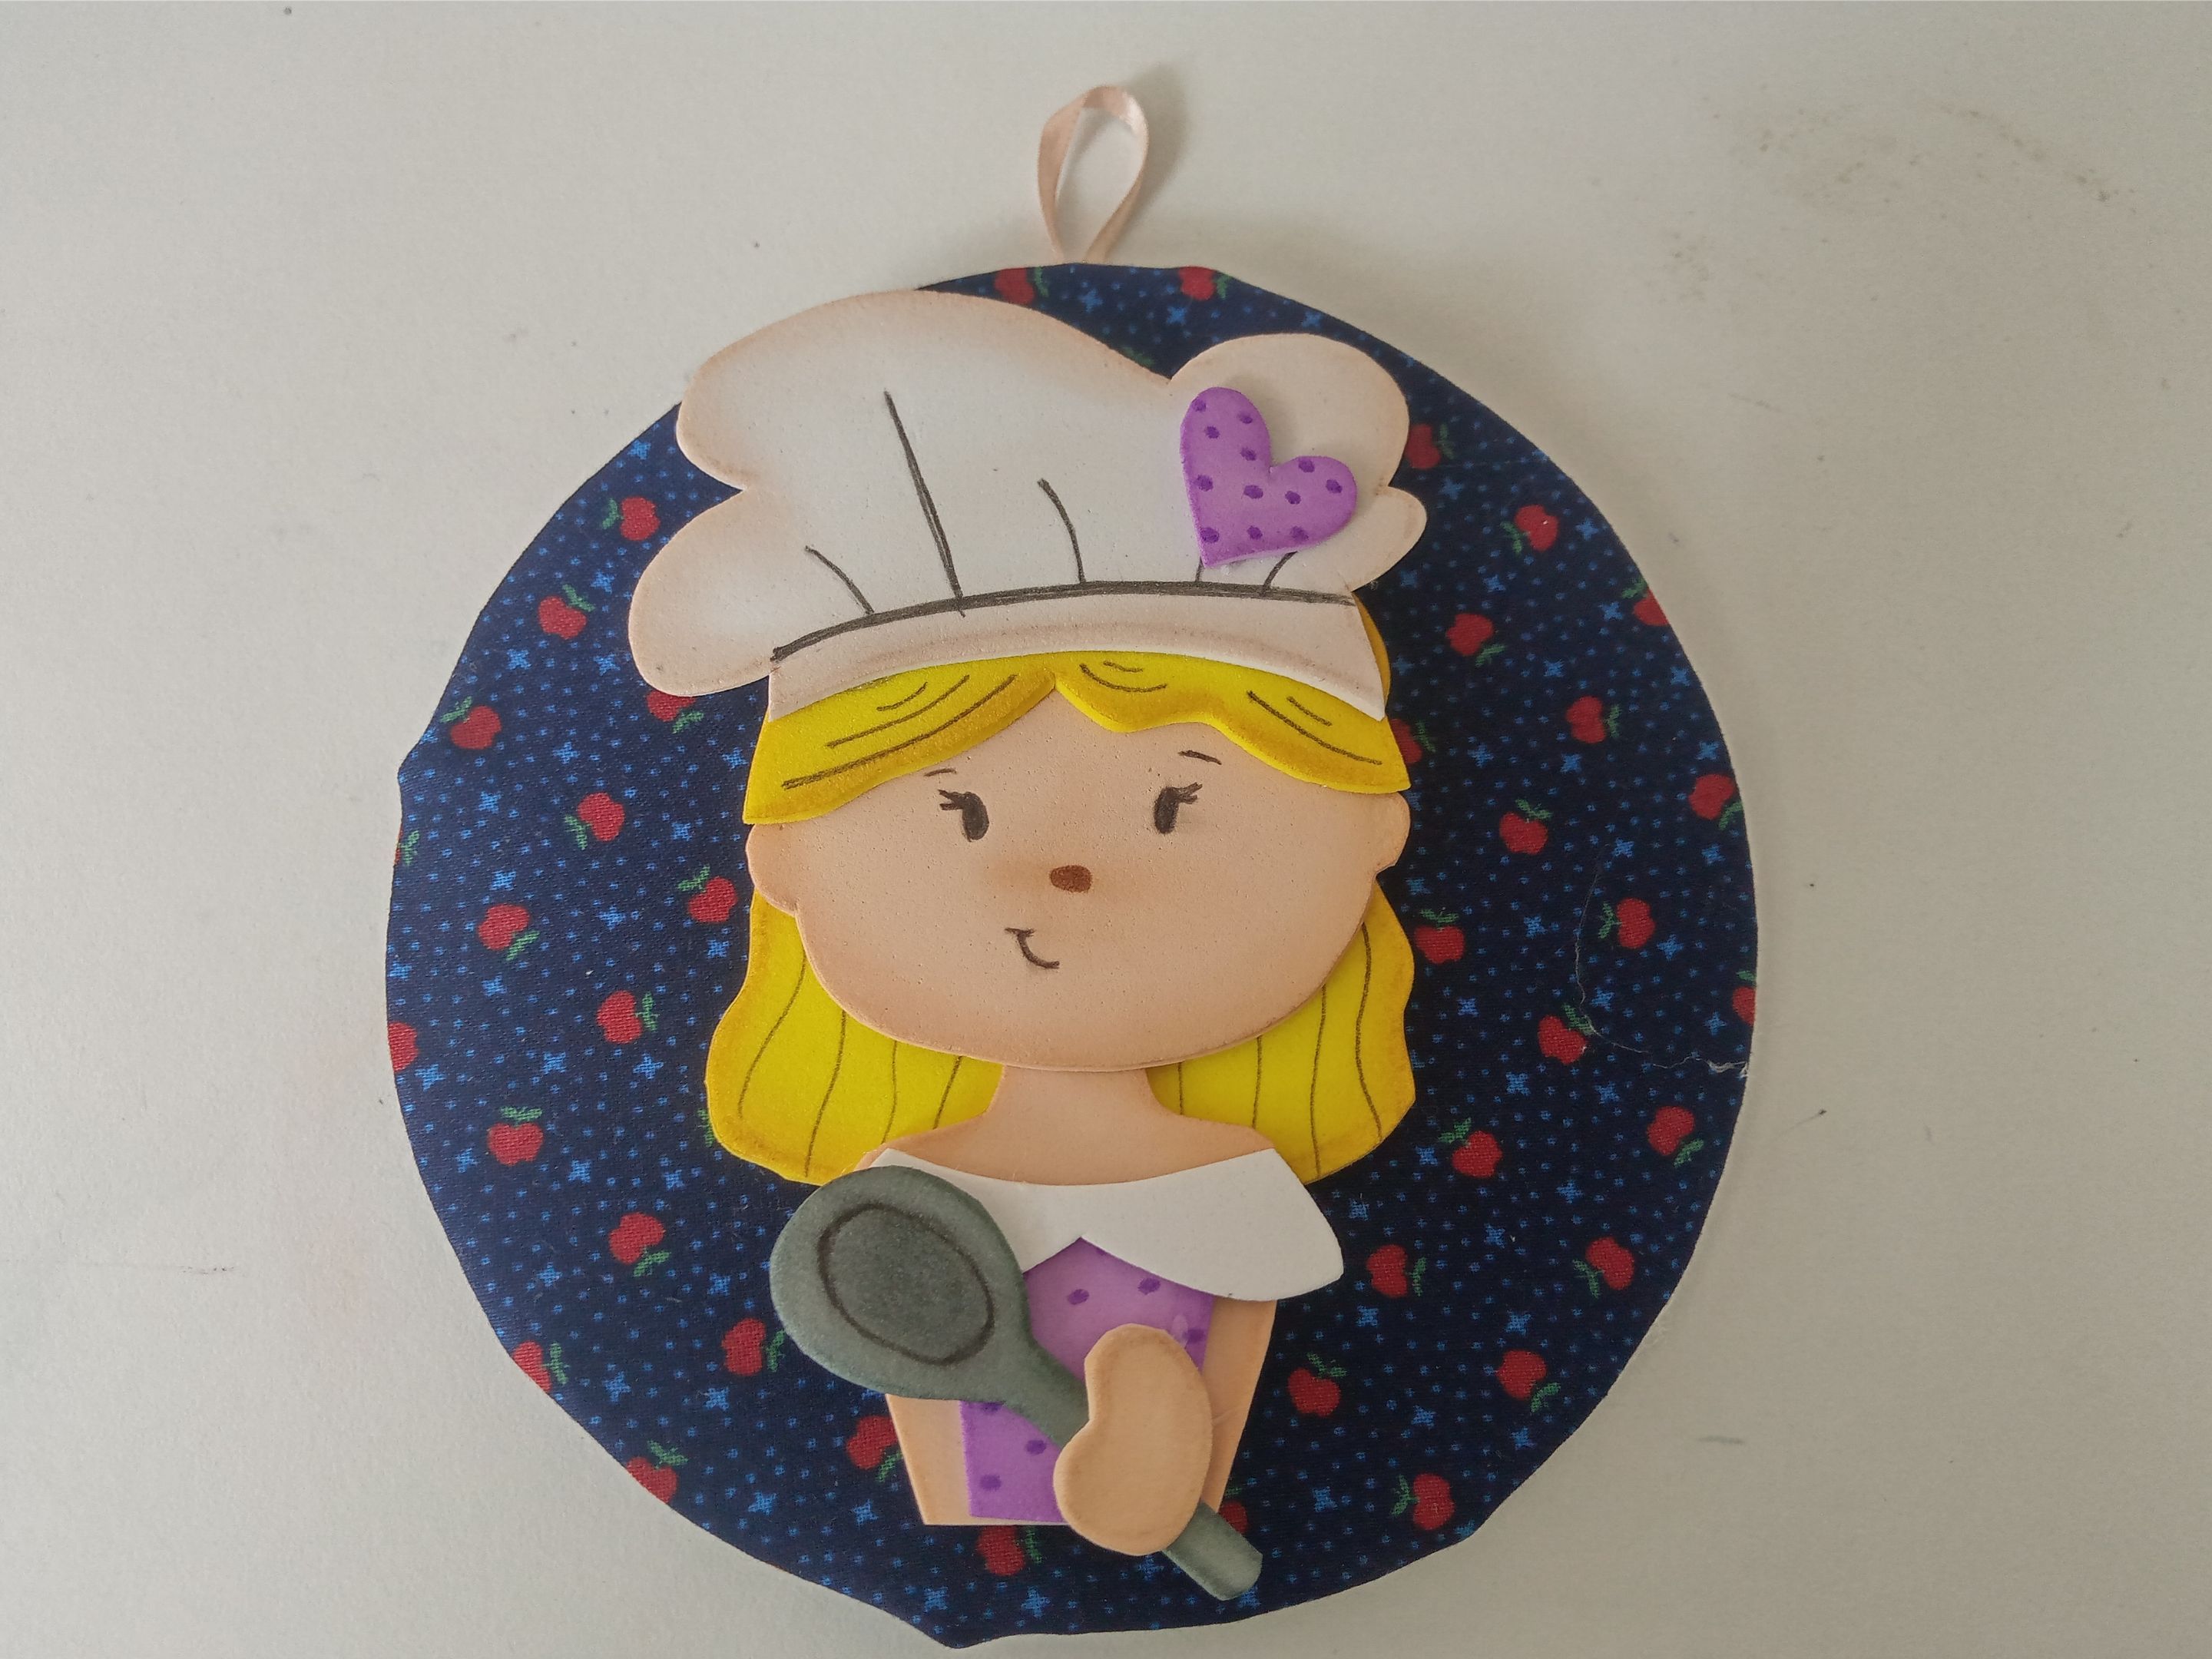
# ✨RESULTADO: | ✨RESULT:

|||
|-|-|
---

---
**!TE DESEO UN GRAN DÏA¡**
Todas las fotografías son de mi propiedad.
Separador y Fotos editadas en [Canva](https://www.canva.com/)
**!I WISH YOU A GOOD DAY**
All photographs are my property.
Photos edited in [Canva](https://www.canva.com/)
Posted Using [INLEO](https://inleo.io/@valenpba/espeng-lindo-colgante-para-la-cocina-nice-pendant-for-the-kitchen-j8x)