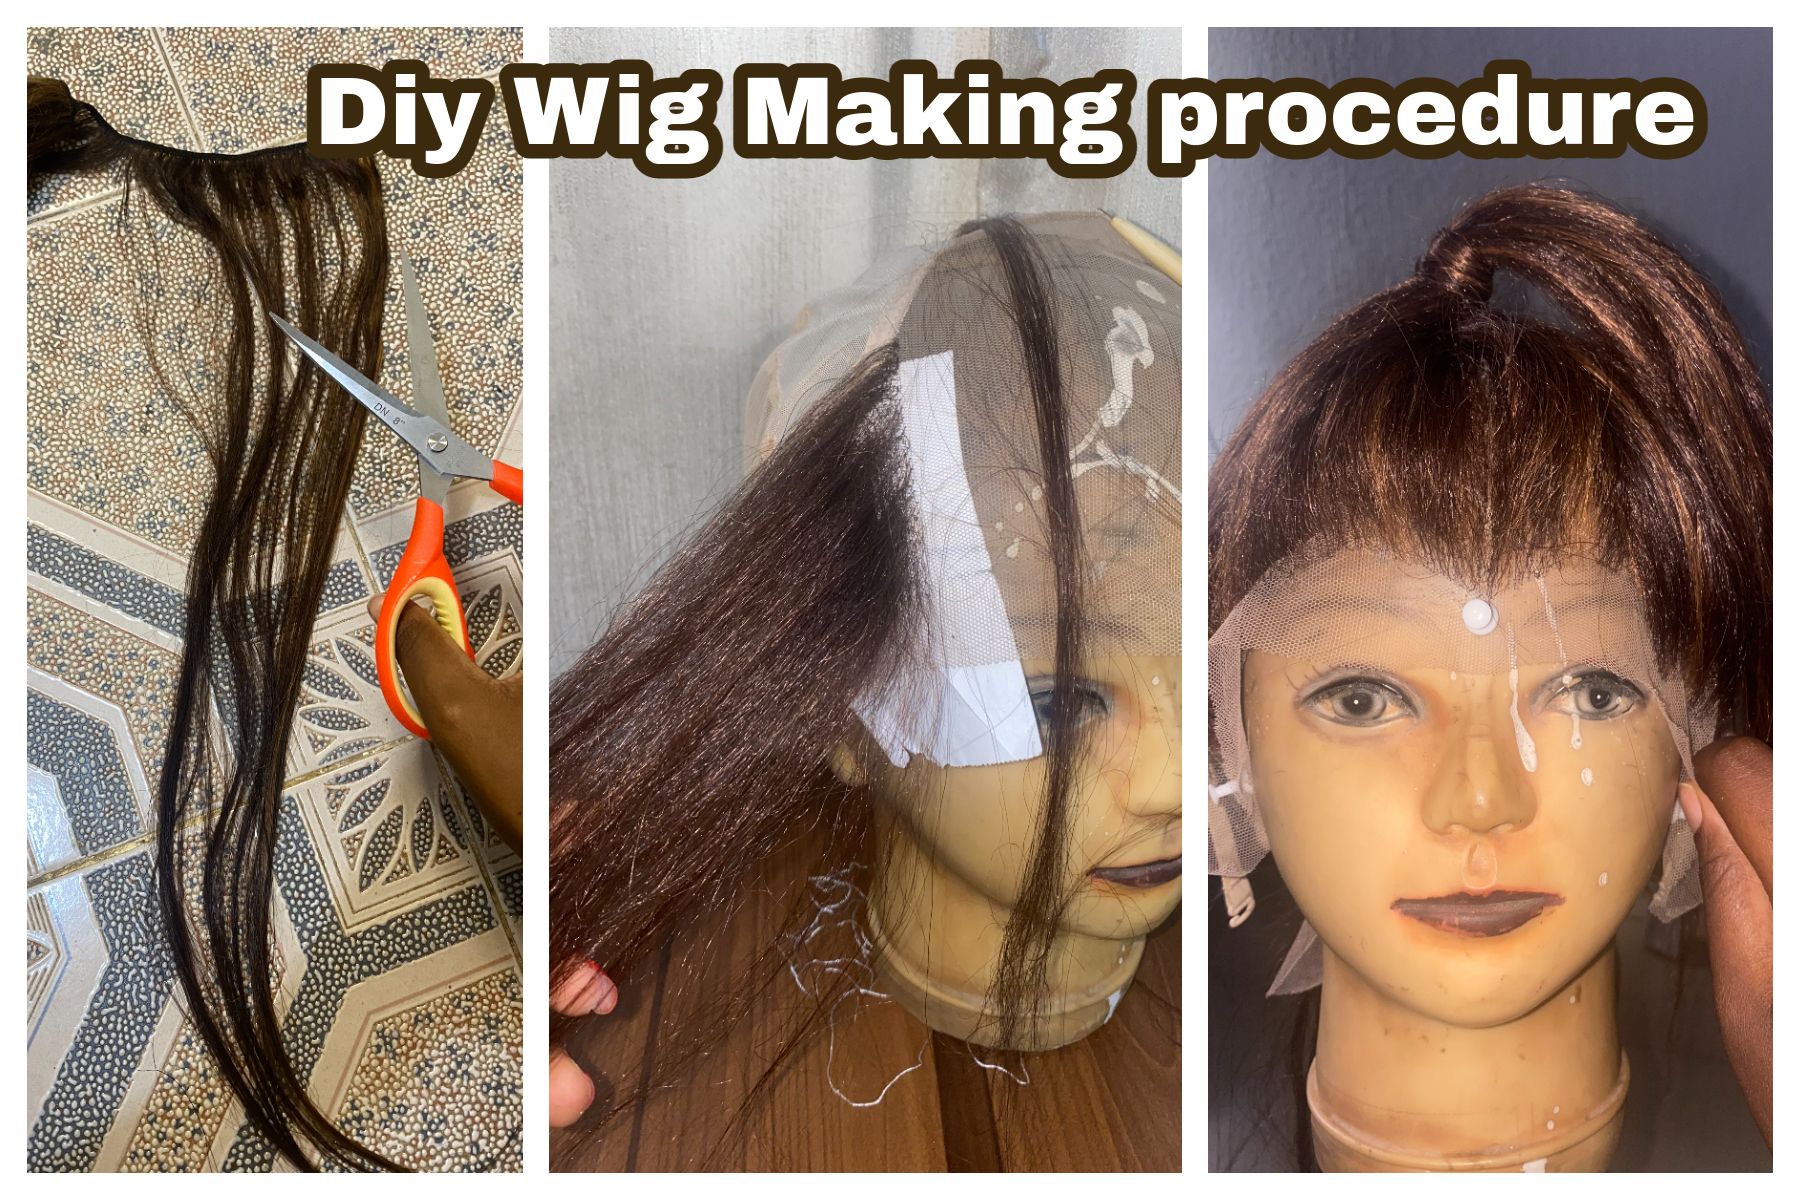
Happy new month diy community Fam, its the eight month of the year and i welcome you all to a months challenges of beauty diy i did , this past month i idnulged in the ventilation process for my wig making, this is indeed a tedious process which is why i have taken the initiative to give myself a month to complete among with other engagements i had to take care of, read below to see the process for ventilating the lace frontal of a 13 by 5 wig
i had purchased this hair last year an knew i wanted to make a frontal, this is human hair and with luxurious textures which i wanted to match with the look for the hair. it is a chocolate hair bundles with honey blond highlight that create and edge to the basic colour of brown.
Esp
Feliz mes nuevo diy comunidad Fam, es el octavo mes del año y les doy la bienvenida a todos ustedes a un mes de retos de belleza diy que hice, este mes pasado me idnulged en el proceso de ventilación para mi peluca de decisiones, este es de hecho un proceso tedioso que es por eso que he tomado la iniciativa de darme un mes para completar entre con otros compromisos que tenía que cuidar, lea a continuación para ver el proceso para ventilar el frente de encaje de una peluca de 13 por 5
Yo habia comprado este pelo el año pasado y sabia que queria hacer un frontal, este es pelo humano y con texturas de lujo que queria coincidir con la mirada para el cabello. se trata de un chocolate manojos de pelo con miel rubia destacan que crean y el borde al color basico de marron.
Materials Needed
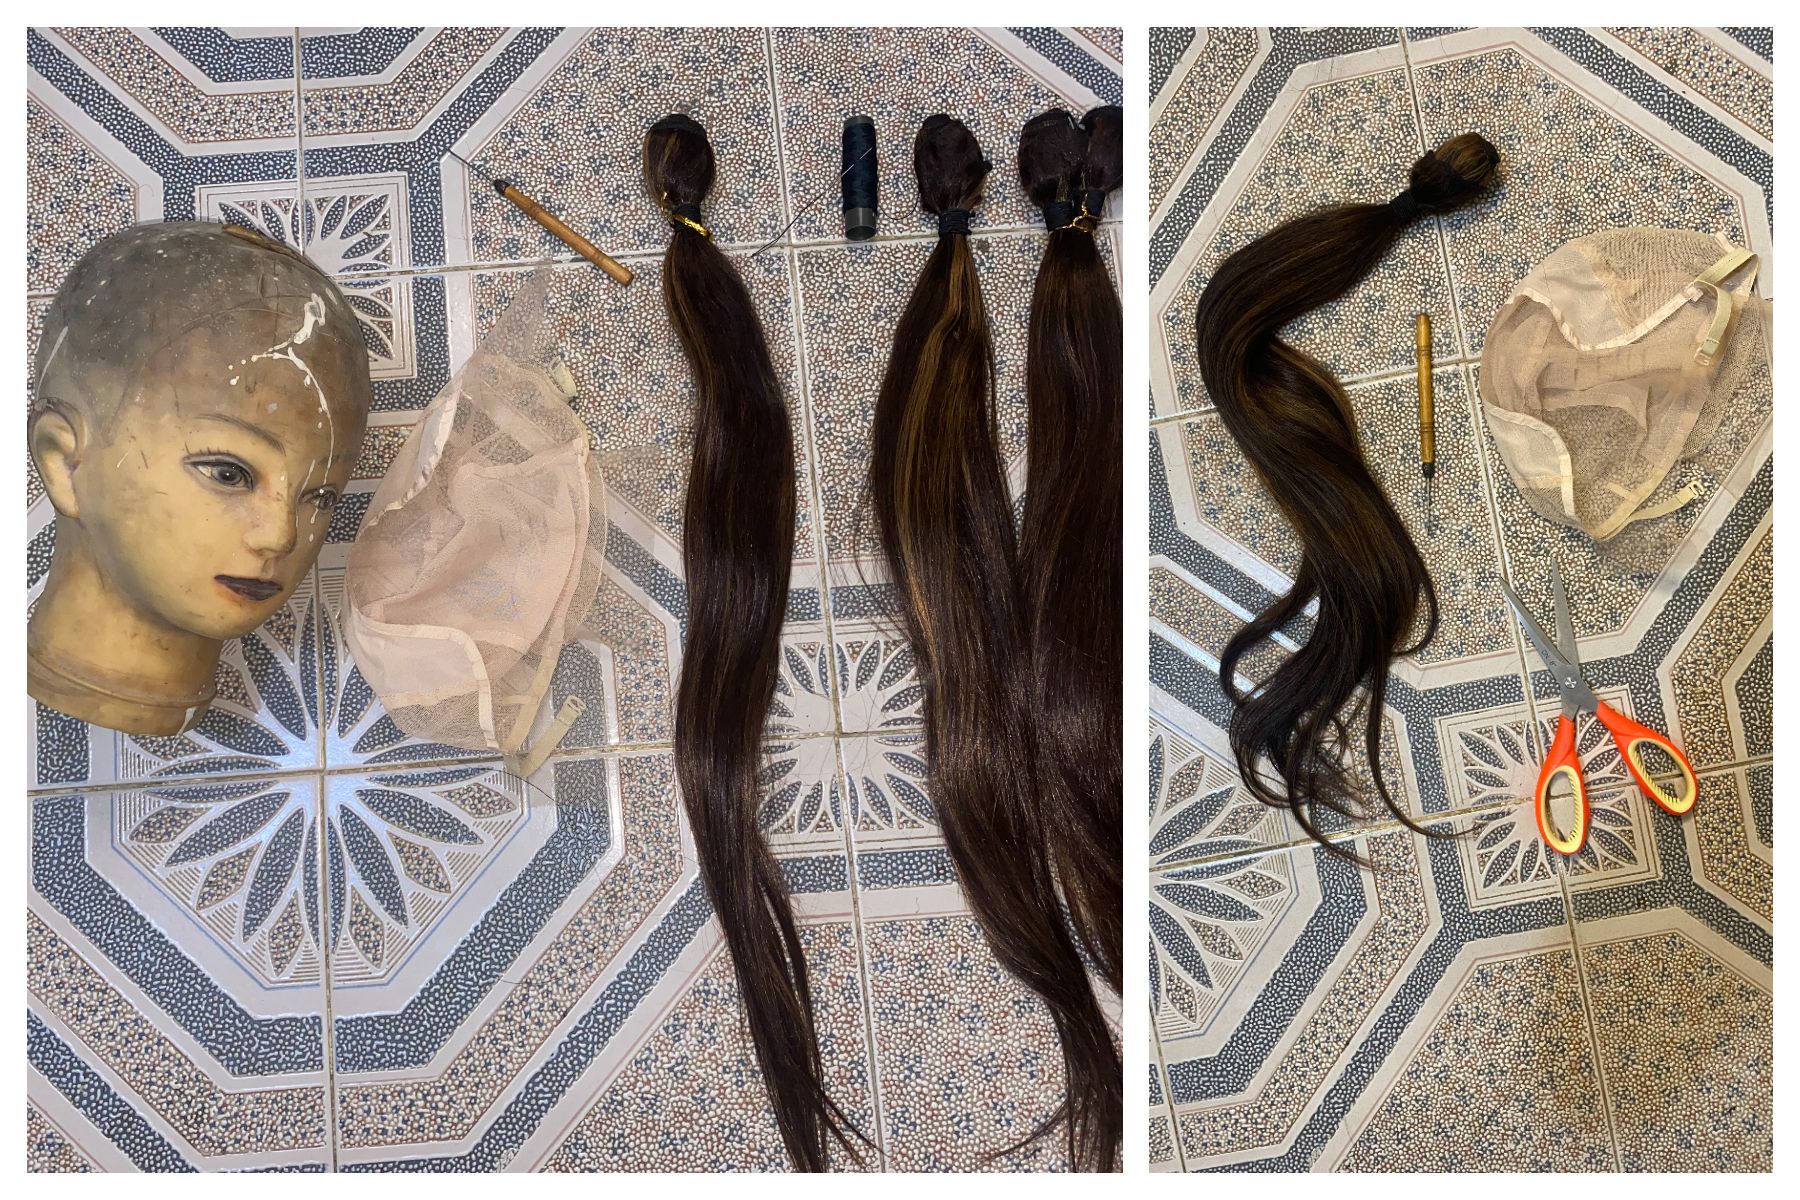
1 bundle of standard chocolate straight hair
Ventilating needle 3-4
13 by 5 inches lace frontal cap
mannequine head
scissors
esp
1 manojo de pelo liso chocolate estándar
Aguja de ventilación 3-4
13 por 5 pulgadas gorro frontal de encaje
cabeza de maniquí
tijeras
Steps by step routine
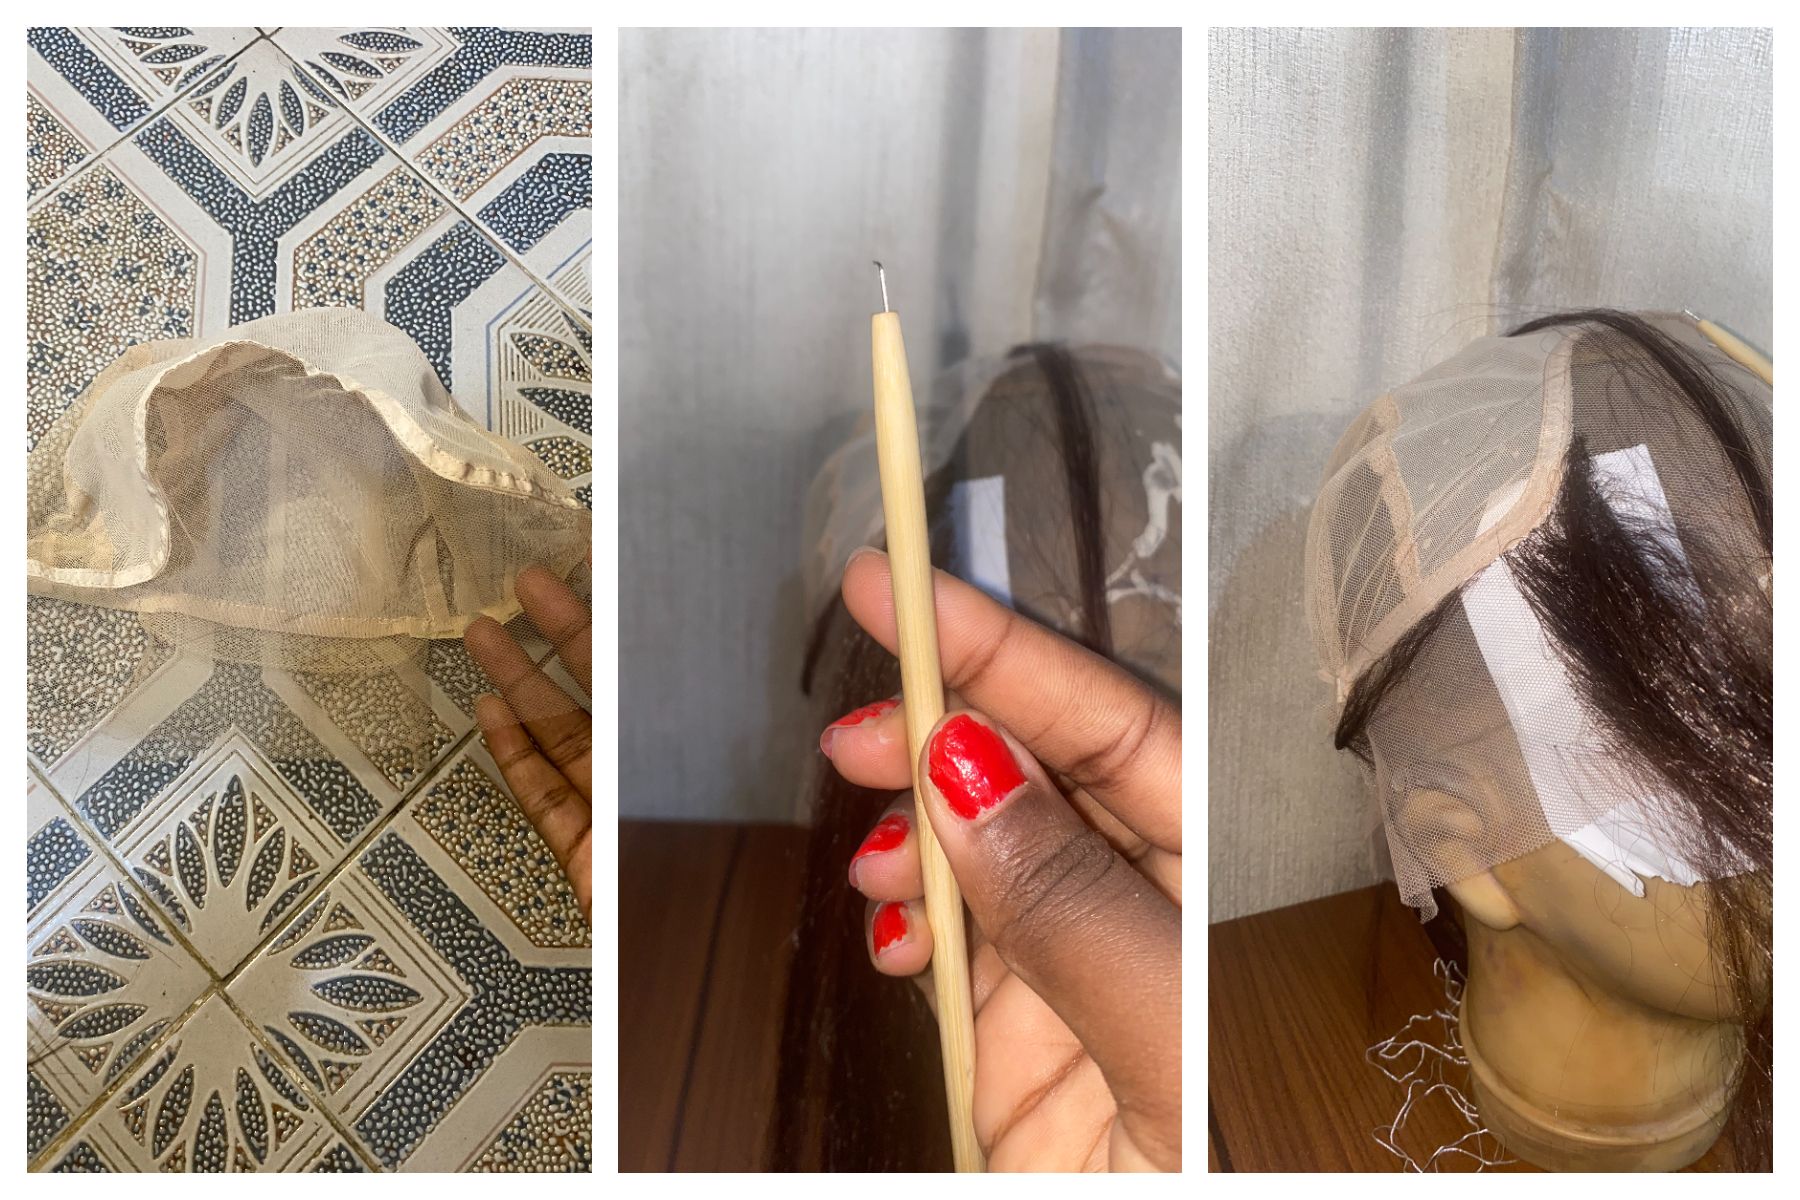
starting off with propping the wig cap unto the mannequin head, i take the needle to begin ventilating after preparing the hair .
empezando por apoyar el gorro de la peluca en la cabeza del maniquí, cojo la aguja para empezar a ventilar después de preparar el pelo .
step 2
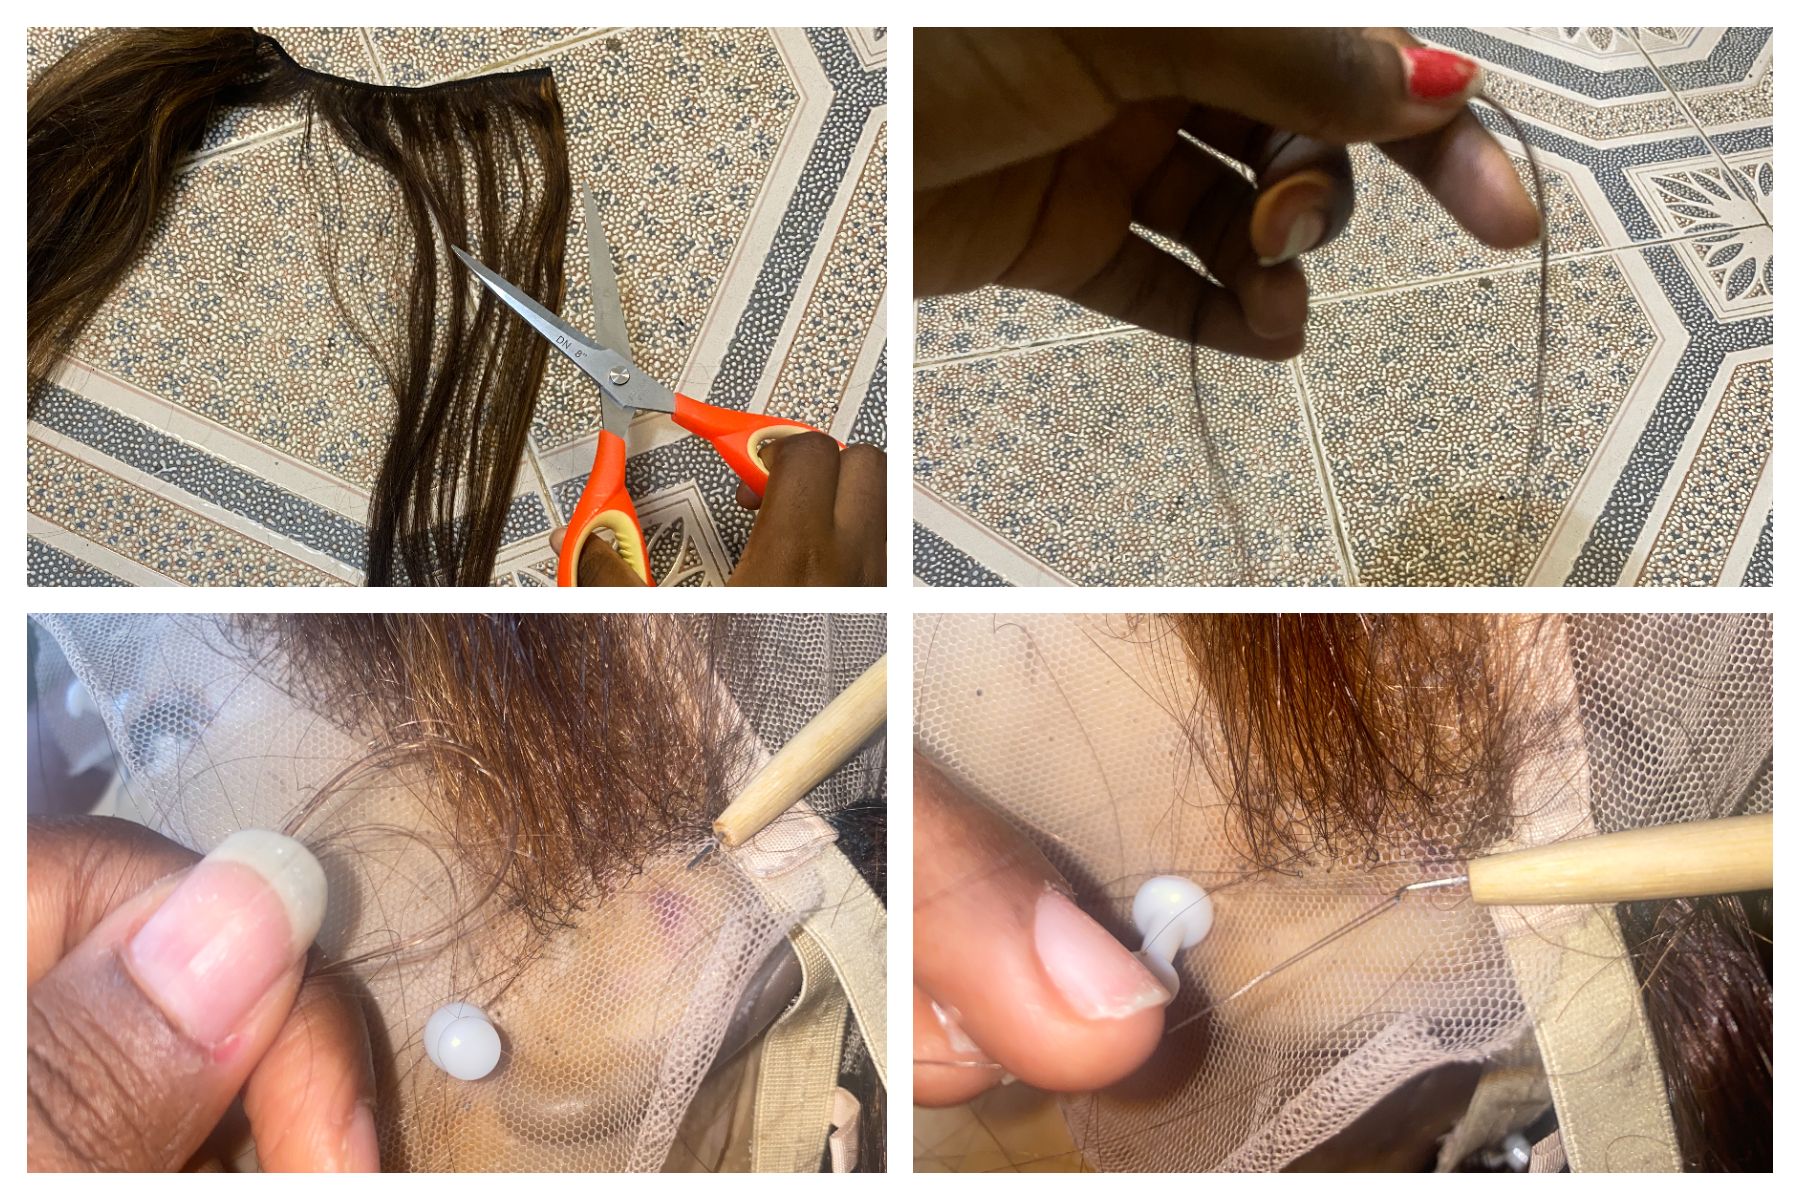
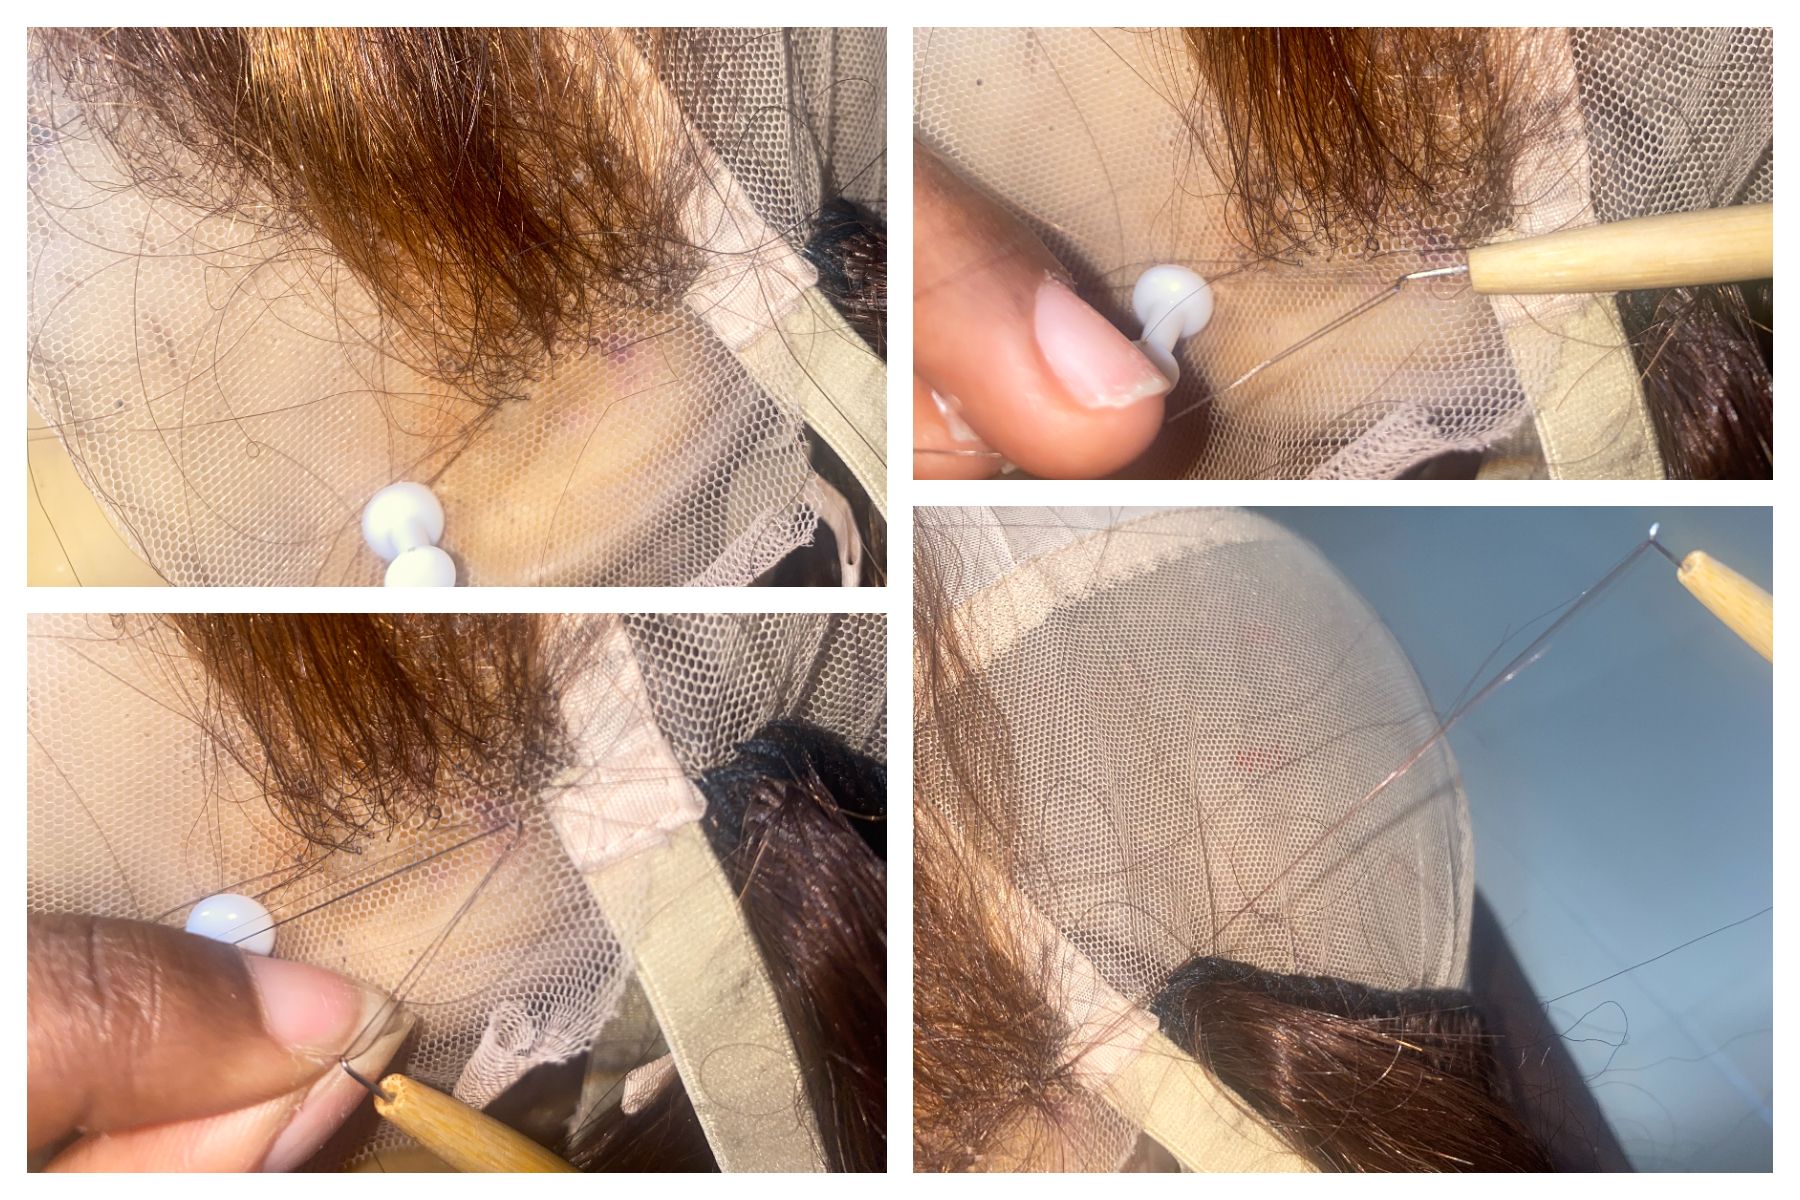
to prepare the hair for ventilation, i cut it off the weft of the bundle with a scissors, i then take the pieces , folding into a loop, in this position of the hair, i began hooking the ventilation needle into tow strands of hair and passing it through the holes in the frontal lace.
para preparar el cabello para la ventilacion, lo corto de la trama del haz con una tijera, luego tomo los pedazos , doblandolos en un bucle, en esta posicion del cabello, comenzo a enganchar la aguja de ventilacion en mechones de cabello y pasandolos a traves de los agujeros en el encaje frontal.
Half Progress
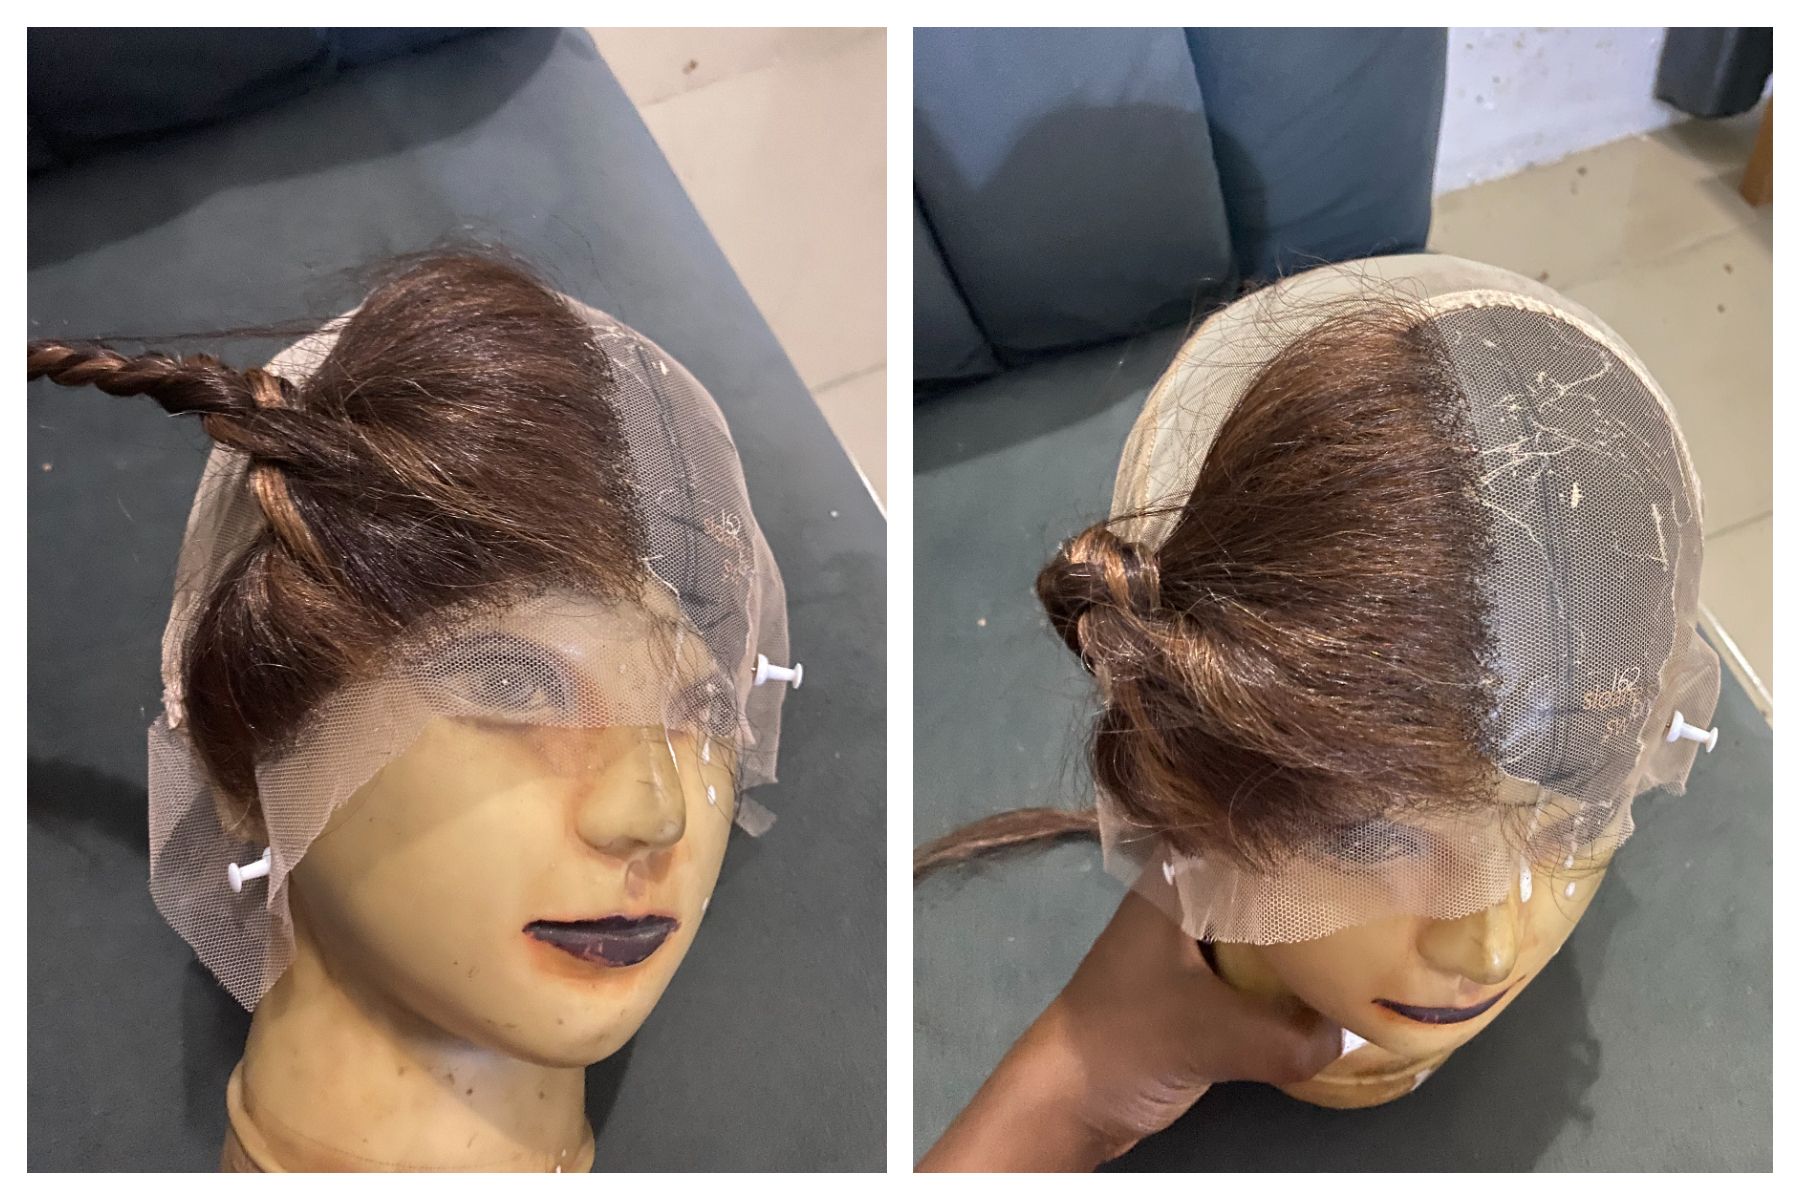
we have progressed up to half of the lace, which is the mid-point of the parting area which i have marked previously with a marker
hemos avanzado hasta la mitad del encaje, que es el punto medio de la zona de la raya que he marcado previamente con un rotulador
A half and quatre progression.
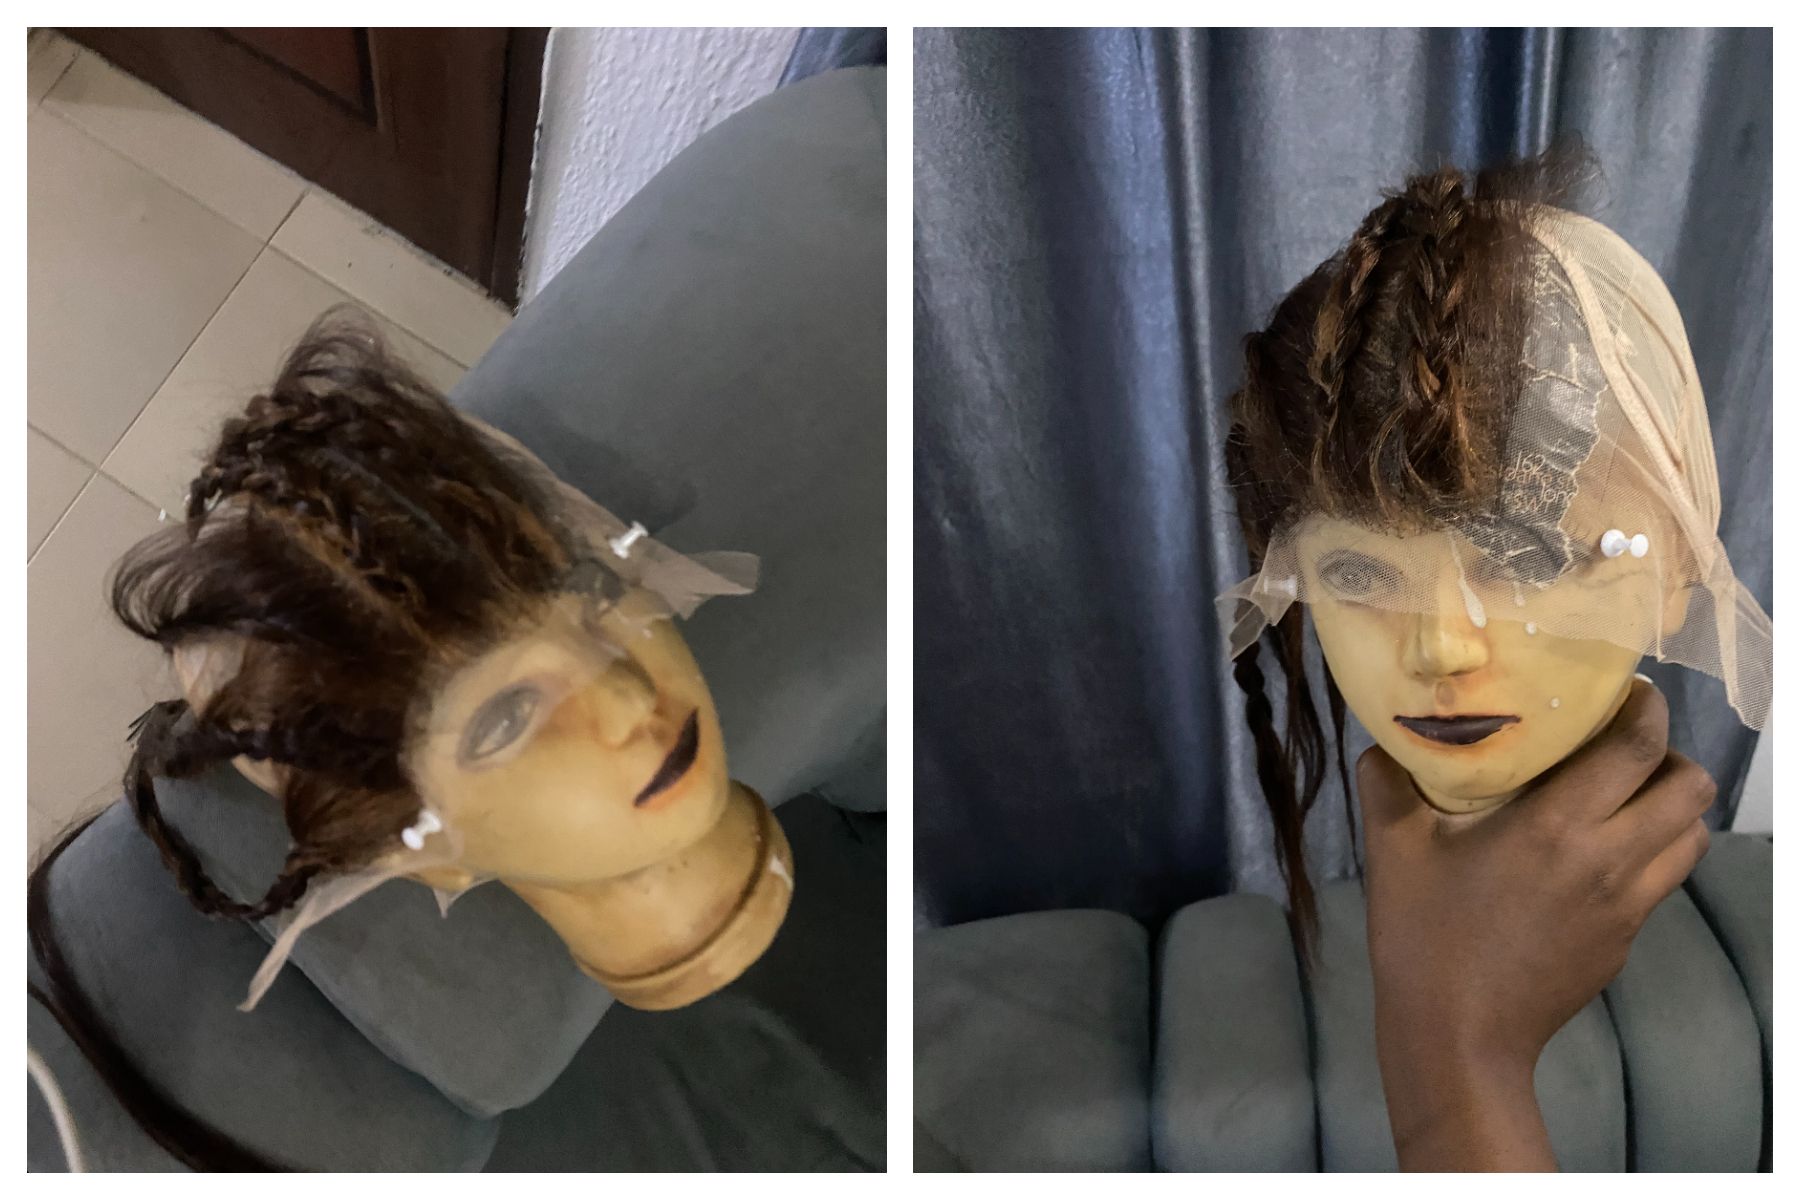
we have progressed past half of the lace frontal.
hemos progresado más allá de la mitad del encaje frontal.
completion
here i have finally completed the lace frontal ventilation process.
aquí por fin he completado el proceso de ventilación frontal de encaje.
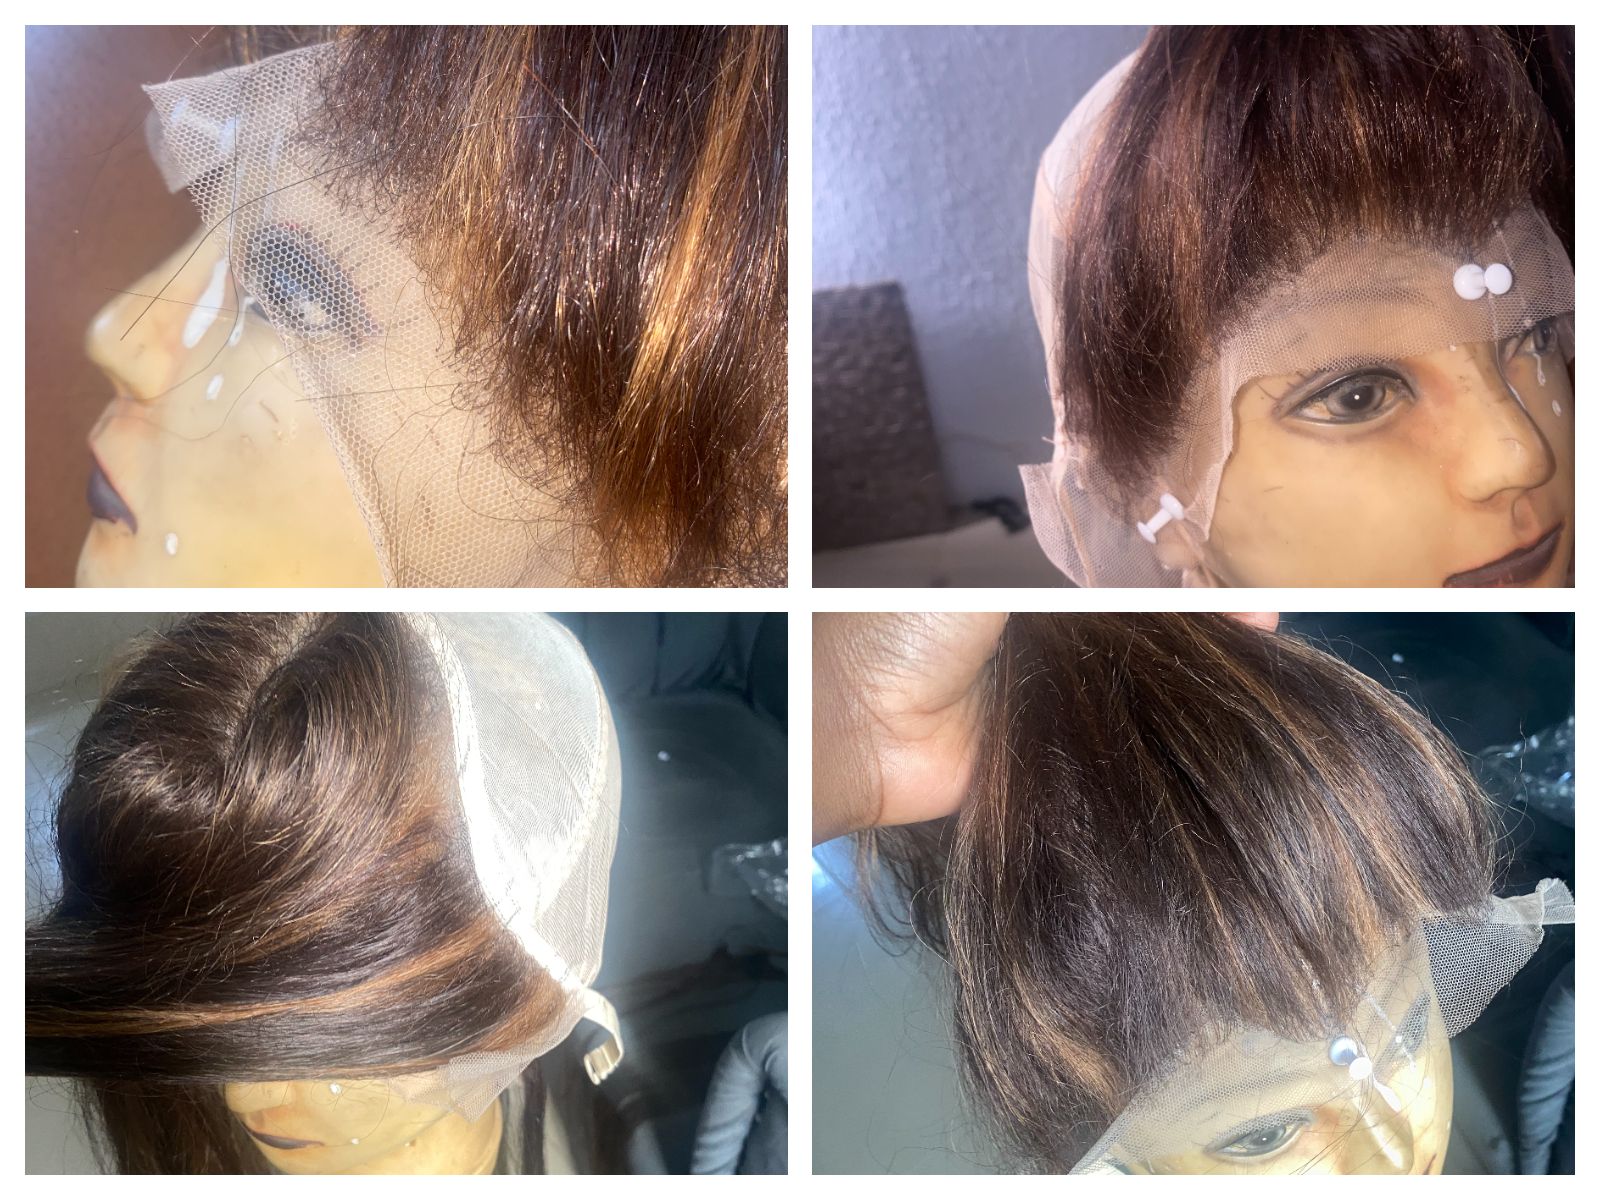
Final Look!!
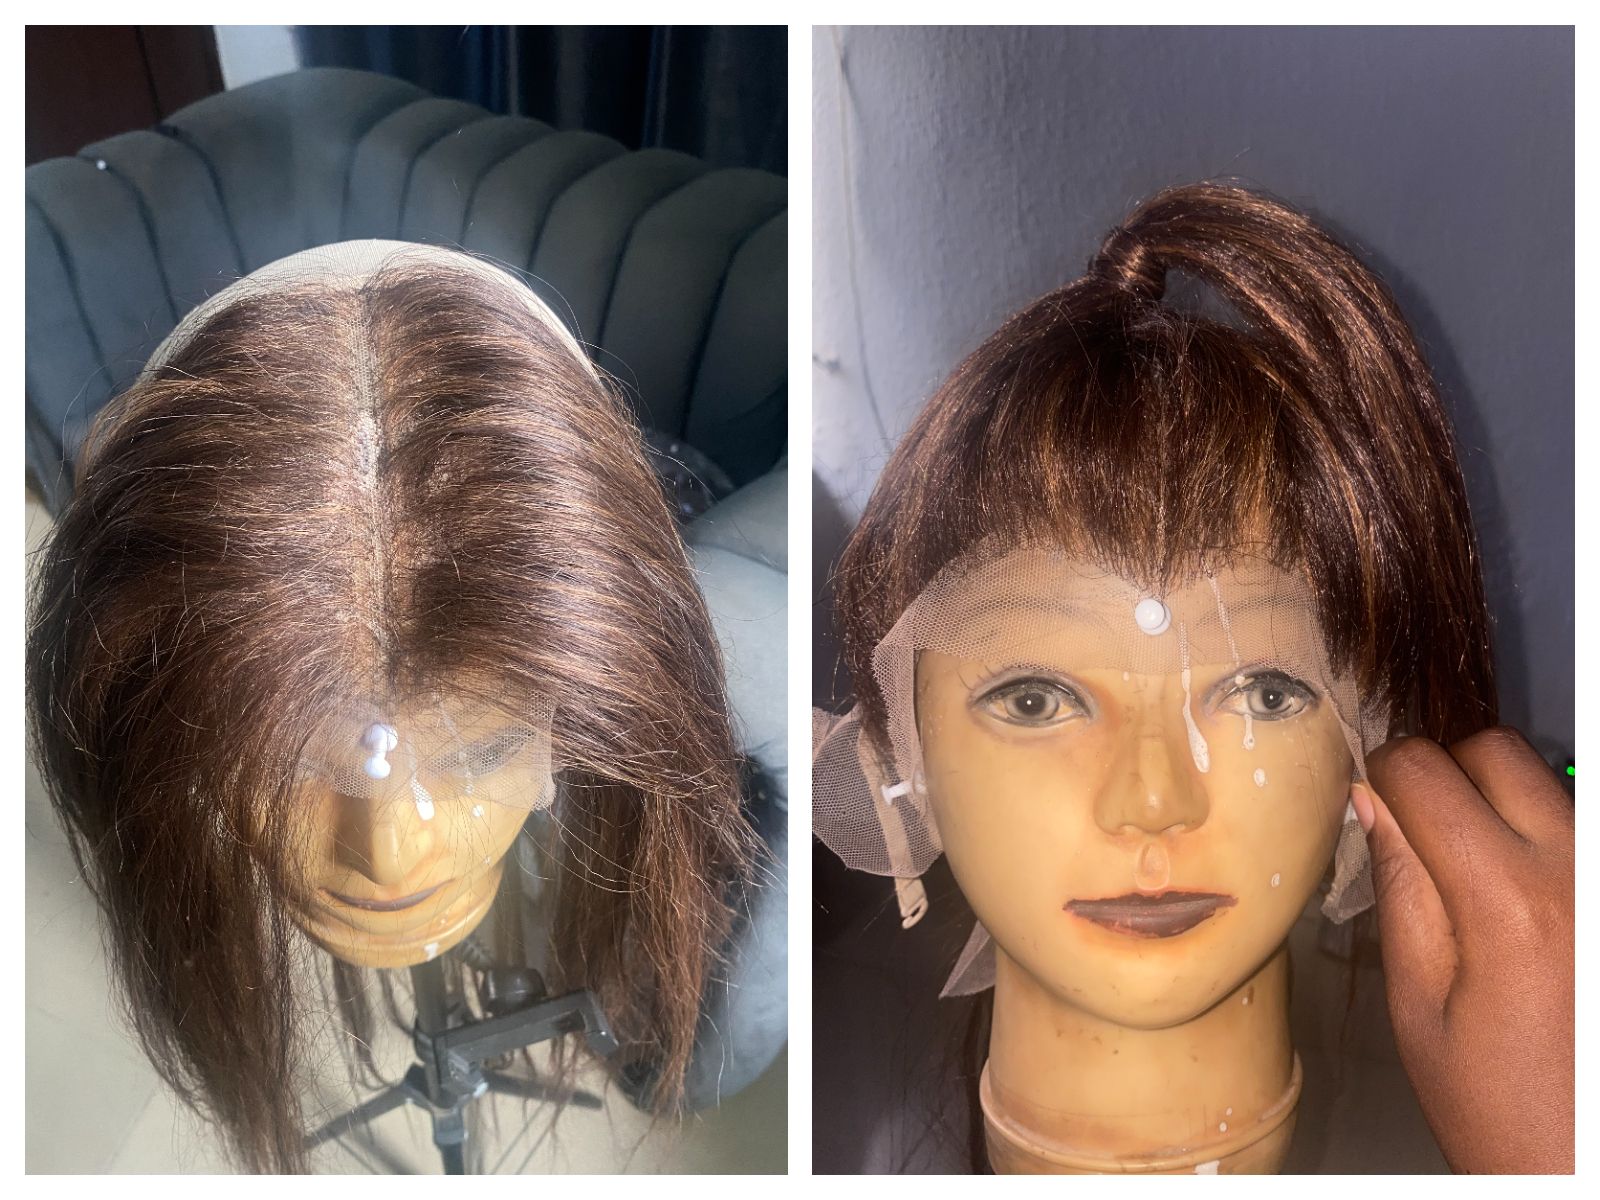
this is the final completed look of my lace frontal hair, i have created a realistic hairline in the process of doing this , using a maker i have marked the hairline point, and then ventilated pieces of hair inside the point, this has allowed me end up with a hairline that is perfect, i also made a middle part at the center of lace frontal, and this was dome by also marking the mid point and excluding ventilating hair at that point. also you would see the highlight patter has also been done with the blonde part of the hair
at different point on the frontal with an intricate pattern and it has turned out more beautiful than i had expected.
Let me know what your thoughts are on this process, also i cant wait to share with you the final look when i get to finish and install it but this is after i must had completed the sewing process which i am going to be sharing with you all before then...and i am hoping to see see you then, make sure to share you opinions on lace frontal and wigs generally in the comments .
esp
Este es el look final de mi frontal de encaje, he creado una linea de cabello realista en el proceso de hacer esto, usando una maquina he marcado el punto de la linea de cabello, y luego ventilado pedazos de cabello dentro del punto, esto me ha permitido terminar con una linea de cabello que es perfecta, tambien hice una parte media en el centro del frontal de encaje, y esto fue domo tambien marcando el punto medio y excluyendo el cabello ventilado en ese punto.También verás que el patrón de reflejos se ha hecho con la parte rubia del cabello
en diferentes puntos de la parte frontal con un patrón intrincado y ha quedado más bonito de lo que esperaba.
Dejame saber cuales son tus pensamientos sobre este proceso, tambien no puedo esperar a compartir contigo el look final cuando lo termine e instale.Pero esto es después de que haya completado el proceso de costura, que voy a compartir con todos ustedes antes de eso..and i am hoping to see see you then, make sure to share you opinions on lace frontal and wigs generally in the comments .
All images are mine captured on iphone 12 pro max mobile device
Traducción realizada con la versión gratuita del traductor DeepL.com