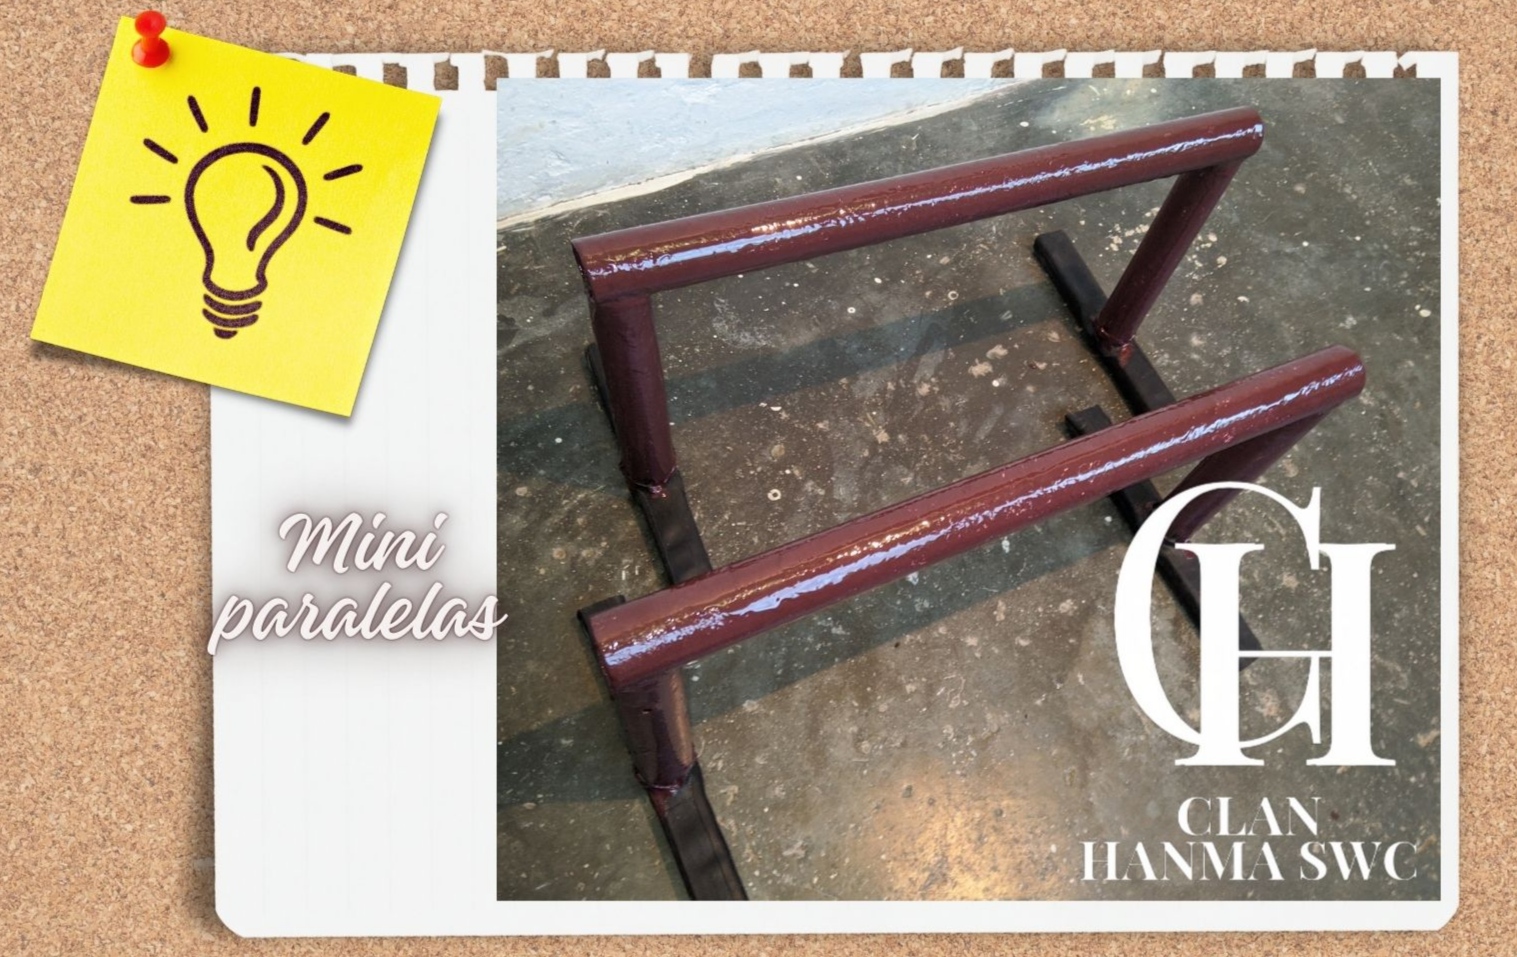
Como hice mis nuevas mini paralelas How I made my new mini parallels @watzitosw
|
Español
|
English
|-|-|
¡Hola a todos! Amigos y comunidad de SWC y HIVE.
Hoy me gustaría mostrarles como hice mis nuevas mini paralelas.
Como saben, los tacos o las mini paralelas son unos instrumentos importantes para la realización de diversos ejercicios a la hora de entrenar, anteriormente realicé la fabricación de un par de tacos en dos ocasiones, lastimosamente se dañaron ya que al estar hechos de madera no son tan duraderos.
A mediados de diciembre se me ocurrió una alternativa a los tacos de madera, pensé ¿como puedo hacerlos mejor?, ¿de una mejor calidad? Le pedí permiso a mis padres para usar unos tubos de hierro que ya no se usaba en la casa y me puse a planificar como hacerlos.
Hello everyone! Friends and community of SWC and HIVE.
Today I would like to show you how I made my new mini parallel bars.
As you know, the cues or mini parallel bars are important tools for performing various exercises when training, previously I made a pair of cues on two occasions, unfortunately they were damaged because being made of wood they are not so durable.
In mid-December I came up with an alternative to the wooden cues, I thought, how can I make them better, of a better quality? I asked my parents for permission to use some iron pipes that were no longer used in the house and I started planning how to make them.

------
Como ven en la foto hay 6 tubos, 4 vigas y una tripa de bicicleta, los dos primeros tubos son de 50 centímetros de largo, los otros 4 son de 23 centímetros de largo y las 4 vigas son de 25 sentimientos de largo, la tripa de bicicleta yo la he usado anteriormente en mis antiguos tacos para entrenar como un anti resbalante y la verdad funcionan muy bien. Como ven, les puse la goma que se utiliza en las tripas de bicicleta, pique dos pedazos del largo de la viga inferior y las cosí lo mejor que pude.
>As you can see in the picture there are 6 tubes, 4 beams and a bicycle gut, the first two tubes are 50 centimeters long, the other 4 are 23 centimeters long and the 4 beams are 25 centimeters long, the bicycle gut I have used before in my old training cues as an anti-slip and the truth is that they work very well. As you can see, I put the rubber that is used in the bicycle casings, cut two pieces of the length of the lower beam and sewed them together as best I could.
-----
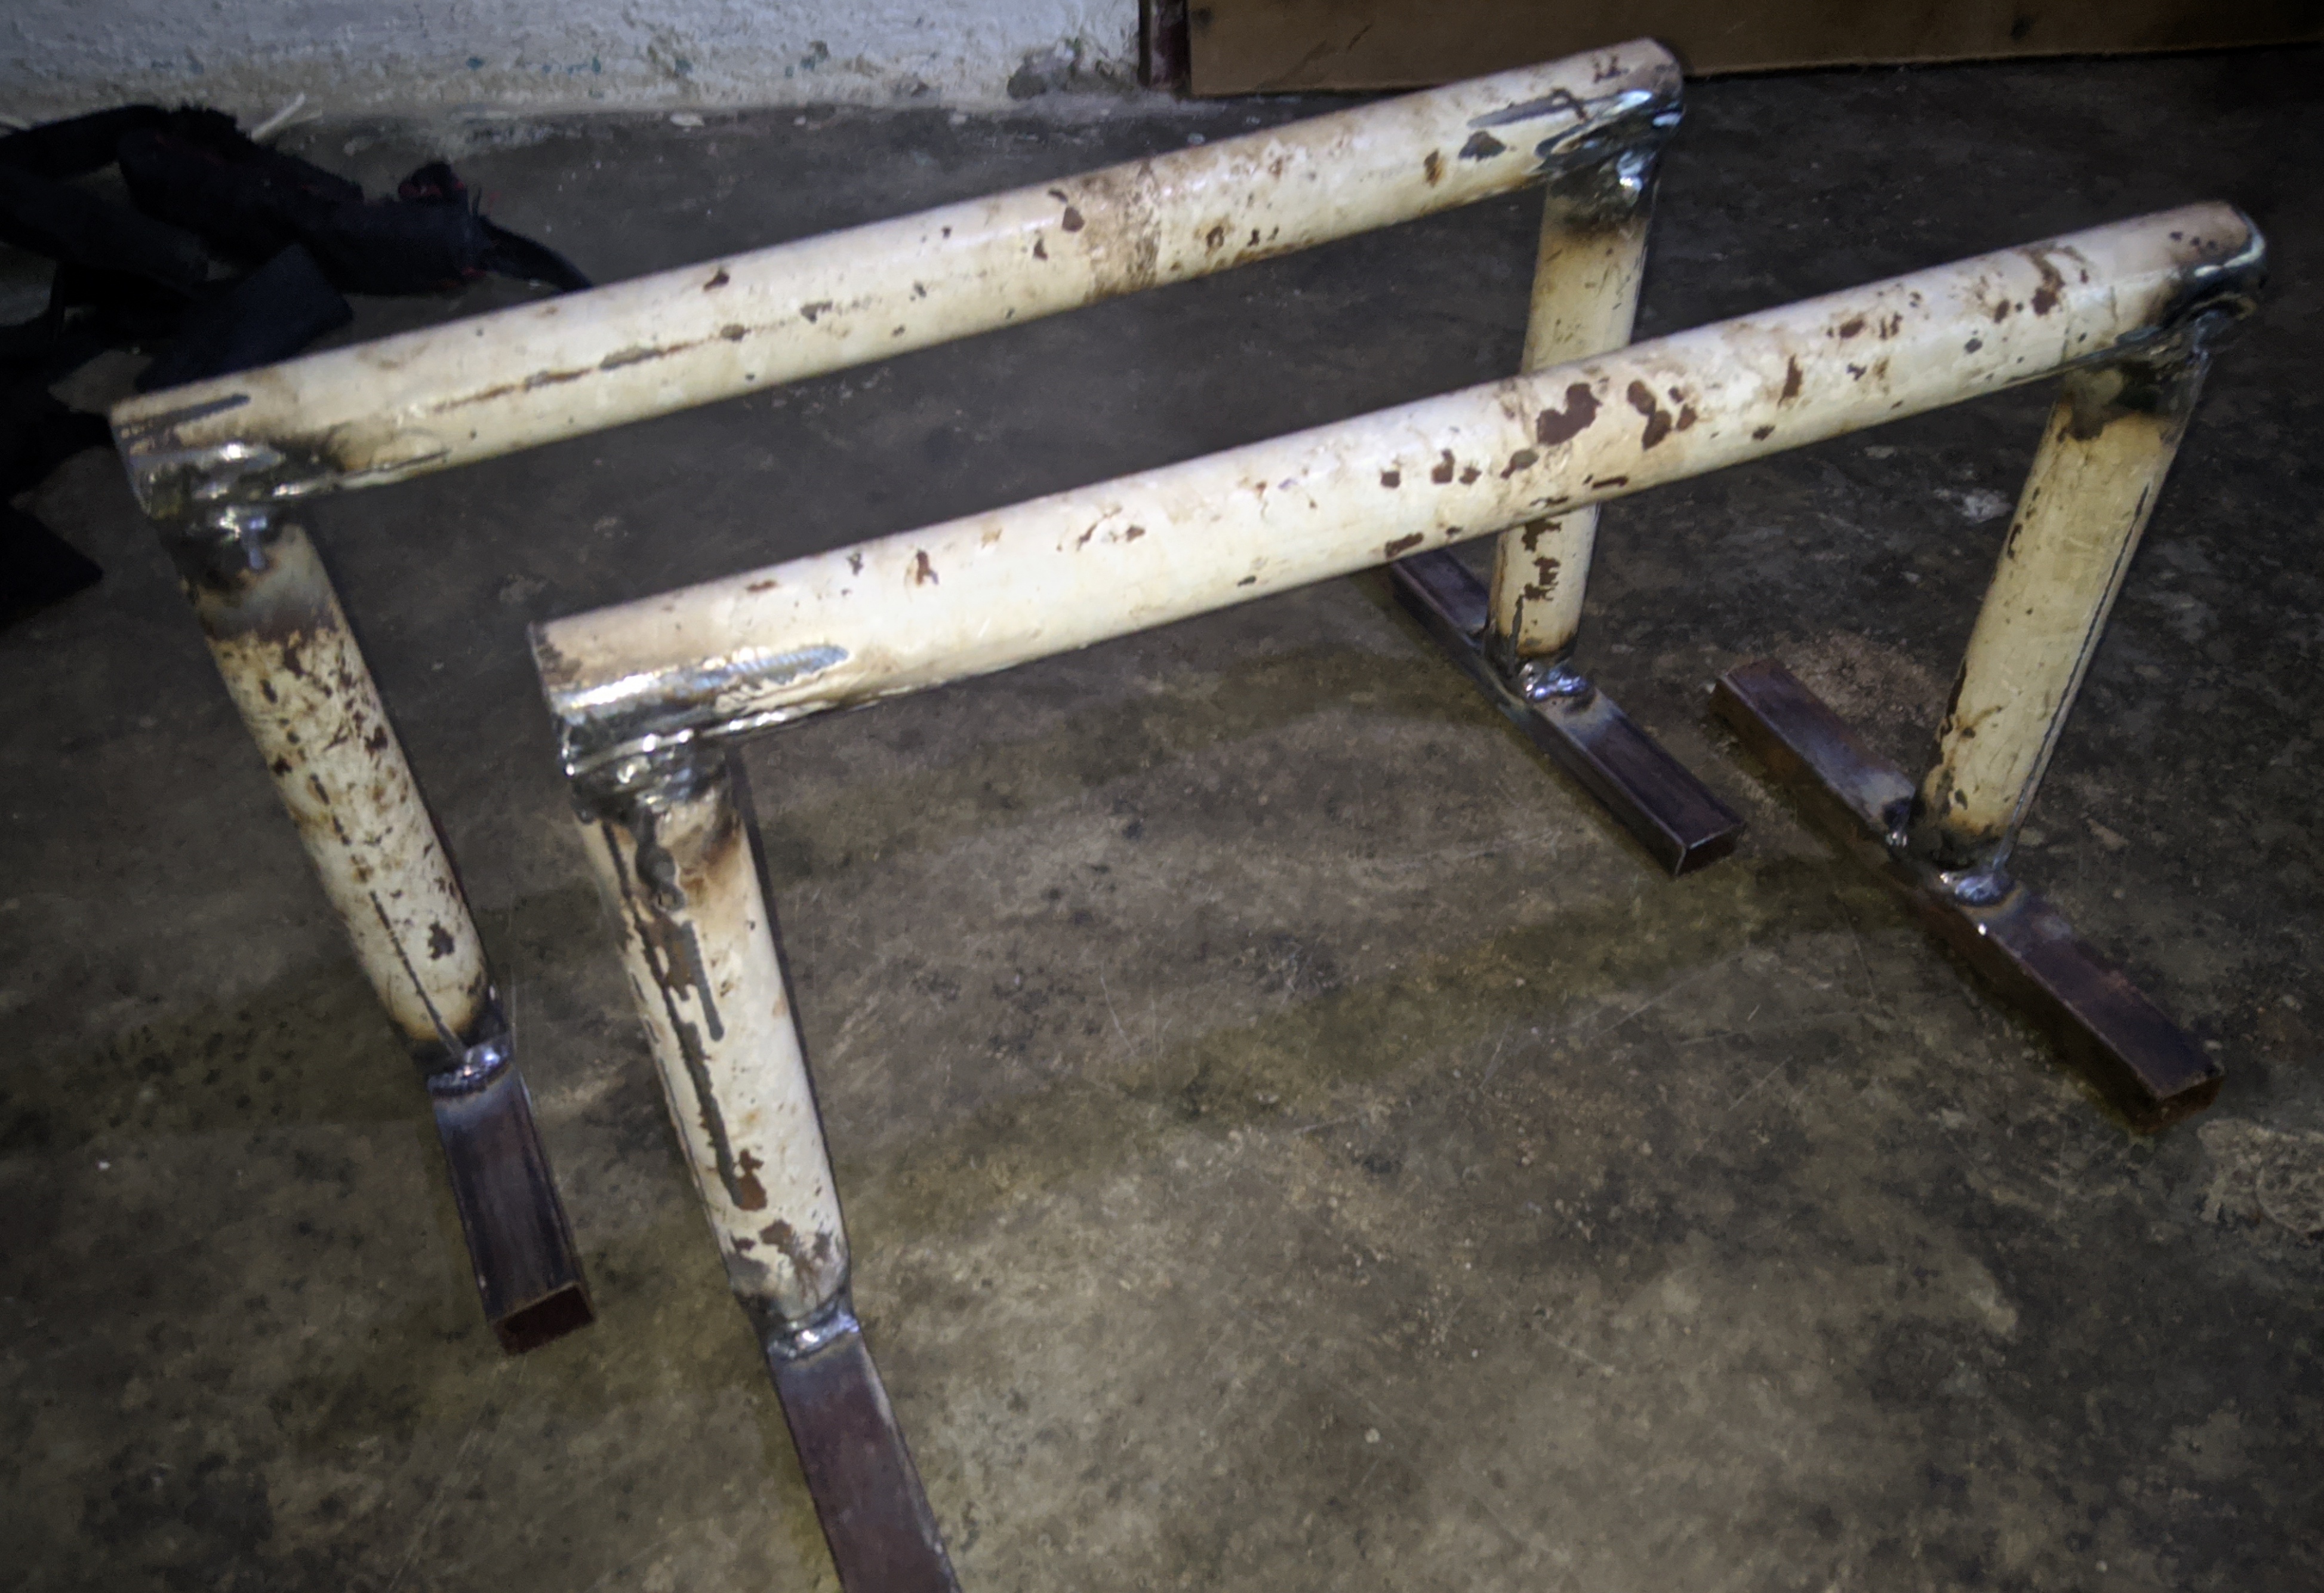
Aquí ya estaban soldados y listos para la siguiente etapa
***Here they were already welded and ready for the next stage***
https://images.hive.blog/DQmc2uLcHhbpCsq3xtTDinjRLze1SNsTLvkxSvtk1DbkYtH/IMG_20240122_174944.jpg<
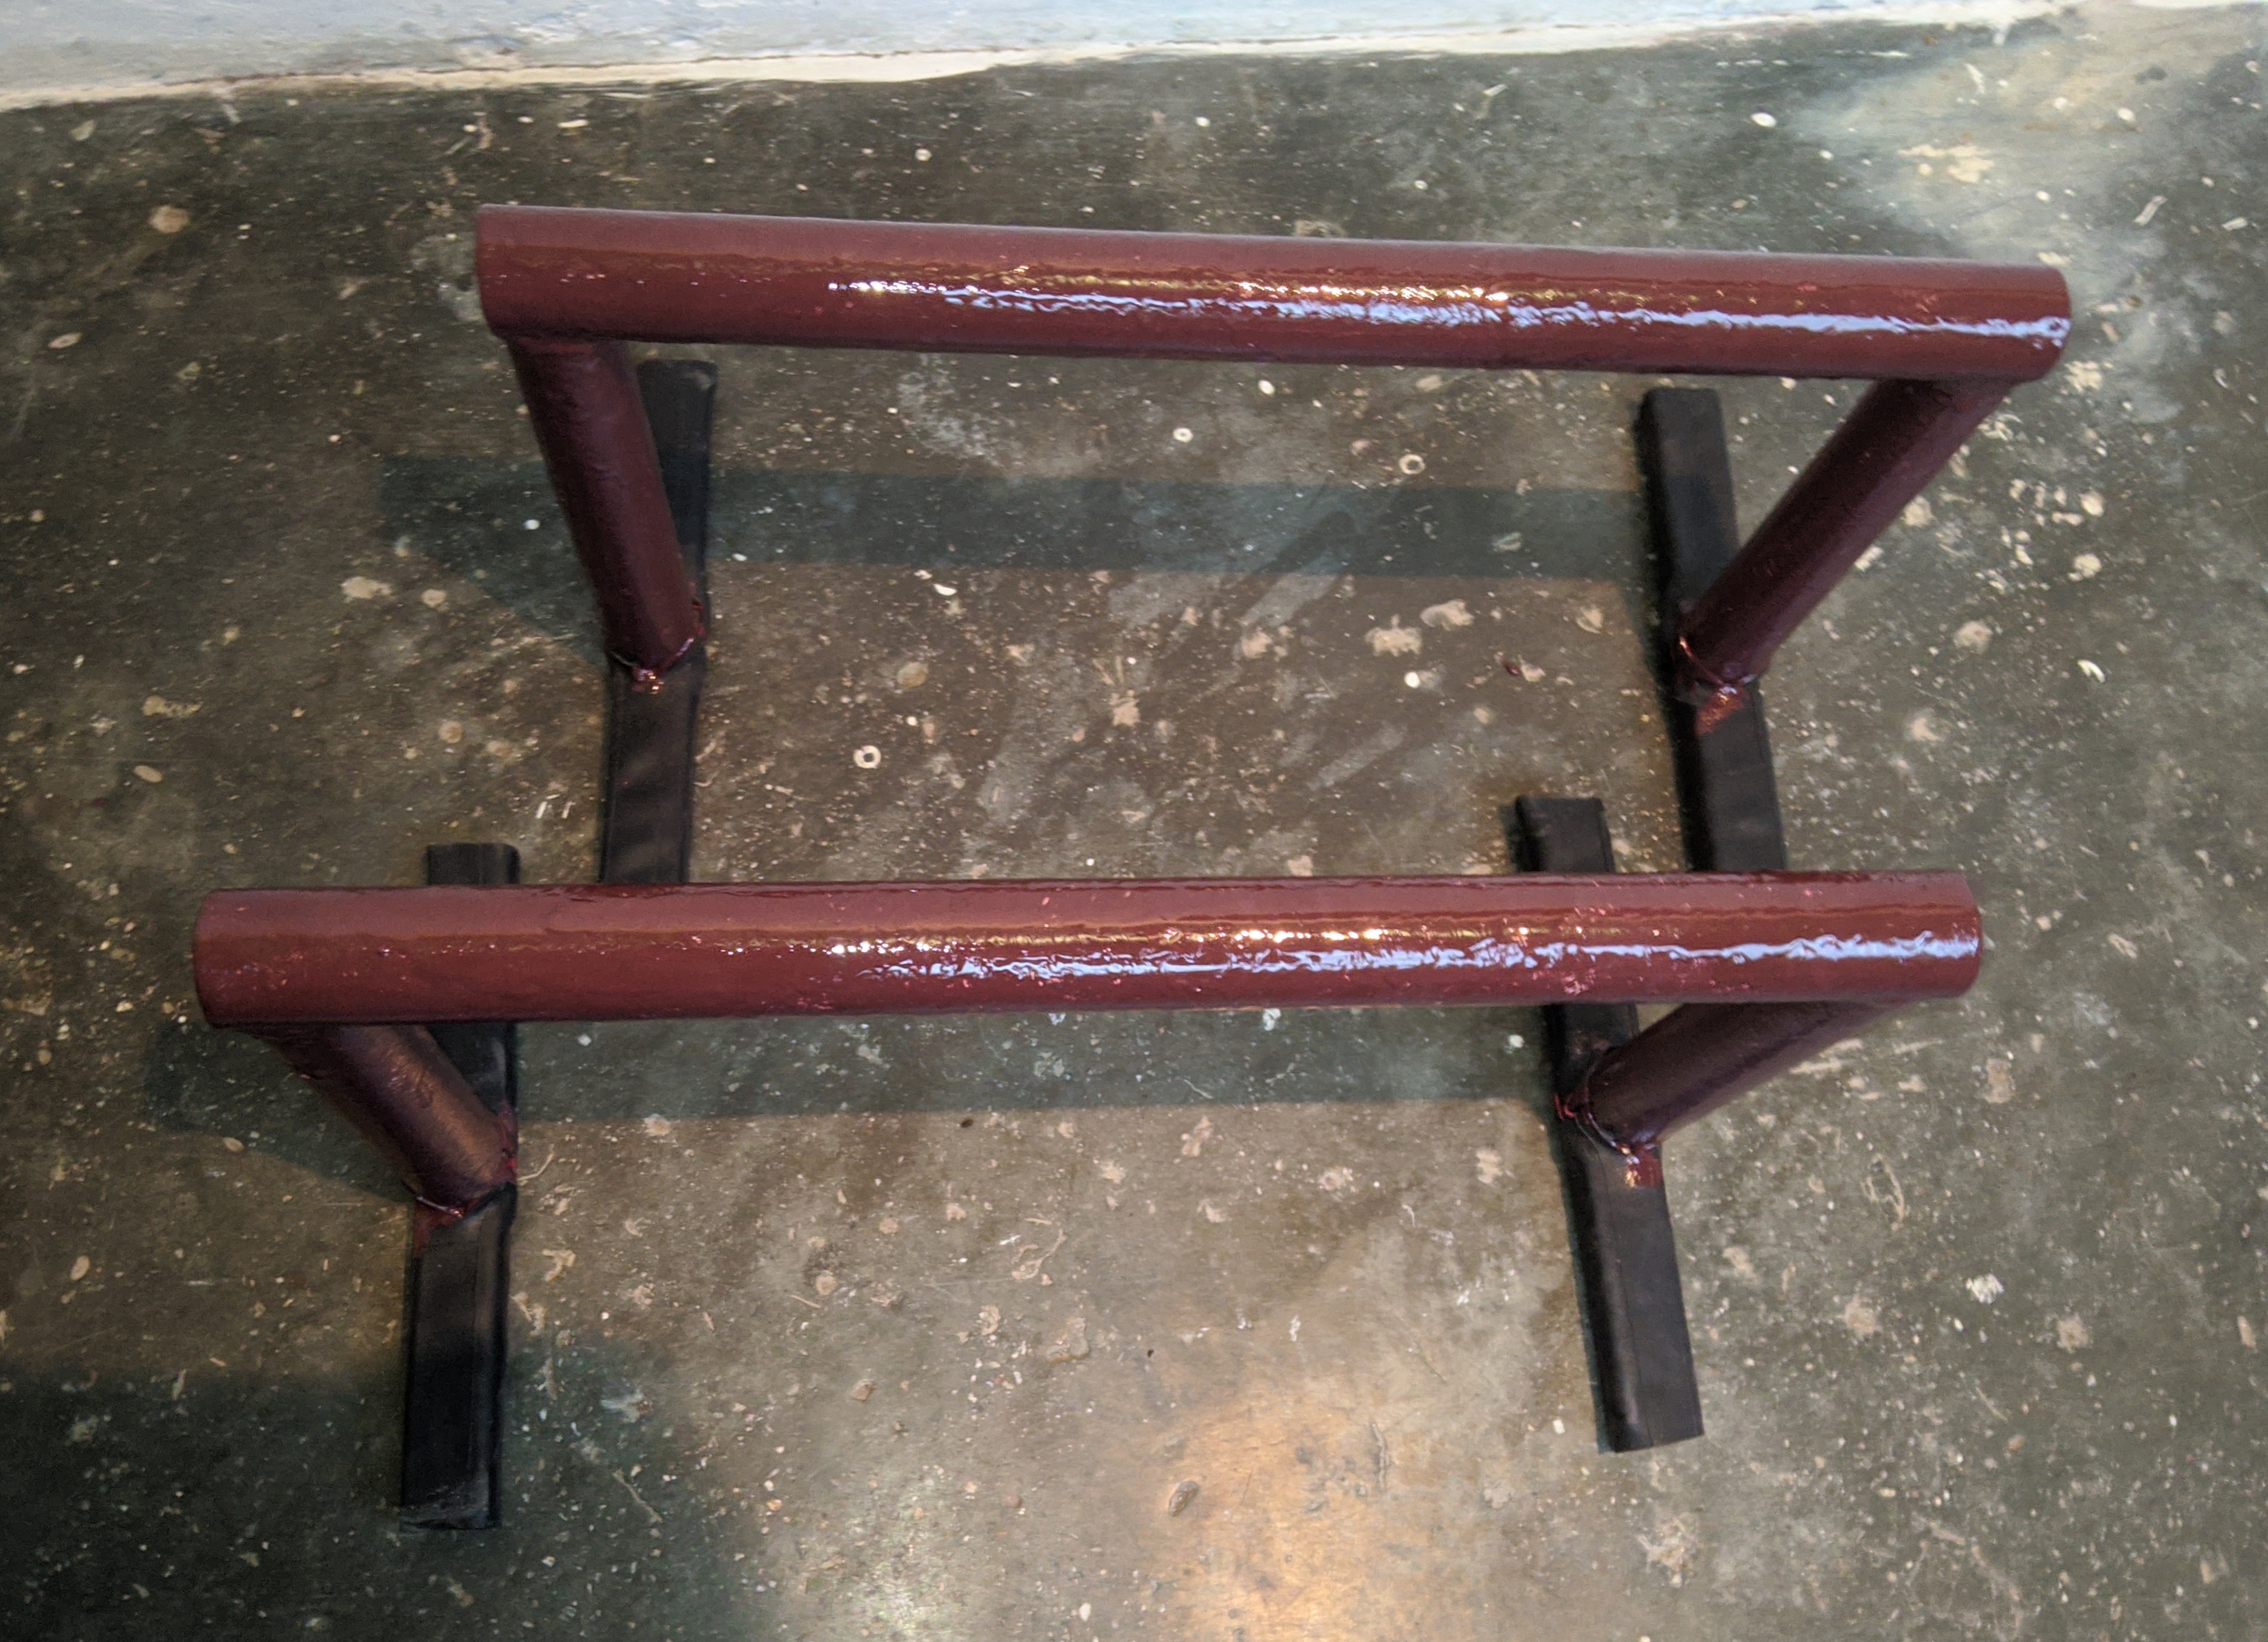
La ultima etapa fue pintarlos y la verdad me gustó mucho el resultado, bueno amigos espero que esta información les pueda servir y los motive a mejorar sus implementos a la hora de entrenar. Recuerden, todo se puede, sólo hay que proponérselo.
>The last step was to paint them and I really liked the result, well friends I hope this information can help you and motivate you to improve your implements when training.
Remember, anything is possible, you just have to put your mind to it.
------
Gracias amigos lectores, nos vemos en una próxima publicación
Thank you reader friends, see you in a future post
-----
|
Muchas gracias por leer mi publicación!
|
Thank you very much for reading my publication!
|-|-|
Créditos
***Credits***
Cámara
***Camera***
Xiaomi Redmi 8
Fotografía
***Photography***
@watzitosw
Edición de Fotografía
***Photography Editing***
@watzitosw
Redes Sociales
***Social Networks***
Instagram
@watzitoo