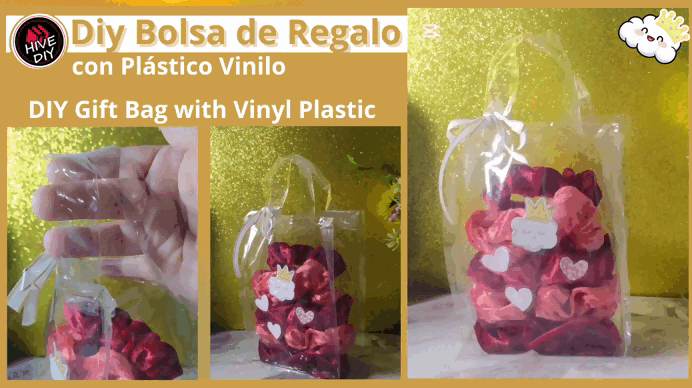
Diy Bolsa de Vinil Transparente / DIY Clear Vinyl Bag
@yennysferm71
· 2025-08-24 23:34
· Hive Diy
¿Sabes qué es completamente un Plus cuando regalas algo? Que el empaque o envase donde está el regalo, sea algo que puedes utilizar posteriormente. Esto siempre me ha gustado y lo hago siempre que puedo, y hoy iba a regalar un detalle a una niña, unos Scrunchies que yo misma hice, en terciopelo vino tinto y rosado, estos colores son realmente hermosos, y entonces se me ocurrió realizar una bolsa con vinil transparente, para que todo luciera bello.
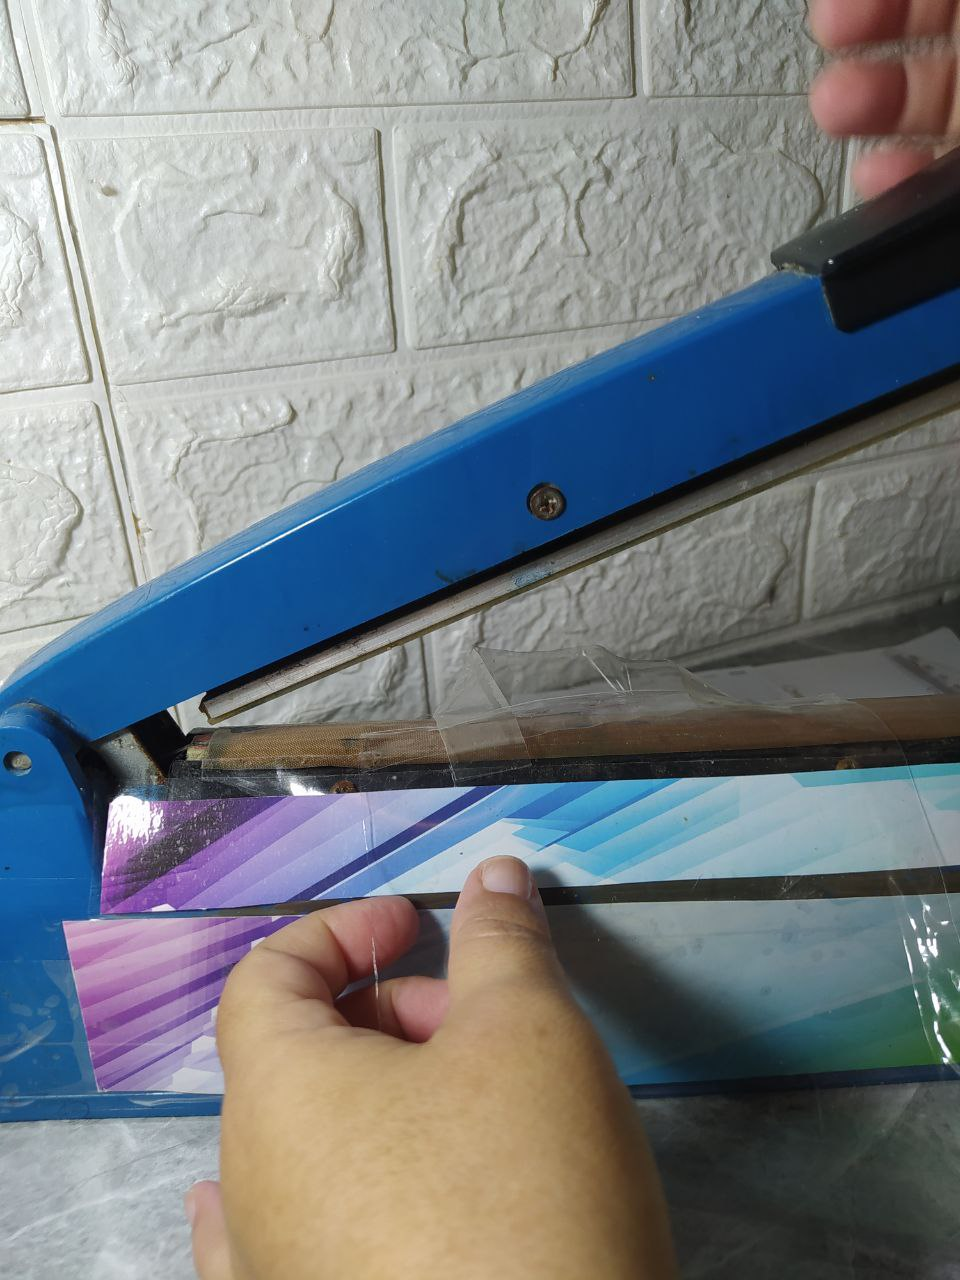
Para elaborar este pequeño proyecto utilicé una Selladora de Bolsas, que es un aparato que tengo desde hace tiempo pero que está algo fea y no había querido usar en mis post, pero la limpie muy bien, y la decoré con unas piezas de cartulinas con estampados y ya estaba bien presentable para salir en HIVE.
Do you know what's a real plus when you give something as a gift? The packaging or container the gift comes in is something you can use later. I've always liked this and I do it whenever I can, and today I was going to give a little girl a gift: some scrunchies I made myself, in burgundy and pink velvet. These colors are really beautiful. Then I thought of making a bag with clear vinyl so everything would look beautiful.
To make this little project, I used a Bag Sealer, a device I've had for a while, but it's a bit ugly, and I hadn't wanted to use it in my posts. But I cleaned it really well and decorated it with some patterned cardstock, and it was ready to go on HIVE.
* Selladora Eléctrica de bolsas.
* Plástico vinilo transparente.
* Cinta de tela.
* Stickers.
* Cinta Adhesiva transparente y gruesa.
* Tijera y Clips de Presión o Ganchos.
* Electric bag sealer.
* Clear vinyl plastic.
* Fabric tape.
* Stickers.
* Thick, clear adhesive tape.
* Scissors and snap clips or hooks.
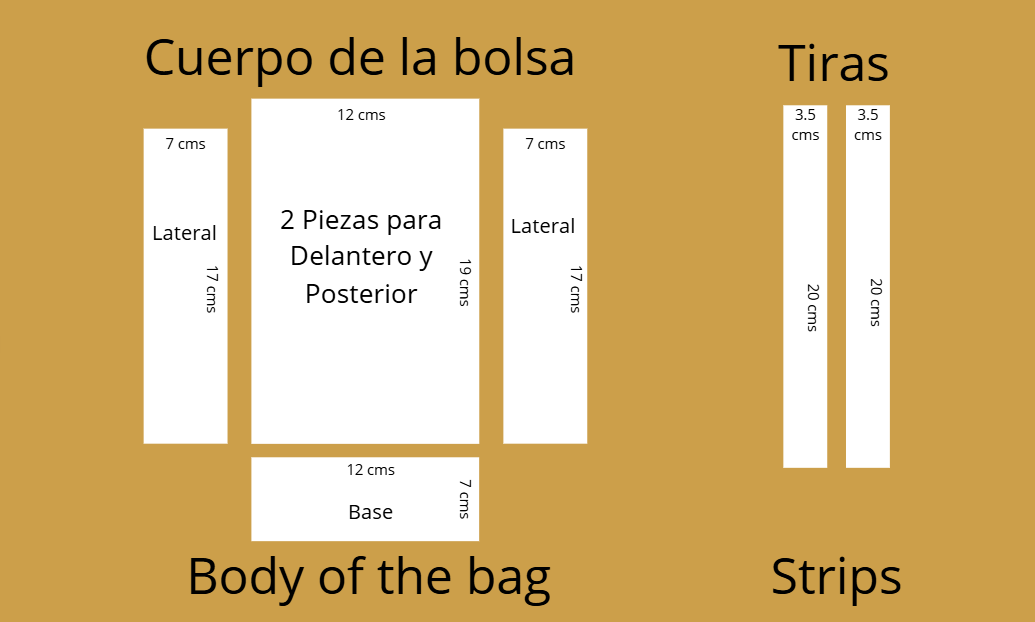
El plástico vinil transparente se corta con las siguientes medidas que corresponden:
Cuerpo de la bolsa:
- 2 Centrales para Delantero y Posterior
- 2 Laterales
- 1 Base
Las Tiras:
- 2 Piezas
The clear vinyl plastic is cut to the following measurements:
Bag Body:
- 2 Center Pieces for Front and Back
- 2 Side Pieces
- 1 Base
Strips:
- 2 Pieces
Para que sea más fácil cortar el plástico vinil transparente, puedes hacerlo utilizando al mismo tiempo una hoja de papel, al poder ver bien lo que se corta, se hace más rápido el trabajo, y si quieres hacer varias, estas hojas te servirán de plantillas.
También para cortar las piezas junto al papel y que no se mueva, te puedes ayudar en pinzas de cabello, clips de presión, ganchos de ropa, etc. lo que tengas a tu disposición. Yo en algunas partes del proceso utilicé pinzas de cabello porque son largas y en otras utilicé clips de presión.
To make cutting the clear vinyl easier, you can use a sheet of paper at the same time. Since you can clearly see what you're cutting, it makes the job faster. If you want to make several, these sheets can serve as templates.
Also, to cut the pieces together with the paper so it doesn't move, you can use bobby pins, snap clips, clothespins, etc., whatever you have available. I used bobby pins for some parts of the process because they're long, and for others, I used snap clips.
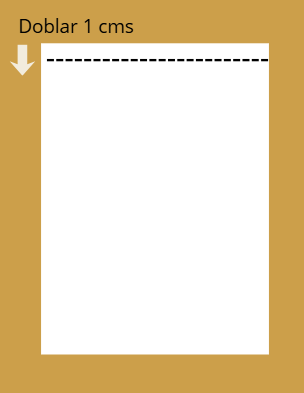
Primero comienzo con las partes Delantera y Posterior, a las cuales les hice un dobles de 1cms en uno de sus extremos que serán las partes superiores del bolso, donde van a ir las tiras.
First I start with the Front and Back parts, to which I made a 1cm fold at one of their ends, which will be the upper parts of the bag, where the straps will go.
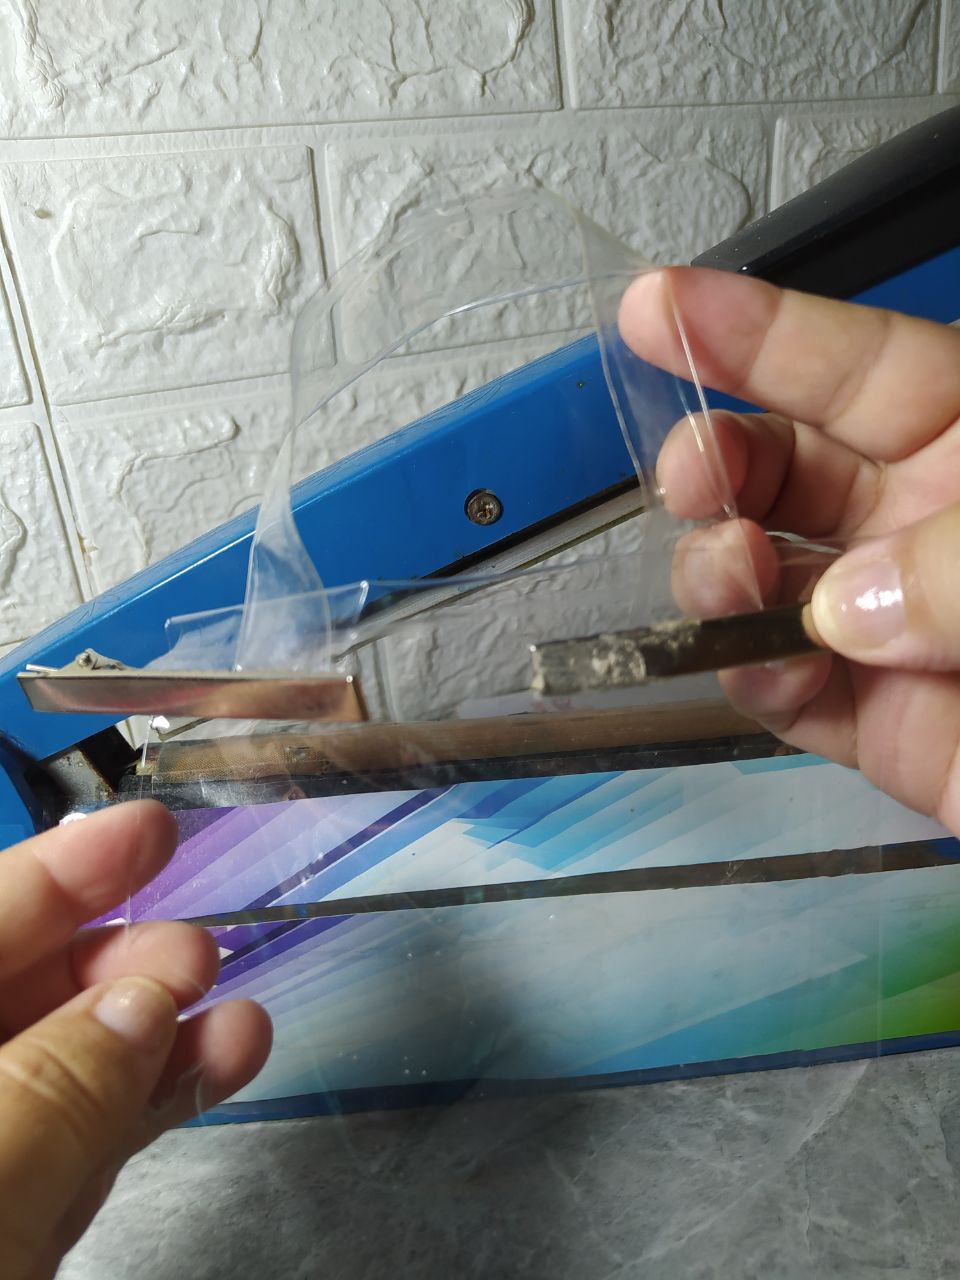
Continúo con las tiras, las cuales doblé por la mitad a todo su largo y sujeté con pinzas, las llevé a la Selladora ubicando arriba toda la parte que quería sellar. Bajé la parte superior de la Selladora, se conté 3 segundos y se levanté.
Las ubico en la parte superior del Delantero y Posterior, y uno igualmente con la Selladora de Bolsa.
I continued with the strips, which I folded in half along their entire length and secured with tweezers. I took them to the Sealer, placing the entire area I wanted to seal on top. I lowered the top of the Sealer, counted 3 seconds, and then raised it.
I placed them on the top of the Front and Back, and then one of them with the Bag Sealer.
Así debe lucir la parte Delantera y la Posterior con las tiras ya colocadas.
This is how the front and back should look with the strips already in place.
Ahora continuamos uniendo Lateral + Delantero + Lateral + Posterior + La otra parte del primer Lateral, tal como se ve en el dibujo, así quedará todo unido de forma continua.
Now we continue joining Side + Front + Side + Back + The other part of the first Side, as seen in the drawing, so everything will be joined continuously.
Ahora se pegará a la base, todo el cuerpo que hemos preparado anteriormente. Este es quizás el paso más complicado, pero aún así es fácil de hacer, solamente que requiere que se tomen las piezas con más cuidado y precisión.
Primero se pegan mejor los lados más anchos, es decir Delantero y Posterior a los lados más anchos de la base, que todo coincide en medidas. Y luego, se pegan o unen los lados más angostos que son los laterales.
Now, the entire body we prepared earlier will be glued to the base. This is perhaps the most complicated step, but it's still easy to do, except that it requires more care and precision in handling the pieces.
First, it's best to glue the widest sides, i.e., the front and back, to the widest sides of the base, so that everything matches the measurements. Then, glue or join the narrowest sides, which are the sides.
Ahora la parte más divertida de todos los proyectos, la decoración. El principal atractivo por supuesto es que la bolsa es transparente y se todo lo que coloquemos adentro, pero nunca está demás darle un poco más de interés.
Para esto, coloqué unos Sticker Kawaii que tenía impresos, lo hice con cinta adhesiva transparente o como se conoce en algunas partes como cinta de embalar. Y también coloqué un lazo con cinta de tela de color blanco con borde dorado y realmente que todo quedó muy bien.
Now for the most fun part of all the projects: the decoration. The main attraction, of course, is that the bag is transparent and everything we put inside can be seen, but it never hurts to add a little more interest.
For this, I placed some Kawaii Stickers I had printed, using clear adhesive tape, or packing tape as it's known in some places. I also added a bow with white fabric ribbon with a gold trim, and everything really turned out beautifully.
Aquí se aprecian las tiras o asas del bolsito, me encantó este diseño simple pero que en el tamaño que hice el bolso luce muy bien y hasta algo gracioso.
Here you can see the straps or handles of the bag. I loved this simple design, but in the size I made the bag, it looks very good and even a little cute.
Realmente que los Sticker y el lazo le aportan a la bolsa, le dan mucha gracias, y estoy segura que este bolsito lo usaran para guardar los Scrunchies o cualquier otro tesoro para tenerlos organizados y a la vista.
The stickers and the bow really add a touch of class to the bag, they're so cute, and I'm sure they'll use this little bag to store their scrunchies or any other treasures, keeping them organized and visible.
Me encantó este proyecto HIVE DIY, y también volver a utilizar la Selladora de Bolsas, es una herramienta valiosa con la que se pueden hacer muchas otras manualidades, que deseo poder traerles en mi blog.
I loved this HIVE DIY project, and also reusing the Bag Sealer. It's a valuable tool that can be used to make many other crafts, which I hope to bring to you on my blog.
Las fotos las tomé con mi teléfono Redmi Note 8
Apps que utilicé:
Canva Pro para la Portada, Collage y Banners
Utilicé el Traductor Deepl
Mi redes sociales:
Discord: YennysYaneth#0189
Twitter: @yennysferm
Instagram: @yennysyaneth
I took the photos with my phone Redmi Note 8
Apps I used:
Canva Pro for Cover, Collage and Banners
I used Deepl Translator
My social networks:
Discord: YennysYaneth#0189
Twitter: @yennysferm
Instagram: @yennysyaneth