Diy Estuche que se abre completo - DIY Case that opens completely

@yennysferm71 · 2025-08-28 05:58 · DIYHub

Estuche Redondo.gif

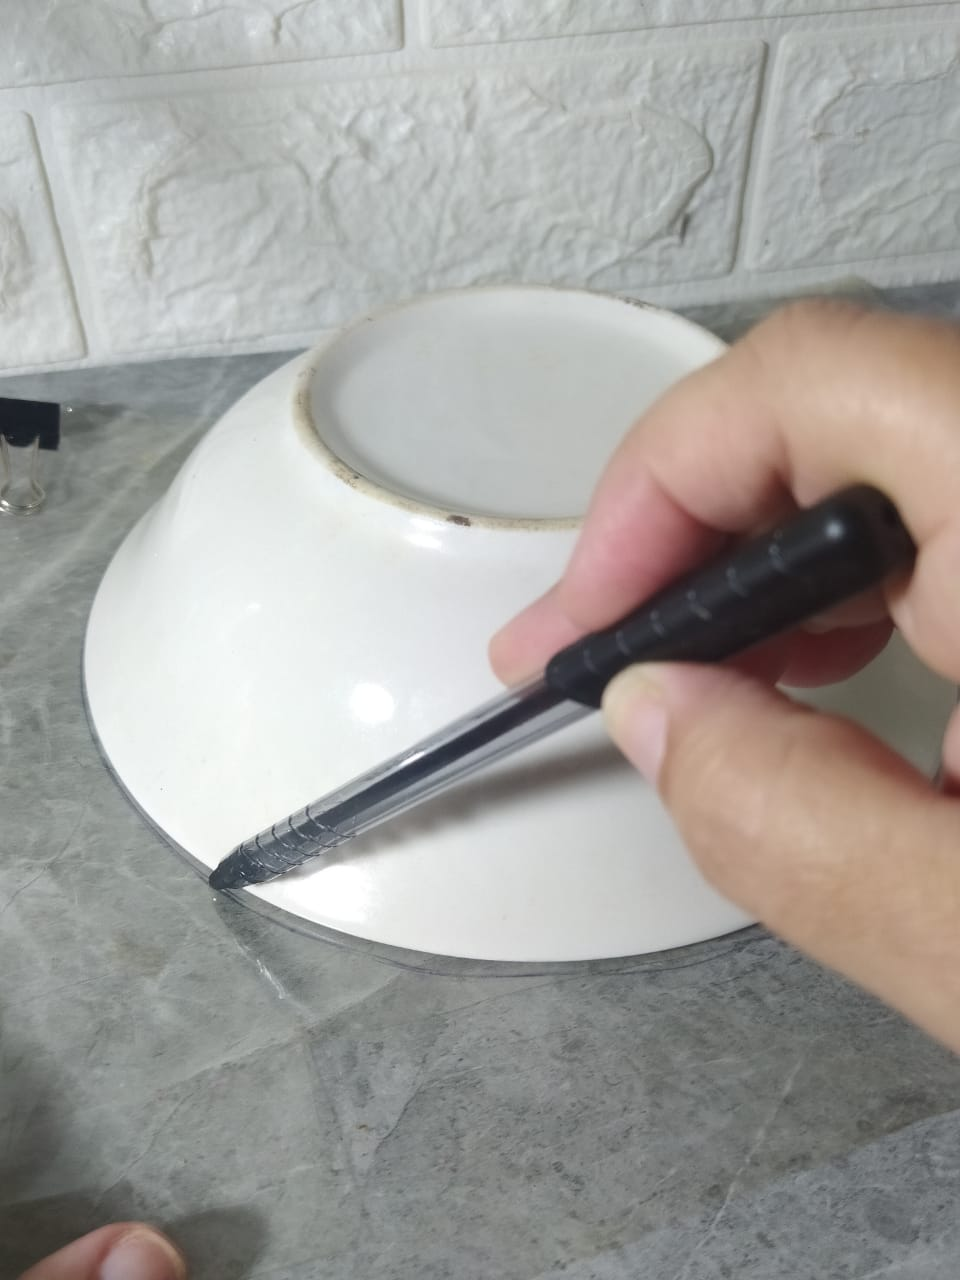
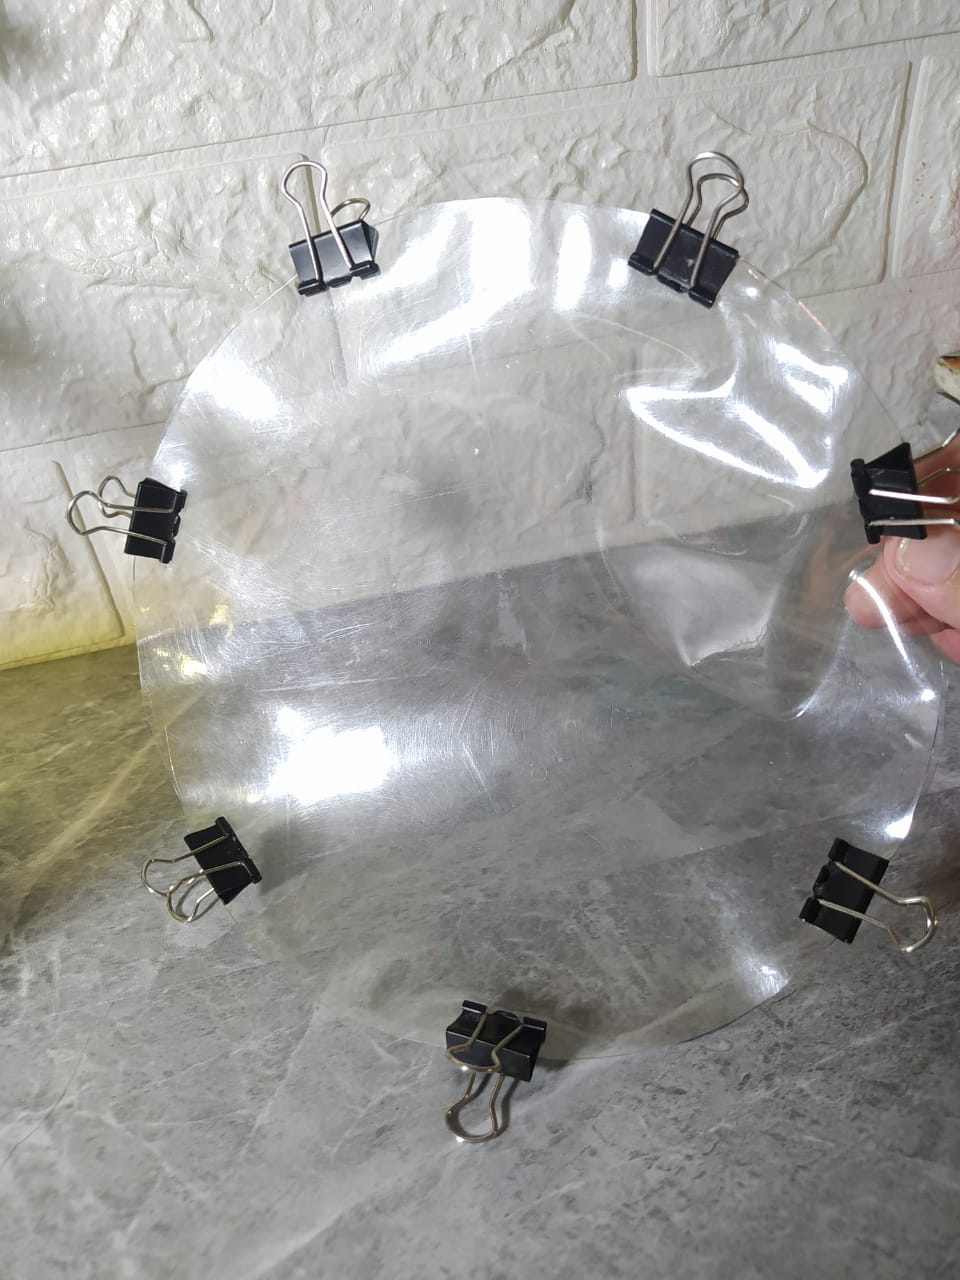
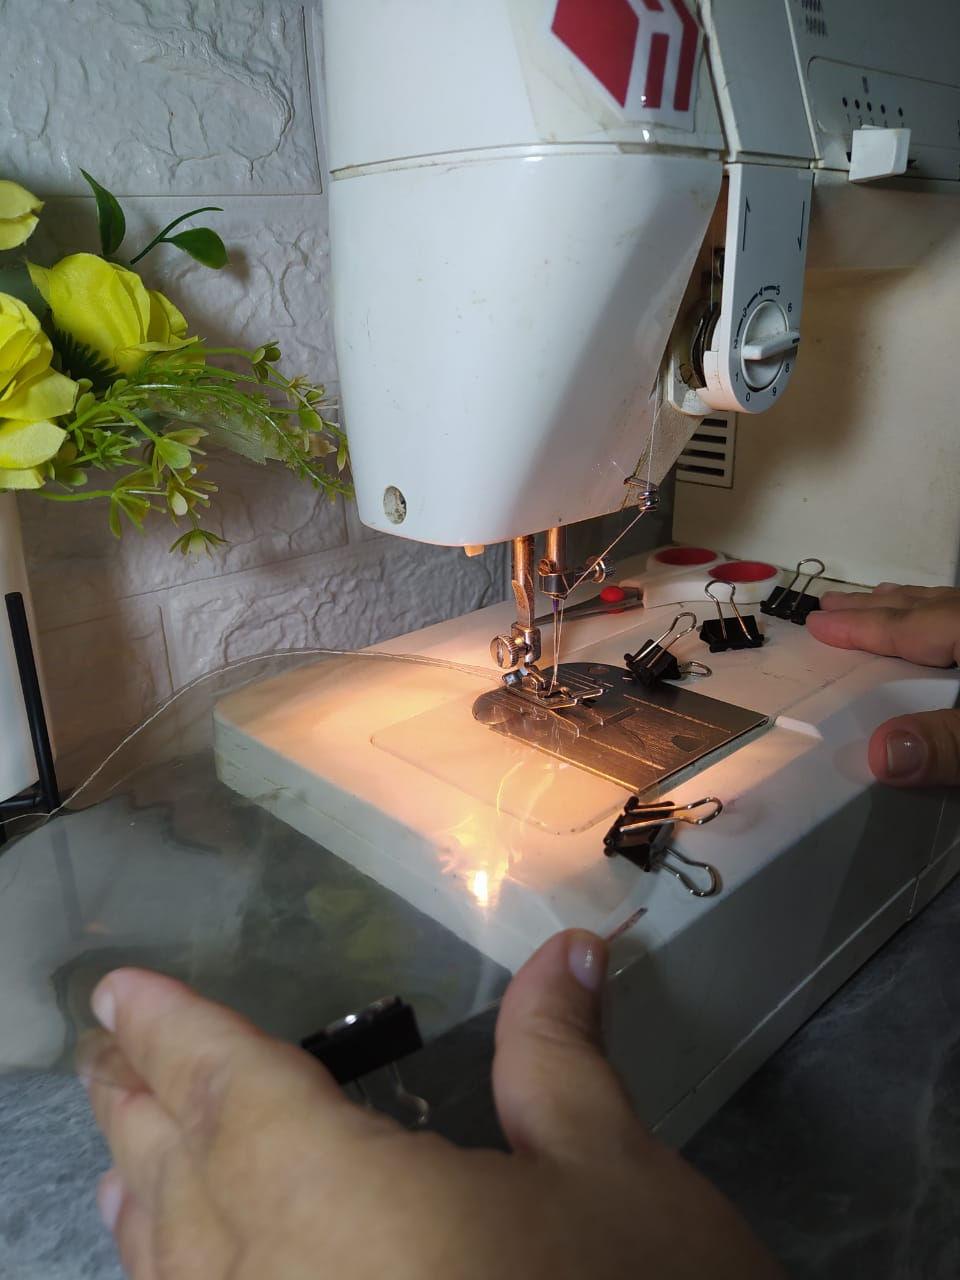
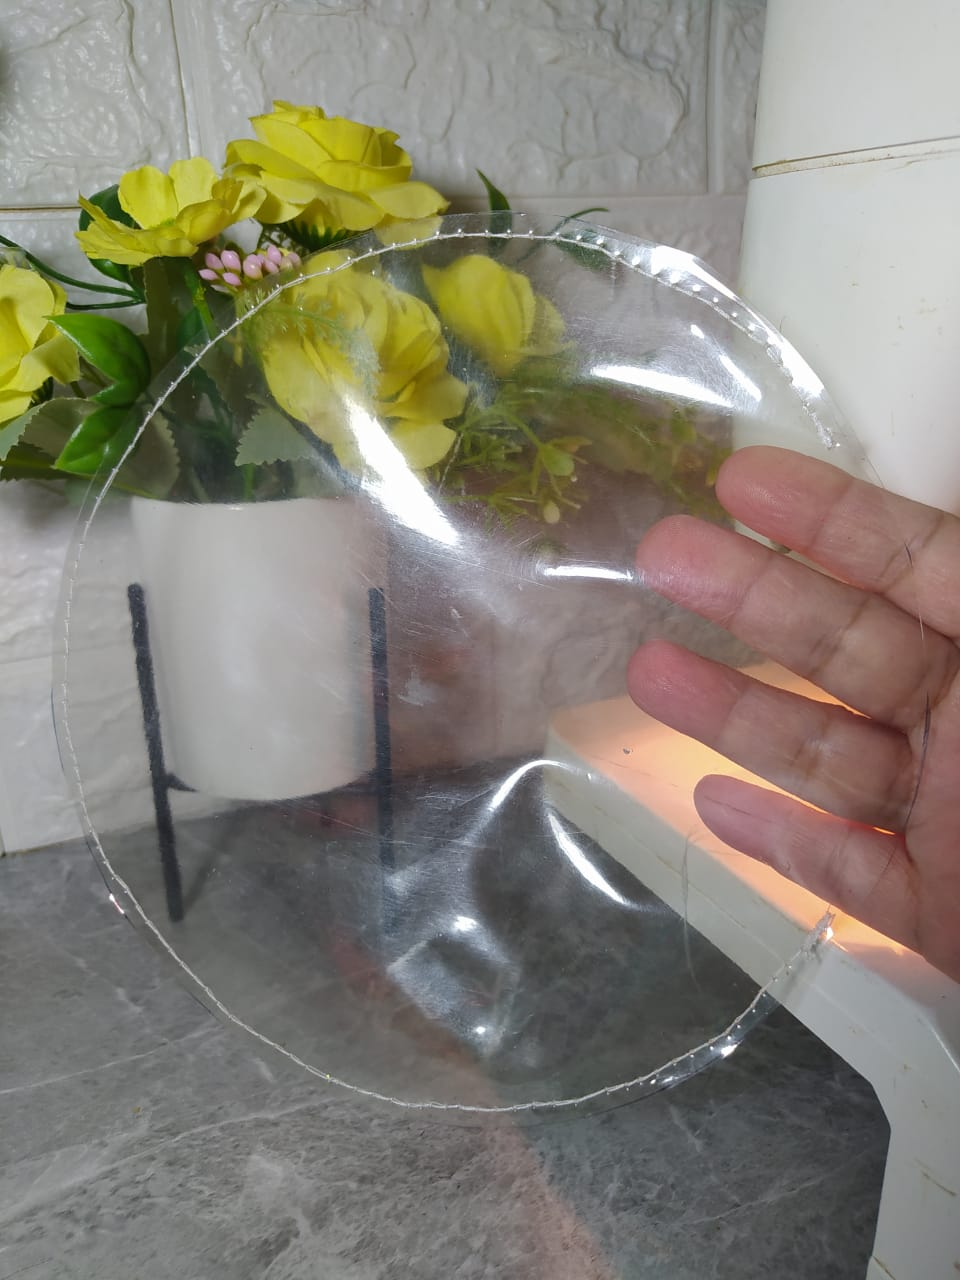
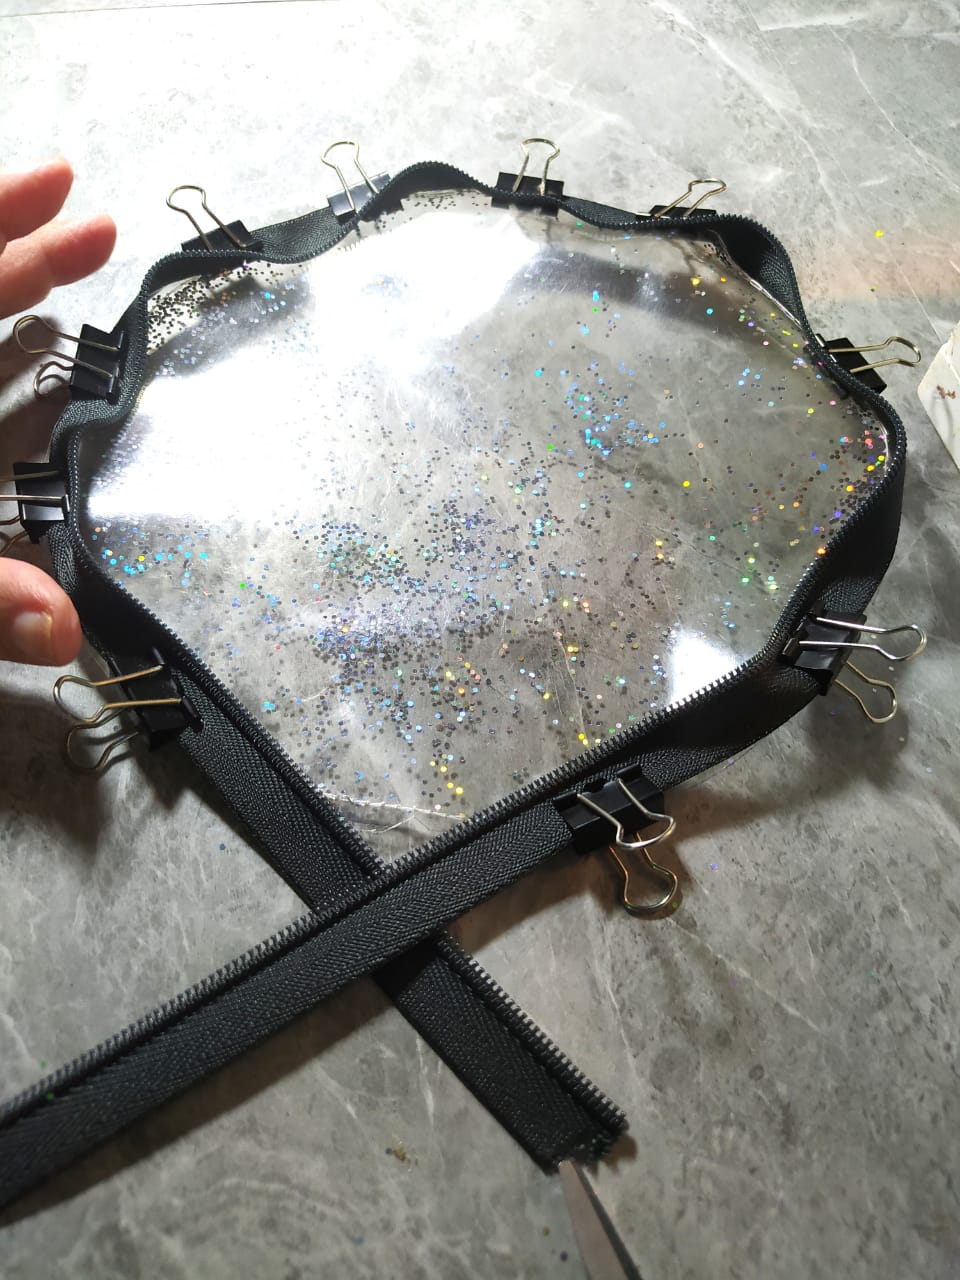
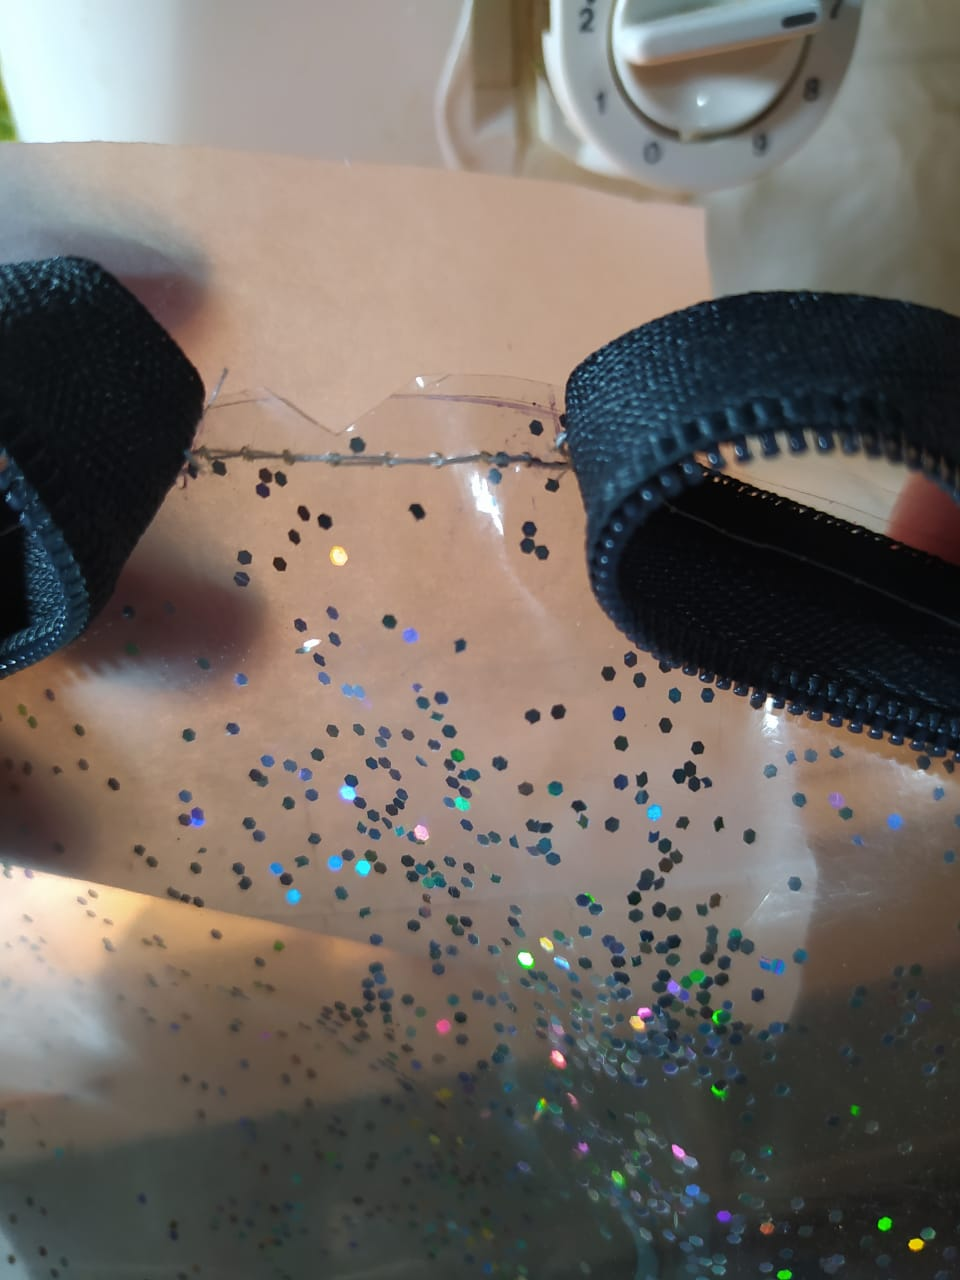
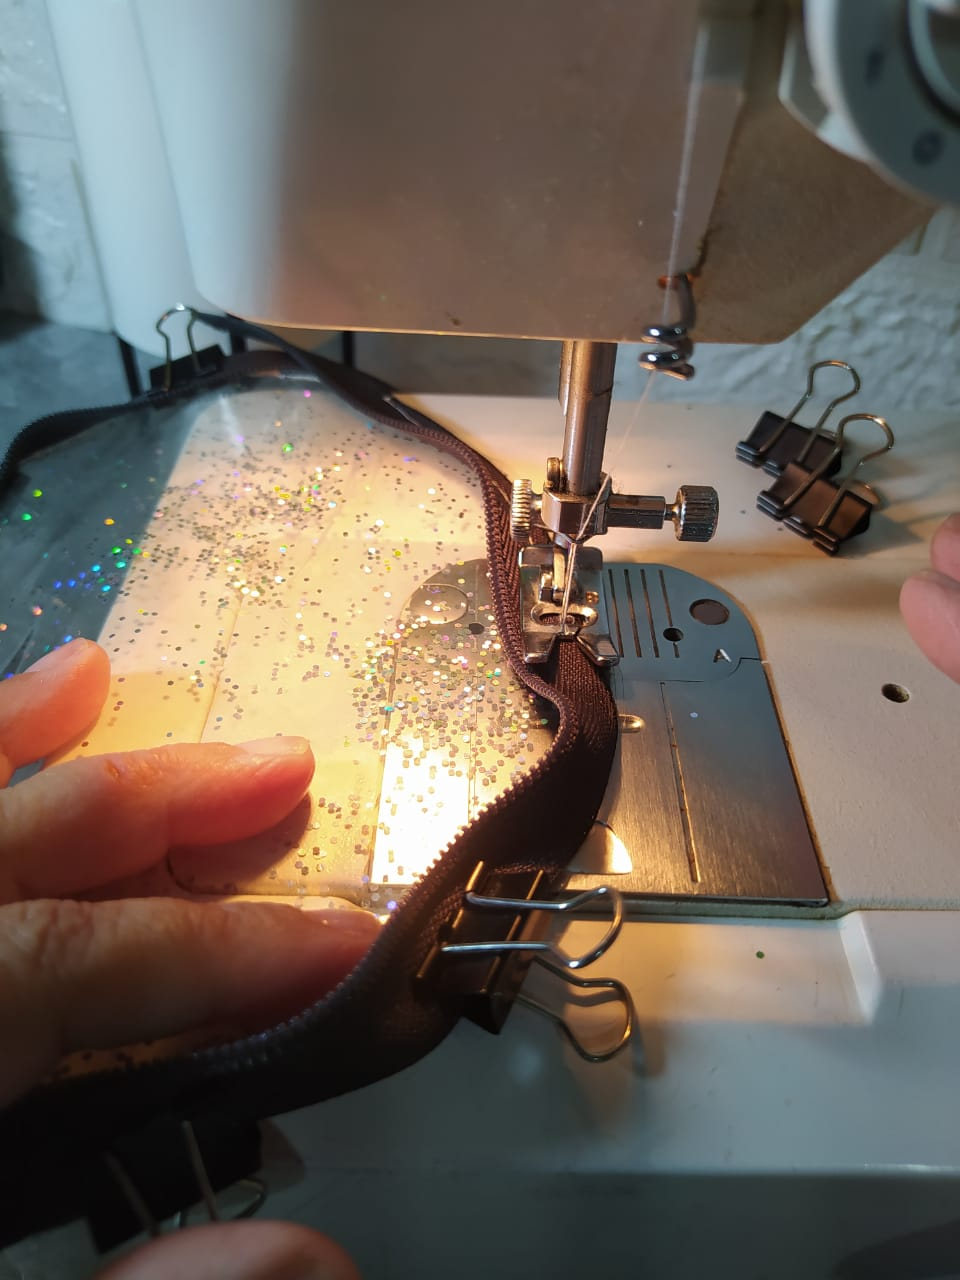
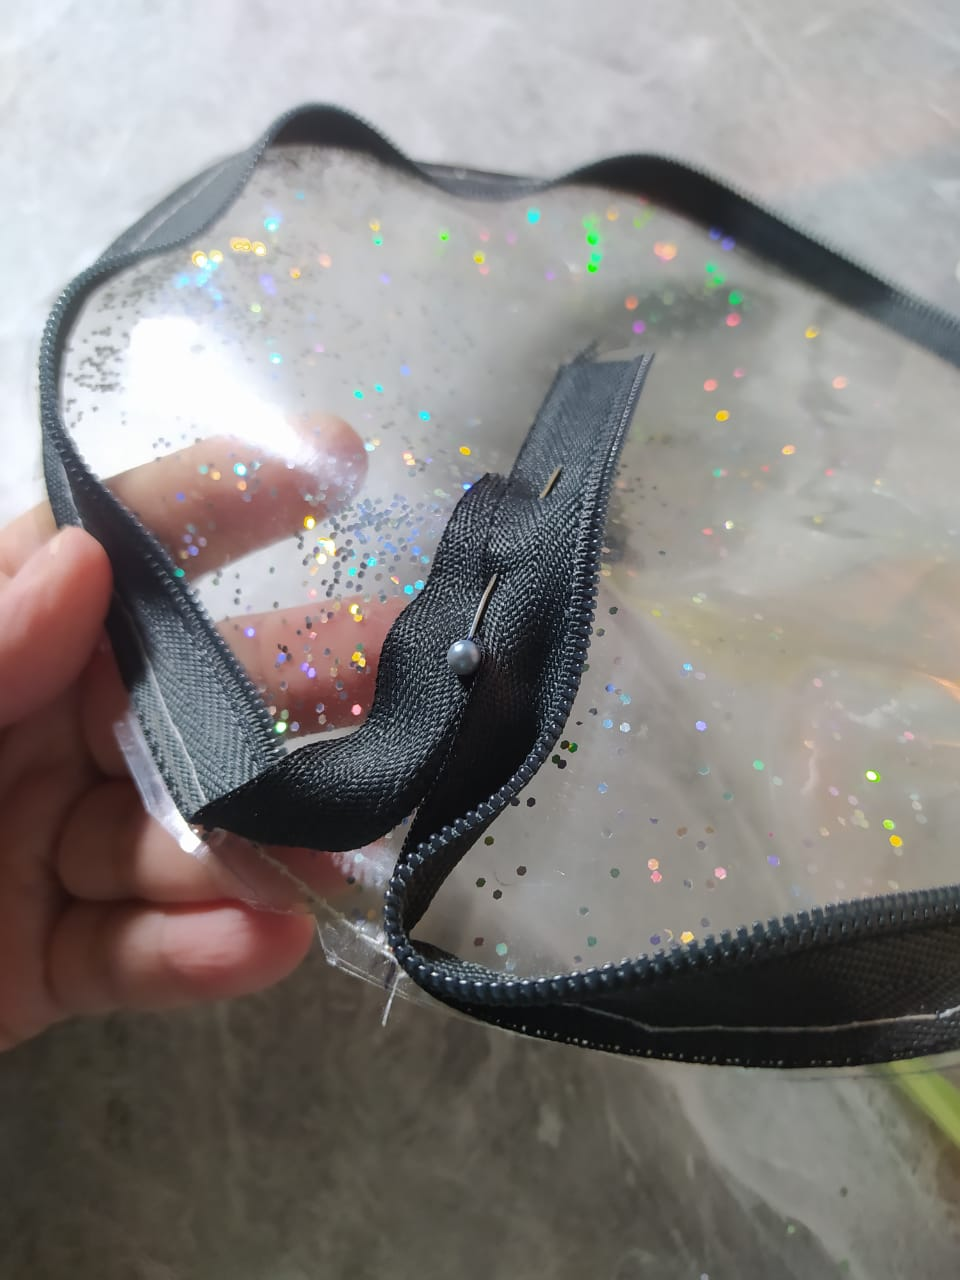
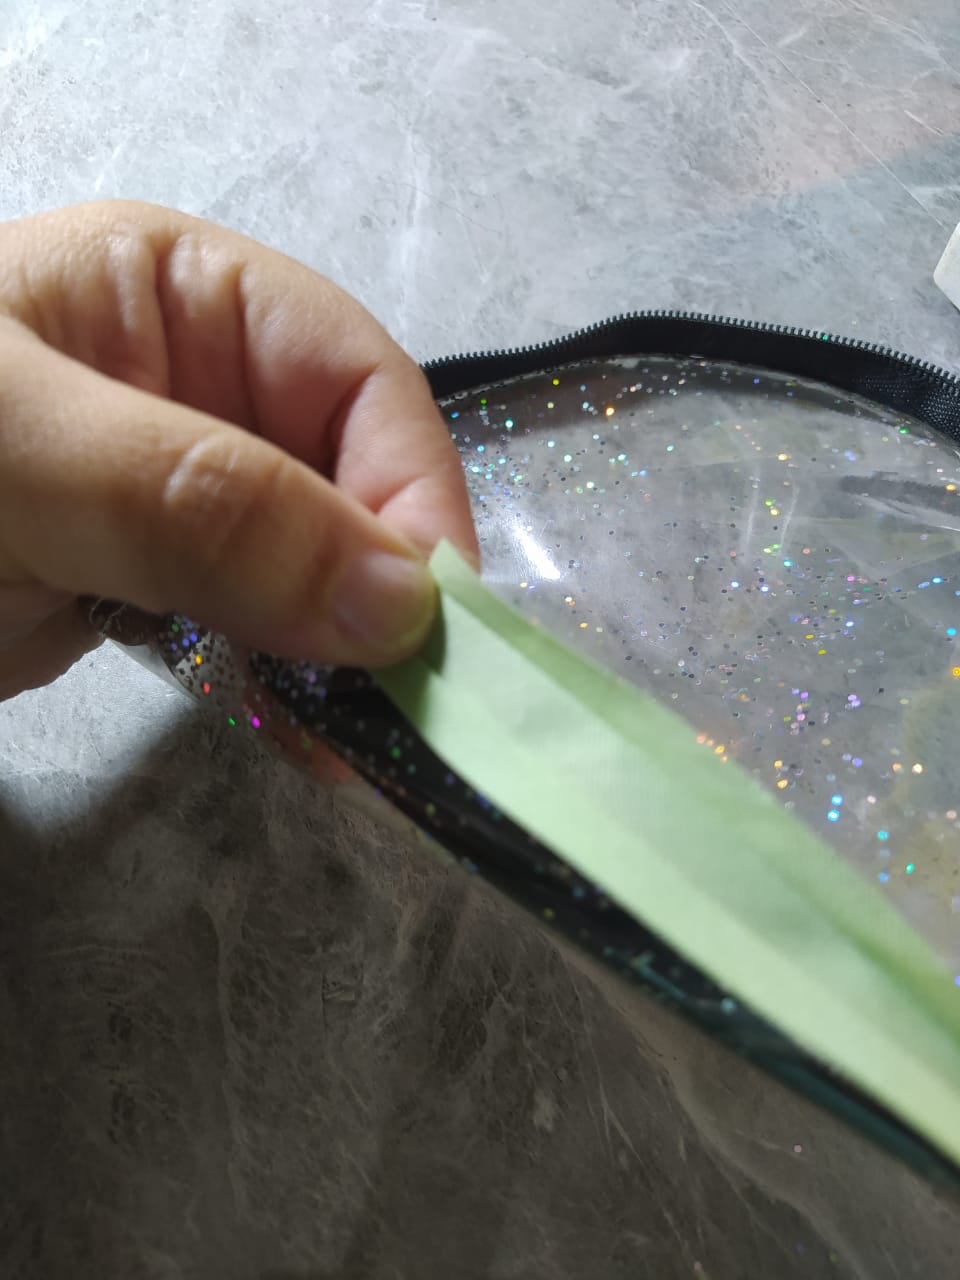
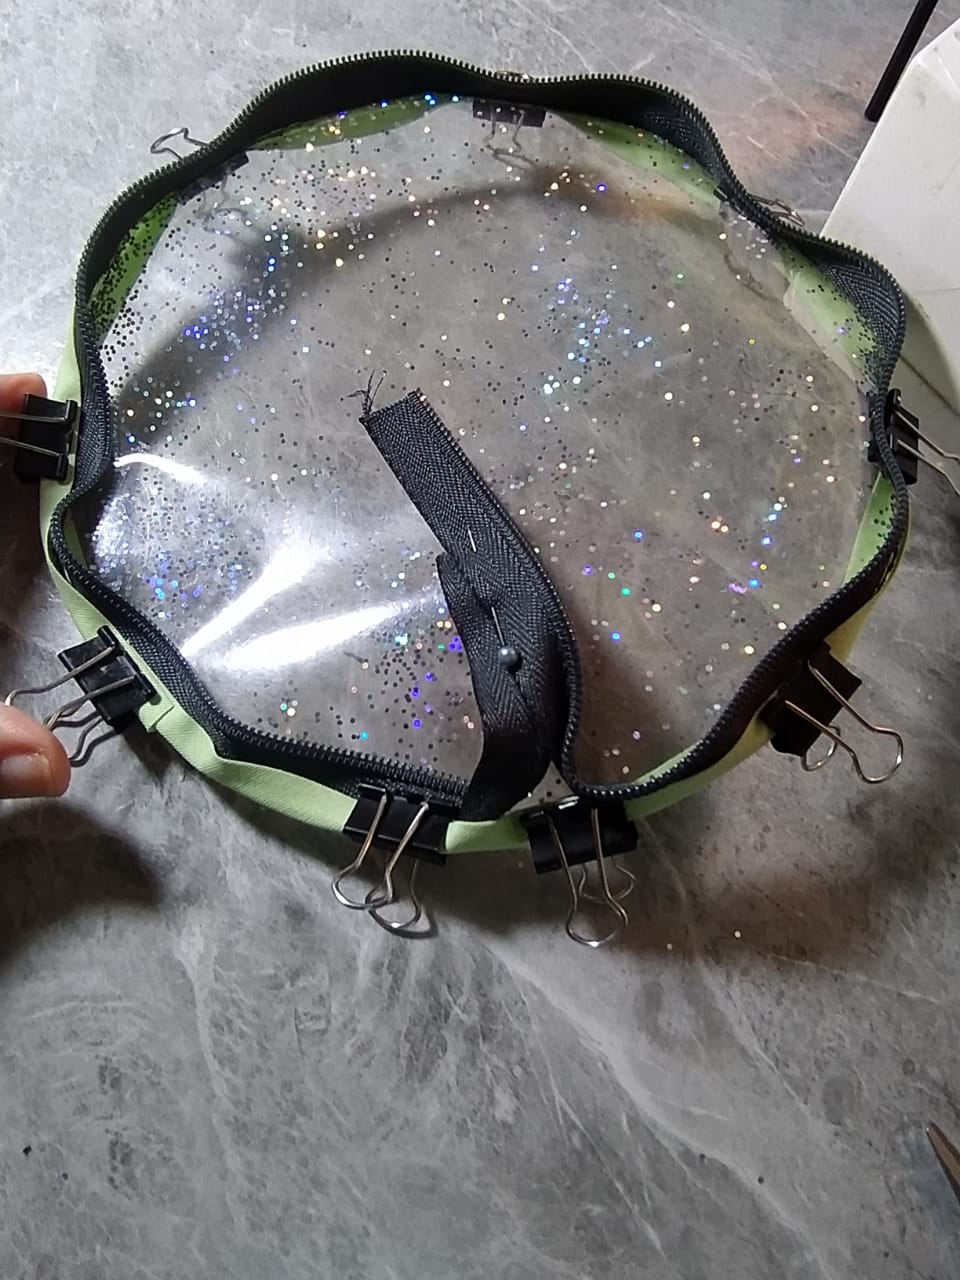
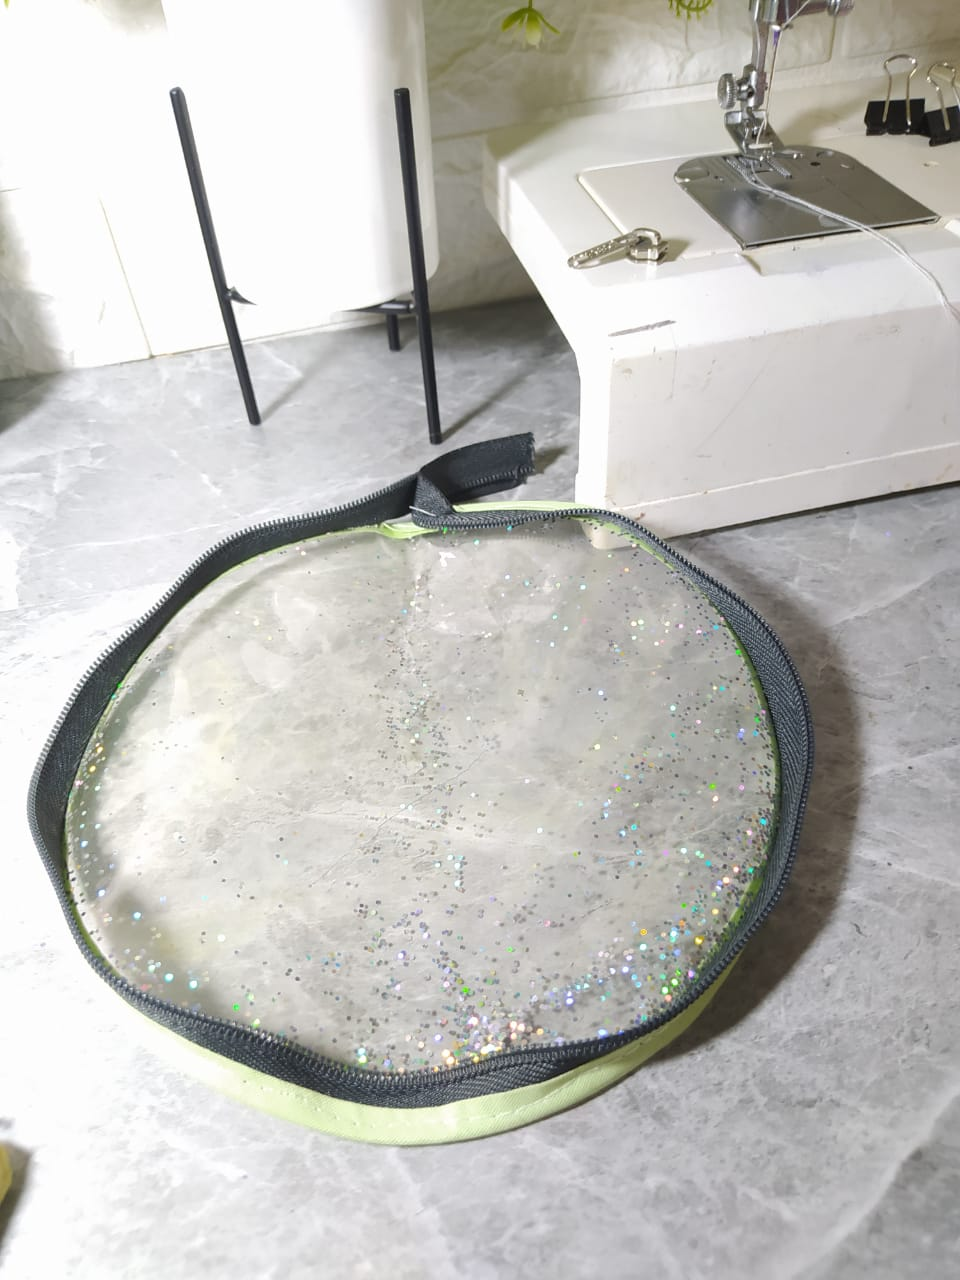
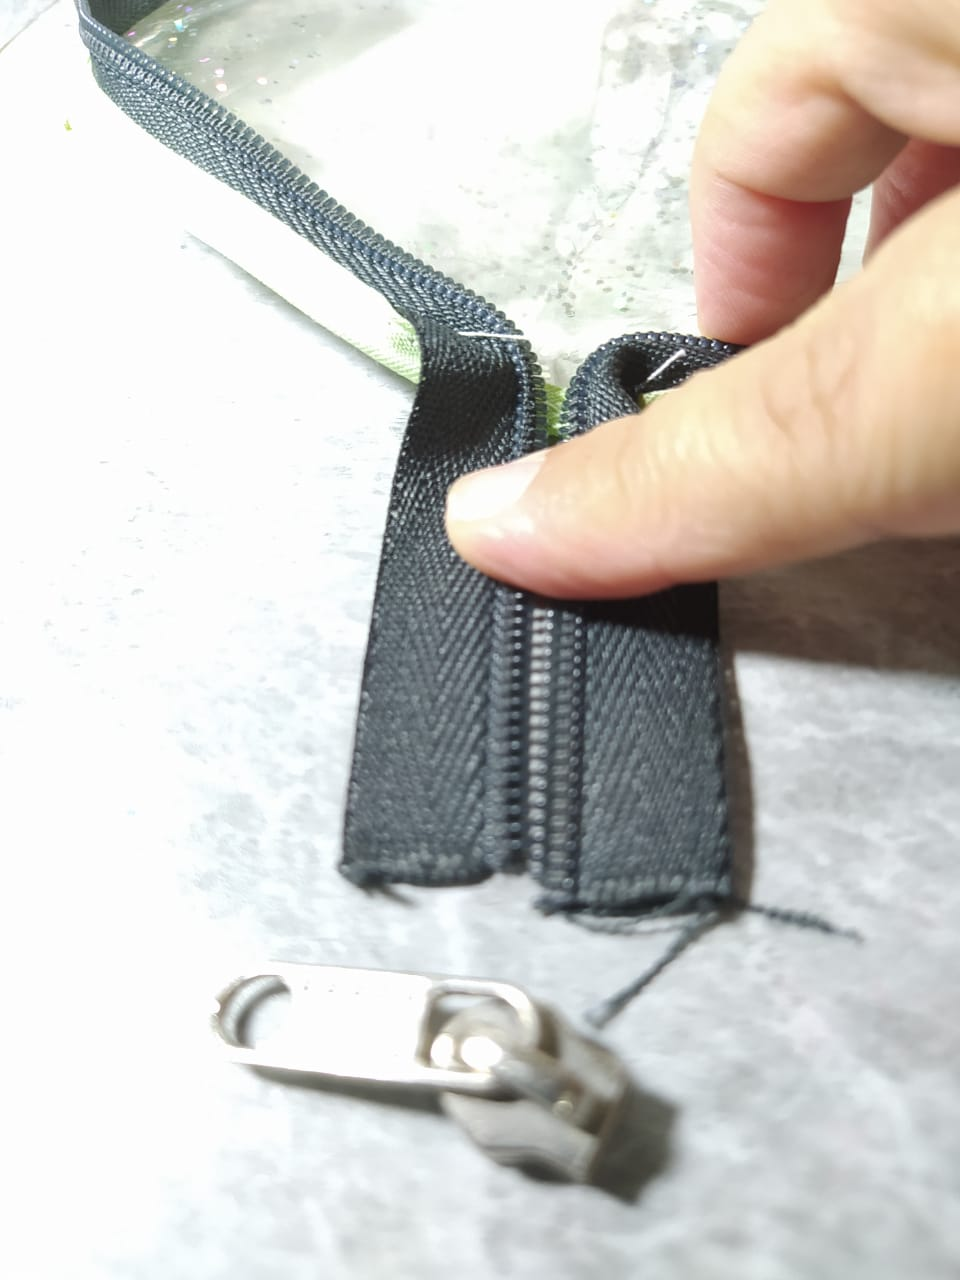
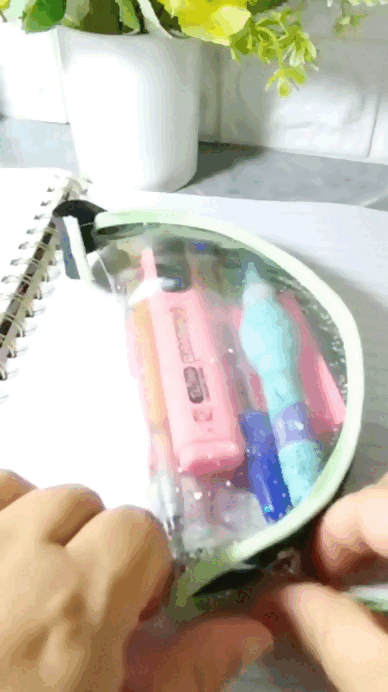
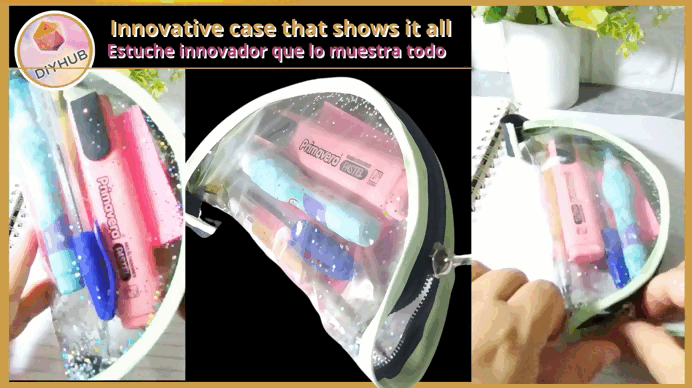
¿Saben por qué hago tantos bolsitos o estuches? Porque nunca son suficientes, siempre hay algo que guardar, organizar, alguna de mis hijas también lo quieren, o alguna amiga, si lo publico en mis estados igualmente siempre hay alguien que pregunta y quieren uno. Como ando muy entusiasmada con el plástico vinilo transparente, quise realizar un estuche o bolsito con este material, pero quise realizar un modelo muy, muy diferente a los que he hecho, y que fuese ideal para llevar lo estrictamente necesario como un bolígrafo azul y otro negro, un resaltador, un corrector y una libreta pequeña para notas. Así que realicé este diseño de estuche y hoy se los quiero mostrar... Bienvenidos.

Do you know why I make so many little purses or pencil cases? Because there are never enough, there's always something to store, organize, one of my daughters wants one too, or a friend. If I post it on my status, there's always someone who asks and wants one. Since I'm very excited about clear vinyl plastic, I wanted to make a little purse or pencil case with this material, but I wanted to make a very, very different model from the ones I've made, and one that would be ideal for carrying the bare essentials, like a blue pen and a black pen, a highlighter, a corrector, and a small notebook. So I made this pencil case design, and today I want to show it to you... Welcome.

Materiales.png

* Plástico vinilo transparente. * Cinta de tela al bies. * Cierre con deslizador. * Escarcha. * Máquina de coser, hilo y tijera. * Clips de presión.
* Clear vinyl plastic. * Fabric bias tape. * Slider closure. * Glitter. * Sewing machine, thread, and scissors. * Snap clips.

Tutorial.png

* Con un plato tracé la forma redonda, para sacar dos círculo de plástico vinilo transparente. * Las dos piezas de plástico las aseguré con clips de presión y pasé costura recta por todo el borde, dejando un espacio como de 5 cms aproximadamente libre de costura.

* Using a plate, I traced the round shape to cut out two circles of clear vinyl plastic. * I secured the two pieces of plastic with pressure clips and sewed straight around the entire edge, leaving a space of approximately 5 cm free from seam allowance.

image.png image.png image.png image.png

* El espacio que dejé libre de costura, tiene la función de introducir la escarcha y luego se puede distribuir por todo el espacio del círculo. * Se puede aplanar o unir bien las dos piezas, como sacándole el aire, y se cierra con costura recta el espacio libre. * Se dobla la pieza completa, y se hacen dos piquetes para marcar el centro en donde se marcan las mitades o centros.

* The space I left free from the seam serves to introduce the frosting, which can then be distributed throughout the circle. * You can flatten or join the two pieces tightly, as if removing the air, and close the free space with a straight seam. * Fold the entire piece, and make two notches to mark the center where the halves or centers are marked.

image.png image.png image.png image.png

* El cierre que voy a usar lo corté considerando que de la vuelta a la circunferencia y quede un poco más grande. * Separo el cierre porque voy a utilizar solo uno de los lados, el cual doblo para marcar la mitad de esa medida y hago un piquete para macar. * Uno un piquete del plástico con el piquete del cierre, colocando el frente del cierre hacia arriba.

* I cut the zipper I'm going to use, considering that it goes around the circumference and is slightly larger. * I separate the zipper because I'm only going to use one side. I fold it over to mark half of that measurement and make a notch to mark it. * I join a notch of plastic to the notch of the zipper, placing the front of the zipper facing up.

image.png image.png image.png image.png

* Ubico el cierre por todo el borde del círculo y aseguro con clips de presión. * ES MUY IMPORTANTE que el otro piquete del círculo marque 1 cm de cada lado y lo dejaré libre, es decir en ese espacio no voy a coser el cierre. * Paso costura recta, y como mencioné dejando el espacio libre de costura en el piquete, y ahí es donde van a coincidir los extremos del cierre con su excedente libre..

* I place the zipper around the entire edge of the circle and secure it with pressure clips. * It's VERY IMPORTANT that the other notch of the circle marks 1 cm on each side, and I'll leave it free; I won't sew the zipper in that space. * I sew straight stitches, leaving the space free from sewing on the notch, and that's where the ends of the zipper will meet with their excess.

image.png image.png image.png image.png

* Ahora todo el borde lo cubro con la cinta de tela al bies. Para esto paso los extremos del cierre hacia el centro para que el bies no los agarre. * Todo el borde tendrá la cinta al bies, y se terminará sobre si misma, con una costura muy limpia.

* Now I cover the entire edge with the bias tape. To do this, I bring the ends of the zipper toward the center so the bias tape doesn't catch them. * The entire edge will have bias tape, and it will end on itself, with a very clean seam.

image.png image.png image.png image.png

Ahora solo queda introducir el deslizador en el cierre, emparejar las puntas del cierre y dar un acabado limpio con un trozo de cinta al bien también, esto hará que tenga un acabao hermoso.

Now all that's left is to insert the slider into the clasp, align the clasp's prongs, and give the good a neat finish with a piece of tape, too; this will give it a beautiful finish.

image.png image.png image.png image.png

Aquí pueden ver en la primera imagen el acabado del cierre con la cinta al bies. El otro detalle que agregué es una tira para el deslizador del cierre, esta la hice cosiendo un trozo de la cinta de tela al bies. Luego, la introduzco en el cierre y paso una costura transversal para que no se salga.

Here you can see the finished closure with the bias tape in the first image. The other detail I added is a strip for the zipper slider. I made this by sewing a piece of bias tape. Then, I tuck it into the closure and sew a crosswise stitch to keep it in place.

image.png image.png image.png image.png

Listo, es un estuche o bolso muy fácil de hacer, solo es colocar el cierre y la cinta de tela al bien, y dar los detalles que queremos que tenga. Los dos círculos de plástico los hice porque quise hacer el efecto de escarchado, pero si se va a hacer con tela, el plástico transparente o un plástico que ya tenga el efecto deseado, pues en este caso solo se cortaría un círculo para el estuche, lo que lo haría aún más rápido de confeccionar.

There you have it, it's a very easy case or bag to make. Just attach the closure and fabric ribbon to the bag, and add the details you want. I made the two plastic circles because I wanted to create the frosted effect, but if you're going to make it with fabric, clear plastic, or plastic that already has the desired effect, in this case you'd only have to cut one circle for the case, which would make it even faster to make.

Gif nro 2 (1).gif

Cabe señalar que, el tamaño del estuche es totalmente personal, solo puedes hacer el círculo del tamaño que quieras y seguir el paso a paso que es muy rápido y fácil. Deseo que les haya gustado, yo quedé enamorada de este diseño por todo lo que mencioné ya, y por supuesto que quiero hacer más.

It's worth noting that the size of the case is completely customizable. You can simply make the circle the size you want and follow the step-by-step instructions, which are very quick and easy. I hope you liked it. I fell in love with this design for all the reasons I've already mentioned, and of course I want to make more.

Estuche 1 Gif.gif


I took the photos with my phone Redmi Note 8 Apps I used: Canva Pro for Cover, Collage and Banners

I used Deepl Translator

My social networks: Discord: YennysYaneth#0189 Twitter: @yennysferm Instagram: @yennysyaneth


Las fotos las tomé con mi teléfono Redmi Note 8
Apps que utilicé: Canva Pro para la Portada, Collage y Banners

Utilicé el Traductor Deepl

Mi redes sociales:
Discord: YennysYaneth#0189
Twitter: @yennysferm
Instagram: @yennysyaneth

#spanish #diy #handmade #sewing #bag #hazlotumisma #costurafacil #neoxian
Payout: 0.000 HBD
Votes: 465
More interactions (upvote, reblog, reply) coming soon.