La Caja más fácil y el Lazo más fácil, te enseño ( Esp-Eng)
@yennysferm71
· 2025-09-21 04:20
· Hive Diy
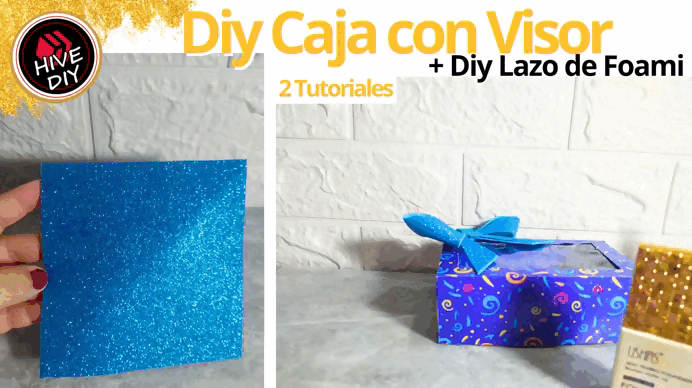
Una Caja con Visor, es más linda e interesante que una bolsa de regalo. Hoy estrené mi Block de Cartulinas que compre hace pocos días y que les comenté en mi post [Haul de Materiales de Manualidades](https://peakd.com/hive-130560/@yennysferm71/haul-de-materiales-de-manualidades-craft-supplies-haul), estaba pensando en una Caja de Regalo con una de las Cartulinas Estampadas con diseños que tiene ese block.
Claro, siempre me gusta darle un toque que se distinga de lo común, y que haga sentir a la persona a la que le regalo algo, que es muy especial. Hoy precisamente no tengo pensada esa persona especial u ocasión especial, pero es buenísimo que tengamos cajitas o bolsitas guardadas, listas para usarse eventualmente, eso nos ahora mucho tiempo.
Los invito a ver el Diy Caja con Visor y también el Diy del Lazo de Foami que hice para decorarla aún más... Bienvenidos.
A display box is prettier and more interesting than a gift bag. Today I debuted my Cardstock Block I bought a few days ago and which I told you about in my [Craft Supplies Haul](https://peakd.com/hive-130560/@yennysferm71/haul-de-materiales-de-manualidades-craft-supplies-haul) post. I was thinking about a Gift Box with one of the patterned cardstocks from that block.
Of course, I always like to add a touch that stands out from the ordinary and makes the person I'm giving something to feel very special. I don't have that special person or occasion in mind today, but it's great to have little boxes or bags stored away, ready to be used eventually; it saves us a lot of time.
I invite you to see the DIY Box with Viewfinder and also the DIY Foam Bow that I made to decorate it even more... Welcome.
- Cartulina Estampada con diseño y unicolor en el reverso.
- Foami Escarchado.
- Regla y punzón.
- Estecas plásticas varias.
- Silicón caliente.
- Acetato.
- Printed cardstock with a design and a solid color backing.
- Frosted foam.
- Ruler and punch.
- Various plastic stamps.
- Hot glue.
- Acetate.
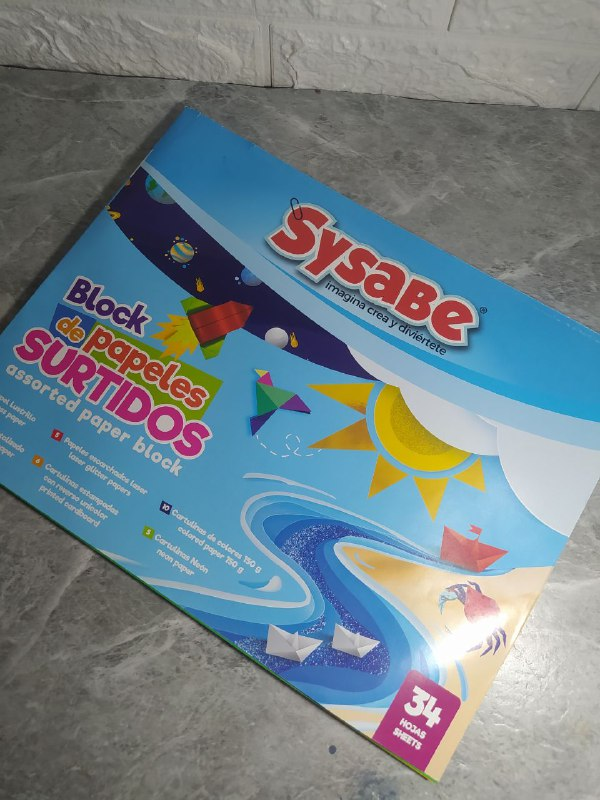
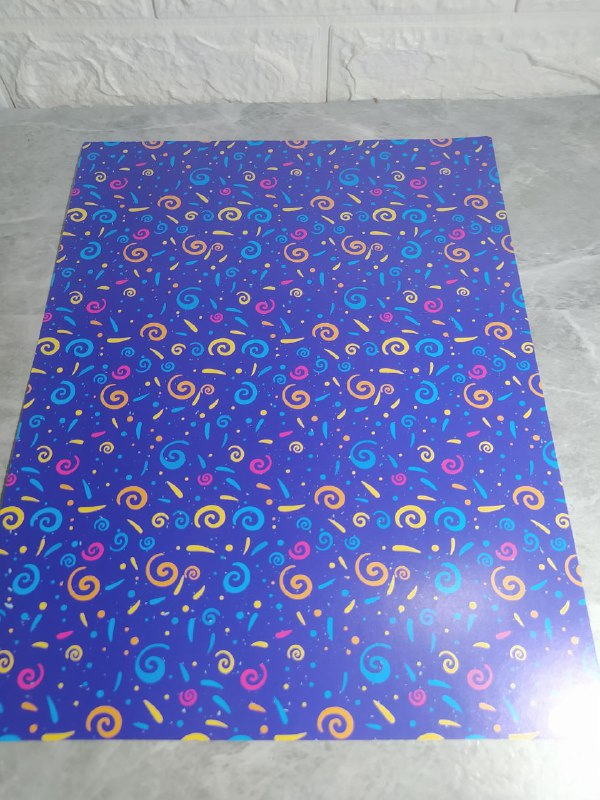
Como les mencioné estoy usando un block de la marca Sysabe, y una de sus Cartulinas Estampadas que por el reverso son de un color precioso que combina con el diseño principal, y es un tamaño de 32cms x 24,5cms.
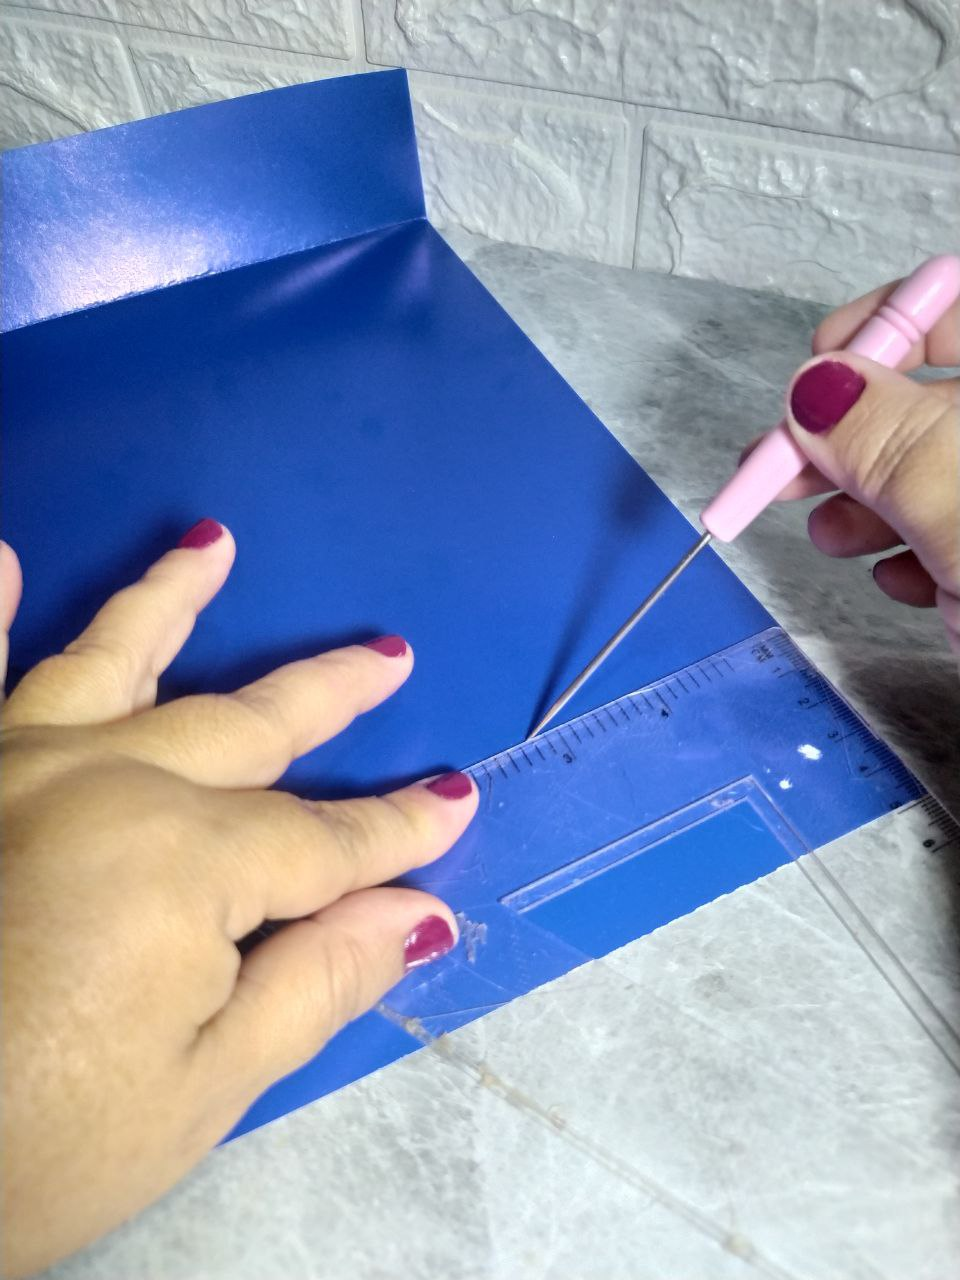
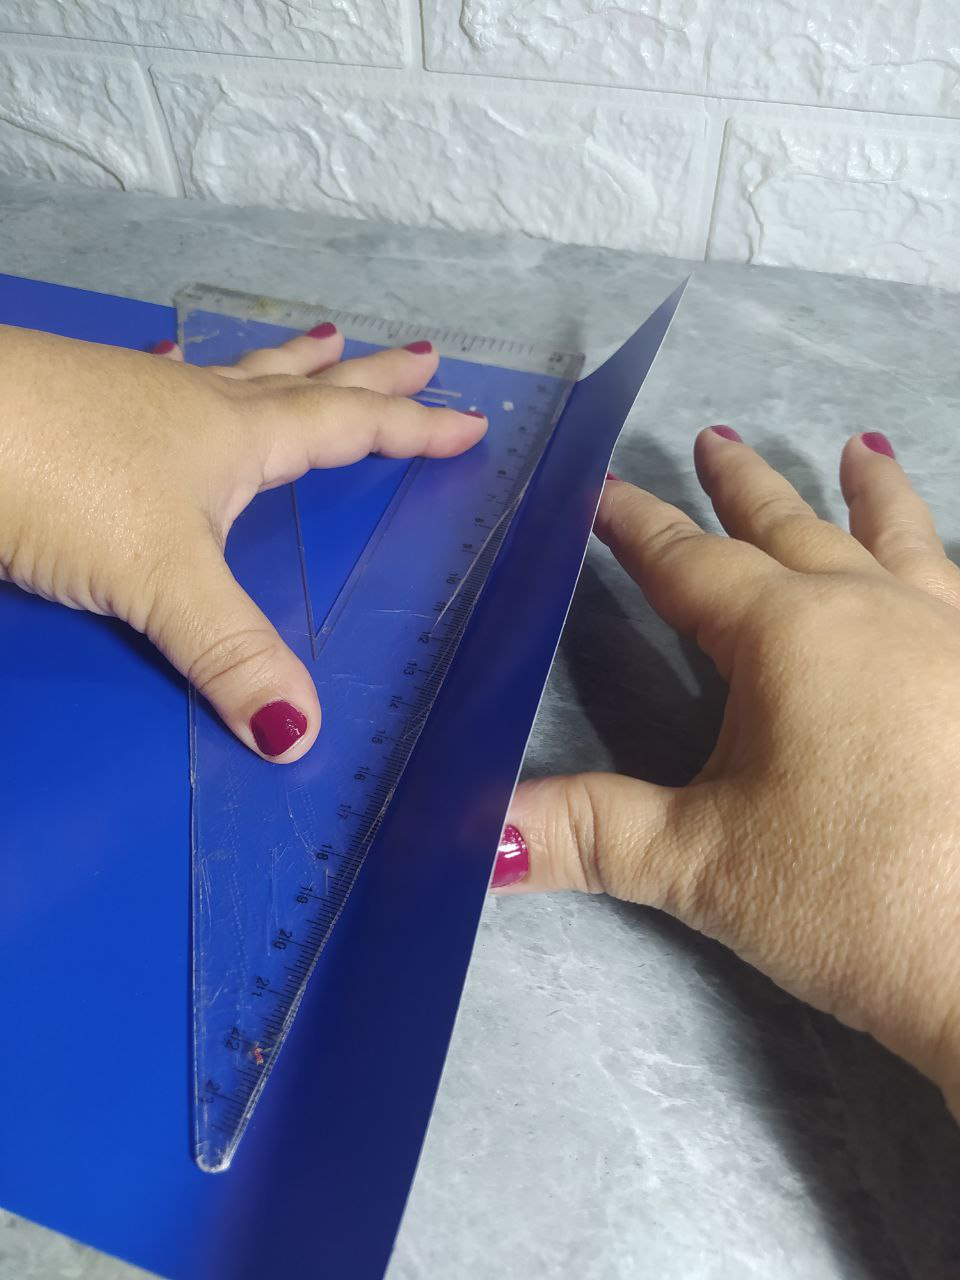
Para hacer la caja hay que hacer unos doblez de 5cms cada uno. Primero marco esa medida en cada extremo de la cartulina con un punzón, es mejor hacerlo con así porque no mancha el material y también ayuda a hacer el doblez, solo hay que tener cuidado de no ejercer tanta fuerza, y doblo con la ayuda de la misma regla.
As I mentioned, I'm using a Sysabe brand block and one of their patterned cardstocks. The back is a beautiful color that matches the main design. It's 32 cm x 24.5 cm in size.
To make the box, you need to make 5 cm folds each. First, I mark this measurement on each end of the cardstock with a hole punch. It's best to do this because it doesn't stain the material and also helps make the fold. Just be careful not to apply too much force. Then, I fold it with the help of the same ruler.
En los laterales se repite lo mismo con la misma medida. Al terminar deben estar todos los lados iguales.
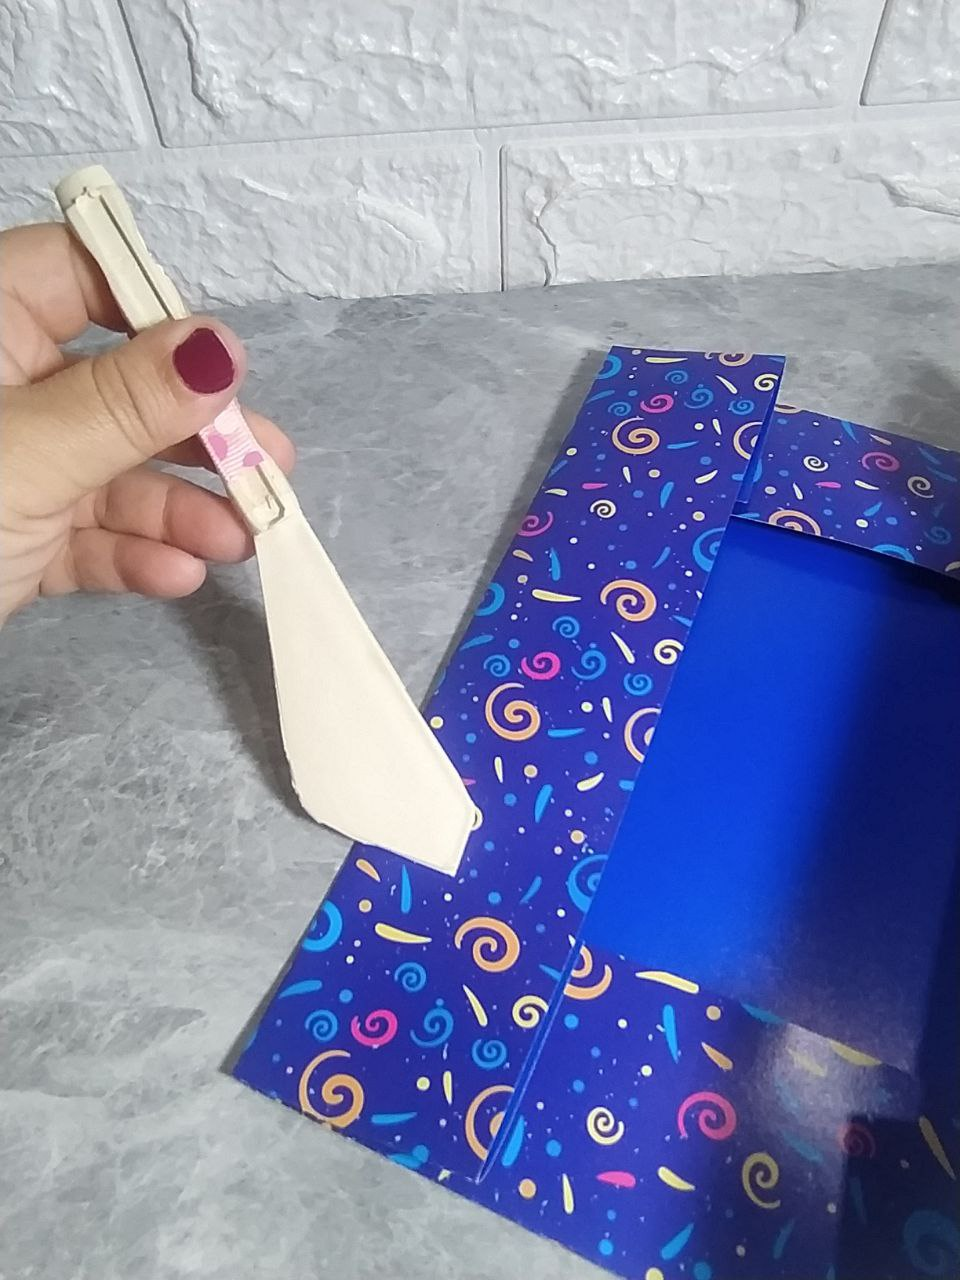
Es ideal ayudarse de alguna herramienta para perfilar bien los doblez que acabamos de realizar, para que queden prolijos. Yo utilicé esta herramienta, pero puede hacerse incluso con los ojos de la tijera.
Repeat the same process on the sides with the same measurement. When finished, all sides should be the same size.
It's ideal to use a tool to properly outline the folds you just made, so they look neat. I used this tool, but you can even do it with scissors.
Los siguientes doblez son muy fáciles. Llevo uno de los extremos hacia el otro extremo y los presento, en ese punto marco el doblez que se formó abajo. Perfilo bien ese doblez y ya puedo abrir nuevamente, solo es para marcar.
Doy vuelta y repito en el otro extremo, nuevamente presento y perfilo el doblez.
The next folds are very easy. I bring one end to the other and present them, at which point I mark the fold that formed below. I outline that fold well and can open it again; it's just to mark it.
I turn it over and repeat on the other end, presenting it again and outlining the fold.
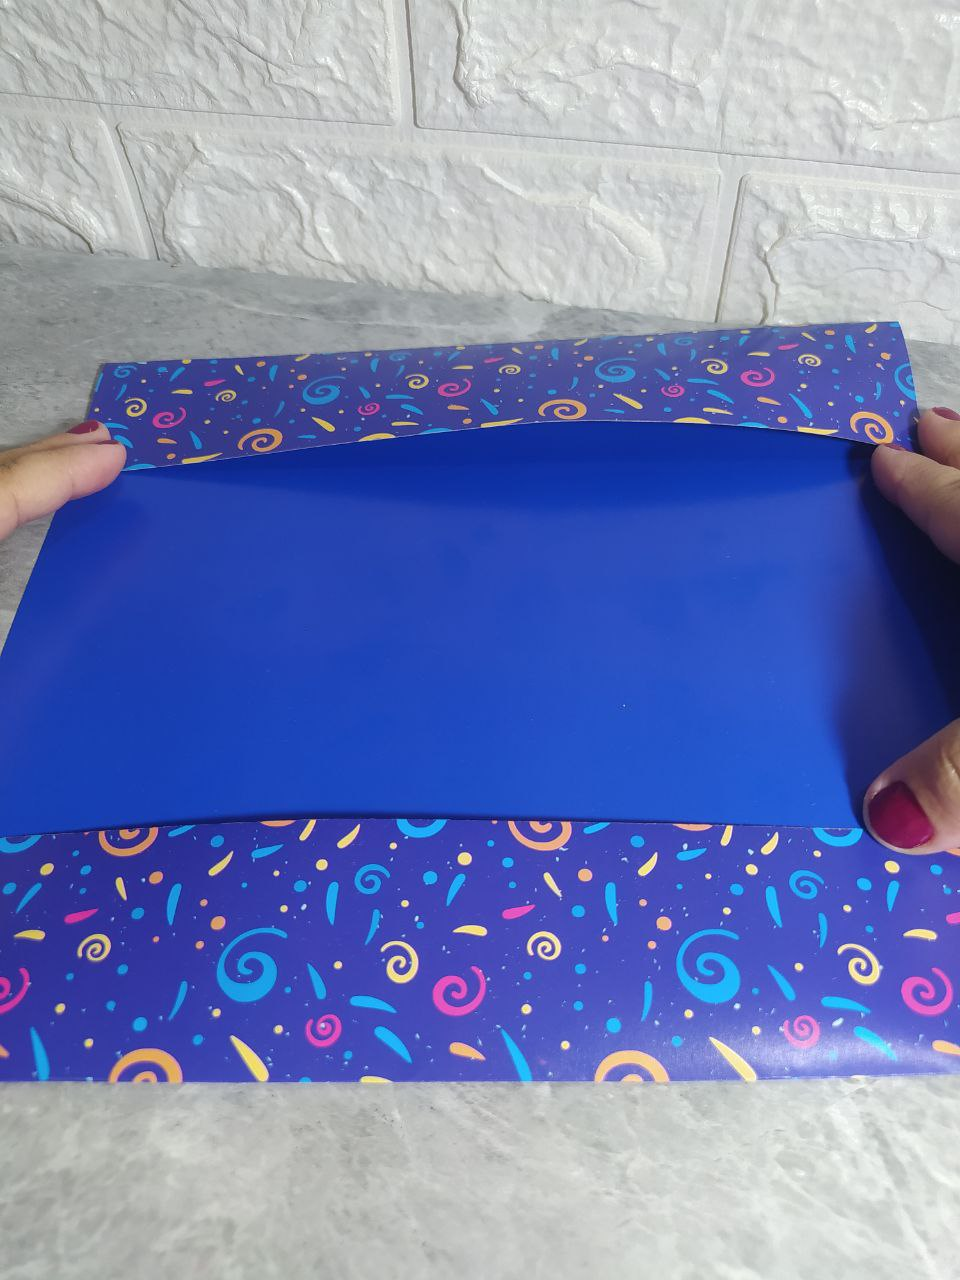
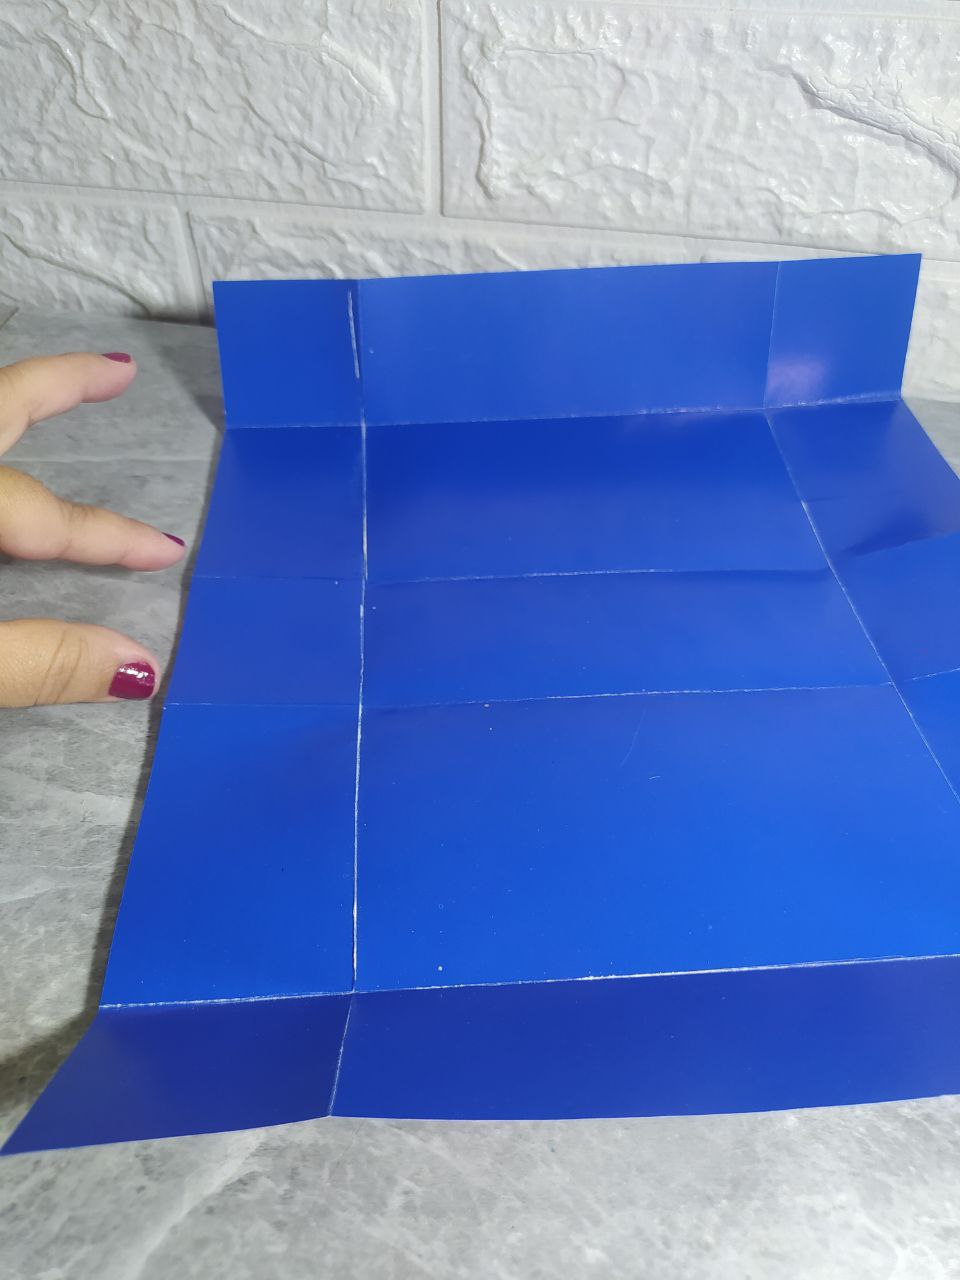
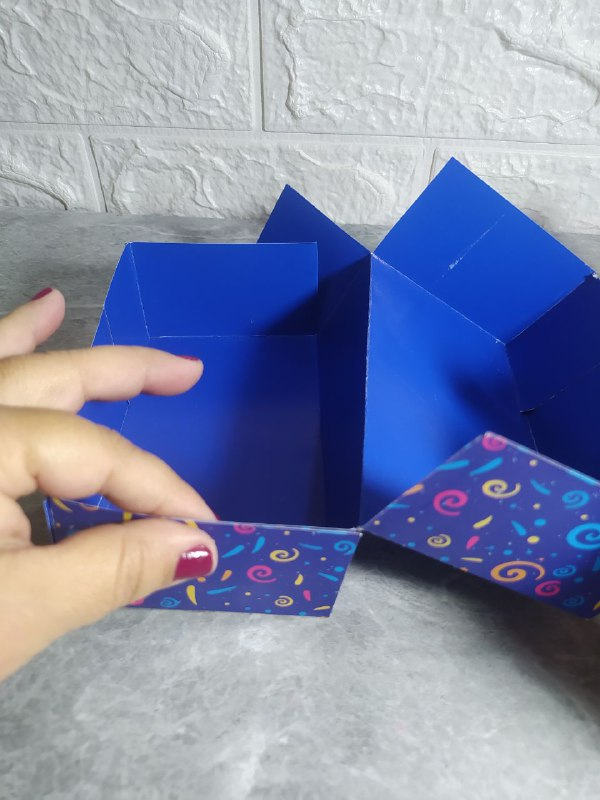
Abro toda la Cartulina y se va a apreciar todas las marcas de los doblez que hice.
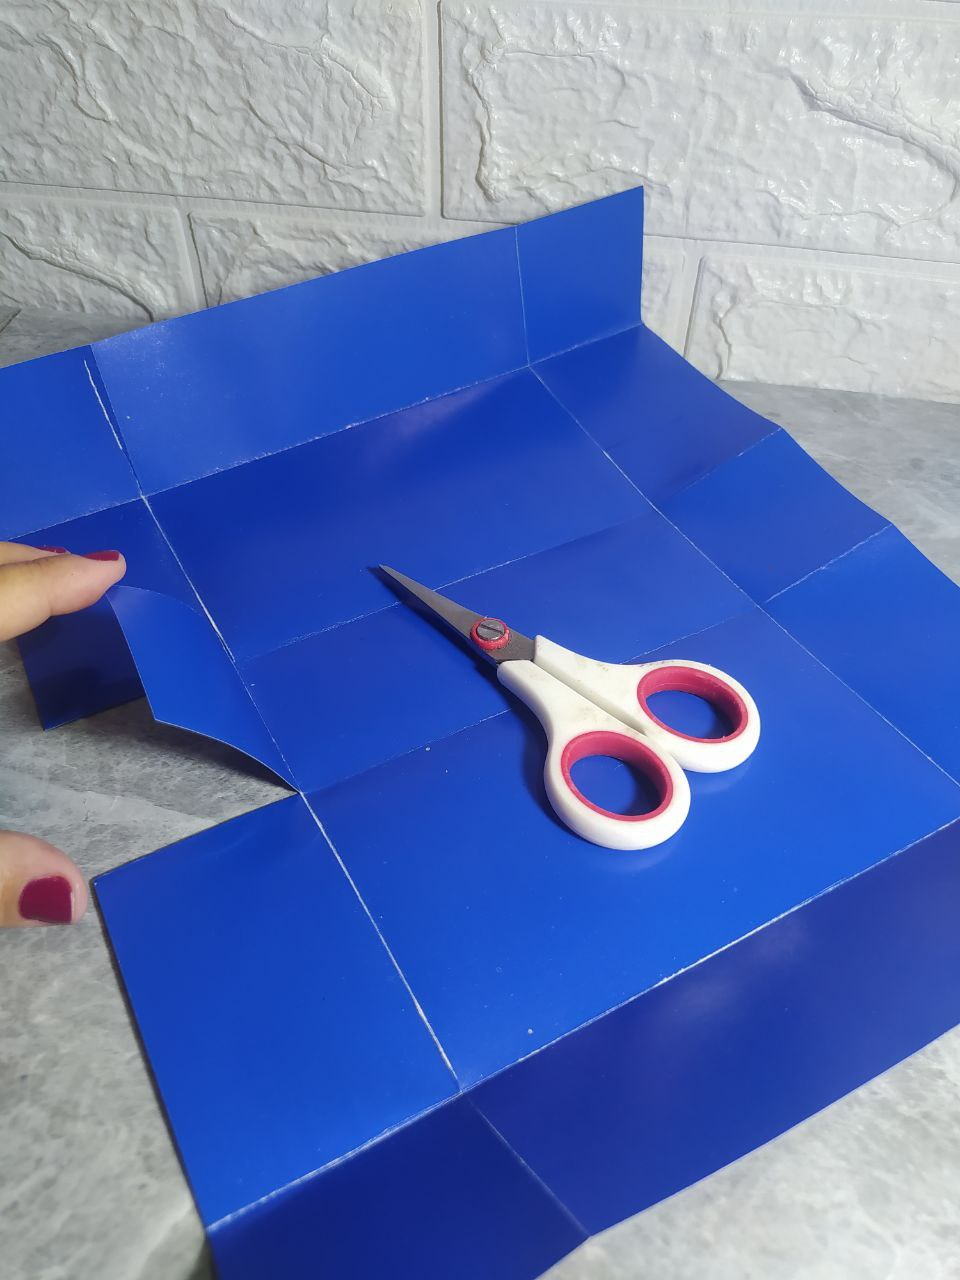
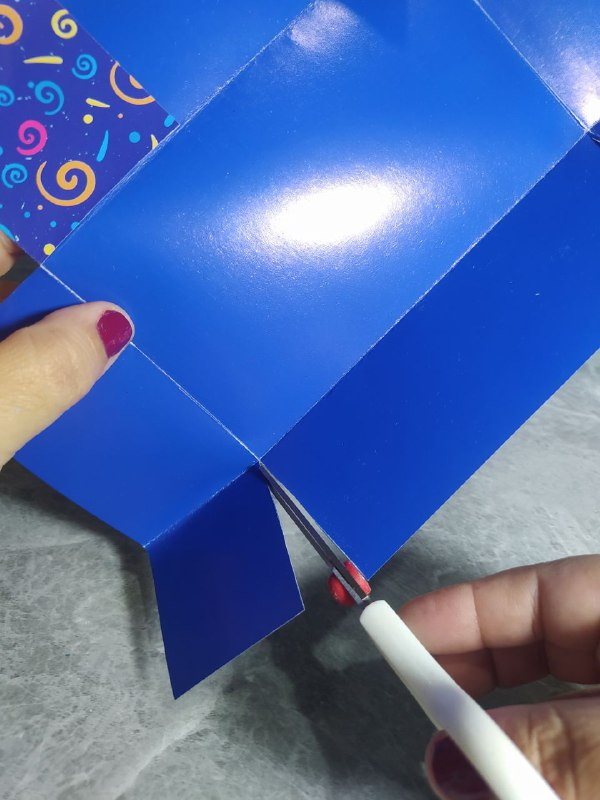
Claramente se ve unas líneas centrales y en ella, dos cuadrados pequeños a los lados, los cuales corto esas líneas a sus lados para que se puedan doblar los cuadrados hacia el centro. Tal como se ve.
En los extremos también se formaron unos cuadrado pequeños en los extremos, a los cuales les recorto solo una de las líneas, preferiblemente de las líneas que están en esos extremos.
I open the cardboard completely, and you can see all the fold marks I made.
You can clearly see some center lines, and on them, two small squares on the sides. I cut these lines on their sides so the squares can be folded toward the center. Just as you can see.
At the ends, I also made some small squares, from which I cut only one of the lines, preferably one of the lines on those ends.
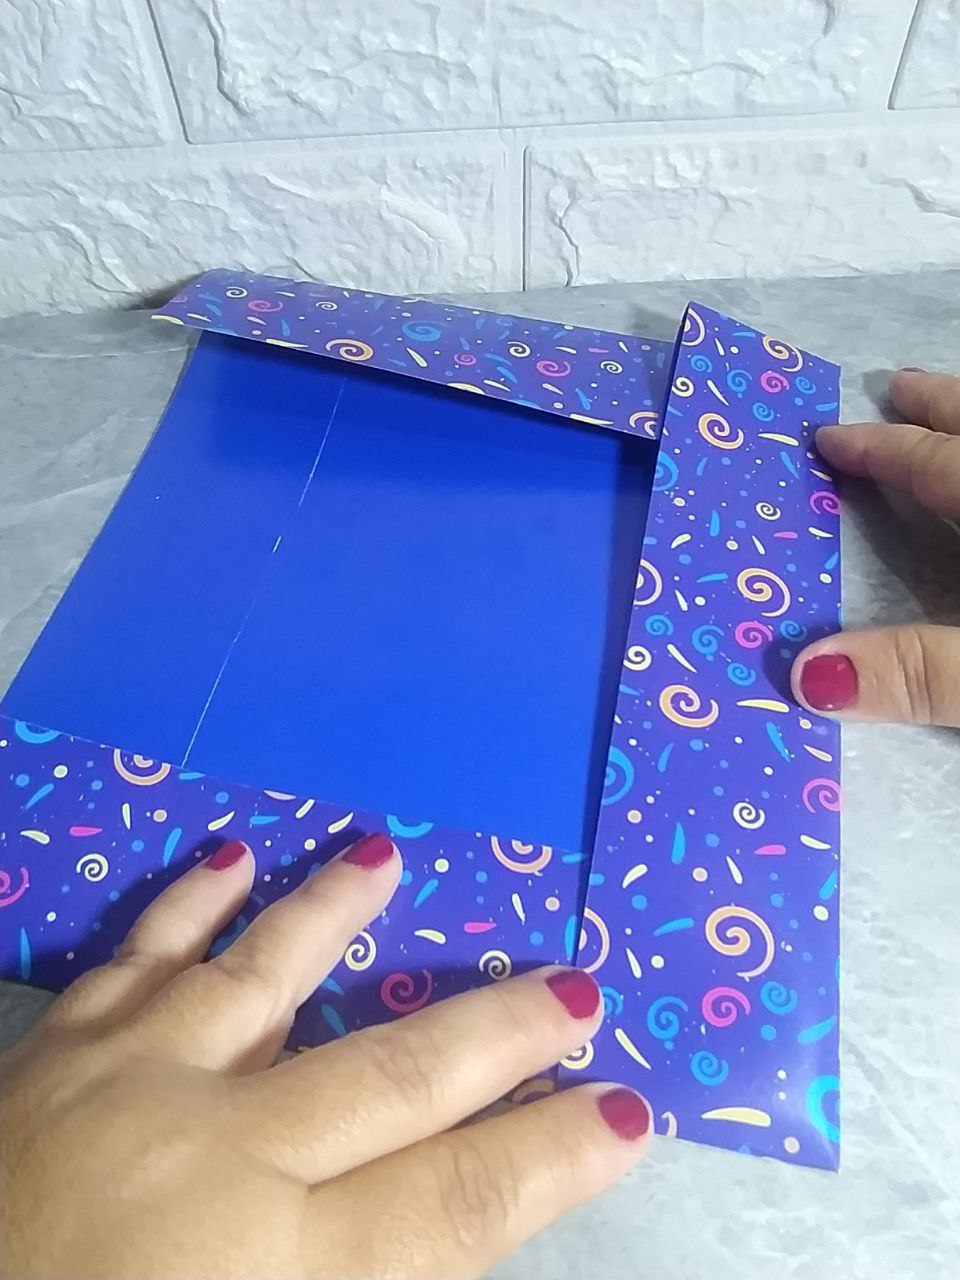
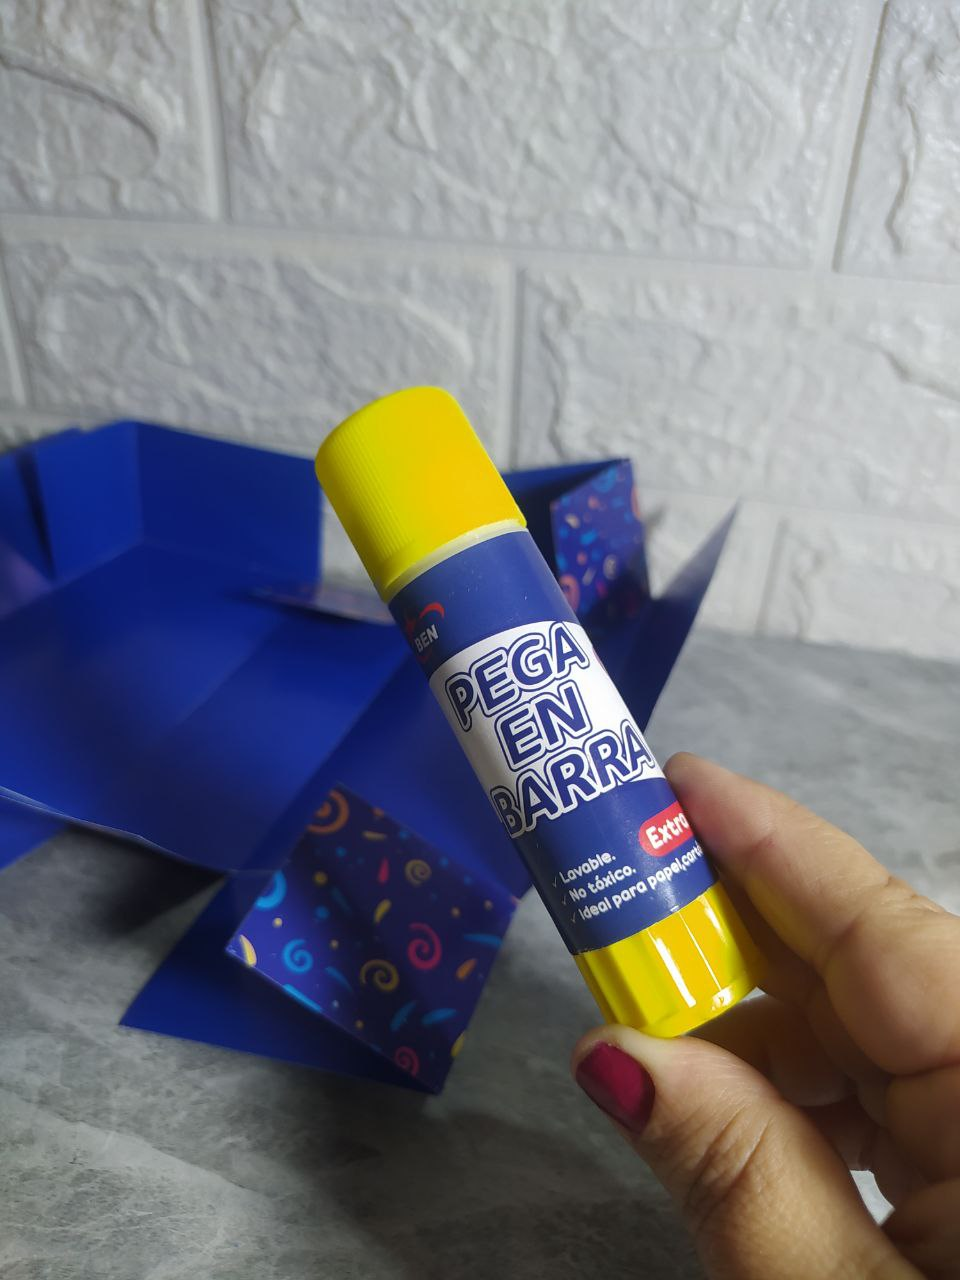
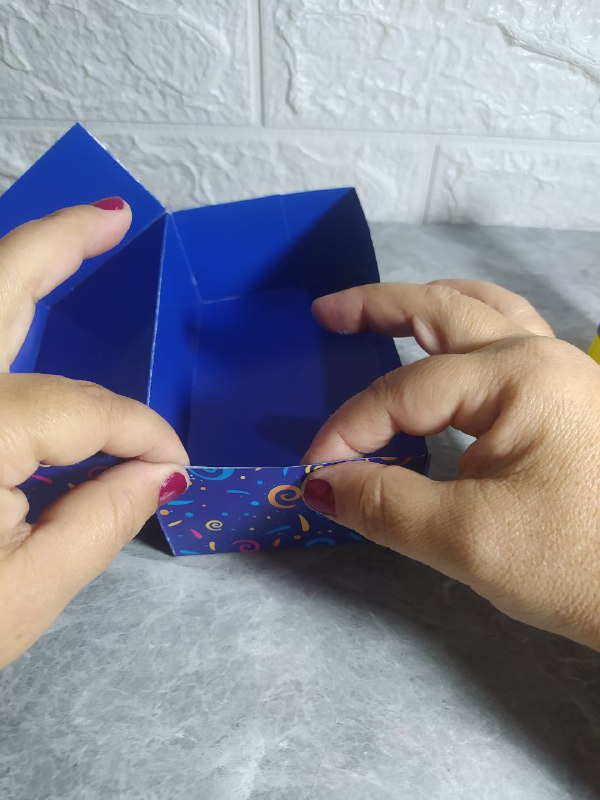
Dado que estoy trabajando con cartulina, la pega en barra puede funcionar muy bien para pegar. La coloco en los cuadrados o pestañas de los extremos y las pego hacia sus lados para formar ya la caja.
Repito en el otro extremo.
Since I'm working with cardstock, a glue stick works very well for gluing. I place it on the squares or tabs at the ends and glue them to the sides to form the box.
I repeat on the other end.
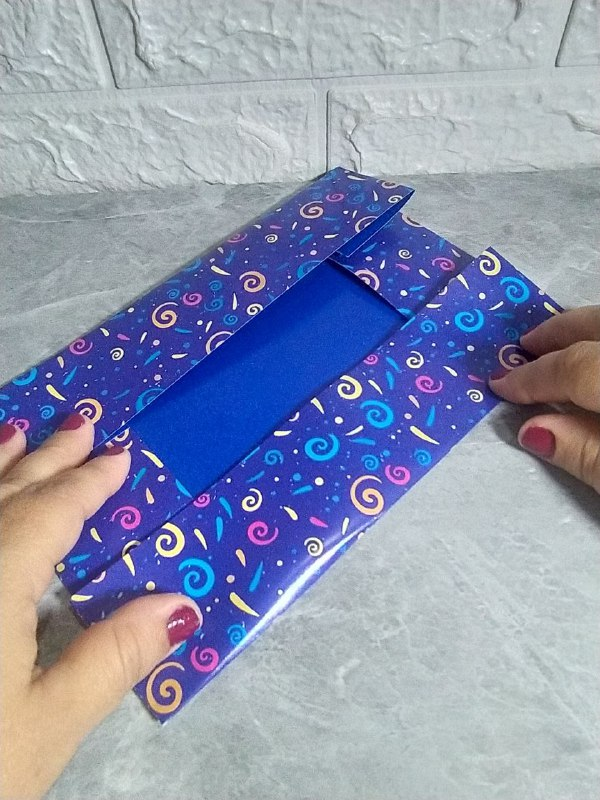
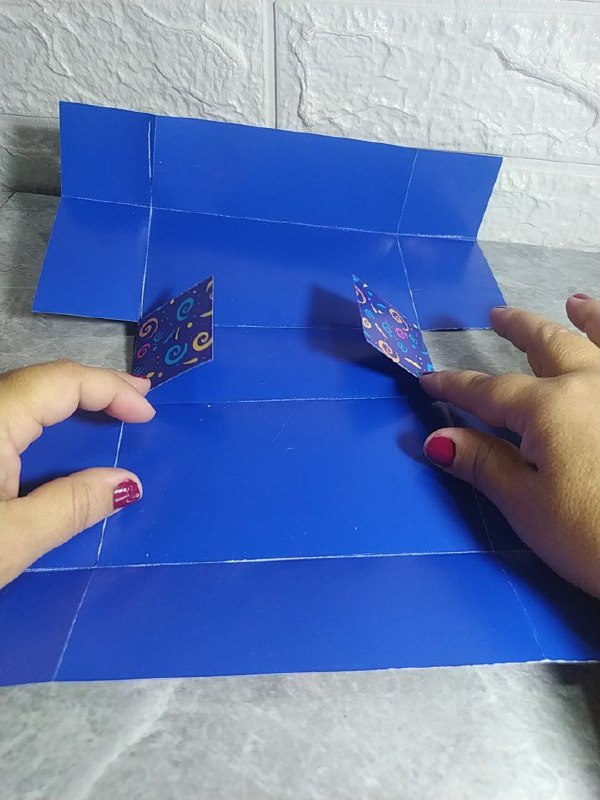
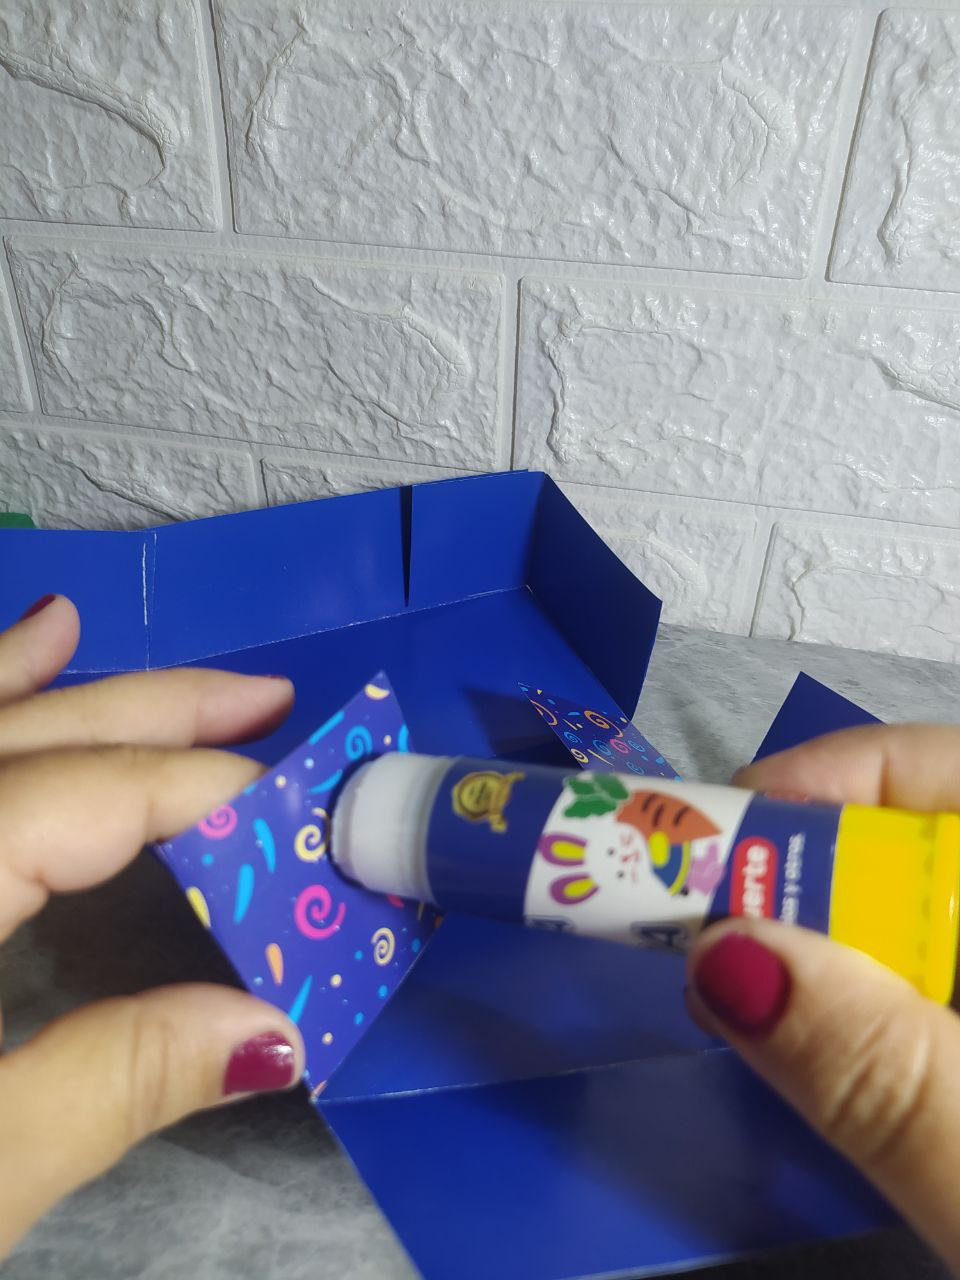
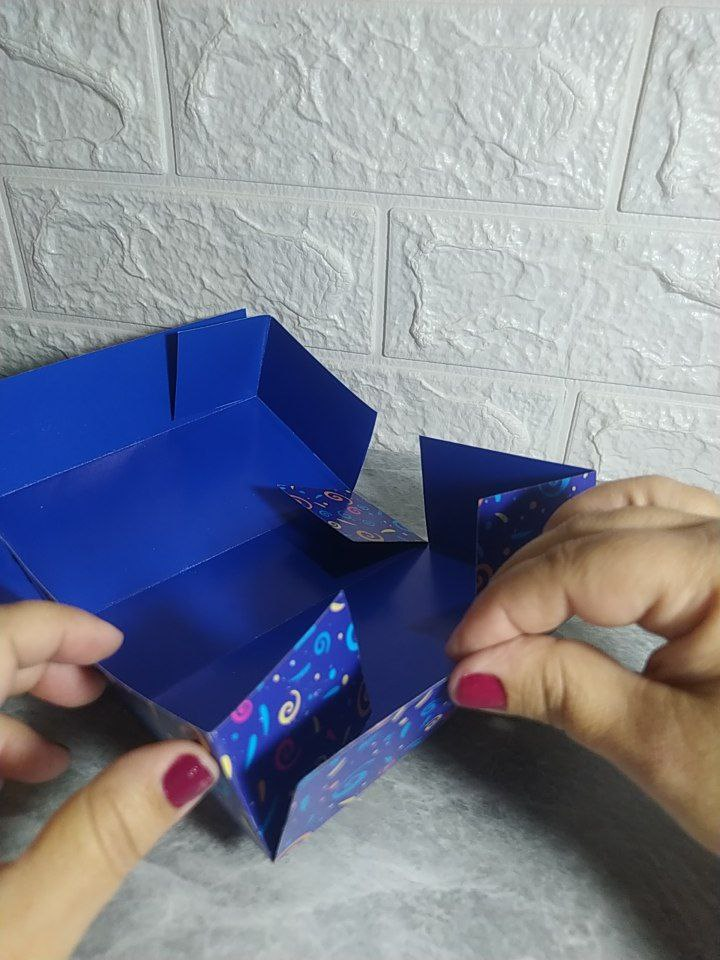
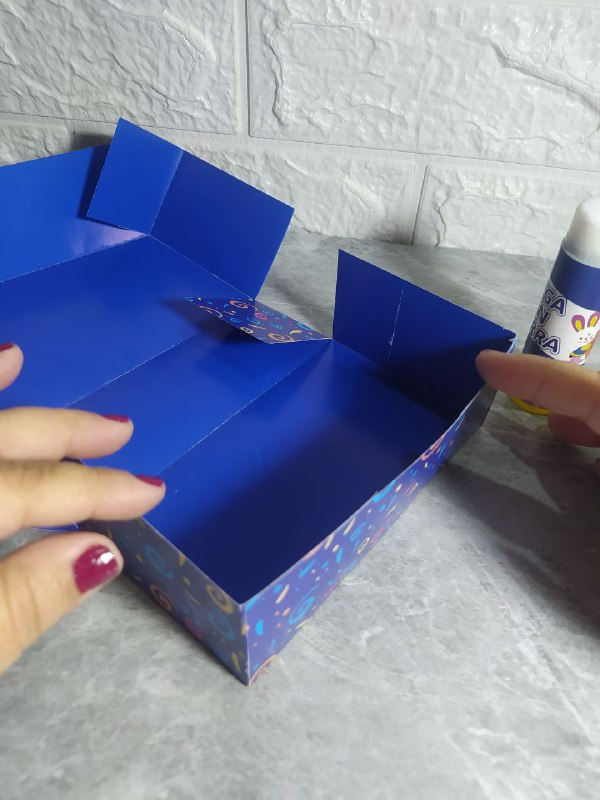
Ahora nos quedan solo los cuadrados o pestañas del centro, los cuales pego en uno de los lados de la caja que ya se aprecia perfectamente. Repito en la otra pestaña.
Now we only have the squares or tabs in the center left, which I glue to one of the sides of the box, which is now clearly visible. I repeat on the other tab.
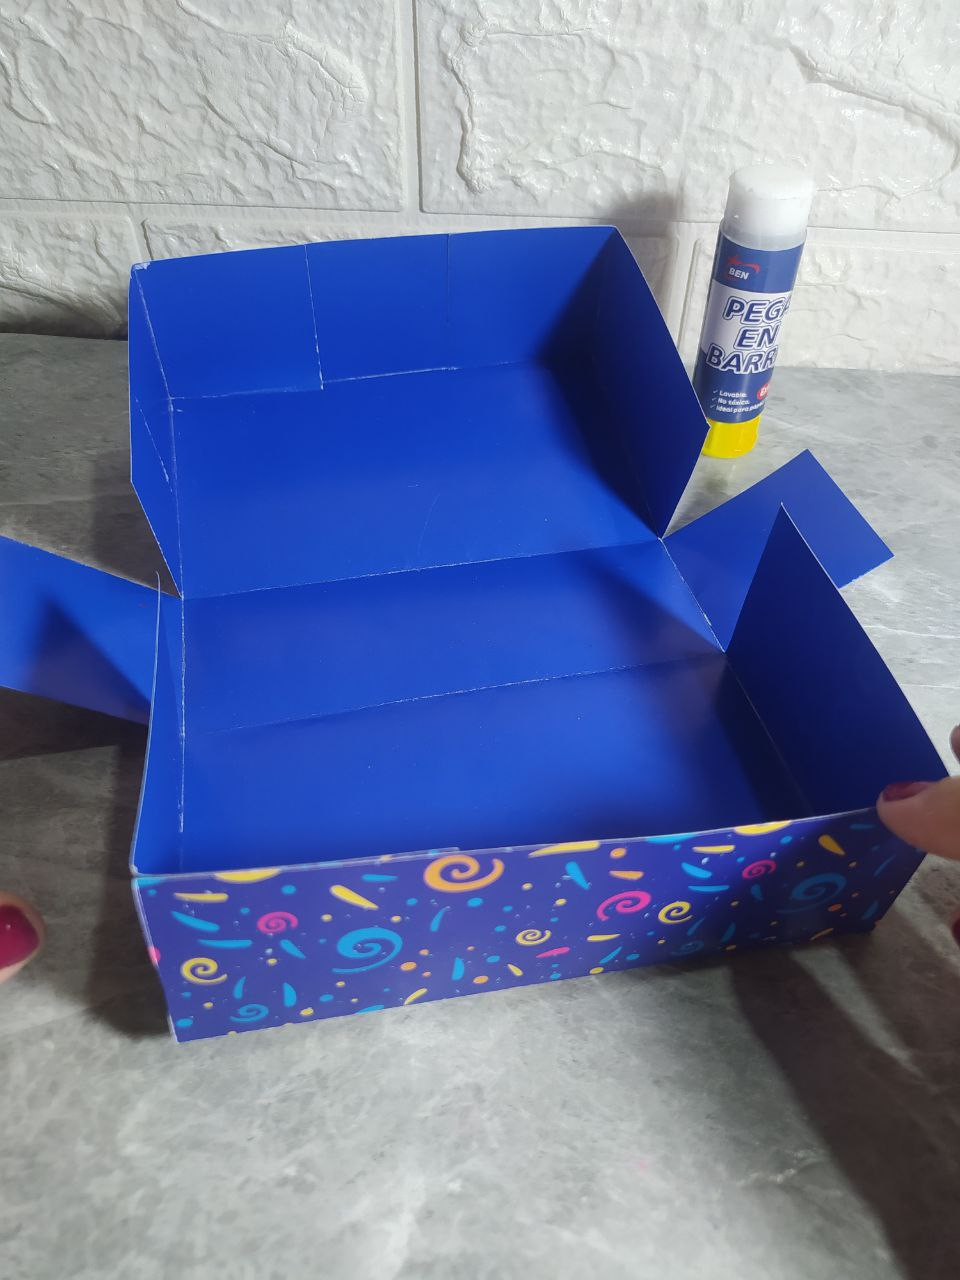
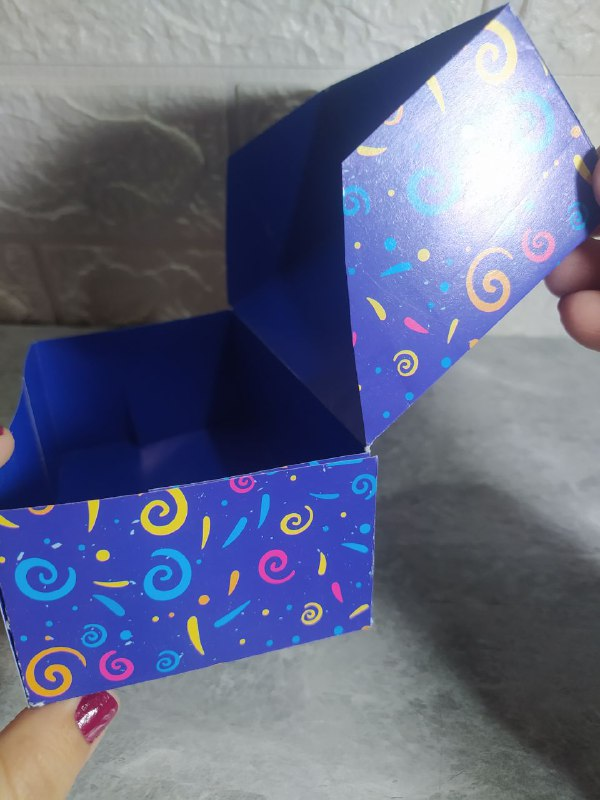
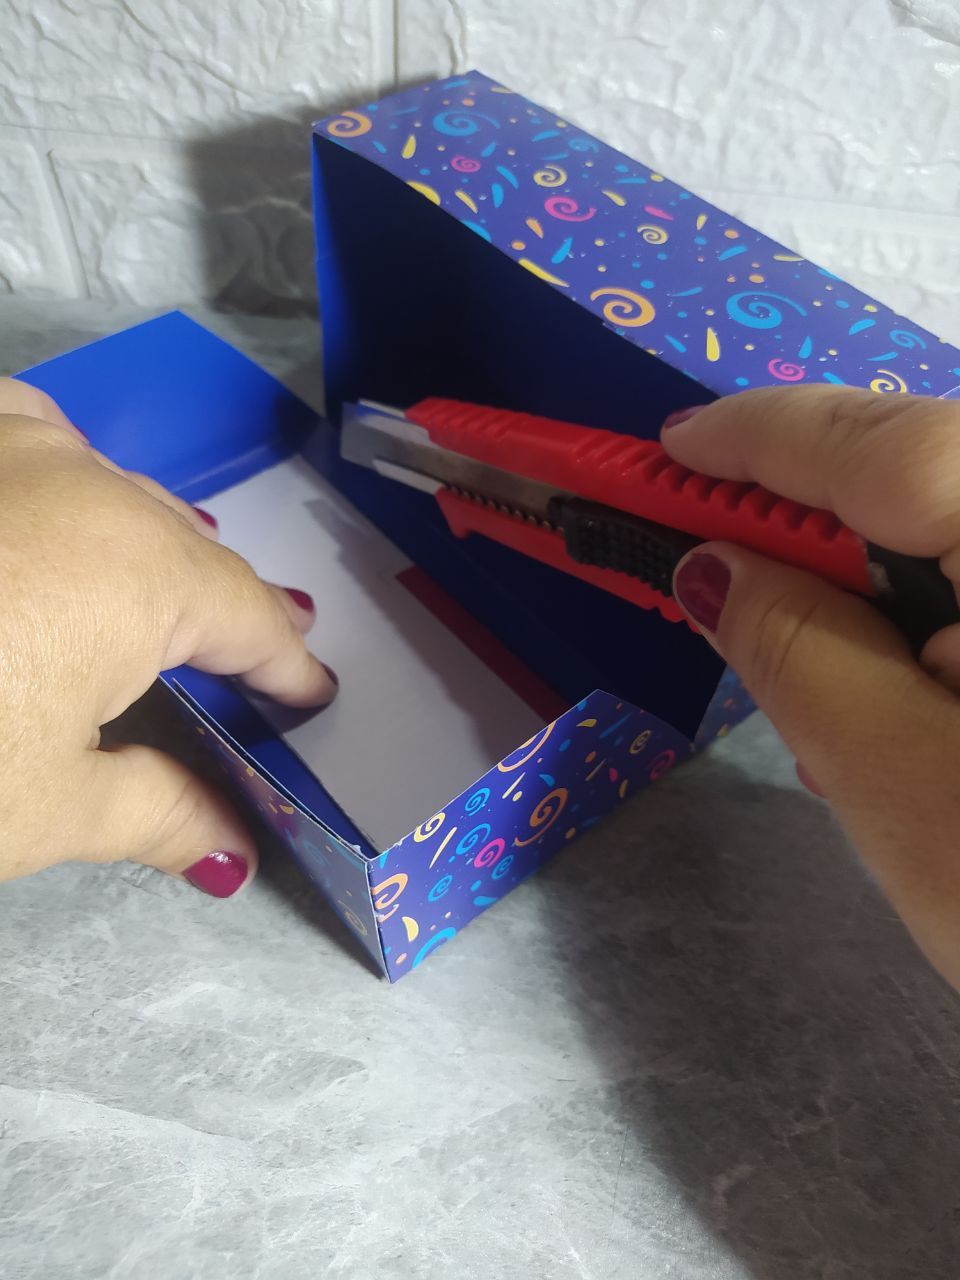
La caja está formada, en la parte que quedará como la tapa de la caja, realicé unos cortes en diagonal, para darle más interés al diseño.
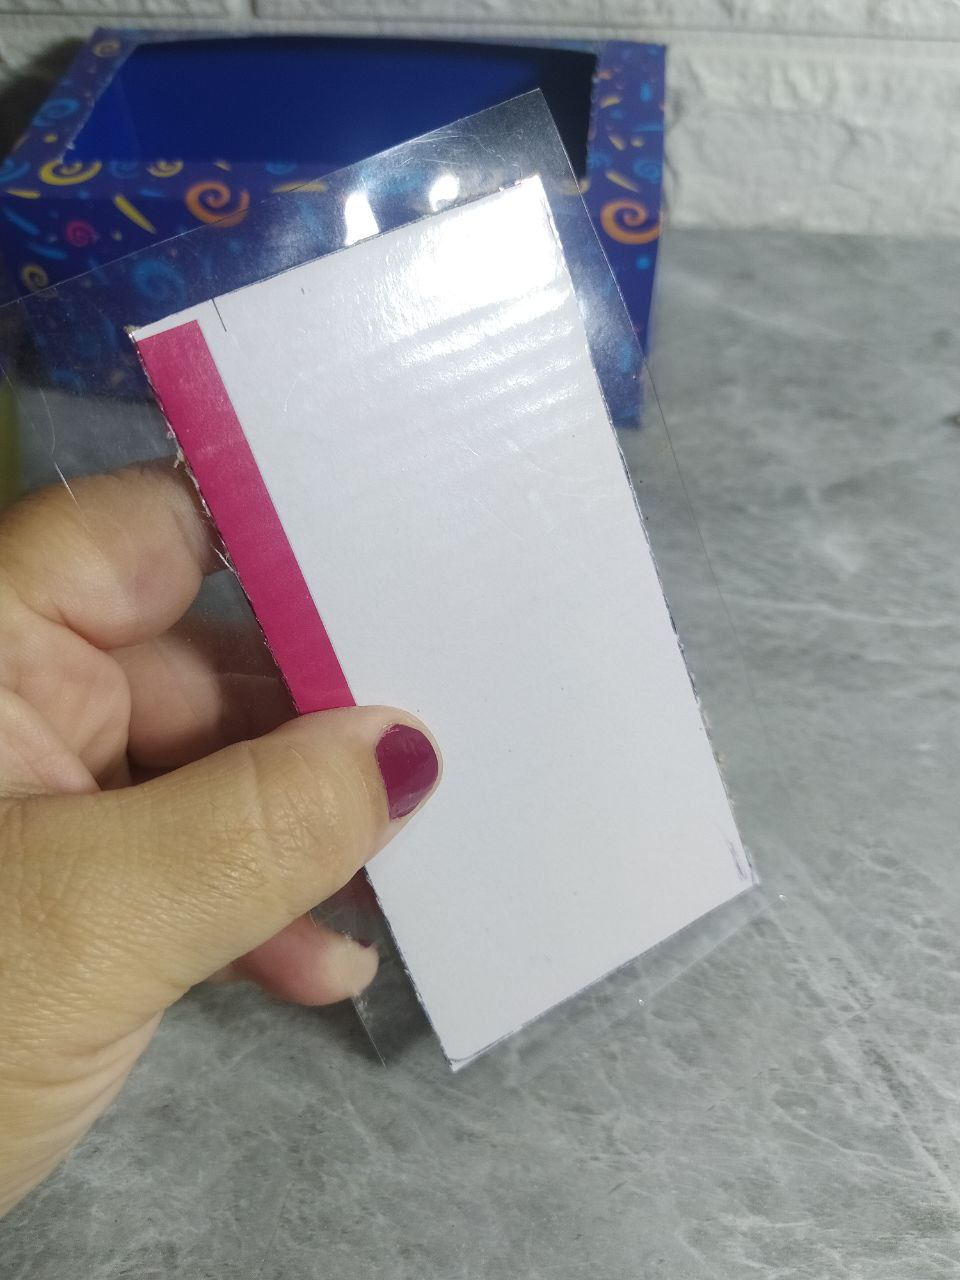
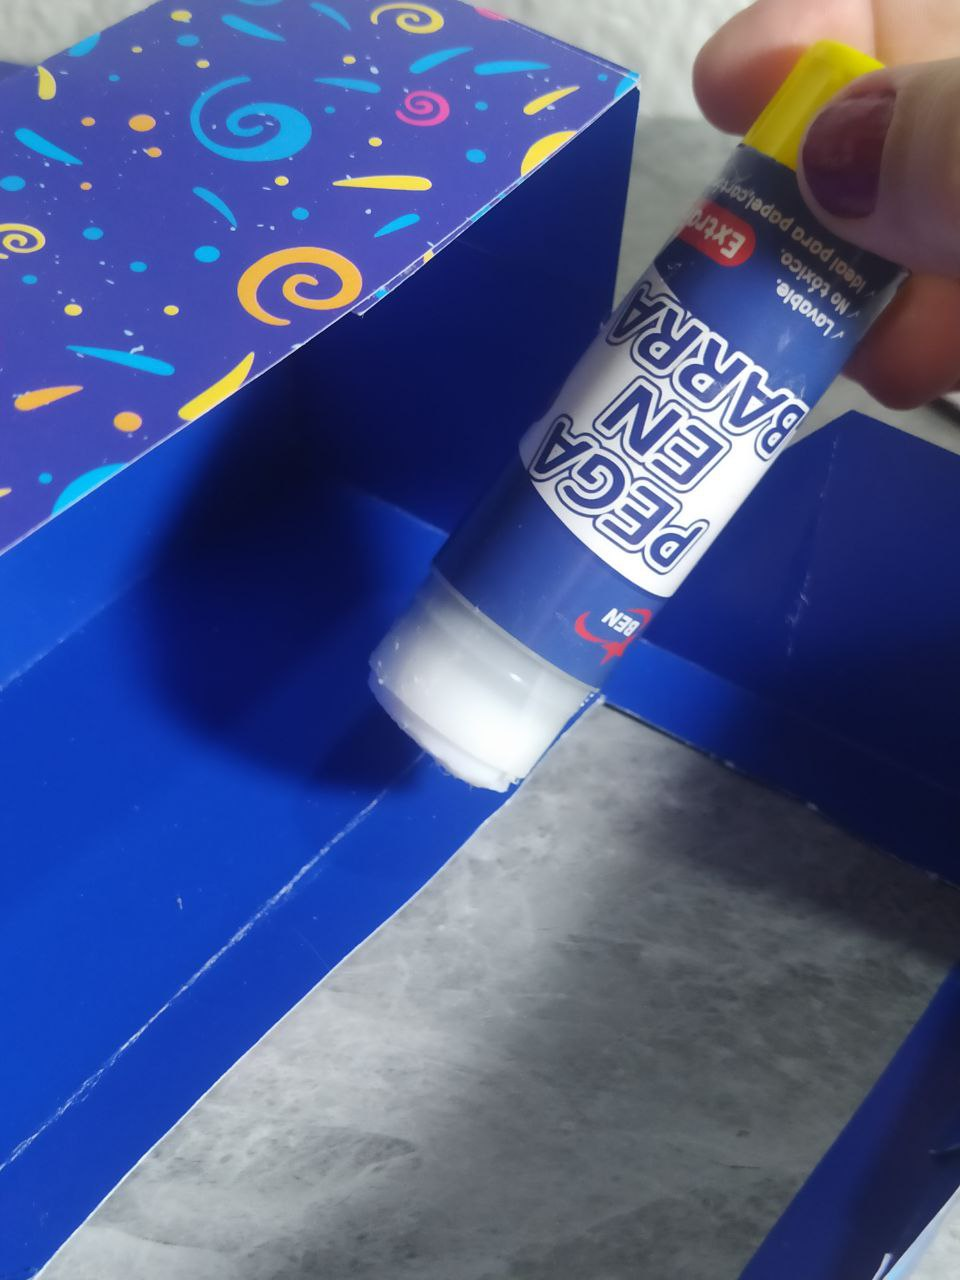
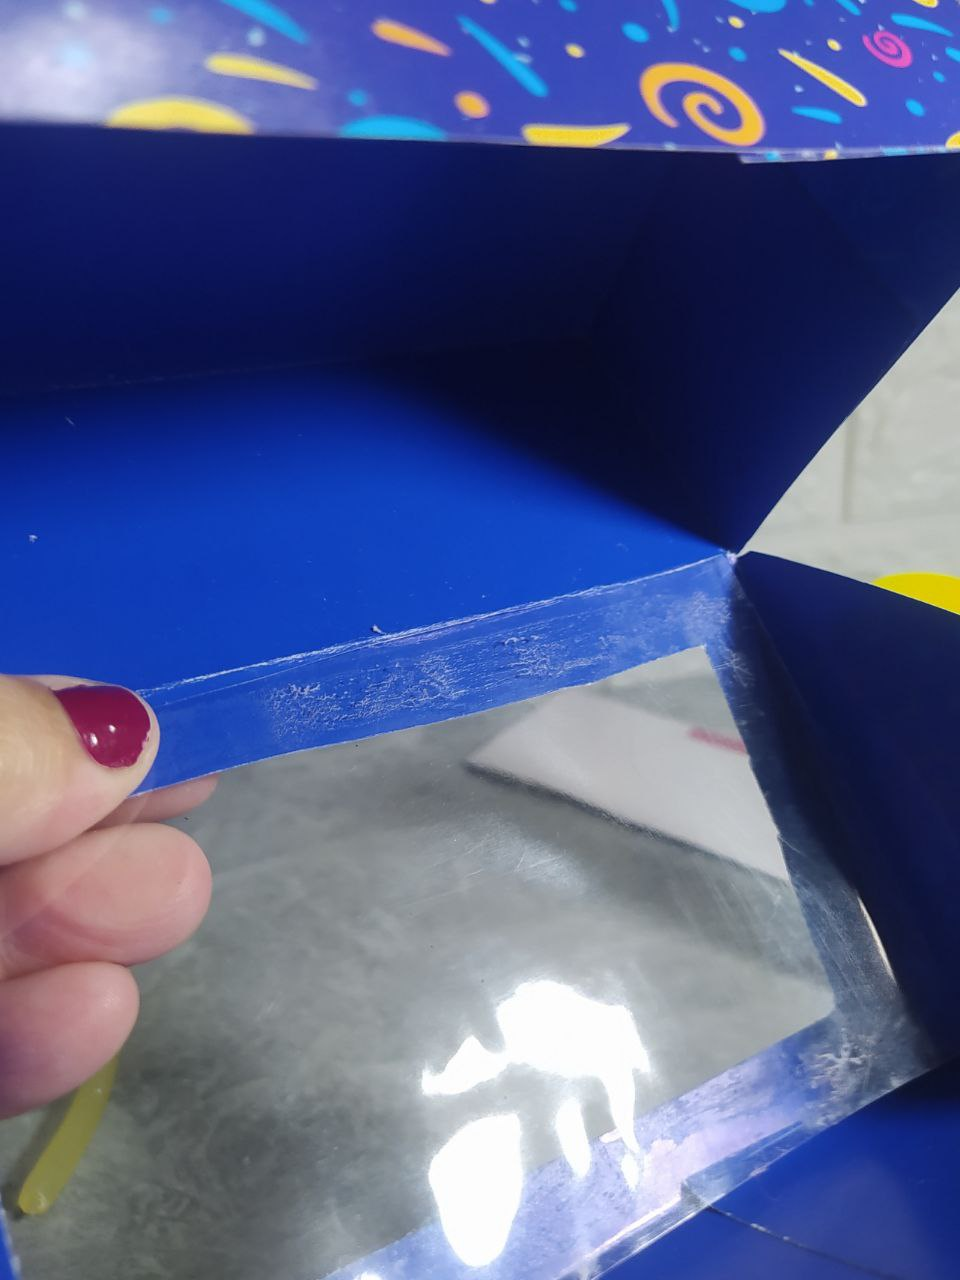
Y precisamente para darle más interés al diseño en este momento decidí realizar un visor, pero si es tu gusto se puede dejar sin él. Pero me pareció espectacular hacerle un visor, así que corté una plantilla con el tamaño que pensé sería ideal para él, corté esa forma en la tapa con la ayuda de un cúter. Corté un trozo de acetato un poco más grande que la plantilla y lo pegué por el lado de adentro.
The box is now formed. In the part that will become the box lid, I made some diagonal cuts to give the design more interest.
And precisely to give the design more interest, I decided to make a visor, but you can leave it without it if you like. However, I thought it would be spectacular to make a visor, so I cut a template in the size I thought would be ideal for it. I cut that shape into the lid with a box cutter. I cut a piece of acetate slightly larger than the template and glued it on the inside.
Me funcionó la pega en barra para pegar el acetato de la cartulina, pero podríamos usar un pegamento más fuerte también.
Fíjate que por dentro debe quedar todo muy prolijo, este diseño de caja se realiza solo haciendo doblez y unos pocos cortes, así que no hay excusa para que quede con feas terminaciones, todo debe estar muy prolijo.
The glue stick worked for me to stick the acetate to the cardboard, but we could also use a stronger glue.
Make sure everything inside is very neat. This box design is made with just one fold and a few cuts, so there's no excuse for it to end up with ugly finishes; everything must be very neat.
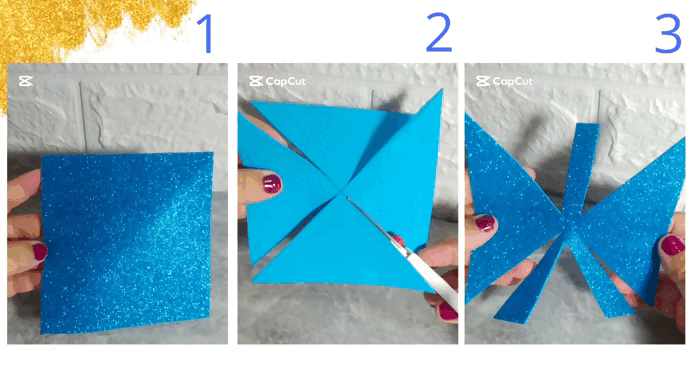
Para hacerle un Lazo a esta caja, hice el Lazo MÁS FÁCIL DEL MUNDO, porque se hace simplemente con un cuadrado.
1- Un cuadrado en foami escarchado de la medida que quieras. Marcas una X considerando sus esquinas. Recortas todas las líneas hasta un poco antes de llegar al centro.
2- En uno de los triángulo que se formaron, cortas para dejar solo una tira central. Y en el triángulo que tiene al frente, se dobla y corta otro triángulo para dejar sus extremos, como se ve en el número 2.
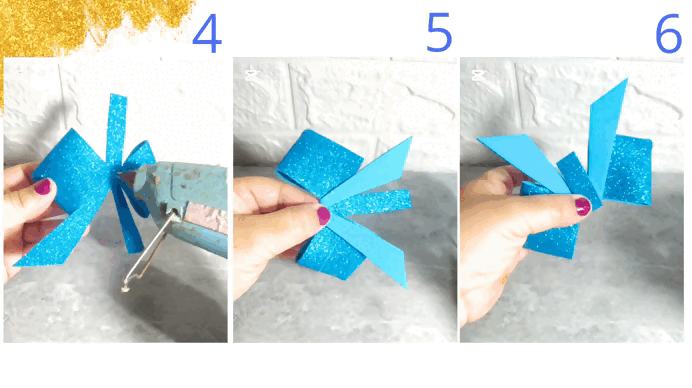
3- Se doblan las puntas de los triángulos que quedan, hacia el centro y se pegan con silicón caliente. Esto se hace en los dos triángulos que nos habían quedado.
To make a bow for this box, I made the EASIEST Bow in the World, because it's simply made with a square.
1- Cut a square of frosted foam of the desired size. Mark an X, including its corners. Trim all the lines to just before the center.
2- Cut one of the triangles you formed, leaving only a central strip. Fold and cut another triangle in the front triangle to reveal its ends, as shown in number 2.
3- Fold the tips of the remaining triangles toward the center and glue them together with hot glue. This is done on the two remaining triangles.
4- Las dos tiras que se formaron en el paso 2, las llevo hacia el lado contrario y fijo con un punto de silicón caliente en el centro.
5- La tira (sola) que se formó en el paso 2, la utilizo para dar vuelta al lazo que claramente ya se ve formado, y la fijo con un punto de silicón caliente atrás.
6- Corto el excedente de la tira del paso anterior.
Listo... ES EL LAZO MÁS FÁCIL DEL MUNDO, y queda PRECIOSO.
To make a bow for this box, I made the EASIEST Bow in the World, because it's simply made with a square.
1- Cut a square of frosted foam of the desired size. Mark an X, including its corners. Trim all the lines to just before the center.
2- Cut one of the triangles you formed, leaving only a central strip. Fold and cut another triangle in the front triangle to reveal its ends, as shown in number 2.
3- Fold the tips of the remaining triangles toward the center and glue them together with hot glue. This is done on the two remaining triangles.
Ya está listo mi proyecto Hive Diy de hoy. Es a gusto personal hacer la caja simple o agregarle un visor, hacer este lazo hermoso o dejarlo sin lazo, todo es cuestión de gusto personal.
A mí me encantó cómo luce todo el proyecto, incluí algunos productos míos, para hacer la presentación y que aprecien el visor de la caja, se puede incluir lo que desees, y con el visor podemos verlo y se ve hermoso.
My DIY Hive project for today is ready. It's up to you whether you want to make the box simple or add a display, make this beautiful bow or leave it without a bow; it's all a matter of personal taste.
I loved the look of the whole project. I included some of my own products to showcase it and show off the box's display. You can include anything you want, and with the display, we can see it, and it looks beautiful.
Deseo que te haya gustado este proyecto, y nos vemos en la próxima publicación.
I hope you enjoyed this project, and I'll see you in the next post.
I took the photos with my phone Redmi Note 8
Apps I used:
Canva Pro for Cover, Collage and Banners
I used Deepl Translator
My social networks:
Discord: YennysYaneth#0189
Twitter: @yennysferm
Instagram: @yennysyaneth
Las fotos las tomé con mi teléfono Redmi Note 8
Apps que utilicé:
Canva Pro para la Portada, Collage y Banners
Utilicé el Traductor Deepl
Mi redes sociales:
Discord: YennysYaneth#0189
Twitter: @yennysferm
Instagram: @yennysyaneth