La Mini Piñata de Jack Skillington que necesitas este Halloween (Esp/Eng)
@yennysferm71
· 2025-10-21 23:35
· Hive Diy
Las Piñatas son recipientes decorados, normalmente de papel maché o papel crepé, que se llenan de dulces y sorpresas, y que se rompen durante las celebraciones, y son de lo más esperado por los niños en las fiestas de cumpleaños.
**Las Mini Piñatas** están ganando popularidad como un detalle divertido y personalizable, ideal para sorprender en cualquier ocasión. Puedes adaptarlas al tamaño que prefieras y decorarlas con los personajes de moda o los favoritos, haciéndolas perfectas para Navidad, cumpleaños, Día de los Enamorados y muchas ocasiones más. Las utilizamos como una alternativa creativa a las tradicionales bolsitas de regalo, ideales para entregar sorpresas de forma original, generando conversación y risas; en las fiestas son una opción perfecta para los más pequeños que no pueden participar en la piñata tradicional. En este mes de Halloween, me animé a crear mis propias Mini Piñatas y hoy quiero compartir con ustedes todo el proceso para que puedas hacer las tuyas... Bienvenidos.
Piñatas are decorated containers, usually made of papier-mâché or crepe paper, which are filled with candy and surprises and broken during celebrations. They are eagerly awaited by children at birthday parties.
Mini Piñatas are gaining popularity as a fun and customizable gift, ideal for surprising guests on any occasion. You can adapt them to the size you prefer and decorate them with trendy or favorite characters, making them perfect for Christmas, birthdays, Valentine's Day, and many other occasions. We use them as a creative alternative to traditional gift bags, ideal for delivering surprises in an original way, generating conversation and laughter. At parties, they are a perfect option for younger children who cannot participate in the traditional piñata. This Halloween month, I decided to create my own Mini Piñatas, and today I want to share the whole process with you so you can make your own... Welcome.
Realizaré algunas Mini Piñatas con la temática de Halloween, pero para empezar quise hacerlo con el personaje Jack Skillington, de "Pesadilla antes de Navidad" o "El extraño mundo de Jack" es de mis personajes preferidos de Tim Burton, que se pasea entre Halloween y Navidad.
I'm going to make some mini piñatas with a Halloween theme, but to start with, I wanted to make one featuring Jack Skellington from “The Nightmare Before Christmas” or “The Strange World of Jack.” He's one of my favorite Tim Burton characters, who wanders between Halloween and Christmas.
* Papel crepé blanco
* Cartulina negra
* Cartón reciclado
* Pega escolar blanca
* Silicón caliente
* Cordón blanco
* Tijera, bolígrafo y hoja para dibujar boceto
* White crepe paper
* Black cardstock
* Recycled cardboard
* White school glue
* Hot glue
* White string
* Scissors, pen, and paper for sketching
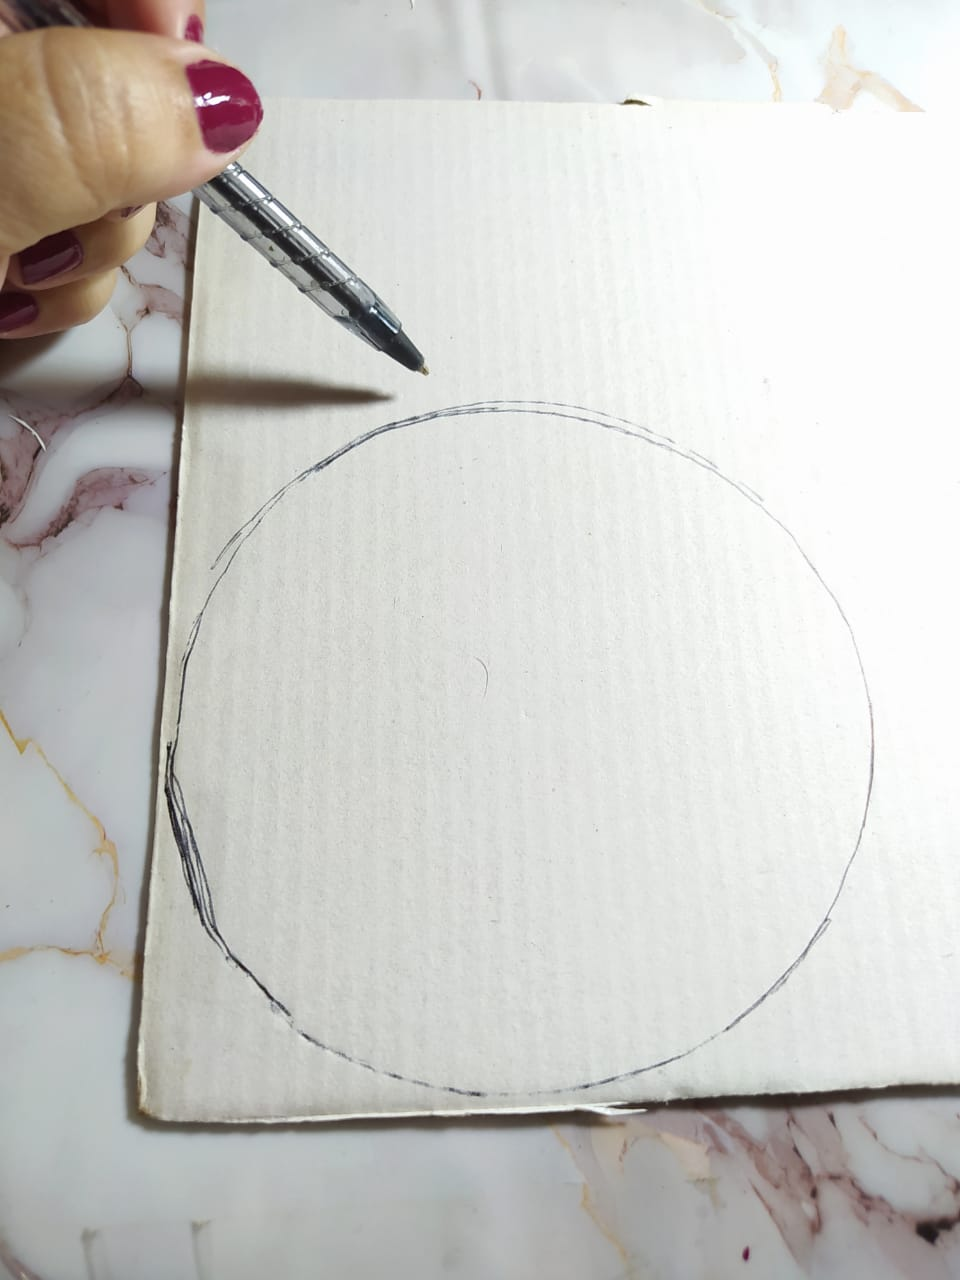
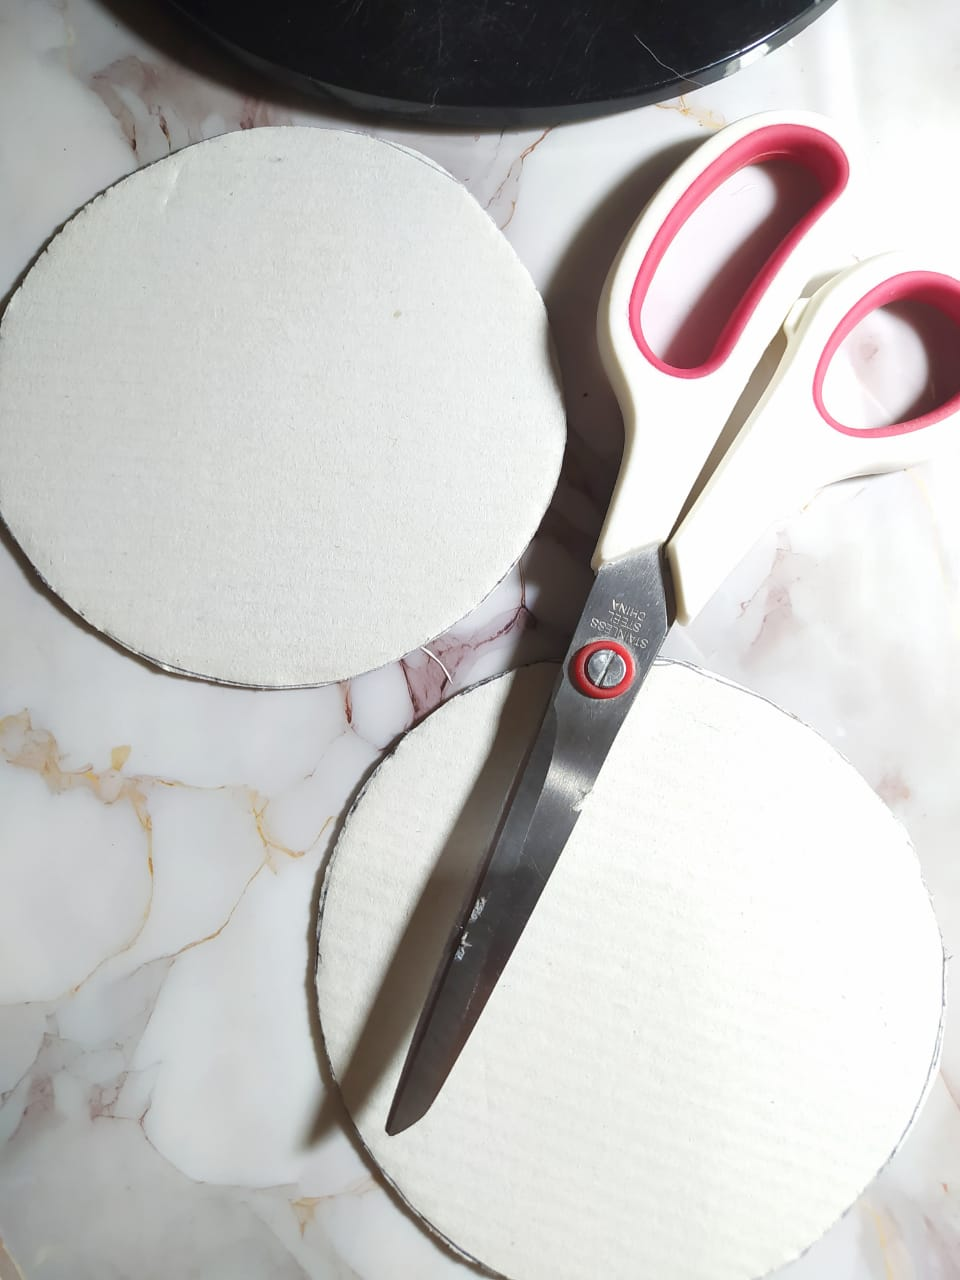
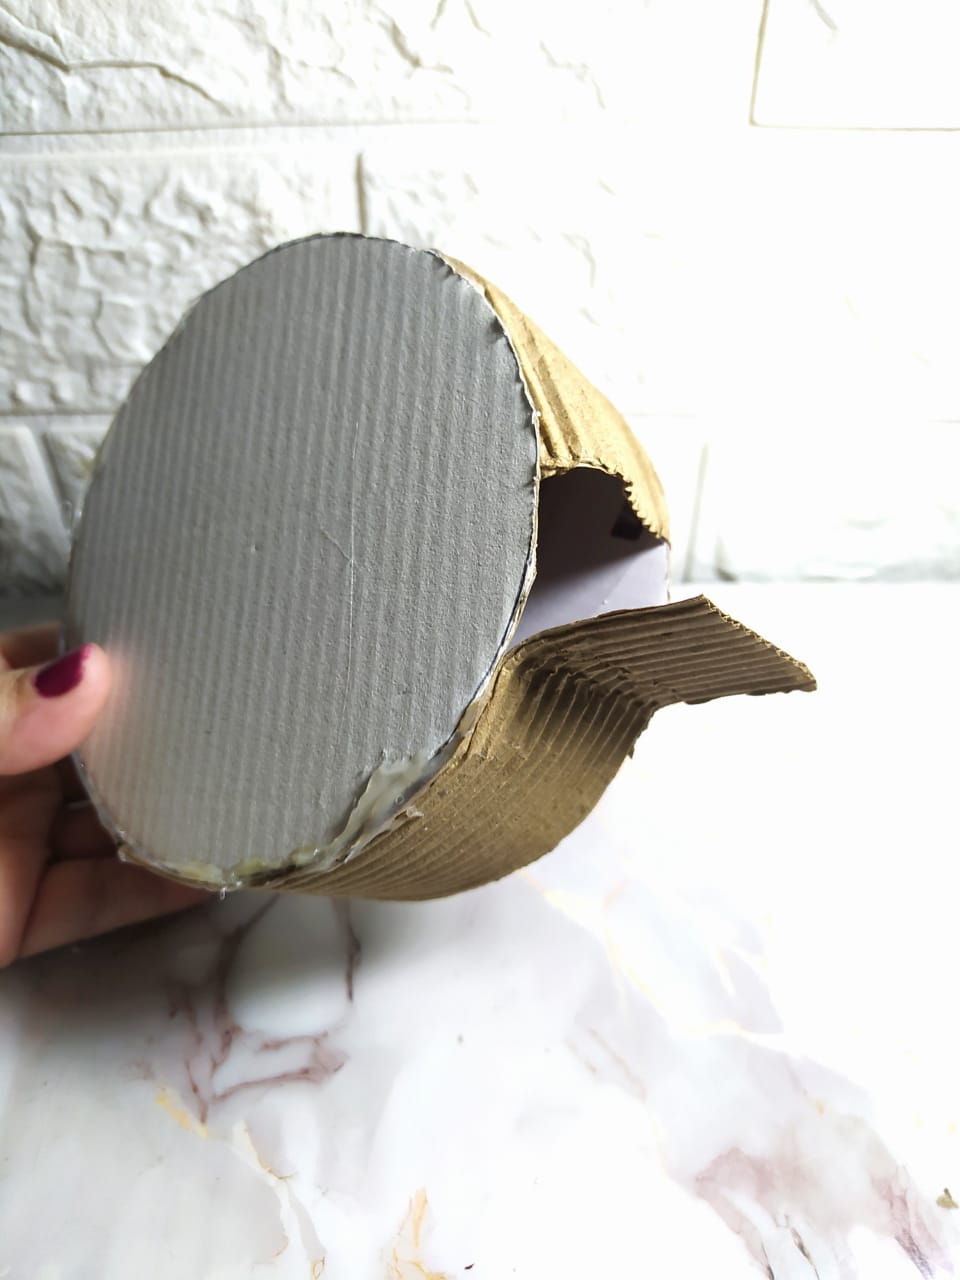
En cartón reciclado dibujé un círculo y lo corté 2 veces, este cartón tenía una muy buena calidad, y ambas piezas serán el frente y reverso de la cara de Jack Skillington.
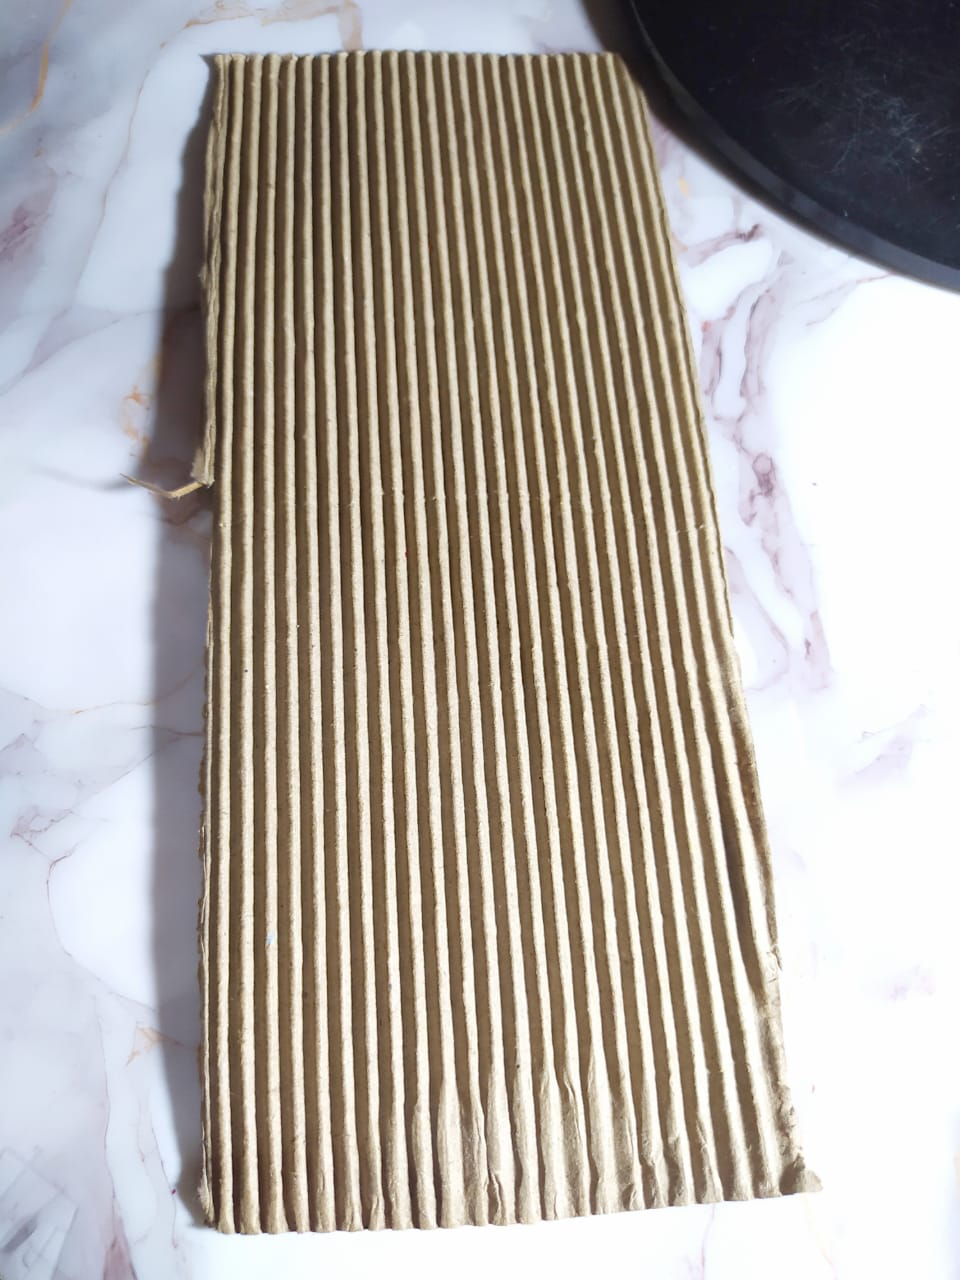
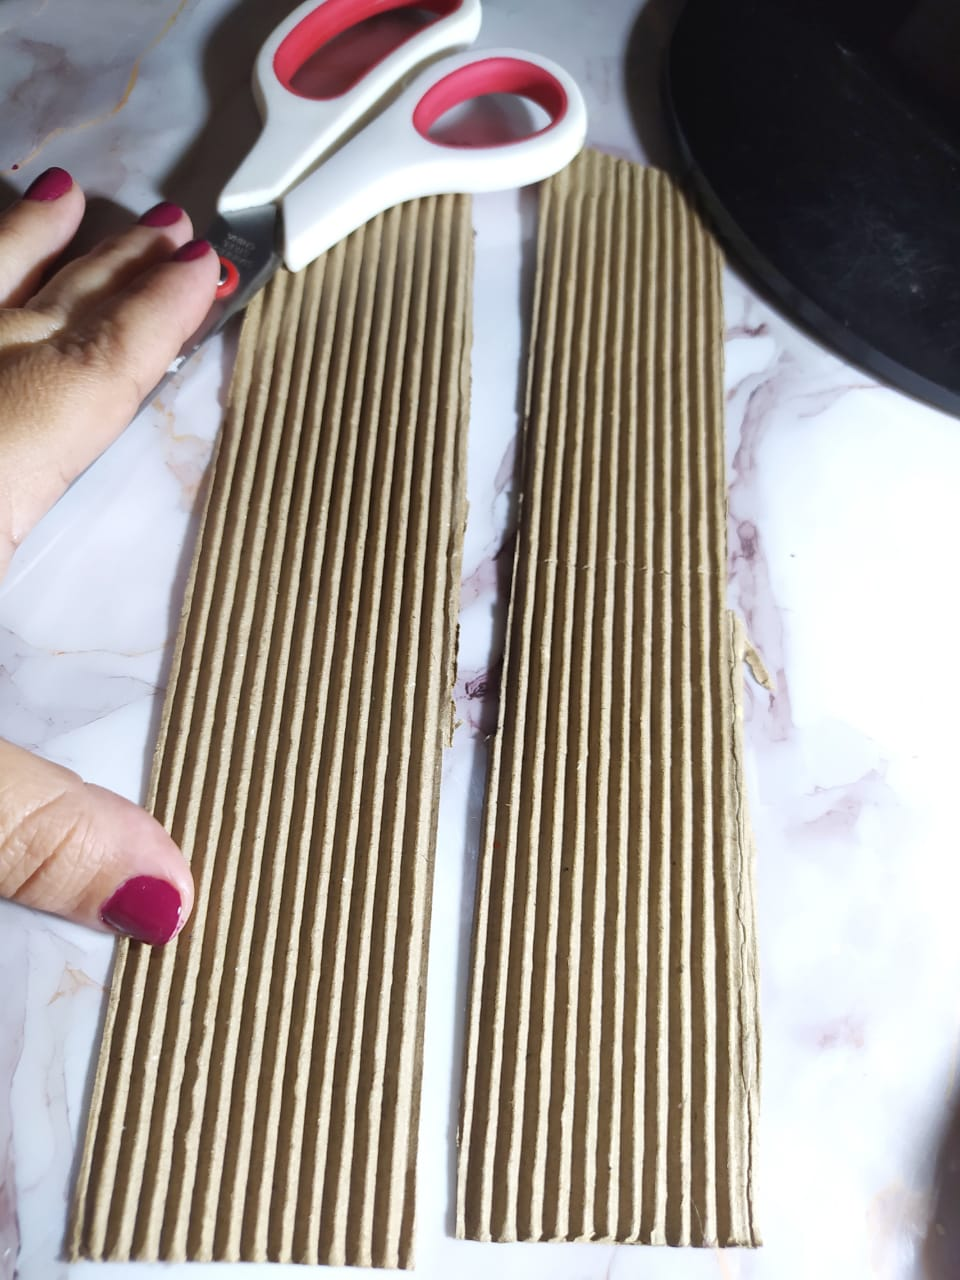
Para el borde o ancho de la Mini Piñata, utilicé una tira de cartón corrugado ya que es más flexible o manejable para formar toda la curva alrededor.
Estas medidas son absolutamente personales, pero esta que hice hoy tiene 12cms de diámetro y la tira para el ancho tiene 5cms. Corté dos tiras para completar la vuelta, pero si tienes suficiente material no será necesario que cortes dos tiras obviamente.
I drew a circle on recycled cardboard and cut it out twice. The cardboard was very good quality, and both pieces will be the front and back of Jack Skillington's face.
For the edge or width of the mini piñata, I used a strip of corrugated cardboard as it is more flexible and easier to work with to form the curve around the edge.
These measurements are entirely personal, but the one I made today is 12 cm in diameter and the strip for the width is 5 cm. I cut two strips to complete the circle, but if you have enough material, you obviously won't need to cut two strips.
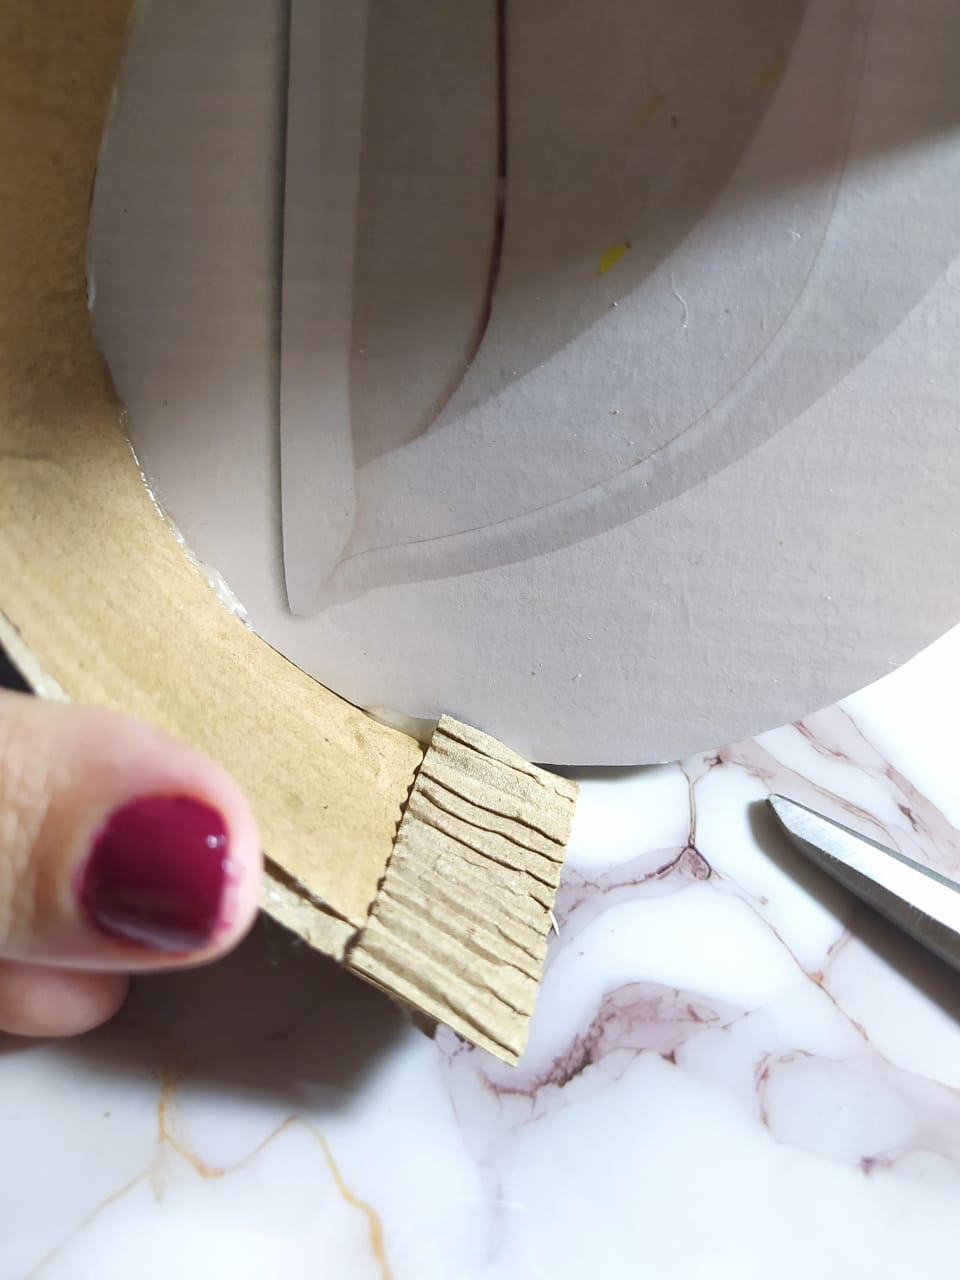
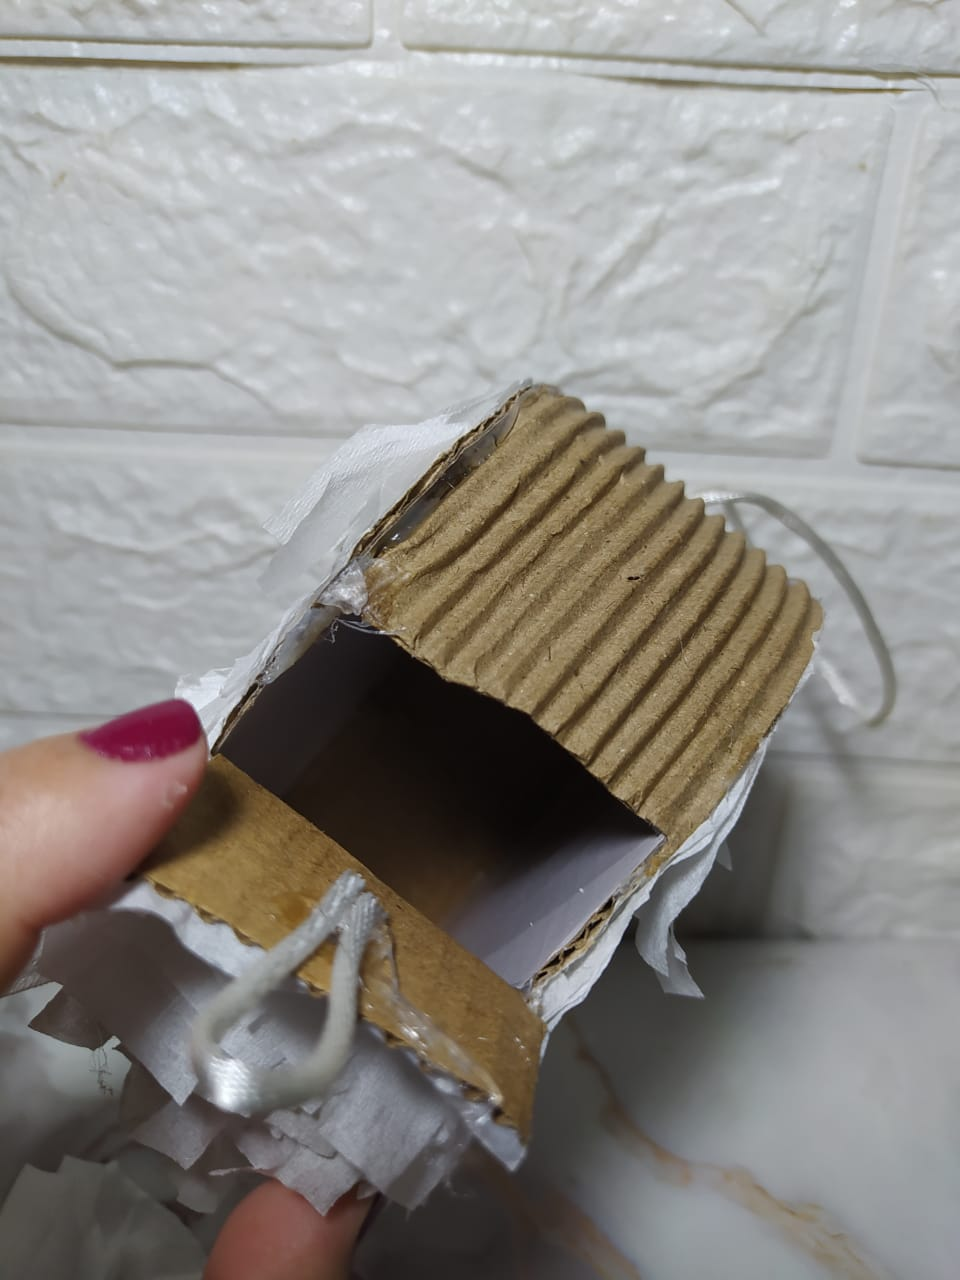
Comencé a pegar la tira en el borde de uno de los círculo, con silicón caliente. Este paso me ahorra tener que colocar anclajes, y dado que la Mini Piñata no carga mucho peso, hacerlo con silicón caliente fue más que suficiente. Cuando elaboramos piñatas grandes para los cumpleaños, si es necesario colocar anclajes con cartón o cinta .
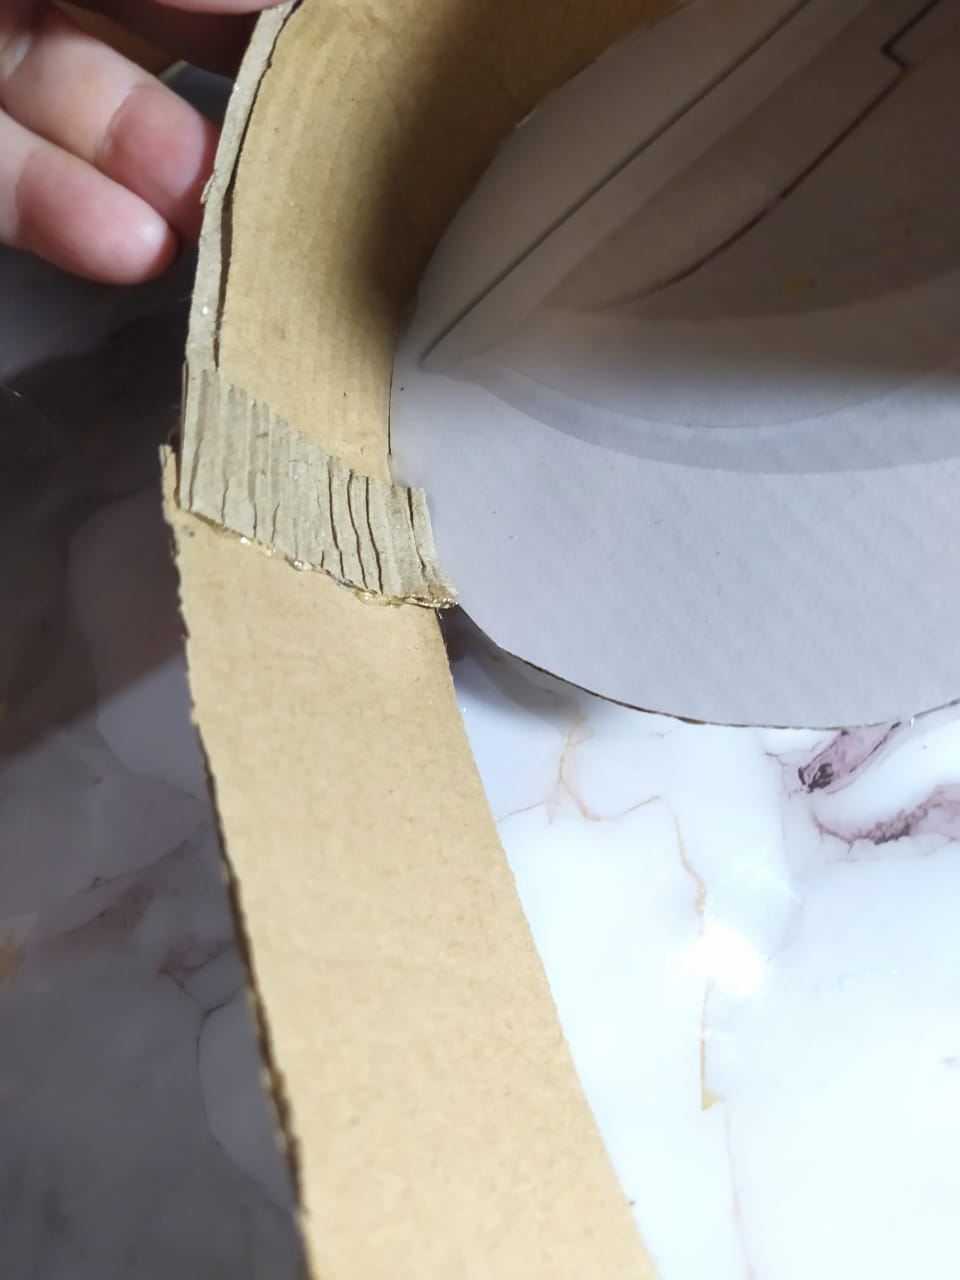
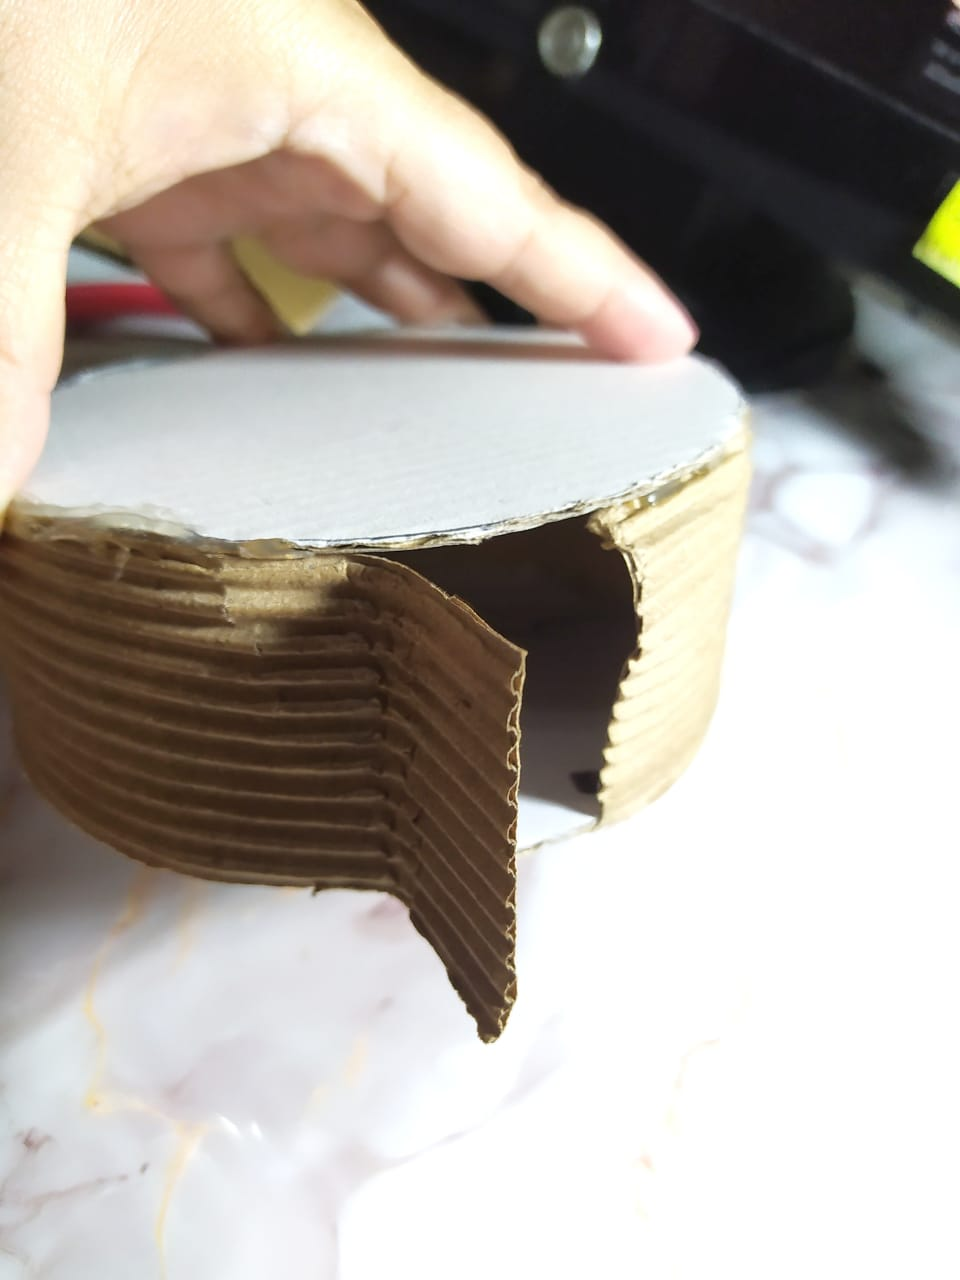
Cuando la tira no me alcanzó para dar la vuelta, simplemente coloqué un pedacito de cartón por el lado interno, y conecté o pegué la siguiente tira. Antes de llegar al extremo que pegué al principio, dejé un espacio libre de pegar, ya que por este lado introduciré los pequeños obsequios que llevará dentro. Una vez listo, procedo a pegar igualmente el otro círculo al otro extremo de la tira de cartón, quedando así lista la estructura.
I started gluing the strip to the edge of one of the circles with hot glue. This step saves me from having to put in anchors, and since the Mini Piñata doesn't carry much weight, using hot glue was more than enough. When we make large piñatas for birthdays, we sometimes need to put in anchors with cardboard or tape.
When the strip wasn't long enough to go all the way around, I simply placed a small piece of cardboard on the inside and connected or glued the next strip. Before reaching the end that I glued at the beginning, I left a space free of glue, as this is where I will insert the small gifts that will go inside. Once ready, I proceed to glue the other circle to the other end of the cardboard strip, thus completing the structure.
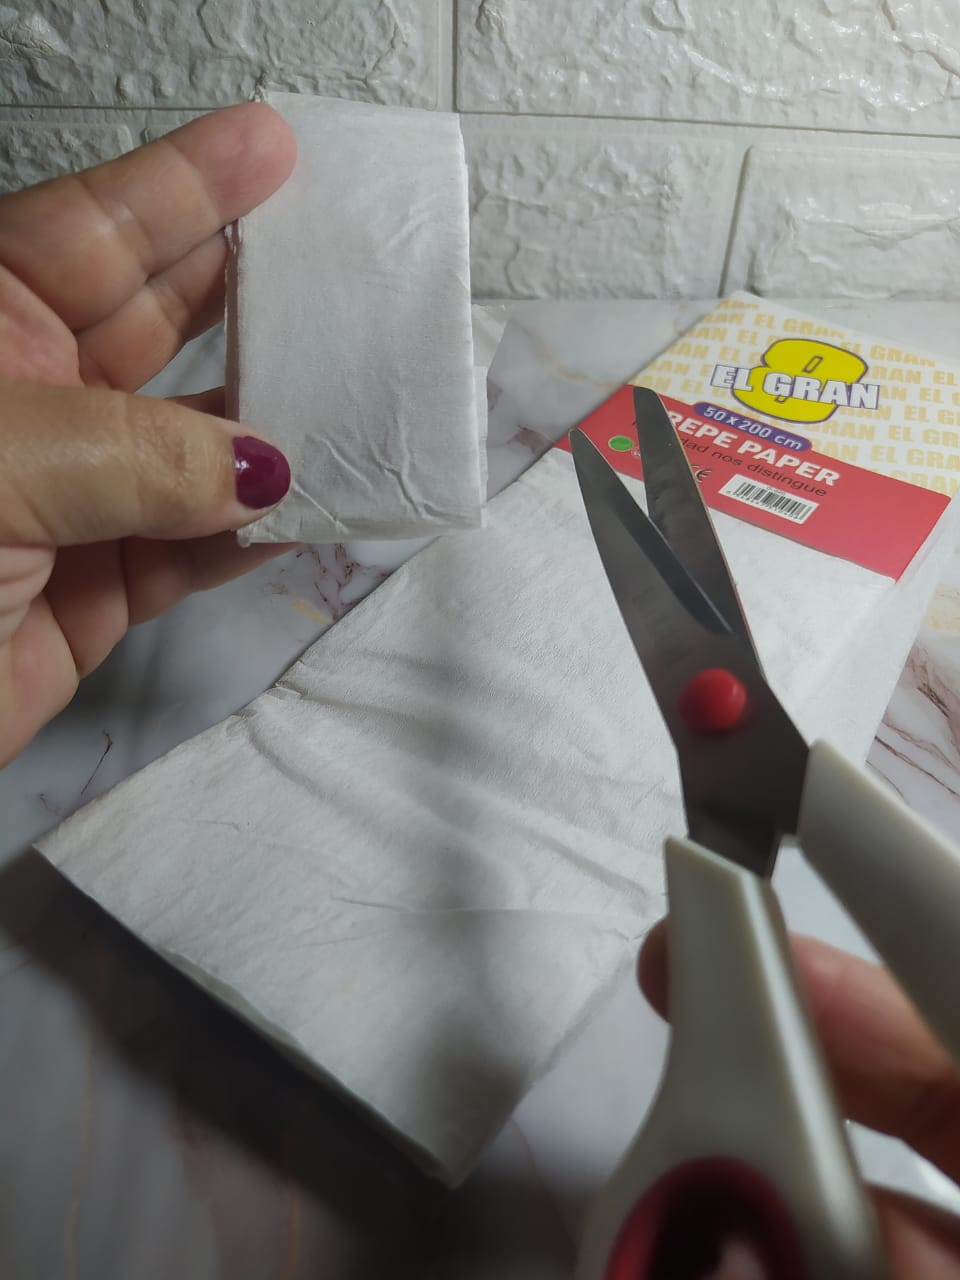
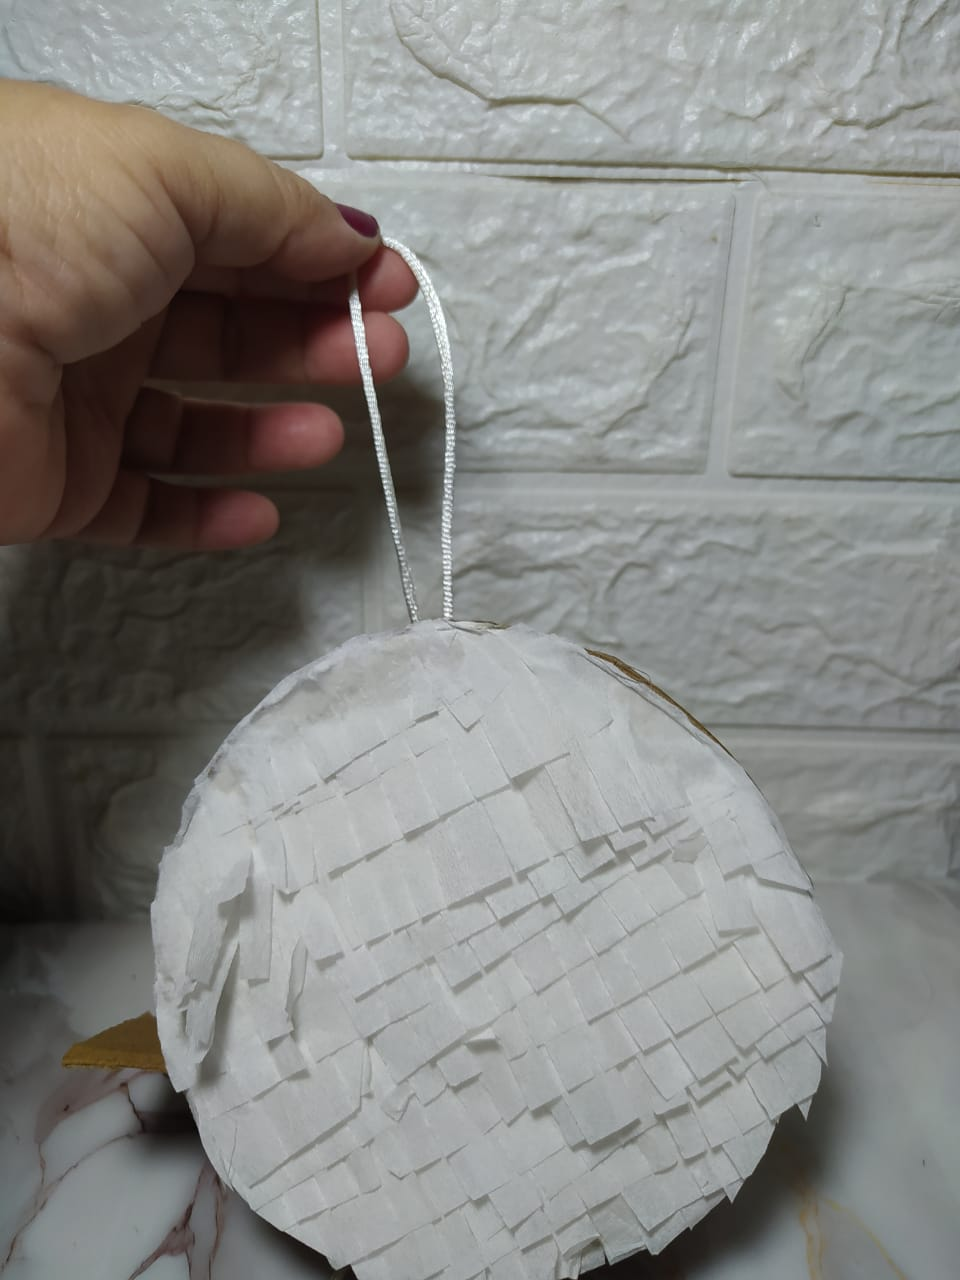
Para decorar la Mini Piñata se puede utilizar varios materiales, yo trabajaré con papel crepé. Pero dado que es pequeña podría utilizar perfectamente incluso foami u otros materiales más.
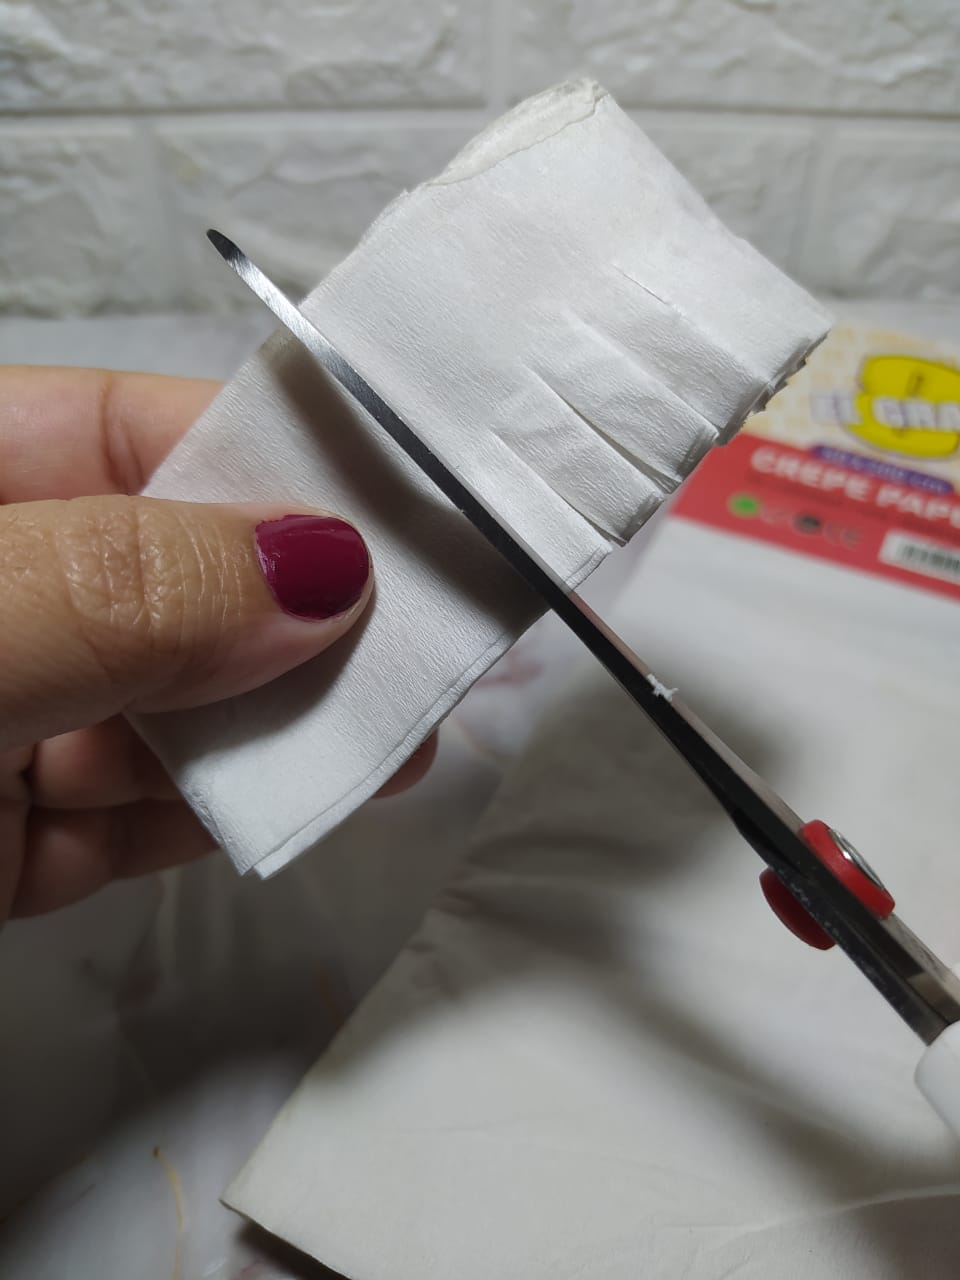
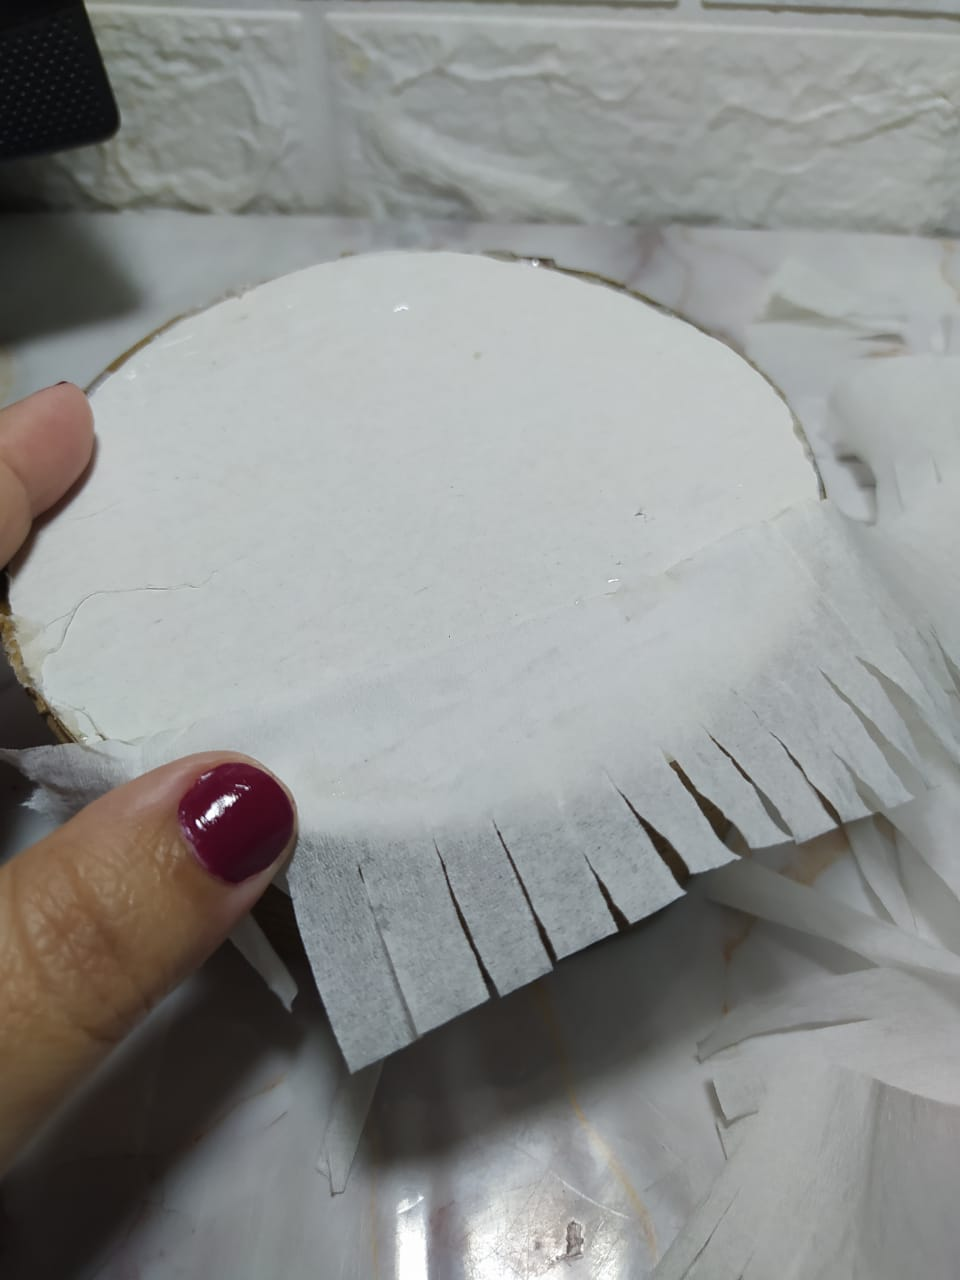
Corté tiras de papel crepé blanco de 4cms, y luego realicé cortes hasta la mitad, para formar los flecos.
You can use various materials to decorate the mini piñata. I will be working with crepe paper. But since it is small, you could also use foam or other materials.
I cut 4 cm strips of white crepe paper, and then made cuts halfway through to form the fringes.
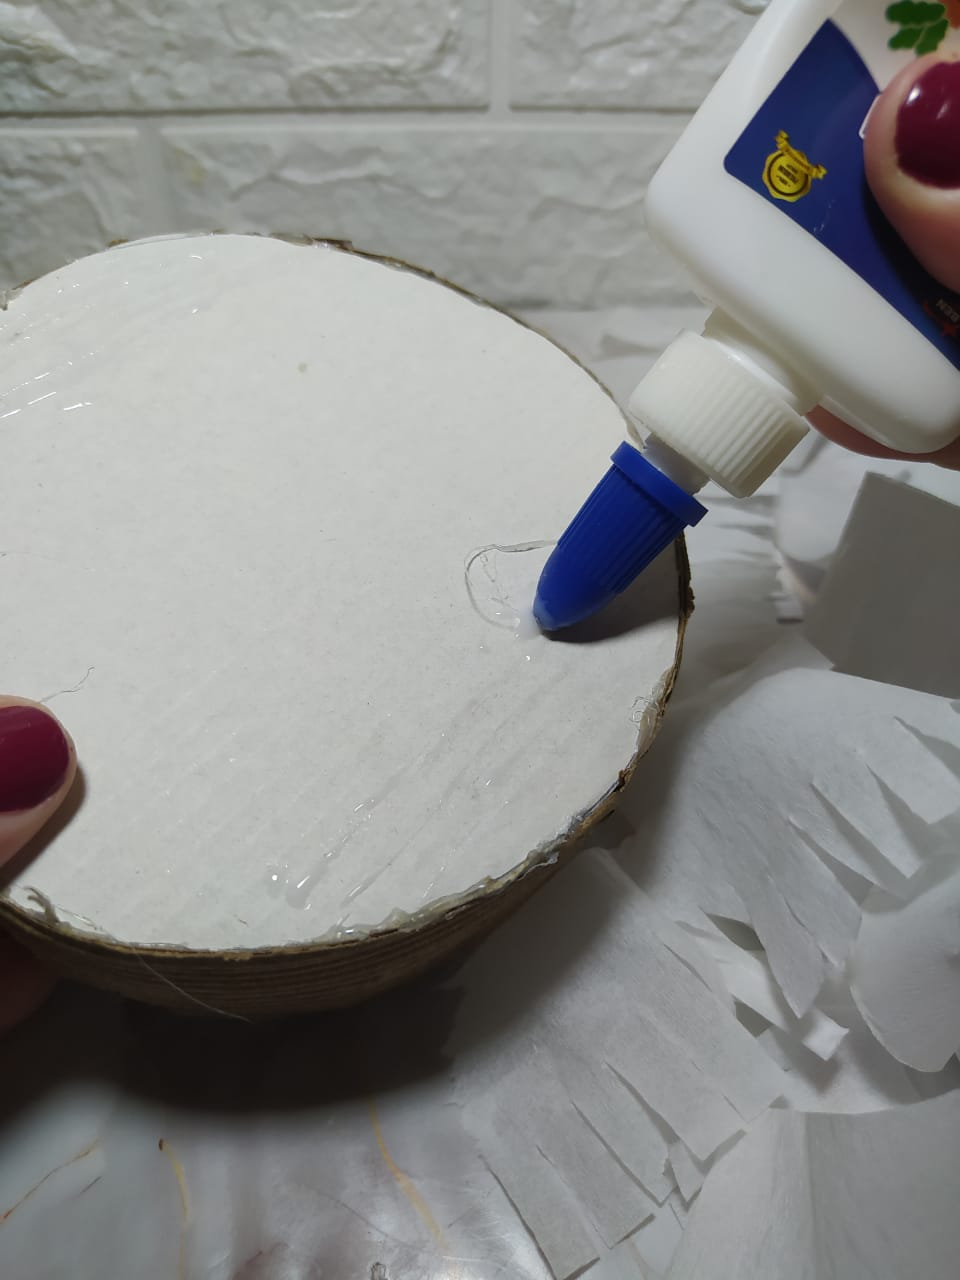
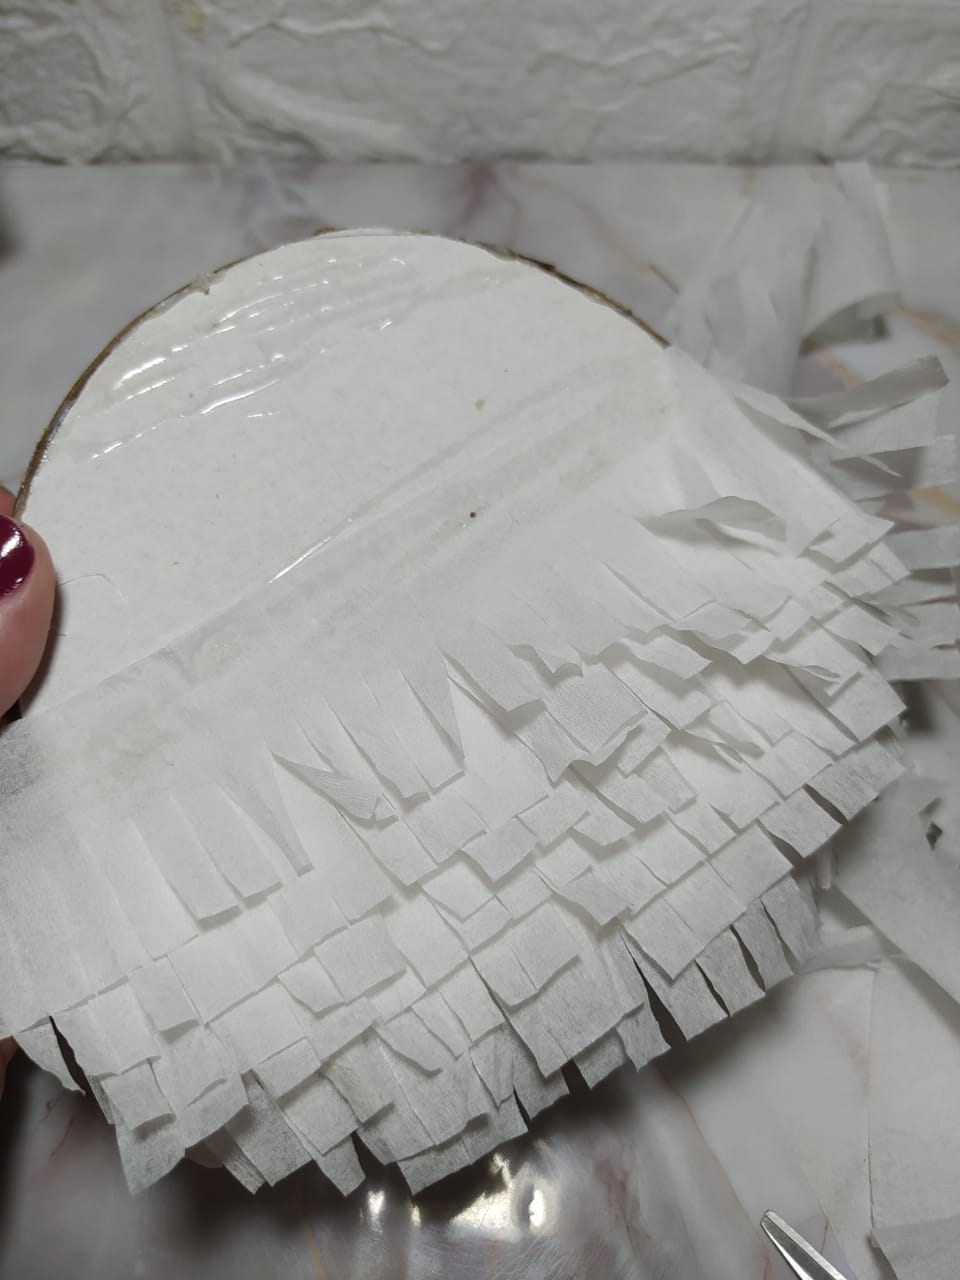
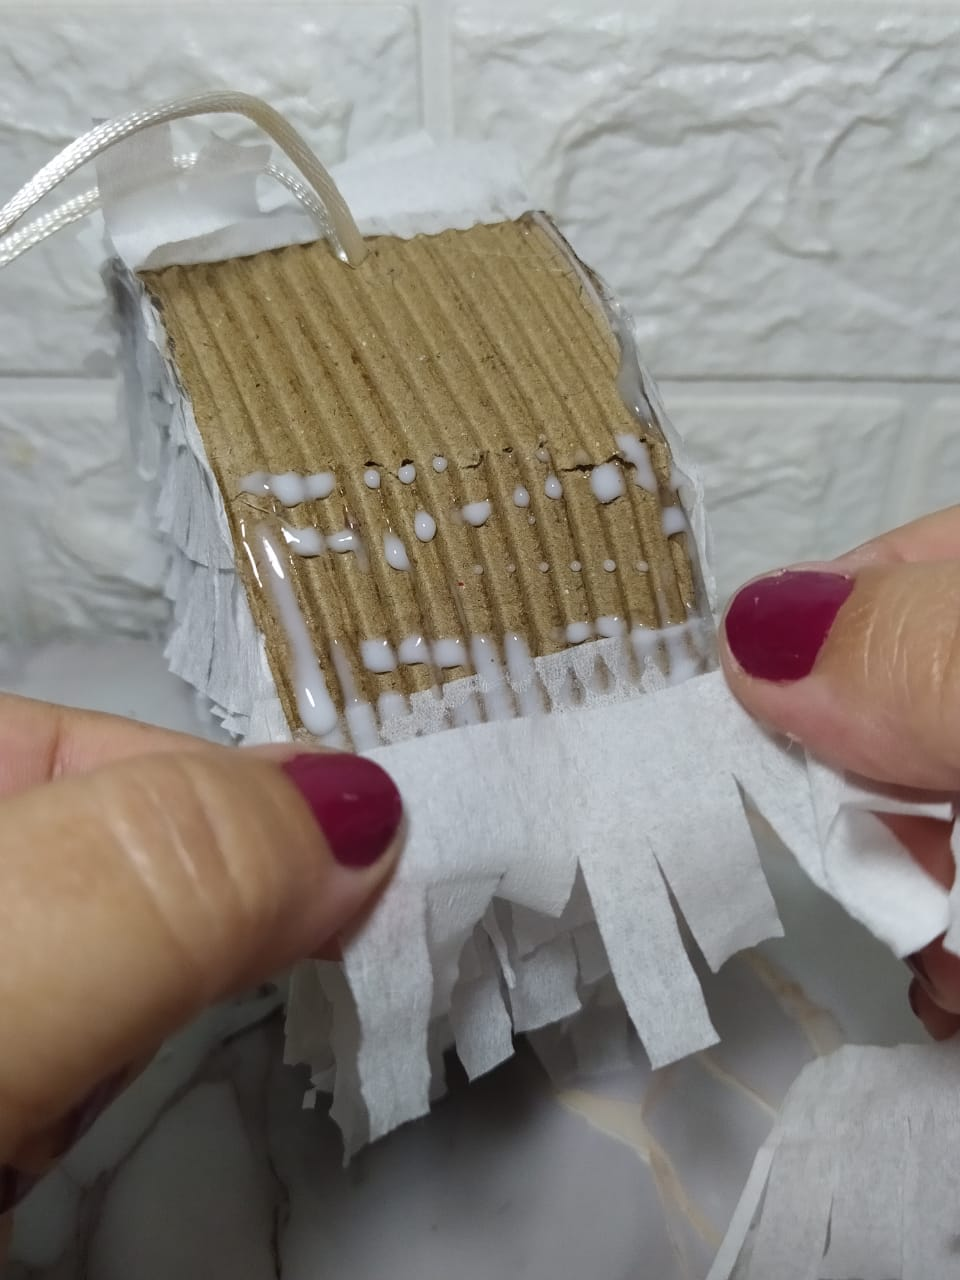
Con pega blanca escolar, comienzo a pegar los flecos, siempre desde abajo hacia arriba. Coloco una línea de pega, coloco la tira y la corto, y voy repitiendo en el espacio superior hasta completar el área de ambas caras o círculos.
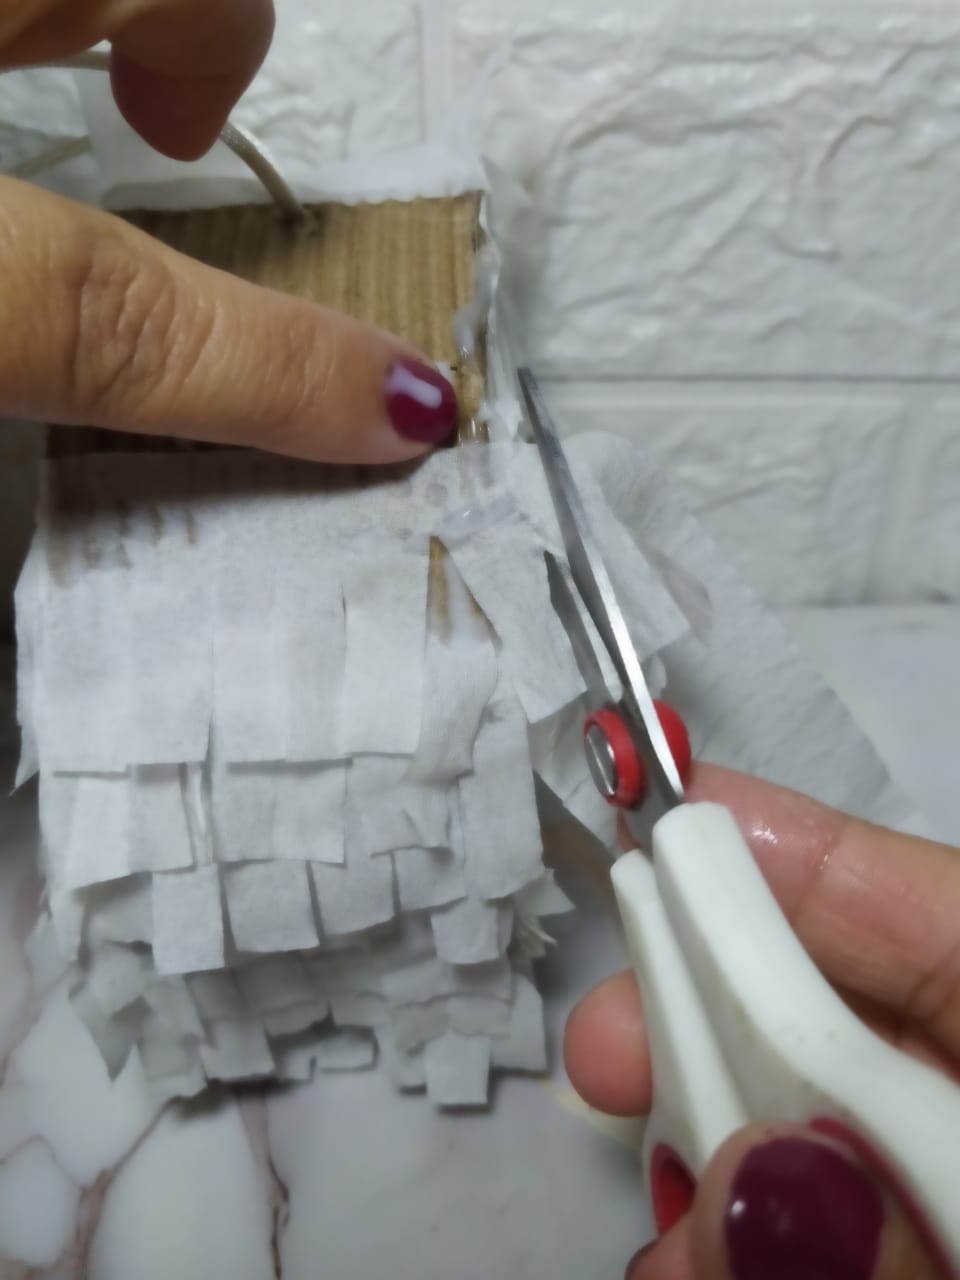
Al completar, recorto con una tijera todos los excedentes para que quede el borde muy limpio.
Using white school glue, I begin to stick on the fringes, always working from the bottom up. I apply a line of glue, place the strip and cut it, repeating this process in the upper space until I have covered the entire area of both sides or circles.
When finished, I trim off any excess with scissors so that the edge is very neat.
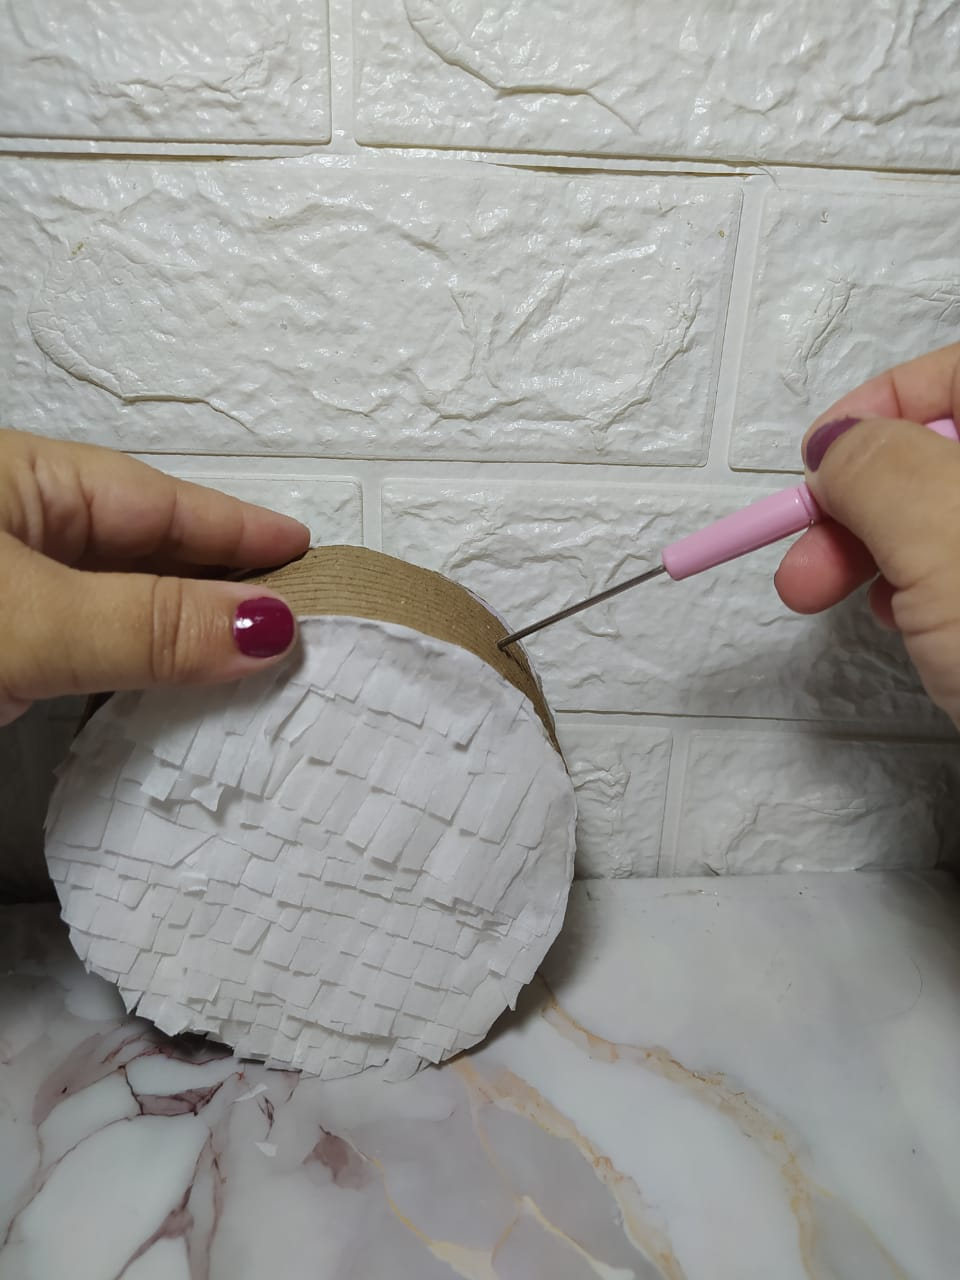
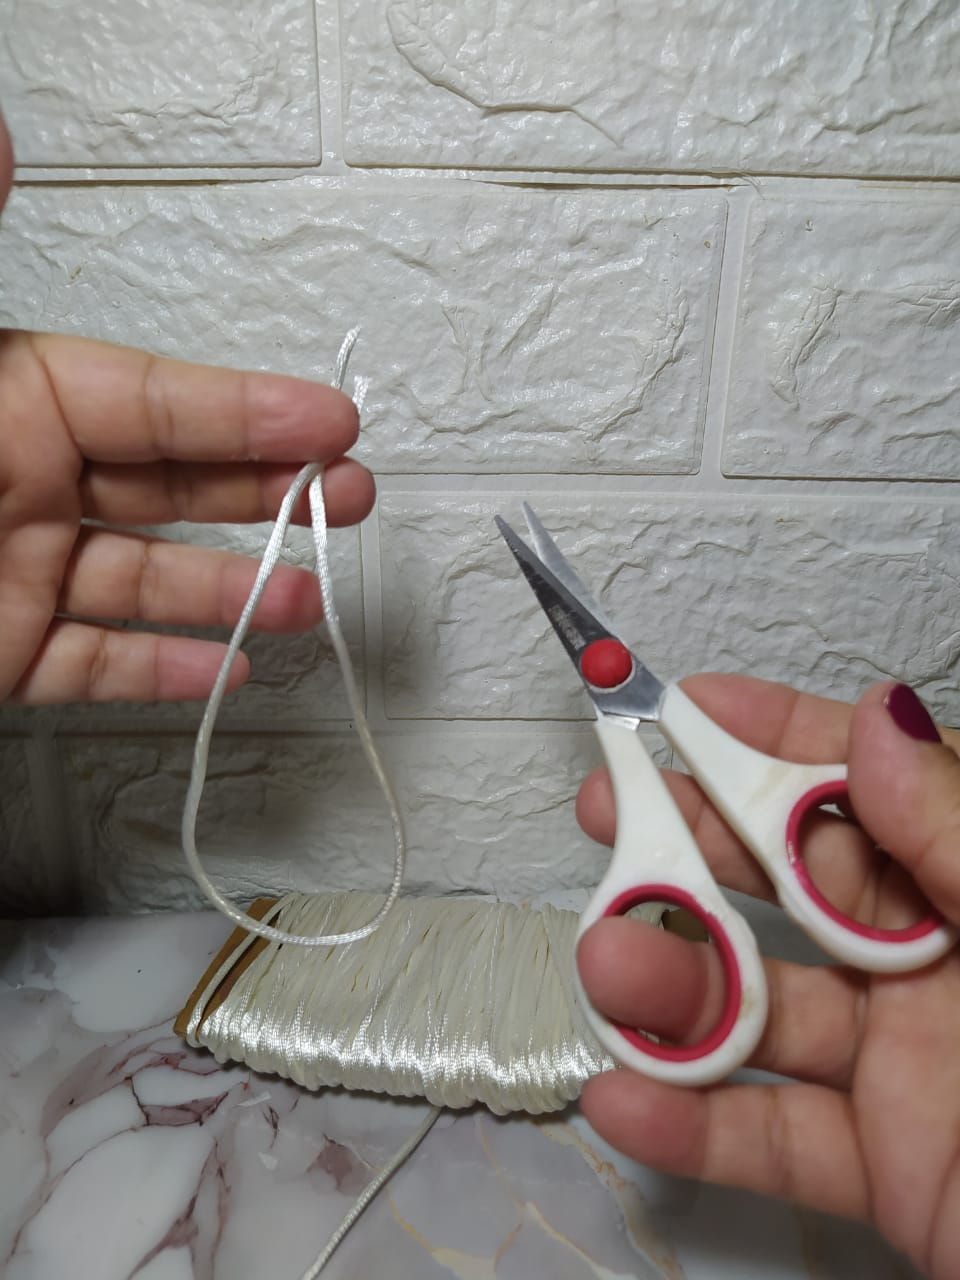
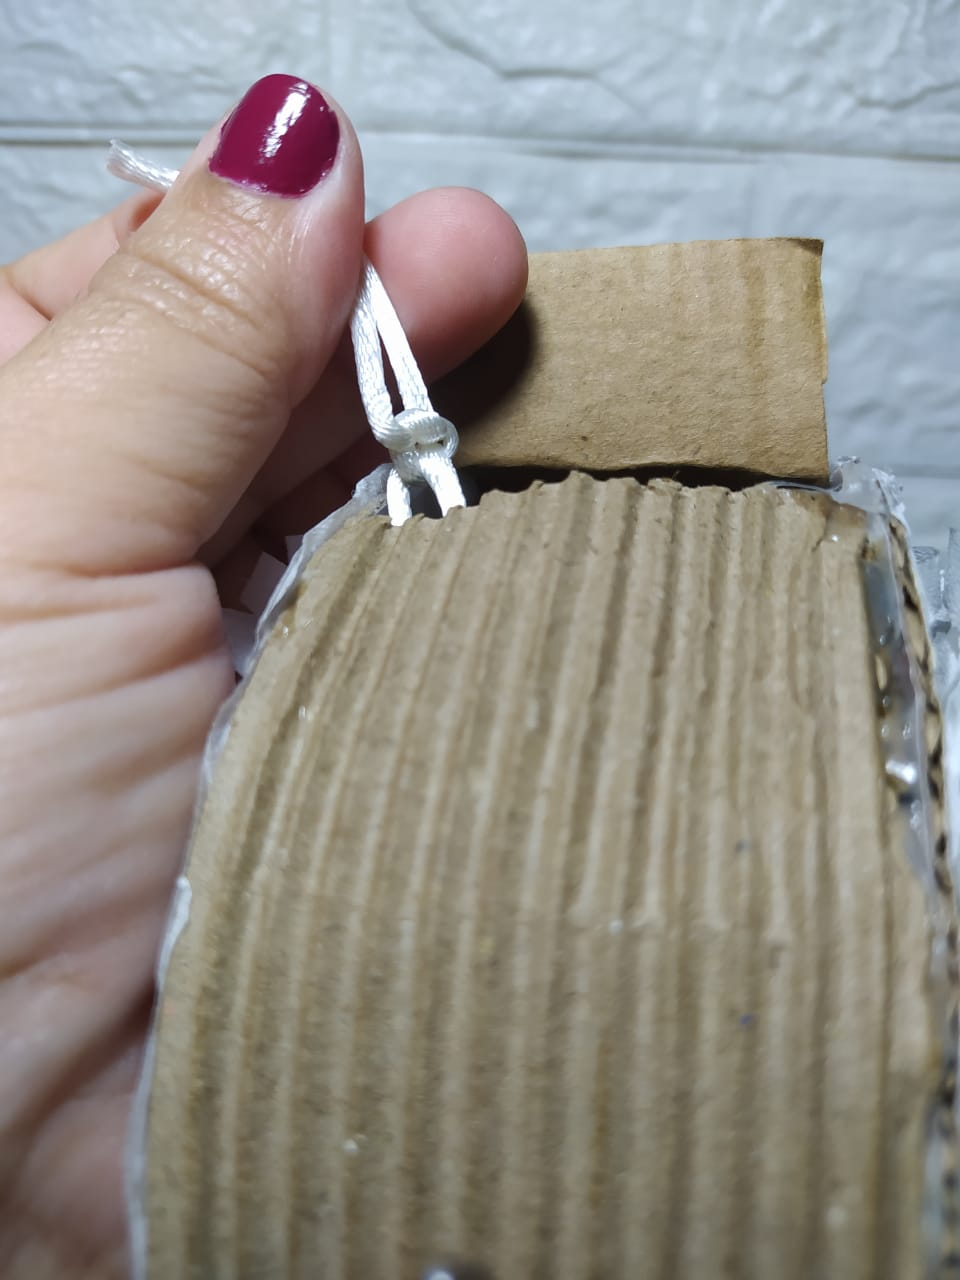
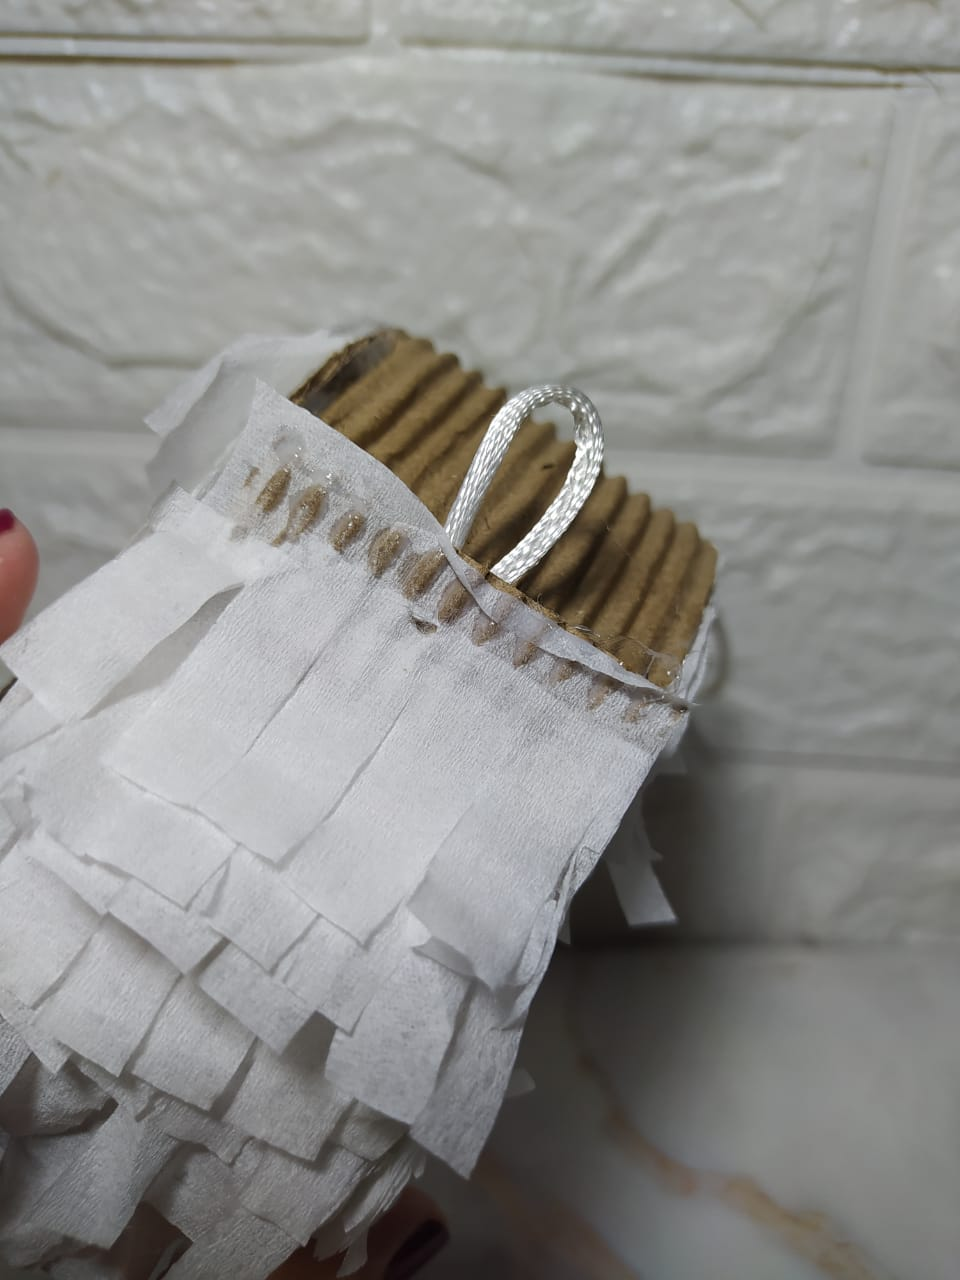
Casi olvidaba pegar la tira para agarrar la Mini Piñata, este paso se podría hacer antes, pero en este punto igual la pondré. Con un objeto punzante, puede ser la misma tijera, hago una pequeña perforación en lo que será la parte superior. Introduzco un trozo de cordón blanco para que combine, hago un nudo por dentro, y ya puedo sacar la tira para colgar.
I almost forgot to attach the strip to hold the Mini Piñata. This step could be done earlier, but I'll do it at this point anyway. Using a sharp object, such as scissors, I make a small hole in what will be the top. I insert a piece of white string to match, tie a knot inside, and now I can pull out the strip to hang it.
Con el mismo cordón realicé una vuelta u oreja, que utilizaré para abrir y cerrar al apertura por donde se introducirán y sacaran los obsequios. Lo pegué con silicón caliente.
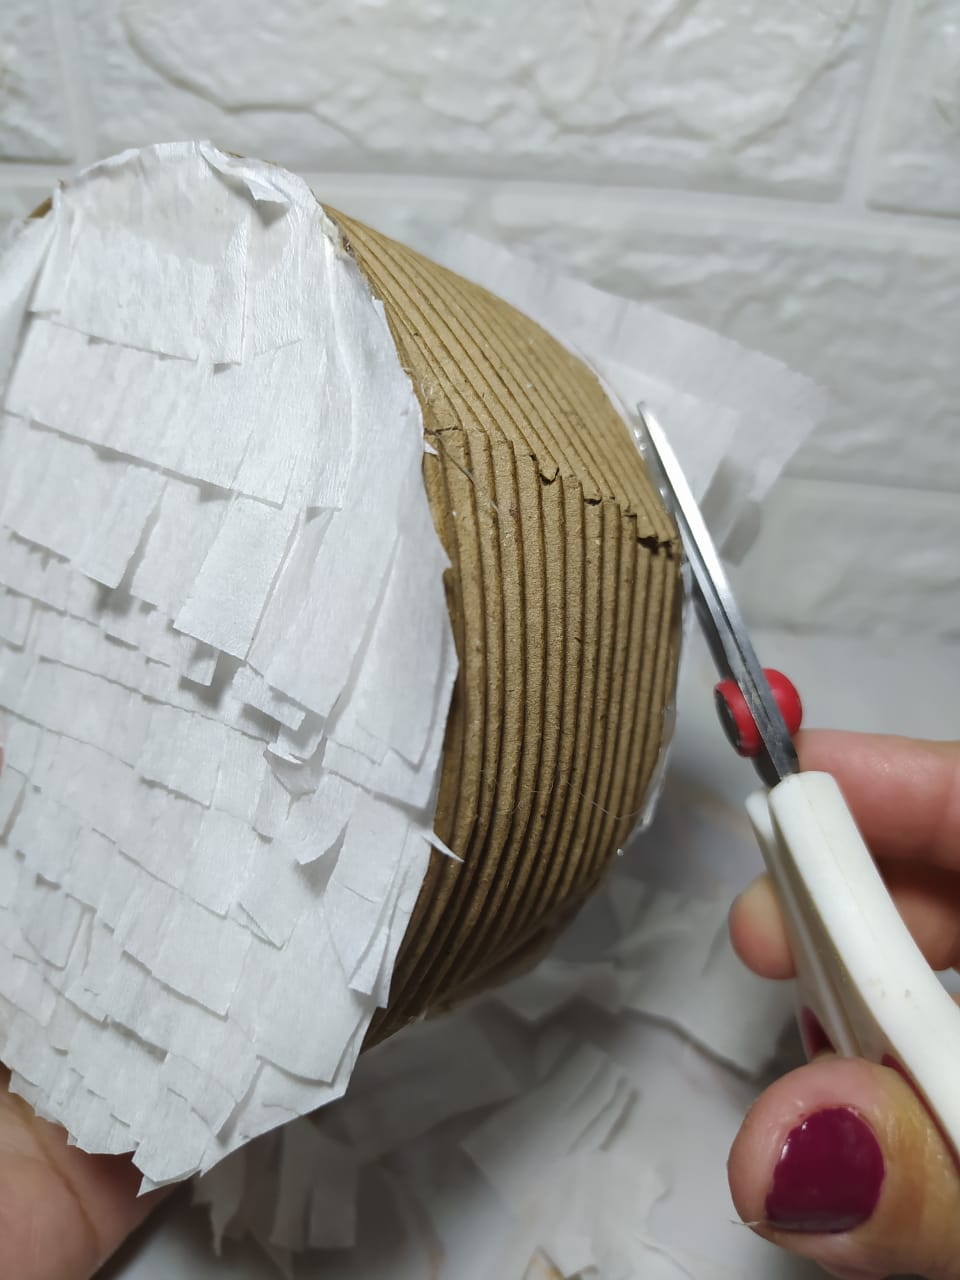
Ahora forro todo el ancho con el mismo procedimiento que utilicé en las caras de la Mini Piñata, limpiando igualmente los bordes.
With the same cord, I made a loop or ear, which I will use to open and close the opening where the gifts will be inserted and removed. I glued it with hot silicone.
Now I cover the entire width using the same procedure I used on the sides of the Mini Piñata, cleaning the edges as well.
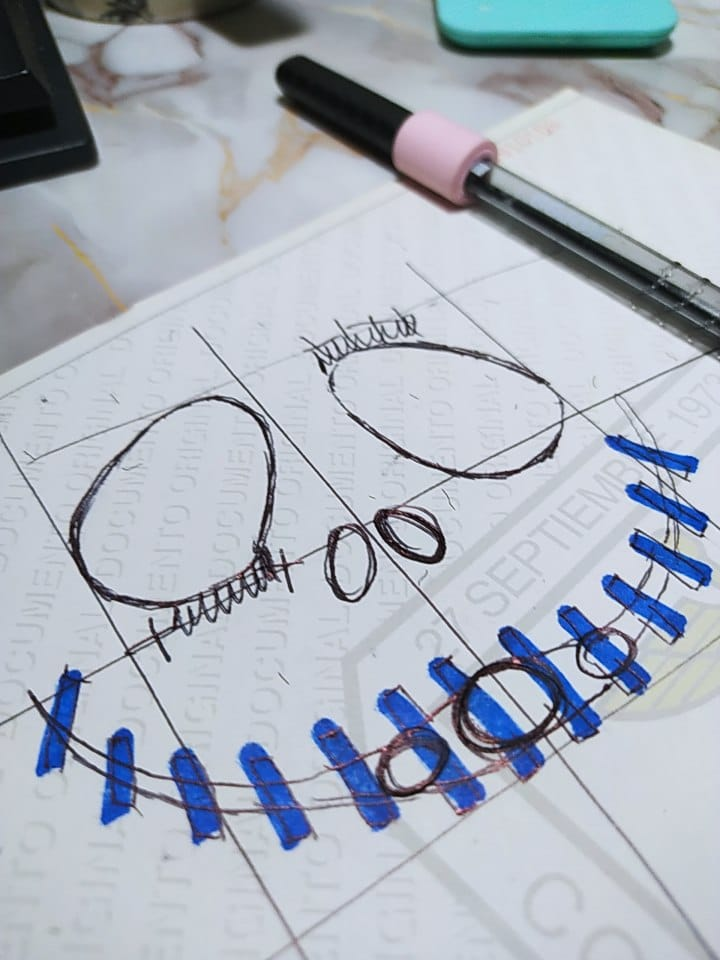
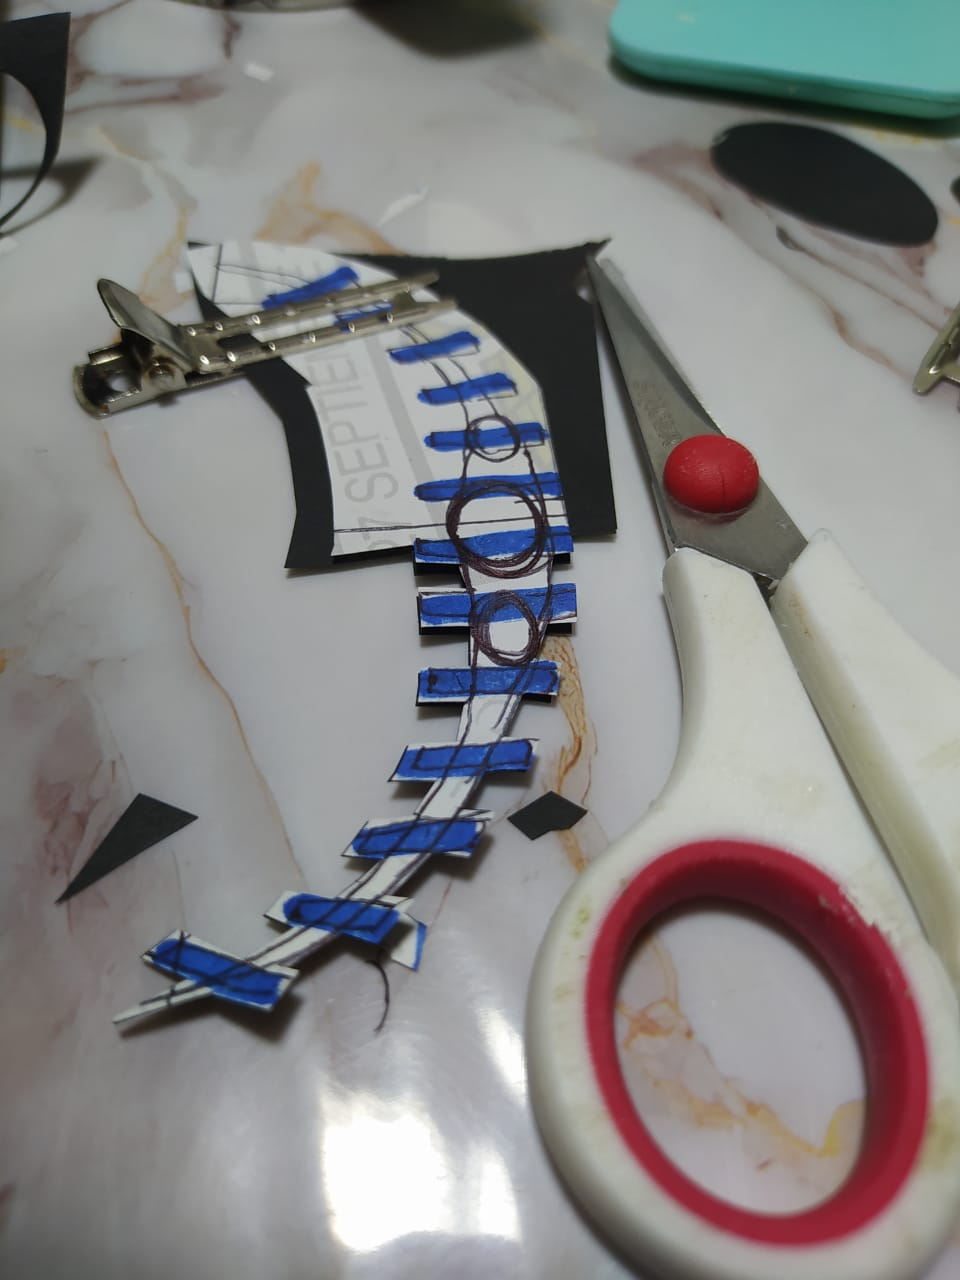
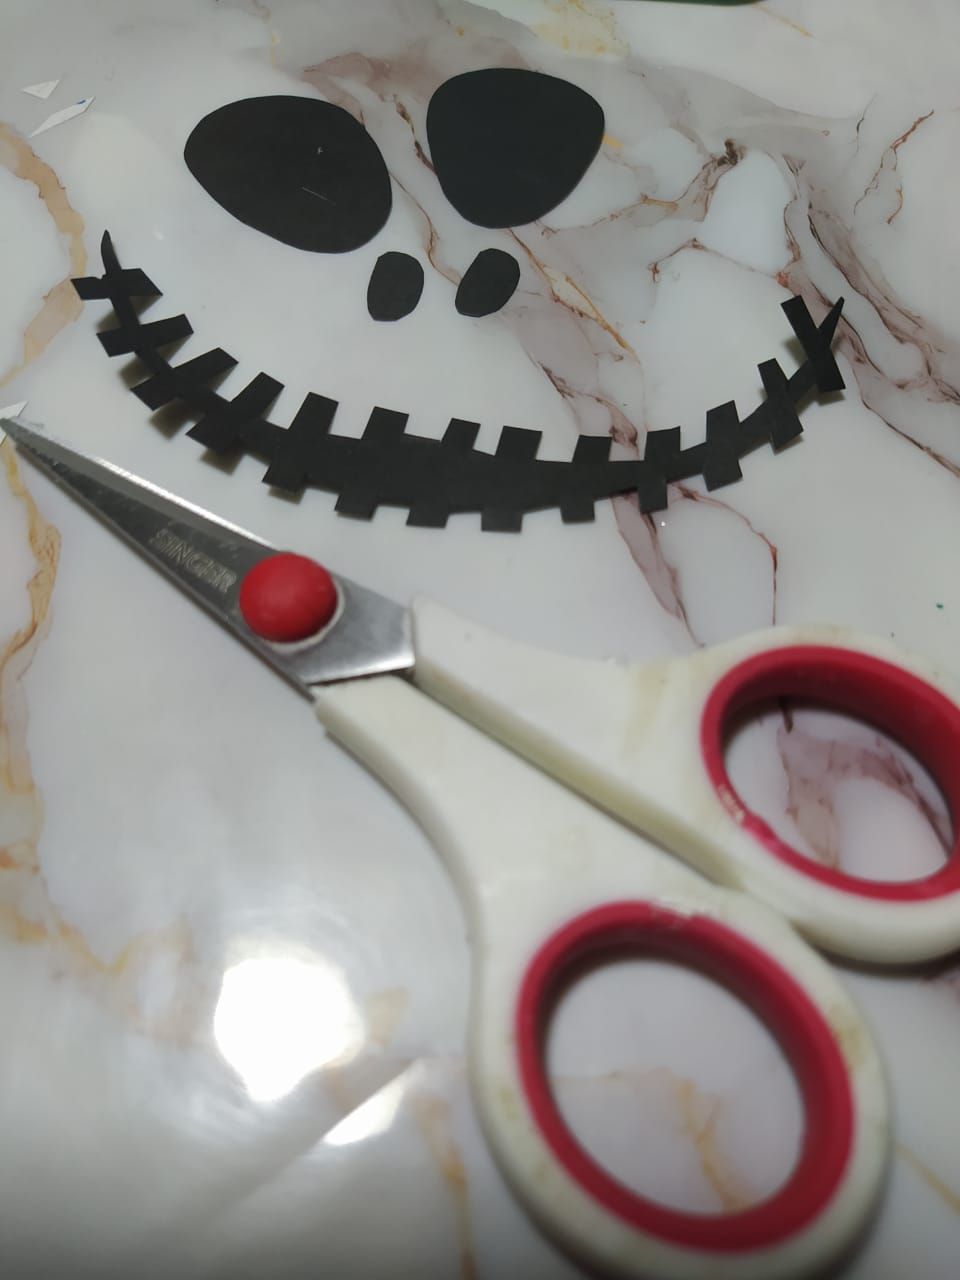
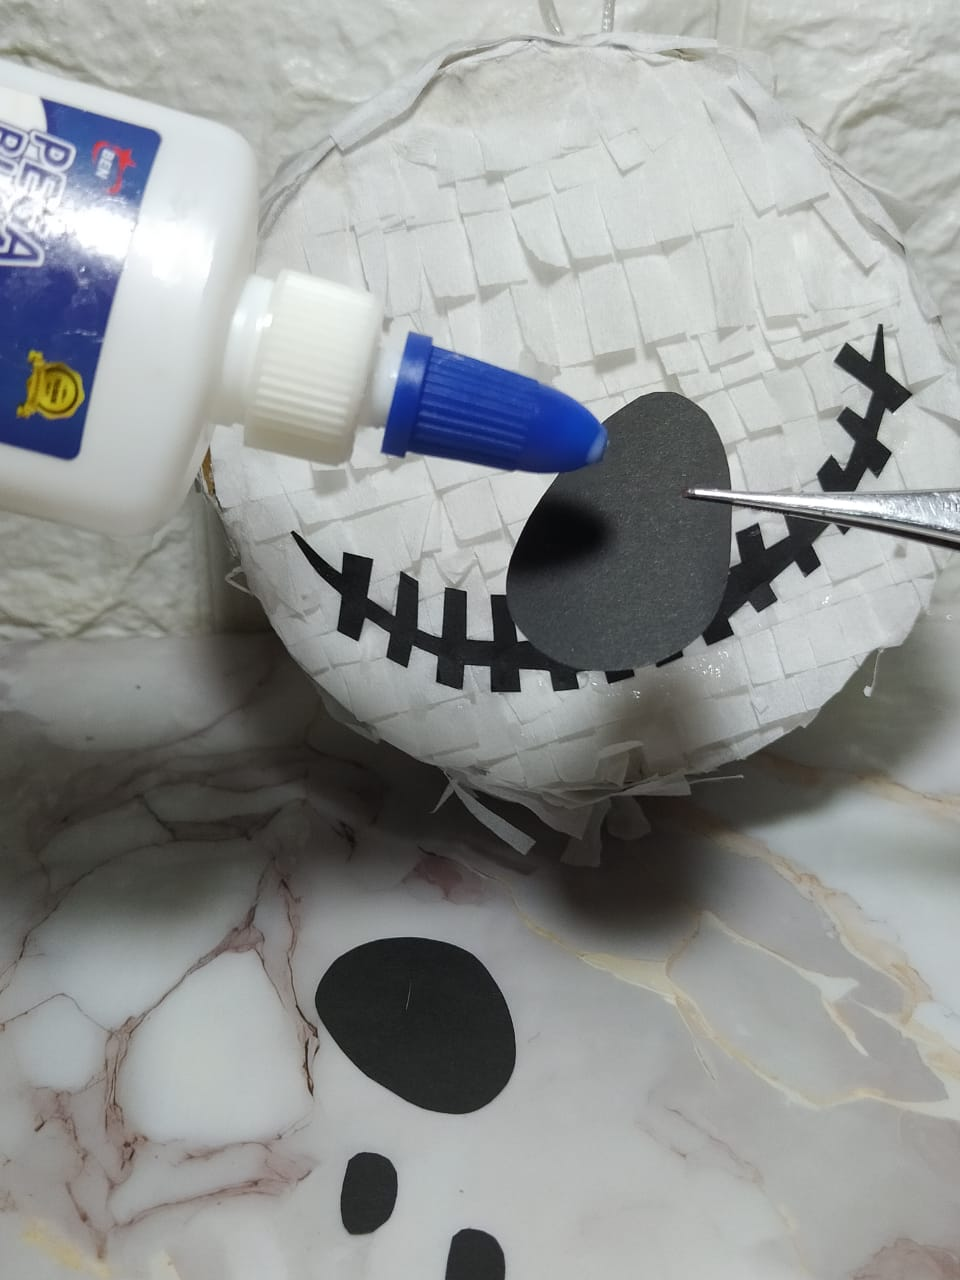
En un hoja dibujé los ojos, la nariz y la boca de Jack Skillington. Este personaje a pesar de tener solo figuras negras en su rostro, tiene muchas divertidas expresiones, así que elegí una que me parece linda para el personaje.
Luego, corté cada pieza sobre la cartulina de color negro. La boca debo confesar que fue algo fastidiosa de cortar, pero con algo de paciencia se logra. Una vez listas, se pegan con pega blanca escolar, en uno de los lados de la Mini Piñata, cuidando un poco los espacios para que se vea armoniosa su cara.
On a piece of paper, I drew Jack Skillington's eyes, nose, and mouth. Even though this character only has black shapes on his face, he has lots of funny expressions, so I chose one that I thought was cute for the character.
Then, I cut out each piece on black cardstock. I must confess that the mouth was a bit tricky to cut out, but with a little patience, it can be done. Once ready, they are glued with white school glue on one side of the Mini Piñata, taking care to space them out so that his face looks harmonious.
Y así terminé ya la Mini Piñata de Jack Skillington, para este Halloween. La amé, es uno de mis personajes preferidos. Nunca había hecho Mini Piñatas ni mucho menos Piñatas, pero me encantó el proceso y el producto final, ya estoy muy emocionada de hacer más y para cada ocasión.
Tal vez, eventualmente me anime a hacerlas más grandes, ya que son muy fáciles de hacer, con bajo costo y pueden ser un bello detalle para regalar o decorar fiestas o espacios temáticos.
And so I finished Jack Skellington's Mini Piñata for this Halloween. I loved it; he's one of my favorite characters. I had never made Mini Piñatas before, let alone Piñatas, but I loved the process and the final product. I'm already excited to make more for every occasion.
Maybe eventually I'll get the courage to make bigger ones, since they're very easy to make, inexpensive, and can be a beautiful gift or decoration for parties or themed spaces.
Deseo que les haya gustado este tutorial, y gracias por haber pasado por mi publicación.
I took the photos with my phone Redmi Note 8
Apps I used:
Canva Pro for Cover, Collage and Banners
I used Deepl Translator
My social networks:
Discord: YennysYaneth#0189
Twitter: @yennysferm
Instagram: @yennysyaneth
Las fotos las tomé con mi teléfono Redmi Note 8
Apps que utilicé:
Canva Pro para la Portada, Collage y Banners
Utilicé el Traductor Deepl
Mi redes sociales:
Discord: YennysYaneth#0189
Twitter: @yennysferm
Instagram: @yennysyaneth