
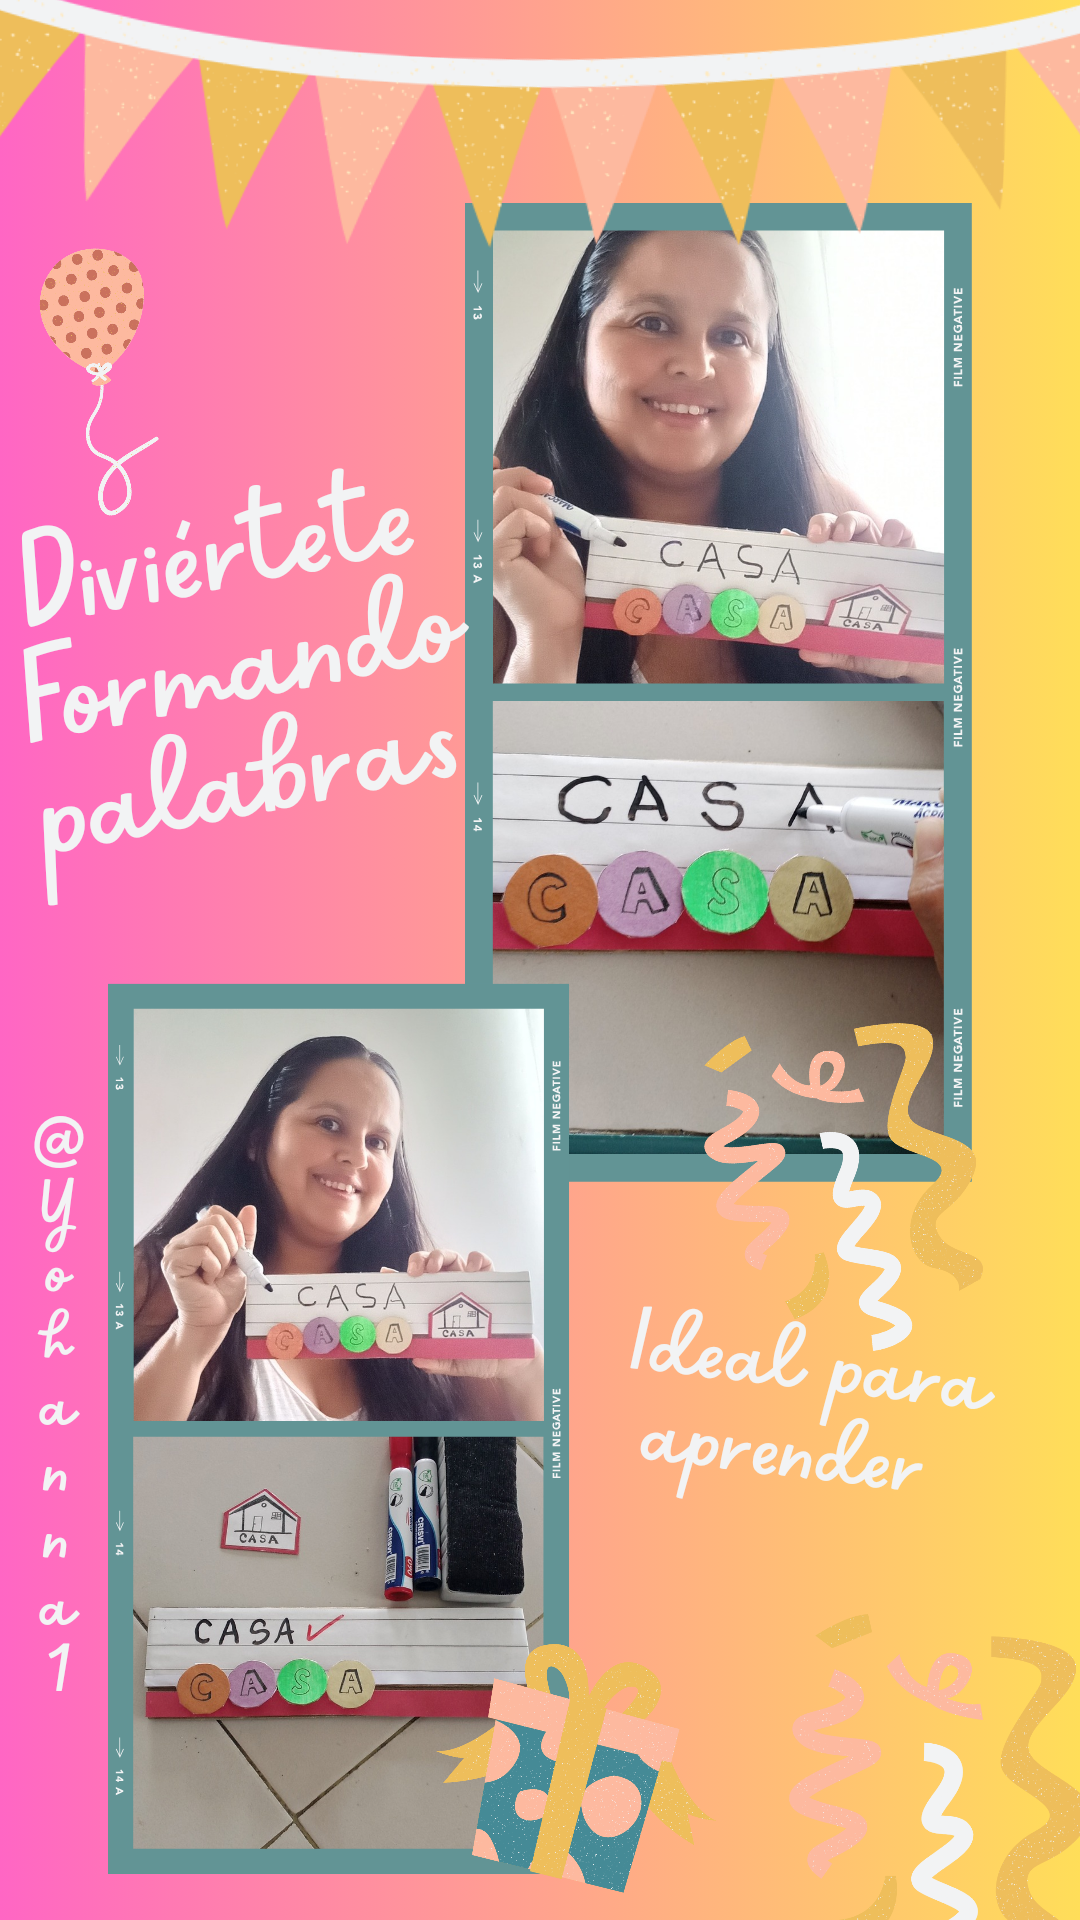
En la búsqueda de hacer divertido el aprendizaje en mis hijos, le comparto una herramienta muy entretenida que les puede servir como estrategia de aprendizaje a la hora de enseñar la letras, vocales, palabras, animales, cosas, figuras, números, cantidades entre otras cosas que se te puedan ocurrir con este divertido formador de palabras que les comparto como fue su realización en casa.
In my quest to make learning fun for my children, I am sharing with you a very entertaining tool that can serve as a learning strategy when teaching letters, vowels, words, animals, things, figures, numbers, quantities, among other things that you can think of with this fun word former that I am sharing with you how it was made at home.
Materiales
- Cartón para la base
- Hoja blanca para dibujar el molde o figuras
- Hoja escolar de diferentes colores
- Lápiz o marcador
- Palito de altura o pitillo
- Silicón líquido
- Tijera
- Cinta adhesiva
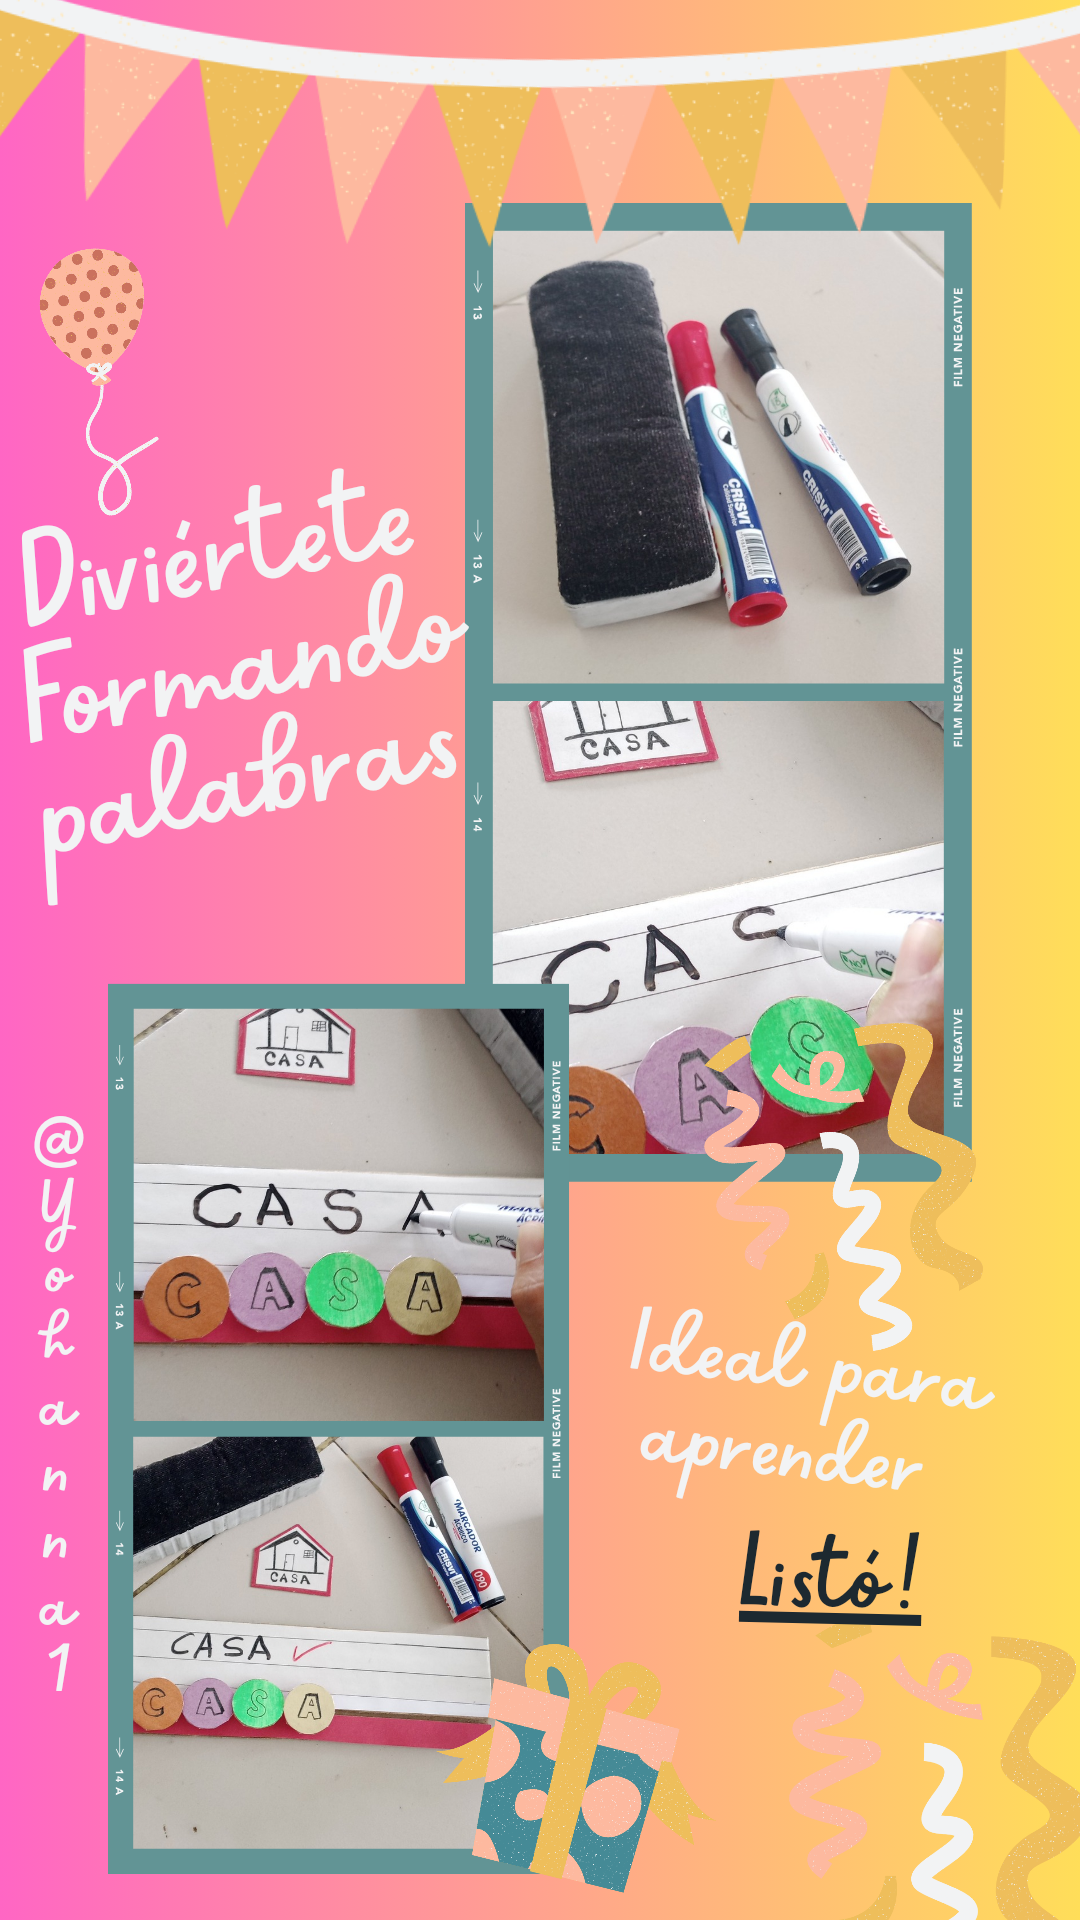
- Marcador acrílico y borrador para pizarra acrílica
# **Materials**


# **Pasó a pasó**
- Cardboard for the base
- White sheet to draw the mold or figures
- School paper of different colors
- Pencil or marker
- Stick or straw
- Liquid silicone
- Scissors
- Adhesive tape
- Acrylic marker and eraser for acrylic board
Iniciamos midiendo el cartón según la medidas de la imagen, es un pequeño rectángulo de 25 cm de largo y 7,5 cm de ancho. A parte sacamos 2 parte: una inferior con las medidas de 25cm de largo y 1,5 cm de ancho quedara fina esta parte. Luego sacamos la más ancha que mide 25 cm de largo y 5,5 de ancho.
Una vez cortado iniciamos a pegar a la base, dejando un espacio aproximadamente de 0,5cm de abertura, donde entre un palito de altura como se ve en la imagen. Dejamos reposar para que el pegamento haga su efecto de secado.
# **Step by Step**
We start by measuring the cardboard according to the measurements in the image, it is a small rectangle of 25 cm long and 7.5 cm wide. We take out 2 parts: a lower one with the measurements of 25 cm long and 1.5 cm wide, this part will be thin. Then we take out the widest one that measures 25 cm long and 5.5 cm wide.

Once cut, we start to glue it to the base, leaving a space of approximately 0.5 cm of opening, where a stick of height can fit as seen in the image. We let it rest so that the glue does its drying effect.
Mientras dejamos secar el cartón, iniciamos a dibujar en una hoja blanca o de reciclaje las figuras que desees realizar, acá trabajaremos una casa, la cual se realiza en grafito y posteriormente se remarca con un marcador punta fina para mejor terminación.
Se realizan círculos necesarios con ayuda de una tapa, en esta ocasión se requieren 4 círculos de colores diferentes para formar la palabra casa, una vez listo recortamos y se dibuja en cada circulo una letra de acuerdo a la palabra a formar.
While we let the cardboard dry, we begin to draw on a white sheet or recycled paper the figures that we want to make, here we will work on a house, which is done in graphite and then marked with a fine-tipped marker for a better finish.

The necessary circles are made with the help of a lid, in this case 4 circles of different colors are required to form the word house, once ready we cut them out and draw a letter in each circle according to the word to be formed.
Cortamos 4 trocitos de palito de altura, para pegarlos a las letras ya dibujadas y cortadas, tal como se muestra en la imagen. Dejamos secar.
We cut 4 pieces of stick of height, to stick them to the letters already drawn and cut, as shown in the image. We let it dry.
Volvemos a ubicar el cartón base, al cual a la parte superior se le coloca una envoltura con hoja blanca previamente marcada unas líneas, la reforzamos con cinta adhesiva para formar una mini pizarra acrílica. A la parte inferior para darle un toque más vistoso se le coloca una cinta o hoja de color rojo
Con la cinta adhesiva reforzamos la figura o dibujo de la casa, al igual que las letras, para una mayor durabilidad.
We put the cardboard back in place, and on the top we put a white sheet of paper with some lines previously marked on it, and we reinforce it with adhesive tape to form a mini acrylic board. On the bottom, to give it a more striking touch, we put a red ribbon or sheet of paper.

With the adhesive tape we reinforce the figure or drawing of the house, as well as the letters, for greater durability.
***Listo!***
Nuestro divertido formador de palabra para los niños. Utiliza marcador acrílico para formar la palabra y puede tranquilamente borrar y volver a utilizar. Muestra la imagen al niño y que ubique paso a paso cada letra en el orden que te muestra la imagen. Todo está en la creatividad de enseñar y aprender a enseñar de una manera divertida y partica.

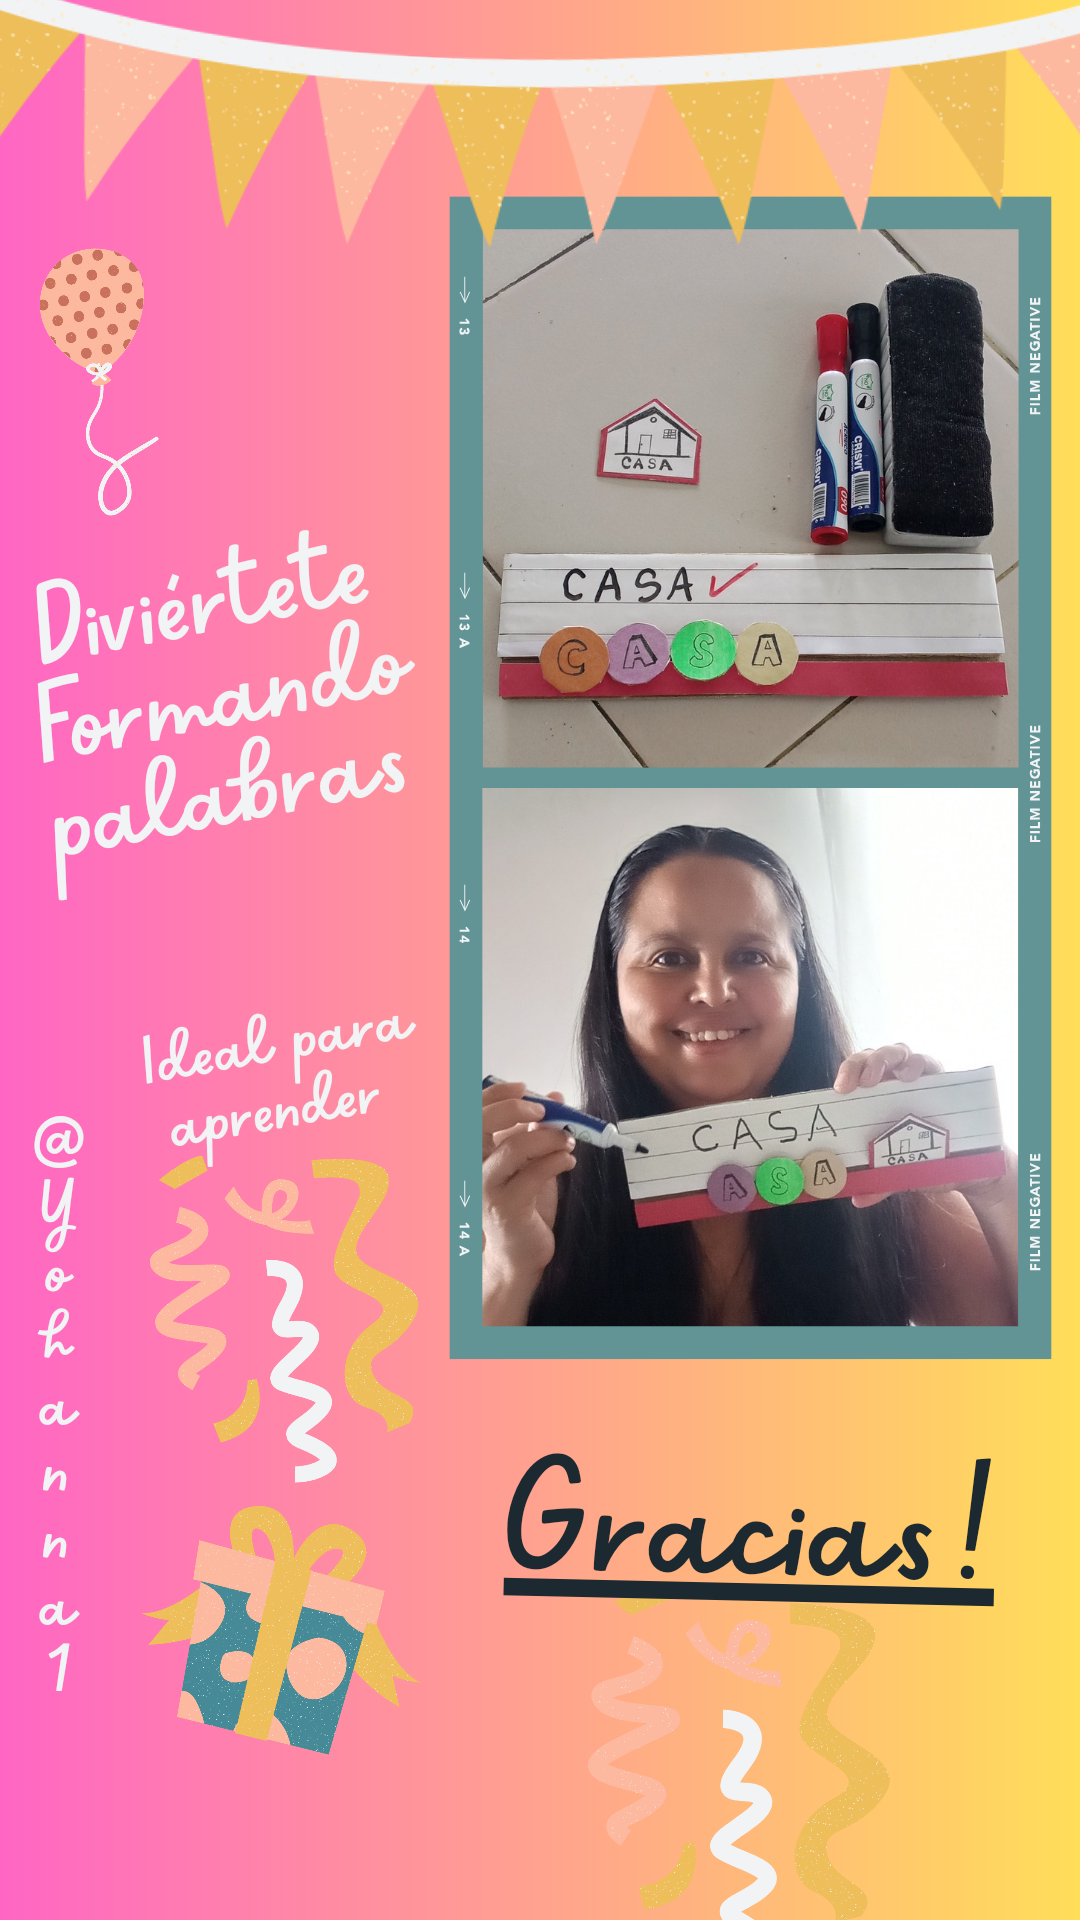

## Agradecida por cada apoyo. Dios los bendigas!
## Thankful for every support. God bless you!

Ready!

Our fun word builder for kids. Use acrylic marker to form the word and can easily be erased and reused. Show the picture to the child and have them place each letter step by step in the order shown in the picture. It's all about the creativity of teaching and learning to teach in a fun and engaging way.
Contenido: Original del Autor.
Imágenes: Originales tomadas con mi teléfono
Recursos: Computador y teléfono infinix hp 10
Programa: Canva y Polish
Traducido con traductor google
Todos los Derechos Reservados: @yohanna1

Content: Original by the Author.
Images: Originals taken with my phone
Resources: Computer and phone infinix hp 10
Program: Canva and Polish
Translated with google translator
All Rights Reserved: @yohanna1
#spanish
#english
#diy
#hivediy
#manualidades
#hadmade
#tutorial
#appreciator
#crafts
#diyhub
Payout: 0.000 HBD
Votes: 3
More interactions (upvote, reblog, reply) coming soon.