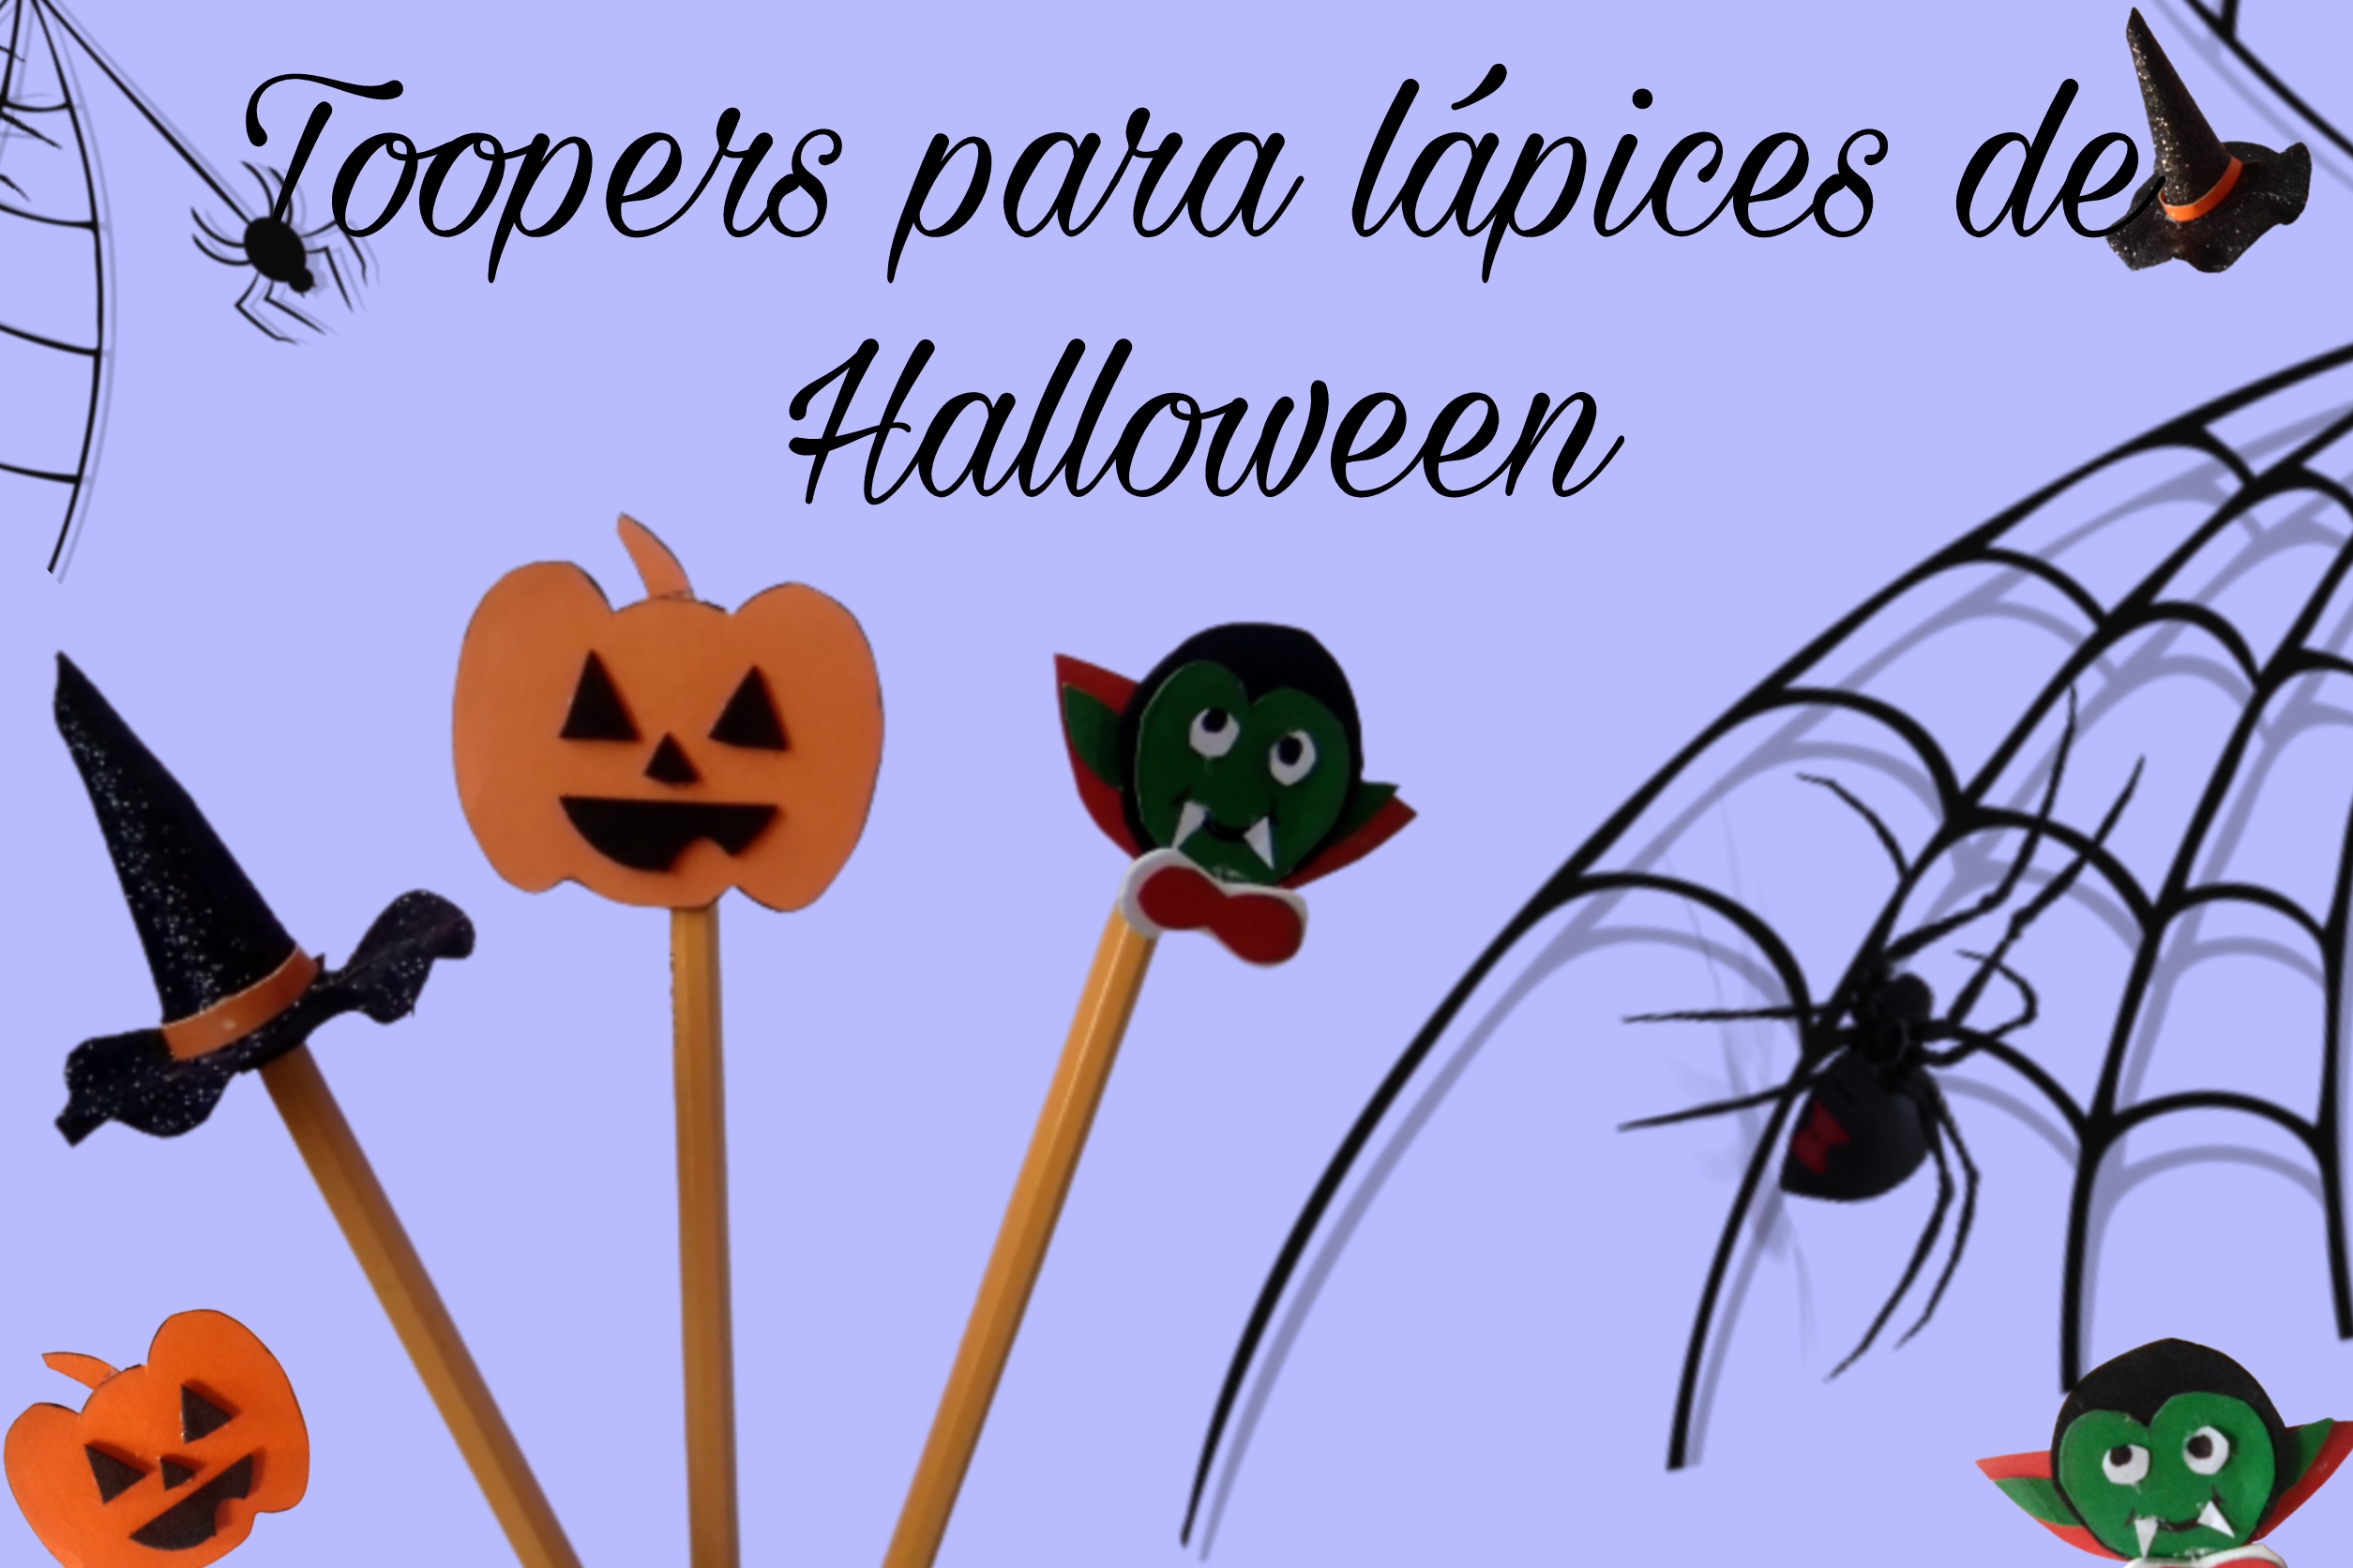

Happy day to the community of creators of Hice Diy, who pleasantly surprise us every day with their great talent. We have just received the month of October, and among the most anticipated dates of the month is Halloween, therefore we must prepare in advance to count the elements of decoration and accessories to be in tune with the celebration. That is why for this day, I am going to show you how I made some Toppers, Halloween style to decorate our children's pencils, and that they enjoy and show them in the last week of October. Here I tell you how to make them, and the best thing is that not many materials are used.

*MATERIALS*
✓ Scraps of foami, white, matte black and frosted
✓ Scraps of cardboard, white green, orange and red
✓ Black marker.
✓ Scissor
✓ Clothes iron
✓ Gun and silicone bar.

*STEP BY STEP*
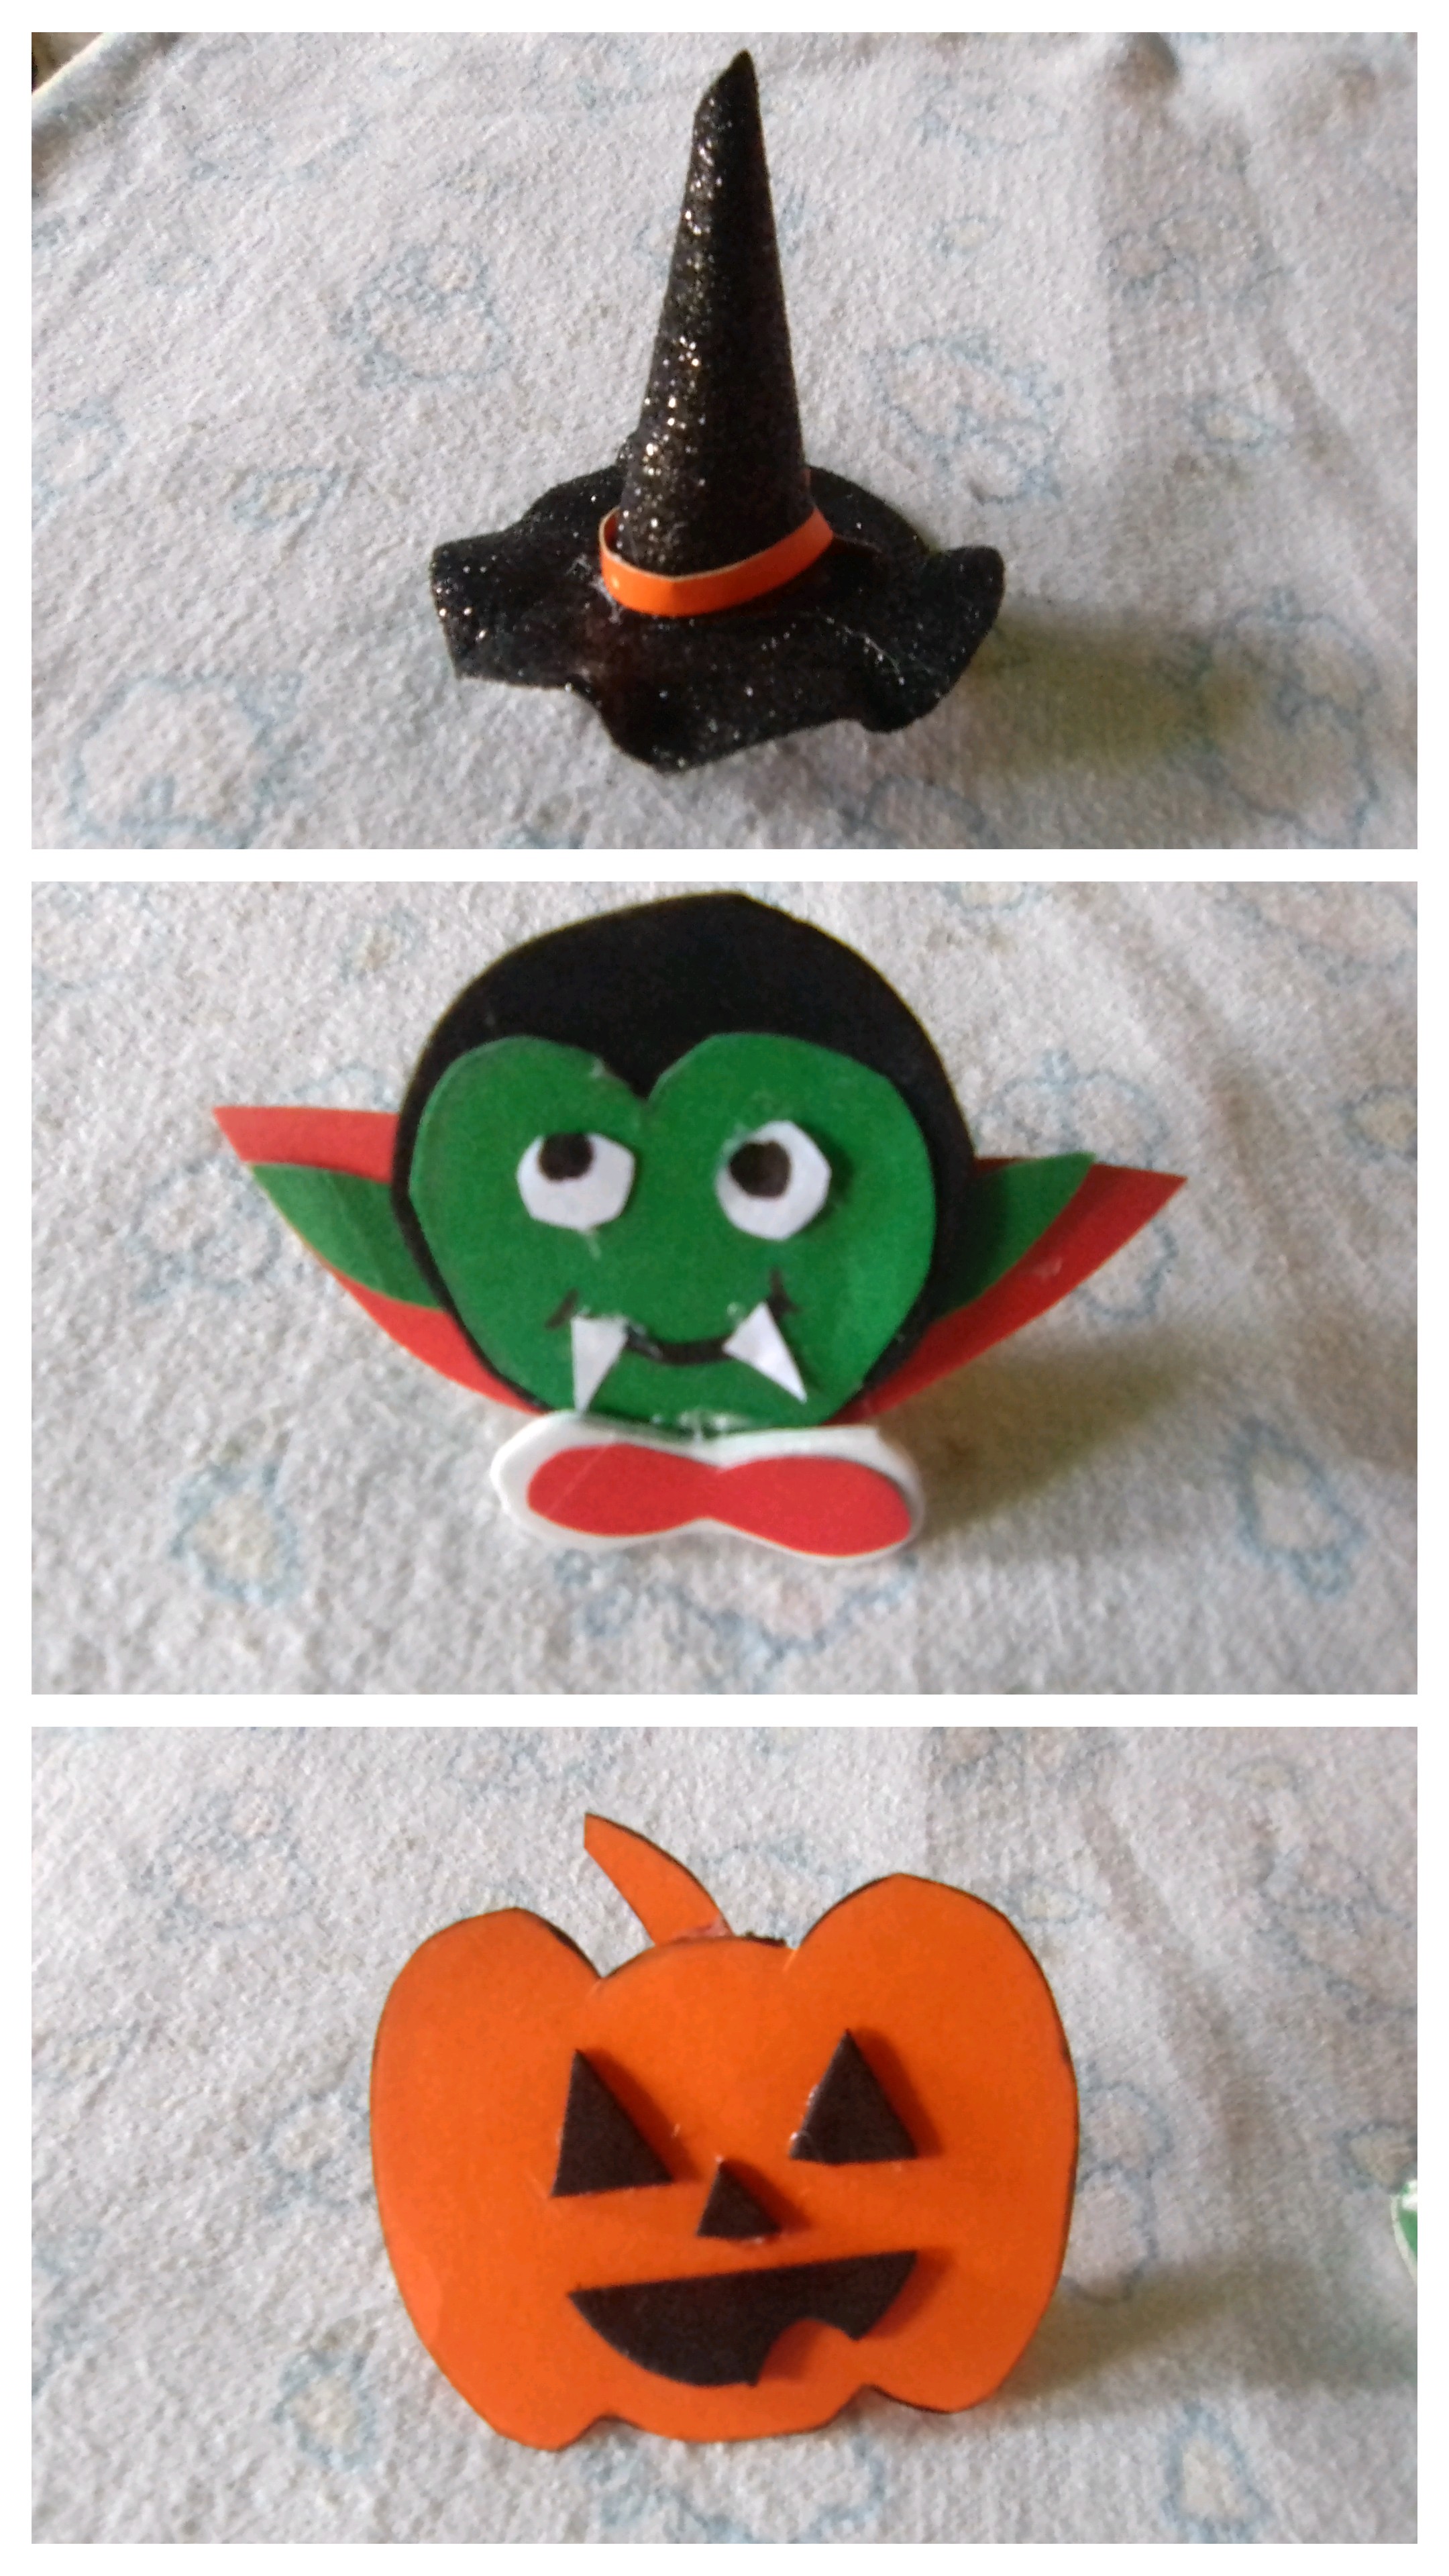
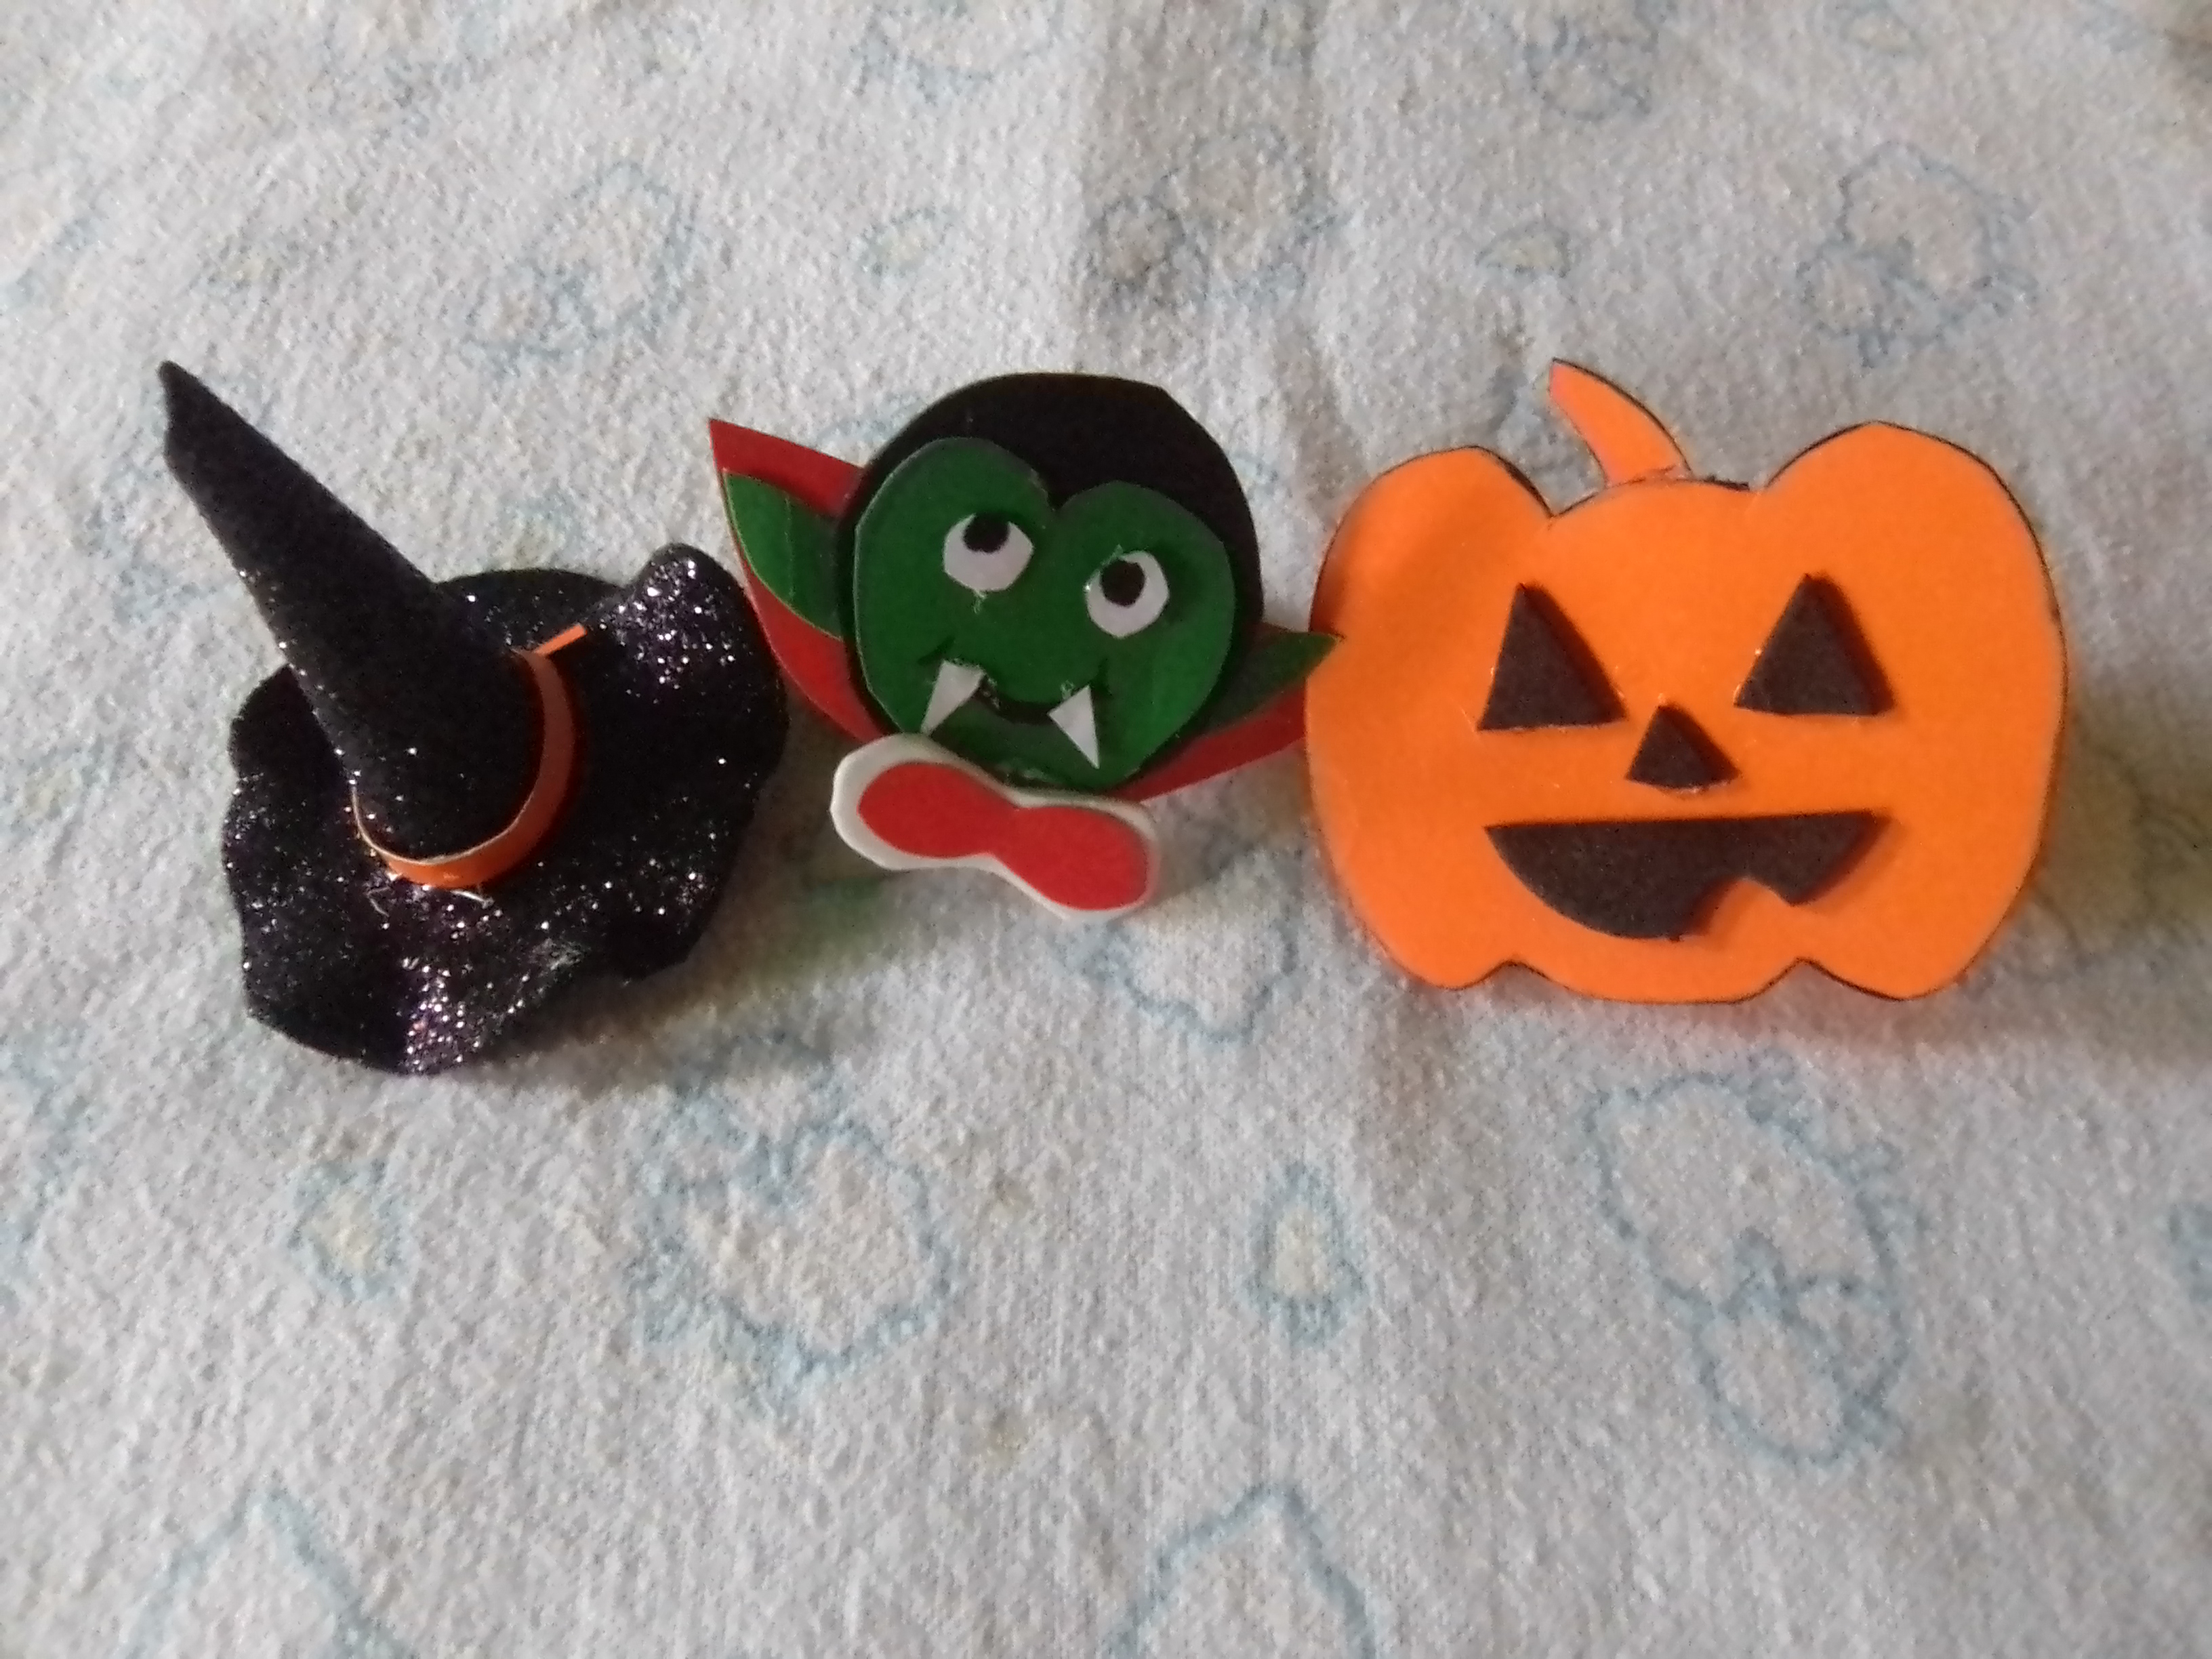
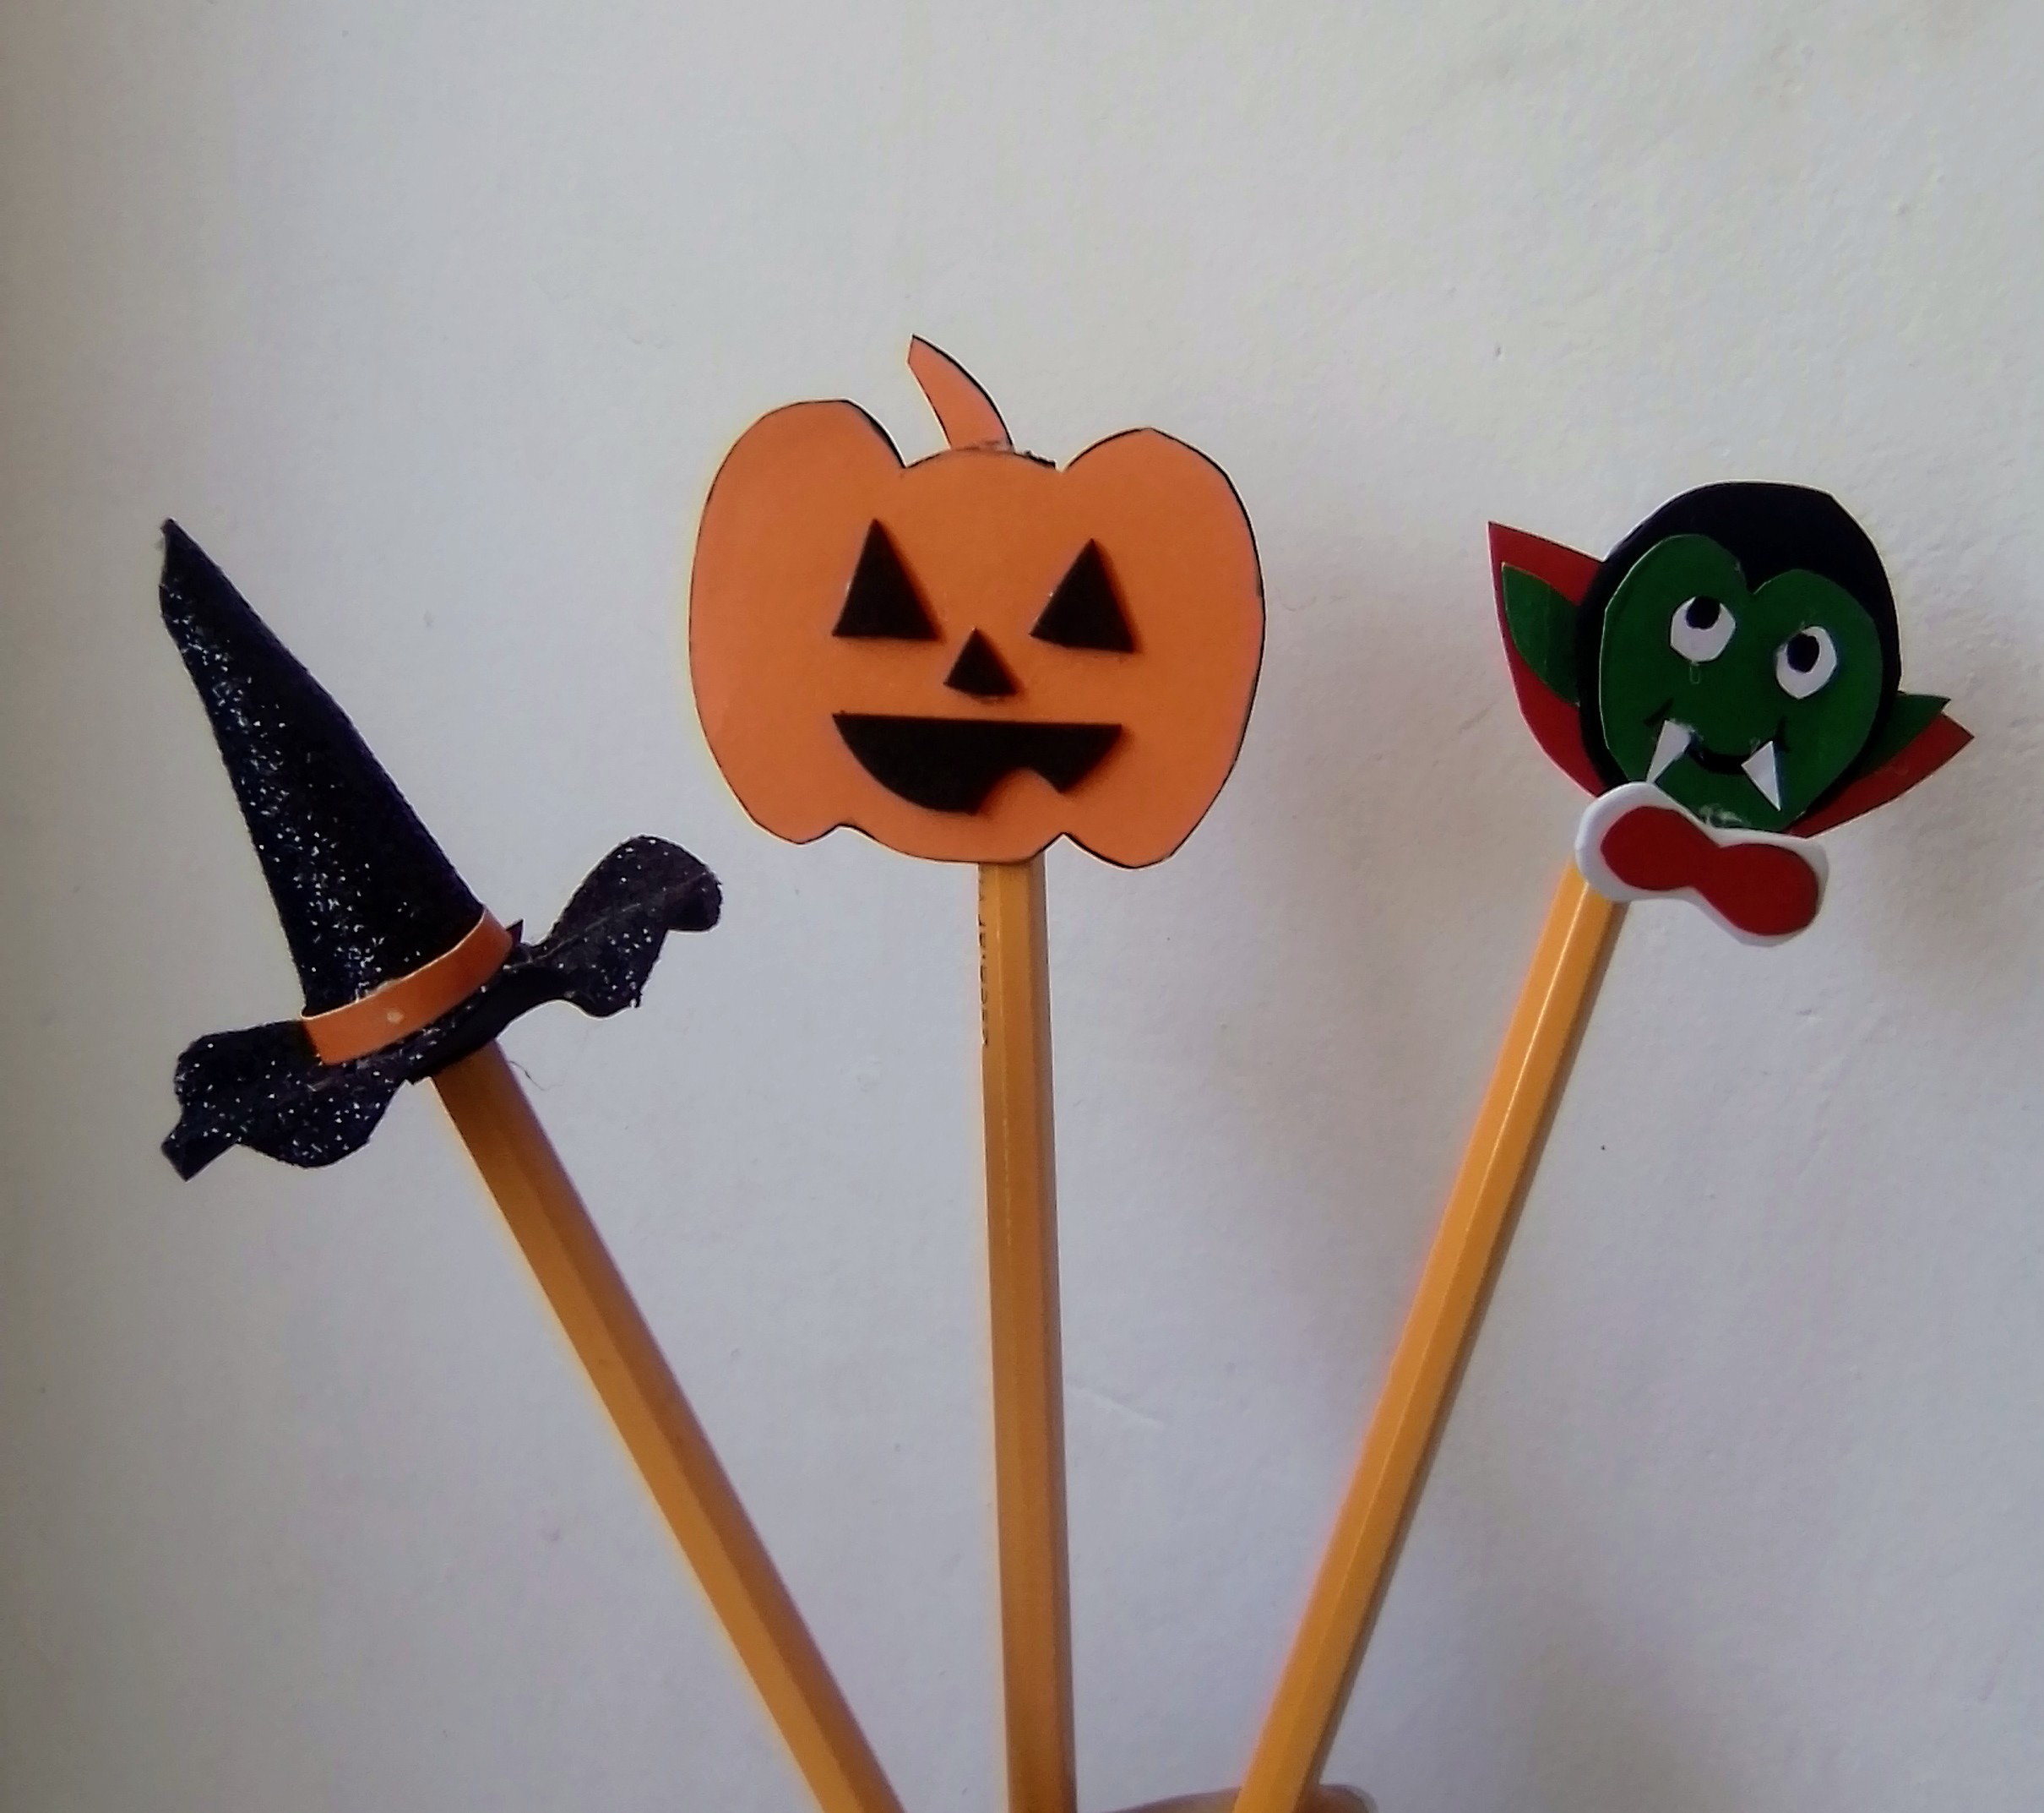
Halloween is a celebration that every day is more anticipated and enjoyed by children, who want spooky and horror outfits and accessories for that day, so we will begin to make some simple Halloween-themed pencil toppers, we will make three designs, a witch hat, a pumpkin and a green monster, these designs for boys and girls to choose the one they prefer.
The first thing was to make the designs and molds of the Halloween horror elements, then I transferred them to the foami and the cardboard colors arranged for each design.
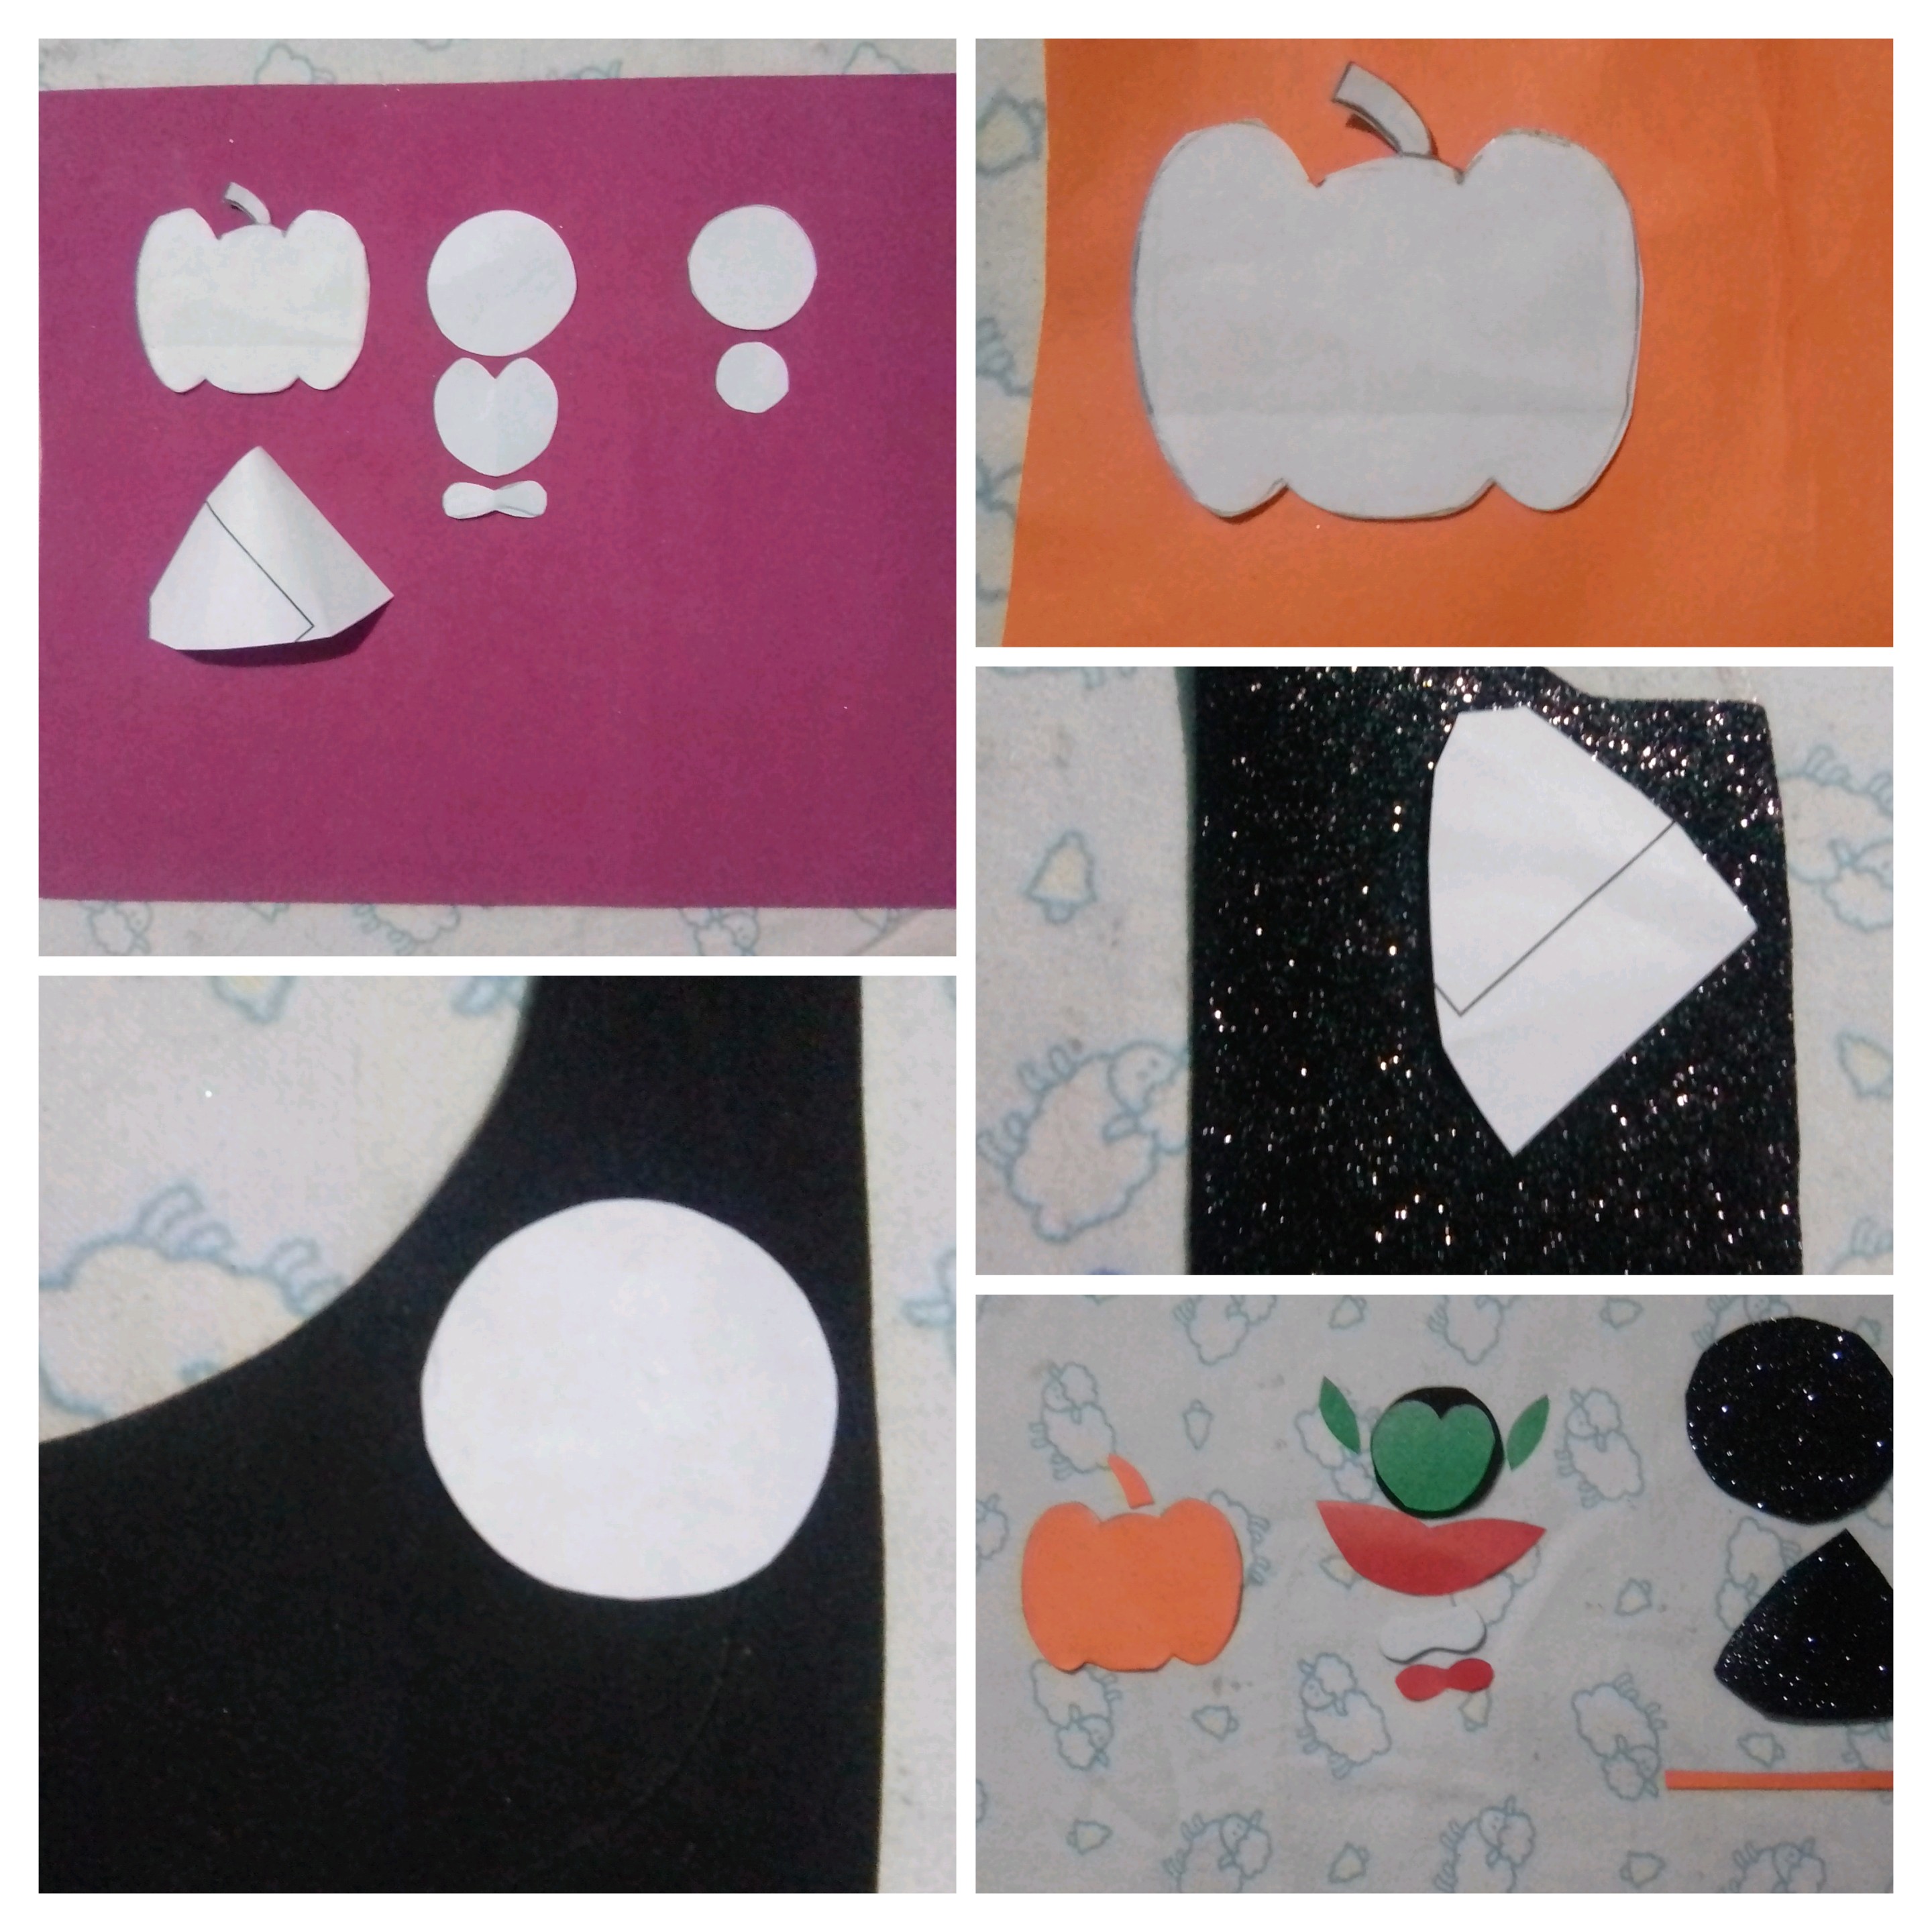
Having the shapes ready, I proceed to assemble and start with the witch's hat, I take the foam cone, turn it over, glue with hot silicone, then the black circle of the brim of the hat, fold it in half and make a cut crosswise with scissors, then applied heat with the clothes iron on the edges, to give movement. I glue the parts of the hat and decorate an orange ribbon. He made the clip, in black foami, with the measure of a pencil and I introduce it in the hole, so that it is flush with the hat.

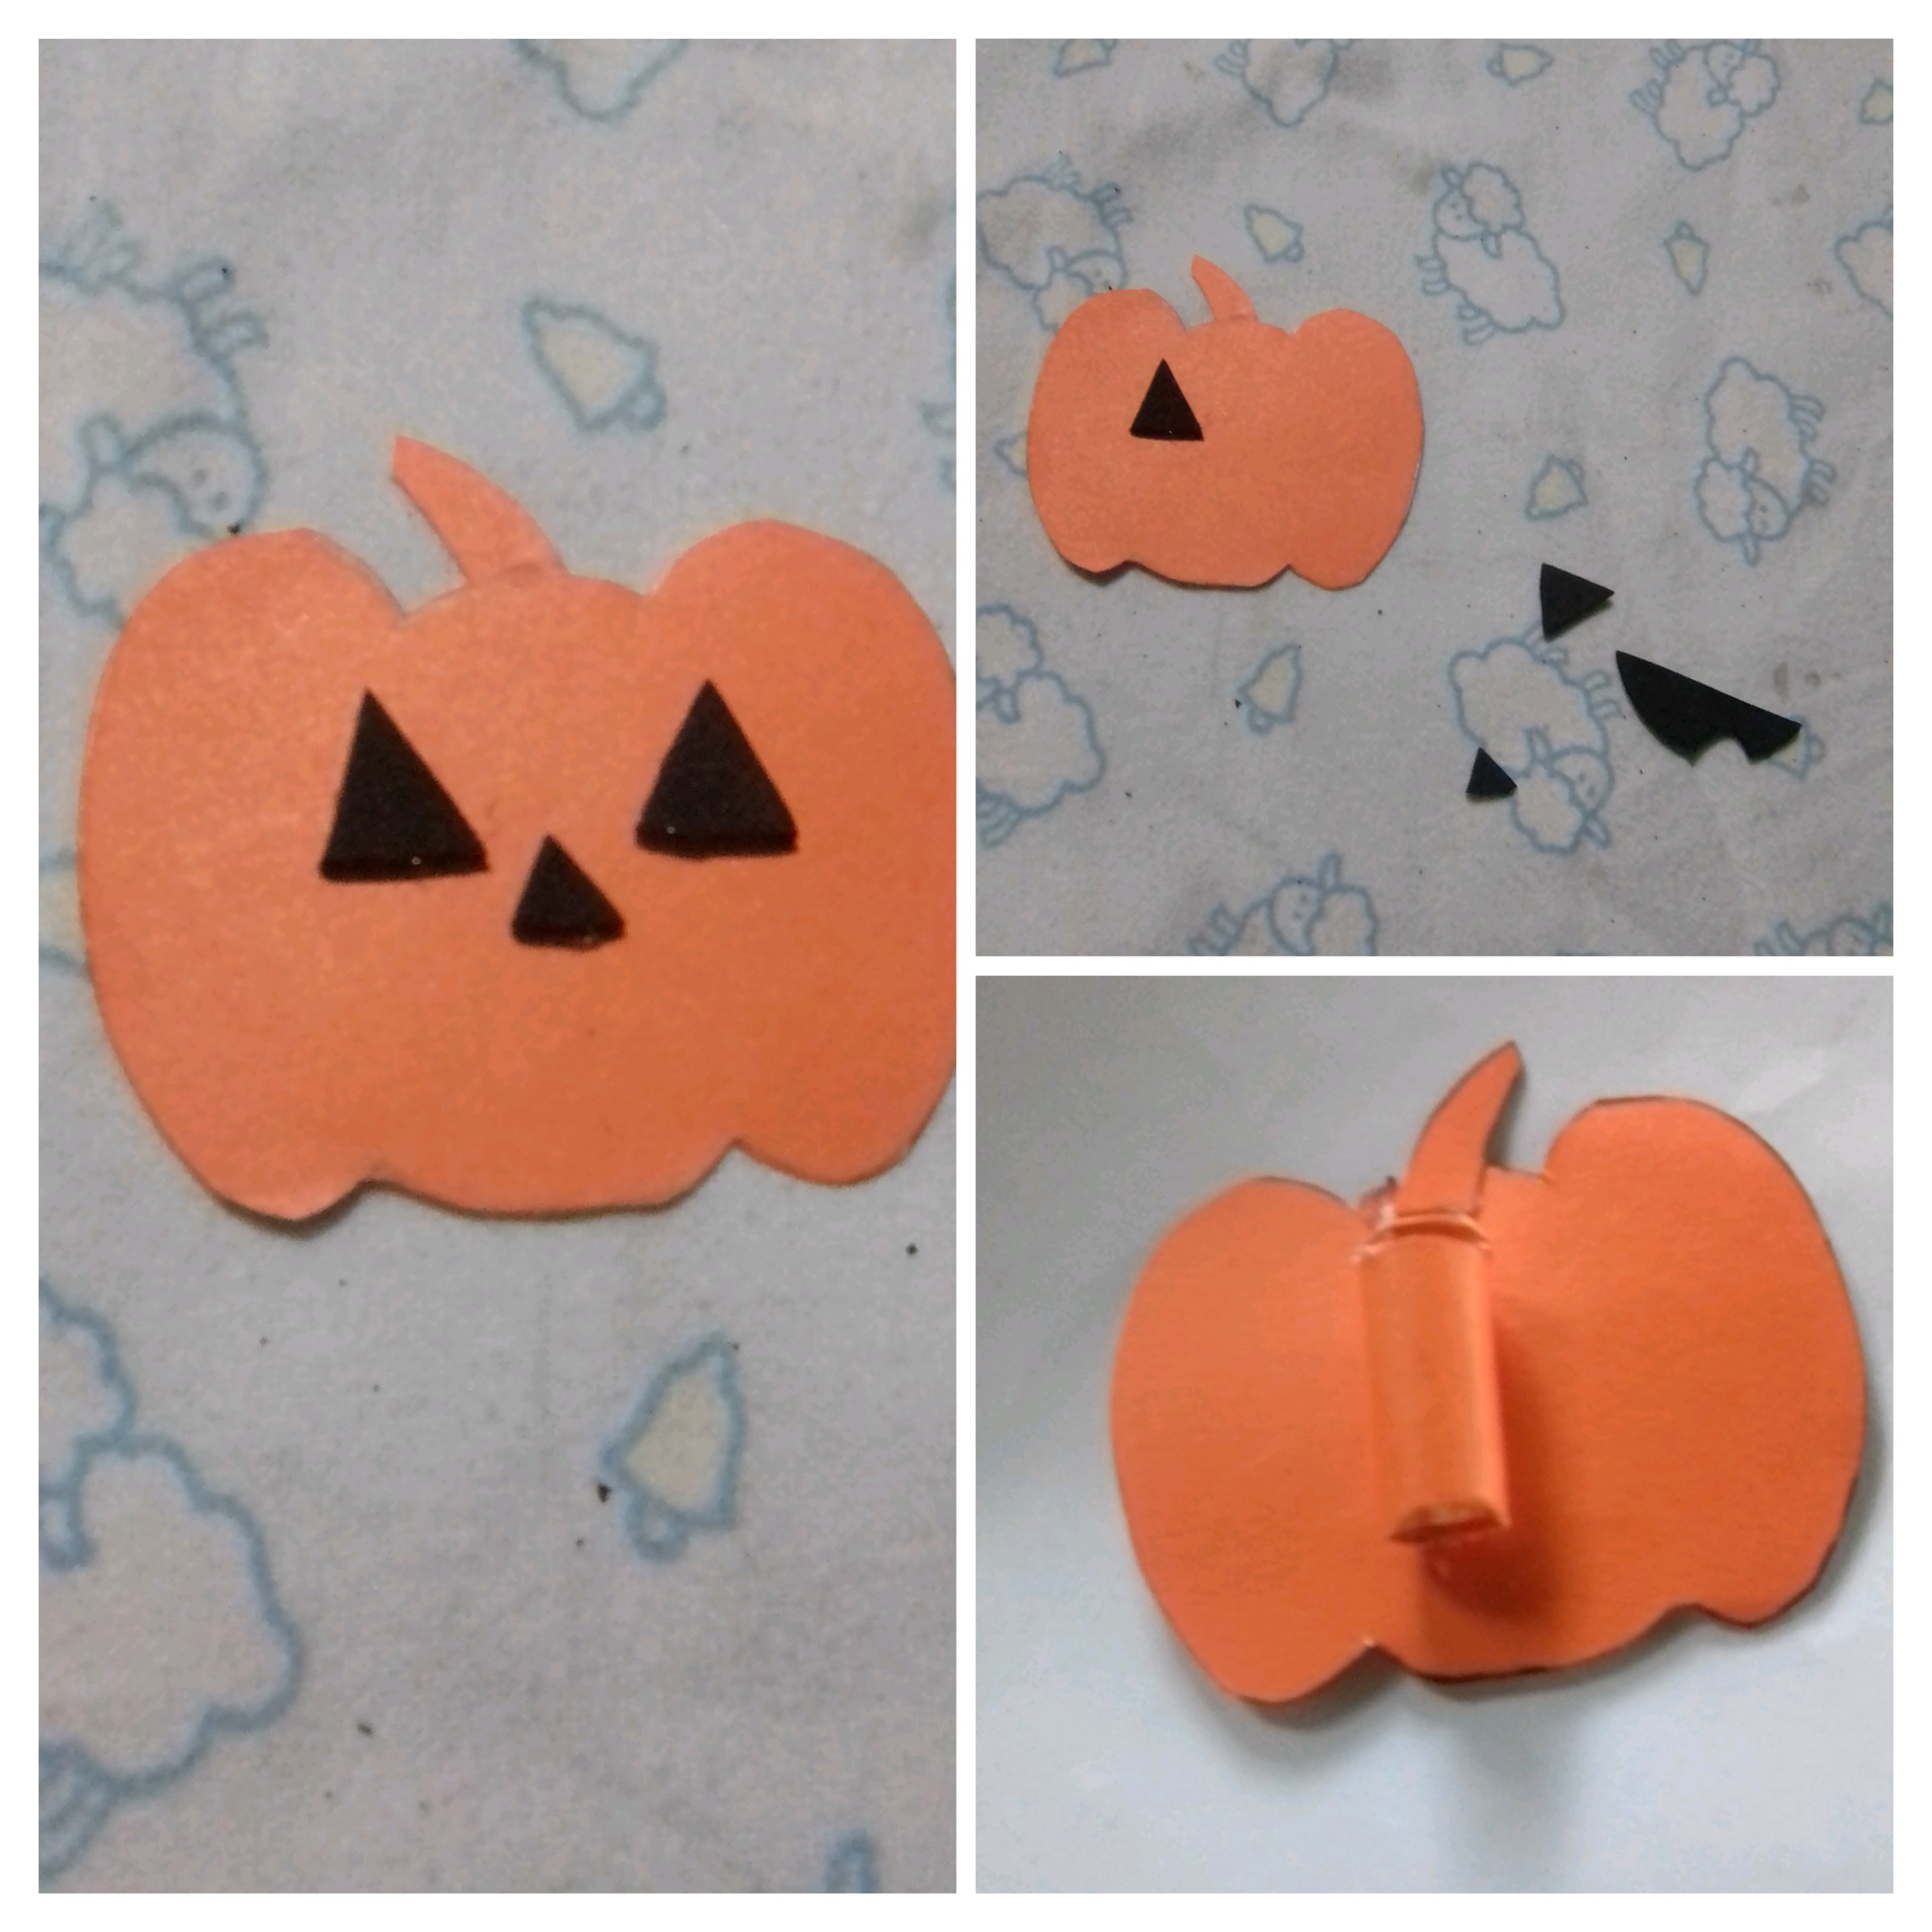
For the pumpkin, I made and glued the triangles that will be the eyes and nose, as well as the mouth, to which I decided to make a characteristic face. I traced very subtly around the pumpkin with a black marker and I made the clip with the same orange cardstock.
For the green monster I attached the green face to the black circle, the tie loops and the ears and the red suit, then assembled the parts, glued the eyes and outlined the smile with a black marker and glued the fangs, I made the clip with black foam.

It's that simple to make these fun Toppers, for the pencils of the spoiled of the house, with a Halloween theme, I hope you will be encouraged to make them at home, to advance the preparations for the horror party.
RESULT

The photos are my property taken exclusively in this project.
The collages of the procedure were made with the tool of my Blue C6 and the main one in Canva
The dividers and the banners were edited by me in Canva

Feliz día para la comunidad de creadores de Hice Diy, quienes cada día nos sorprenden gratamente con su gran talento. Recién hemos recibido al mes de octubre, y entre las fechas más esperadas del mes está el día de Halloween, por lo tanto debemos prepararnos con anticipación para contar los elementos propios de decoración y de accesorios para estar a tono con la celebración. Es por ello que para este día, les voy a enseñar cómo hice unos Toppers, al estilo noche de Halloween para adornar los lápices de nuestros hijos, y que ellos los disfruten y los muestren en la última semana de octubre. A continuación les cuento cómo hacerlos, y lo mejor es que no se utilizan muchos materiales.


*MATERIALES*
✓ Retazos de foami, blanco, negro mate y escarchado
✓ Retazos de cartulina, blanco verde, naranja y rojo
✓ Marcador negro.
✓ Tijera
✓ Plancha de ropa
✓ Pistola y barra de silicona.

*PASO A PASO*
Halloween es una celebración que cada día, es más esperada y disfrutada por los niños, quienes desean atuendos y accesorios fantasmagóricos y de horror para ese día, así que comenzará elaborar unos sencillos Toppers para los lápices con temática de Halloween, haremos tres diseños, un sombrero de bruja, una calabaza y un monstruo verde, estos diseños para que niños y niñas elijan el de su preferencia.
Lo primero fue realizar los diseños y moldes de los elementos de horror de Halloween, luego los transferí al foami y los colores de cartulina dispuestos para cada diseño.

Al tener las formas listas, procedo a ensamblar y comienzo con el sombrero de bruja, tomo el cono de foami, lo giro sobre el, pego con silicona caliente, luego el círculo negro del ala del sombrero, lo doblo a la mitad y hago un corte en cruz con la tijera, seguidamente le aplicó calor con la plancha de ropa en los bordes, para dar movimiento. Pego las los partes del sombrero y decoro un una cinta naranja. Realizó el clip, en foami negro, con la medida de un lápiz y lo introduzco el el orificio, que quede al ras del sombrero.

Para la calabaza, elabore y pegué los triángulos que serán los ojos y nariz, además de la boca, a la cual decidí realizar una mueca característica. Delinee muy sutilmente alrededor de la calabaza con marcador negro y el clip lo hice con la misma cartulina color naranja.

Para el monstruo verde uni la cara verde al círculo negro, los lazos de la corbata y las orejas y el traje rojo, luego ensamble las partes, pegué los ojos y delinee la sonrisa con marcador negro y pegué los colmillos, el clip le realice con foami negro.

Así de sencillo elabore estos divertidos Toppers, para los lápices de los consentidos de la casa , con temática de Halloween, espero se animen a realizar en casa, para adelantar los preparativos de la fiesta del horror.
RESULTADO
Las fotos son de mi propiedad tomadas exclusivamente en este proyecto.
Los collages del procedimiento los hice con la herramienta de mi Blue C6 y el principal en Canva
Lo separadores y el banners fueron editados por mi en Canva
La traducción fue realizada con DeepL Traductor