Good day, everyone, and Splinterlands community, it's today that I would share with you another modern battle strategy, showing a Maneuvers Rule Set with Commander Slade. The match was played under the Maneuvers rule set, which lets melee monsters attack from the second position. It might sound like a small twist, but it completely shifts how you can build a lineup. Normally, melee cards are forced into the front, but with Maneuvers in play, you suddenly get more flexibility, and that opens the door for creative builds. For this match, I relied heavily on Commander Slade, who turned out to be the perfect card for this setup. I’ll walk you through how I built the team, why Slade fit the plan so well, and how the battle actually unfolded.

Why Slade Stands Out Here
Commander Slade is already a favorite for anyone who leans on melee-heavy teams, and with good reason. Slade's stats at higher levels are impressive on their own: solid attack, speed, health, and armor, but what makes Slade shine are its abilities. With Enfeeble, Dodge, Deflect, and Backfire, Slade is tough to bring down and dangerous to ignore. In a Maneuvers battle, that extra layer of utility means Slade can start dishing out damage early instead of waiting to move into the front line. This single rule set turns Slade from a tank into a formidable or invincible unit.
Another thing that helps is Slade's availability. Since Slade is a Soulbound Rebellion rare unit, a lot of players have copies from Glint purchases, making Slade more accessible than many other main attacker options.
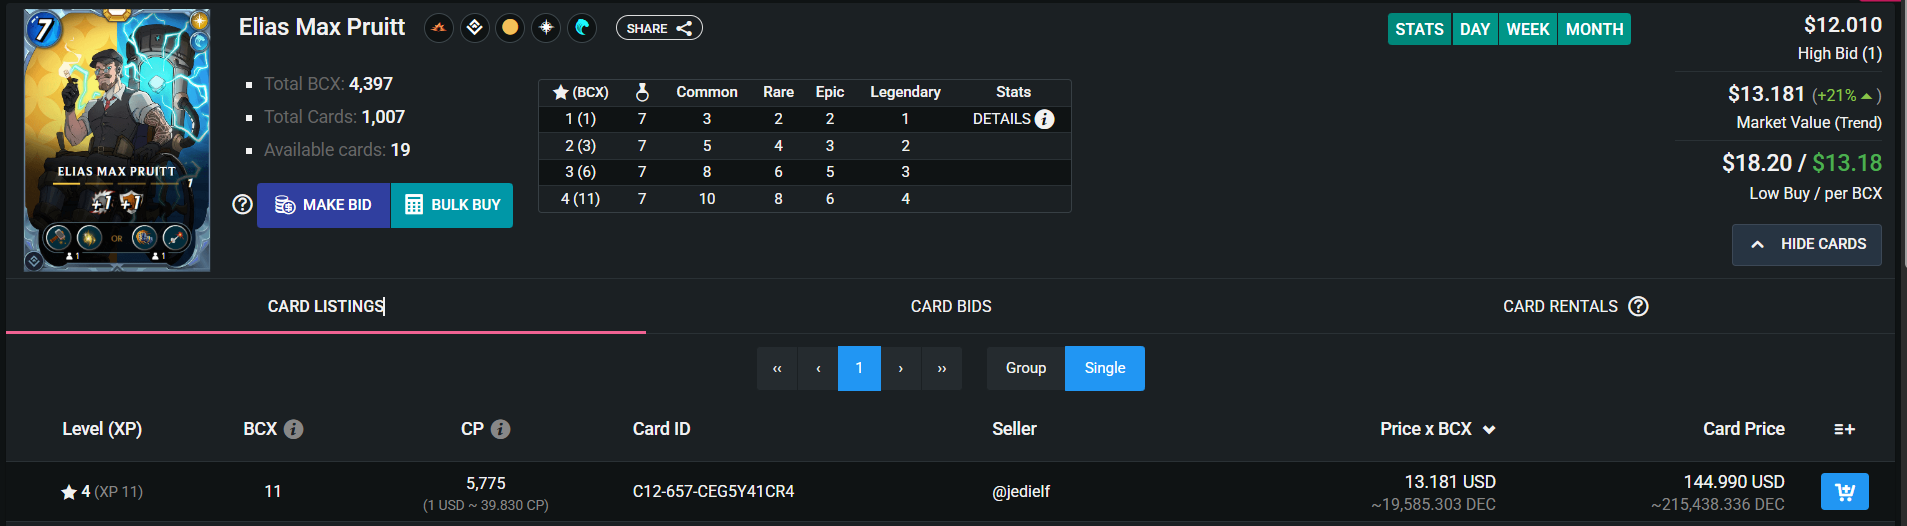

Of course, Slade pairs beautifully with high-cost summoners like Elias Max Priutt, who grants Armored Strike, but even with simpler setups, Slade can anchor a lineup. Using the Elias Max Priutt summoner with the Commander Slade and Maneuvers rule set almost guarantees victory, but it is also very costly to obtain. The skills and stats that this summoner bestows make even a level 1 powerful. In terms of play, you can still use other summoners that are adequate and support units that complement your team's composition.
I’ve seen Slade work best in larger mana battles where you have room to stack support around Slade, exactly like the one I’ll break down today.
Using the Elias Max Priutt summoner with the Commander Slade and Maneuvers rule set almost guarantees victory, but it is also very costly to obtain. The skills and stats that this summoner bestows make even a level 1 powerful. In terms of play, you can still use other summoners that are adequate and support units that complement your team's composition.

Into the battle: https://splinterlands.com/battle/sl_c1e820a5f1ee4624c724335229a0df8c
Battle Setup and Strategy
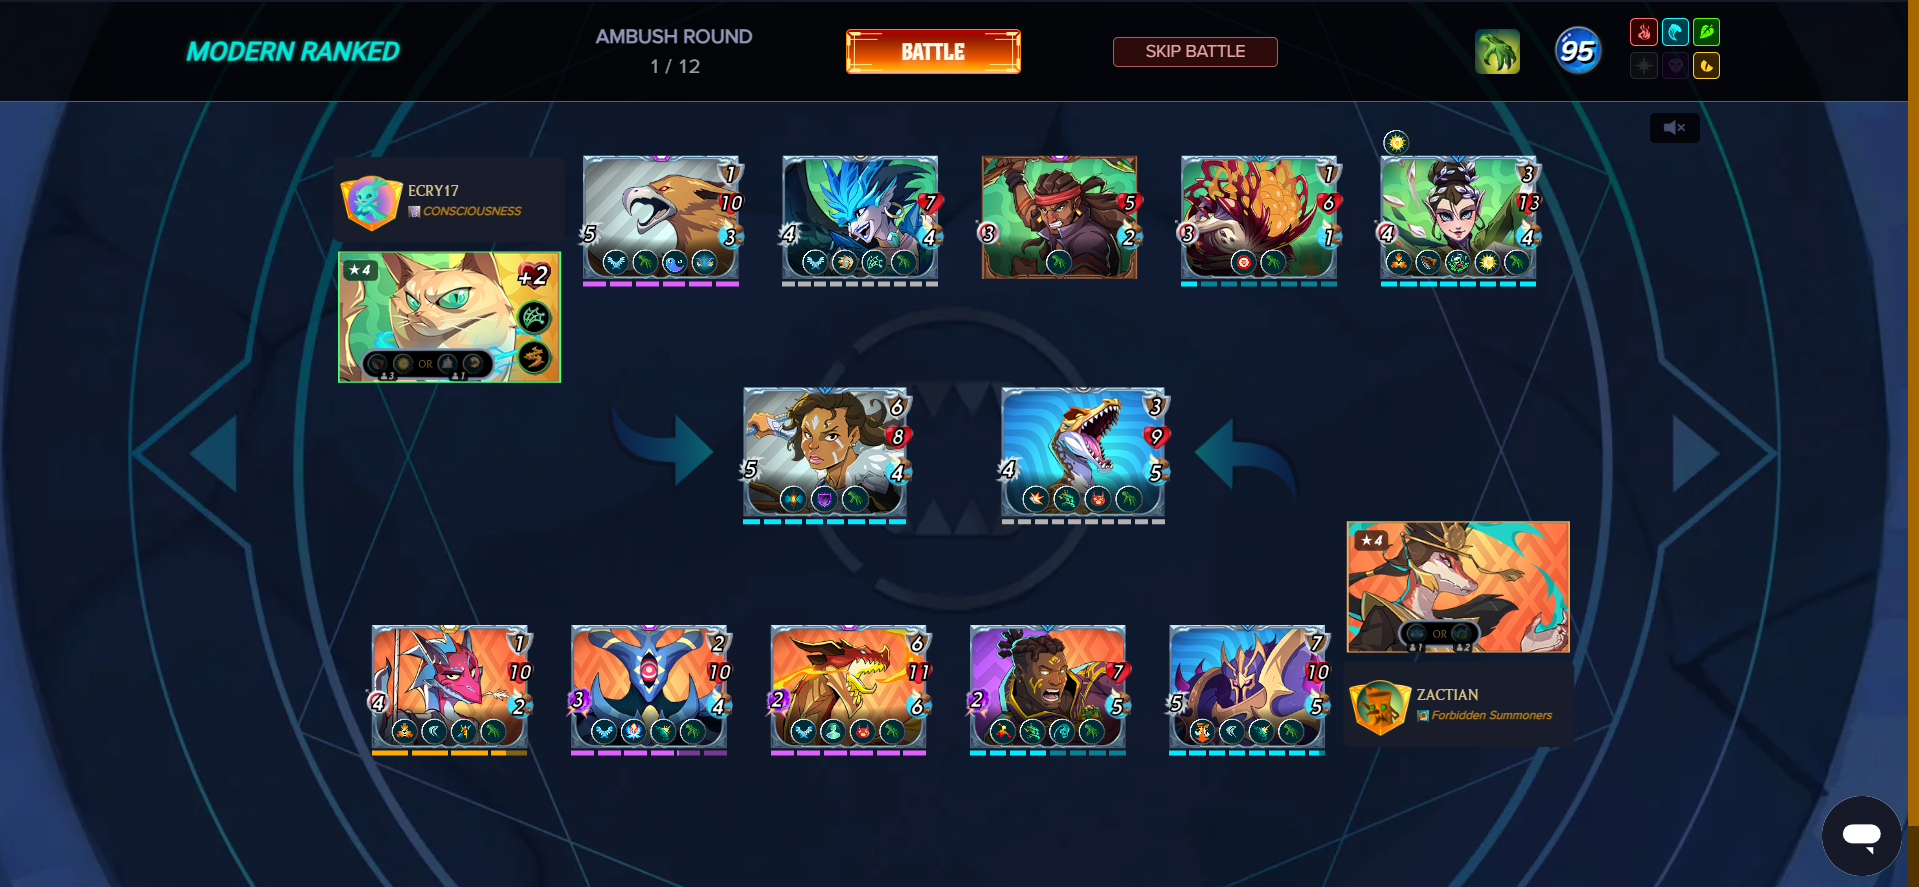
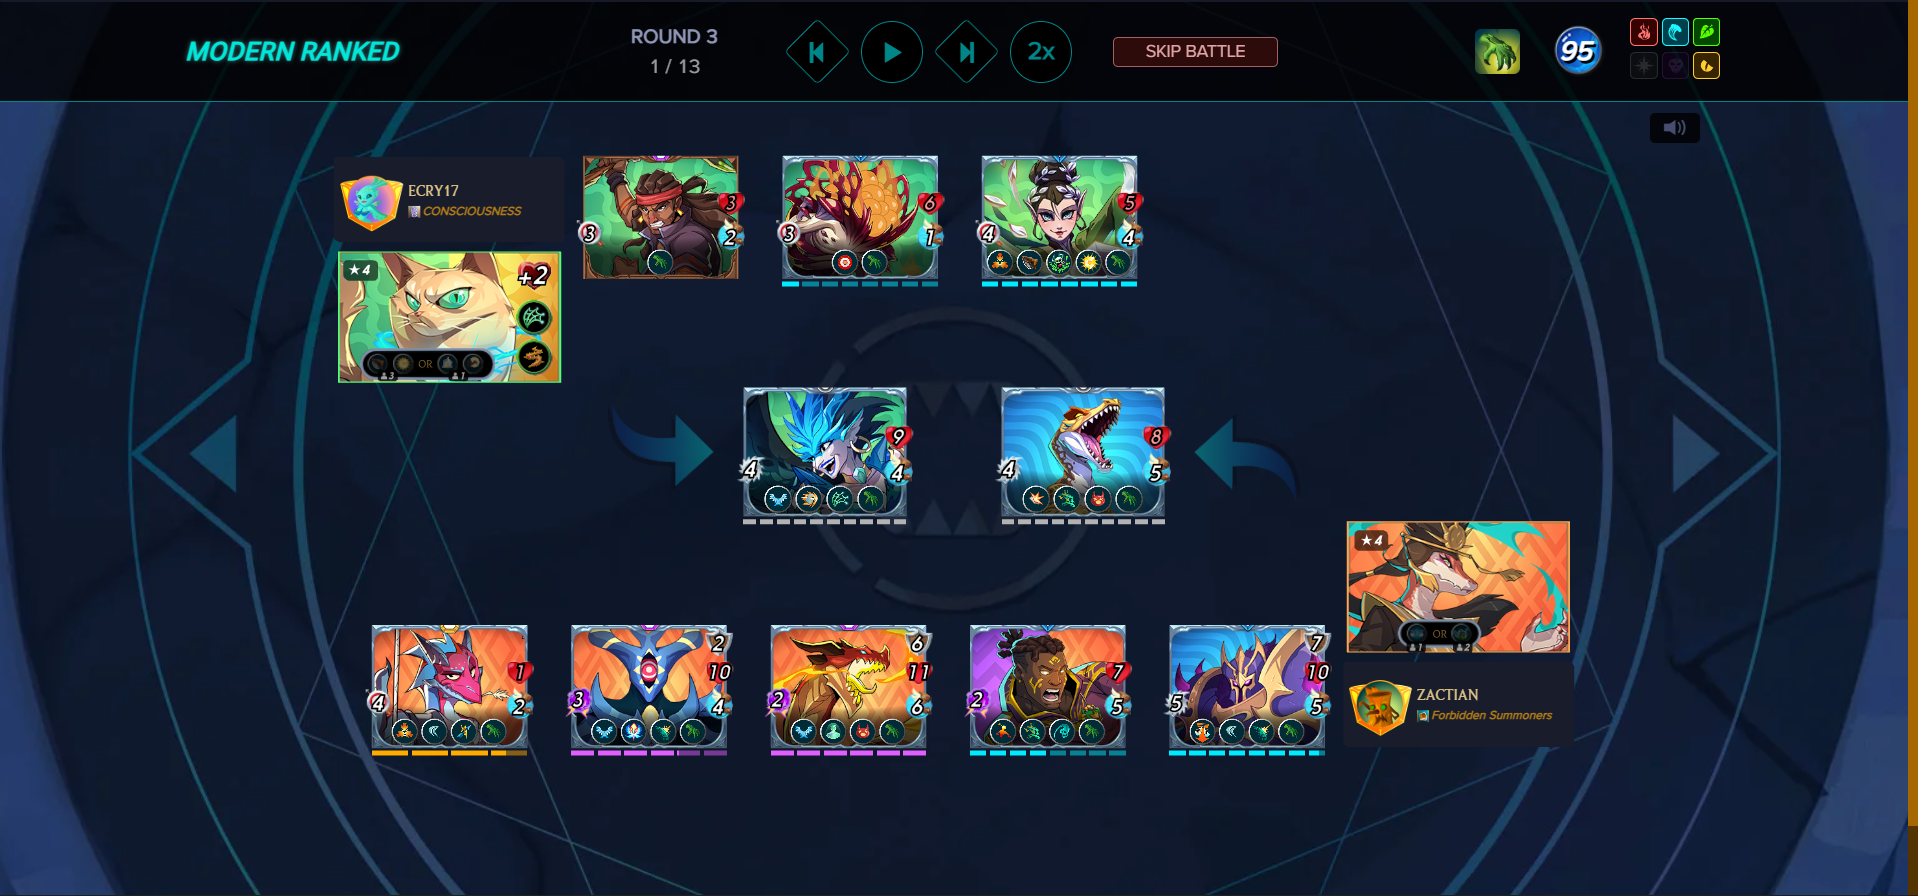
This modern battle had Maneuvers active with a 95 mana cap, which is among the higher caps you’ll encounter. The inactive elements were Life and Death, which still left Dragon, Water, Fire, and Earth in play. Because Dragon was available, I immediately leaned in that direction since Dragon offers flexibility and some of the most powerful magic and melee synergies. I was able to find a good balance between powerful magic support and a lot of melee options by pairing Dragon with Water.
I choose Akane as the summoner because of her Ambush ability, which gives two units a significant early strike advantage. Using this configuration, I deployed:
- First place goes to my main tank, the Giant Alpine Skink. It could absorb a lot of physical damage and buy time for my other units because of its Shield ability.
- The second allows Commander Slade to fully utilize the Maneuvers rule set. Slade's role was to be my primary melee damage dealer and could be a backup tank if the Skink went down.
- Third-position defensive anchor Kelan Gaines counters opponents who use a lot of magic.
- Fourth place goes to the Redwyrm Dragon, a unit I appreciate for its magic damage and stun potential.
- The fifth slot's Night Reaper, my primary magic powerhouse, is especially deadly against flying opponents thanks to its Wingbreak ability.
- As reinsurance against distance or stealth backline attacks, Syrenth occupies the final position.
The setup strategy is simple: to overwhelm the opponent, combine powerful melee and magic damage. If Maneuvers had not been in play, I would likely have leaned more heavily toward a pure magic build. But with the rule set allowing my Slade to unleash his melee power from the second slot, it made sense to take advantage of it.
The Opponent’s Lineup
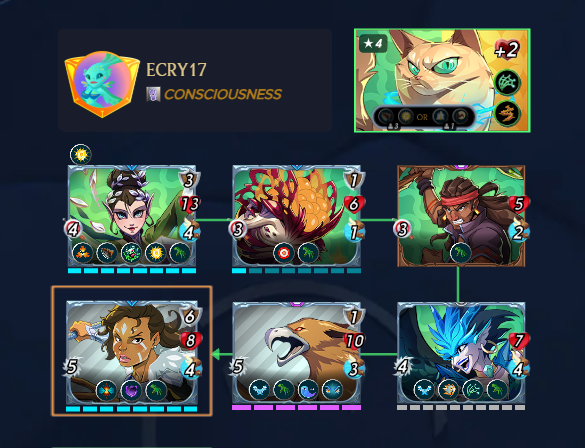
On the other side, my opponent chooses an Eternal Tofu, a legendary Rebellion summoner that targets melee with Thorns. The opponent team deploys Anyu Huntswoman, Pallus, Halaran Huntress, Kicking Roc, Swell Spore Beast, and Silverleaf Mage, respectively line-up position, a well-balanced mix of ranged and melee pressure. Eternal Tofu added an extra layer of danger for me, since Thorns can chip away at attackers if you’re not careful.
Even so, I saw a few openings. Slade’s Deflect meant reflected damage wasn’t going to be a big issue, and my Skink’s Shield would reduce most melee hits, including the return damage. Beyond that, I had clear edges in speed, card levels, and overall damage output. Some of their units were still sitting at level 1 (like Kicking Roc and Swell Spore Beast), which made them easier to bring down.
Battle Progression
The match started fast (forward to round 3), and within the first three rounds, the momentum was already mine. By Round 3, my Alpine Skink and Commander Slade had broken through the first two enemy positions. Slade didn’t waste a single turn—he kept landing heavy strikes thanks to Maneuvers, which forced my opponent to constantly play catch-up.

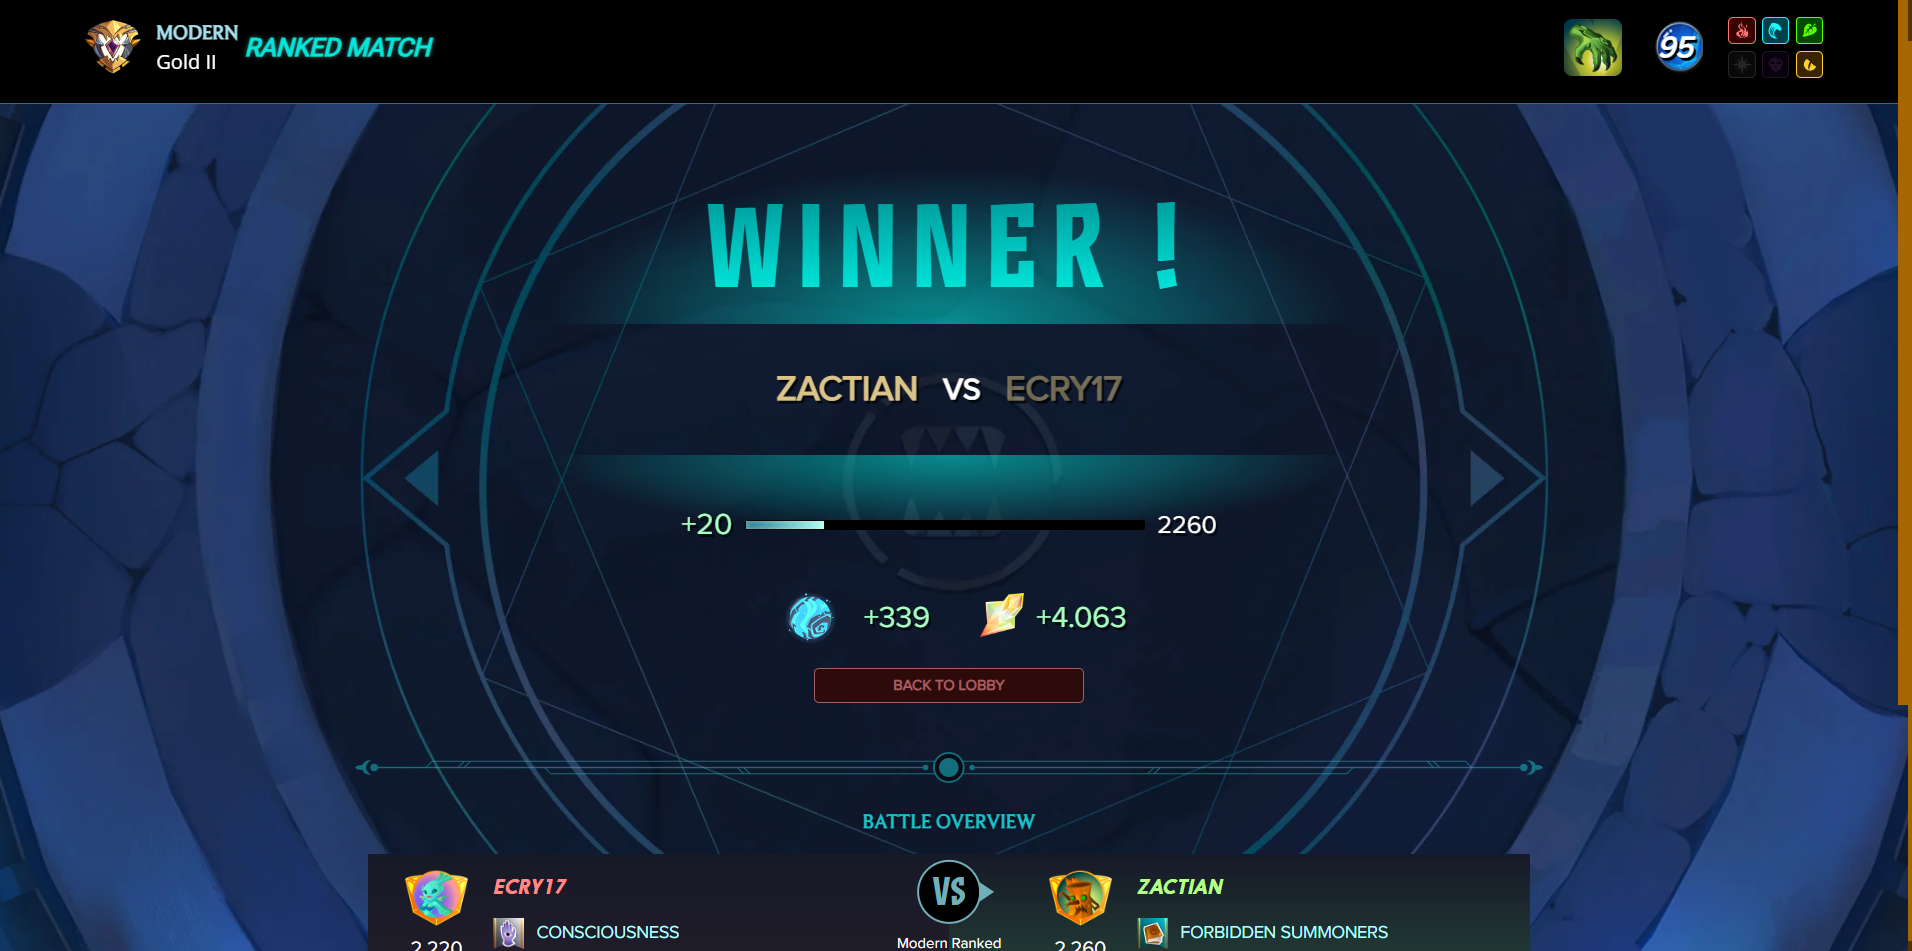
By the start of Round 4, it was all but decided. None of my monsters had fallen, and the opponent’s lineup was collapsing under the pressure of my melee and magic combo. The synergy worked exactly the way I had hoped: Skink absorbed attack and thorns, Slade carved through defenses, and my casters cleaned up the rest. The battle closed with a clean sweep; I didn’t lose a single card or unit.

A Big Thanks! For supporting me, being here, and coming this far. I hope this strategy assists you with some of your battles with these rule sets in modern format conclave and rebellion sets.
If you haven’t played Splinterlands, now is a great opportunity to sign up for Splinterlands and earn.
Use my referral link: Click Here
Credits:
Thumbnail Edited the Design photo Splinterlands Modern League using PicsArt Screenshot In-game splinterlands