***English***
Türkçe bölüm için lütfen buraya tıklayın.
---
Hello everyone!!!
I hope you’re doing well, or are trying to be well. I’m doing fairly alright myself. Lately, I’ve found myself in quite a busy period – not so much physically exhausting, but mentally draining. Hopefully, I’ll be able to get through it soon.
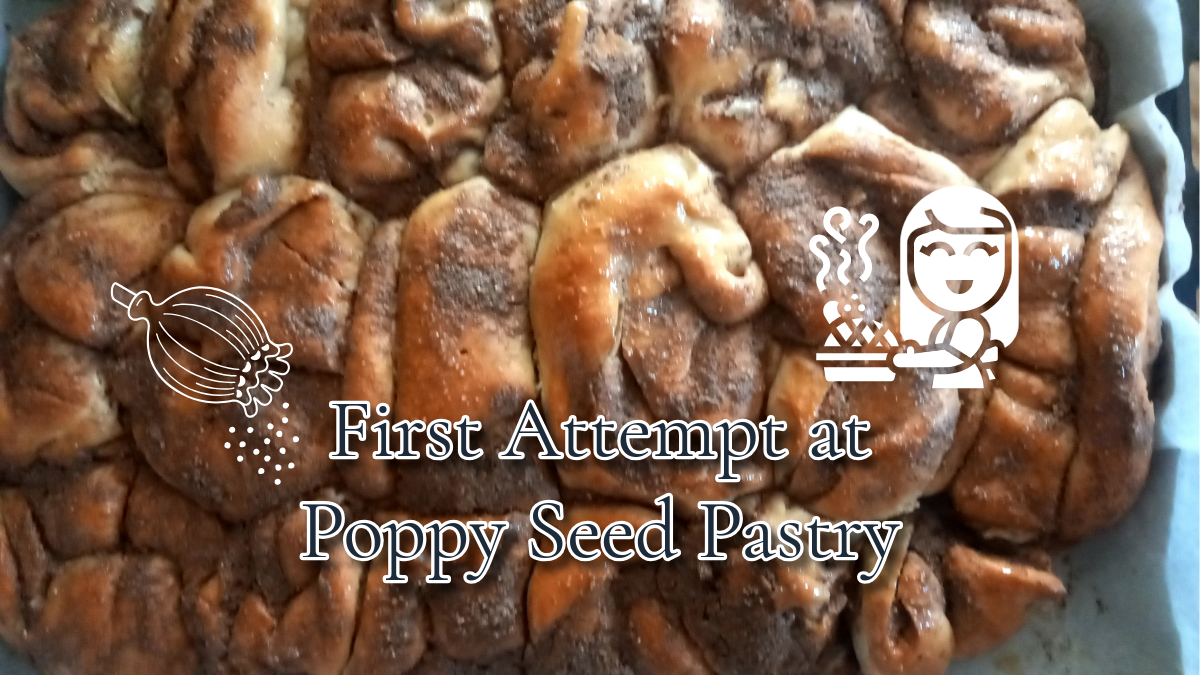
Today, I’d like to talk about a recipe I’ve tried for the very first time: poppy seed pastry. Normally, you can make this with ready-made filo pastry, but I wanted to prepare the dough from scratch this time. That, of course, made the process a little longer for me.


### Ingredients ***For the dough:*** - 1 cup lukewarm water - 1 cup lukewarm milk - Half a tea glass of oil - 1 egg white - 1 tablespoon sugar - 1 tablespoon dry yeast -Half a teaspoon salt - 4.5 cups flour ***For the filling:*** - 150g poppy seed paste - 2 tablespoons sugar - Half a tea glass of oil
Thankfully, poppy seed paste is sold in supermarkets. I’d never tried it before – my mum isn’t particularly fond of it – but I wanted to give it a go. The dough should be soft but not sticky. One note: if you leave the dough to rise for more than 45 minutes, it will start sticking everywhere and no amount of flour will fix it. Timing matters with this recipe.

### Preparation  ---

Turns out this dough demands more attention than I thought, but the taste more than made up for it. Even as I write this, I’m nibbling on a piece at my desk. Next time, I might add a little more sugar – or better yet, try it with honey for a slightly different flavour. We’ll see how that goes. That’s all from me for today. See you later. Take care of yourself in advance, stay in health and love, and please remember that; ***You are the only one of you.*** 

### Ingredients ***For the dough:*** - 1 cup lukewarm water - 1 cup lukewarm milk - Half a tea glass of oil - 1 egg white - 1 tablespoon sugar - 1 tablespoon dry yeast -Half a teaspoon salt - 4.5 cups flour ***For the filling:*** - 150g poppy seed paste - 2 tablespoons sugar - Half a tea glass of oil
Thankfully, poppy seed paste is sold in supermarkets. I’d never tried it before – my mum isn’t particularly fond of it – but I wanted to give it a go. The dough should be soft but not sticky. One note: if you leave the dough to rise for more than 45 minutes, it will start sticking everywhere and no amount of flour will fix it. Timing matters with this recipe.

### Preparation  ---


---

---


---
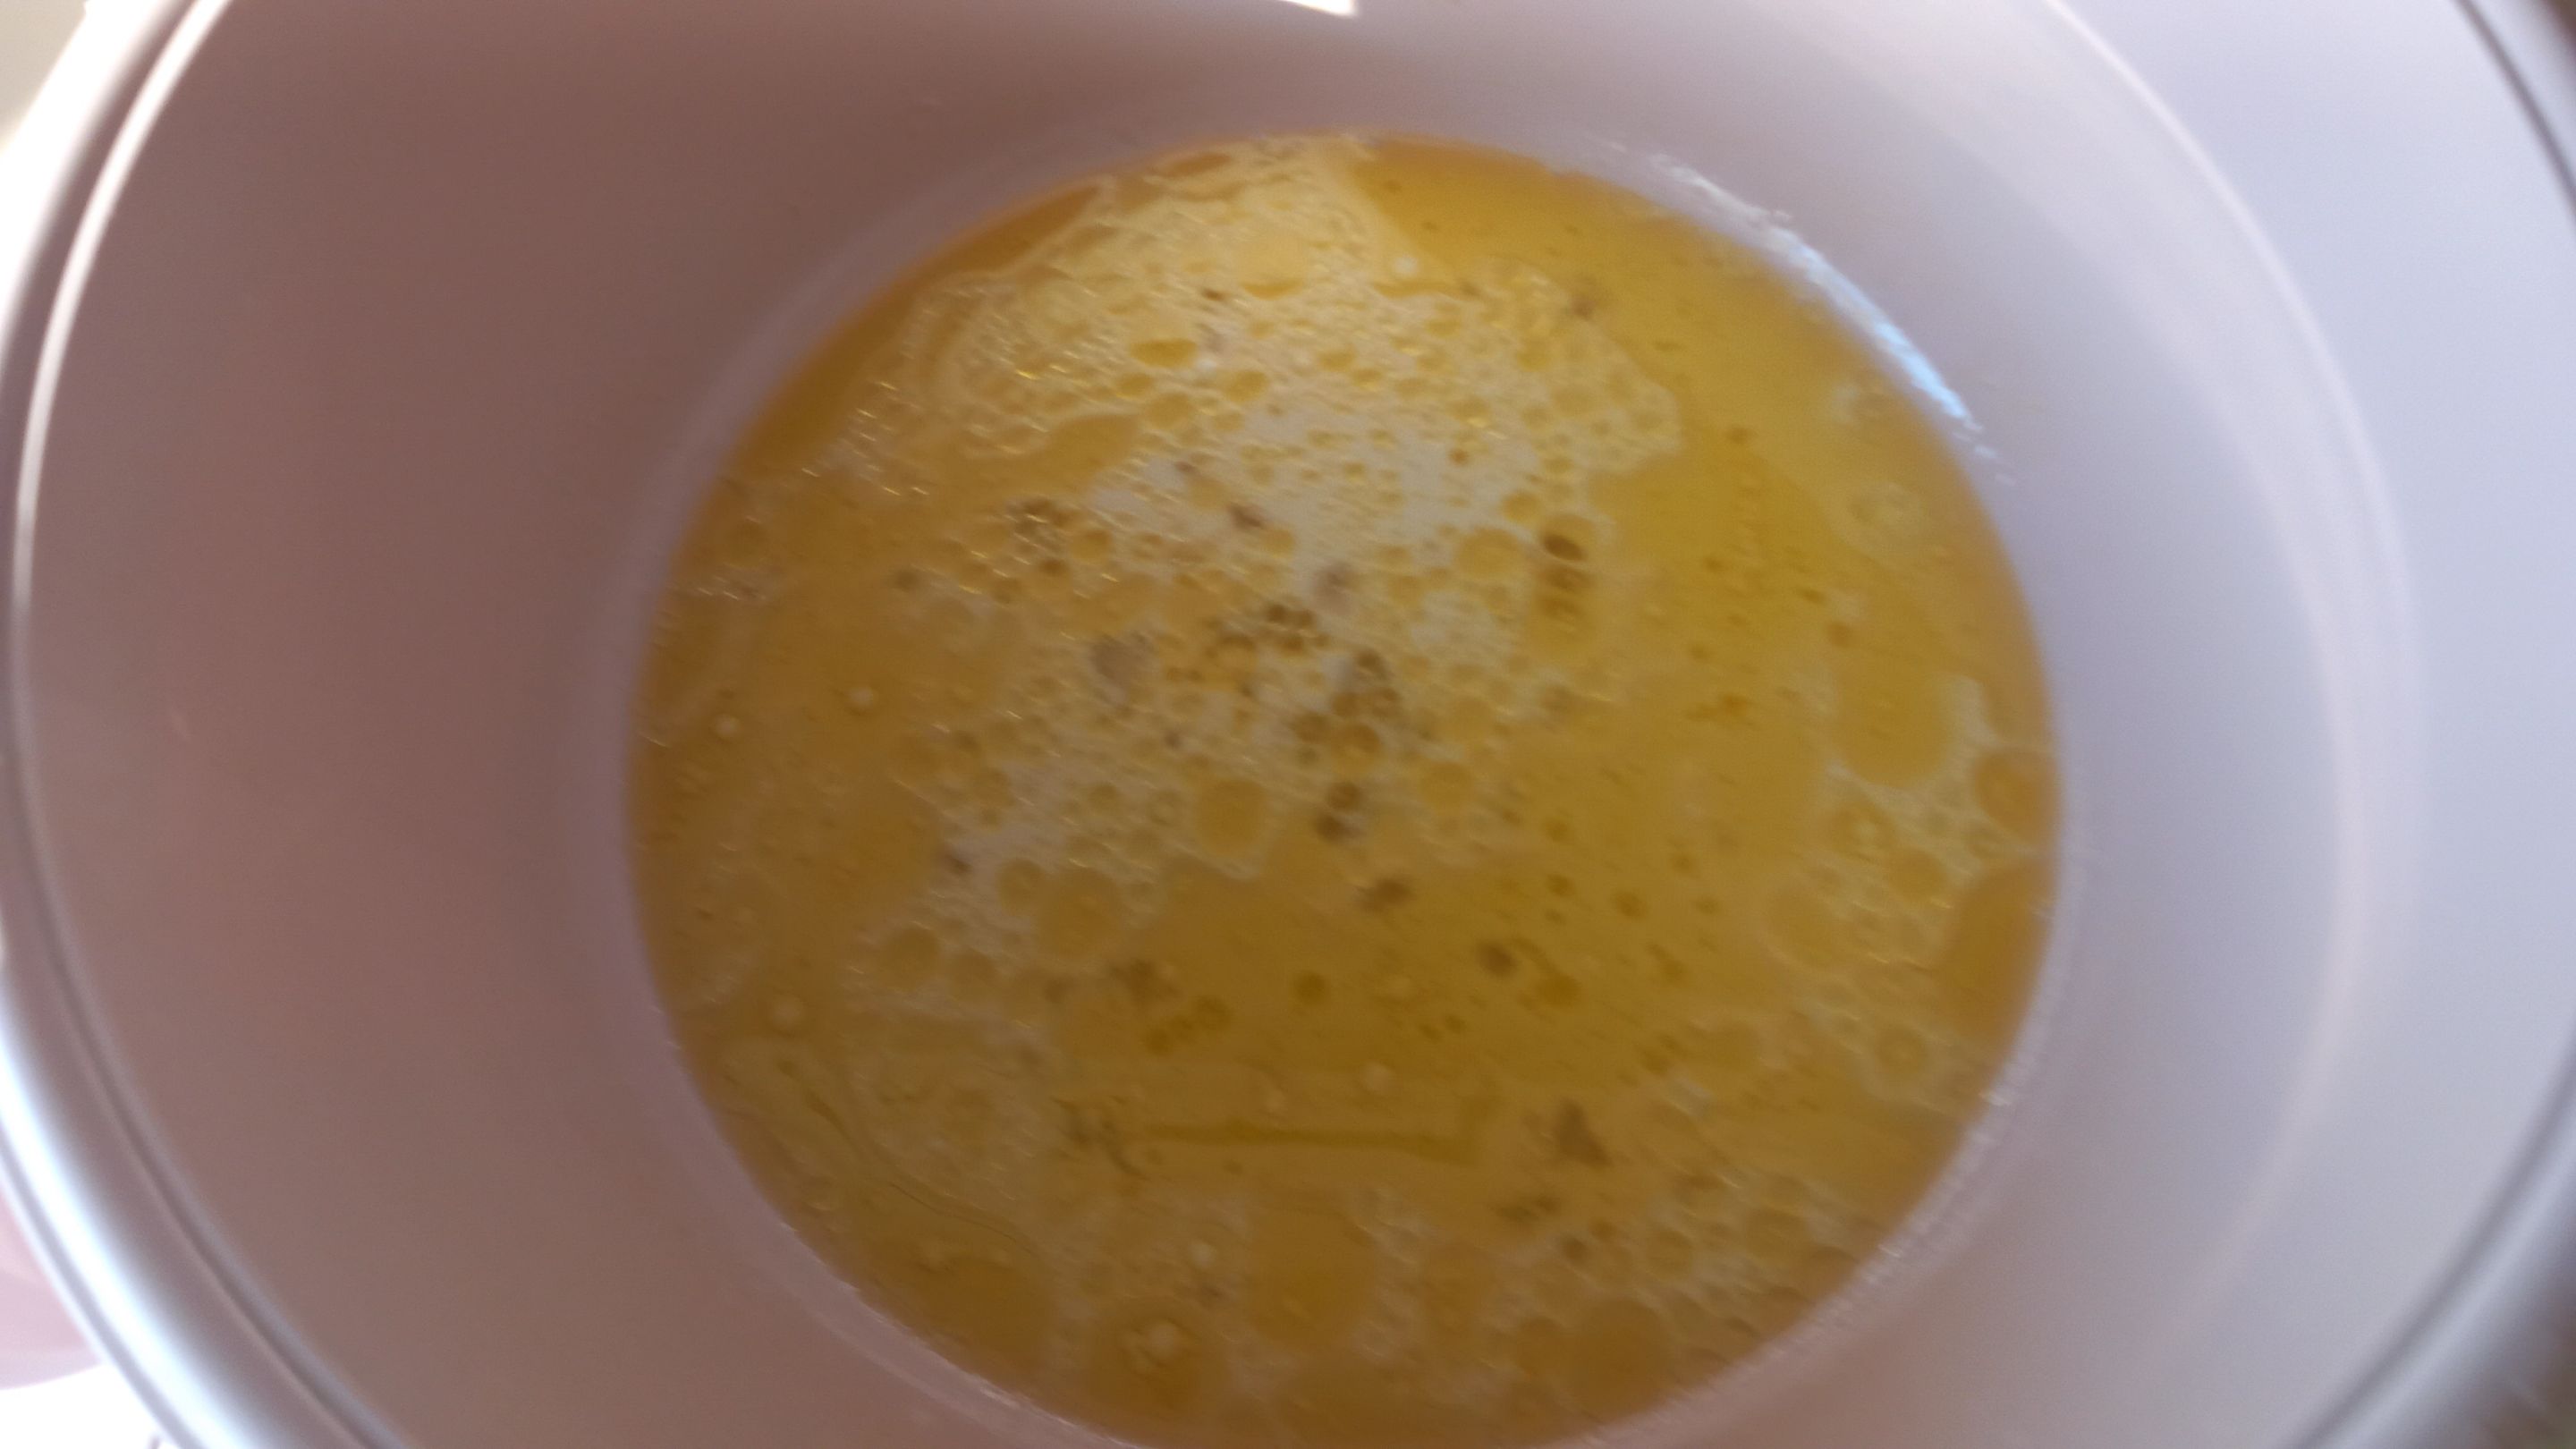
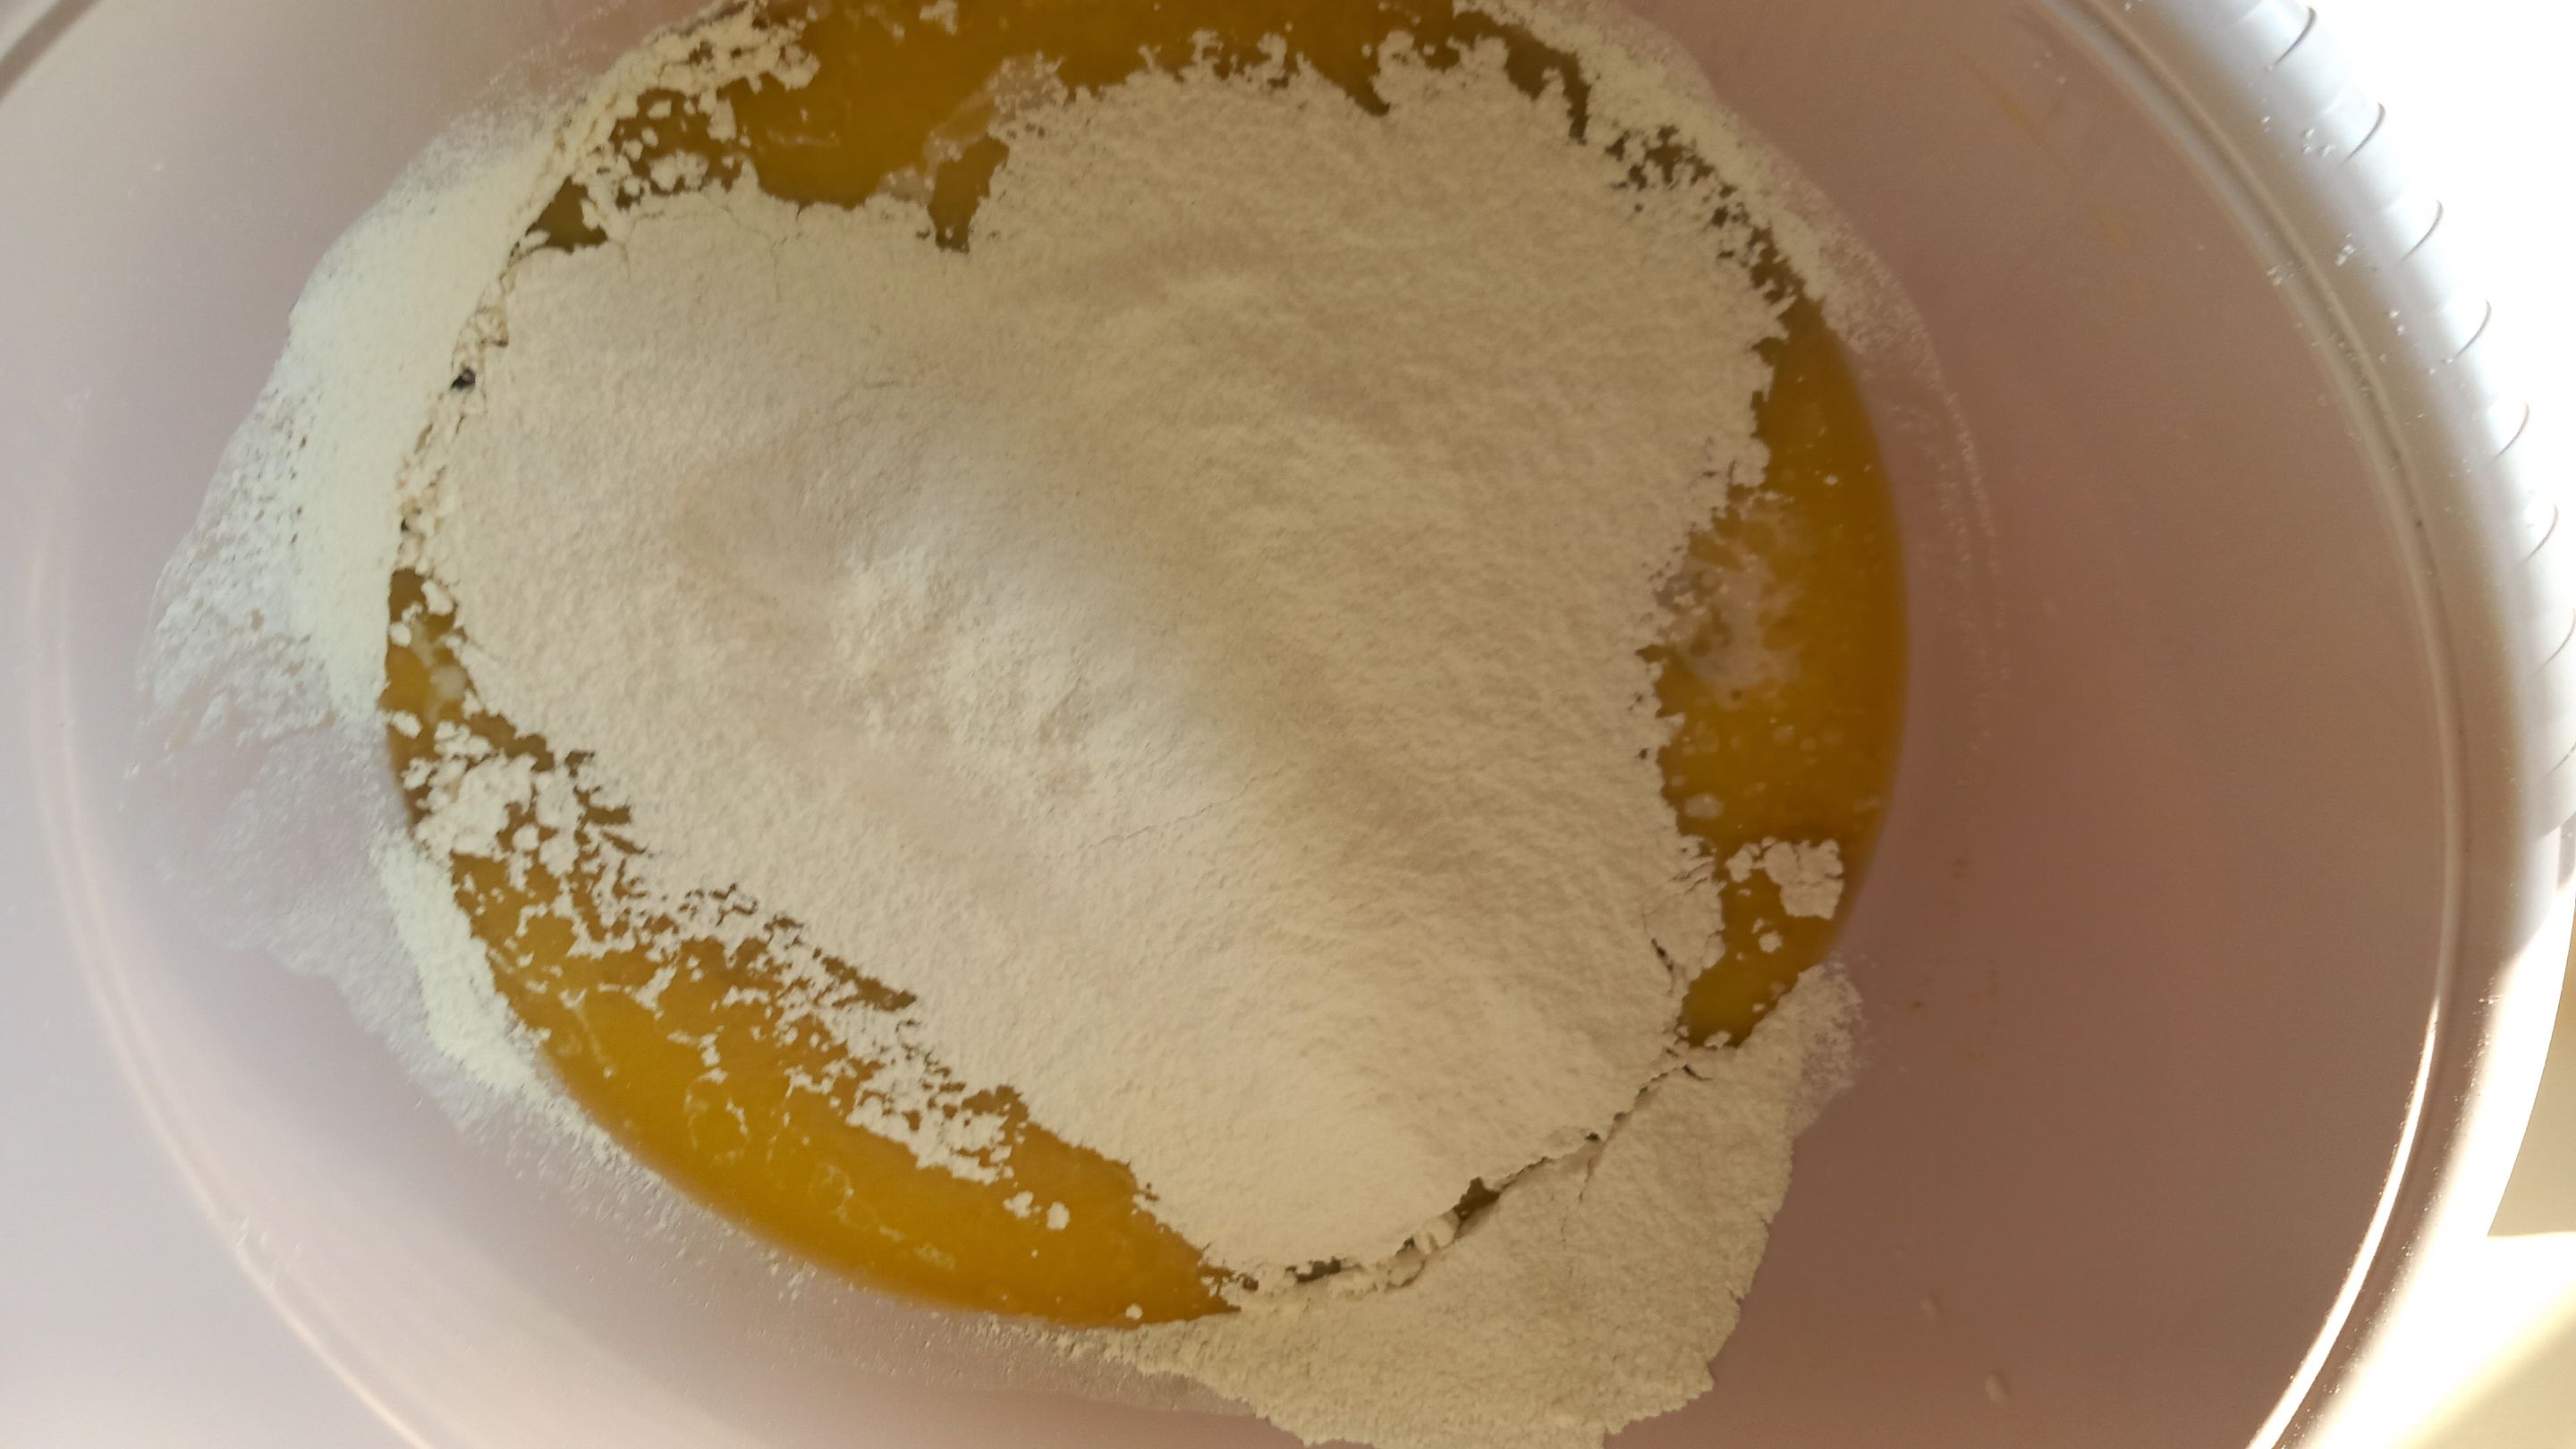
First, add the liquids, followed by the dry ingredients – slowly. This is becoming something of a habit for me, since I’ve never had issues with recipes made this way. Quite the opposite, in fact – the results have been wonderfully smooth.
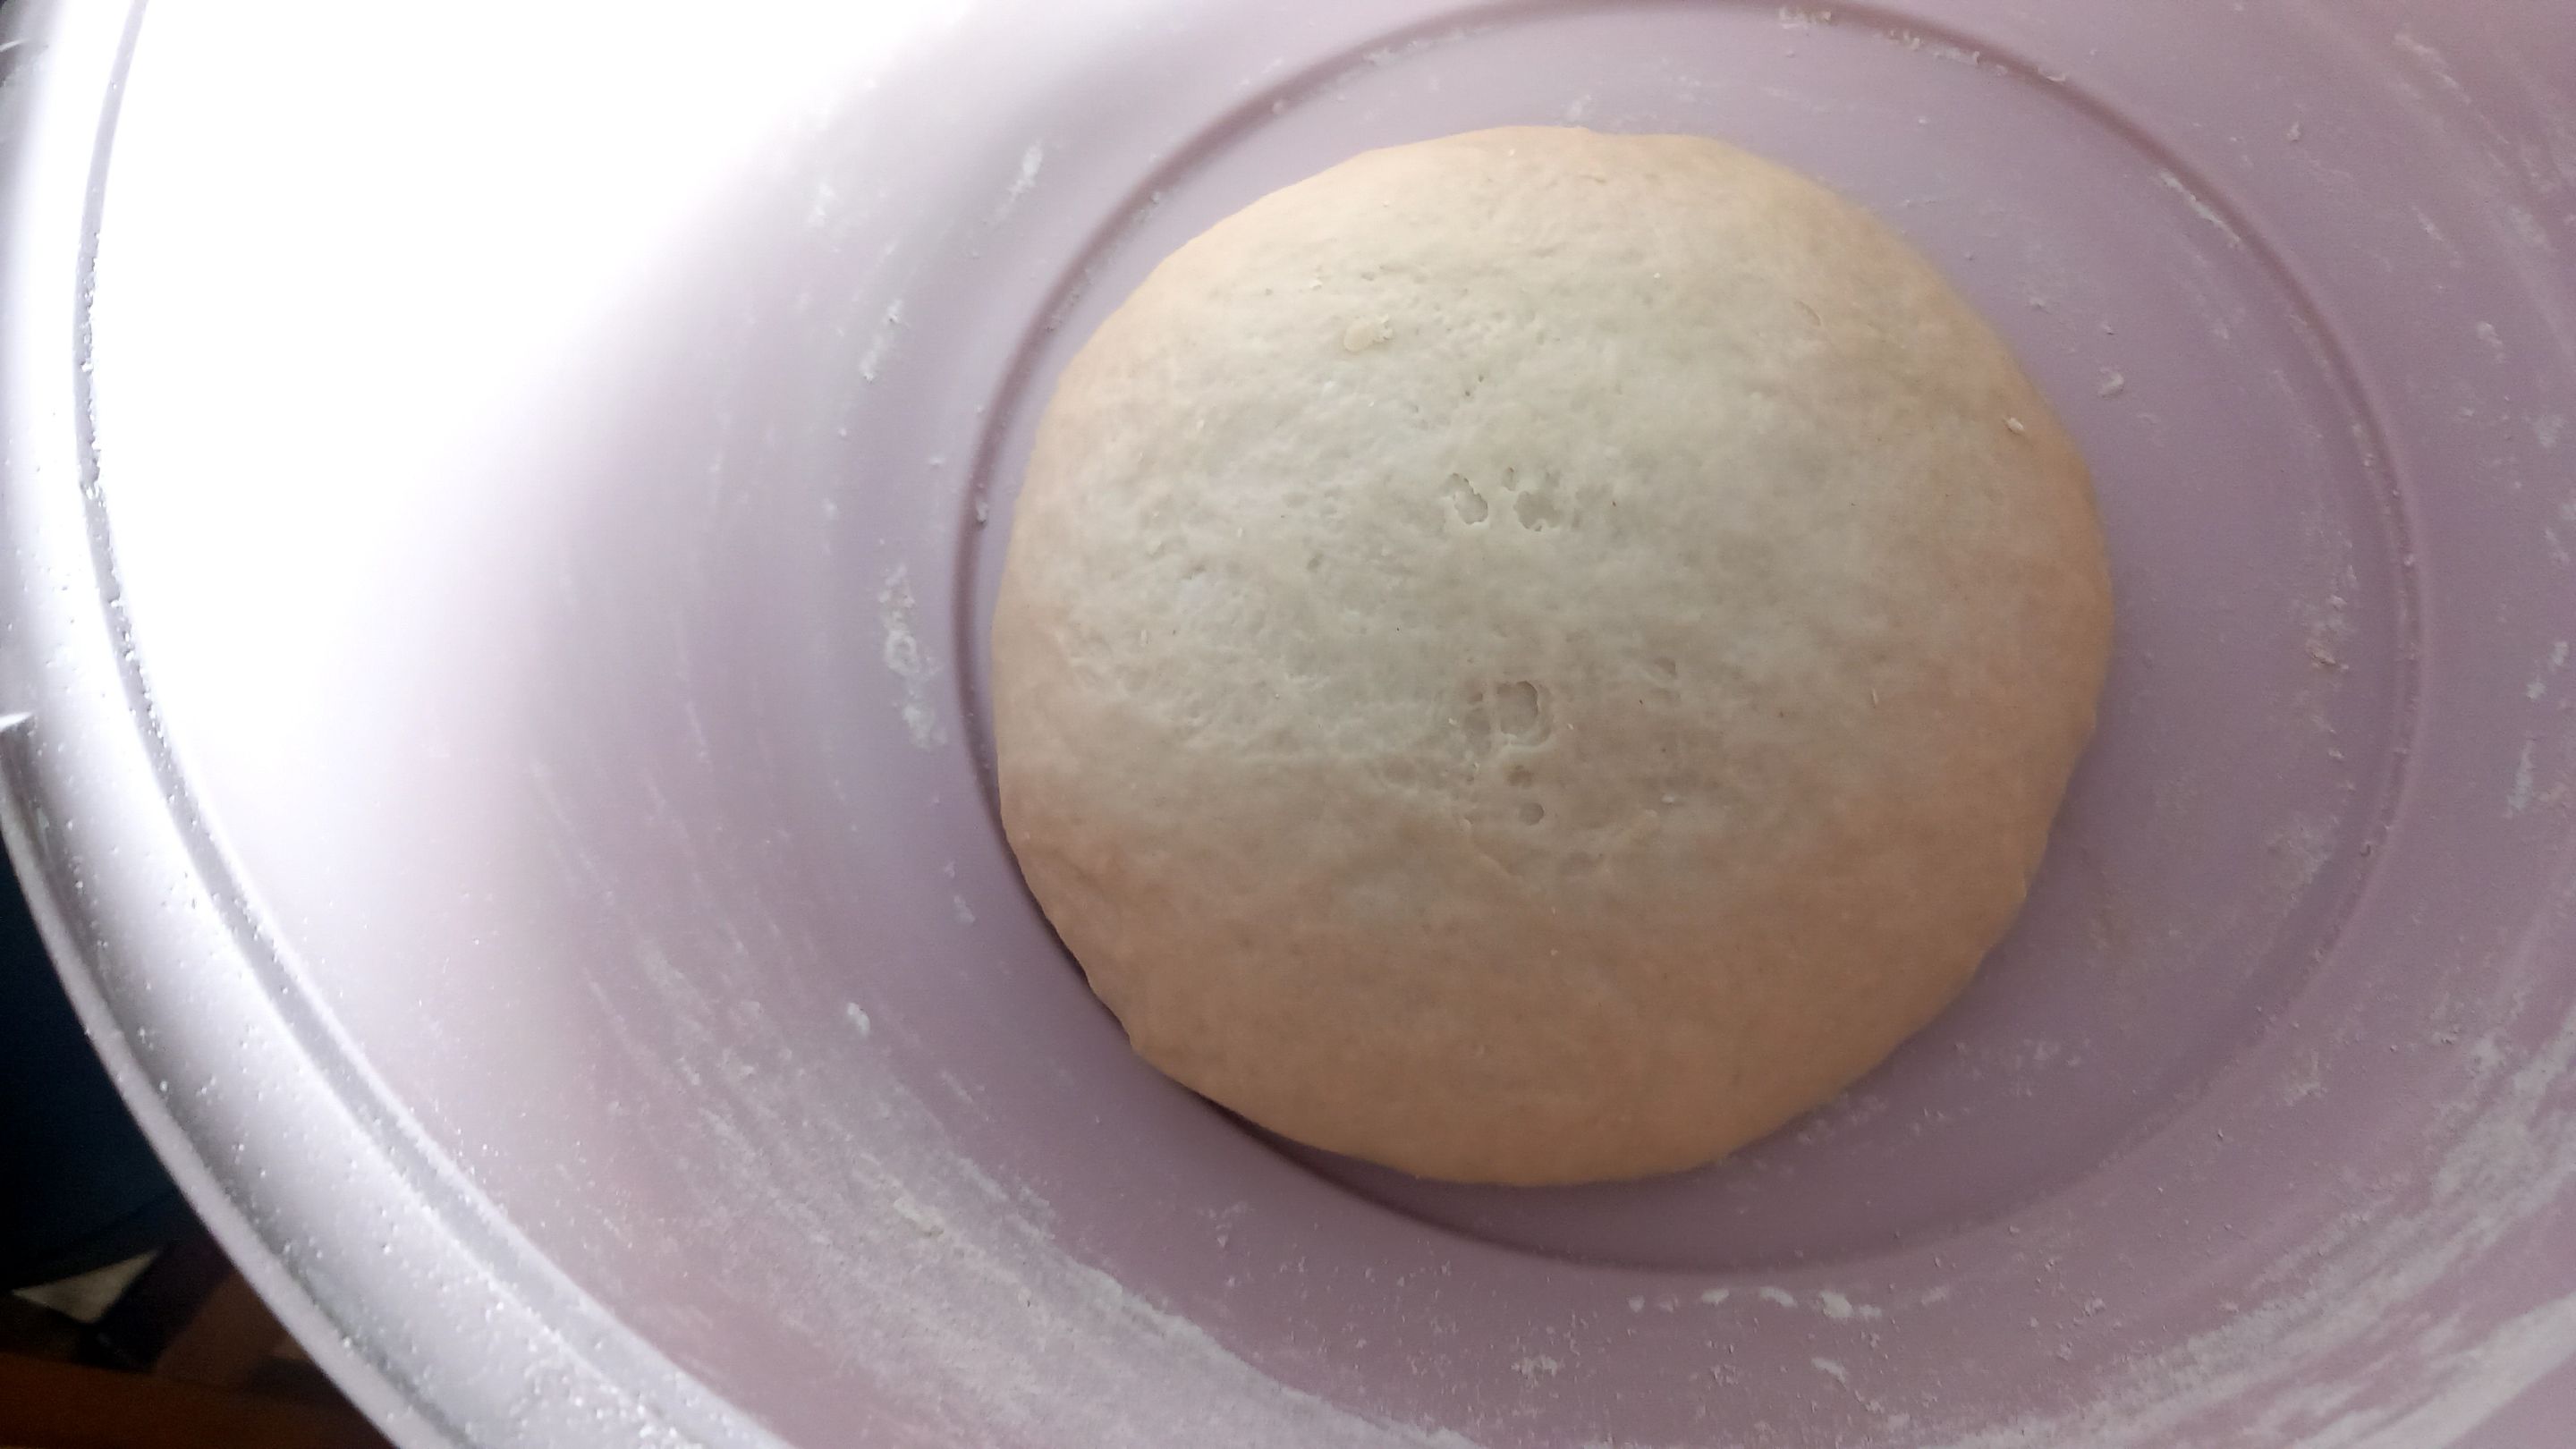
After warming the milk and water together, I added them to the bowl with the other liquids, mixing well. Then, I added the flour and salt gradually, kneading until the dough reached that perfect non-sticky texture – about five minutes.
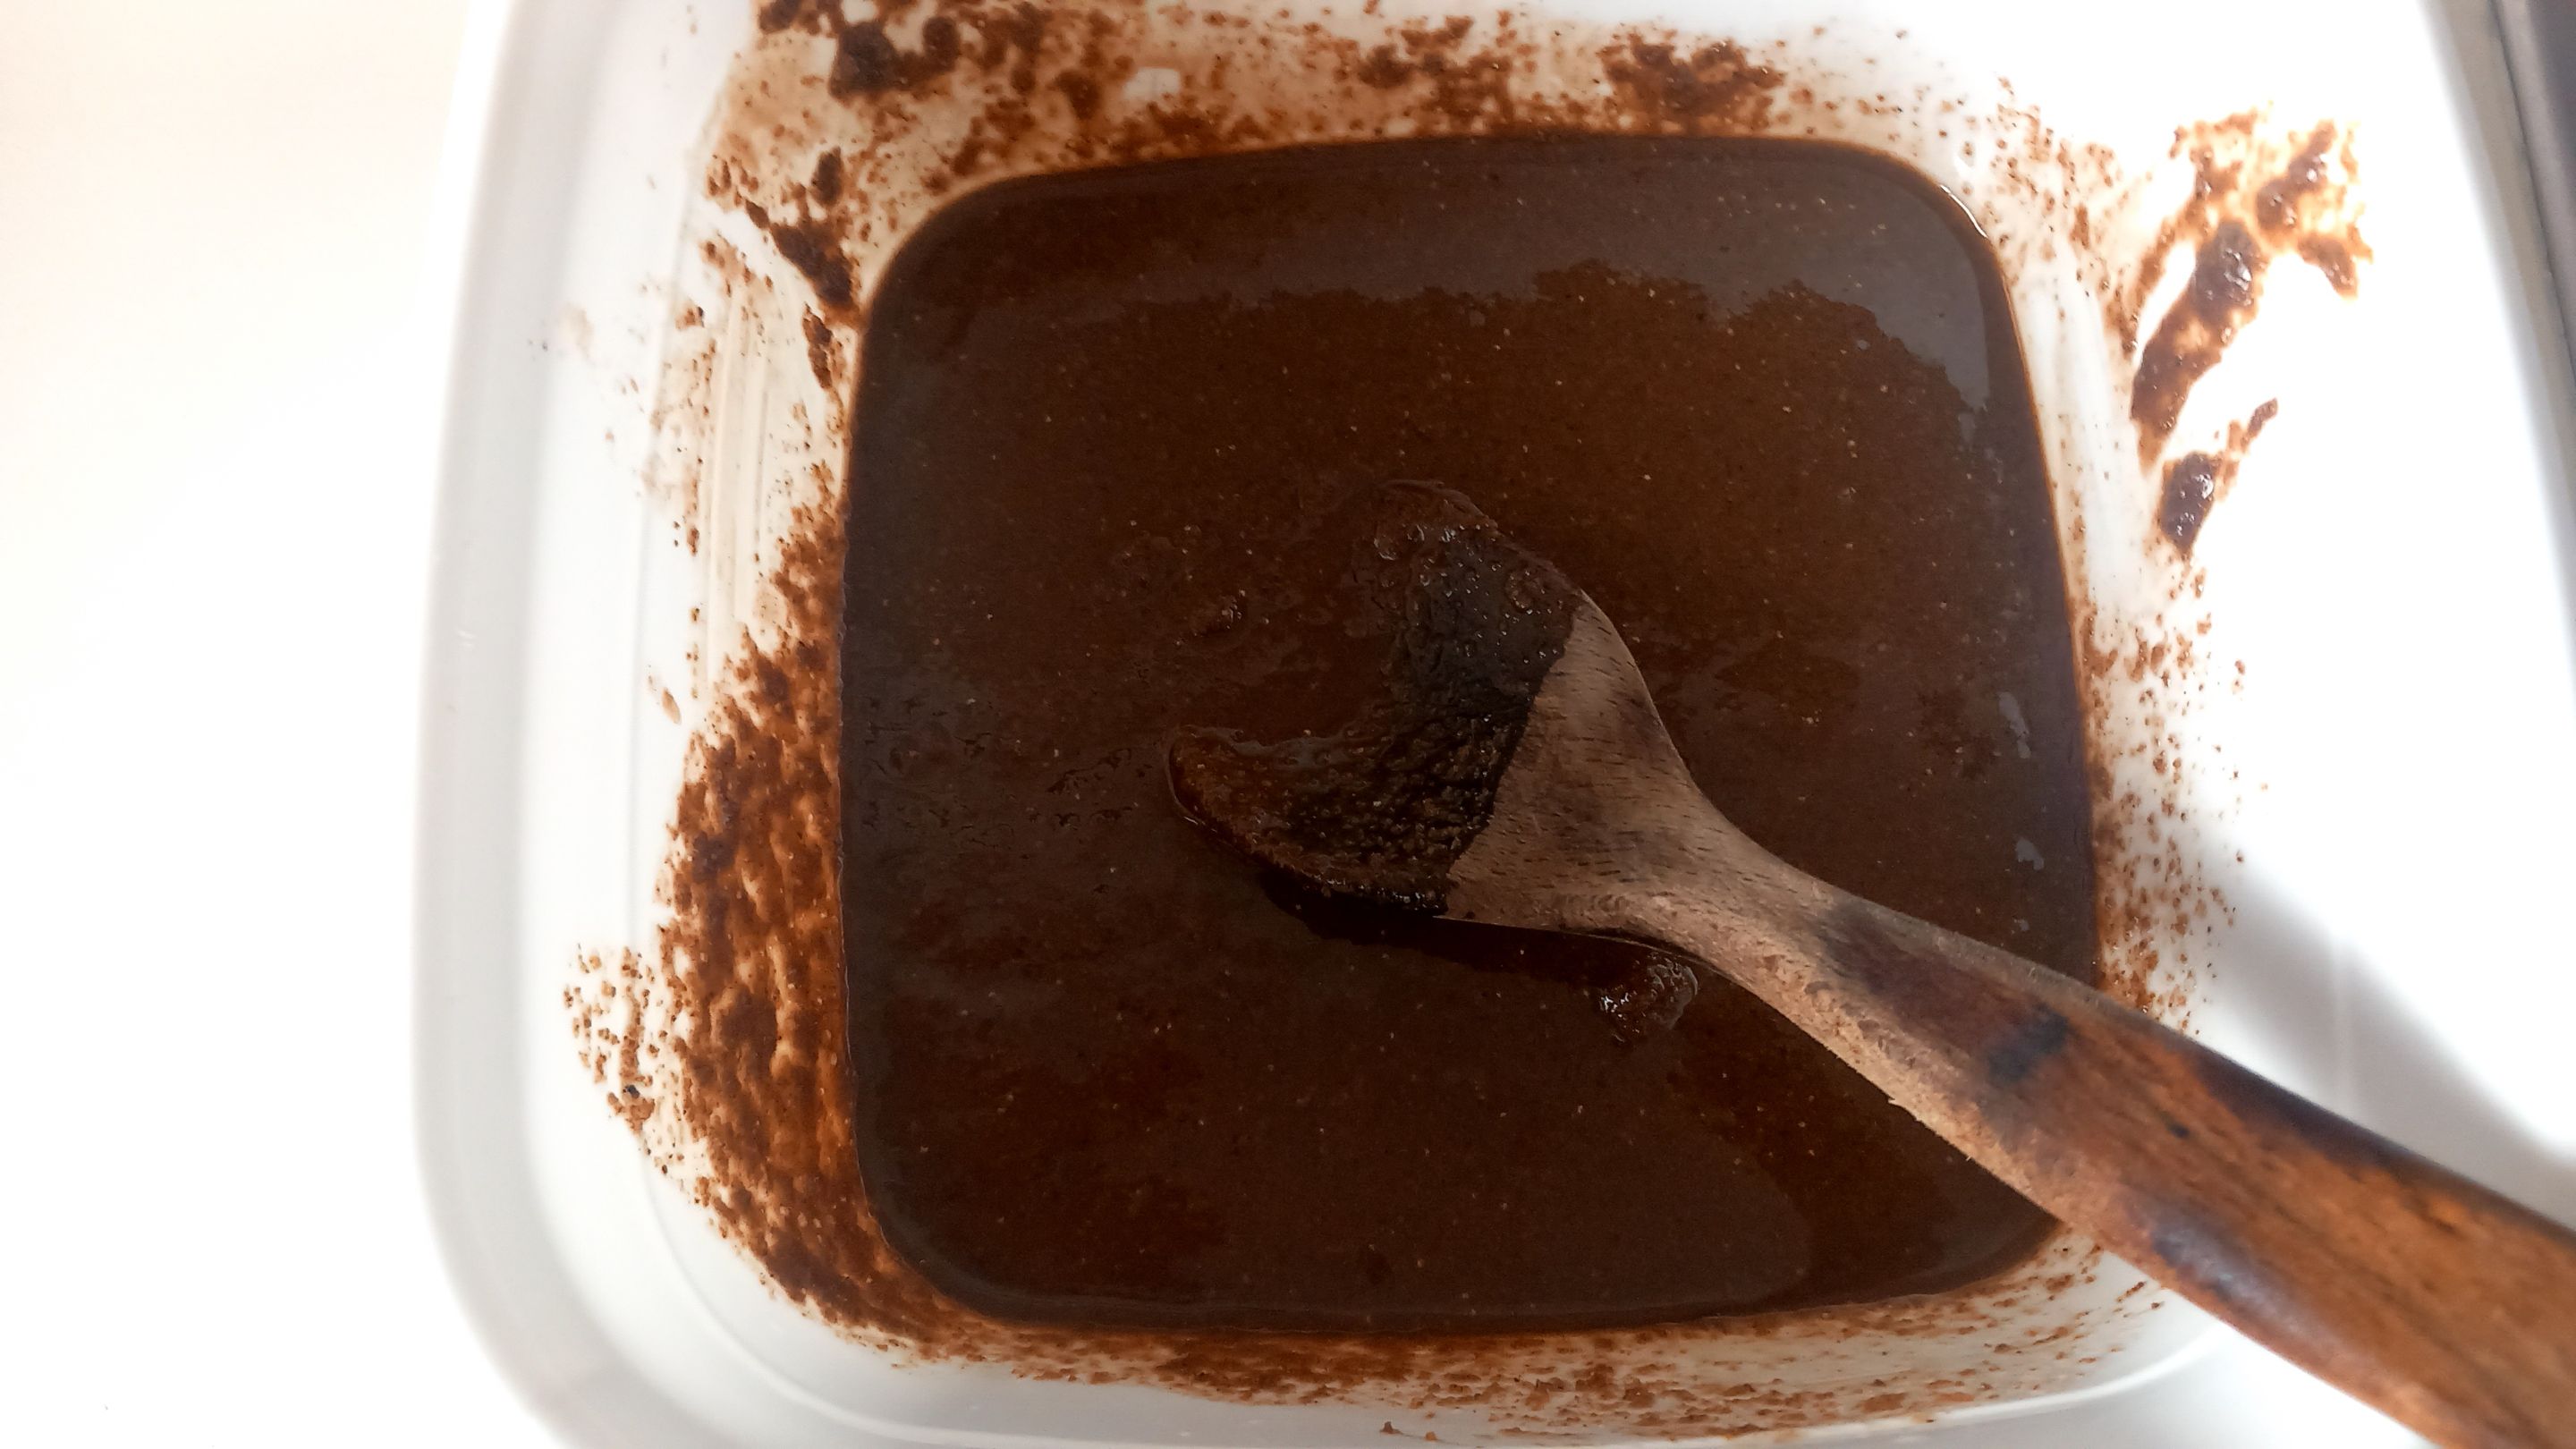
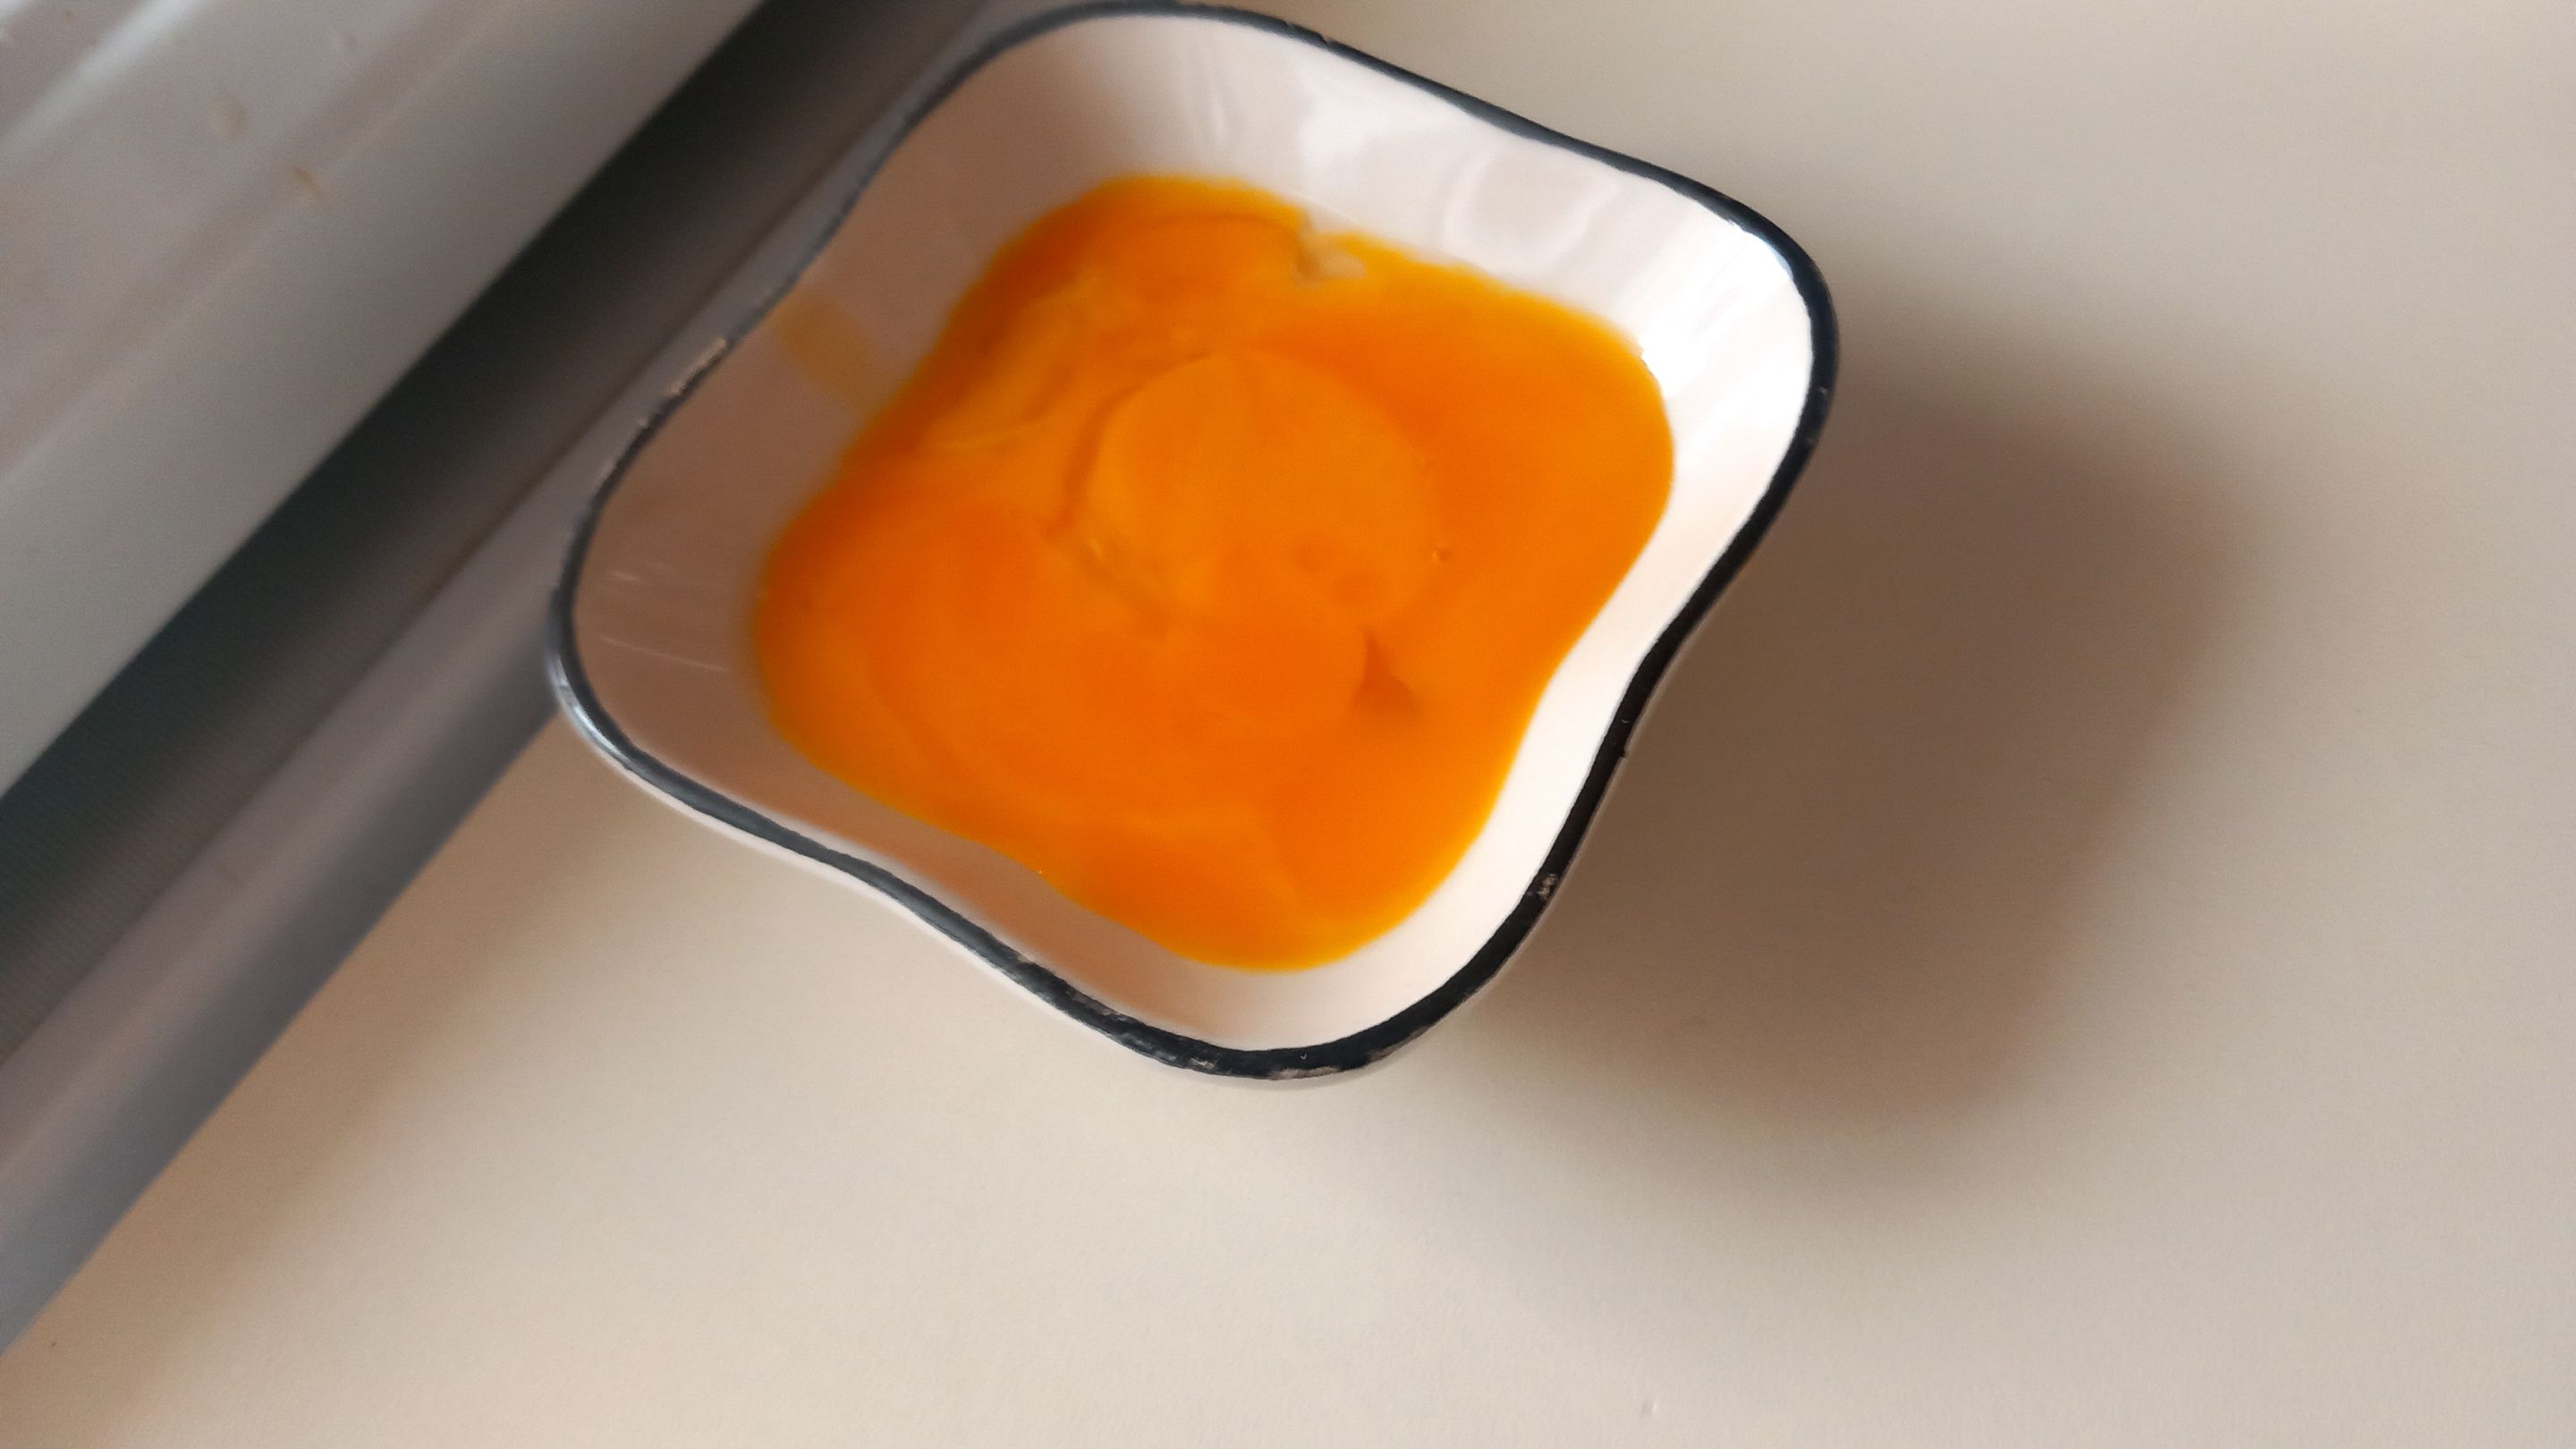
Meanwhile, my mum prepared the filling by mixing the poppy seed paste with oil and sugar. I saved the egg yolk for brushing the top – not strictly necessary, but no reason to waste it either.
After leaving the dough to rise for 45 minutes, things got messy for me. Apparently, that was too long – the dough decided to stick everywhere, turning into a nightmare. Somehow, with my hands coated up to my wrists, I managed to get it under control, but I couldn’t take photos of that stage.
In short, I rolled the dough out to about half a centimetre thick, trying to shape it into a rectangle. Then I spread the poppy seed mixture evenly on top. Rolling it up was more difficult than expected, and when I tried to cut it into equal pieces, the rolls immediately started to fall apart.

---
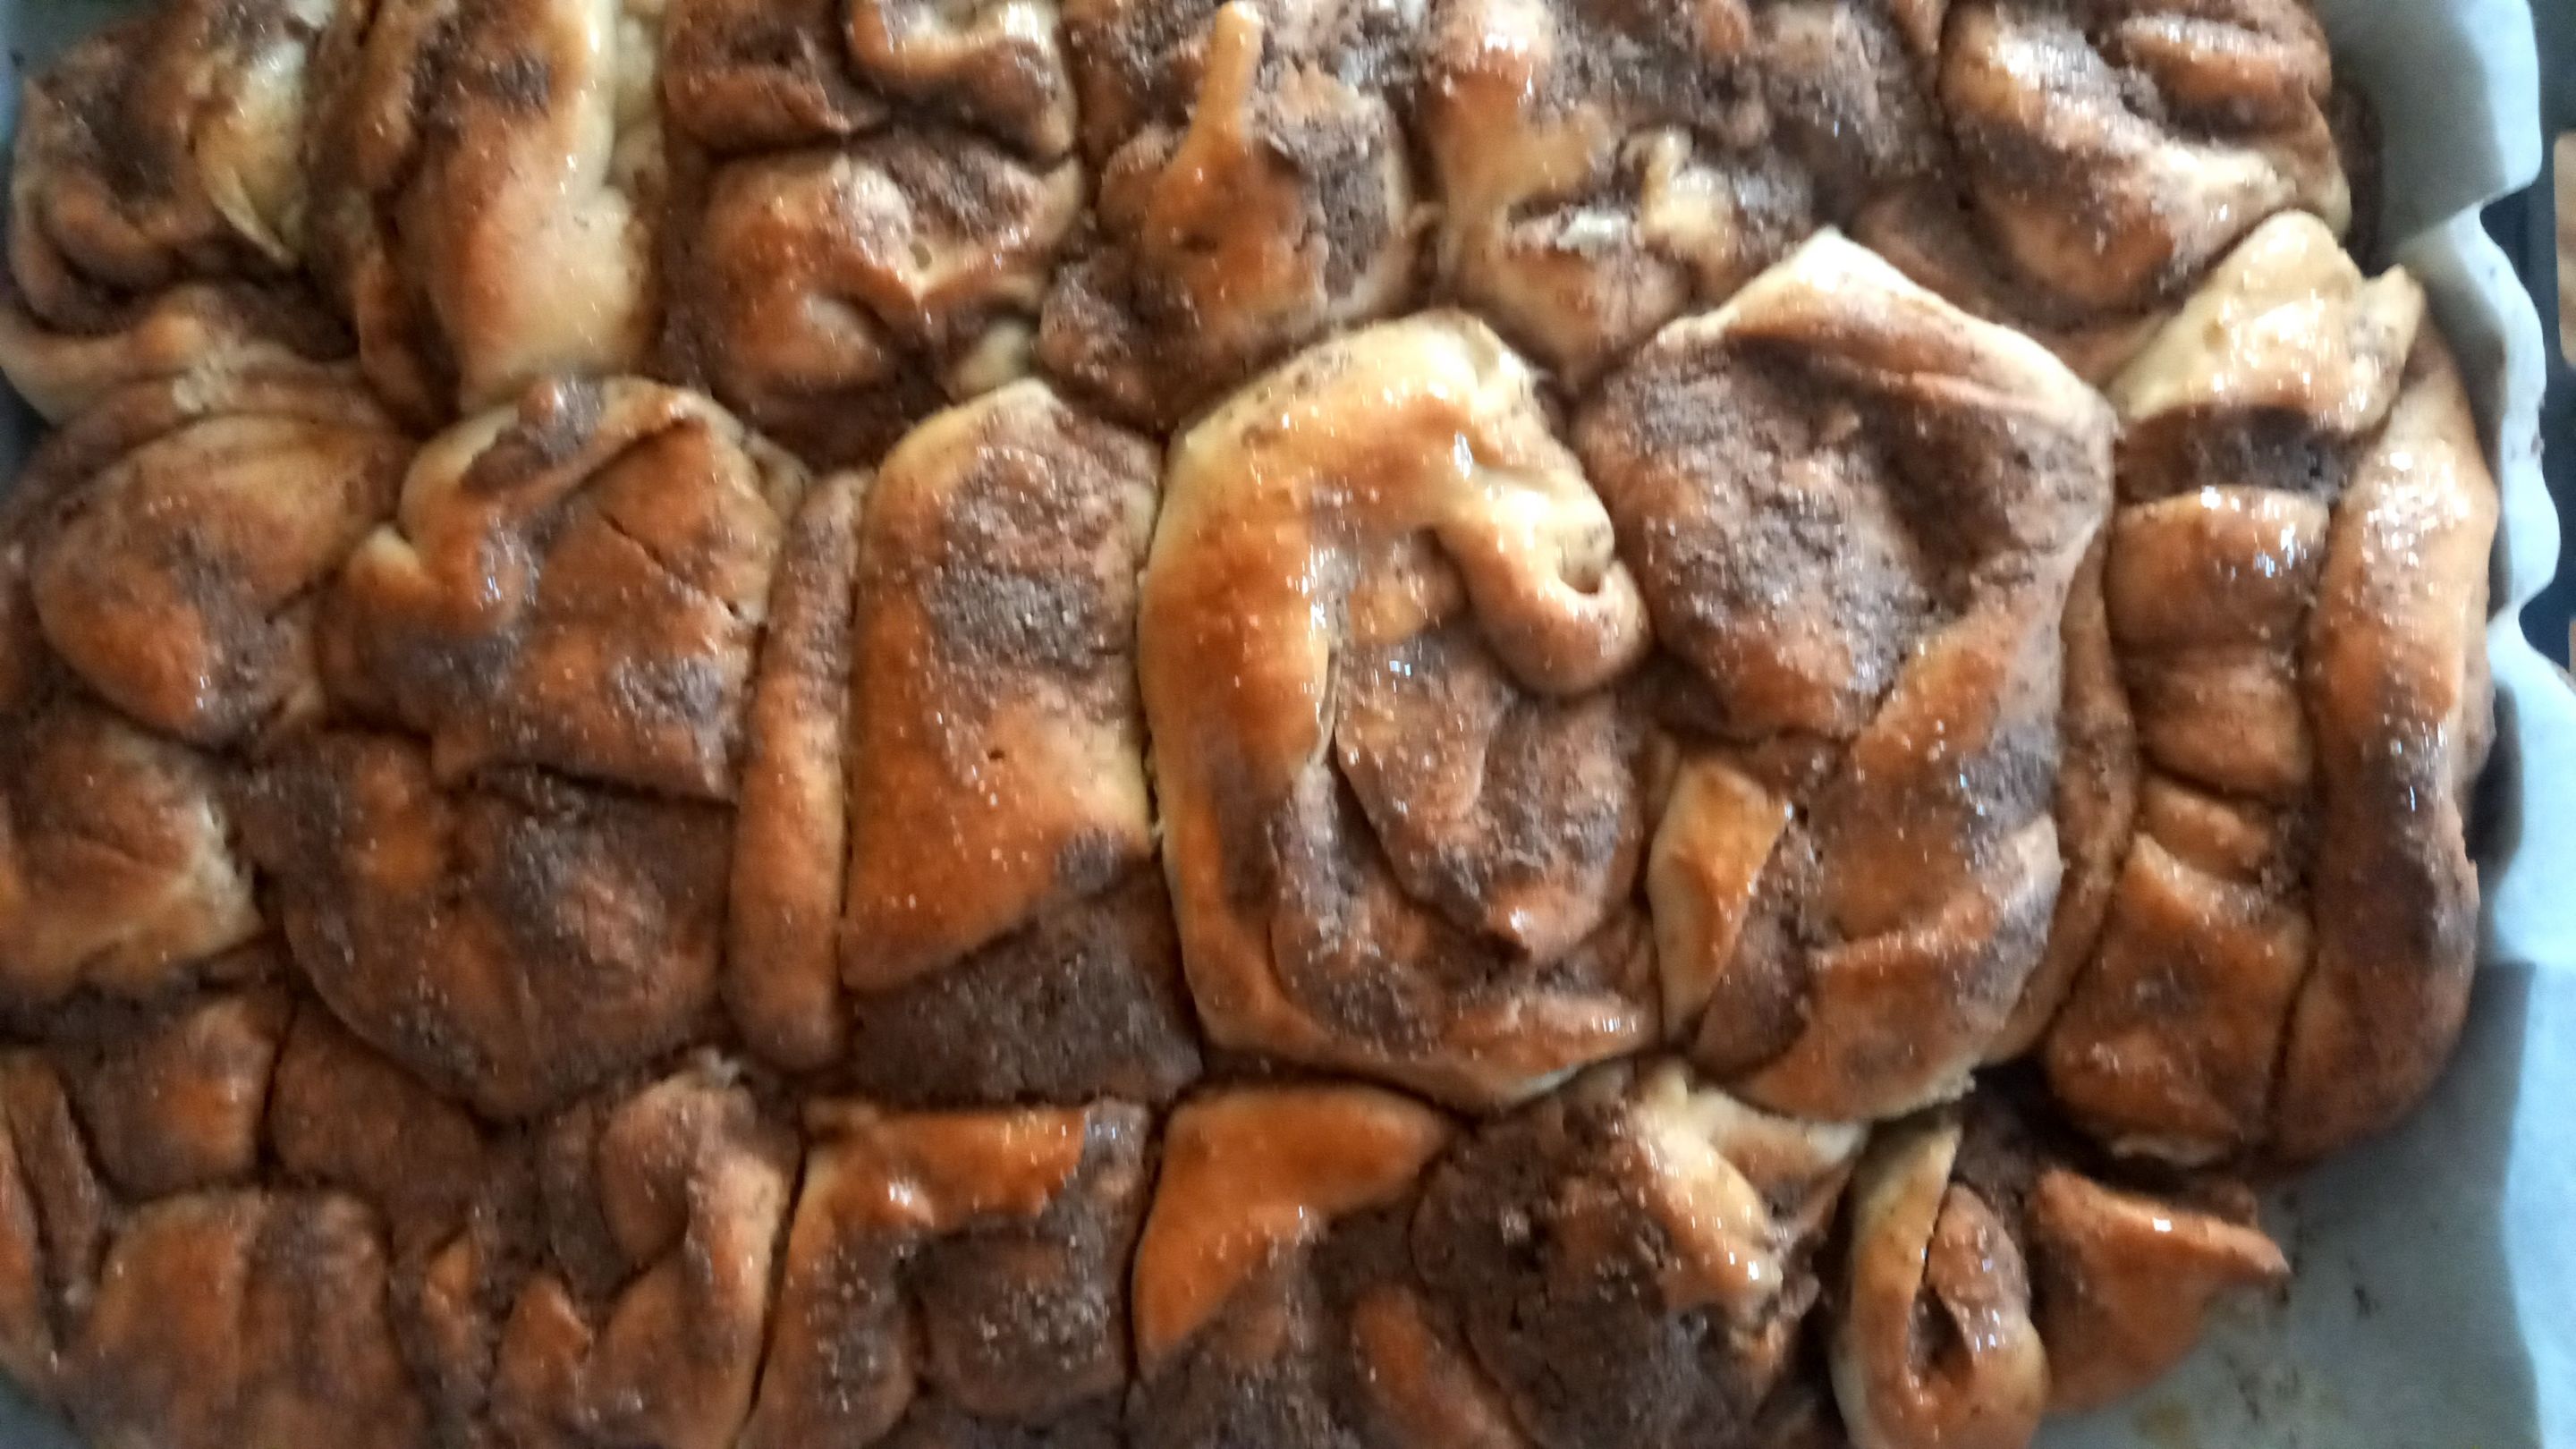
Frustrated, I ended up placing the rolls all together, side by side. It wasn’t the neat swirled effect I’d envisioned 😂 but still, it worked out in the end.
After baking for about 40 minutes at 250°C, they were ready. While still hot, you can brush them with melted butter if you like. I didn’t – for calorie reasons – but I must admit, it makes them even tastier.

Turns out this dough demands more attention than I thought, but the taste more than made up for it. Even as I write this, I’m nibbling on a piece at my desk. Next time, I might add a little more sugar – or better yet, try it with honey for a slightly different flavour. We’ll see how that goes. That’s all from me for today. See you later. Take care of yourself in advance, stay in health and love, and please remember that; ***You are the only one of you.*** 

Herkese merhabaaa!!!
Umarım iyisinizdir ya da iyi olmaya çalışıyorsunuzdur. Ben iyi sayılırım. Biraz yoğun bir sürece girdim ve beni fizikselden ziyade psikolojik olarak çok yoruyor. Umarım bunun üzerinden kısa zamanda gelebilirim.
Bugün sizlerle ilk defa denediğim bir tarif hakkında konuşmak istiyorum. Haşhaş ezmeli çörek. Bu çöreği normalde yufka ile de yapabilirsiniz fakat ben hamurunu da kendim açmak istedim. Bu yüzden de benim işim biraz daha uzun sürdü.

### Malzemeler ***Hamuru için;*** - 1 su bardağı ılık su - 1 su bardağı ılık süt - Yarım çay bardağı sıvı yağ - 1 yumurta beyazı - 1 yemek kaşığı şeker - 1 yemek kaşığı kuru maya - Yarım tatlı kaşığı tuz - 4,5 su bardağı un ***Arası için;*** - 150 gram haşhaş ezmesi - 2 yemek kaşığı şeker - Yarım çay bardağı yağ
Neyse ki marketlerde haşhaş ezmesi satılıyor. Daha önce denediğim bir şey değildi çünkü annem pek sevmez ama bu sefer ben denemek istedim. Hamur biraz yumuşak ama ele yapışmayan bir kıvamda olmalı. Bir de hamuru 45 dakikadan fazla bekletirseniz eğer istemediğiniz bir şekilde her yere yapışmaya başlayacak ve ne kadar un eklerseniz ekleyin düzelmeyecek. Bu yüzden zaman konusunda biraz dikkat etmek gerekiyor.

### Hazırlanışı 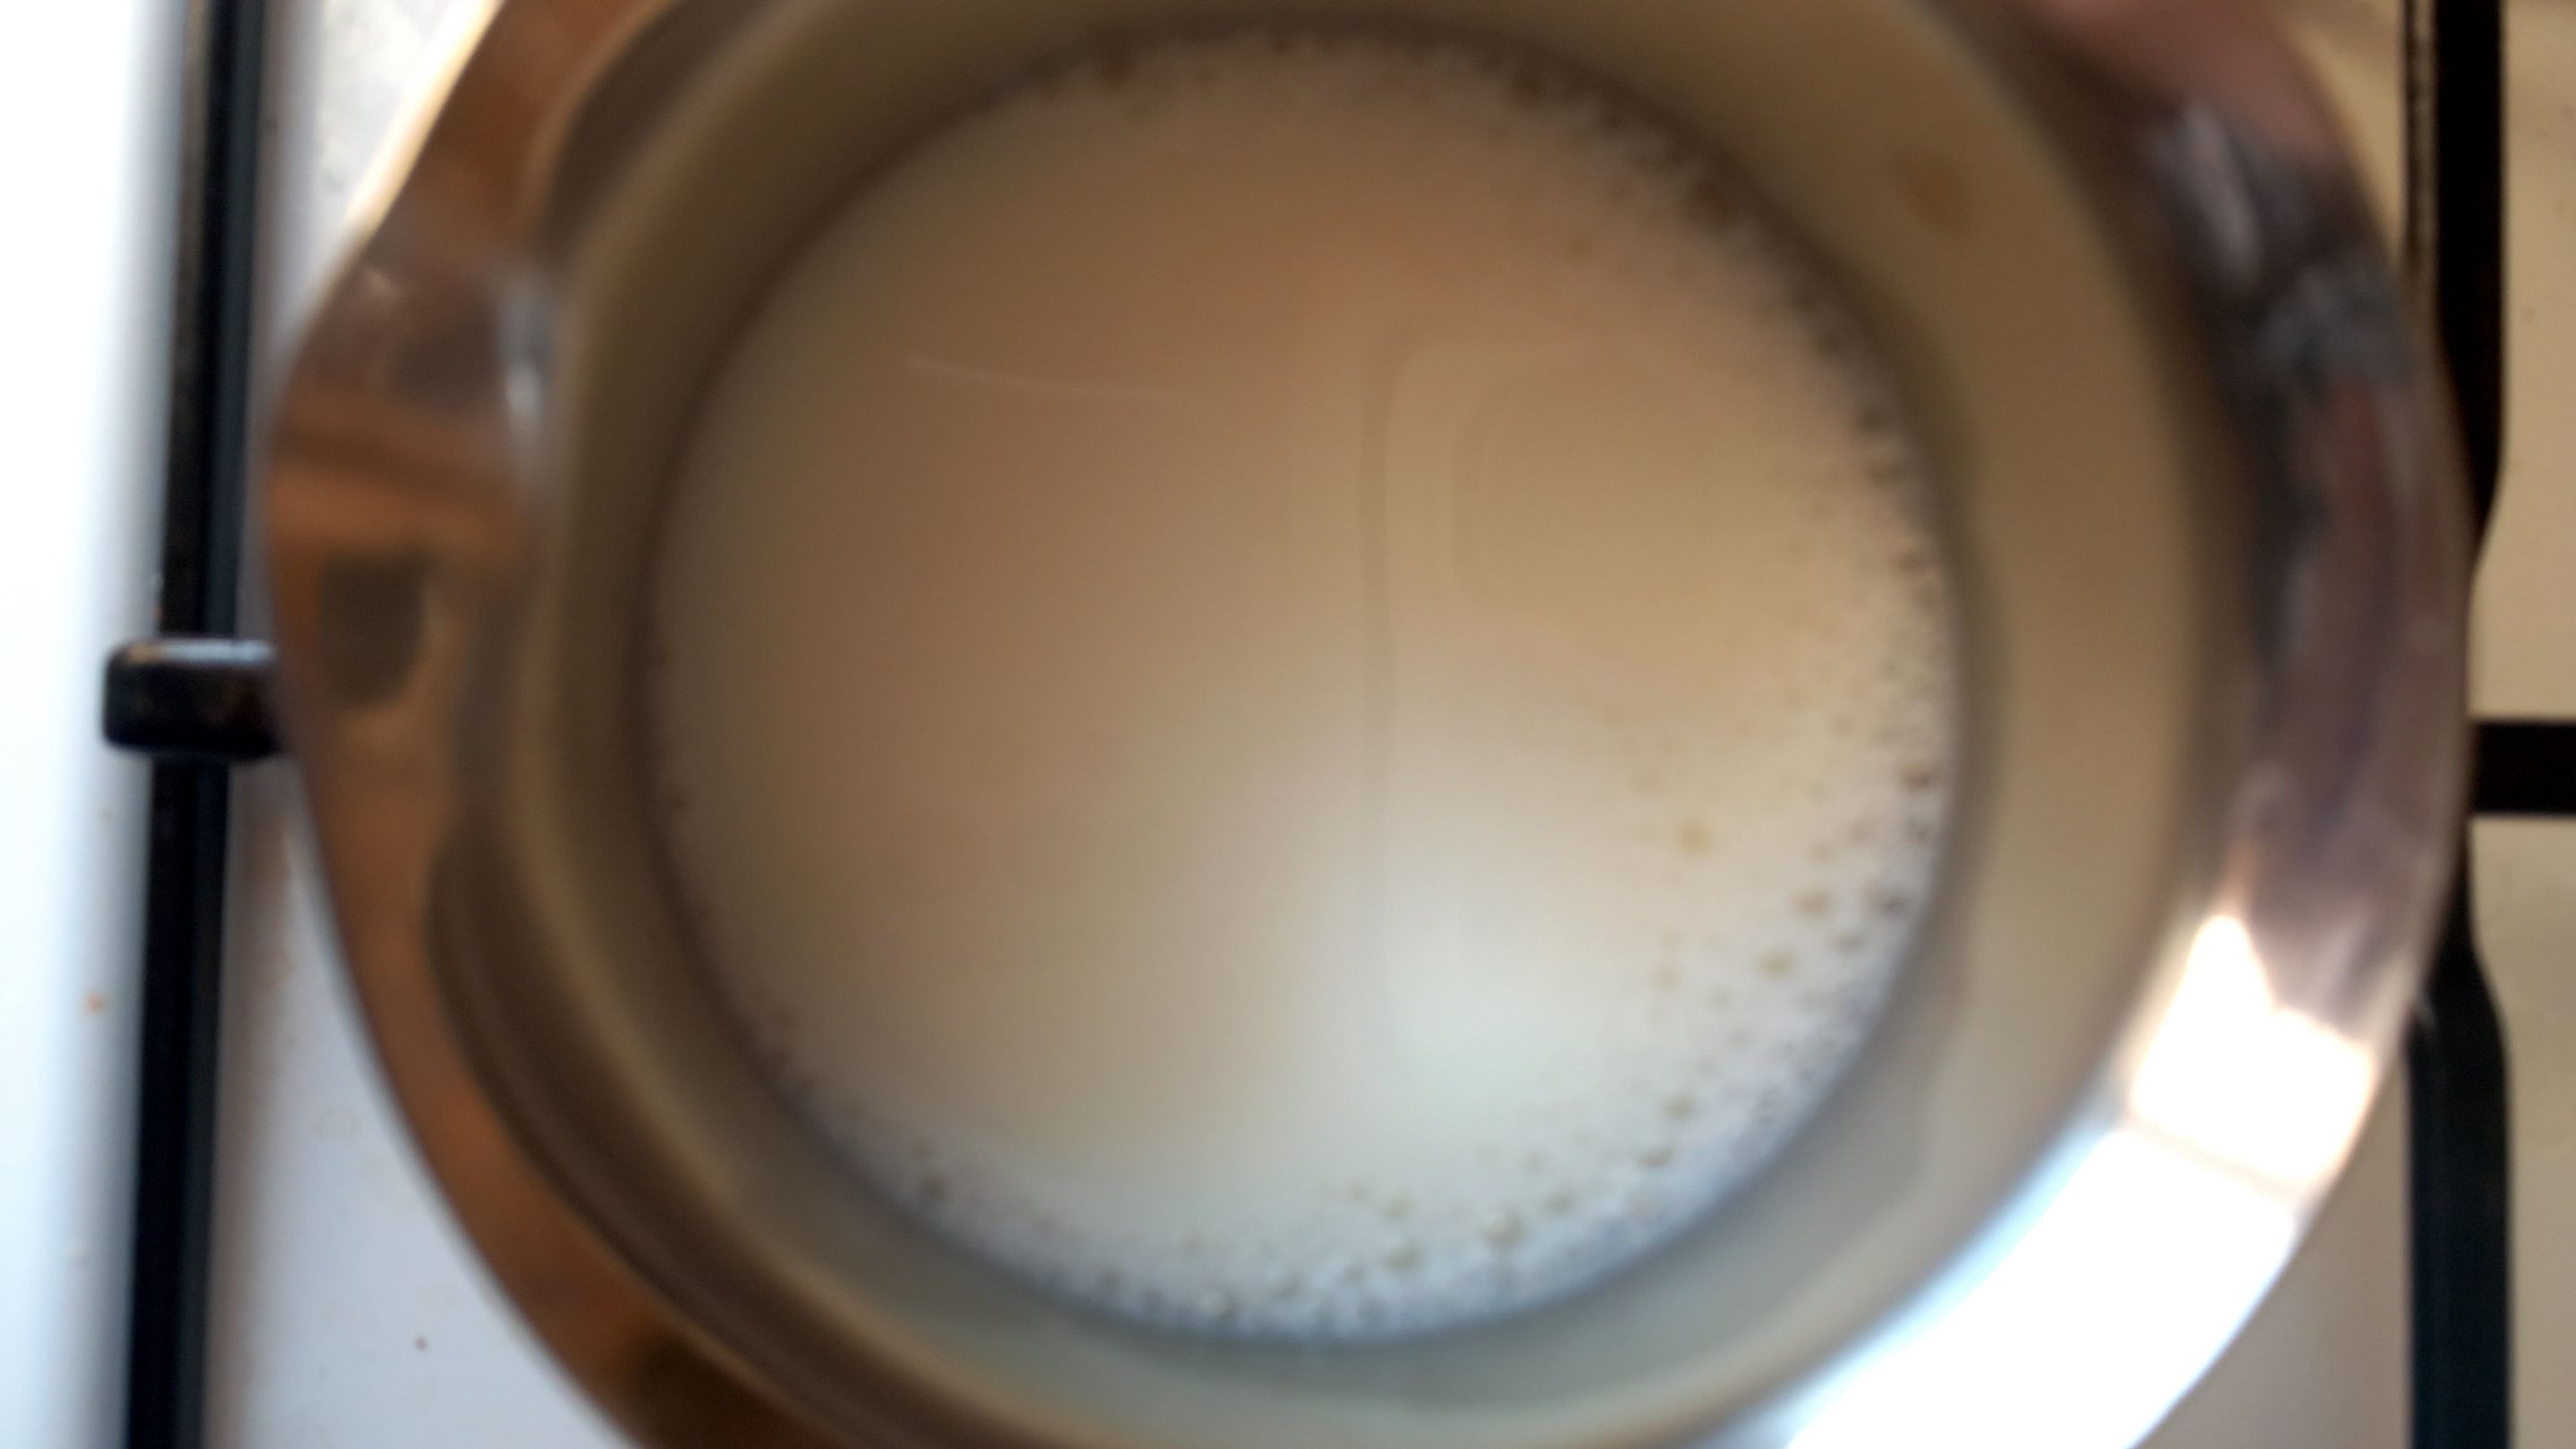 ---

Düşündüğümden daha dikkatli olmam gereken bu hamurla başım belada anlaşılan ama tadına doyamadım. Hatta şu anda bile bir tabakta masamda atıştırırken bu yazıyı yazıyorum. Biraz daha şeker ile daha da lezzetli olabilecek bir tarif. Hedefim ise bir dahaki sefere bal ile benzer bir tadı yakalamak. Bakalım o zaman ne olacak? Bugünlük benden bu kadar. Sonra görüşmek üzere. Kendinize dikkat edin, sağlık ve sevgiyle kalın ve lütfen unutmayın ki; ***Bu dünyada sizden başka bir tane daha yok.*** 

### Malzemeler ***Hamuru için;*** - 1 su bardağı ılık su - 1 su bardağı ılık süt - Yarım çay bardağı sıvı yağ - 1 yumurta beyazı - 1 yemek kaşığı şeker - 1 yemek kaşığı kuru maya - Yarım tatlı kaşığı tuz - 4,5 su bardağı un ***Arası için;*** - 150 gram haşhaş ezmesi - 2 yemek kaşığı şeker - Yarım çay bardağı yağ
Neyse ki marketlerde haşhaş ezmesi satılıyor. Daha önce denediğim bir şey değildi çünkü annem pek sevmez ama bu sefer ben denemek istedim. Hamur biraz yumuşak ama ele yapışmayan bir kıvamda olmalı. Bir de hamuru 45 dakikadan fazla bekletirseniz eğer istemediğiniz bir şekilde her yere yapışmaya başlayacak ve ne kadar un eklerseniz ekleyin düzelmeyecek. Bu yüzden zaman konusunda biraz dikkat etmek gerekiyor.

### Hazırlanışı  ---
---
---
---
Bu tarifte de ilk önce sıvıları sonrasında ise katıları yavaşça ekliyoruz. Sanırım bu yeni bir alışkanlık olmalı benim için çünkü şu zamana kadarki bu tarz tariflerde bir problem yaşamadım. Hatta tam tersine harika bir kıvamda oldular.
Sütü ve suyu bir cezveye yerleştirip biraz ısıttıktan sonra diğer sıvıları da bir kaba ekledim. Elimden geldiğince iyi bir şekilde karıştırdıktan sonra unu ve tuzu da yavaş bir şekilde yoğurdum ele yapışmayan bir kıvama gelene kadar. Bu yaklaşık 5 dakika süren bir süreç.
Bu sırada da annem marketten aldığımız haşhaş ezmesini, yağ ve şeker ile karıştırdı. Yumurtanın sarısını ise üzerine ayırdım bu arada. Çok gerekli olmasa da çöpe atmaya gerek yok. Mutlaka bir kullanım amacı bulunur.
Hamurun mayalanması için 45 dakika kadar beklediktens sonra işler benim için biraz kirlendi. Neden mi? Benim hamuruma 45 dakika fazlaymış ve her yere yapışmaya karar verdi.
Bu süreçte çok zorlandım çünkü her yere yapışan bir hamur kabus gibi. Neyse. Bir şekilde ellerimi bileklerime kadar kirlettikten sonra bu işin üstesinden gelebildim ama fotoğraf çekemedim.
Kısaca anlatmak gerekirse hamuru 0,5 santimetre belki biraz daha kalın bir şekilde açarak dikdörtgen şeklini almasını sağlamaya çalıştım. Sonra içerisine haşhaş ezmeli karışımı ekledim ve iyice yaydım. Bu işlem bittiğinde ki beklediğimden daha zordu,
Hamuru, ezmeli kısım arada kalacak şekilde rulo hâline getirdikten sonra eşit boylarda kesmeye çalıştım. Tabii belli bir katılık olmadığı için rulo parçaları hemen dağıldı.
---
Bende buna sinir olduğum için öyle dipdibe bütün ruloları koydum. Zaten oldukça karmaşık görüntüye sahip olmaları gerekiyordu ama bu yöntemle değil 😂 Yine de istediğim oldu.
250 derecelik fırında 40 dakika kadar pişirdikten sonra hazırdı. Bu noktada, hâlâ sıcakken, isterseniz üzerine eritilmiş tereyağı sürebilirsiniz. Ben kalori açısından pek tavsiye etmem fakat oldukça lezzetli olduğunu da söylemeliyim.

Düşündüğümden daha dikkatli olmam gereken bu hamurla başım belada anlaşılan ama tadına doyamadım. Hatta şu anda bile bir tabakta masamda atıştırırken bu yazıyı yazıyorum. Biraz daha şeker ile daha da lezzetli olabilecek bir tarif. Hedefim ise bir dahaki sefere bal ile benzer bir tadı yakalamak. Bakalım o zaman ne olacak? Bugünlük benden bu kadar. Sonra görüşmek üzere. Kendinize dikkat edin, sağlık ve sevgiyle kalın ve lütfen unutmayın ki; ***Bu dünyada sizden başka bir tane daha yok.*** 
All of my content is written in Turkish first and then with the help of translators and dictionaries below translated in English.
https://www.seslisozluk.net https://www.deepl.com/translator
P.S. If you know English AND Turkish, I do that too... If you see a translation discrepancy that was on purpose. I did think this is as proper as I could do. Because there are many differences between these languages.
Not: Hem Türkçe hem de İngilizce biliyorsanız, ben de biliyorum... Eğer çeviri farklılığı görürseniz bunun bilinçli olduğunu bilin lütfen. Bunu yapabileceğim en uygun şekilde yaptığımı düşünüyorum. Çünkü bu iki dil arasında çok fazla fark var.