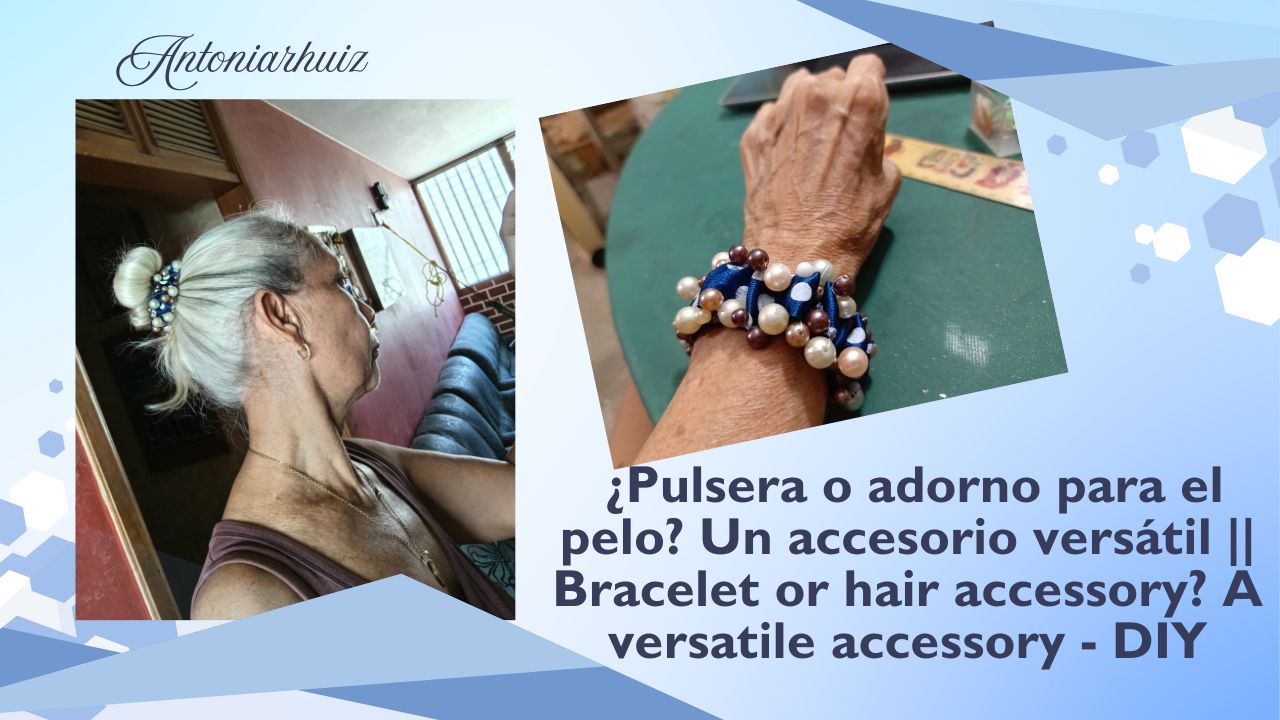
Hola, mis queridos seguidores. Dios les bendiga y tengan un bonito día. Hoy les enseño un accesorio que puedes lucir como una bonita pulsera o como un elegante adorno para el pelo.
Tenía guardadas no sé cuántas perlas. Pensaba que en cualquier momento serían las protagonistas de algún trabajo decorativo, y ese día ha llegado. Pasé mucho tiempo pensando en qué haría con ese material. Se me había ocurrido hacer un collar, pero finalmente me decidí por este accesorio multiusos.
En este sencillo accesorio usamos muy poco material y es muy fácil de hacer. Comenzamos sin más pérdida de tiempo.
### Accesorio multifuncional
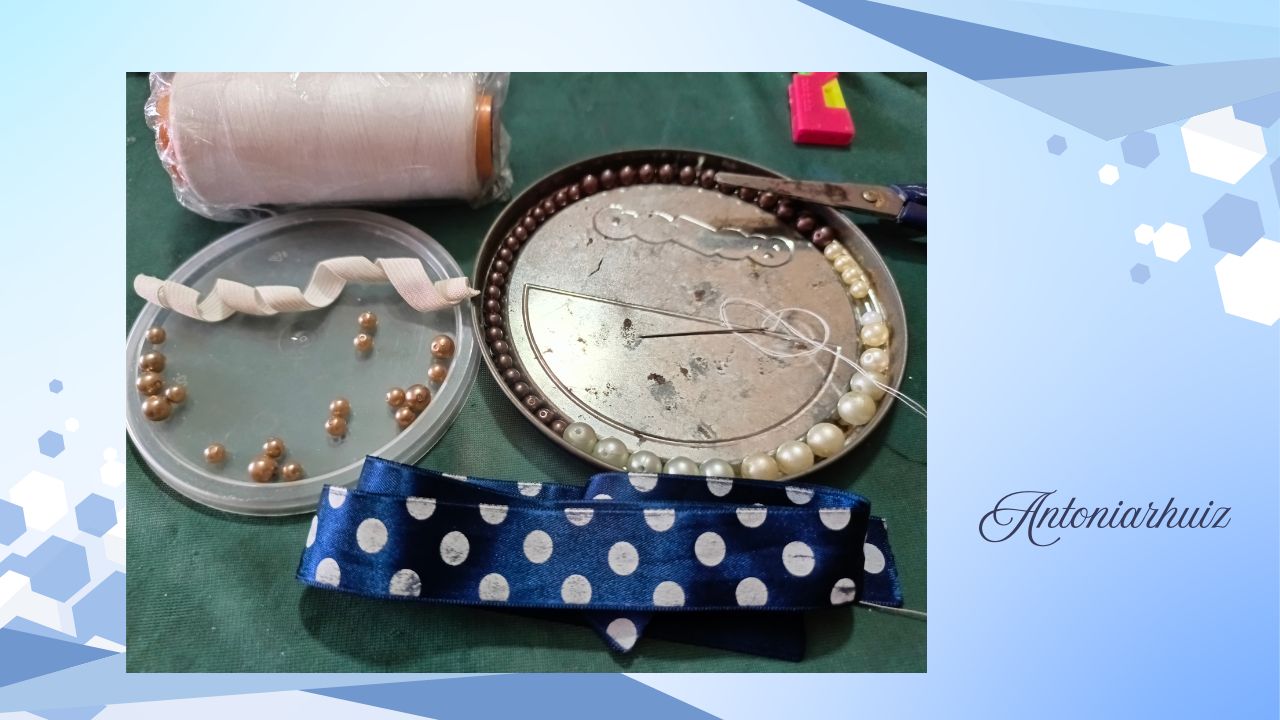
Los materiales necesarios son: hilo de coser, perlas (la cantidad que se desee colocar), 80 cm de cinta de 2,5 cm de ancho, 20 cm de elástico, aguja de coser y tijera.

Procedimiento:
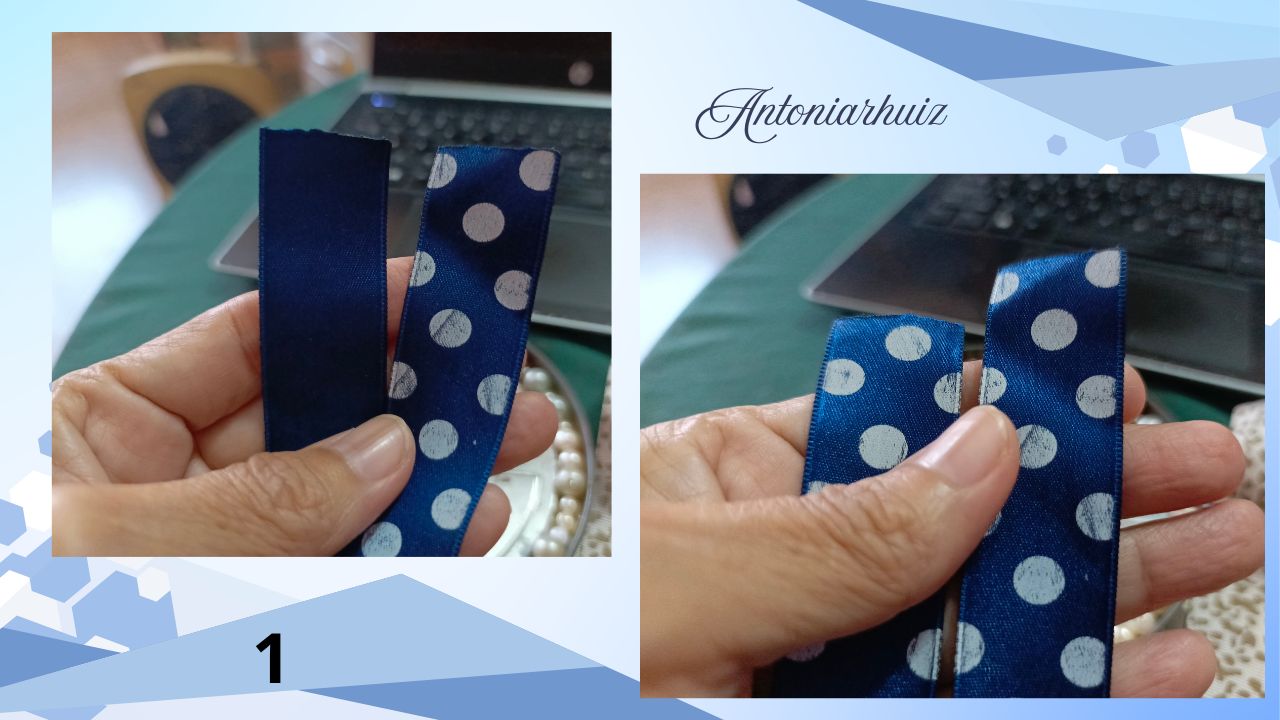
1- Cortamos la cinta en dos pedazos iguales de 40 cm. Ponemos las caras traseras juntas, es decir, el revés contra el revés.
2- Damos una primera puntada recta en el borde de las cintas para comenzar a unirlas con las perlas. Tomamos una perla con la aguja, la pasamos por el hilo y la sujetamos con una puntada recta. Clavamos una perla al lado de la otra.
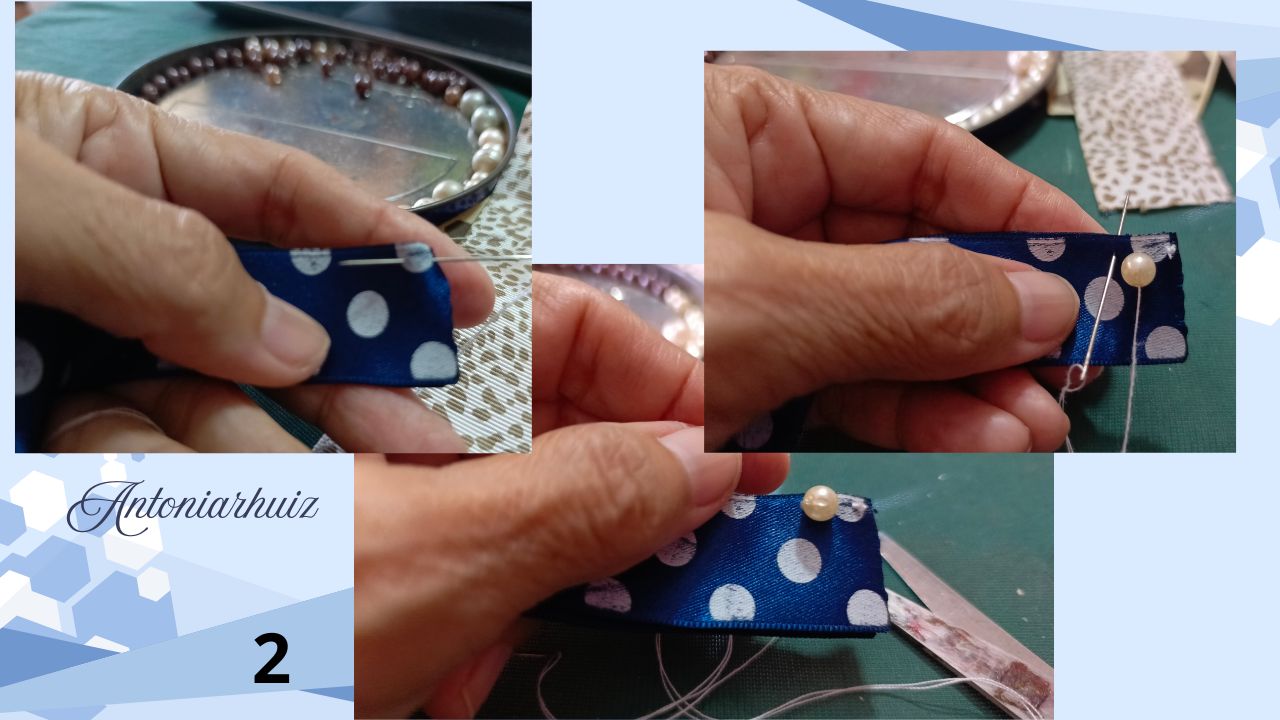
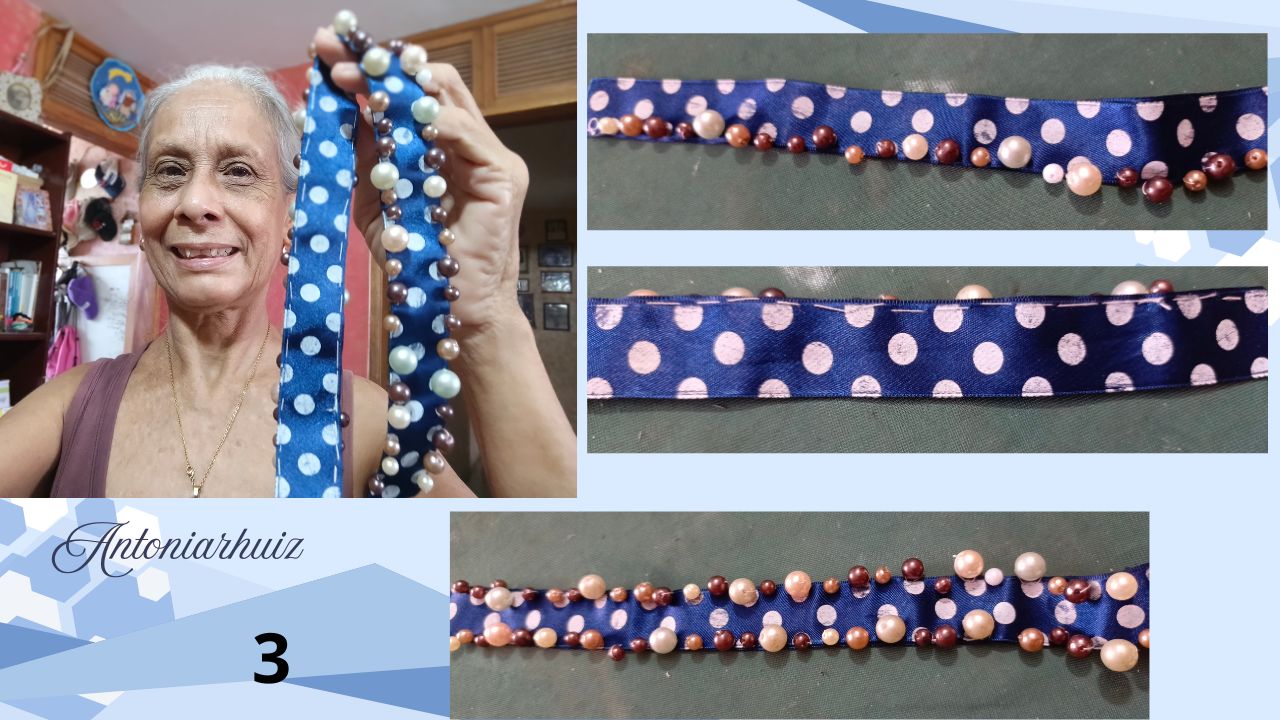
3- Repite el paso hasta el final del lado trabajado y haz lo mismo con el otro extremo.
4- Introducimos el elástico por entre las cintas y lo atamos.
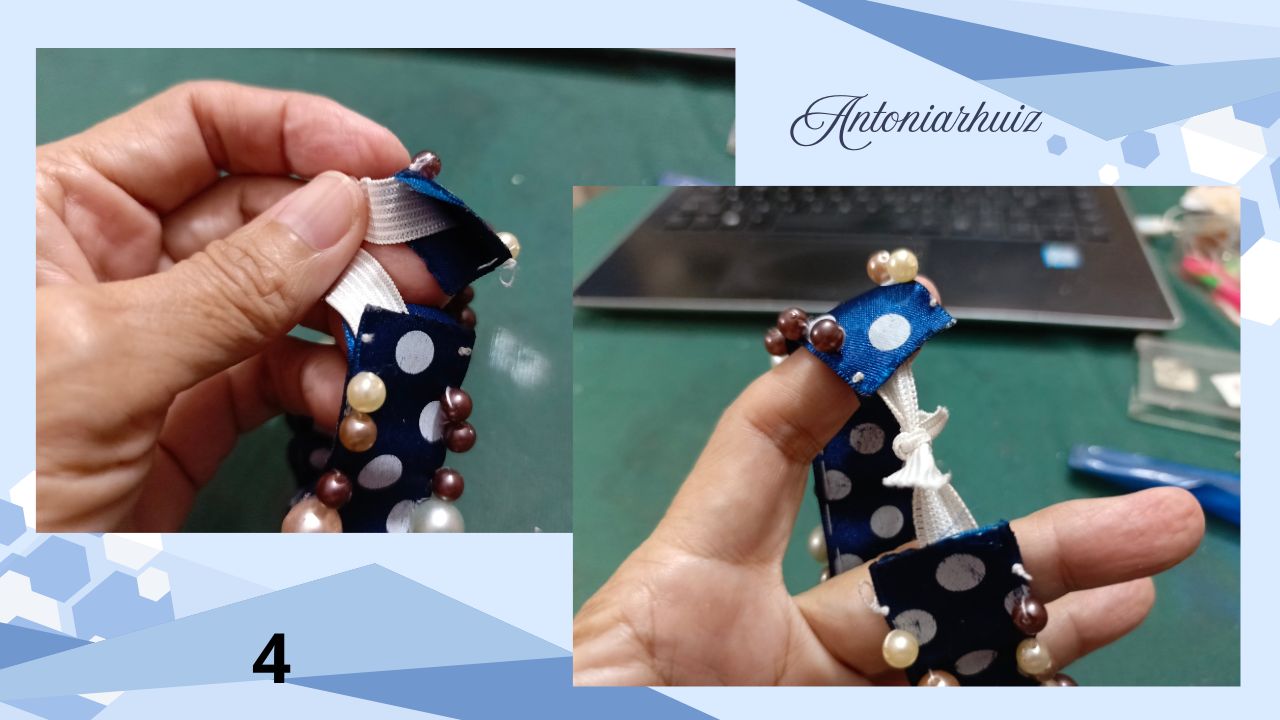
5- Unimos los dos bordes con costura y ya está.

Ya tenemos listo nuestro accesorio, ¿cómo debemos usarlo? Es un adorno muy versátil, ya que podemos llevarlo en el pelo o en la muñeca; todo depende del uso que quieras darle a esta delicada y bella pieza. Las perlas le dan un acabado elegante, delicado y bonito. Una variante o una sugerencia que se me ocurre es agregarle una línea más de perlas.
A veces no sabemos qué hacer con el material que guardamos y olvidamos. Eso me pasa a veces. Luego, cuando se me ocurre una idea, me ves buscando entre todas las cosas que tengo almacenadas para cualquier ocasión. ¿Qué te parece? ¿Cómo te gustaría usarla?
Bueno, mis amores espero que les haya gustado tanto como a mí este proyecto.
---
>! [ENGLISH]
Hello, my dear followers. God bless you and have a nice day. Today I'm going to show you an accessory that you can wear as a pretty bracelet or an elegant hair ornament.
I had saved up I don't know how many pearls. I thought that at any moment they would be the stars of some decorative project, and that day has arrived. I spent a long time thinking about what I would do with this material. I had thought about making a necklace, but finally decided on this multipurpose accessory.
This simple accessory requires very little material and is very easy to make. Let's get started without further ado.
Multifunctional accessory
The materials needed are: sewing thread, pearls (as many as you want to use), 80 cm of 2.5 cm wide ribbon, 20 cm of elastic, a sewing needle, and scissors.
Procedure:
1- Cut the ribbon into two equal pieces of 40 cm. Place the backs together, i.e., wrong side to wrong side.
2- Sew a straight stitch along the edge of the ribbons to begin attaching the beads. Thread a bead onto the needle, pass it through the thread, and secure it with a straight stitch. Sew one bead next to the other.
3- Repeat the step until you reach the end of the side you are working on and do the same with the other end.
4- Insert the elastic between the ribbons and tie it.
5- Join the two edges with a seam and you're done.
Now that our accessory is ready, how should we wear it? It is a very versatile accessory, as we can wear it in our hair or on our wrist; it all depends on how you want to use this delicate and beautiful piece. The pearls give it an elegant, delicate, and beautiful finish. One variation or suggestion that comes to mind is to add another row of pearls.
Sometimes we don't know what to do with the materials we store away and forget about. That happens to me sometimes. Then, when I come up with an idea, you'll find me searching through all the things I have stored away for any occasion. What do you think? How would you like to use it?
Well, my dears, I hope you liked this project as much as I did.

Fotos propias Edición Canva Traductor Deepl Cumaná, Venezuela 2025