https://files.peakd.com/file/peakd-hive/bertrayo/Enyo4d2KNC9dwGuWMVoWdT9r7awN4qgRzhmXSAVcpnyFGVx2s9Vx9PFMvLJYQdCFZvJ.png
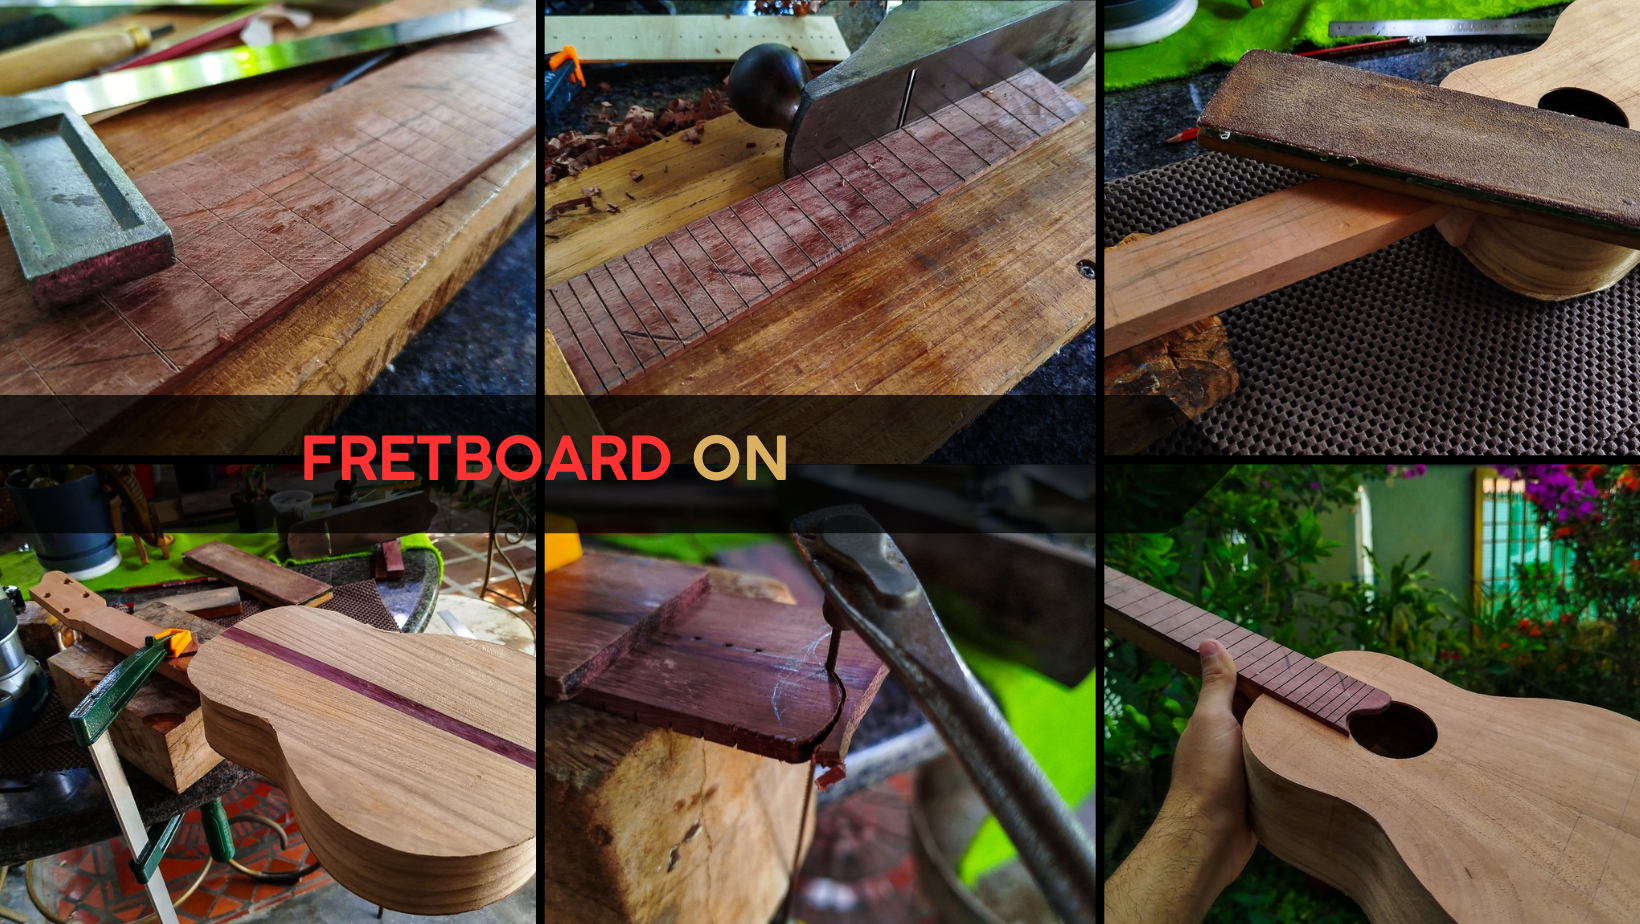
Welcome back to another entry on this ukulele build. Last time, we finished making the back and then we glued it to close the body of the instrument. What comes next is preparing the pieces that go in the outside and on the skeleton we have built, i.e., the fretboard, bridge, nut and saddle. We'll go over the first one in the entry.
Let's get to it!
Slots
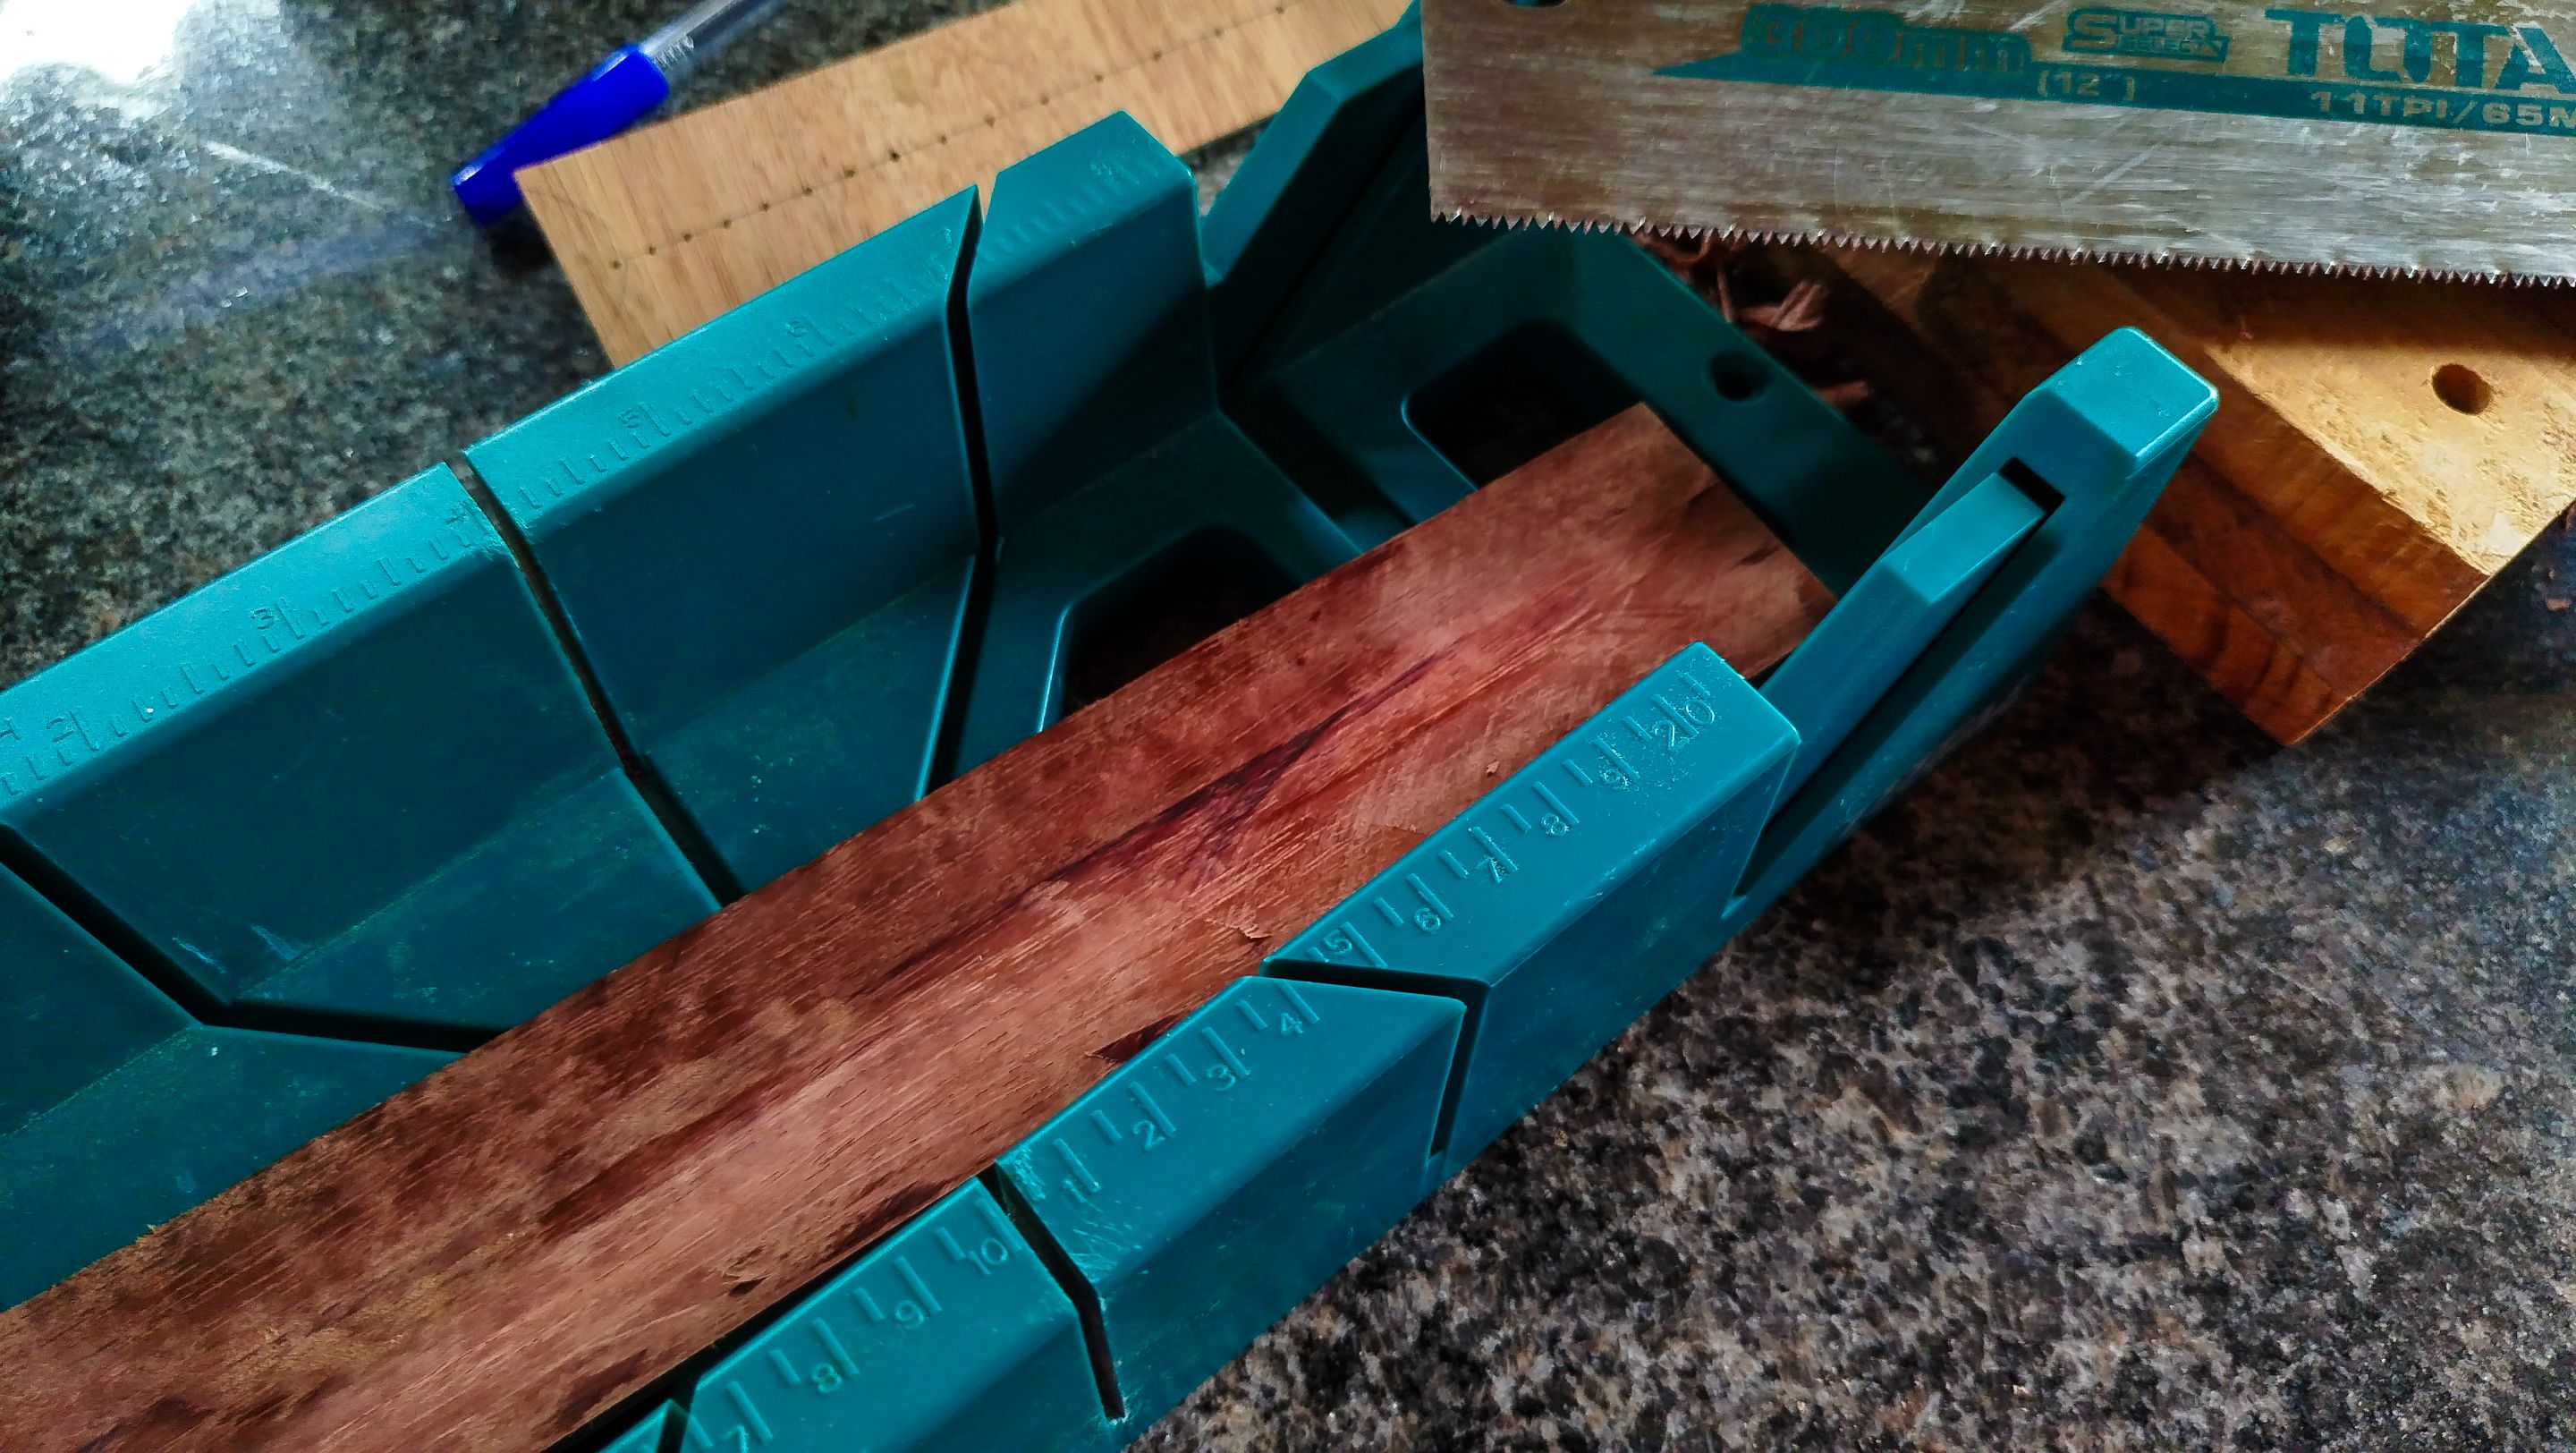
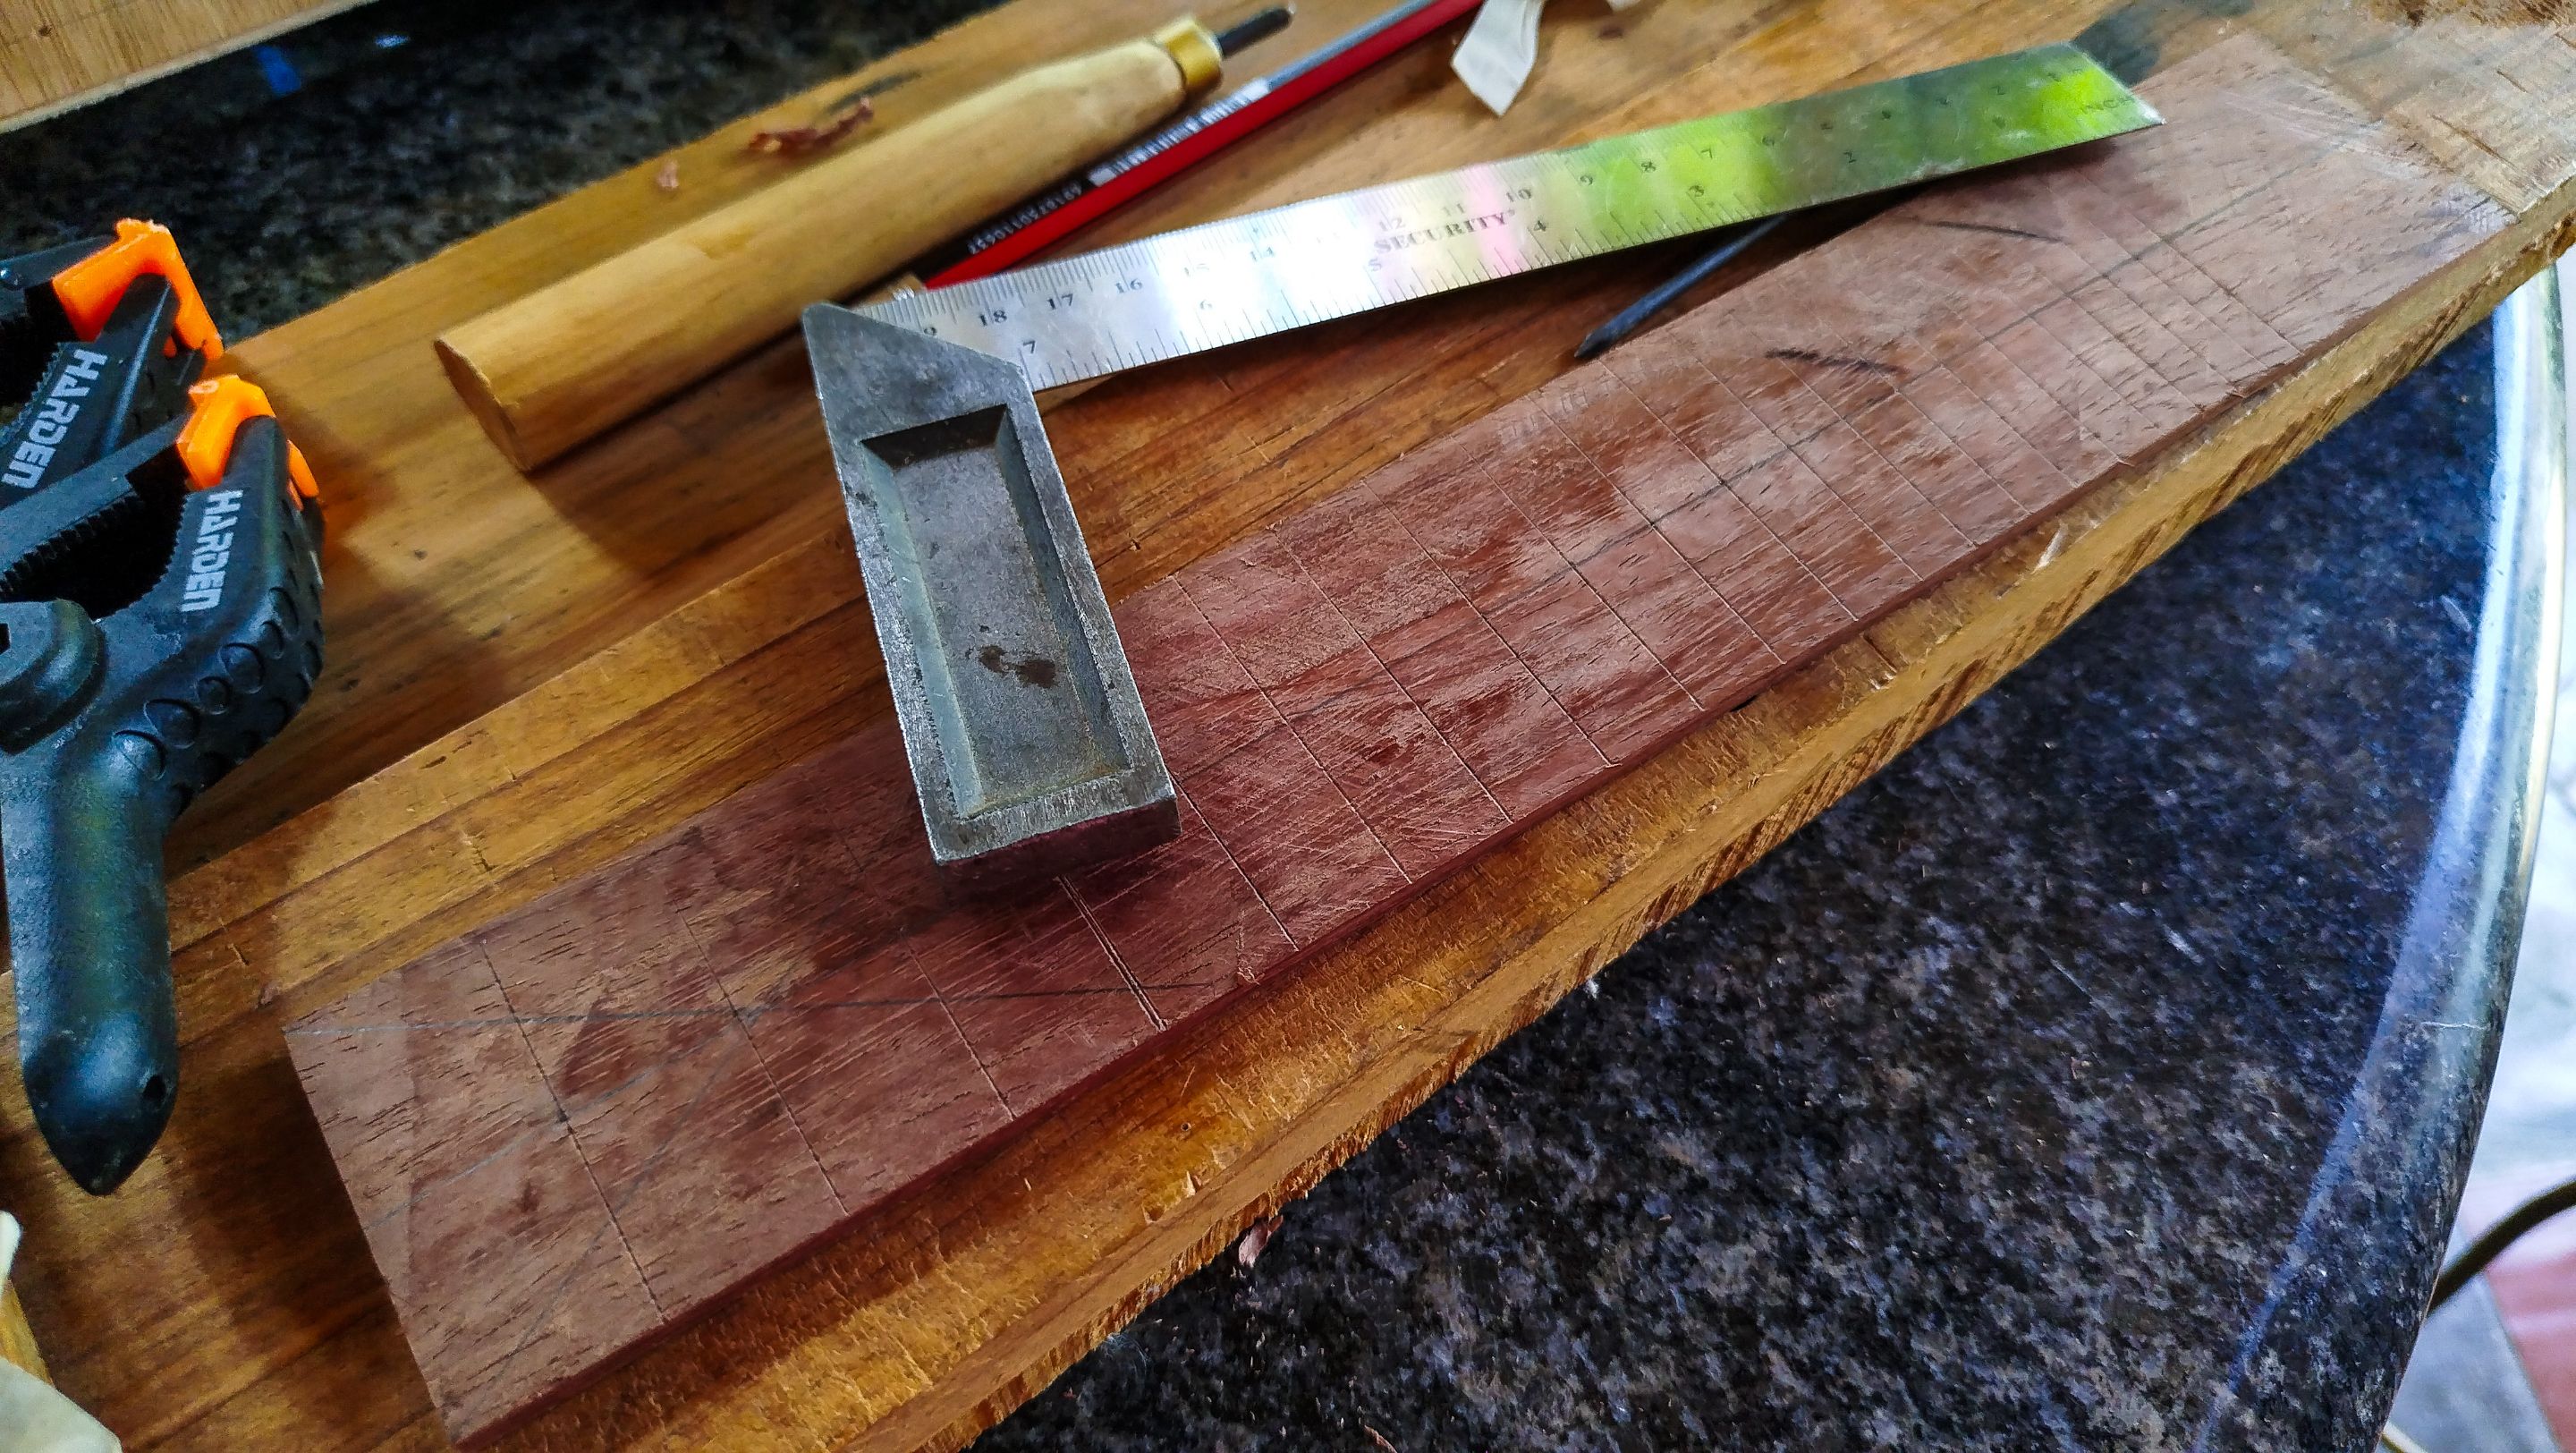
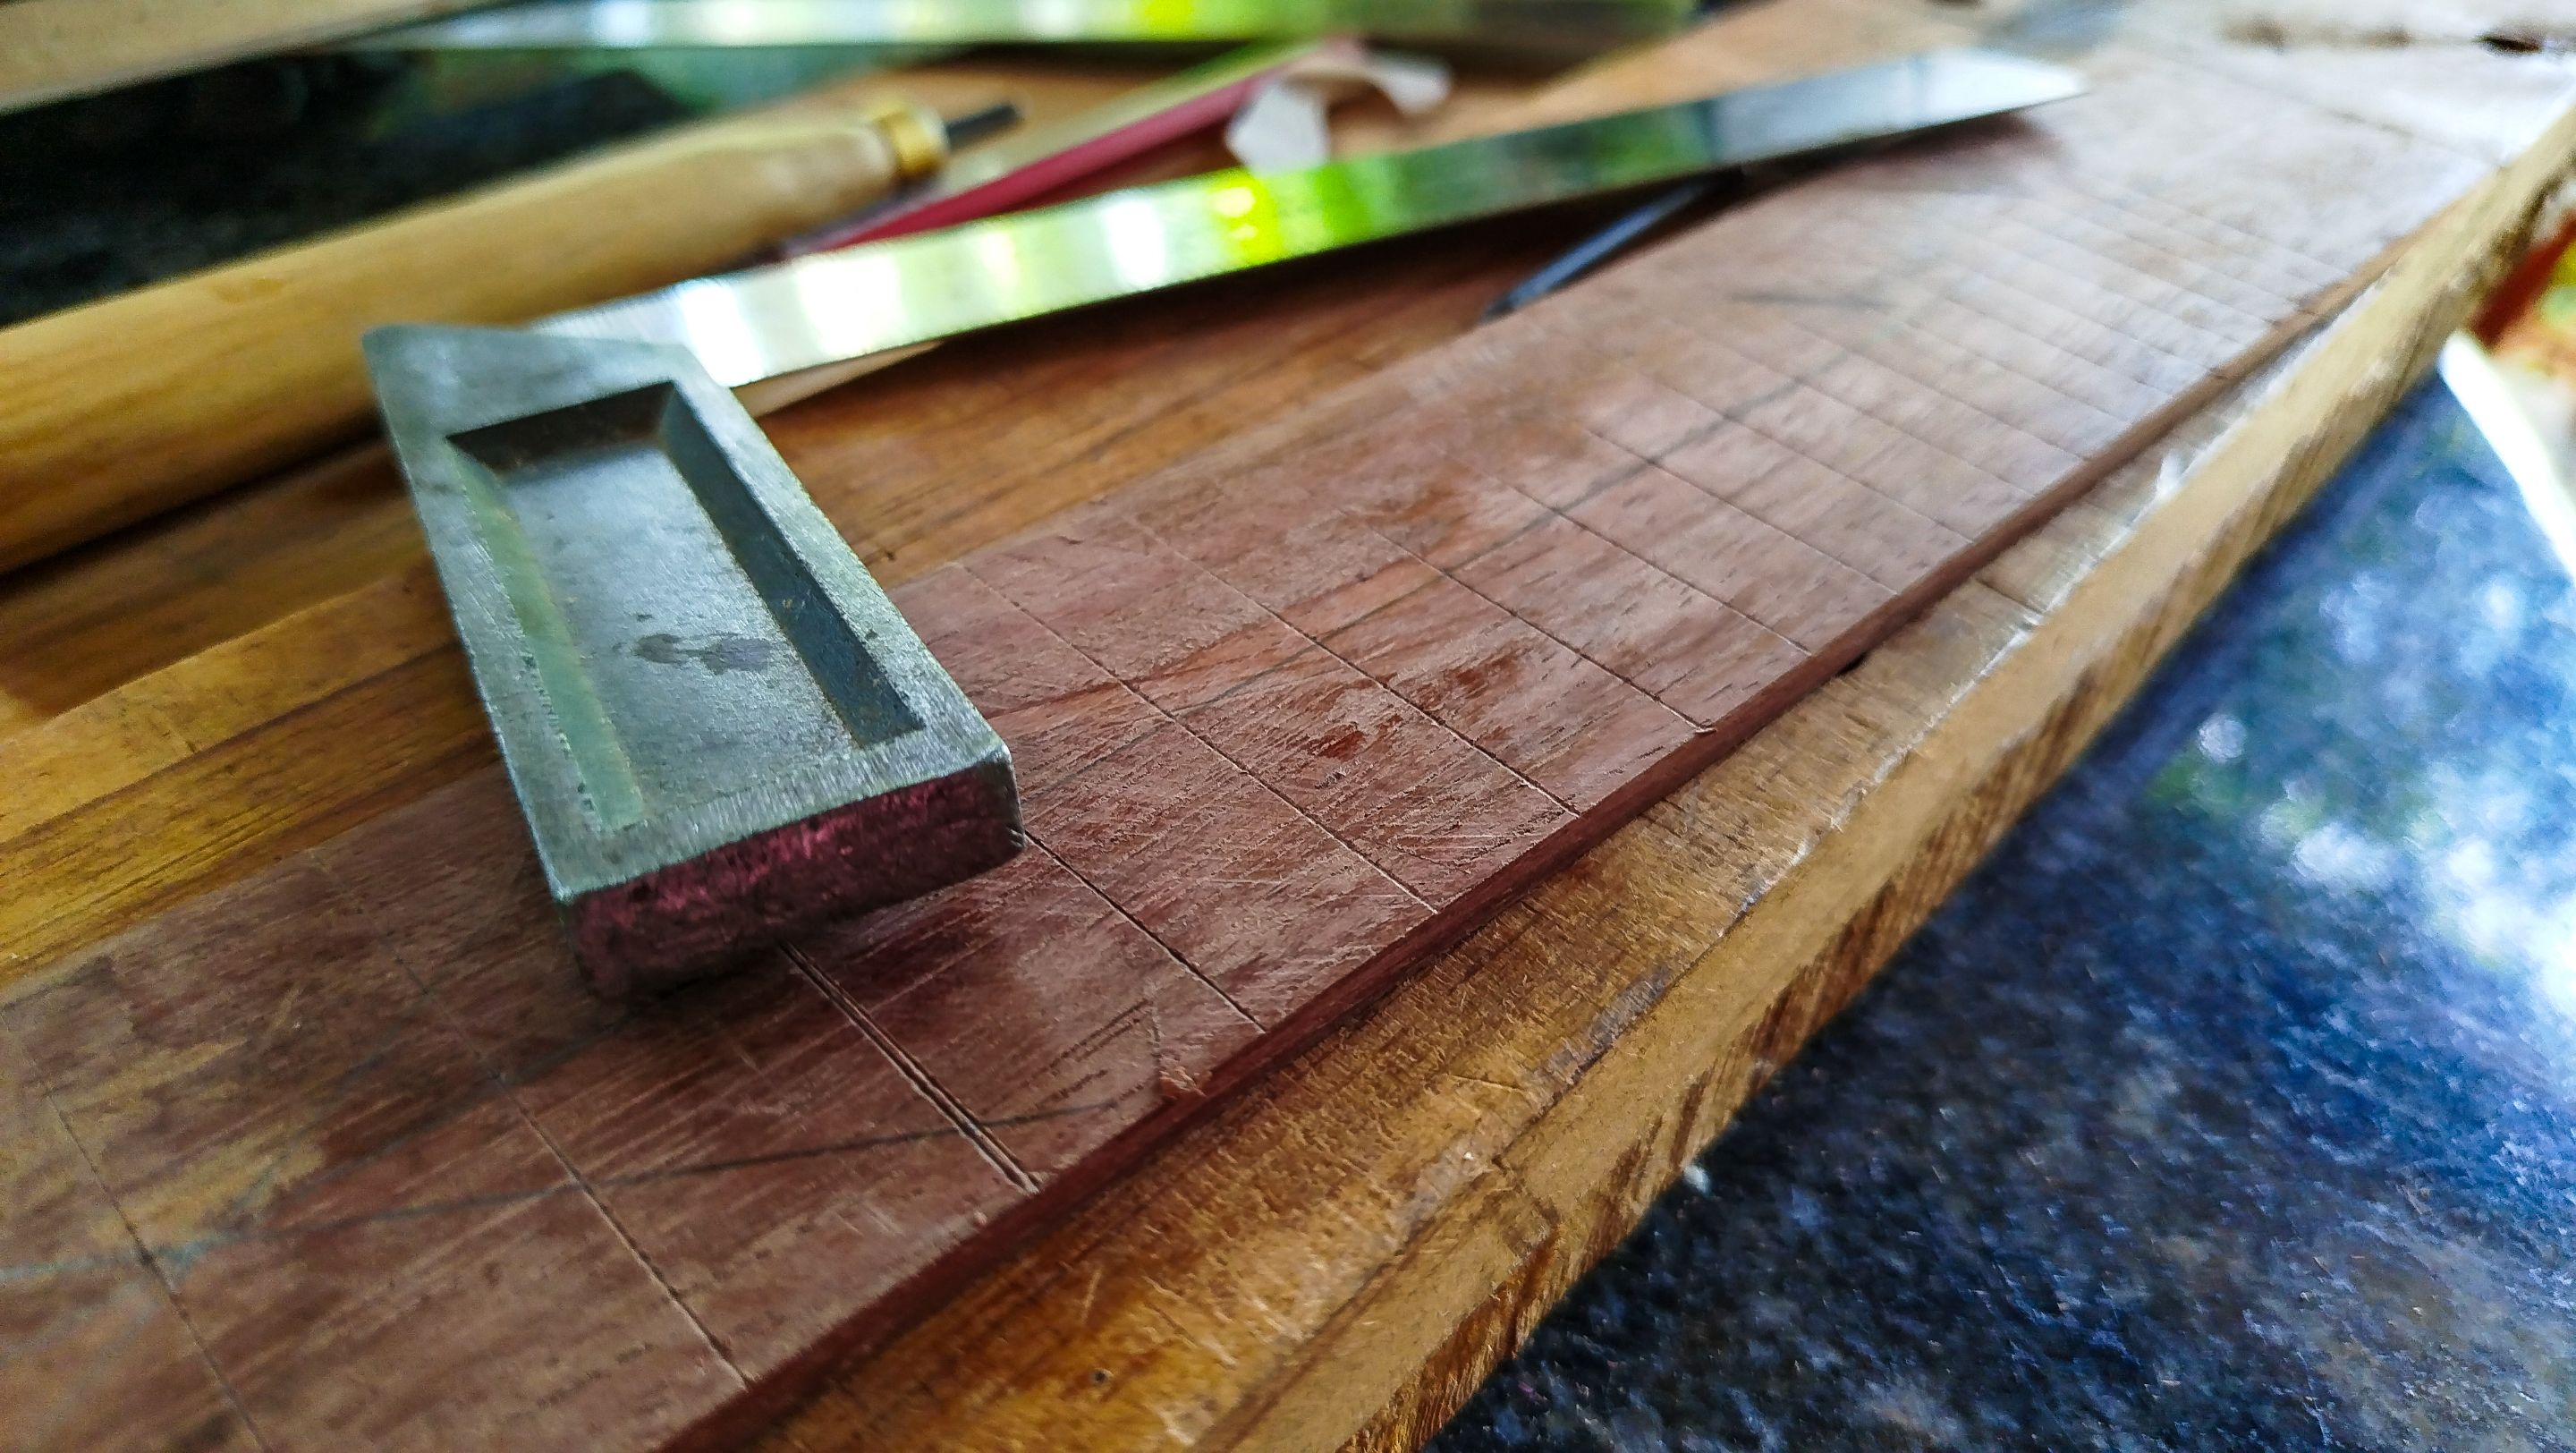
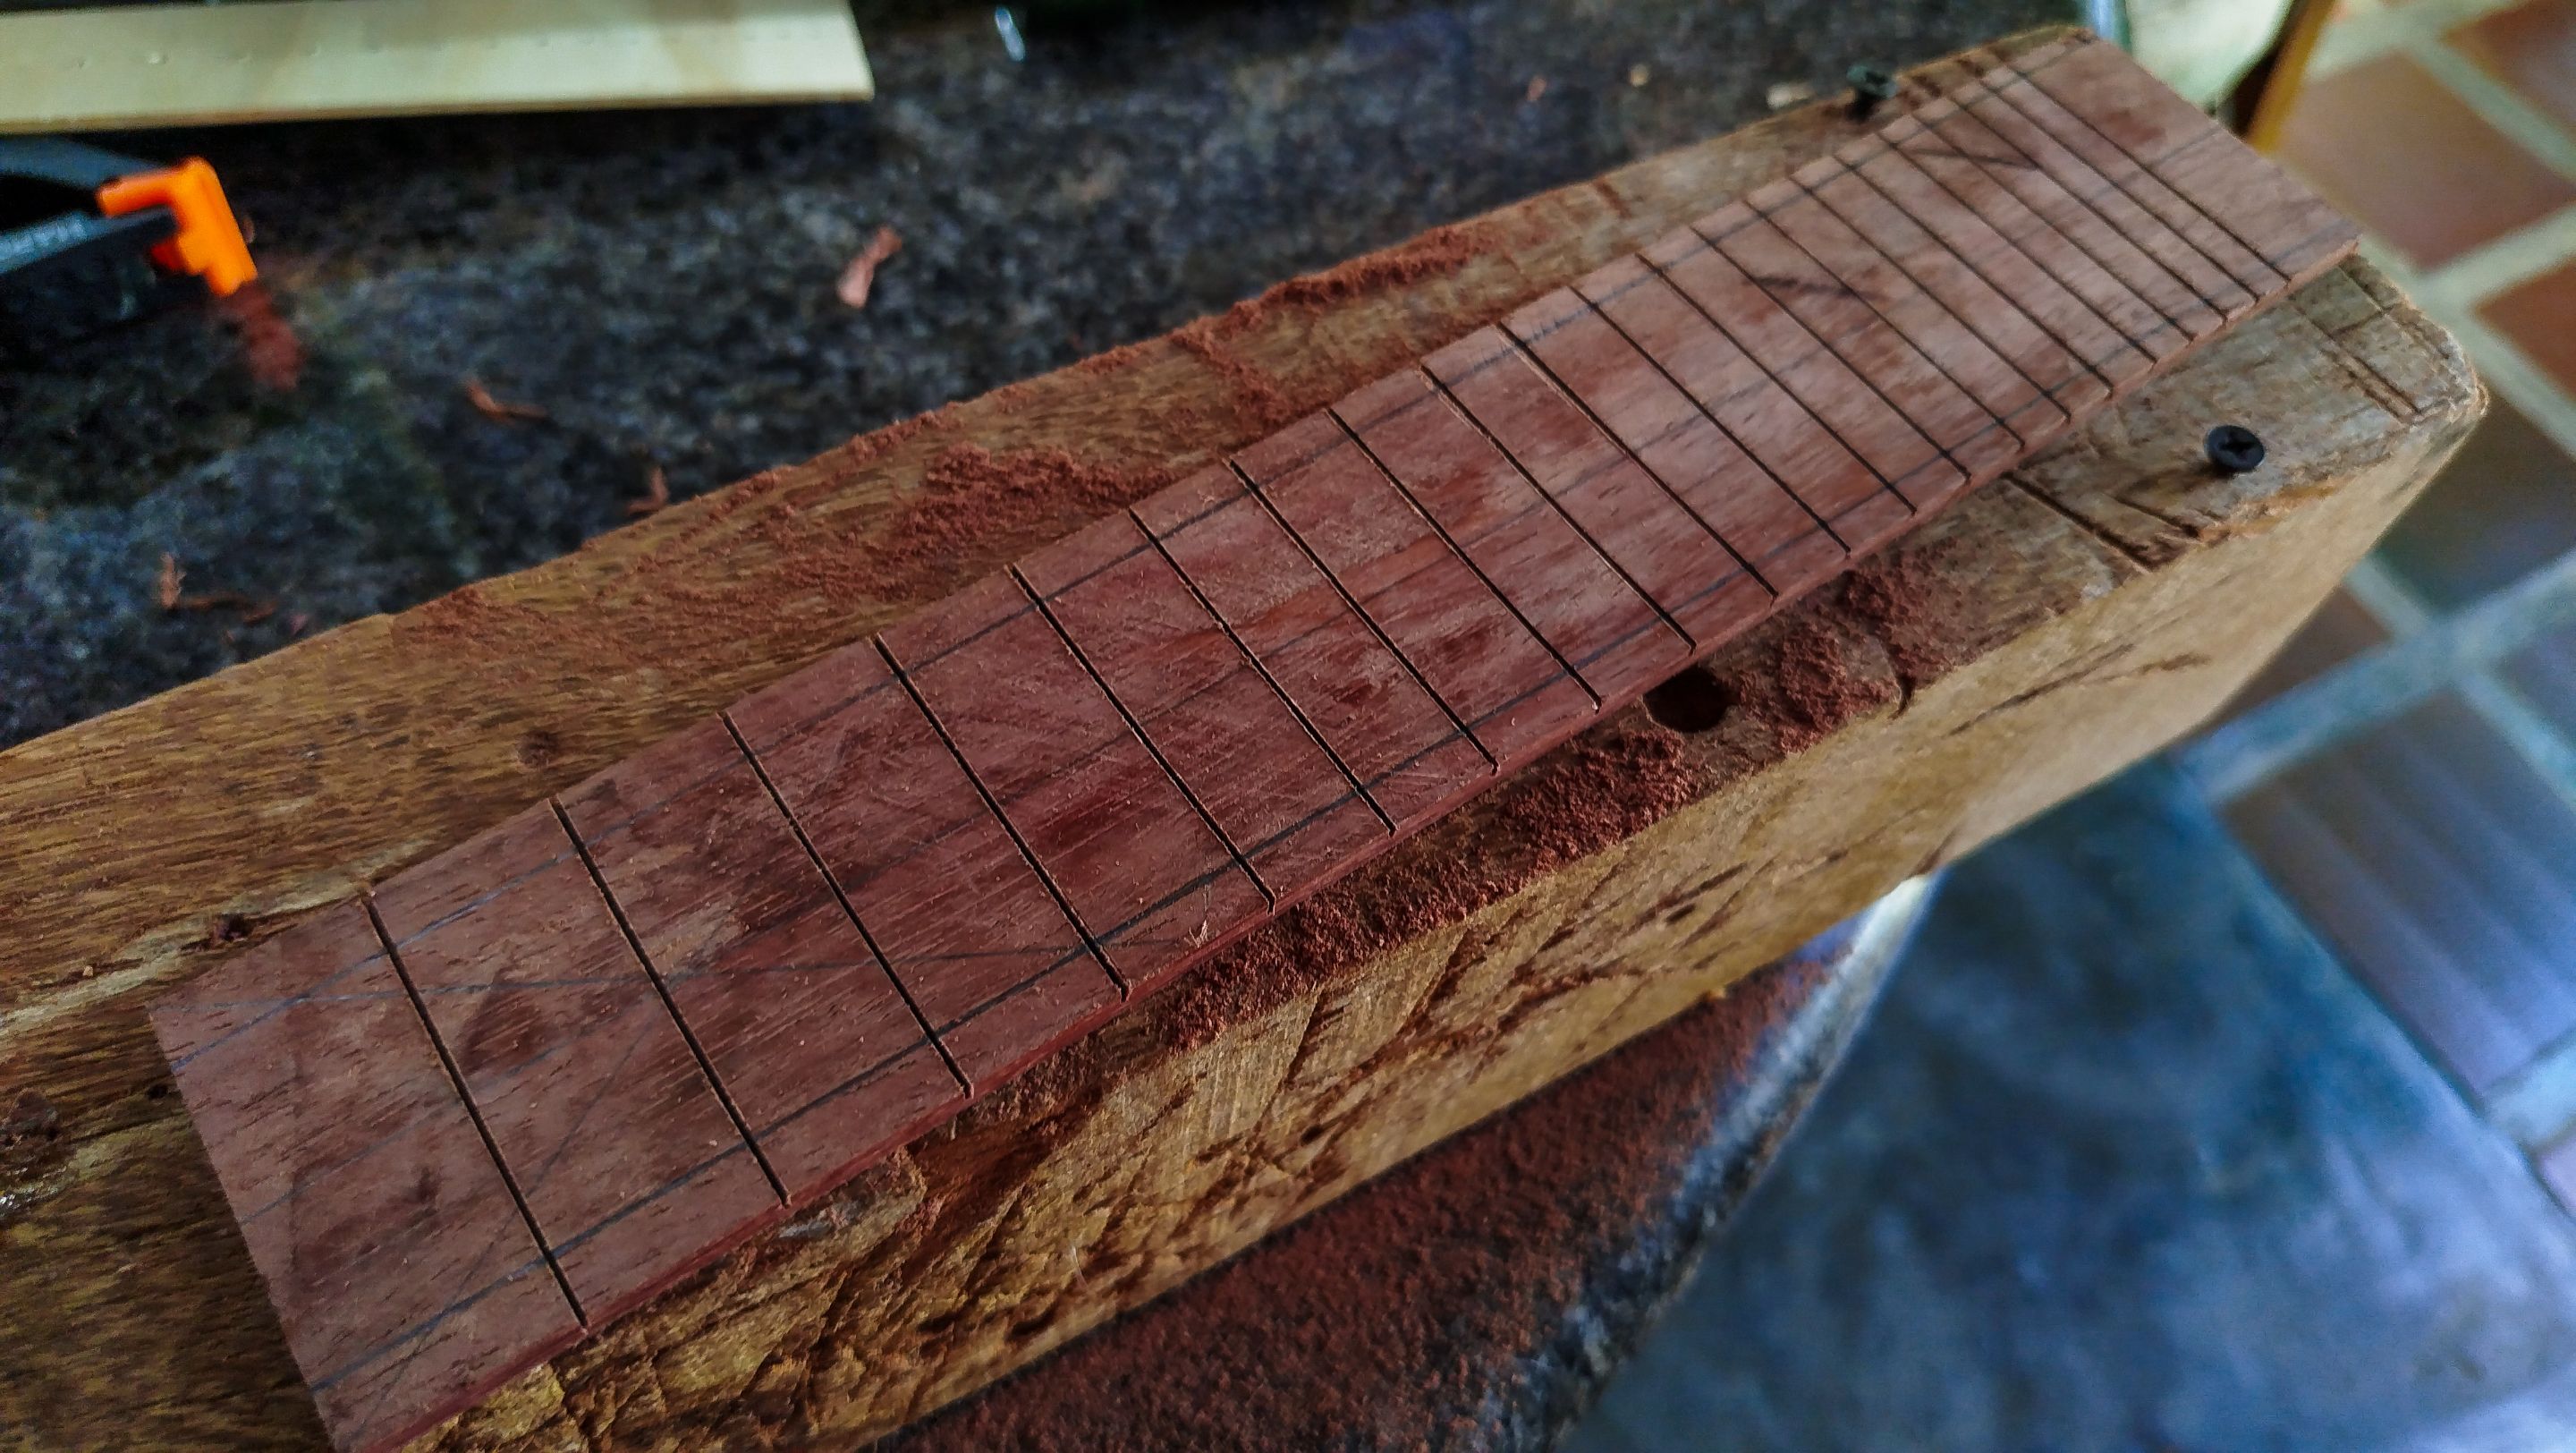
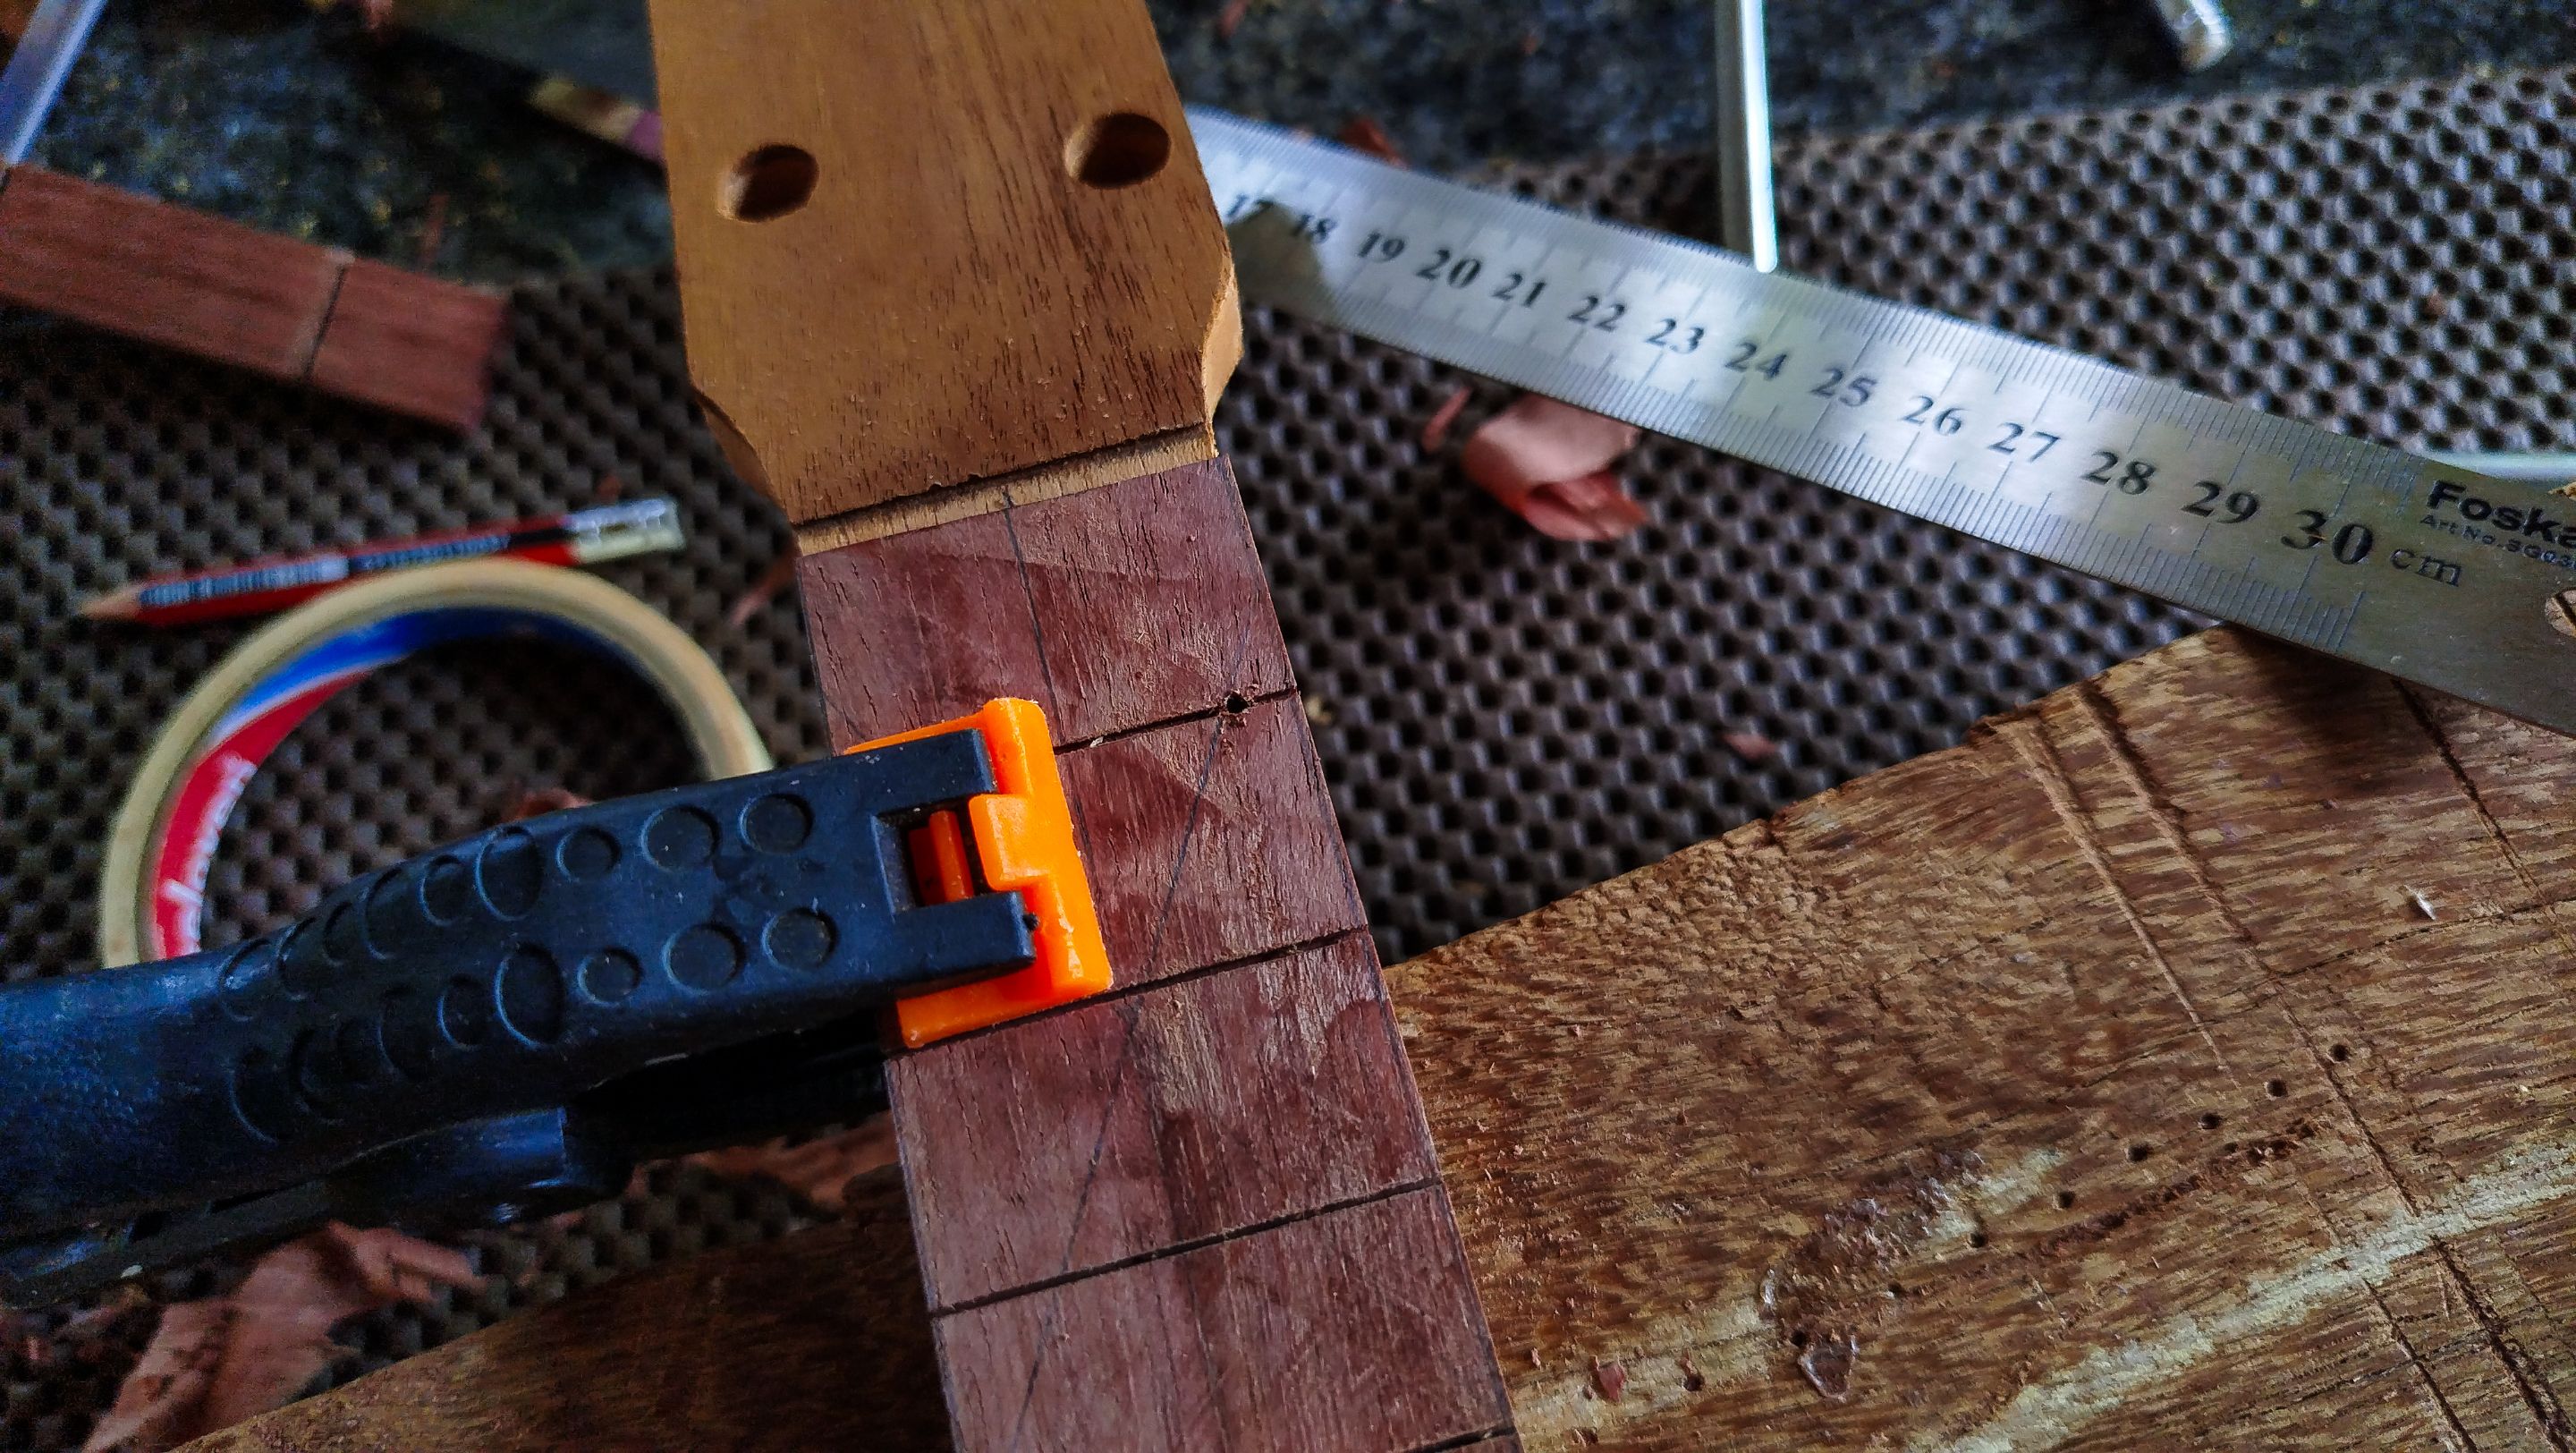
The first part of the job is to cut a blank to the length we need and then remove any marks from the cutting disk from its surface. We had already prepared a template with the placement of the fret slots. We just need to make sure to hold it onto the fretboard blank and then mark the placement of the slots in our fretboard.
To make sure the marks give us straight slots, we need to make sure the thin faces of the fretboard are squared off to the rest of the faces. That way, we can use a carpenter square to make the marks along the width of the wood. We keep doing this until we have all the marks we need.
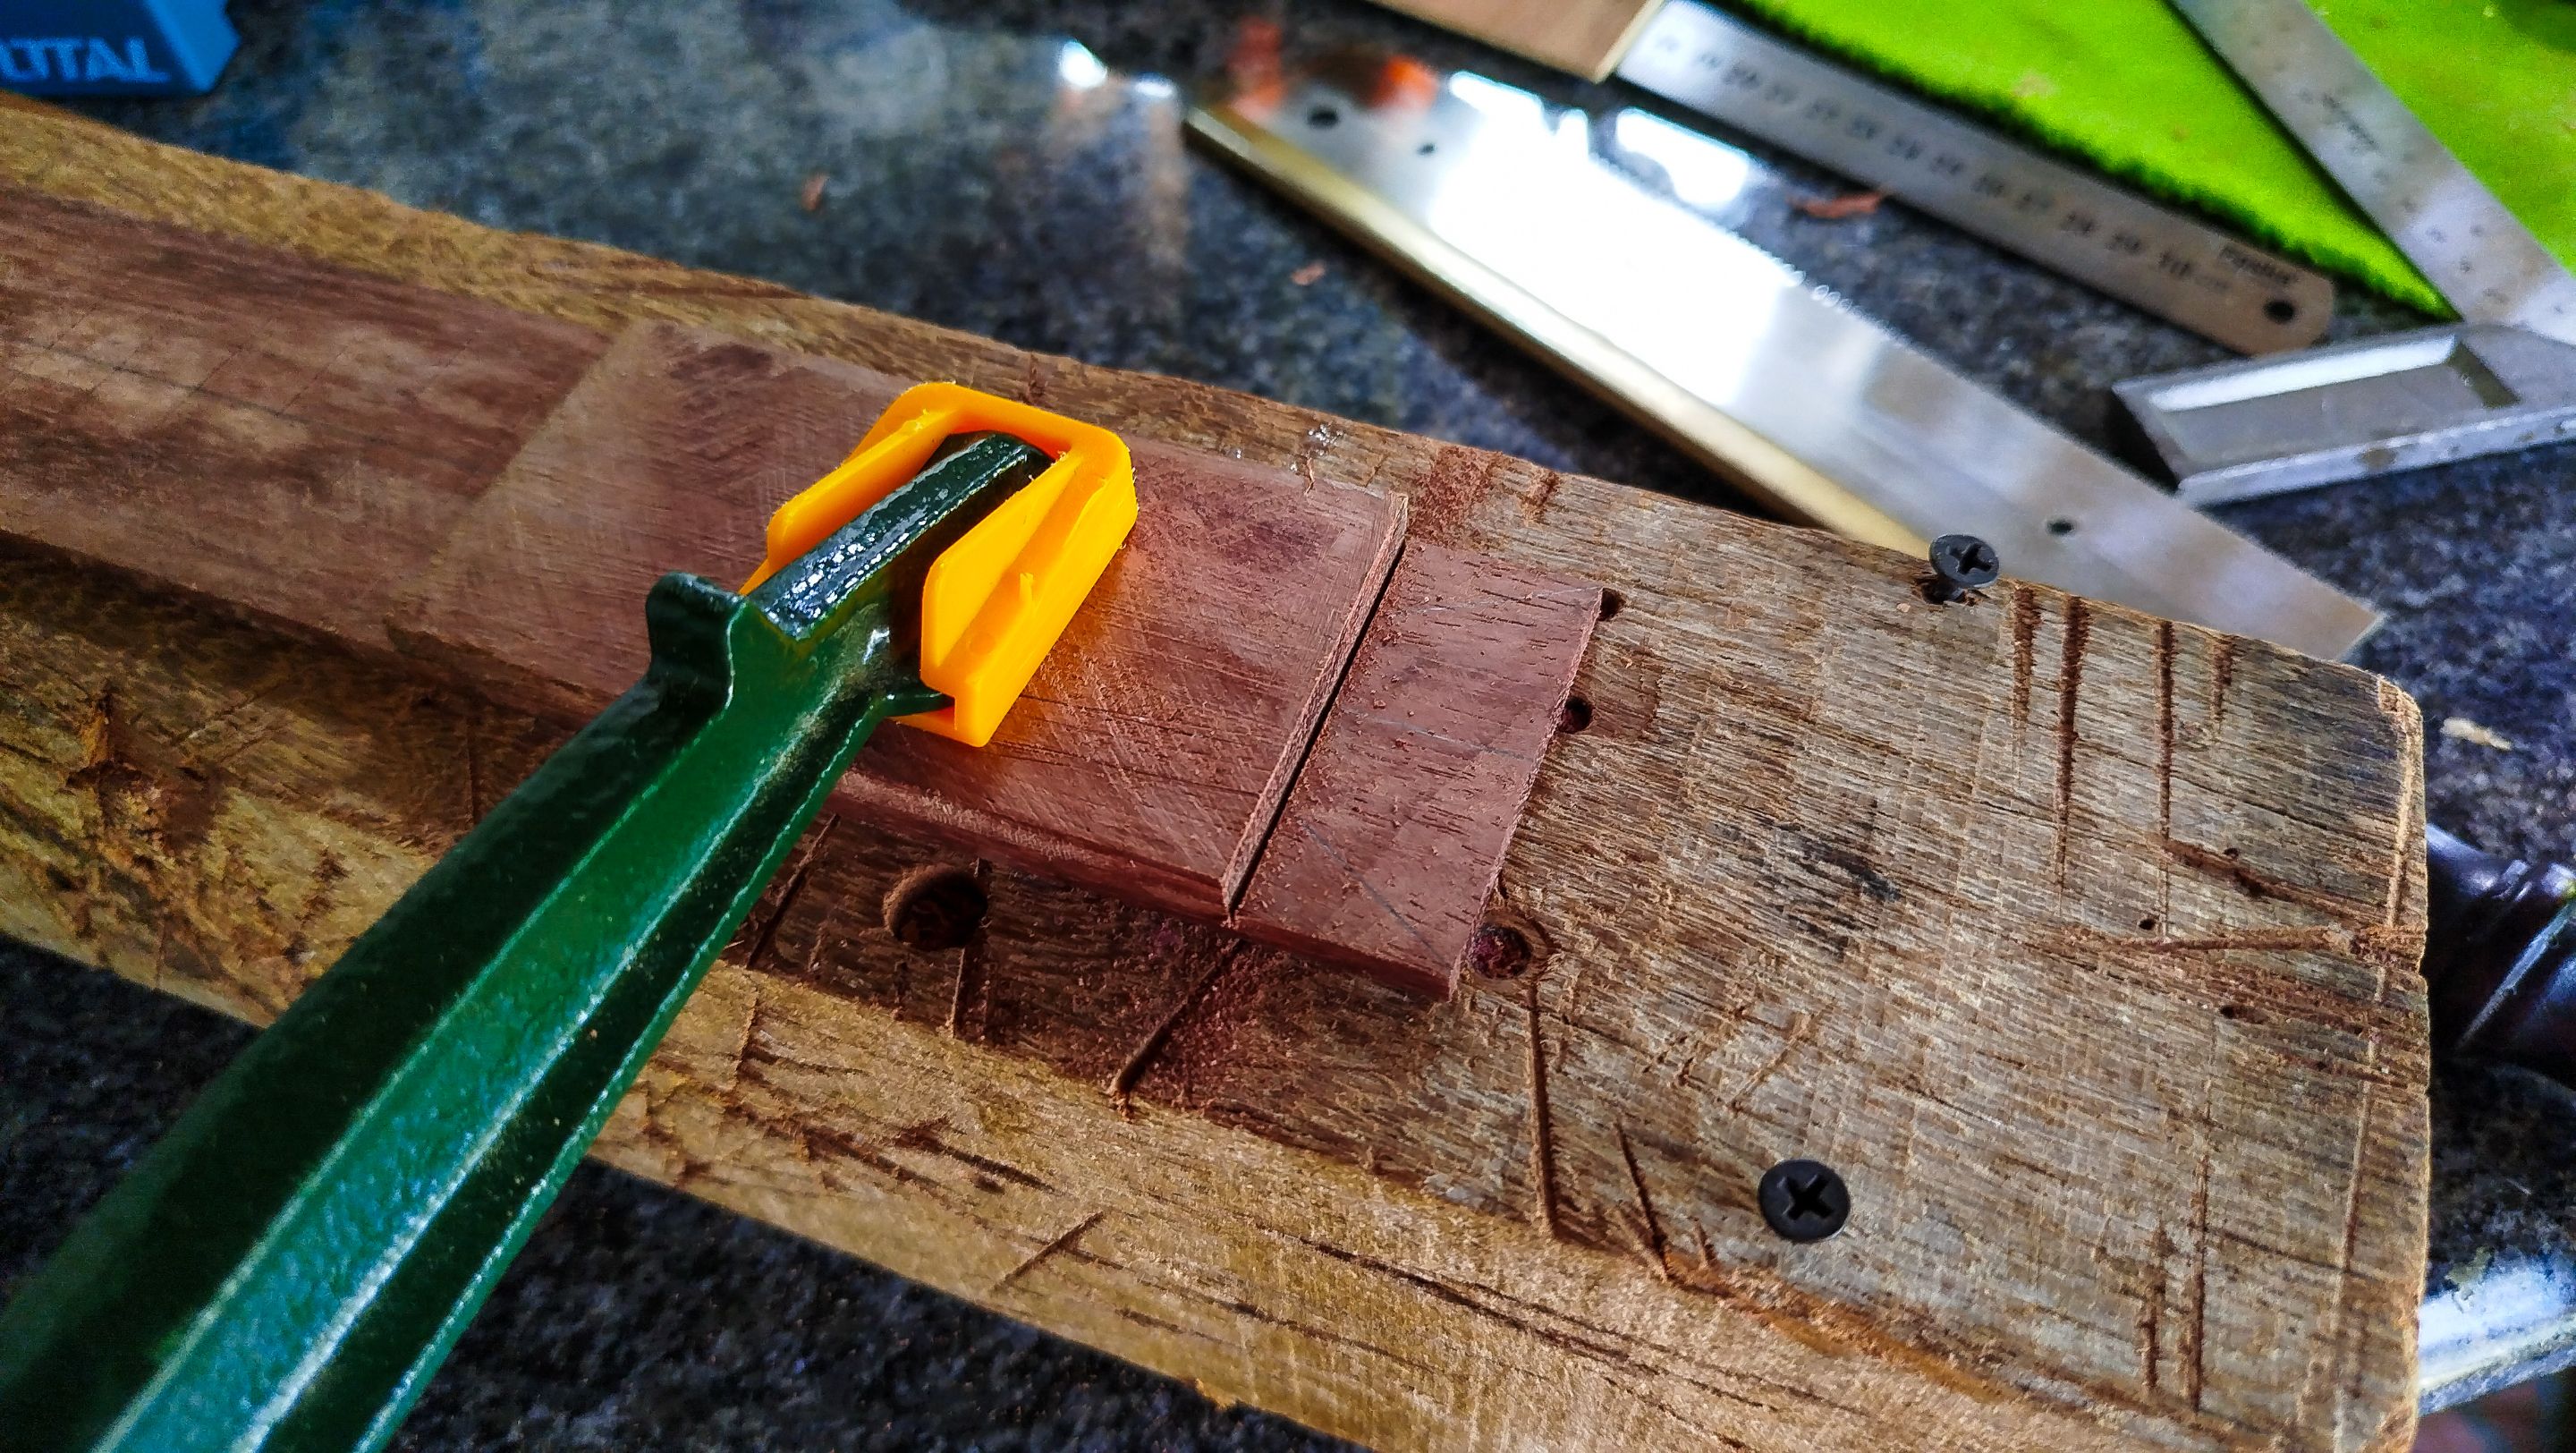
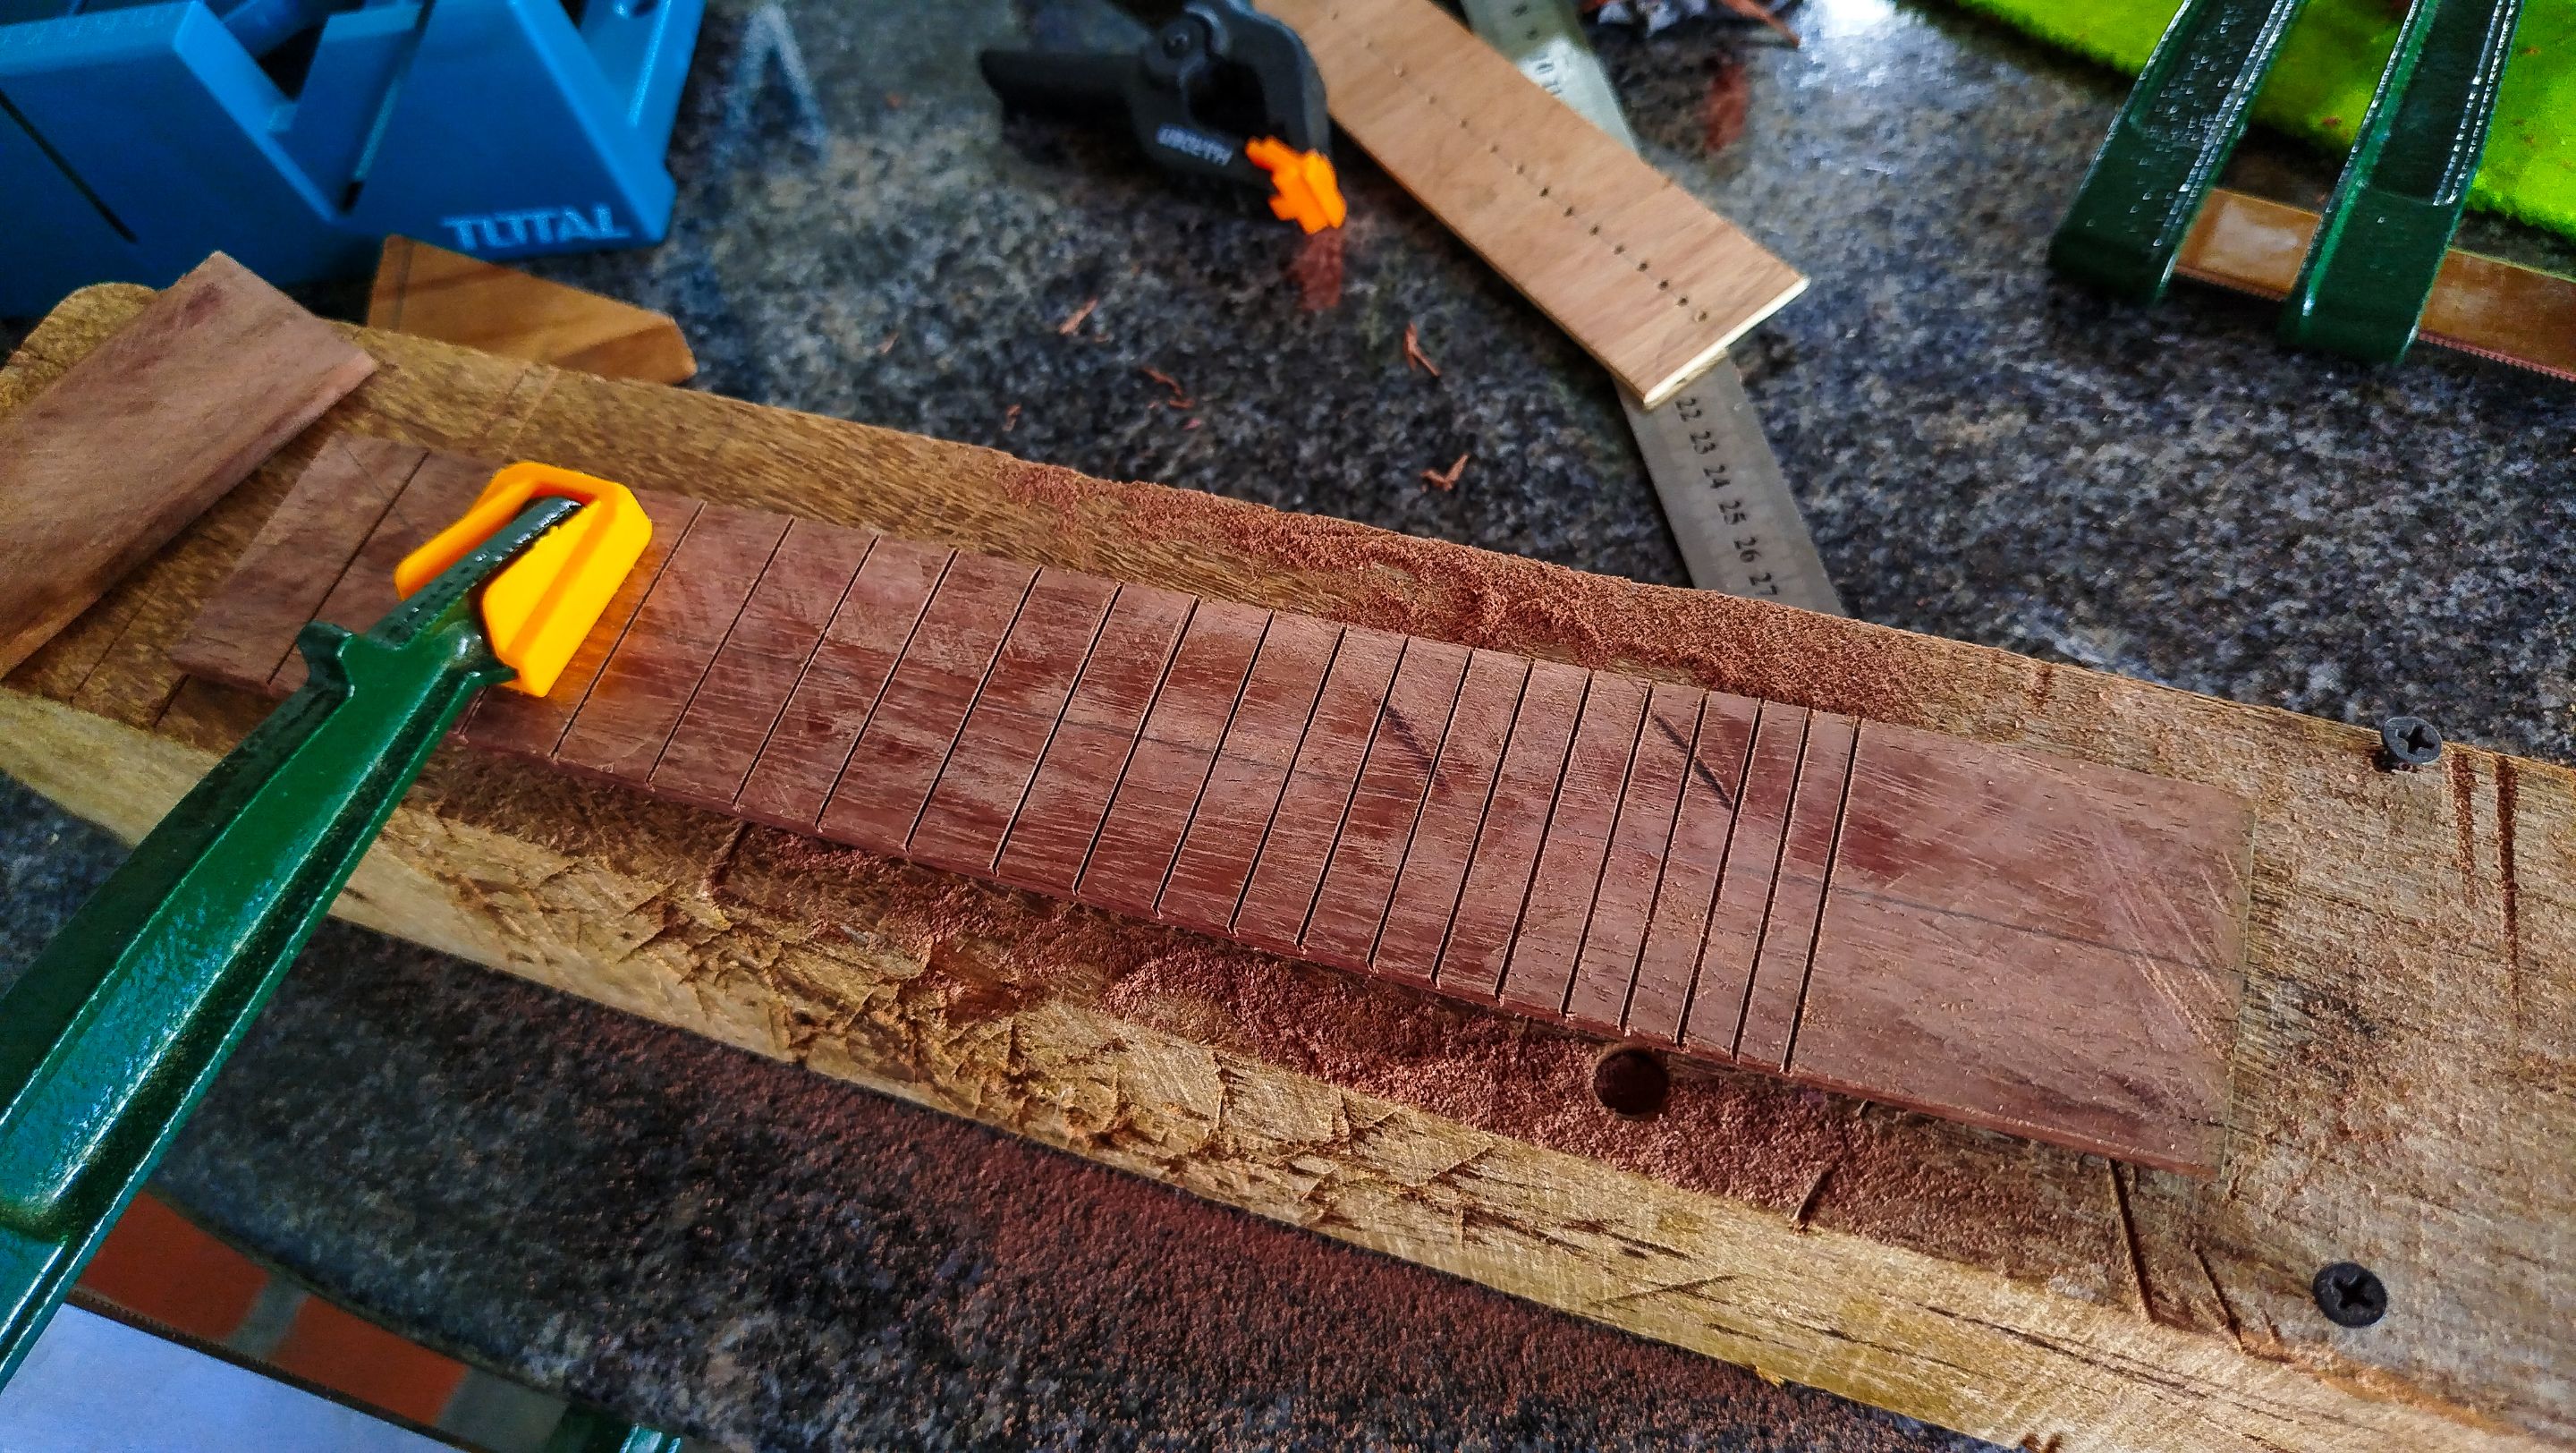
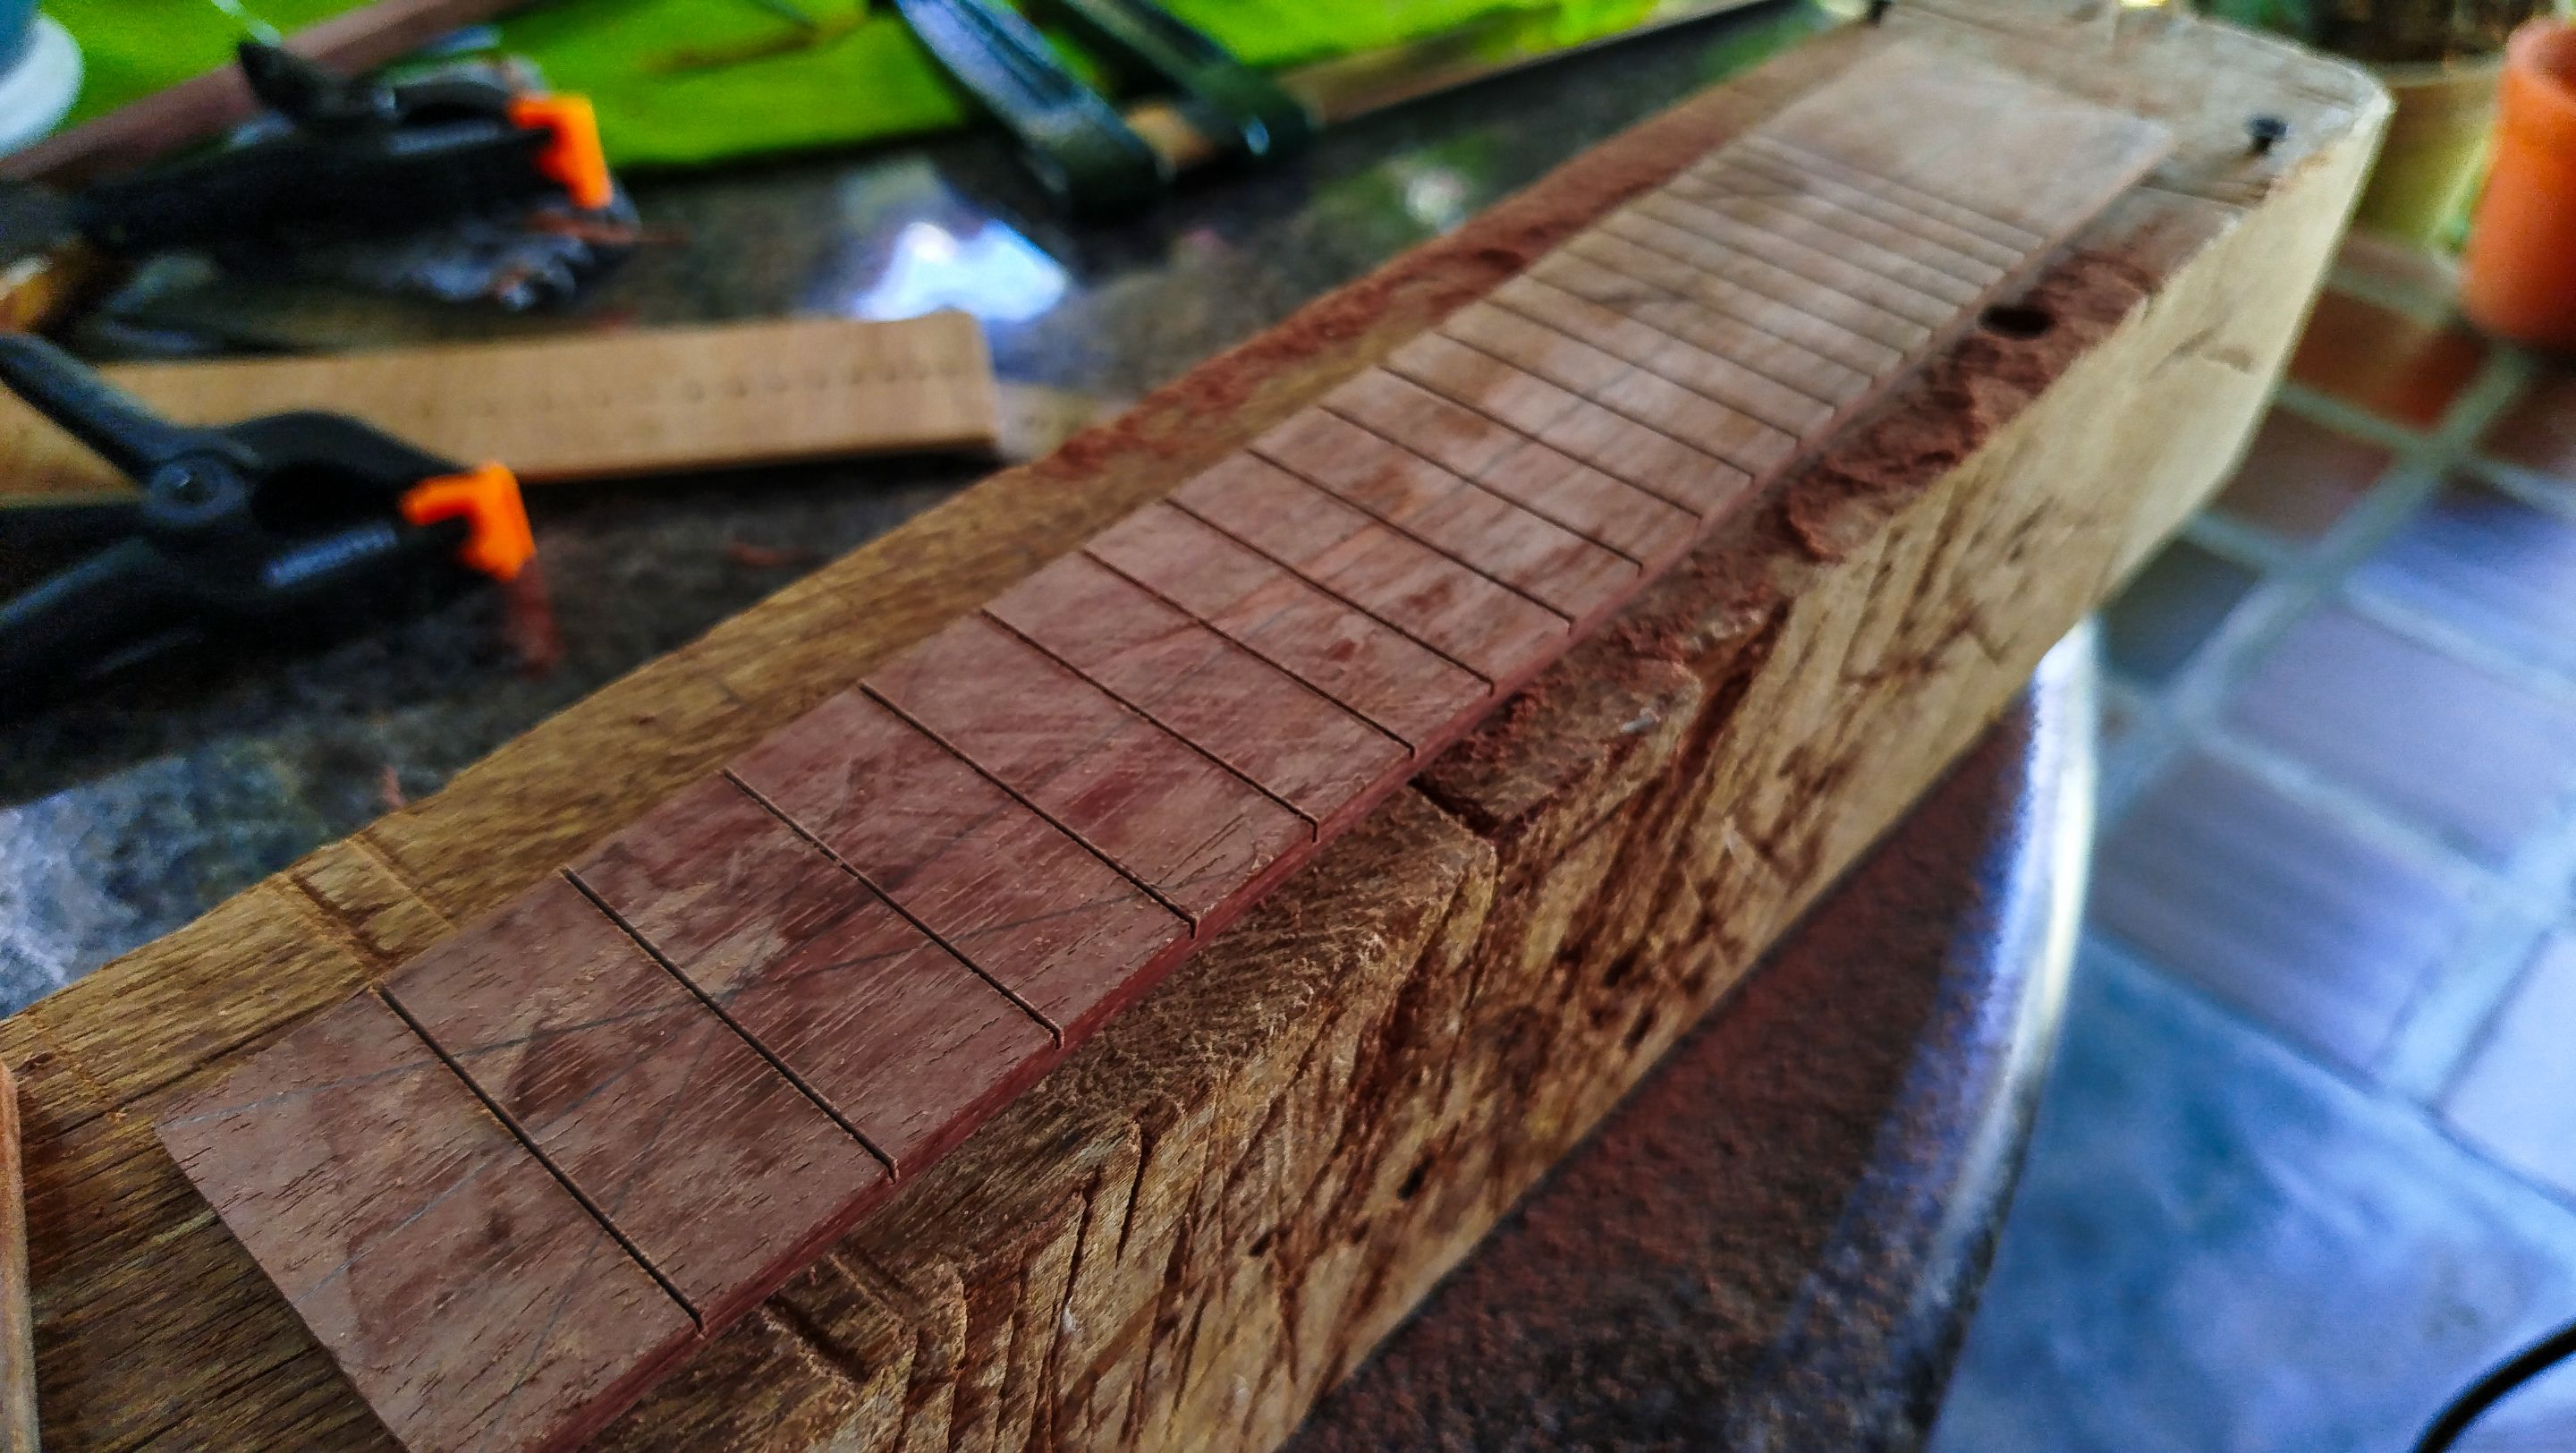
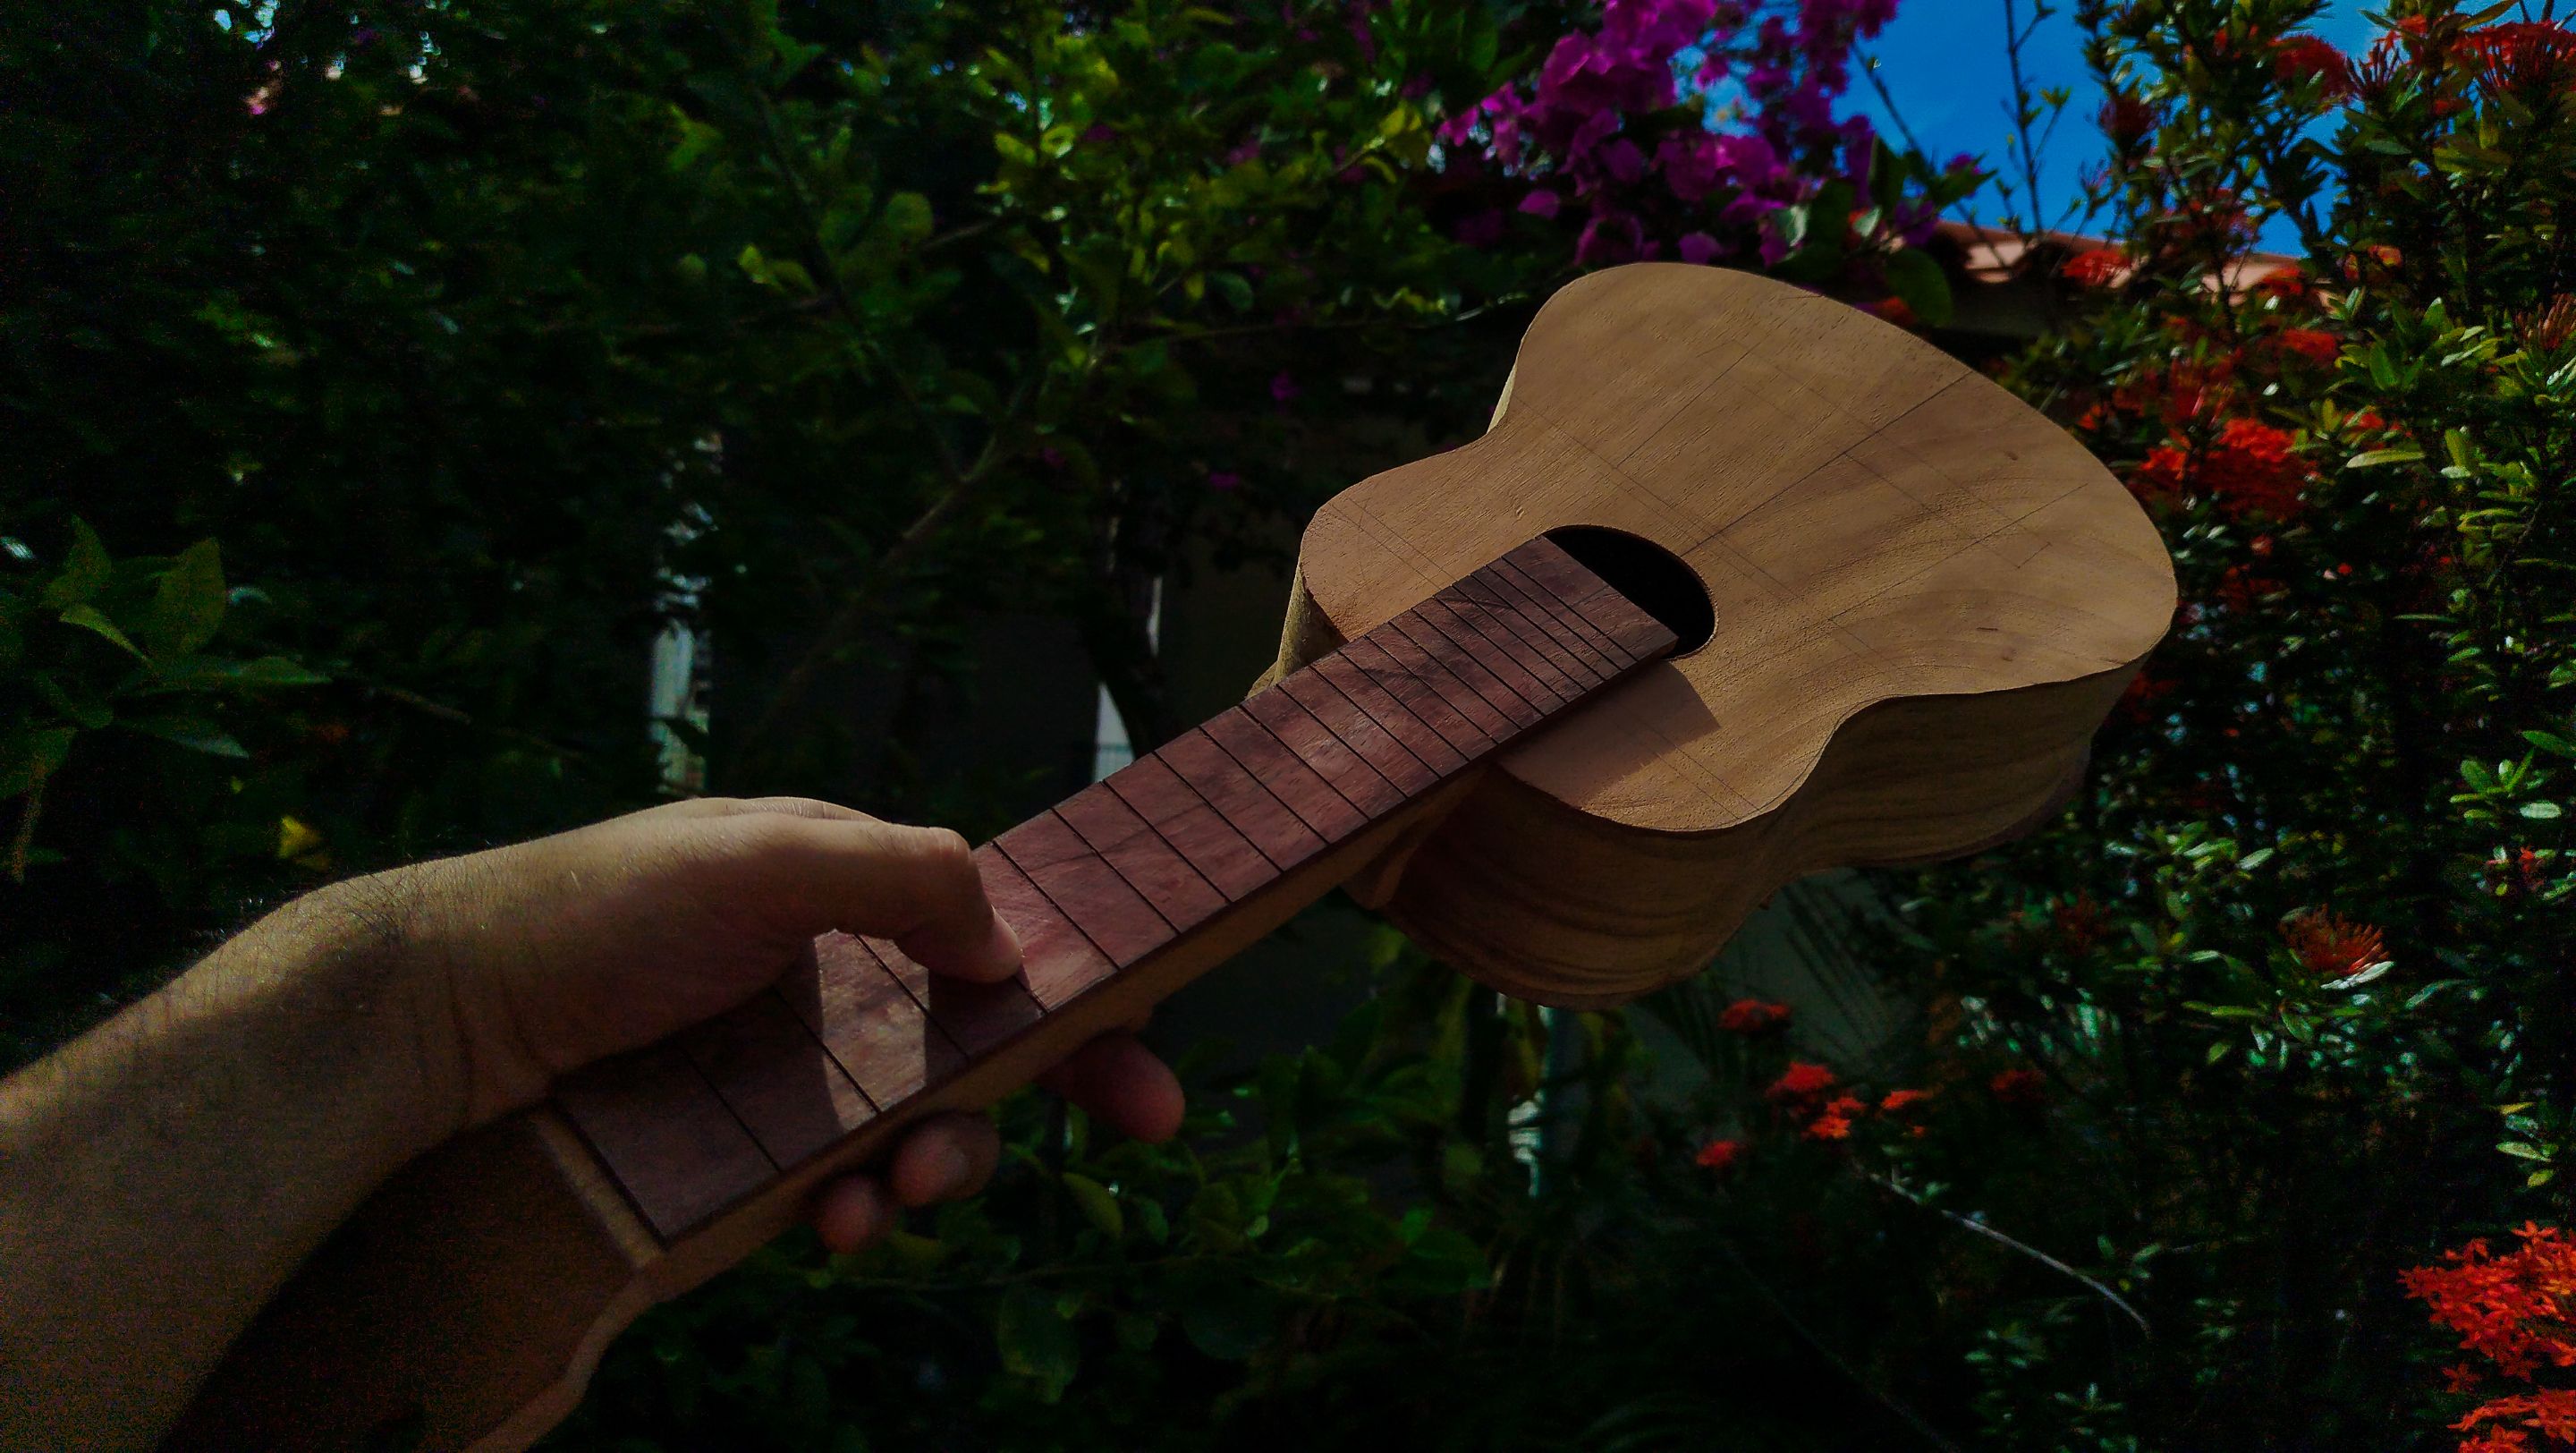
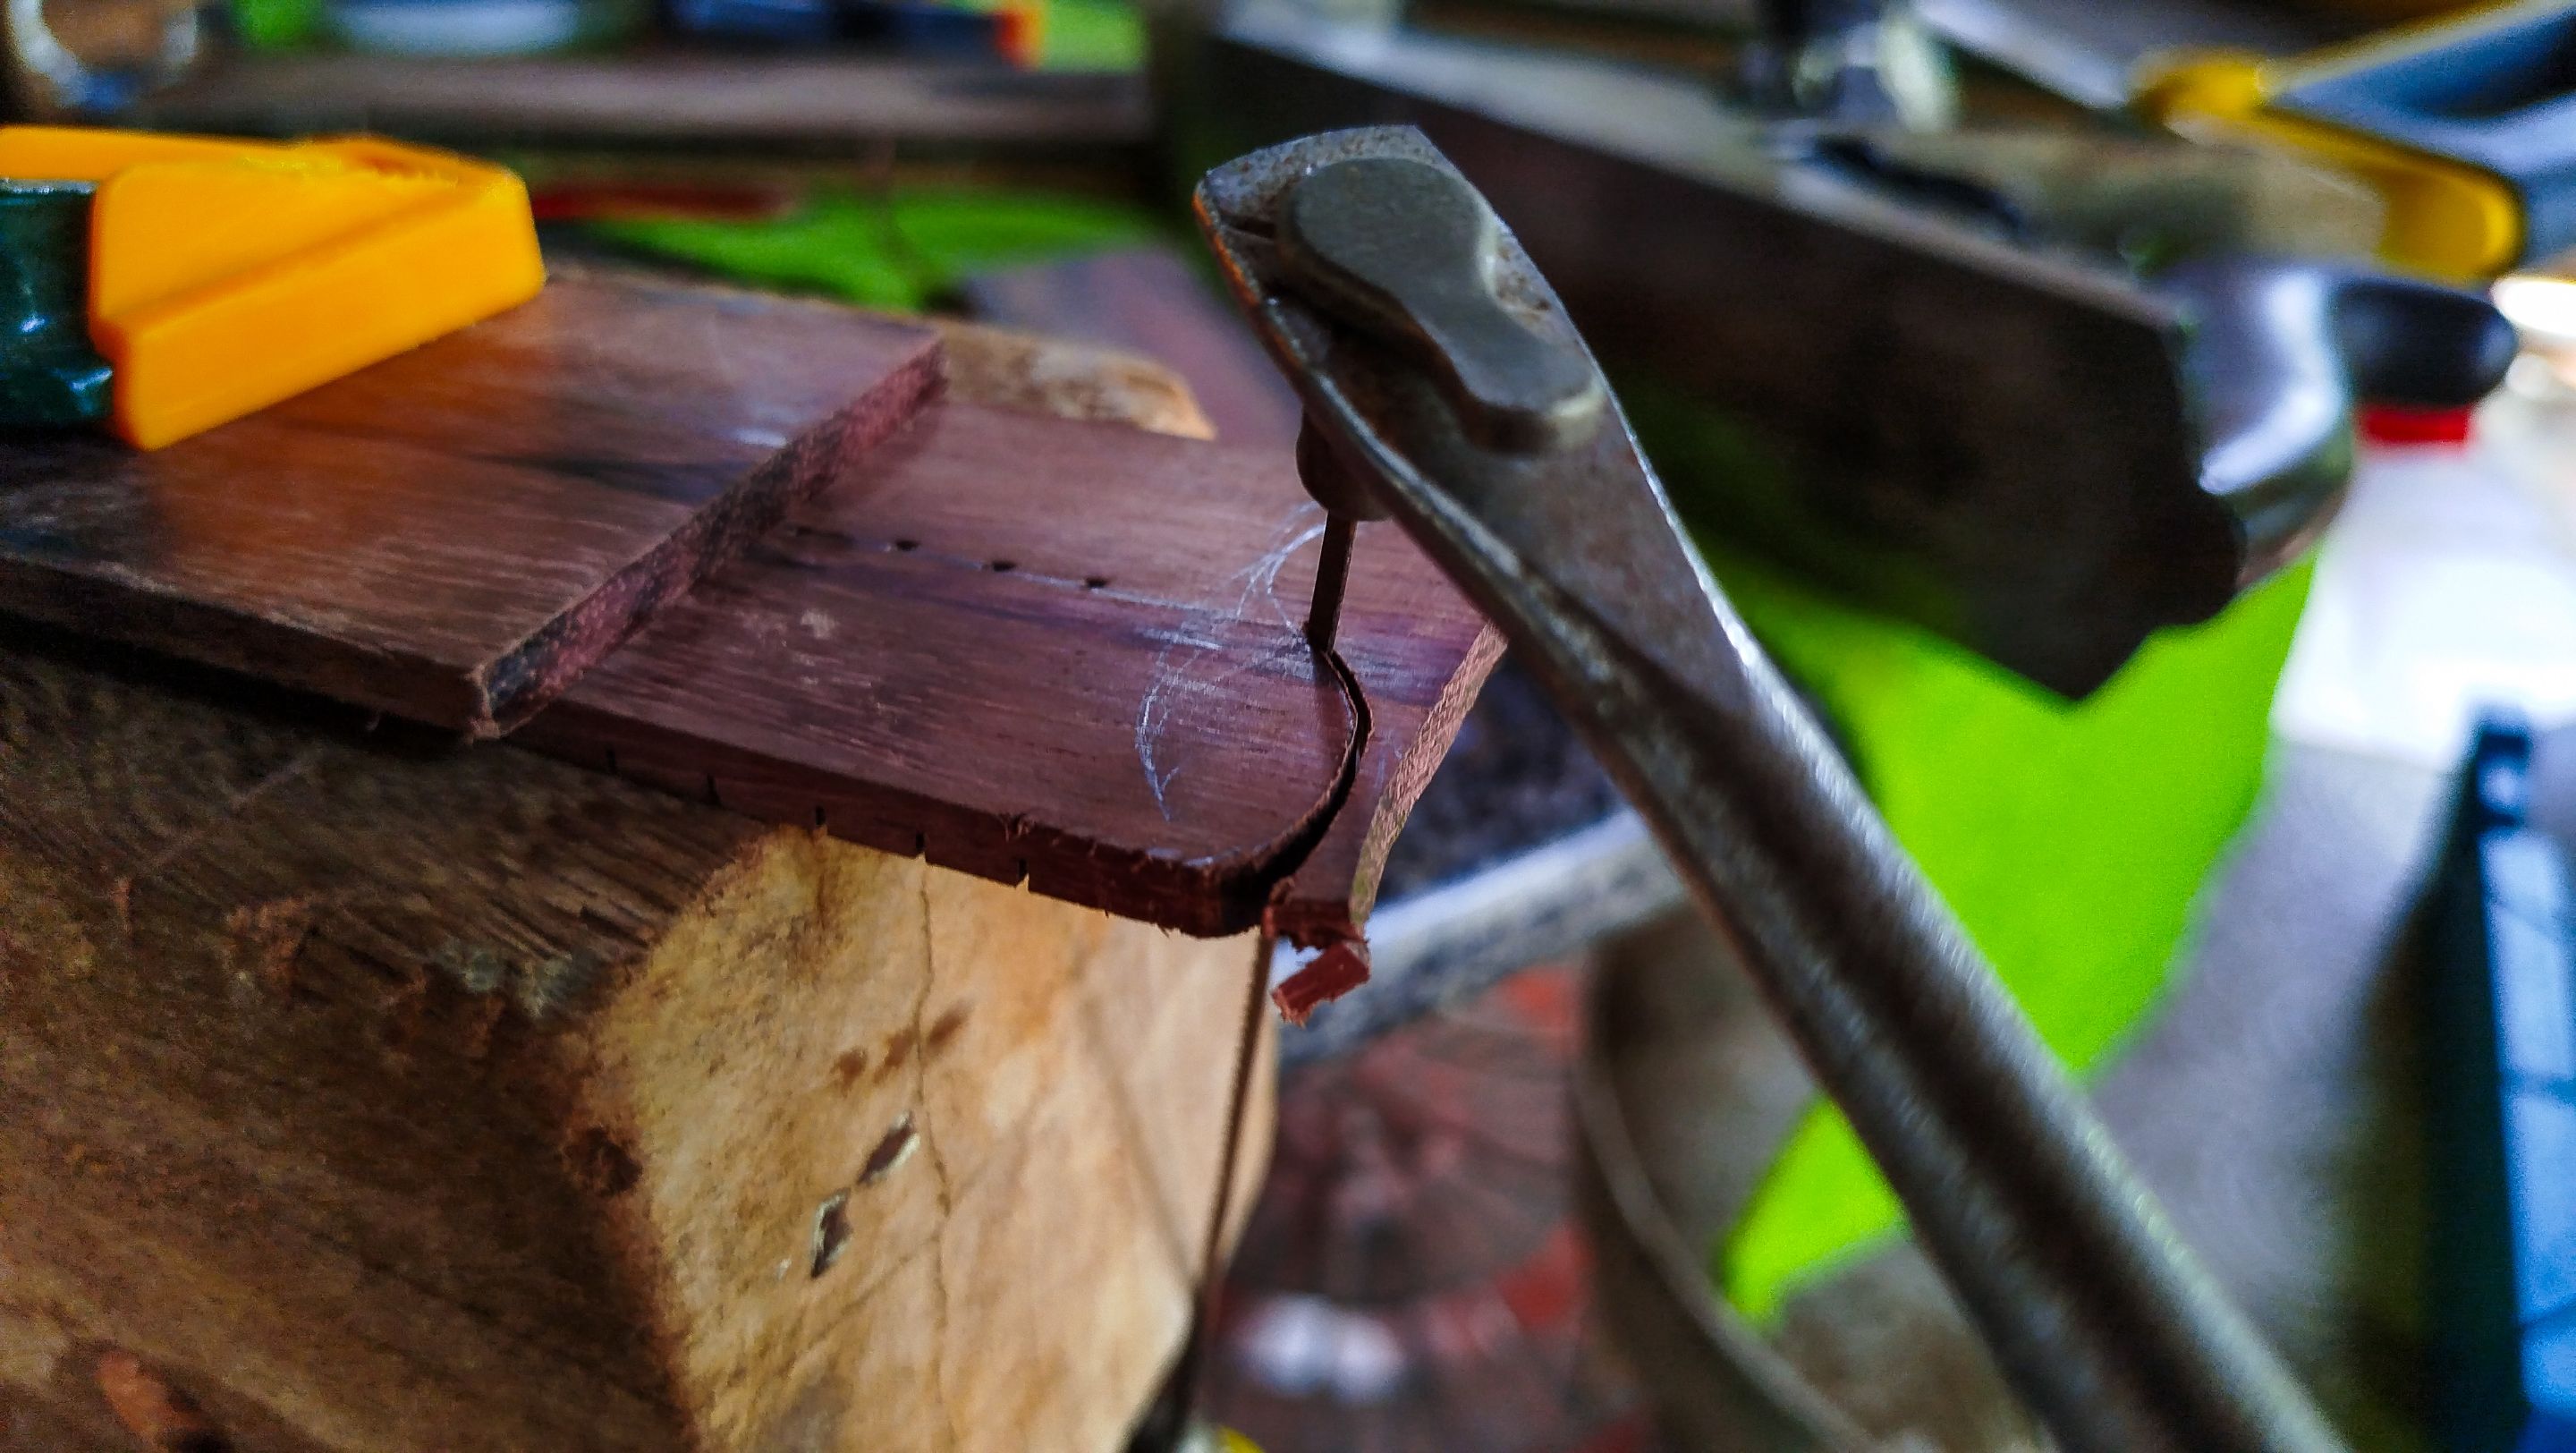
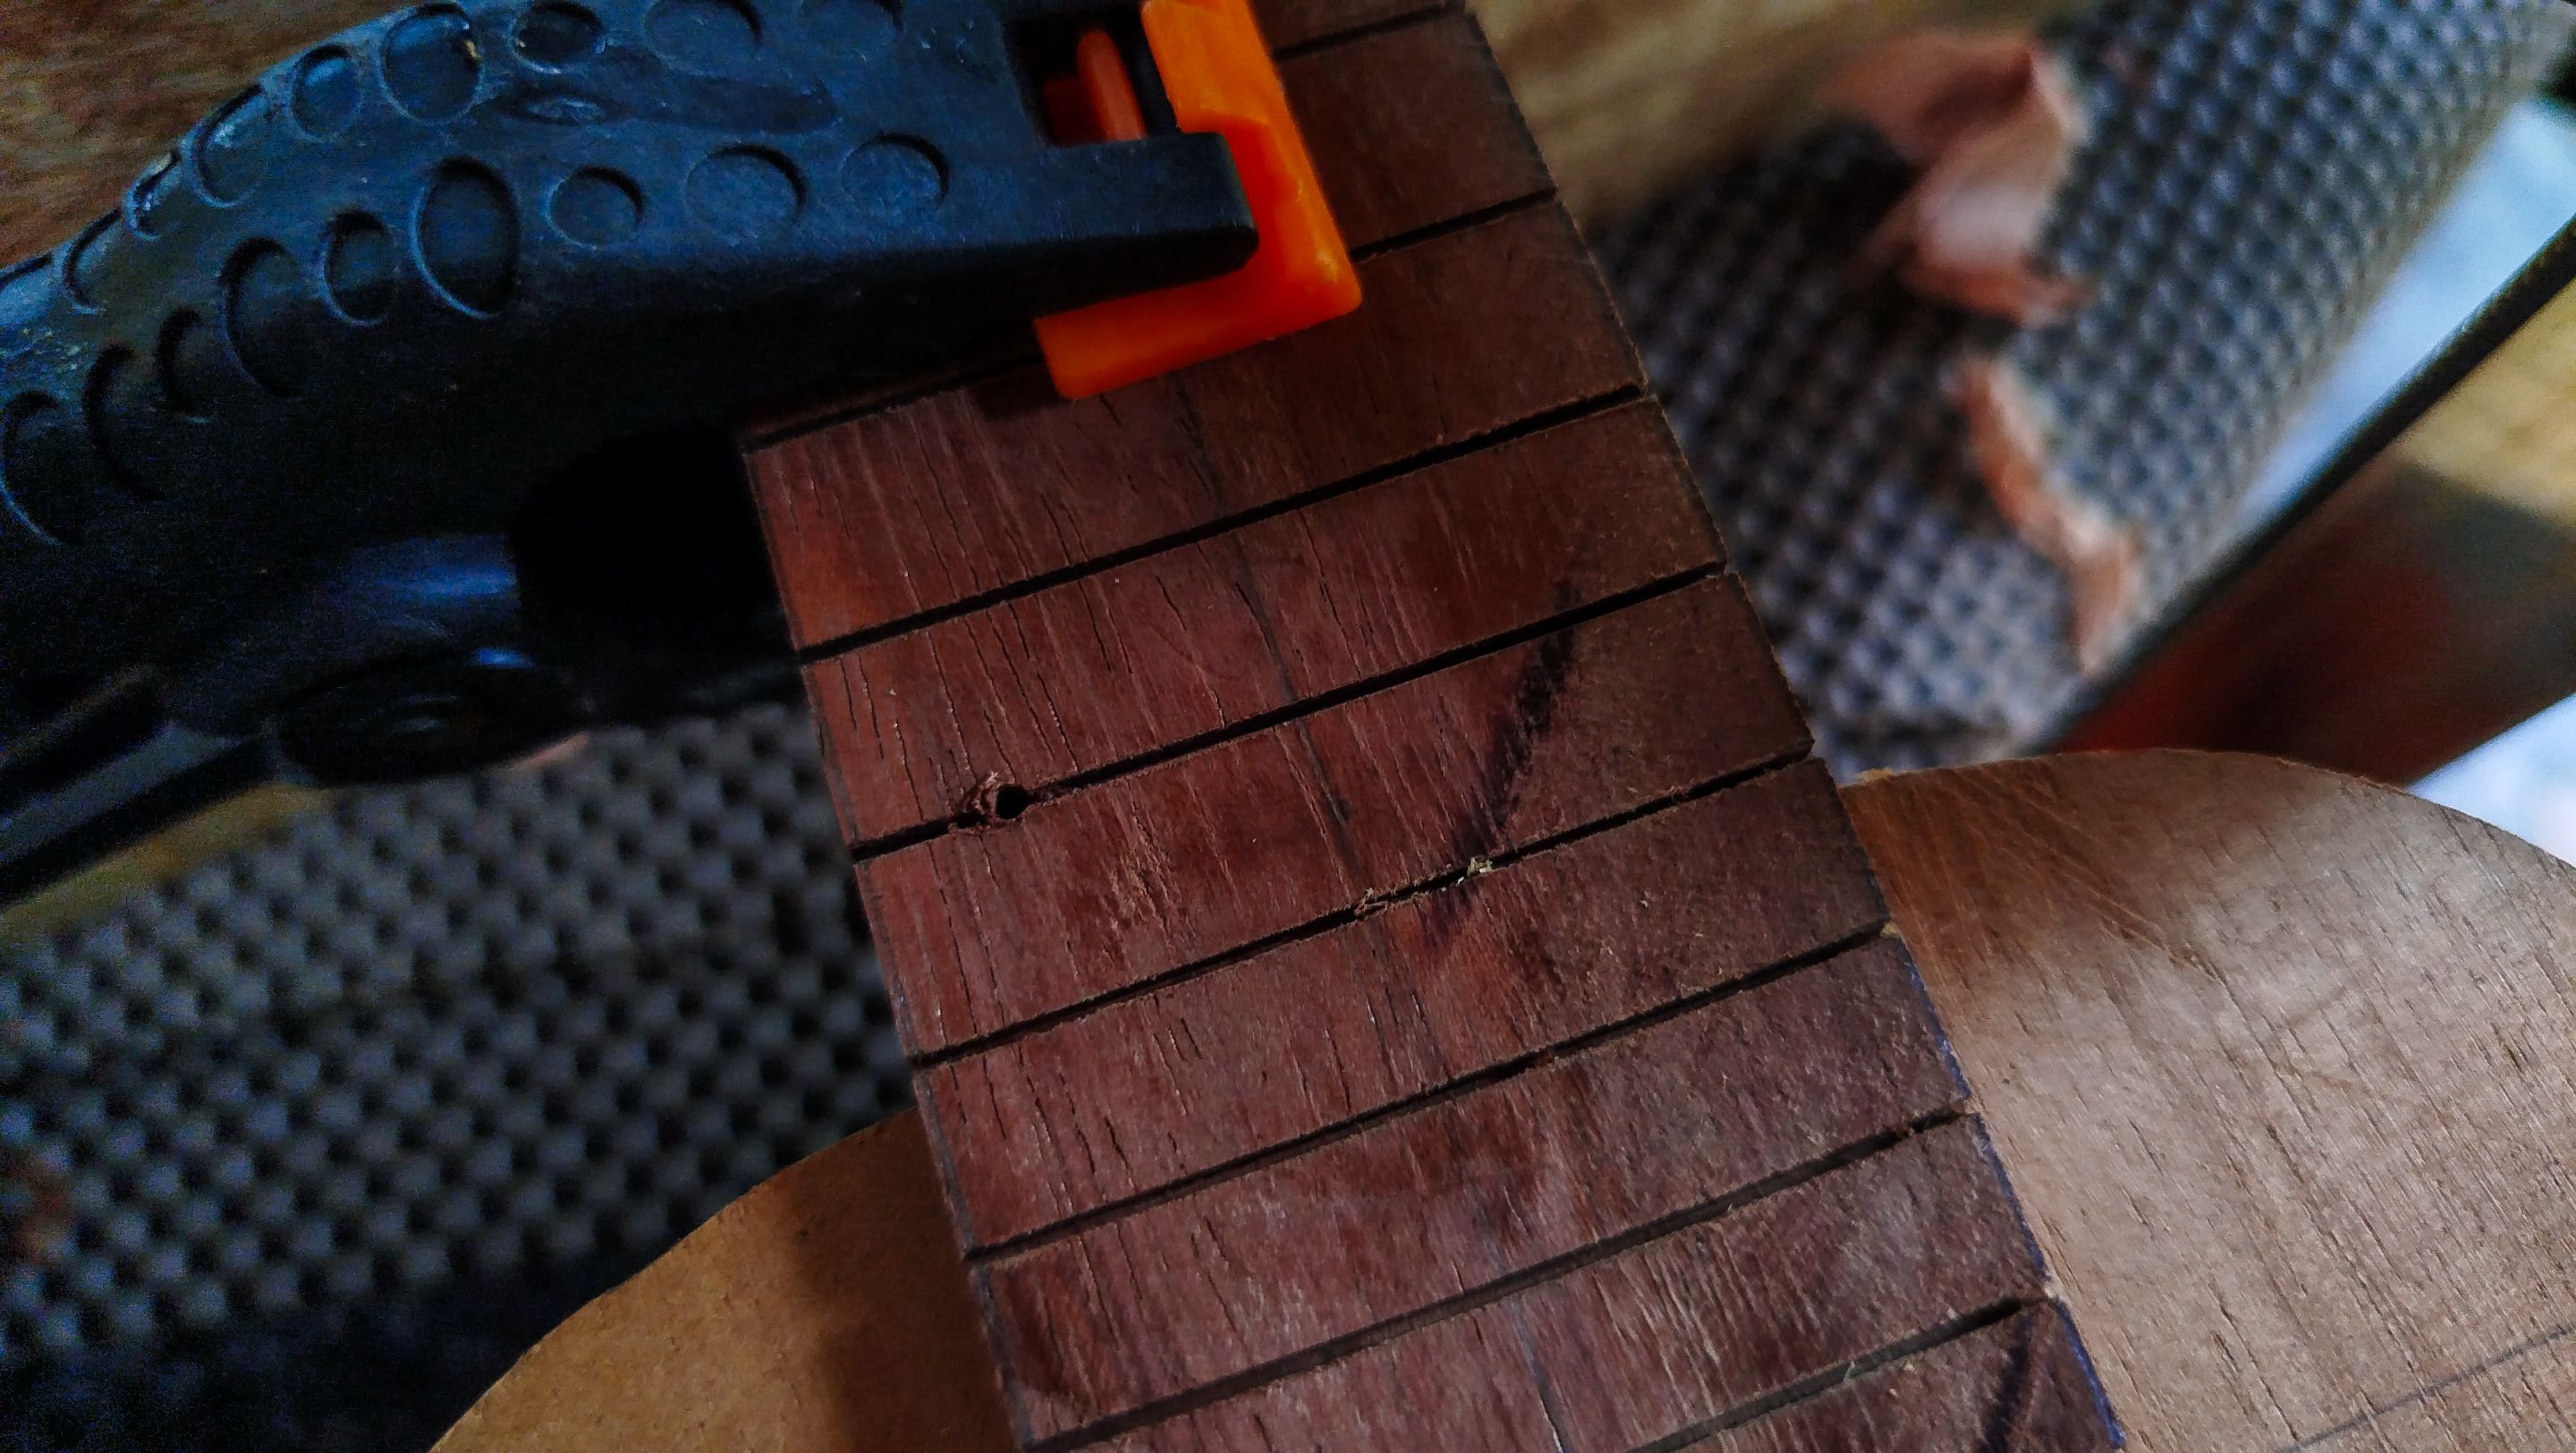
Now we can finally start to open the slots with our fret saw. We work one at a time using something to hold the saw straight as we use it. We also need to be careful not to go all the way down with the saw or we could split the fretboard in more than one piece. Once we are ready, we can check out how the piece looks on the ukulele.
Prep work
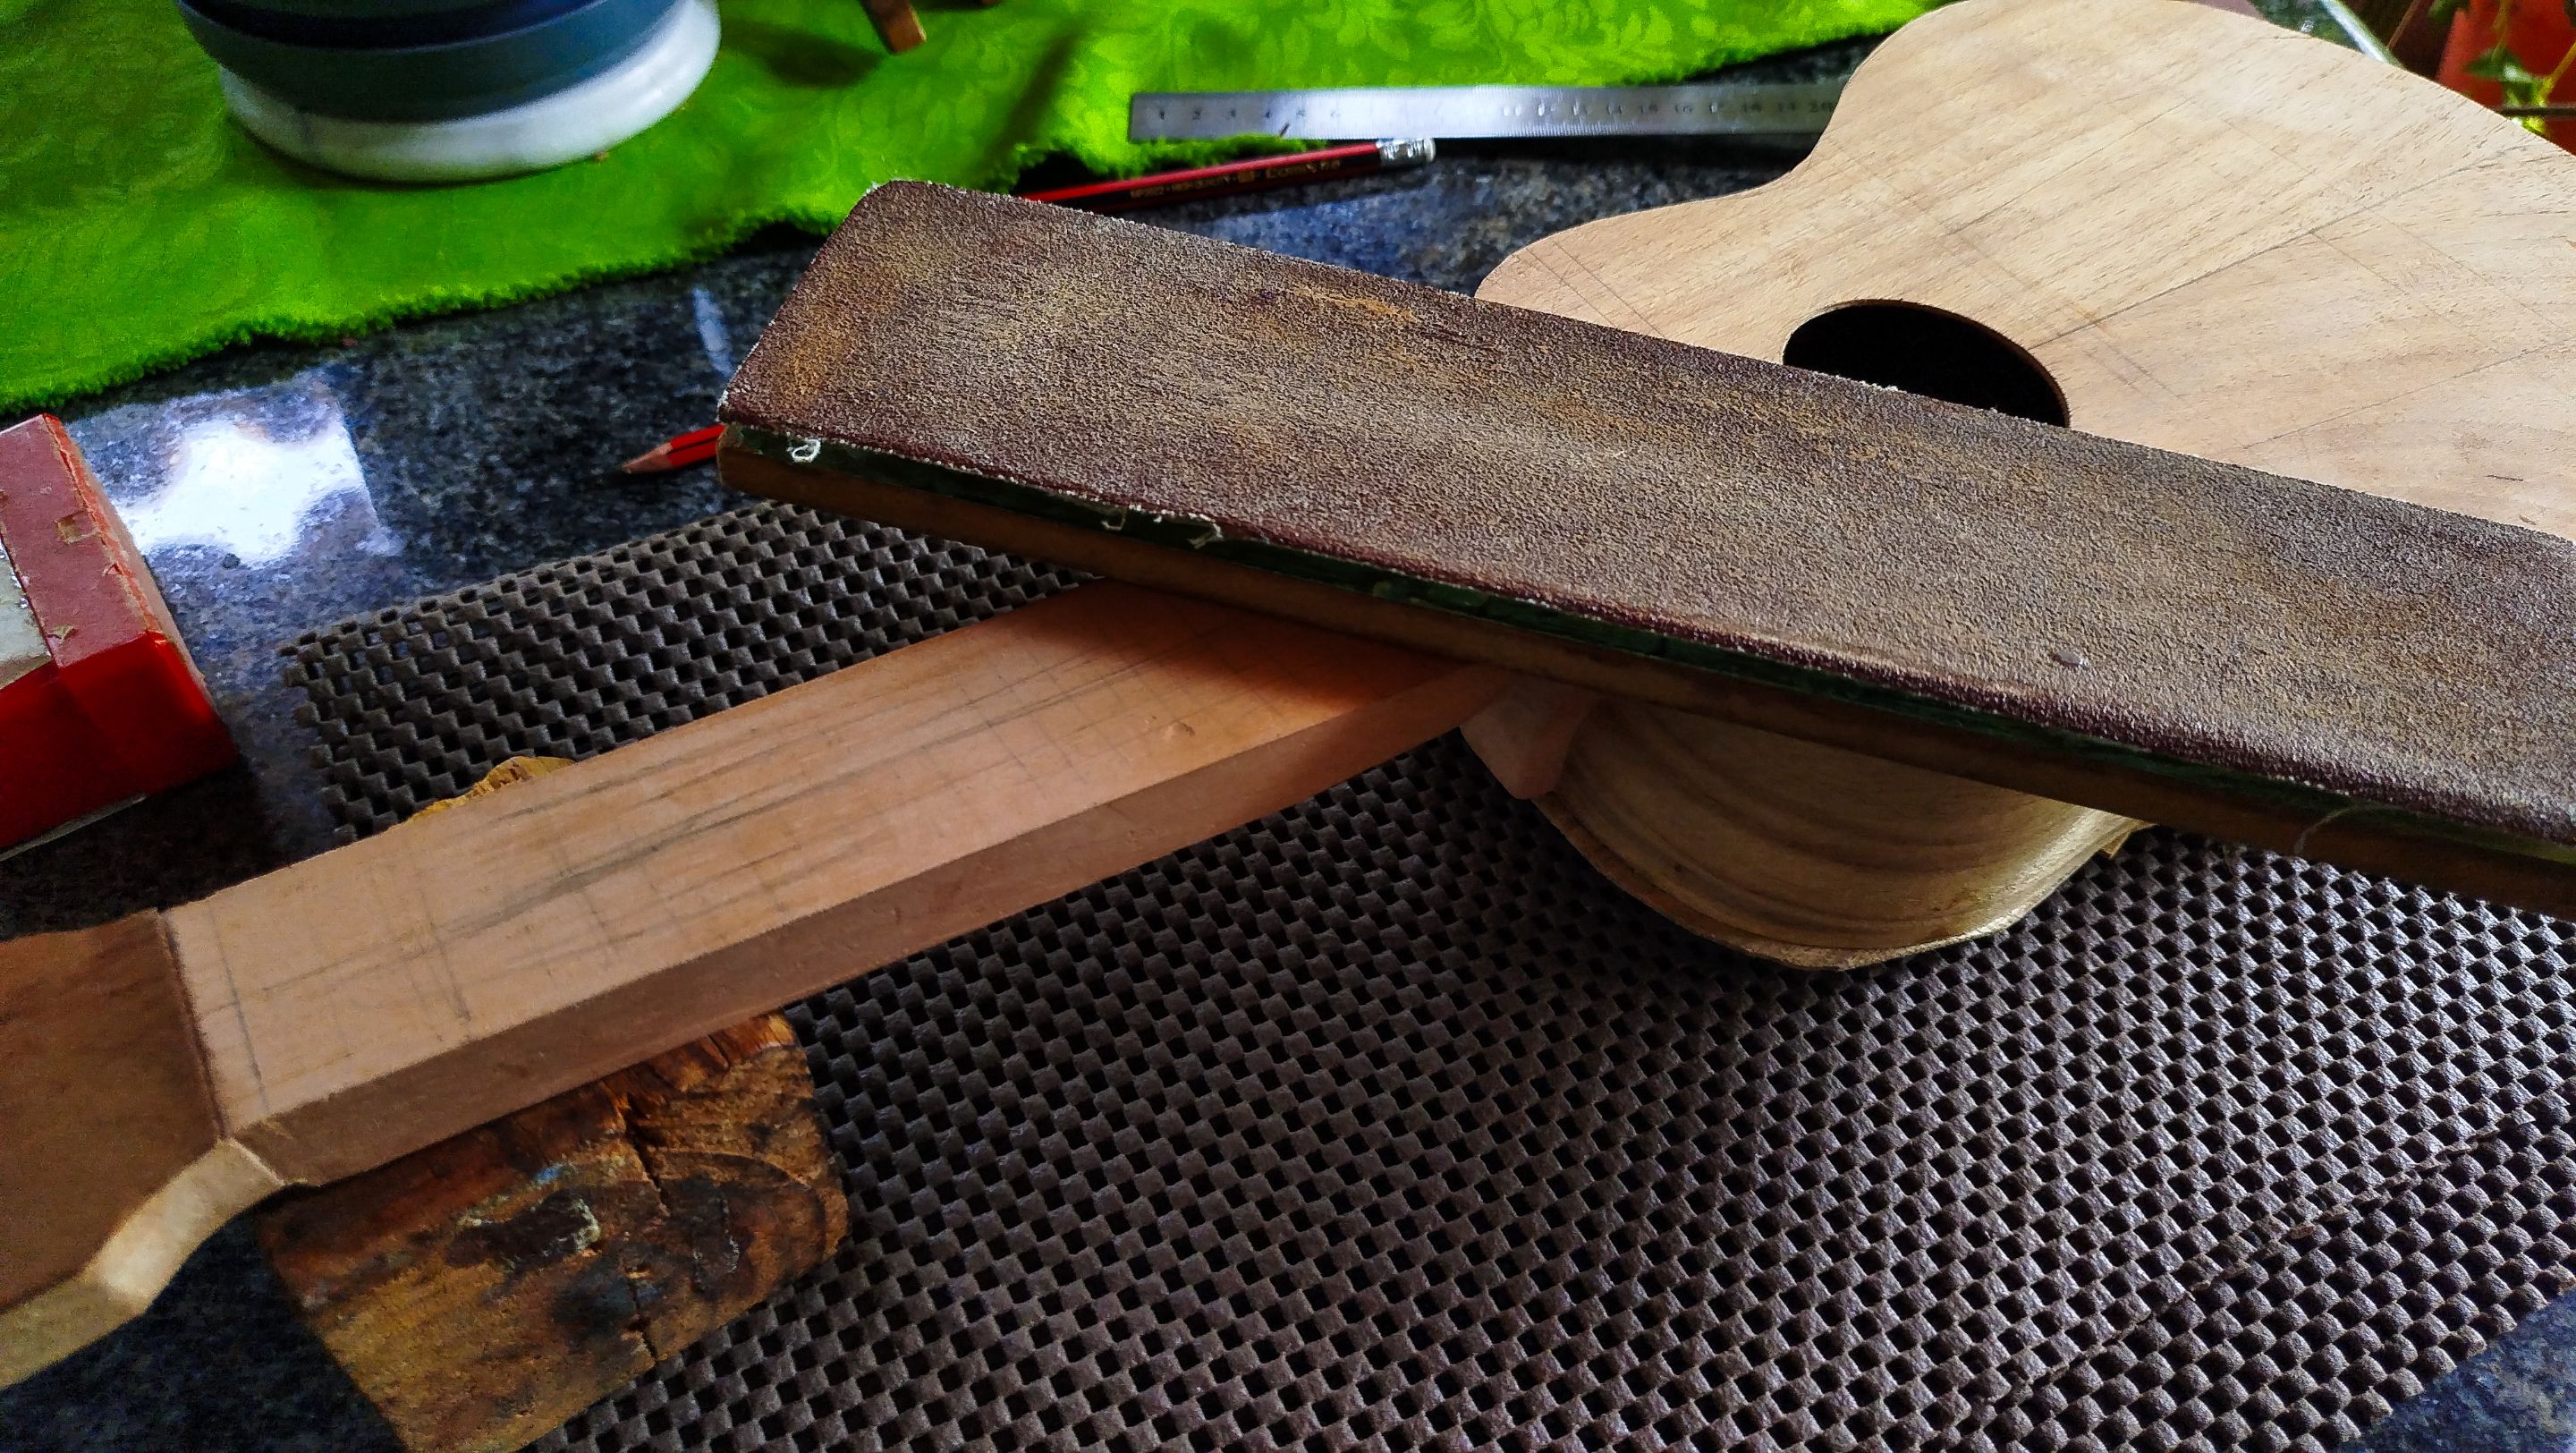
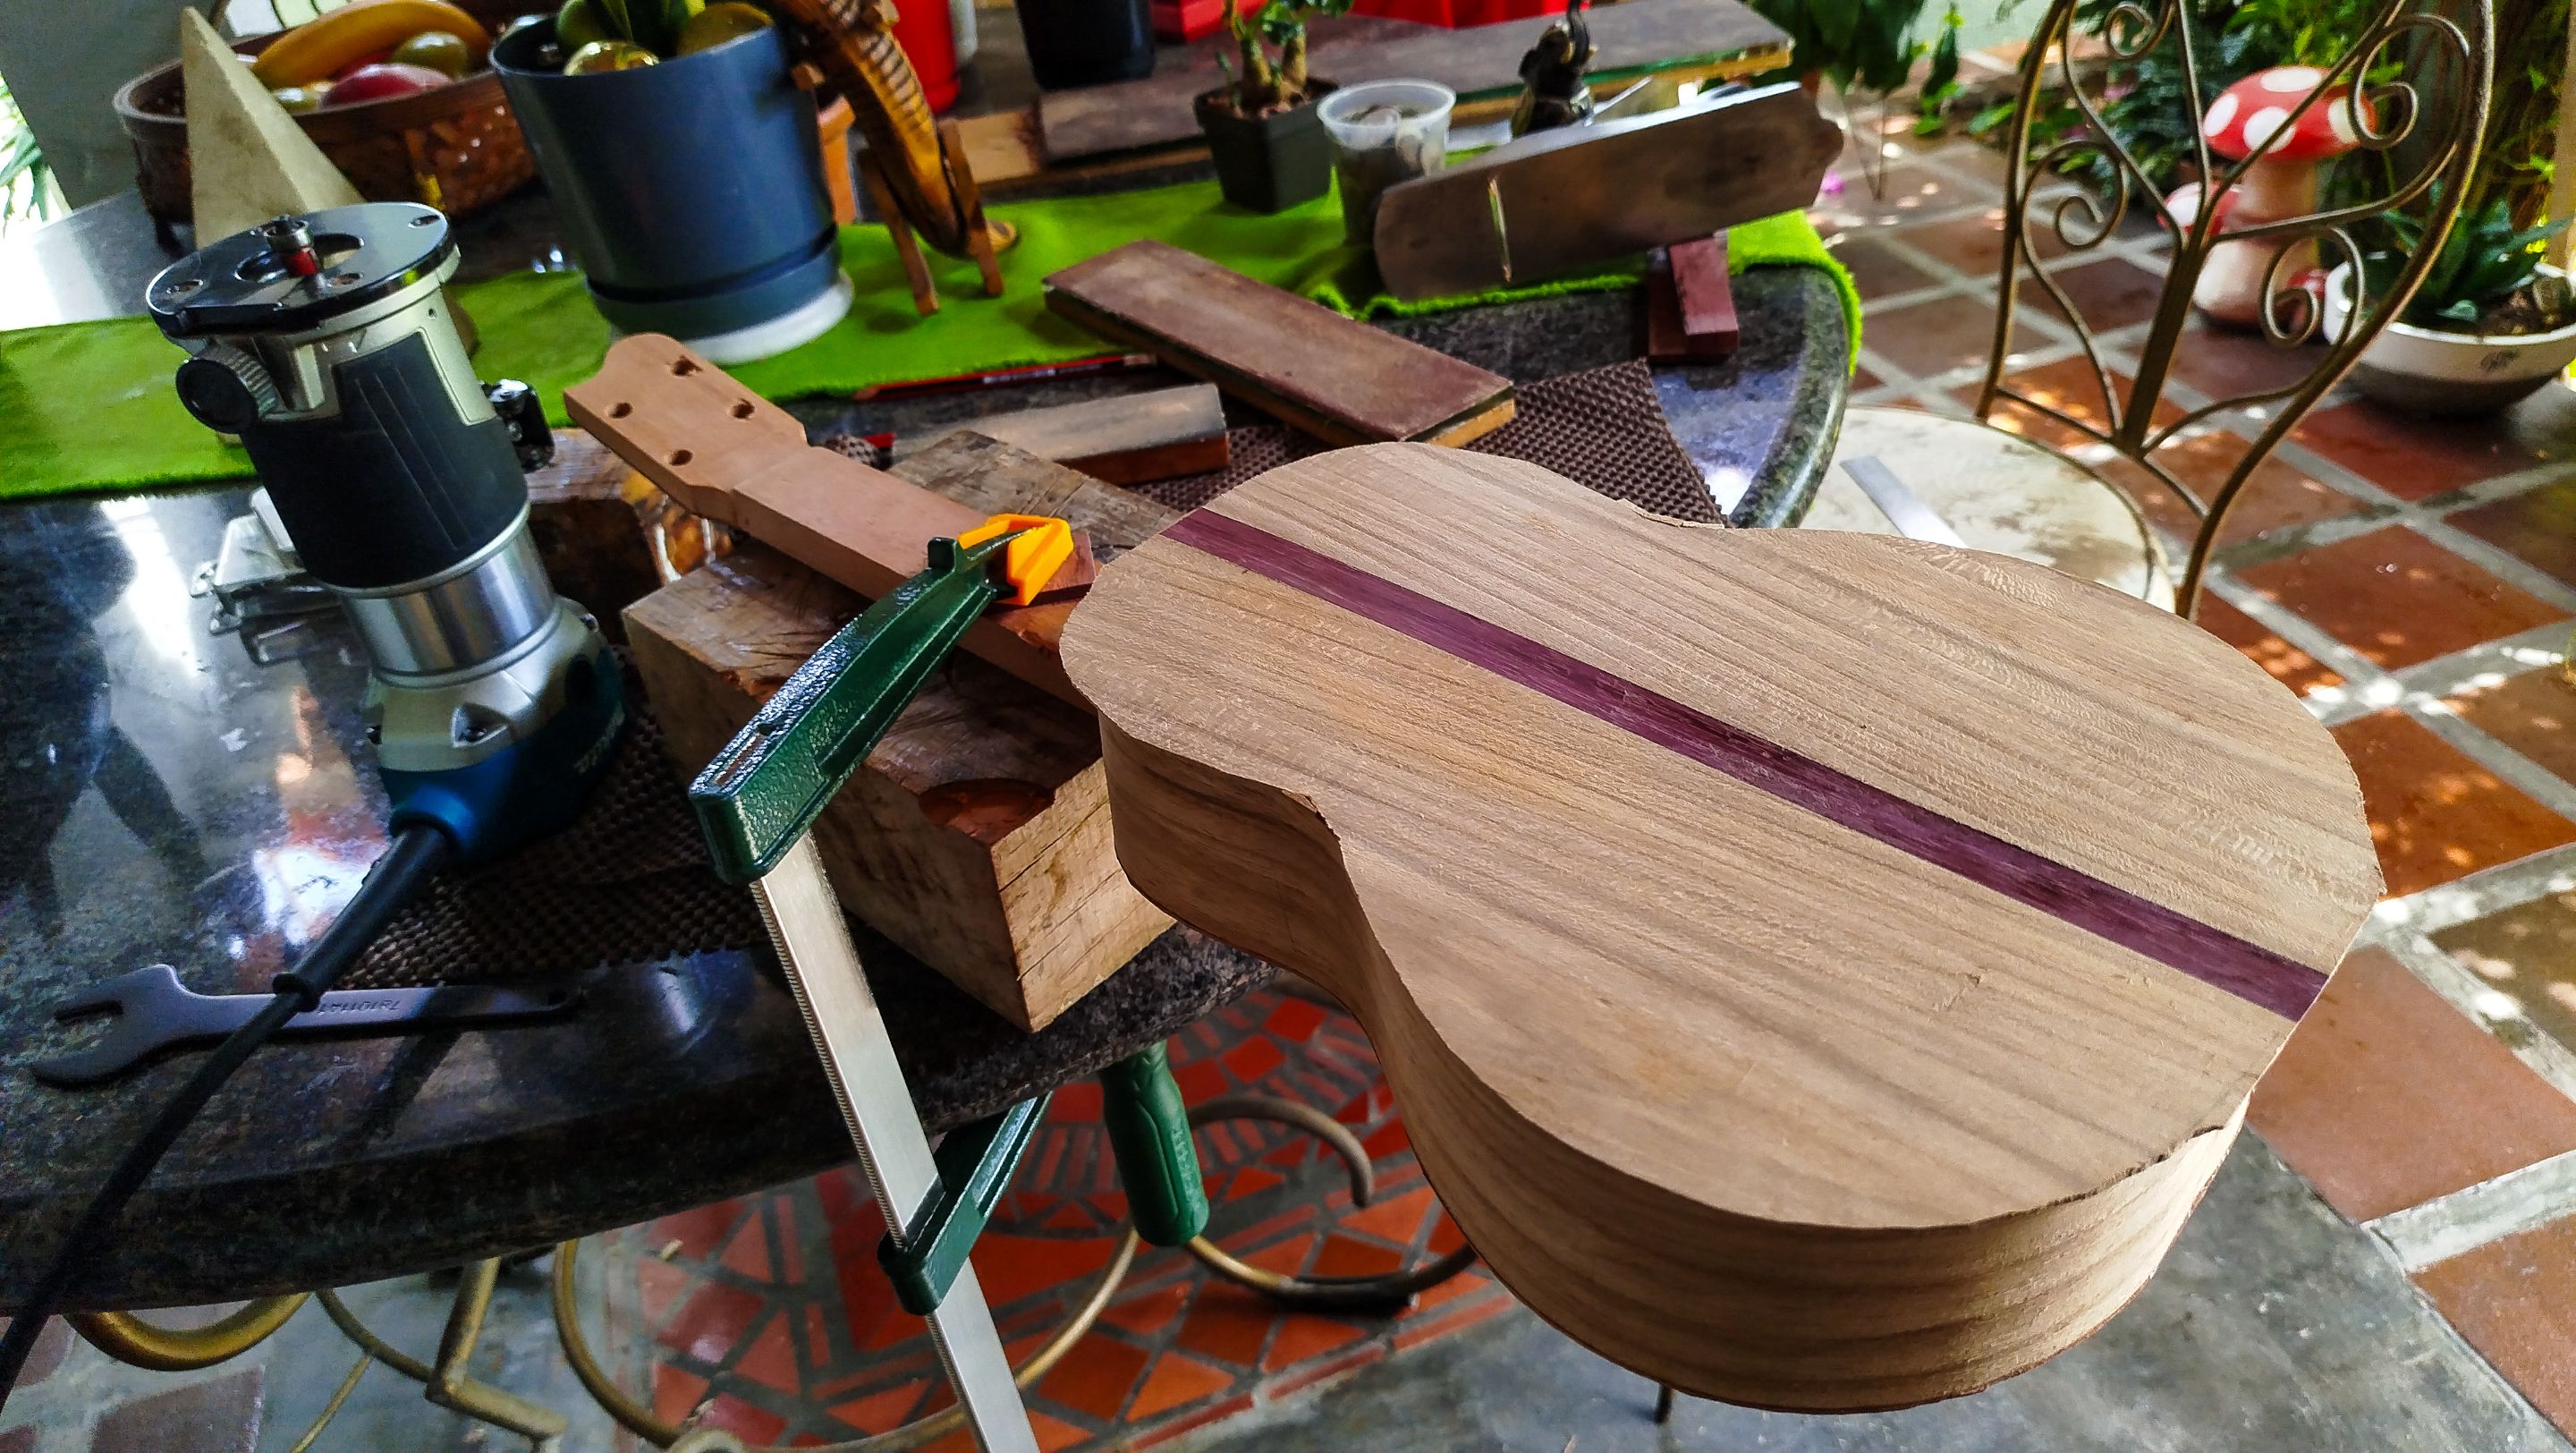
We need to sand the neck and the top portion of the sound board to make sure the fretboard will have an even base and will sit flat on this part. We use our sanding blocks until we can see the fretboard rests even over that portion of the instrument.
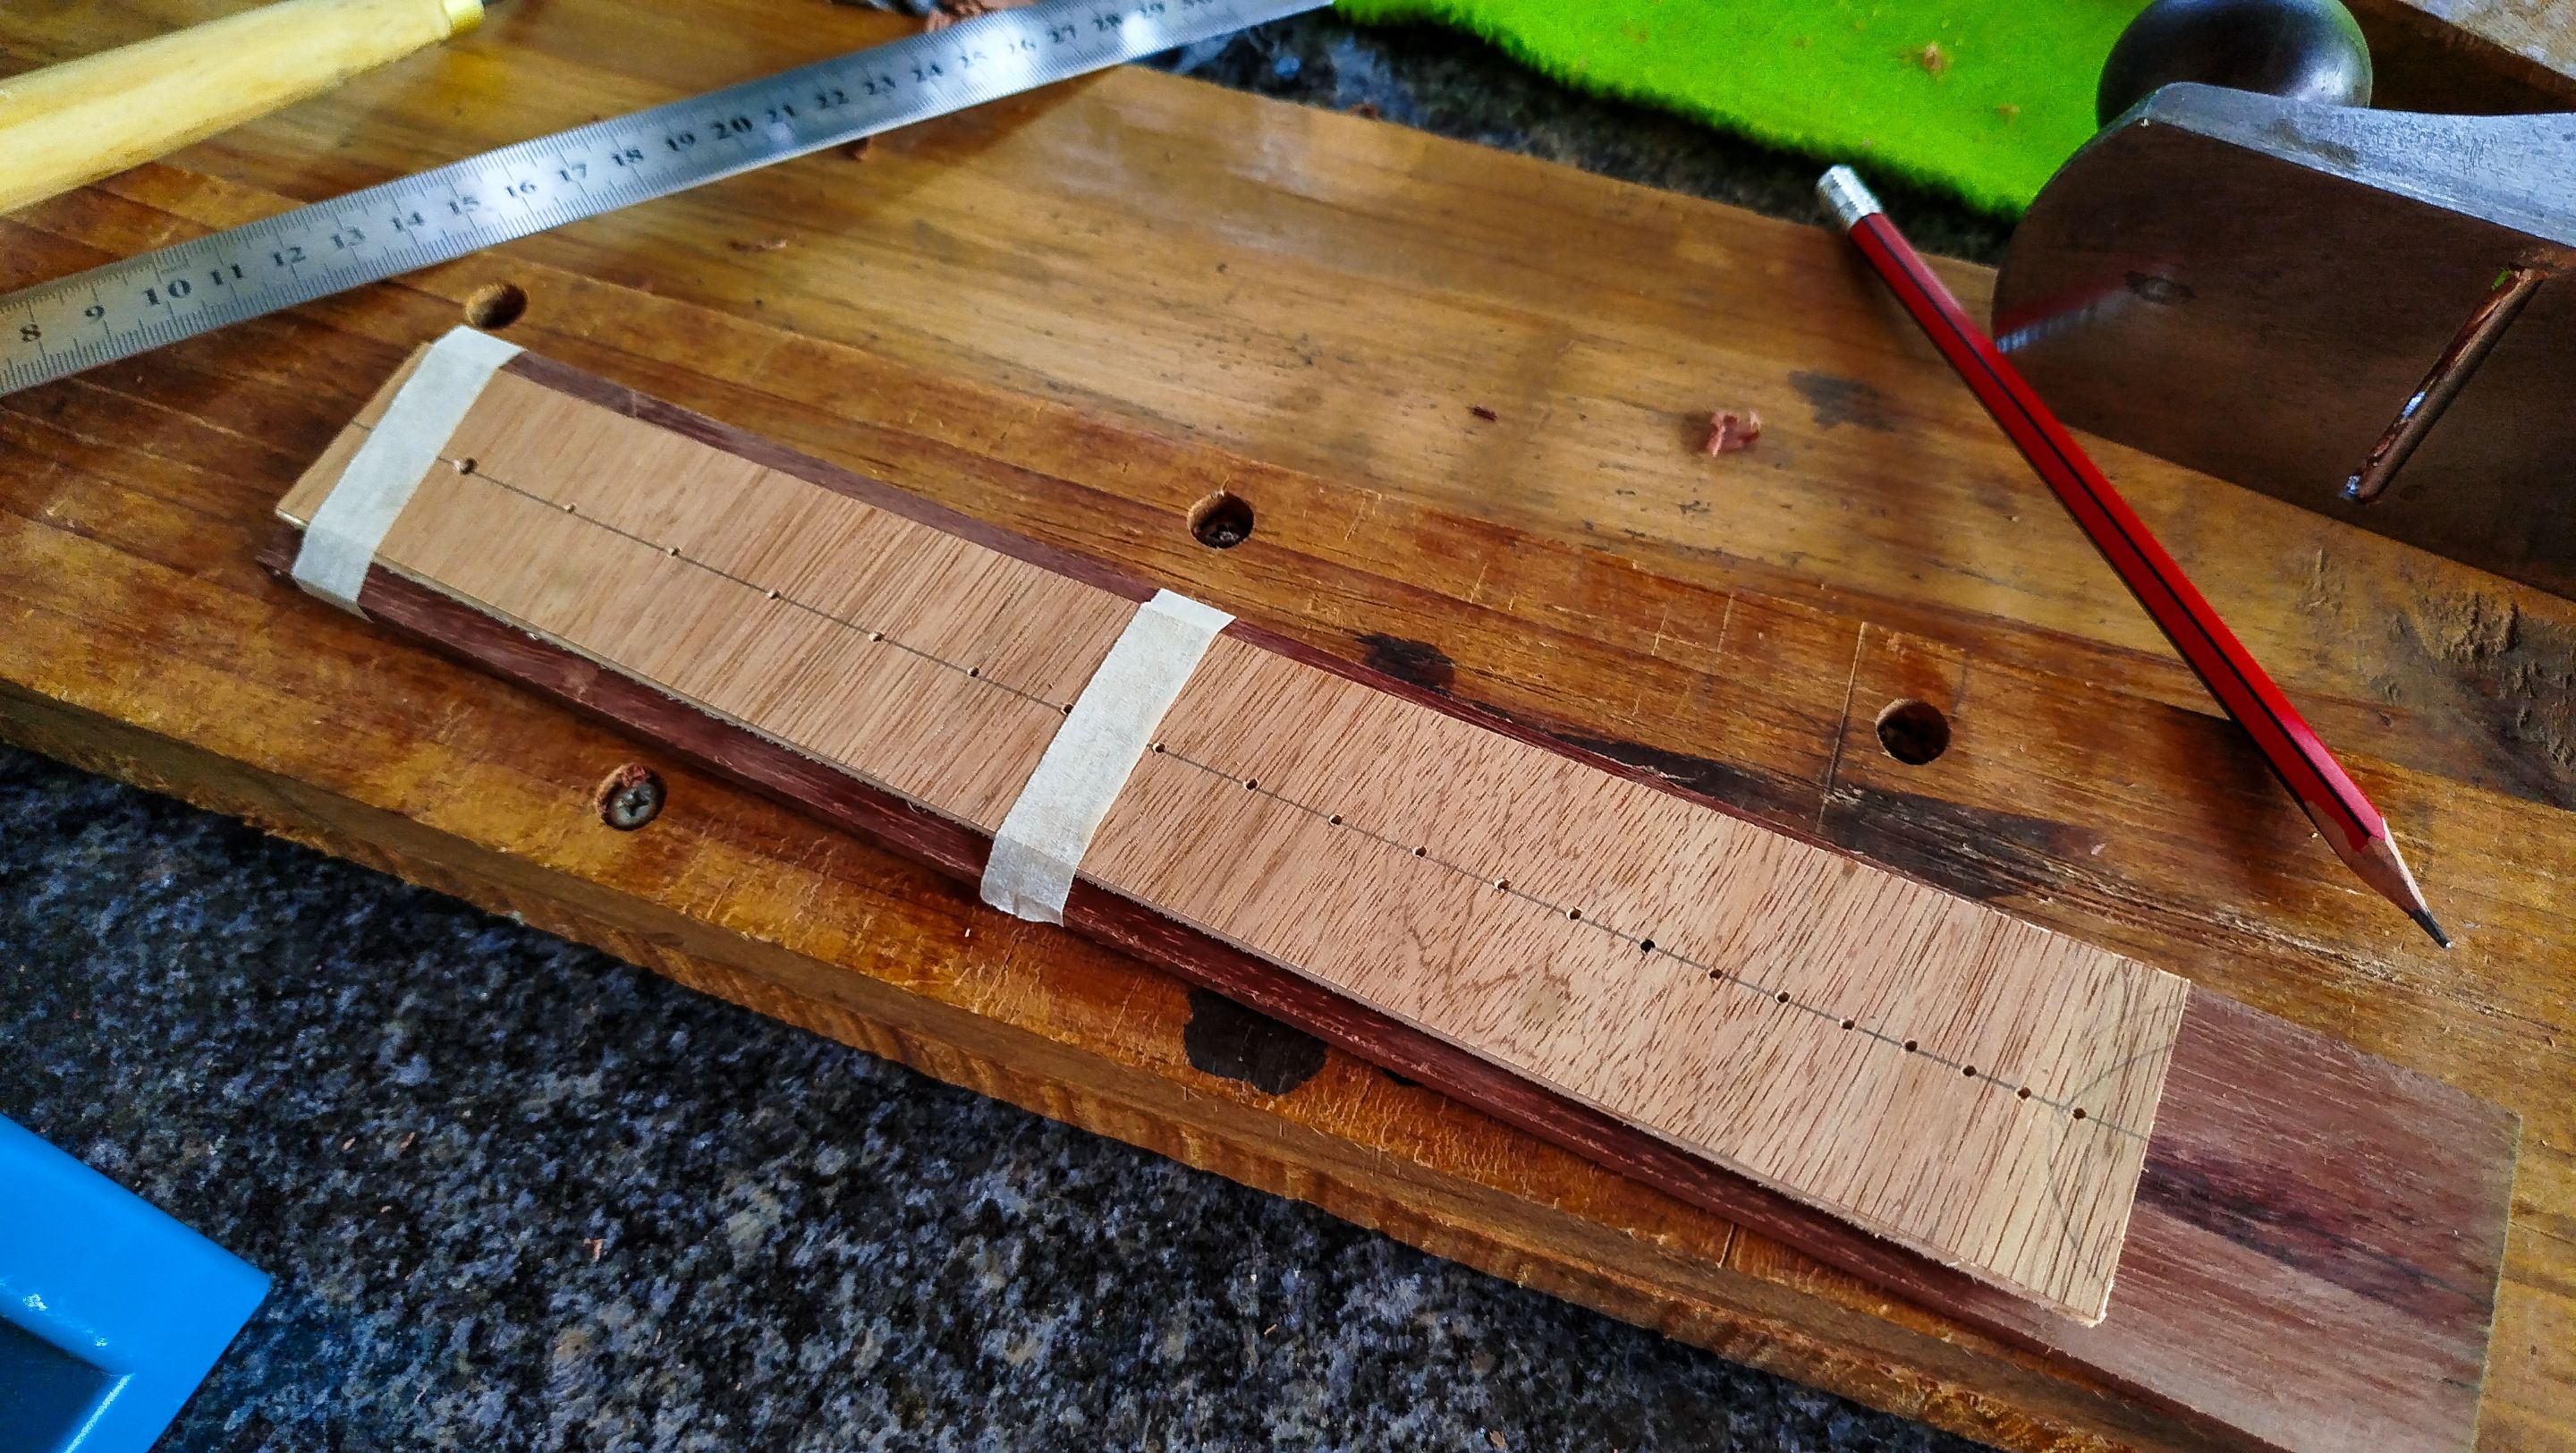
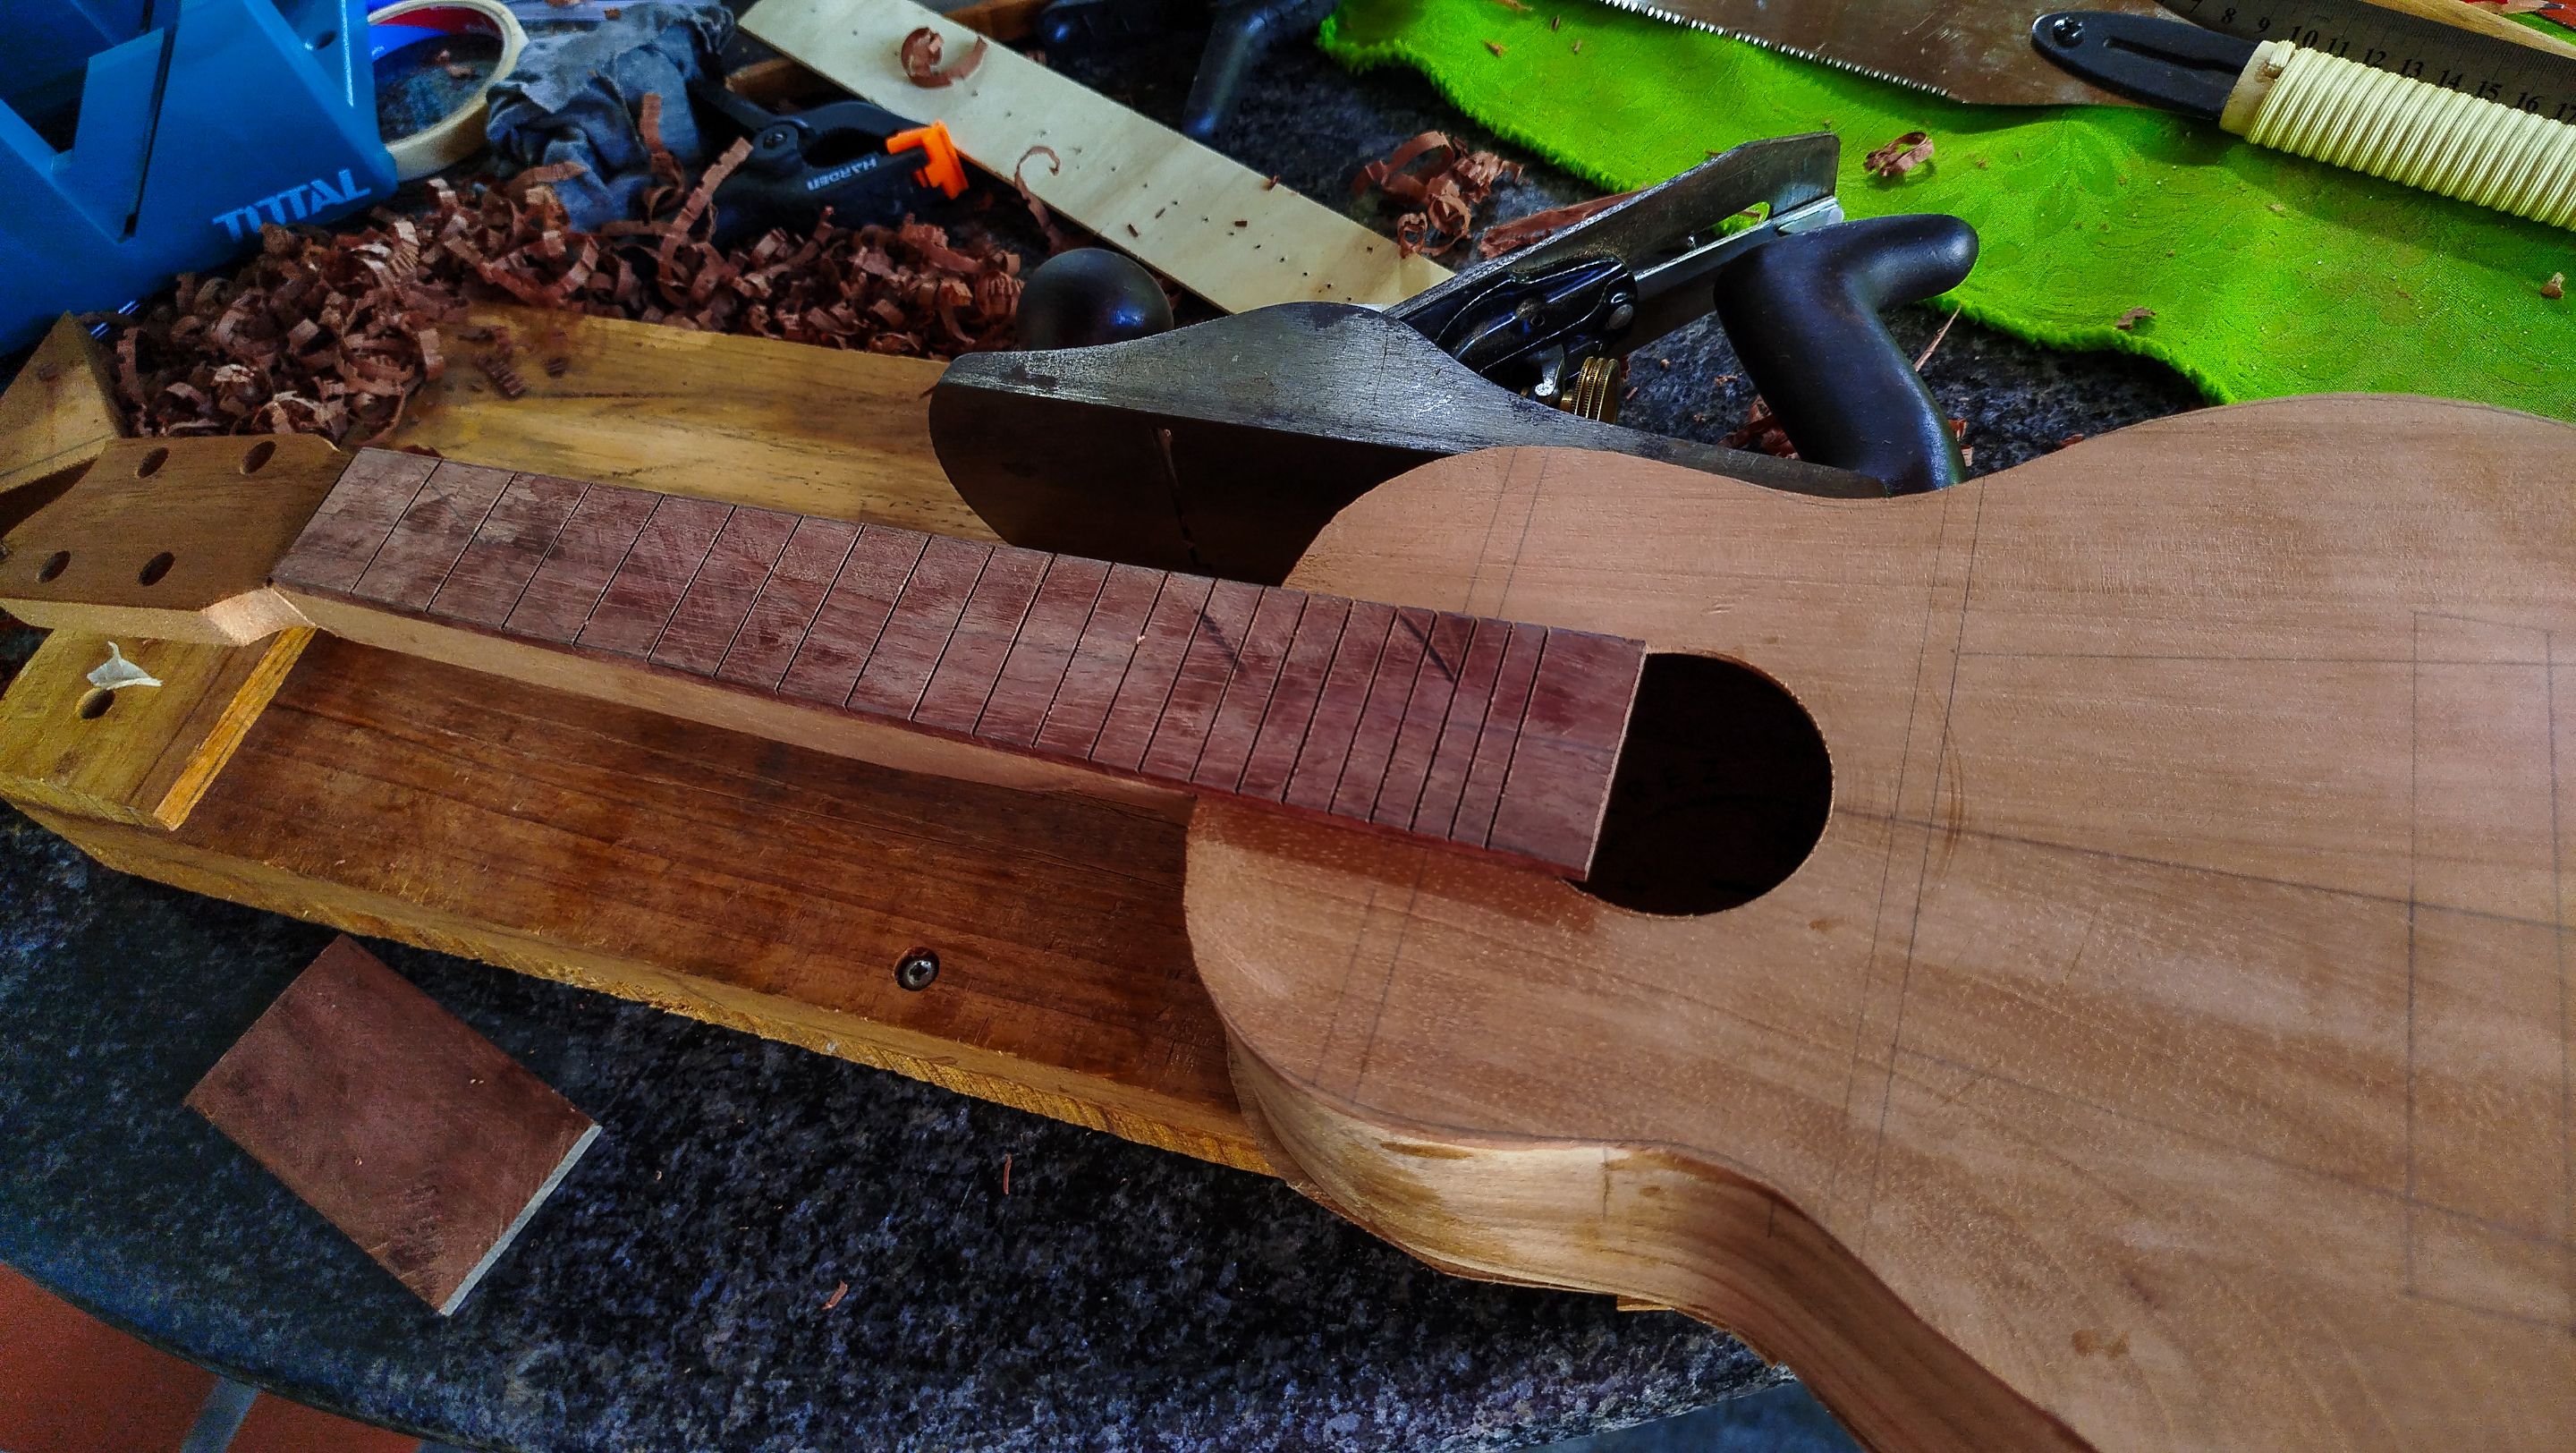
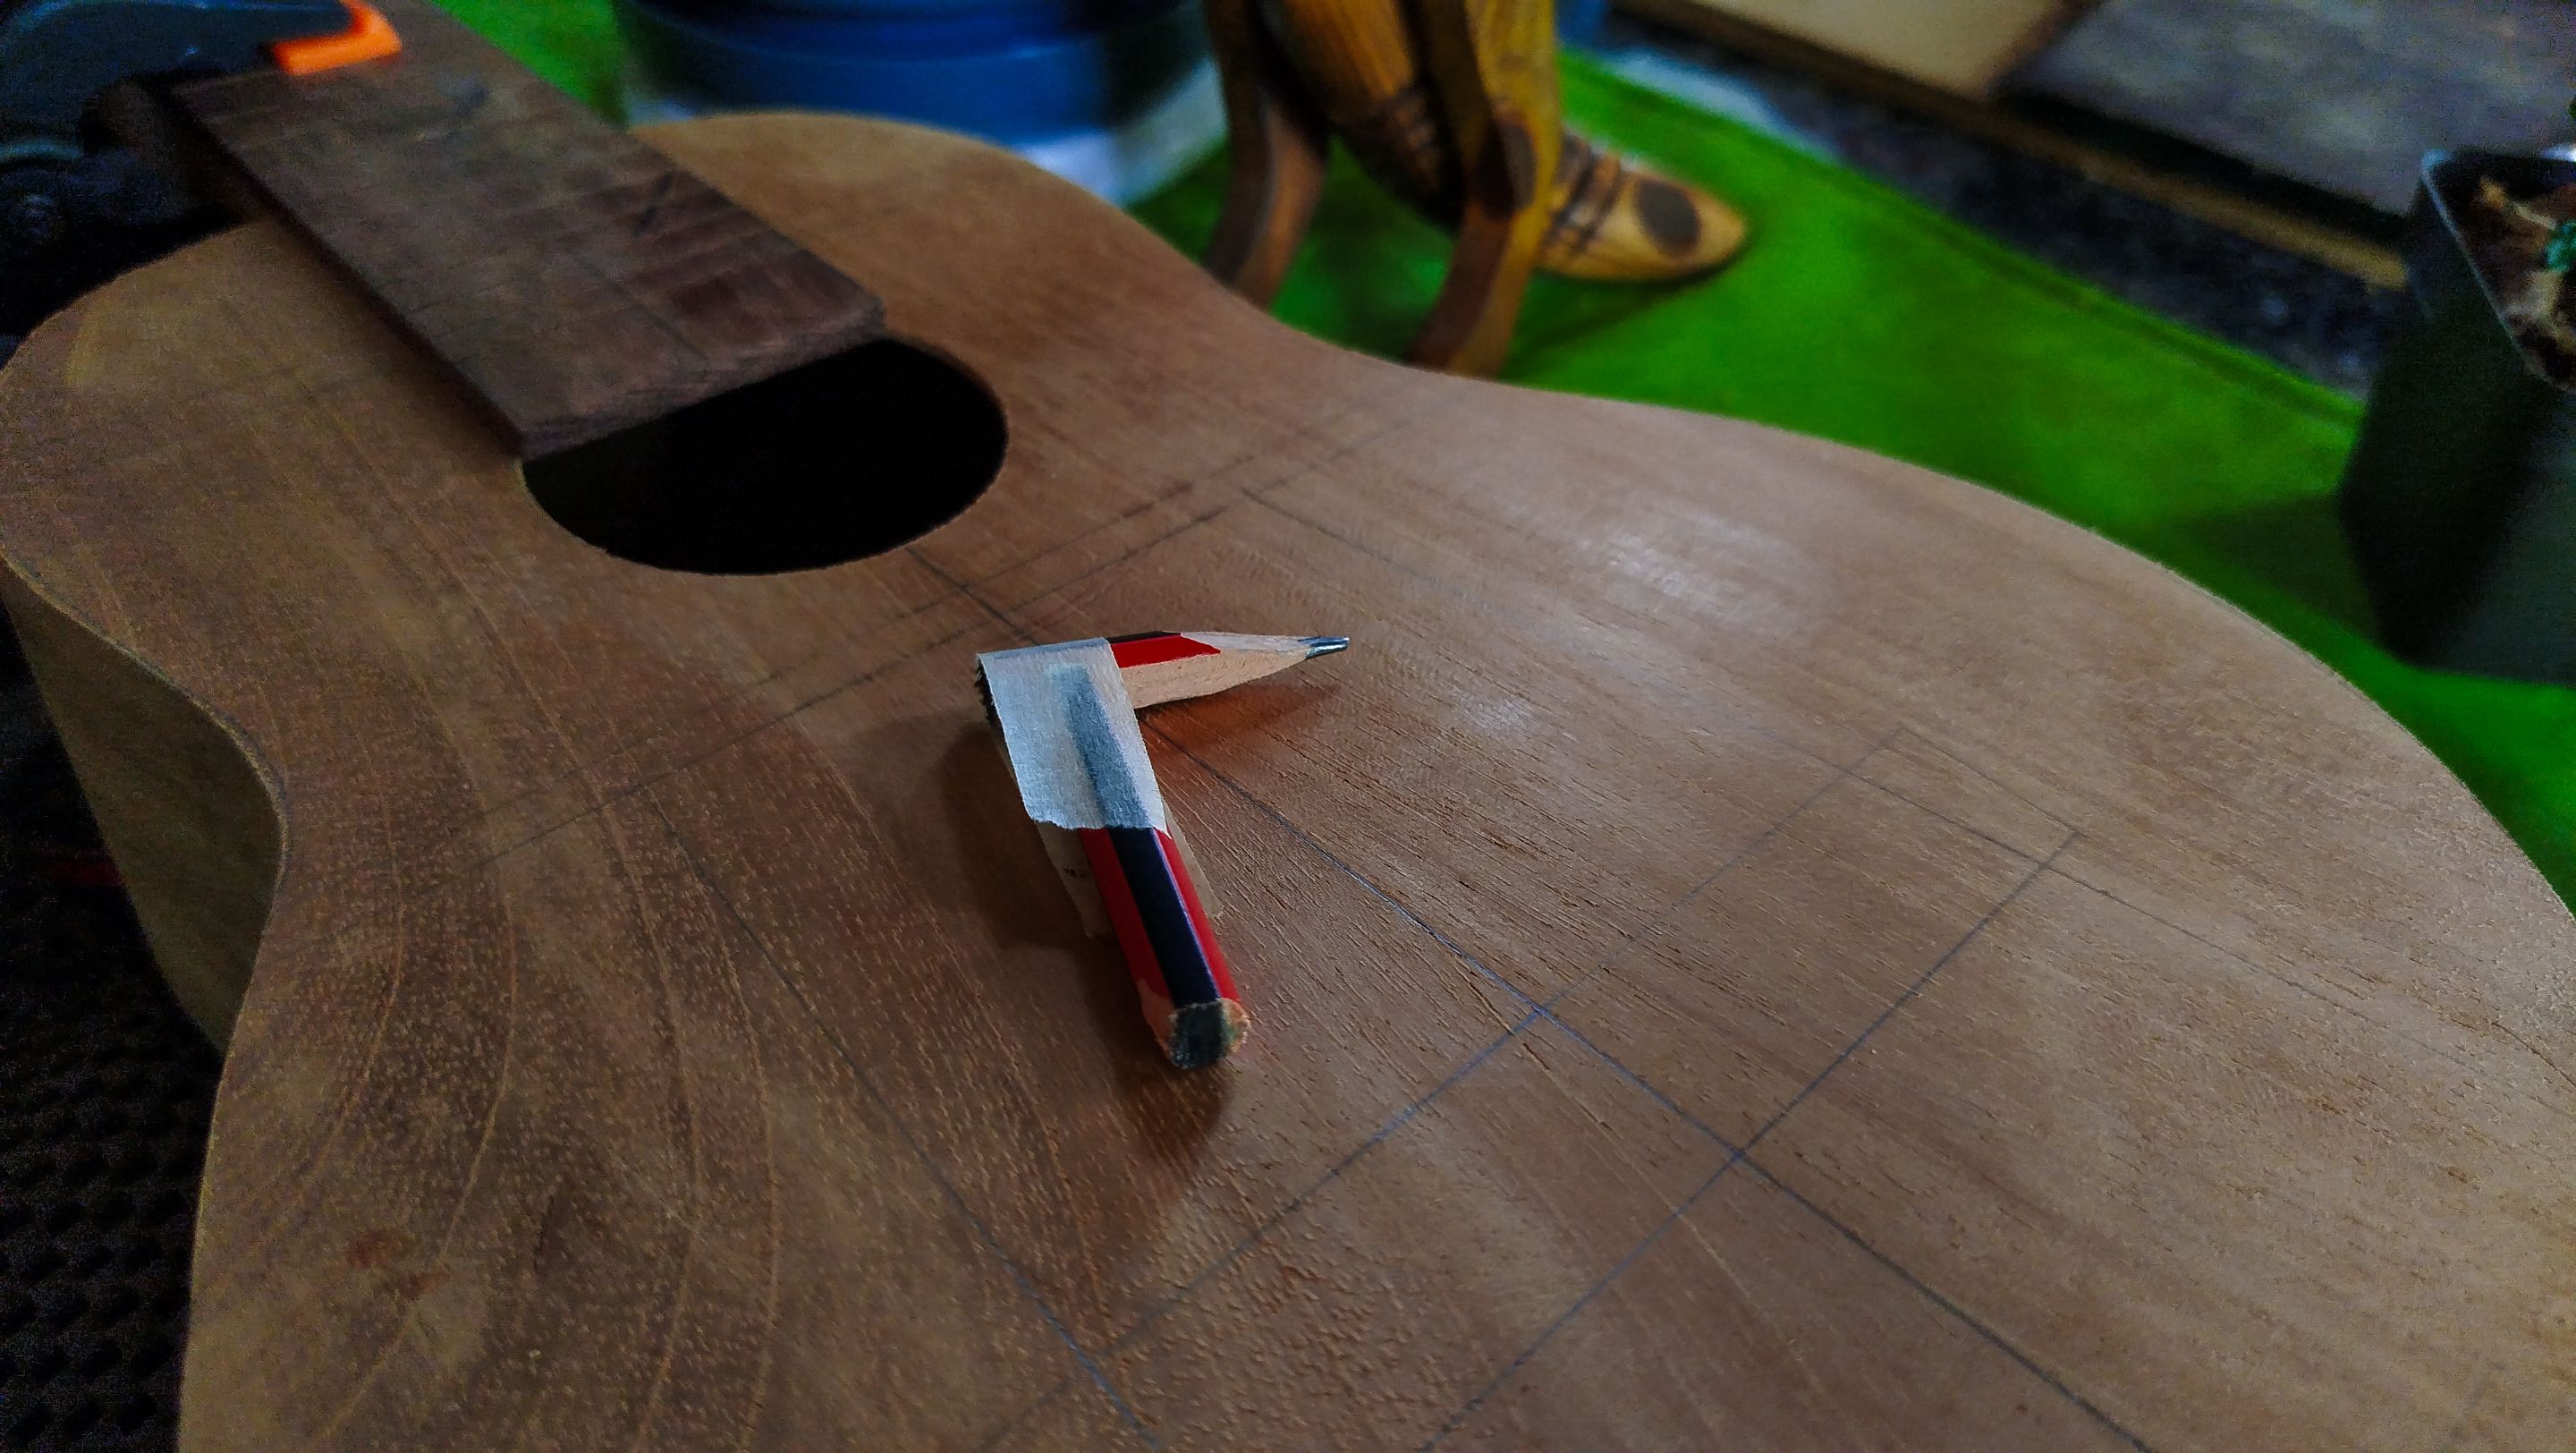
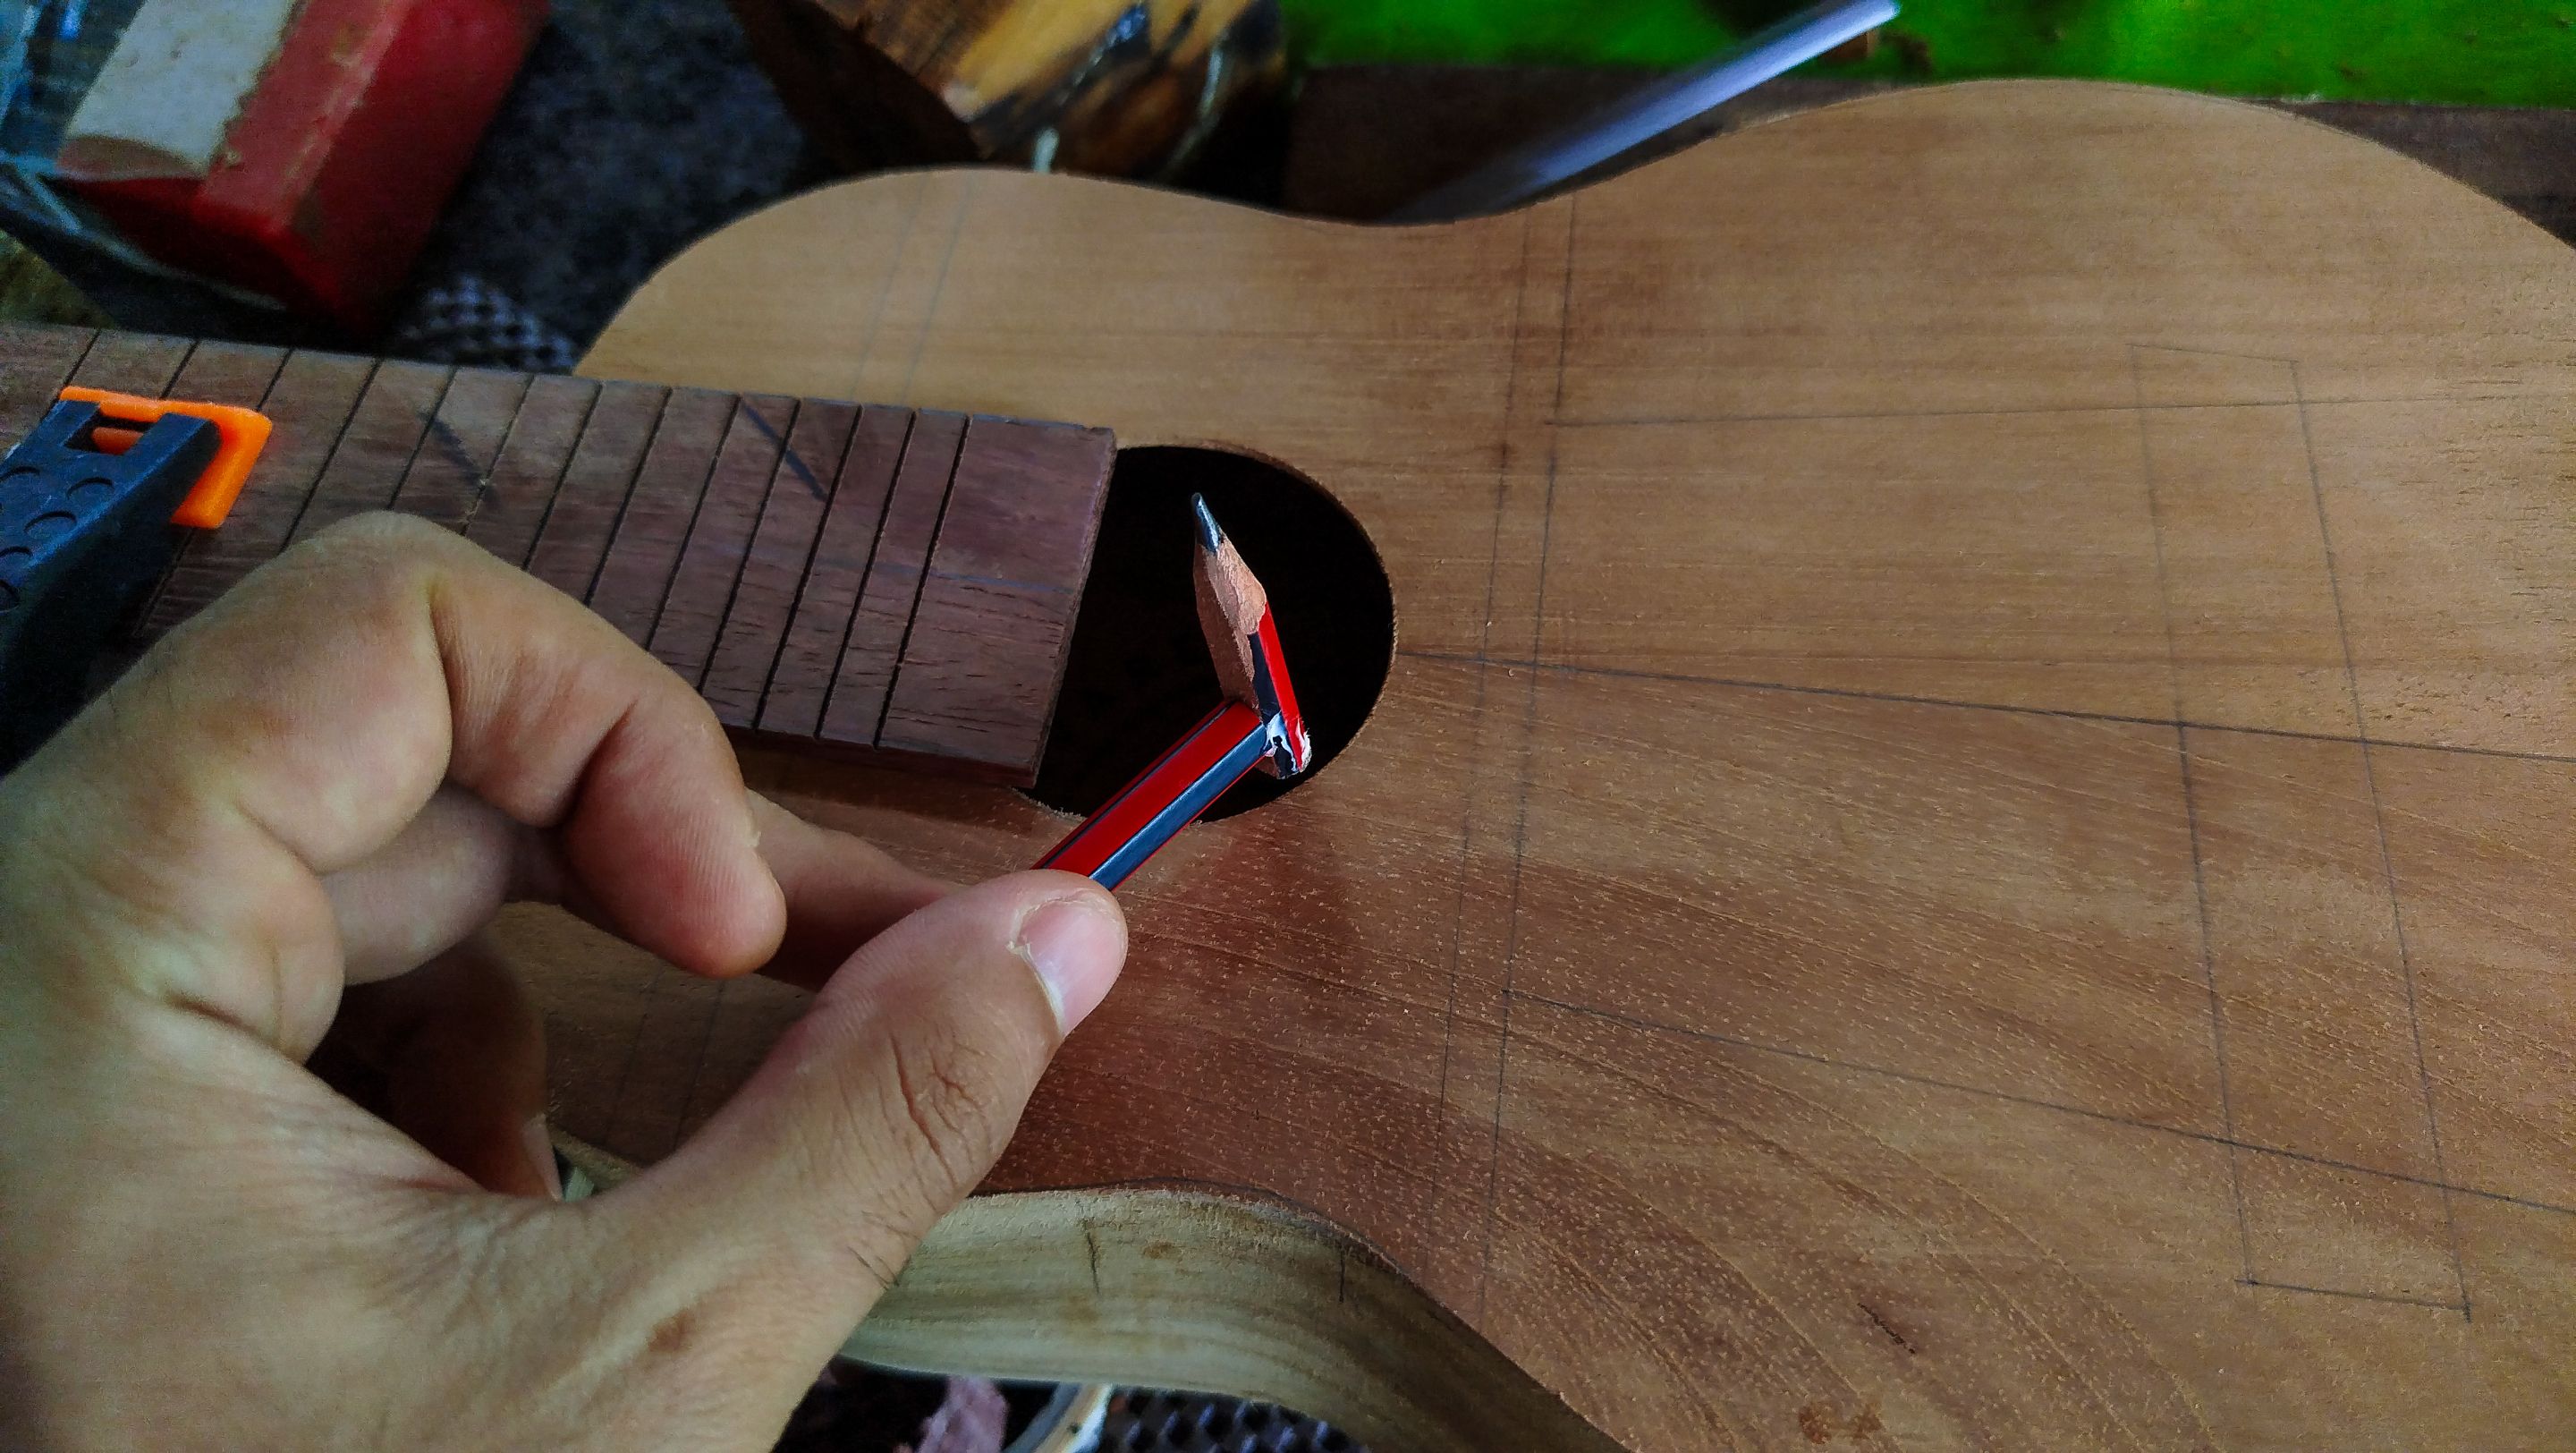
During the length of this process, we made a special pencil to mark the place where we need to cut then fretboard to match the sound hole. It was an creative exercise and it turned out to be a really cool process.
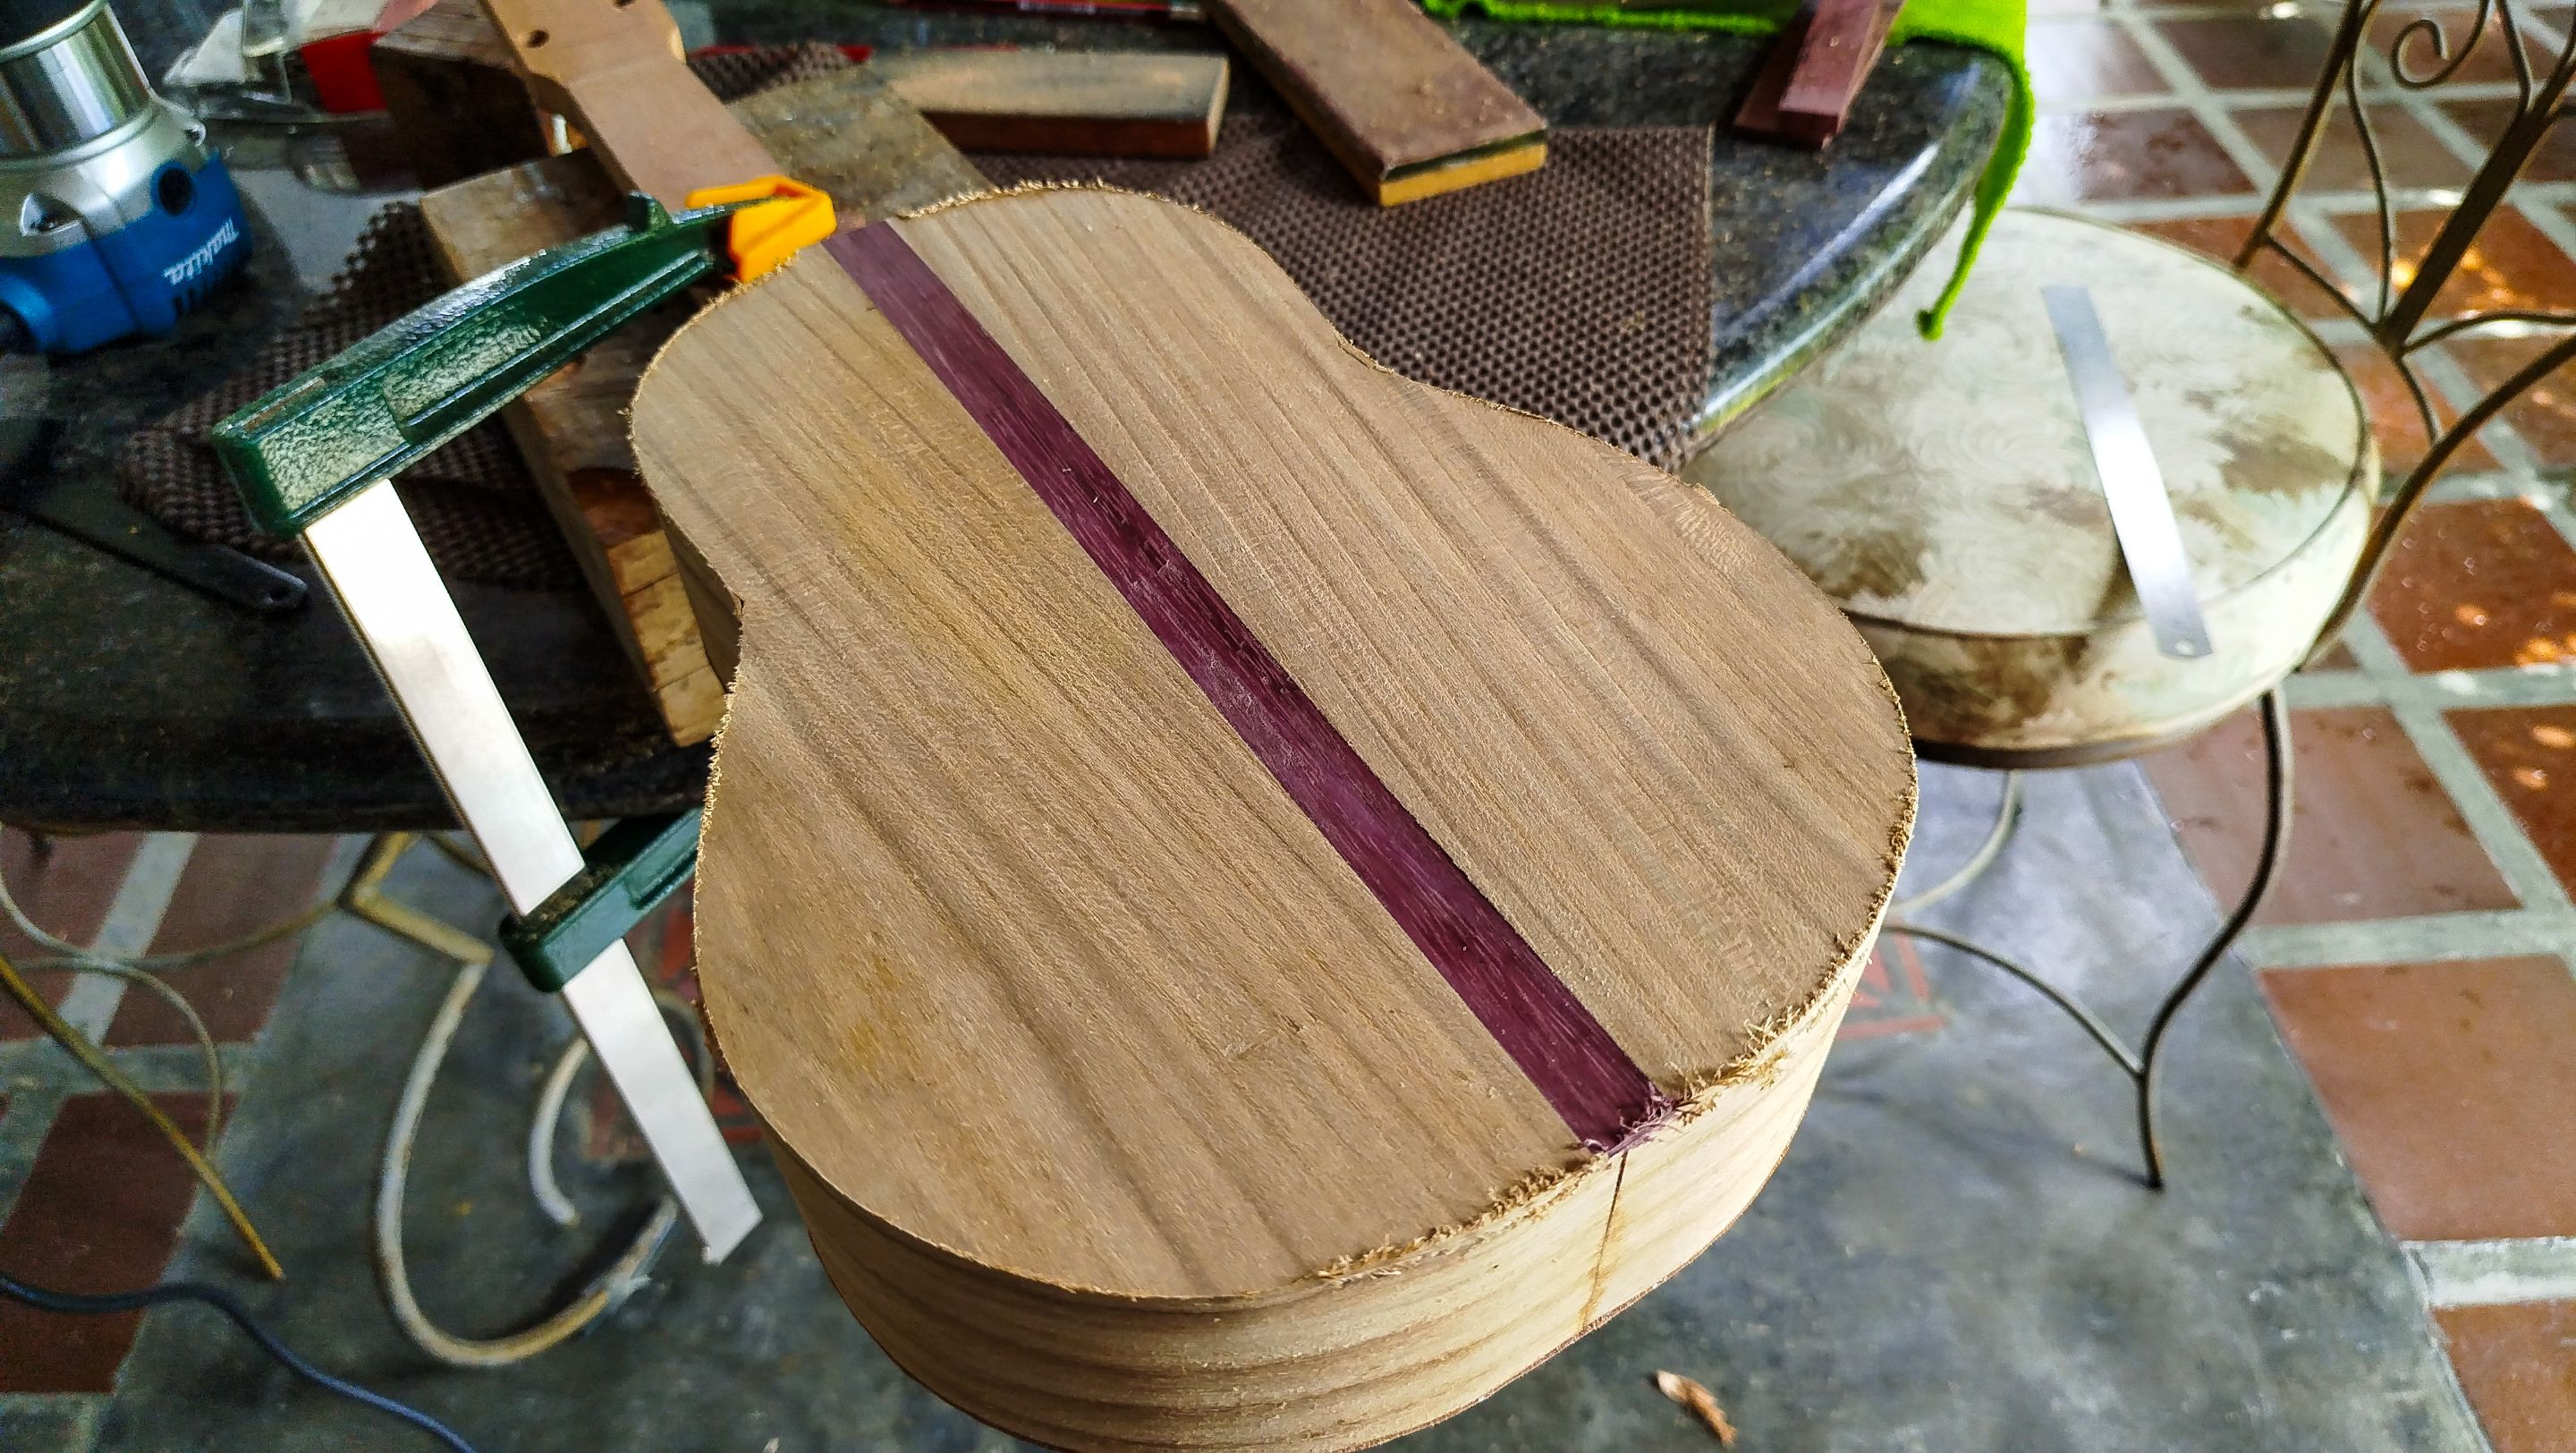
The last part of this prep work before working on the shape of the fretboard and glue up was to use the router to remove the excess material from the back of the body. And then, we can move on.
Glue up


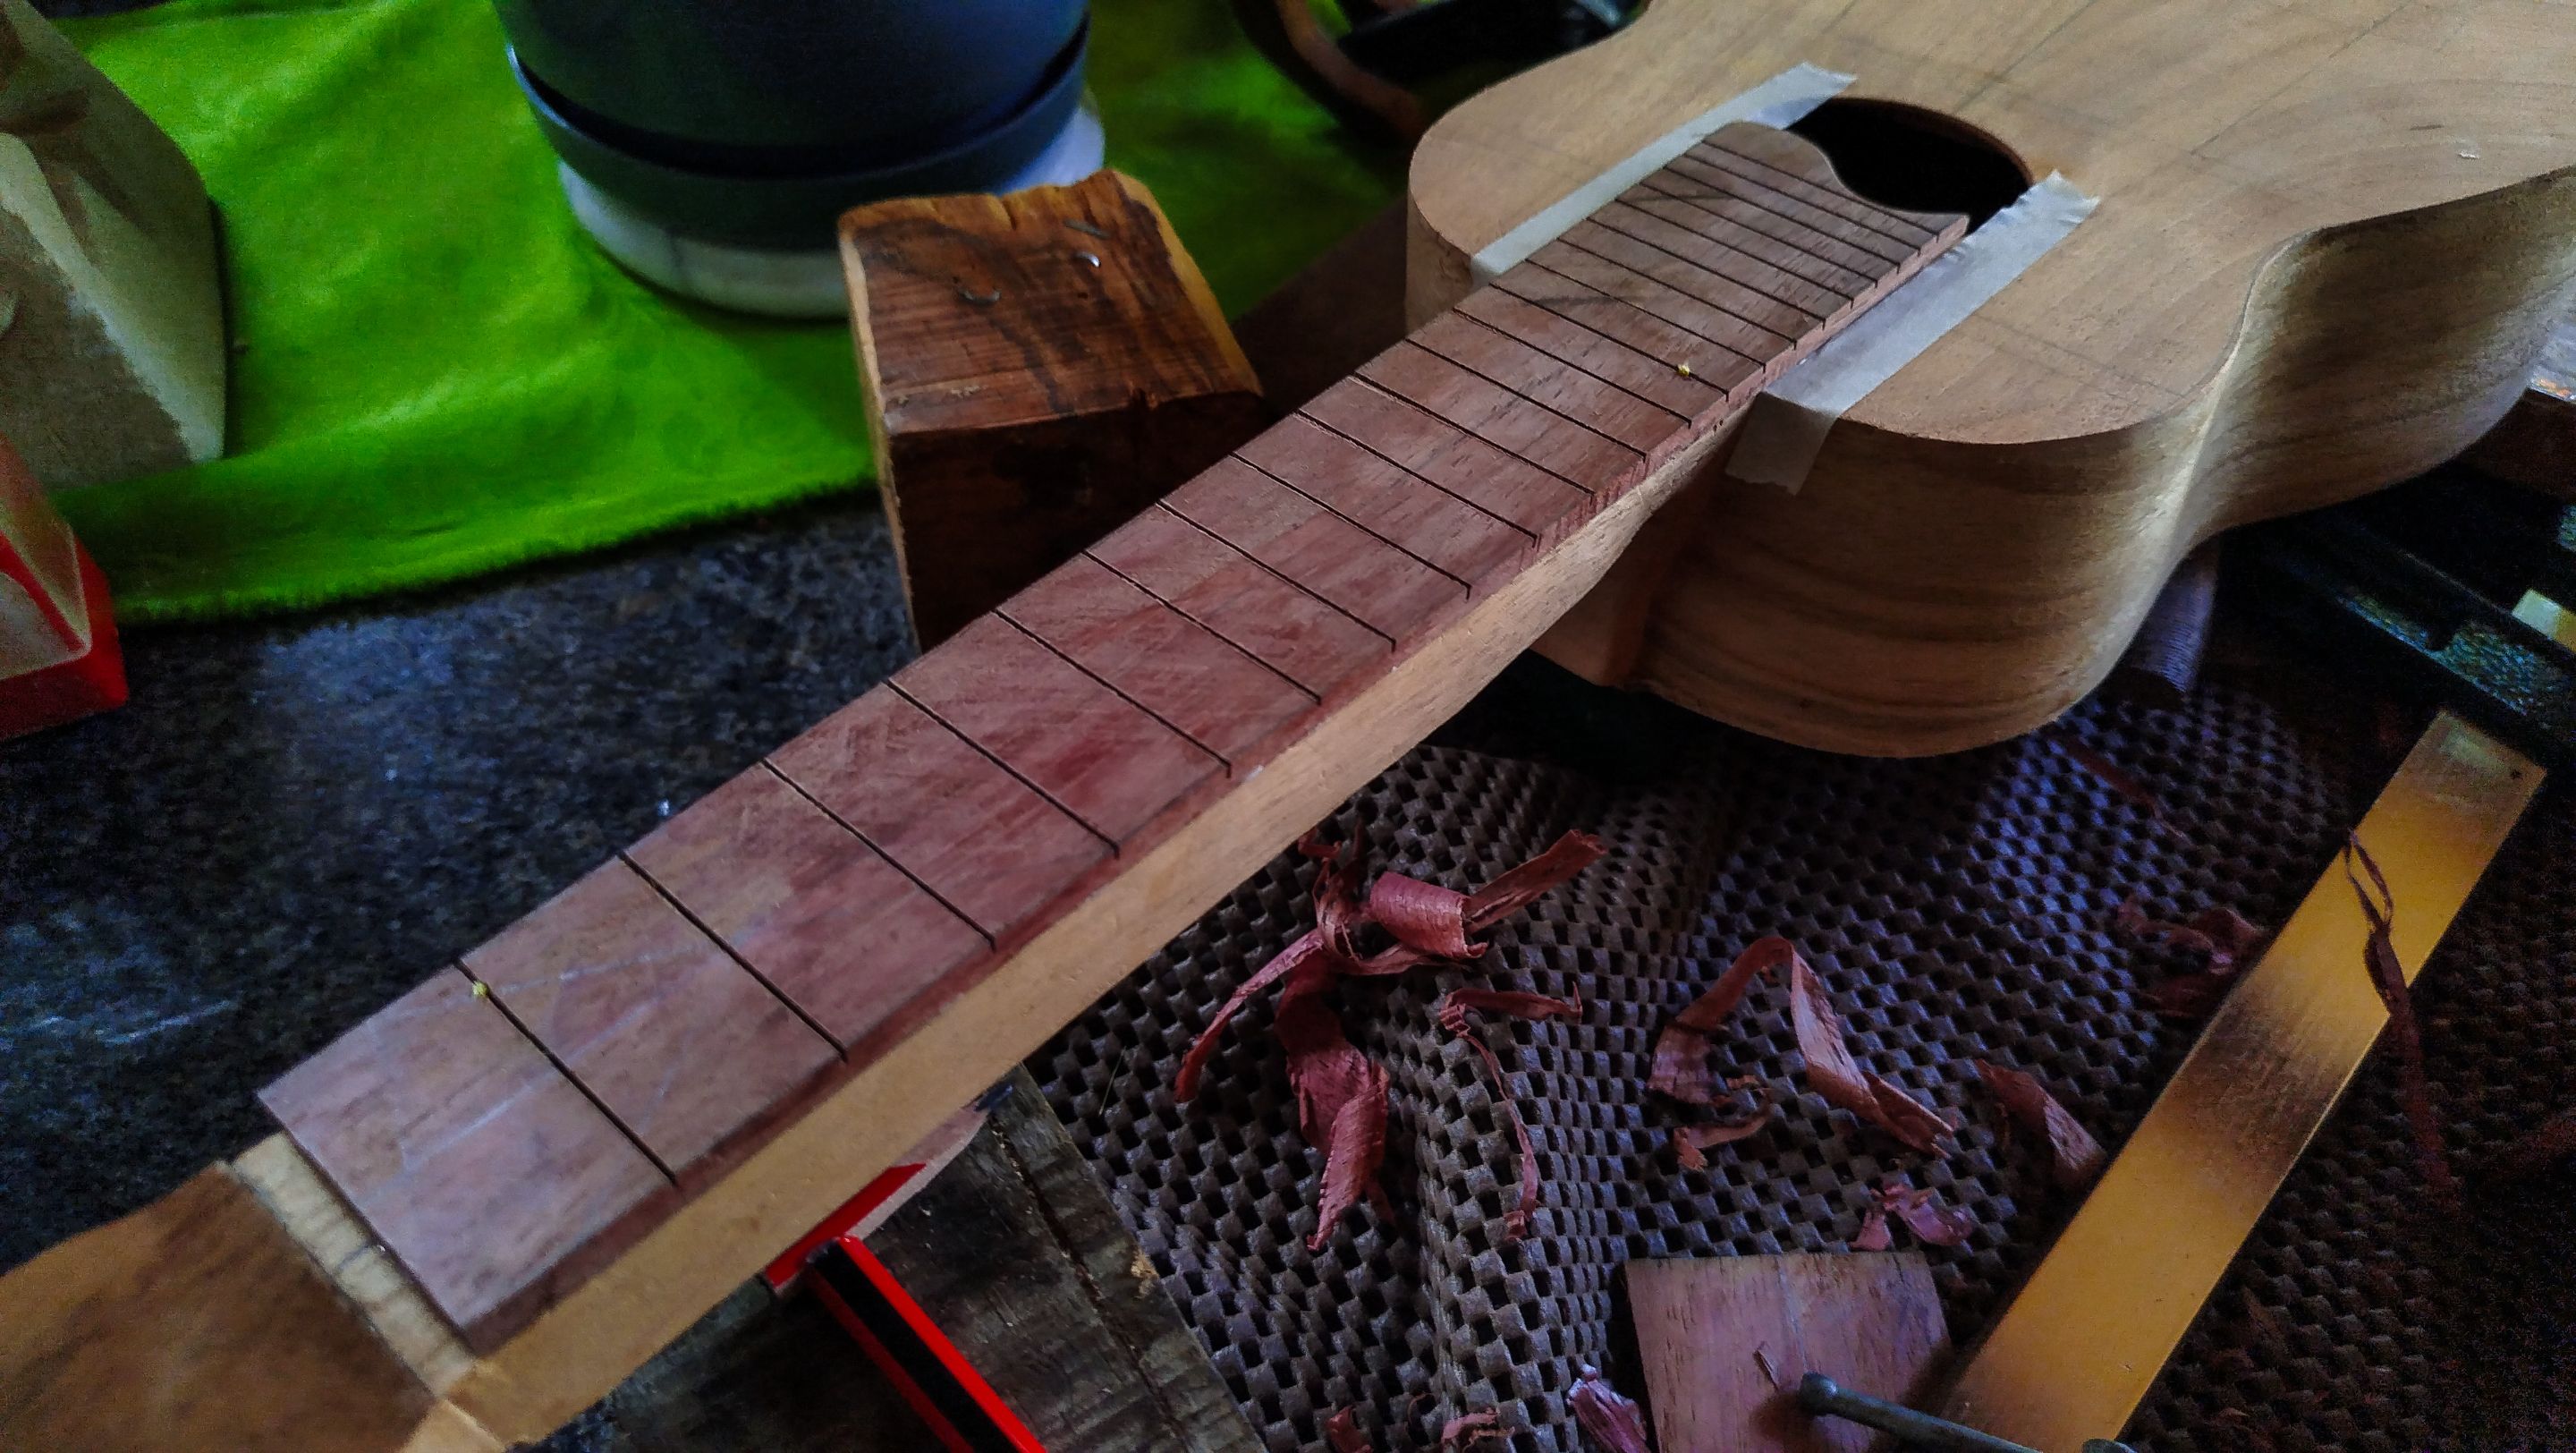

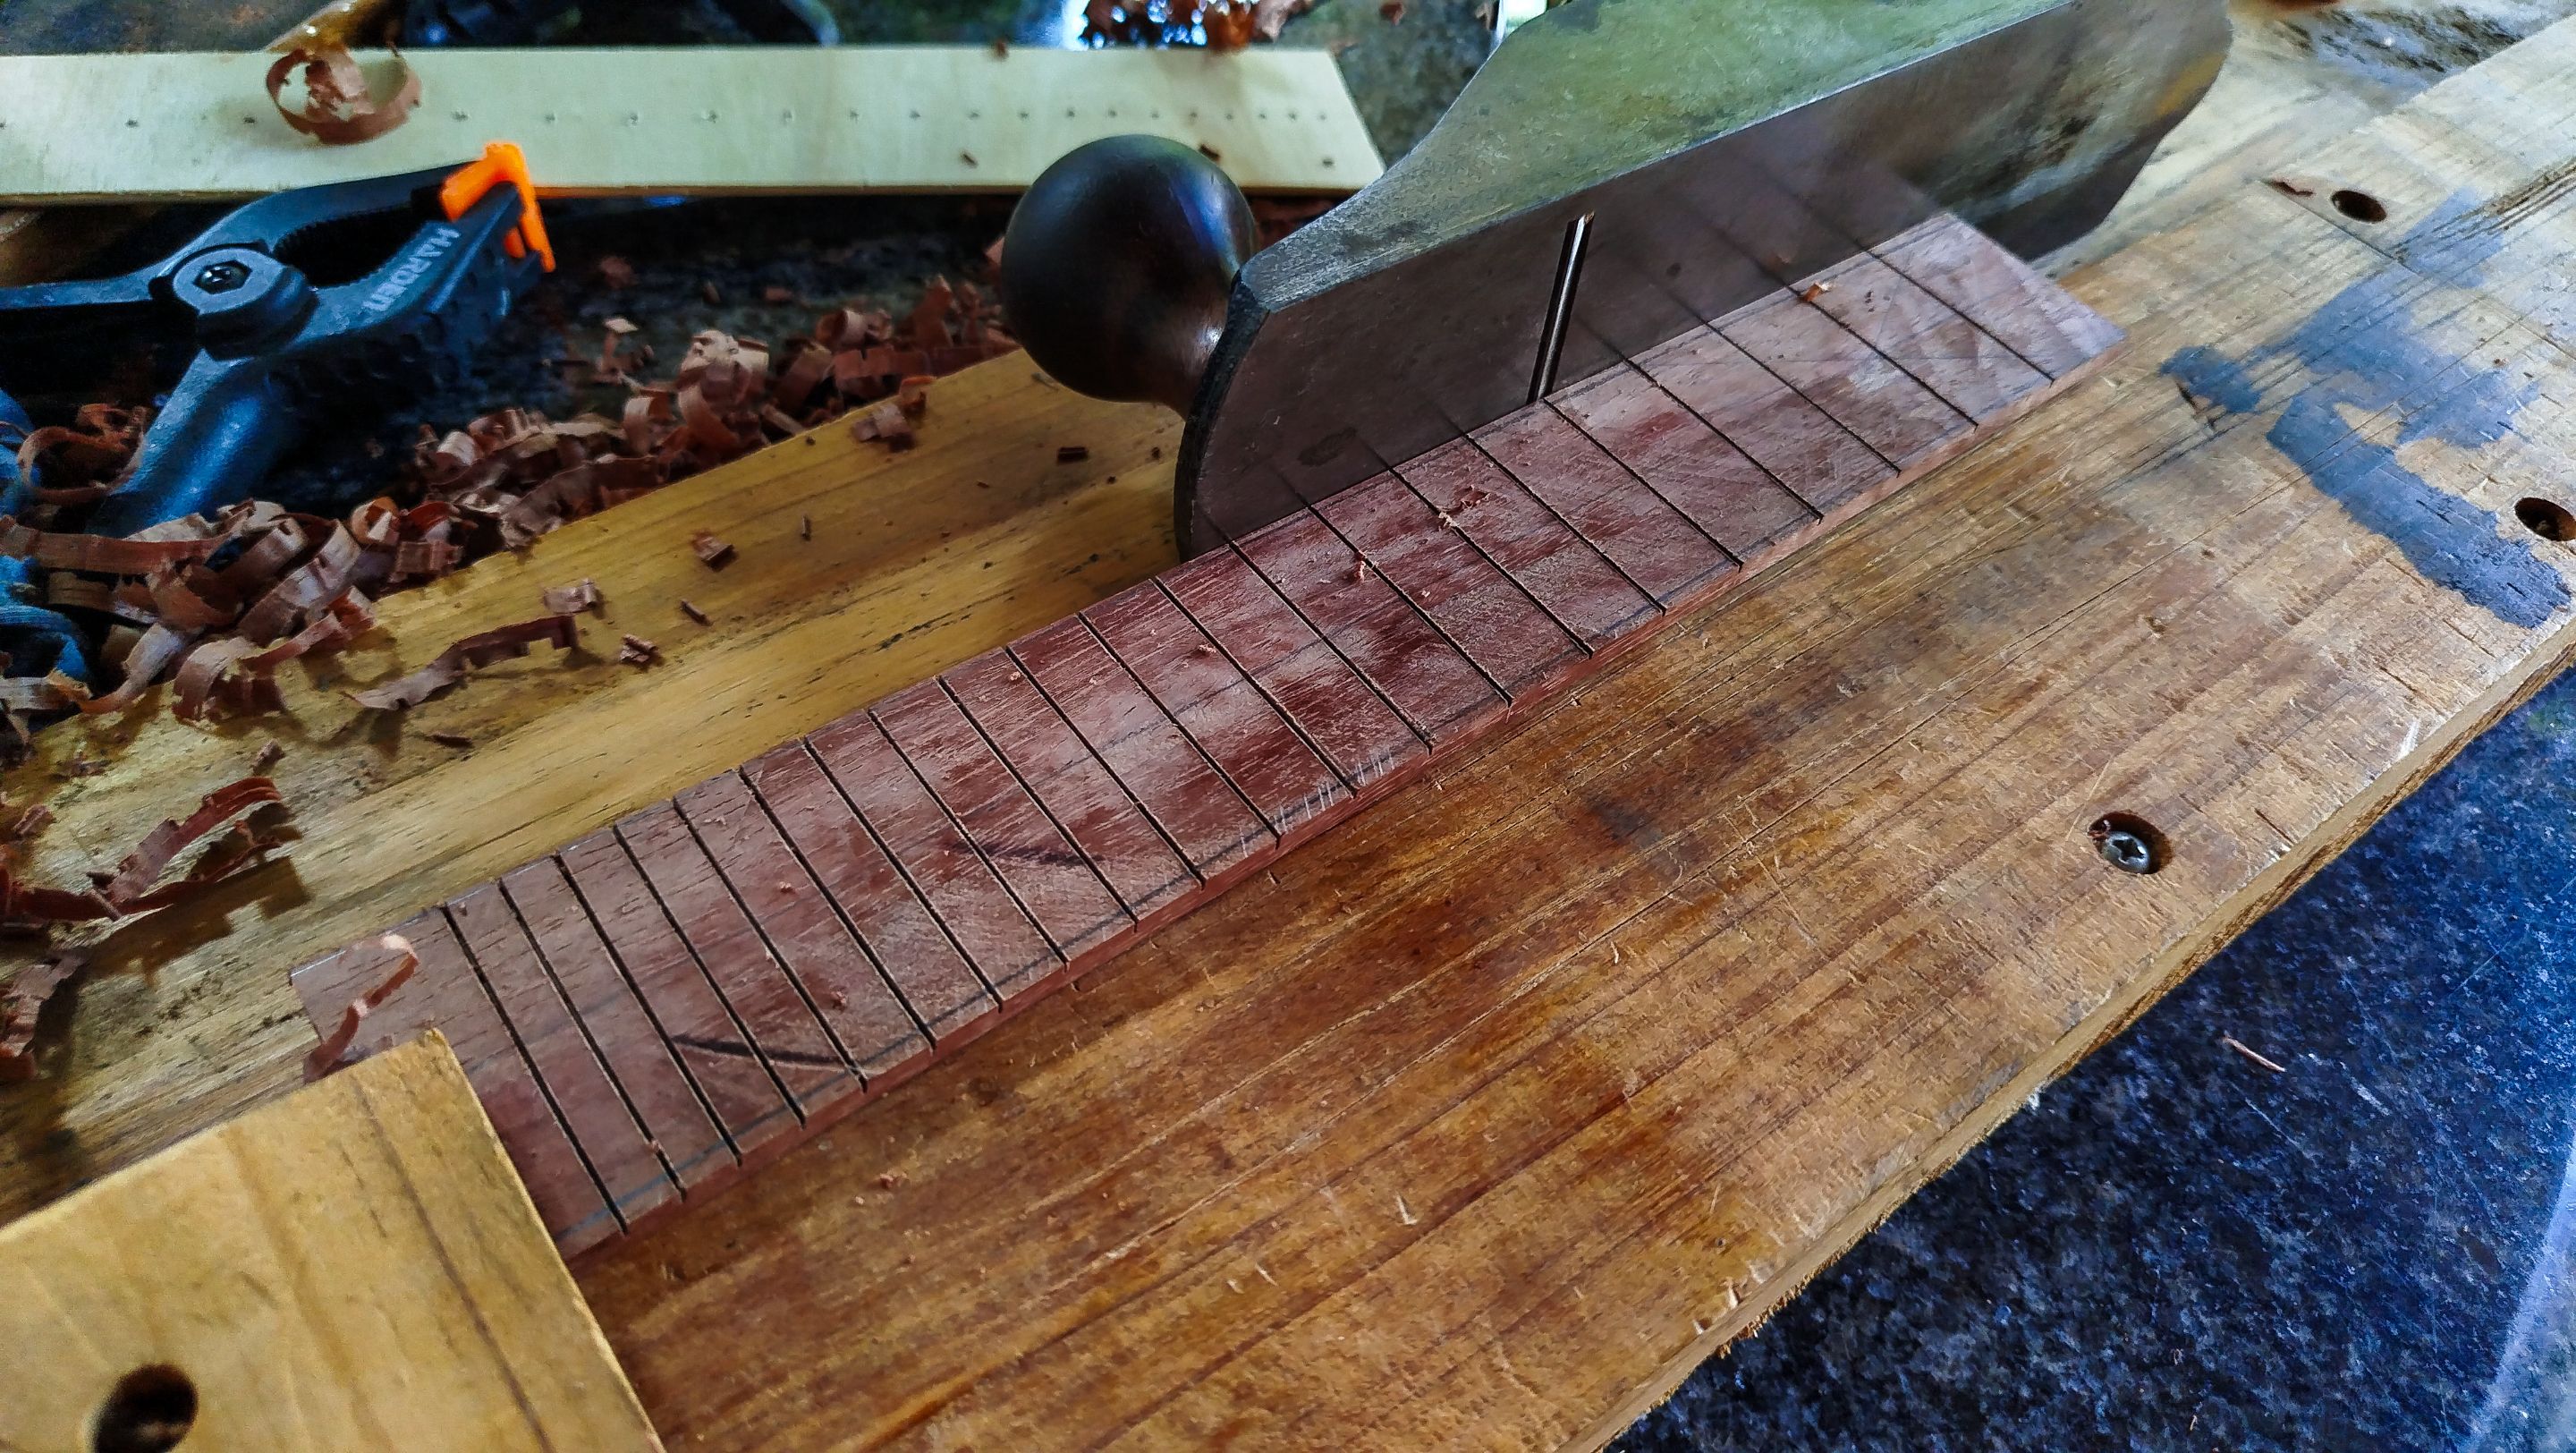
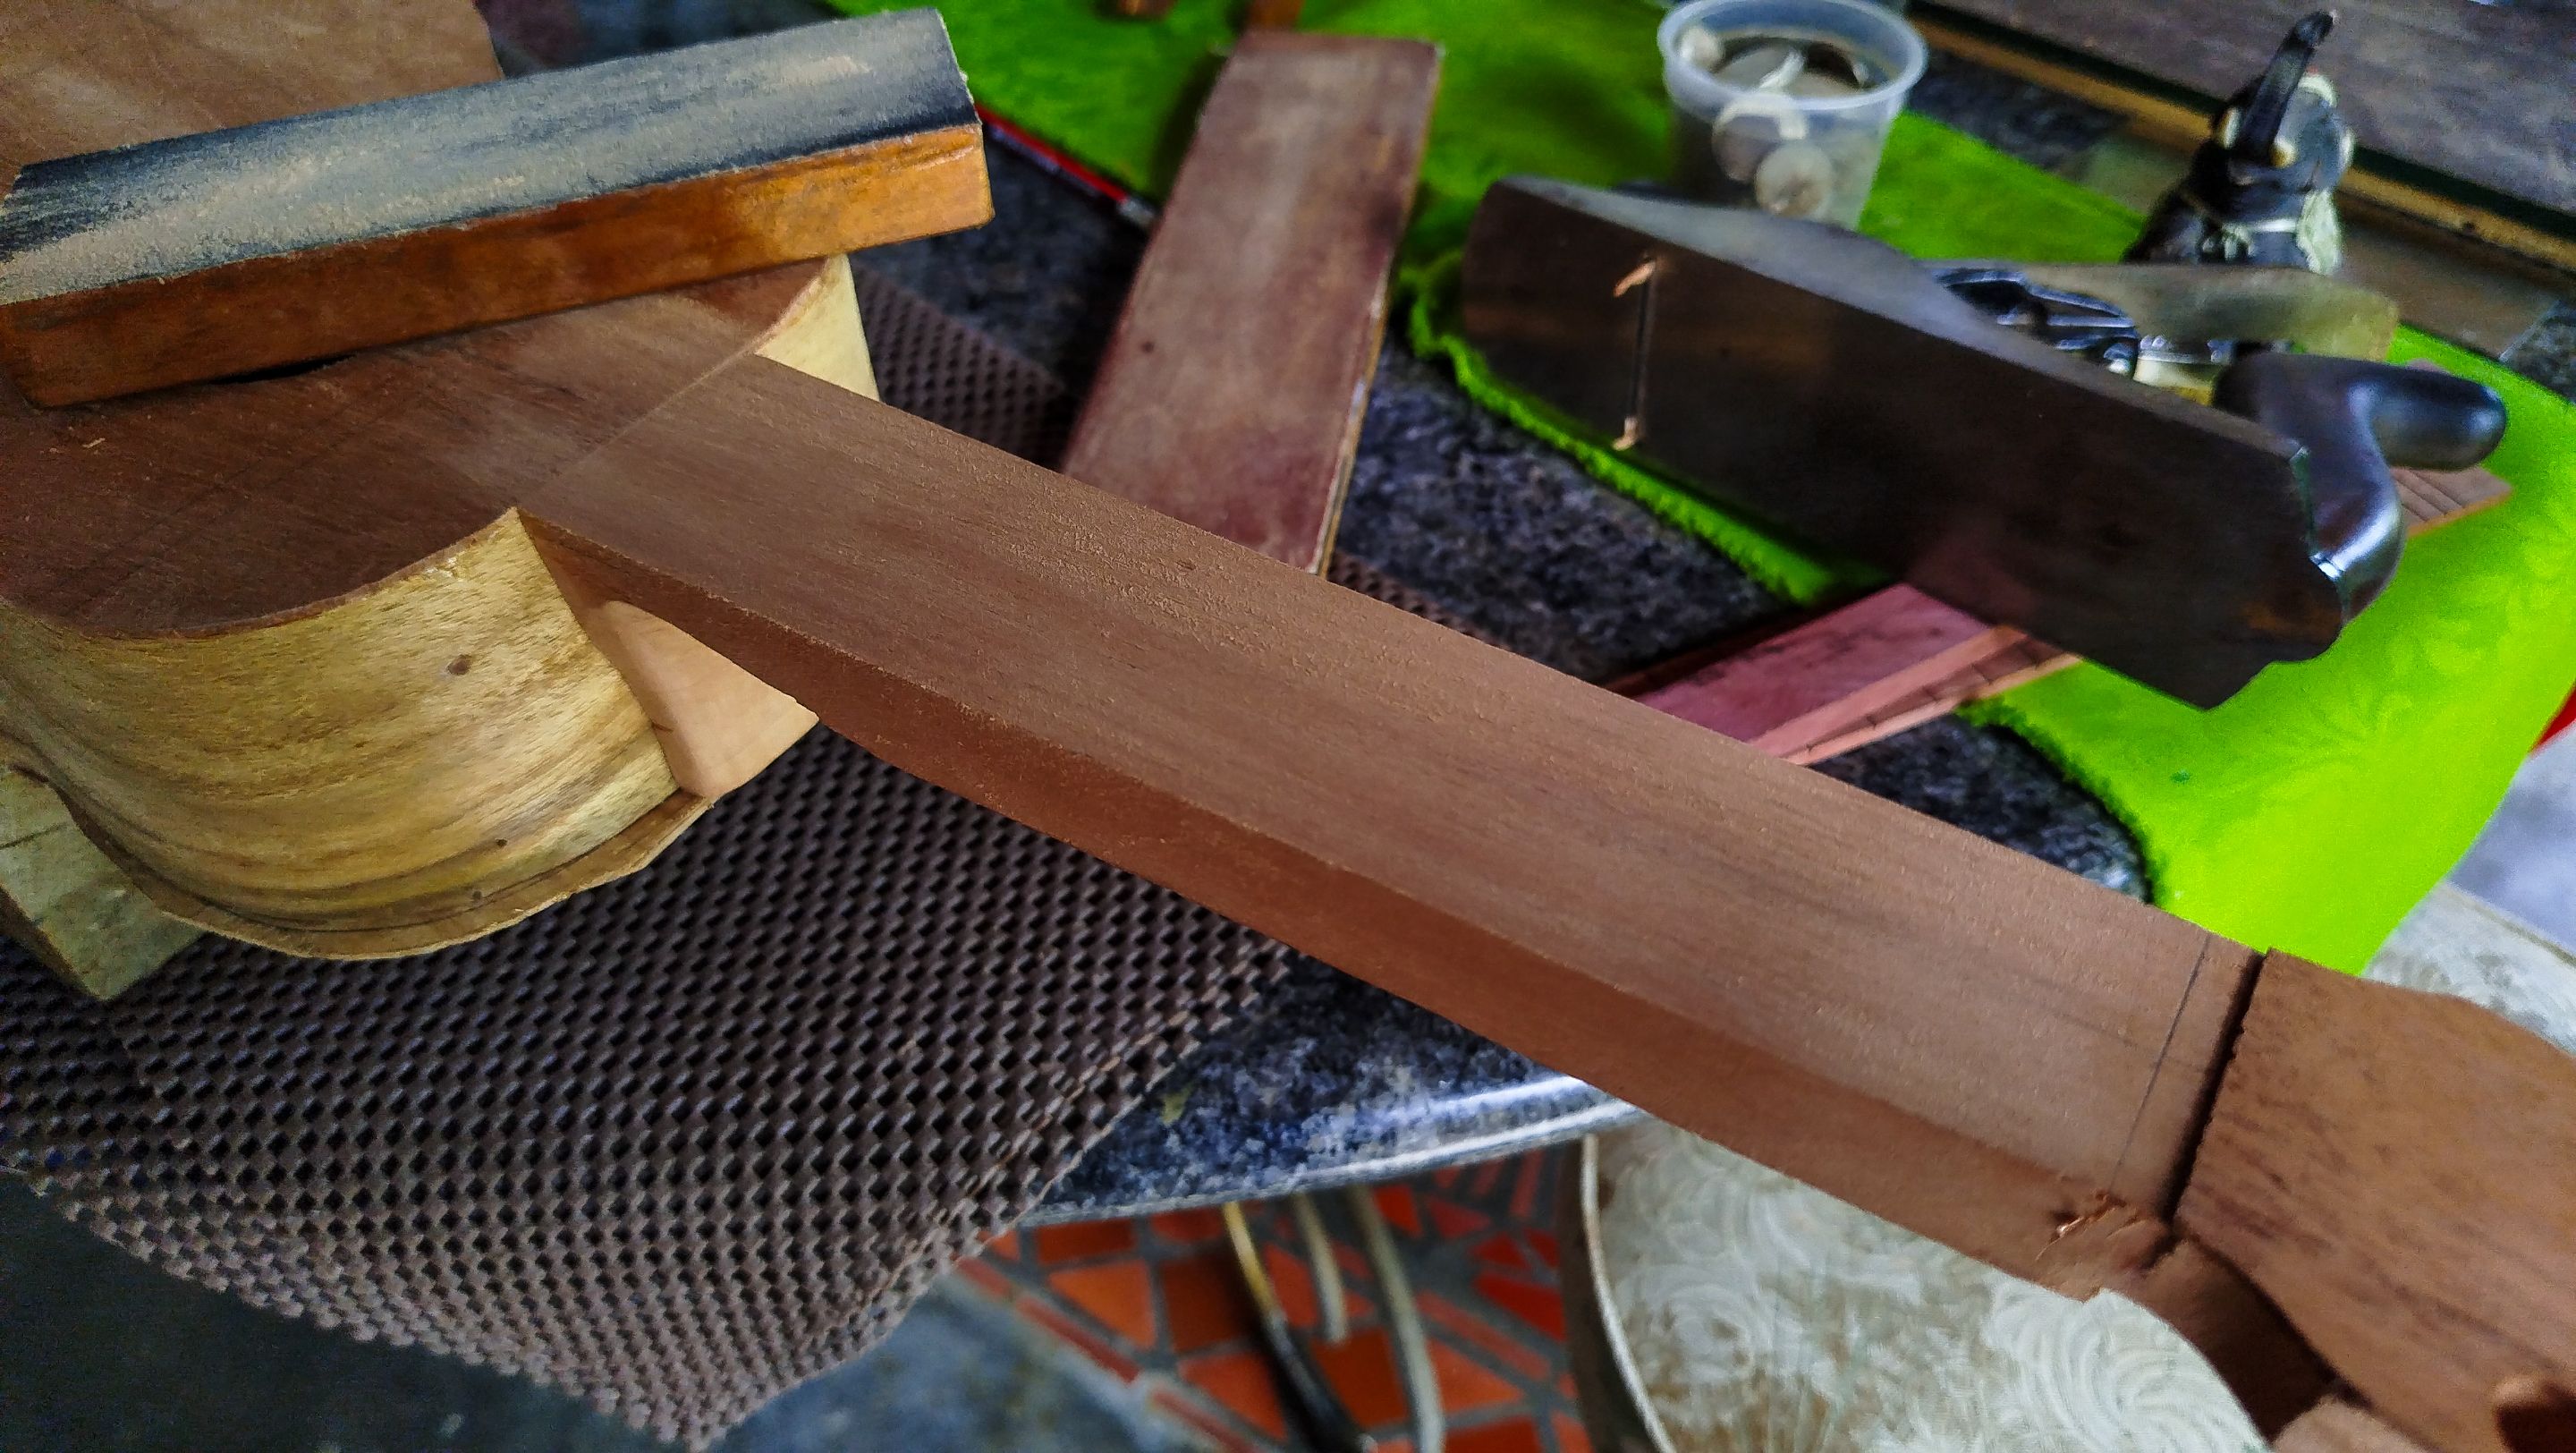
Before we can apply the glue we need to work on removing some material from the sides. This is to give it a conic shape. And we just need to measure how much we have of the neck at the upper portion and how much it is at the place where it meets the body. We transfer these measurements onto the fretboard and then we can use the hand plane to remove the material until we get close to the line marked for this.
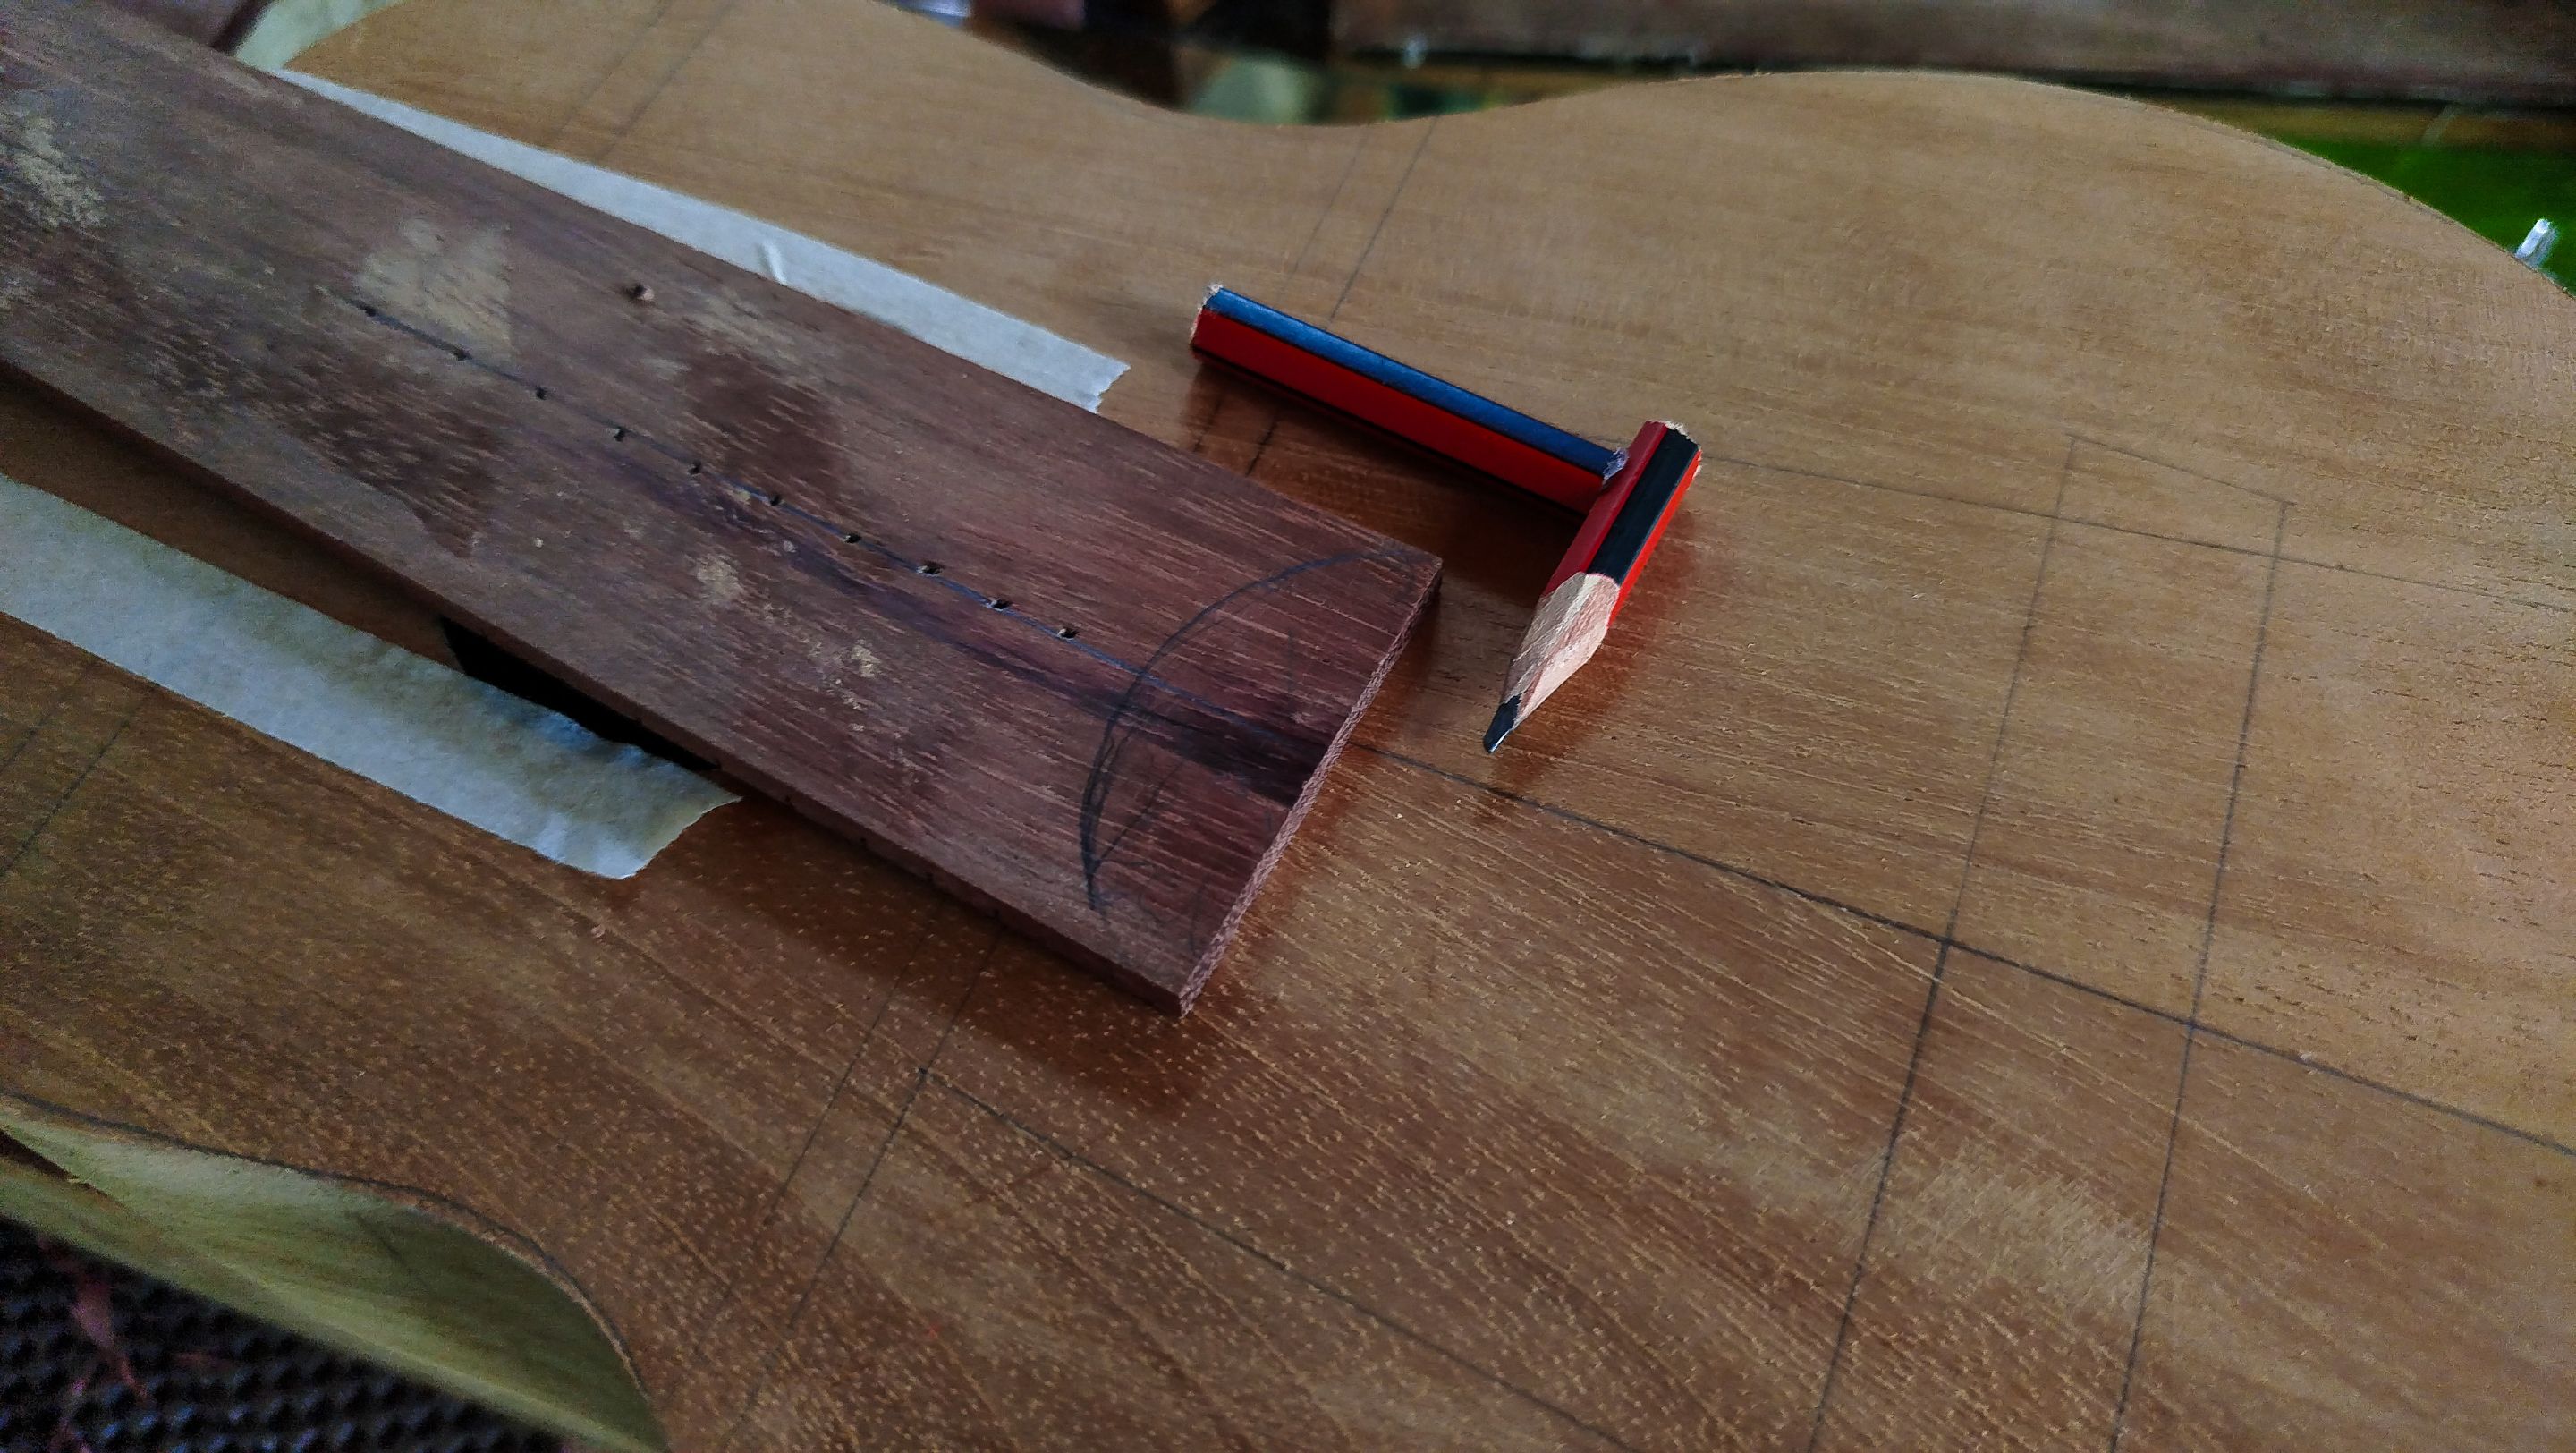
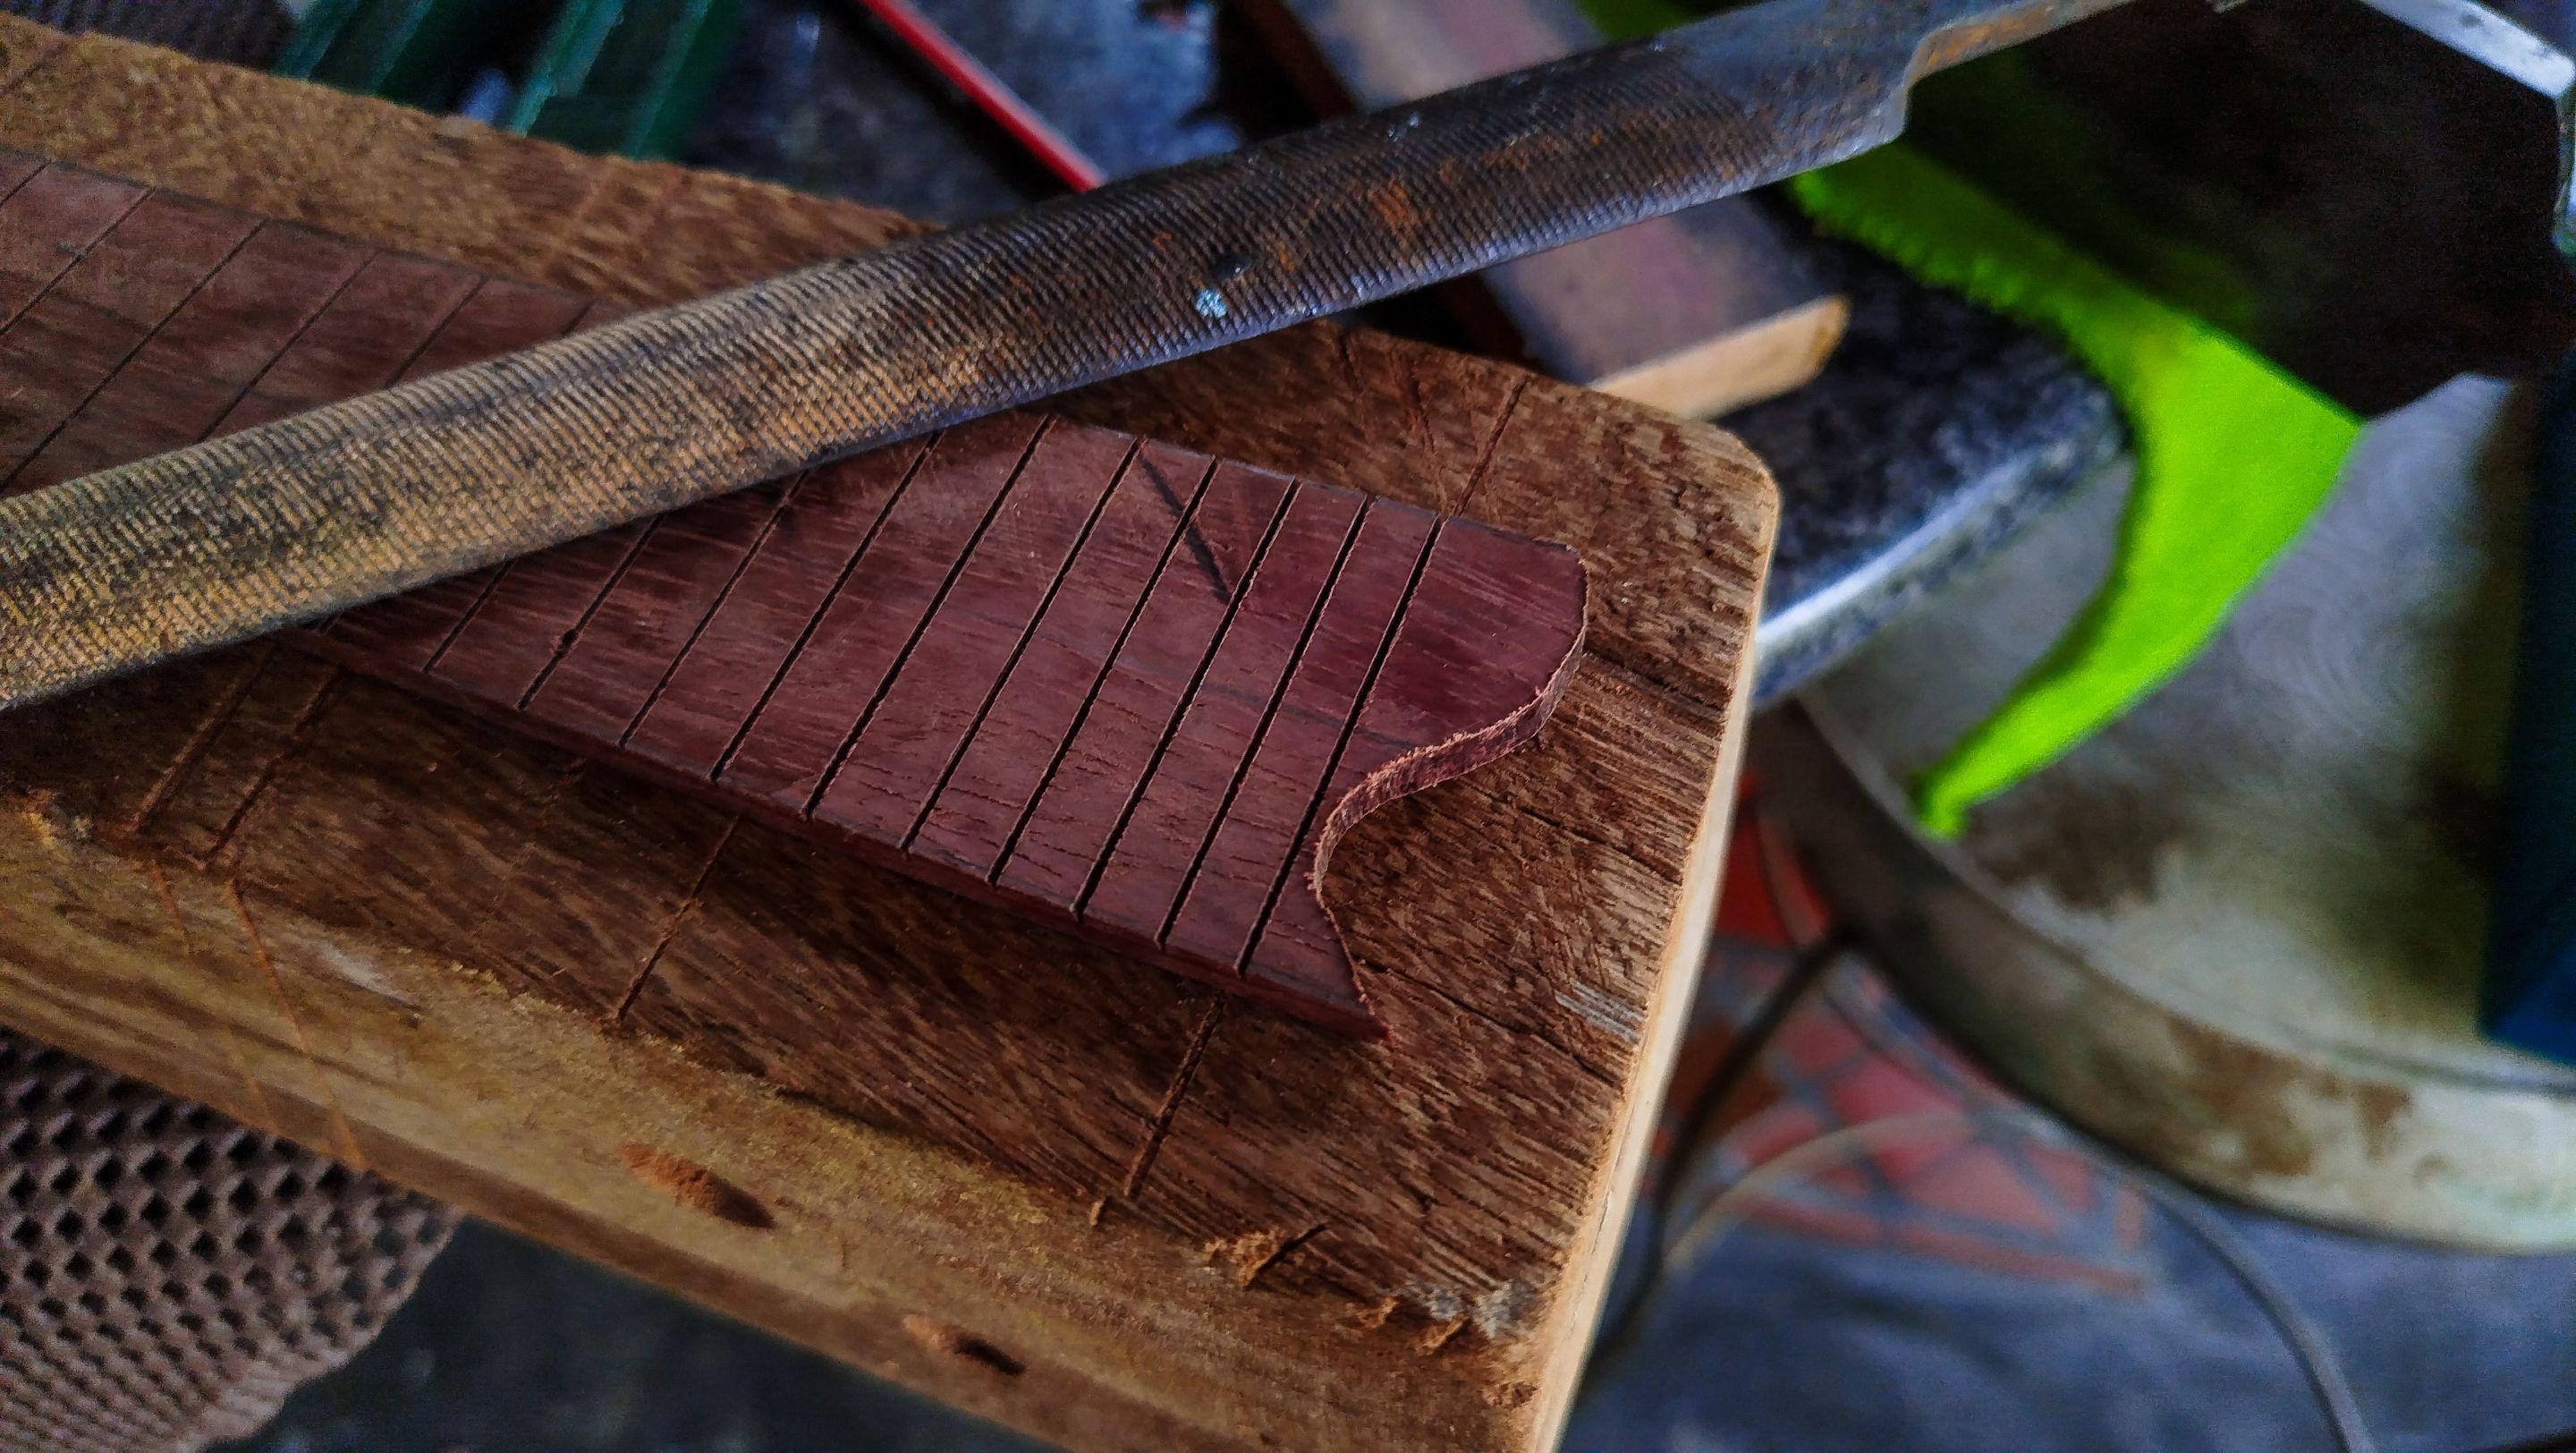
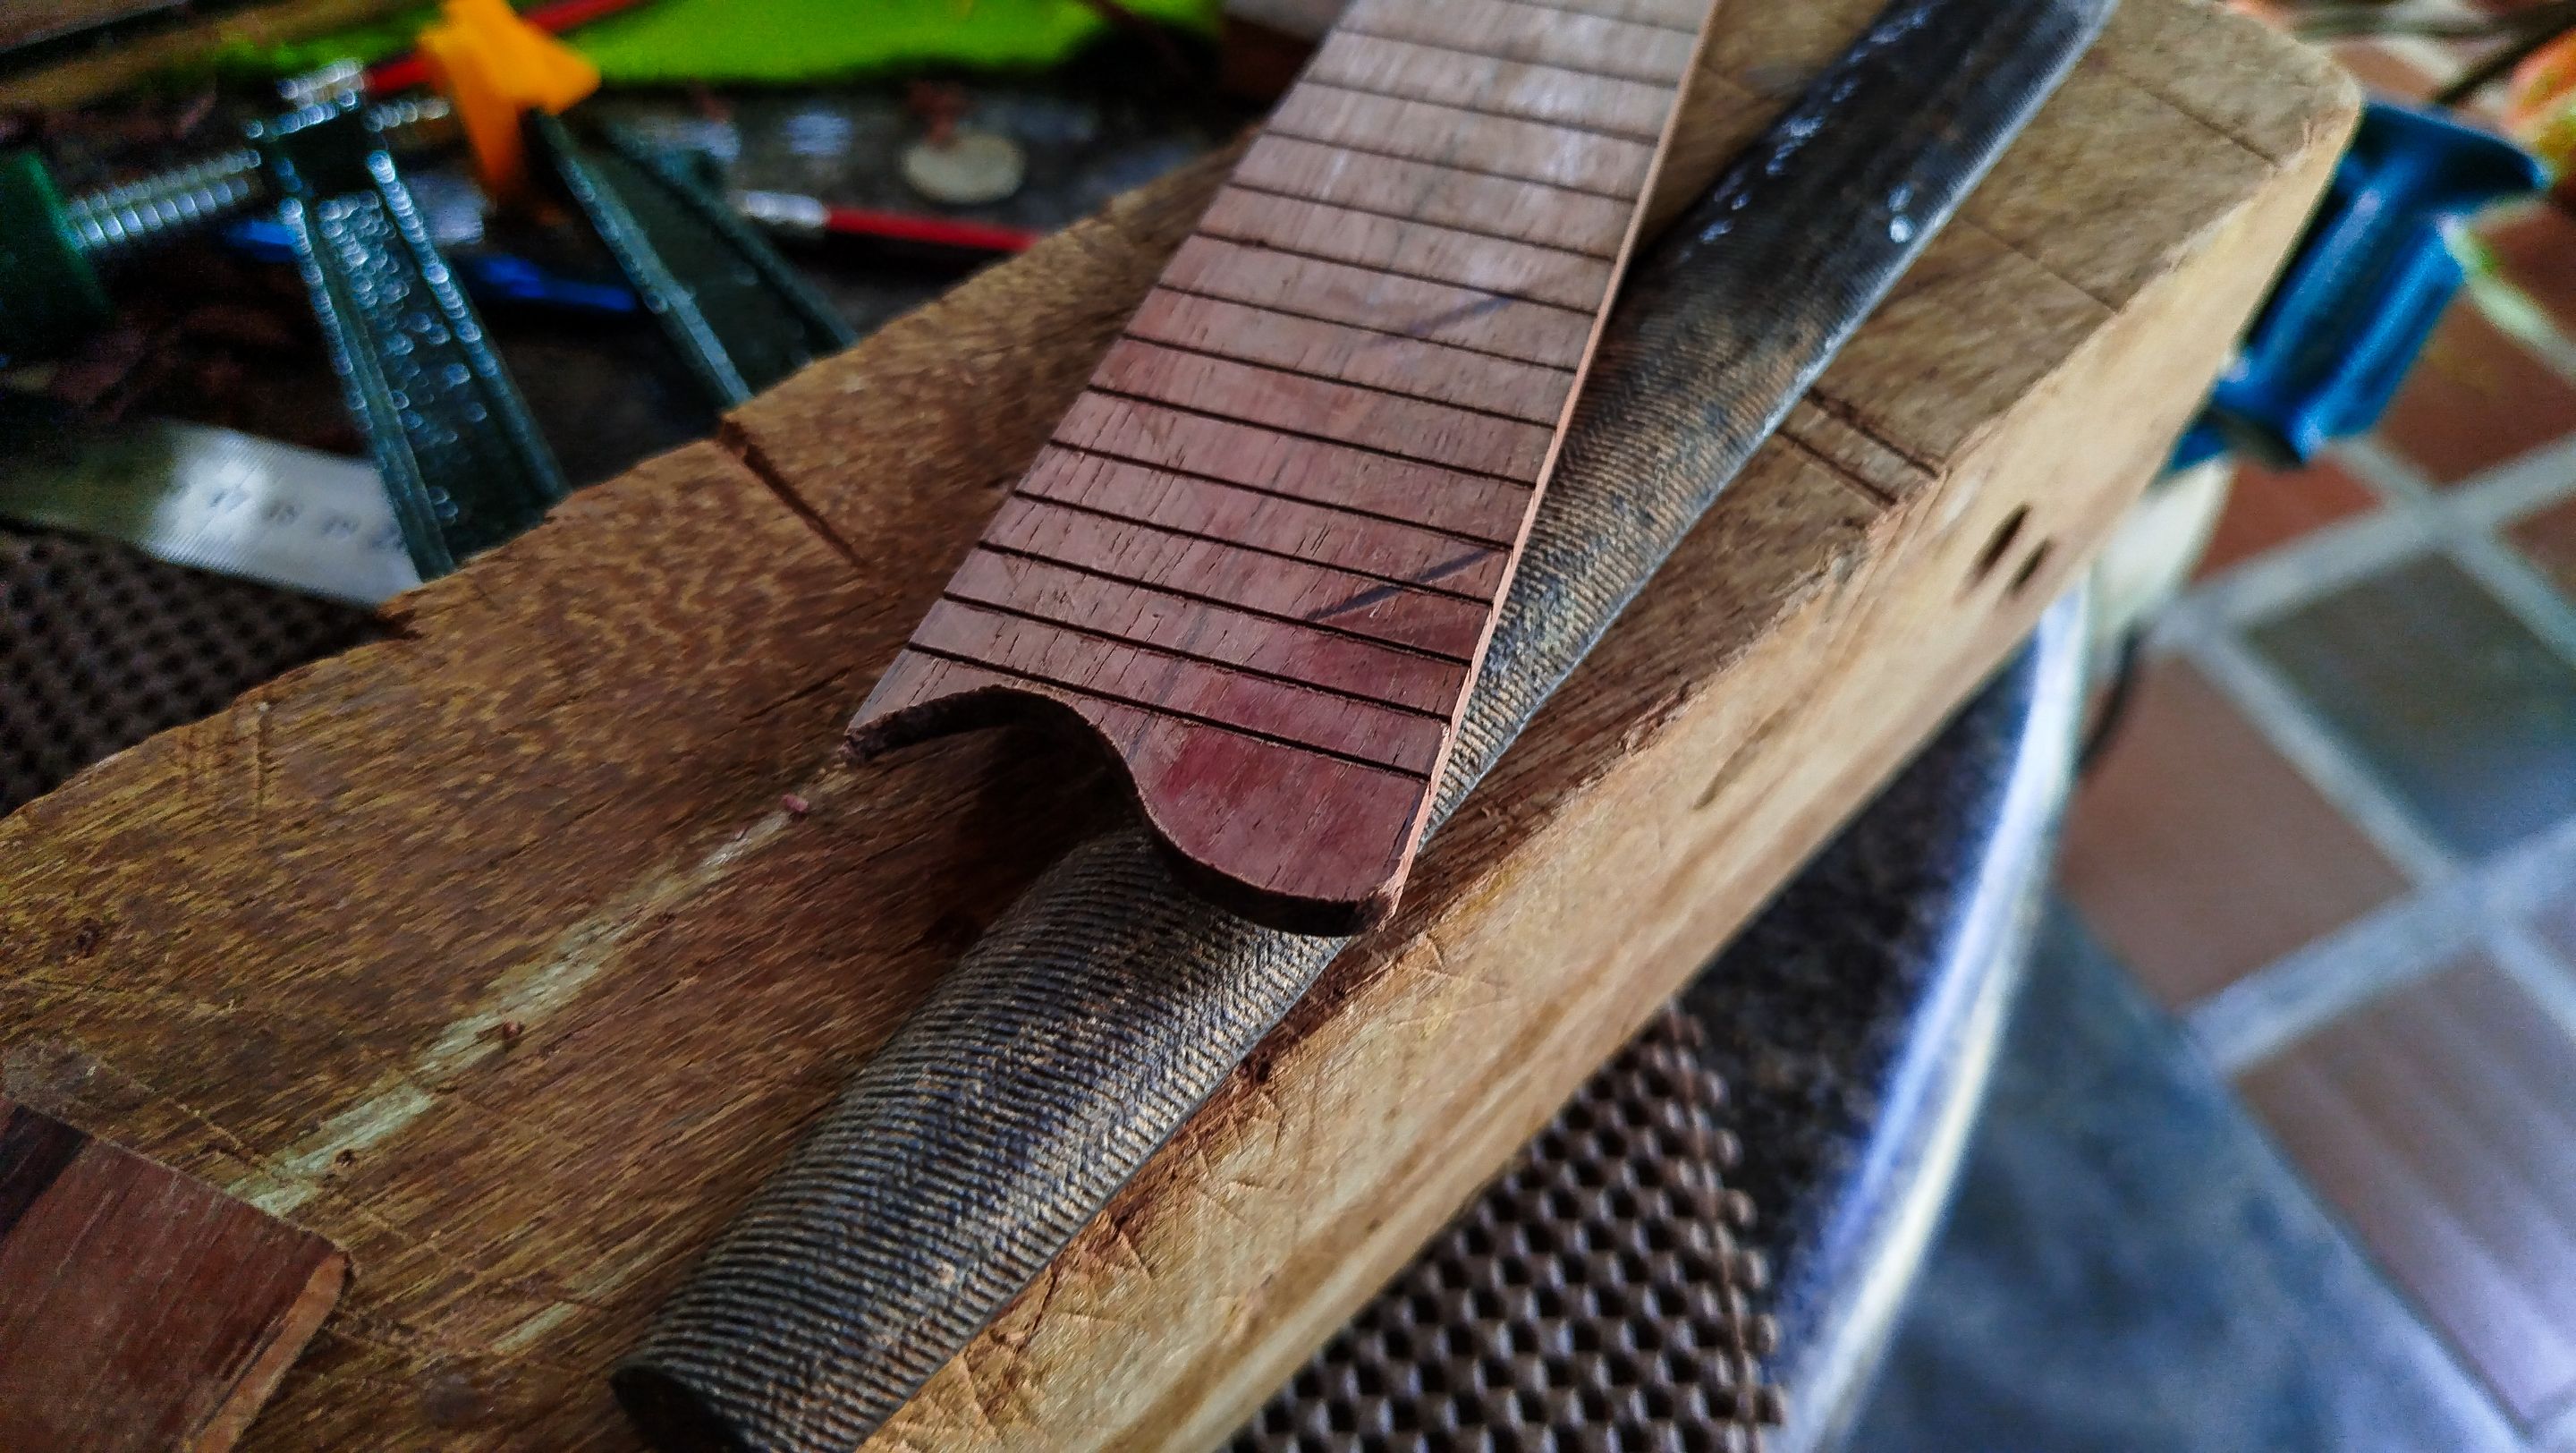
The other thing we need to do is to cut a portion of the lower part of the fretboard to create a design. In Spanish, we call this cola de piano. This is a refence to the shape of a grand piano's body. It has a certain curve to it. To make this shape on the fretboard, we are just using a mirror image of the head stock to create that cut. We first make the marks and then cut using the coping saw. Then we smooth the cut with a file to make it look nice.
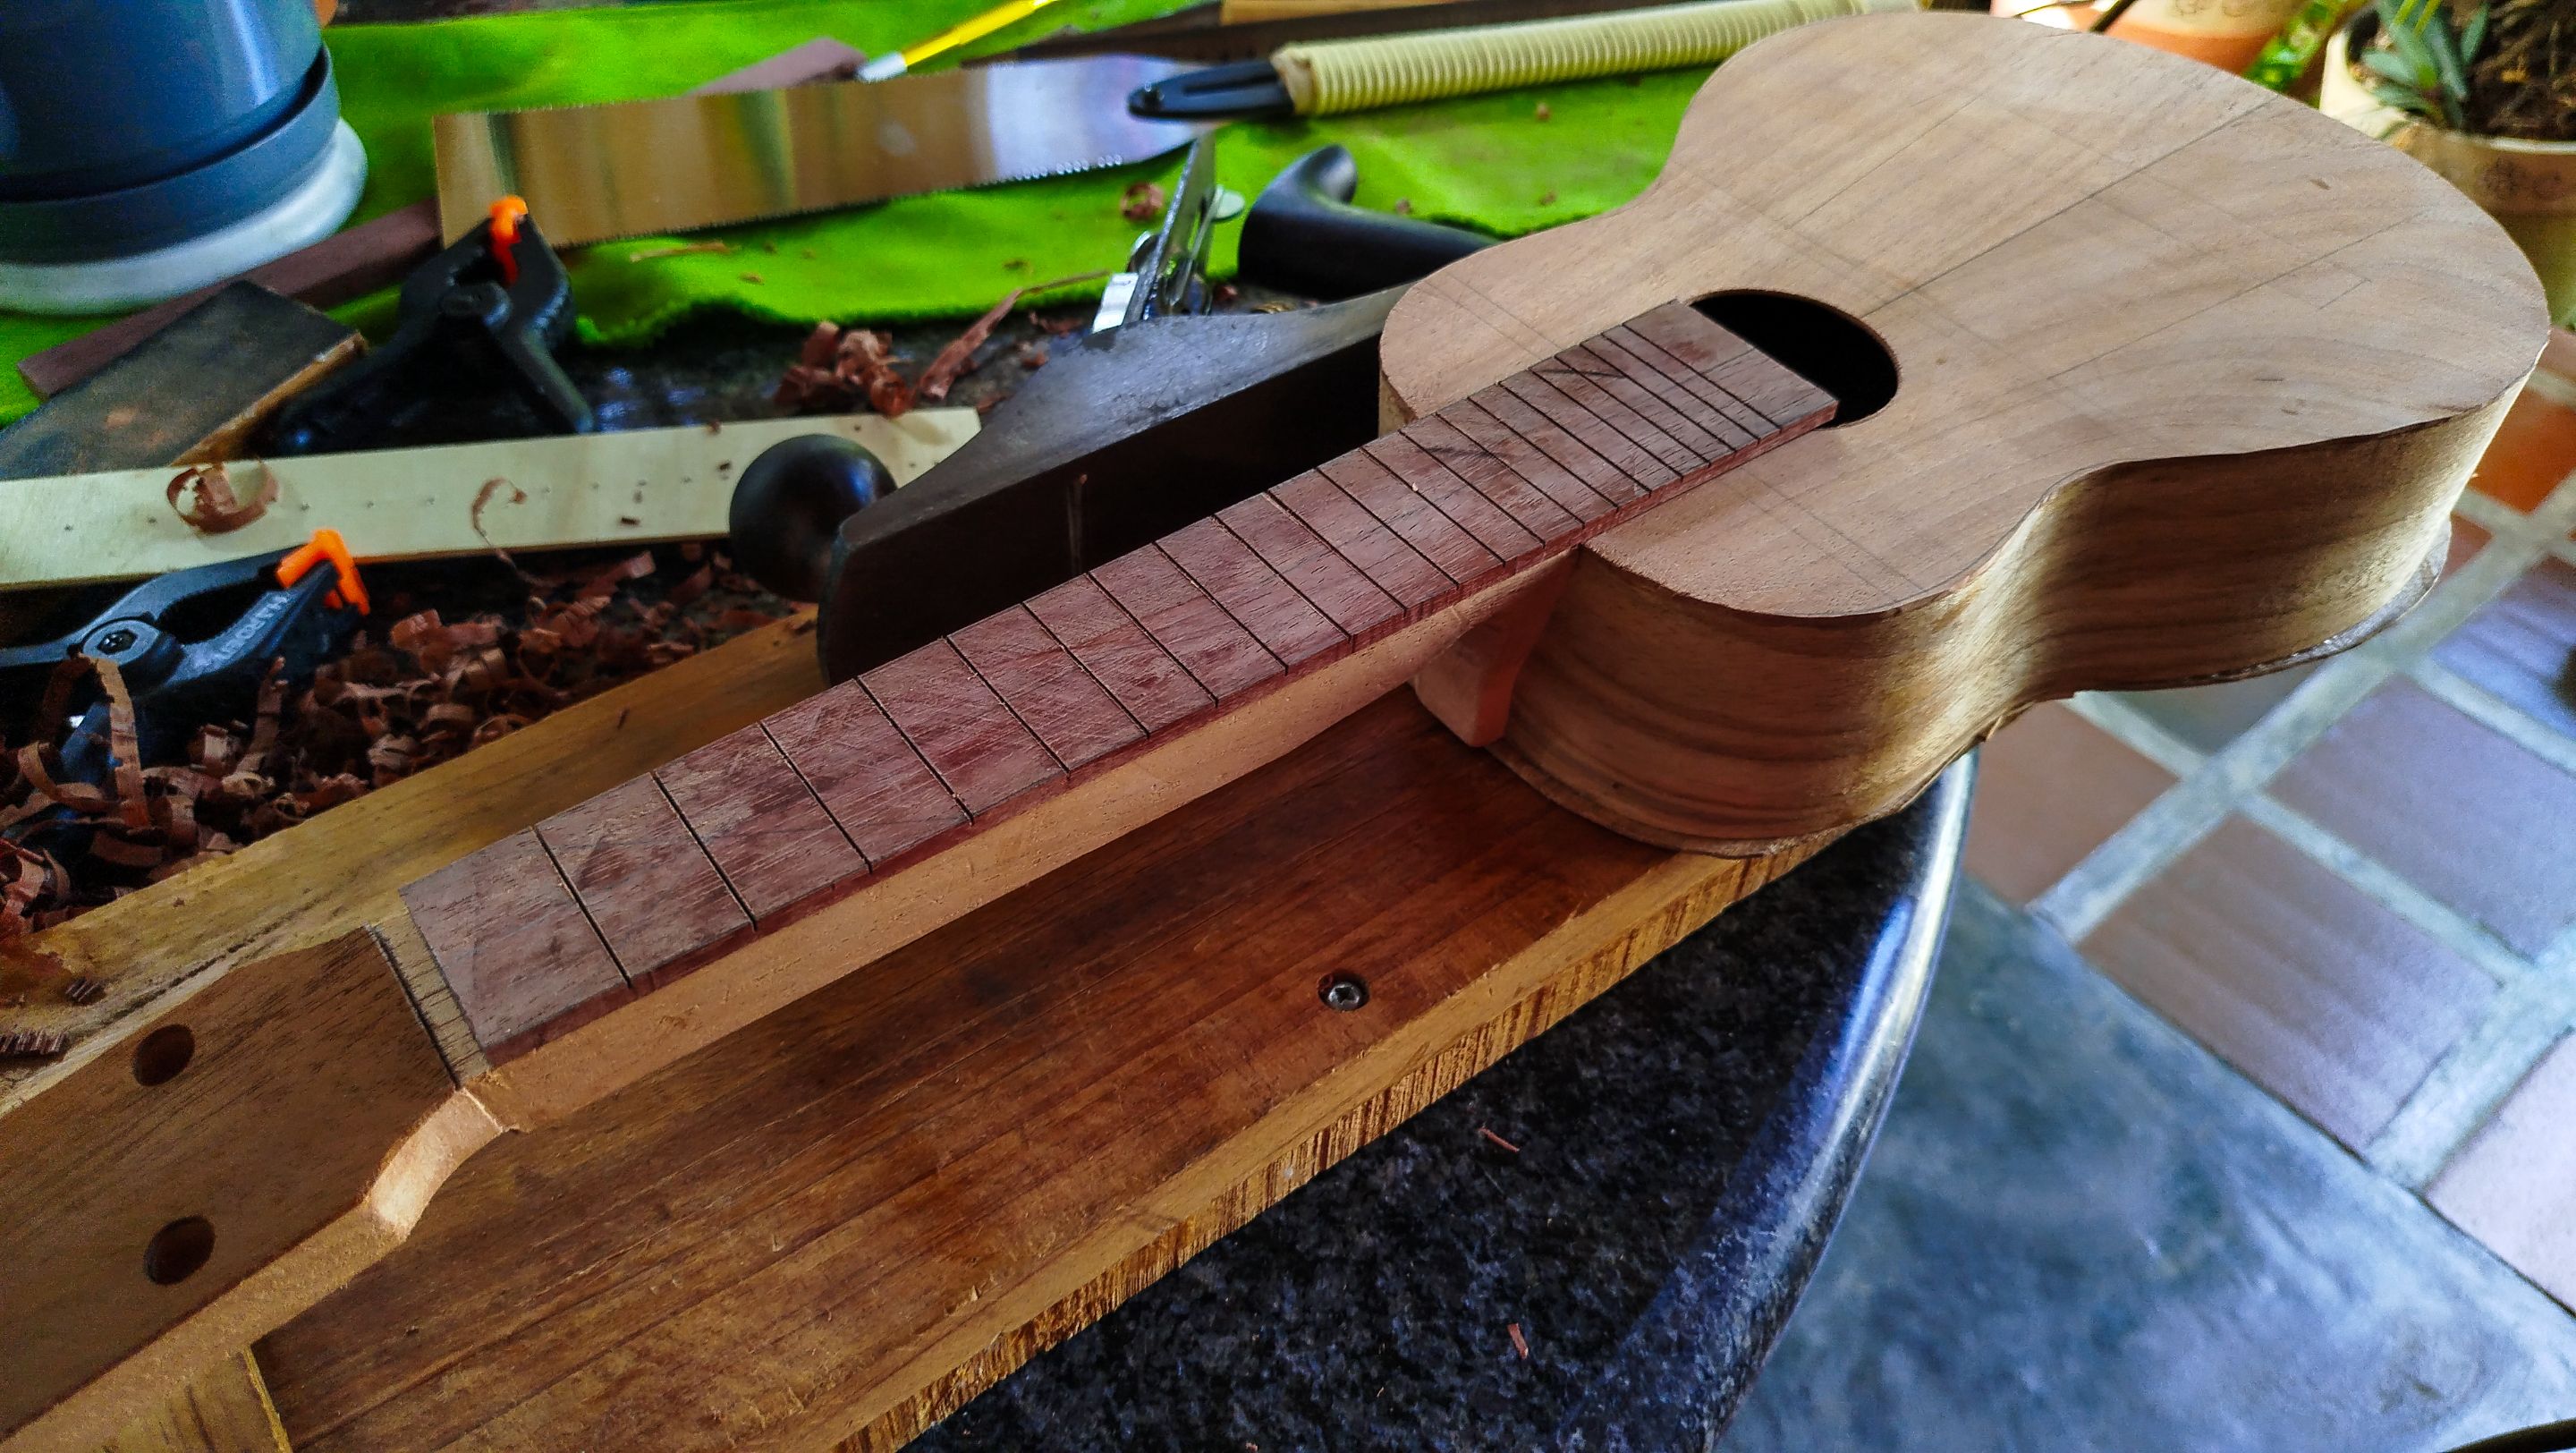
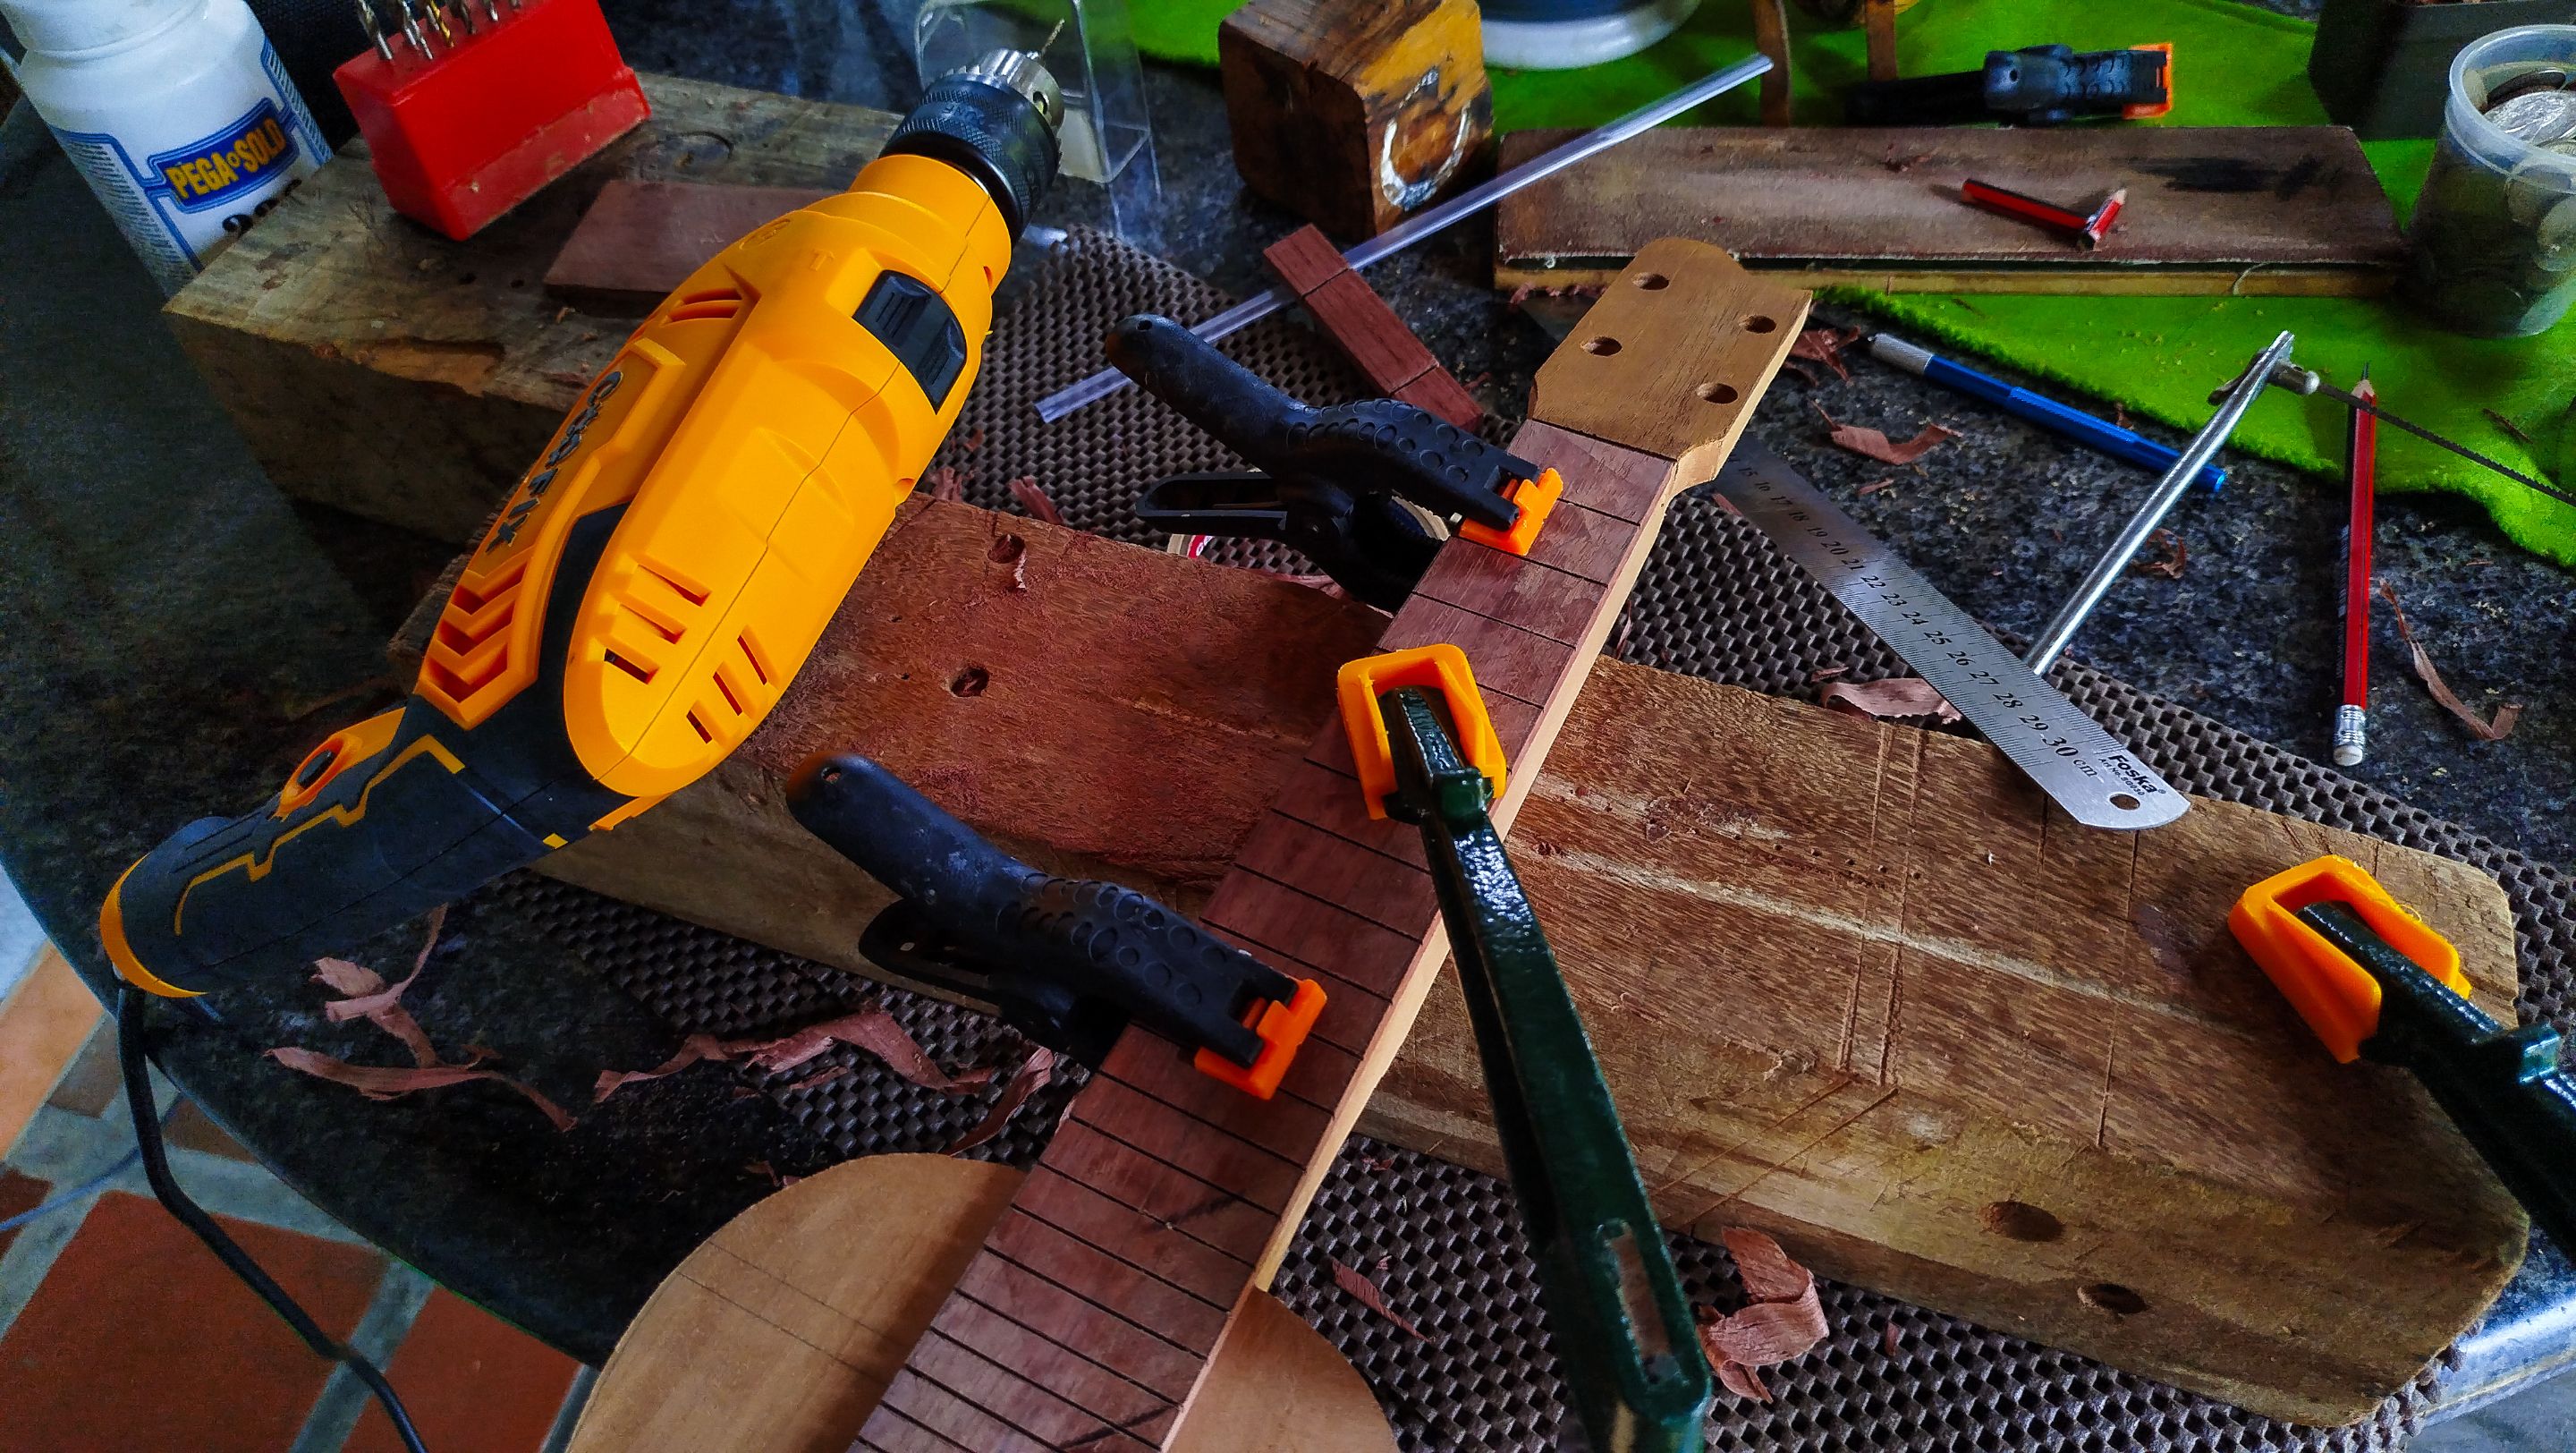
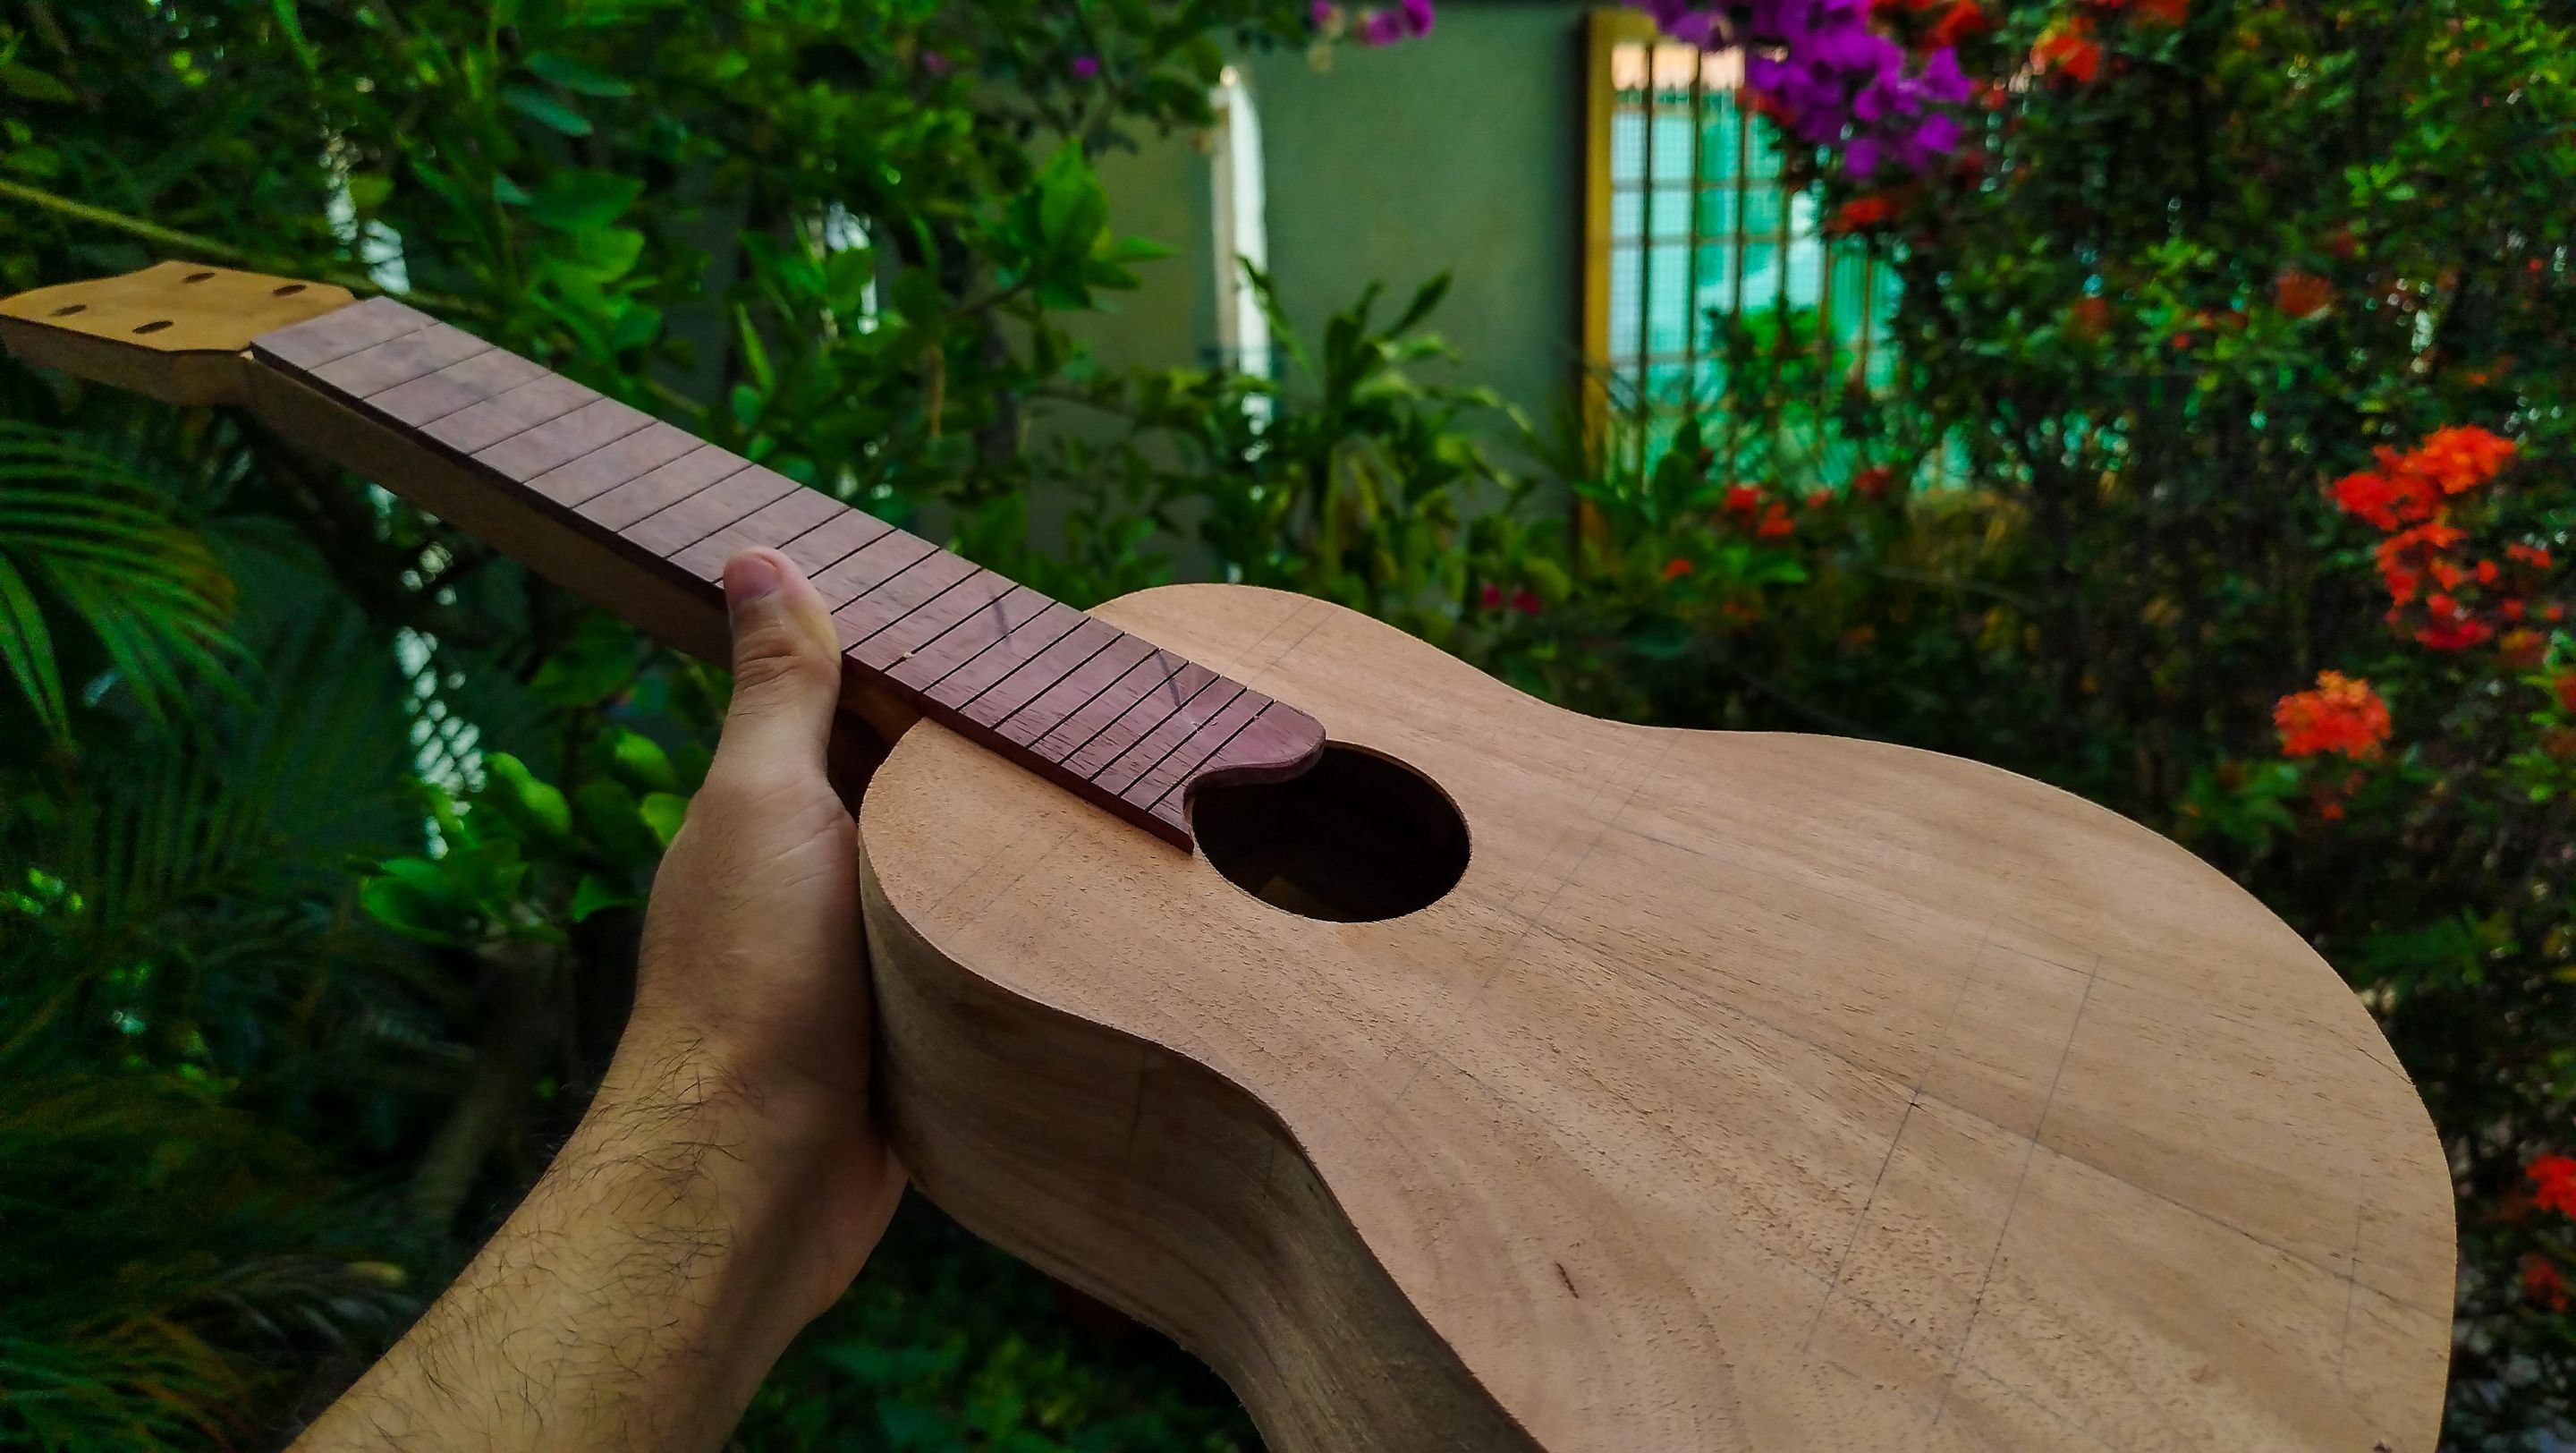
When the fretboard' shape is ready, we can clamp it to the neck and drill some holes to create anchors for the glue up. We make a last check to make sure everything is aligned and then we proceed to apply the glue and clamp all this thing. We let it rest until we can see that all the glue has dried up. Then we check the results.
In the next entry, we will get into the details regarding the bridge, nut and saddle. Thanks a lot for reading. See you next time!
https://files.peakd.com/file/peakd-hive/bertrayo/Enyo4d2KNC9dwGuWMVoWdT9r7awN4qgRzhmXSAVcpnyFGVx2s9Vx9PFMvLJYQdCFZvJ.png
| Entry | Title |
|---|---|
| 1 | The Fist Ukuele |
| 2 | Structure |
| 3 | Heel and Bars |
| 4 | Head Stock and End Block |
| 5 | Sides and Kerfing |
| 6 | Out of the Mould |
| 7 | Lid On |
https://files.peakd.com/file/peakd-hive/bertrayo/Enyo4d2KNC9dwGuWMVoWdT9r7awN4qgRzhmXSAVcpnyFGVx2s9Vx9PFMvLJYQdCFZvJ.png
-
Photos 📷: Redmi Note 13
-
Thumbnail 🖼️: Canva.
-
Editing 🎬:Adobe Photoshop Lightroom.
https://files.peakd.com/file/peakd-hive/bertrayo/Enyo4d2KNC9dwGuWMVoWdT9r7awN4qgRzhmXSAVcpnyFGVx2s9Vx9PFMvLJYQdCFZvJ.png

Follow me on Instagram for enquires and commission.
If you'd like to help the workshop grow, you can make a donation here.
You can find me at discord as bertrayo#1763