Buenas noches y bienvenidos sean todos a mi Blog.
Espero y deseo que esta semana sea muy productiva para todos.
Así que te invito a que me acompañes.
Los materiales que utilizarás son:
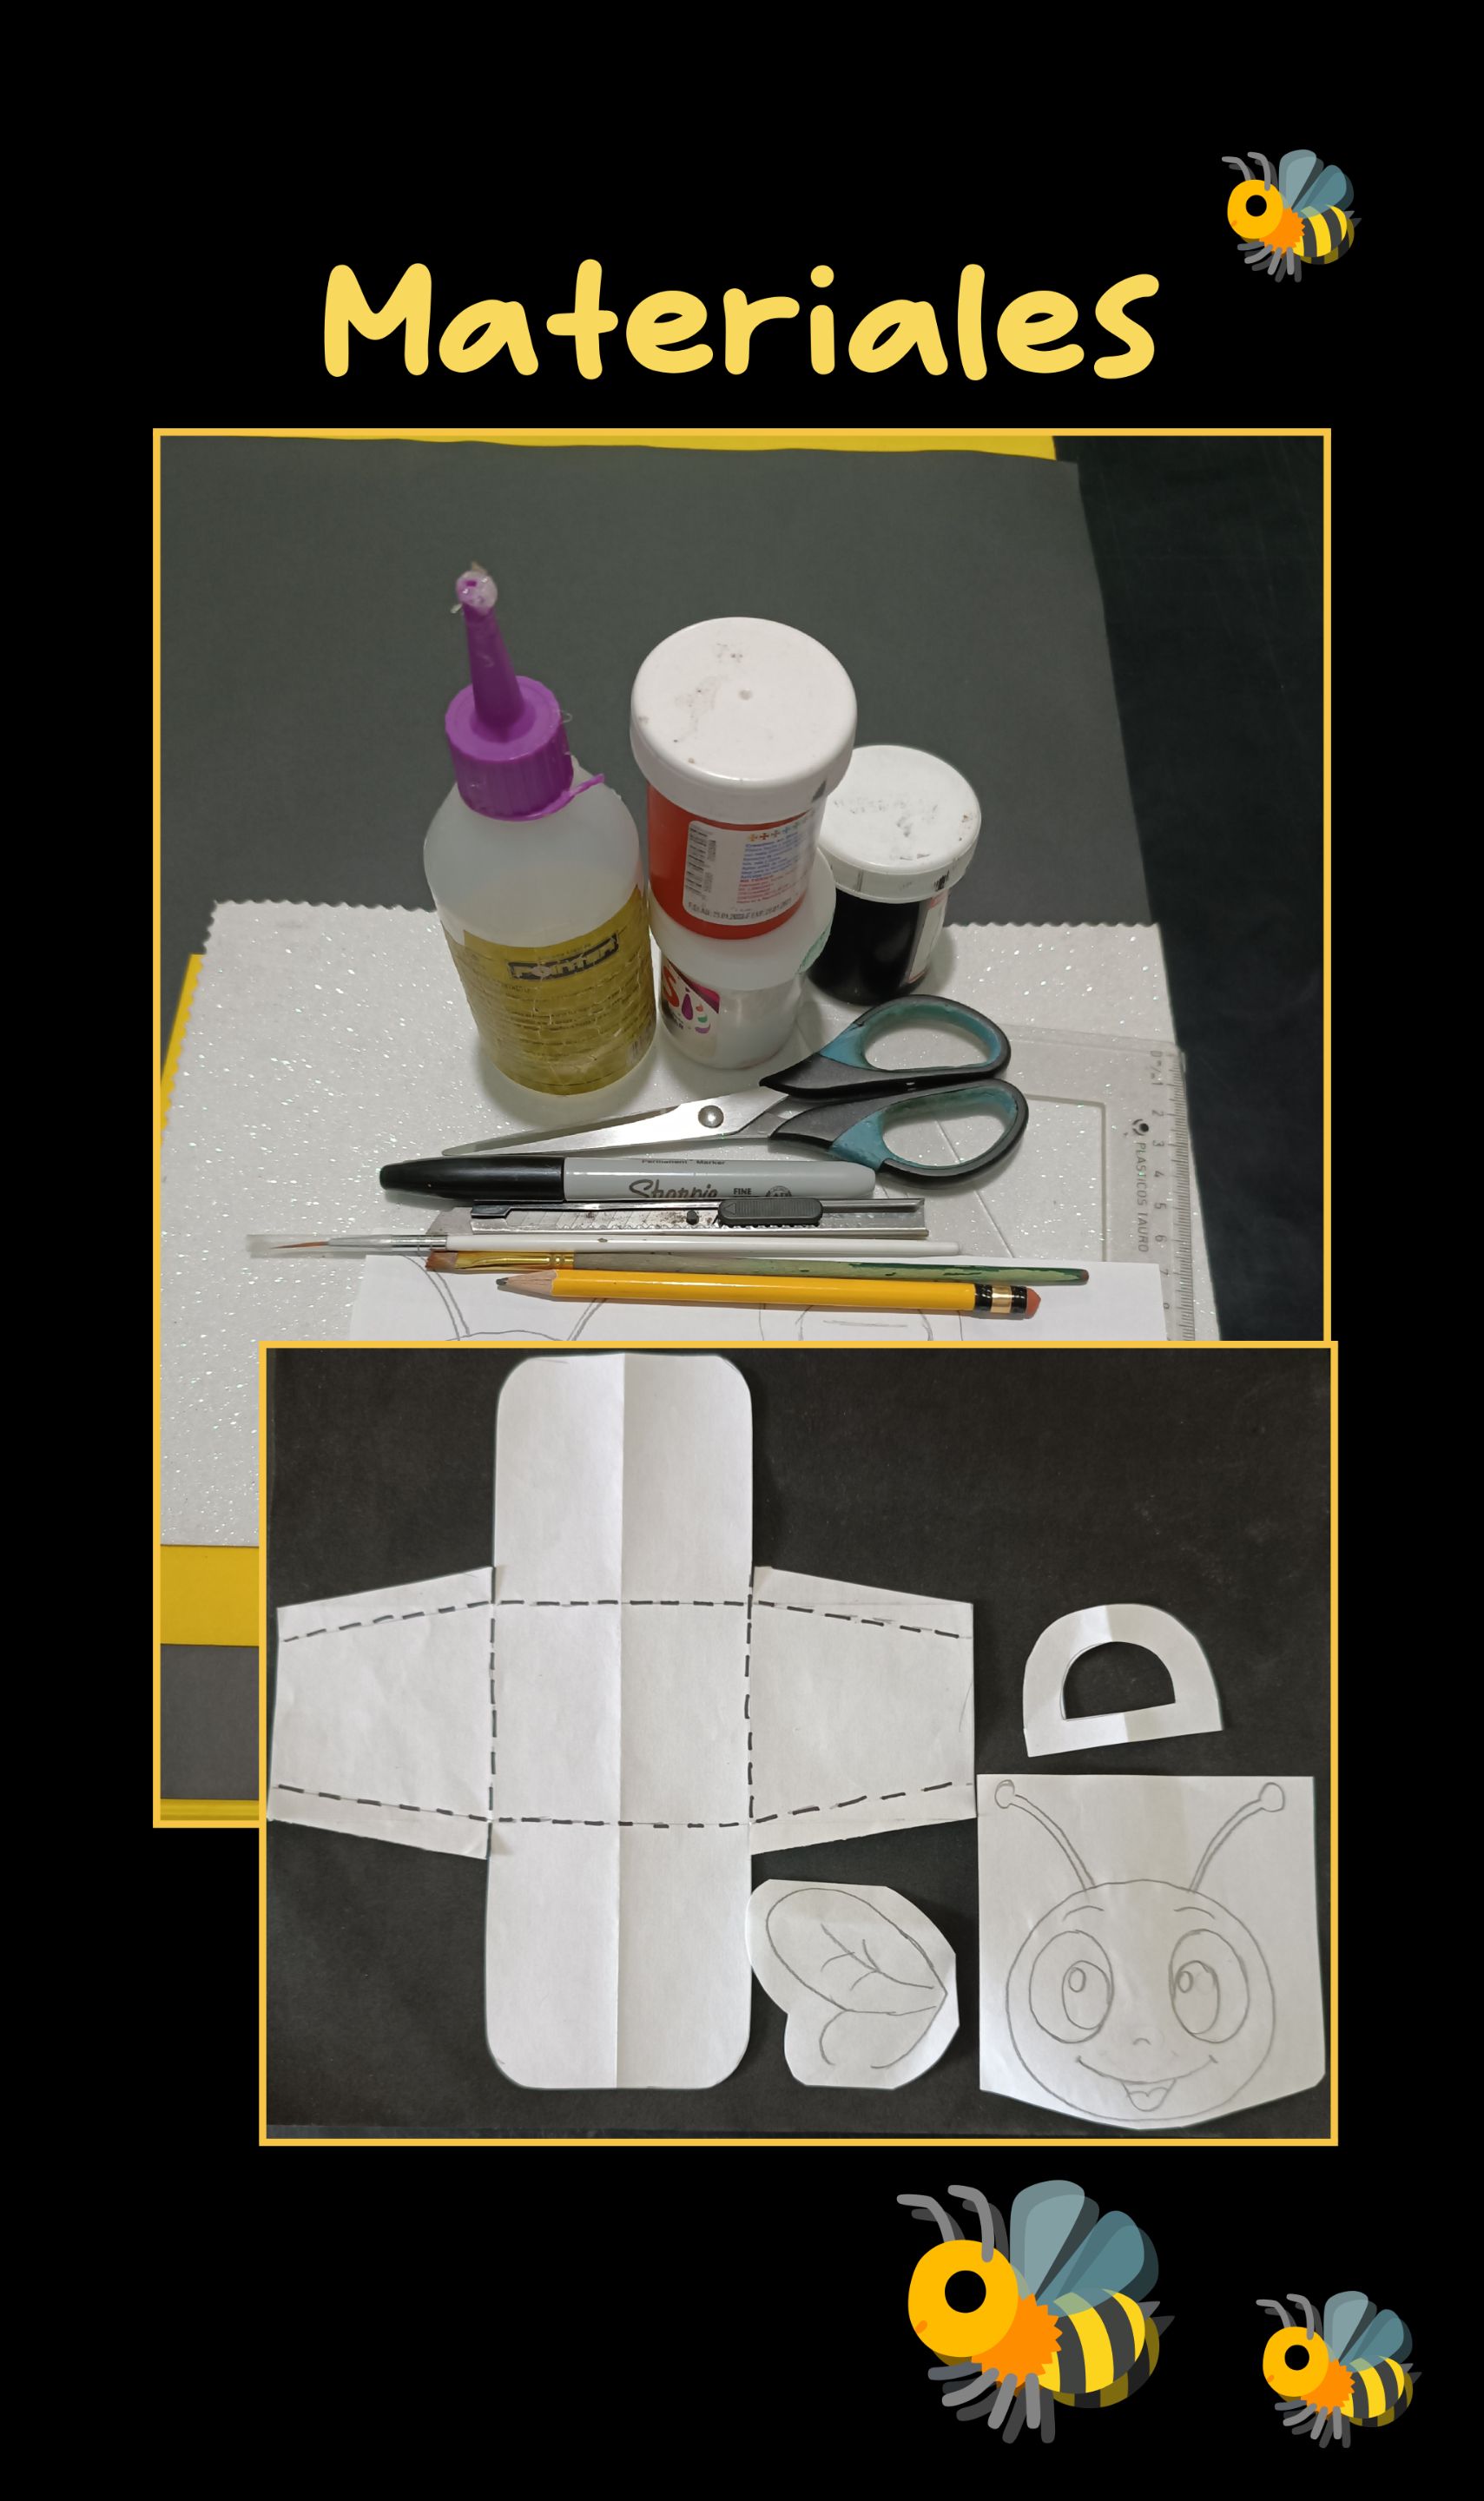
| Cartulina amarilla y azul | Foami mate y escarchado |
|---|---|
| Pinturas y pinceles | Tijera y exacta |
| Regla | Lápiz y marcador |
| Silicón | Molde |
| Tiza pastel o rubor |
¡Comencemos!
PASO 1: 🐝
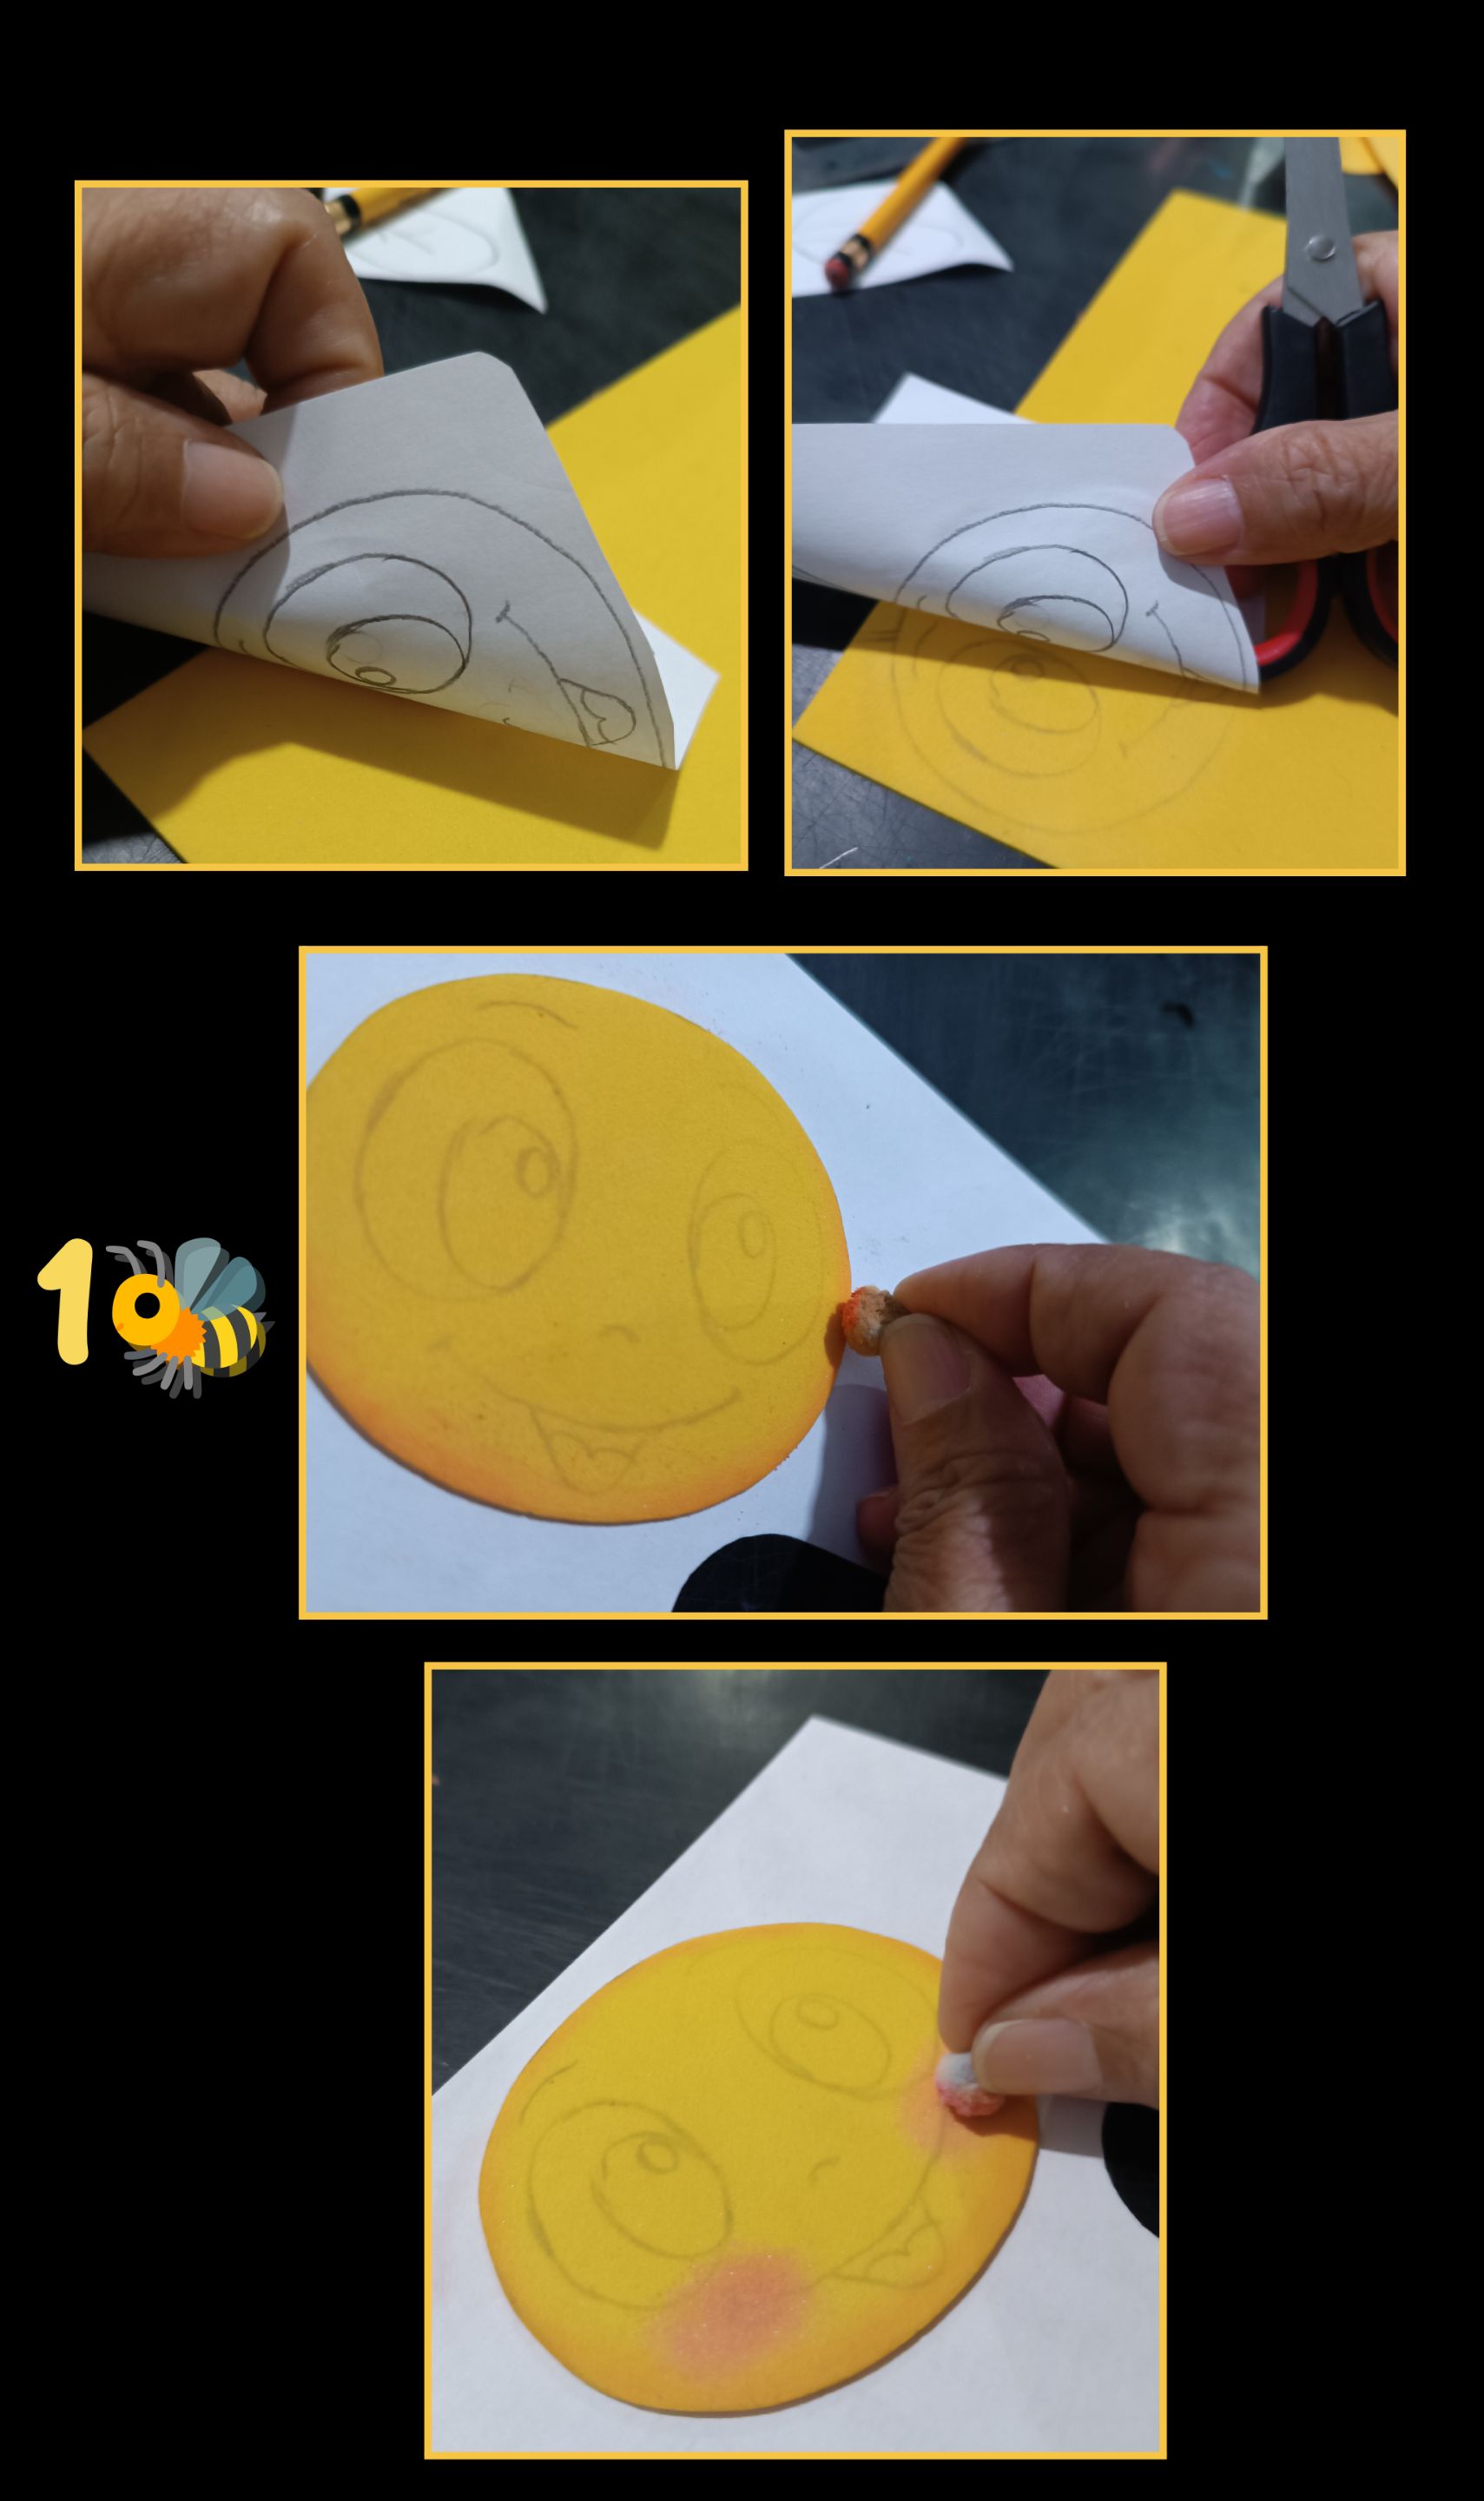 - Remarca el dibujo con lápiz de mina, luego coloca sobre el foami y frota encima del papel con la ayuda de una tijera hasta transferir todo el dibujo, así harás con todas las piezas y luego recorta por todo el borde.
- Pasa un pedacito de algodón por la tiza y pinta toda la orilla de la carita y los cacheticos.
- Remarca el dibujo con lápiz de mina, luego coloca sobre el foami y frota encima del papel con la ayuda de una tijera hasta transferir todo el dibujo, así harás con todas las piezas y luego recorta por todo el borde.
- Pasa un pedacito de algodón por la tiza y pinta toda la orilla de la carita y los cacheticos.
PASO 2: 🐝

- Pinta con un marcador el centro de los ojos y luego aplica una capa de pintura blanca para rellenar los ojitos, deja secar y aplica la segunda capa, luego repasa nuevamente el centro de los ojos, delinea con un marcador punta fina o con pincel y pinta el resto de la carita, pestañas, cejas y boca y pon unos puntos de luz en cada ojo y deja secar.
PASO 3: 🐝
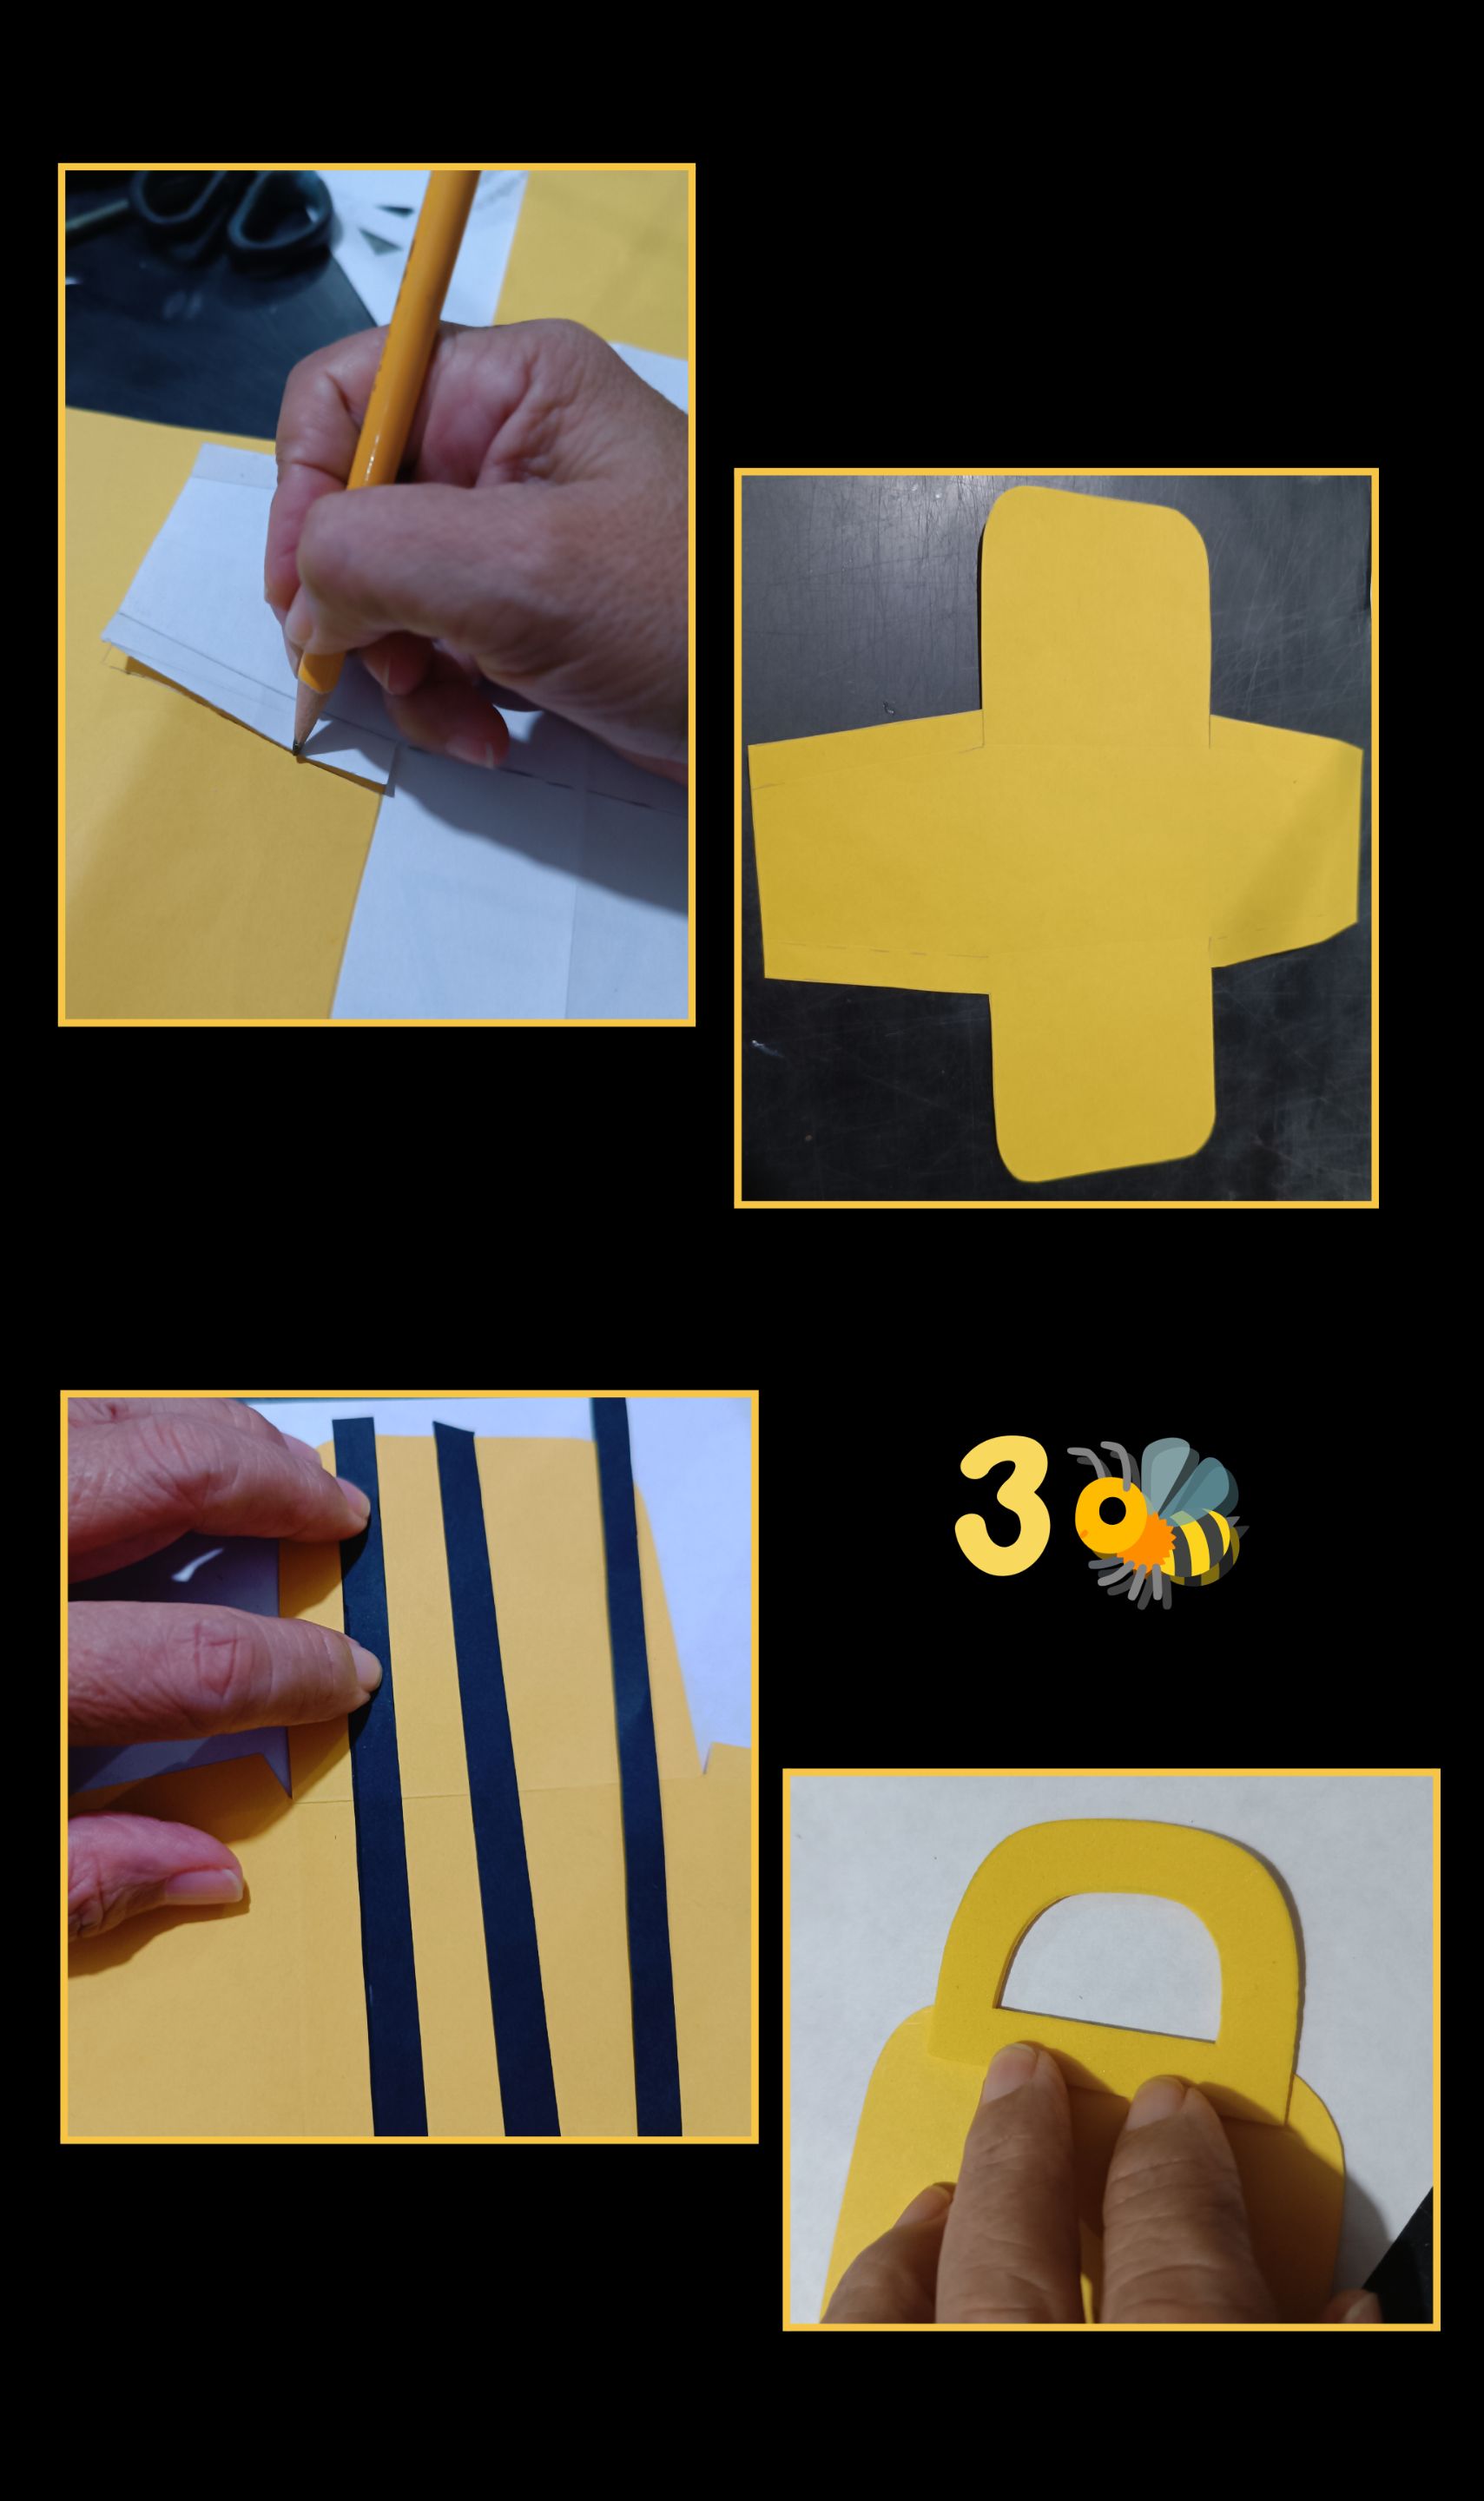
- Ahora recorta el molde y transfiere a la cartulina y recorta por el contorno, luego pasa un bolígrafo sin tinta o una aguja punta gruesa por las líneas divisorias.
- Luego recorta tres (3) tiras de cartulina negra y pega en la parte más ancha de la bolsa, luego pega las asas en la parte interior como te muestro en la foto.
PASO 4: 🐝
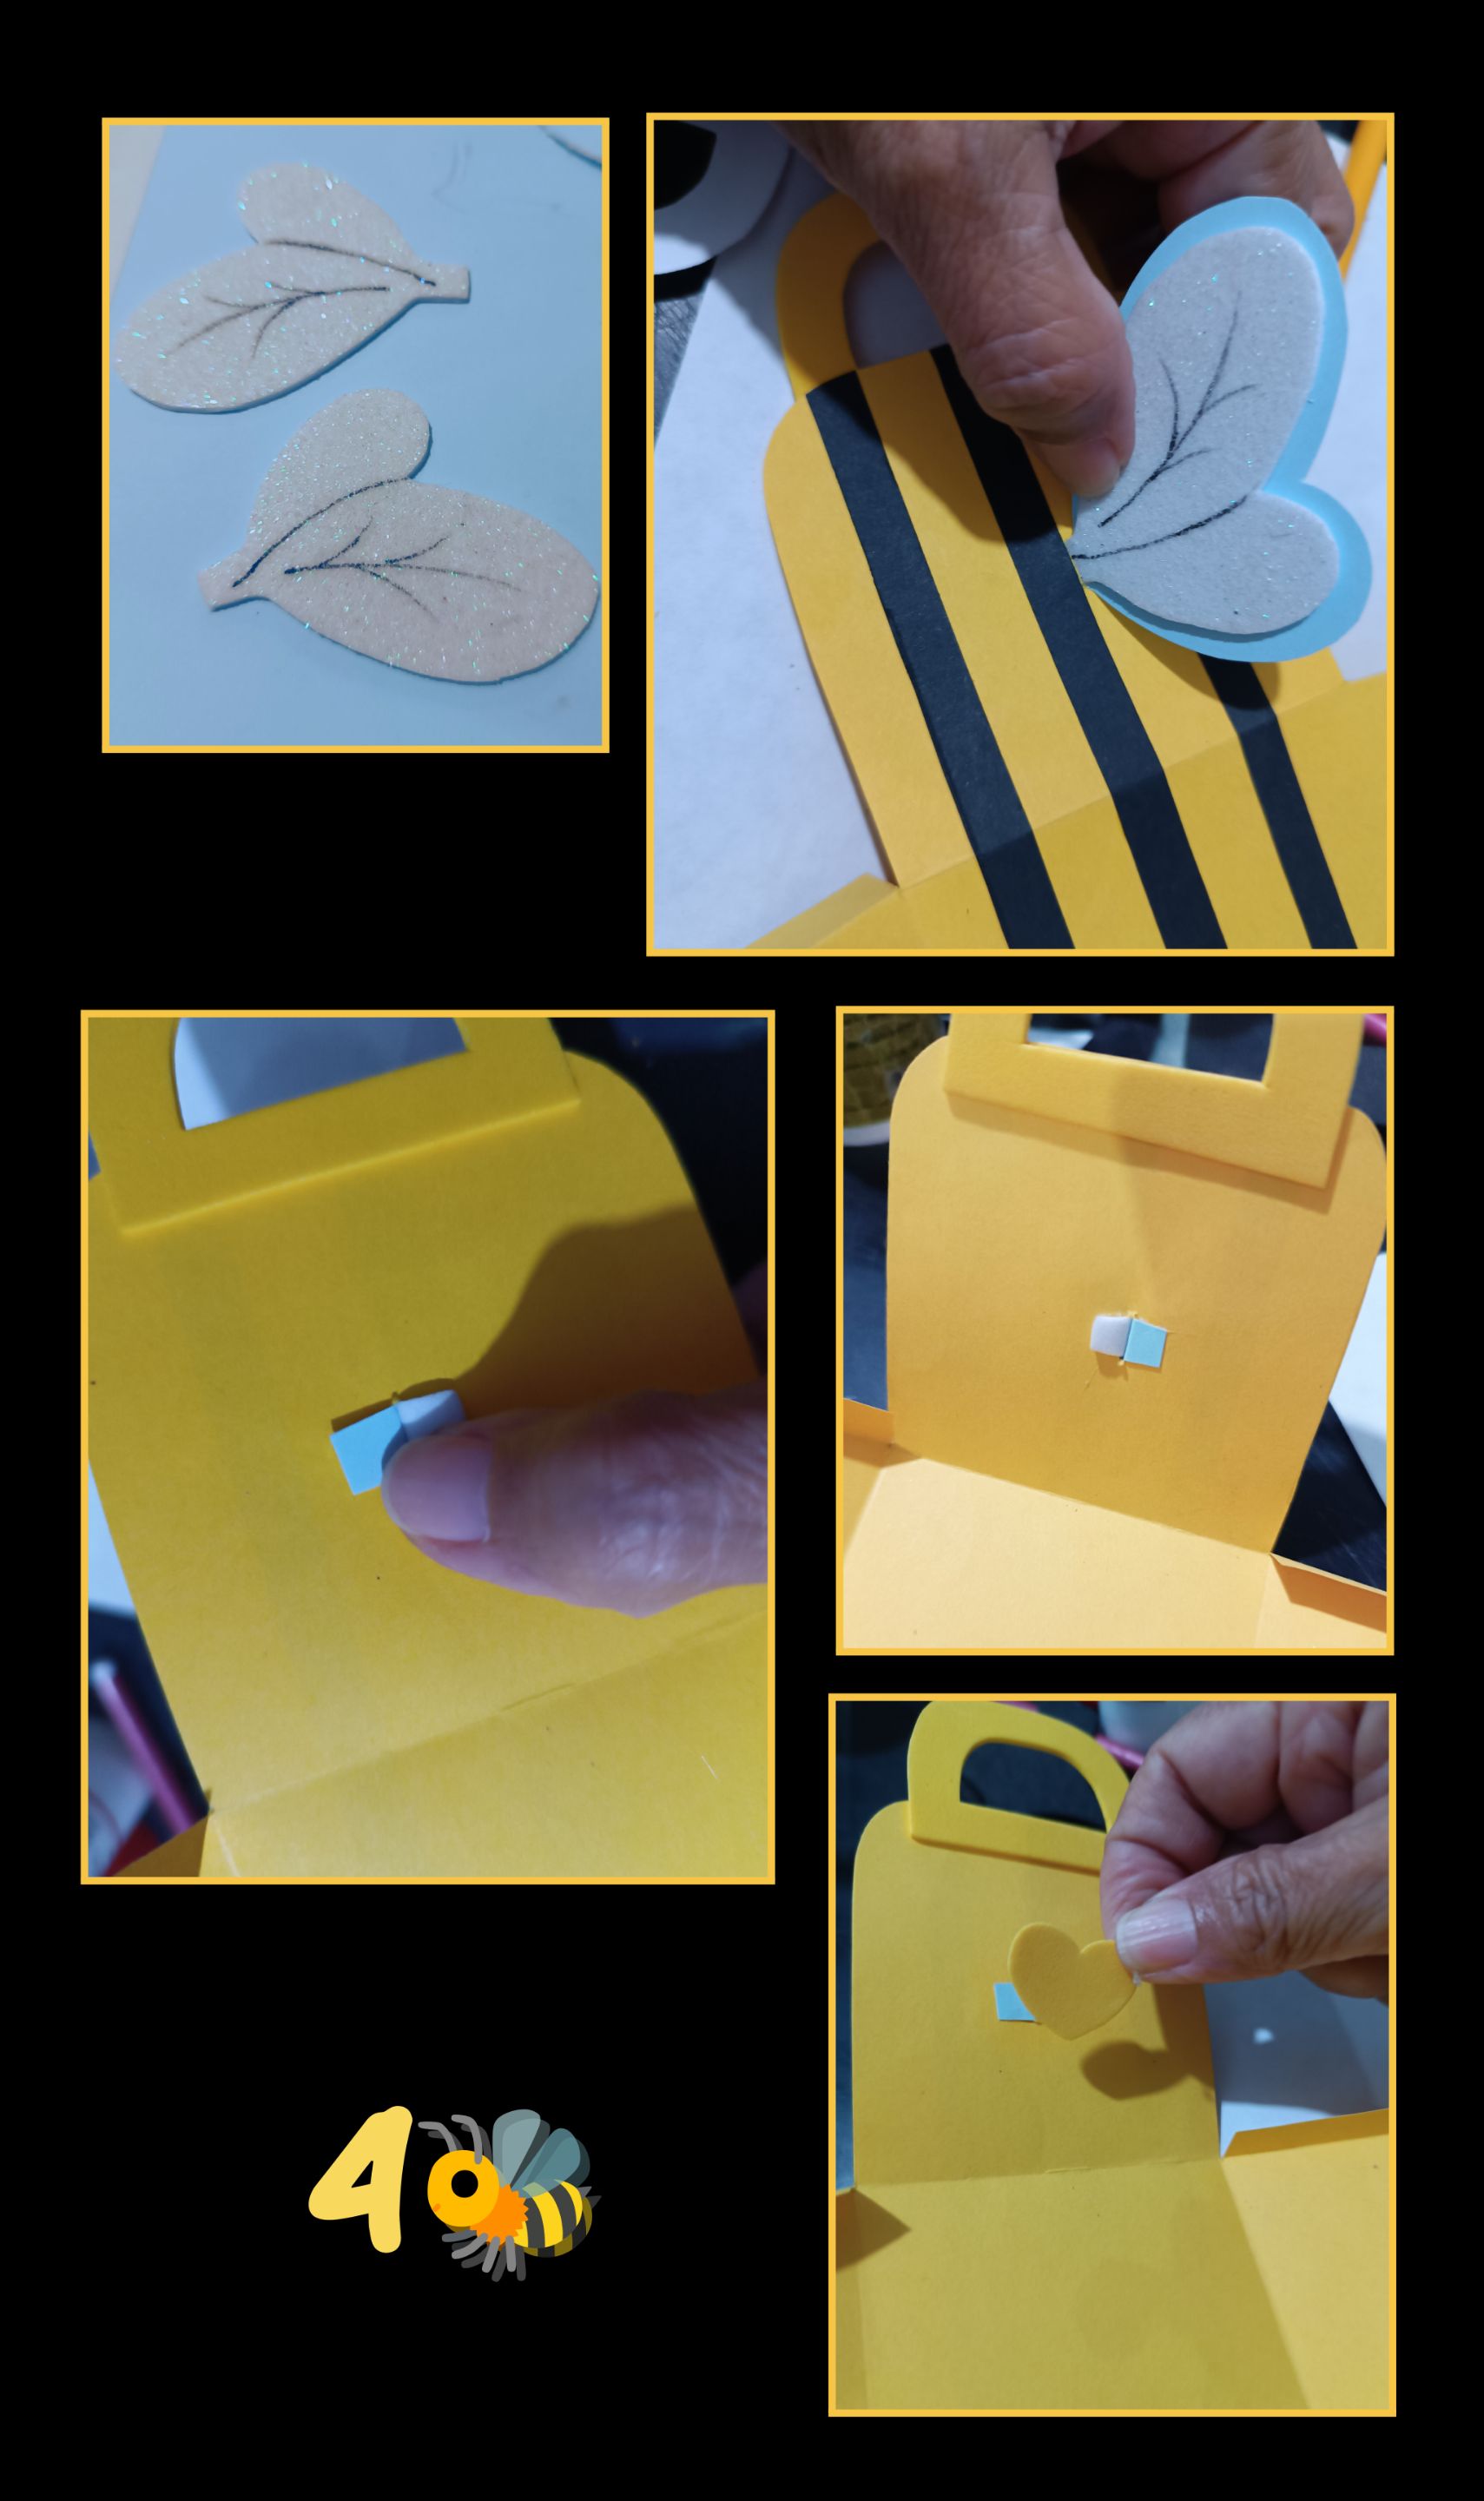
- Aplica silicón a las alitas de foami y pega sobre la cartulina azul y recorta dejando un borde.
- Haz una pequeña abertura donde vas a colocar las alas, después inserta, dobla y pega en la parte interna.
- Luego recorta 2 corazoncitos y pega para rematar y tapar el defecto.
PASO 5: 🐝
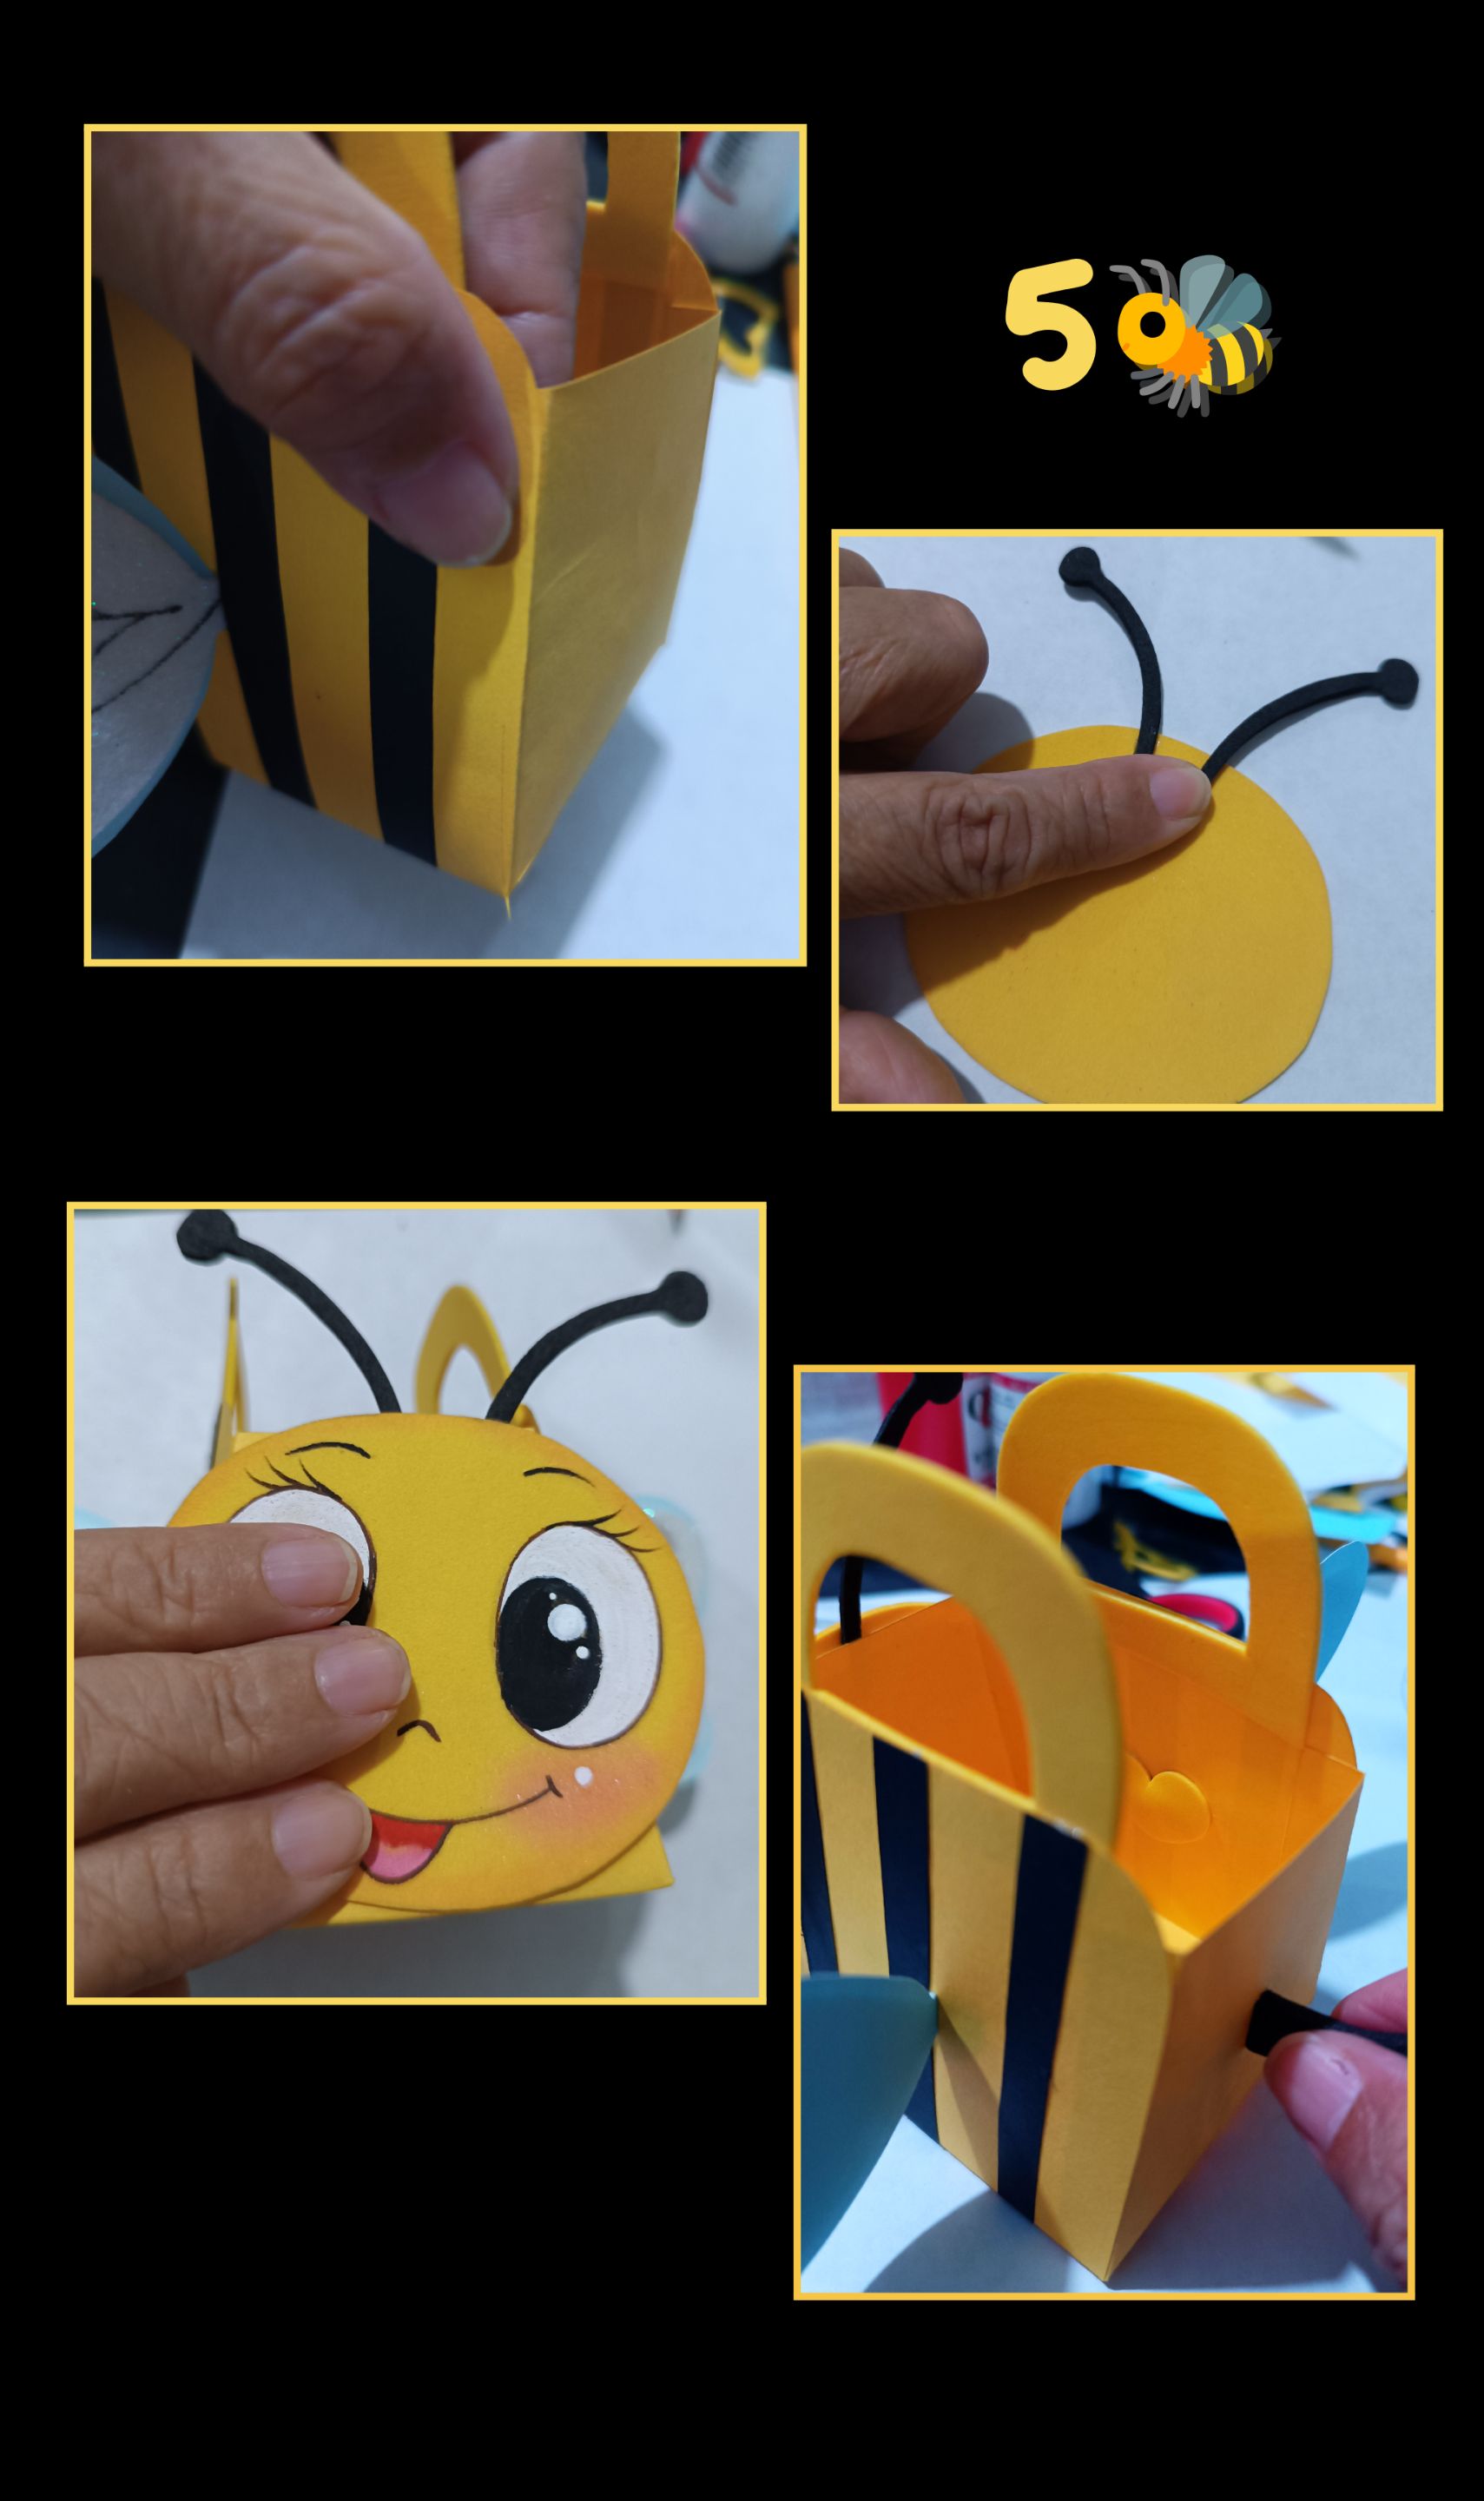
- Ahora aplica silicón en las pestañas de la bolsita y pega haciendo presión hasta que pegue bien.
- Luego pega las antenas y la carita al frente de la bolsita, por último pega el aguijón.
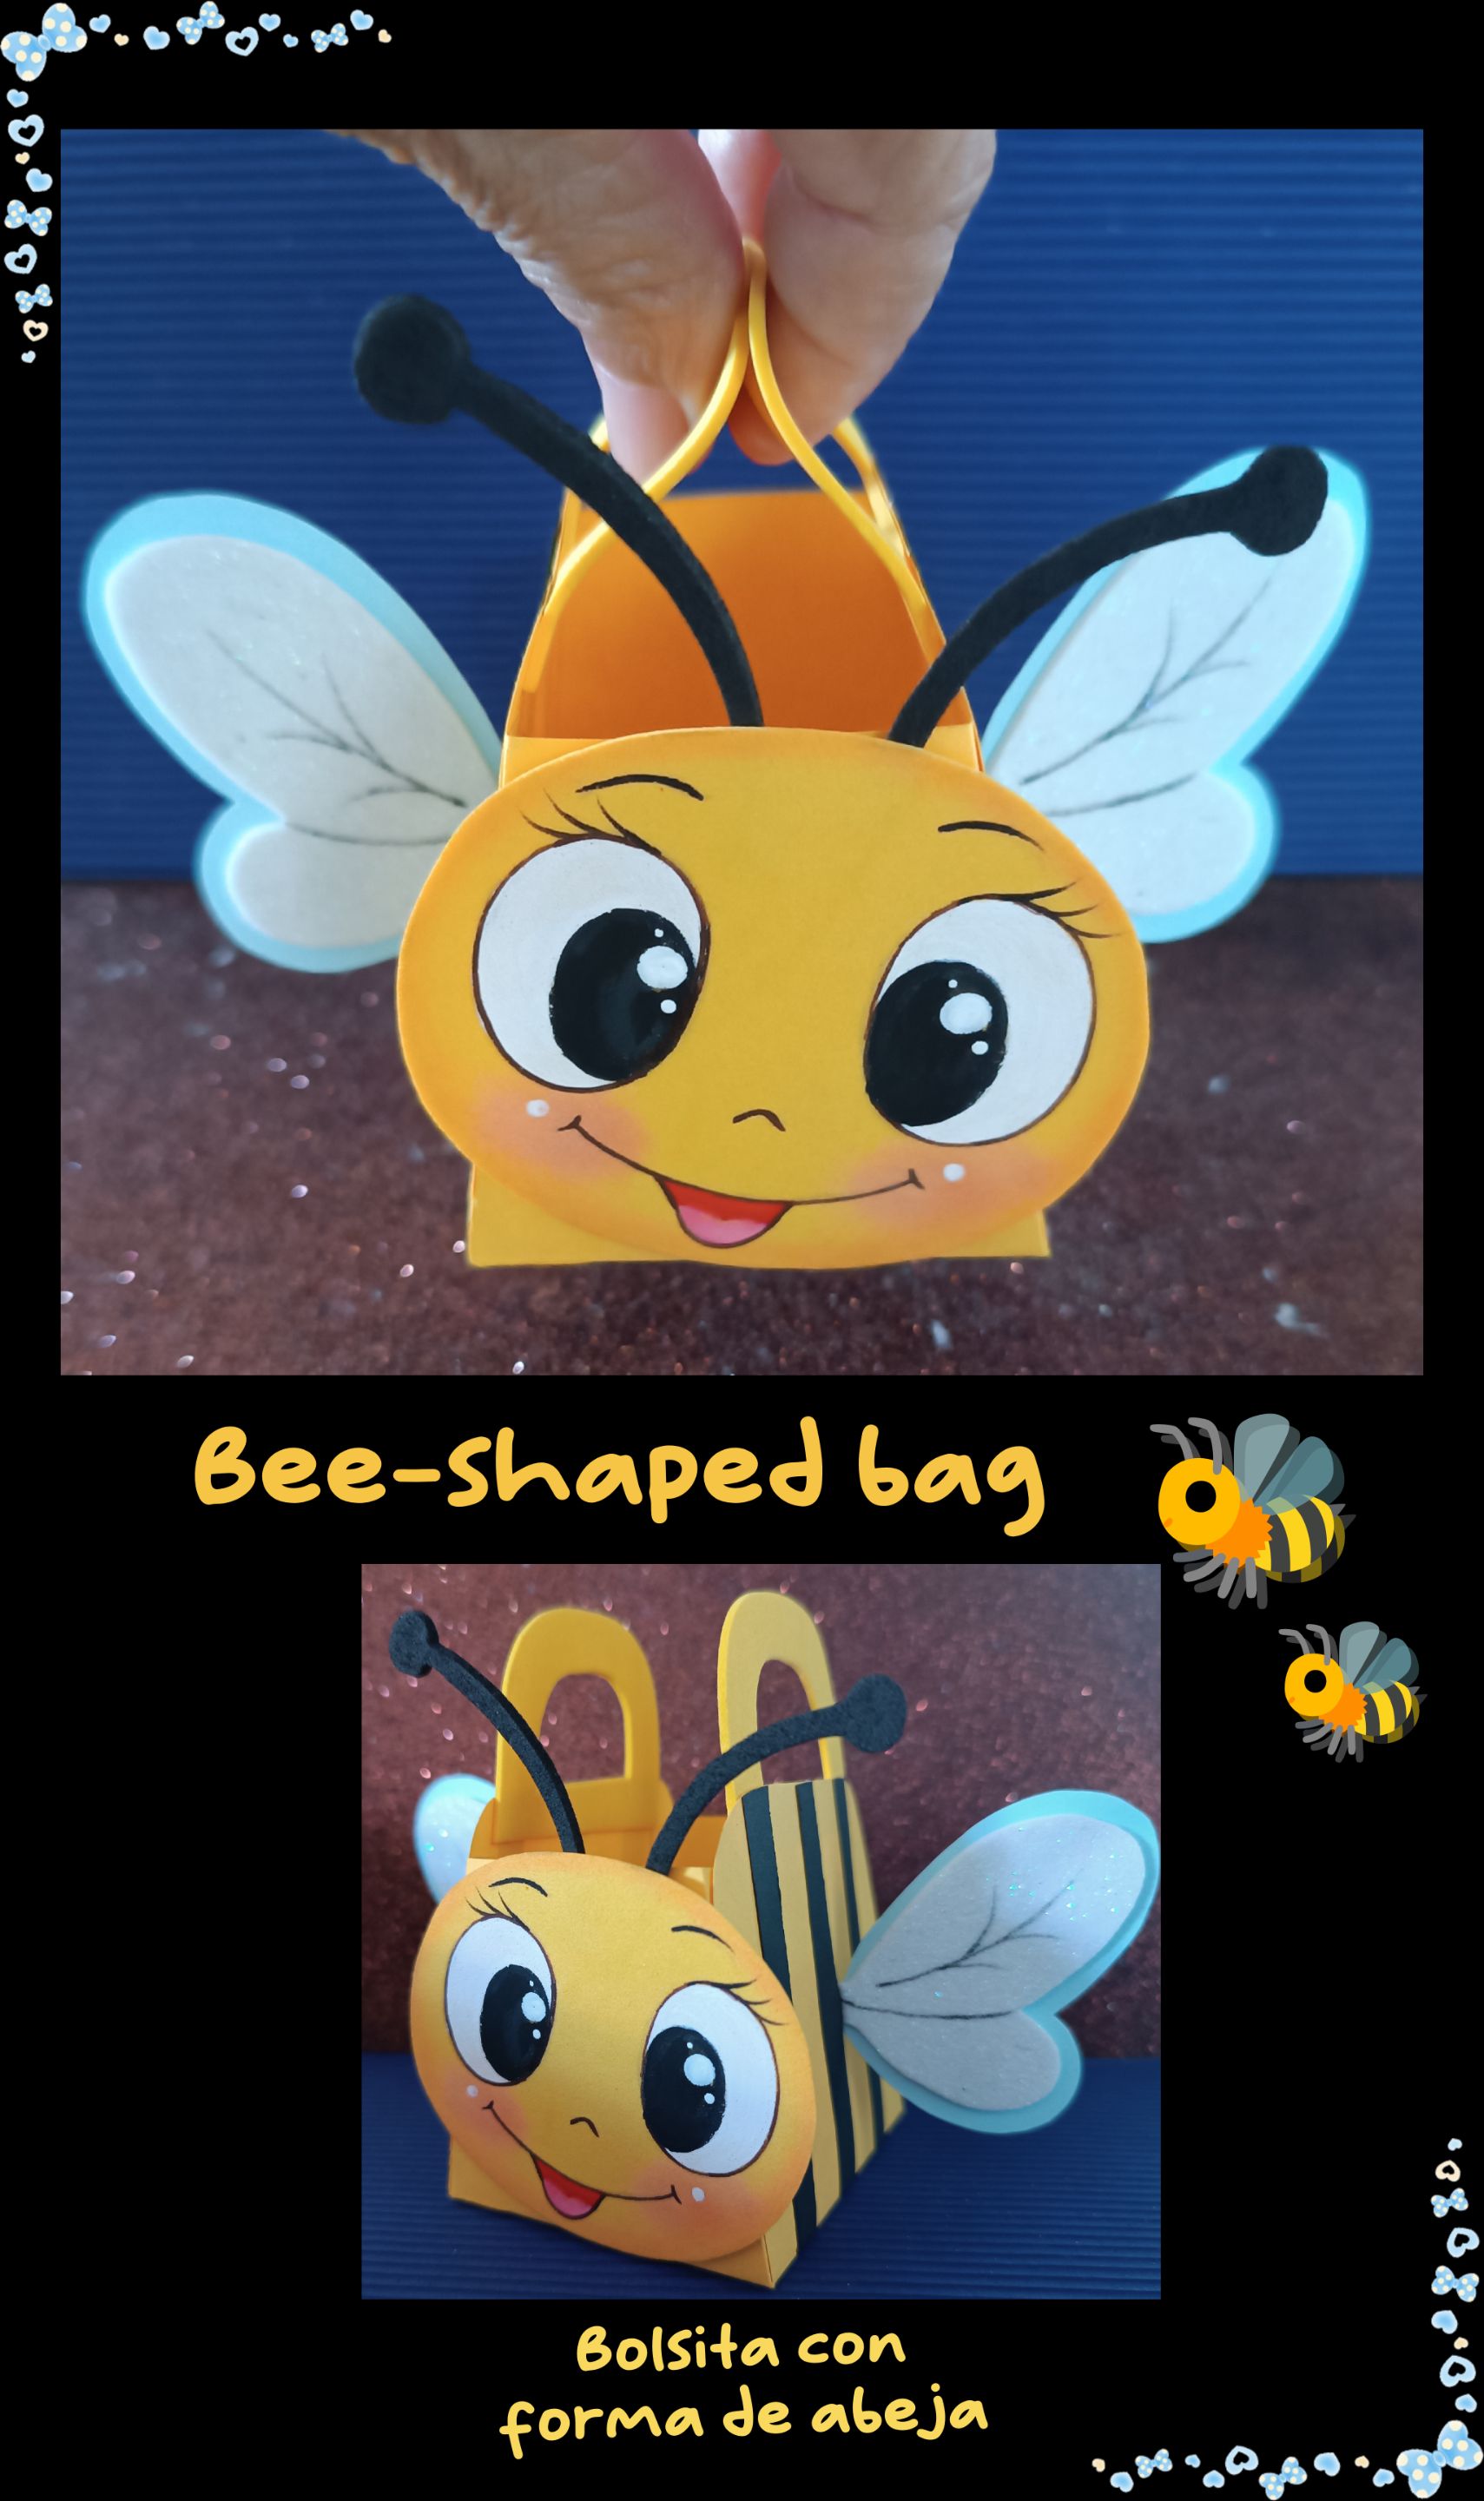
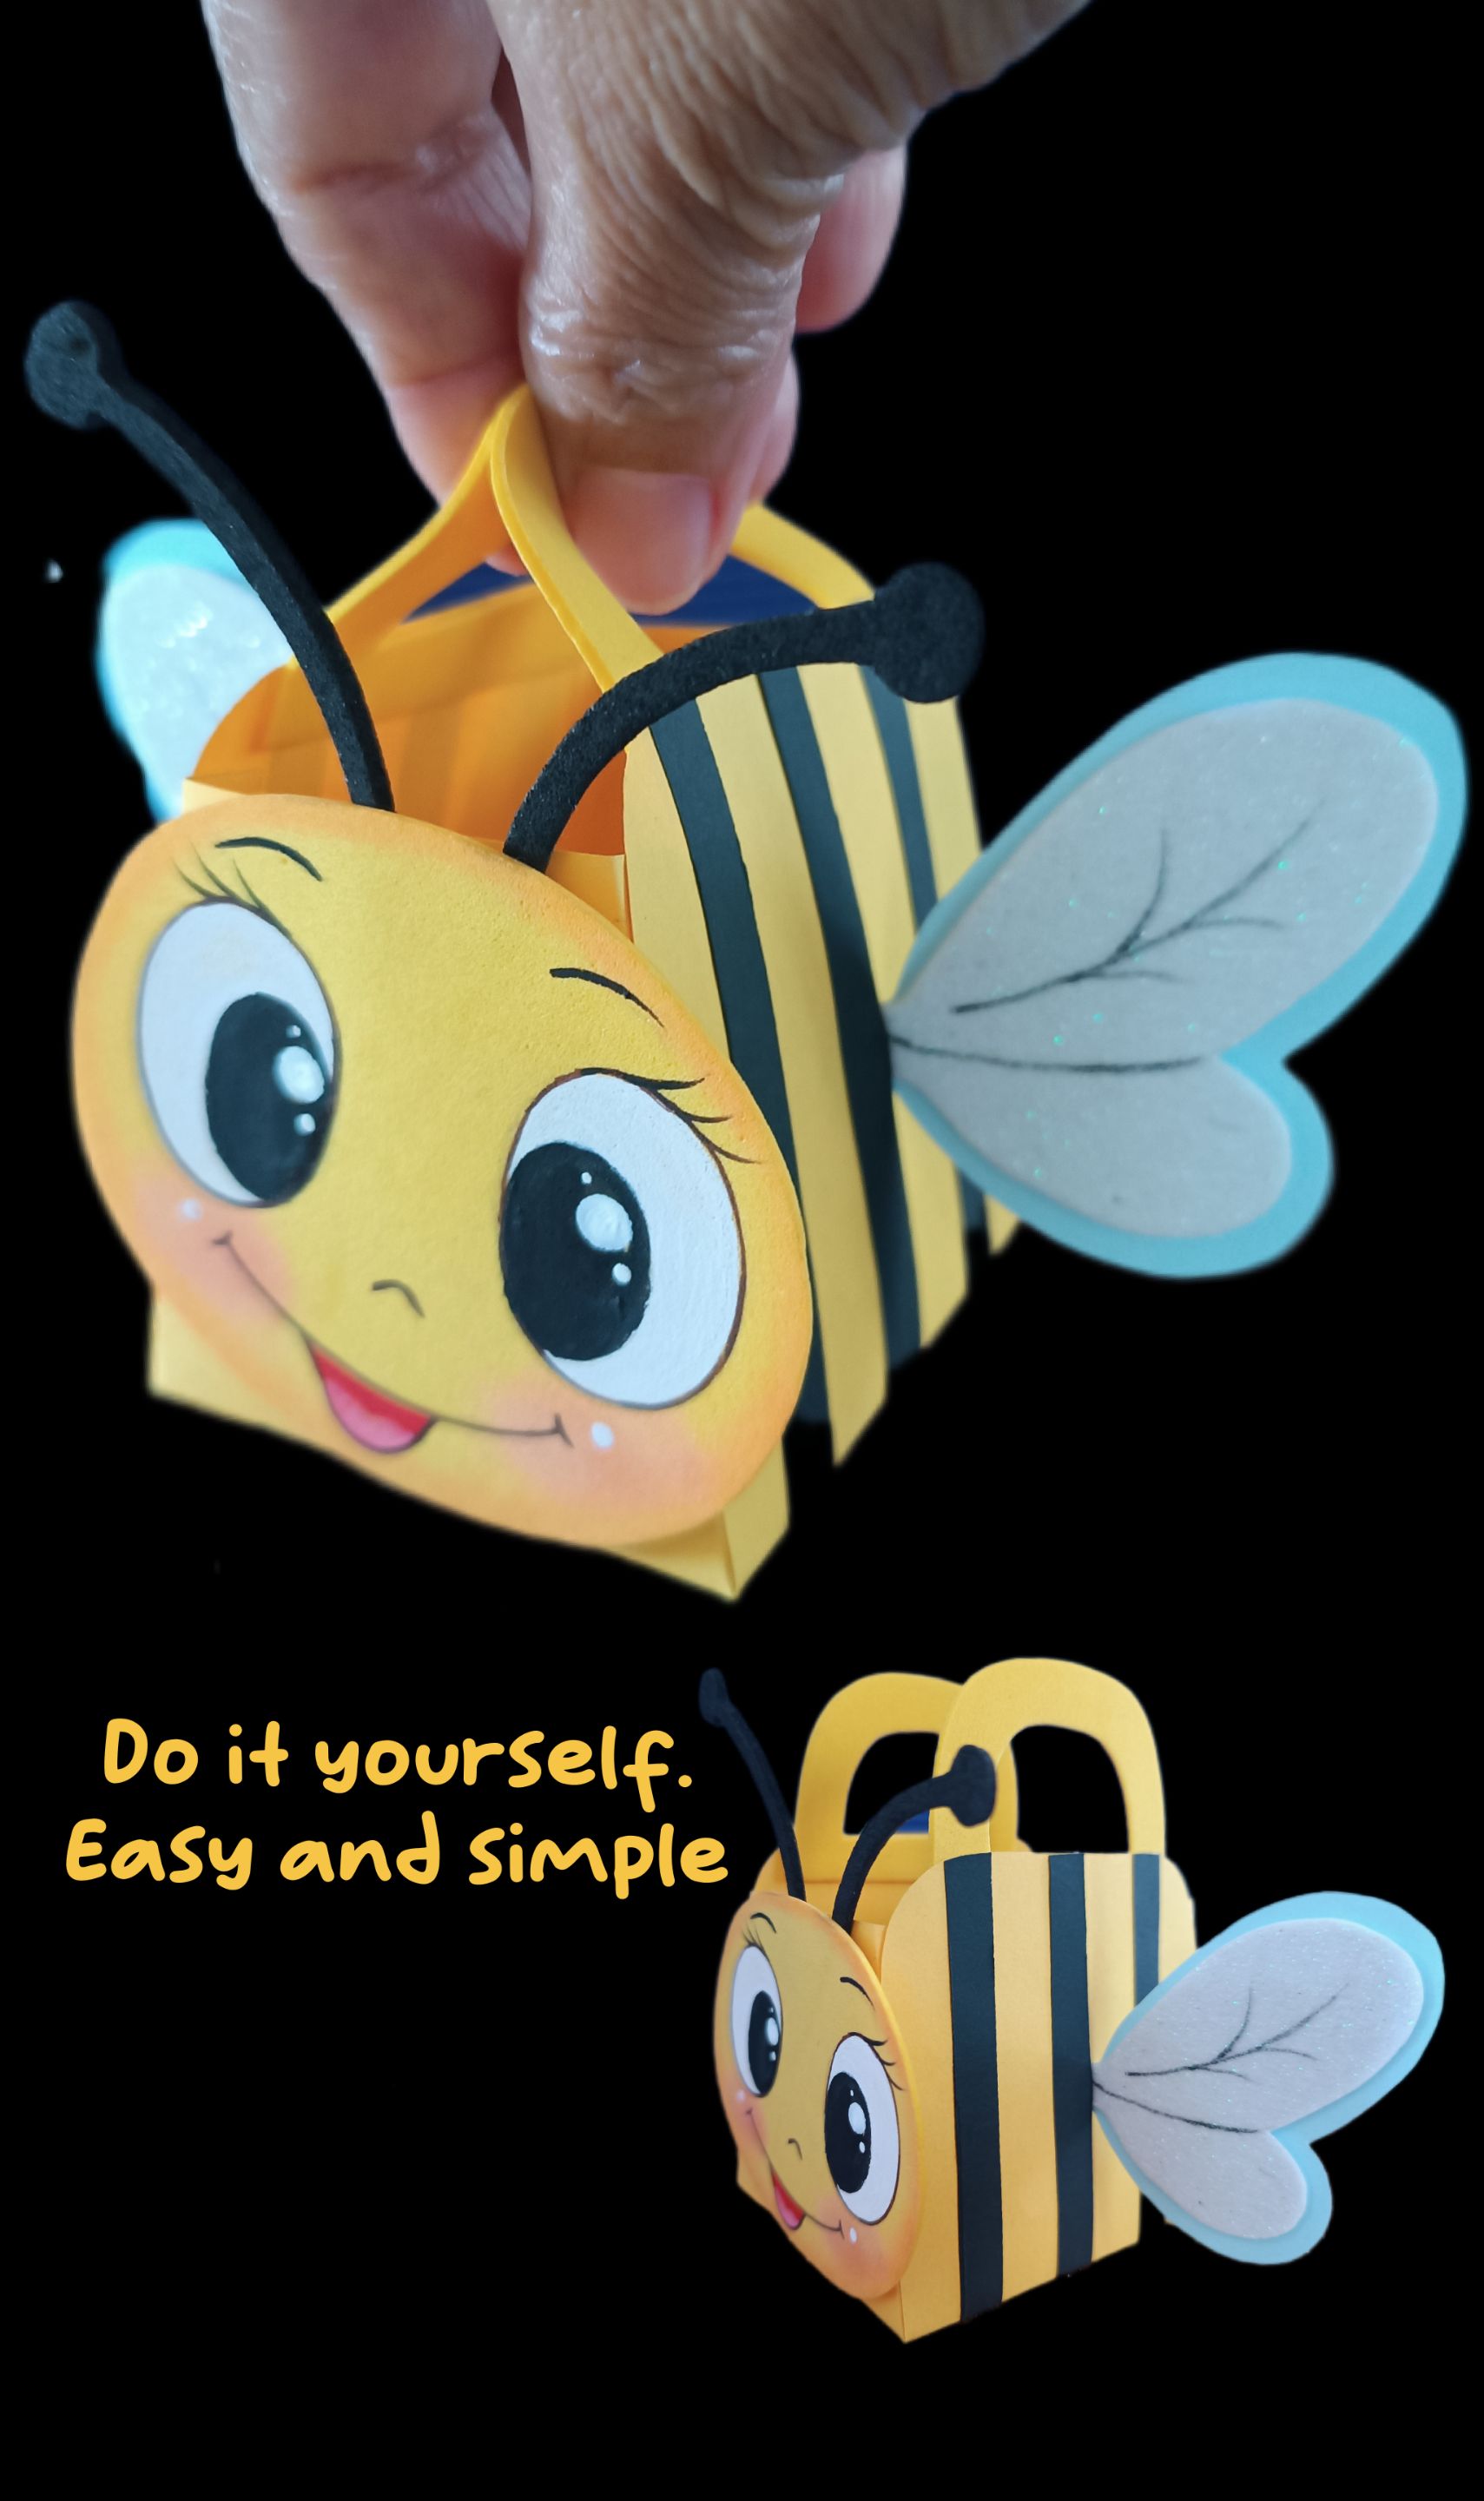
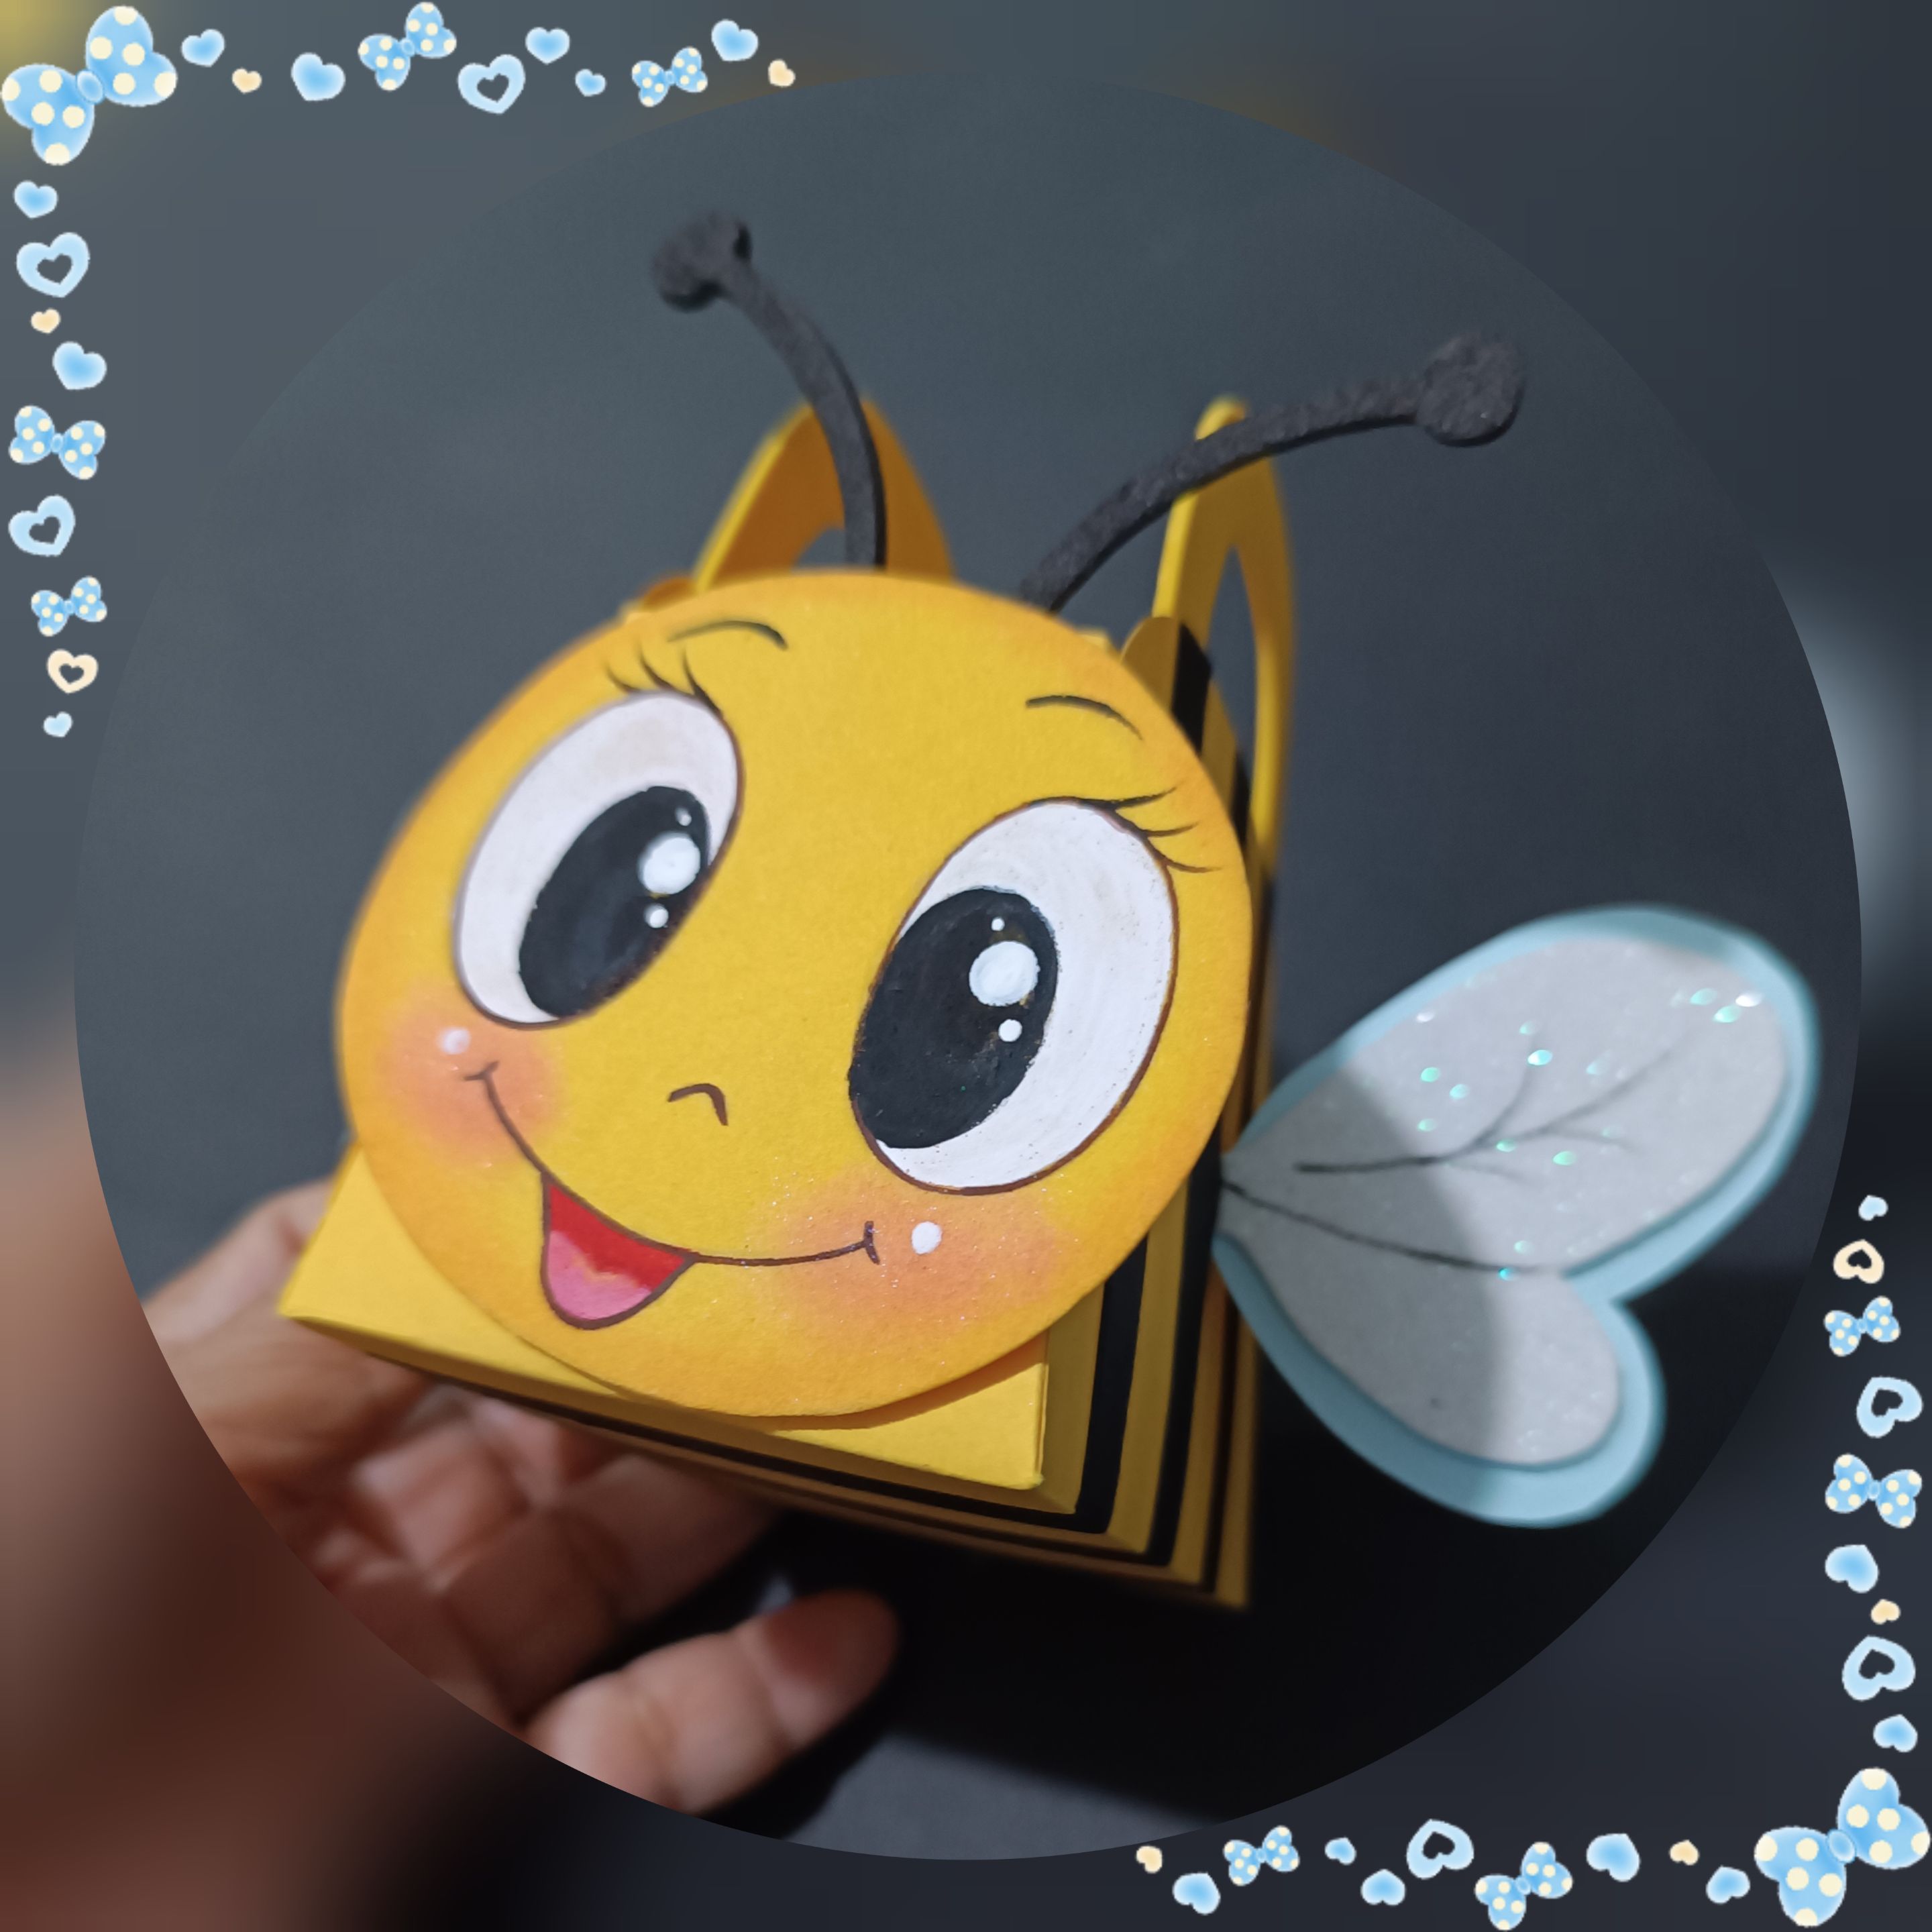
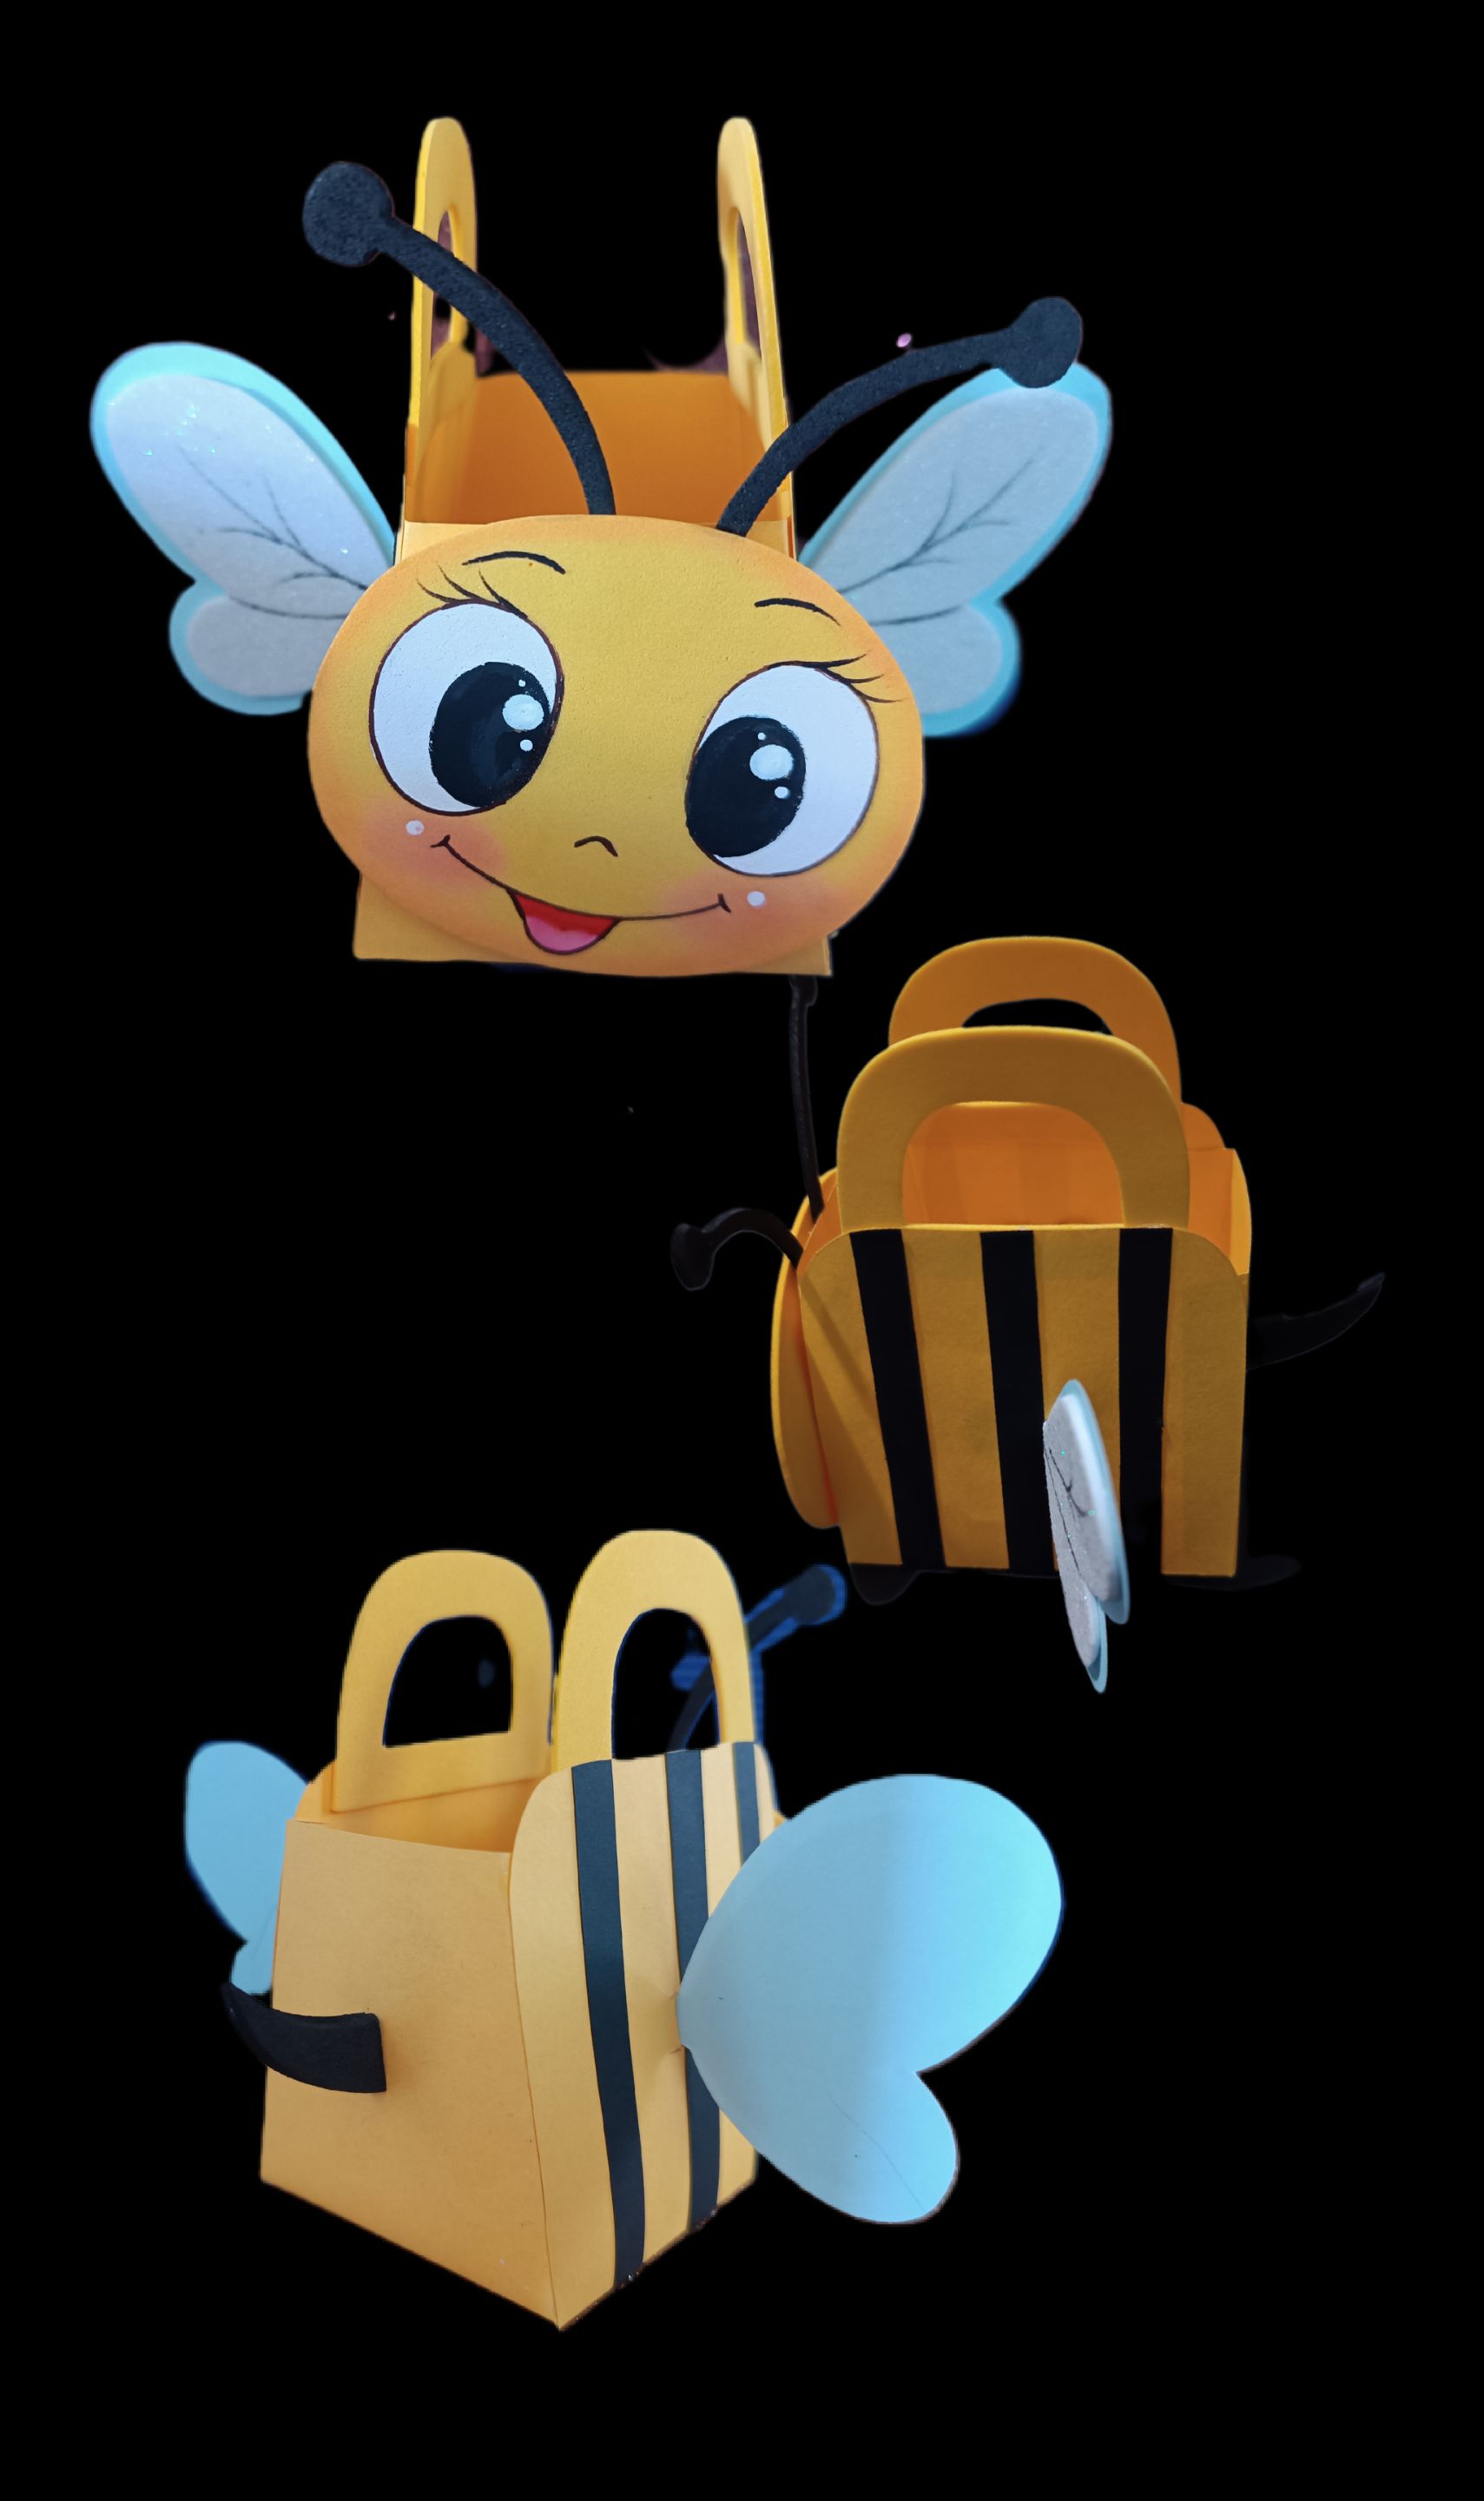
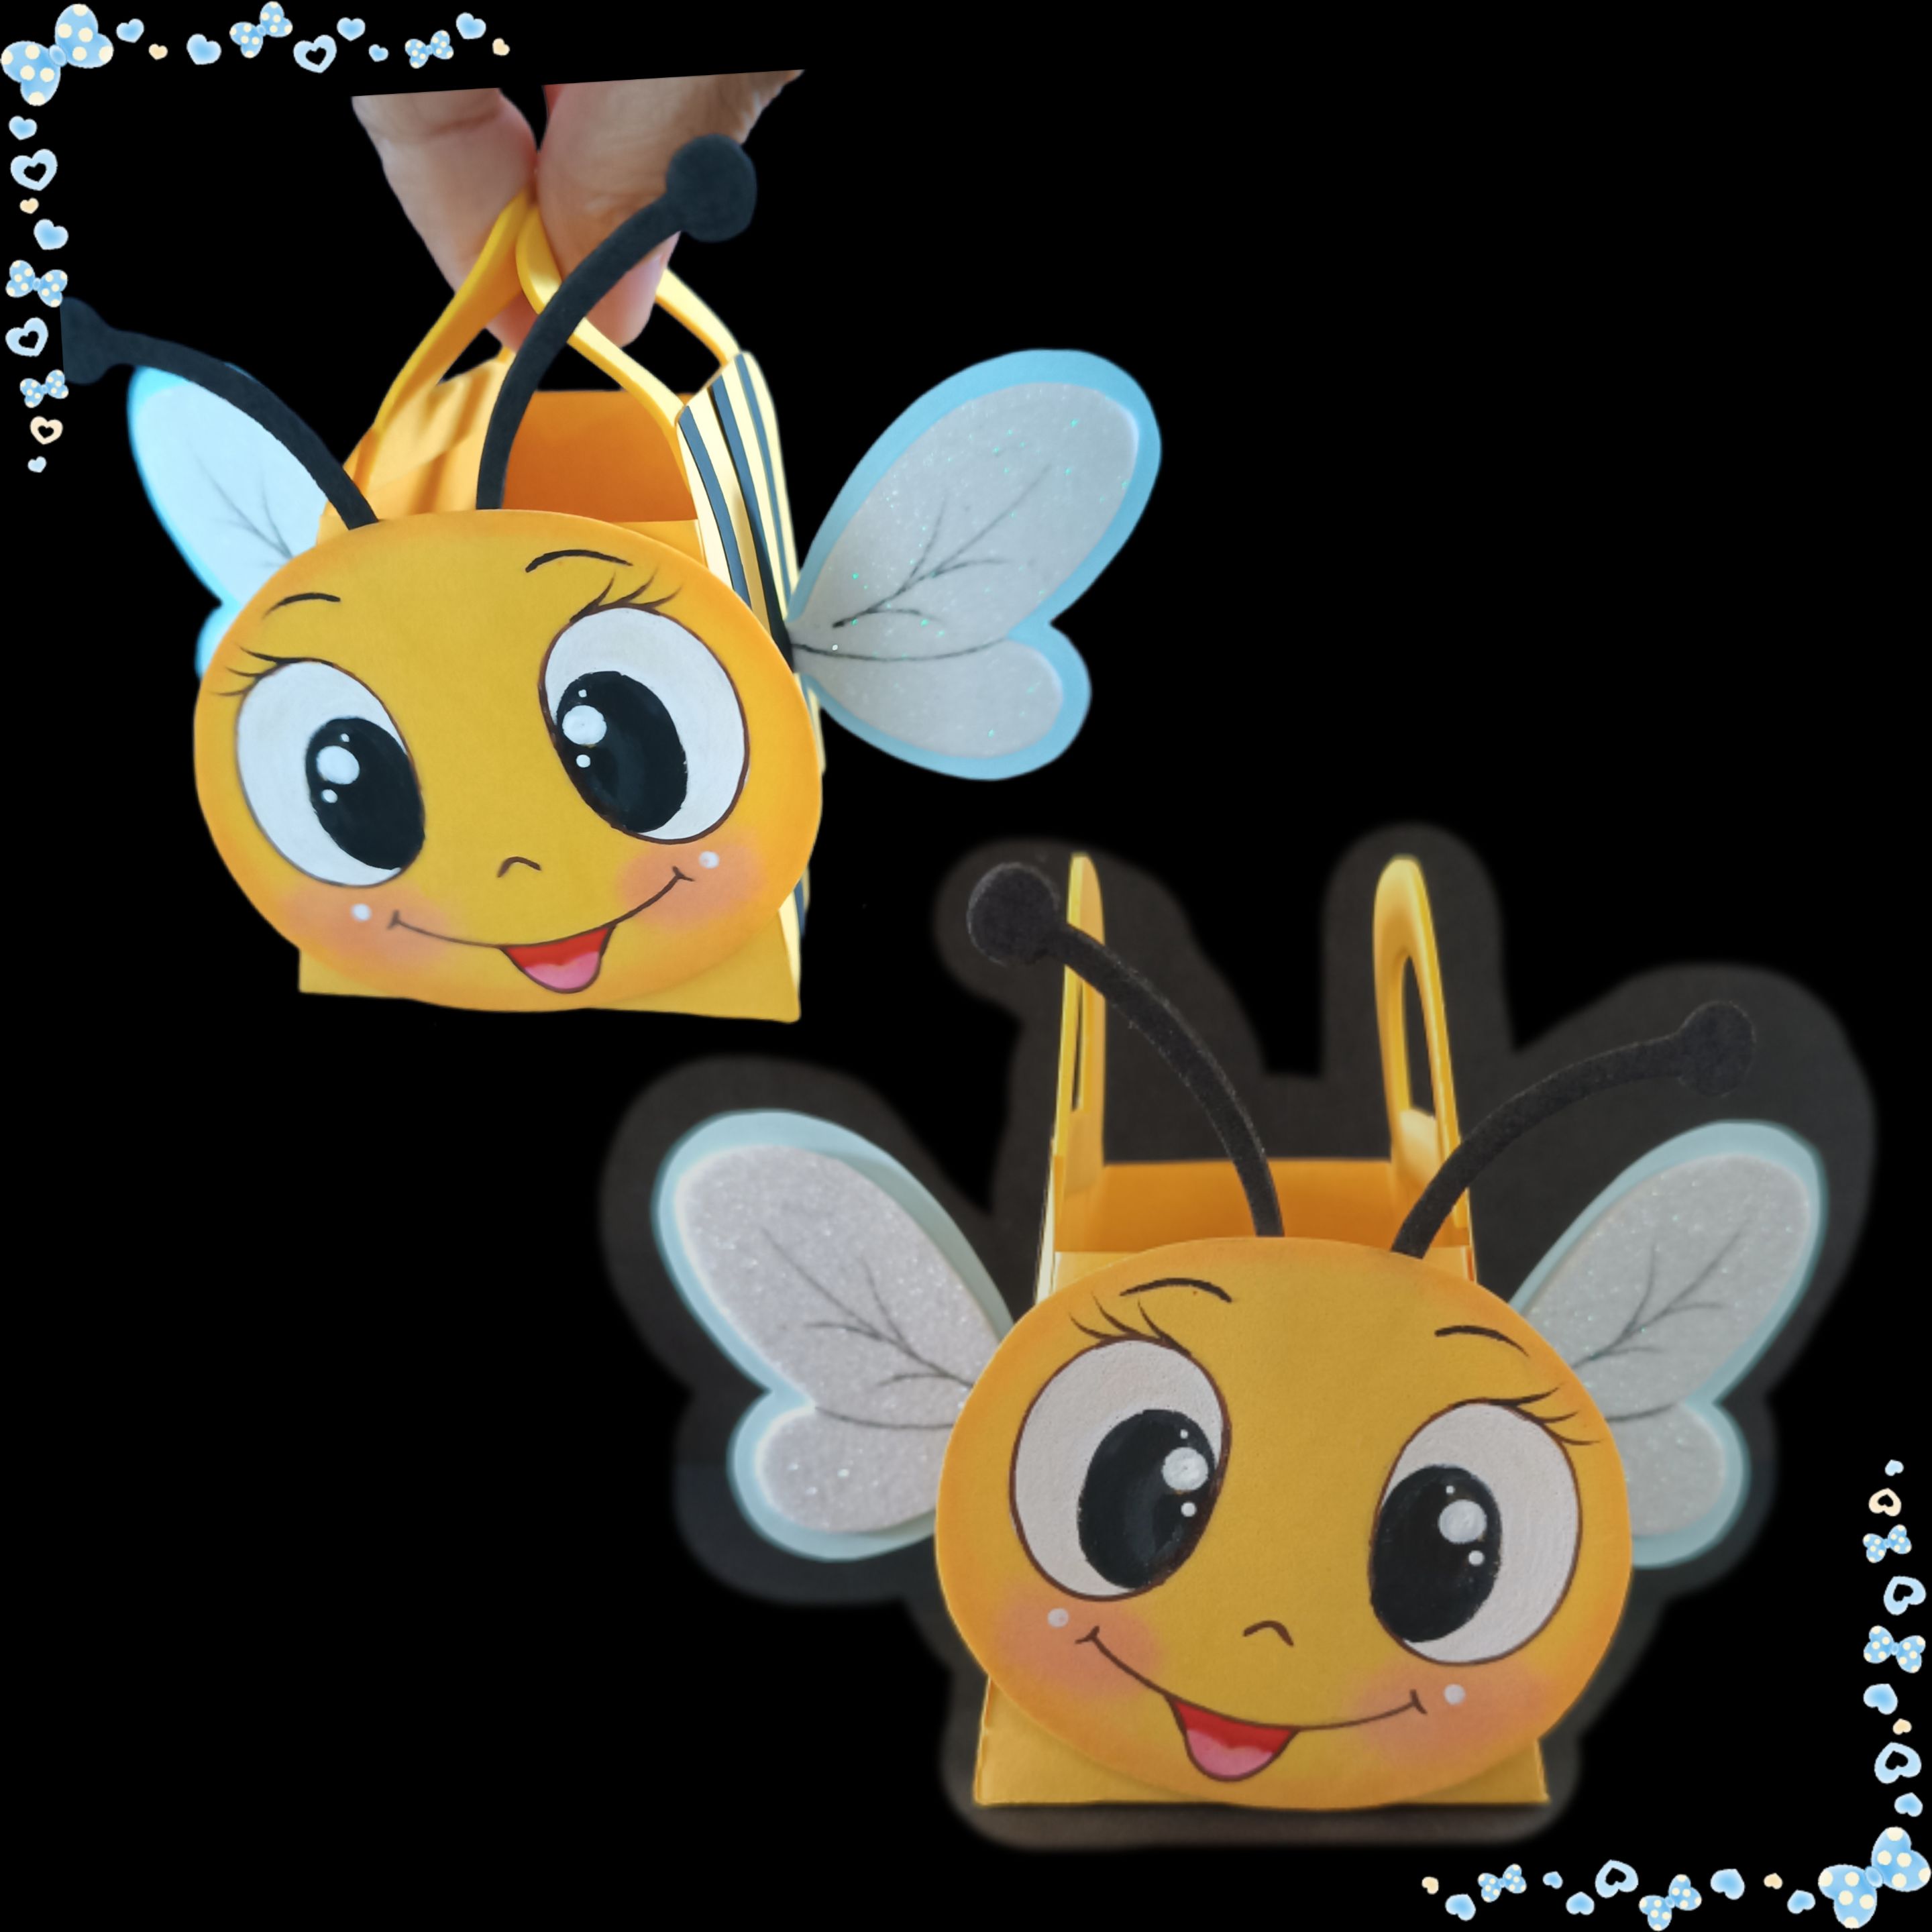
Así quedó esta linda cajita hecha totalmente a mano y de una manera muy fácil.
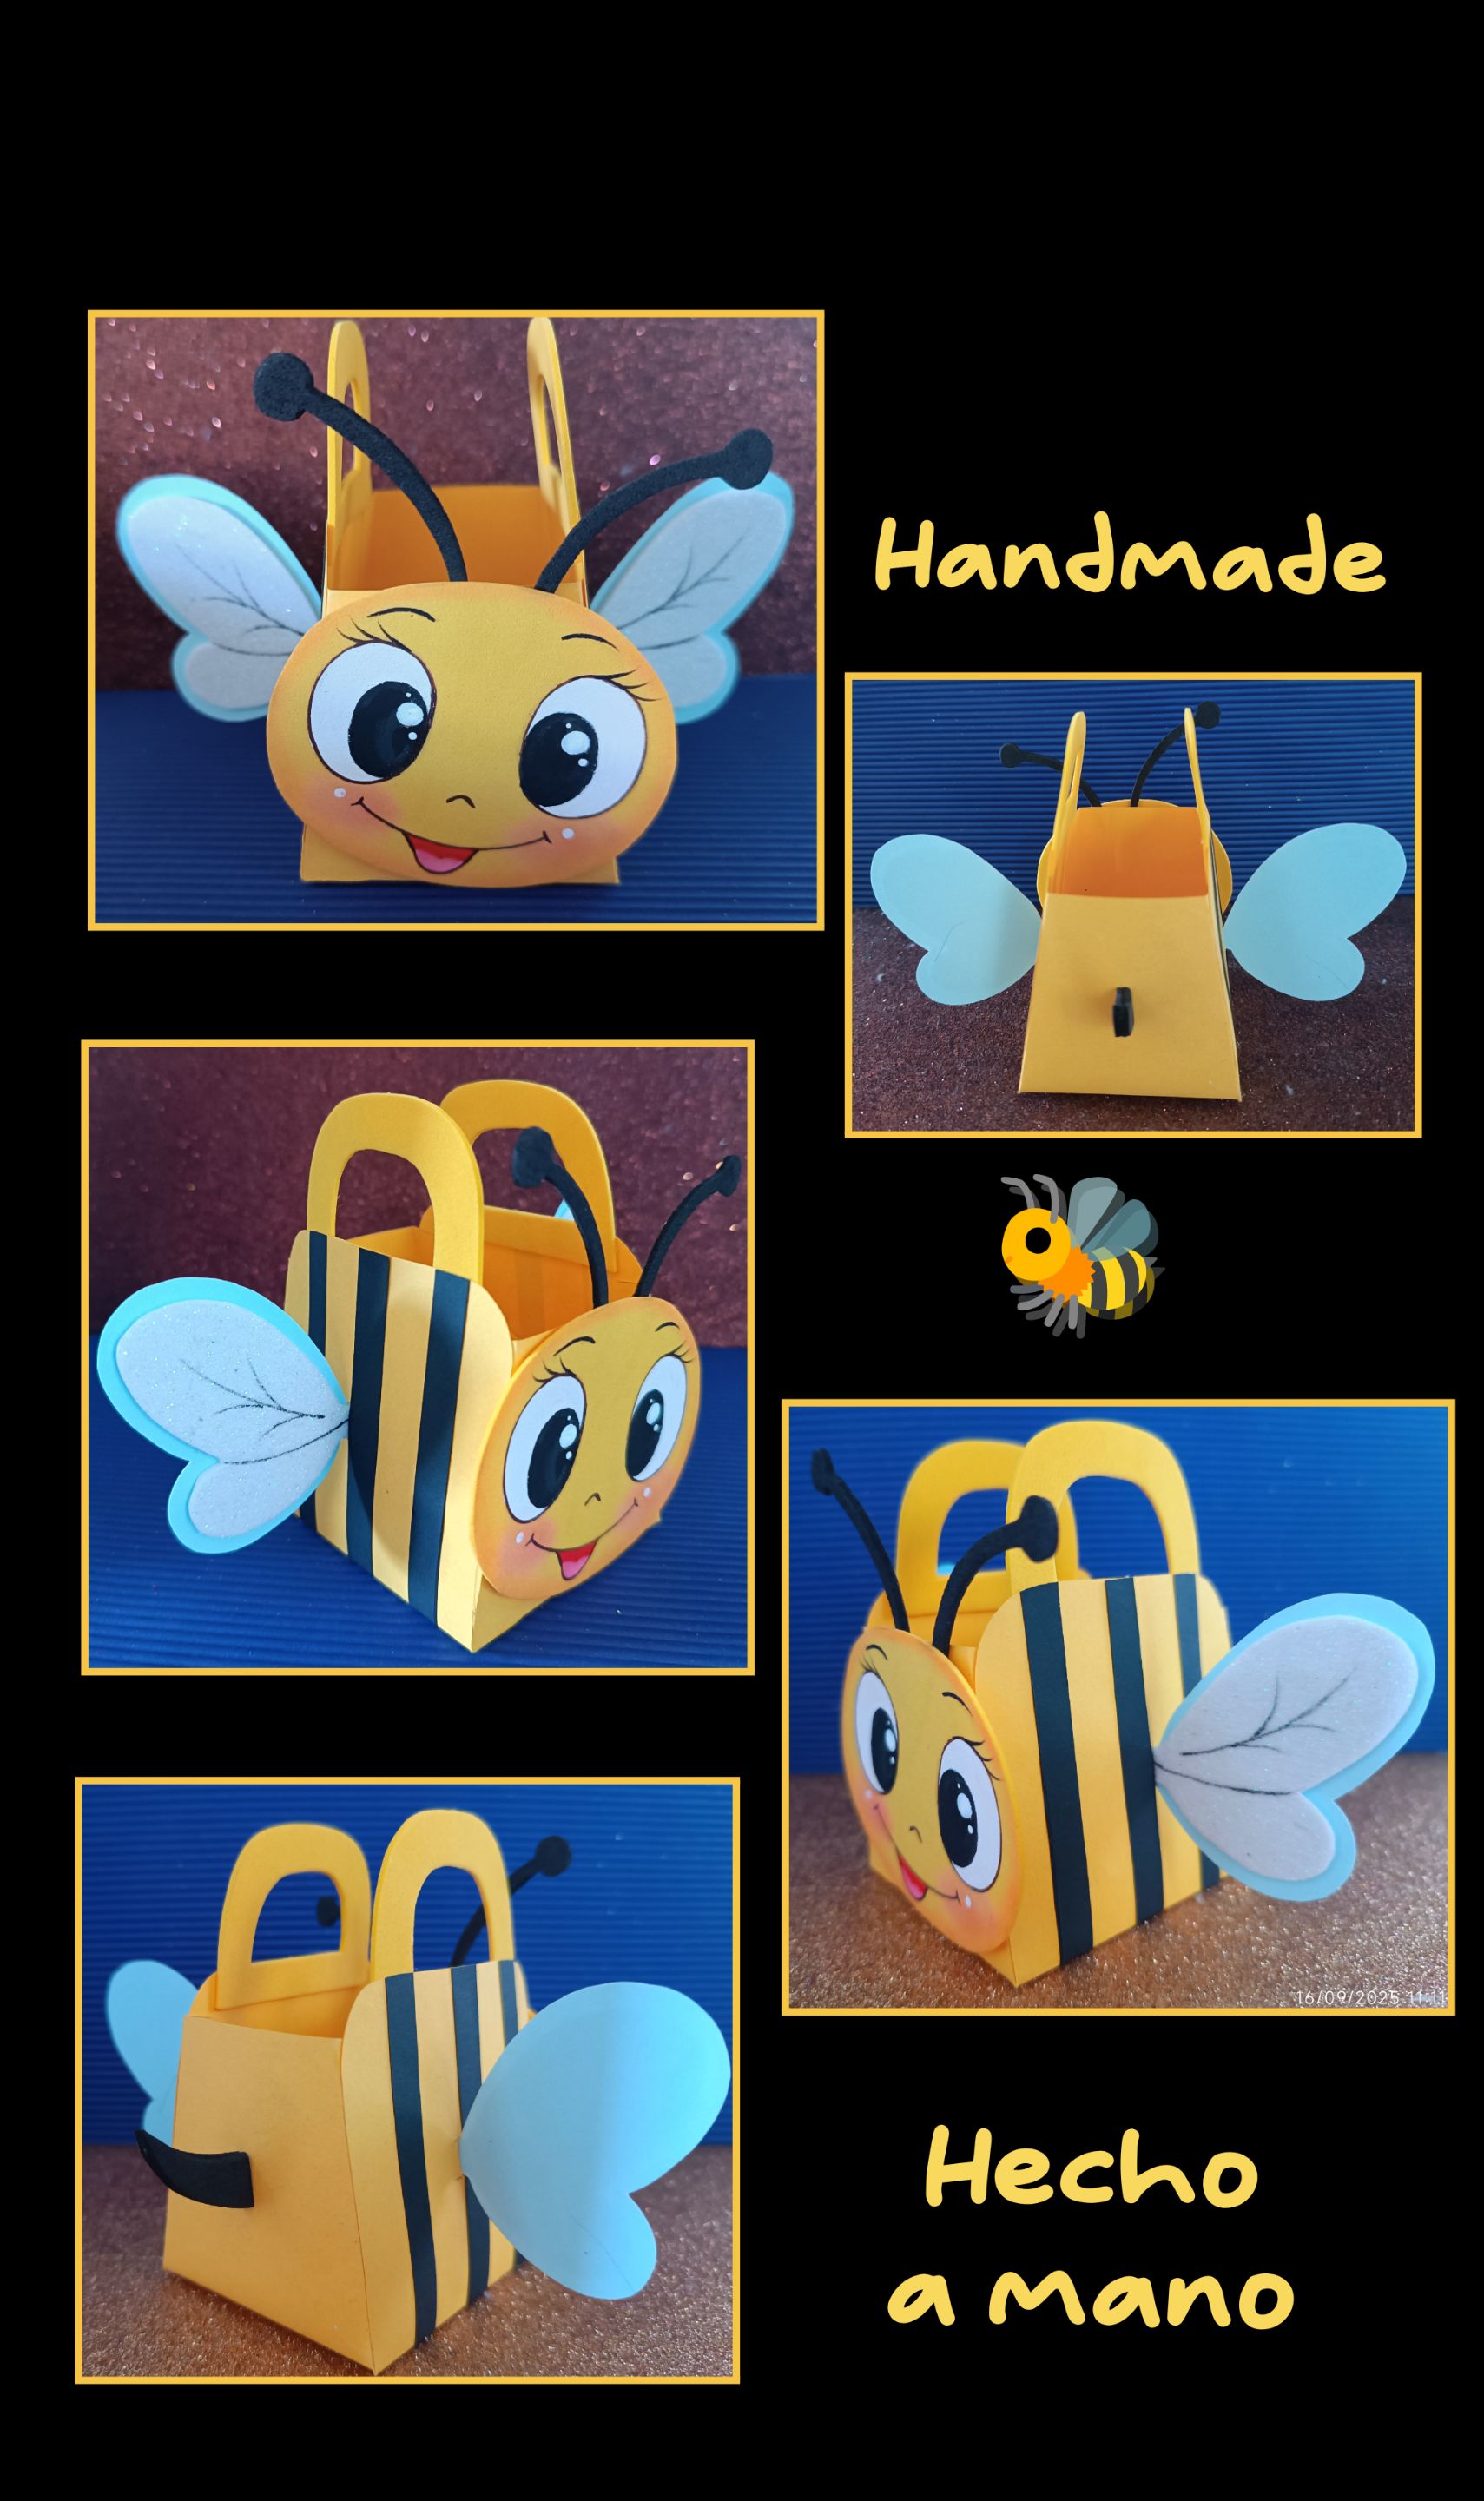 Aquí te muestro varias fotos, espero te gusten y te animes a realizarla.
Fuente:https://es.pinterest.com/pin/476255729365450546/
Ahora me despido, deseando que te haya gustado mi paso a paso. Mi publicación está traducida con DeepL Las fotos están editadas con GridArt Teléfono Redmi Note 12
Y llegó la hora de despedirme y quiero agradecer tu visita, tiempo y apoyo a mi publicación. Saludos y feliz semana.
English:
Good evening and welcome to my blog.
I hope this week is a productive one for everyone.
So I invite you to join me.
The materials you will need are:
| Yellow and blue cardstock | Matte and glitter foam |
|---|---|
| Paints and brushes | Scissors and craft knife |
| Ruler | Pencil and marker |
| Silicone | Mold |
| Pastel chalk or blush |
Let's get started!
STEP 1: 🐝
- Trace the drawing with a pencil, then place it on the foam and rub over the paper with a pair of scissors until the entire drawing is transferred. Do this with all the pieces and then cut around the edges.
- Dip a small piece of cotton in the chalk and paint around the edges of the face and cheeks.
STEP 2: 🐝
- Paint the center of the eyes with a marker and then apply a coat of white paint to fill in the eyes. Let dry and apply a second coat, then go over the center of the eyes again. Outline with a fine-tip marker or brush and paint the rest of the face, eyelashes, eyebrows, and mouth. Add a few highlights to each eye and let dry.
STEP 3: 🐝
- Now cut out the template and transfer it to the cardstock and cut around the outline, then trace the dividing lines with an empty pen or a thick-tipped needle.
- Next, cut out three (3) strips of black cardstock and glue them to the widest part of the bag, then glue the handles to the inside as shown in the photo.
STEP 4: 🐝
- Apply silicone to the foam wings and stick them onto the blue cardstock, then cut around them leaving a border.
- Make a small opening where you are going to place the wings, then insert, fold, and glue them on the inside.
- Then cut out two small hearts and glue them on to finish off and cover the opening.
STEP 5: 🐝
- Now apply silicone to the tabs on the bag and press down until it sticks well.
- Then glue the antennae and the face to the front of the bag, and finally glue the stinger.
This is how this cute little box turned out, made entirely by hand and in a very easy way.
Here are some photos. I hope you like them and feel inspired to make one yourself.
Source:https://es.pinterest.com/pin/476255729365450546/
Now I bid you farewell, hoping you enjoyed my step-by-step guide. My post is translated with DeepL. The photos are edited with GridArt. Redmi Note 12 phone
It's time to say goodbye, and I want to thank you for visiting, for your time, and for supporting my post. Best regards and have a great week.