Buenas noches mis queridos creadores y amigos que hoy me visitan. ¿Cómo están?
Entonces los invito a que me acompañen a ver el procedimiento.
Necesitarás:
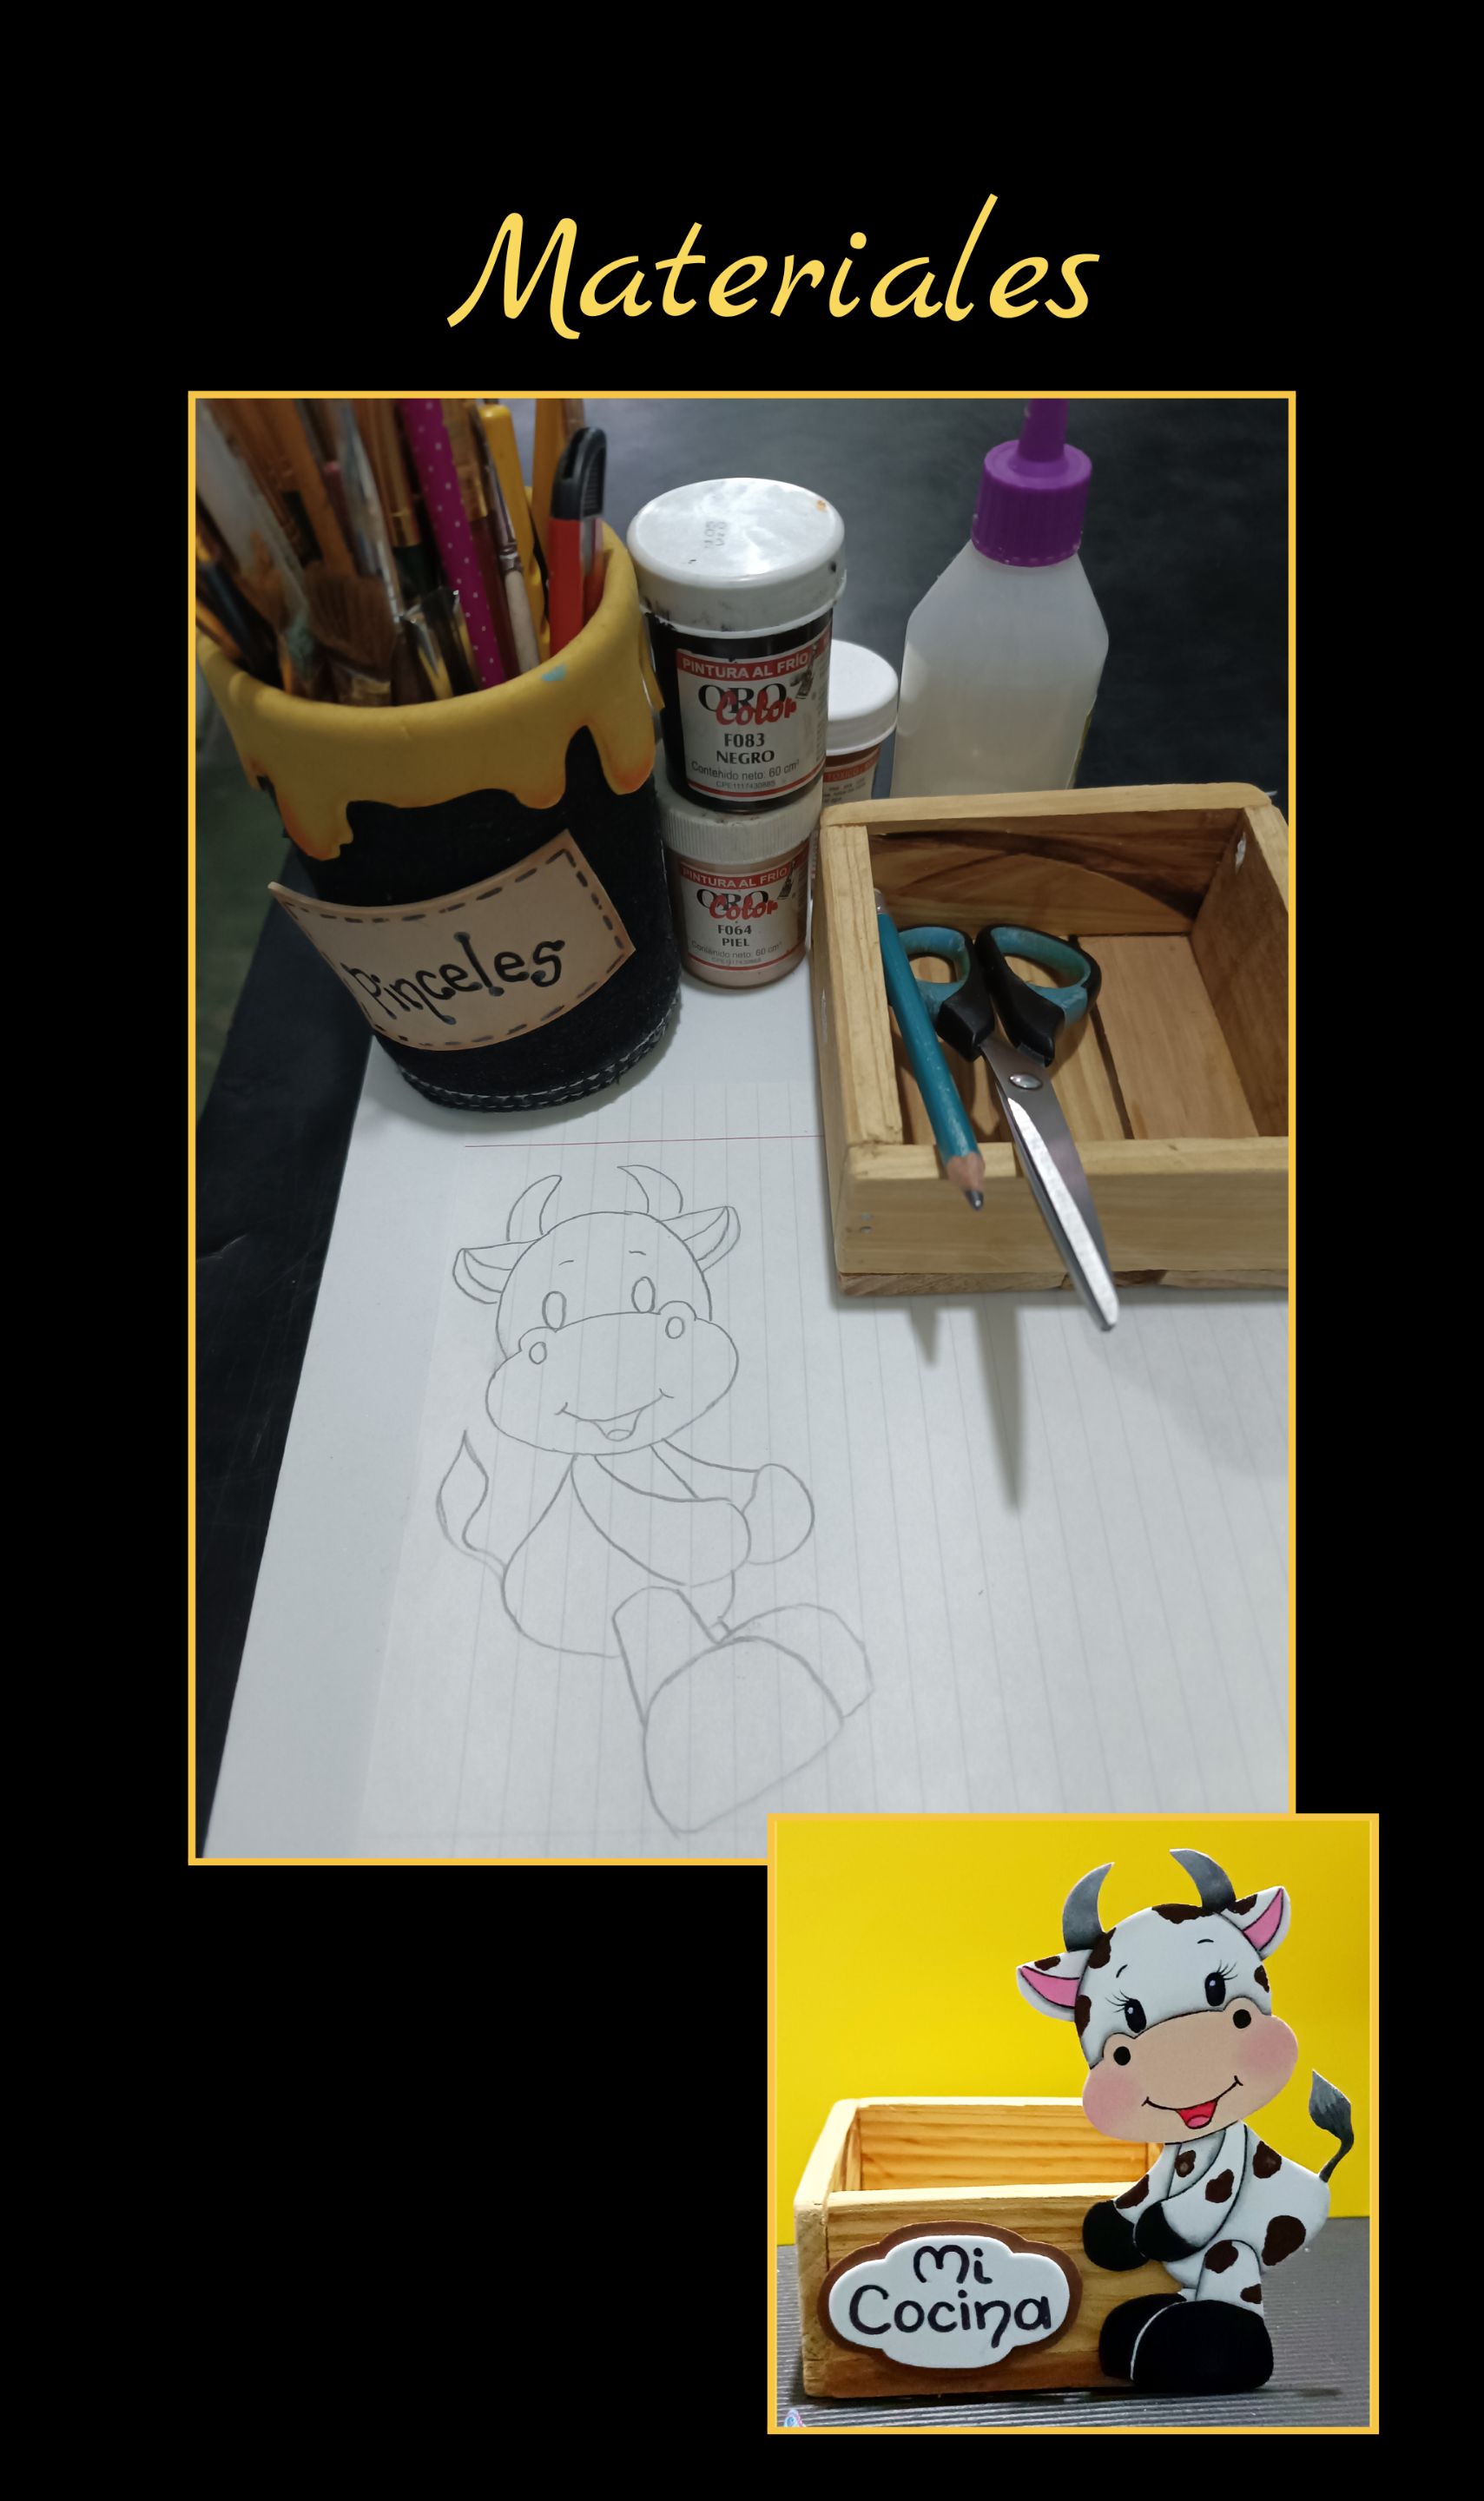 |Foami blanco| Dibujo o impresión|
|----|----|
|Tijera| Lápiz|
|Pinturas y pinceles| Marcador|
|Silicón| Caja de madera o cartón|
|Foami blanco| Dibujo o impresión|
|----|----|
|Tijera| Lápiz|
|Pinturas y pinceles| Marcador|
|Silicón| Caja de madera o cartón|
Comencemos:
Paso 1
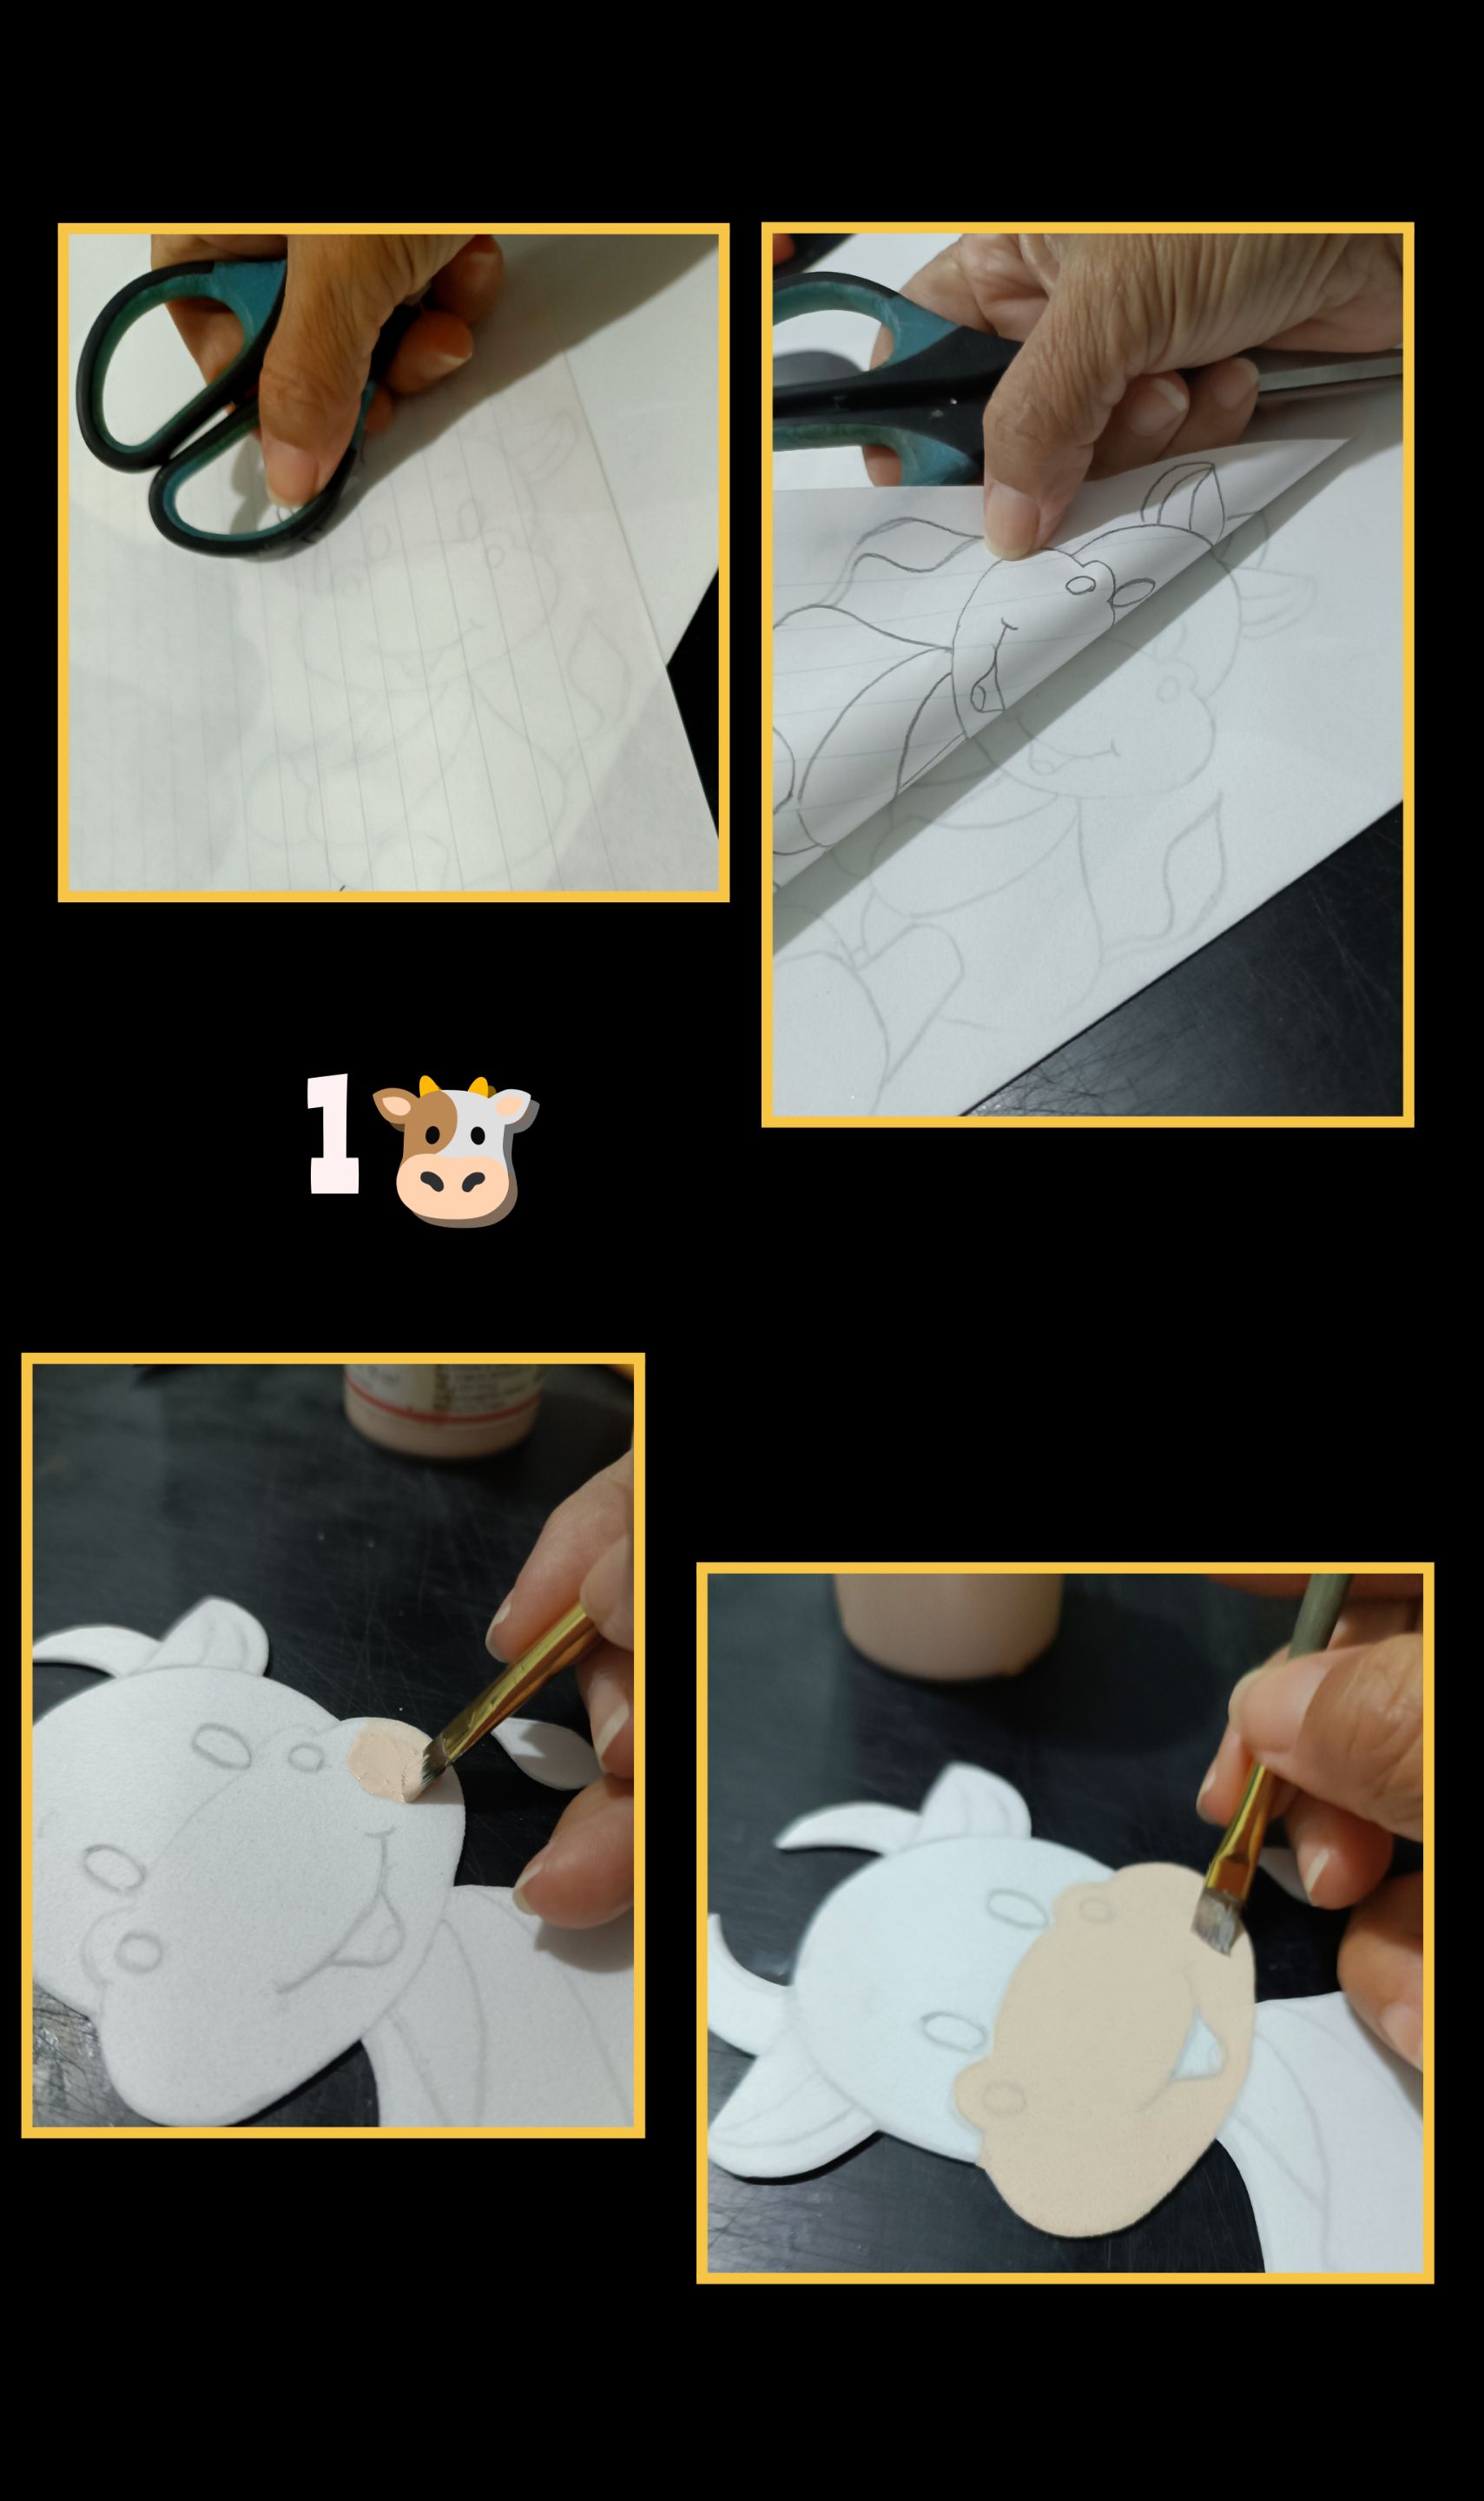
- Para transferir sobre el foami, primero remarca el dibujo y coloca sobre el foami, como se muestra en la foto, luego frota el papel con la tijera haciendo un poco de presión.
- Luego levanta poco a poco el papel para asegurarte que el dibujo quede bien marcado y recorta por todo el contorno.
- Ahora comienza a rellenar pintando en un solo sentido el hocico con pintura color piel y deja secar, luego aplica una segunda mano.
Paso 2
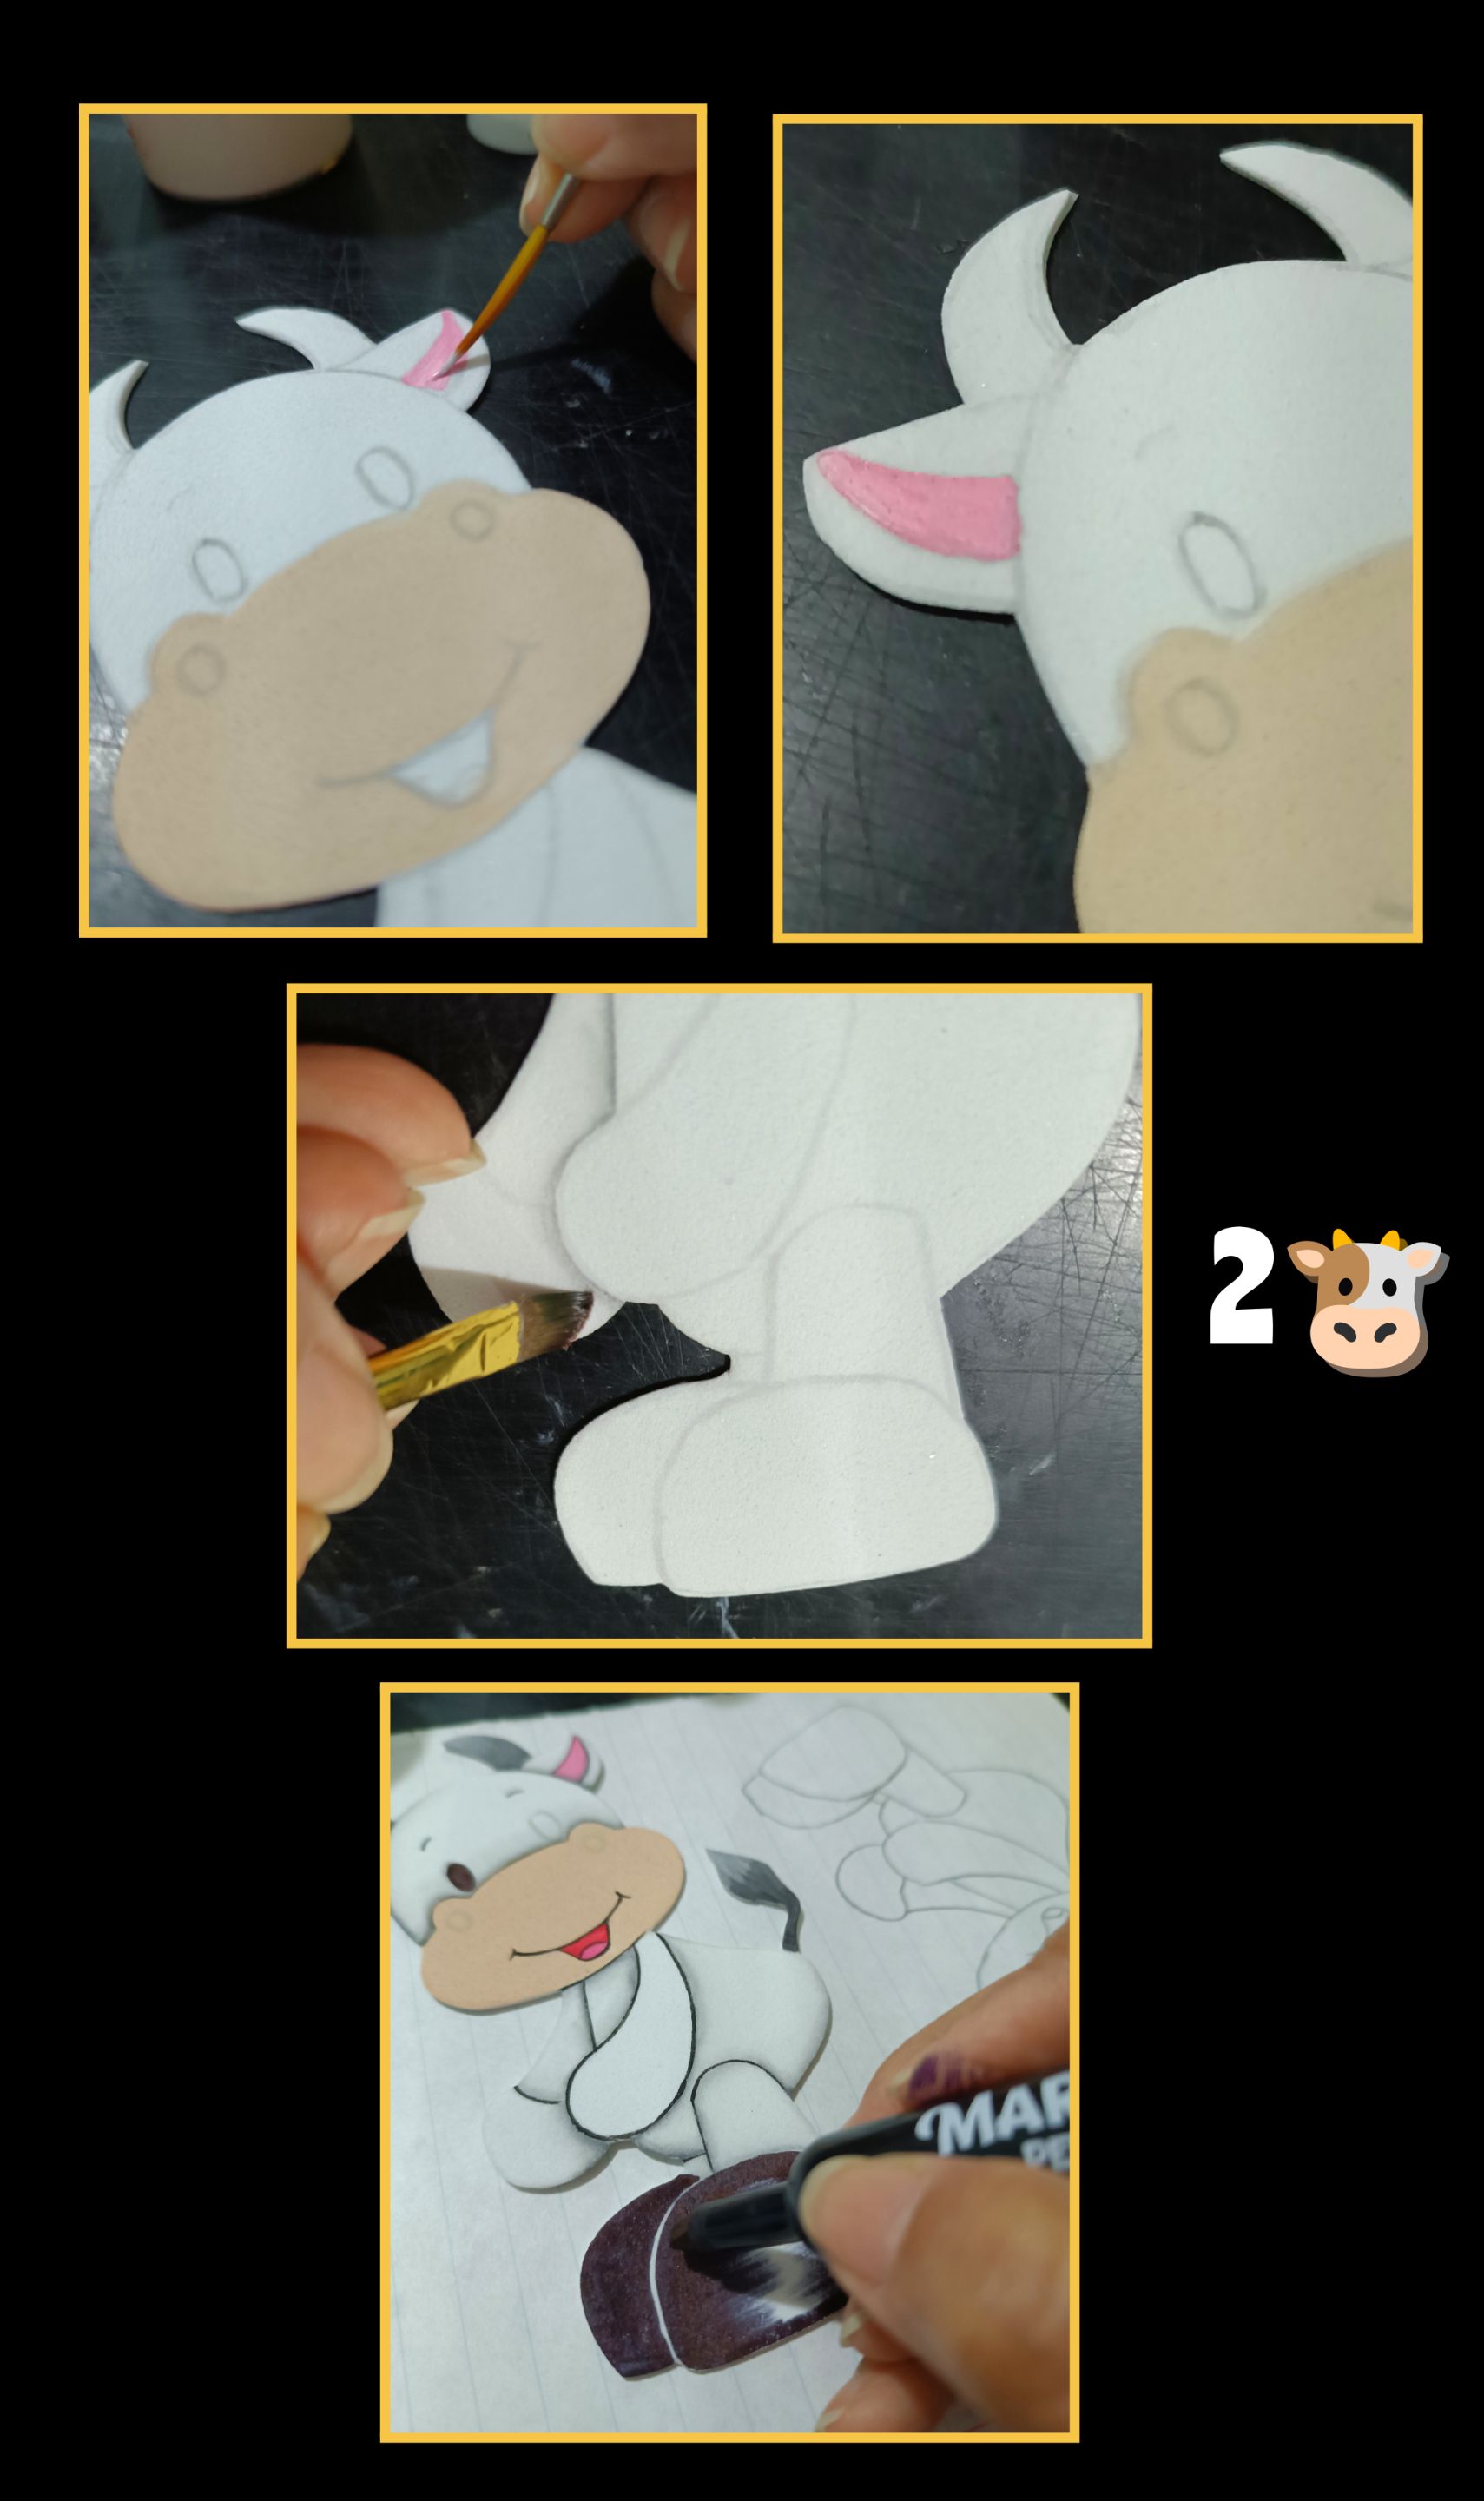 - Ahora continuaremos pintando las orejas.
- Luego usa un pincel angular o plano el cual vas a mojar primero en agua y luego pasa por un paño para quitar el exceso, que quede húmedo.
- Después moja la punta del pincel en pintura gris y comienza a pasar por todas las líneas marcadas como te muestro en la foto.
- Puedes ir delineando algunas partes de la vaquita, a los cascos pasa o rellena con marcador negro.
- Ahora continuaremos pintando las orejas.
- Luego usa un pincel angular o plano el cual vas a mojar primero en agua y luego pasa por un paño para quitar el exceso, que quede húmedo.
- Después moja la punta del pincel en pintura gris y comienza a pasar por todas las líneas marcadas como te muestro en la foto.
- Puedes ir delineando algunas partes de la vaquita, a los cascos pasa o rellena con marcador negro.
Paso 3:
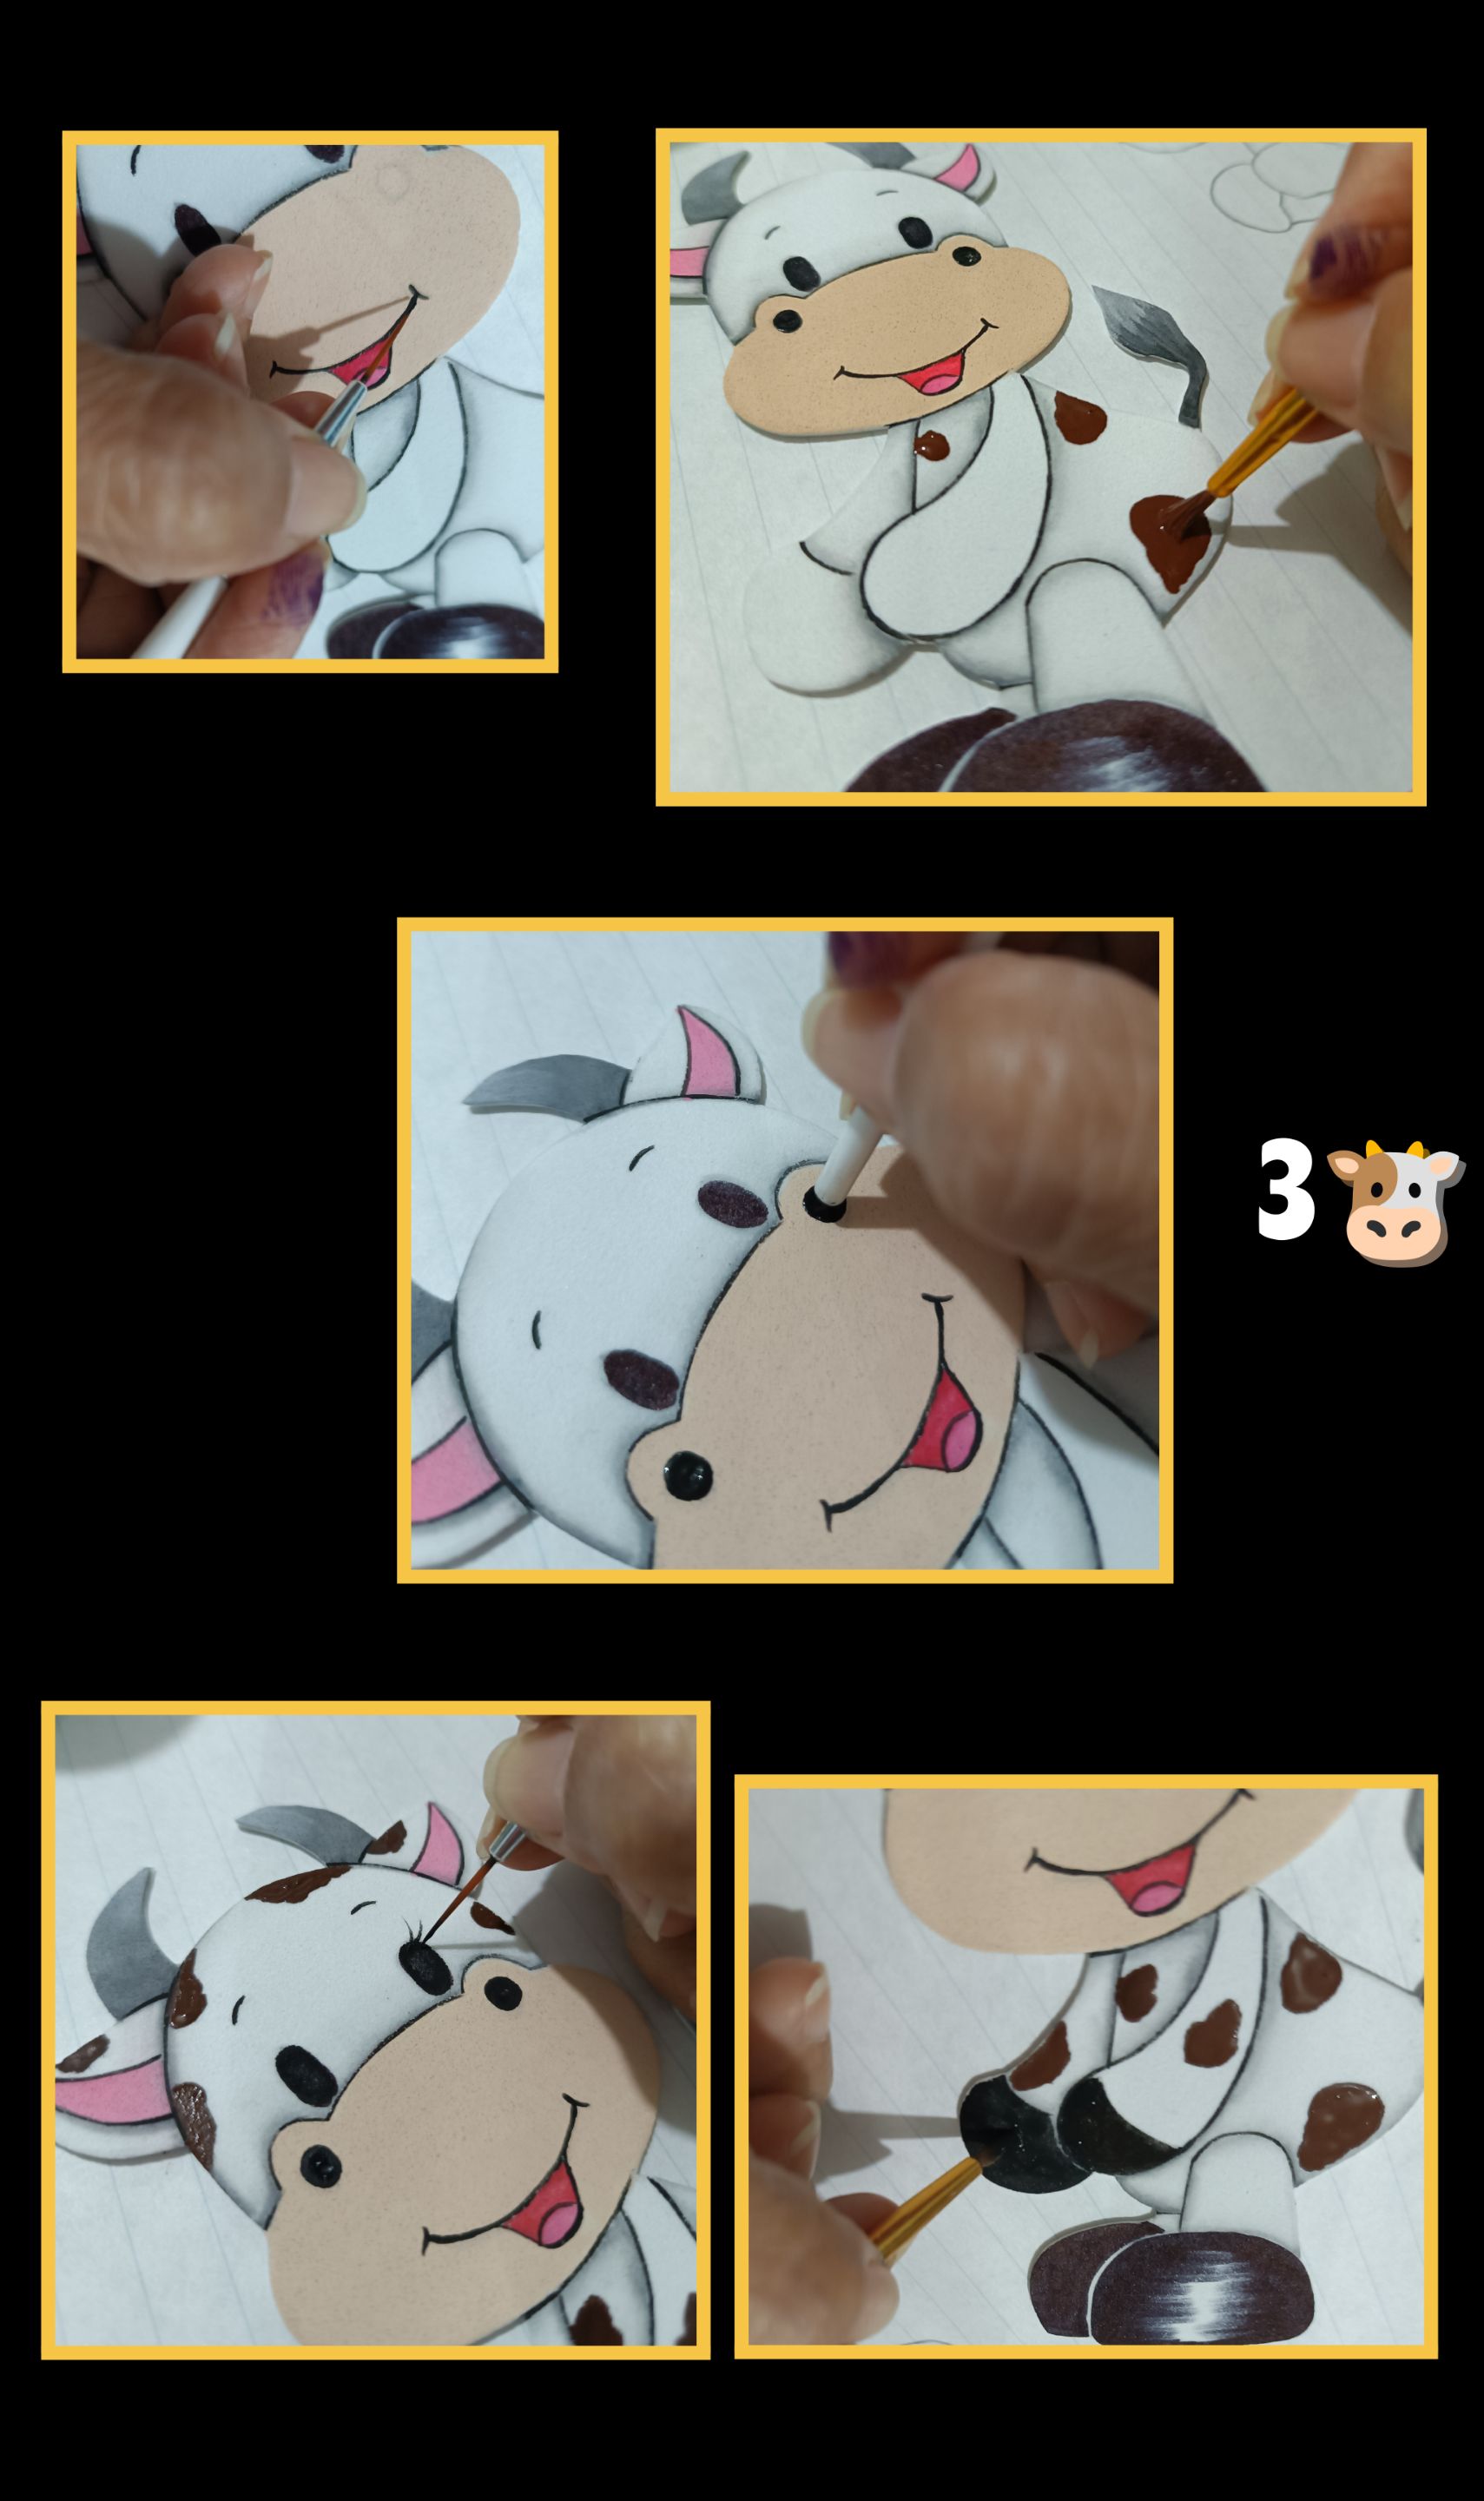 - Delinea la boca, pinta manchas con pintura marrón oscuro y para los ojos y orificios de la nariz, moja un pincel por la parte redondeada y presiona sobre el foami, luego con un delineador pinta las pestañas y por último pinta los cascos de arriba.
Paso 4:
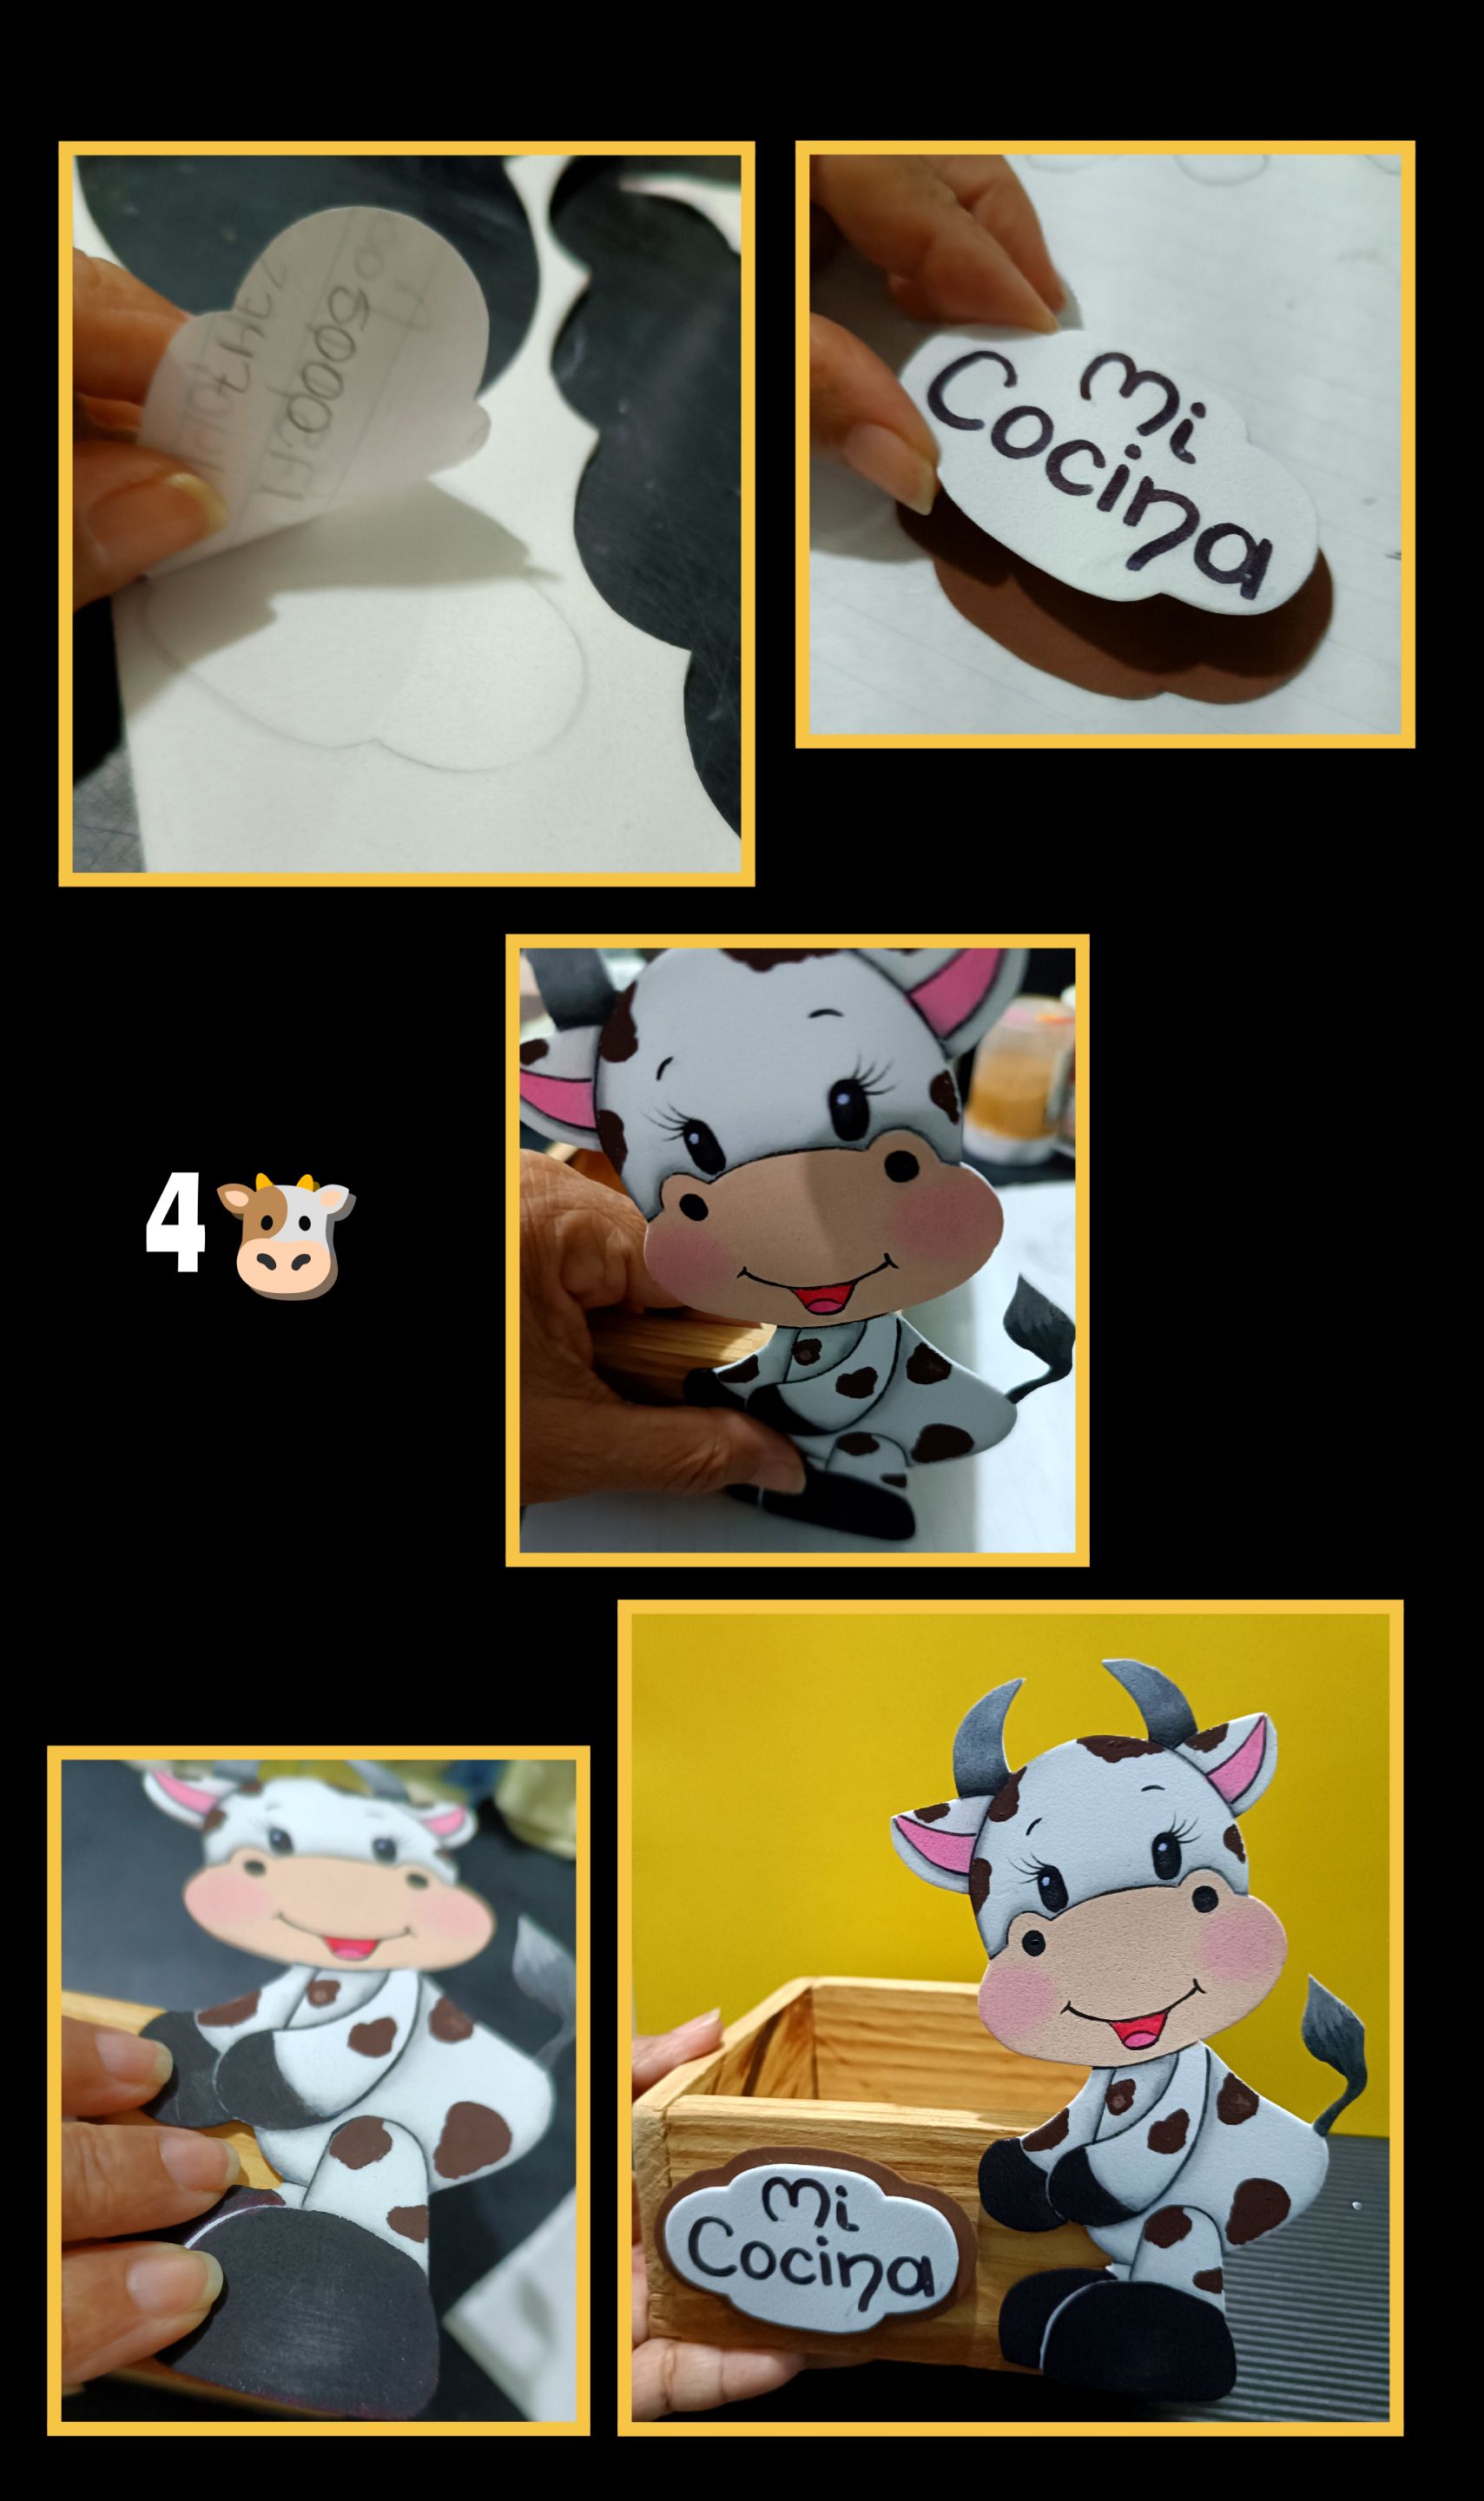 -Para hacer el nombre, dibuja o haz una forma en un papel y recorta, luego marca sobre el foami y recorta una pieza en blanco y una un poquito más grande en marrón.
- Coloca con marcador "Mi Cocina" y pega una sobre otra.
- Por último, aplica silicón en las piezas de foami y pega a la cajita ya sea de madera o cartón.
-Para hacer el nombre, dibuja o haz una forma en un papel y recorta, luego marca sobre el foami y recorta una pieza en blanco y una un poquito más grande en marrón.
- Coloca con marcador "Mi Cocina" y pega una sobre otra.
- Por último, aplica silicón en las piezas de foami y pega a la cajita ya sea de madera o cartón.
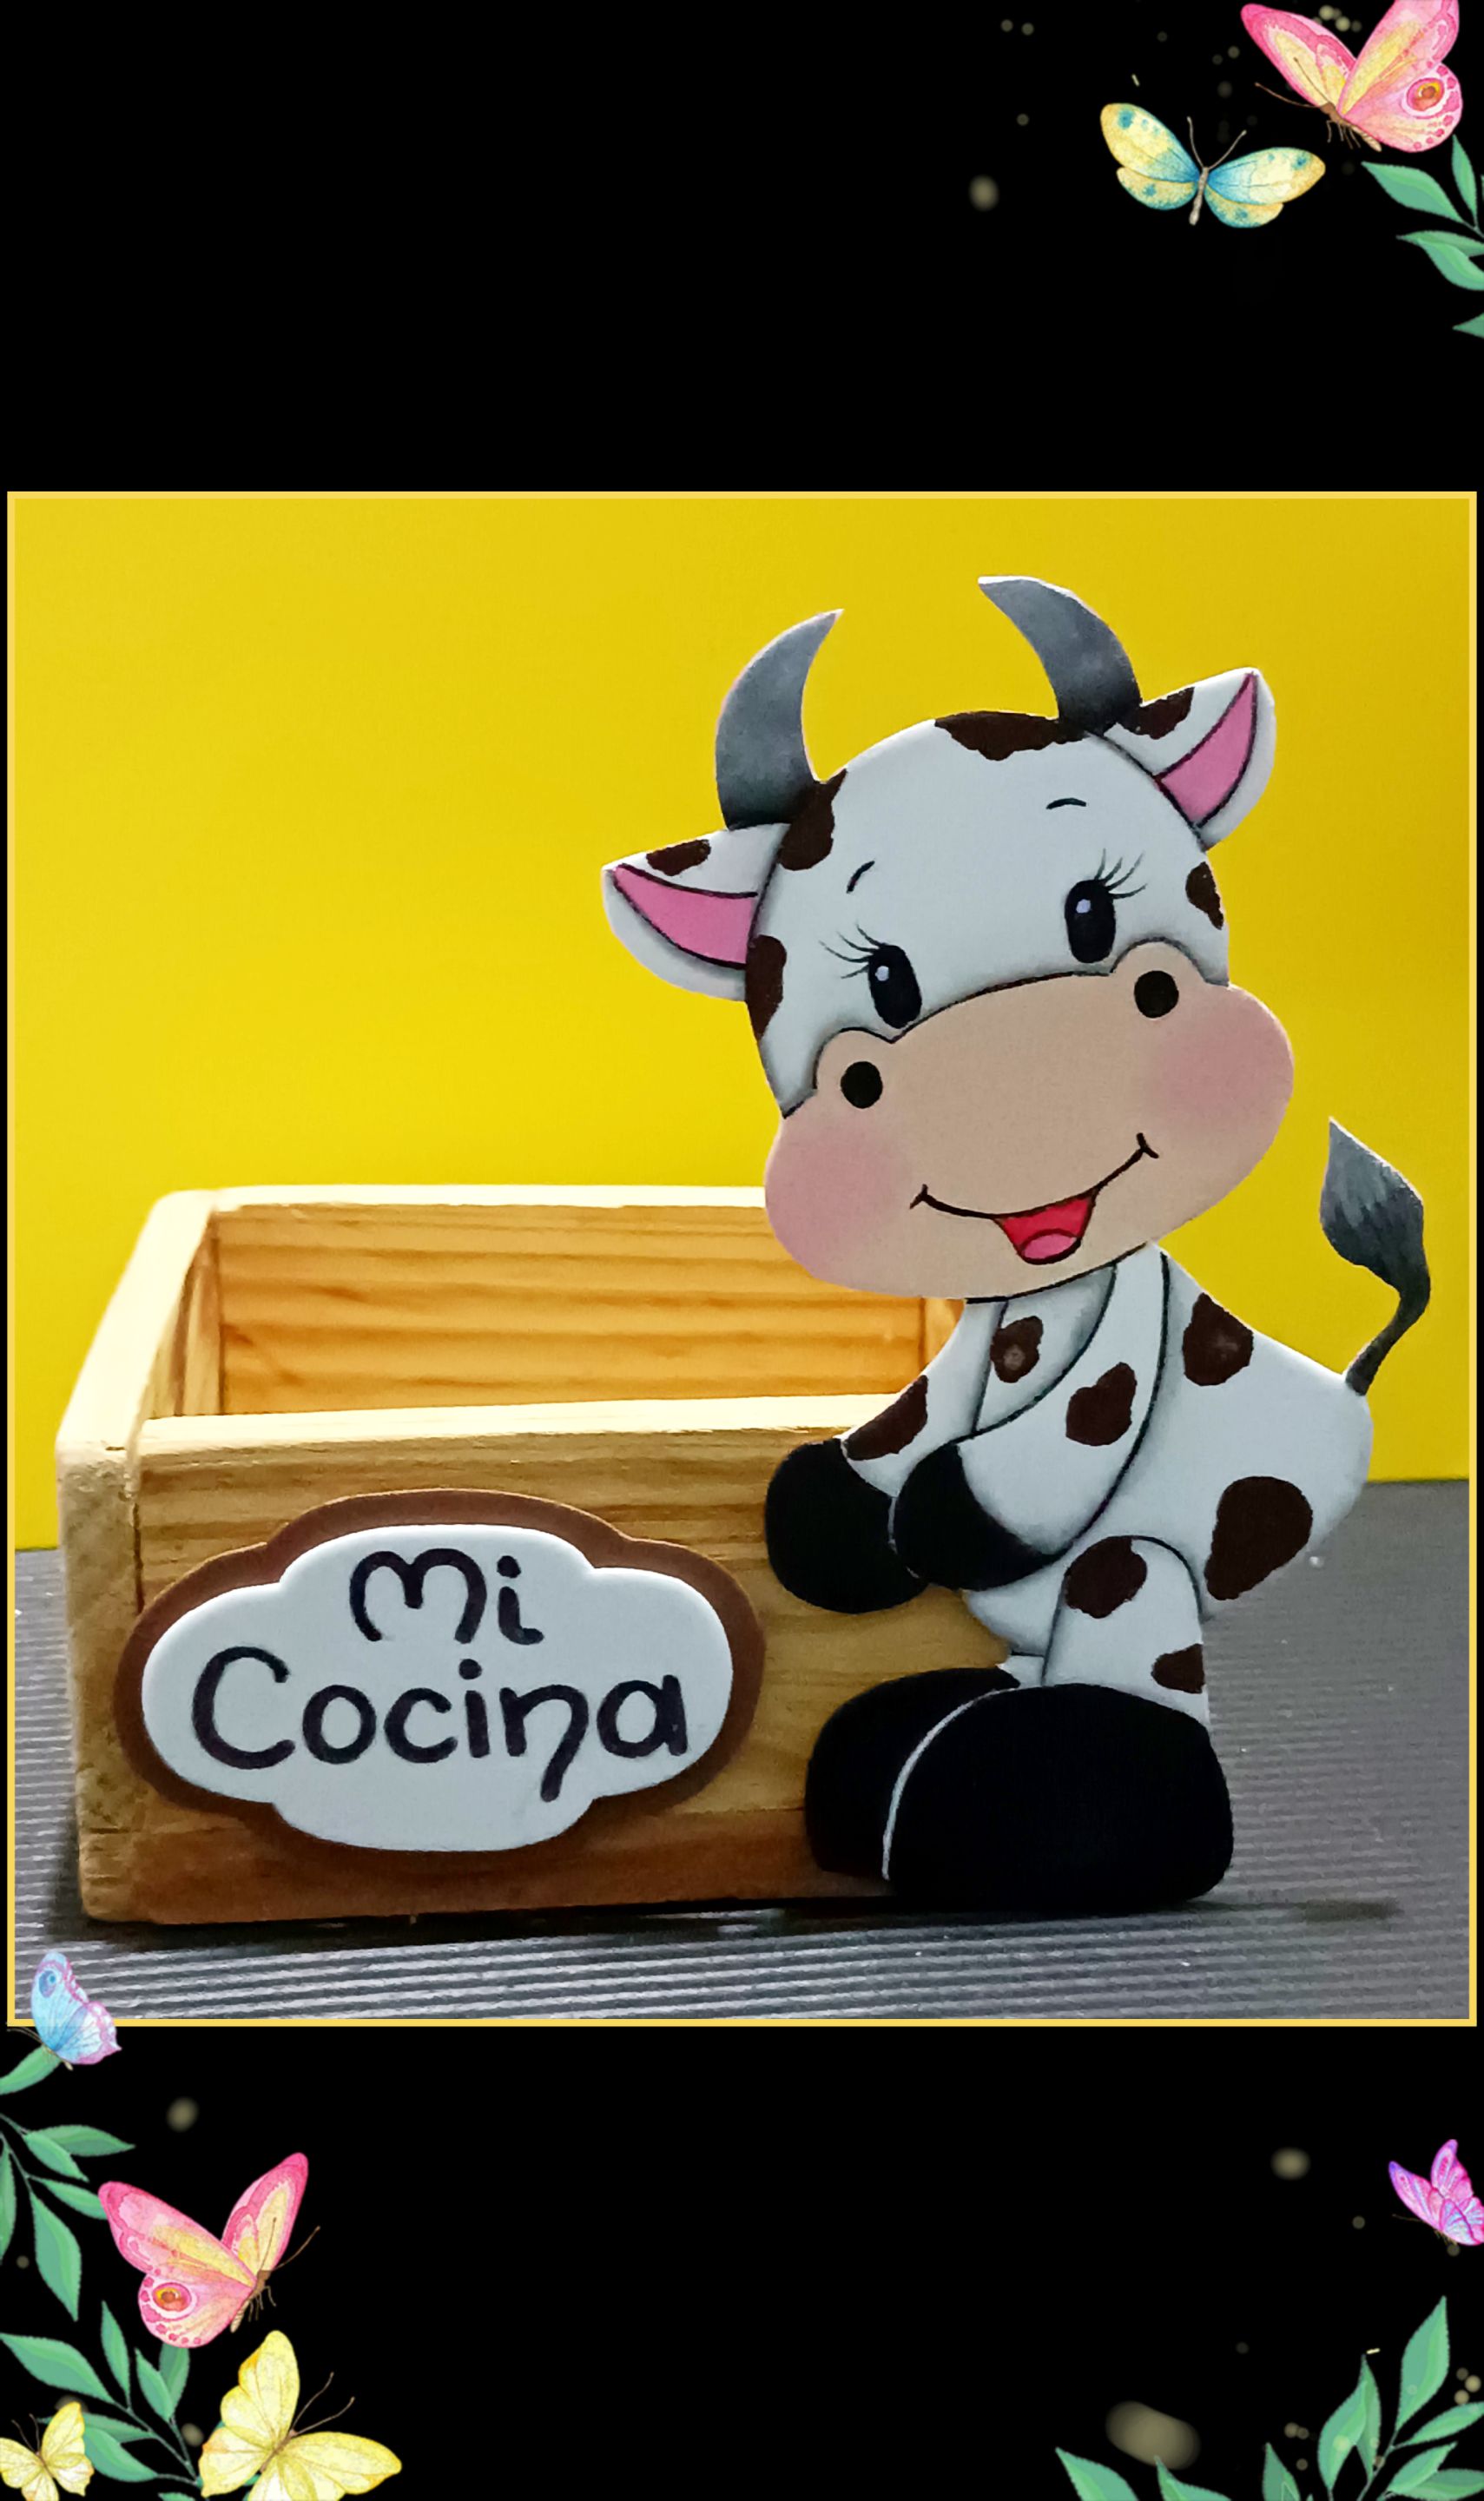
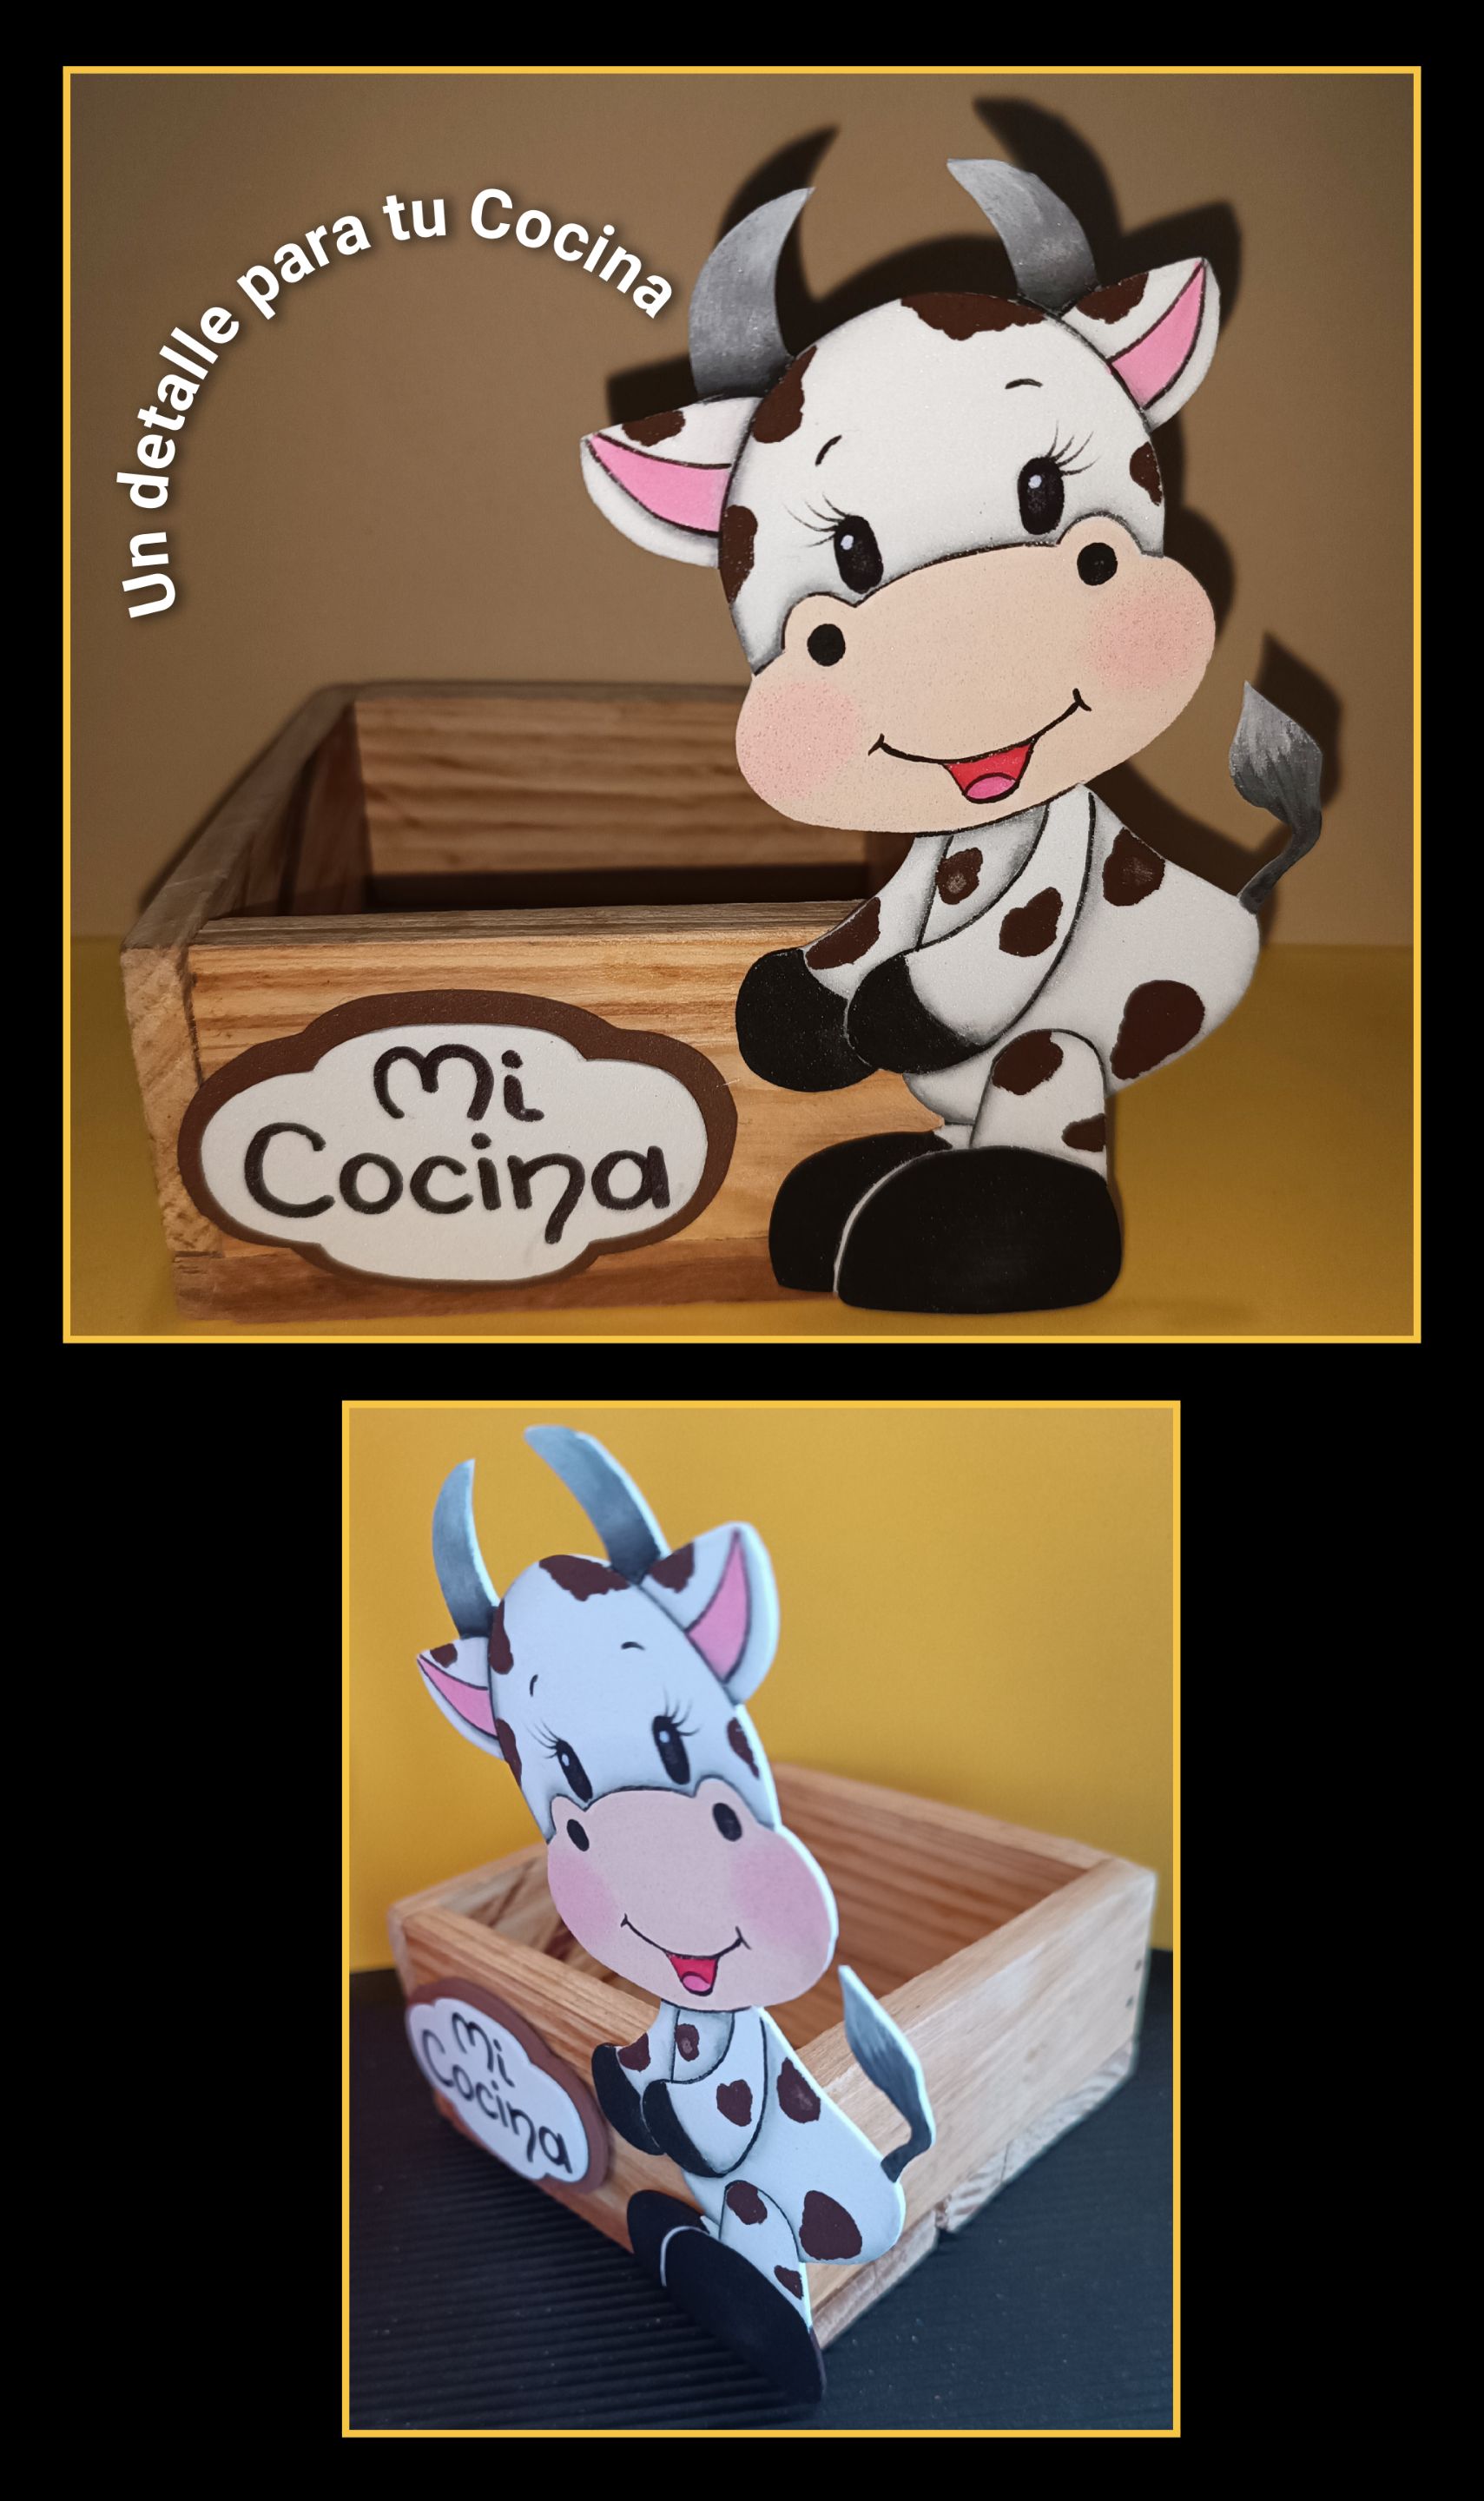
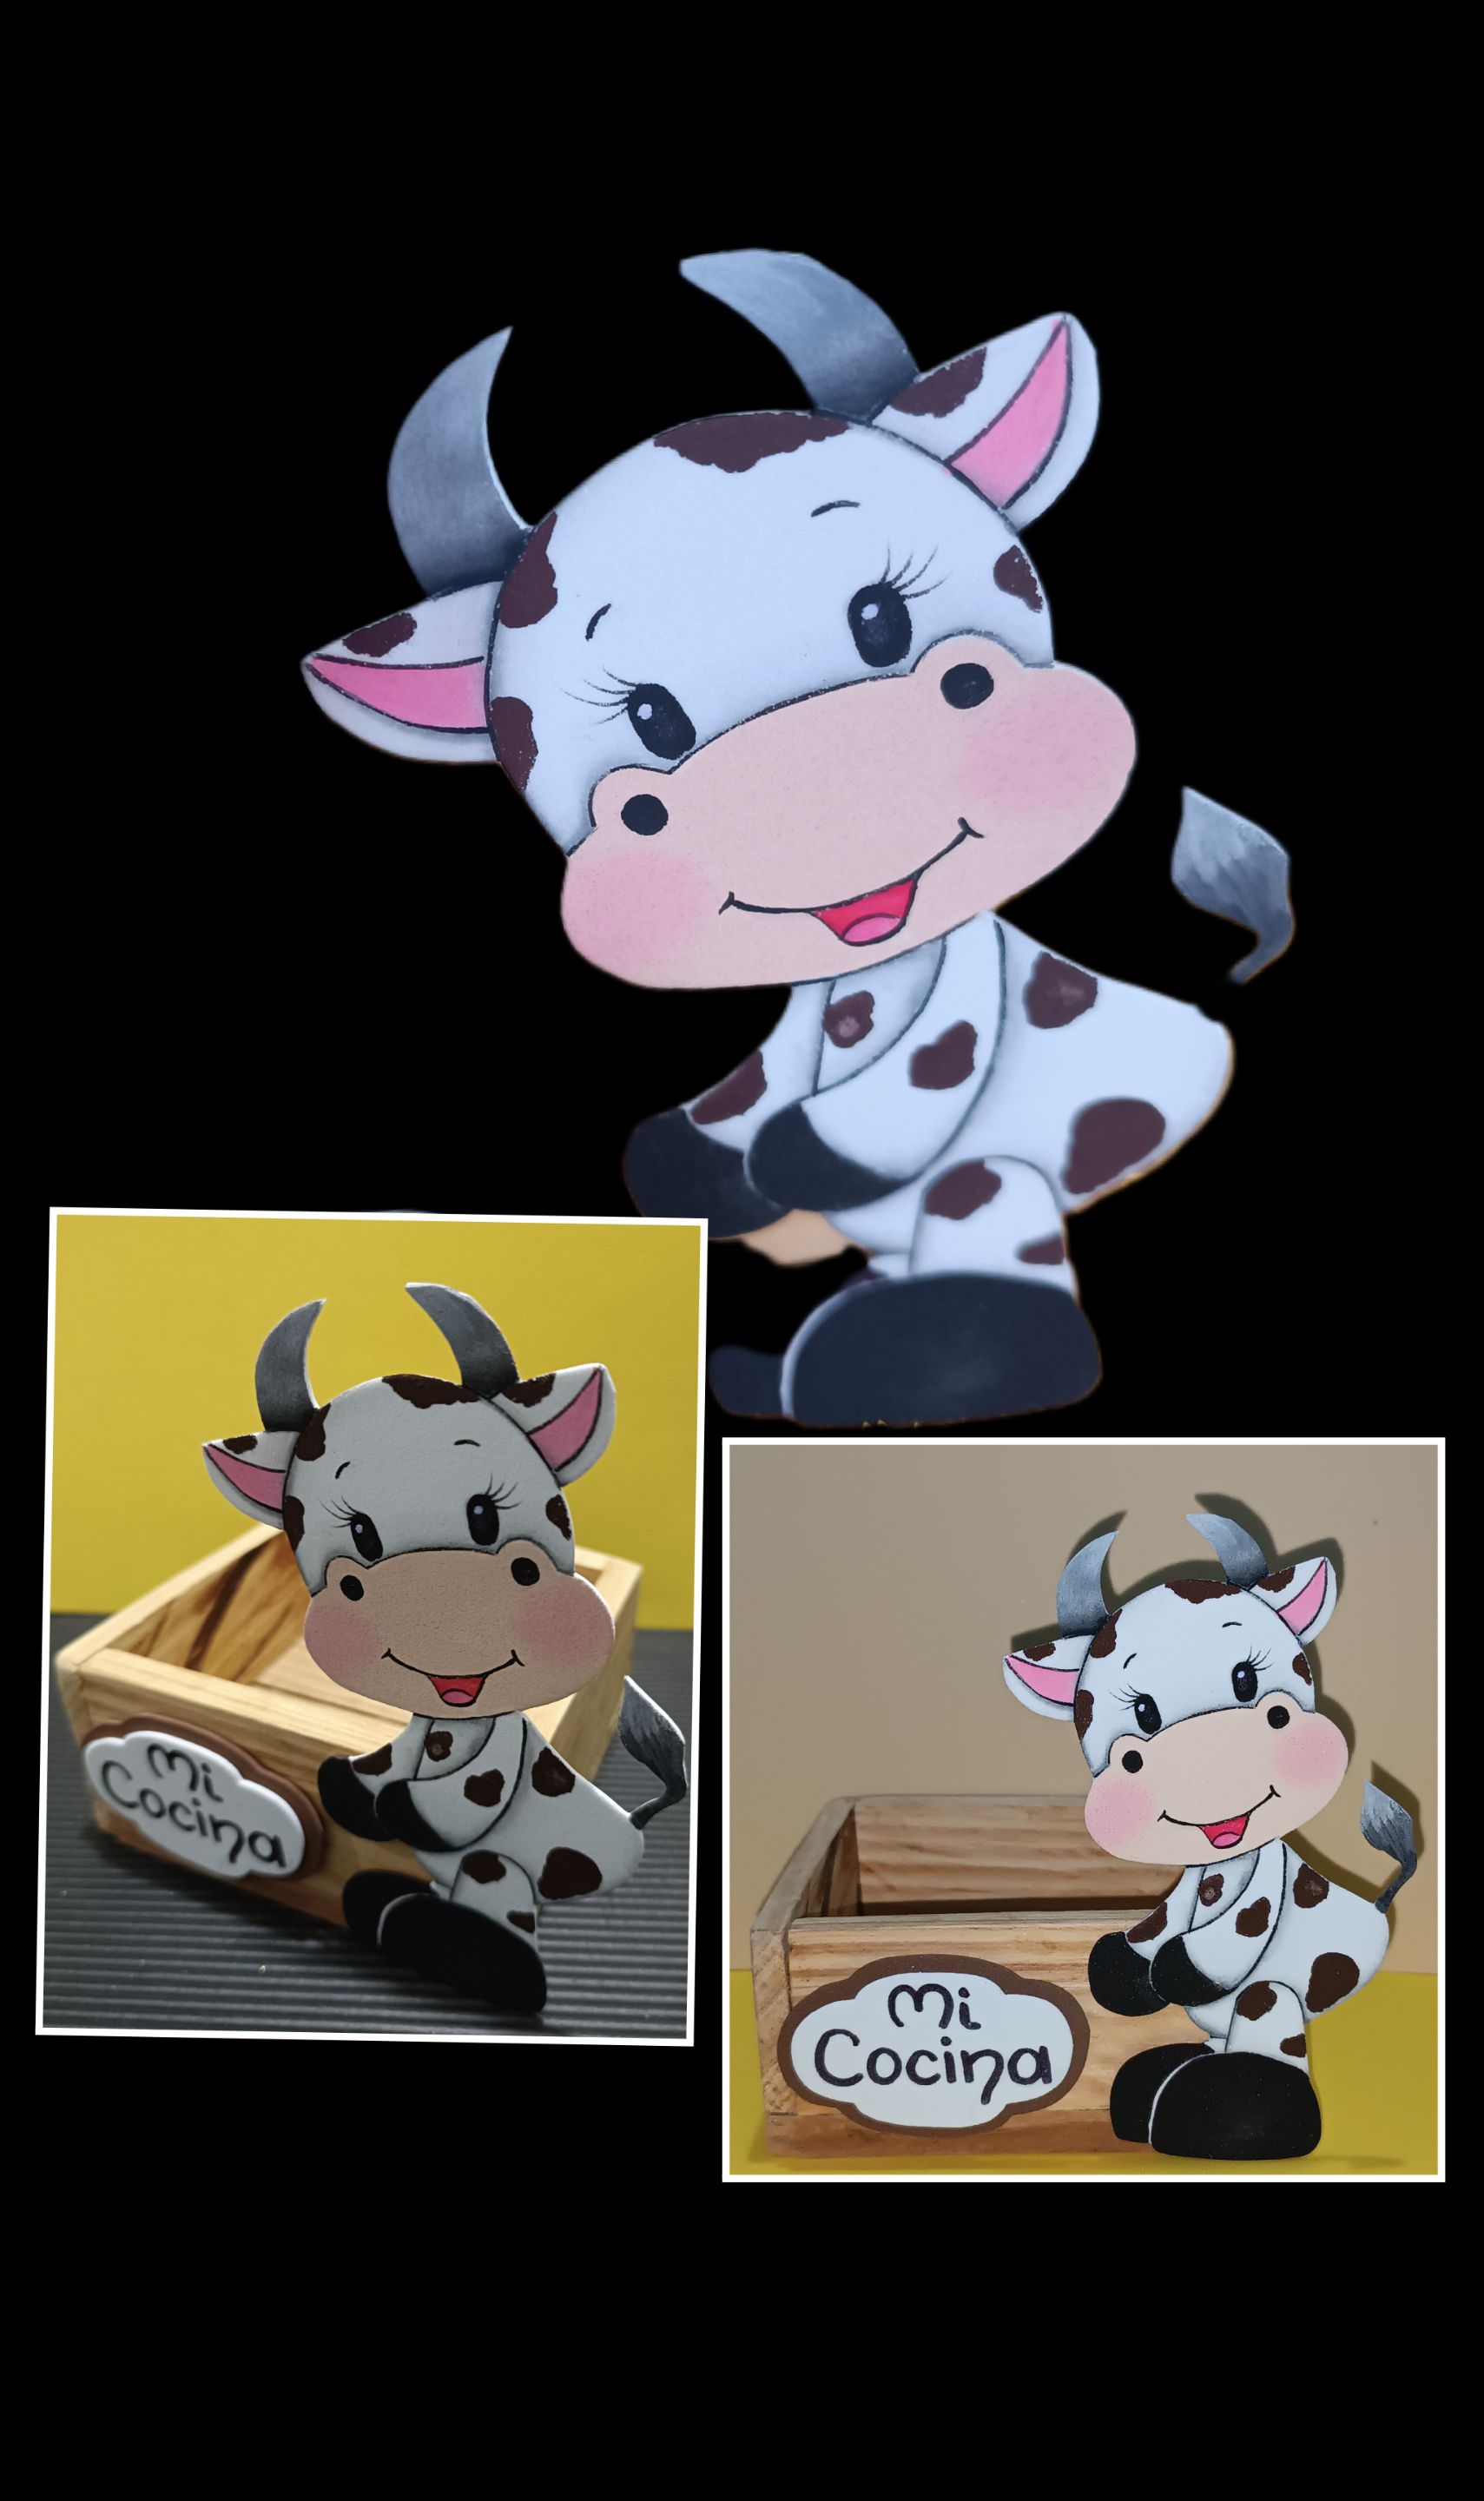
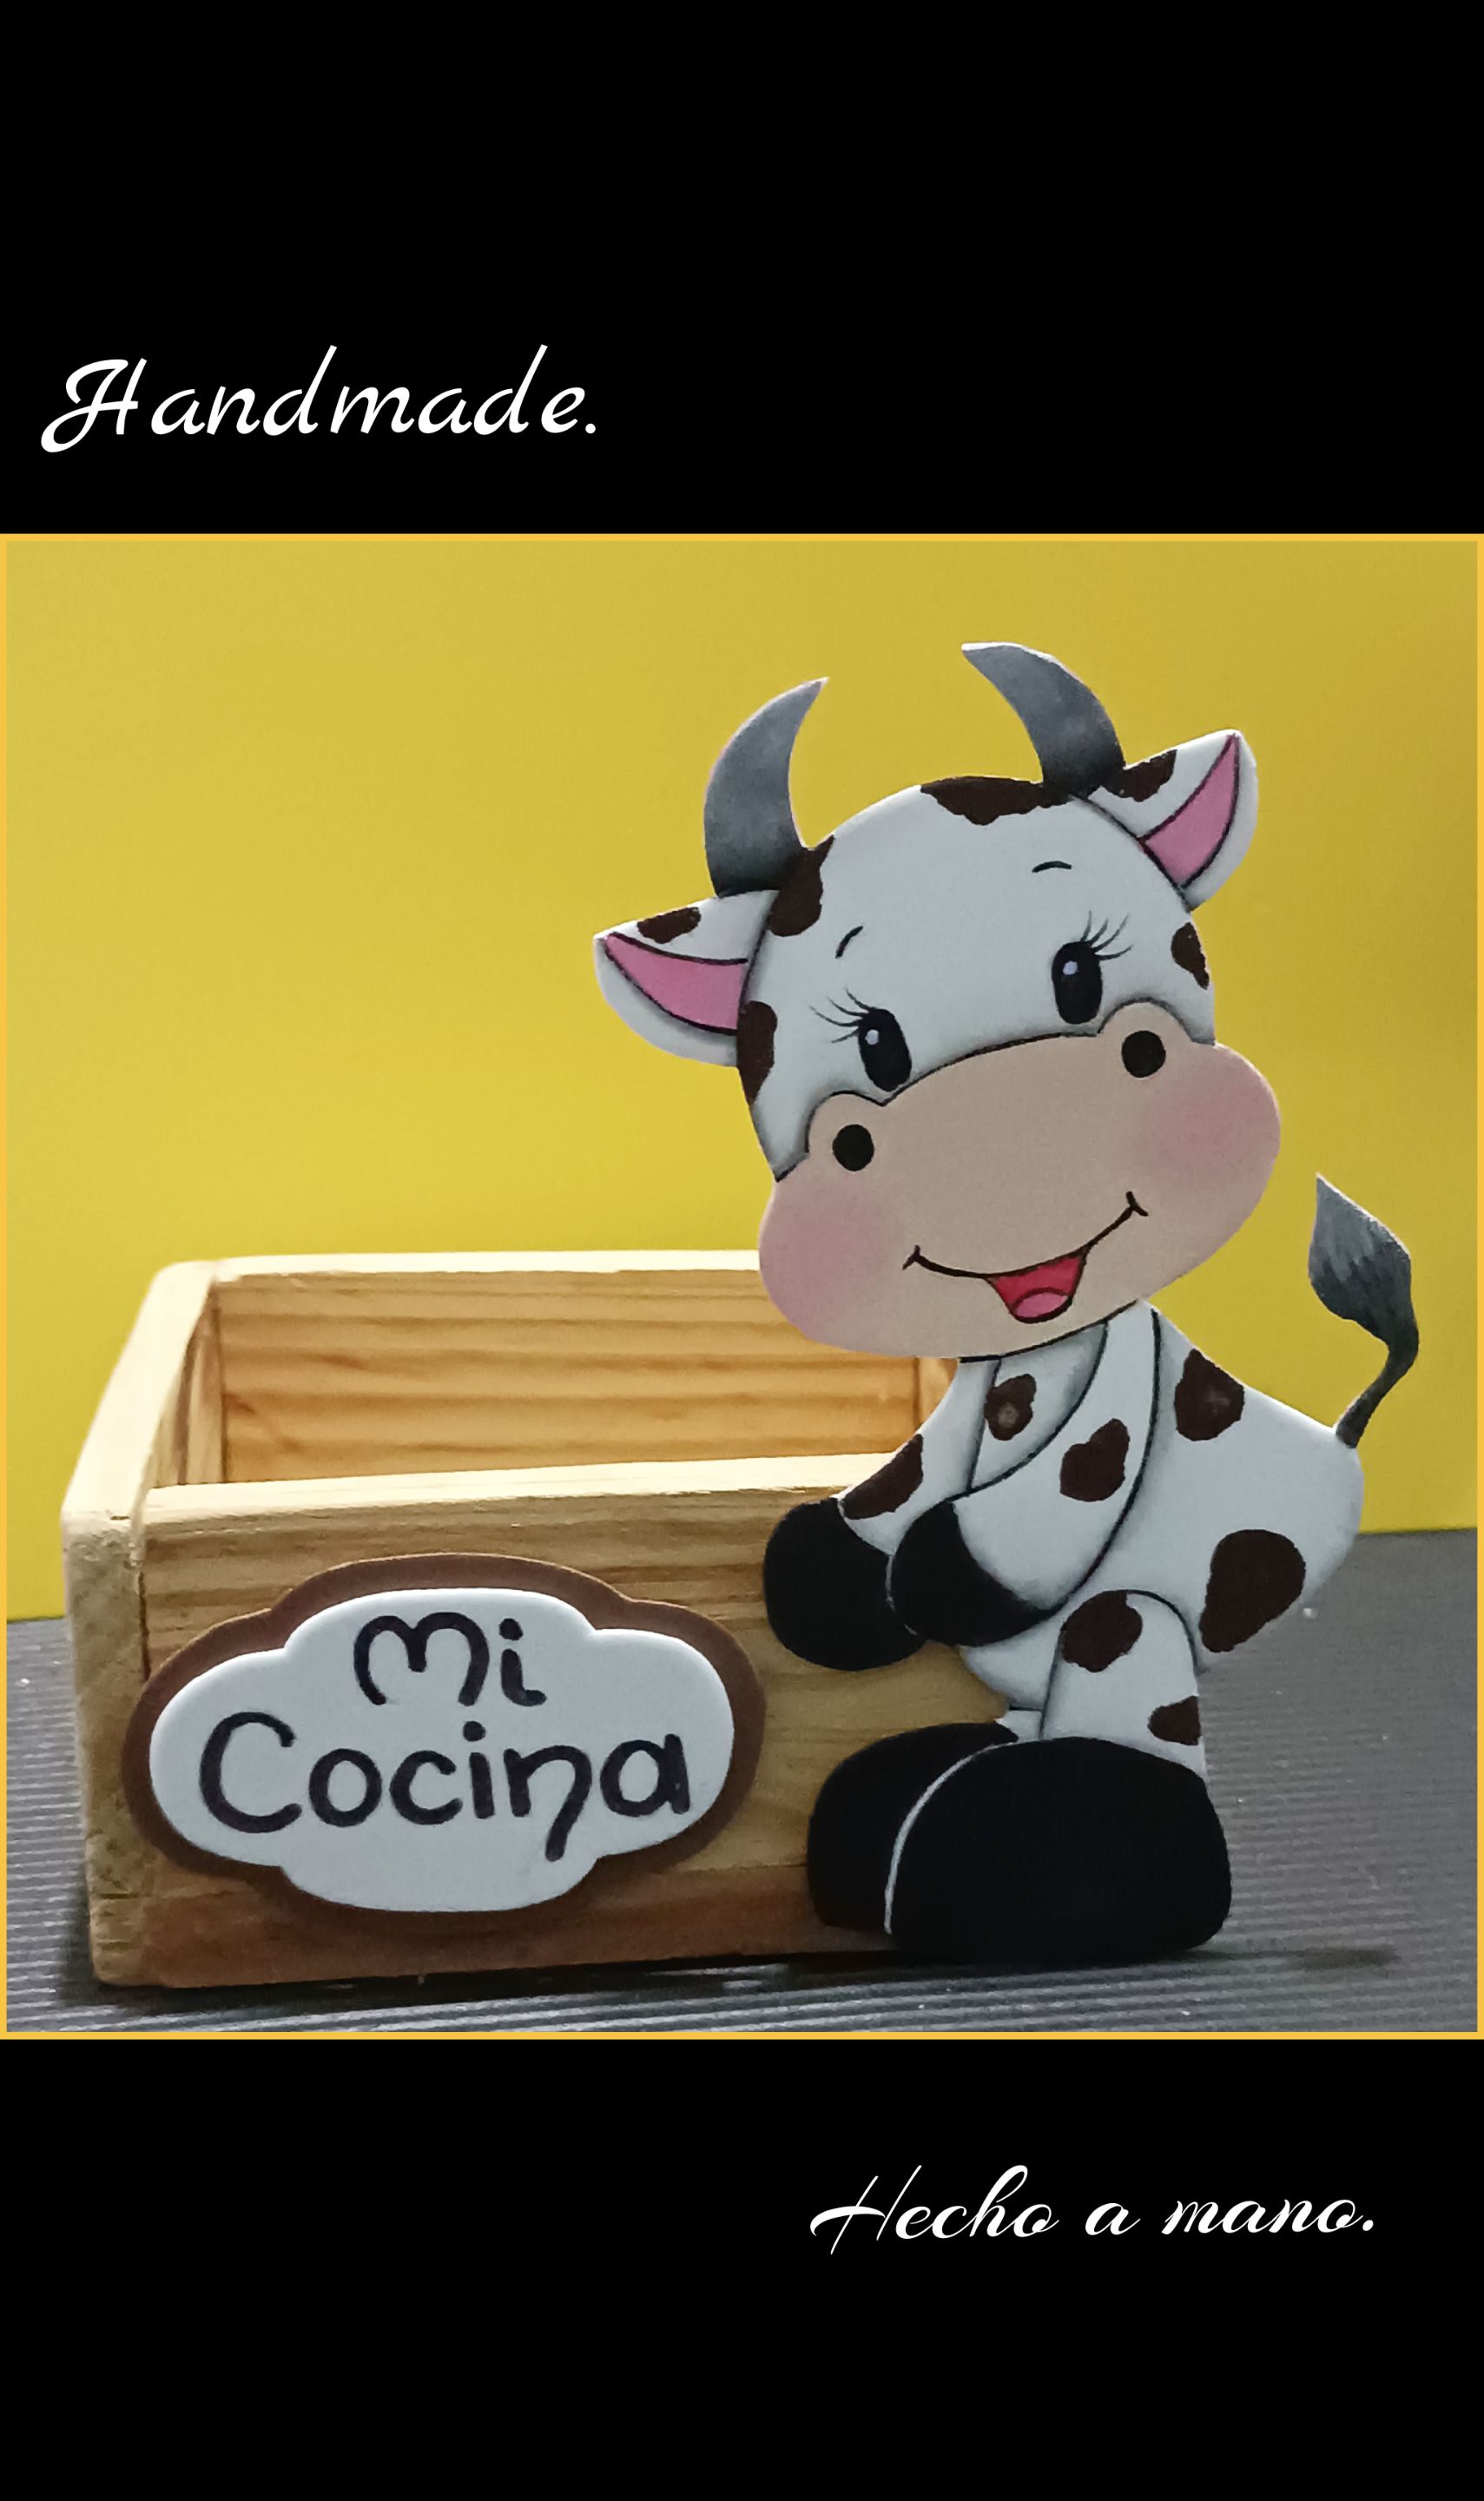
Así queda terminada esta hermosa vaca, demás está decirte que esta misma forma la puedes usar para hacer cualquier figura que te guste. Como puedes ver, esta es otra forma de realizar figuras de foami, espero les guste.
Esta publicación está traducida con DeepL Las fotos capturadas con mi Redmi Note 12 Editadas con GridArt.
Fuente:
https://es.pinterest.com/pin/476255729364289823/
El resultado final...
Ahora me despido, agradecida por tu visita y deseando haya sido de tu agrado este mi tutorial. Muchas gracias por acompañarme y apoyarme. Saludos y hasta mi próxima publicación.
English:
Good evening my dear creators and friends who visit me today ¿How are you?
Then I invite you to join me to see the procedure.
You will need:
|White Foami| Drawing or print|
|----|----|
|Scissors| Pencil|
|Paints and brushes| Marker|
|Silicone| Wooden or cardboard box|
Let's get started:
Step 1
- To transfer onto the foami, first outline the drawing and place it on the foami, as shown in the photo, then rub the paper with the scissors, applying a little pressure.
- Then lift the paper little by little to make sure that the drawing is well marked and cut all around the contour.
- Now start to fill in by painting the muzzle in one direction only with skin color paint and let it dry, then apply a second coat.
Step 2
- Now we will continue painting the ears.
- Then use an angled or flat brush which you are going to dip first in water and then wipe off the excess with a damp cloth.
- Then dip the tip of the brush in gray paint and start going over all the marked lines as shown in the picture.
- You can go outlining some parts of the cow, to the hooves pass or fill with black marker.
Step 3:
- Outline the mouth, paint spots with dark brown paint and for the eyes and nostrils, wet a brush on the rounded part and press on the foami, then with an eyeliner paint the eyelashes and finally paint the hooves on top.
Step 4:
-To make the name, draw or make a shape on a piece of paper and cut it out, then mark on the foami and cut out a white piece and a slightly larger one in brown.
- Place "My Kitchen" in marker and glue one on top of the other.
- Finally, apply silicone on the foami pieces and glue to the wooden or cardboard box.
This is how this beautiful cow is finished, it goes without saying that you can use this same shape to make any figure you like. As you can see, this is another way to make foami figures, I hope you like it.
This post is translated with DeepL Photos captured with my Redmi Note 12 Edited with GridArt.
Source:
https://es.pinterest.com/pin/476255729364289823/
The final result...
Now I say goodbye, thank you for your visit and I hope you have enjoyed this tutorial. Thank you very much for joining me and supporting me. Greetings and until my next publication.