

### 🌺 *Flowers and glitter go great together in any craft. Highlighting its beauty.* 🌺
I needed a little box to store my nail polishes, lipsticks and other delicate things that I don't like to have lying around in my display drawer. A couple of days ago I saw a rustic wooden box for sale in a store, I decided to buy it, because it was at a very low cost, as soon as I saw it, it was love at first sight and I knew I was going to decorate it in this style. A relaxed, airy style that would not overload and that would simply enhance both the country style beauty of the box and the small flowers. I came up with a trick to not burn my hands so much with the hot silicone, so I made use of a straw or straw as you know it in your country, a trick that turned out great and I want to share with you. Join me and I will explain you step by step, how to do it, if you find it difficult or you get stuck in any step, anyway I recorded the process and at the end of the post you will have the video that will help you a little more.

### 🌺 *Las flores y los brillos combinan excelente en cualquier manualidad. Resaltando su belleza.* 🌺
Necesitaba una cajita para guardar mis pinturas de uñas, labiales y otras cositas delicadas que no me gusta tener regadas en la gaveta de mi escaparate. Hace un par de días observé una caja rústica de madera en venta en una tienda, decidí comprarla, pues estaba a muy bajo costo, en lo que la vi fue amor a primera vista y ya sabía que la iba a decorar en este estilo. Un estilo relajado, aireado, que no sobrecargara y que simplemente realzara tanto la belleza estilo country de la cajita como las pequeñas flores. Ideé un truco para no quemarme tanto las manos con el silicón caliente, así que hice uso de un pitillo o popote como lo conozcas en tu país, un truco que me resultó genial y quiero compartir contigo. Acompáñame y te explico paso a paso, cómo se hace, si se te hace algo difícil o te trabas en algún paso, de todas maneras grabé el proceso y al final del post tendrás el vídeo que te ayudará un poco más.
---

### 🌺 *Las flores y los brillos combinan excelente en cualquier manualidad. Resaltando su belleza.* 🌺
Necesitaba una cajita para guardar mis pinturas de uñas, labiales y otras cositas delicadas que no me gusta tener regadas en la gaveta de mi escaparate. Hace un par de días observé una caja rústica de madera en venta en una tienda, decidí comprarla, pues estaba a muy bajo costo, en lo que la vi fue amor a primera vista y ya sabía que la iba a decorar en este estilo. Un estilo relajado, aireado, que no sobrecargara y que simplemente realzara tanto la belleza estilo country de la cajita como las pequeñas flores. Ideé un truco para no quemarme tanto las manos con el silicón caliente, así que hice uso de un pitillo o popote como lo conozcas en tu país, un truco que me resultó genial y quiero compartir contigo. Acompáñame y te explico paso a paso, cómo se hace, si se te hace algo difícil o te trabas en algún paso, de todas maneras grabé el proceso y al final del post tendrás el vídeo que te ayudará un poco más.


🌺Foami (Goma Eva). 🌺Straw. 🌺Rustic wooden box. 🌺Scissors. 🌺Hot silicone.
🌺Foami (Goma Eva). 🌺Straw. 🌺Rustic wooden box. 🌺Scissors. 🌺Hot silicone.

# 🌺 Step 1
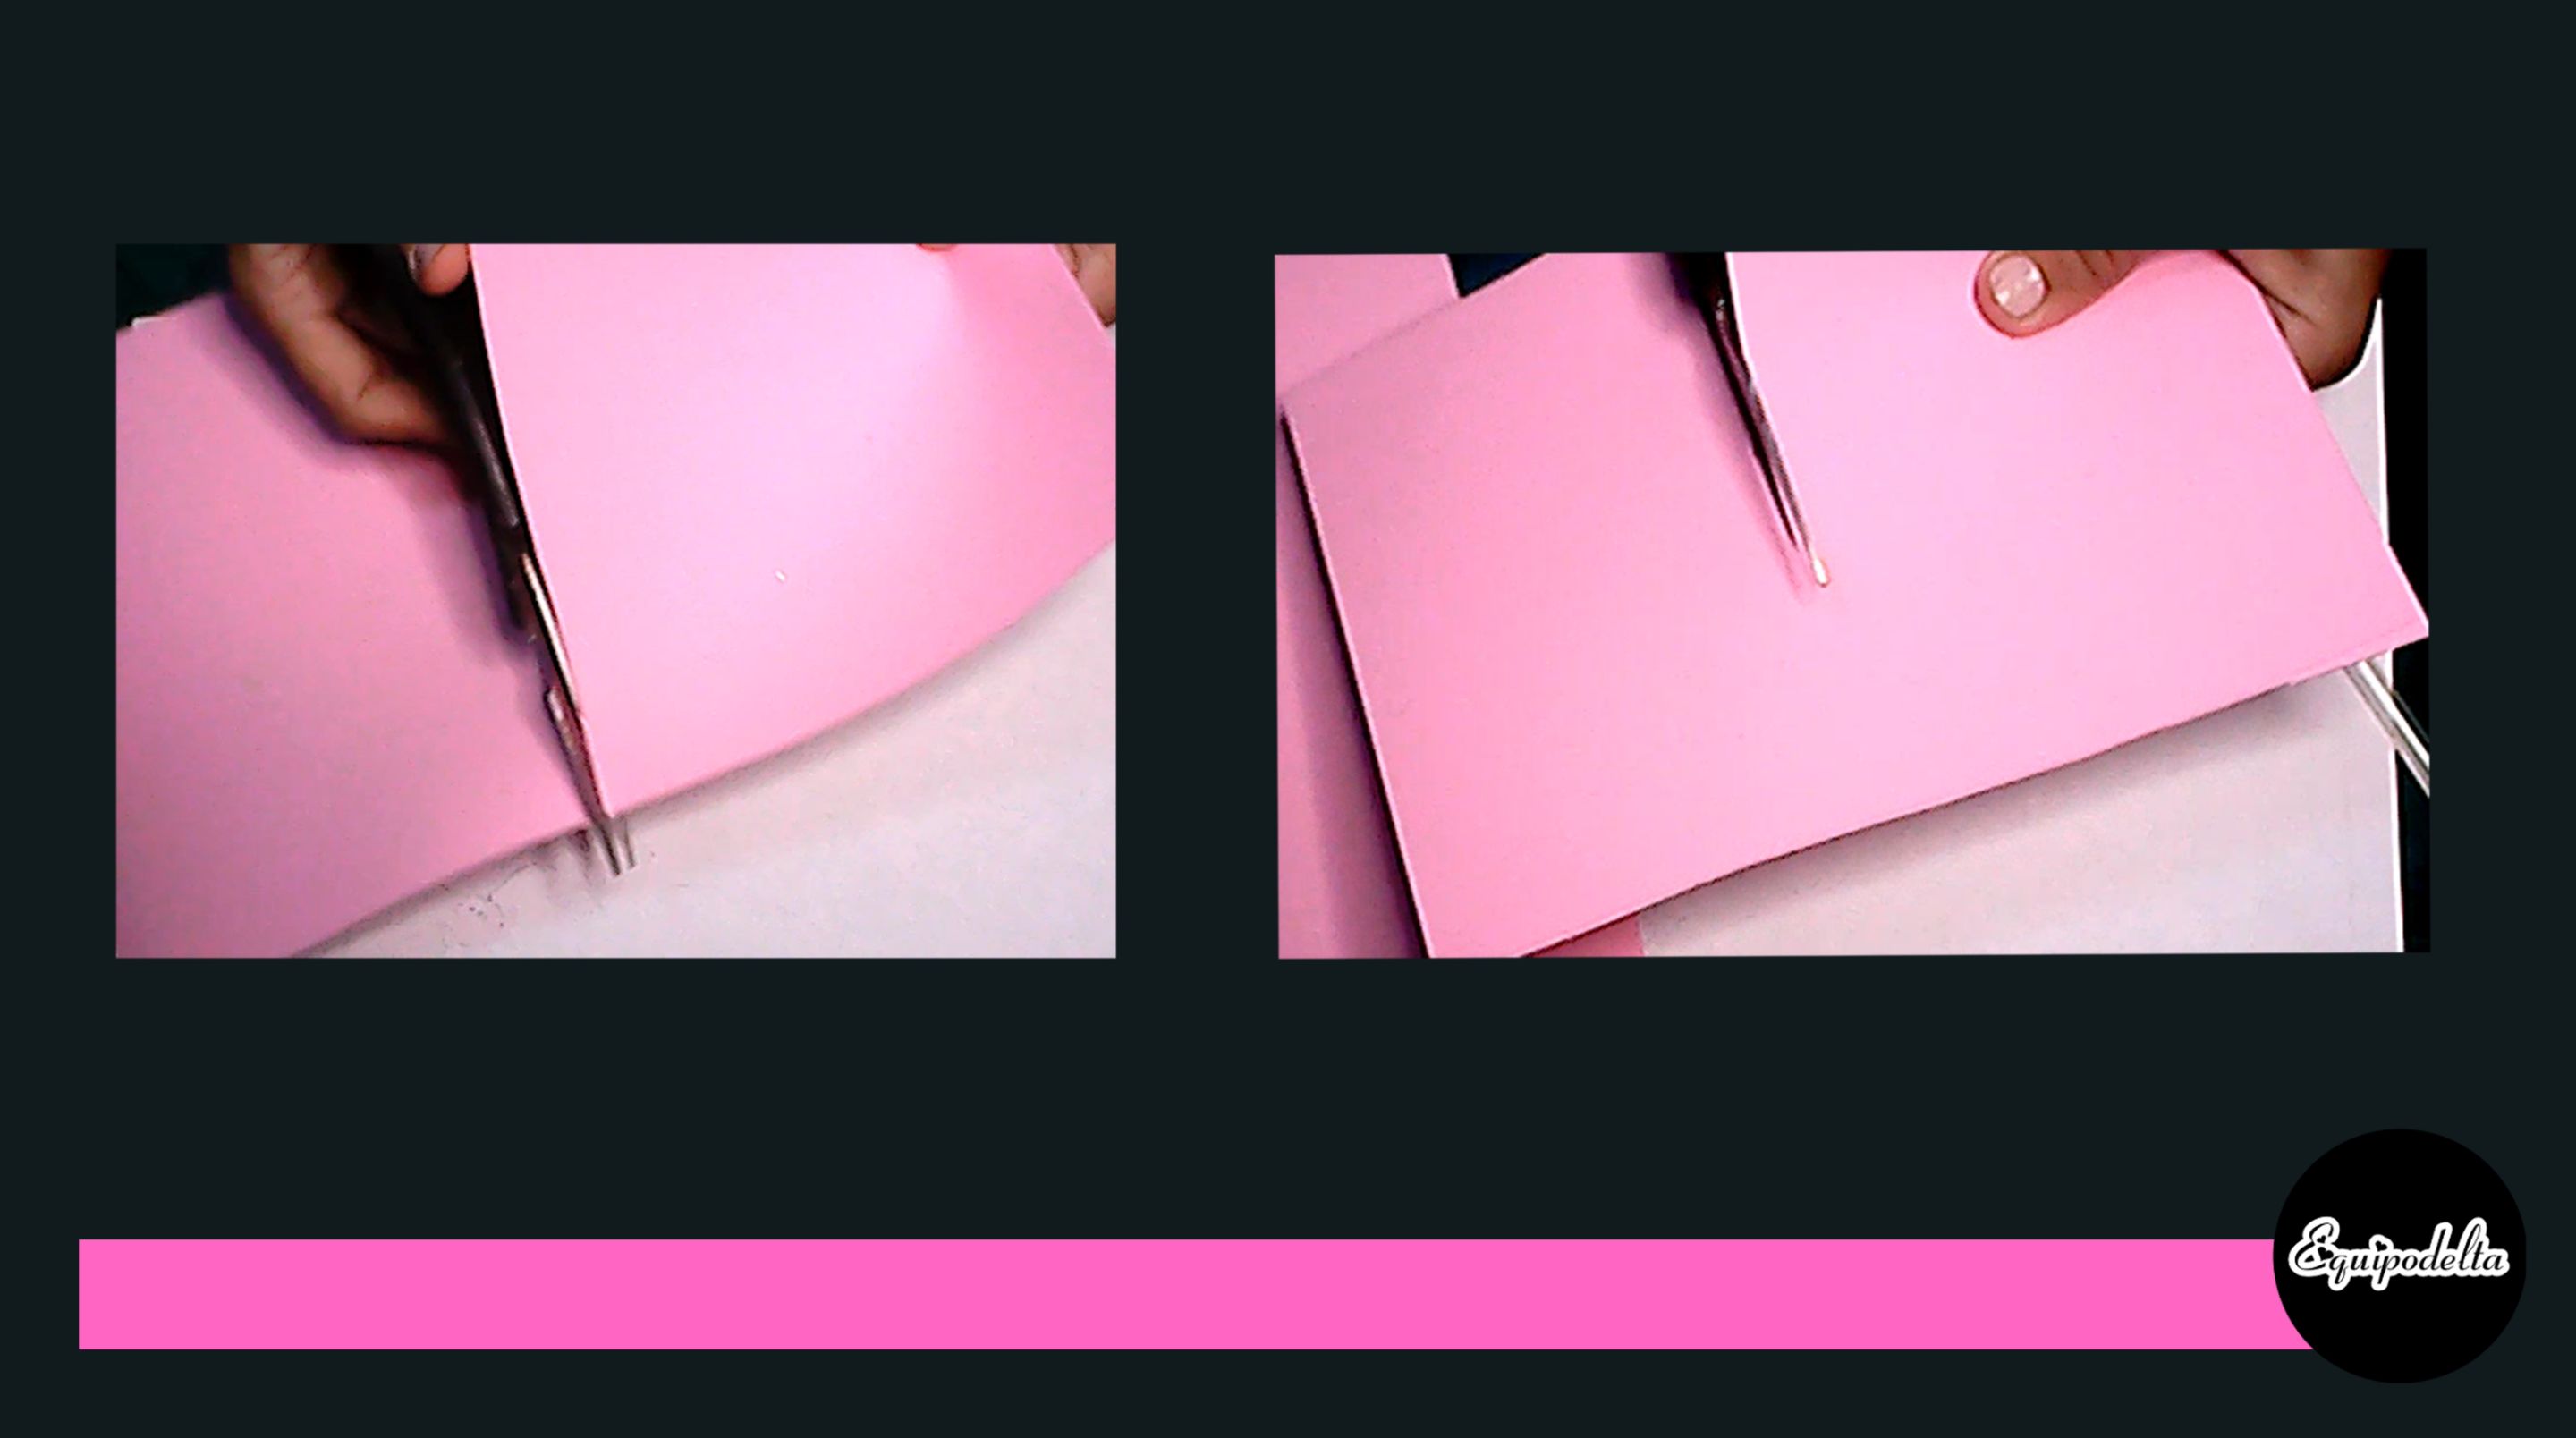
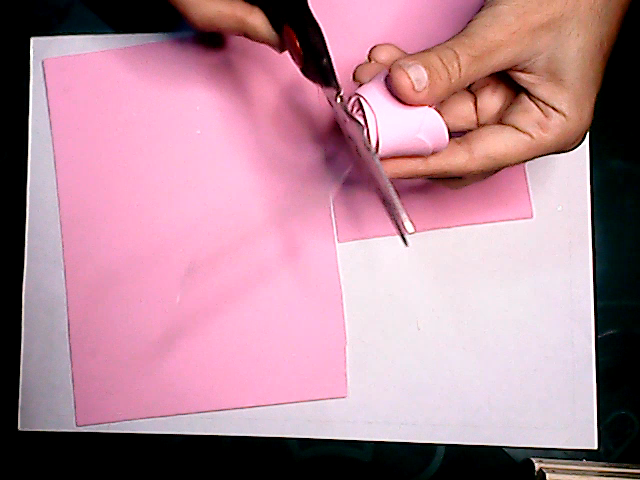
Take a letter size foami (Eva rubber) and fold it in half, then cut it out, you will have two pieces left. Now fold those two pieces in half and cut them out, as a result you will have 4 rectangular pieces of foami.
# 🌺 Step 1
Take a letter size foami (Eva rubber) and fold it in half, then cut it out, you will have two pieces left. Now fold those two pieces in half and cut them out, as a result you will have 4 rectangular pieces of foami.

# 🌺 Paso 1
Toma un foami (goma Eva) tamaño carta y dobla por la mitad, luego recorta, te quedarán dos piezas. Ahora dobla por la mitad esas dos piezas y recortas, como resultado tendrás 4 piezas rectangulares de foami.
---
# 🌺 Paso 1
Toma un foami (goma Eva) tamaño carta y dobla por la mitad, luego recorta, te quedarán dos piezas. Ahora dobla por la mitad esas dos piezas y recortas, como resultado tendrás 4 piezas rectangulares de foami.


# 🌺 Step 2
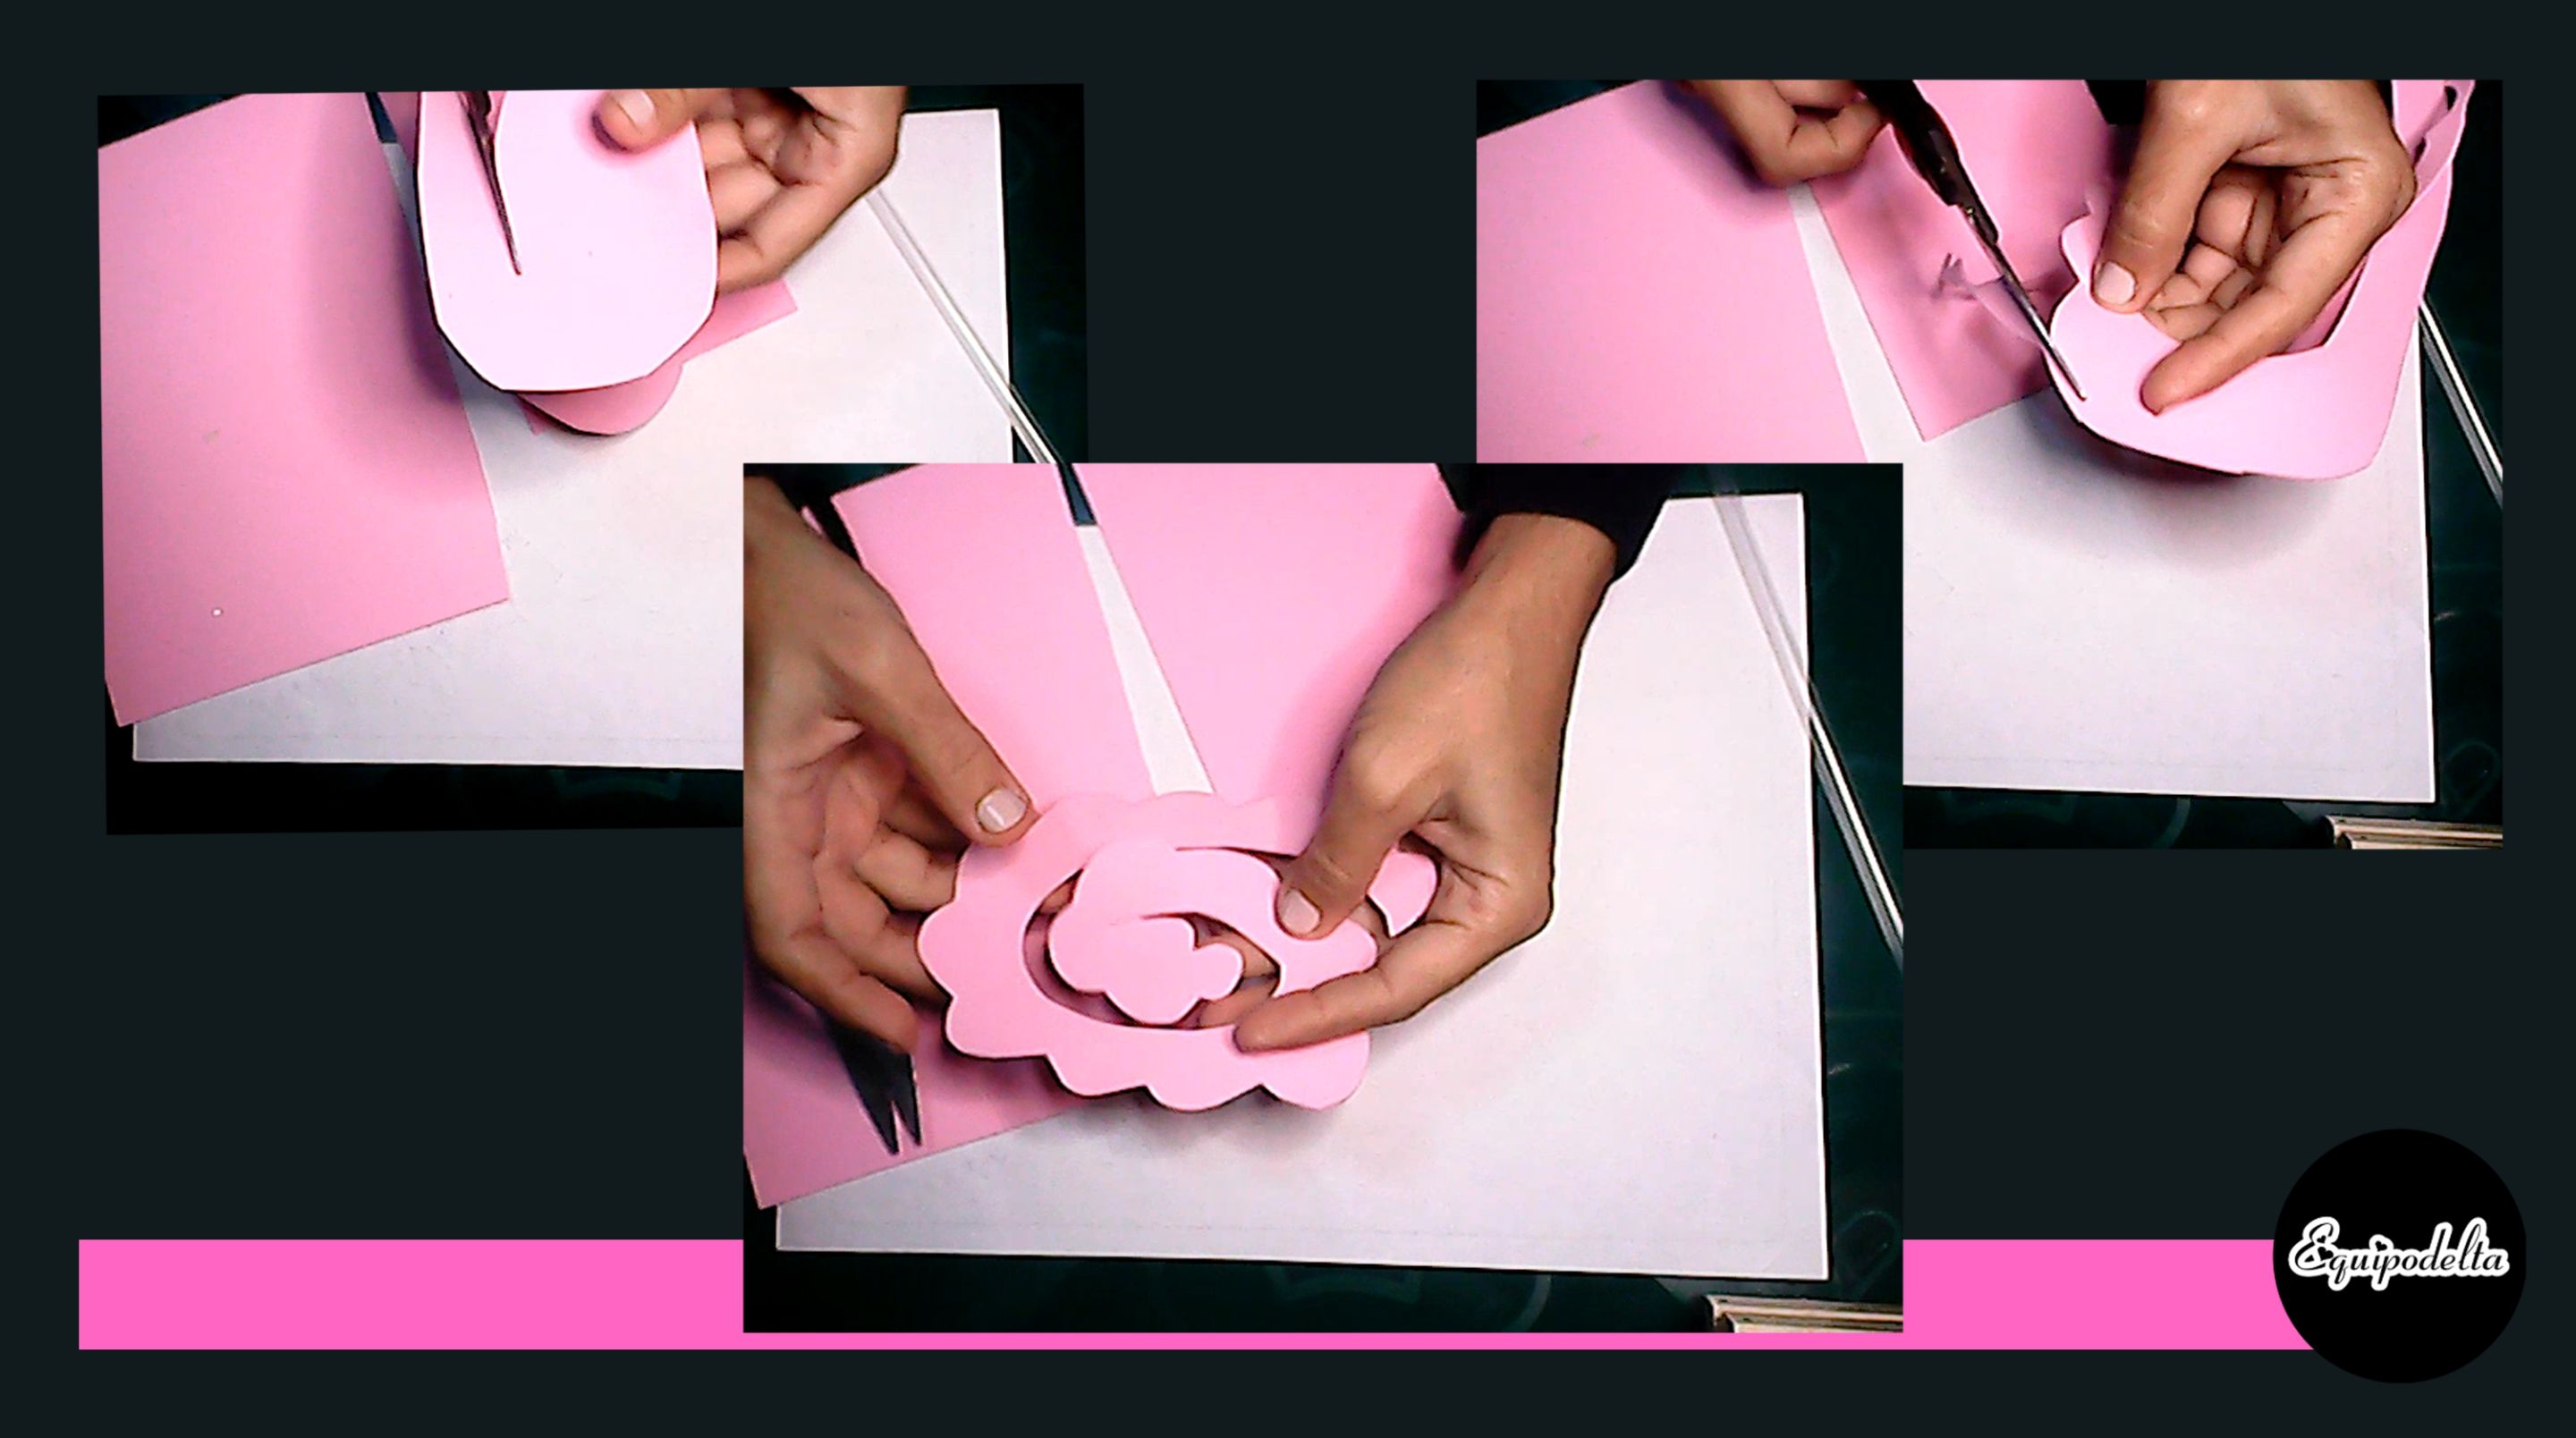
Cut a spiral from the outside to the inside in one of these rectangles of foami, try to leave at least 2 centimeters wide. Cut some waves on the outside of the foami, start from one of the ends, I start making the petals starting from the center, it is easier.
# 🌺 Step 2
Cut a spiral from the outside to the inside in one of these rectangles of foami, try to leave at least 2 centimeters wide. Cut some waves on the outside of the foami, start from one of the ends, I start making the petals starting from the center, it is easier.

# 🌺 Paso 2
Recorta un espiral de afuera hacia a dentro en uno de esos rectángulos de foami, Procura dejar al menos un ancho de 2 centímetros. Recorta unas ondas por la parte de afuera del foami, comienza desde una de las puntas, yo comienzo a hacer los pétalos comenzando desde el centro, es más fácil.
---
# 🌺 Paso 2
Recorta un espiral de afuera hacia a dentro en uno de esos rectángulos de foami, Procura dejar al menos un ancho de 2 centímetros. Recorta unas ondas por la parte de afuera del foami, comienza desde una de las puntas, yo comienzo a hacer los pétalos comenzando desde el centro, es más fácil.


# 🌺 Step 3
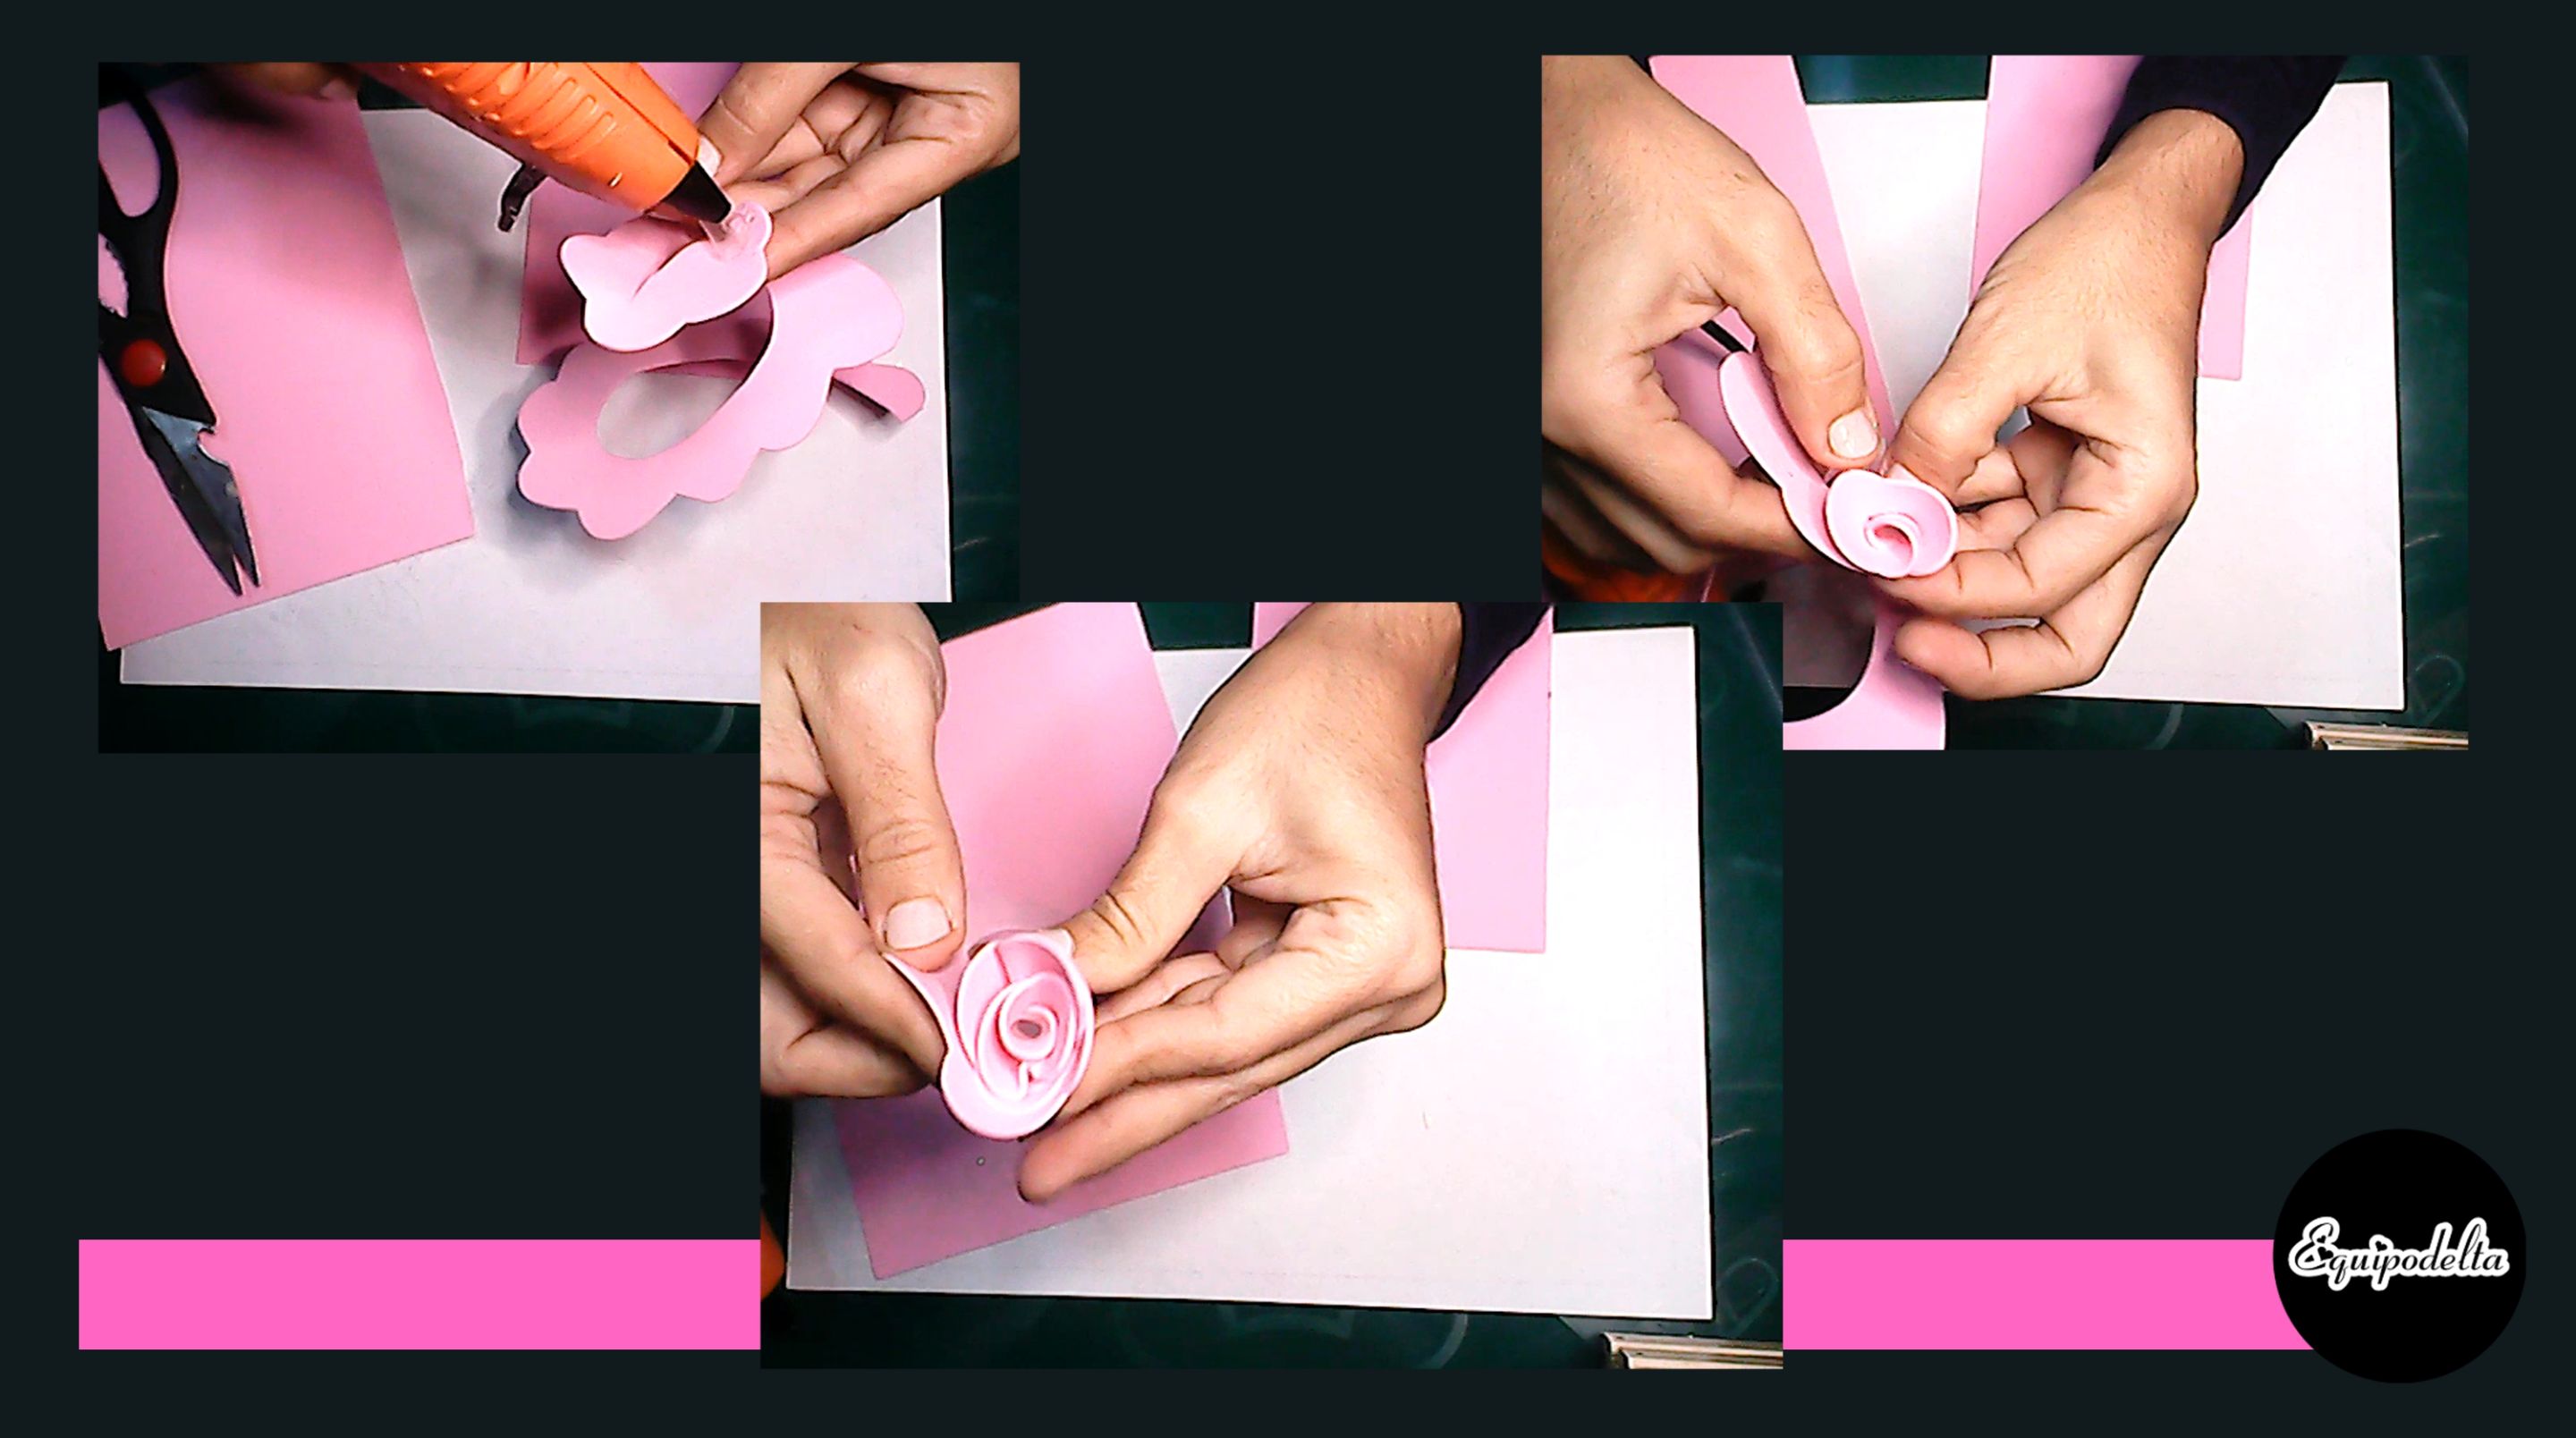
Place glue (hot silicone) in the central part of the piece you just cut out, now fix the straw. The straw will help you to keep the shape of the flower and not to burn yourself with the hot silicone trying to border the flower. Cut off the excess of the straw.
# 🌺 Step 3
Place glue (hot silicone) in the central part of the piece you just cut out, now fix the straw. The straw will help you to keep the shape of the flower and not to burn yourself with the hot silicone trying to border the flower. Cut off the excess of the straw.

# 🌺 Paso 3
Coloca pegamento (silicón caliente) en la parte central de la pieza que acabas de recortar, ahora fija el pitillo. El pitillo te ayudará a mantener la forma de la flor y a no quemarte con el silicón caliente tratando de bordear la flor. Recorta el sobrante del pitillo.
---
# 🌺 Paso 3
Coloca pegamento (silicón caliente) en la parte central de la pieza que acabas de recortar, ahora fija el pitillo. El pitillo te ayudará a mantener la forma de la flor y a no quemarte con el silicón caliente tratando de bordear la flor. Recorta el sobrante del pitillo.


# 🌺 Step 4
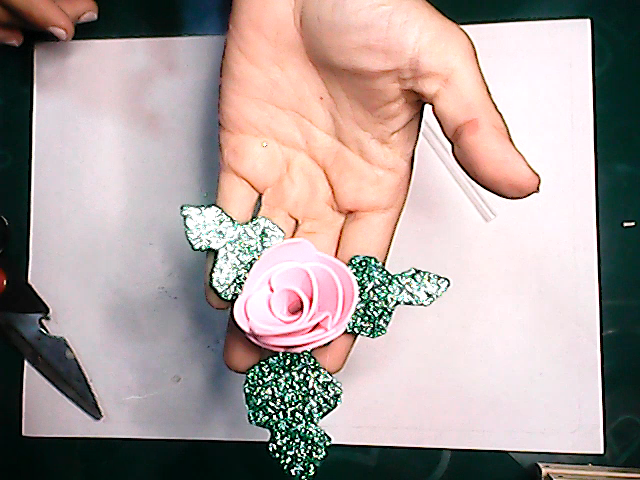
Cut out several rectangles of green foami, we will make some rustic leaves. Once you have cut out their shapes, make several small holes in the leaf. Then glue the three leaves in a triangular shape, then glue the flower in the center.
# 🌺 Step 4
Cut out several rectangles of green foami, we will make some rustic leaves. Once you have cut out their shapes, make several small holes in the leaf. Then glue the three leaves in a triangular shape, then glue the flower in the center.

# 🌺 Paso 4
Recorta varios rectángulos de foami verde, haremos unas hojas rústicas. Una vez recortes su formas realizas varios piquitos a la hoja. Seguidamente pegas las tres hojas en forma triangular, luego pega la flor en el centro.
---
# 🌺 Paso 4
Recorta varios rectángulos de foami verde, haremos unas hojas rústicas. Una vez recortes su formas realizas varios piquitos a la hoja. Seguidamente pegas las tres hojas en forma triangular, luego pega la flor en el centro.


# 🌺 Step 5
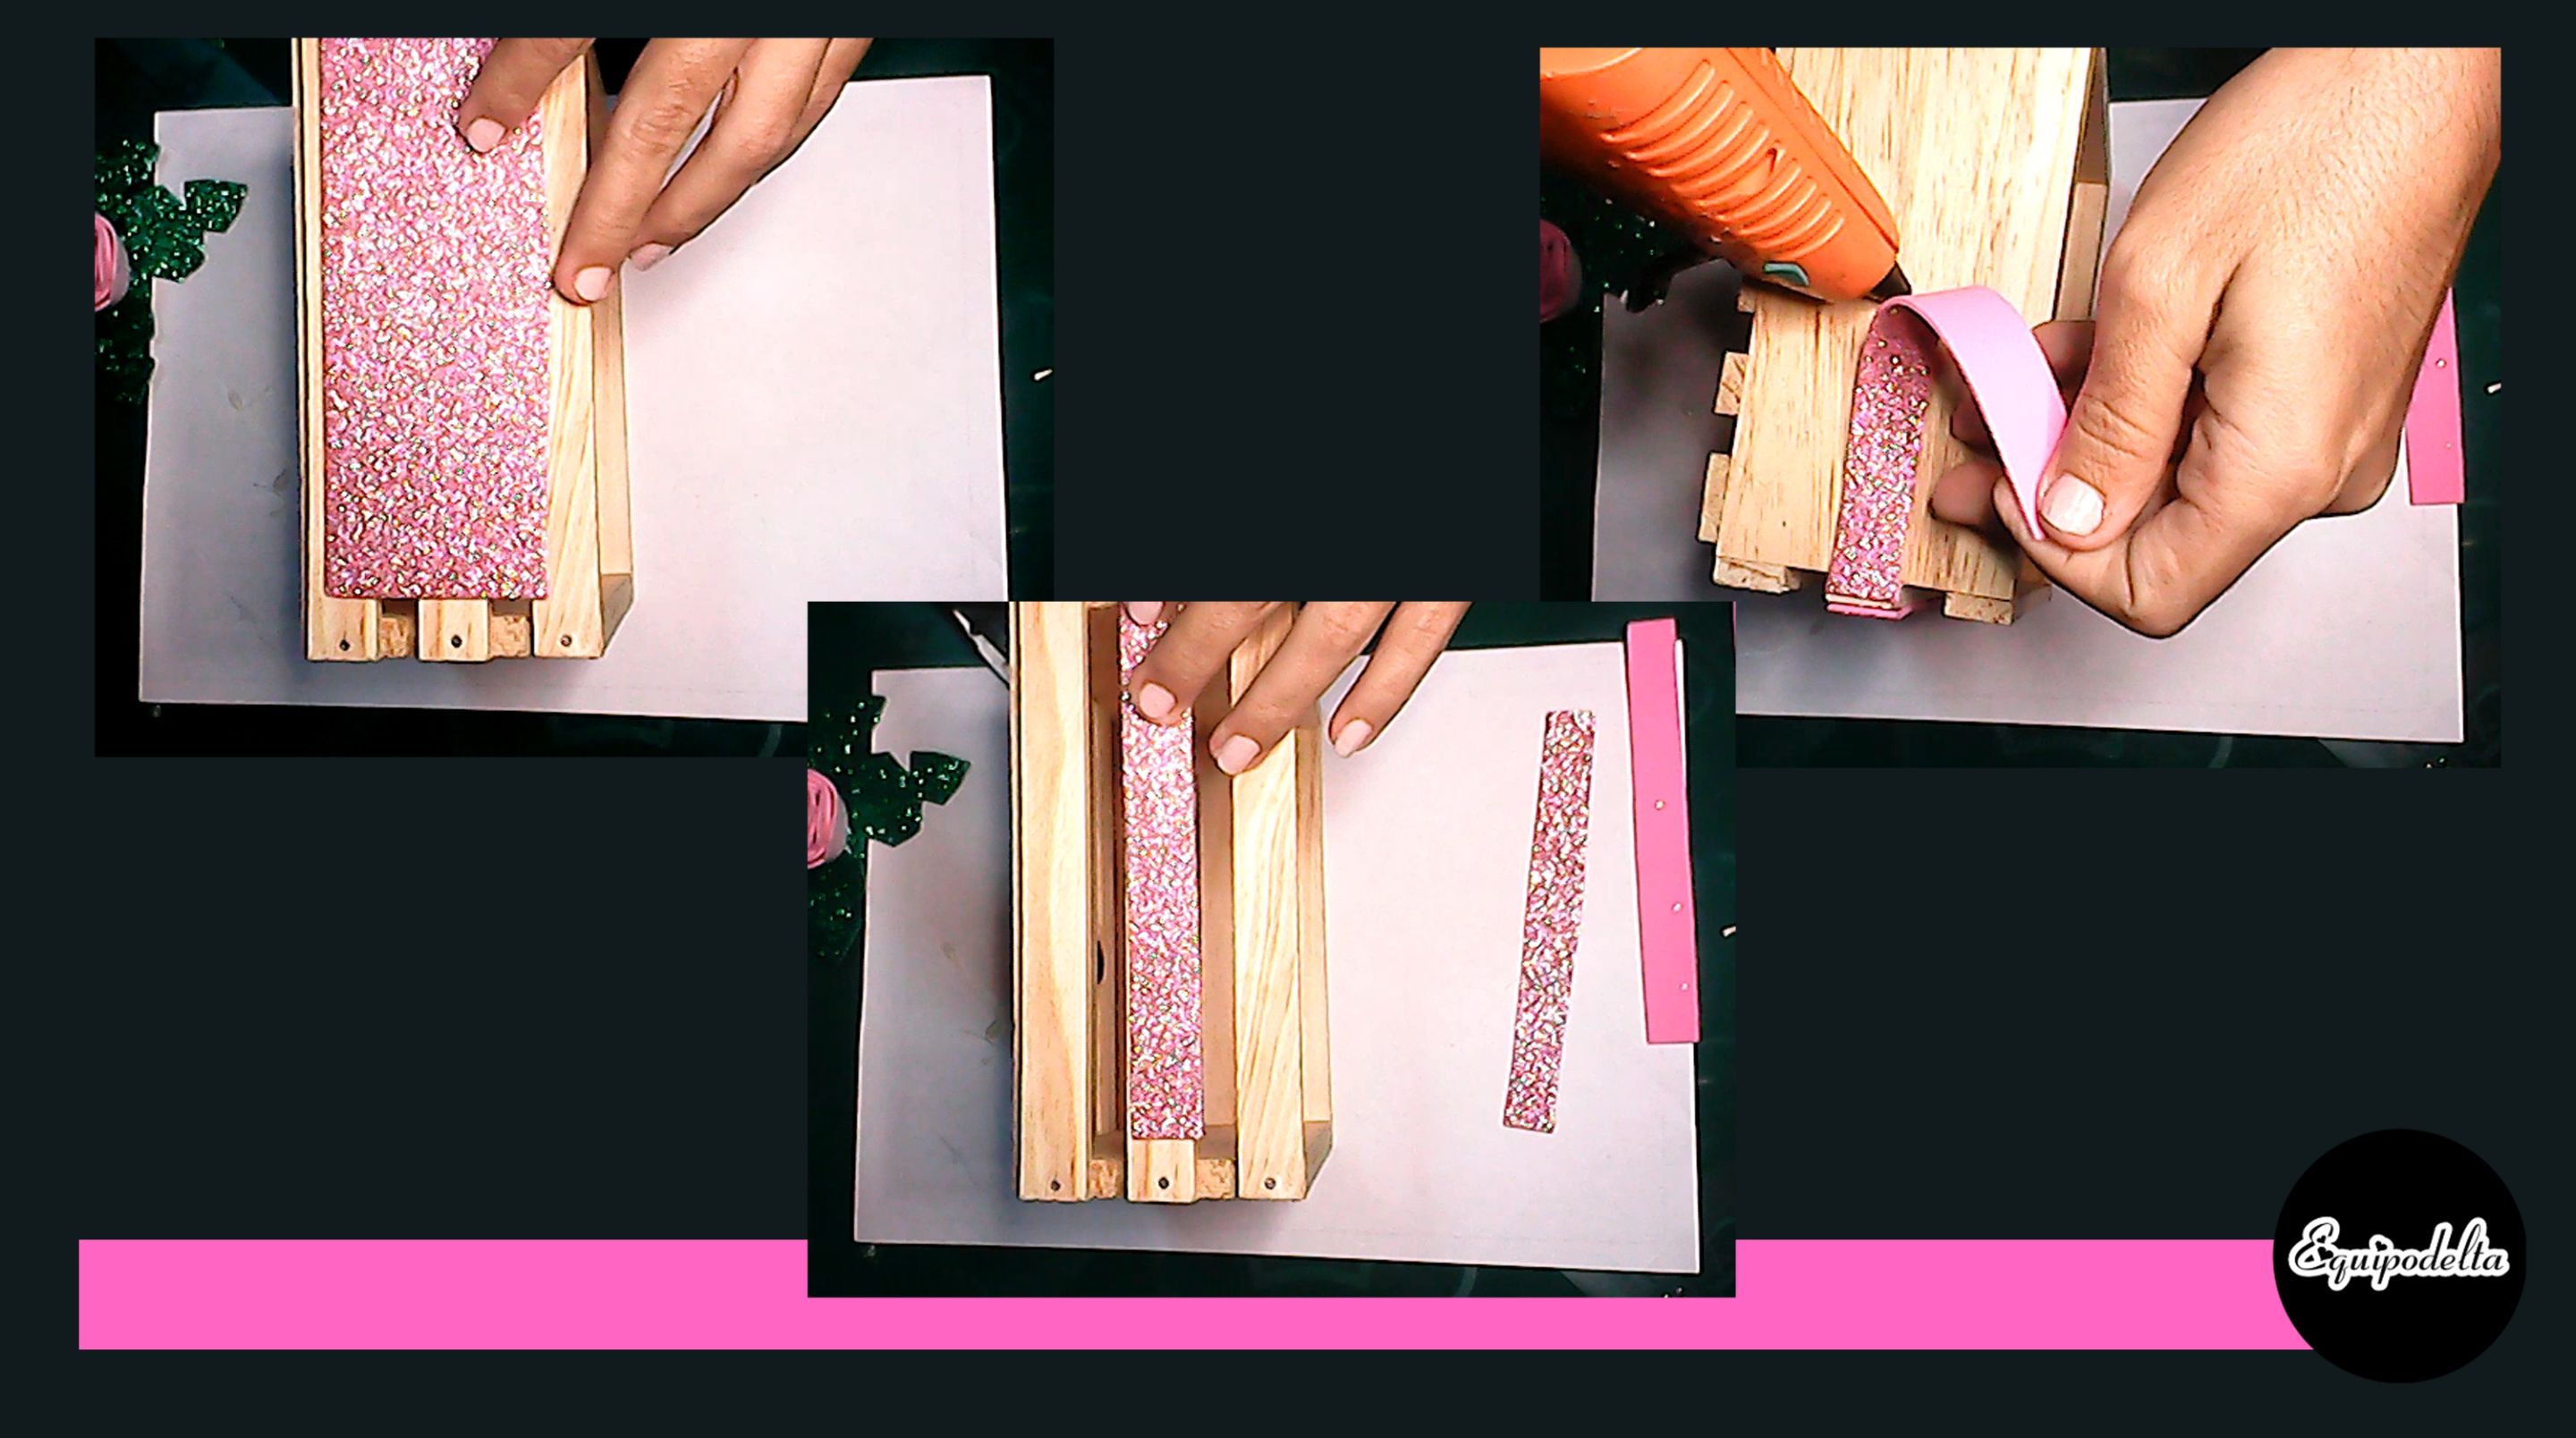
Take the measurement of the trim strip to place it in the box. Cut out. Glue in the place of your choice, I placed it in the center.
# 🌺 Step 5
Take the measurement of the trim strip to place it in the box. Cut out. Glue in the place of your choice, I placed it in the center.

# 🌺 Paso 5
Toma la medida de la tira de adorno para colocarla en la caja. Recorta. Pega en el lugar de tu preferencia, yo la coloqué en el centro.
---
# 🌺 Paso 5
Toma la medida de la tira de adorno para colocarla en la caja. Recorta. Pega en el lugar de tu preferencia, yo la coloqué en el centro.


# 🌺 Step 6
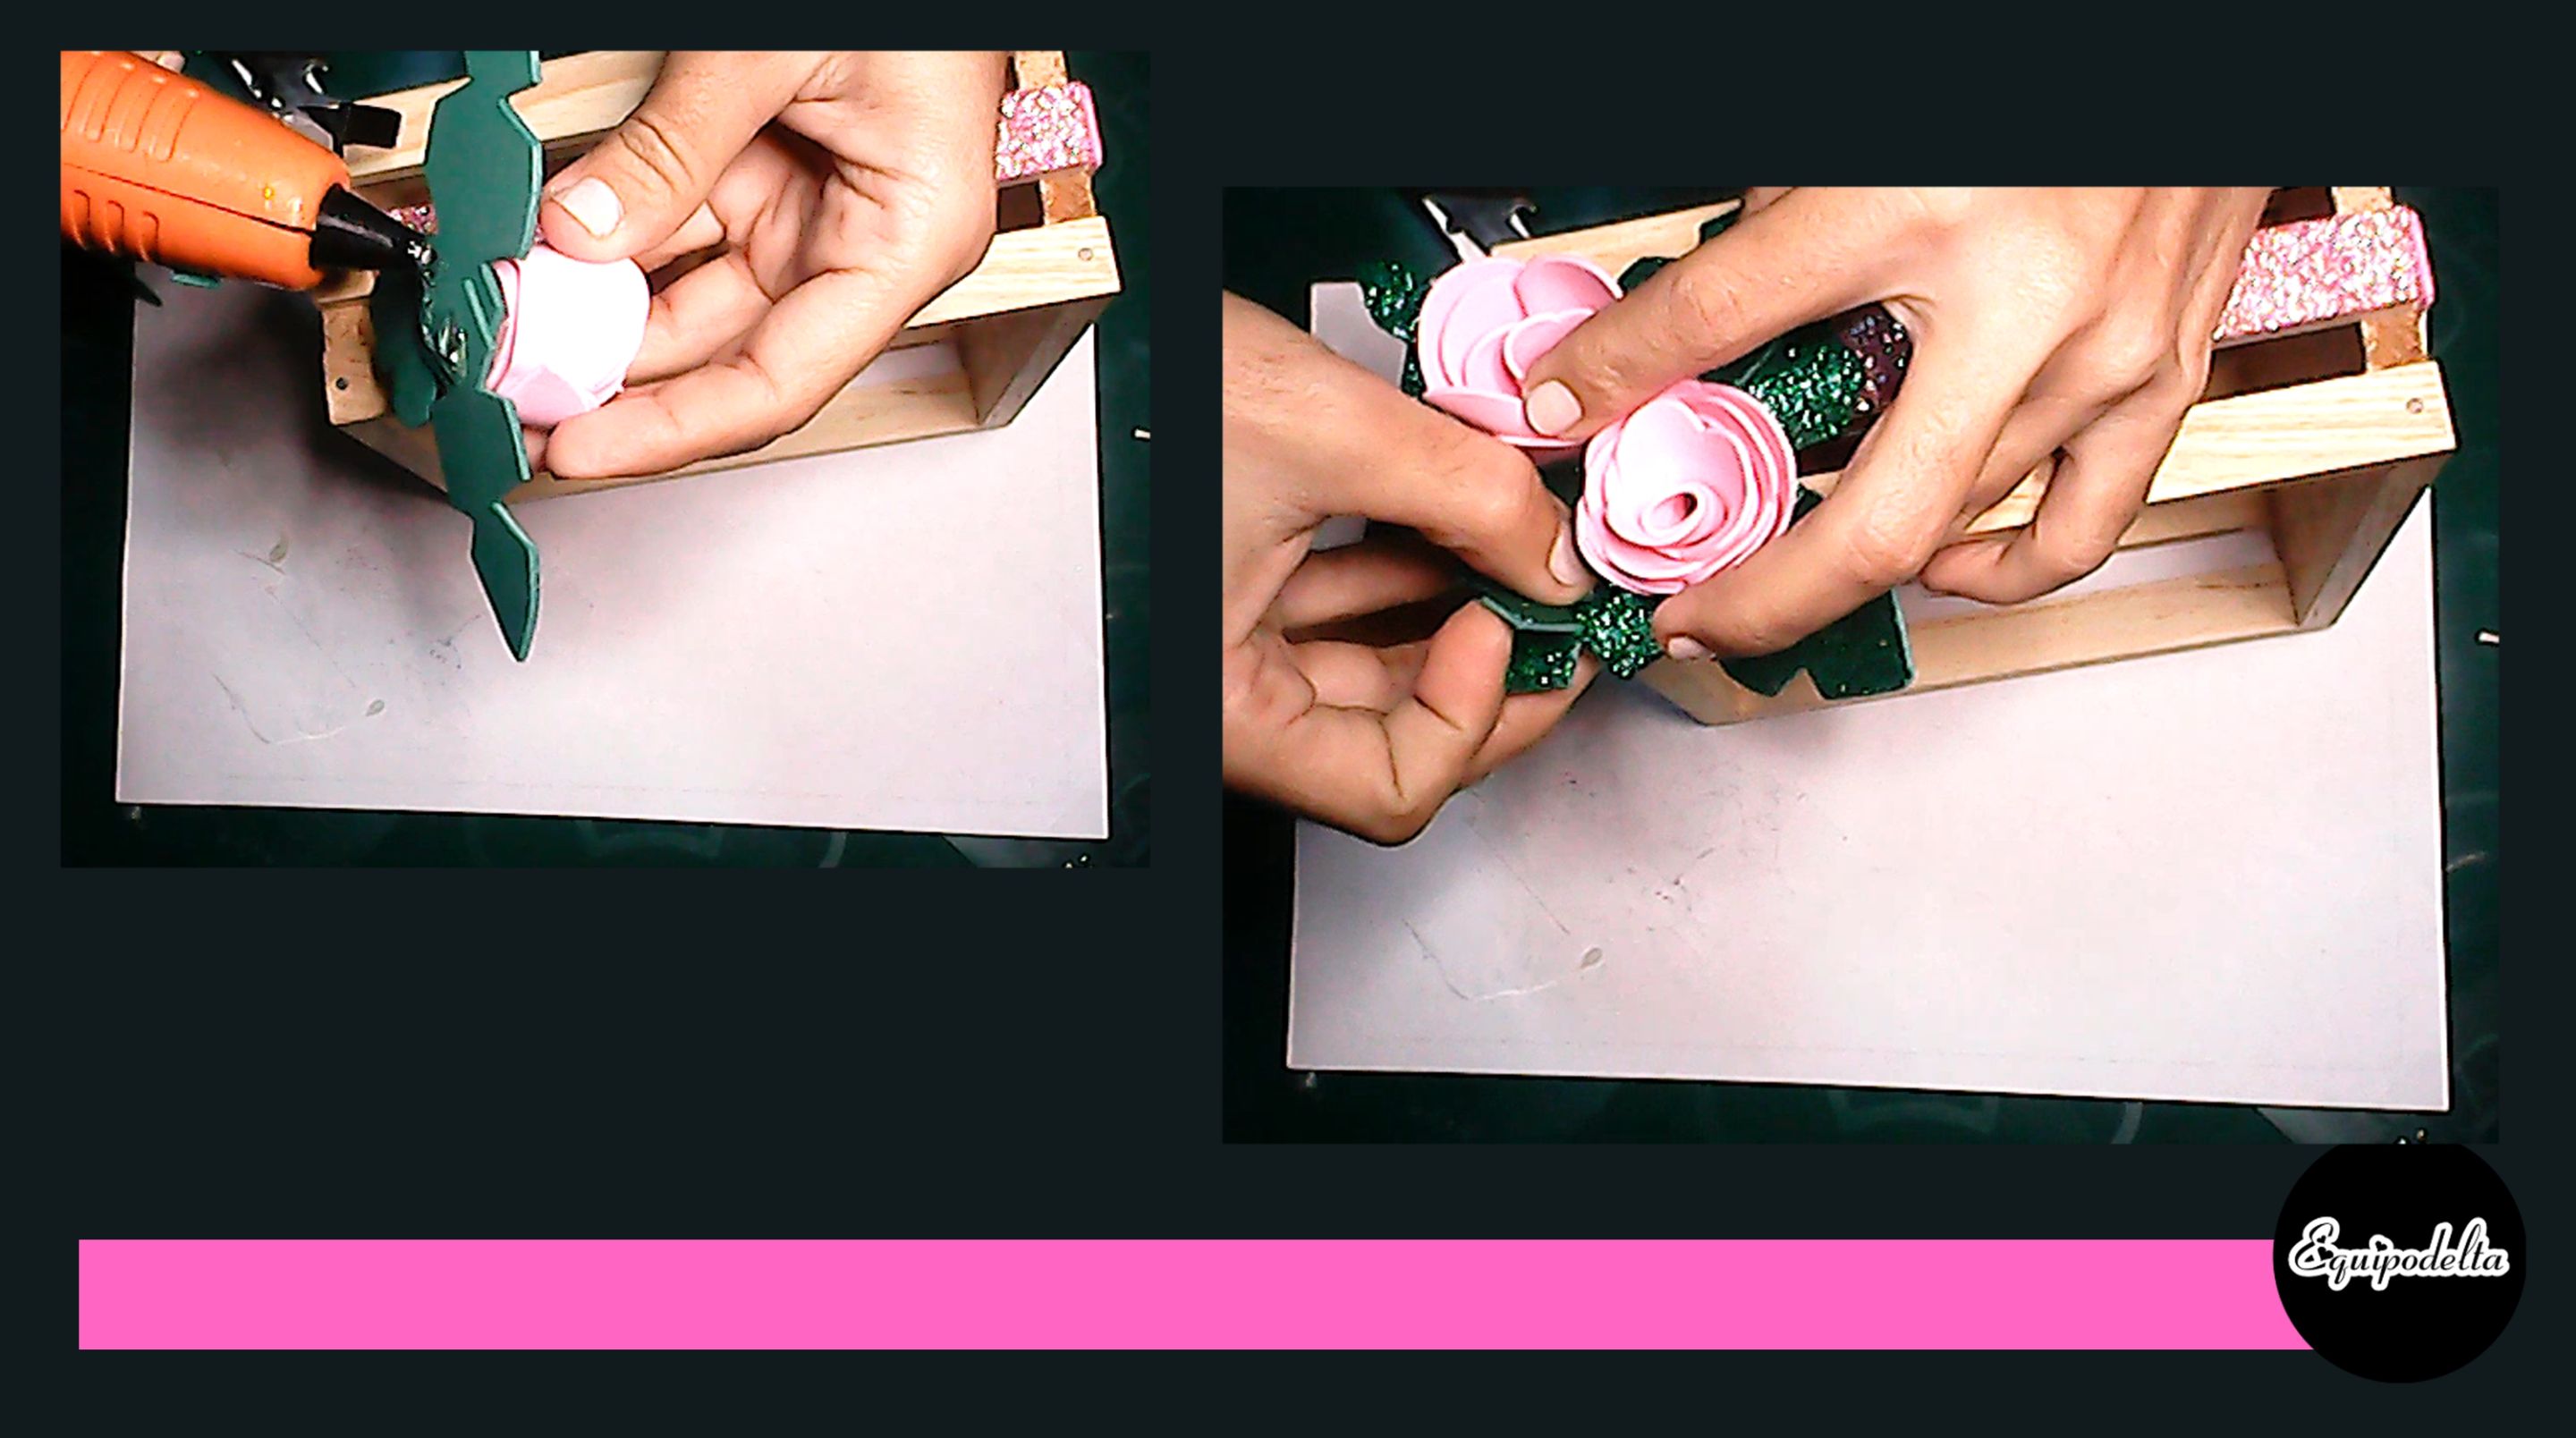
Remember to repeat the above steps to make another flower. Now proceed to glue both flowers in the box.
# 🌺 Step 6
Remember to repeat the above steps to make another flower. Now proceed to glue both flowers in the box.

# 🌺 Paso 6
Recuerda repetir los pasos anteriores para elaborar otra flor. Ahora procede a pegar ambas flores en la caja.
---
# 🌺 Paso 6
Recuerda repetir los pasos anteriores para elaborar otra flor. Ahora procede a pegar ambas flores en la caja.

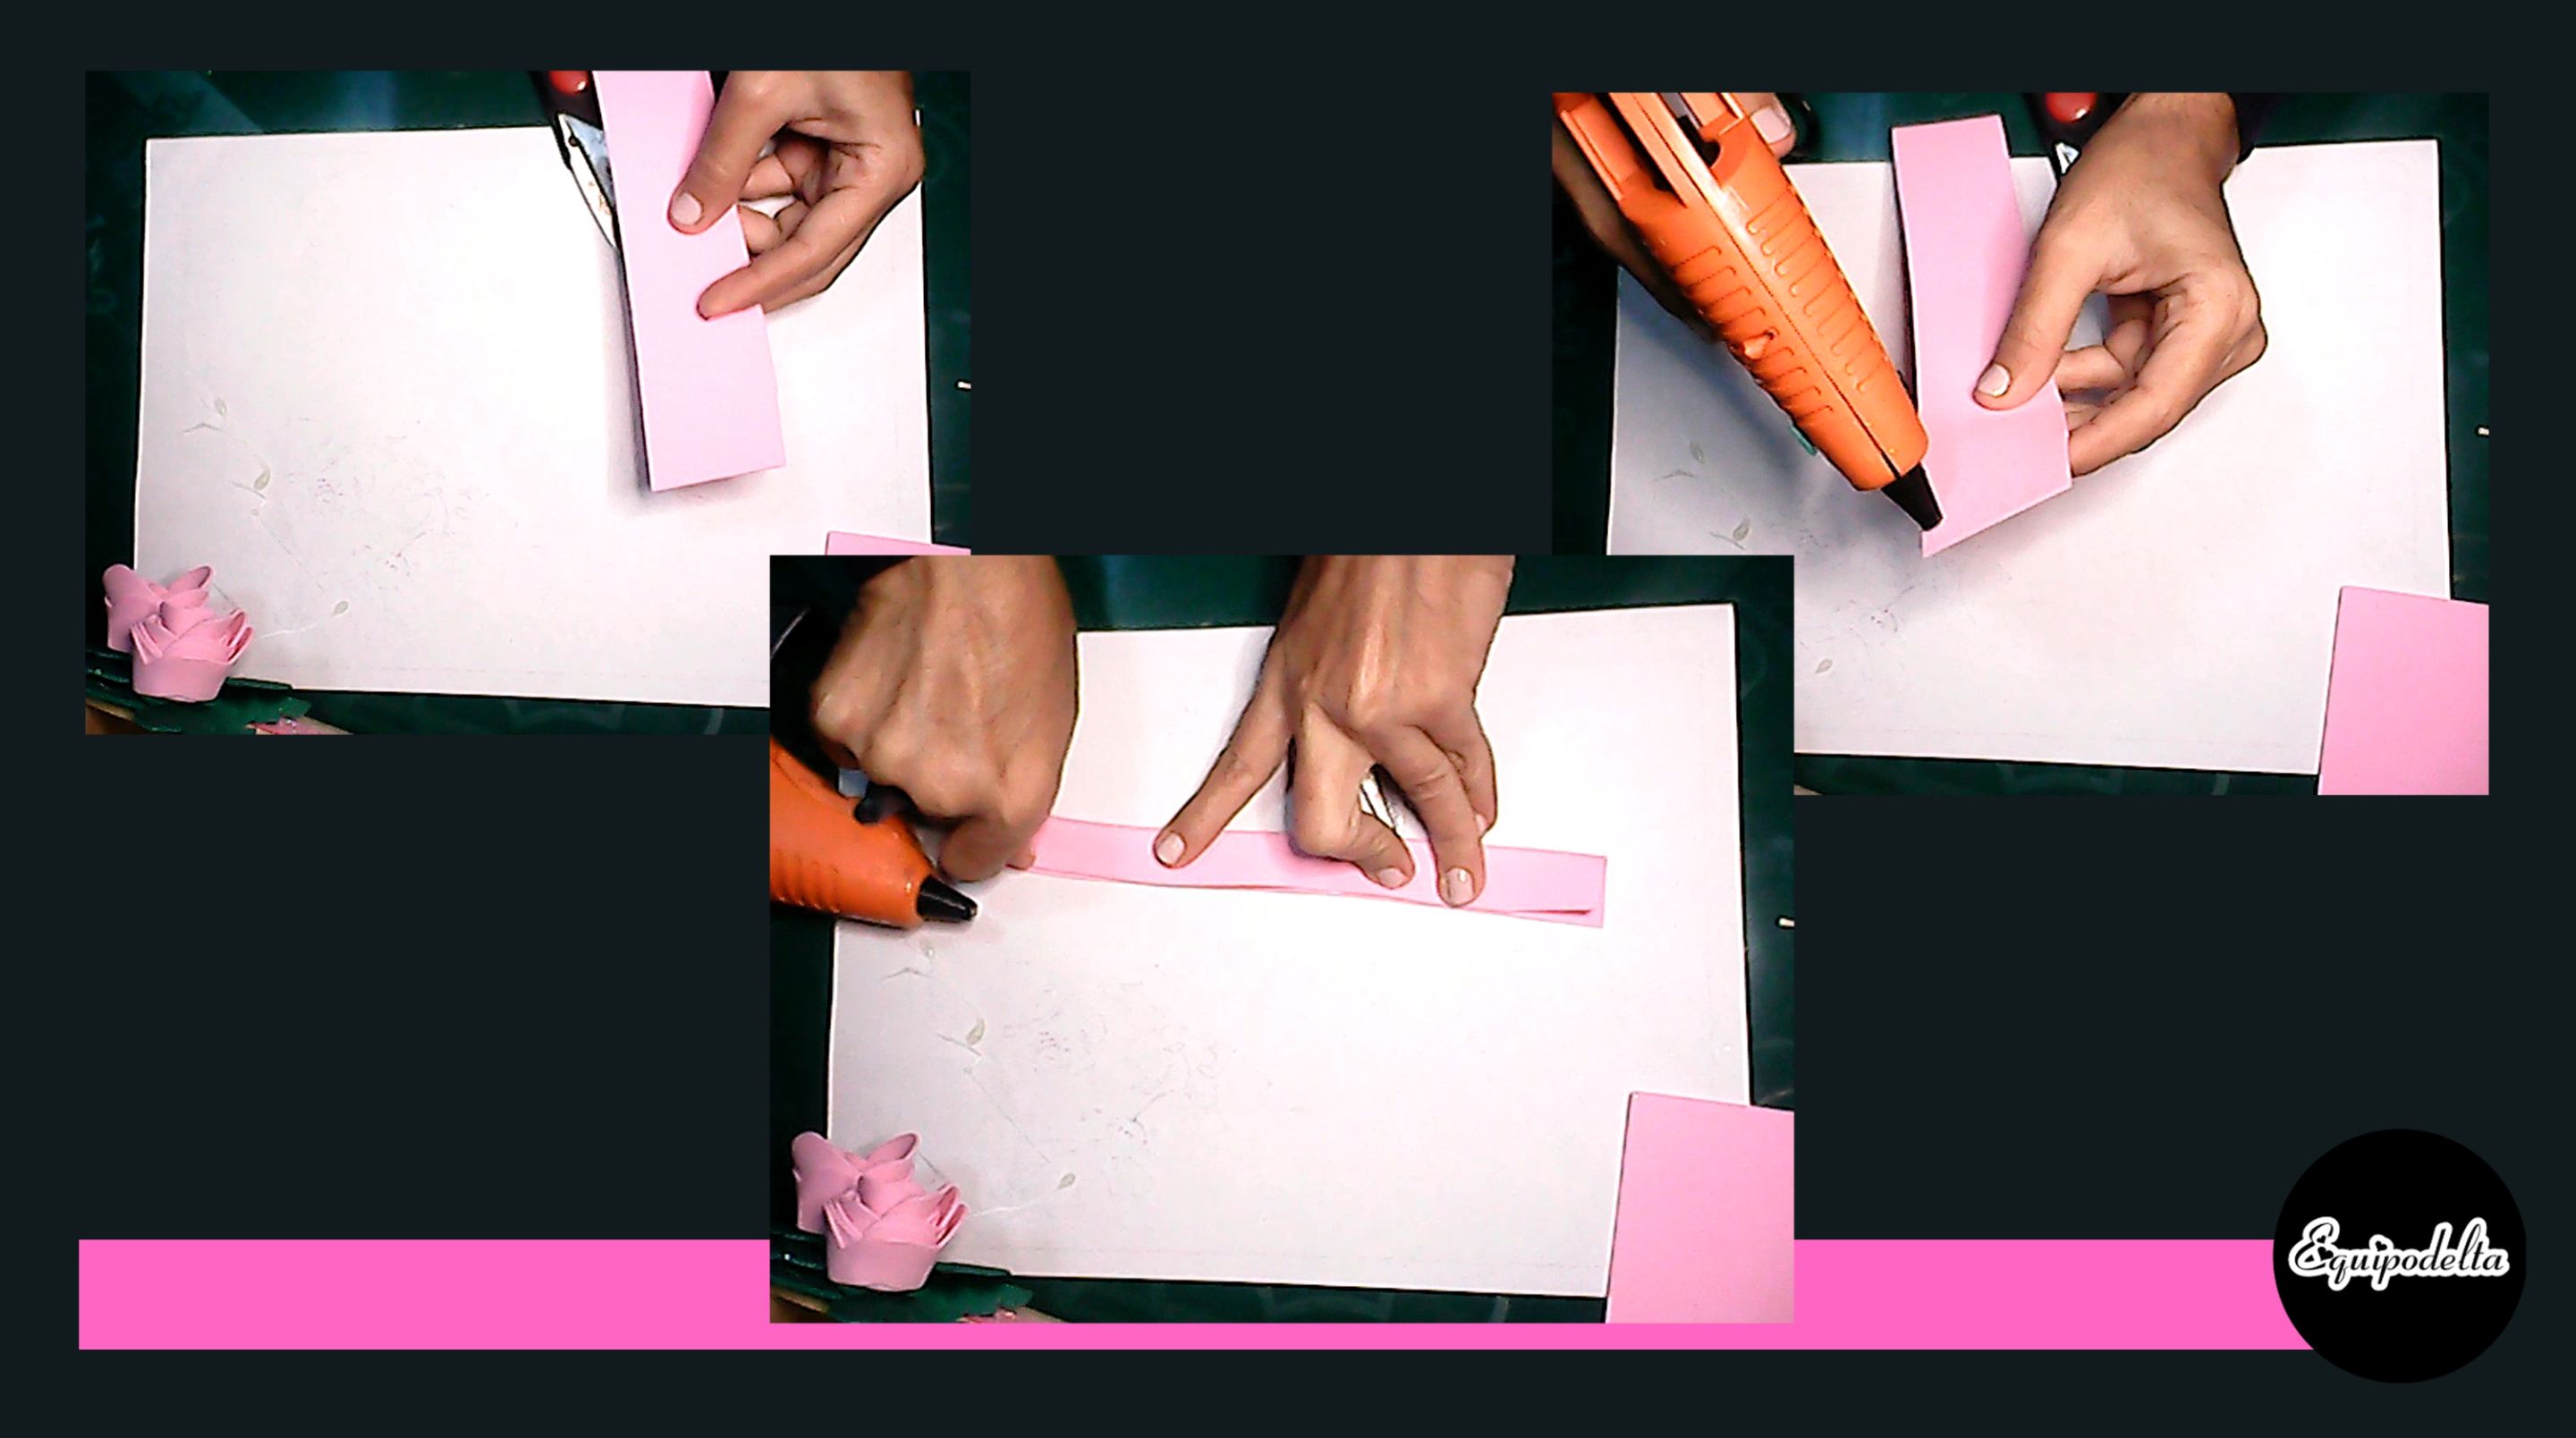

# 🌺 Step 7
Cut a strip approximately 4 centimeters wide, place glue on one of the edges, fold in half and glue. On the folded part, cut without reaching the end of the strip, leaving a space of about 0.5 millimeters, very thin strips. This is to make a button or a pompom, it is another form of flower that we can create. Place a dot of glue on one end of the strip, now glue the straw, every few seconds remember to place more glue as you go along the edge of the flower. Cut the excess straw.

# 🌺 Paso 7
Recorta una tira de 4 centímetros de ancho aproximadamente, coloca pegamento en uno de los bordes, dobla por la mitad y pega. En la parte del doblado, recorta sin llegar al final de la tira, dejando un espacio de 0.5 milímetros aproximadamente, tiras muy delgadas. Esto es para hacer un botón o un pompón, es otra forma de flor que podemos crear. Coloca un punto de pegamento en uno de los extremos de la tira, ahora pega el pitillo, cada cierta distancia recuerda colocar más pegamento mientras vas bordeando la flor. Corta el excedente de pitillo.
---
# 🌺 Paso 7
Recorta una tira de 4 centímetros de ancho aproximadamente, coloca pegamento en uno de los bordes, dobla por la mitad y pega. En la parte del doblado, recorta sin llegar al final de la tira, dejando un espacio de 0.5 milímetros aproximadamente, tiras muy delgadas. Esto es para hacer un botón o un pompón, es otra forma de flor que podemos crear. Coloca un punto de pegamento en uno de los extremos de la tira, ahora pega el pitillo, cada cierta distancia recuerda colocar más pegamento mientras vas bordeando la flor. Corta el excedente de pitillo.

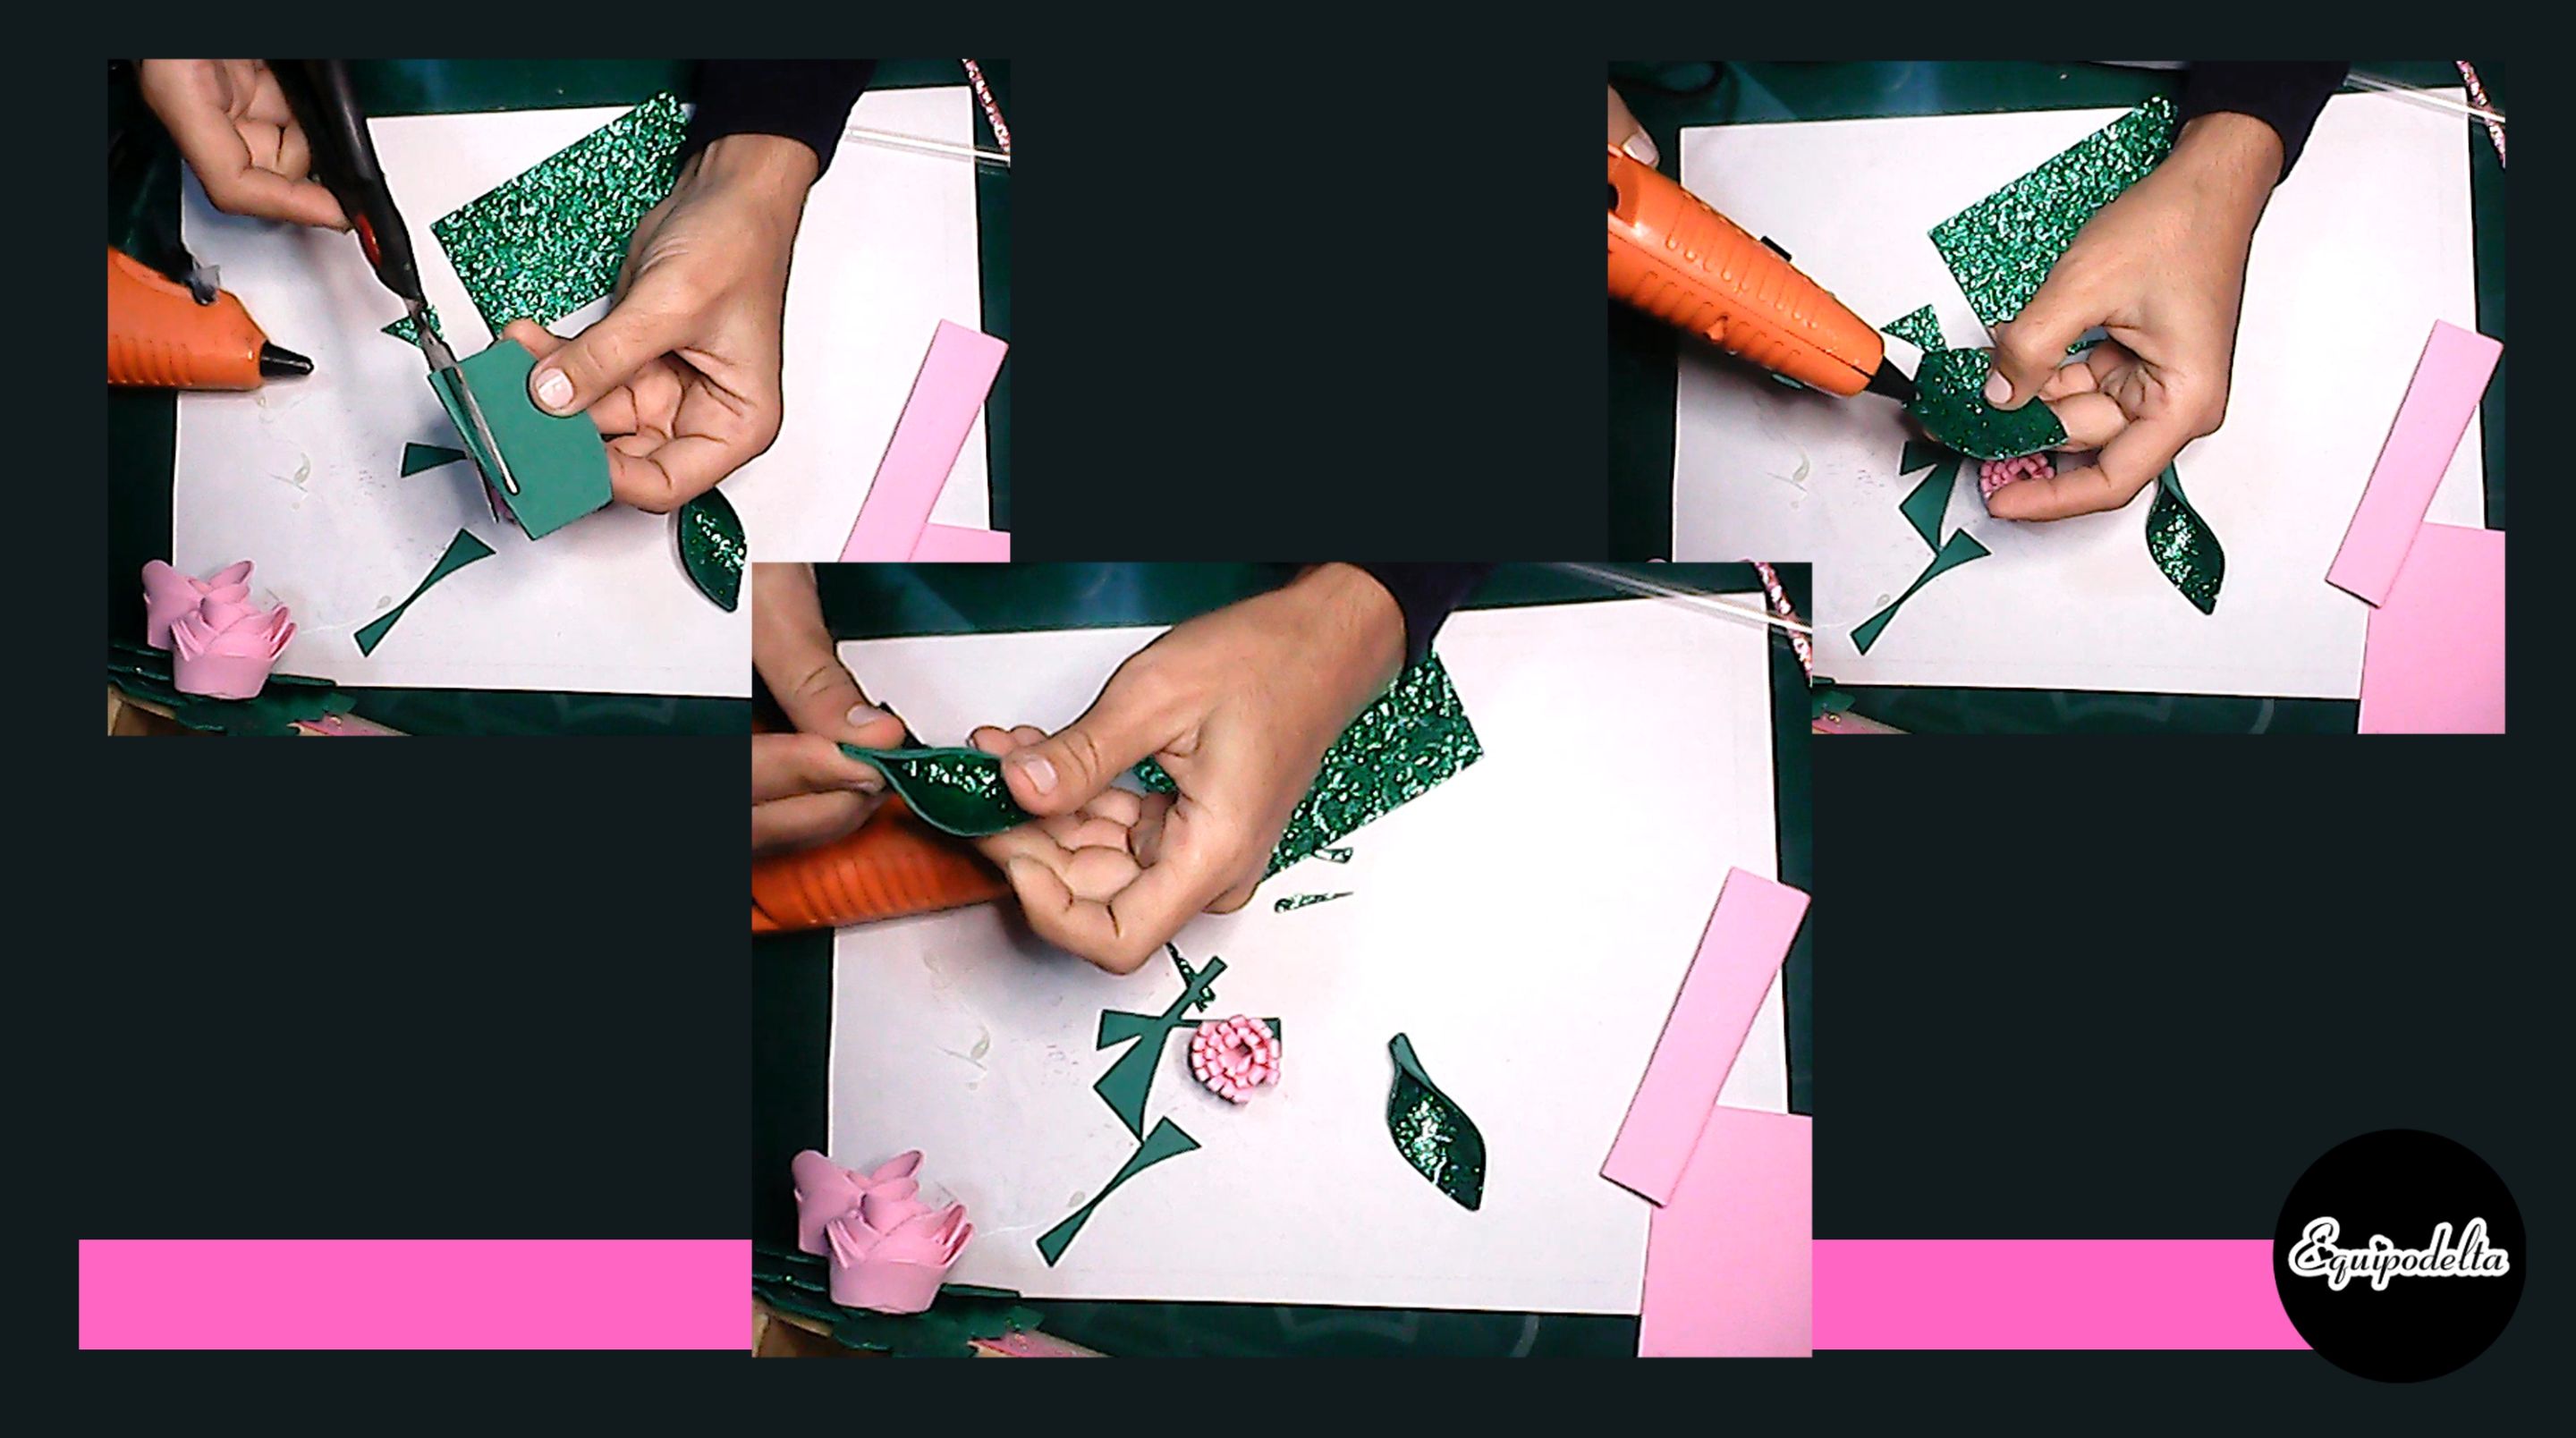

# 🌺 Step 8
We will make different leaves that will combine excellently. Cut out a rectangle with the green foami, cut out the shape of a leaf. Apply a drop of hot silicone in the center and fold to glue. Finally, glue the leaves to your liking on the box, covering any empty space.
# 🌺 Step 8
We will make different leaves that will combine excellently. Cut out a rectangle with the green foami, cut out the shape of a leaf. Apply a drop of hot silicone in the center and fold to glue. Finally, glue the leaves to your liking on the box, covering any empty space.

# 🌺 Paso 8
Haremos unas hojas diferentes que combinarán excelente. Recorta un rectángulo con el foami verde, recorta la florma de una hoja. Aplica una gota de silicón caliente en el centro y dobla para pegar. Para finalizar, pega las hojitas a tu gusto en la cajita, cubriendo algún espacio vacío.
---

# 🌺 Paso 8
Haremos unas hojas diferentes que combinarán excelente. Recorta un rectángulo con el foami verde, recorta la florma de una hoja. Aplica una gota de silicón caliente en el centro y dobla para pegar. Para finalizar, pega las hojitas a tu gusto en la cajita, cubriendo algún espacio vacío.

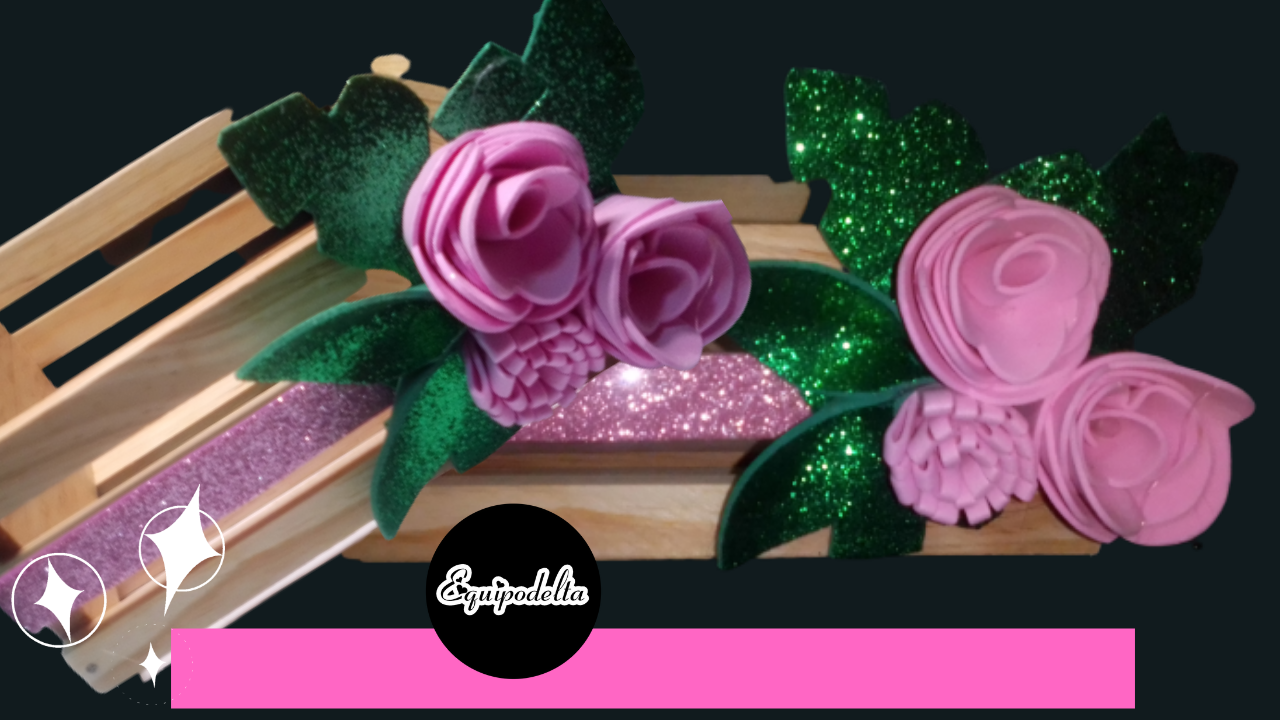

# 🌺🌺 Done! 🌺🌺
Now you know this trick that will make your life easier by making foami flowers. Besides... We have decorated a cute little multipurpose box. I used it for my nail polish and lipsticks, what about you?
# 🌺🌺 Done! 🌺🌺
Now you know this trick that will make your life easier by making foami flowers. Besides... We have decorated a cute little multipurpose box. I used it for my nail polish and lipsticks, what about you?

# 🌺🌺 ¡Listo! 🌺🌺
Ya sabes ahora este truco que te facilitará la vida haciendo florecitas de foami. Además... Hemos decorado una linda cajita multiuso. Yo la usé para mis pinturas de uñas y labiales. ¿Y tú?
---
# 🌺🌺 ¡Listo! 🌺🌺
Ya sabes ahora este truco que te facilitará la vida haciendo florecitas de foami. Además... Hemos decorado una linda cajita multiuso. Yo la usé para mis pinturas de uñas y labiales. ¿Y tú?

# Detalles Técnicos / Technical Details

# Tutorial Video https://www.youtube.com/watch?v=dJmps0oLbwQ
Edition: Program: [MediBang Paint Pro.](https://medibangpaint.com/es/pc/) Graphics tablet: Huion (Usb Pen Tablet). Model 420.
[Translator](https://www.deepl.com/) [CANVA](https://www.canva.com/) [Text separator](https://www.freepik.es/vector-gratis/set-separadores_4187069.htm#page=1&query=separador%20de%20texto&position=4&from_view=search) [Source](https://vibra.co/curiosidades/como-hacer-flores-en-foami/)
Music Video: –––––––––––––––––––––––––––––– [Adventures by A Himitsu](https://soundcloud.com/a-himitsu) Creative Commons — Attribution 3.0 Unported— CC BY 3.0 [Music released by Argofox](https://youtu.be/8BXNwnxaVQE) [Music promoted by Audio Library](https://youtu.be/MkNeIUgNPQ8) ––––––––––––––––––––––––––––––

Mi canal [Youtube](https://www.youtube.com/isabelliraequipodelta?sub_confirmation=1), tiene un montón de tutoriales muy útiles para ti. >My [Youtube](https://www.youtube.com/isabelliraequipodelta?sub_confirmation=1) channel, has a lot of very useful tutorials for you.
 [Hacks, DIY, Crafts, handmade arts Community](https://peakd.com/c/hive-130560/created) # [Discord](https://discord.gg/ayRjEtXVK3)
23tbRTM3ugwMpwuNzTBqwgLrp5xpgAMeneVaTeoZvp1Zfr7PoWxfBa5f3T2QDjdkJ4gZJ.png (https://images.hive.blog/0x0/https://files.peakd.com/file/peakd-hive/equipodelta/23tbRTM3ugwMpwuNzTBqwgLrp5xpgAMeneVaTeoZvp1Zfr7PoWxfBa5f3T2QDjdkJ4gZJ.png)
Mi video.gif (https://files.peakd.com/file/peakd-hive/equipodelta/23tRpGw9JnbX24vZqrM4WLM2NidZ826vecMfvpv3ww3A72kQns9BeAu6wRXooixkU5EE4.gif)
[
 ](https://www.facebook.com/lirachaveli?ref=bookmarks) 👉 [
 ](https://www.tiktok.com/@isabeliraequipodelta)
Equipodelta.gif (https://files.peakd.com/file/peakd-hive/equipodelta/Re6kVjKF-Equipodelta.gif)
#spanish
#manualidades
#cervantes
#posh
#palnet
#diy
#crafts
#handmade
#tutorial
#creativecoin
Payout: 0.000 HBD
Votes: 371
More interactions (upvote, reblog, reply) coming soon.