✨👂Hello community! Welcome| ¡Hola comunidad, bienvenido/a👂✨!
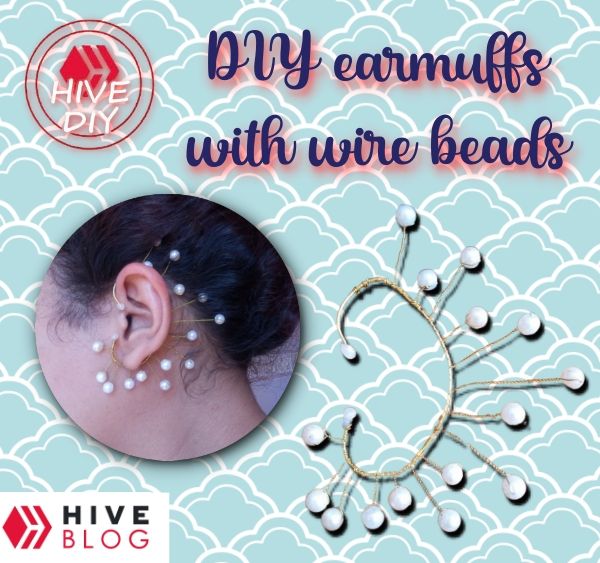
Siguiendo con la temática de alambres, en esta manualidad que les traigo hoy vamos a realizar una orejera que pueden utilizar para un evento elegante o una fiesta. Es un accesorio muy lindo y versátil que puedes combinar con cualquier atuendo. Aquí te muestro los materiales a utilizar:
> Continuing with the theme of wires, in this craft that I bring you today we are going to make an earmuff that you can use for an elegant event or a party. It is a very cute and versatile accessory that you can combine with any outfit. Here I show you the materials to use:
`👂✨Materials to be used👂✨`
✨Materiales a utilizar:✨ |- Nail clippers | - Corta uñas || |-|-|-| | - Fashion jewelry tweezers | - Pinzas de bisutería| | - Fashion jewelry wire (I used 1mm) but you have to buy a thicker one so that it doesn't deform | - Alambre de bisutería (yo utilice de 1mm) pero tienen que comprar uno más grueso para que no se les deforme | | - 0.3mm bijouterie wire | - Alambre de bisutería de 0.3mm| | - Medium pearls | - Perlas medianas| | - Silicone gun | - Pistola de silicón| 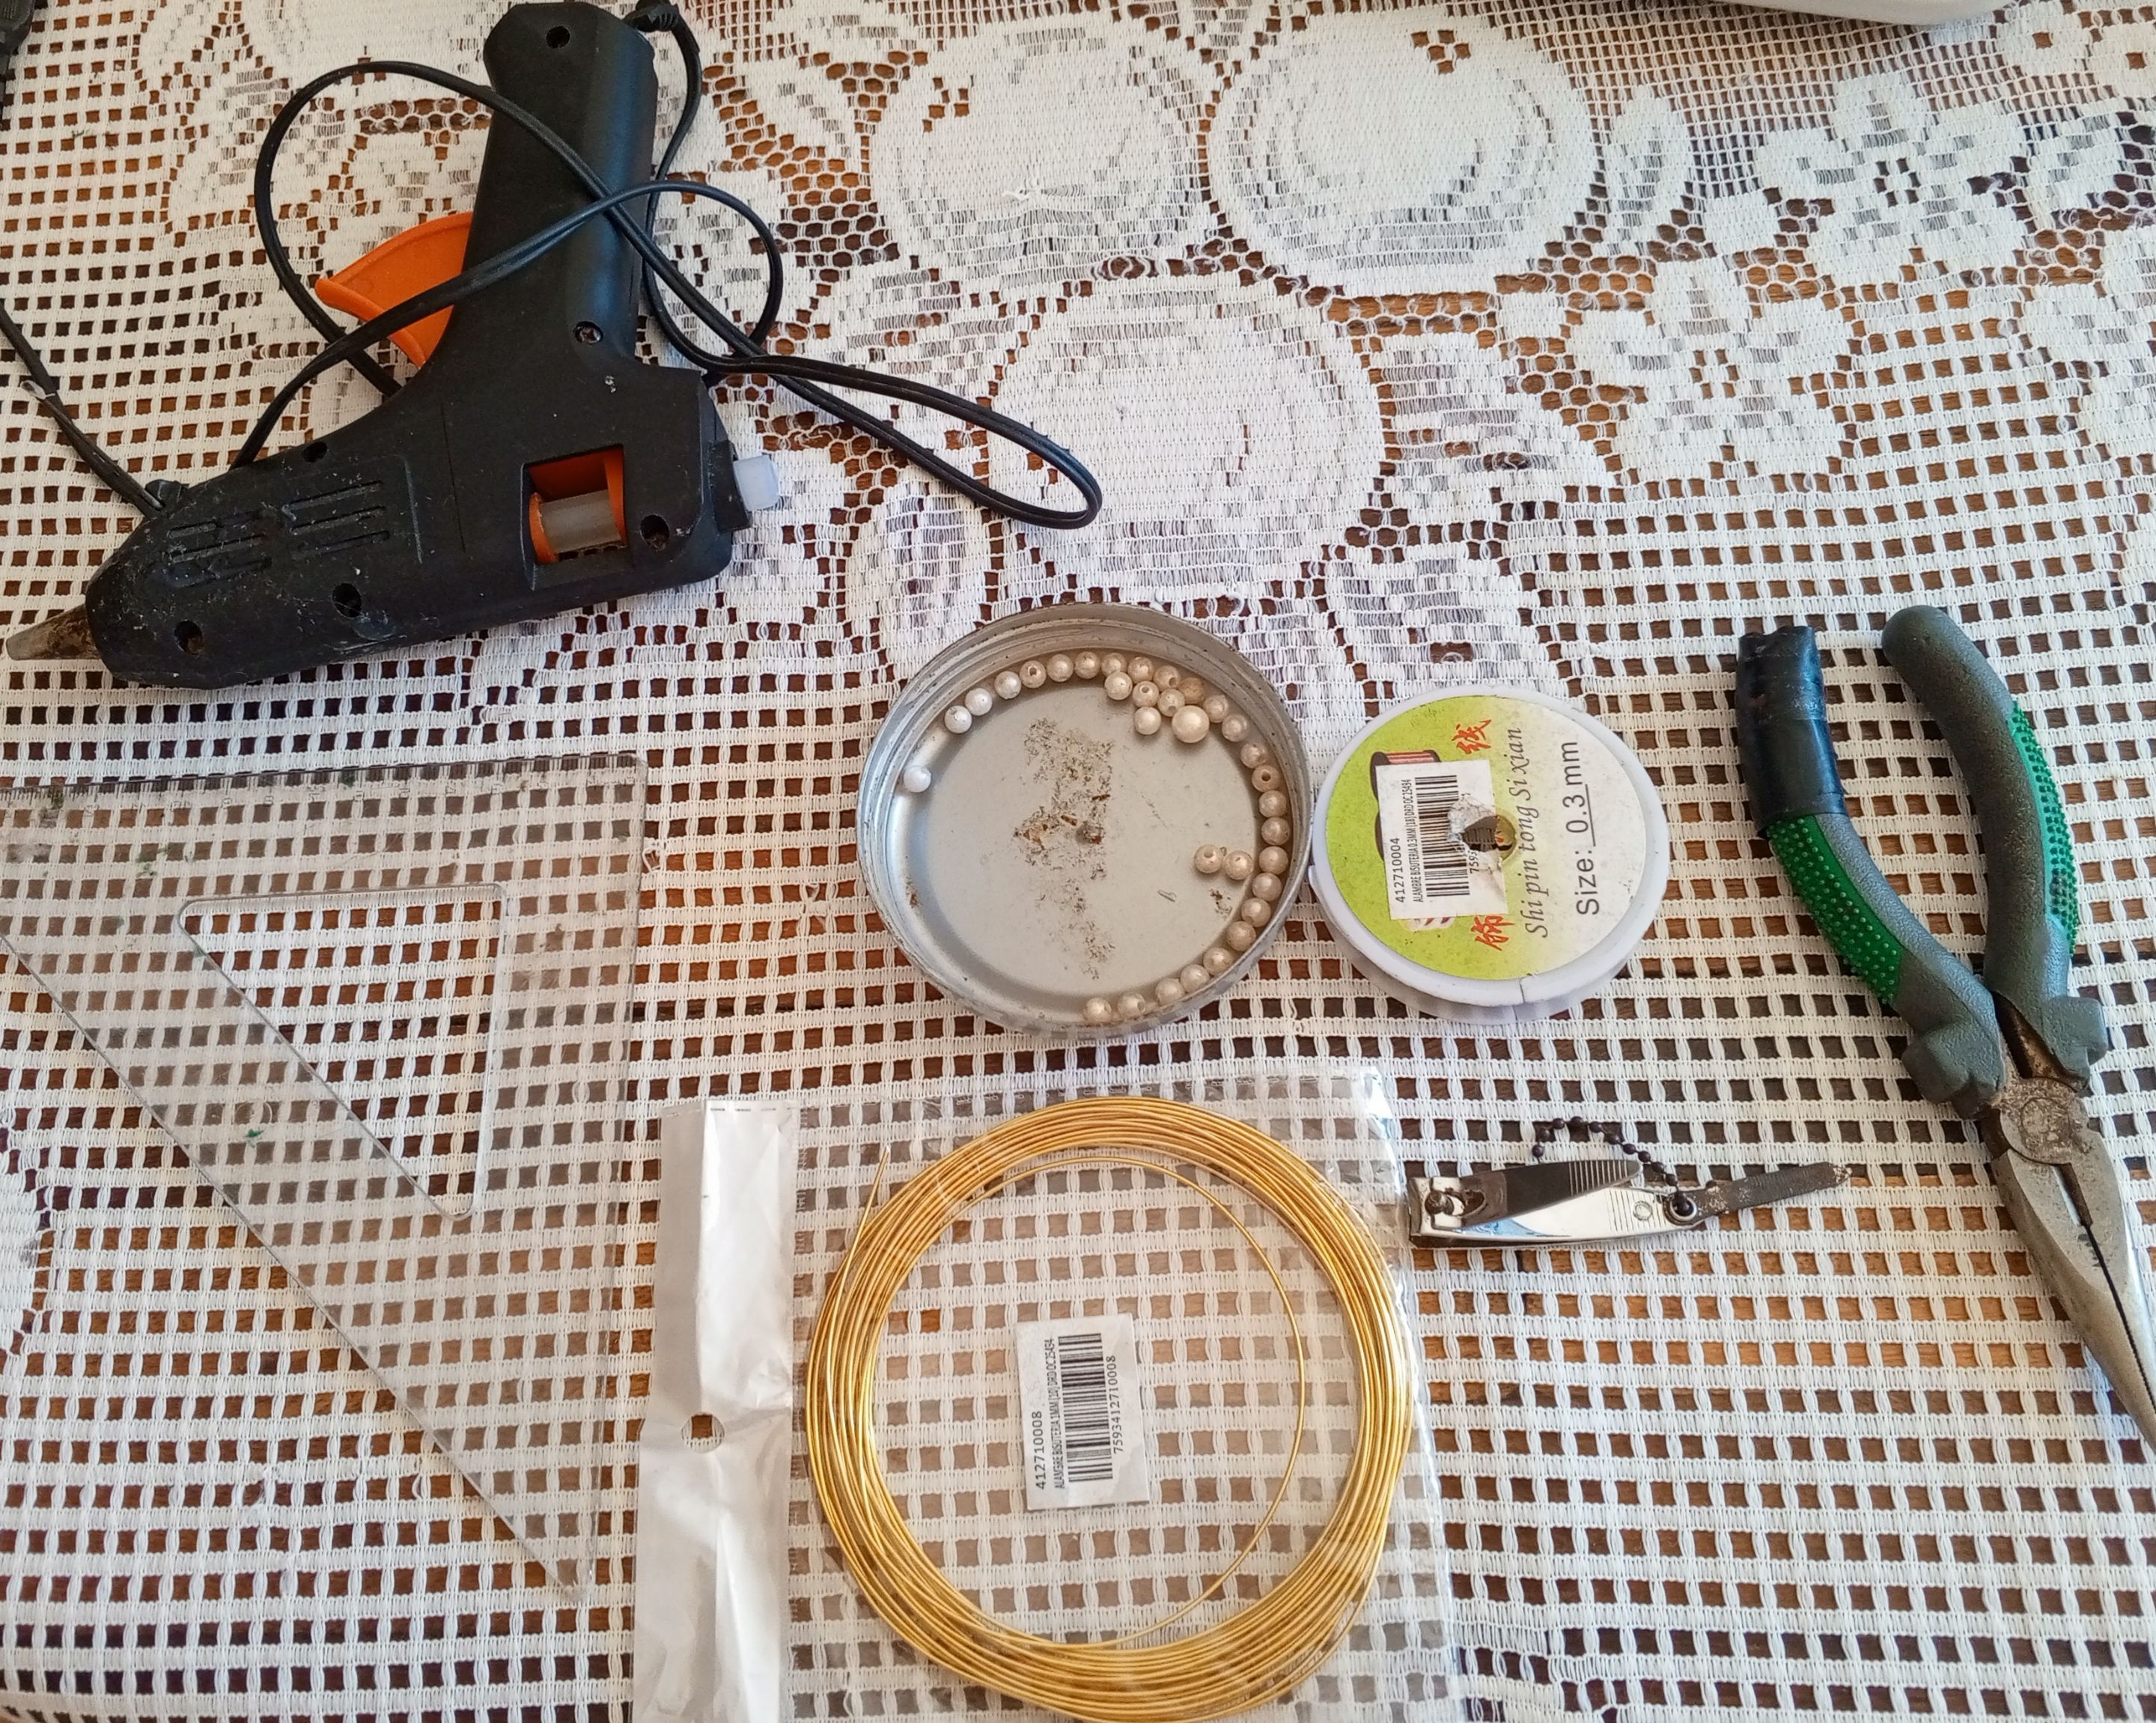 ✨💖🌷✨💖🌷✨💖🌷✨💖🌷✨💖🌷✨💖🌷✨💖🌷✨💖🌷✨`•STEP BY STEP•`
**PASO A PASO**
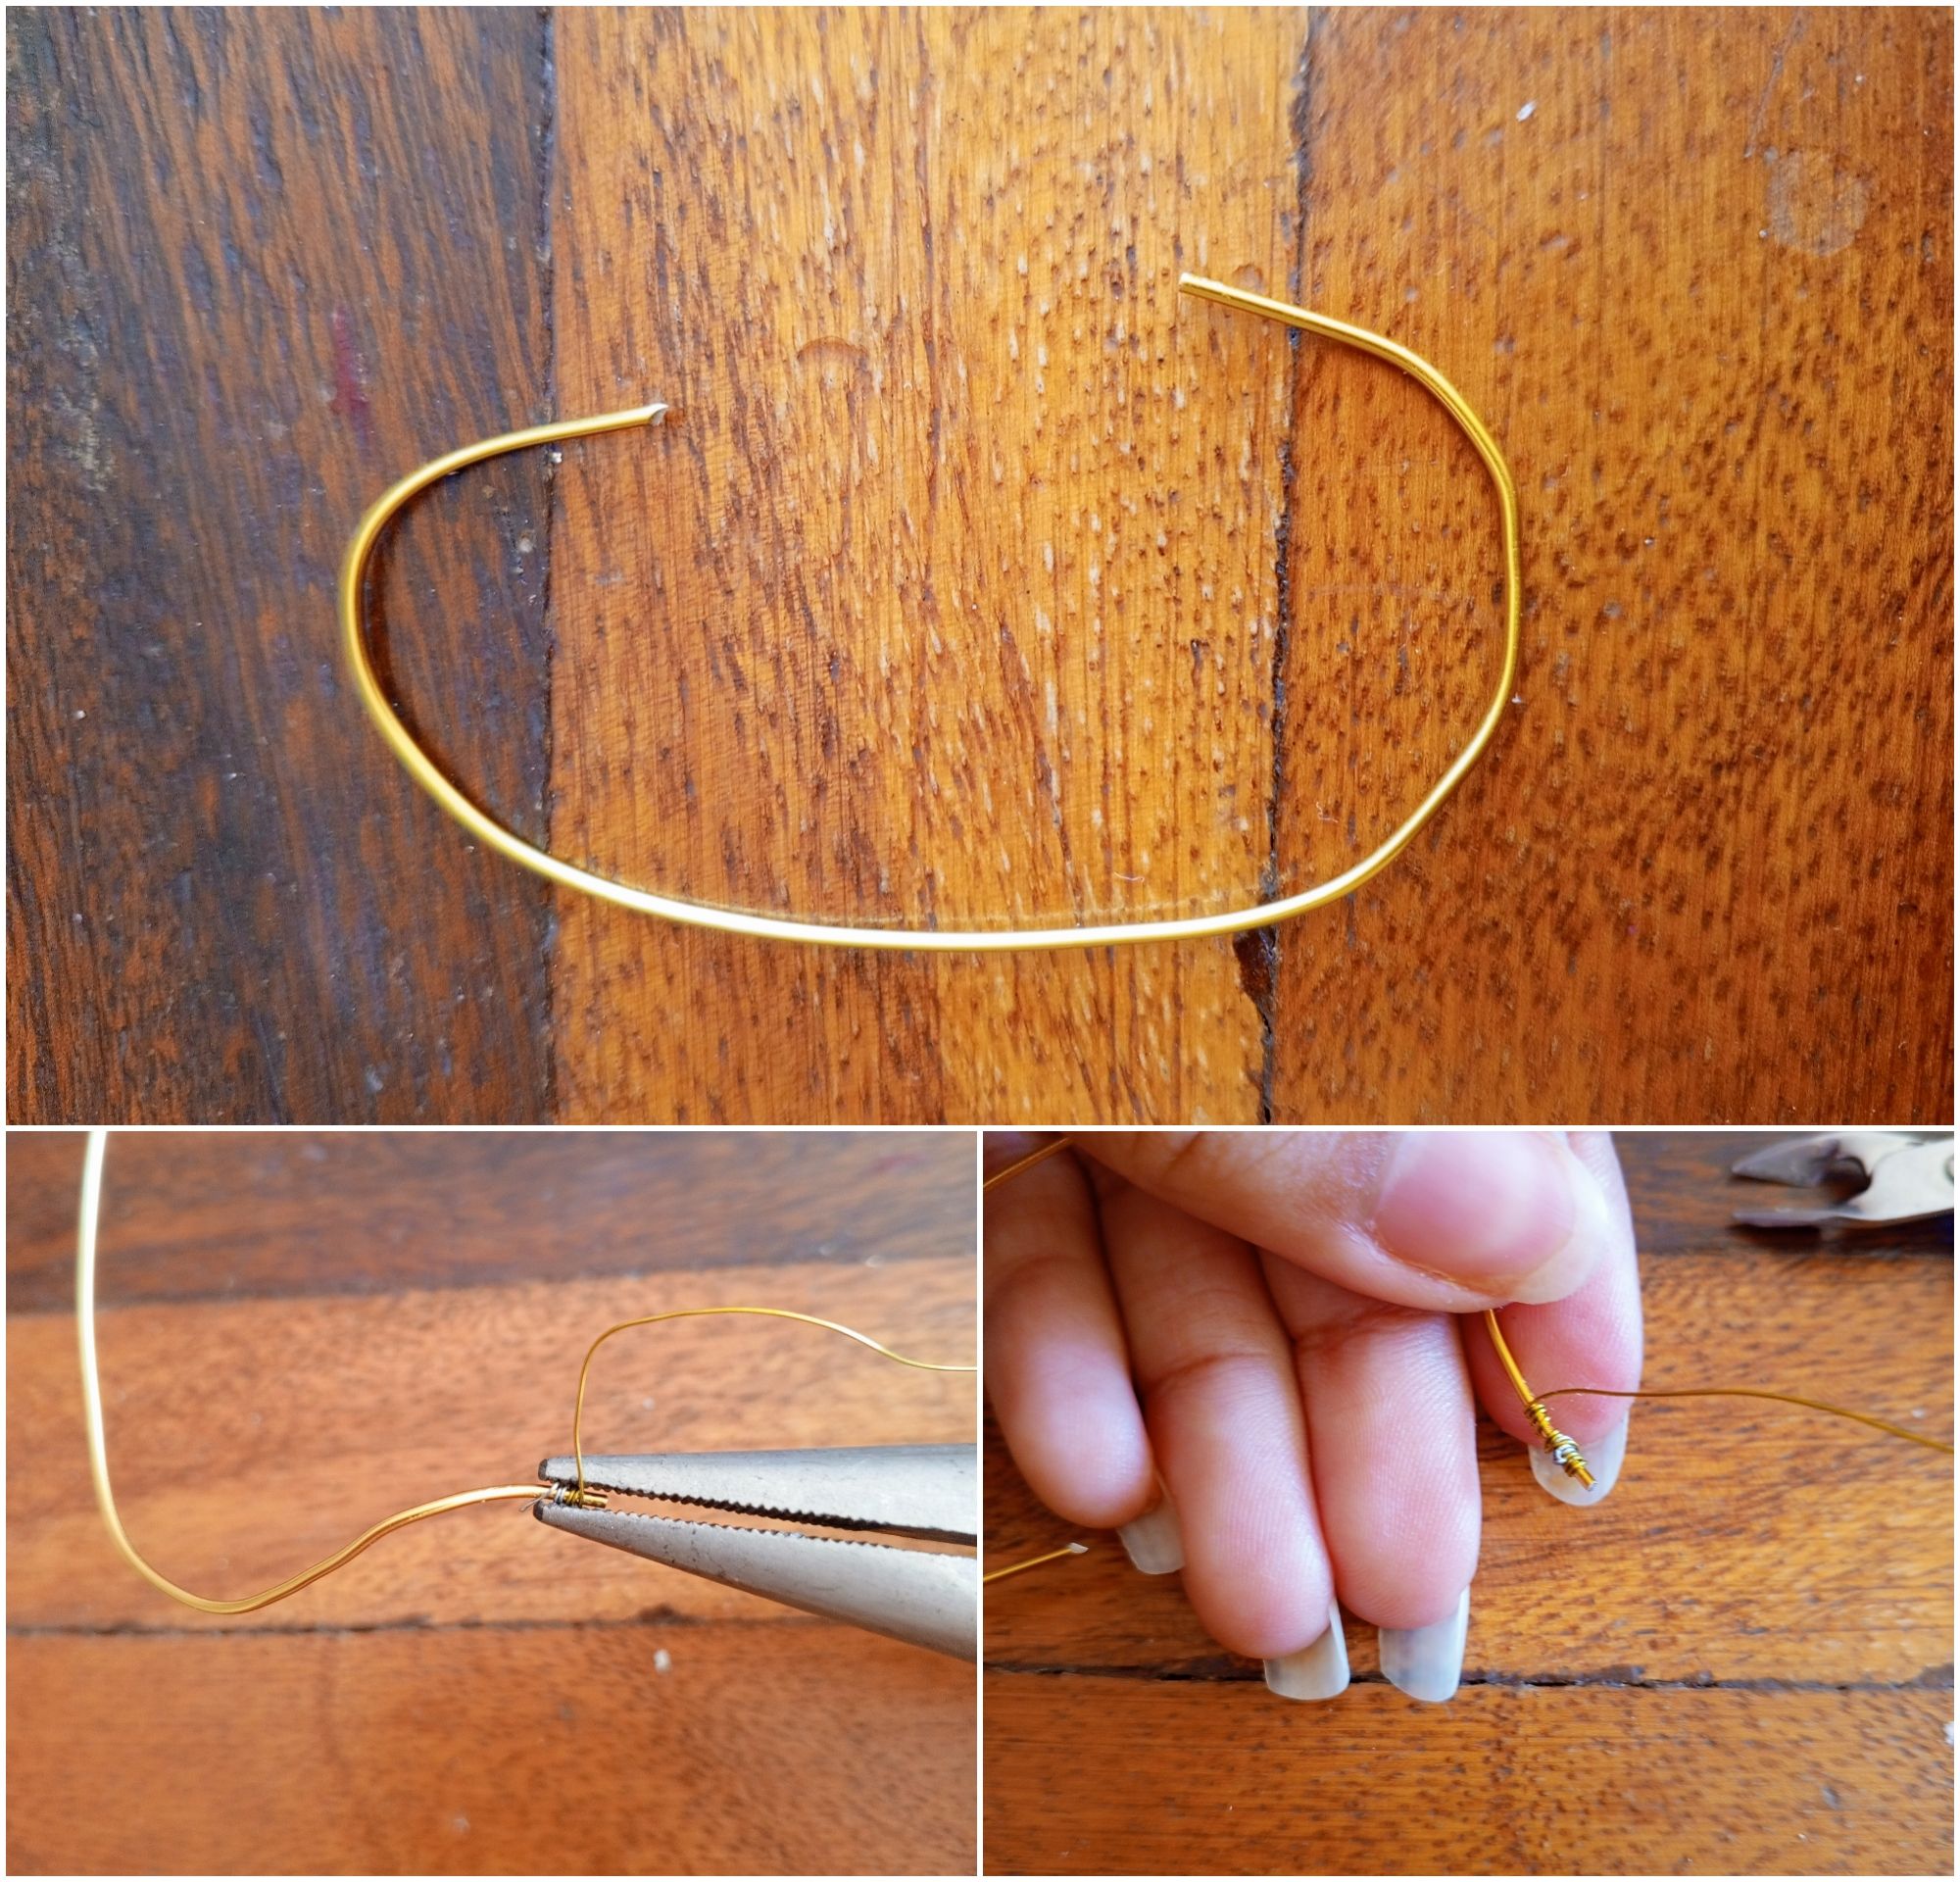
Paso 1️⃣
En este paso vamos a cortar uno 12/10 cm del alambre grueso (esto ya depende del tamaño de tu orejita). Yo corte 12cm. Lo vamos a doblar en forma de “C”. Ahora vamos a pasar a cortar un metro del alambre fino y vamos a enrollarlo en la punta de nuestro alambre para que sostenga las perlas. Podemos apretarlo con la pinza para que se fije mejor al alambre grueso.
Step 1️⃣
In this step we will cut one 12/10 cm of thick wire (this depends on the size of your ear). I cut 12cm. We are going to bend it in a “C” shape. Now we are going to cut one and we are going to wrap it around the tip of our wire to hold the beads. to hold the beads. We can tighten it with the pliers so that it is better fixed to the thick wire. to the thick wire.
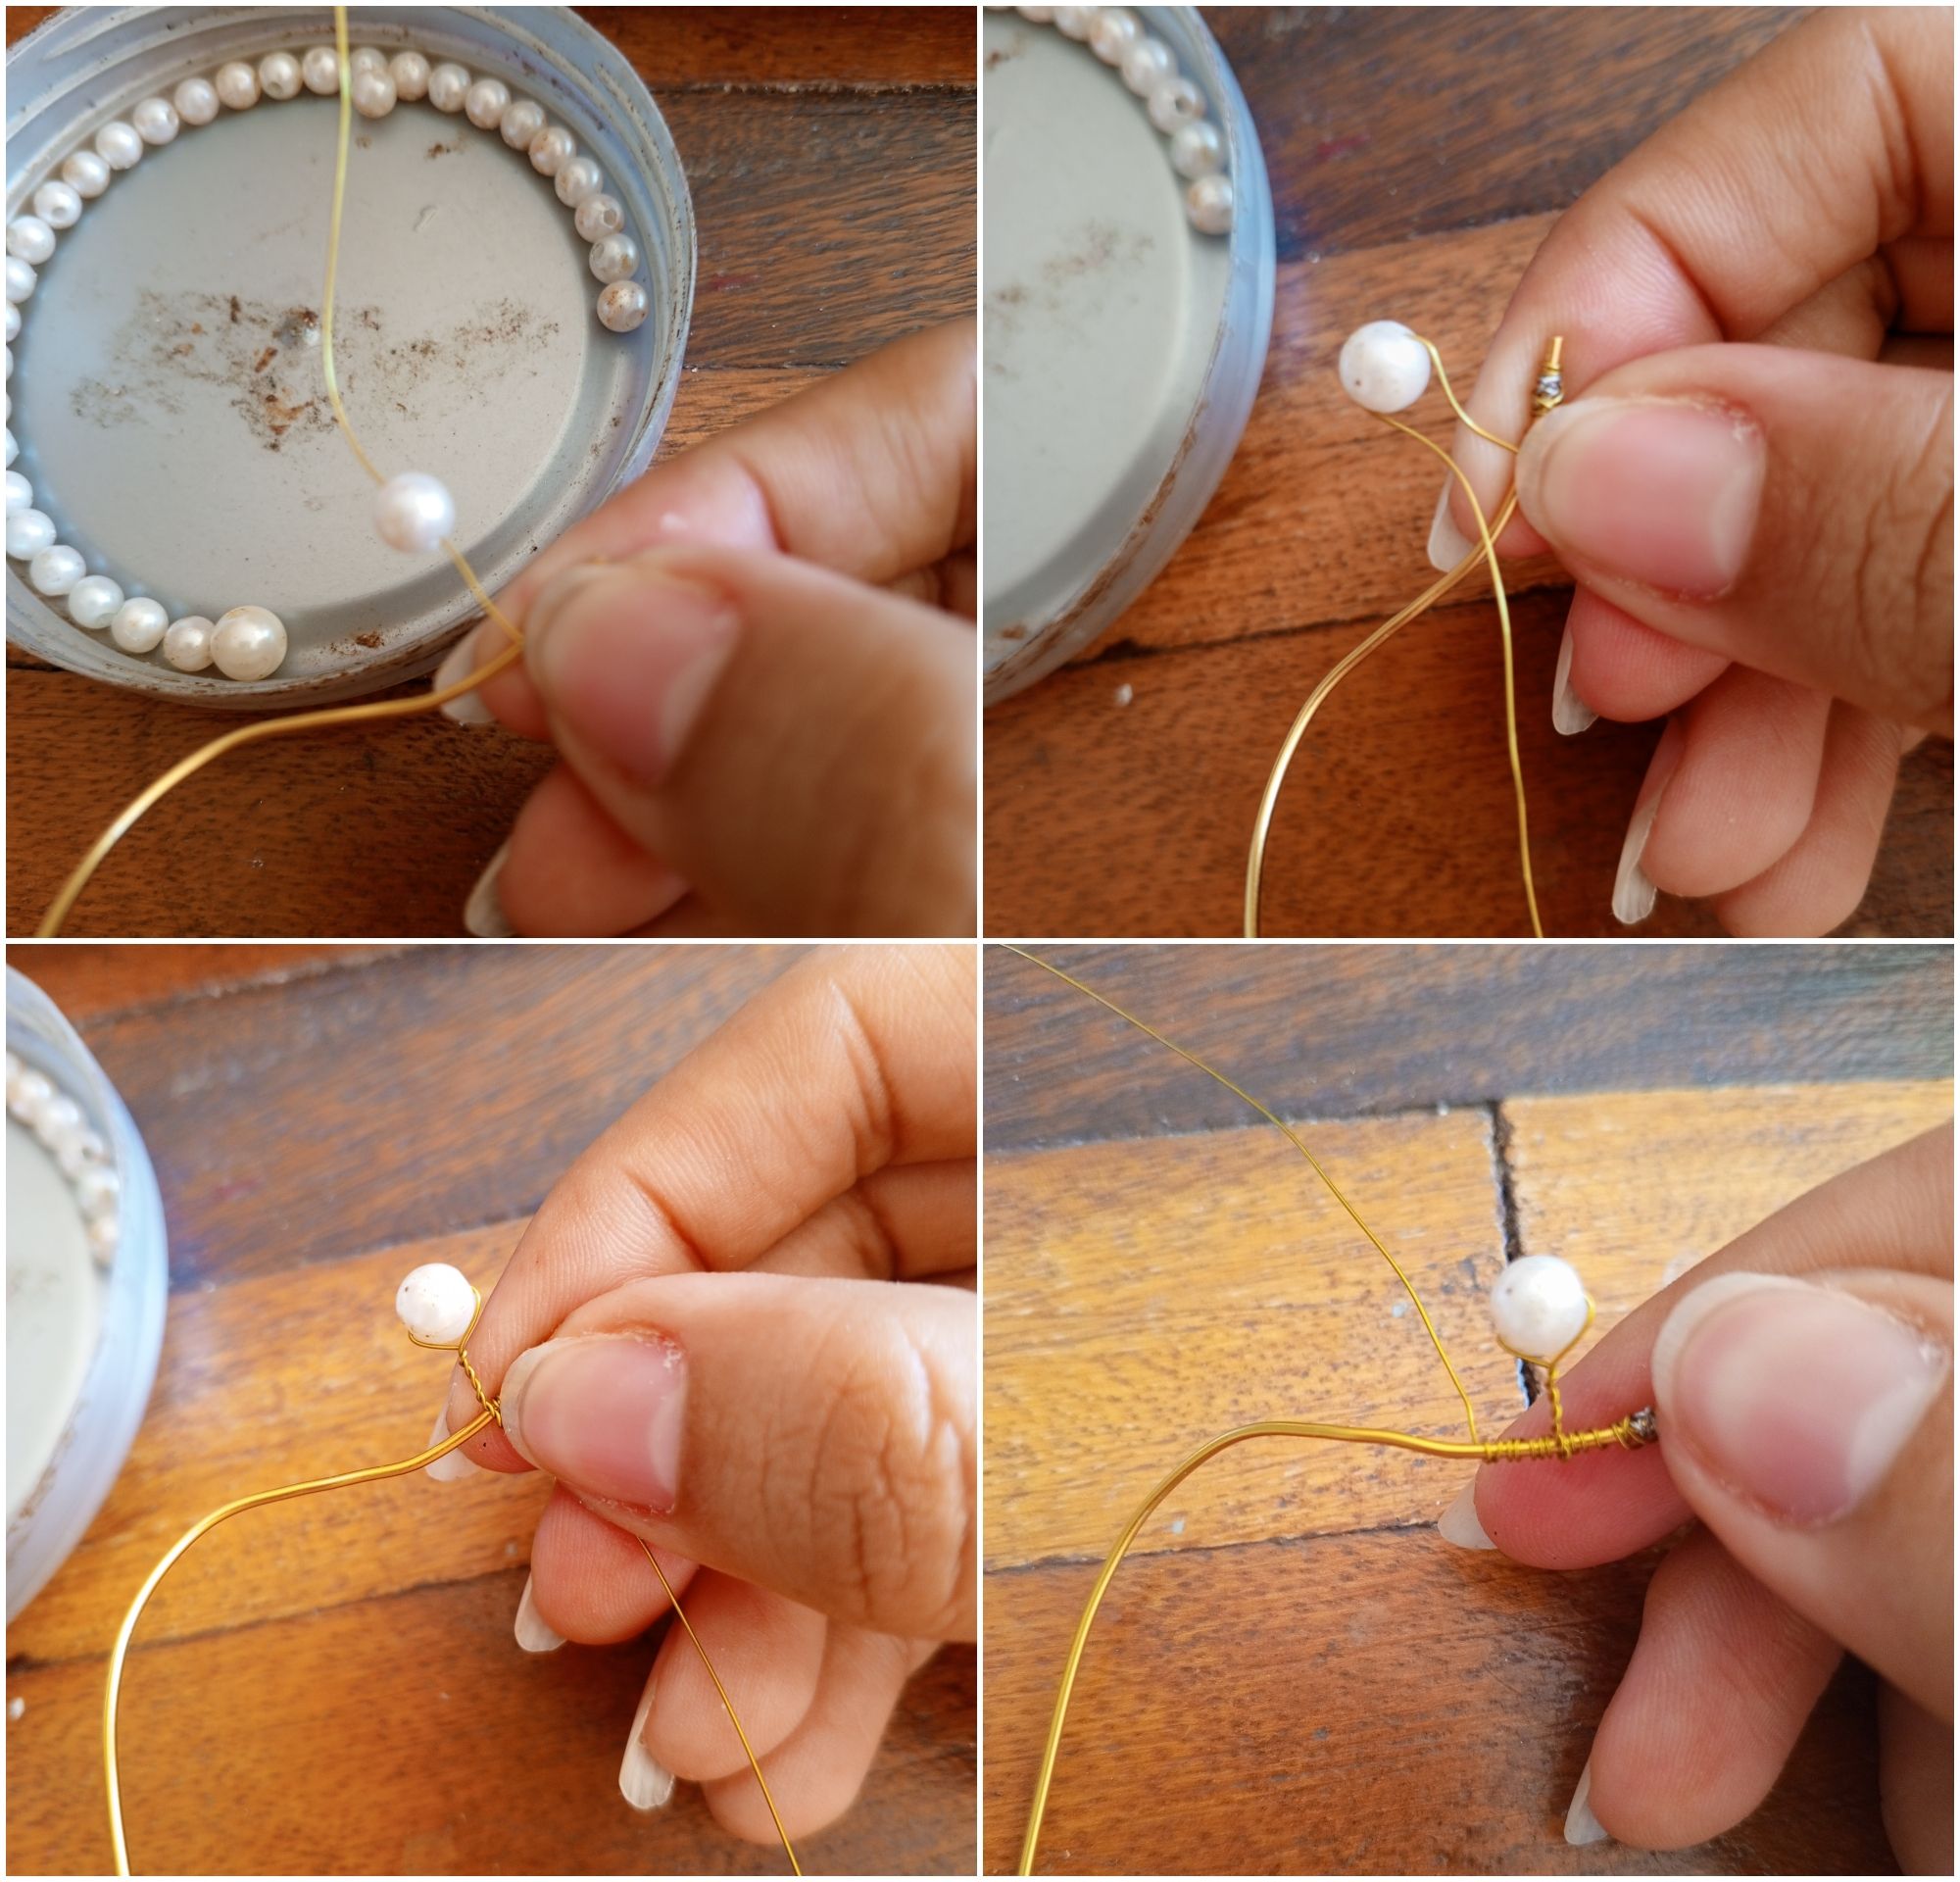
Paso 2️⃣
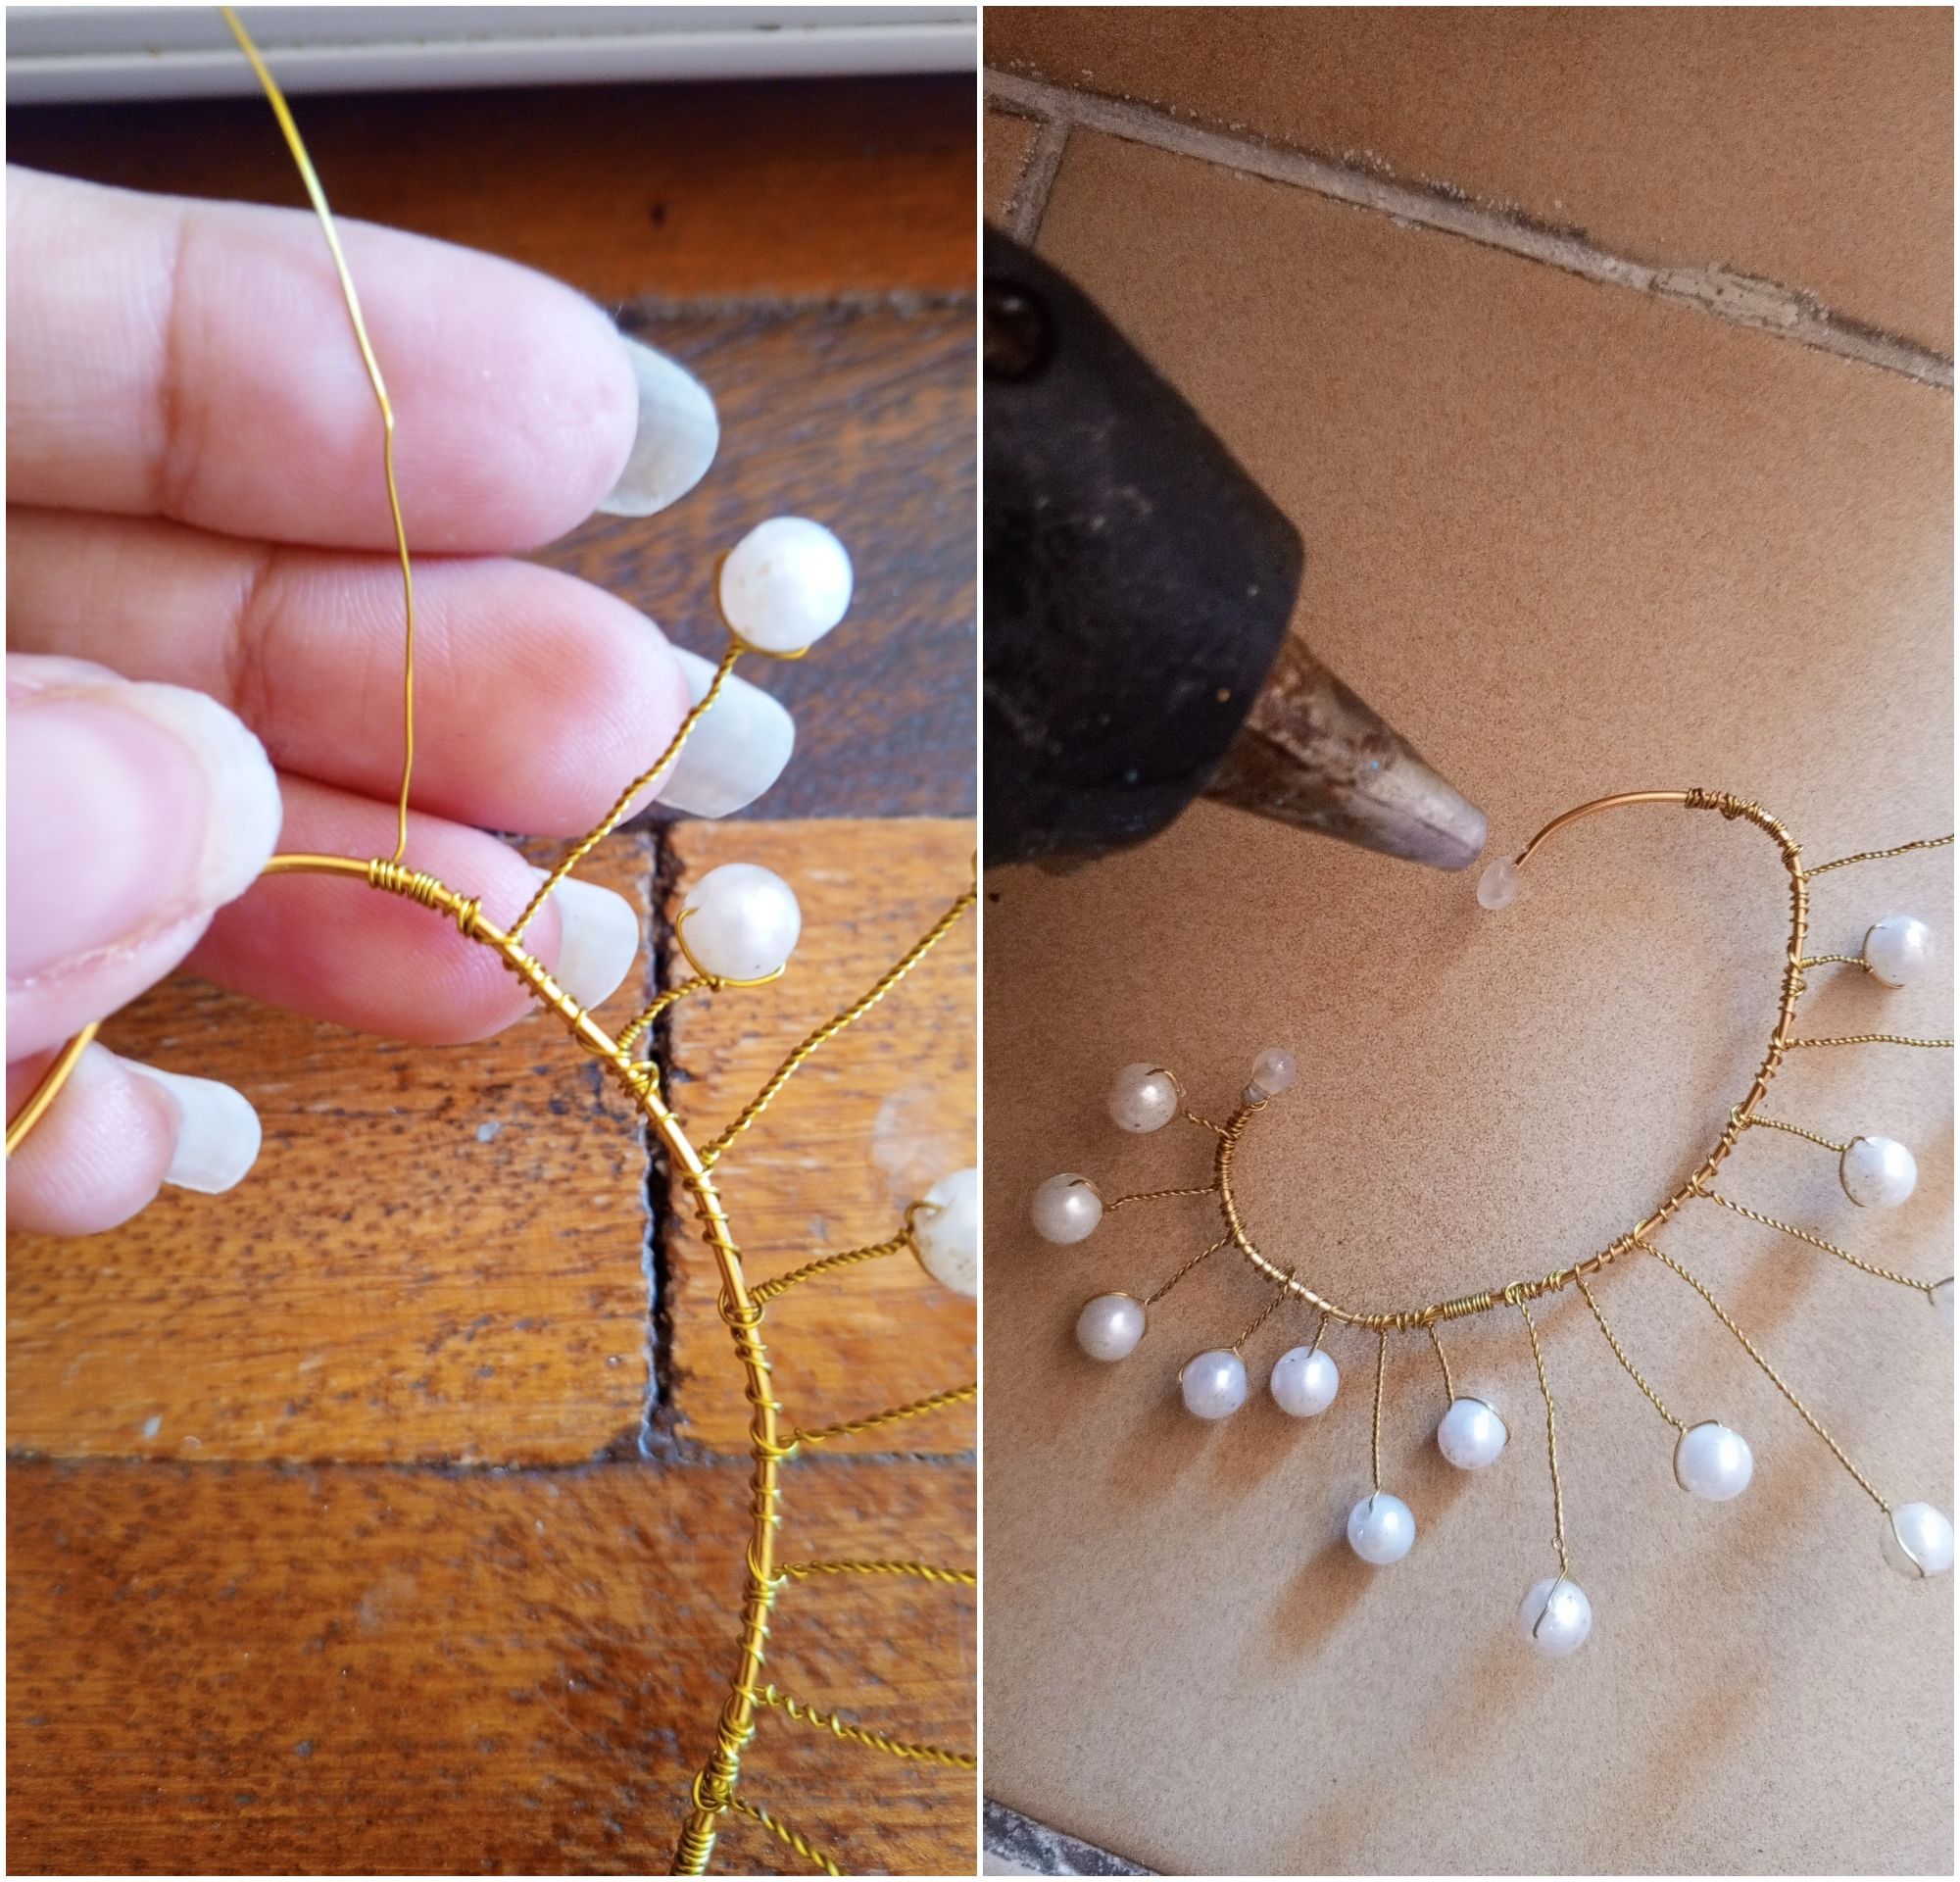
Ahora que ya tenemos nuestro alambre fijado vamos a introducir nuestra perla y dejando un espacio empezamos a girar y a enrollar. La perla debe de quedar hacia afuera como se ve en la foto. Este paso lo vamos a repetir varias veces, pero cambiando el tamaño de la ubicación de la perla. Ustedes van viendo, de igual forma tienen el ejemplo en las siguientes imágenes.
Step 2️⃣
Now that we have our wire wire fixed we are going to introduce our pearl and leaving a space we start to twist and roll to twist and wind. The pearl should be facing outwards as shown in the picture. photo. We are going to repeat this step several times, but changing the size of the bead. size of the location of the pearl. You will see, in the same way you have the example in the following images.

Paso 3️⃣
Como último paso, vamos a enrollar lo que nos queda de alambre como unas 10 veces y picaremos el restante. Fijaremos lo que queda con la pinza para que ese alambre delgado no se mueva y pasamos a continuación a encender nuestra pistola de silicón para colocar en los dos extremos del alambre grueso una gótica de silicón. Esto nos servirá para que no nos pinches ni lastimemos la oreja.
Step 3️⃣
As a last step, we are going to wind what we have left of wire about 10 times and chop up the remaining wire. We will fix what is left with the clamp so that this thin wire does not move and then we turn on our silicone gun to place on the two ends of the thick wire. the two ends of the thick wire a silicone gothic. This will help us to that we do not prick or hurt the ear.
✨💖🌷✨💖🌷✨💖🌷✨💖🌷✨💖🌷✨💖🌷✨💖🌷✨💖🌷✨
`•💖RESULT💖•`
💖RESULTADO💖 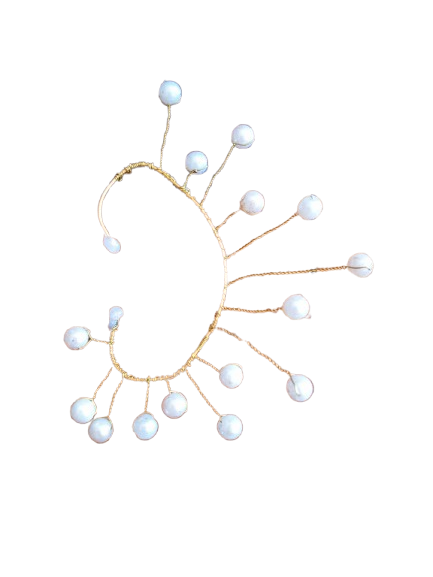 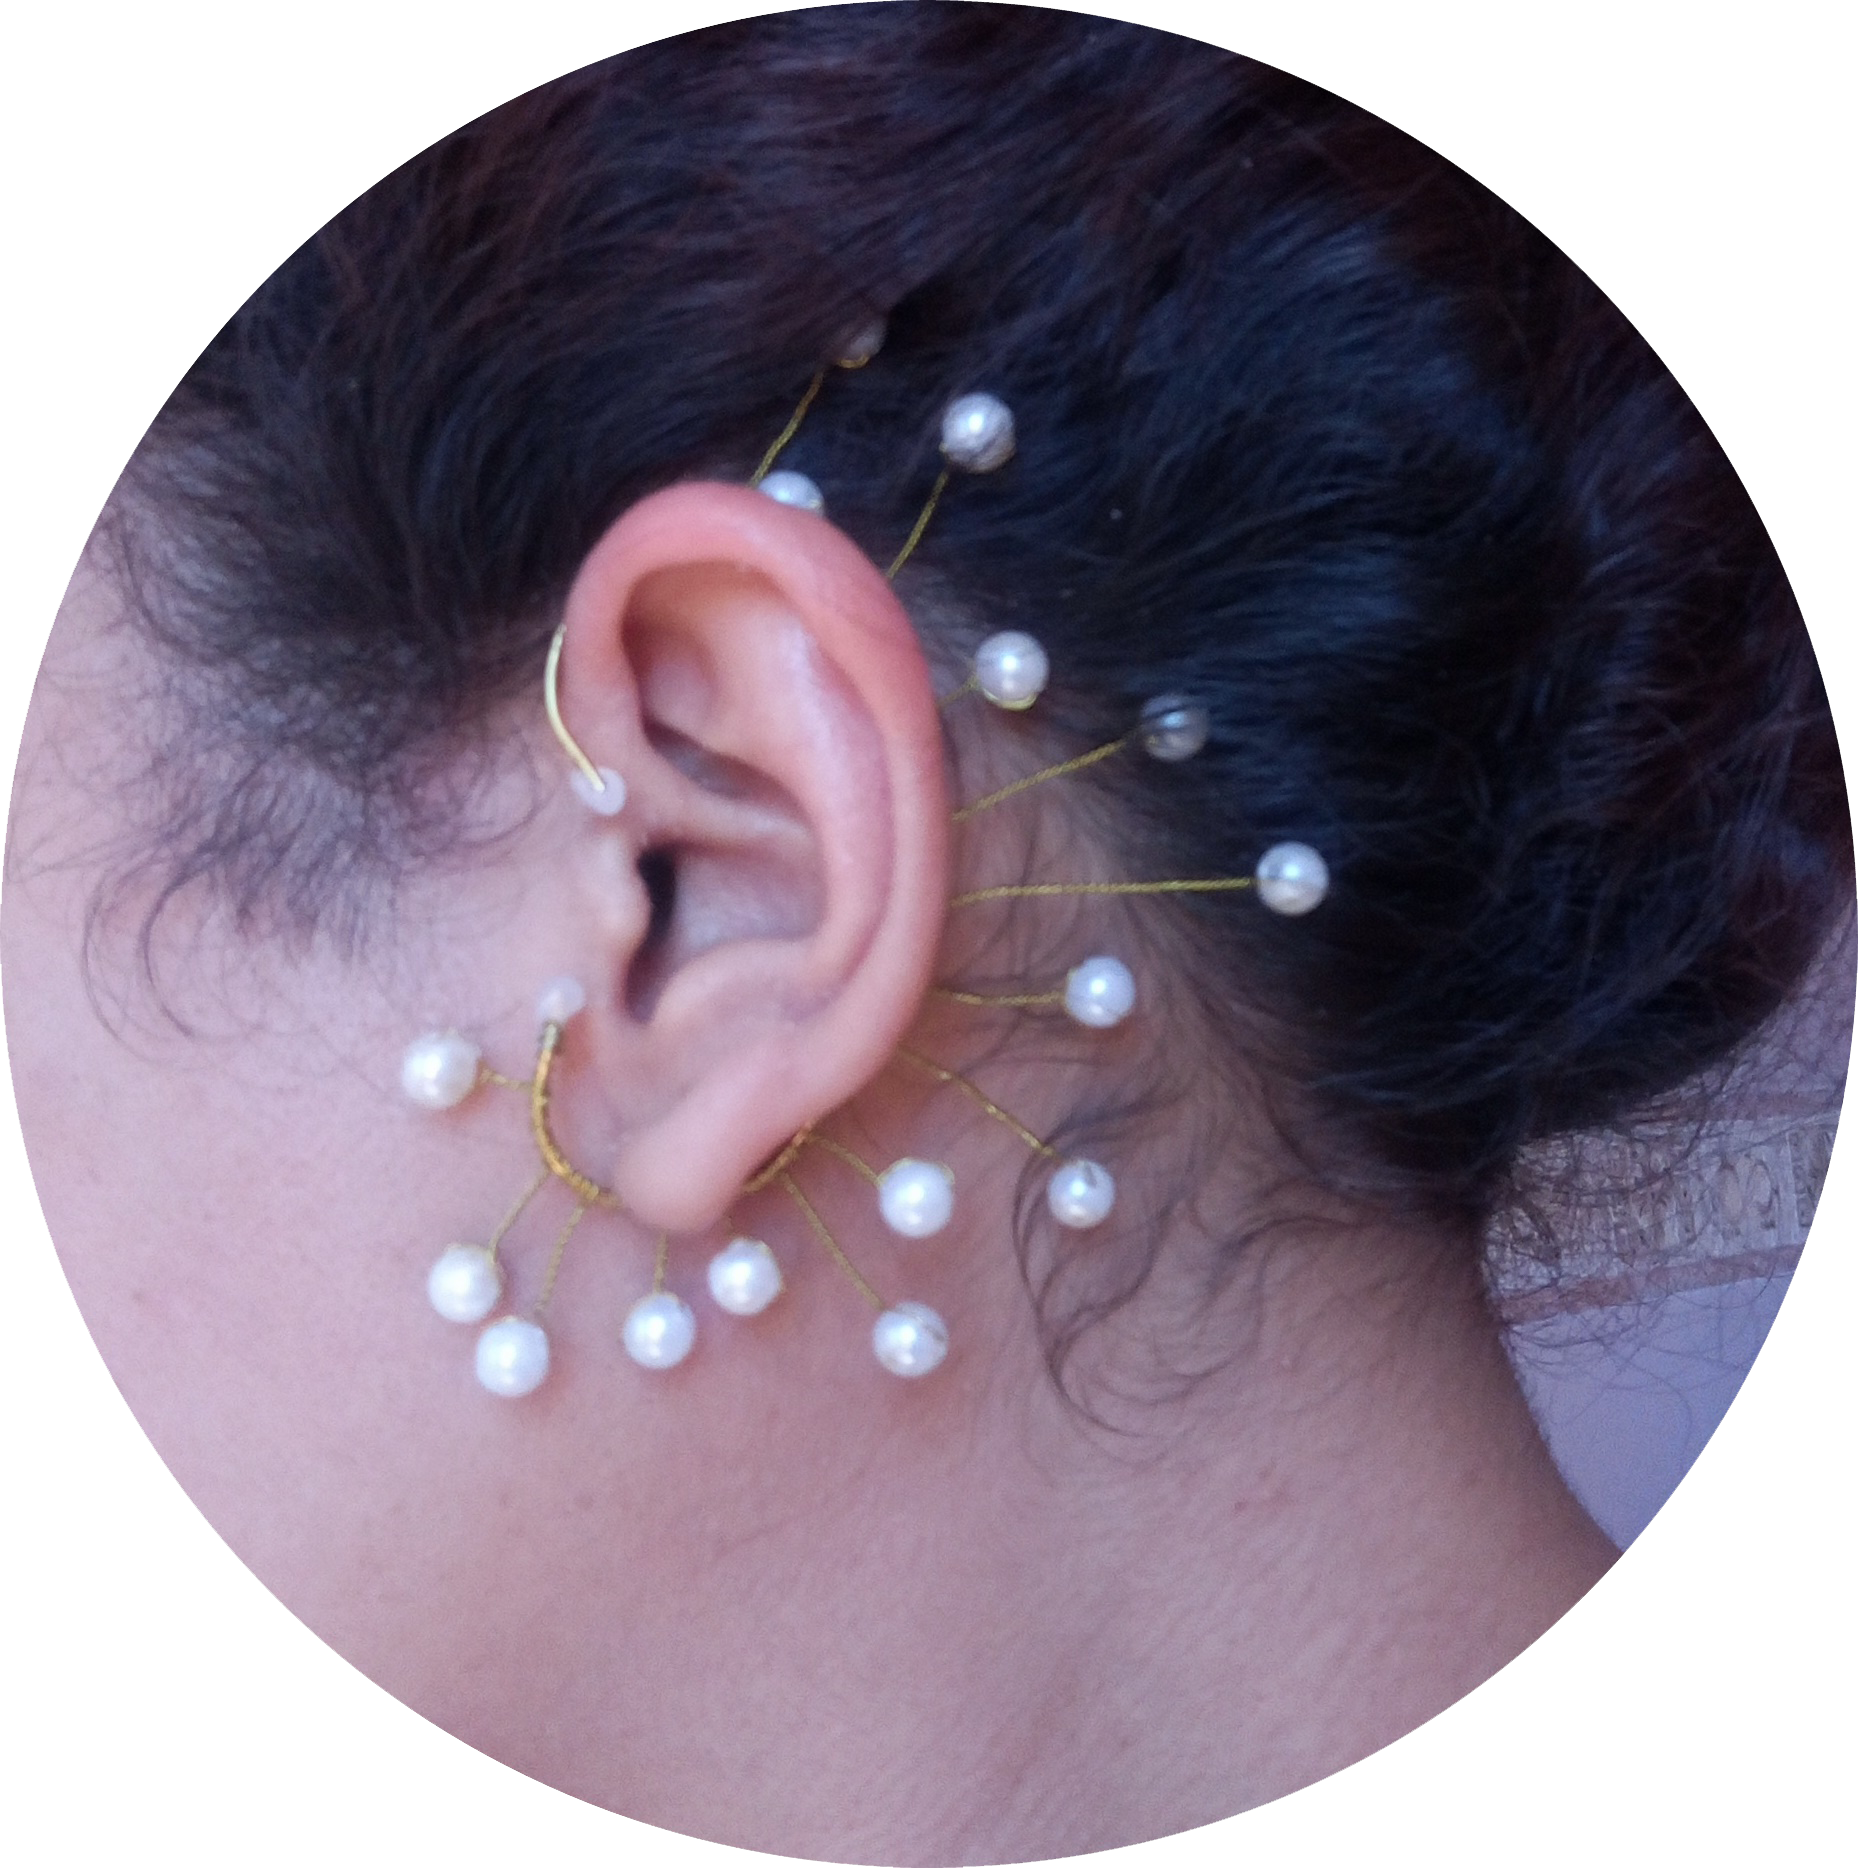 💖And this is the result💖 || 💖Y este es el resultado💖
Y bueno, como pueden ver esta manualidad es súper fácil de realizar, te invito mucho a que la hagas o que al menos lo intentes porque no es tan engorroso. ¡Disfrútalo bastante!
>And well, as you can see this craft is super easy to do, I invite you to do it or at least try it because it is not so cumbersome. Enjoy it a lot!
✨💖🌷✨💖🌷✨💖🌷✨💖🌷✨💖🌷✨💖🌷✨💖🌷✨💖🌷✨
💞Thank you so much for making it this far! I hope you liked my post, I'll see you next time!💞
>💞¡Muchas gracias por llegar hasta aquí! Espero que te haya gustado mi post. ¡Nos vemos en una próxima oportunidad!💞

✎ Translator | Traductor: [Deepl](https://www.deepl.com/es/translator)
📲 All photographs were taken with a Tecno Spark 10 pro phone
📲 Todas las fotografías fueron tomadas con un teléfono Tecno Spark 10 pro
📷 ALL PHOTOS ARE MY PROPERTY
📷 TODAS LAS FOTOS SON DE MI PROPIEDAD


#hivediy
#manualidades
#crafts
#spanish
#tutorial
#diyhub
#originalcontent
#handmade
#hive-130560
Payout: 0.000 HBD
Votes: 158
More interactions (upvote, reblog, reply) coming soon.