Hola feliz noche tengan todos amigos , espero que se encuentren bien, aprovecho para desearles un feliz fin de semana , les quiero compartir en esta bella noche un organizador para baño con material de tela , utilizando algunos materiales reutilizados como la tela y el gancho de ropa
Hello, good evening everyone, I hope you are all well. I would like to take this opportunity to wish you a happy weekend. On this beautiful evening, I would like to share with you a fabric bathroom organizer, made using some reused materials such as fabric and clothes hangers.
Materiales qué utilice para mí organizador:
-Tela tipo paño
-Gancho de ropa
-Hilo, aguja y máquina de coser
-Para el adorno : Cinta , perlas blancas ,tijera y silicón
Materials I used for my organizer:
-Cloth-like fabric
-Clothes hanger
-Thread, needle, and sewing machine
-For decoration: Ribbon, white pearls, scissors, and silicone
A continuación los pasos a seguir:
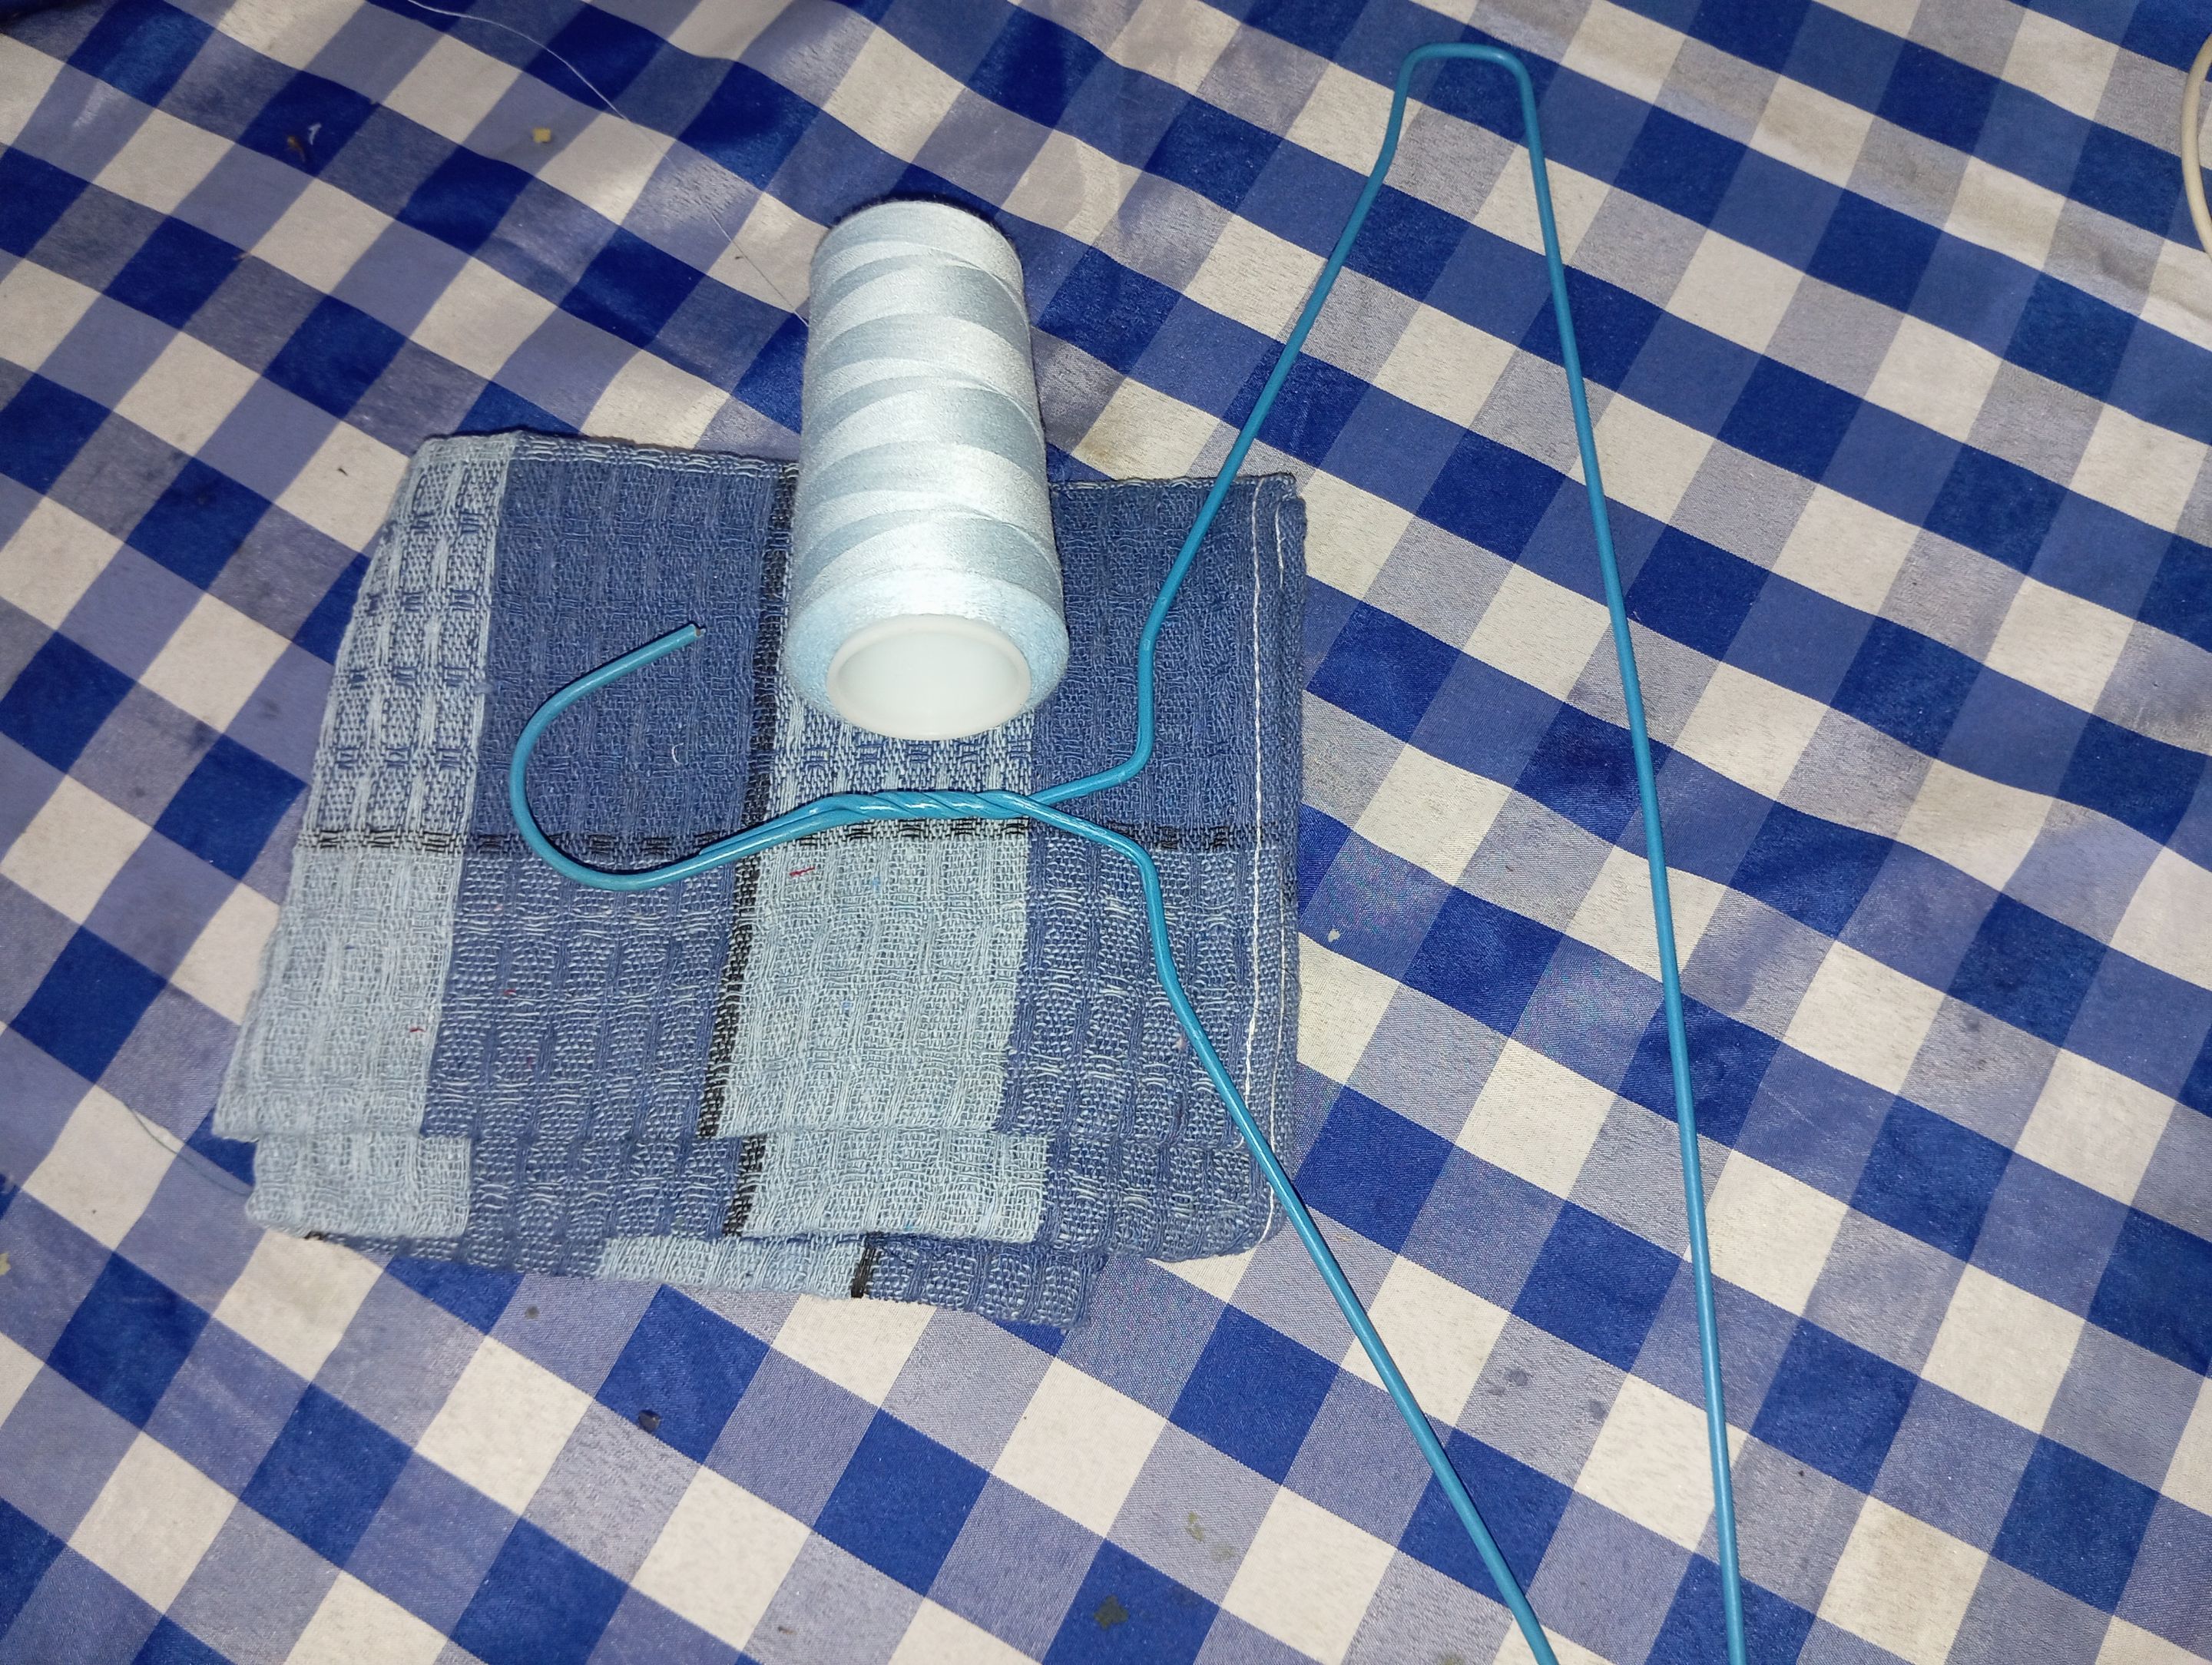
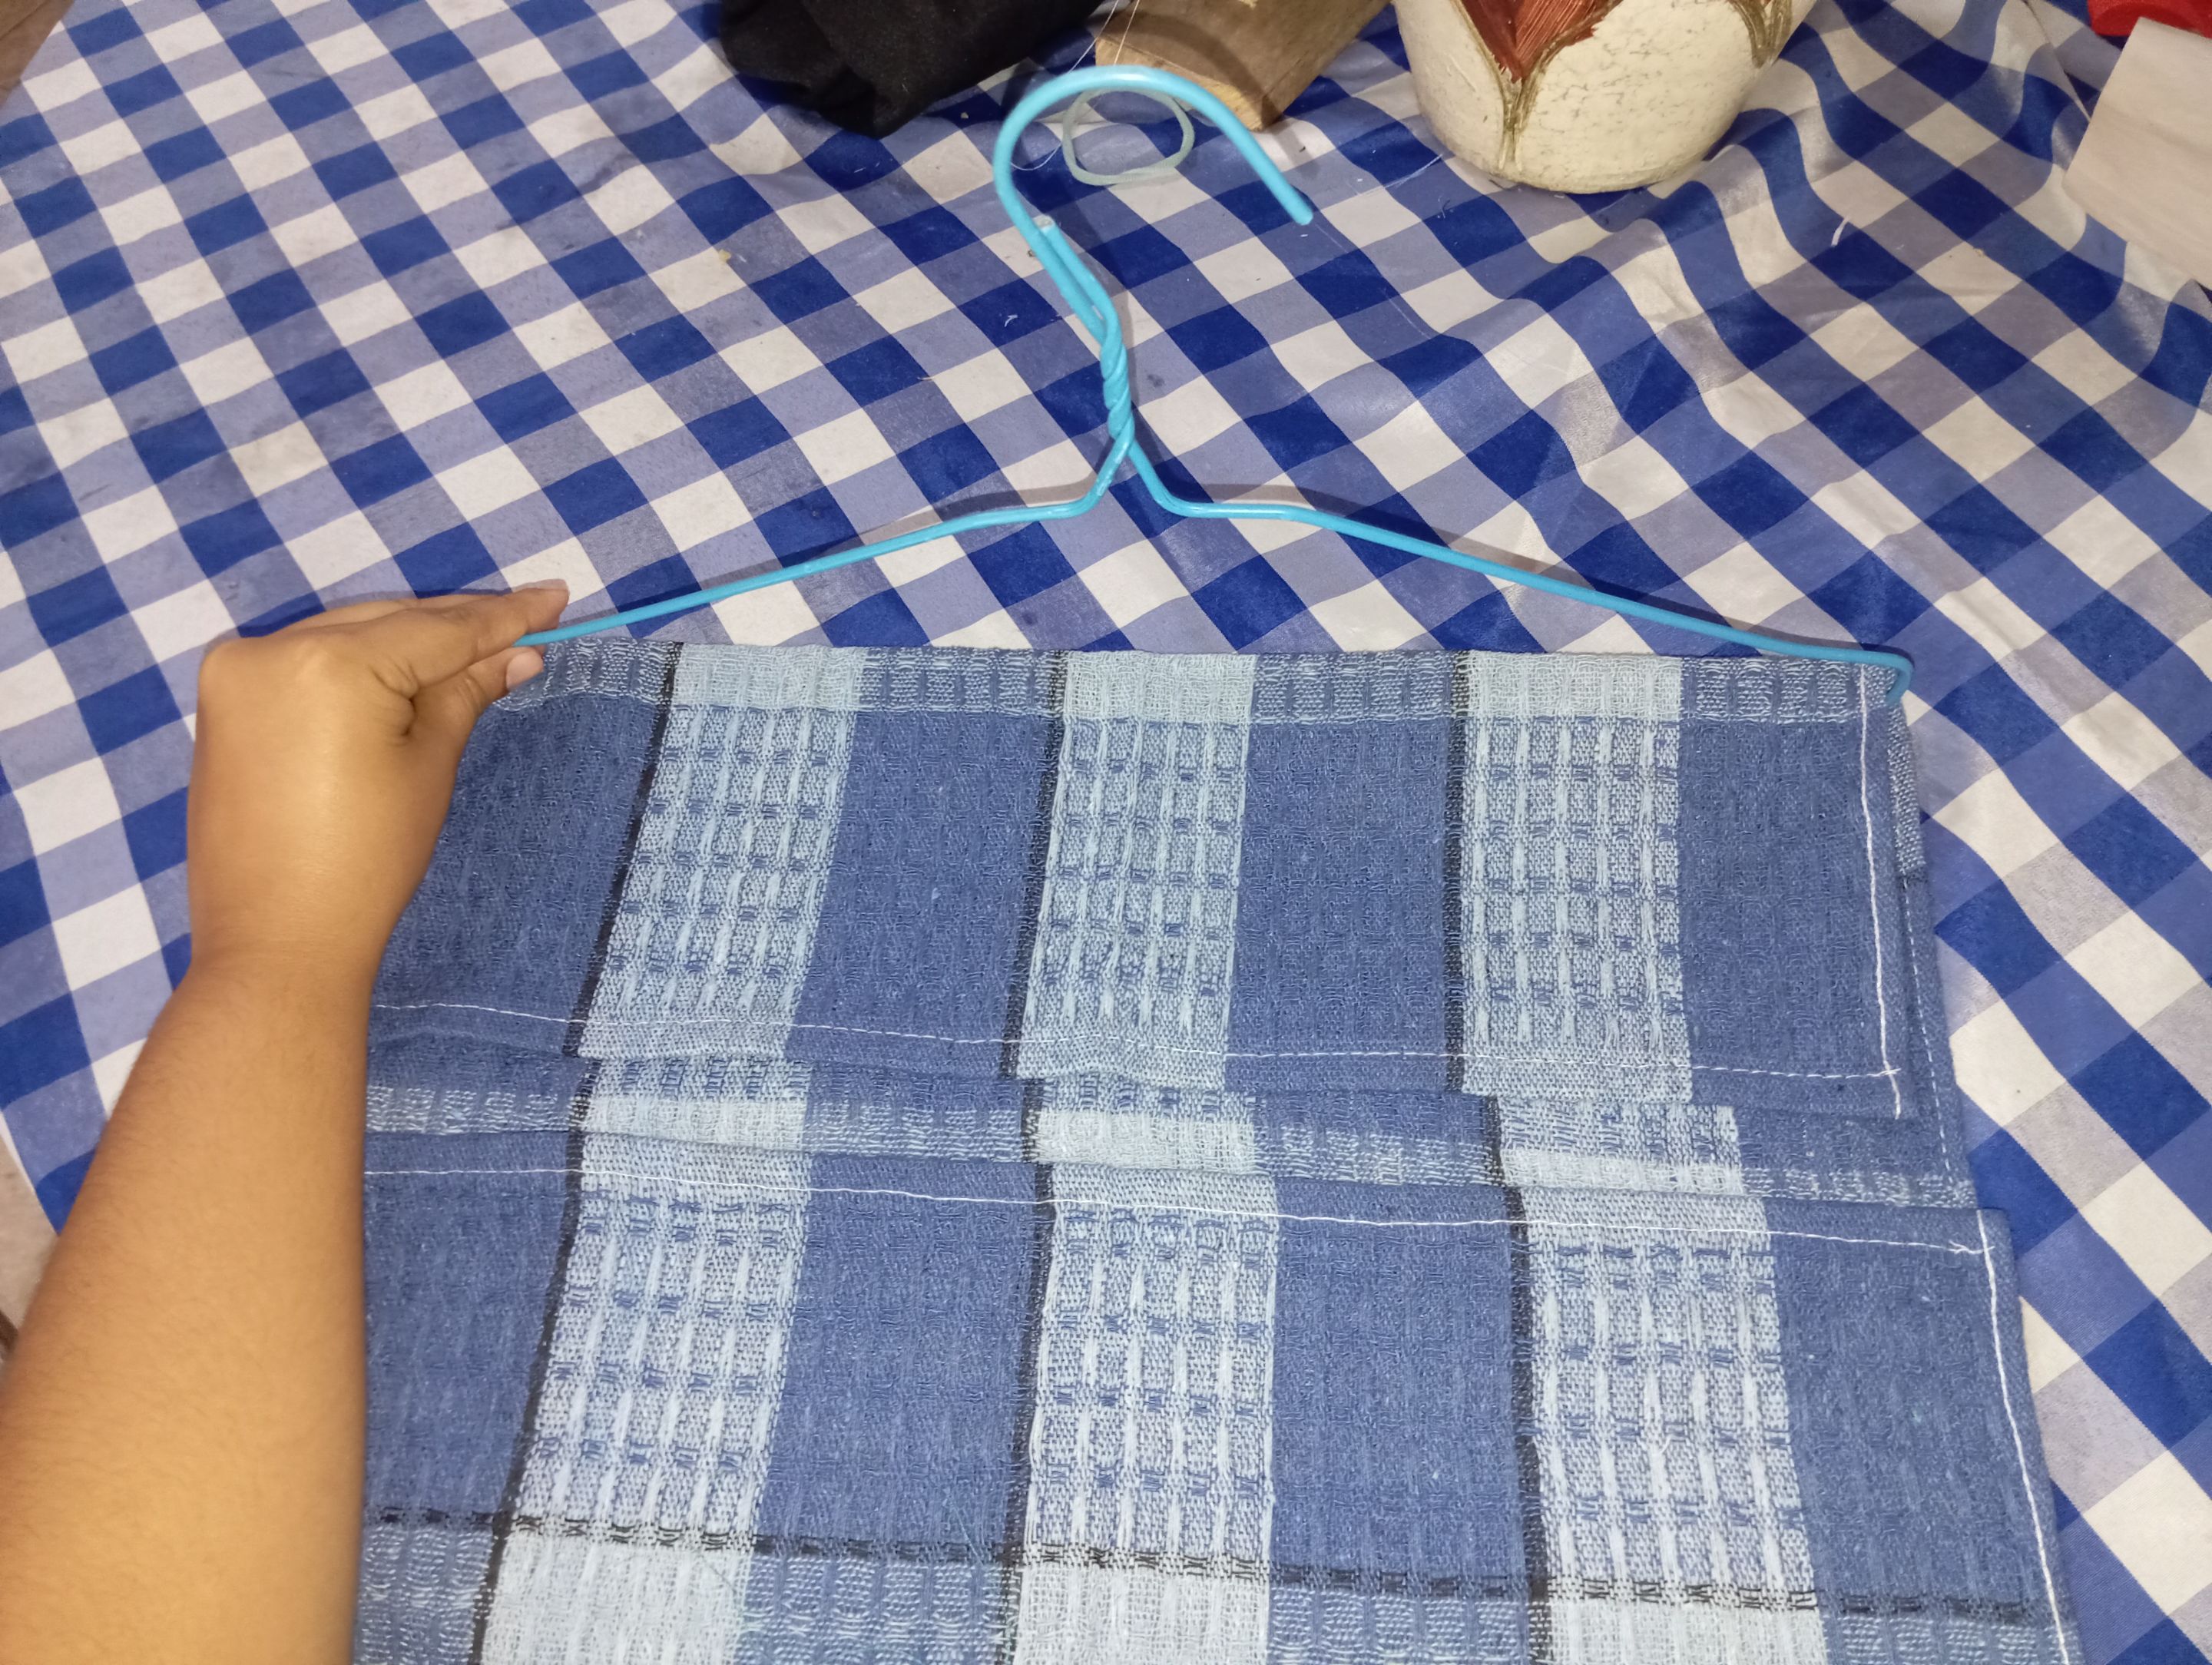
Iniciaremos primeramente tomando nuestra tela , es bastante resistente y gruesa , la vamos a doblar en dos , tomaremos ambos bordes y los doblaremos hacia el centro , dejando como aproximadamente 3 o 4 centímetros de distancia entre ambos dobles como pueden apreciar en la fotografía
Here are the steps to follow:
First, take the fabric, which is quite sturdy and thick, and fold it in half. Take both edges and fold them toward the center, leaving about 3 or 4 centimeters between the two folds, as you can see in the photo.
Seguidamente vamos a tomar un borde el cual será la parte de arriba y vamos a introducir el gancho de ropa lo cual será donde vamos a guindar a nuestro organizador, introducimos y volvemos a doblar con el gancho dentro
Next, take one edge, which will be the top, and insert the clothes hook, which is where we will hang our organizer. Insert the hook and fold again with the hook inside.
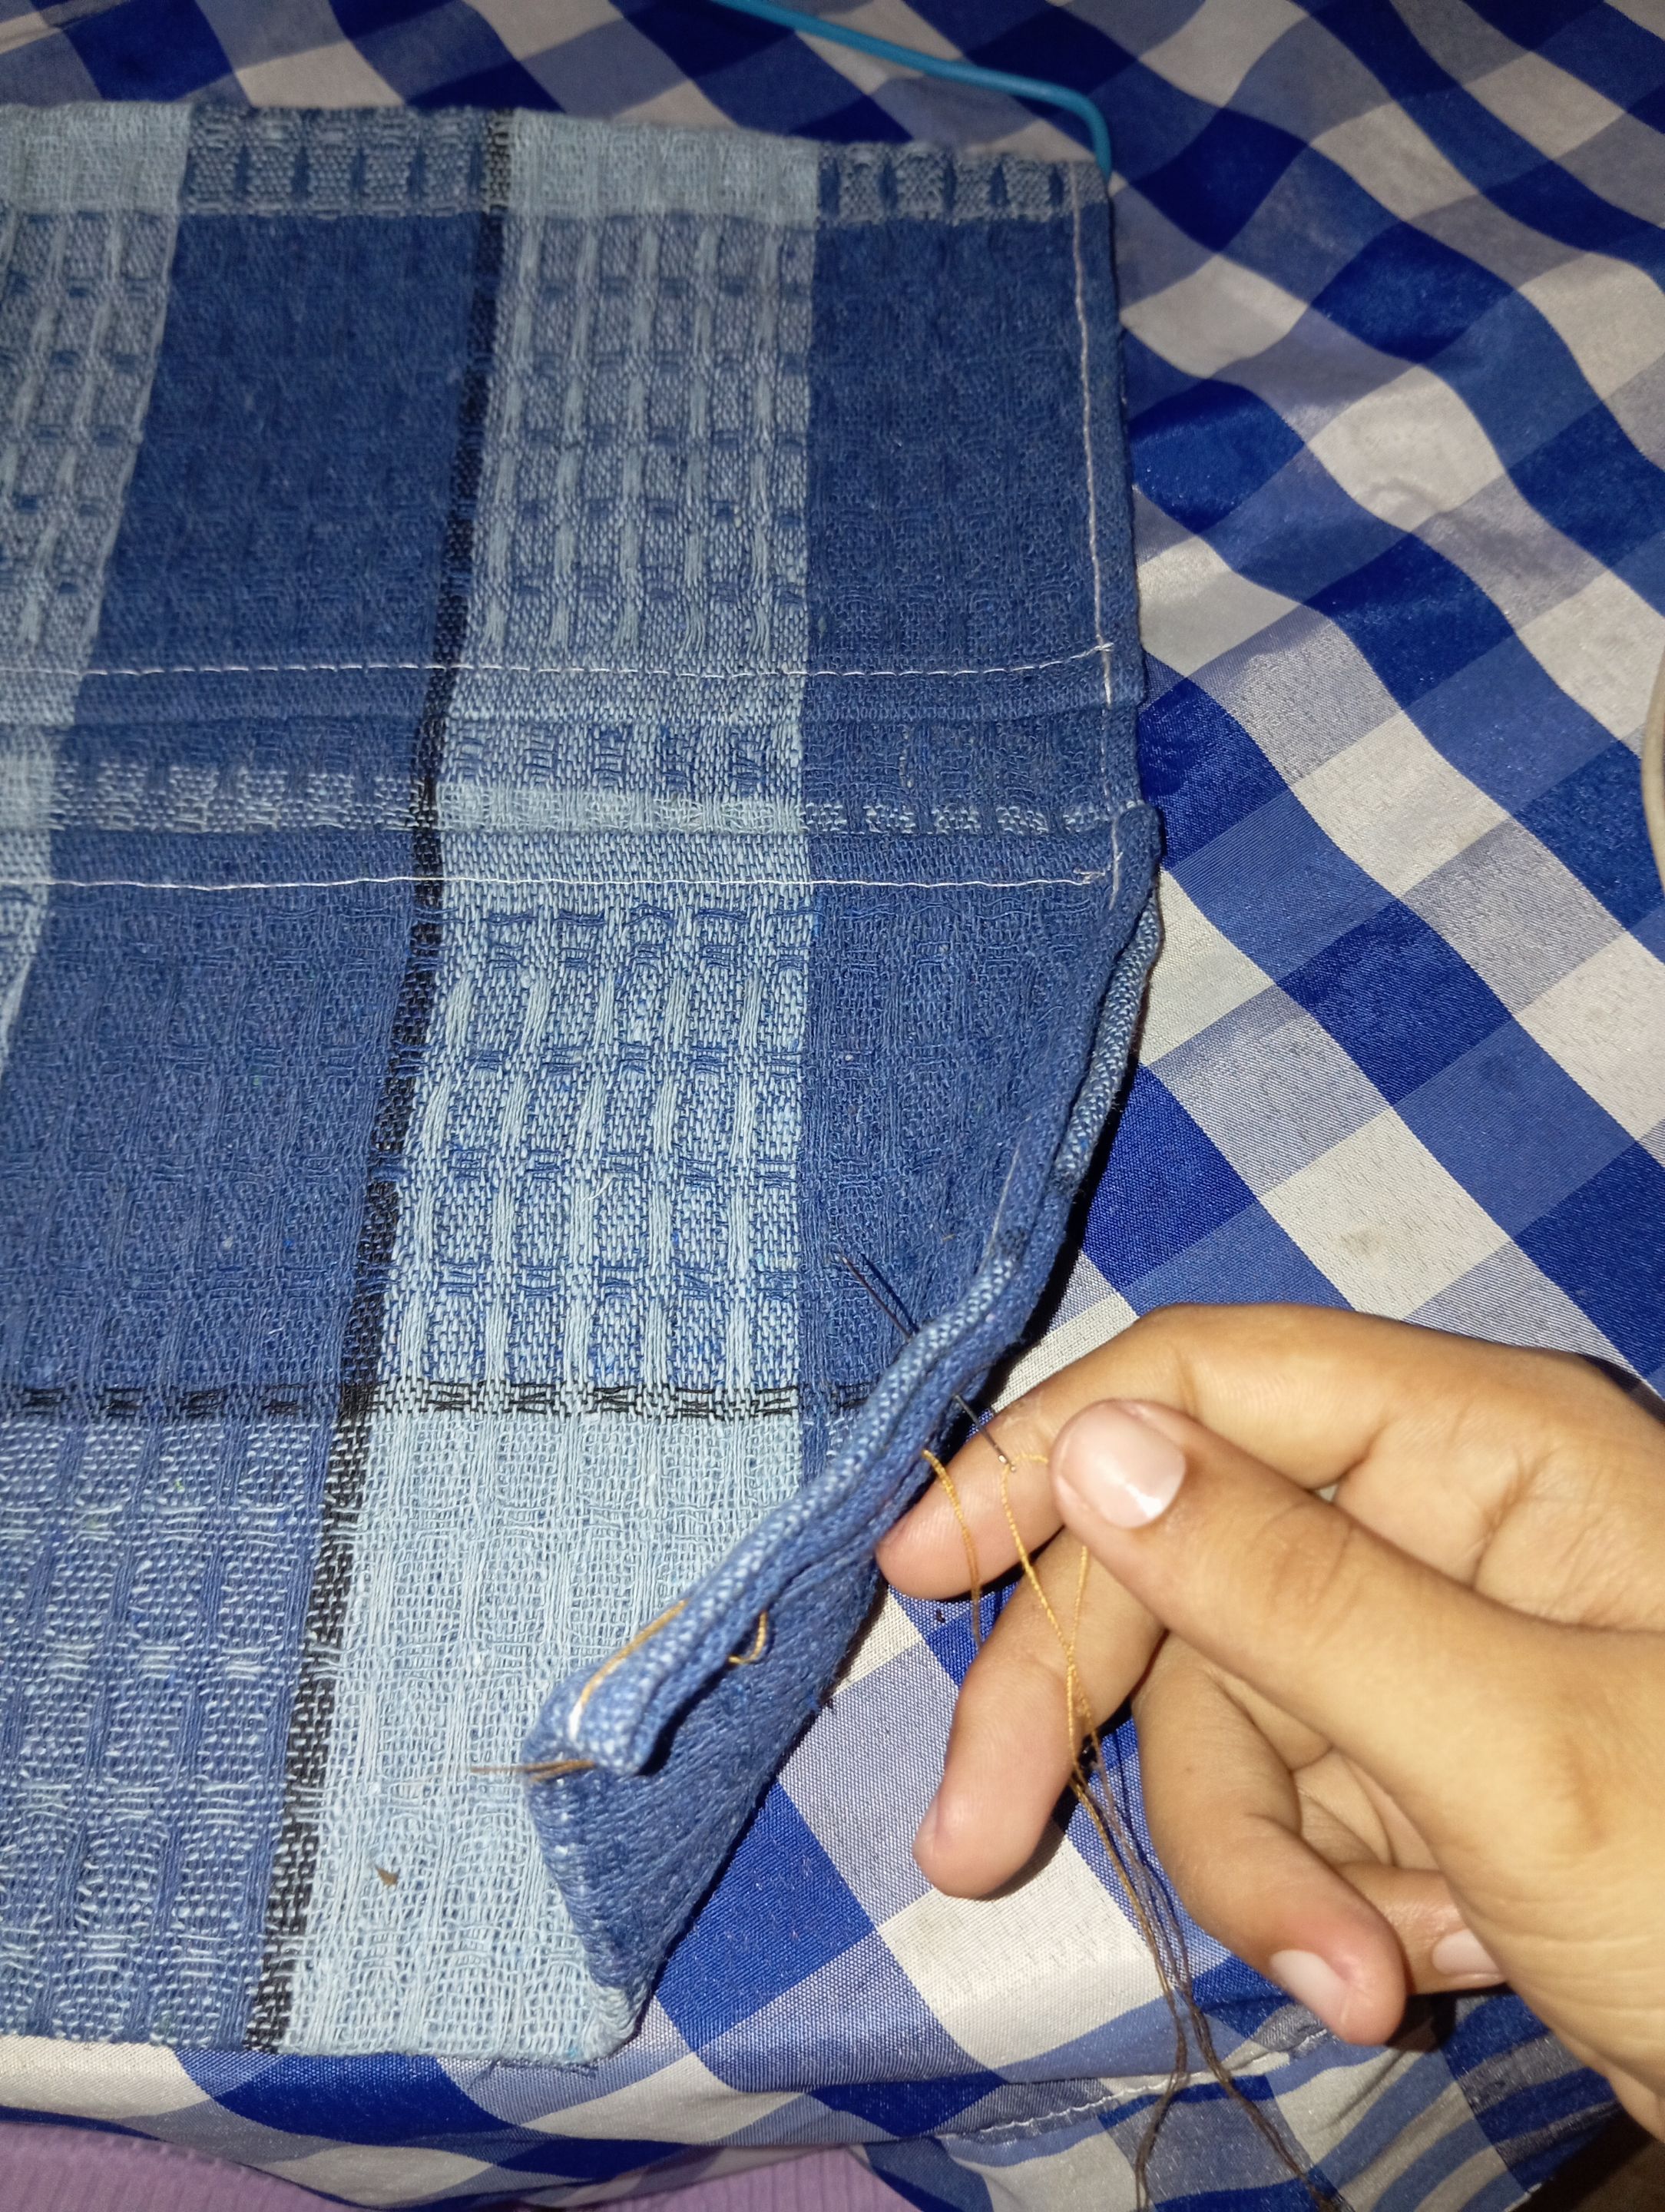
Seguidamente continúe tomando una aguja e hilo de cocer y realizamos una costura punto separada ( mejor conocida como "basteo" es una costura simple y fácil de quitar los puntos es para guiarnos por dónde vamos a cocer )
Next, take a needle and thread and sew a separate stitch (better known as "basting," which is a simple stitch that is easy to remove and is used to guide us where we are going to sew).
Luego continúe cociendo un encaje por todo el borde de la costura de la parte de arriba, en la parte de arriba del encaje continúe colocando una cinta azul oscuro para que resalte , la verdad es que me encantó está combinación
Then continue sewing lace around the entire edge of the top seam. At the top of the lace, continue placing a dark blue ribbon so that it stands out. I really loved this combination.
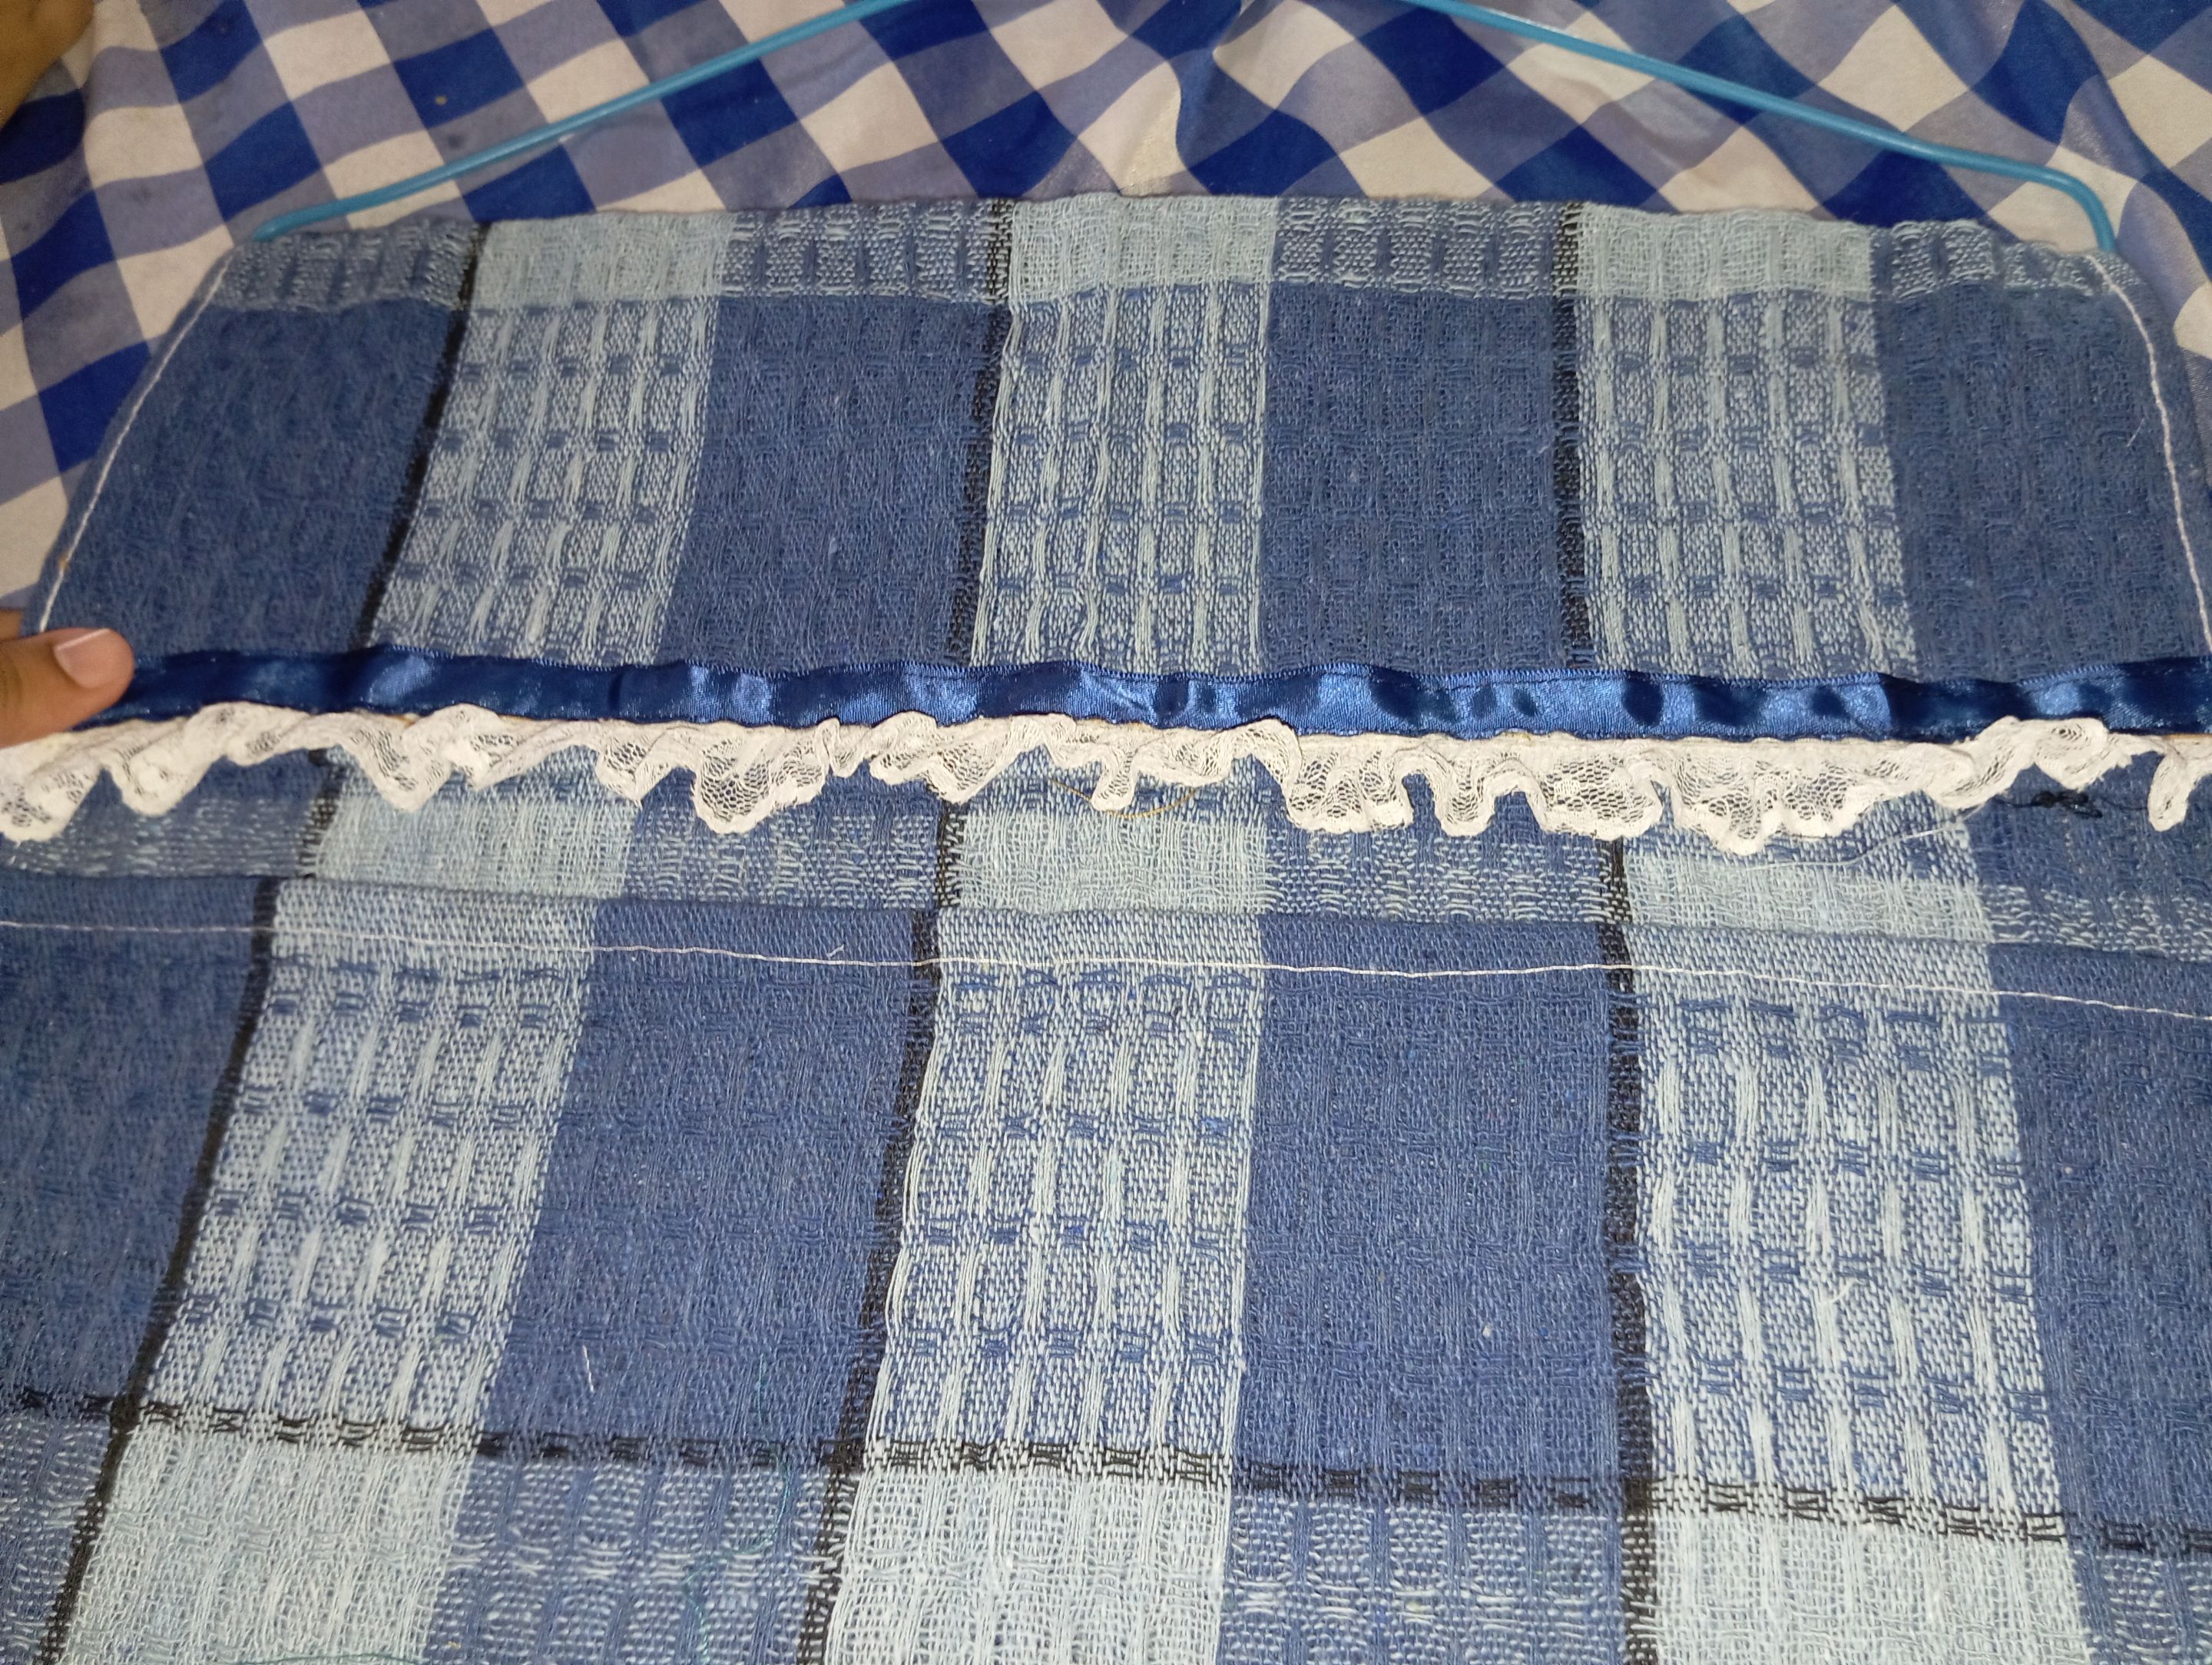
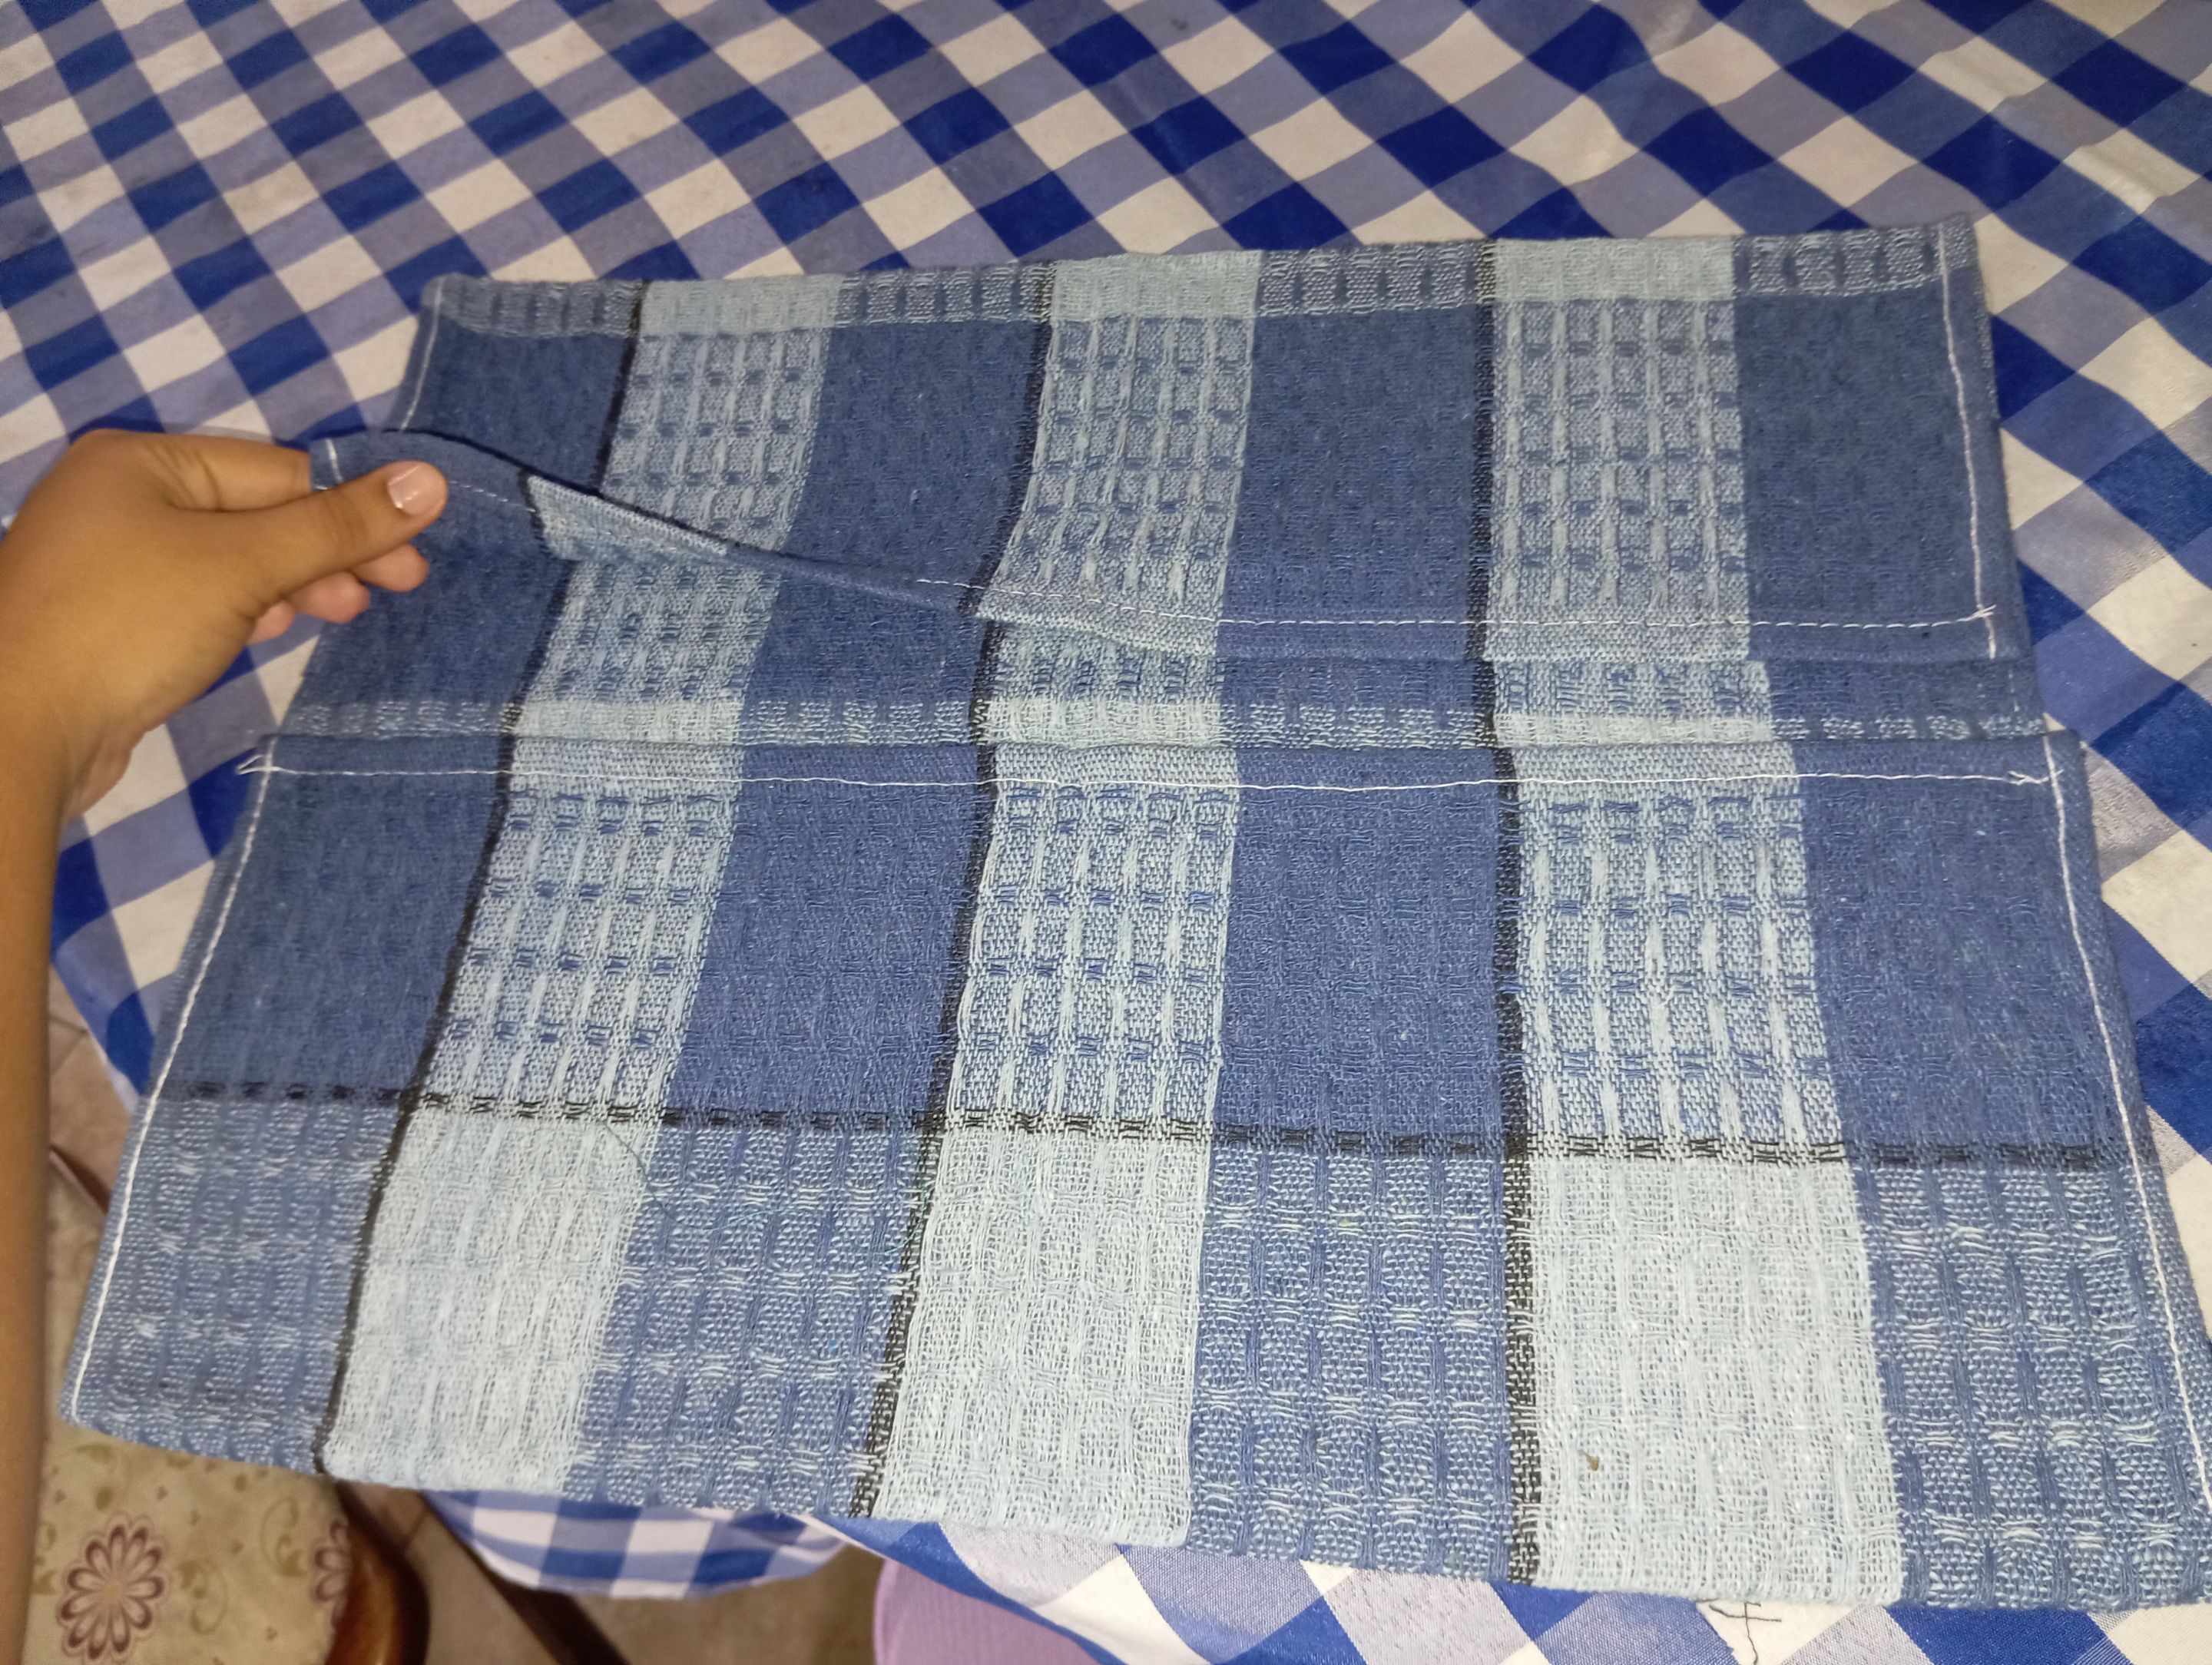
Una vez que tenga mi costura sencilla , continúe pasando la máquina de coser para que el diseño quede firme , así mismo continúe realizando varias costuras en la parte de abajo de forma vertical para hacer una separación donde irán ubicados los cepillos , peines u objetos que vaya a guardar
Once you have your simple stitching, continue sewing with the sewing machine so that the design is secure. Continue sewing several vertical stitches at the bottom to create a separation where you will place the brushes, combs, or other items you want to store.
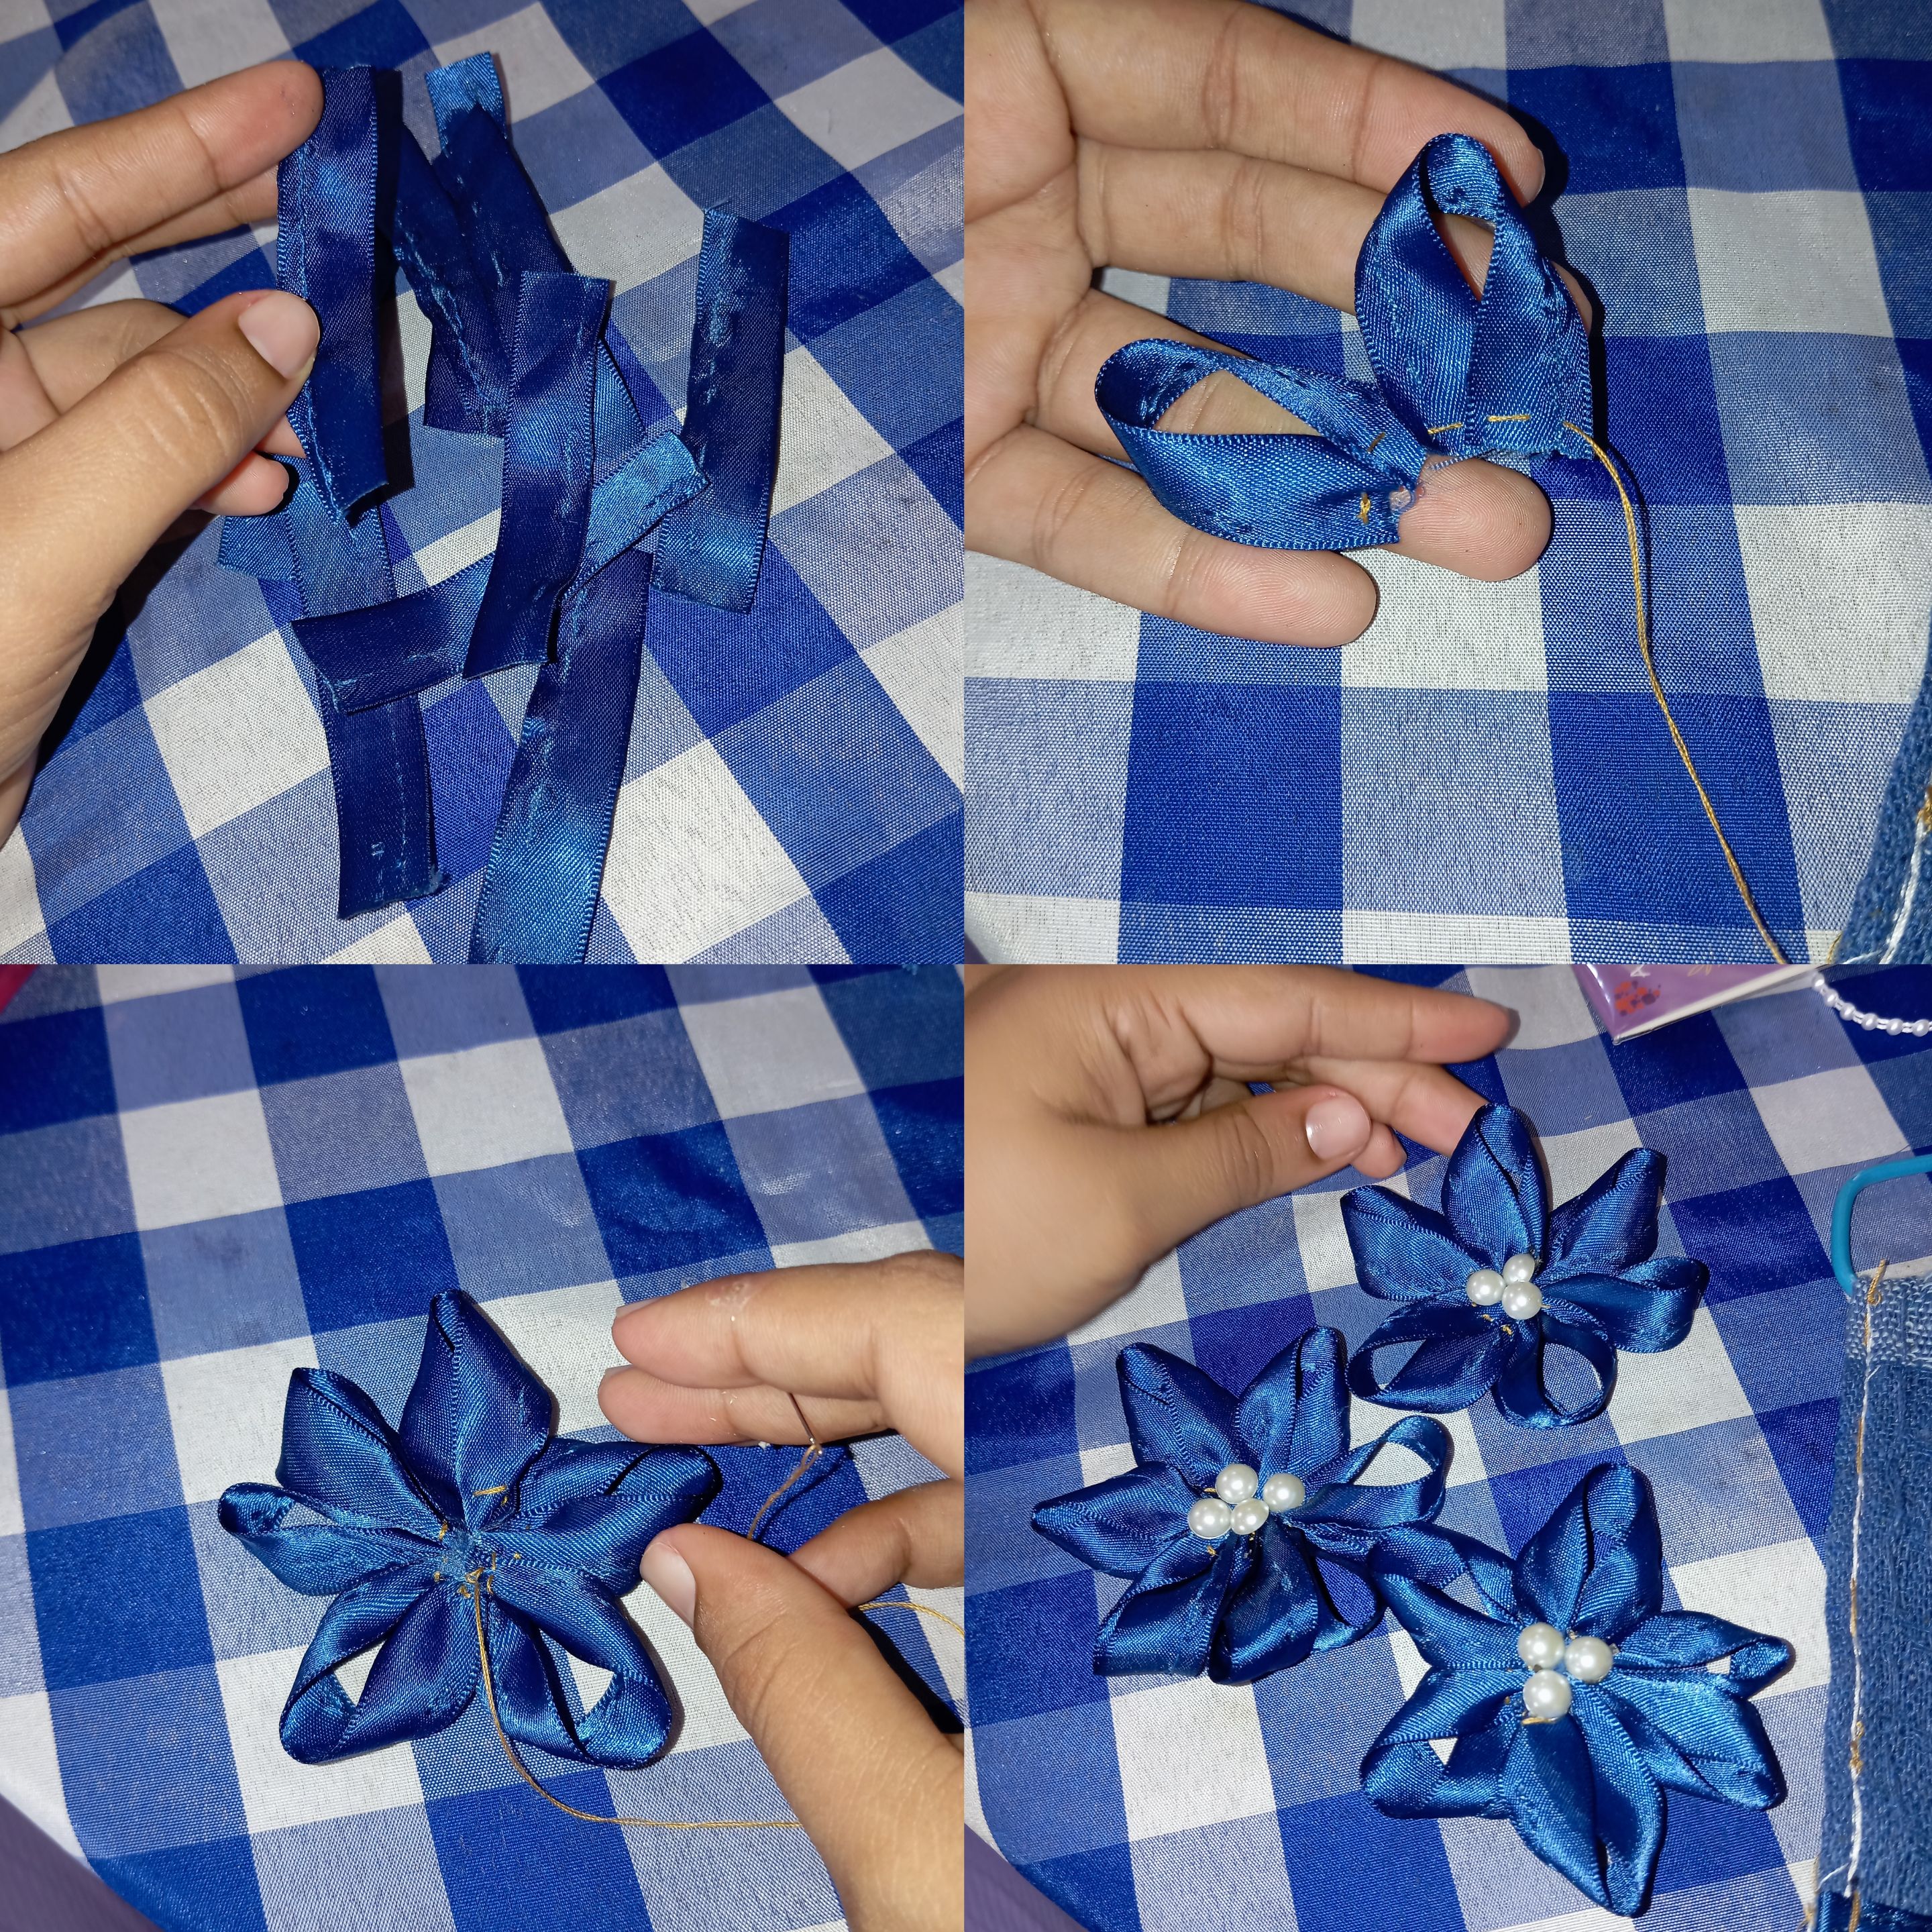
Seguidamente continúe realizando un diseño adicional para adornar nuestro organizador , recorte varias tiras de cinta , las cuales doble y uní punta con punta haciendo la forma similar a un pétalo , con el mismo hilo y aguja continúe colocando los demás pétalos y al tener la cantidad de 6 pétalos continúe jalando el hilo y realizando un nudo , una vez que tengamos una flor , continúe pegando unas perlas en el centro para que queden más llamativas y hermosas , finalizando así mis hermosas flores , realicé 3 pequeñas y 1 mediana
Next, continue making an additional design to decorate our organizer. Cut several strips of ribbon, fold them, and join the ends together to make a petal shape. With the same thread and needle, continue placing the other petals. Once you have 6 petals, continue pulling the thread and tying a knot. Once you have a flower, continue gluing some pearls in the center to make them more eye-catching and beautiful. To finish my beautiful flowers, I made three small ones and one medium one.
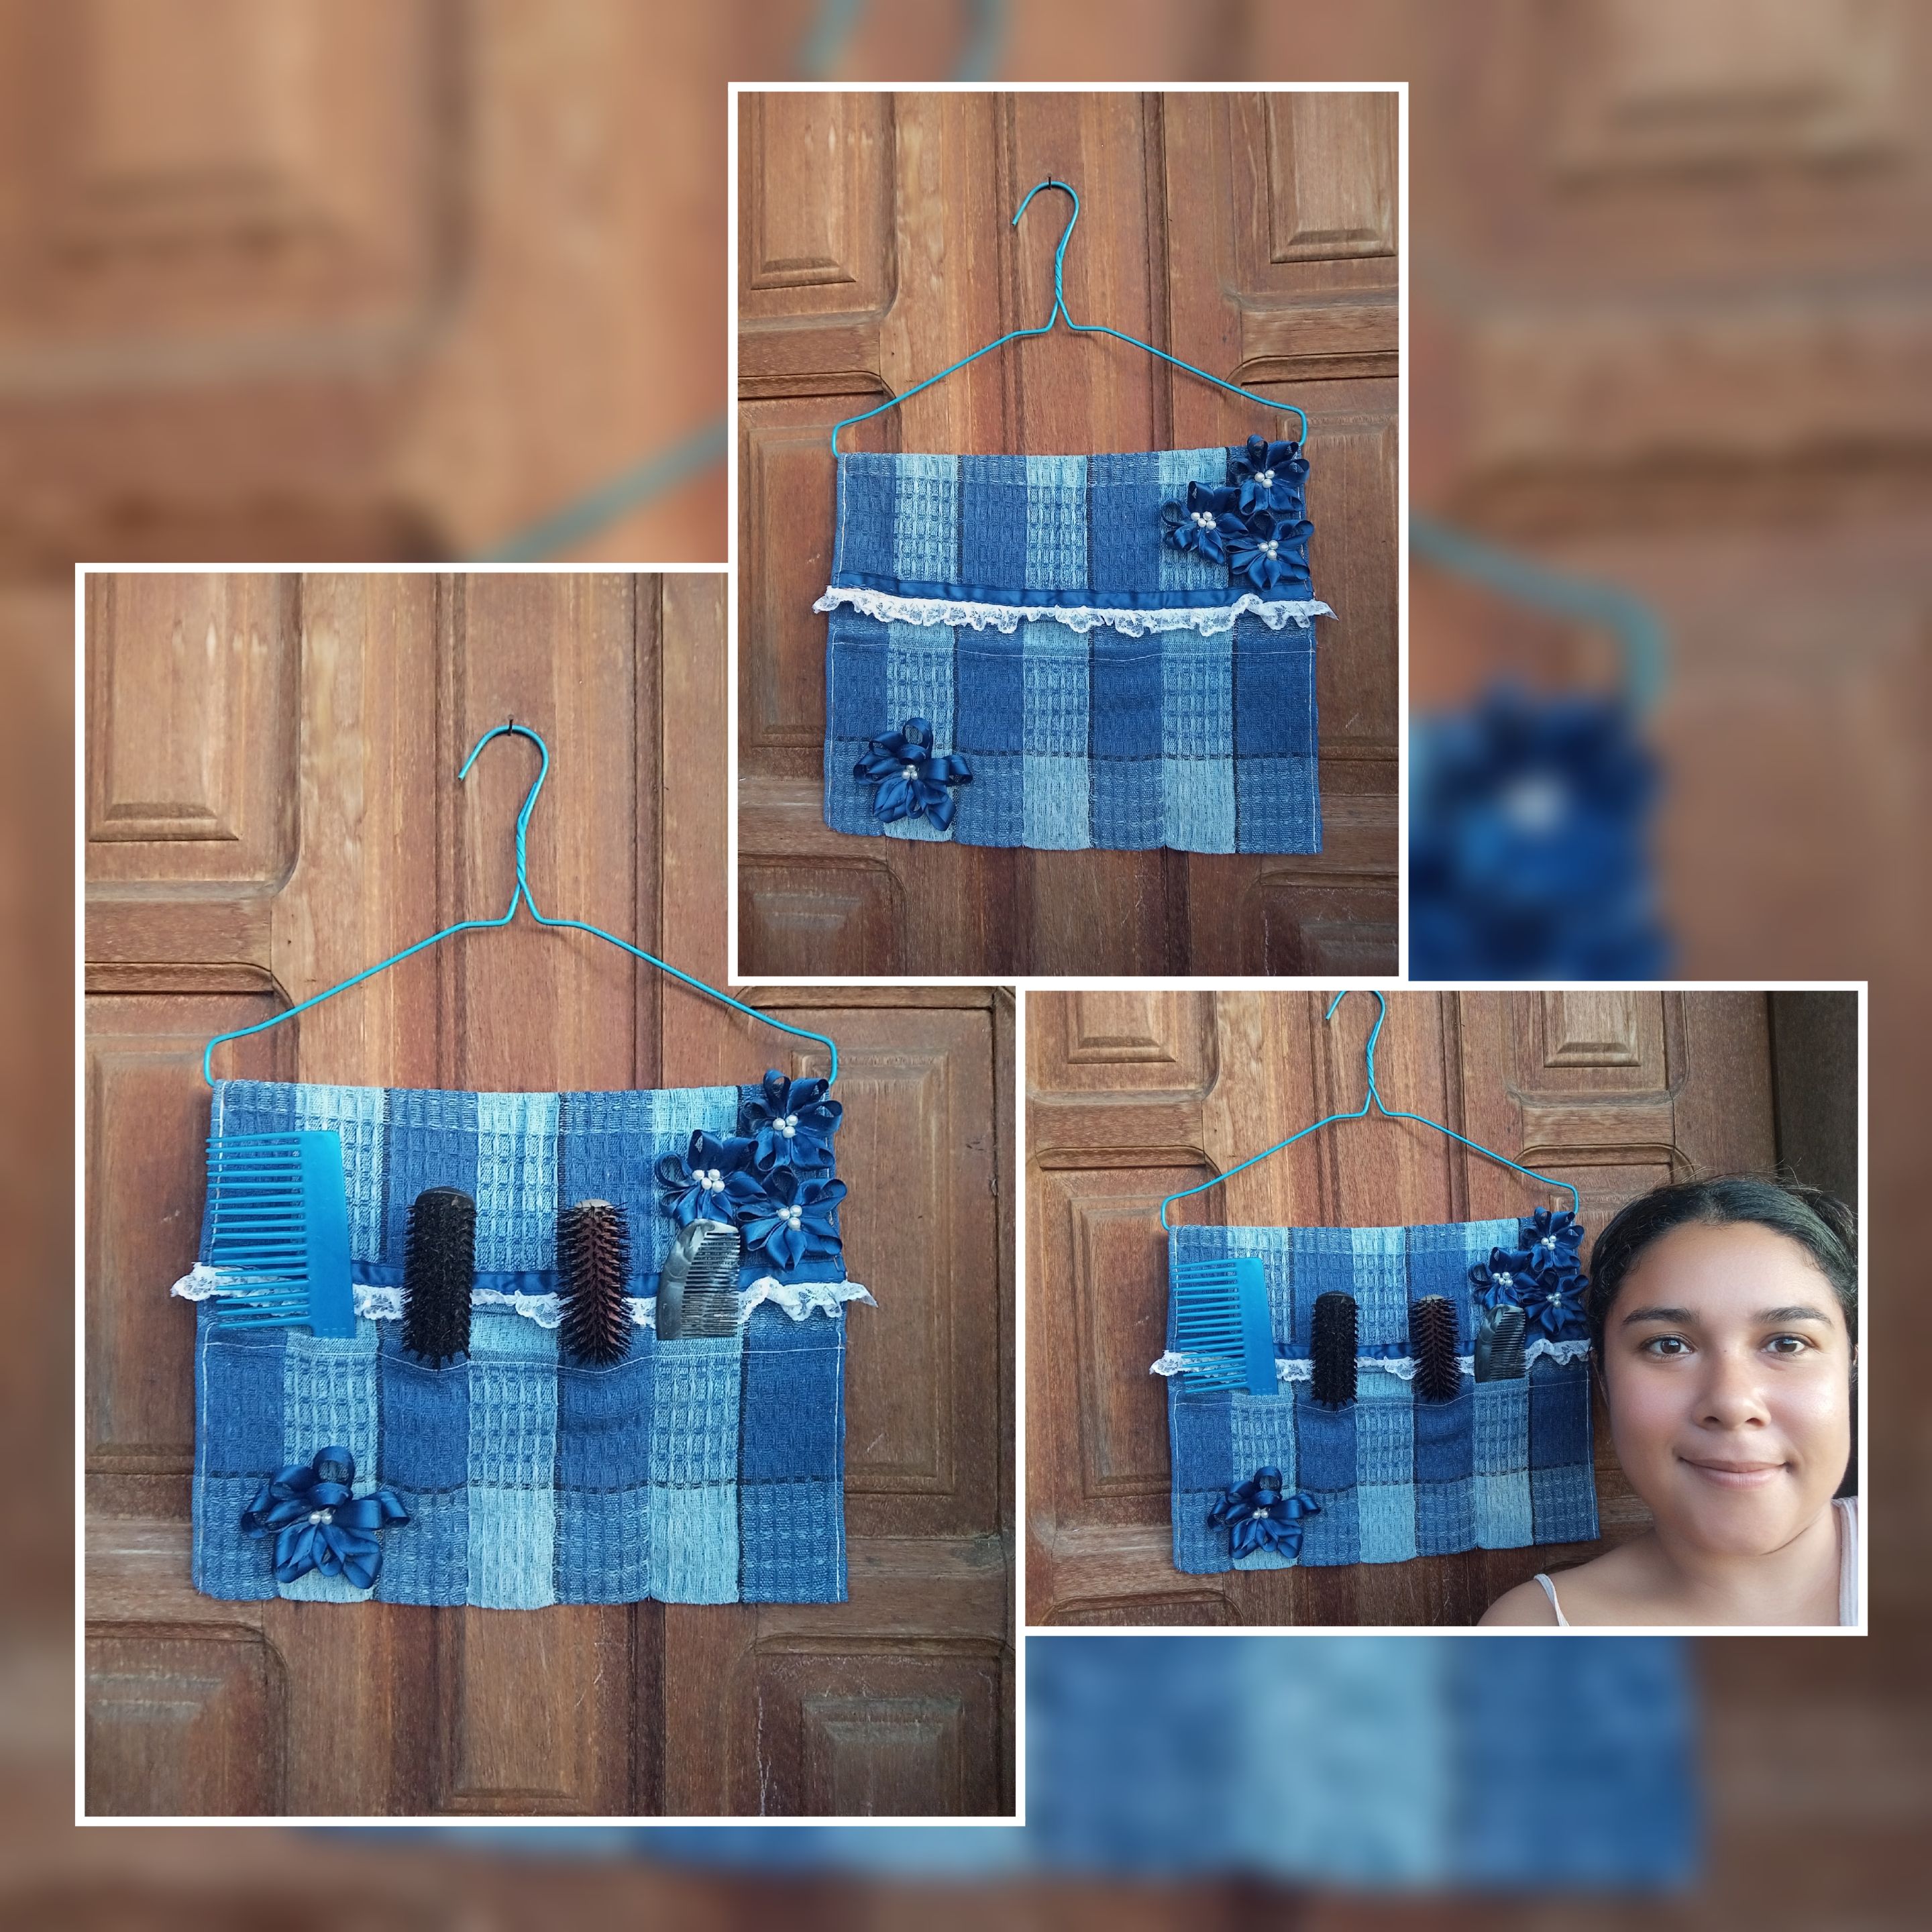
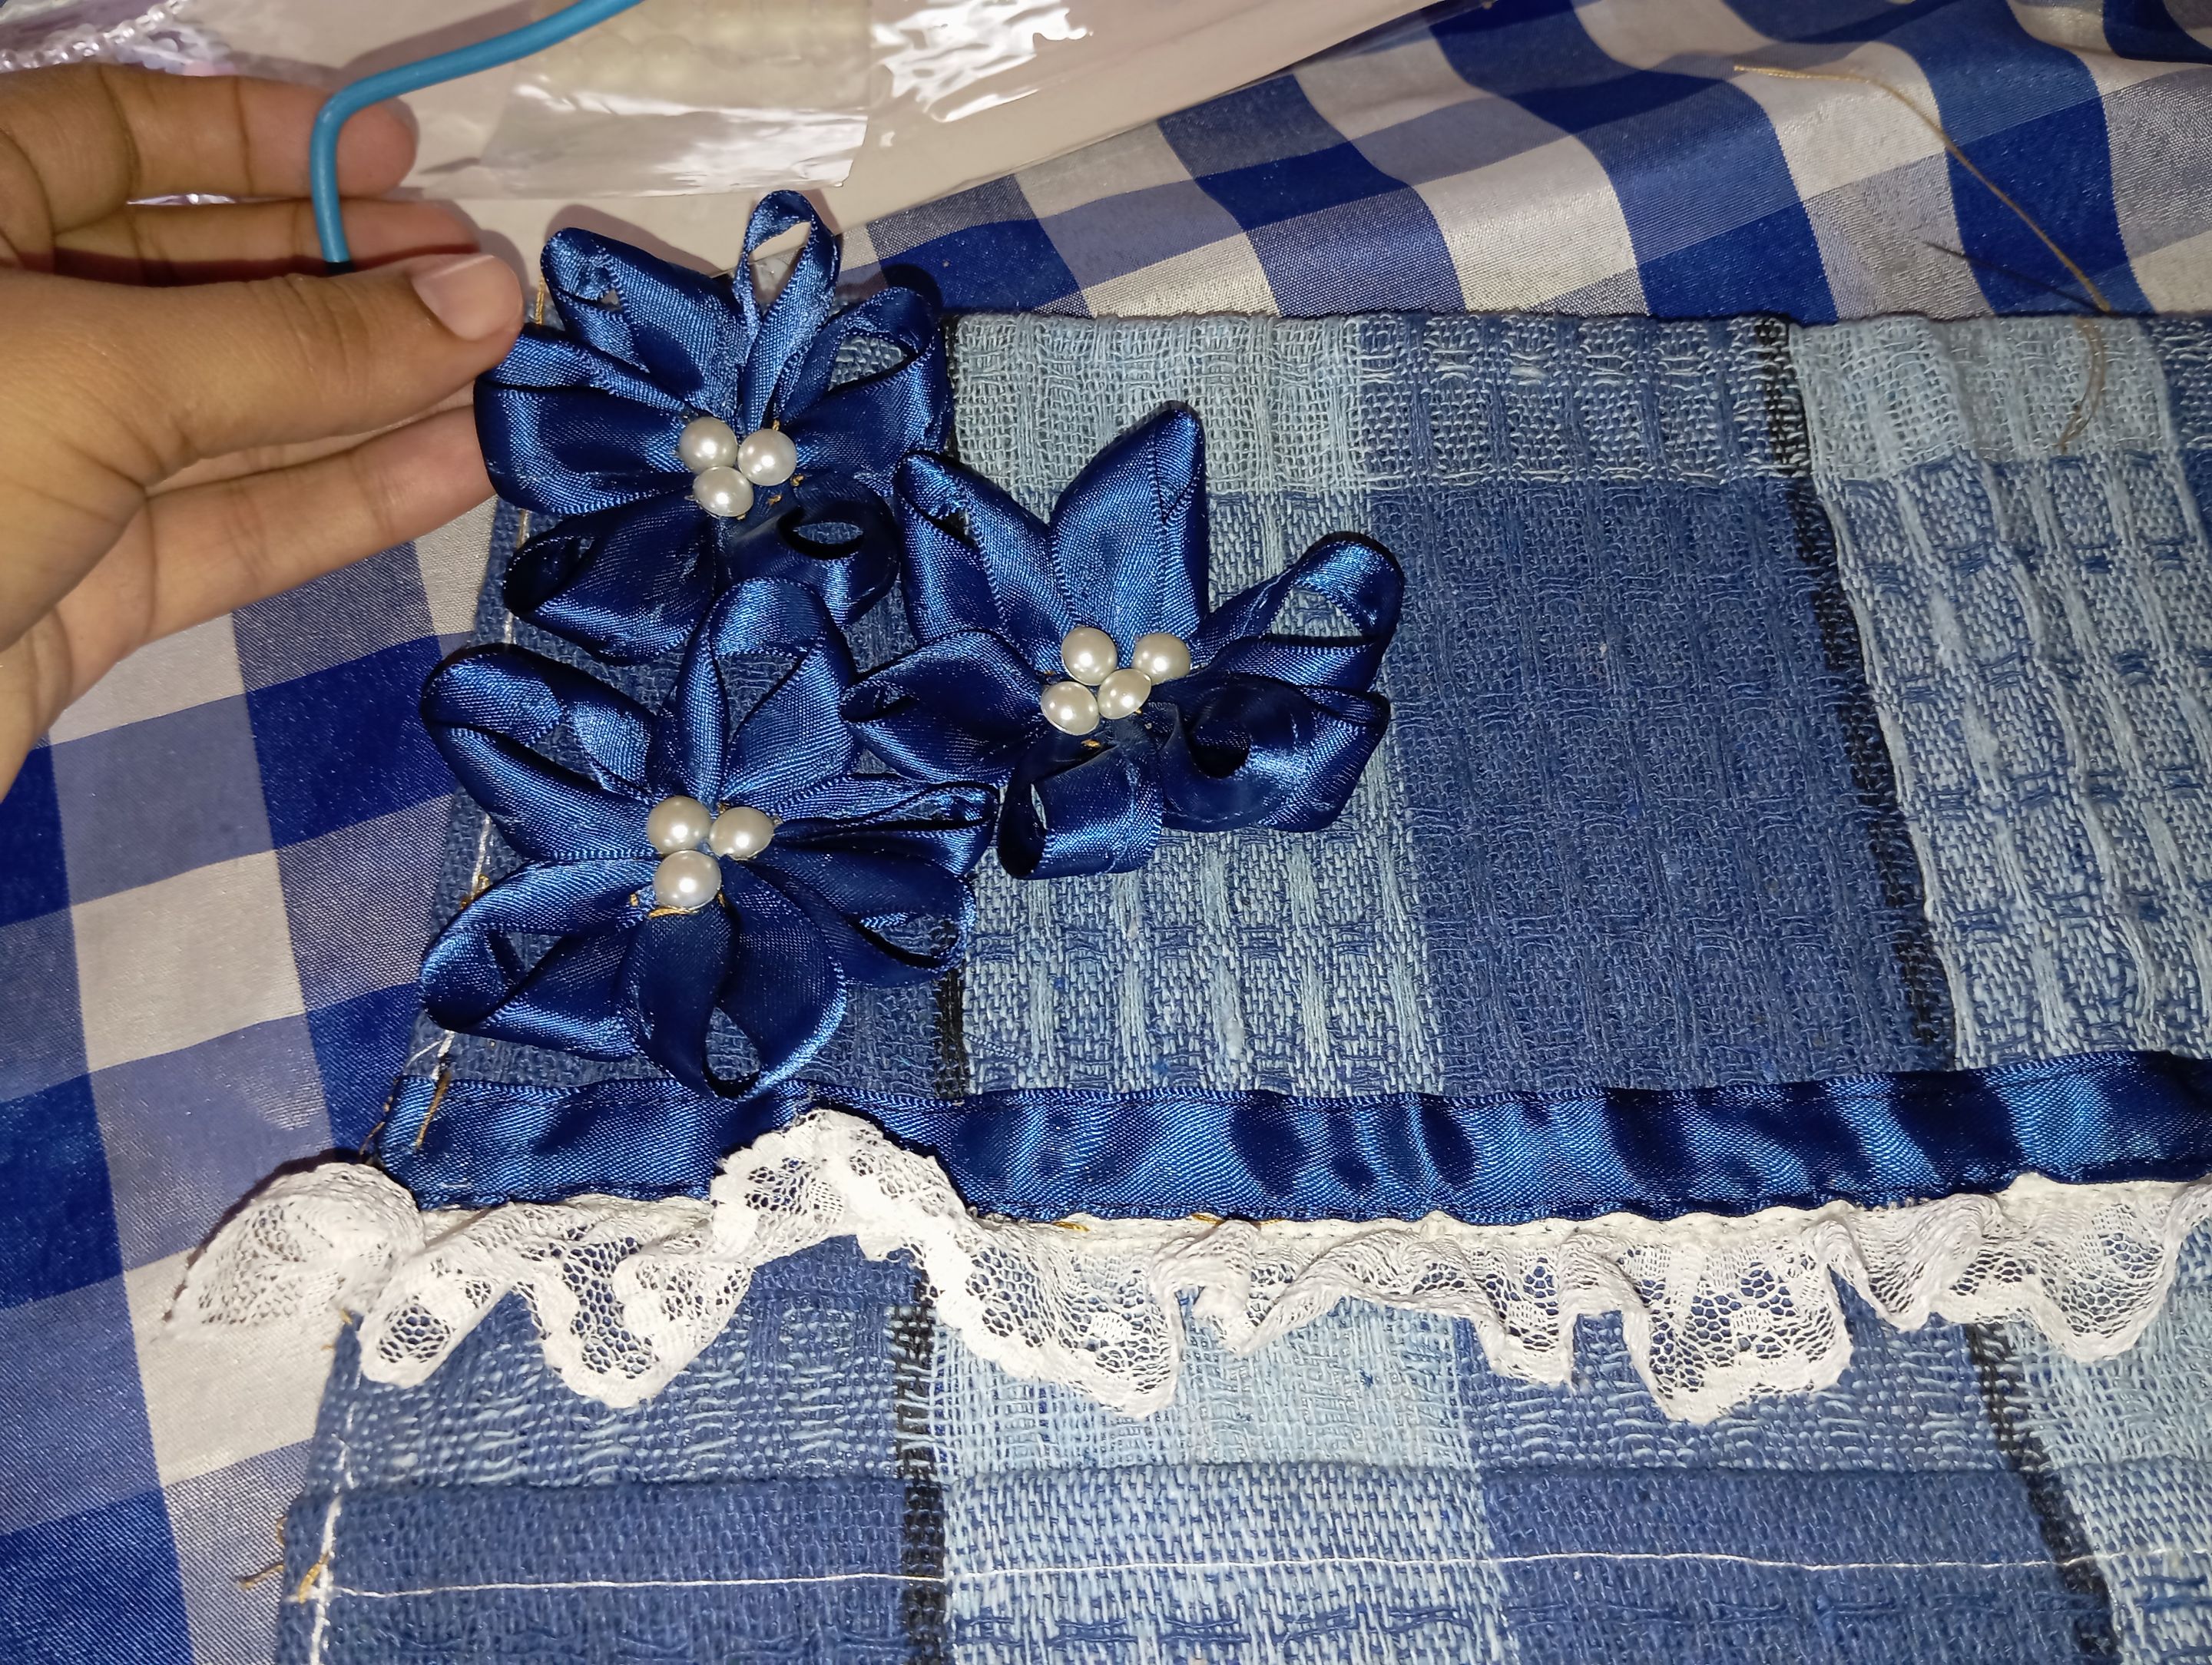
Una vez listas las flores continúe pegando 3 en una esquina de la parte de arriba del organizador y una mediana en la parte de abajo del lado contrario, finalizando así mi organizador
Once the flowers are ready, continue gluing three in one corner at the top of the organizer and one medium one at the bottom on the opposite side, thus finishing my organizer
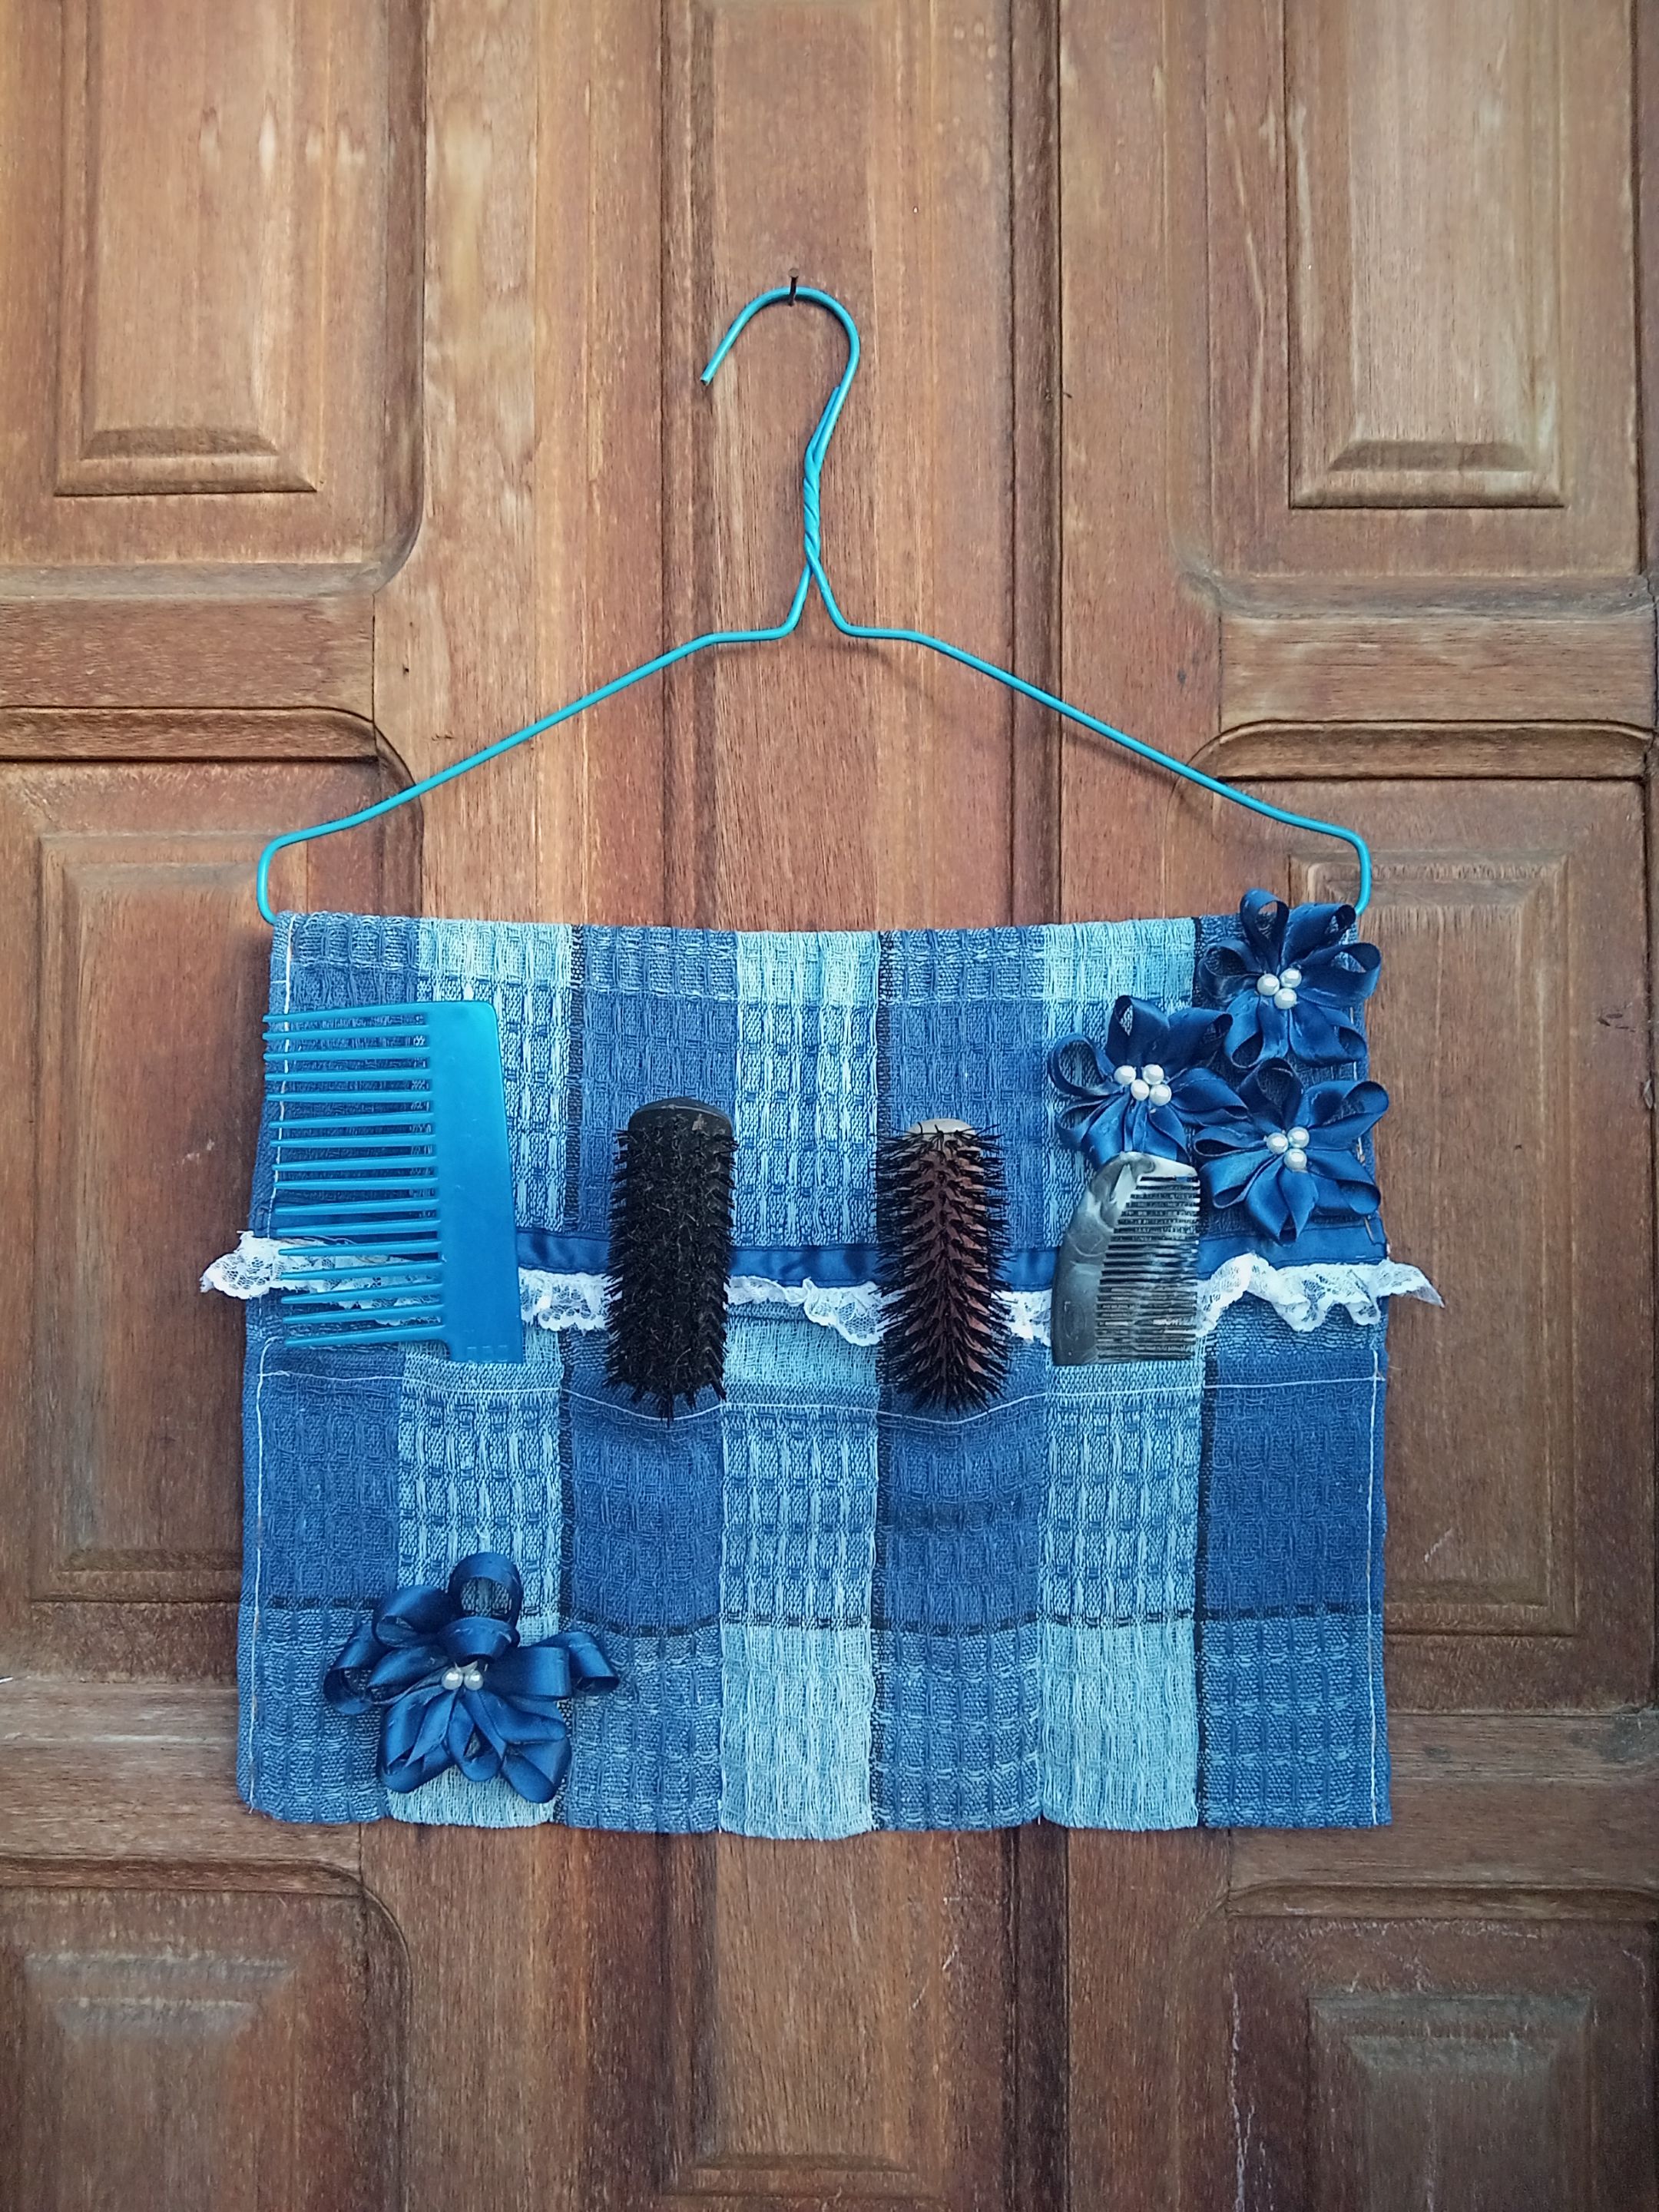
Este es el resultado final de mi hermoso organizador de tela ,puede ser útil no solamente para baños , sino para habitaciones , trabajo de costura.
Créditos: las fotos las tomé con mi redmi 12 , realicé el collage con la aplicación GridArt descargada versión gratuita y traduje los textos con el traductor deepl , feliz noche amigos
This is the final result of my beautiful fabric organizer. It can be useful not only for bathrooms, but also for bedrooms and sewing projects.
Credits: I took the photos with my Redmi 12, made the collage with the free version of the GridArt app, and translated the texts with the Deepl translator. Have a good night, friends!