CRAFT BLOG: Handmade Chicken Feet Clay Keychain Famous Filipino Street Food

@leannwithdoublen · 2025-08-16 06:01 · hive-130560

$1

The first time I tried making a street food keychain, I was in denial that I was so desperate to make the chicken feet because it looked like it was impossible to make. Then one day, I had this feeling that I needed to do it right now at that time, so yeah, I was up for a challenge that day, I didn't want to fail what I am up to do, and no one can stop me LOL. It took me four trials and errors to determine the right size and how big I wanted the chicken feet to be. I enjoyed it a lot, and I wanted to document it so that I have my reference when I need to do it again. And I added to my now what size each part so it makes it easier for me to know what size it is. The first time I tasted chicken feet was when we still lived at my father's side of the house, our neighbor sold different kinds of "Inihaw" or grilled street food on of them are chicken feet, I am always a curious kid before, but sometimes my parent told me not to eat one but whenever they're not around I always eat some LOL. When I was a kid, I always saved up money just for me to buy street food, haha. -----
Materials I Used:
![0.JPG](https://files.peakd.com/file/peakd-hive/leannwithdoublen/EoK6n9emPPiziCNGSMicfb2SssMutvDqc2Tw1g7qnPuTapq7PSQSzyriYFDENvF9ydi.JPG)
  • White Polymer Clay
  • Portable Weighing Scale
  • Soft Pastels
  • X-Acto Knife
  • Toothpick
  • Dotting Tool and Clay Tools
  • Alcohol
  • Qtip
  • Makeup Brush
  • Eyepin
  • Gum Container
  • Oven
  • Silicone Mat
  • Uv Resin
  • Face Shield/Facemask
  • Disposable Gloves
  • Uv Lamp
  • Pliers
  • Keychain
-----
Craft Time!
Conditioning And Coloring The Clay:
![1.JPG](https://files.peakd.com/file/peakd-hive/leannwithdoublen/Eoc8QcBGug4rEFDmtLcPyGoNbE5jnav8HNmuiCzj9hnQgSQsyV3kQNfry6j4sTzLNfD.JPG)
![2.JPG](https://files.peakd.com/file/peakd-hive/leannwithdoublen/Ep7vdhEjDbAd9q67cy6UNEcZCiYsC8wWW7kyCo7QwmwkiU8mJu32thp5pZwA8YvZ9iA.JPG)
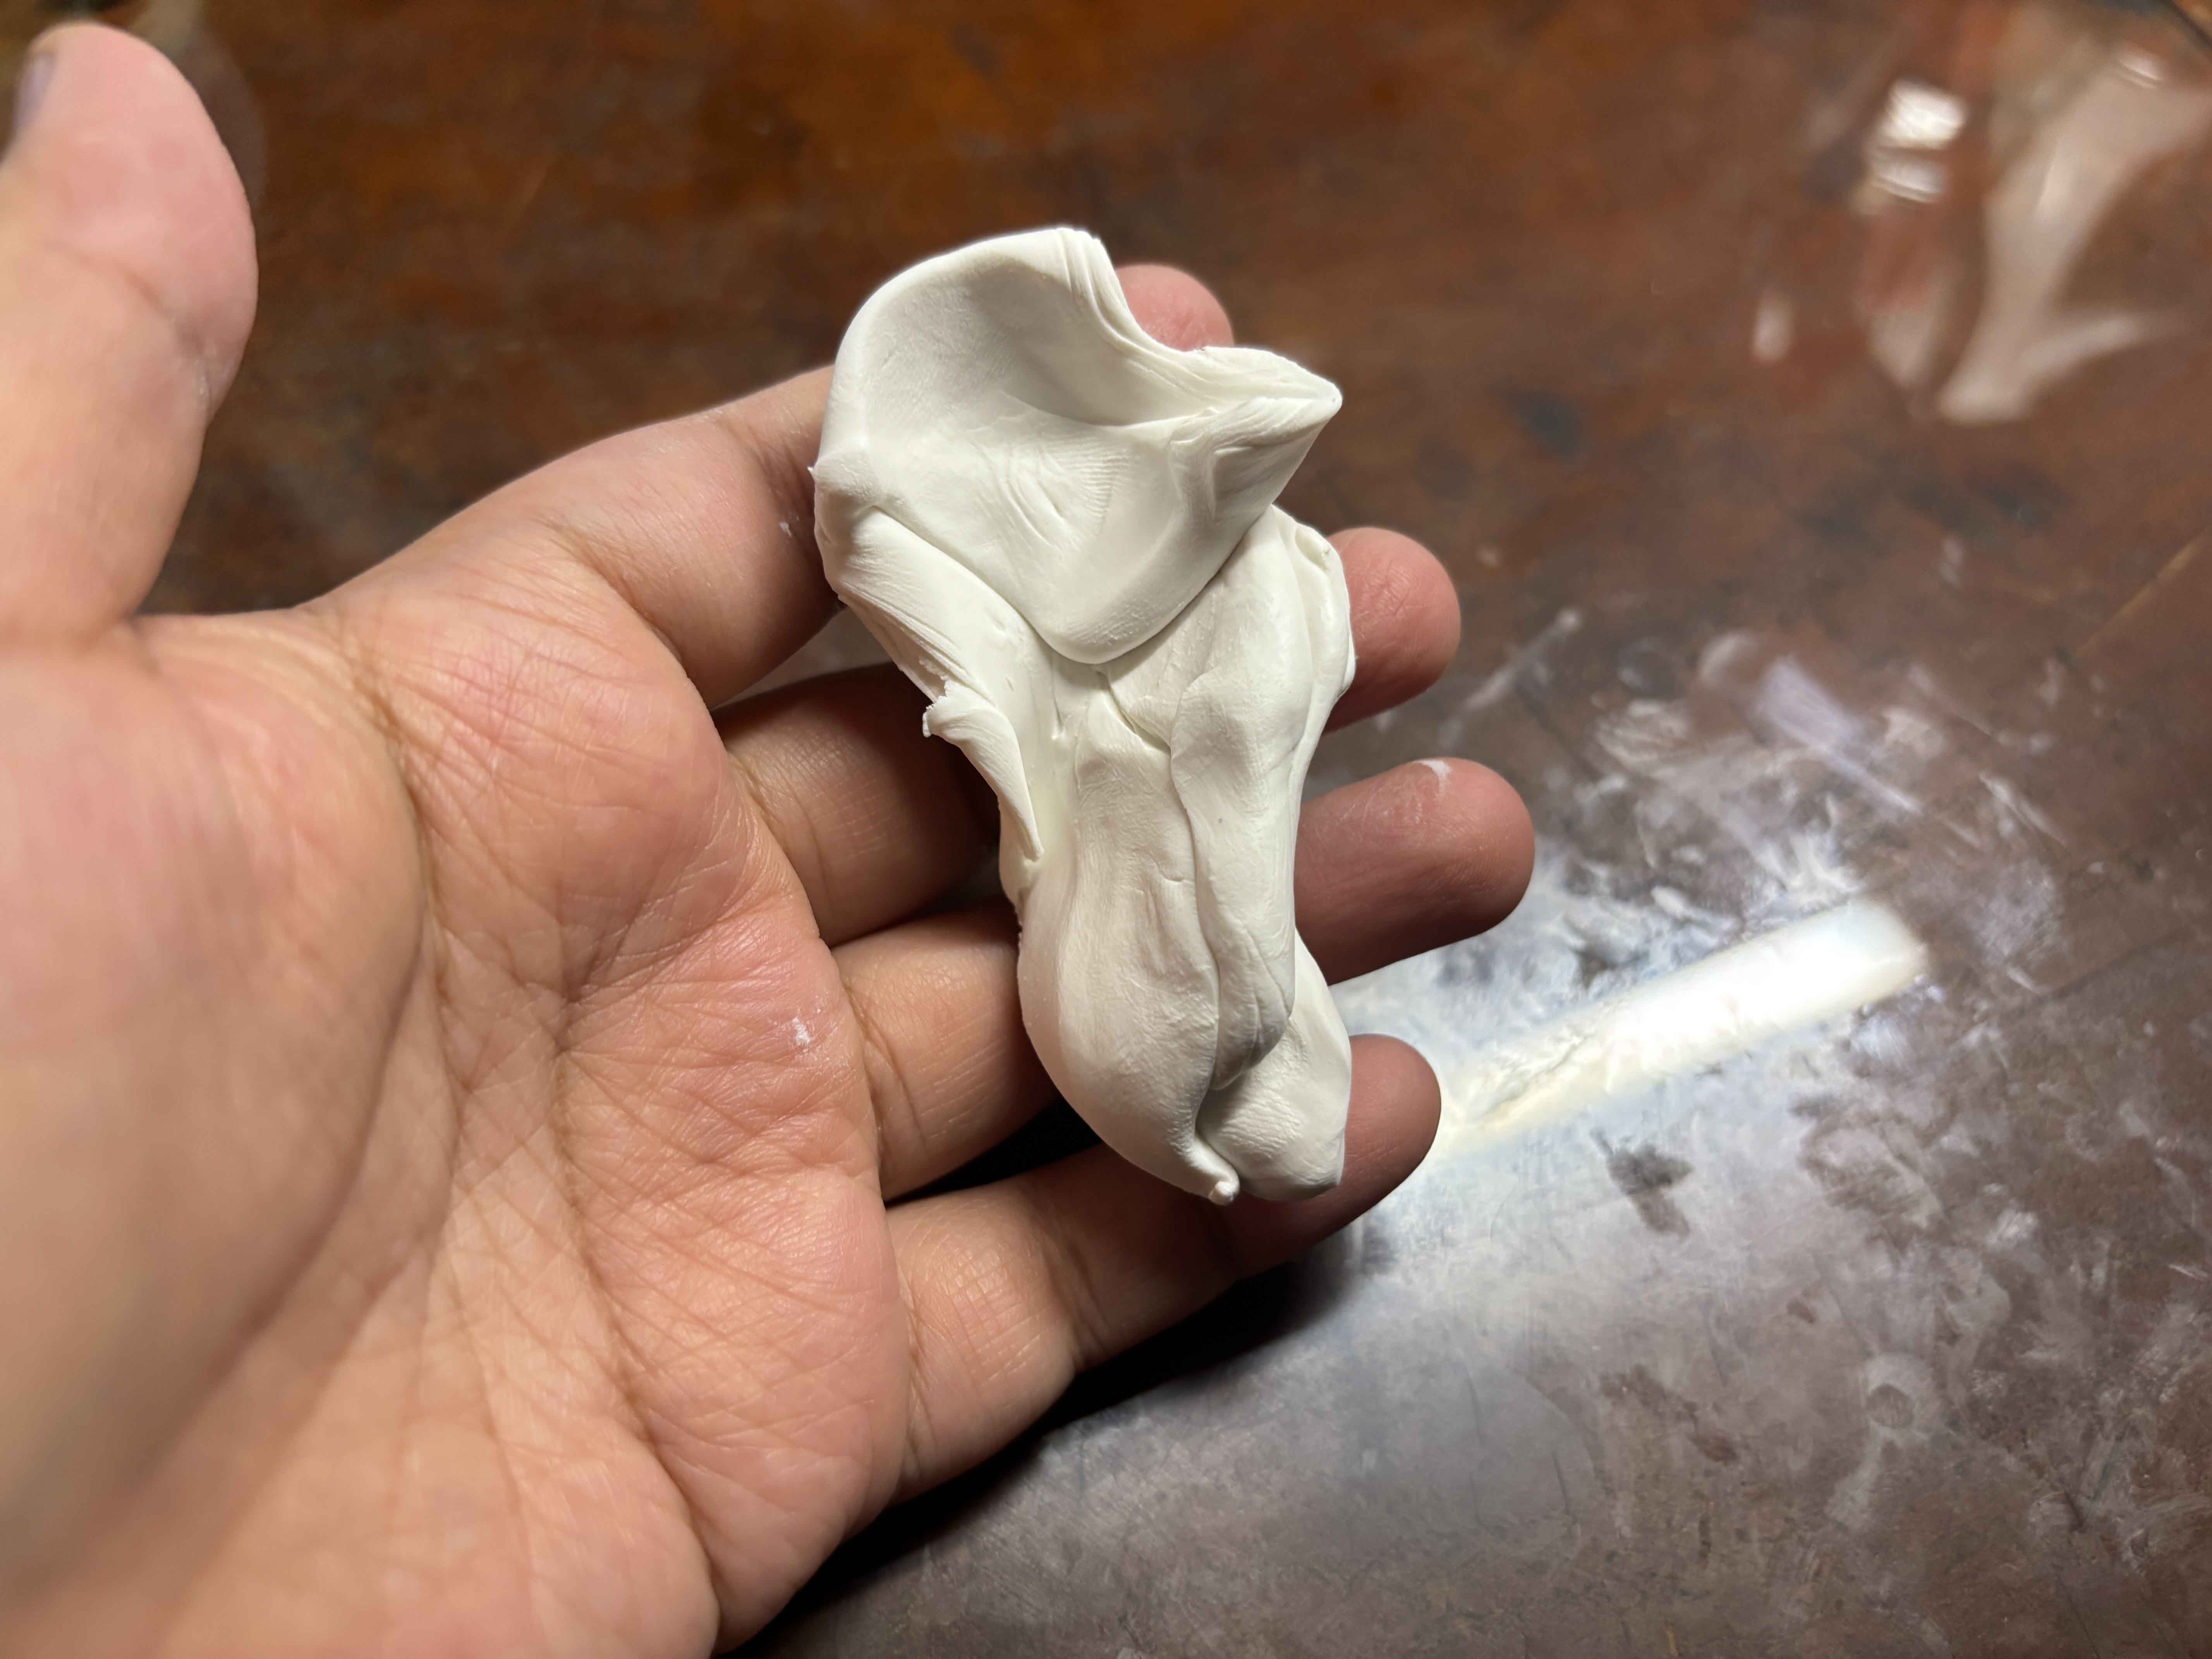
I grab a ball of clay, and I condition it until it is smooth. -----
![3.JPG](https://files.peakd.com/file/peakd-hive/leannwithdoublen/EoeFuoFXWAr2xcvv1cs5fuedAYCXFfJDAYWN1MeS1F7SFJUk2x4iuzCUPMahBPfm7zY.JPG)
![4.JPG](https://files.peakd.com/file/peakd-hive/leannwithdoublen/EoK7oMeUV1RPFWnetuxpkZMrPUTuZfsFmL8bu1CWK1tsFfbWBqzvDnP7UUnnJT6rbZy.JPG)
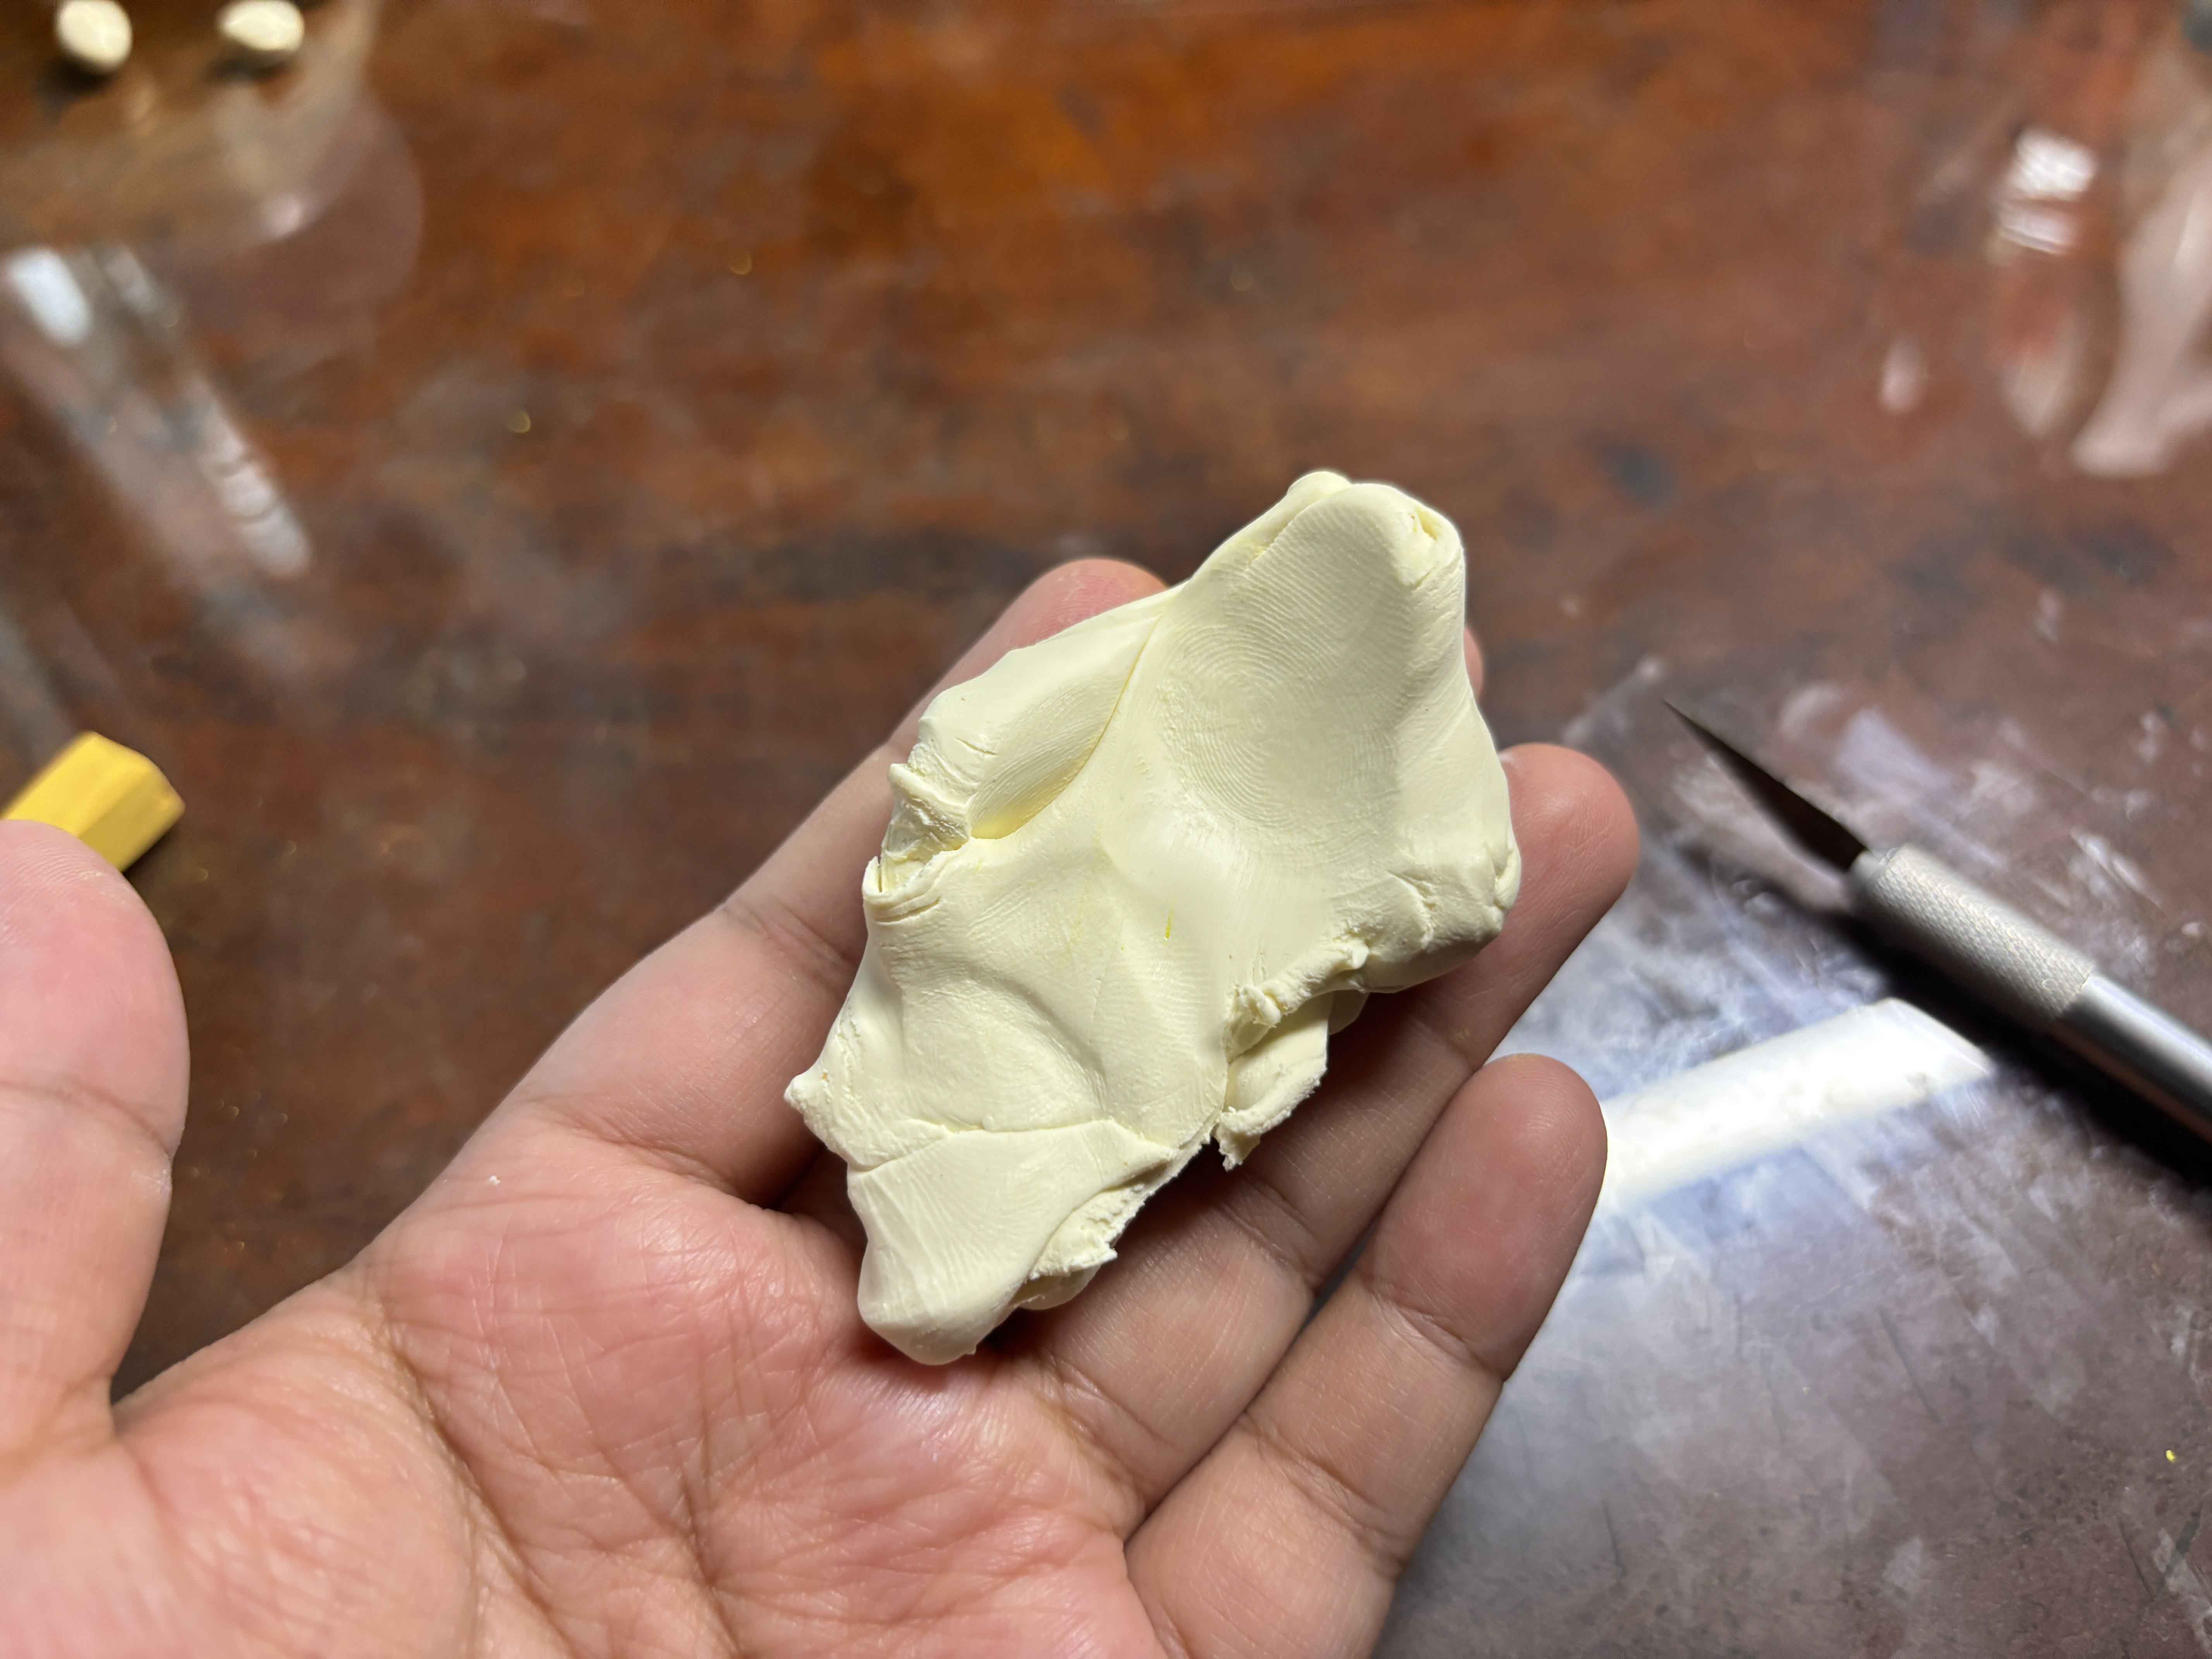
Using the soft pastels of different shades of yellow and scraping some of them, and then I knead them until well combined, if it is still not in the right shade, add a little by little just to control it right. -----
Sculpting The Clay:
-----
![5.JPG](https://files.peakd.com/file/peakd-hive/leannwithdoublen/EoEr3VpMMEJxA9jyfJPzFaQSfSEK1tSC6rkqJCSDFrARTsqHDPS4Seqw4wdaLfD5bzd.JPG)
![6.JPG](https://files.peakd.com/file/peakd-hive/leannwithdoublen/EoK6HneEfTUmESxXrq3HXwjzBfDdvzrNFDLC5QKSJ62yWc1DKvw1rHkXh2MJvhHS1RY.JPG)
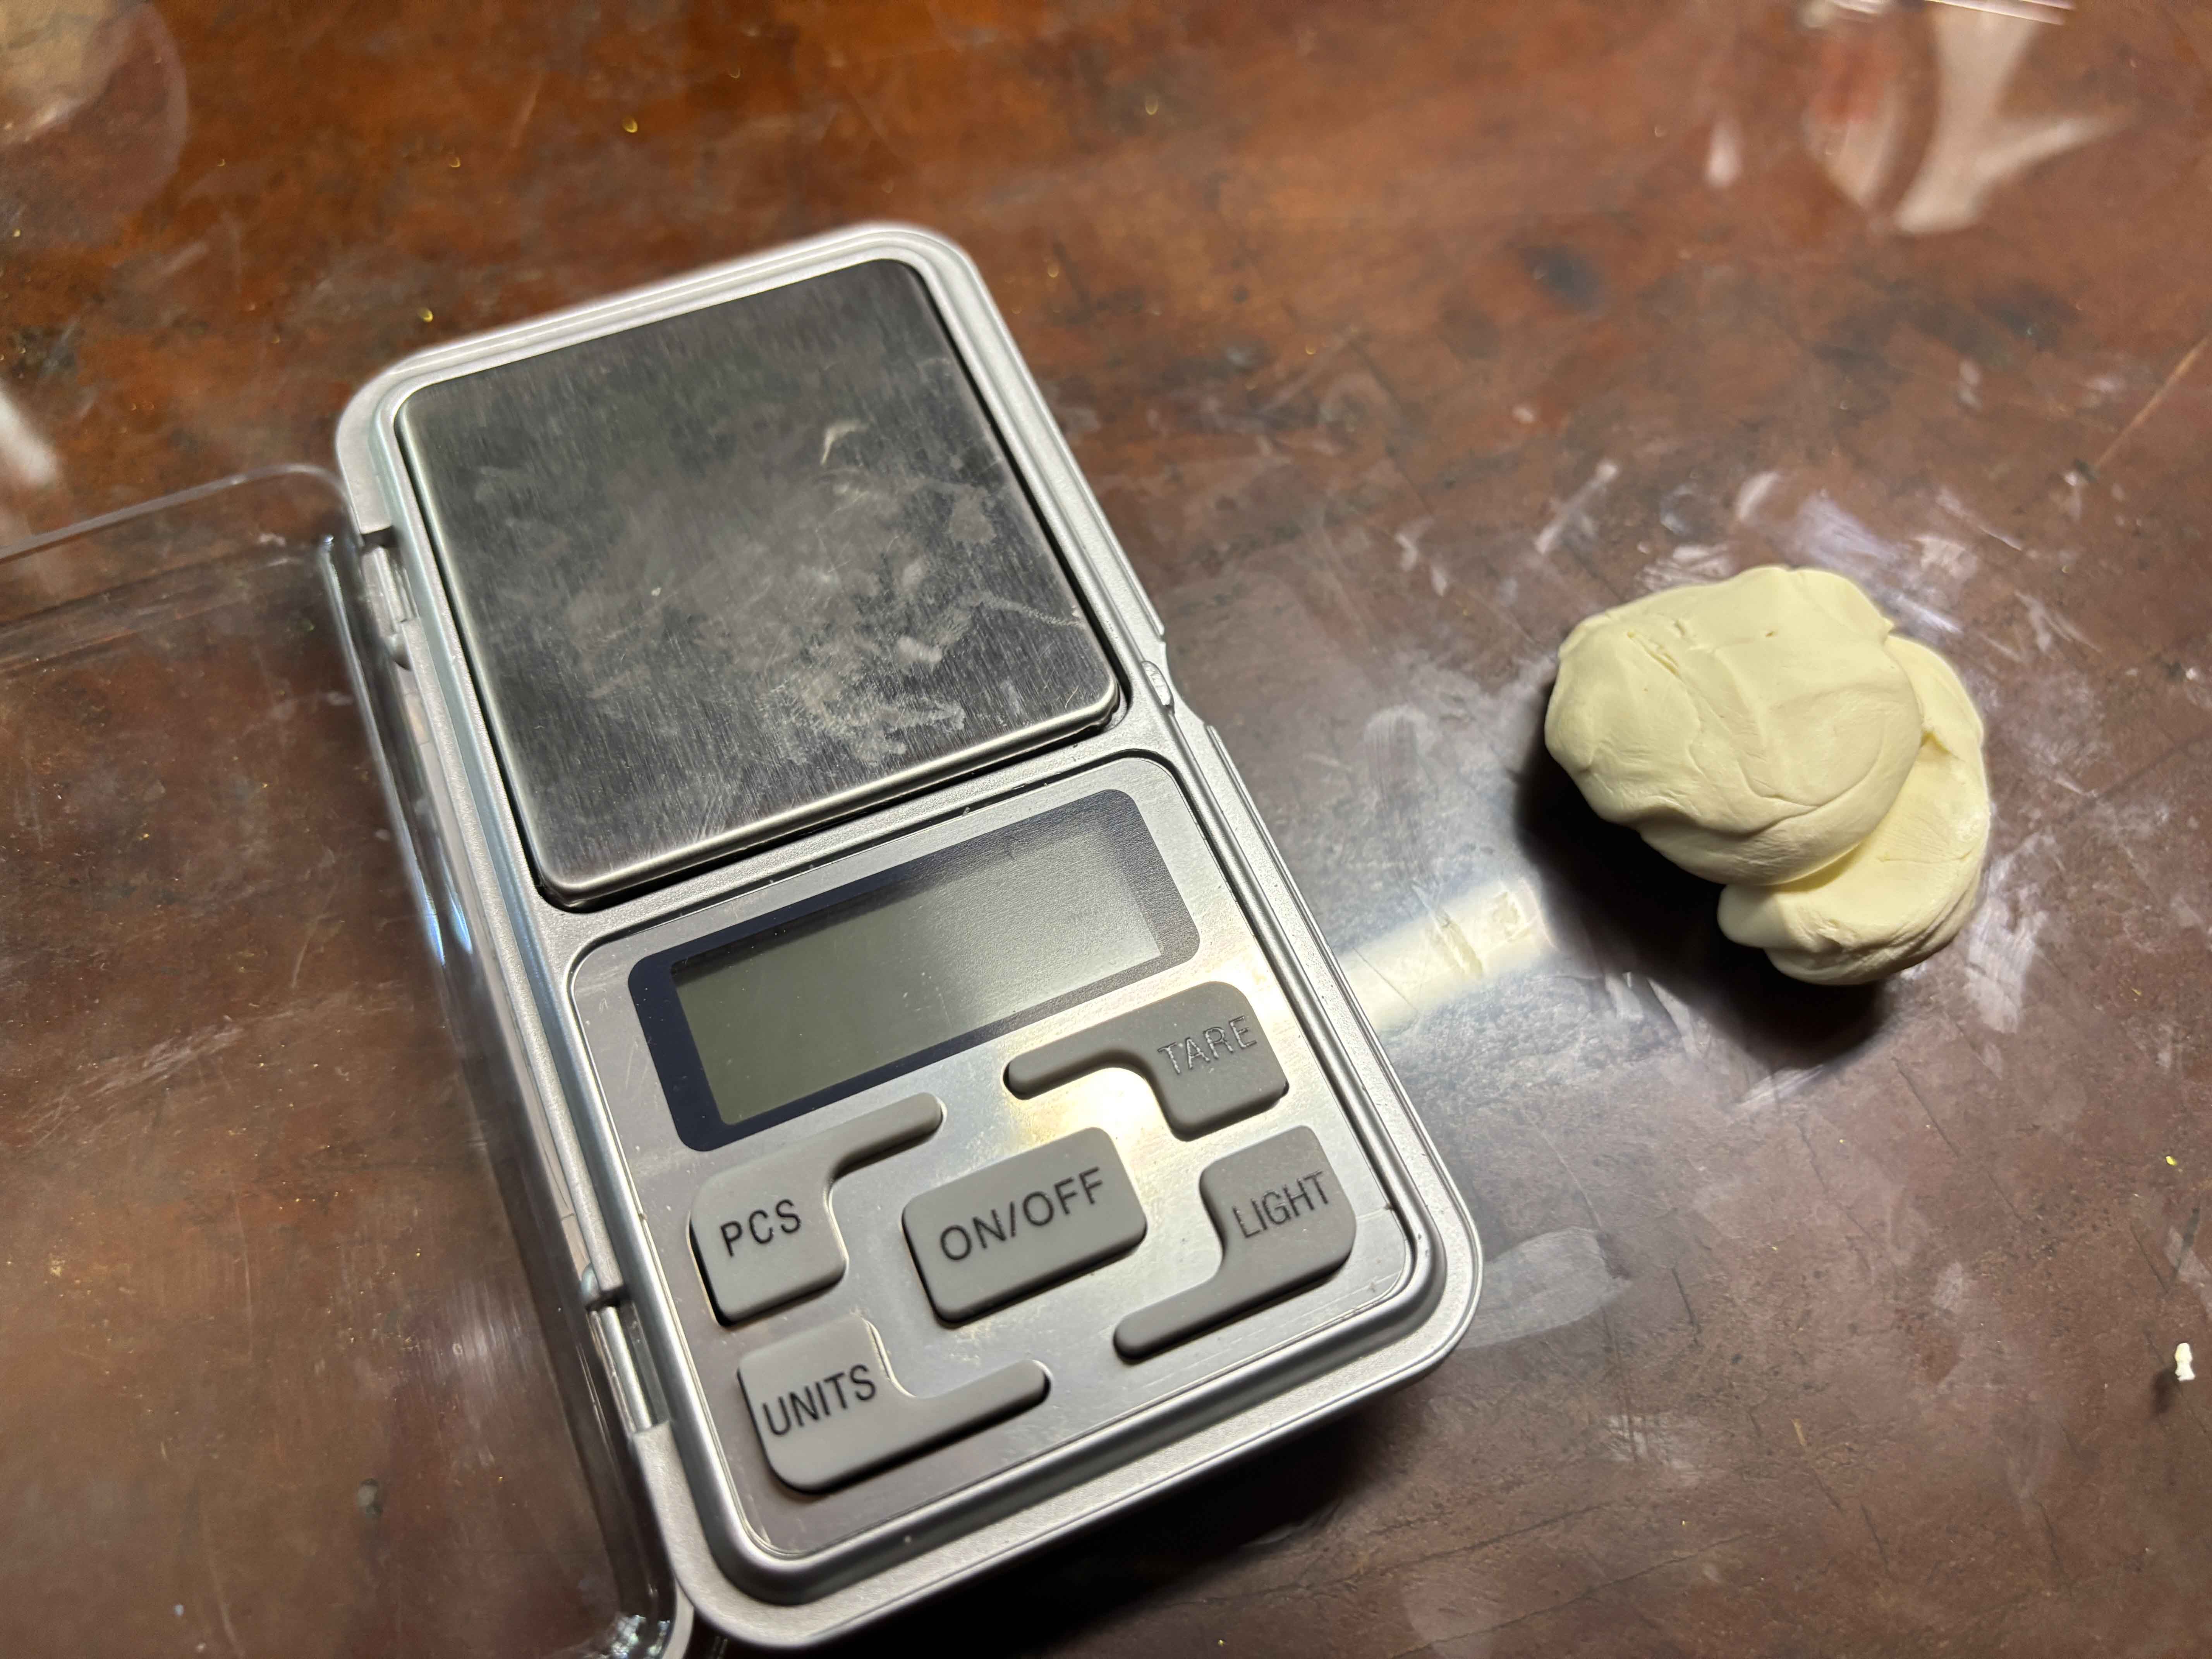
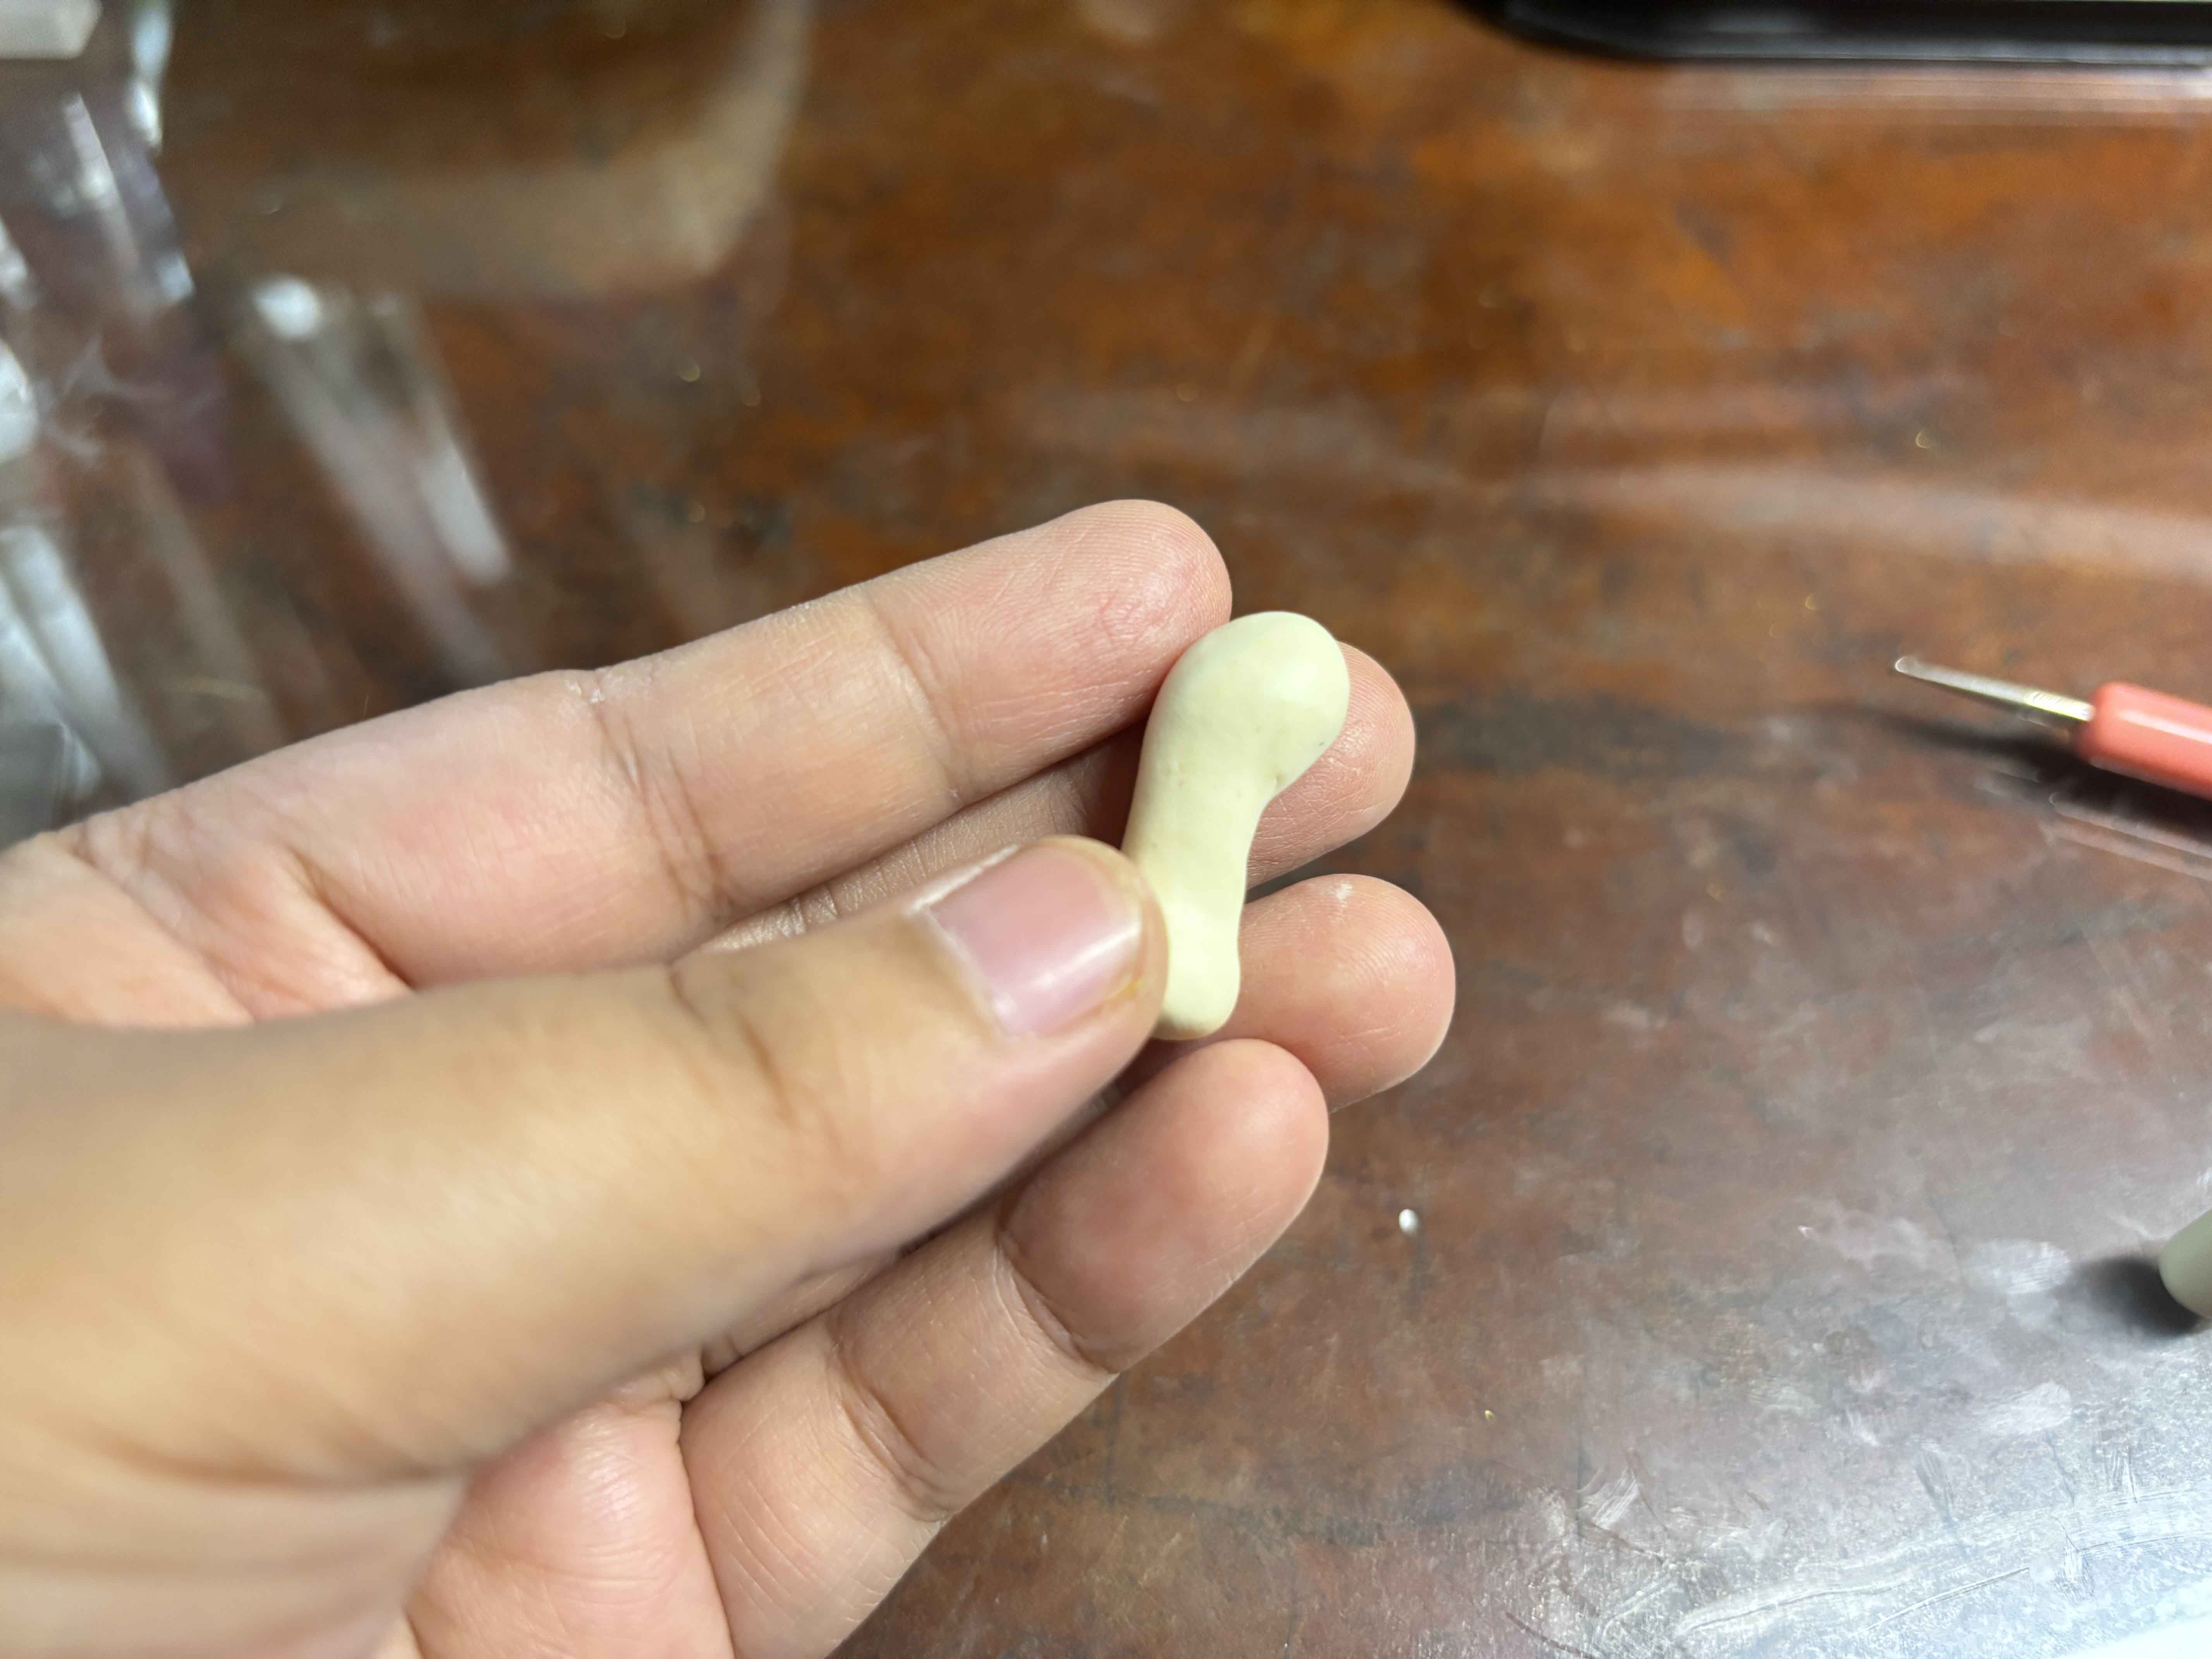
Before I sculpt the clay, I weigh equally each part, one for the body part and four for the fingers. ----
![7.JPG](https://files.peakd.com/file/peakd-hive/leannwithdoublen/EoAbcHPU6xr9dysuGUs7dQFS2guuHZiyd5aASU3VbJMZzLzz3bRFiEj1KGSFTiddZbo.JPG)
![8.JPG](https://files.peakd.com/file/peakd-hive/leannwithdoublen/Eoc92zCtLoG58iQ5d7uY9wh4dRmQZTqtENriqnJPn1uyaGTtAY35VodUEpb2z5tPh47.JPG)
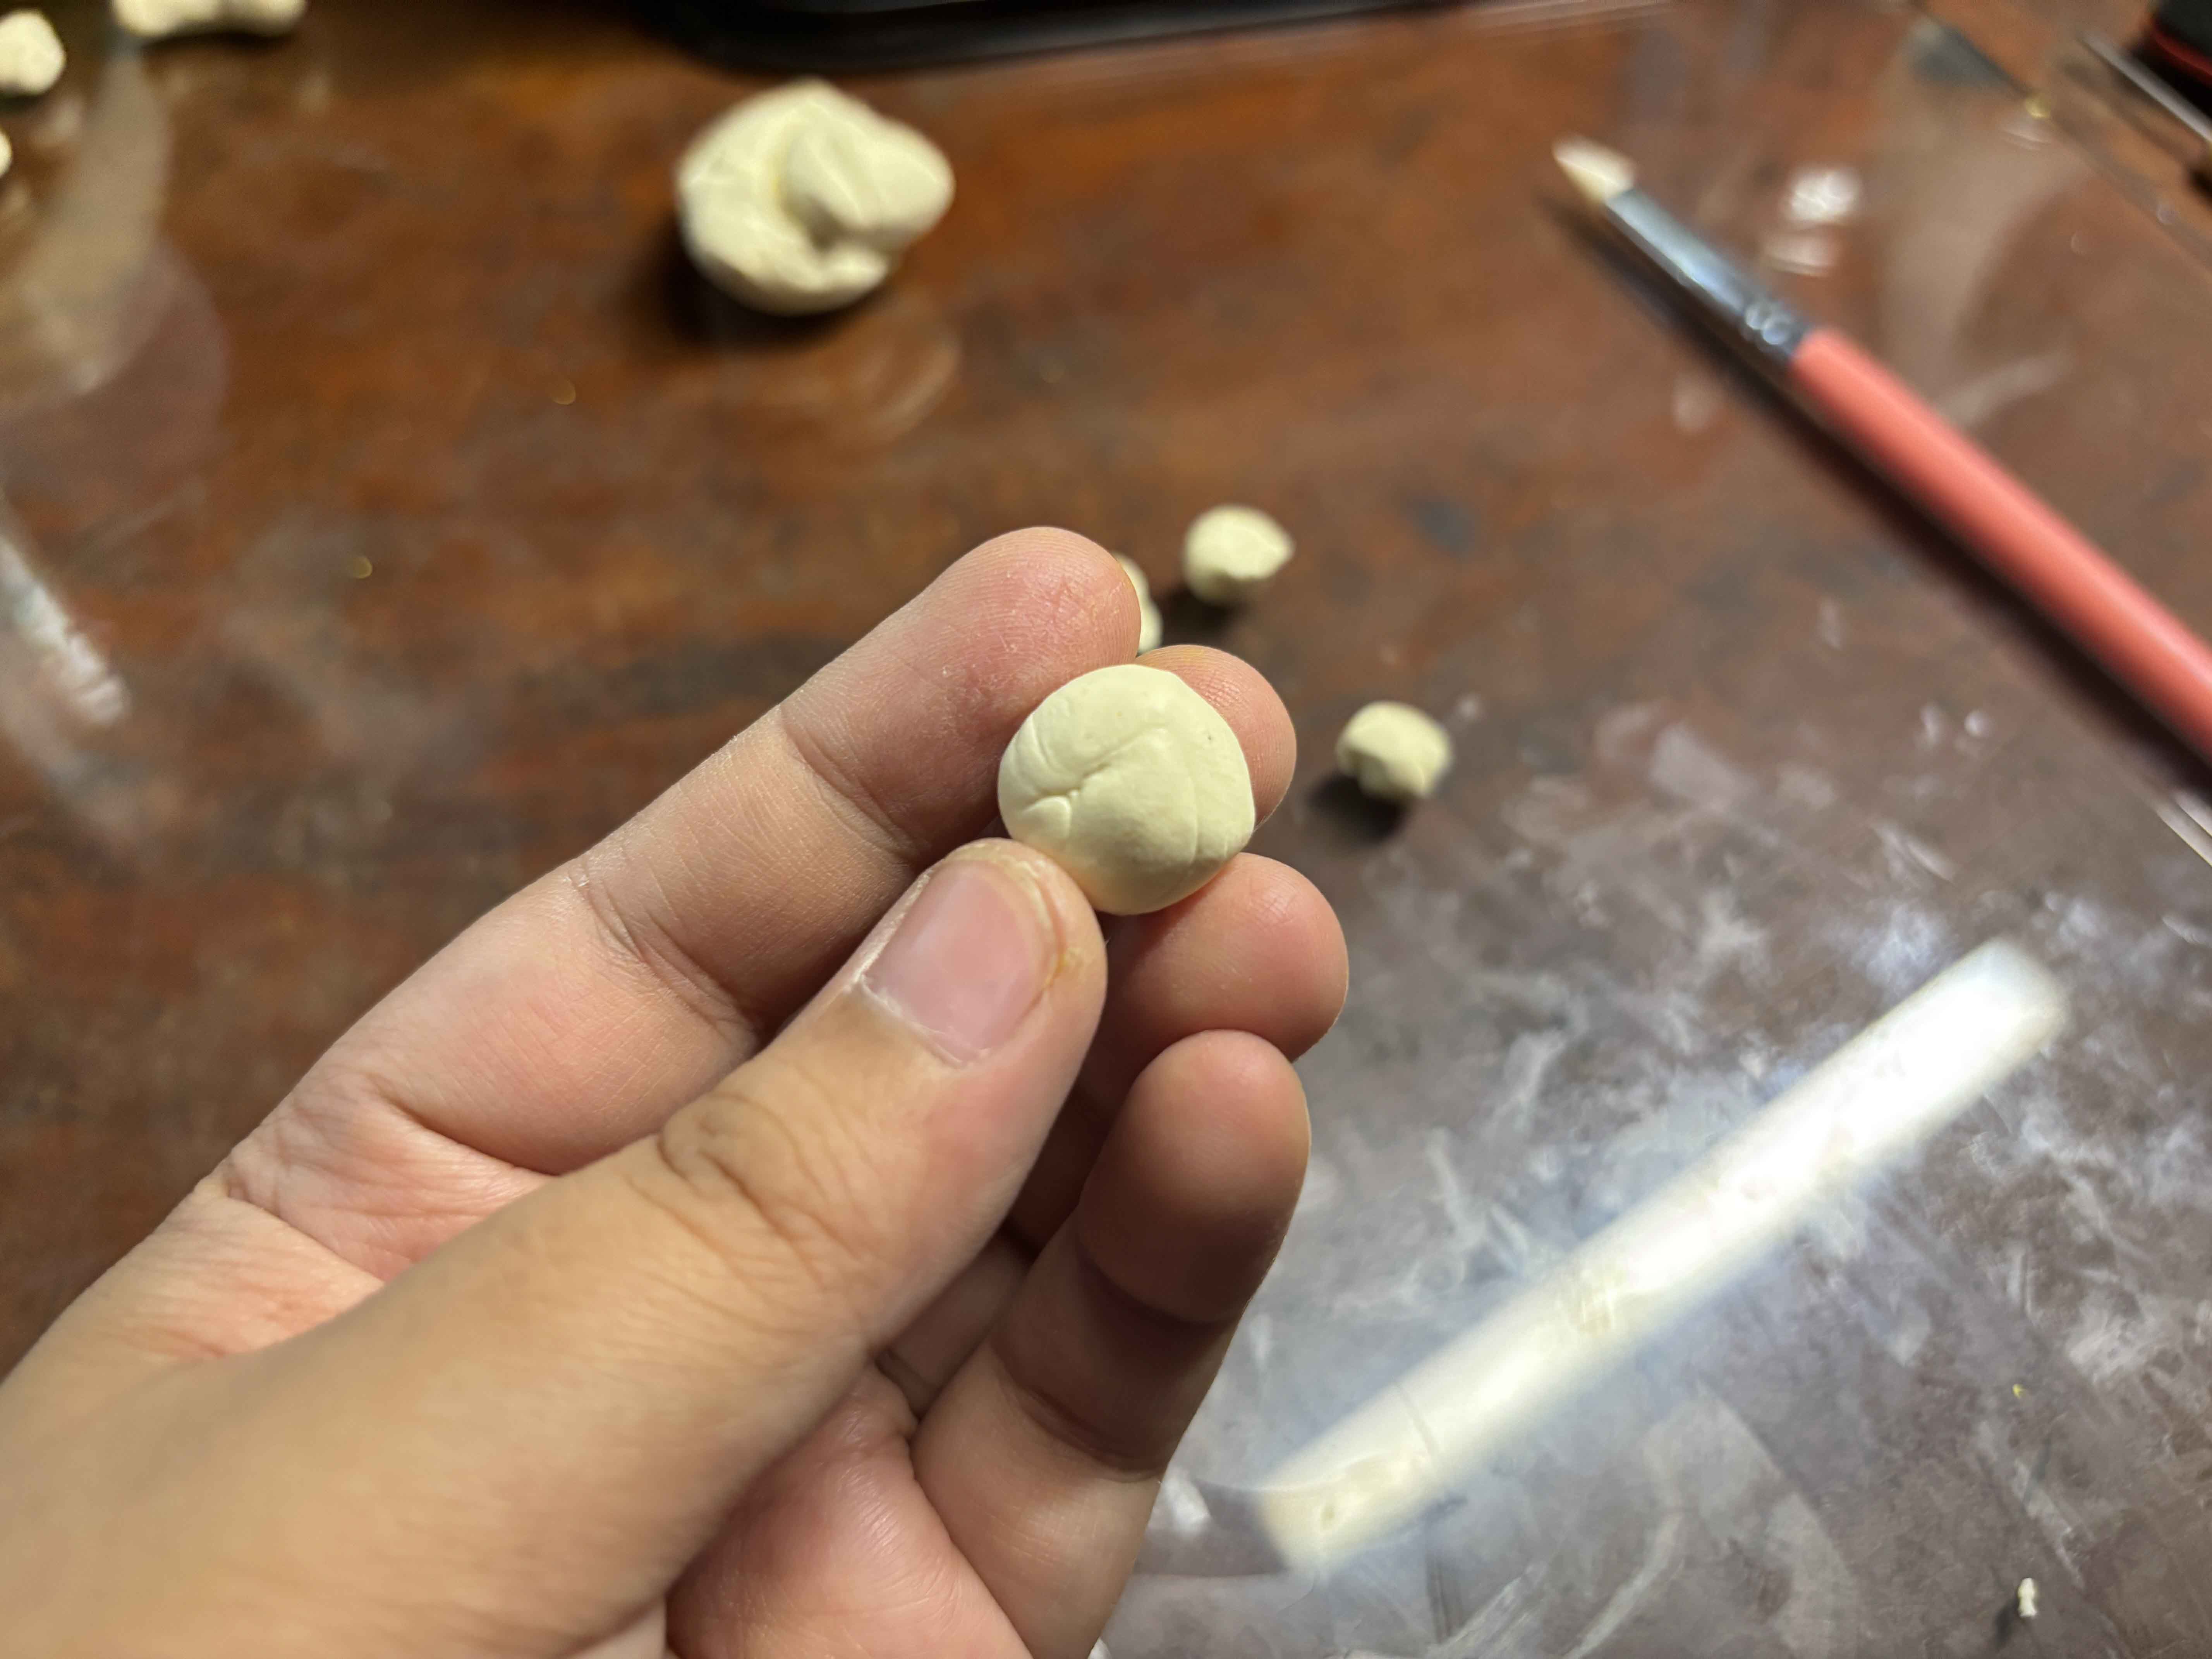
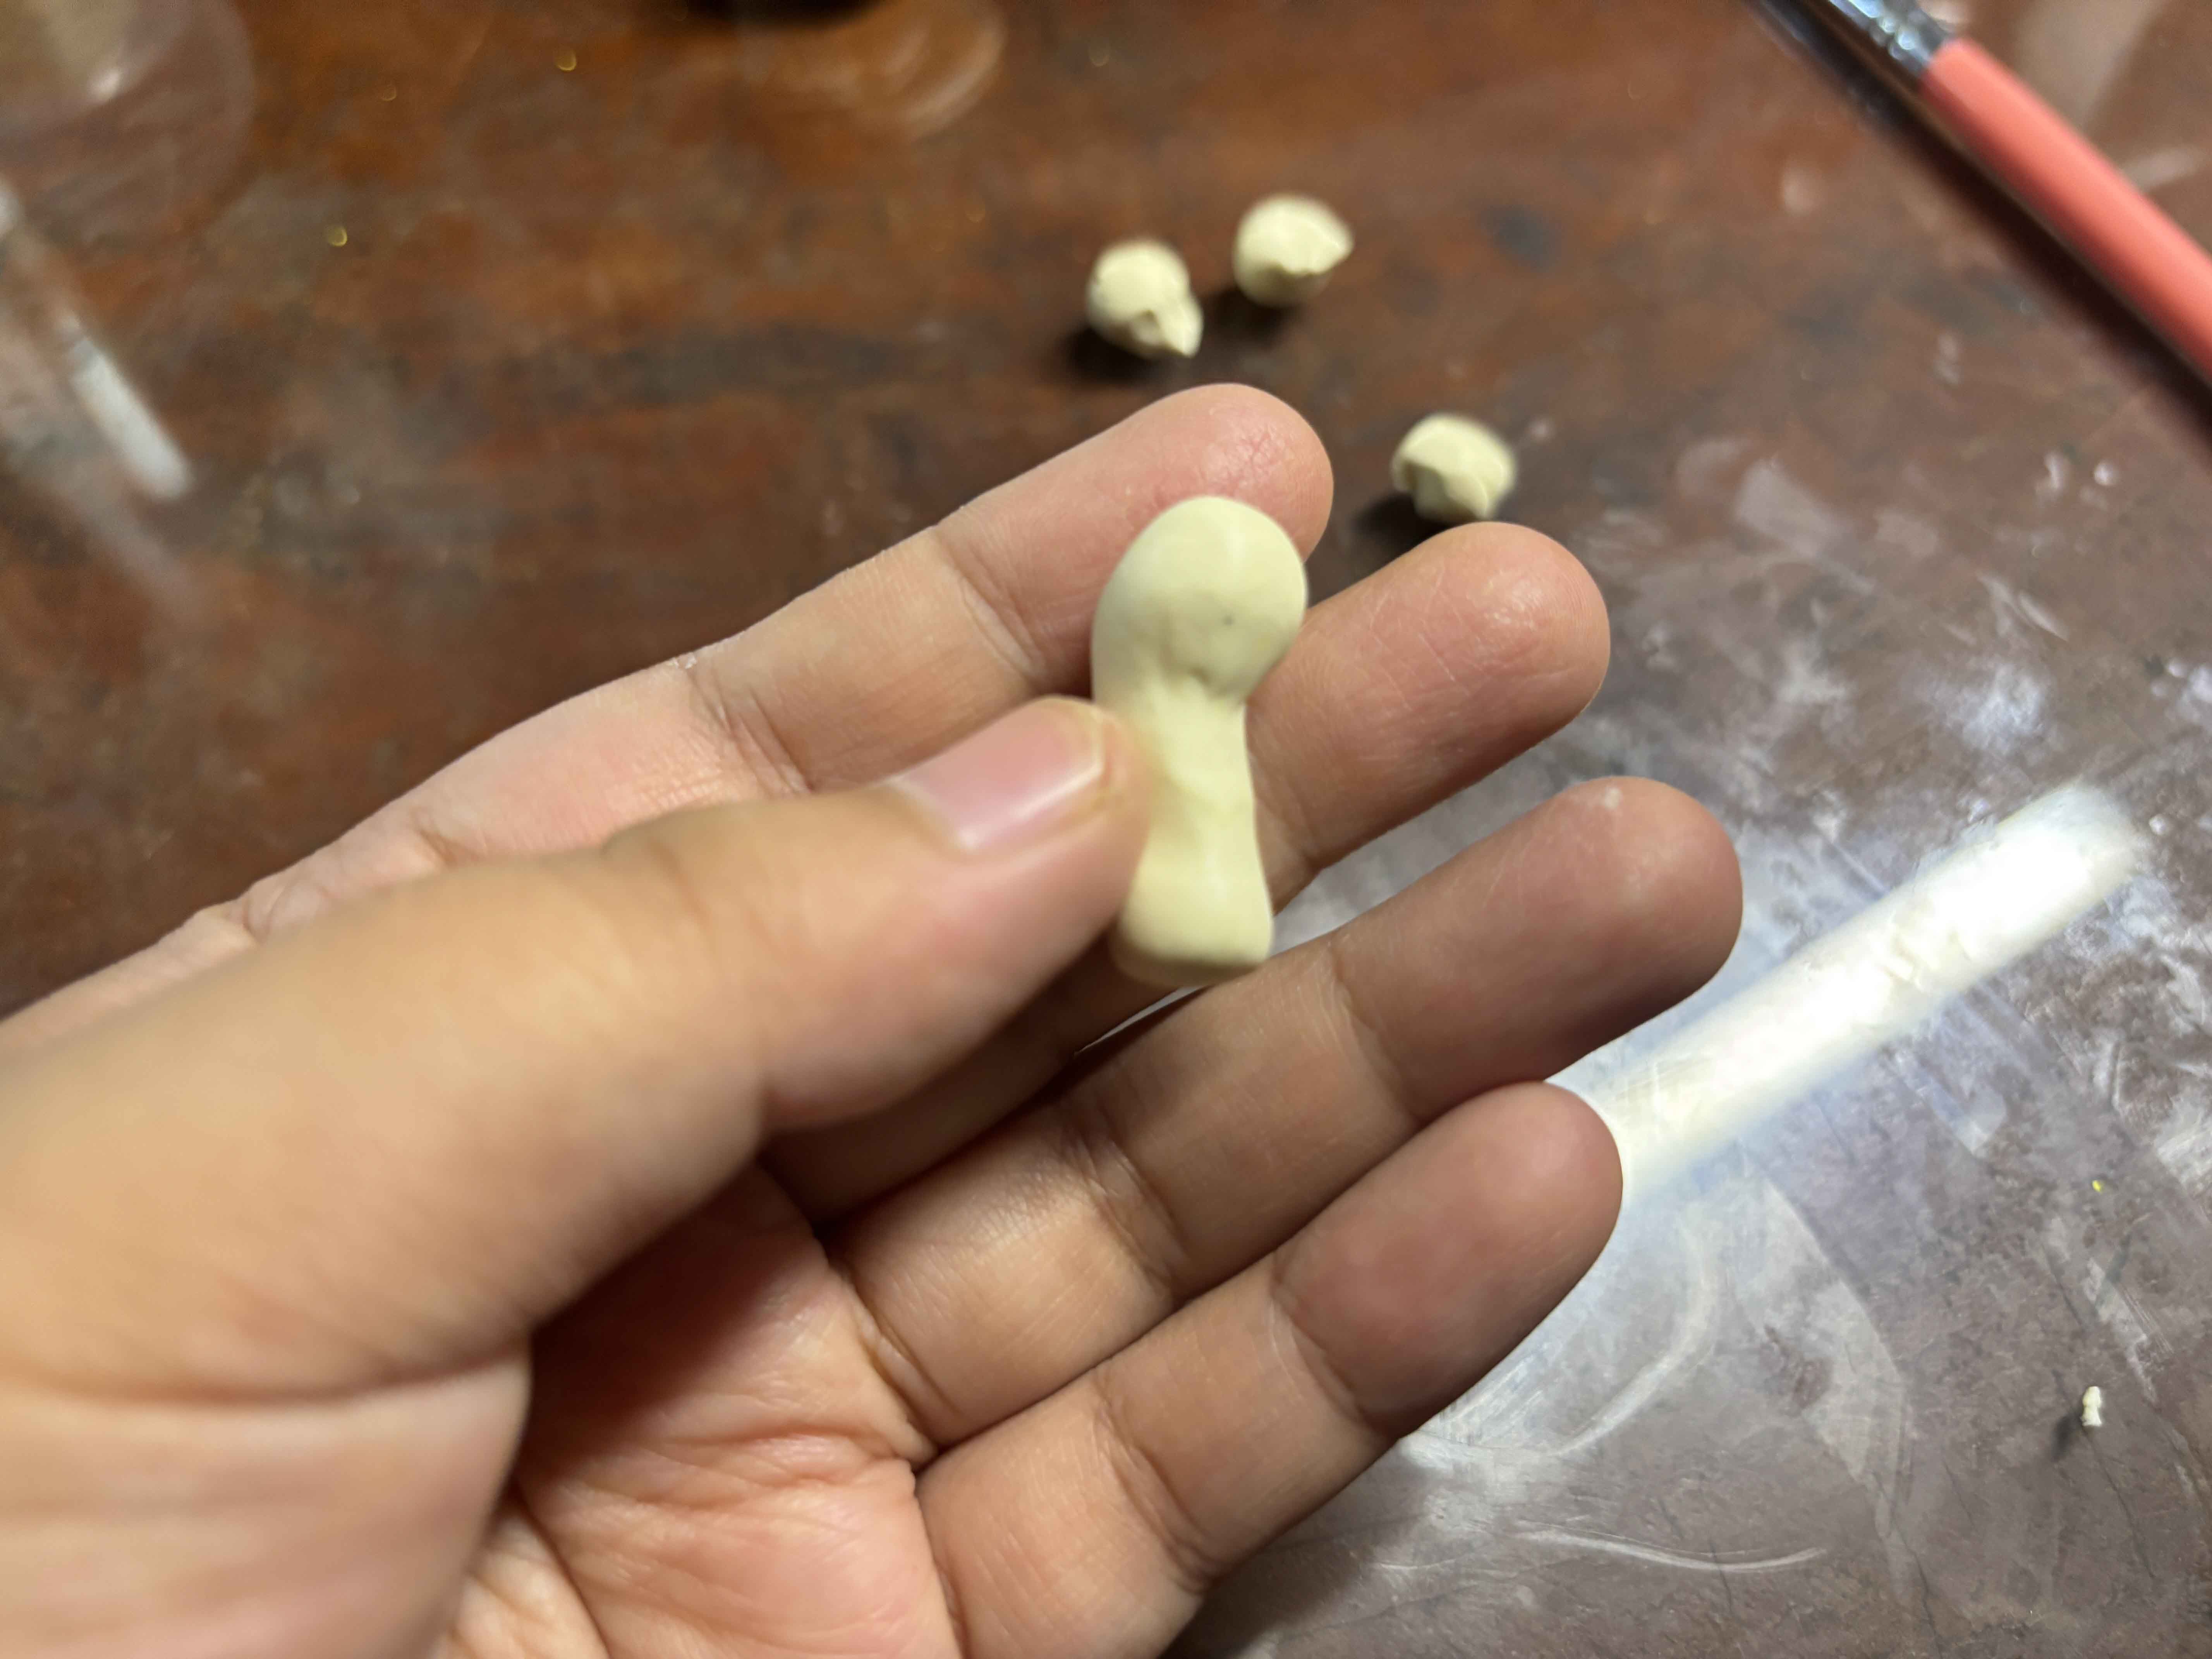
First, I am going to sculpt the body part. I sculpted it into this shape. -----
![9.JPG](https://files.peakd.com/file/peakd-hive/leannwithdoublen/Eonn2wvGMtSRNXDJoopbjDJvB2AtAyJAXwpofdTwSbqWXGFfBrS2J2hzB9Xx1XKMaho.JPG)
![10.JPG](https://files.peakd.com/file/peakd-hive/leannwithdoublen/EoK7HRxaBiC9B2P8PeqAWV4ffCQgbsyw35F9fPTm77rZdTSU6zCPMaJE466qR5mKAq3.JPG)
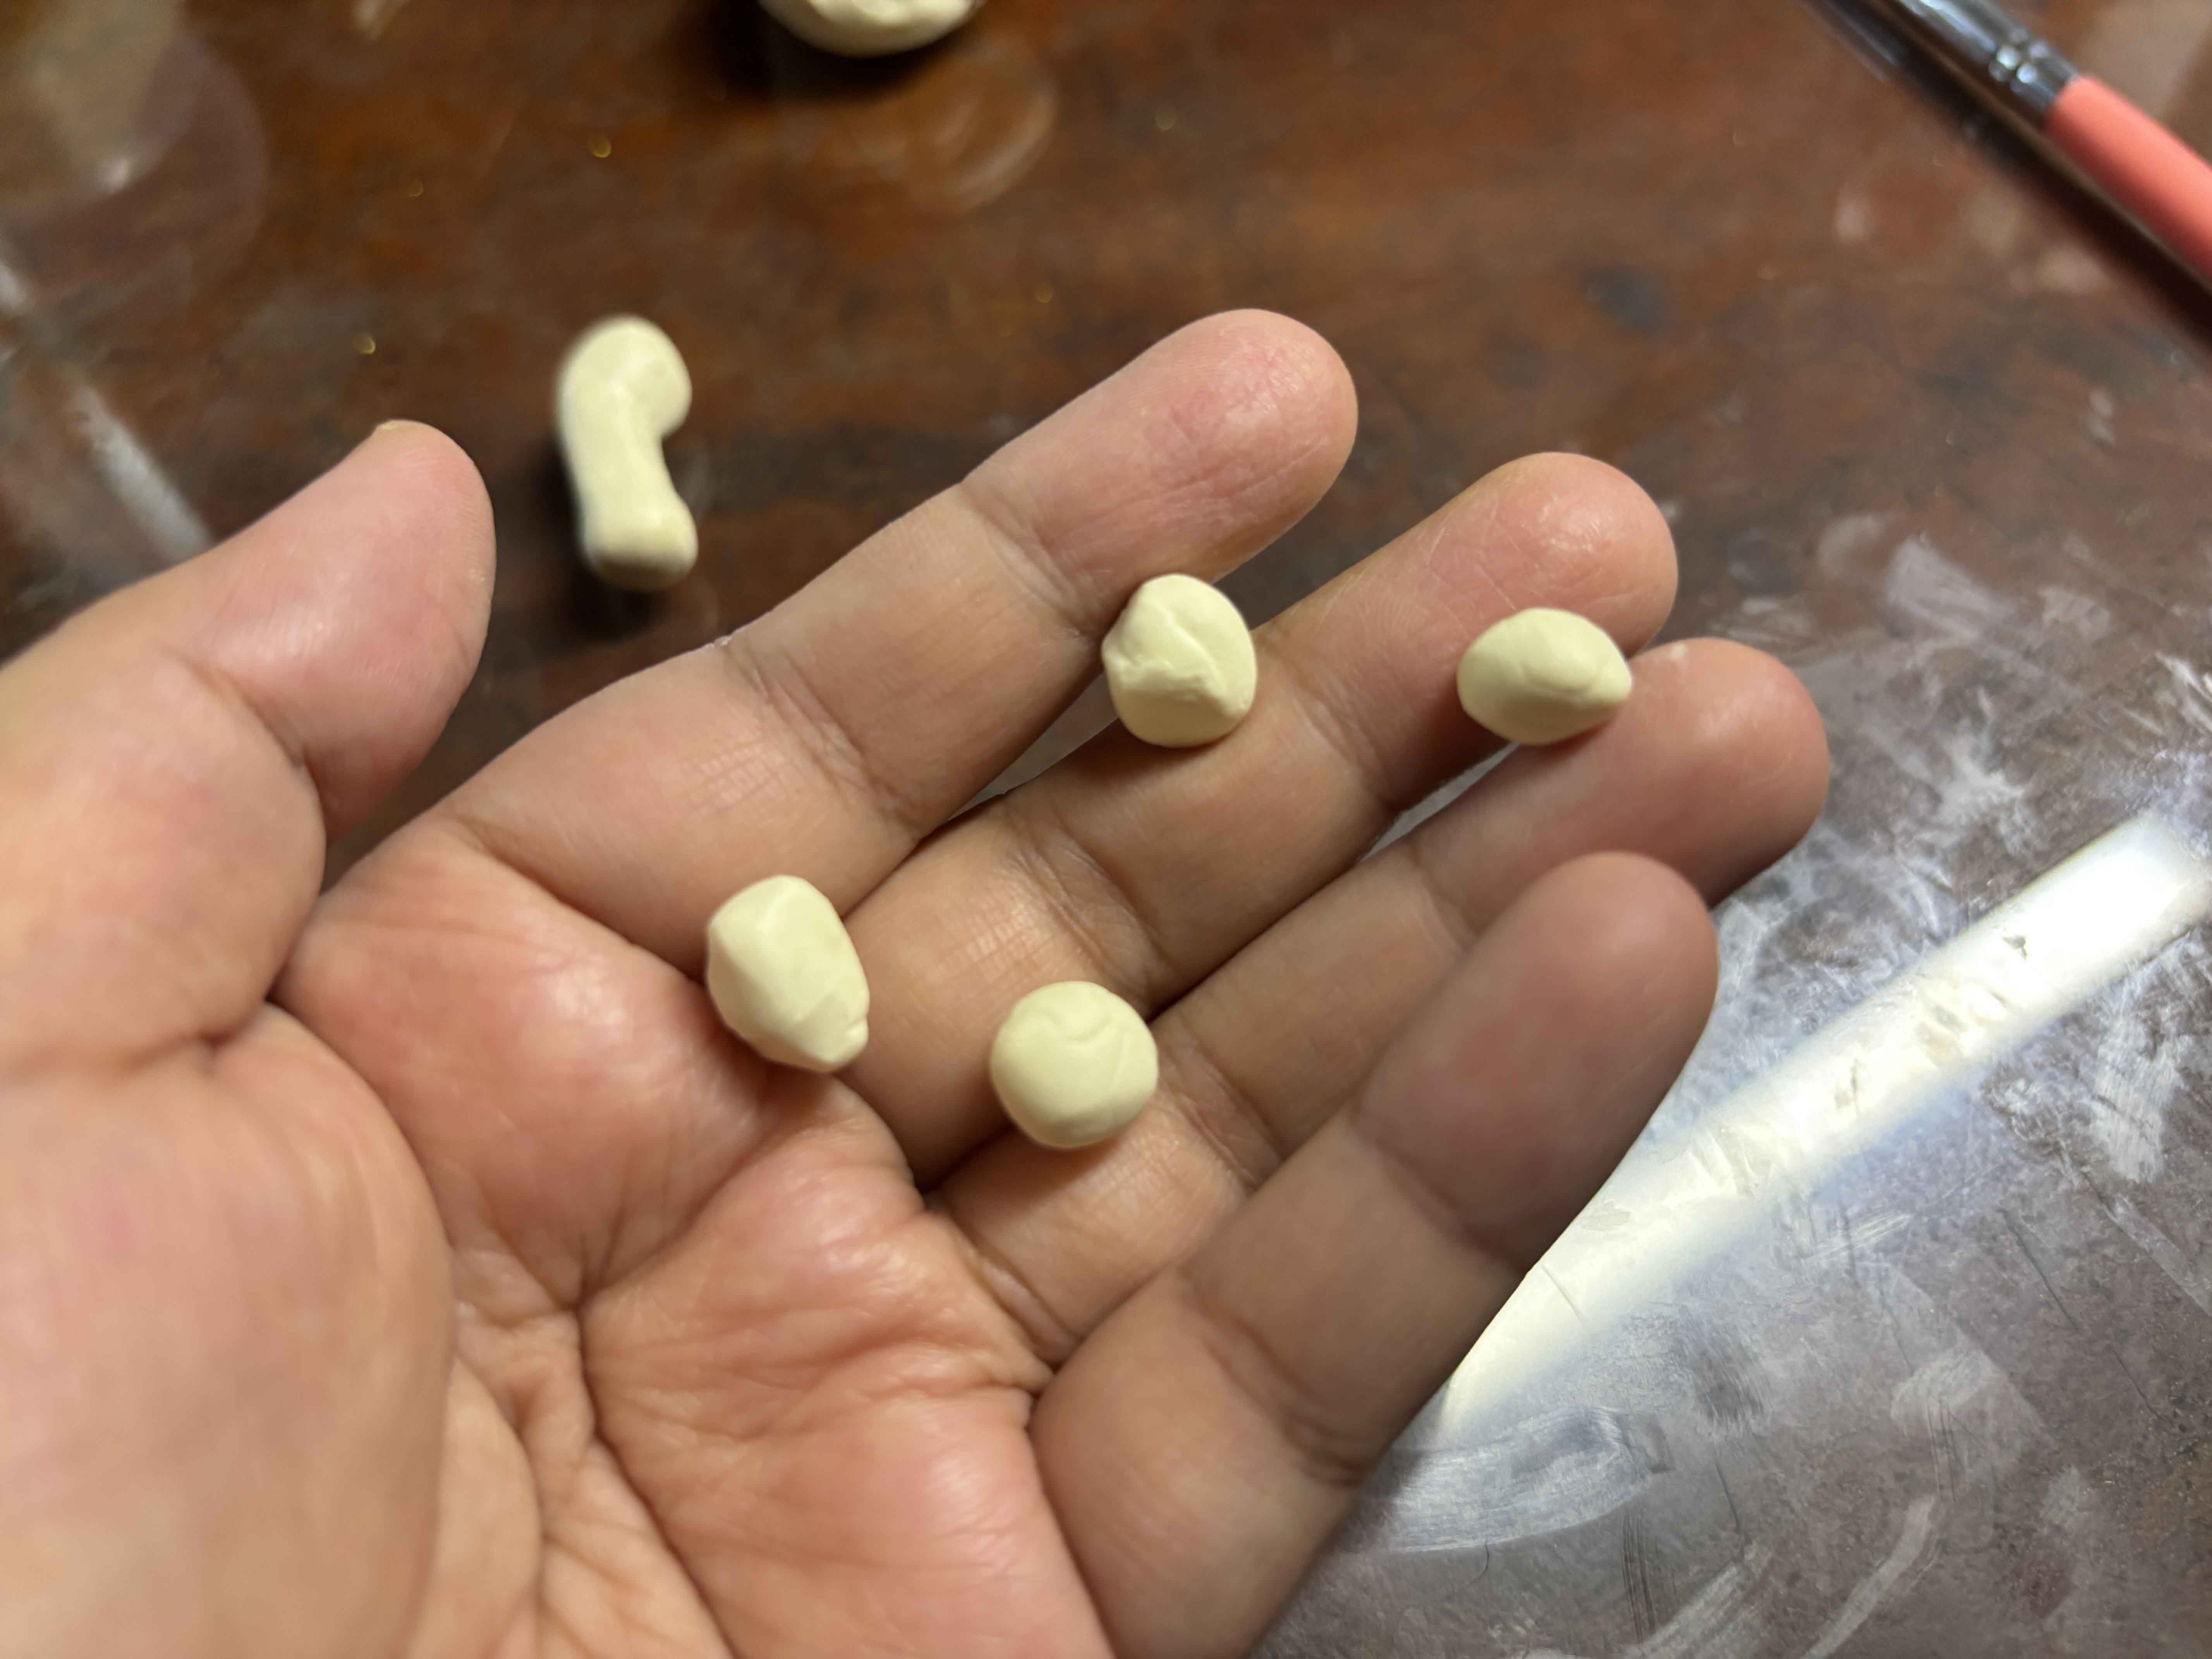
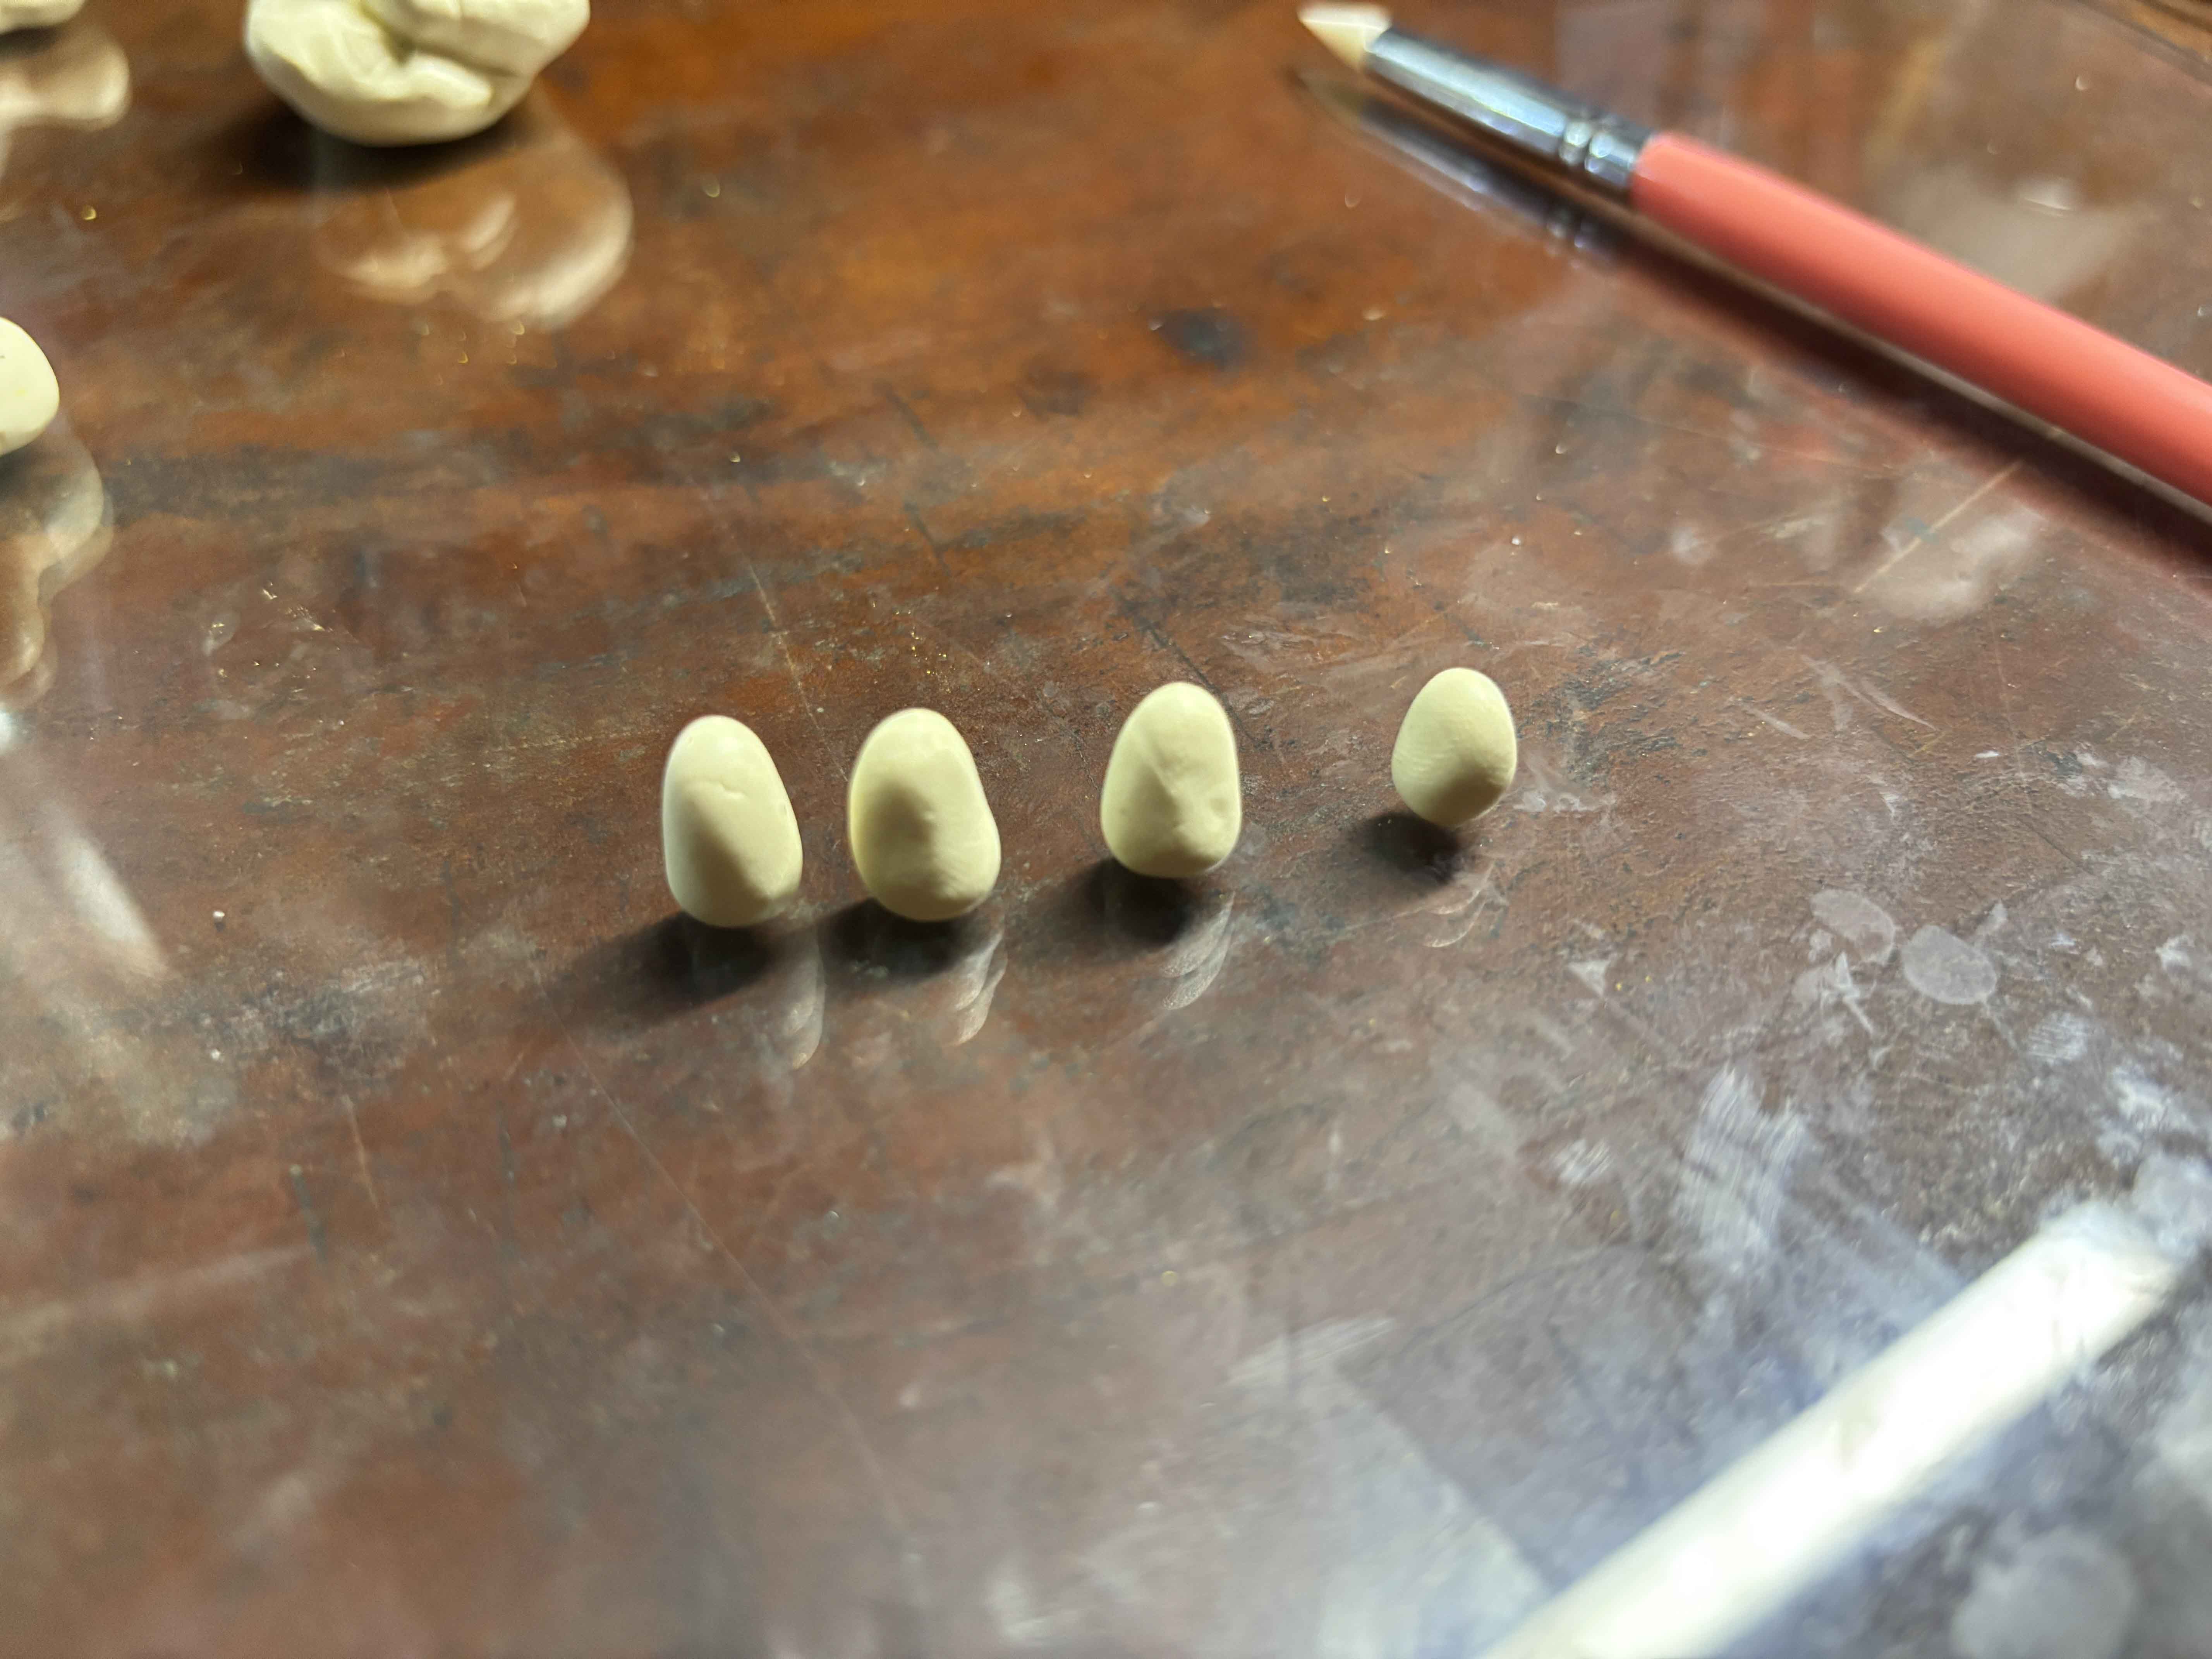
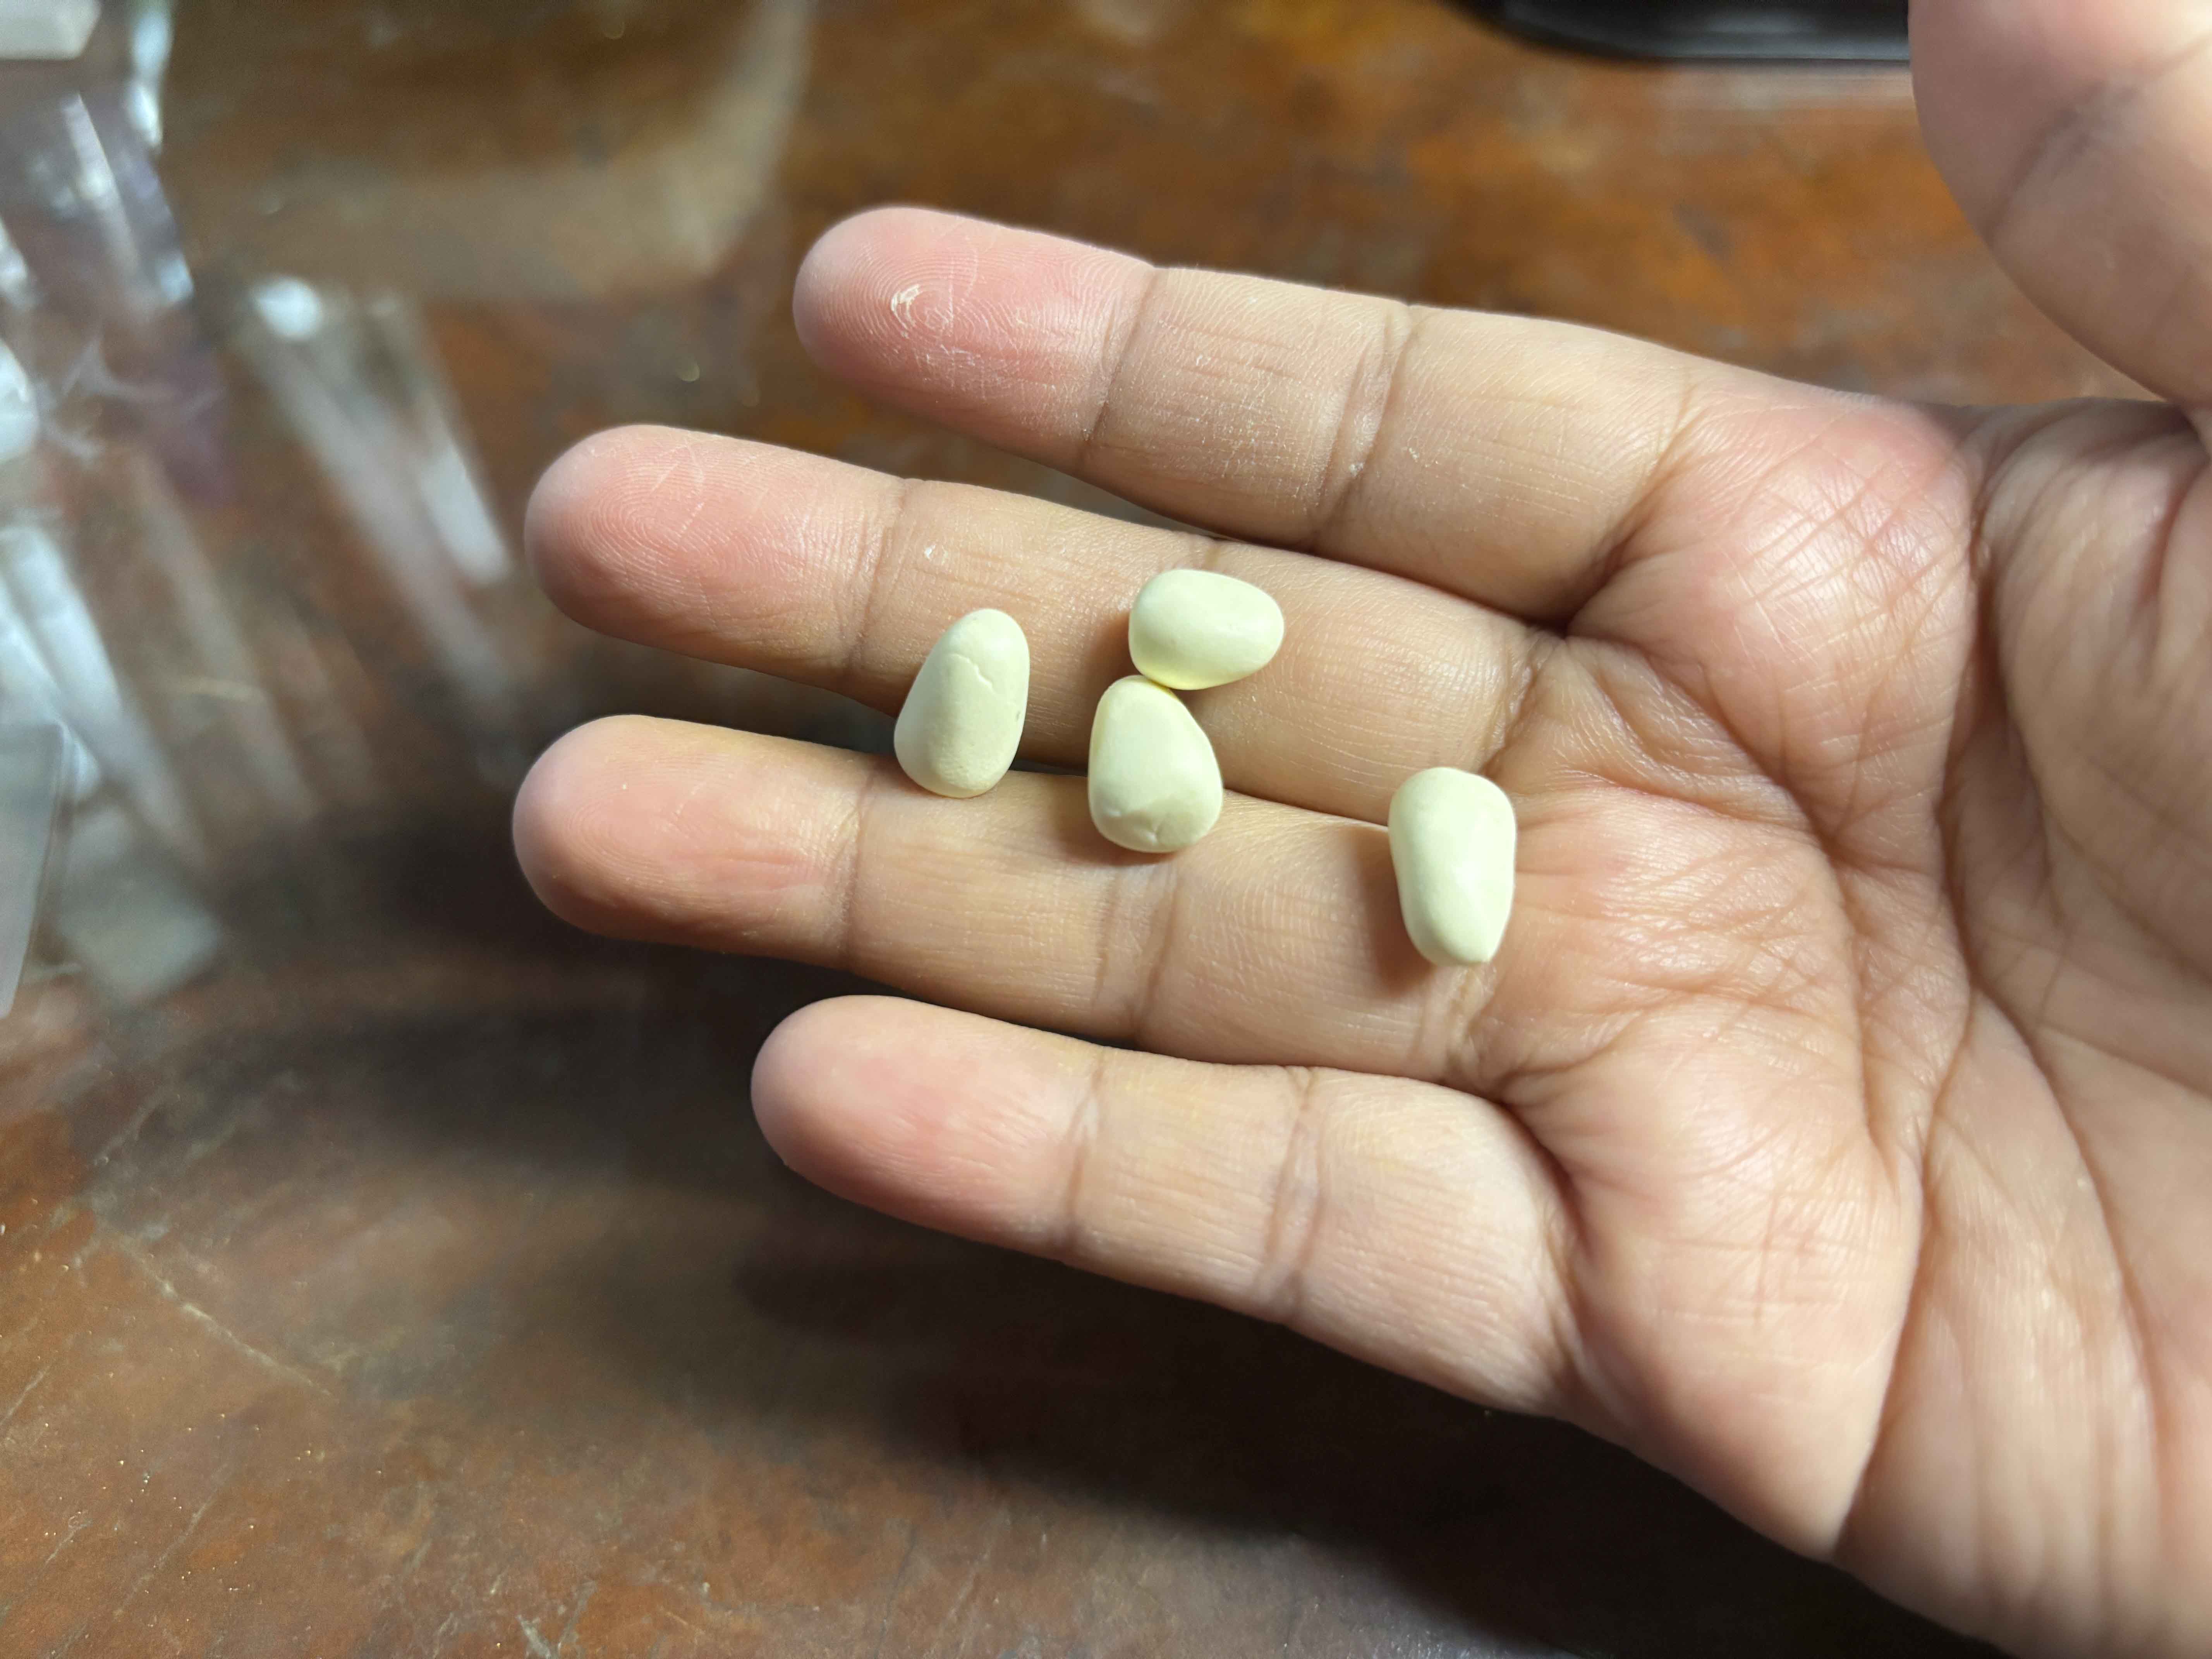
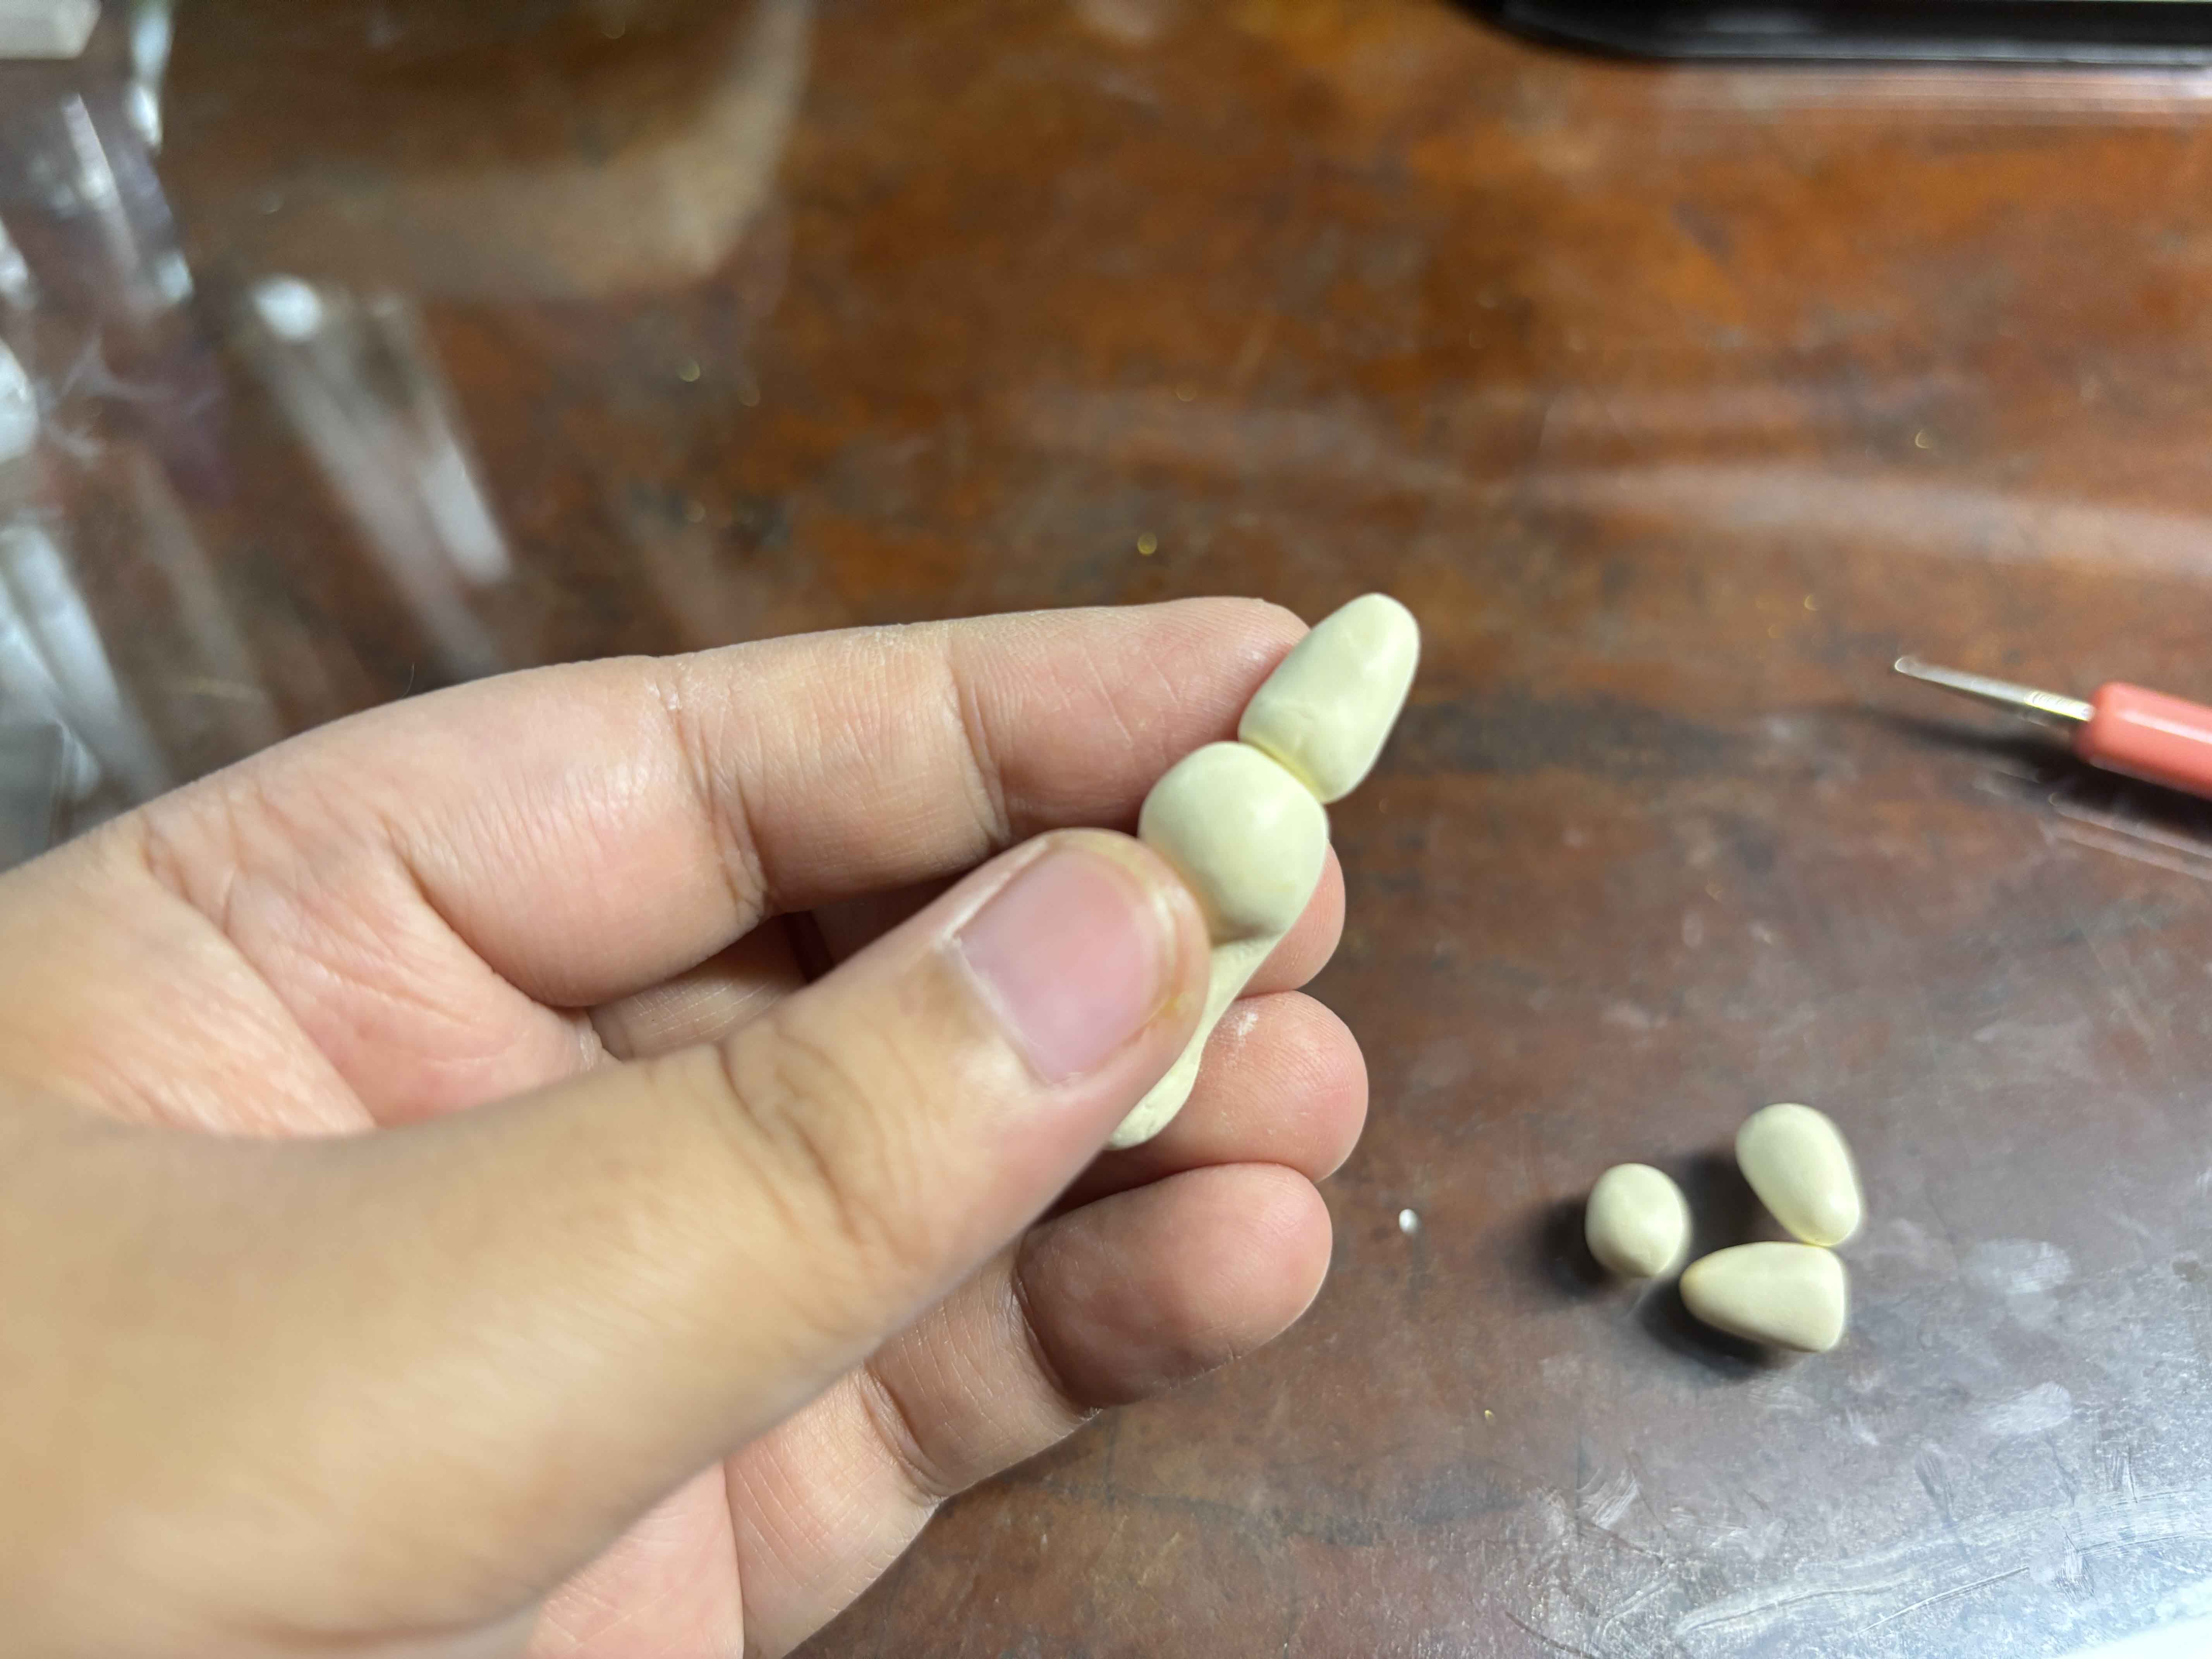
After that, I shape the fingers like this. -----
![11.JPG](https://files.peakd.com/file/peakd-hive/leannwithdoublen/EoiWeVLkcyvZzU3ASqKaDhwjCYQs8wuCkTGNQztr28Eof4eCHmNK1UPyUZFfdBRUVZJ.JPG)
![12.JPG](https://files.peakd.com/file/peakd-hive/leannwithdoublen/EoeFPtX6TwzE2XUwEPeeyoAACh7i1hxEP15KW5XwfM9K1RdrPzv5HPP5goAdnDEXFXt.JPG)
This is how they look. And I am going to use this clay tool to assemble them. -----
![13.JPG](https://files.peakd.com/file/peakd-hive/leannwithdoublen/EoK8EuvWUCwFNy6L2QZNmBCLEJH9MxXeeQusSpSLDSA8G8kRbCvLn2eHN9Wt6ugLj4g.JPG)
![14.JPG](https://files.peakd.com/file/peakd-hive/leannwithdoublen/EoeGNSxYtbfz1W6GwCYnBcrviyq46oY1QgUaoYmUANiYFXzx4toSuV5YdSTNryCwBYQ.JPG)
It looks like it is impossible to make chicken with the shapes of the clay, but just trust the process. -----
![15.JPG](https://files.peakd.com/file/peakd-hive/leannwithdoublen/EoiX7gJPyRWi4CKCJQ4k3TrnGsQHPU27vQr9UMyyGrk7ftWGD5xLzpYfMJDpN9JwoLr.JPG)
![16.JPG](https://files.peakd.com/file/peakd-hive/leannwithdoublen/EouAf1PkJzfxJYZoACm2QZRdgP8PYW5FWxu3TdCCYSG6aYgEZvvcqqwAjQvzArhtpk7.JPG)
What I do next is, I stick the fingers I shaped to the body like the one I did. ----
![17.JPG](https://files.peakd.com/file/peakd-hive/leannwithdoublen/EoCj8aWvF2M9jpABbTrUuLt5hvCHuTQNXyEtSmmNbDqeqVdEC3KgDxfqwwPyiBKF2wA.JPG)
![18.JPG](https://files.peakd.com/file/peakd-hive/leannwithdoublen/EpGShg3o6LjKz6HdP48hSVVSEgHCiQpwKdJ8rQTu1XA7QABpZuzHkjX3YuuK5TnNuaK.JPG)
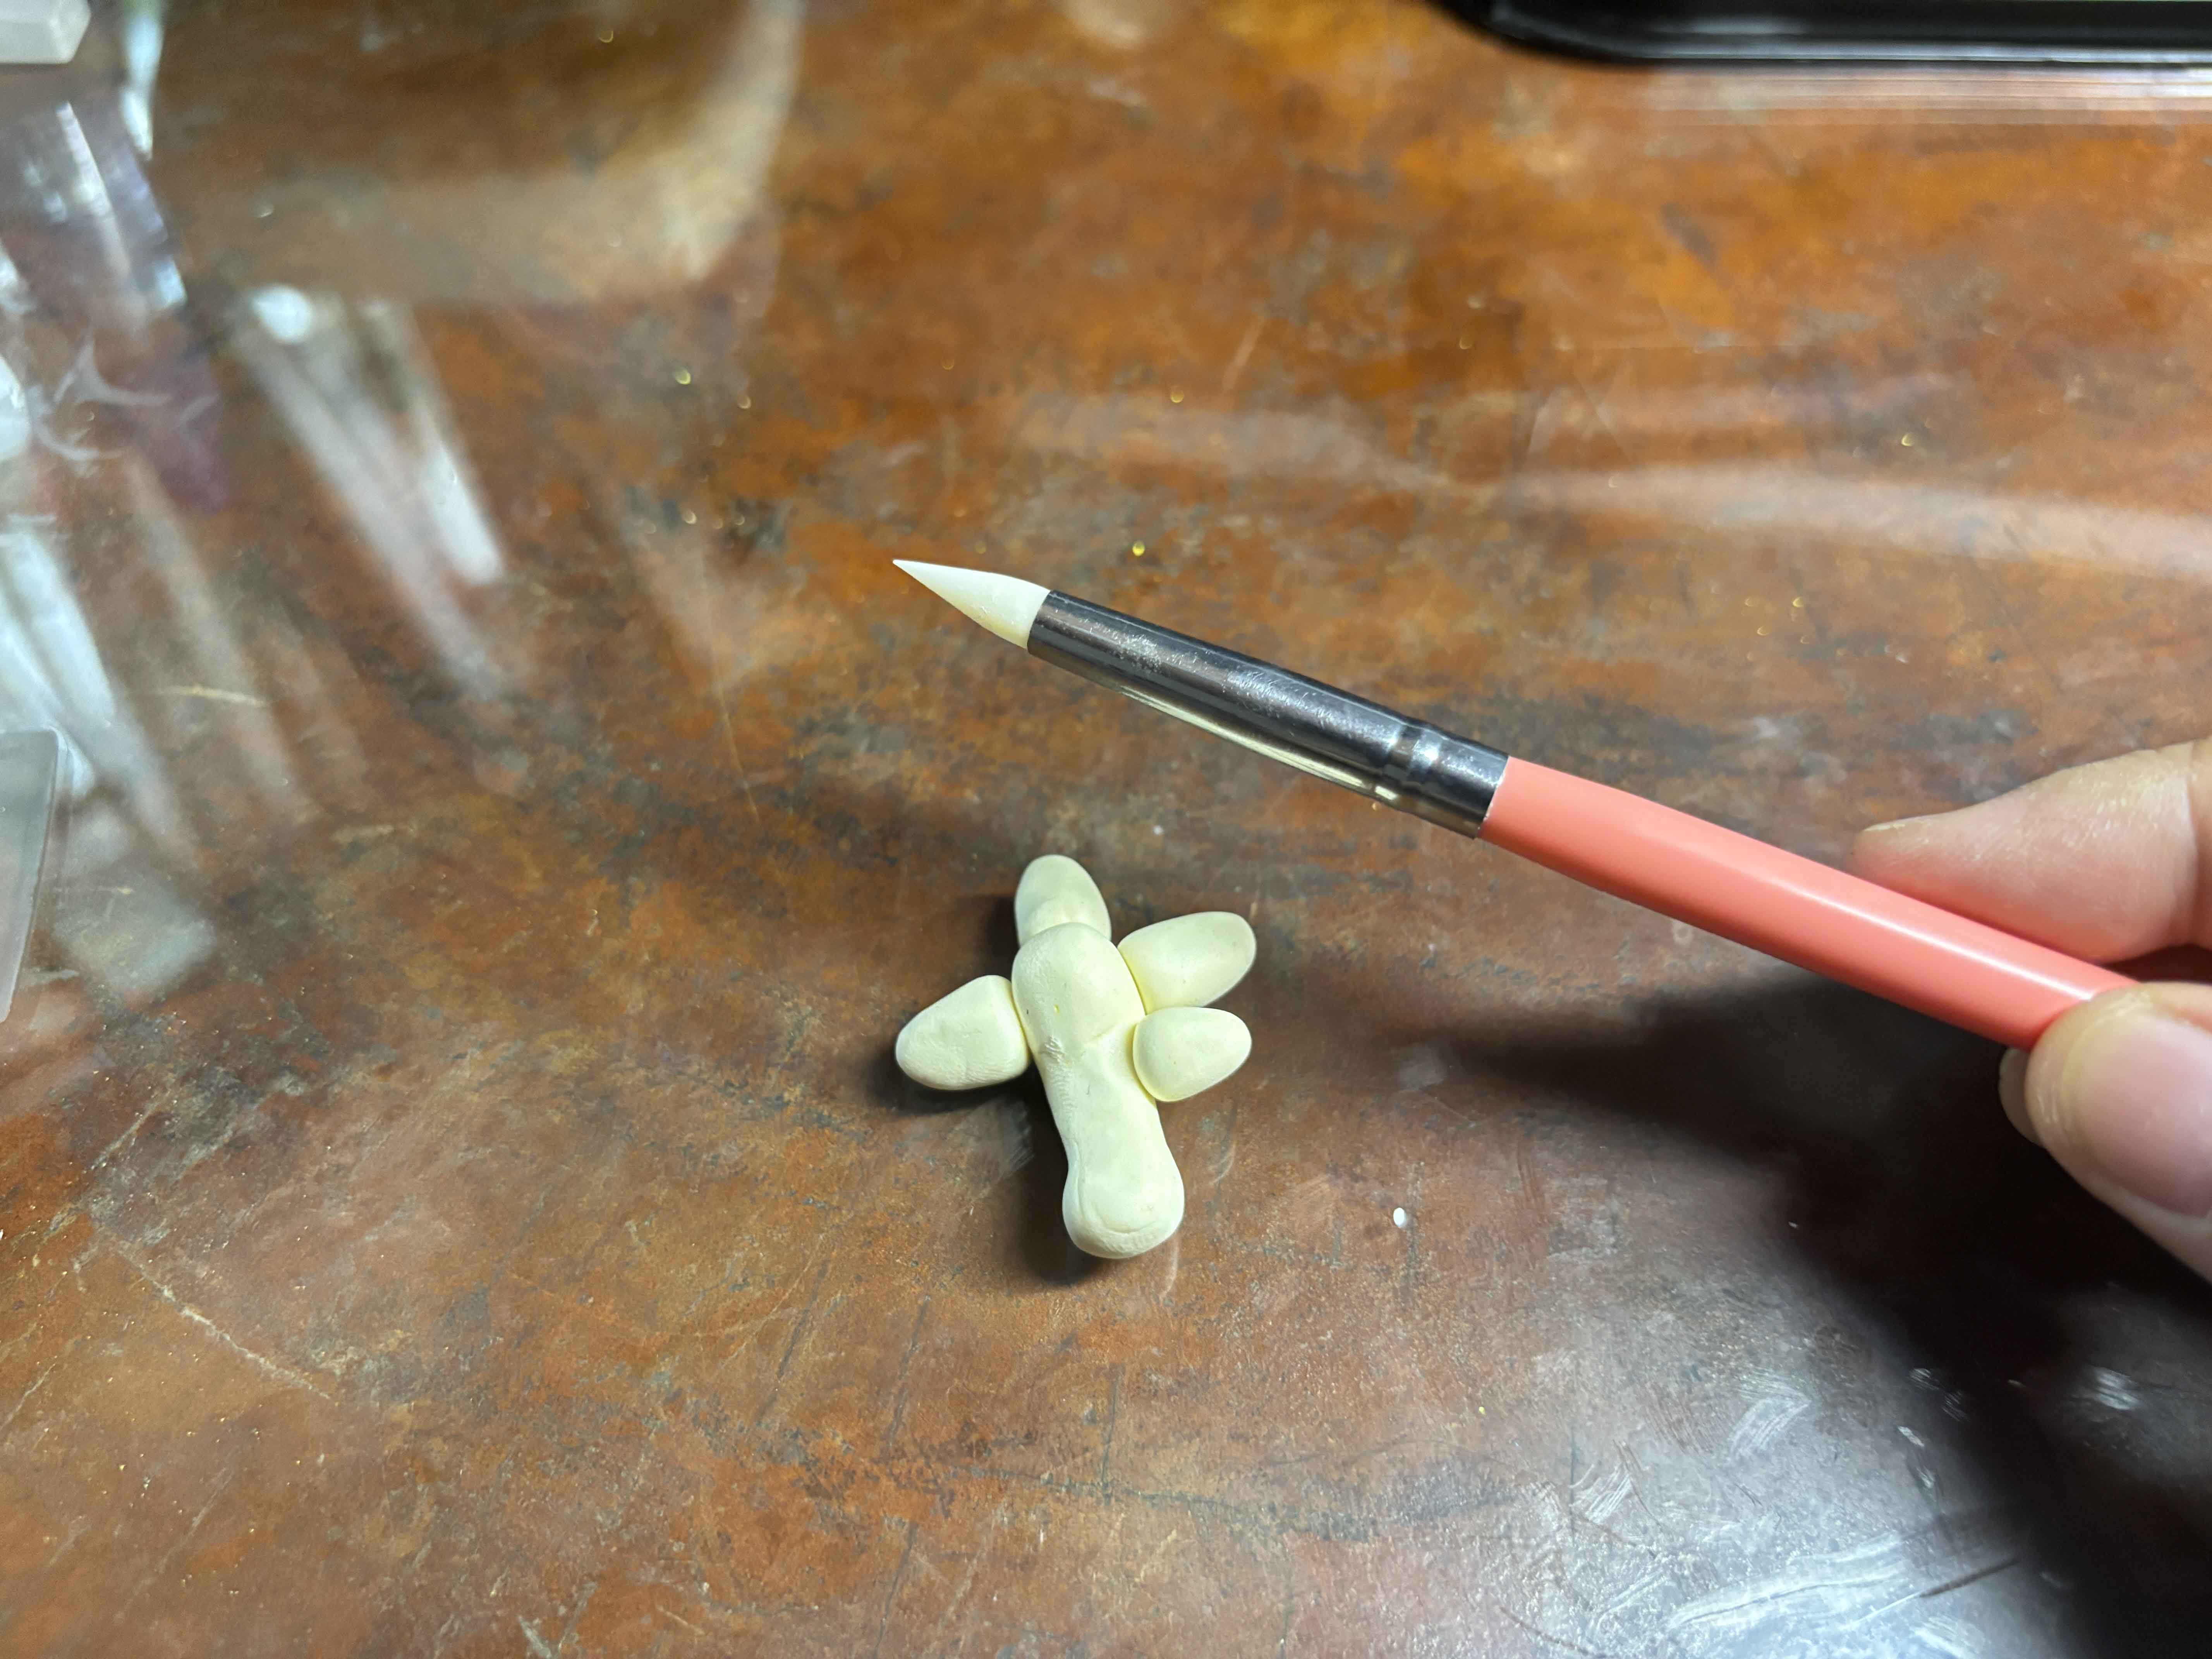
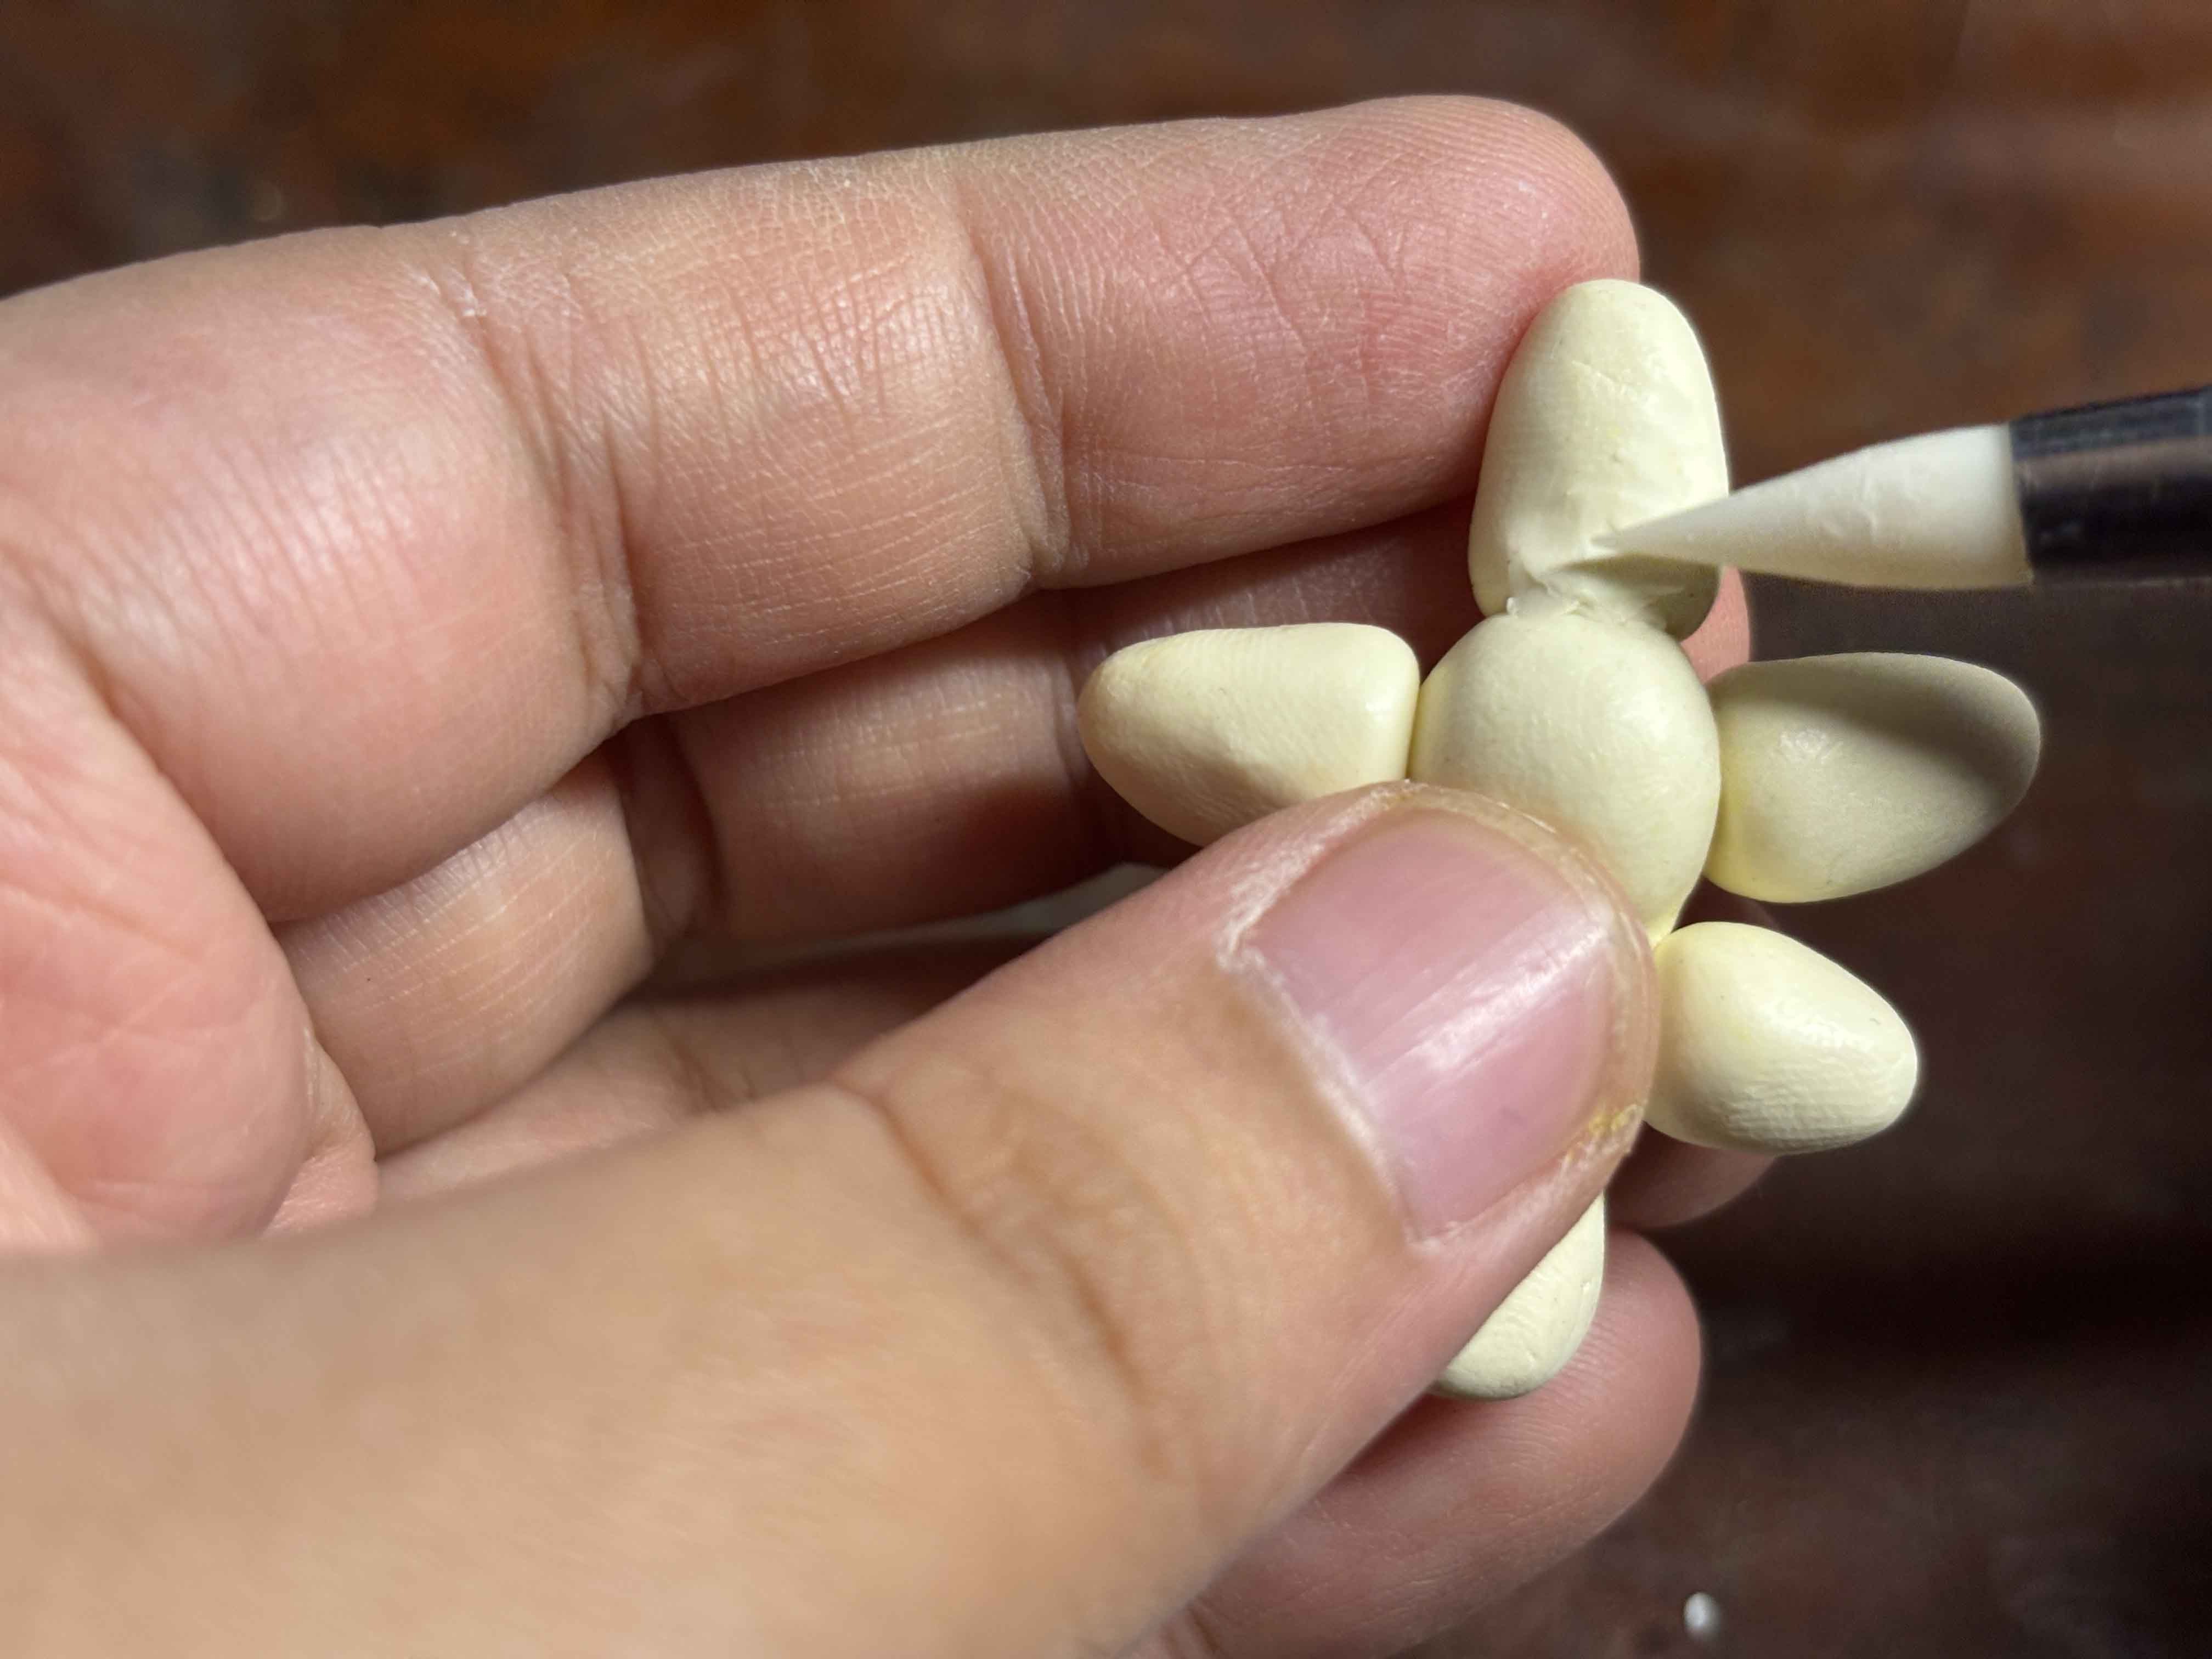
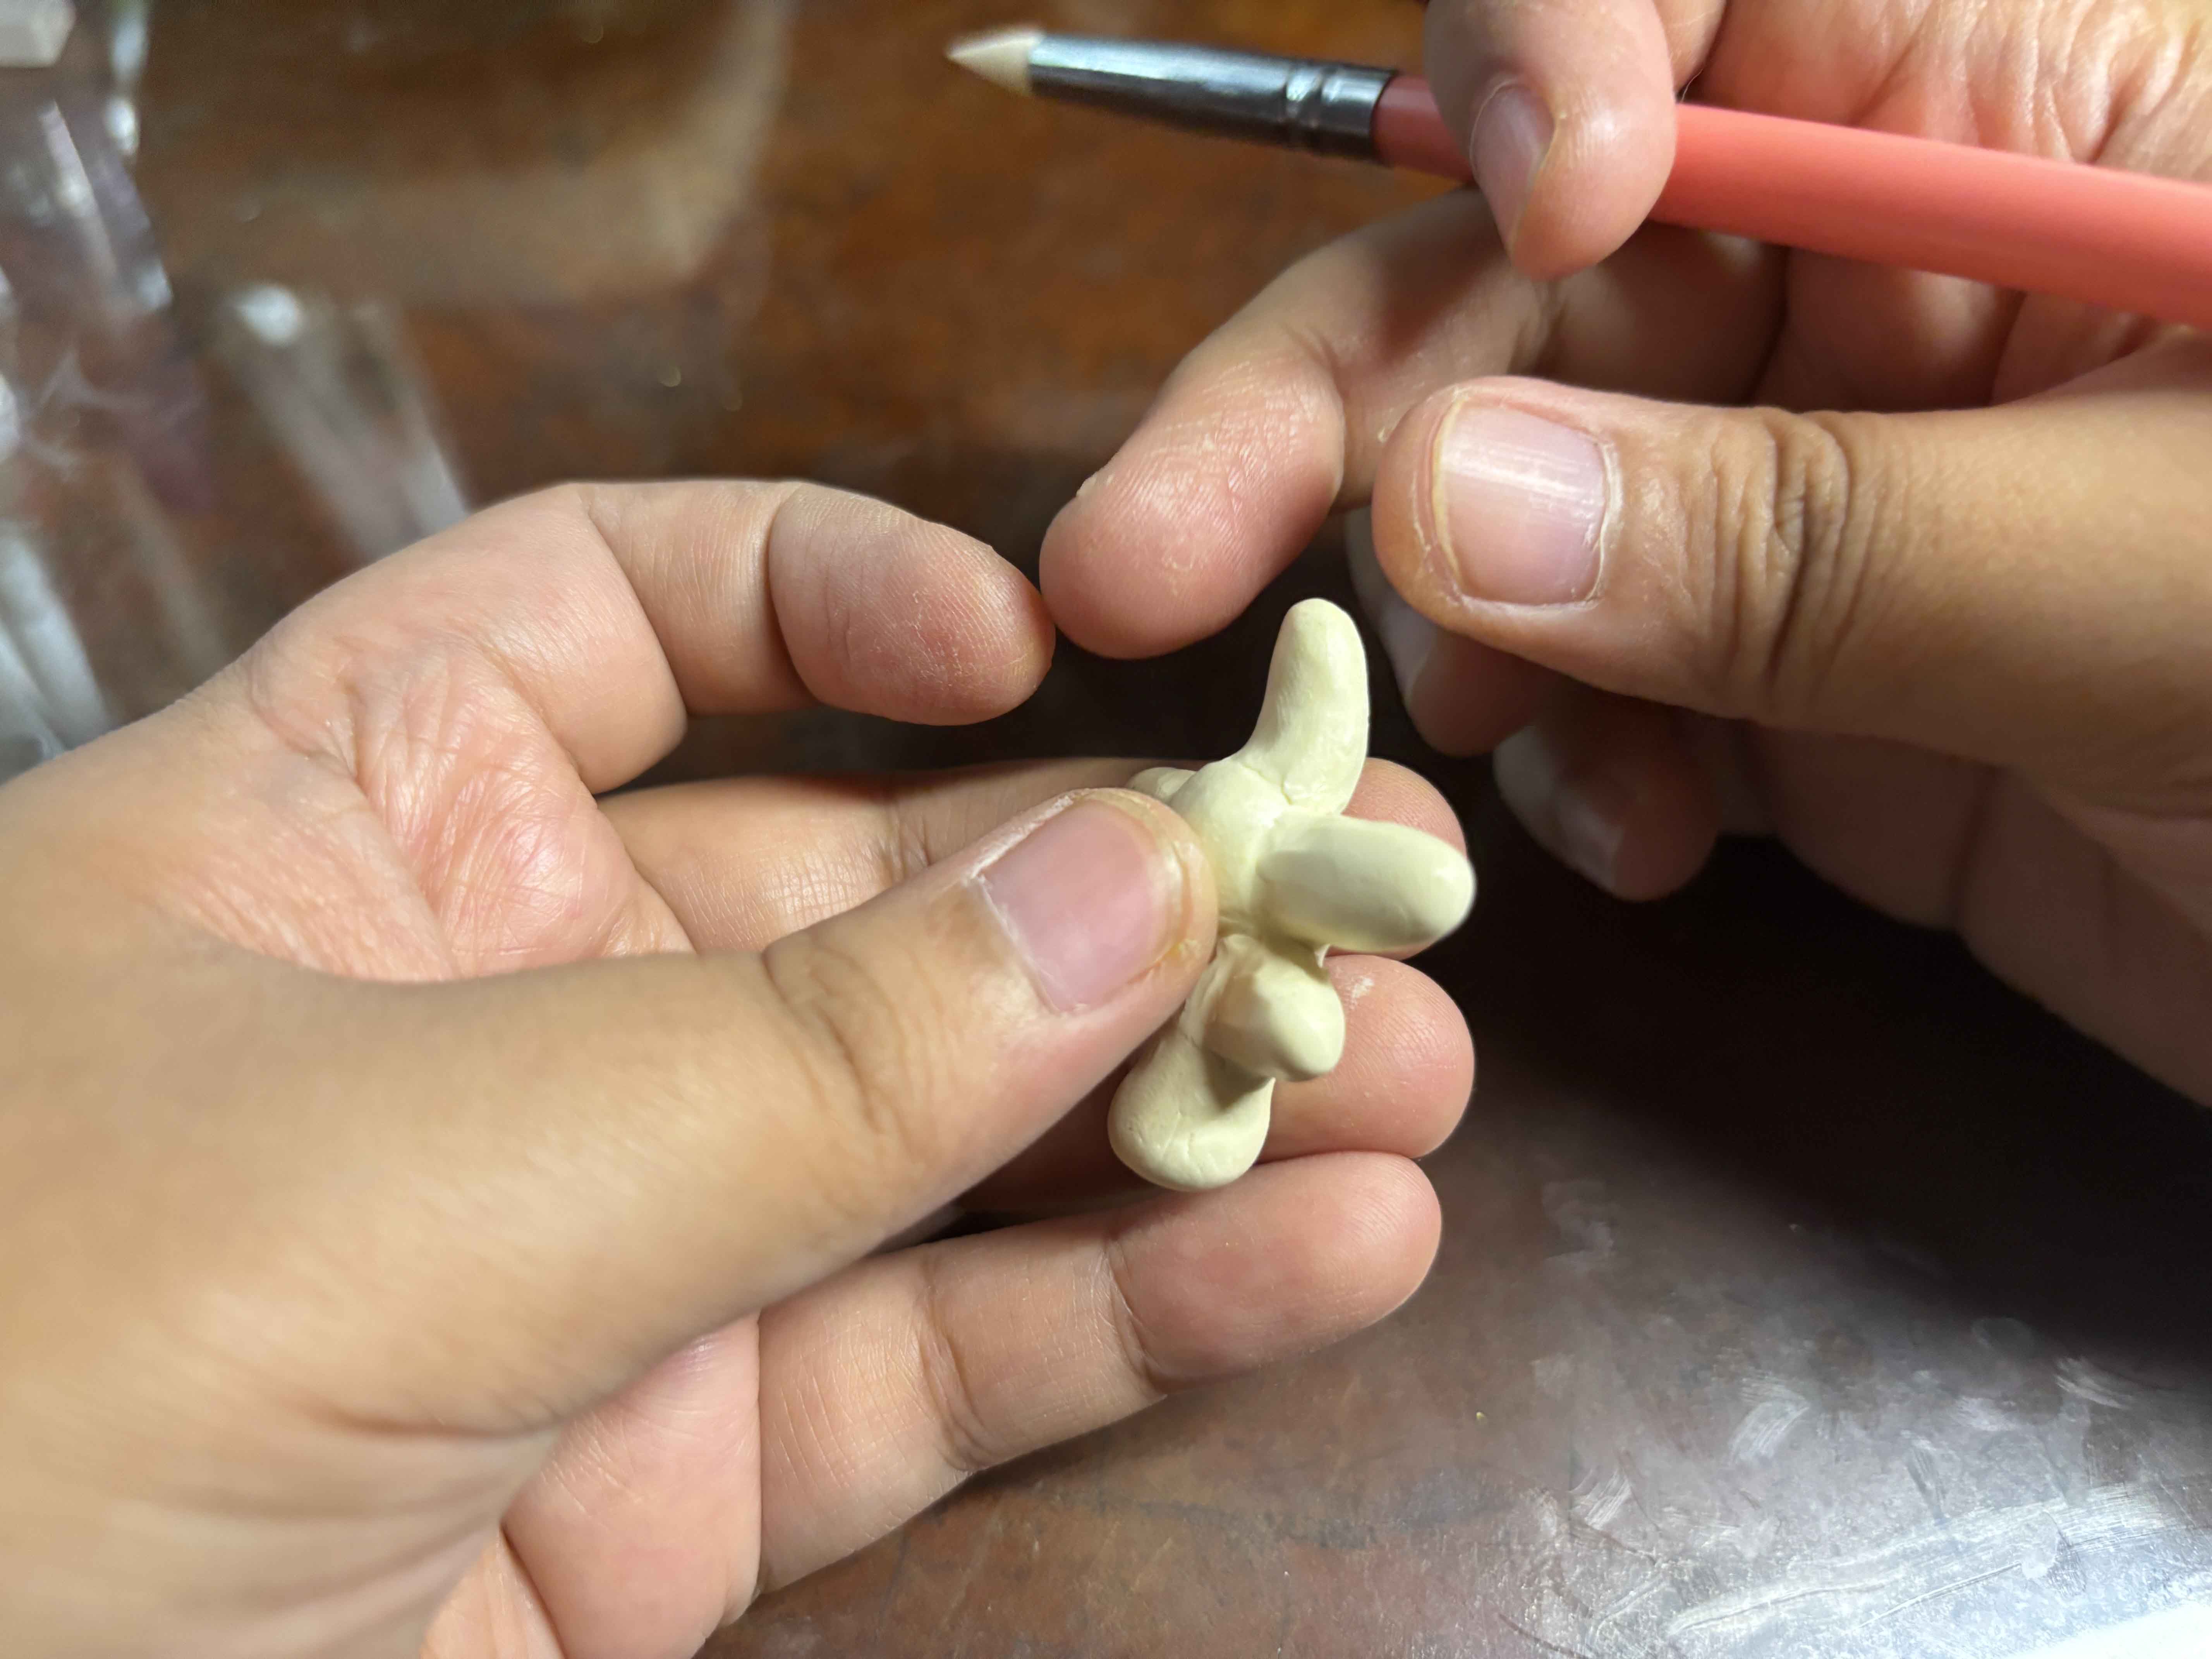
And I used this clay tool to close the gaps between each clay. -----
![19.JPG](https://files.peakd.com/file/peakd-hive/leannwithdoublen/Eos3EosPGsPfrhmnkD8Svv4TBZ7P1iozD37sapHFquaCzy3mJDazpRtoybNUF2KM6bV.JPG)
![20.JPG](https://files.peakd.com/file/peakd-hive/leannwithdoublen/Ep7w5teQ5SAnYrviEzN2zyrHGiCV2gt57LBy999vkQdtsvuX6S3fMfc5MGA2JETCKLh.JPG)
This is how it looks with the gaps all closed, looks weird, right? LOL. -----
![21.JPG](https://files.peakd.com/file/peakd-hive/leannwithdoublen/EopupYXYi6SvZByH94PXiJTZQnty7CQgcWanqsY8i1ixsf7xj1Qa26NxghZG3Gx6vPo.JPG)
![22.JPG](https://files.peakd.com/file/peakd-hive/leannwithdoublen/EoeGremMzTRM2vFGrX32wGZk2GeLrXZHWqEW15wWmLKd9N3qzWeiBpk8KqBcooNahsB.JPG)
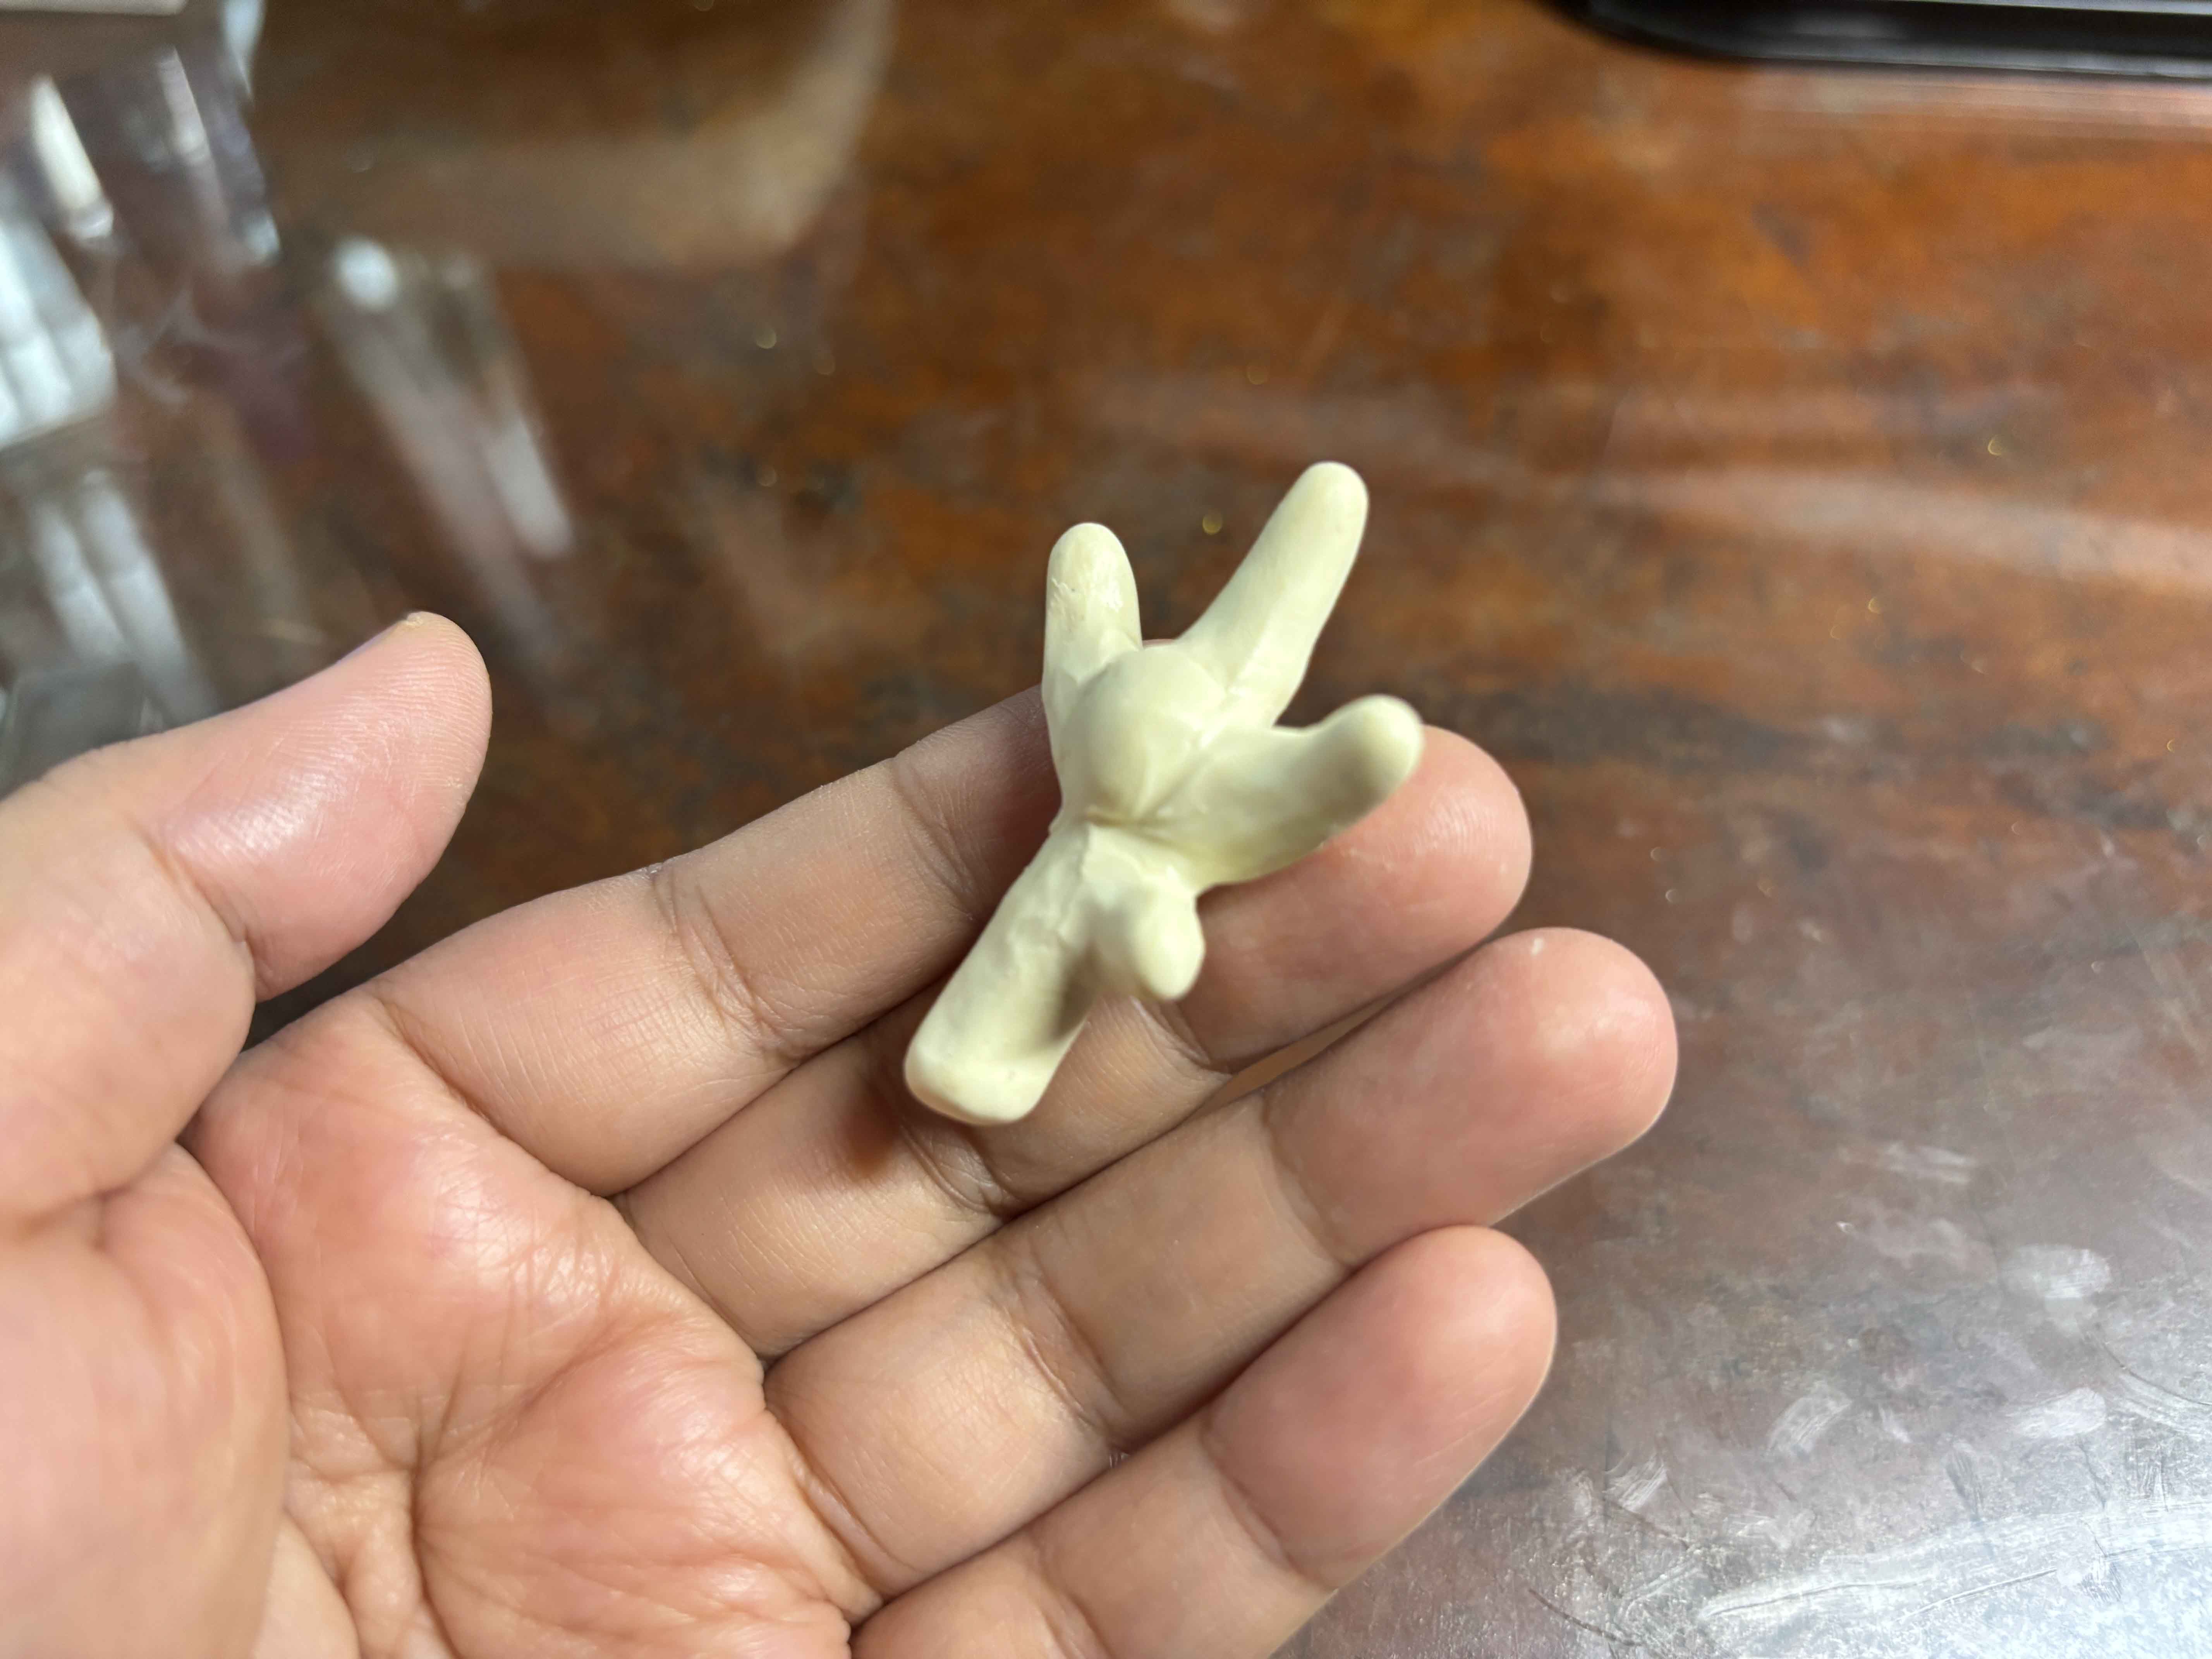
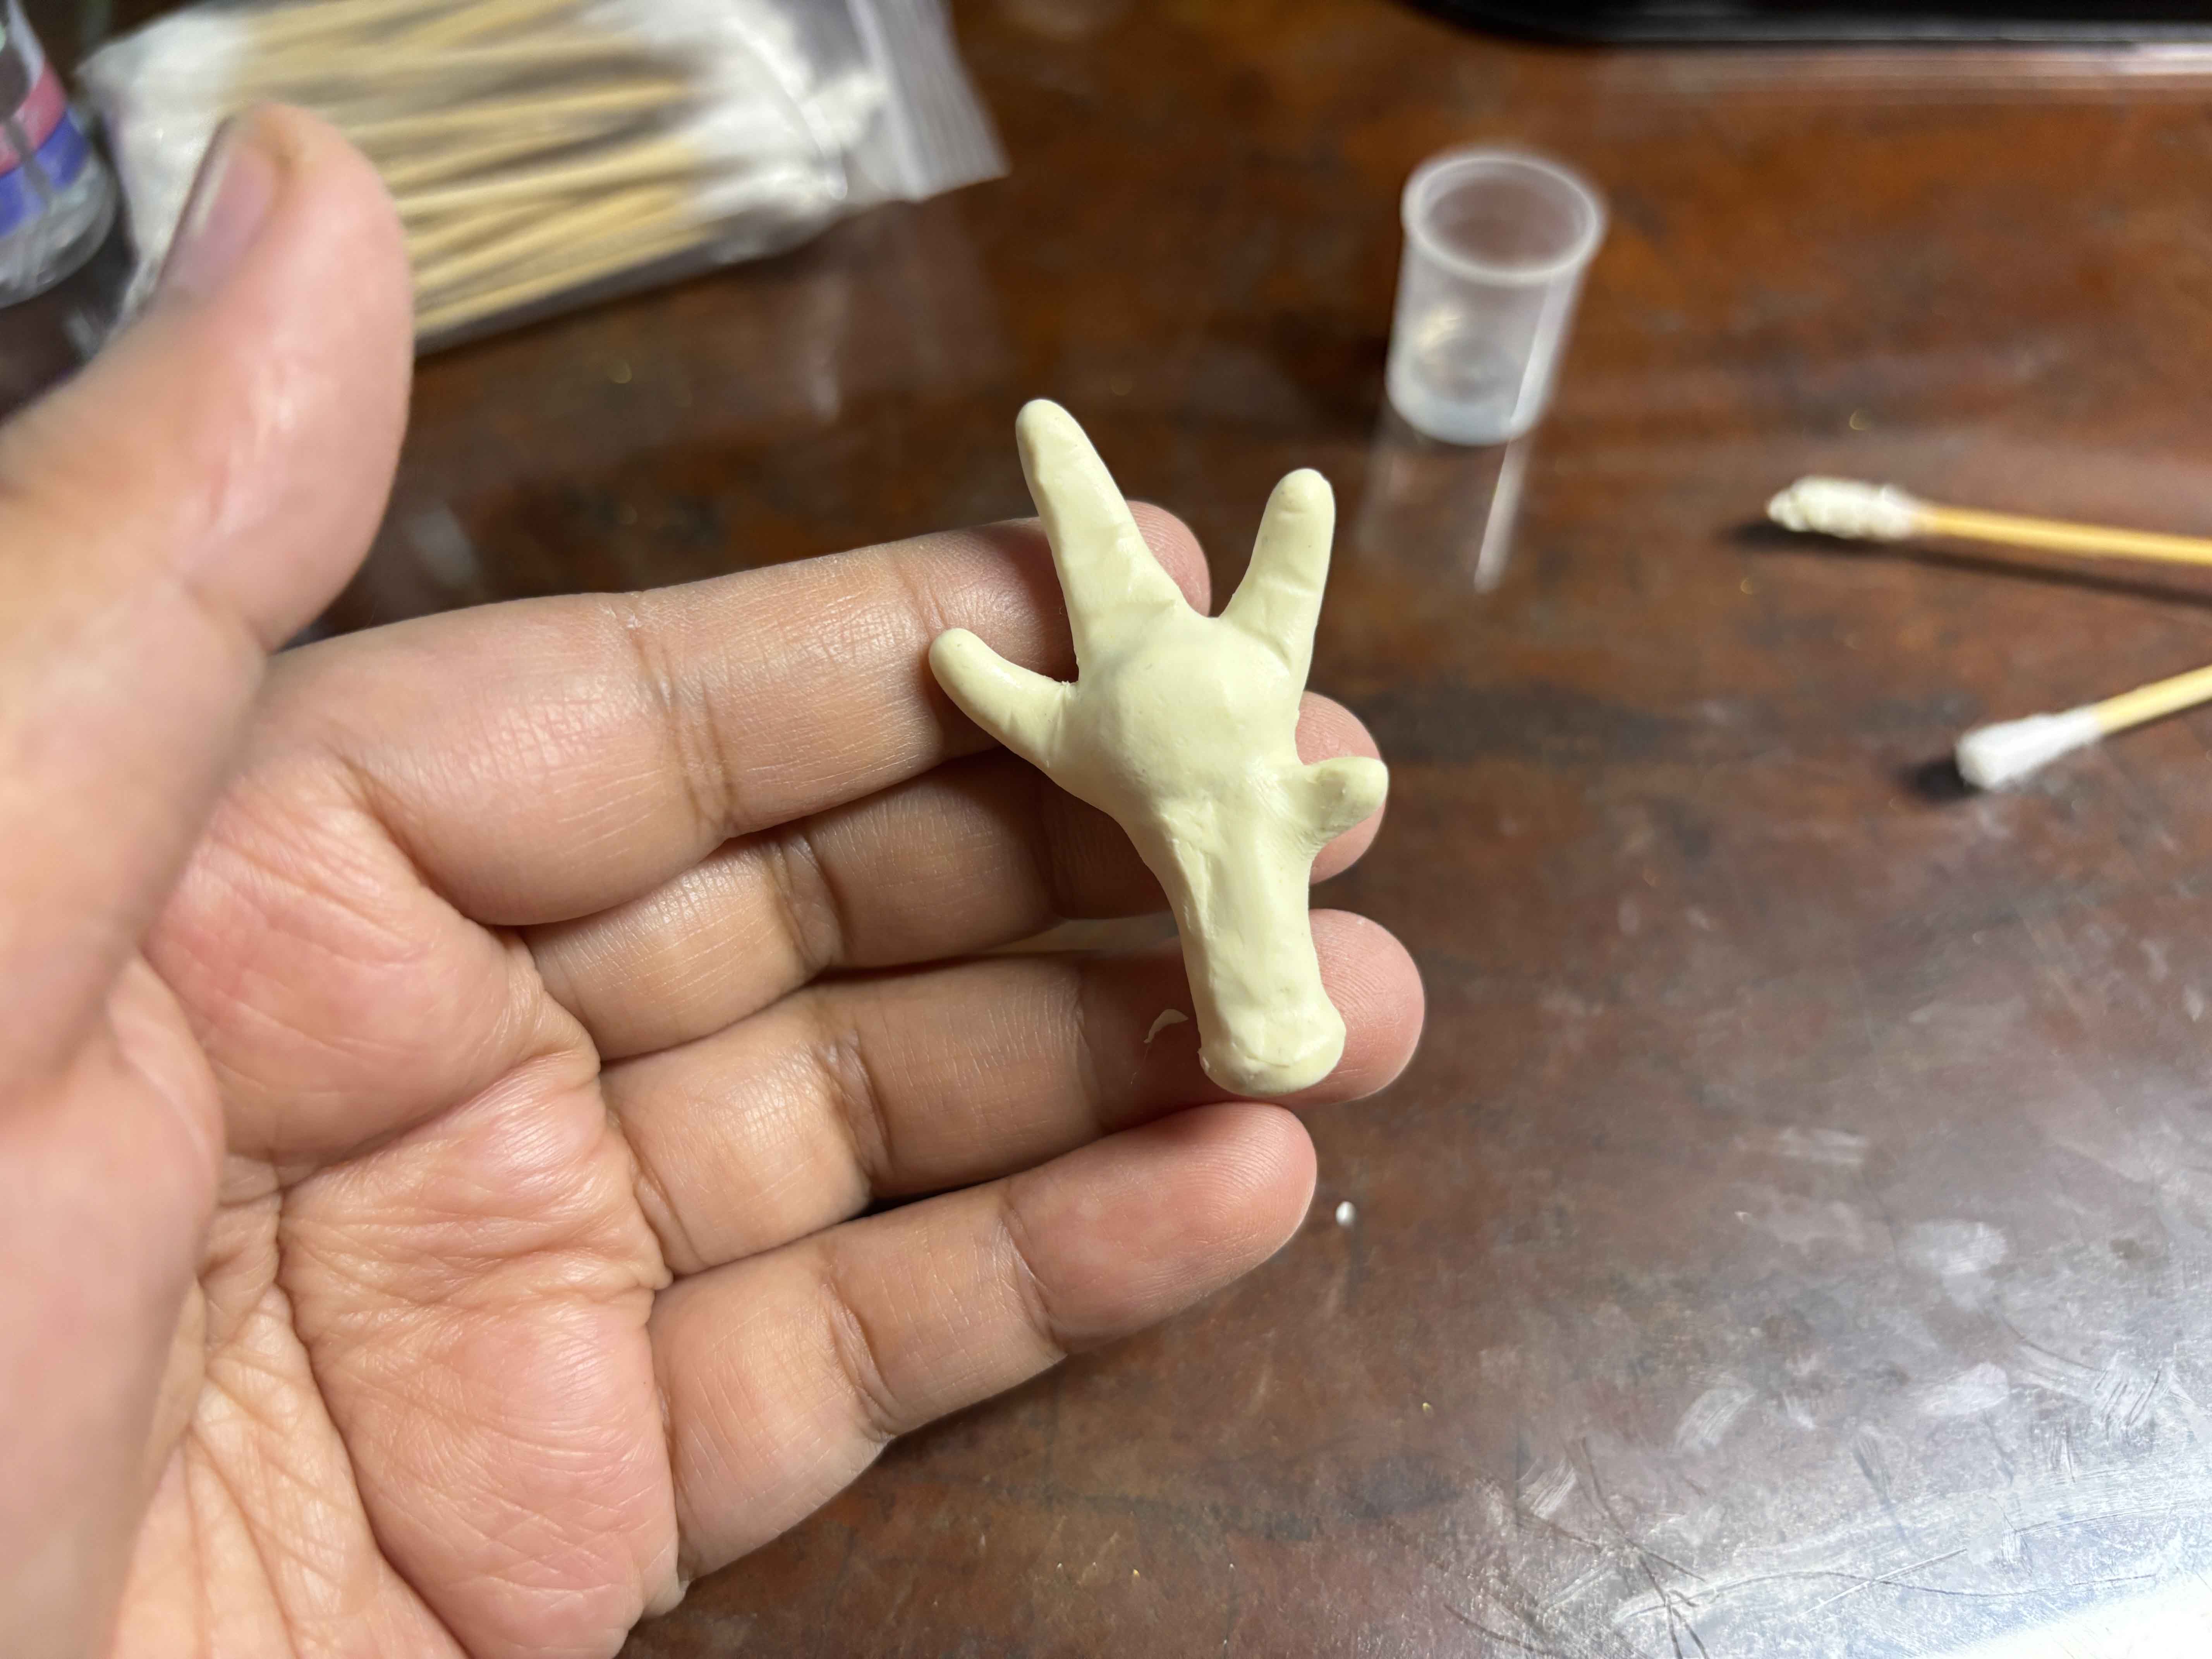
Then I start shaping them into the shape of chicken feet, and make sure you have a reference to look at because it makes everything easier. Make sure to add texture to it so it will look more realistic. -----
![23.JPG](https://files.peakd.com/file/peakd-hive/leannwithdoublen/EowJ289ctsqteujAamz2nwkjr6gt7q5DCVZXzmbJMagGMMKb4DFG4JW96uRQoMg3VmG.JPG)
![24.JPG](https://files.peakd.com/file/peakd-hive/leannwithdoublen/EonnSRYh6TghtZpHNdkFQ1D4y6H8q9E8YAaK6y9j4nj4M2CKAjdDd2FoJCMuVsgiNL8.JPG)
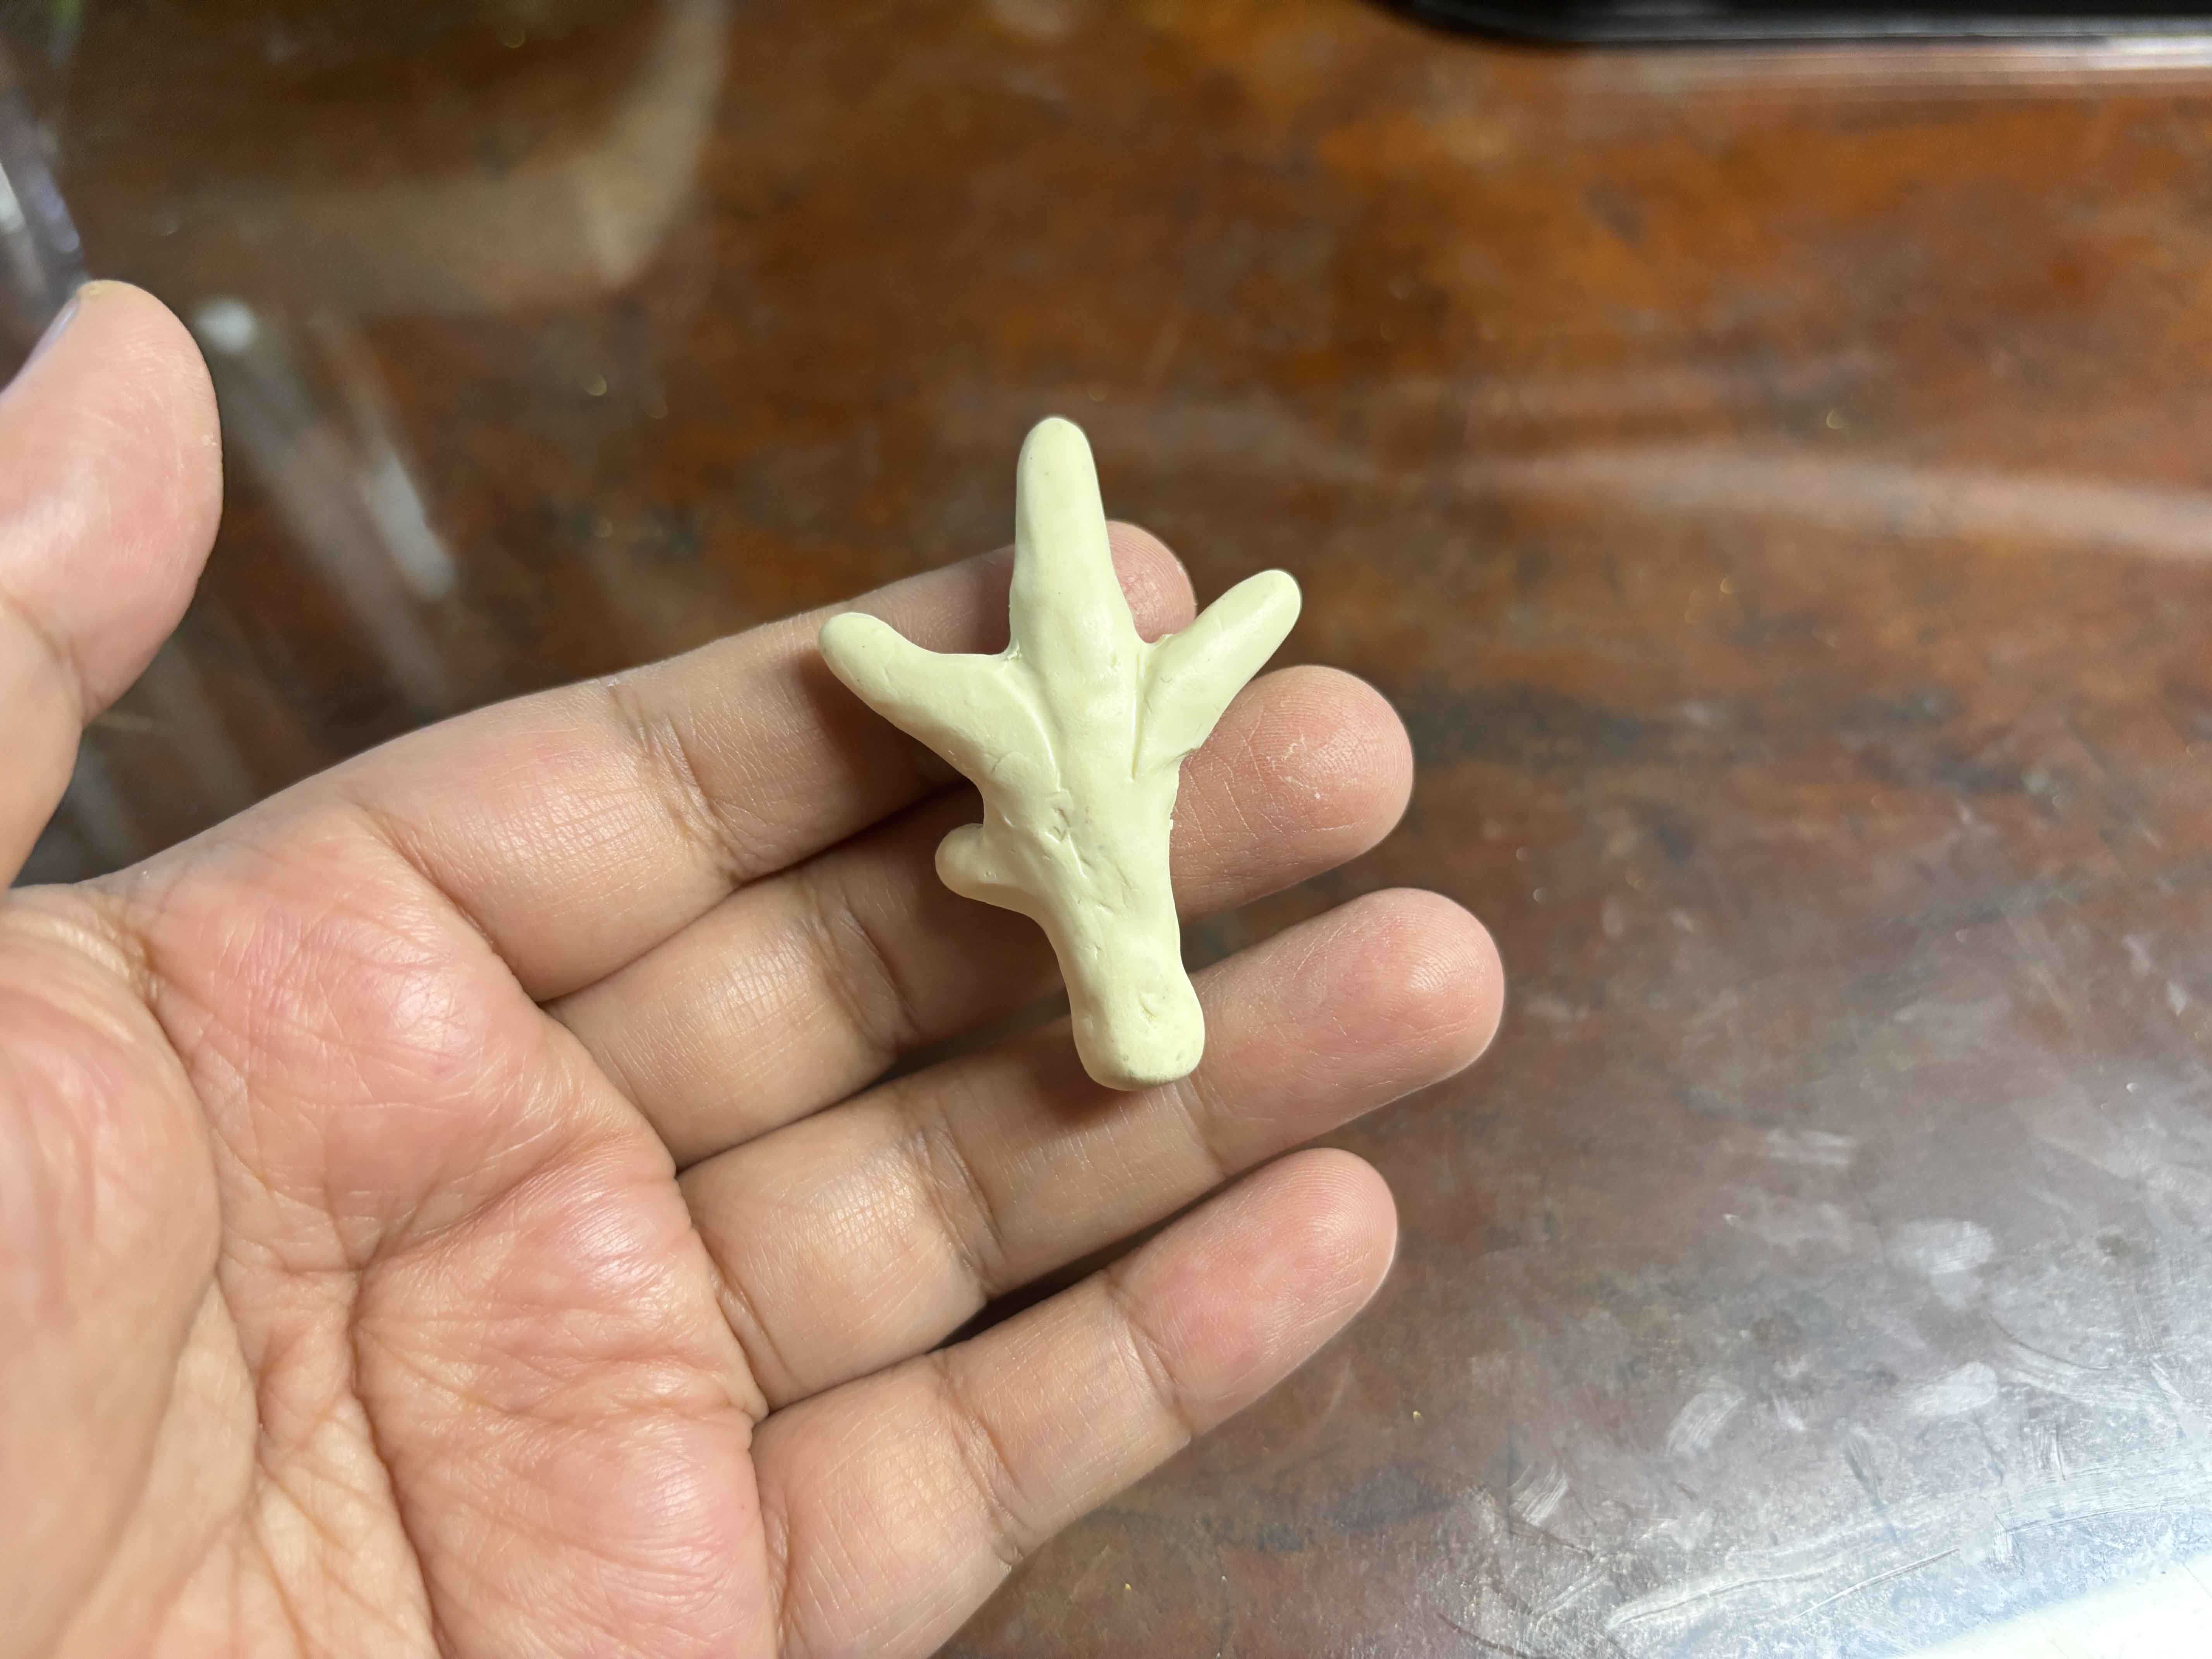
And this is how it should look. -----
![25.JPG](https://files.peakd.com/file/peakd-hive/leannwithdoublen/EonmQbFprijAosQZo6tMGuqH9dXoYaVnWw9tkfbQsUpe5k9HtUSsmKXmDAQAtKoMFjw.JPG)
![26.JPG](https://files.peakd.com/file/peakd-hive/leannwithdoublen/EpVCde1aFjP1YP9Jz5MsPH2QQzvJkxsFFFKKQzQxec21qNuTQYd4EerGRXRWD7SjxvQ.JPG)
And then using alcohol and qtip I clean the clay and then make some parts smoother too. -----
![27.JPG](https://files.peakd.com/file/peakd-hive/leannwithdoublen/EpGSheGFogUNjmFEfbSAe99D737R1LxwDEiu5Z62nqJMwTGsmDj8TreDGtDkA5FEegq.JPG)
![28.JPG](https://files.peakd.com/file/peakd-hive/leannwithdoublen/EpJa24hYVL5YUN7riFENfAeyGrYXx52zrX6X3Xn4R3Mrw43ib6EkS8D5RXV3pvrbGkV.JPG)
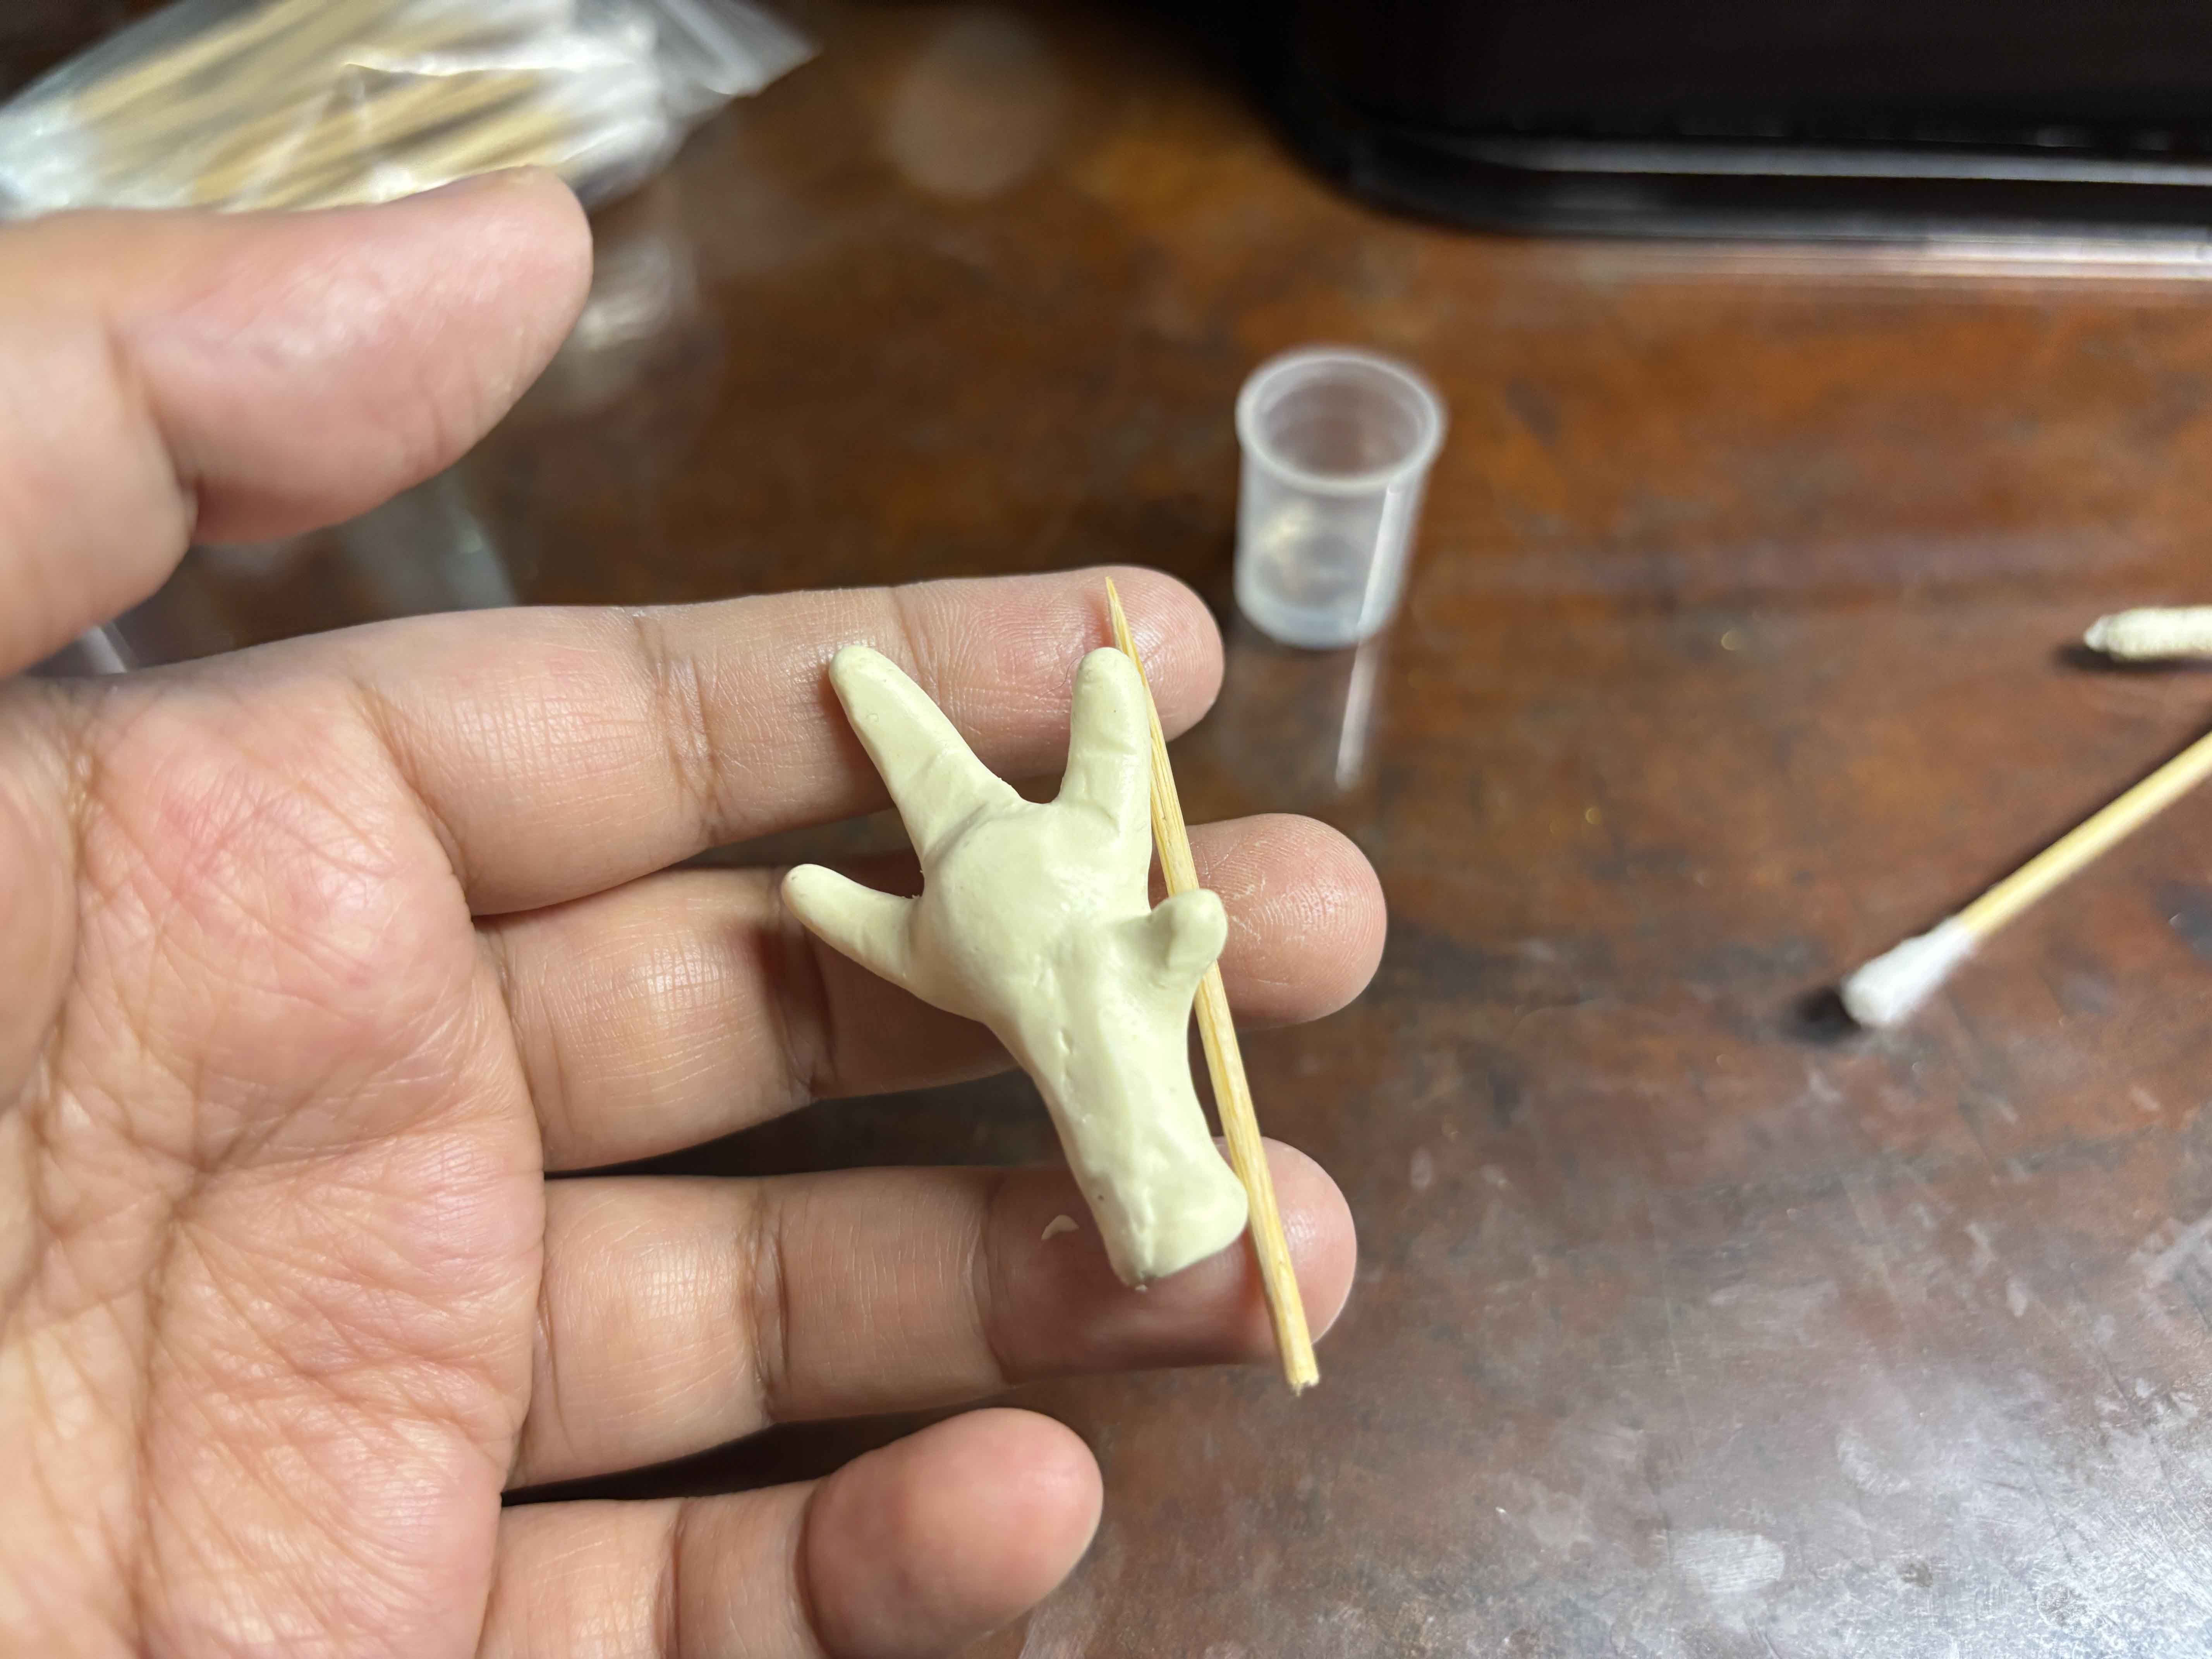
Now everything is clean and smooth, I am going to insert the toothpick into the clay. -----
![29.JPG](https://files.peakd.com/file/peakd-hive/leannwithdoublen/EpvjSAFjjkPWLAdjeGVjSgiP6EPbViBwq49W3PW8cWdguYZn1BtSmvYNHjFArsTtmBd.JPG)
![30.JPG](https://files.peakd.com/file/peakd-hive/leannwithdoublen/Eos3ByM3cawyKcDbburzLp9d73VSpkBCRwdTSn3uy7mF6AkYPWKDJcQA7YeuKGj5sJq.JPG)
Just carefully insert it, make sure not to squeeze the clay too much because it will deform LOL. -----
Adding Shades of Color To The Clay:
![31.JPG](https://files.peakd.com/file/peakd-hive/leannwithdoublen/EoEr2QJLscYE4vnM1MSkjfcL1D5GrsmfX1t5QuwfcdvWnd9S9uuWNwC4PRhNFn5R8Tu.JPG)
![32.JPG](https://files.peakd.com/file/peakd-hive/leannwithdoublen/Eoc7xkPRY7XbFALbjRV9ABjonK3gpPtJyyFDyWu8n3SwFxsgCqrF6uBPvK9aubvs68y.JPG)
For the next process, I am going to use these soft pastels, makeup brushes with thin hair, and the one with more volume. -----
![33.JPG](https://files.peakd.com/file/peakd-hive/leannwithdoublen/Eoc92zaSFqKCuzWgB4KMaLpt5BWTp3QhEMo1tjvdMFdXz7qhK6yEmiJQ5eGk9et7y8q.JPG)
![34.JPG](https://files.peakd.com/file/peakd-hive/leannwithdoublen/EpCBMGyD7hRTY1Uv7ipAe3Z3bTfzaMJusLbLg3V8nYhFCHzTrkQHJ5v6pMML27A1Pqh.JPG)
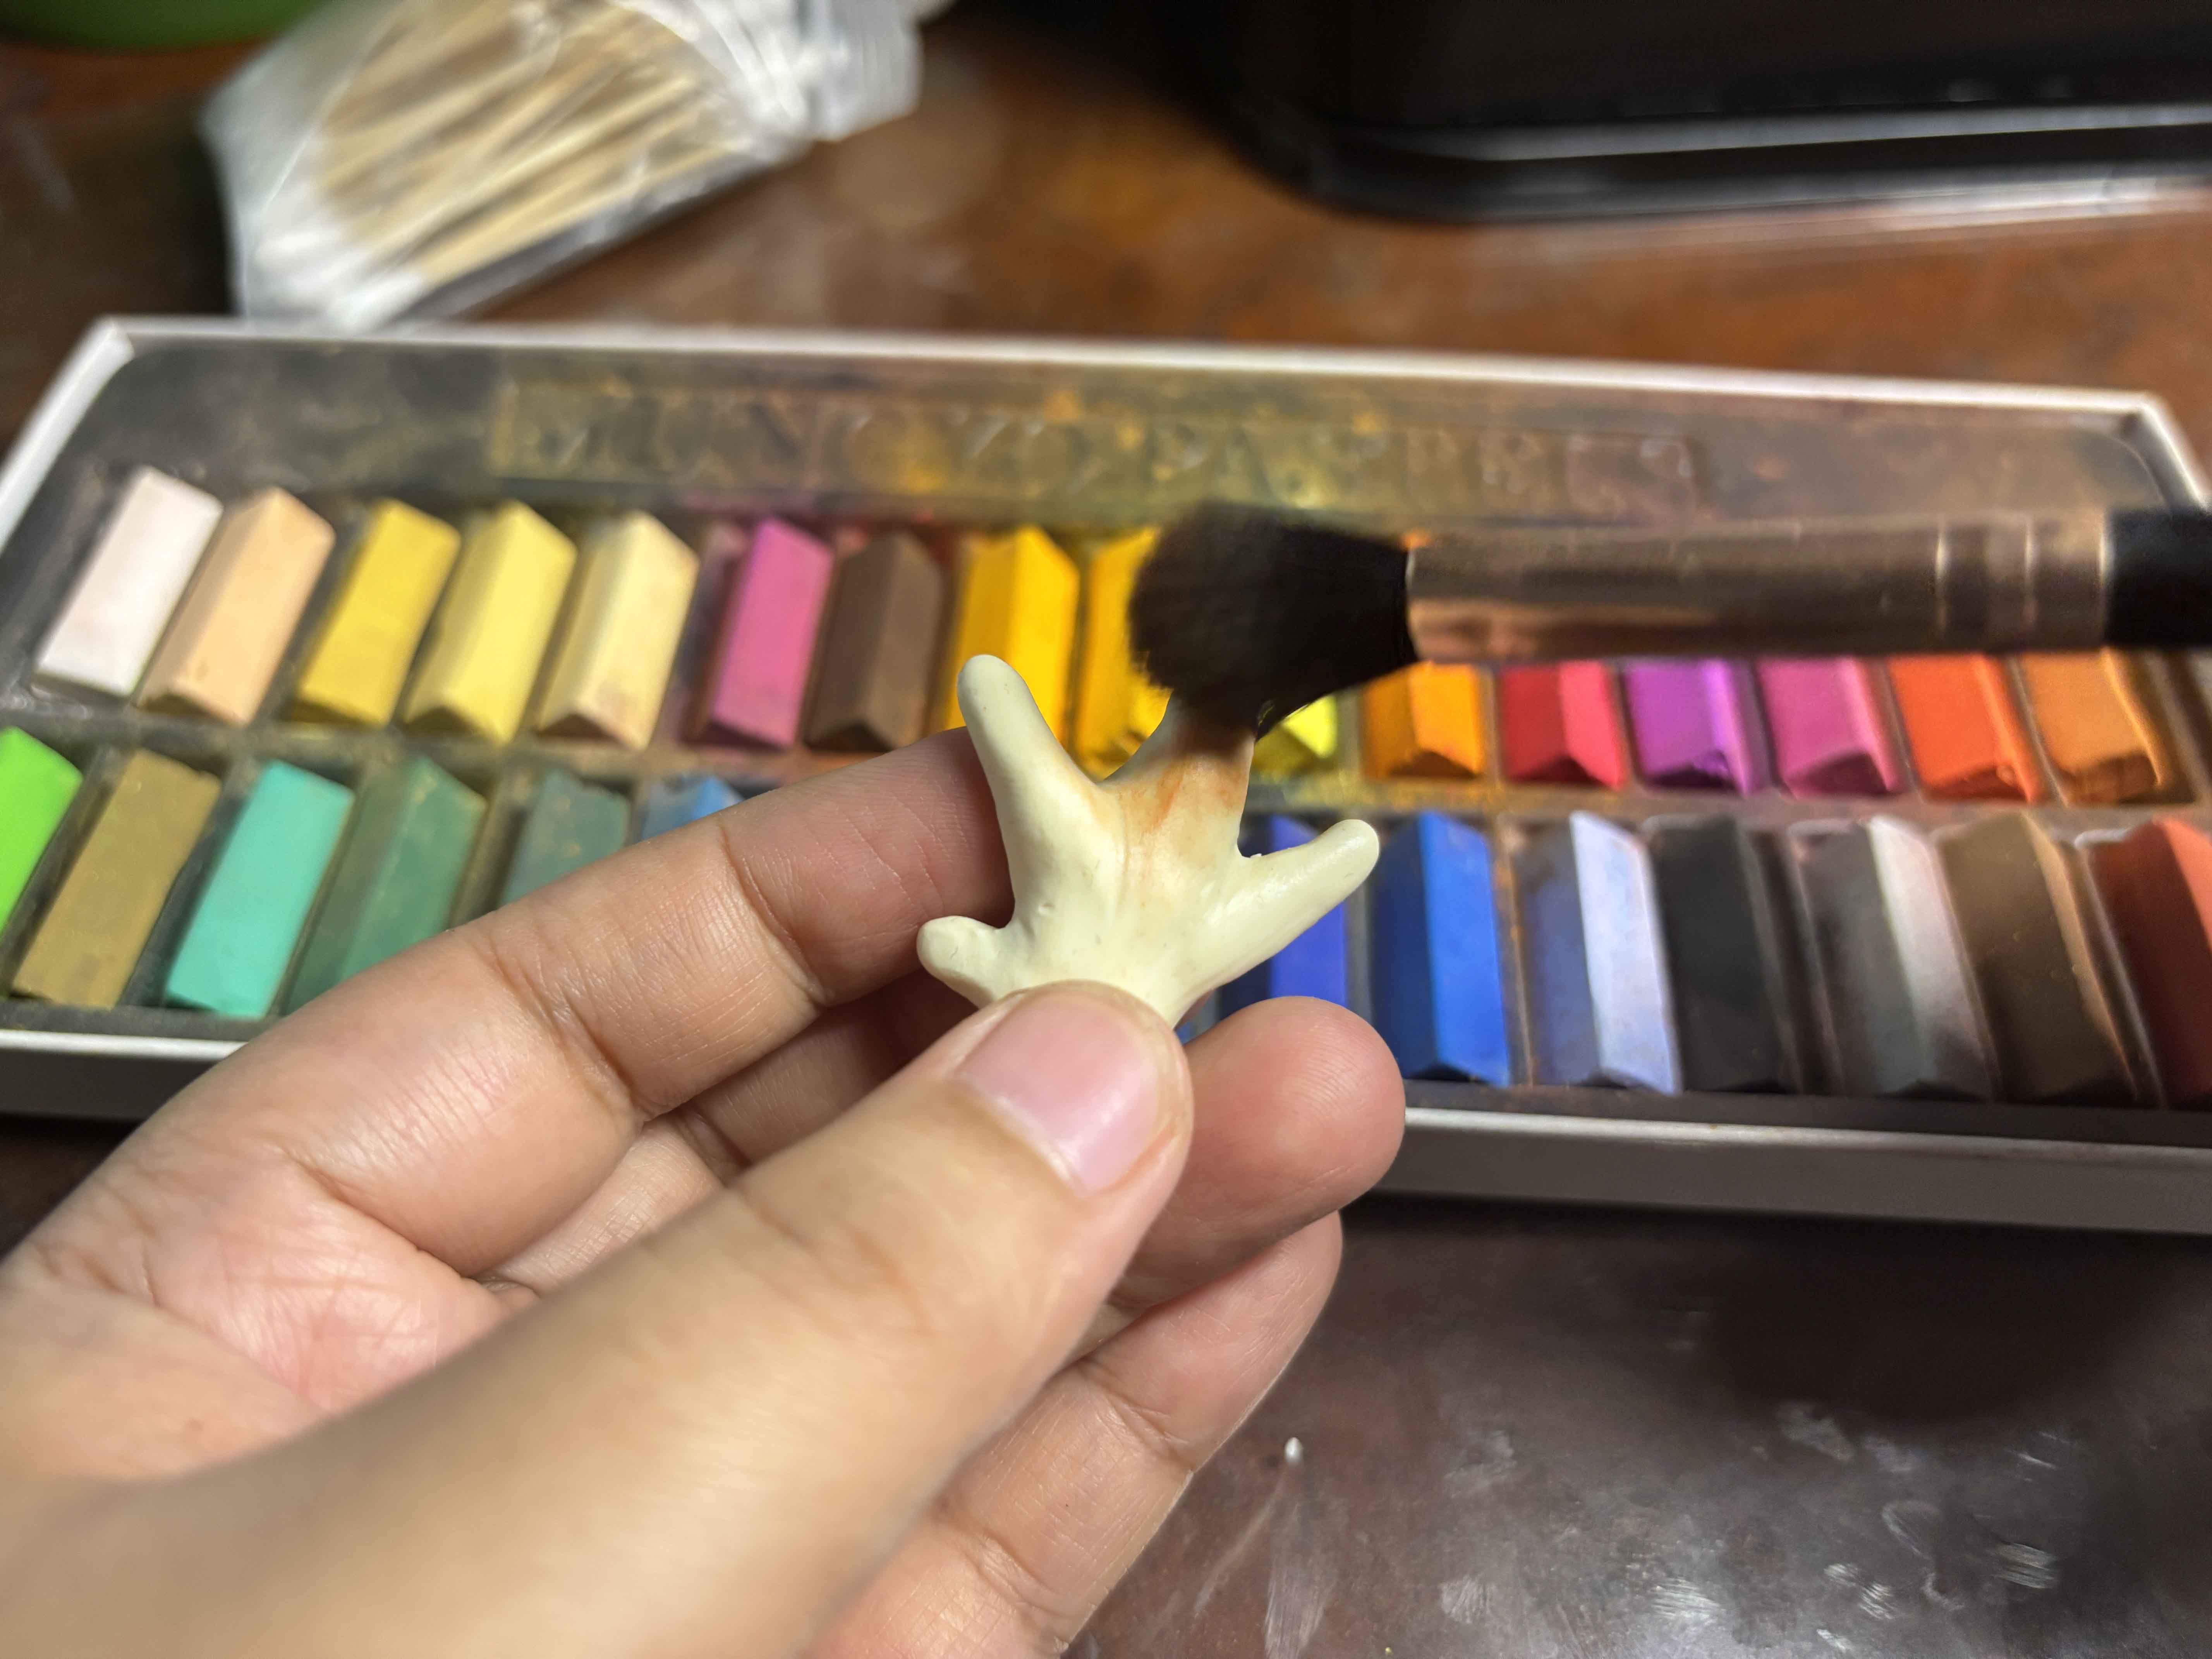
Then I start adding shades of color to the chicken feet. -----
![35.JPG](https://files.peakd.com/file/peakd-hive/leannwithdoublen/Eoc8zuxMSPpik8giRE8QCGj6JirPtyBhoXSuZVAXF4GoBbyLxeytNf8Q76Nj3Ak155S.JPG)
![36.JPG](https://files.peakd.com/file/peakd-hive/leannwithdoublen/EoiWiC1K69SBYHogiZx9T79Jf2BevYABNBHntvHGdT7SWirnYsFm6tm7Yva89ZLzUkF.JPG)
I started with light colors first. -----
![37.JPG](https://files.peakd.com/file/peakd-hive/leannwithdoublen/EoK7M8sgyQwQaGwYvtk6TXCmNLu8pxcba9tULLtGjvYXUtbBBTcZqtUN4Juruhw8AXh.JPG)
![38.JPG](https://files.peakd.com/file/peakd-hive/leannwithdoublen/EoK7JRLdmgEZ6zeAe6Q8MYVm4p8Bi2RmgJnPLip4dPn46Wcj87xaBjFwT17k17AsXVA.JPG)
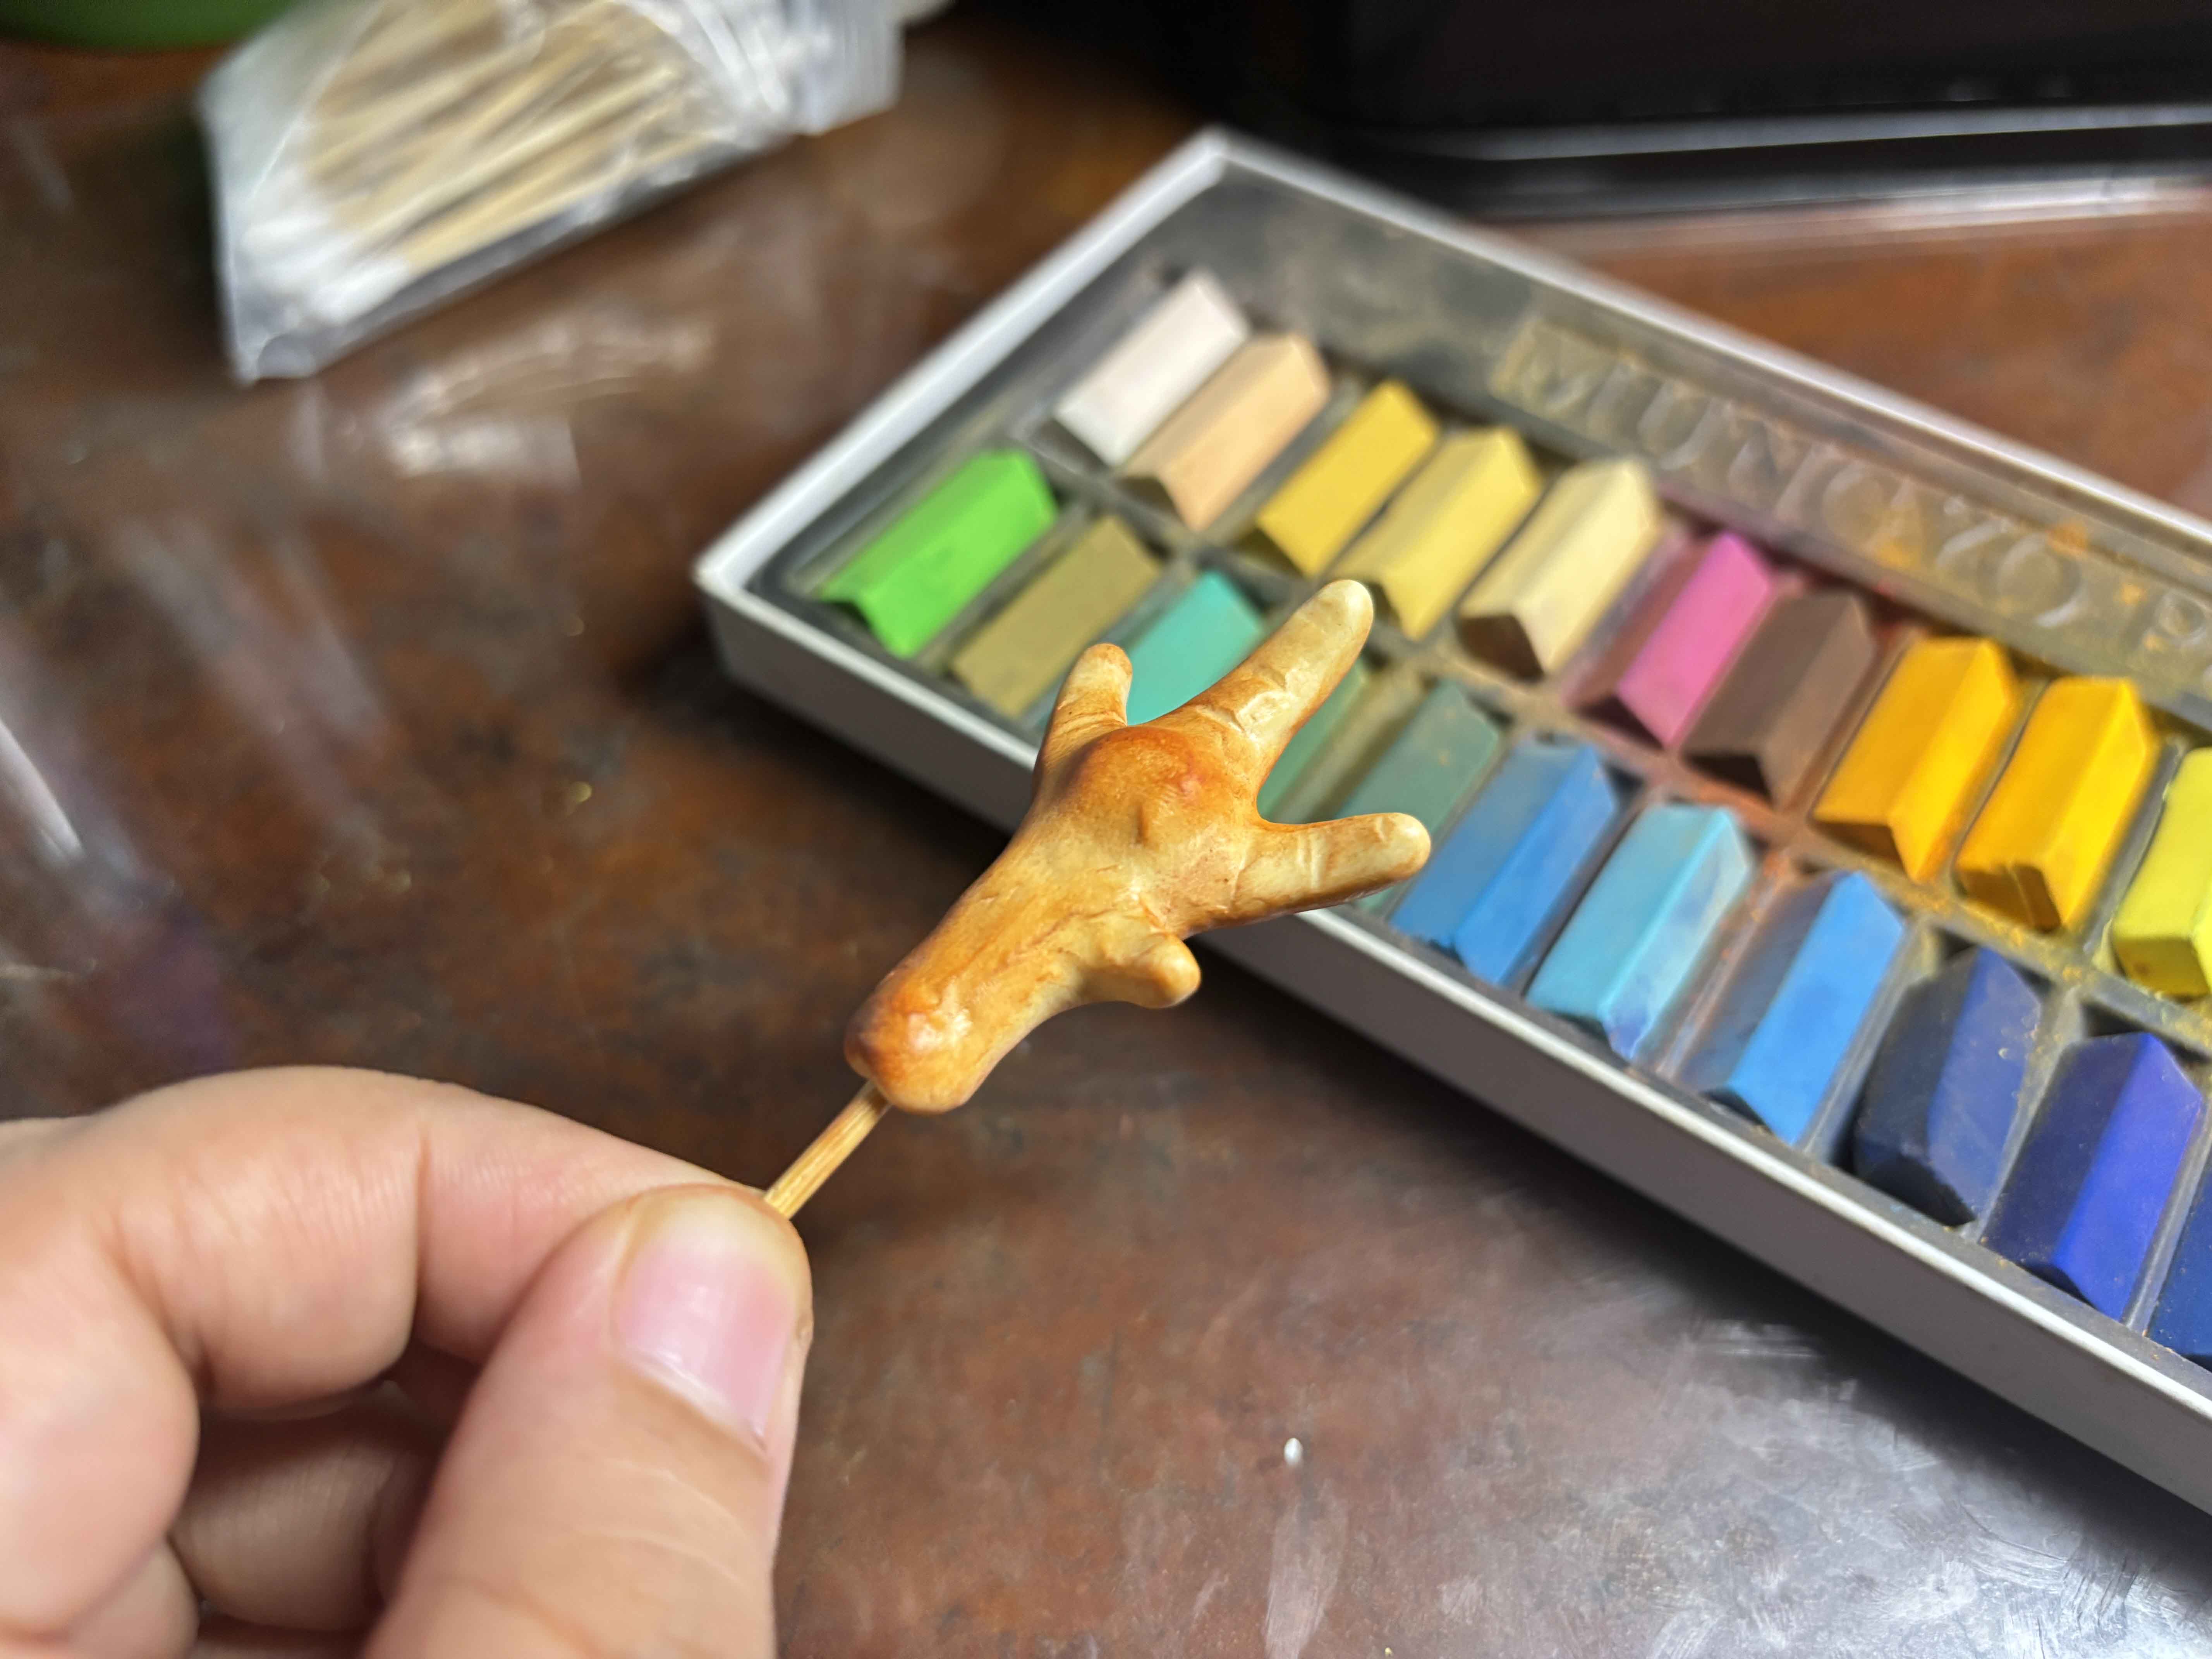
And then for the final shades, I added the darkest one, and this is how it looks from the front and the back. -----
![39.JPG](https://files.peakd.com/file/peakd-hive/leannwithdoublen/Ep3gCv43aYh4EehWo8Lqz9atvGR3YcBL83EaGy6aqAssrfVZGkNfFfXRUKX6VJhSQow.JPG)
![40.JPG](https://files.peakd.com/file/peakd-hive/leannwithdoublen/EpA4RHhFNcAm5akmPaUsypw5wXU49oRBF6Gqk4VAXP6oDvNzAfdHqgYigMNT4KFL5DM.JPG)
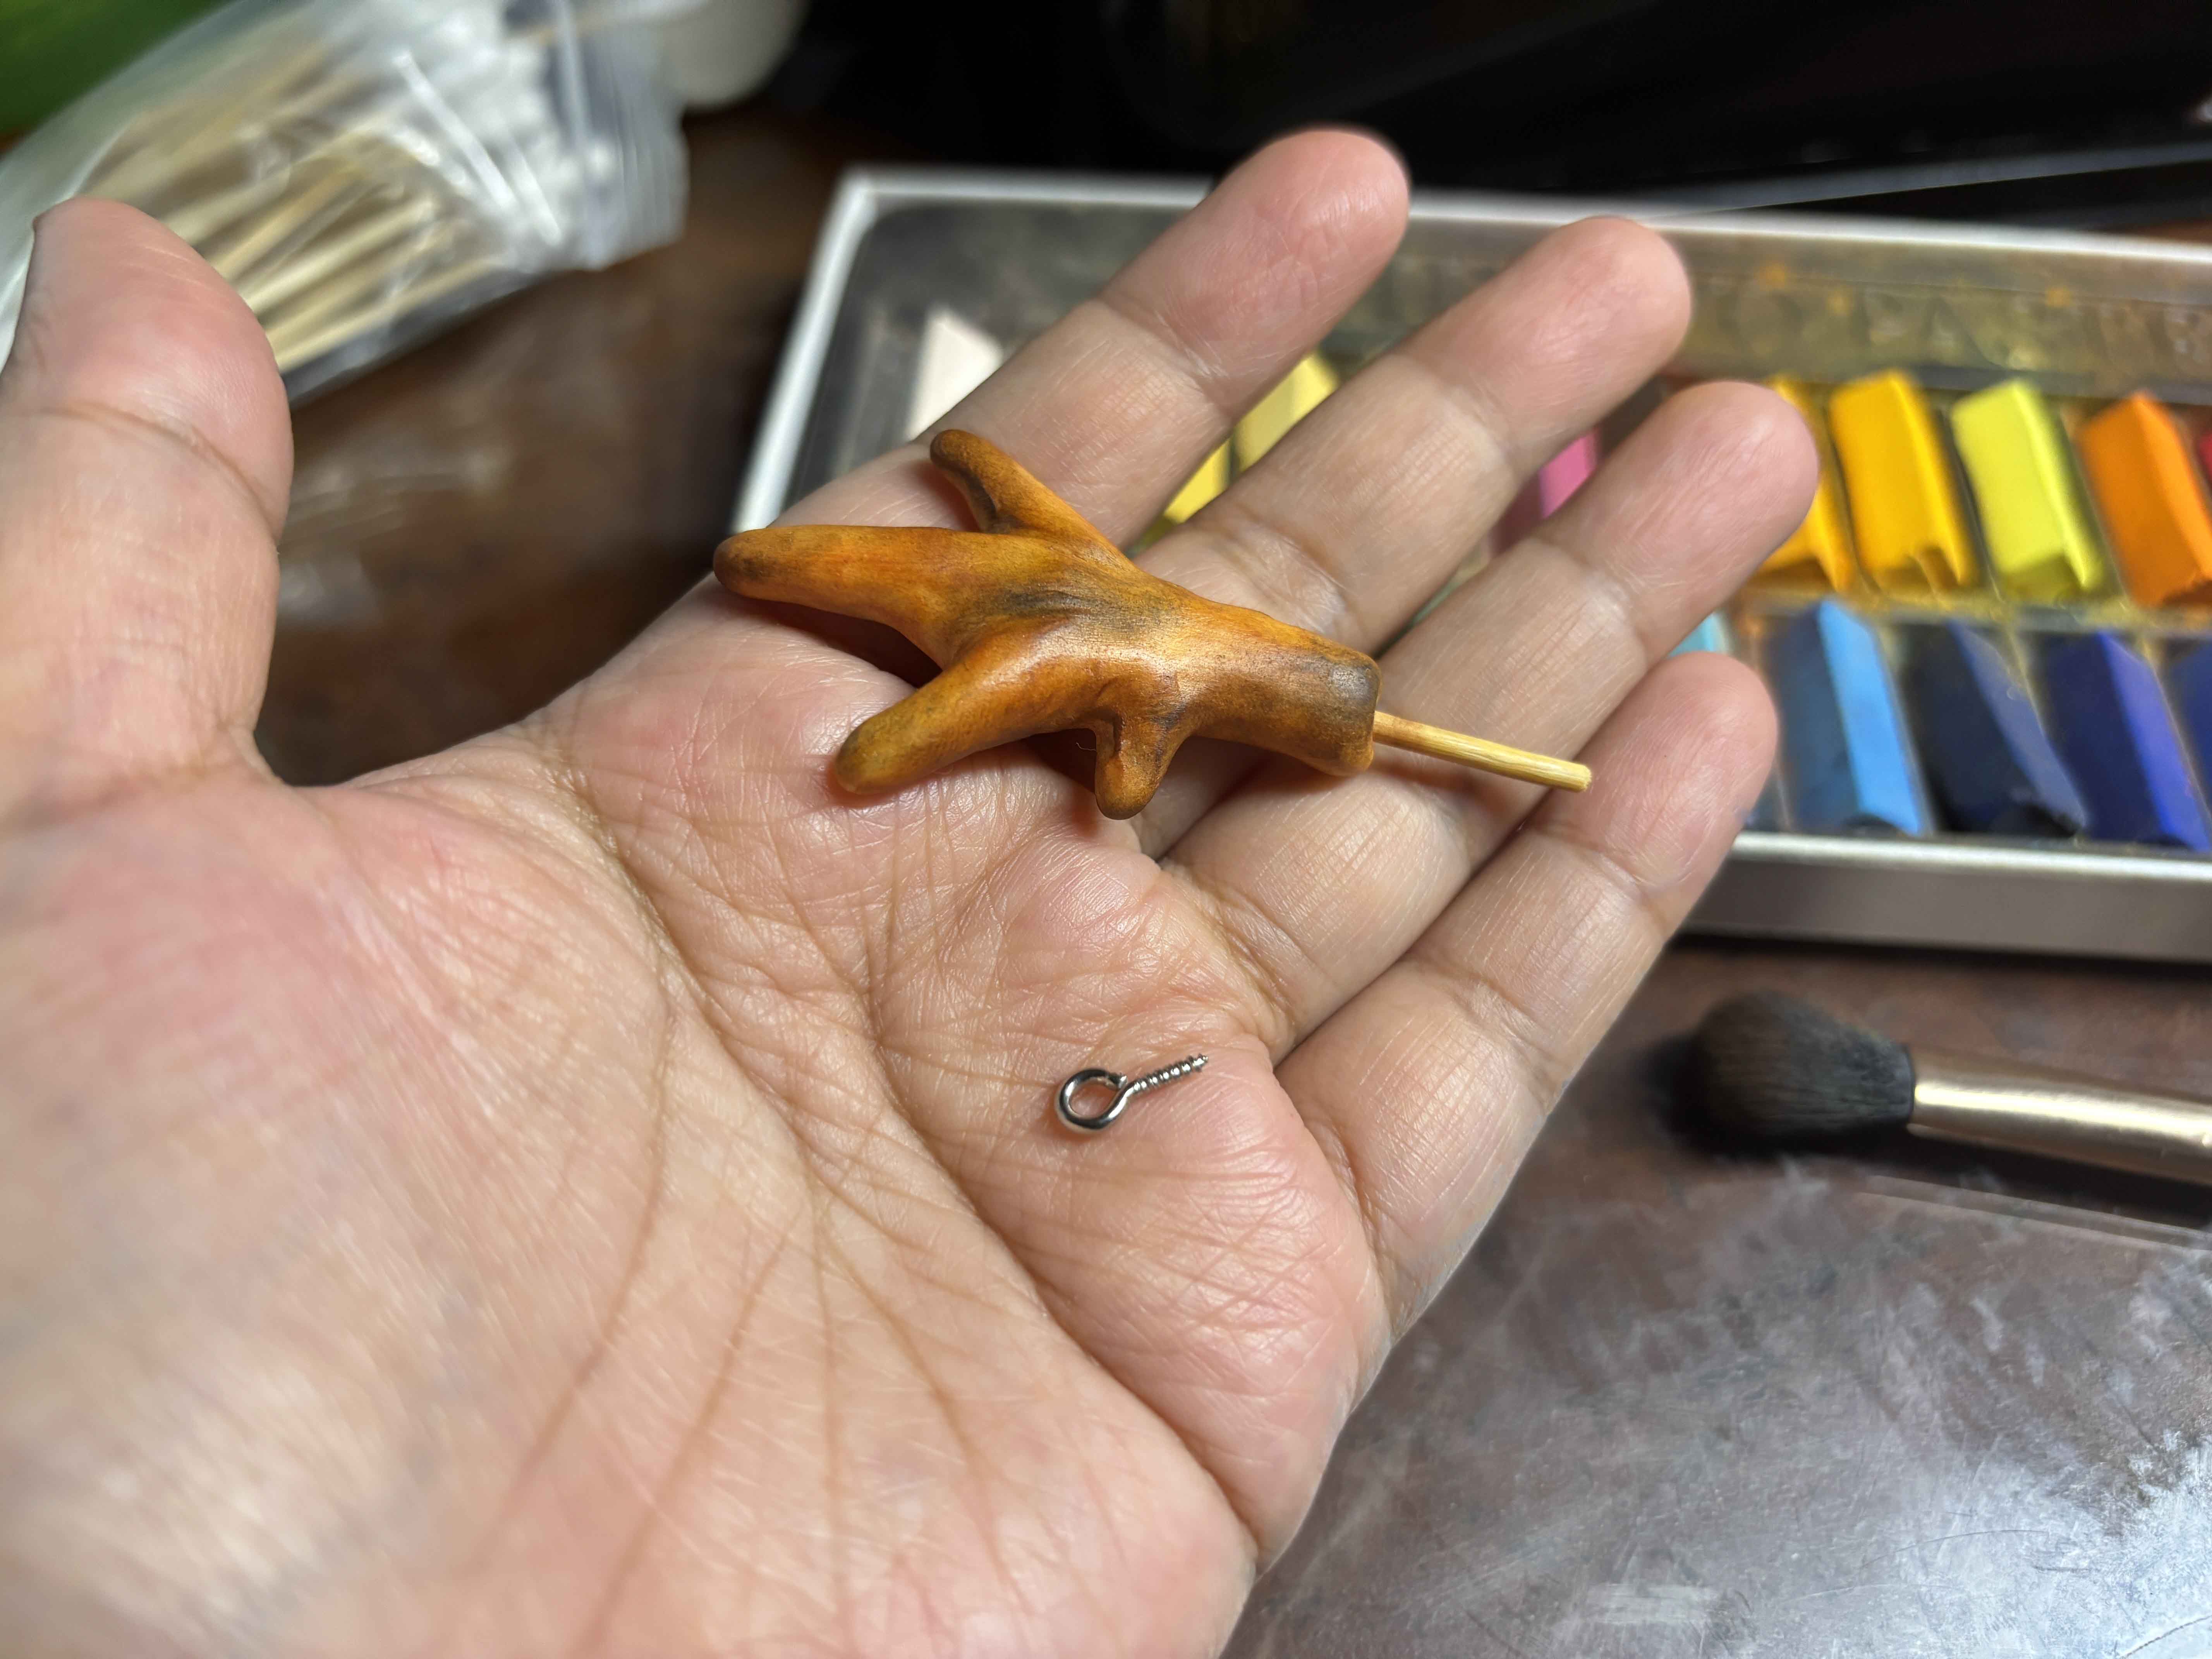
After that, I am going to insert the eyepin into the clay. -----
Baking The Clay:
![41.JPG](https://files.peakd.com/file/peakd-hive/leannwithdoublen/EoiVAtH2ZyRJBDjSwnG5T1zDFprh1P1jkP3FjgsEZgESh3E4JGN3QhR5AETfZsiWsTY.JPG)
![42.JPG](https://files.peakd.com/file/peakd-hive/leannwithdoublen/EonkaD3A4DZYeMwfAj8epLbJvFctPXt4qGboQPUJqWr79bHbHKvPqFc2Gy9zMvHSqTD.JPG)
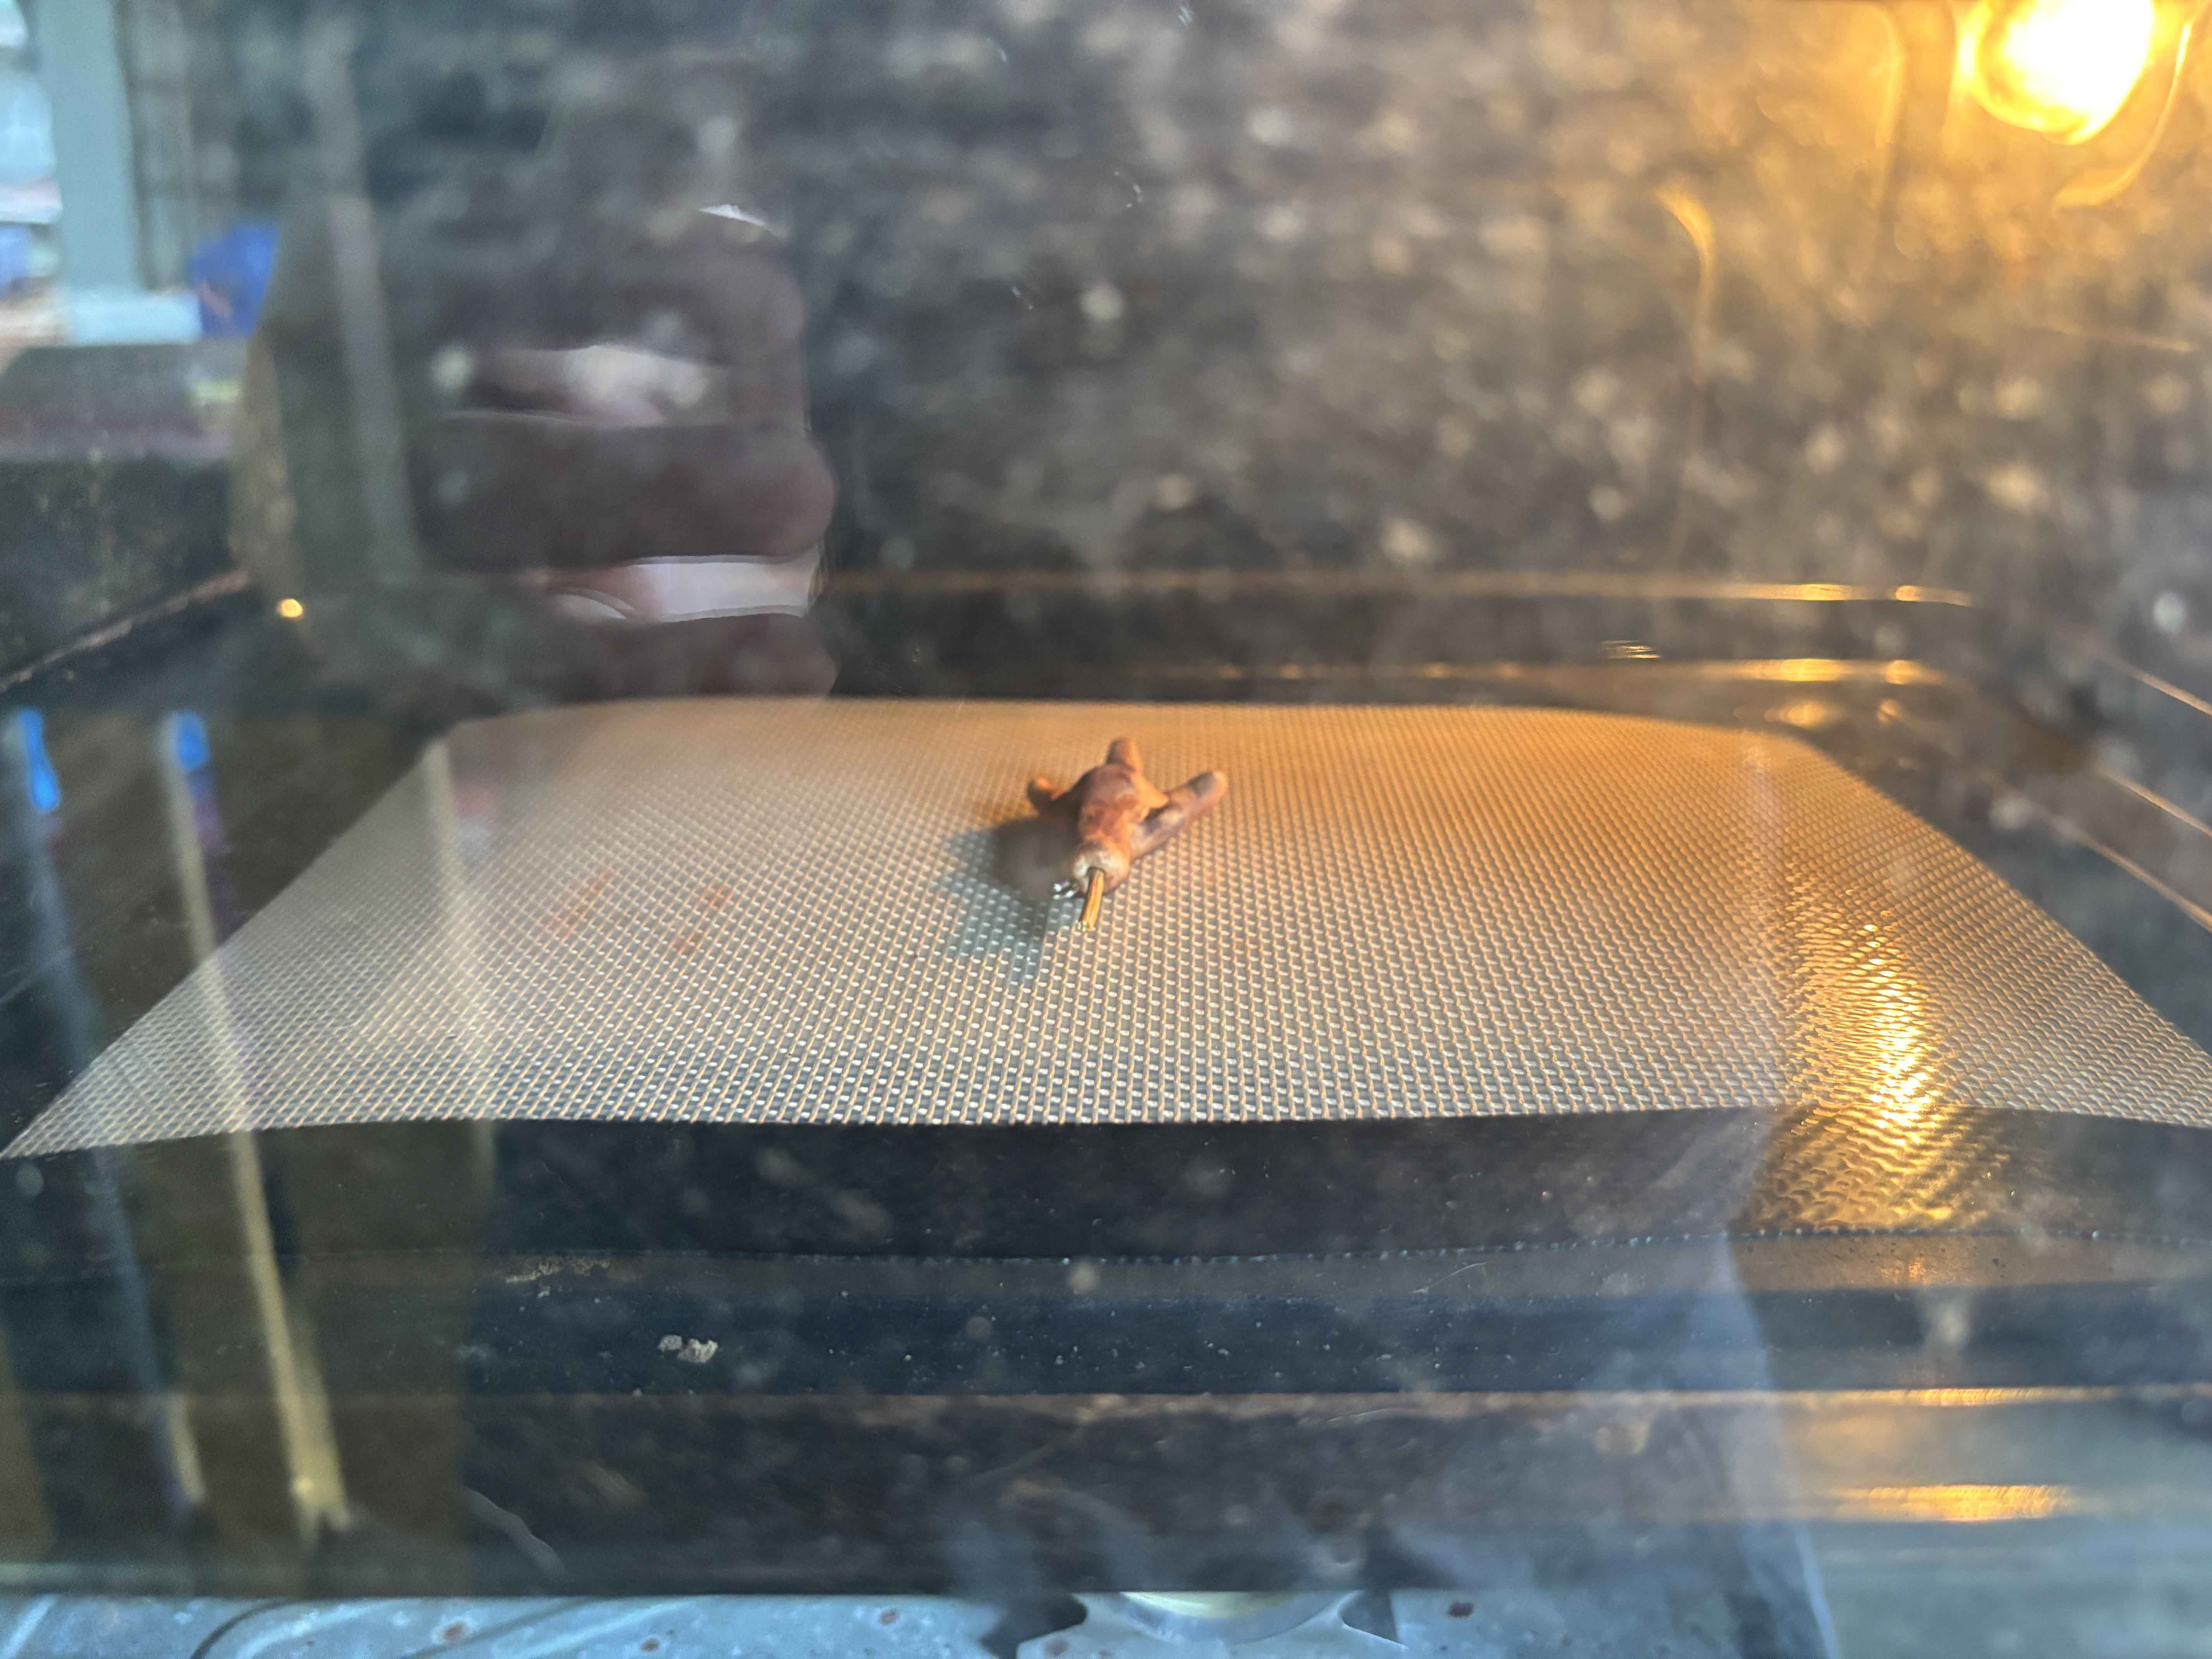
And then I am going to bake the clay based on the instructions said at the packaging. After the clay is baked, let it cool down, and then continue to the next process. -----
Adding Sauce and Chilis:
![43.JPG](https://files.peakd.com/file/peakd-hive/leannwithdoublen/EoeFKe8maEwqqBT2mZM2fXWZcKD6QCraRUwqN47HNCrHbxgoeP83qJ8m9JHNSfFRofn.JPG)
![44.JPG](https://files.peakd.com/file/peakd-hive/leannwithdoublen/EoCgdmPUc3J4zJnx19Xbh5onj56Y9jAvpUJoY9GgsKFe2TPuBJj4Jvzp2pZzAQaVq9J.JPG)
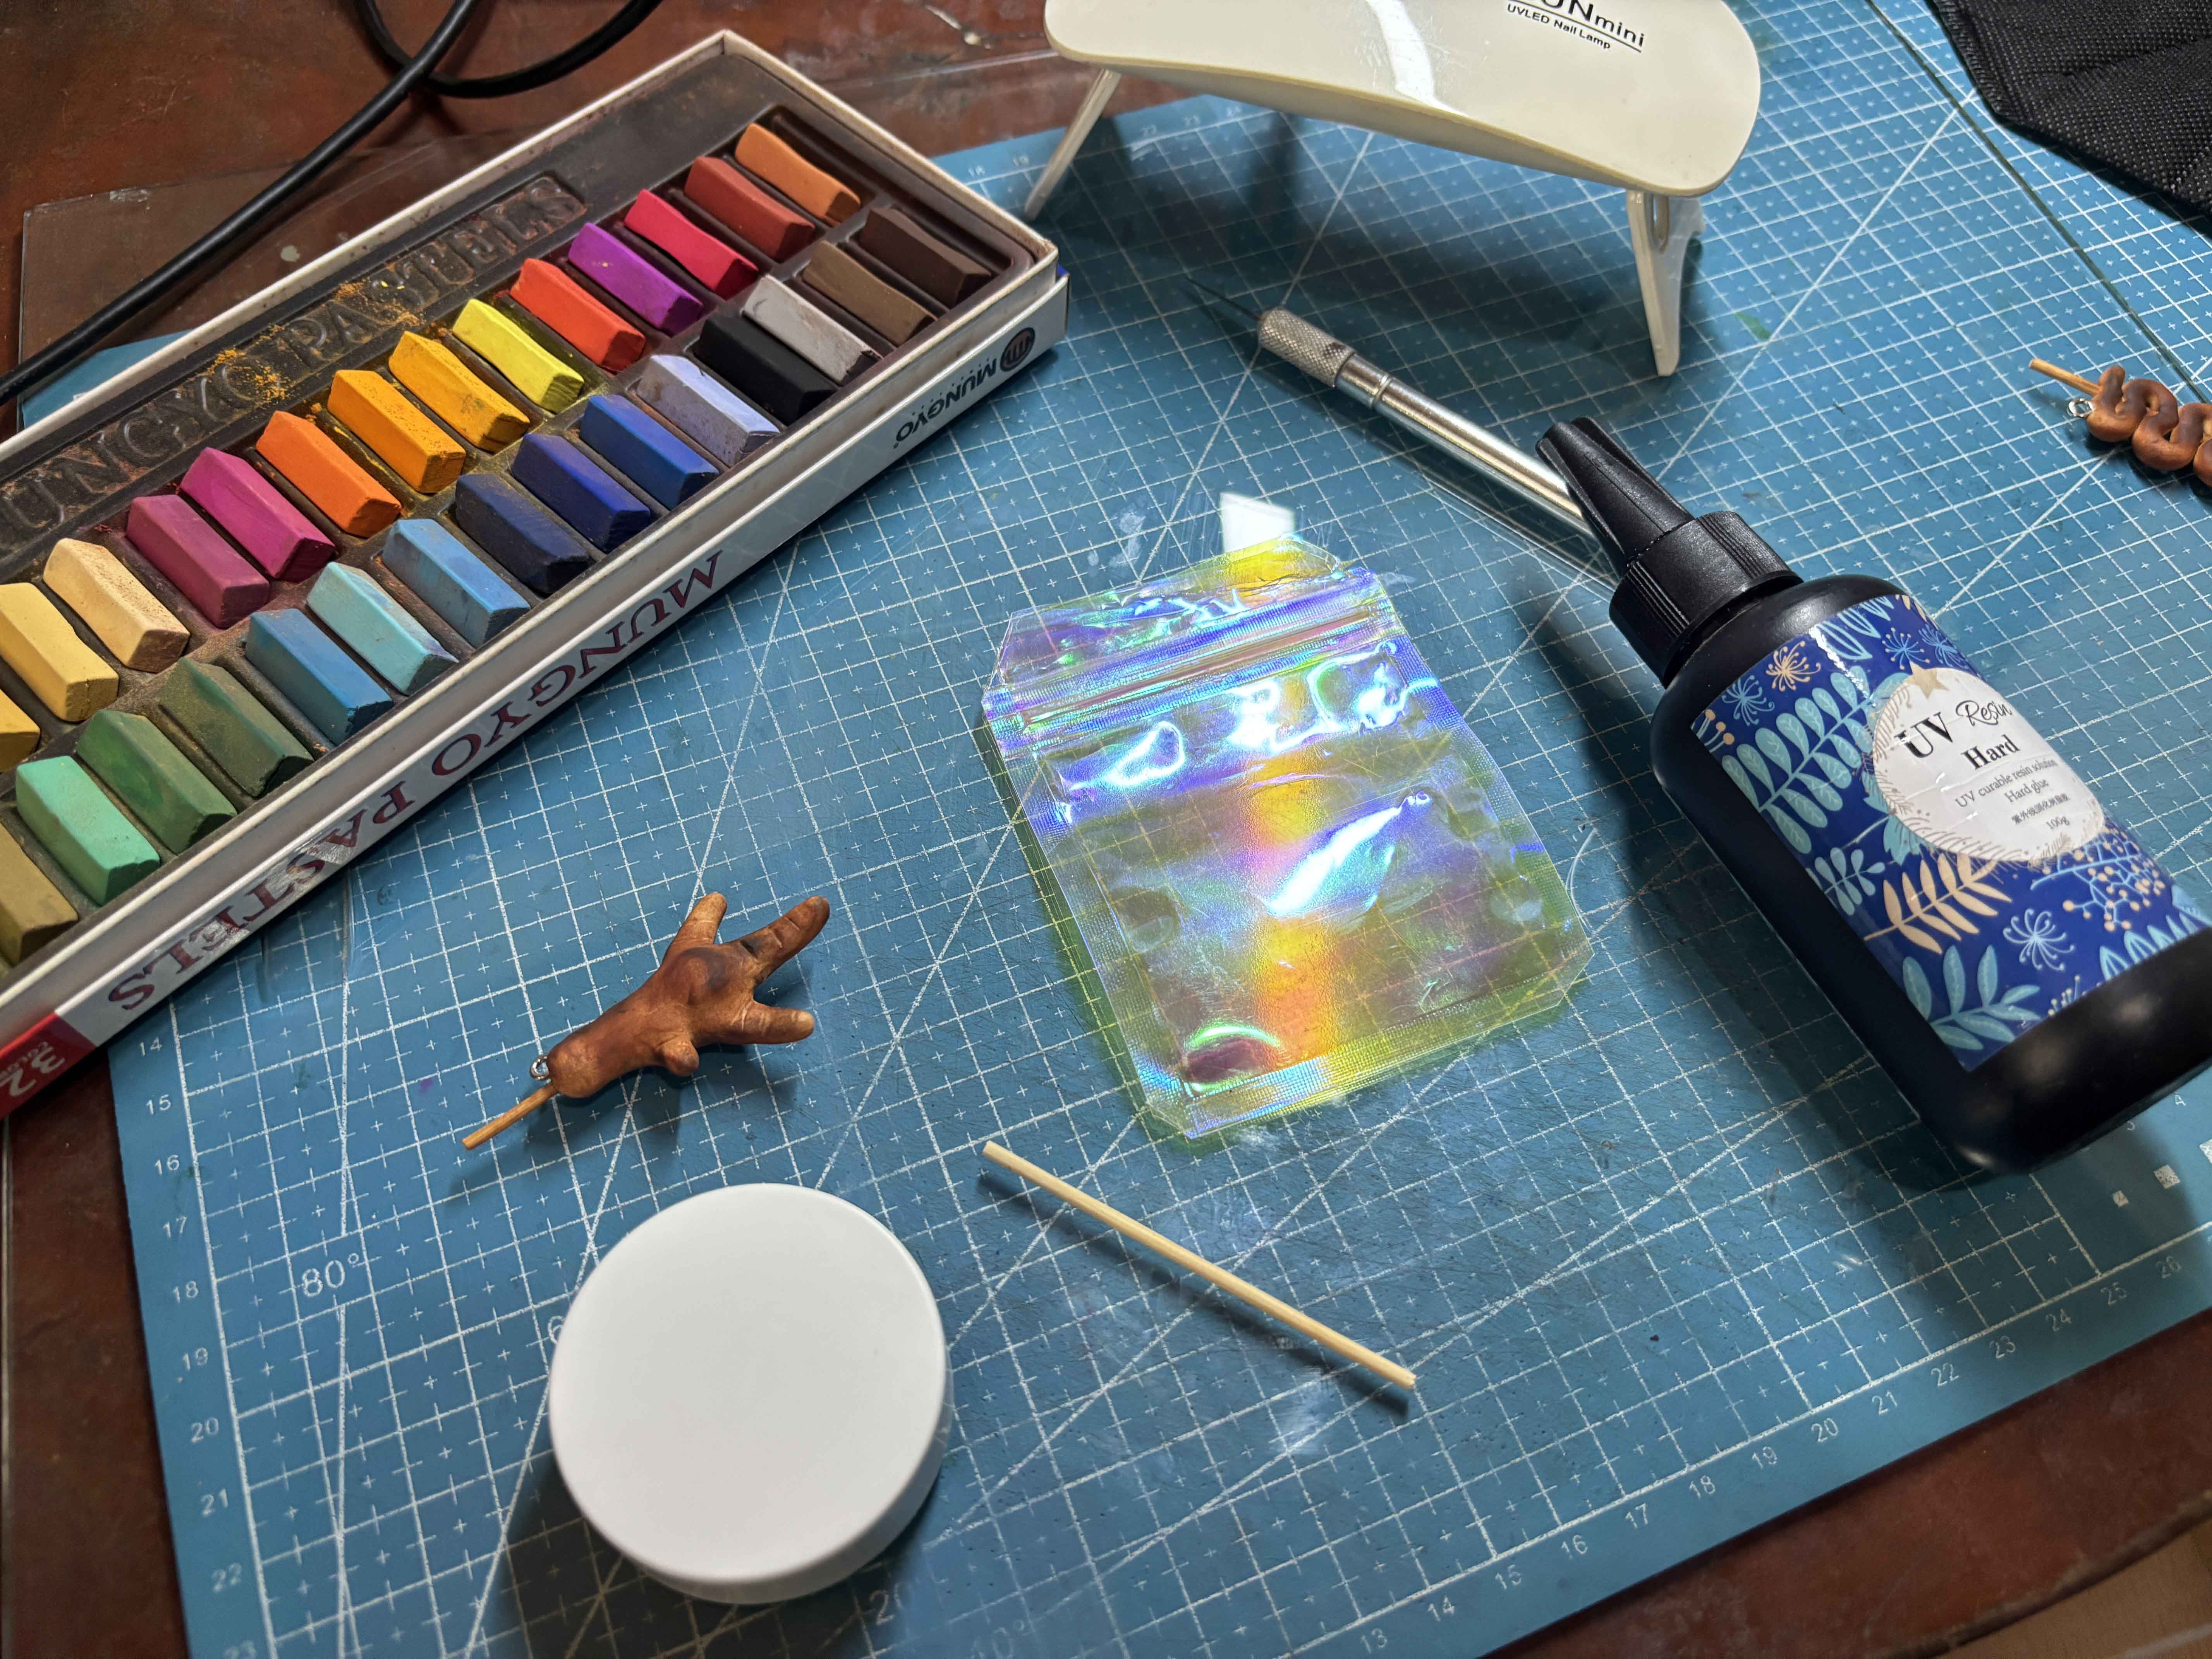
These are the materials I am going to use for this process. -----
![45.JPG](https://files.peakd.com/file/peakd-hive/leannwithdoublen/Eonk2CoWRyD62ChVTVDwYP3vtg6Akpg7aZgxSjhNB2mzUMC9cUXJvGAxrEZ5PnaPgRj.JPG)
![46.JPG](https://files.peakd.com/file/peakd-hive/leannwithdoublen/EoEofLvFGDNsWjS2KrKb3X4A8mw4bECFRqHUJQ2kRbTXAou5Q7XSeqNChfKViiDWX4d.JPG)
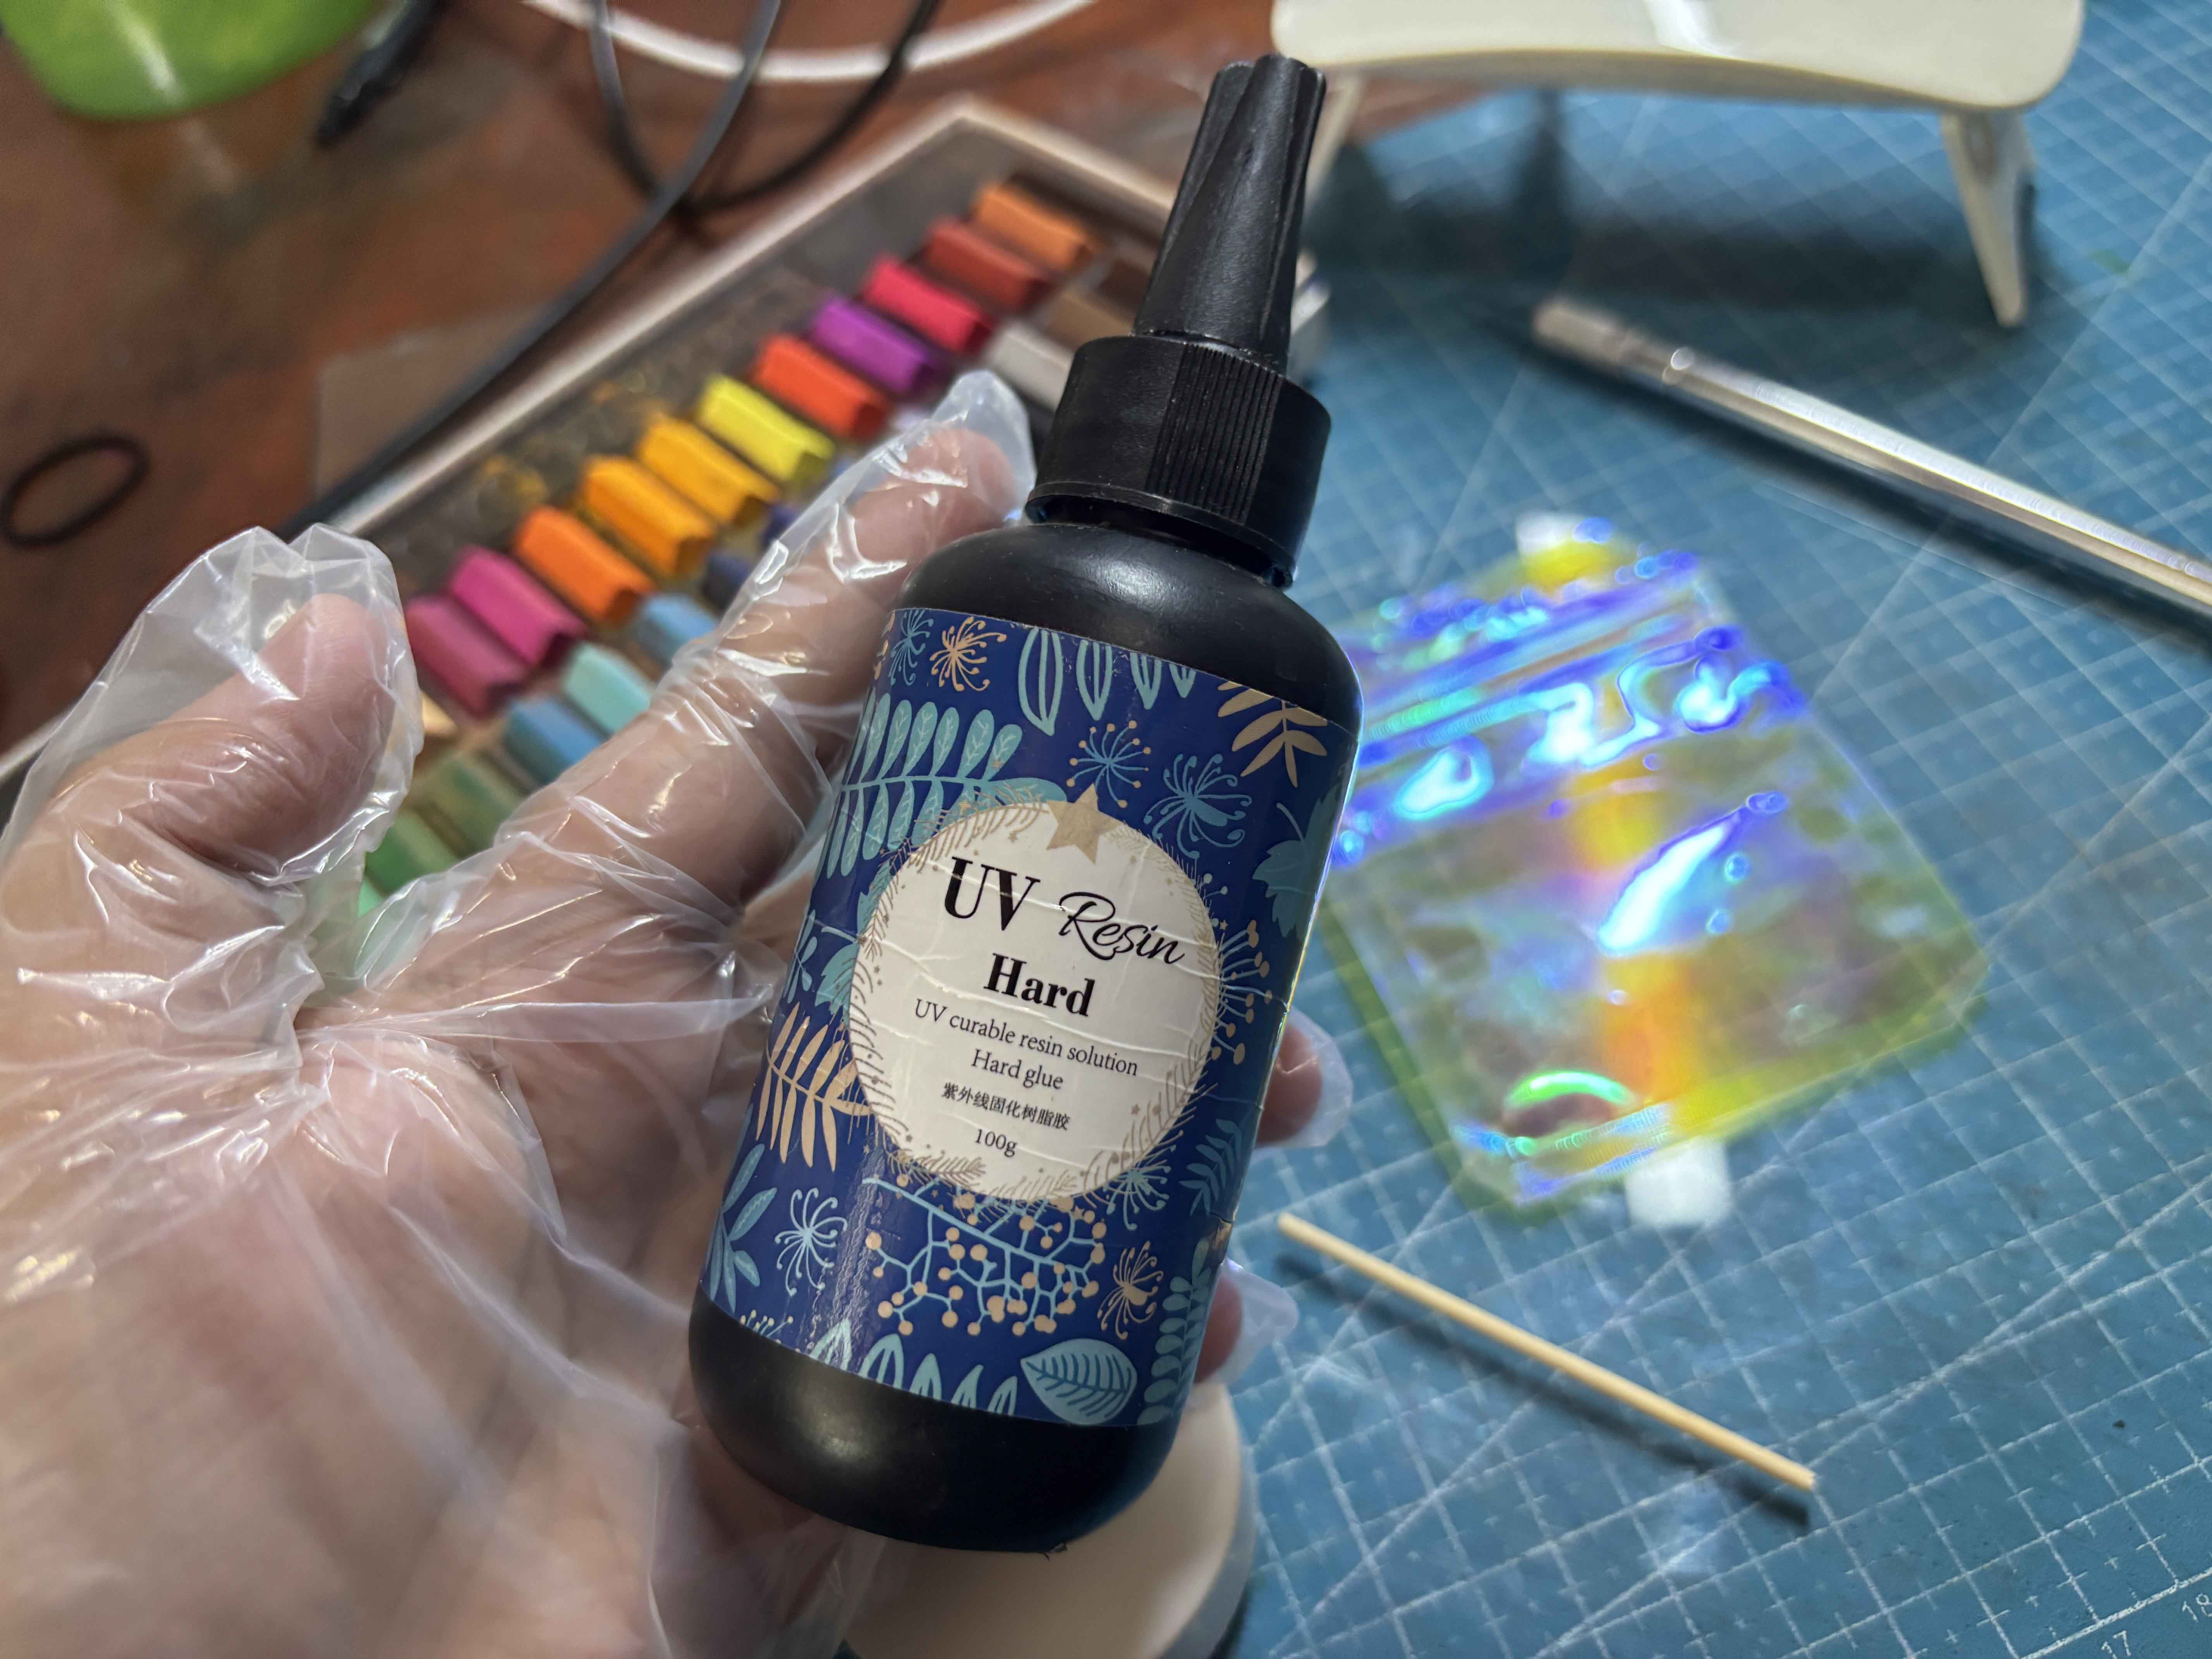
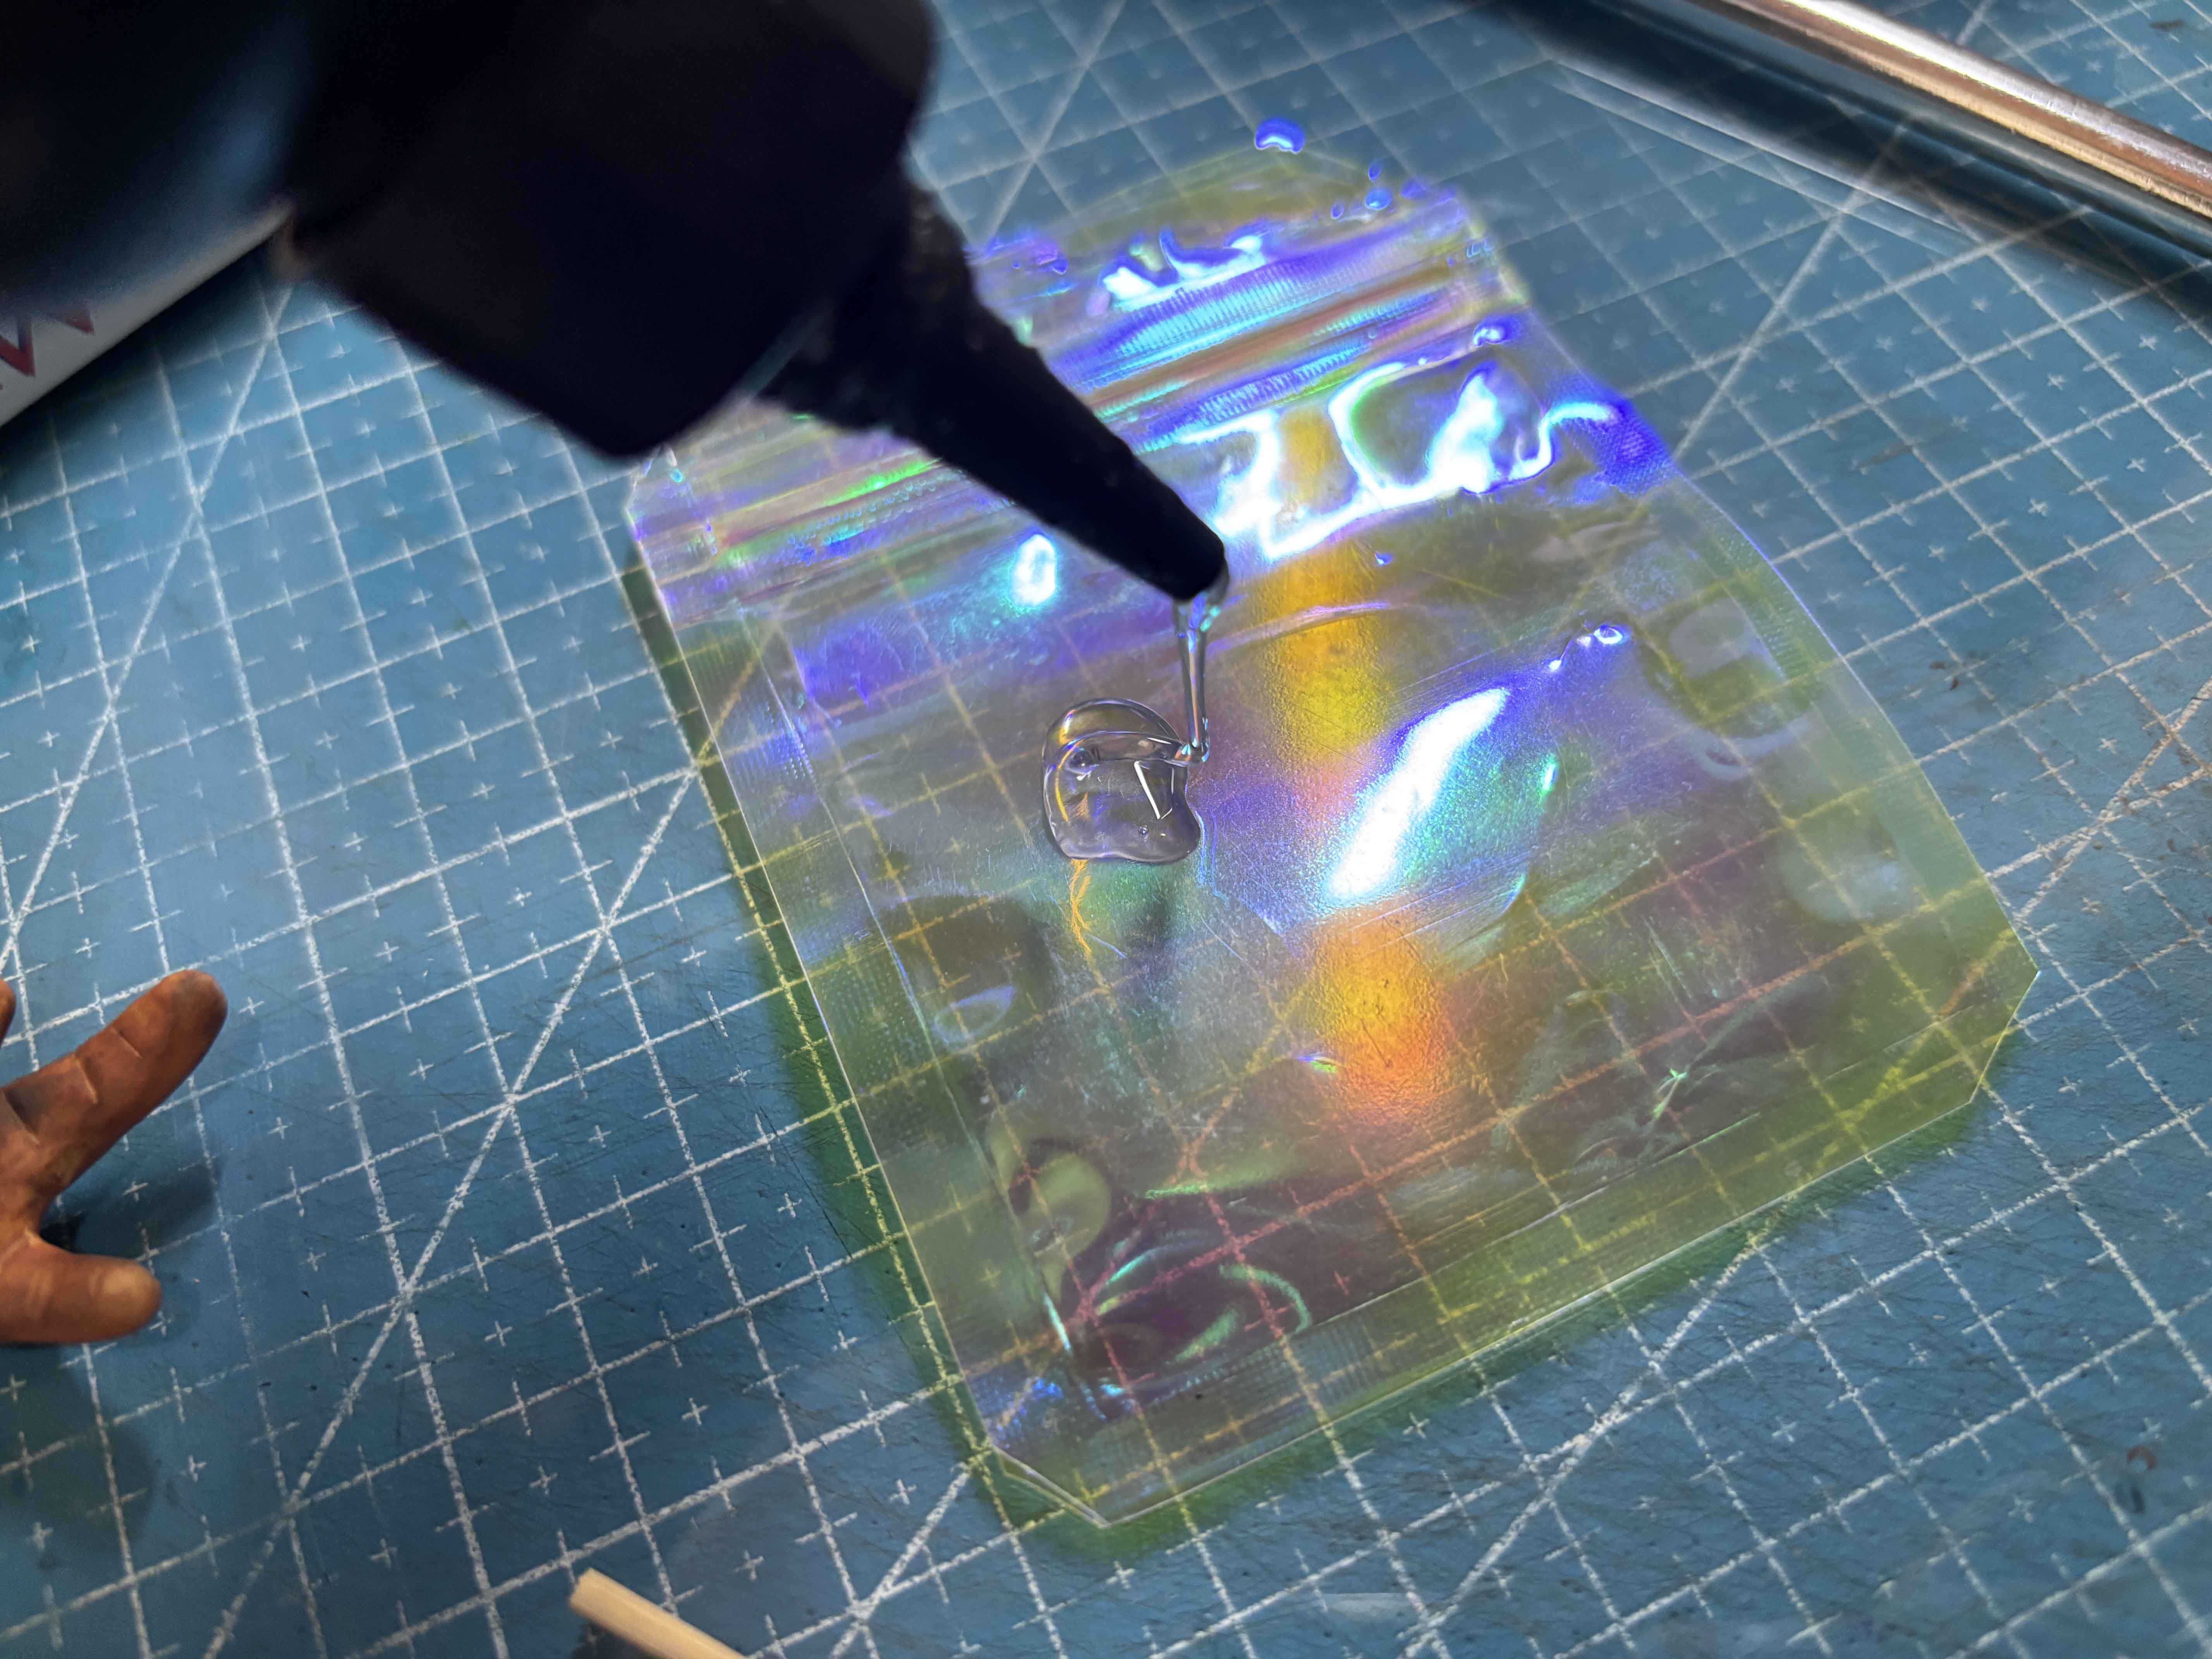
I squeeze out enough UV Resin into a plastic. -----
![47.JPG](https://files.peakd.com/file/peakd-hive/leannwithdoublen/EokcAobC4CmrcArH1VG9uFD22zyRTkeTcq94dJjdi1RpJZuyGxTwF7v8NwwwqqHVMAg.JPG)
![48.JPG](https://files.peakd.com/file/peakd-hive/leannwithdoublen/EoCgedVc4RQaEfJHPmQGPZxY38BBXVgUNqTygohCs1TybBCv9NWcUtfAURwd9wGUvzW.JPG)
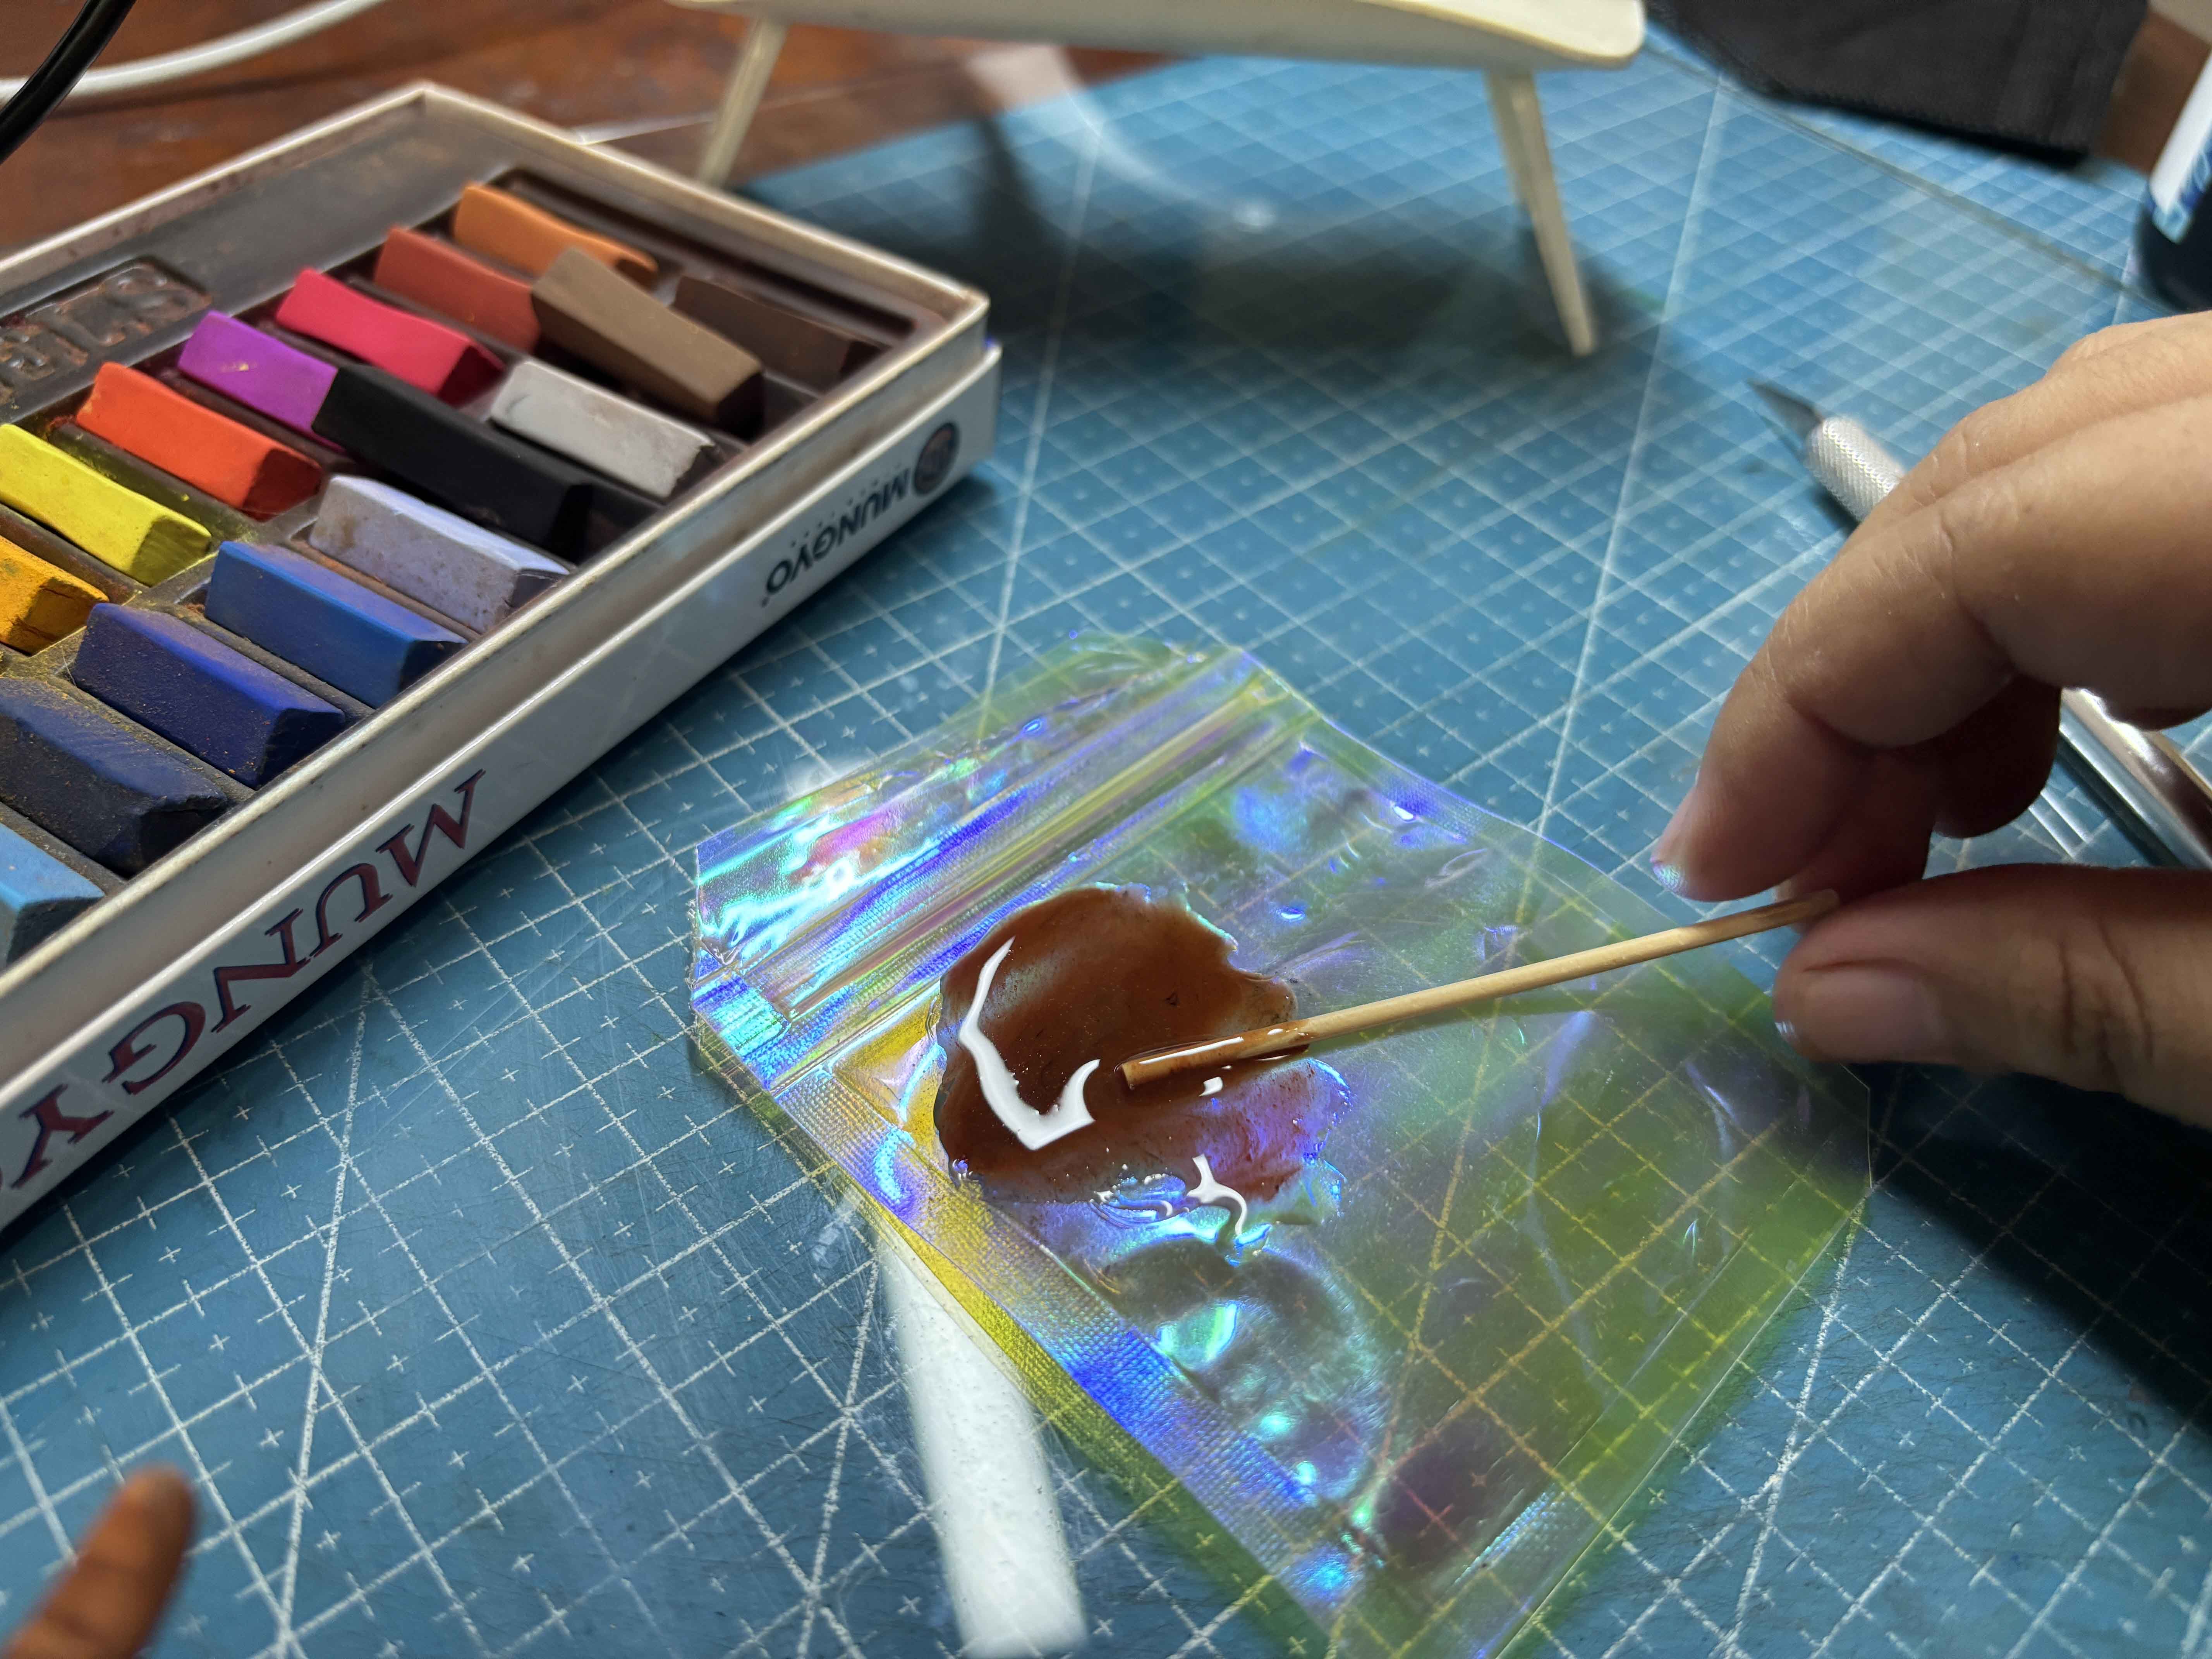
And then scrape out some soft pastel to it, start with a small if it is still not enough, add a little by little. Then mix it until well combined. -----
![49.JPG](https://files.peakd.com/file/peakd-hive/leannwithdoublen/EonjV4Lt9q4mUn6sEMkFpeBvqXLRyk6mVXbGzyJr3fso81isvrViFjEHi1ubhFHWKt4.JPG)
![50.JPG](https://files.peakd.com/file/peakd-hive/leannwithdoublen/EoiUgFeuGgcF4fyhe6VqR8DJA6oeubkSEqSuUVwyijAbfzKf1THJFR2MD14HPgdpMma.JPG)
Then I start adding the mixture of resin to the clay. -----
![51.JPG](https://files.peakd.com/file/peakd-hive/leannwithdoublen/EowDjexuzUyBWUCeDYzF16MC3RidFG68aSBifeiJvExwLmTaX3ACKSkWYdCwkE4Pw5z.JPG)
![52.JPG](https://files.peakd.com/file/peakd-hive/leannwithdoublen/EoCgjTQUfm7MrfXYSPmurhJrFy2m1wjVExAHD5gjnyi1Dmz3x6MwjmX75goRNbXDMcw.JPG)
After that, I cure it using a UV Lamp. After that, I am going to add the chili to it. -----
![53.JPG](https://files.peakd.com/file/peakd-hive/leannwithdoublen/Eonj8ZReVX8cRsfpcYVRteRGpr96YdEDVjSpwddwJi57XyXUELqNcp4S2reqcPbc5pP.JPG)
![54.JPG](https://files.peakd.com/file/peakd-hive/leannwithdoublen/EoryvvyVCp1TEdCRFzW4fLetdC58hYnN9RkJjaUvaNvB1Zkzd2PKzcB4qeg7dKLcHze.JPG)
After that, I added the baked chilis clay into the mixture of the UV Resin, and then added those to the chicken feet clay, and then I ran again to the UV Lamp until it got completely cured. -----
Adding The Keychain:
![55.JPG](https://files.peakd.com/file/peakd-hive/leannwithdoublen/EoyMfYsa6wvbkzX6QgiQUmVcyRWSN2zh7xBmF7QVLf7pAZjTdTs3hUvT4kAVq9TTp1Q.JPG)
![56.JPG](https://files.peakd.com/file/peakd-hive/leannwithdoublen/Ep1Xs84xv5gCFZnAFyf1fhp8DZ4kXRKcXBJ1ddw39NN8xweAye99d9fwS2M8JjscShz.JPG)
For this part, I am going to use these two pliers and then the keychains. -----
![57.JPG](https://files.peakd.com/file/peakd-hive/leannwithdoublen/Eonjz7gRkt97e5zjUanCUWKtqAzMJwfNVpYBzyQns5YYqsW3QJ1vjmAQsypkUyZmkgv.JPG)
![58.JPG](https://files.peakd.com/file/peakd-hive/leannwithdoublen/EoiUpS6vyQ94Ggmnc2zZfxPPQecYCKe931rQdyxf4i3tS4tdFEUnTQxNh3dGpAZMxGM.JPG)
Hoop the jump ring to the eyepin, and then I close it using the two pliers. -----
![60.JPG](https://files.peakd.com/file/peakd-hive/leannwithdoublen/EoK7D4cTMTyzGVFR2ETBsdM1GTbVsA9KLLuiZgvyePhLugatmddFGL1opn2mCuQcD3S.JPG)
![61.JPG](https://files.peakd.com/file/peakd-hive/leannwithdoublen/EoiXEYWx4uCWBTgWT4Jcc1v9aMP7CUfJ59jJBno4FUdXfduZkvChdcFjbdyvVLLjU7V.JPG)
This is how it looks done. ----
Thank you for visiting, see you on my next blog. :D Please take care of your mental health as well. I hope you are okay today :))
--- untitled.gif
#hivediy #handmade #crafts #diy #howto #neoxian #creativecoin #proofofbrain #palnet
Payout: 12.788 HBD
Votes: 214
More interactions (upvote, reblog, reply) coming soon.