***
***
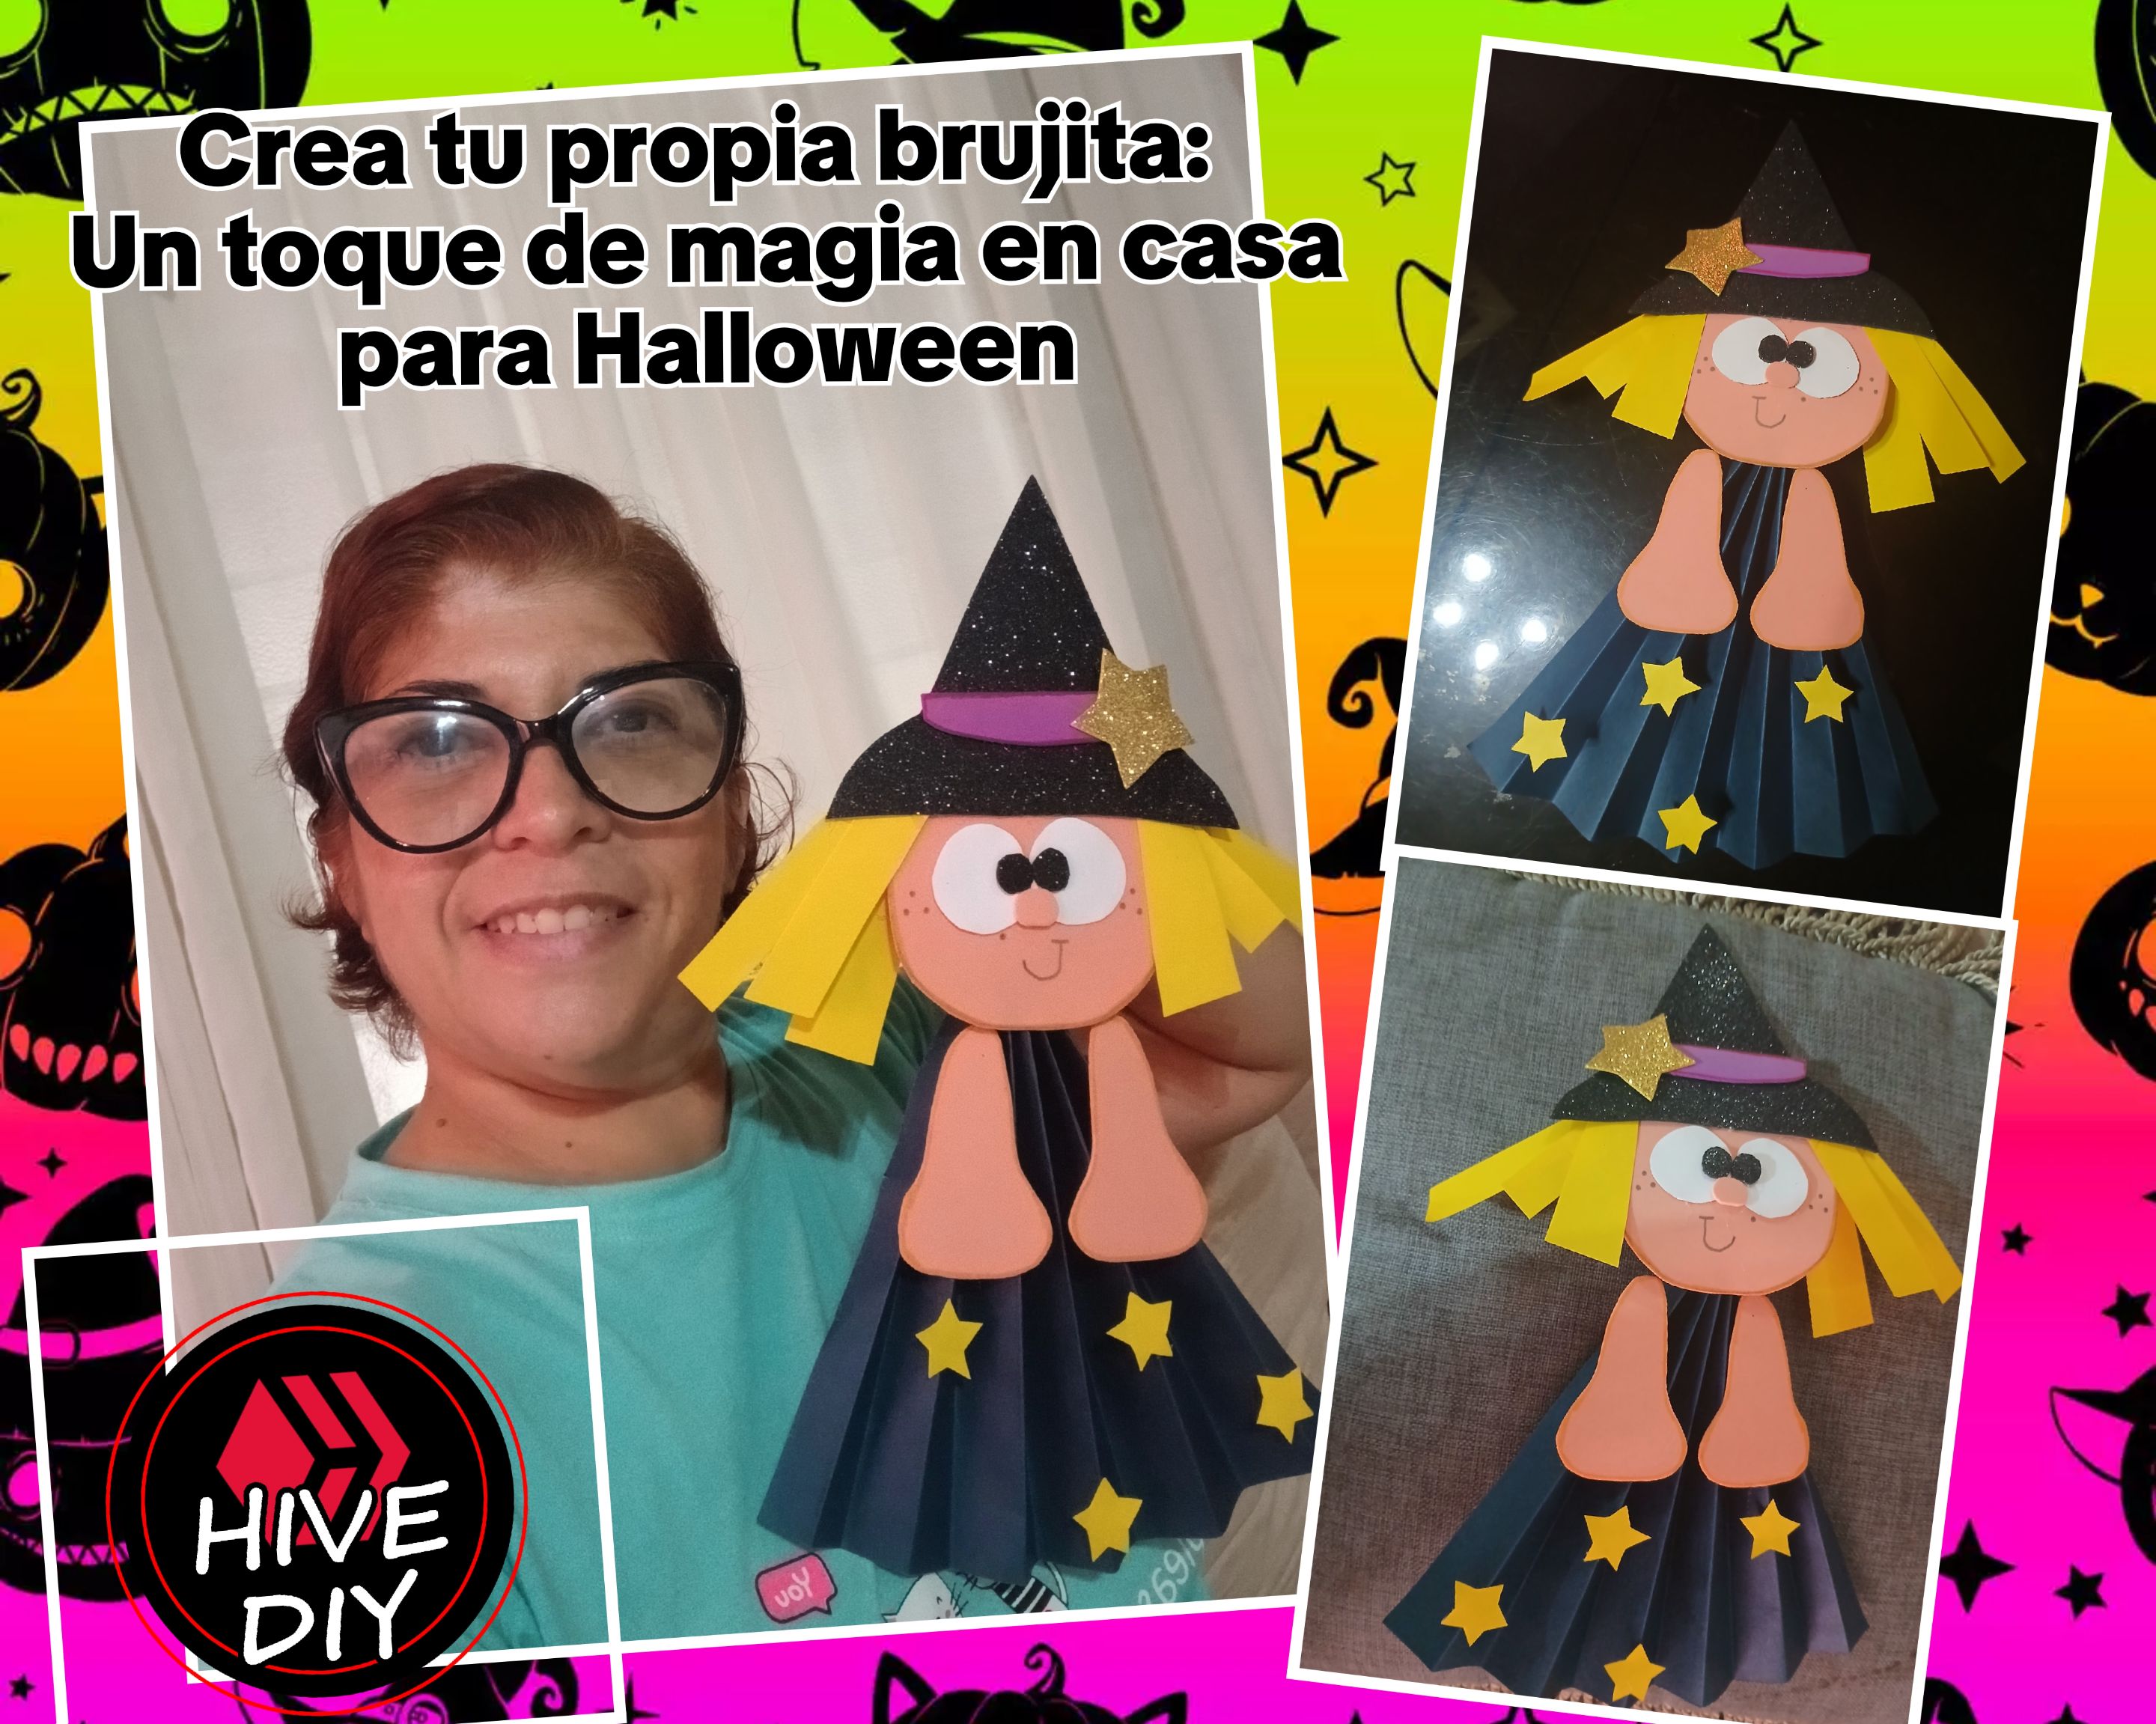
Saludo queridos amigos de esta prestigiosa comunidad Espero que todo se encuentren seamos y felices es como siempre un placer para mí estar aquí con ustedes compartiendo cada uno de mis proyectos y tareas creativas en esto por mi oportunidad no quise dejar pasar la ocasión de las próximas festividades les dejo aquí mi creación quédate hasta el final .
Halloween se está acercando, y aunque puede que no sea tu festividad favorita, siempre hay una oportunidad para dejar volar la imaginación y el arte. Esta vez, decidí hacer una adorable brujita para decorar mi hogar. A continuación, te comparto mi experiencia y los pasos que seguí para que tú también puedas crear la tuya.
#### **Materiales necesarios**
Para este proyecto, utilicé los siguientes materiales:
- Cartulinas de colores
- Foami
- Tijeras
- Regla
- Lápiz
- Pegamento
- Marcadores
- Un molde de brujita
Con estos simples materiales, puedes dar vida a tu propia brujita y llenar tu espacio de un ambiente festivo.
#### **Paso 1: Preparar el molde**
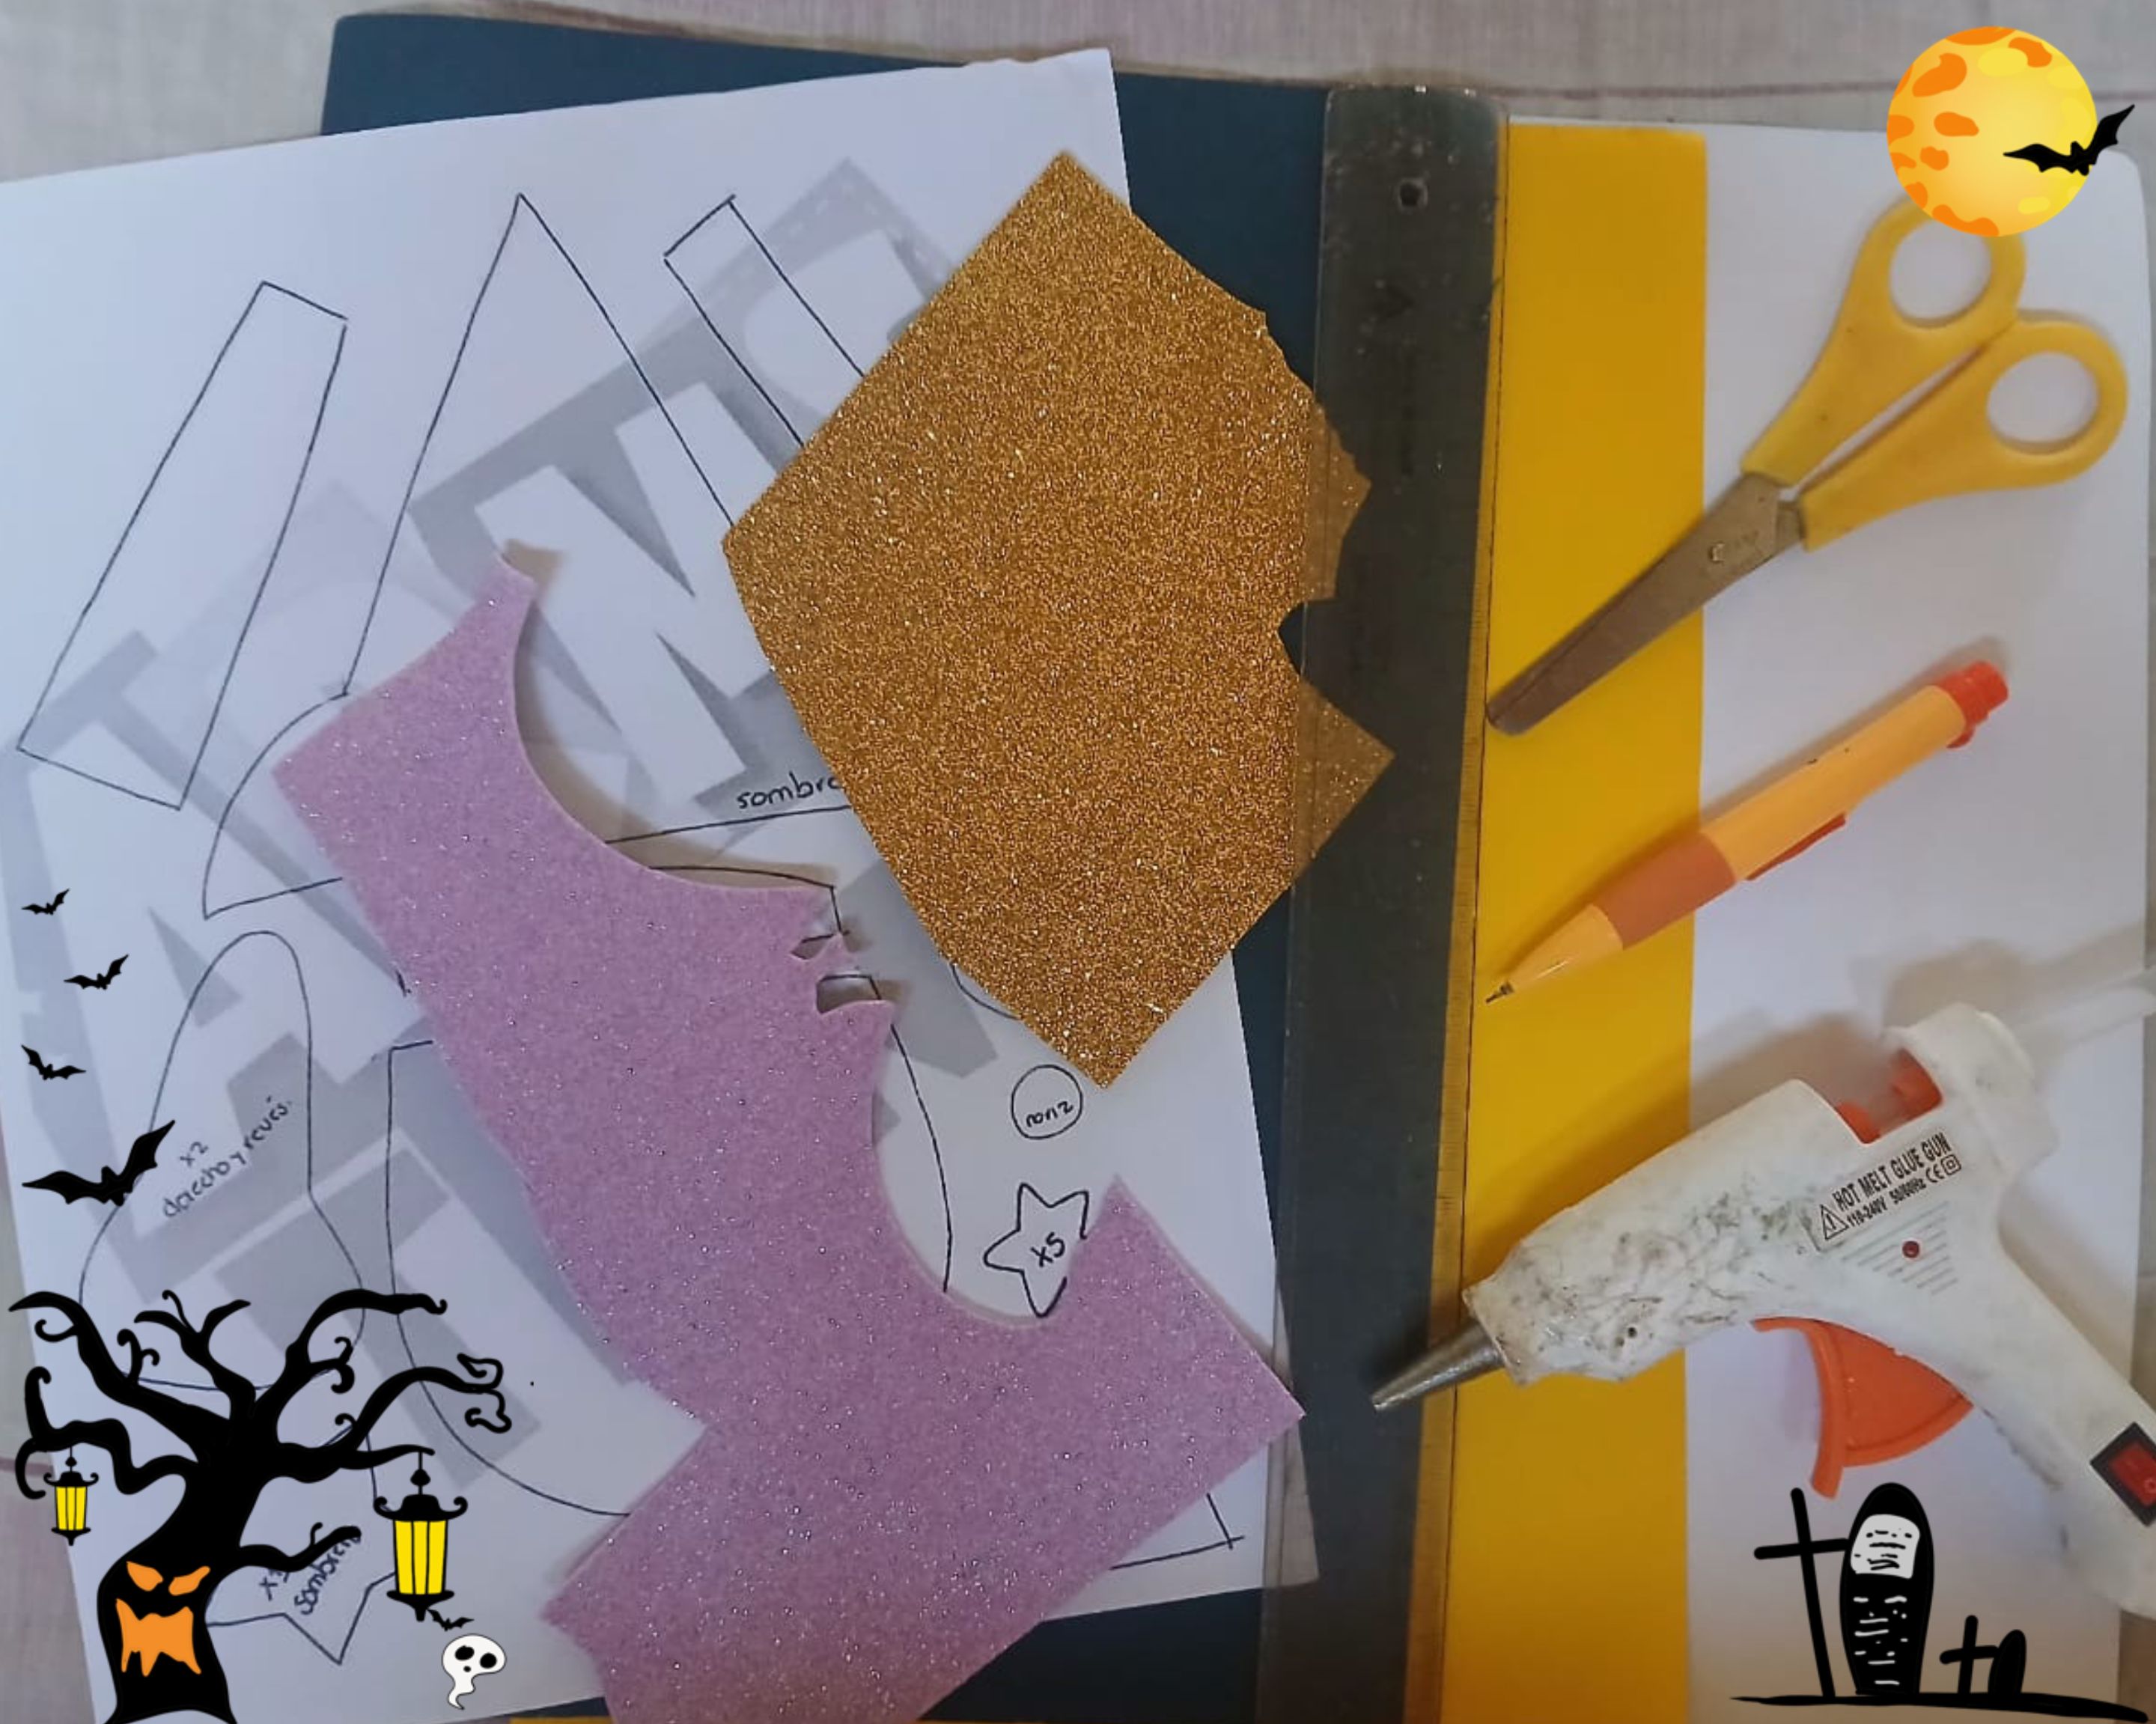
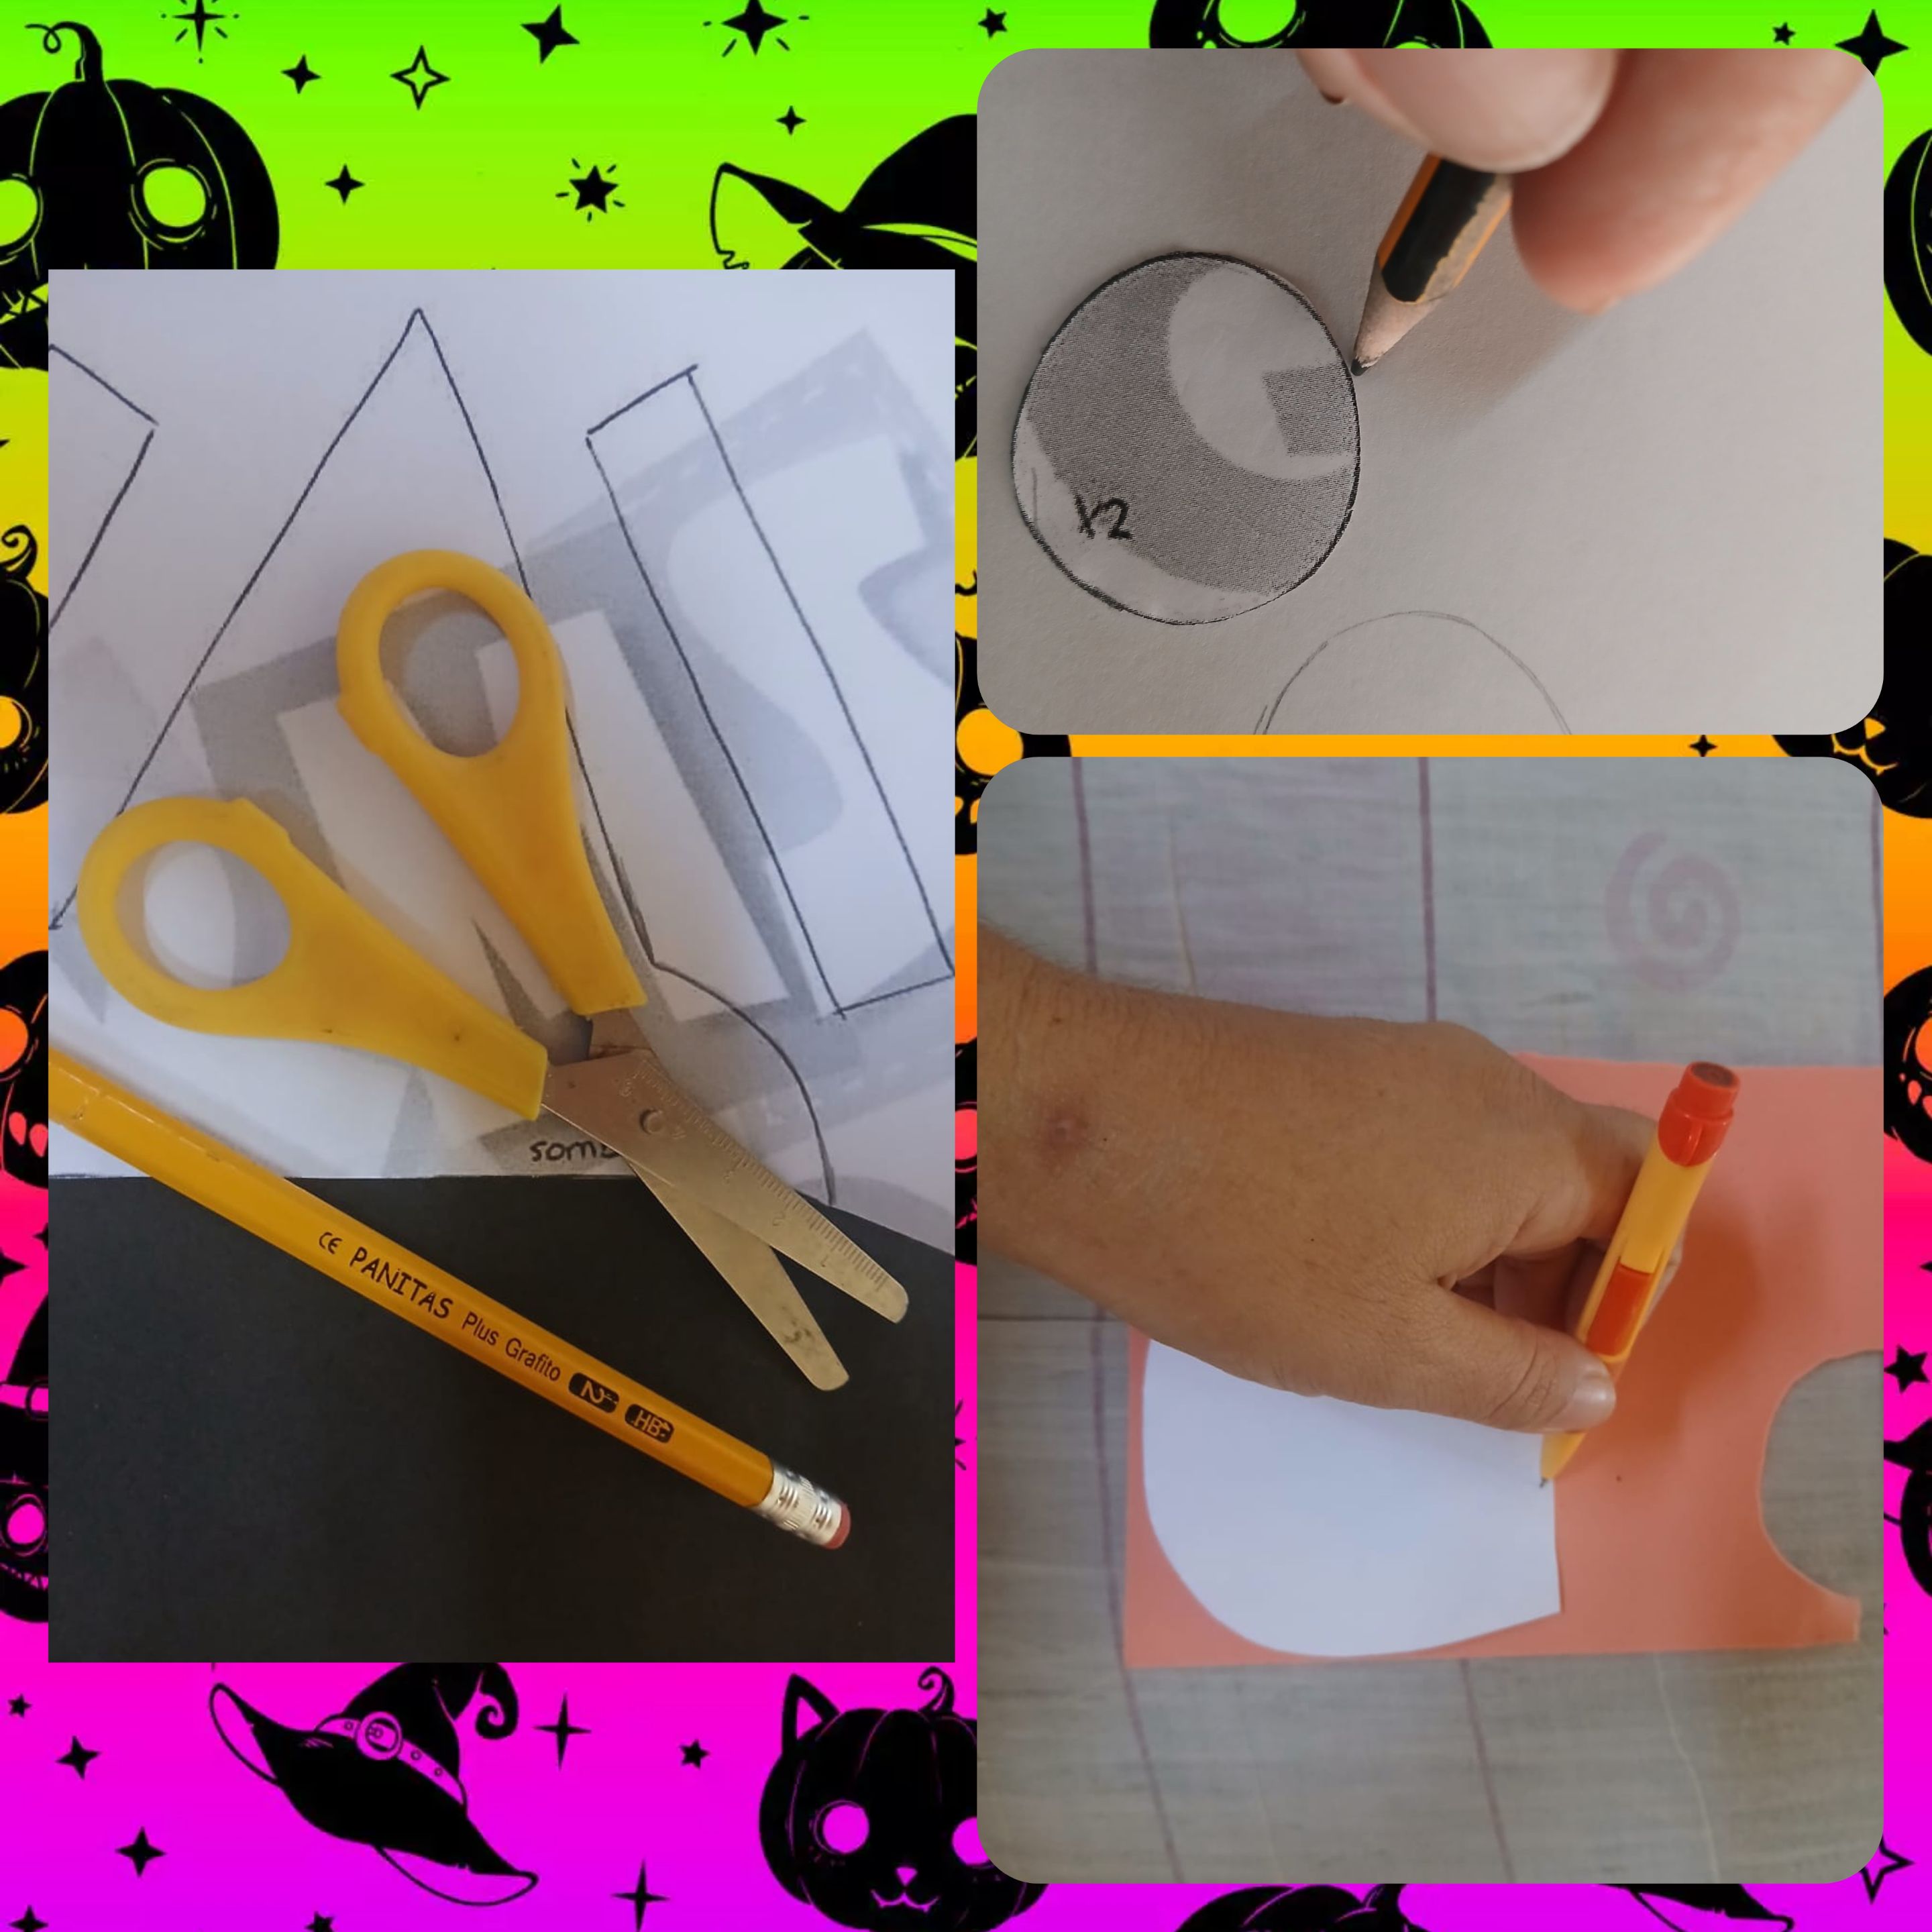
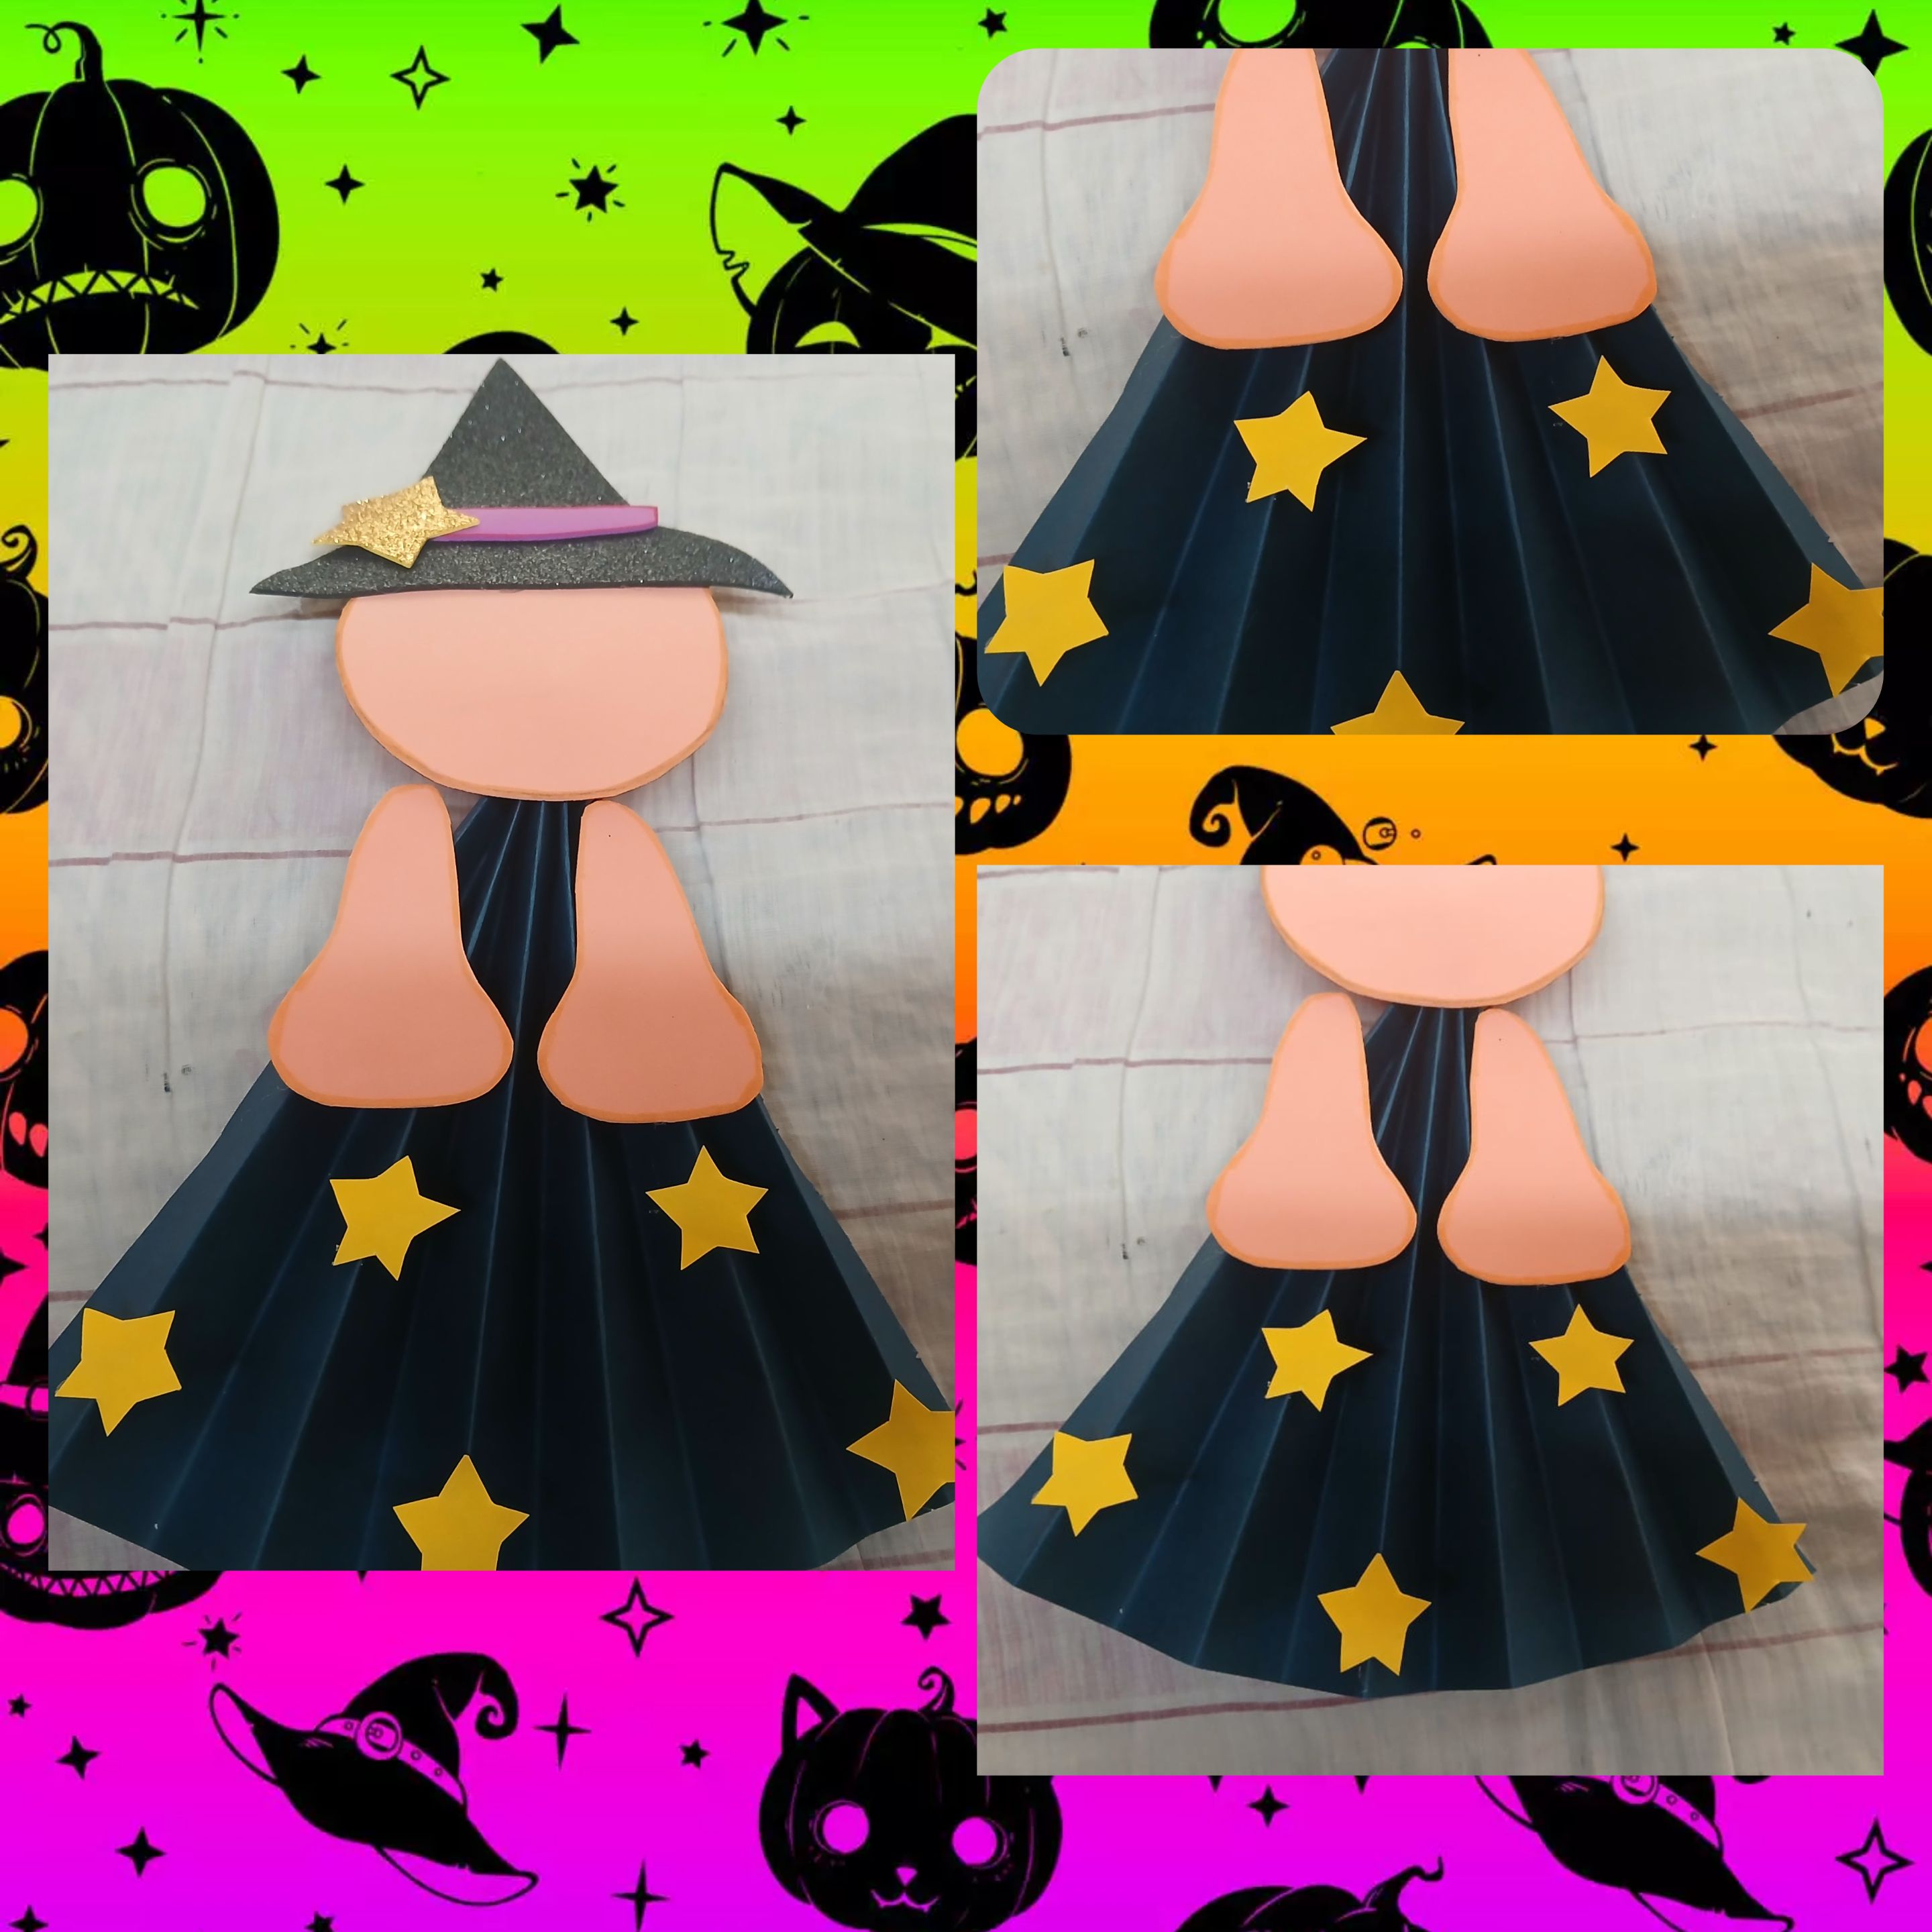
Comencé recortando el molde de la brujita que había elegido. Una vez que lo tuve listo, transferí las piezas a las cartulinas y al foami. Utilicé el lápiz para trazar las formas, asegurándome de que cada parte tuviera el tamaño adecuado. Este paso es fundamental, ya que de él dependerá la apariencia final de tu brujita.
#### **Paso 2: Crear el vestido**
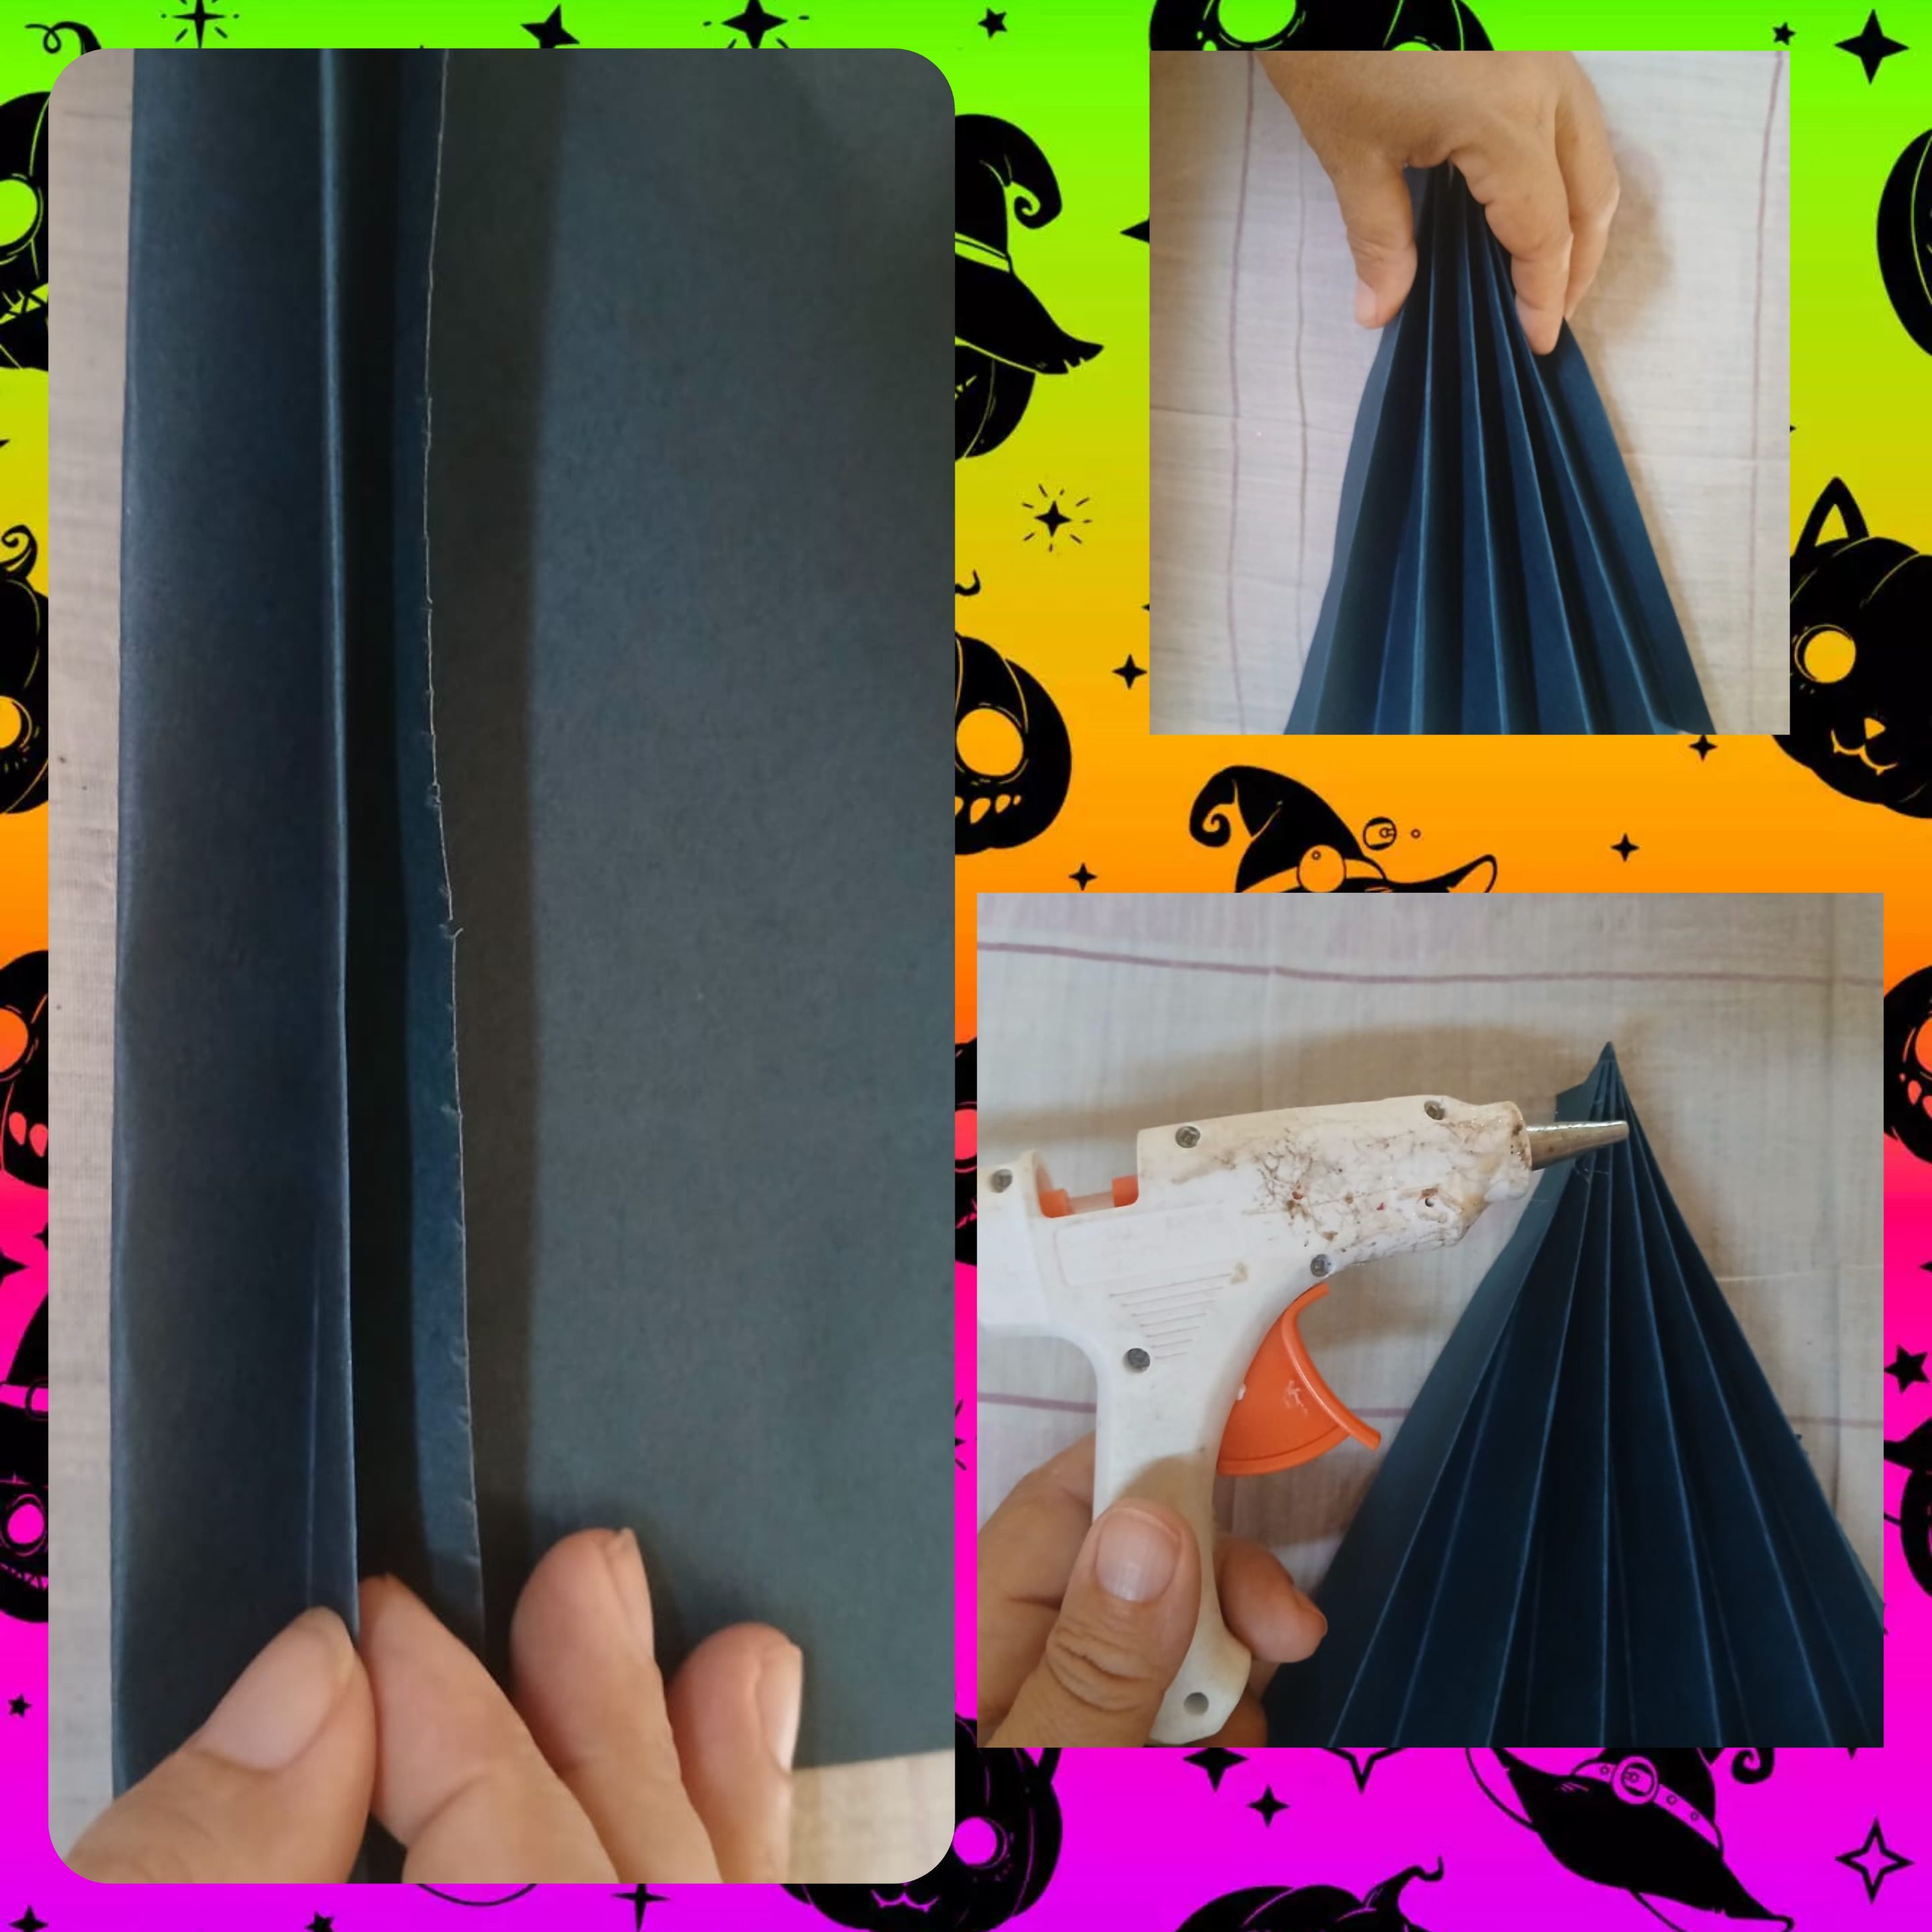
Para el vestido, opté por hacer la falda en forma de zigzag, lo que le dio un toque divertido y dinámico. Utilicé una cartulina de un color vibrante que contrastara con el resto de las piezas. Al recortar la falda, me aseguré de que las puntas fueran bien definidas, para que el diseño fuera más atractivo.
#### **Paso 3: Montar la brujita**
Una vez que tenía todas las partes recortadas, comencé a ensamblar mi brujita. Fue un proceso muy entretenido, ya que cada pieza que pegaba le daba más vida al personaje. Utilicé pegamento para unir las partes, asegurándome de que todo estuviera bien fijado. Es un momento perfecto para dejar volar tu creatividad y personalizarla a tu gusto.
#### **Paso 4: Los detalles finales**
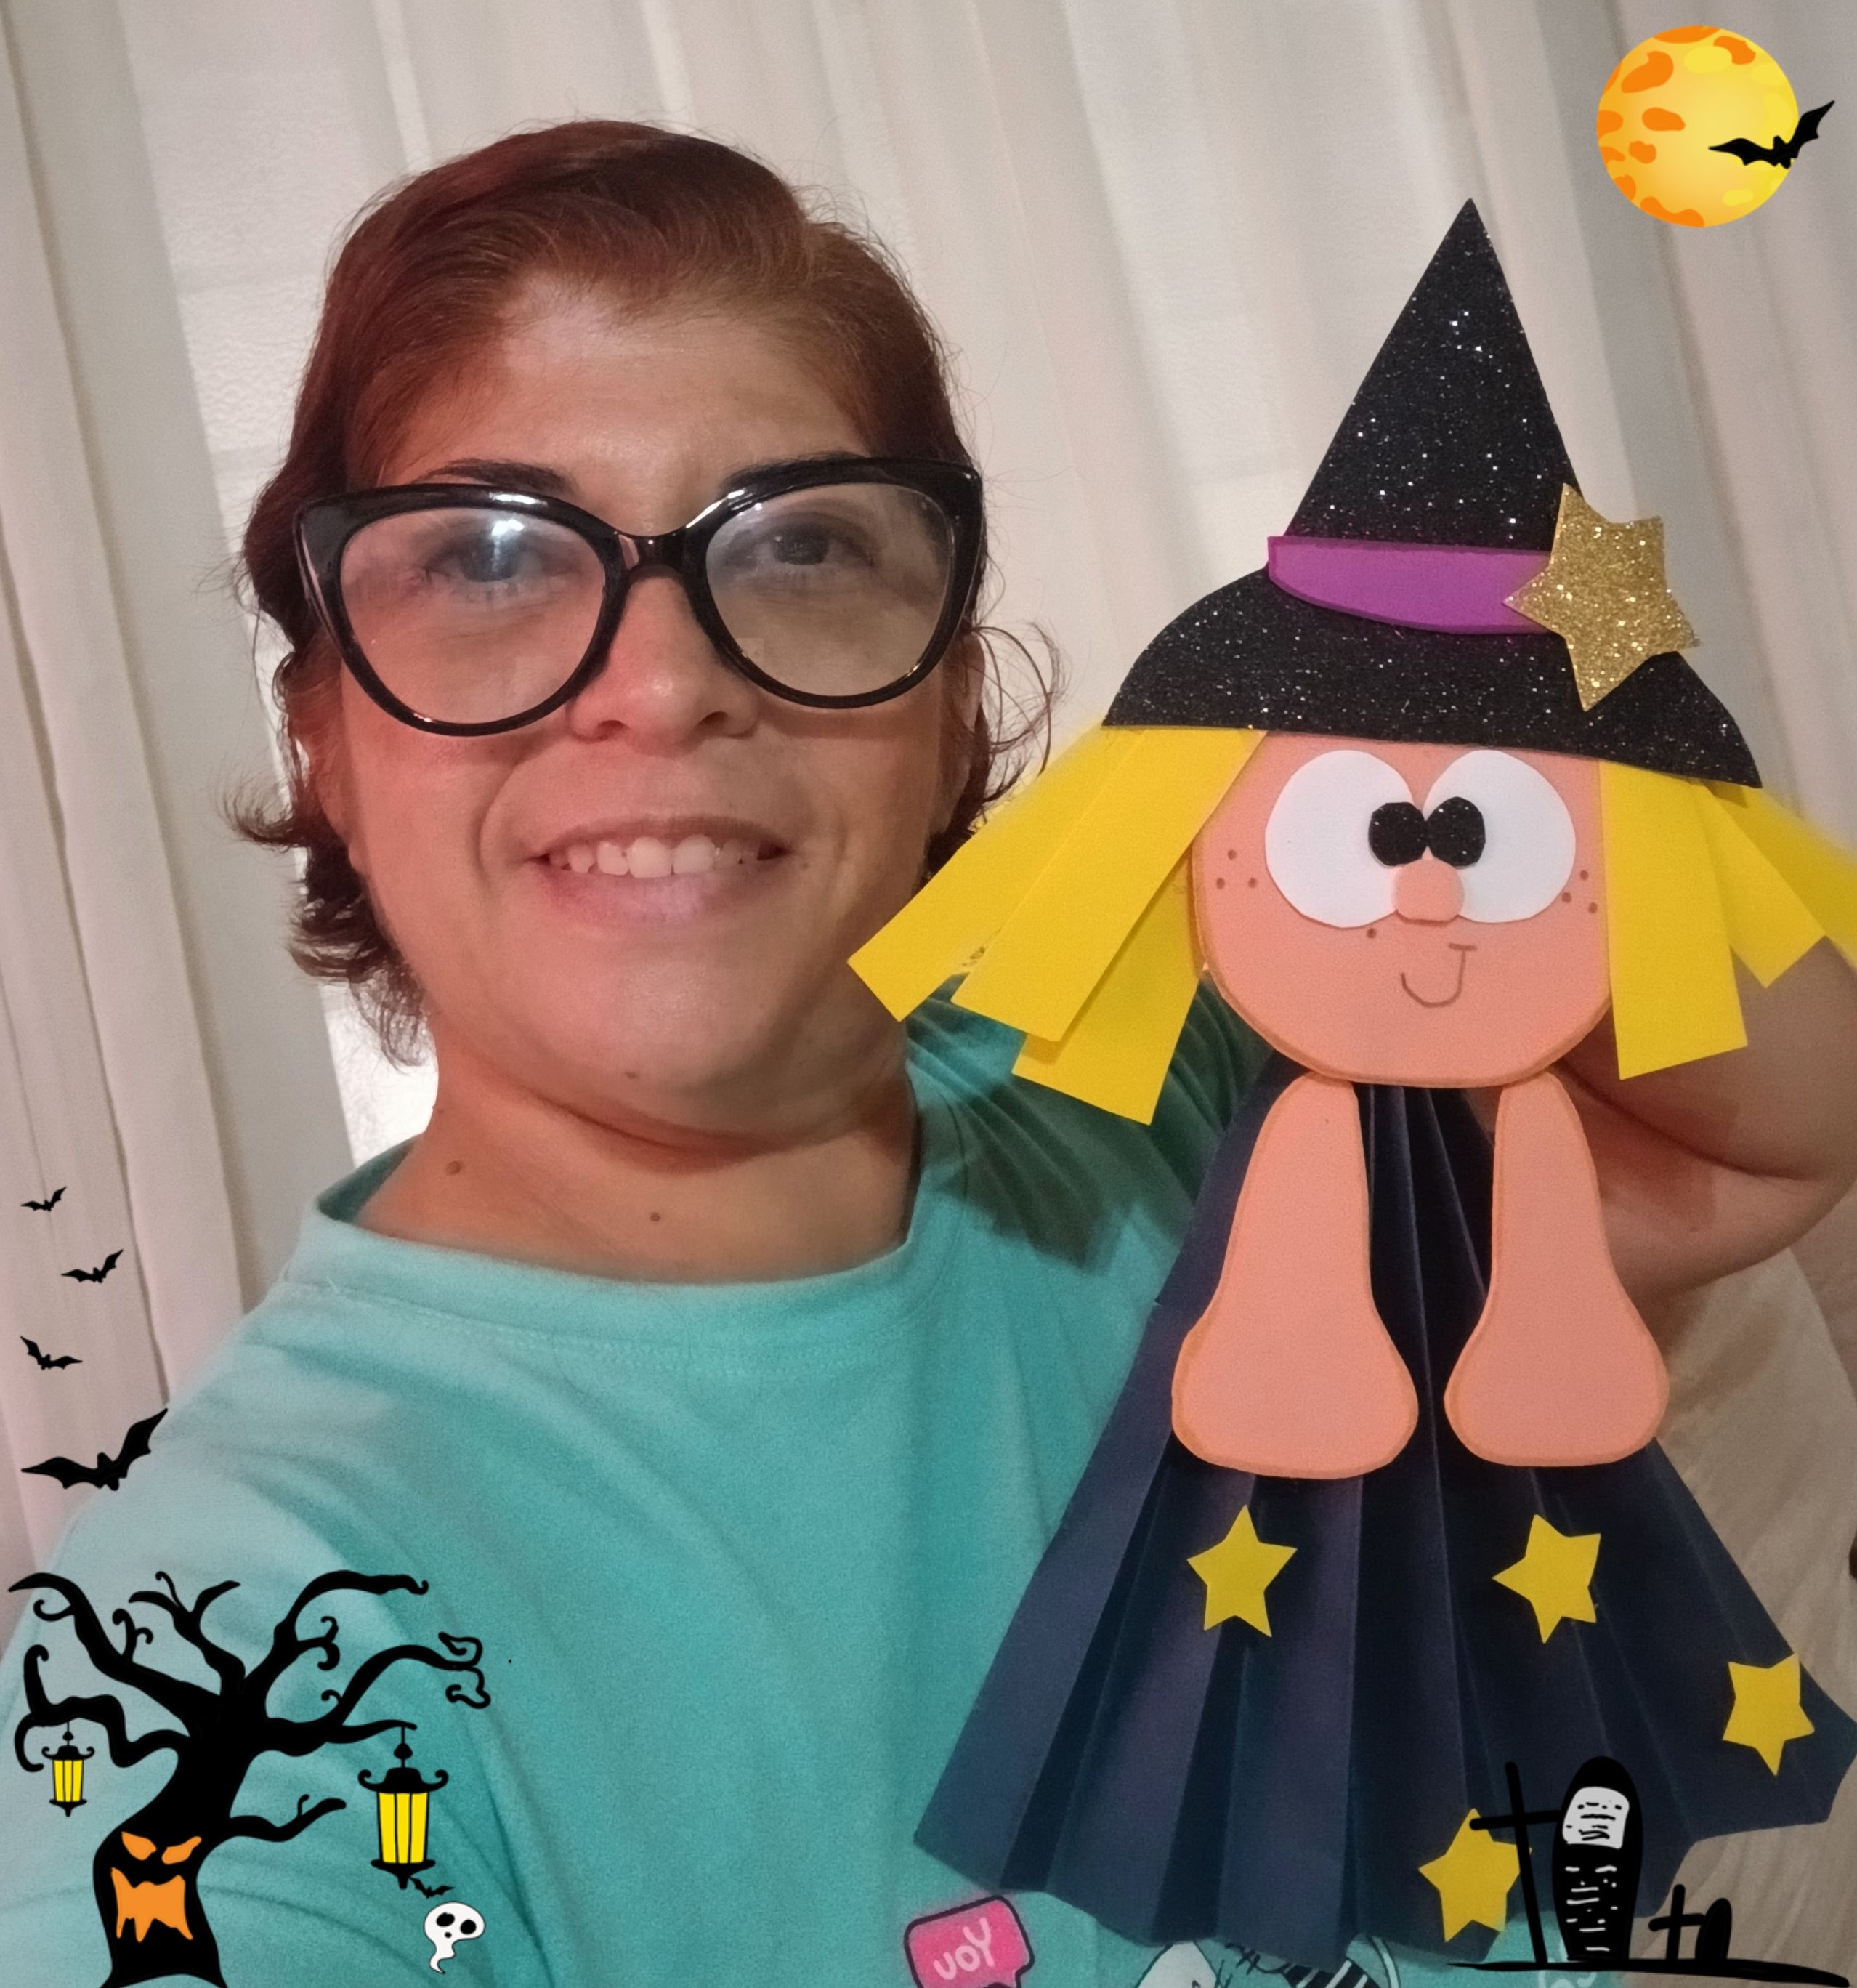
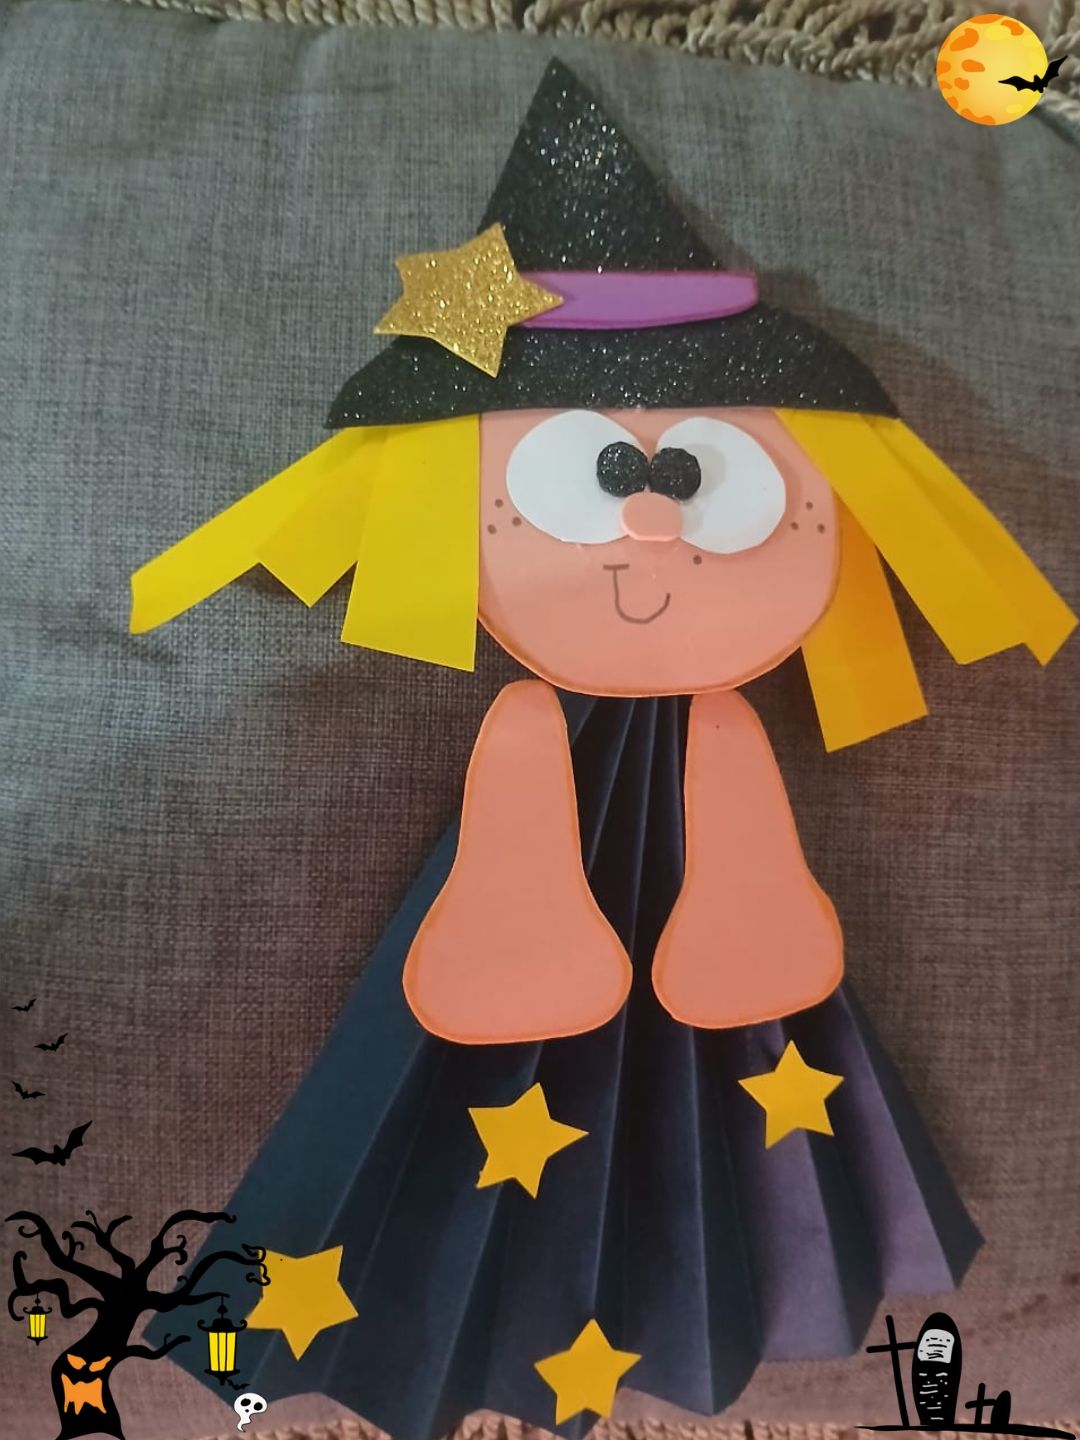
El toque final llegó con los detalles. Usé un marcador para dibujarle una sonrisa, una pequeña nariz y unas lindas pecas en su rostro. Estos pequeños detalles son los que realmente hacen que tu brujita cobre vida. No olvides darle un nombre; ¡puede ser tu compañera de Halloween!
#### **Anímate a crear**
Espero que esta actividad te inspire a crear tu propia brujita y a llenar tu hogar de un toque festivo, aunque Halloween no sea tu celebración favorita. La creatividad no tiene límites, y siempre es gratificante ver cómo algo tan simple puede transformar un espacio. ¡Anímate a compartir tus creaciones y a disfrutar del proceso!

Todas las imágenes son de mi propiedad, capturadas con mi Samsung A15.📸 Editadas con GridArt versión gratuita.Imagen principal y Banner final editado con Canva versión libre.🔁Deeptraductor fue utilizado para esta publicación.📶
English Version
Greetings, dear friends of this prestigious community. I hope you are all well and happy. As always, it is a pleasure for me to be here with you, sharing each of my projects and creative endeavors. Given the opportunity, I didn't want to miss the chance to share my creation with you for the upcoming holidays. Stay tuned until the end.
Halloween is approaching, and although it may not be your favorite holiday, there is always an opportunity to let your imagination and artistry run wild. This time, I decided to make an adorable little witch to decorate my home. Below, I share my experience and the steps I followed so that you can create your own.
#### **Materials needed**
For this project, I used the following materials:
- Colored cardstock
- Foam
- Scissors
- Ruler
- Pencil
- Glue
- Markers
- A little witch template
With these simple materials, you can bring your own little witch to life and fill your space with a festive atmosphere.
#### **Step 1: Prepare the template**
I started by cutting out the witch template I had chosen. Once I had it ready, I transferred the pieces to the cardstock and foam. I used the pencil to trace the shapes, making sure each part was the right size. This step is essential, as it will determine the final appearance of your witch.
#### **Step 2: Create the dress**
For the dress, I decided to make the skirt in a zigzag pattern, which gave it a fun and dynamic touch. I used brightly colored cardstock that contrasted with the rest of the pieces. When cutting out the skirt, I made sure the points were well defined to make the design more attractive.
#### **Step 3: Assemble the little witch**
Once I had all the parts cut out, I began to assemble my little witch. It was a very entertaining process, as each piece I glued on brought the character to life. I used glue to join the parts, making sure everything was securely attached. This is the perfect time to let your creativity run wild and customize her to your liking.
#### **Step 4: The final details**
The finishing touch came with the details. I used a marker to draw a smile, a small nose, and cute freckles on her face. These little details are what really bring your little witch to life. Don't forget to give her a name; she could be your Halloween companion!
#### **Get creative**
I hope this activity inspires you to create your own little witch and fill your home with a festive touch, even if Halloween isn't your favorite holiday. Creativity has no limits, and it's always rewarding to see how something so simple can transform a space. Feel free to share your creations and enjoy the process!
All images are my property, captured with my Samsung A15.📸 Edited with GridArt free version. Main image and final banner edited with Canva free version.🔁Deeptraductor was used for this publication.📶