___Saludos amigos de HiveDiy, primero que todo quiero desearles un feliz día del padre para todos esos hombres que han dedicado sus vidas a criar y formar a sus hijos sean o no de sangre, millones de bendiciones para ustedes y que Dios les siga dando la fortaleza para seguir educando a sus hijos con amor y paciencia___ ❤️🙏
Con motivo de celebrarse este día del padre quiero compartir con ustedes una idea para hacer una linda cajita de obsequio, esta la podemos personalizar con el nombre que deseamos y el tamaño, aquí les muestro el paso a paso:
> Greetings, friends of HiveDiy, first of all, I want to wish a Happy Father's Day to all those men who have dedicated their lives to raising and educating their children, whether they are blood relatives or not. Millions of blessings to you, and may God continue to give you the strength to continue raising your children with love and patience ❤️🙏
>
> On the occasion of this Father's Day, I want to share with you an idea for making a cute gift box. We can personalize it with the name and size of your choice. Here's how to show you the step-by-step instructions:
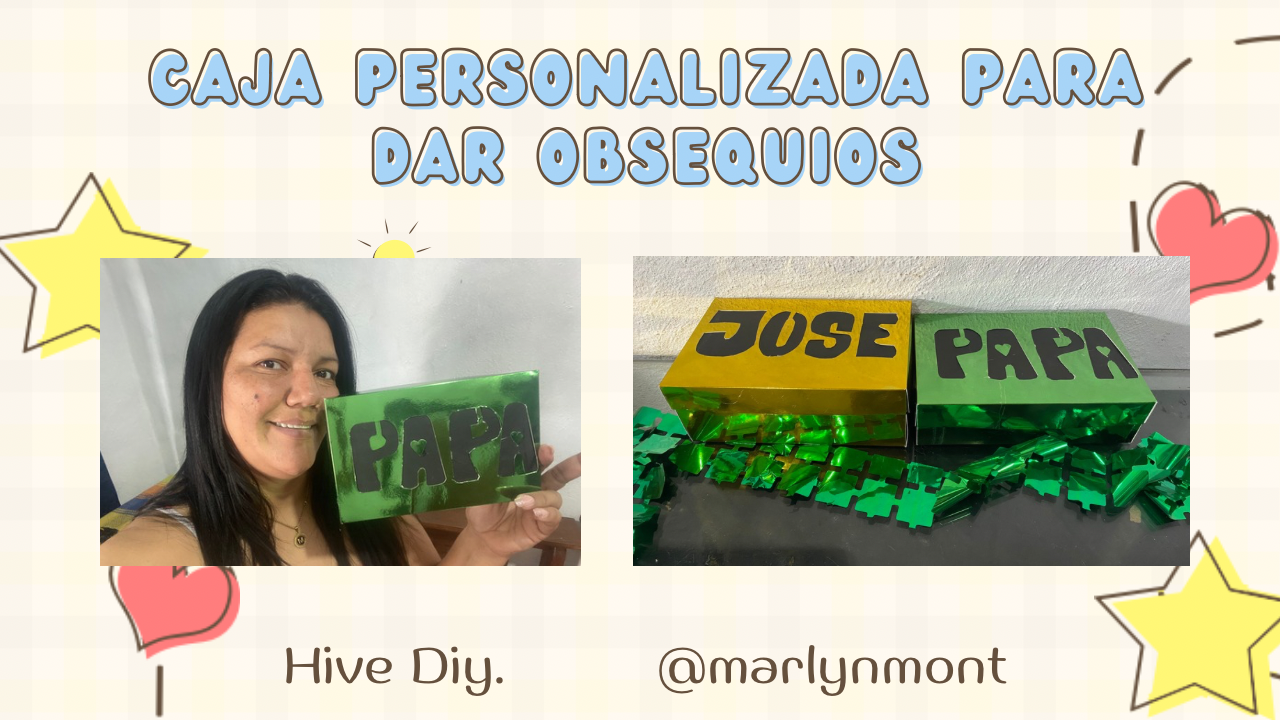
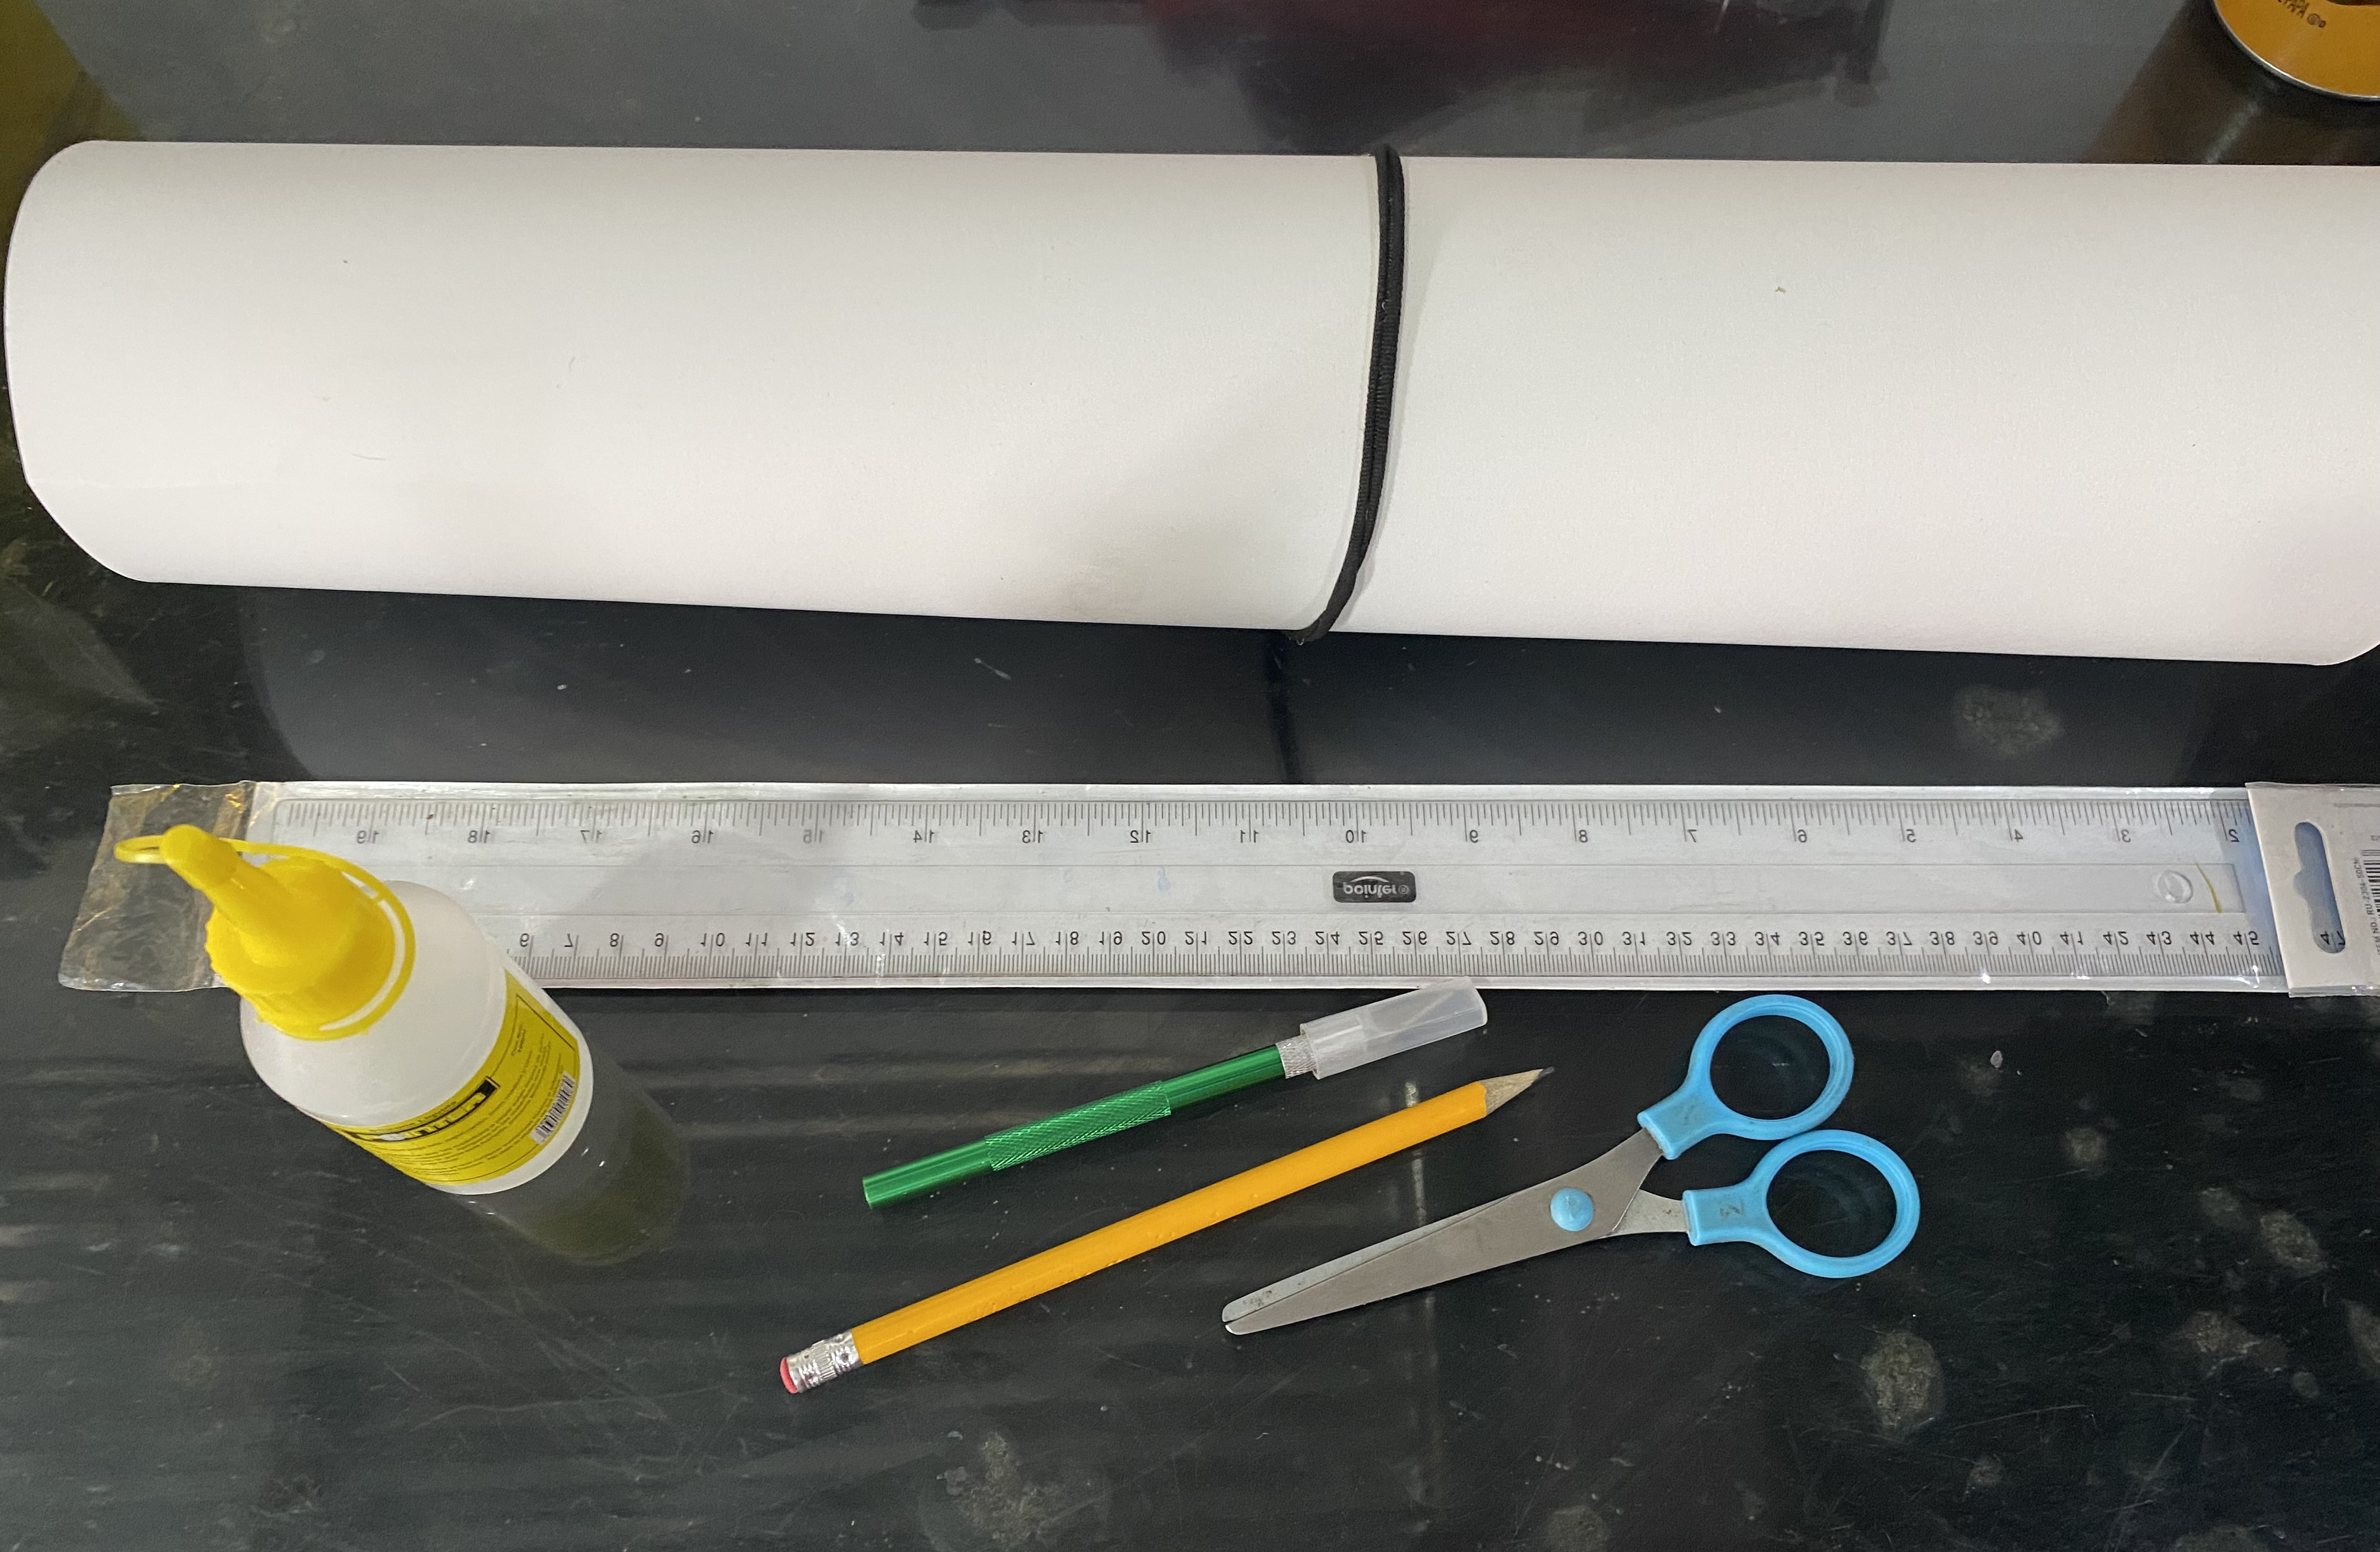
Siempre cuando tengo alguna celebración me gusta dar los obsequios en cajitas o bolsas hechas por mi y de alguna manera personalizadas, esta vez me pareció chévere la idea de hacerle el nombre en la tapa de la caja de regalo, y como dice el dicho “maté dos pájaros de un solo tiro” ya que aproveché de hacer una para mi hijo que estuvo de cumple hace unos días y una para mi padre para celebrar su día, aquí les dejo los materiales a utilizar:
- Cartulina de 2 colores de su preferencia
- Regla
- Tijeras
- Exacto de precisión
- Lápiz
- Pega o Silicon
> Whenever I have a celebration, I like to give gifts in personalized boxes or bags that I made myself. This time, I thought it was a cool idea to put the name on the lid of the gift box. And as the saying goes, "I killed two birds with one stone." I took the opportunity to make one for my son, who had his birthday a few days ago, and one for my father to celebrate his birthday. Here are the materials to use:
>
> - Cardstock in two colors of your choice
> - Ruler
> - Scissors
> - Precision sharpie
> - Pencil
> - Glue or silicone
___MATERIALES___
> MATERIALS
ñ
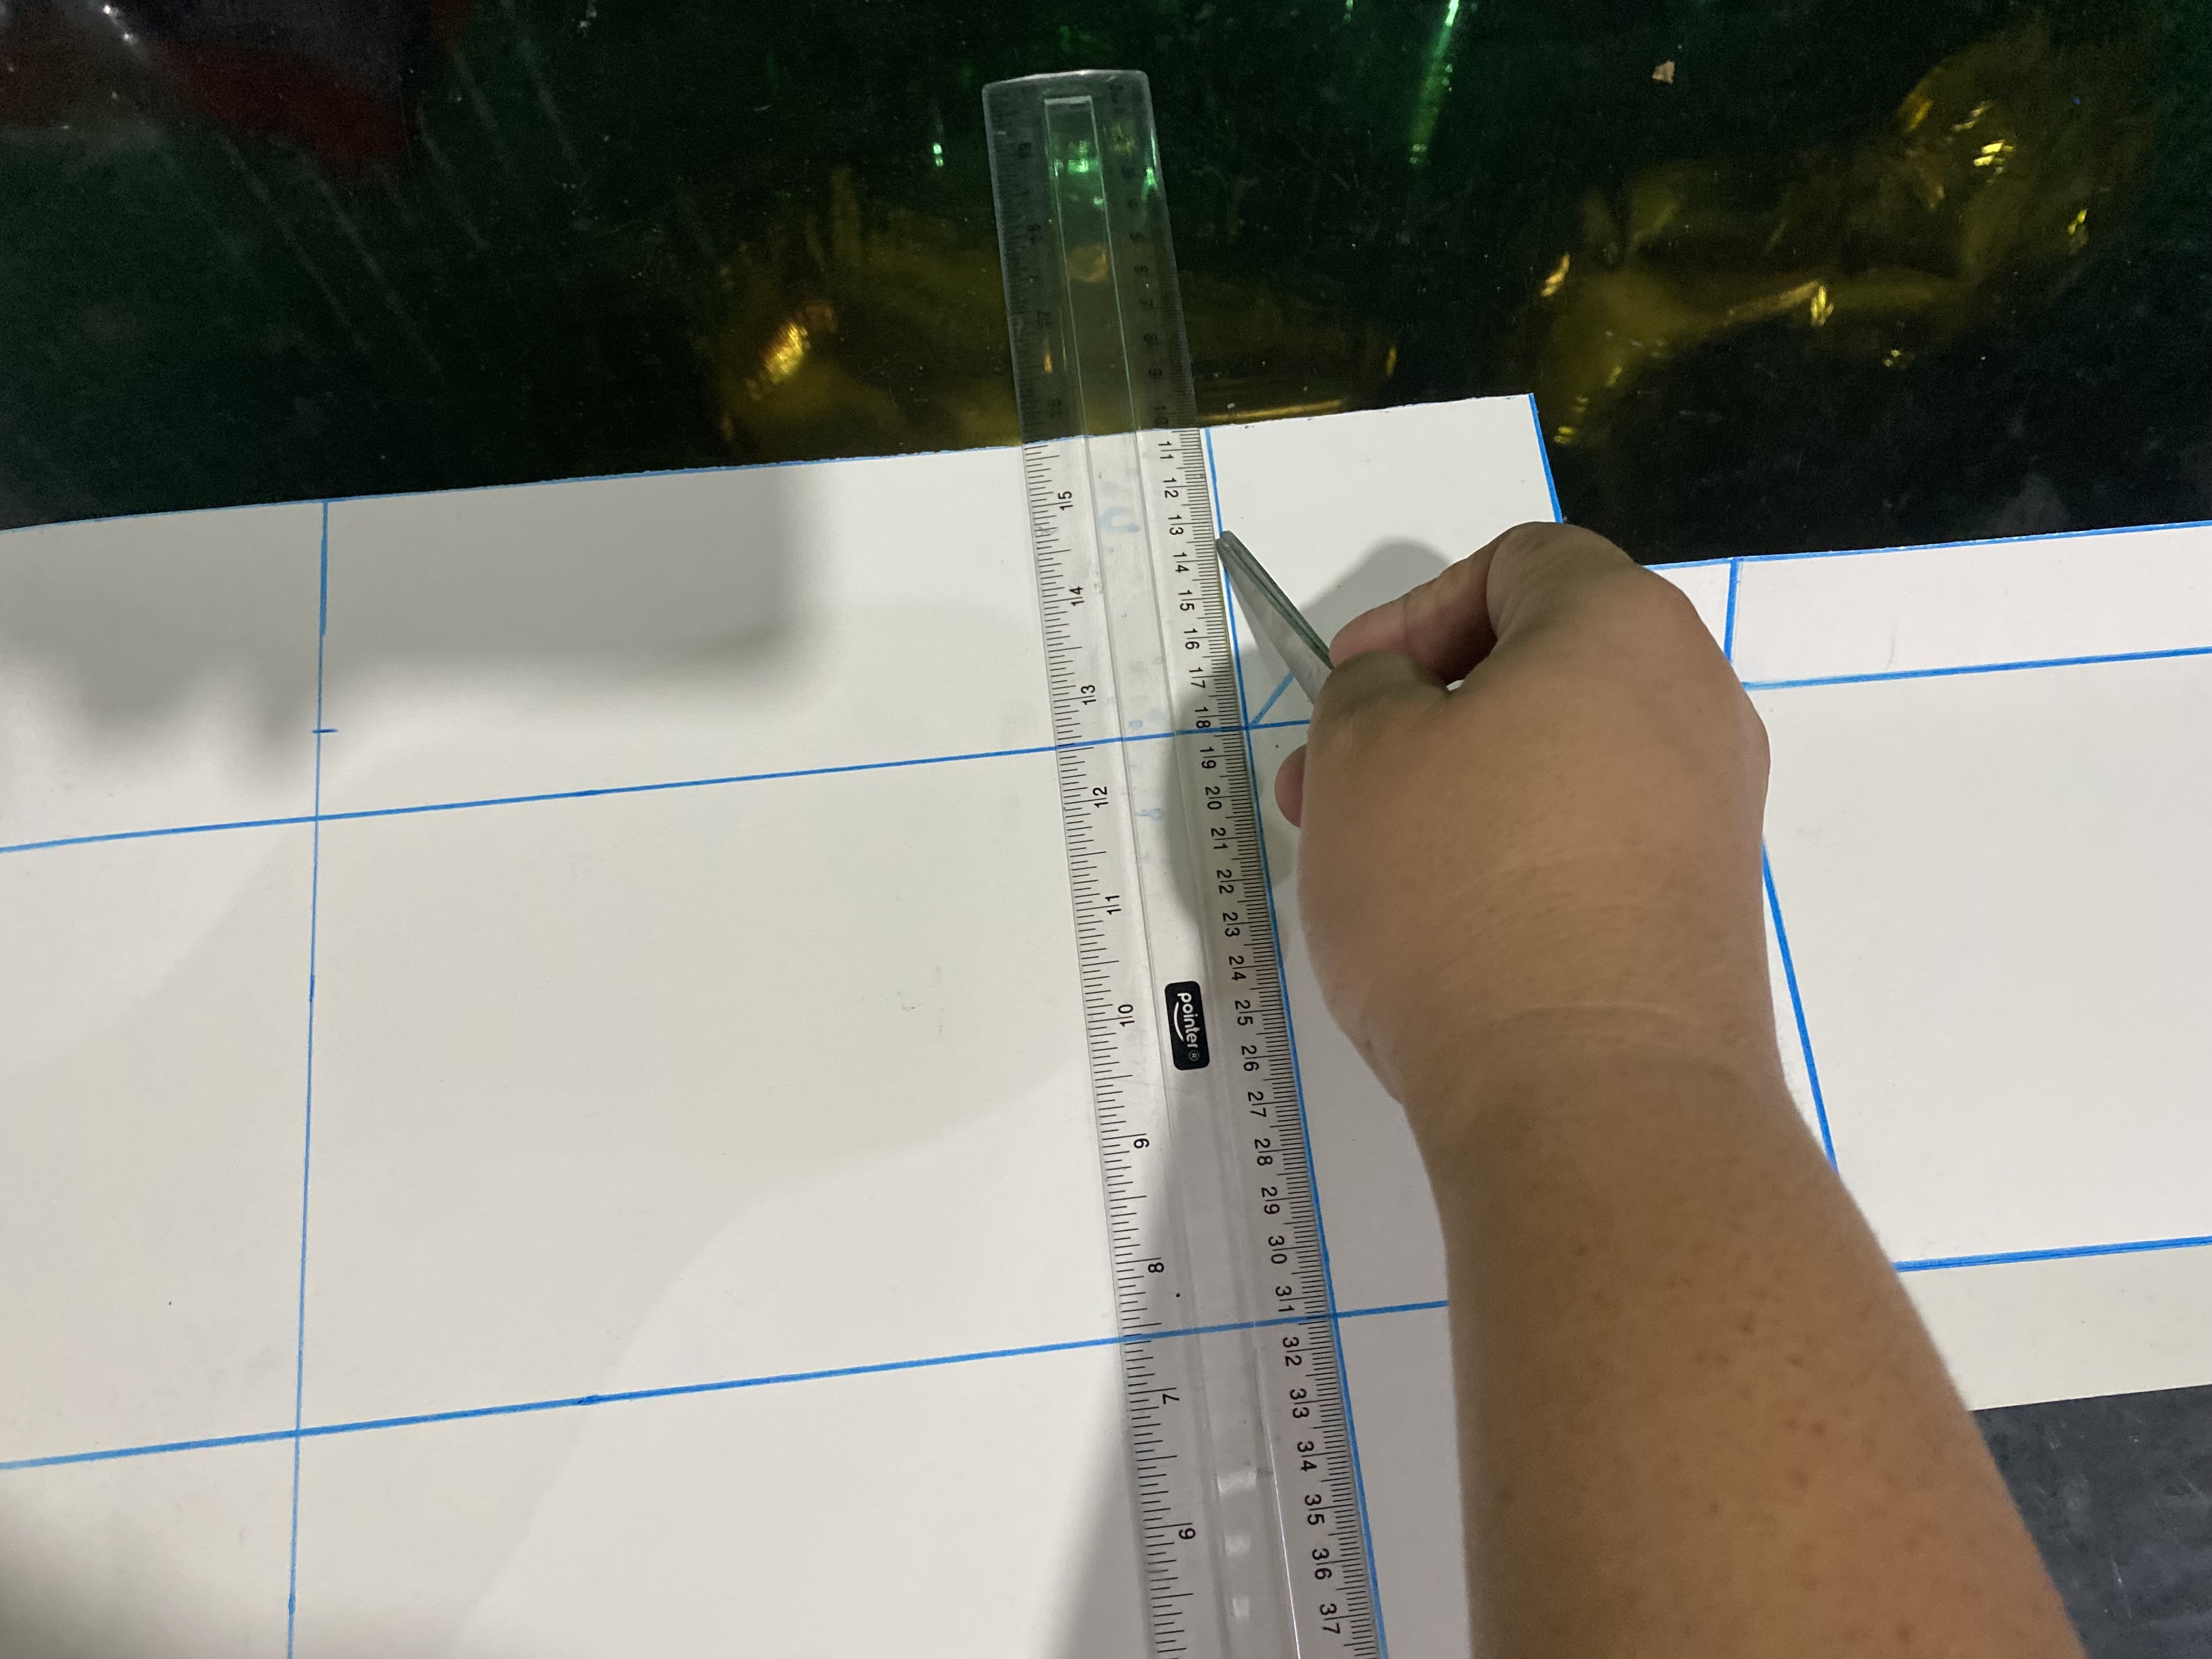
Para hacer estas cajas compré unas cartulinas en color dorado y verde, aproveché un retazo de cartulina negra que me quedaba en Casa para los detalles, comenzaremos dibujando el tamaño de nuestra caja, para esto vamos a colocar la cartulina por el lado del revés, las medidas las puedes hacer del tamaño que desees, en mi caso para la parte de abajo las medidas serán las siguientes : 8 cm será el alto de la caja por 21 cm el fondo, marcamos y luego al lado contrario trazamos líneas en vertical, éstas serán de 8 cm por 13 cm.
> To make these boxes I bought some gold and green cardboard, I used a scrap of black cardboard that I had at home for the details, we will start by drawing the size of our box, for this we will place the cardboard on the back side, you can make the measurements of the size you want, in my case for the bottom the measurements will be the following: 8 cm will be the height of the box by 21 cm the depth, we mark and then on the opposite side we draw vertical lines, these will be 8 cm by 13 cm.
___PASO A PASO___
> STEP BY STEP
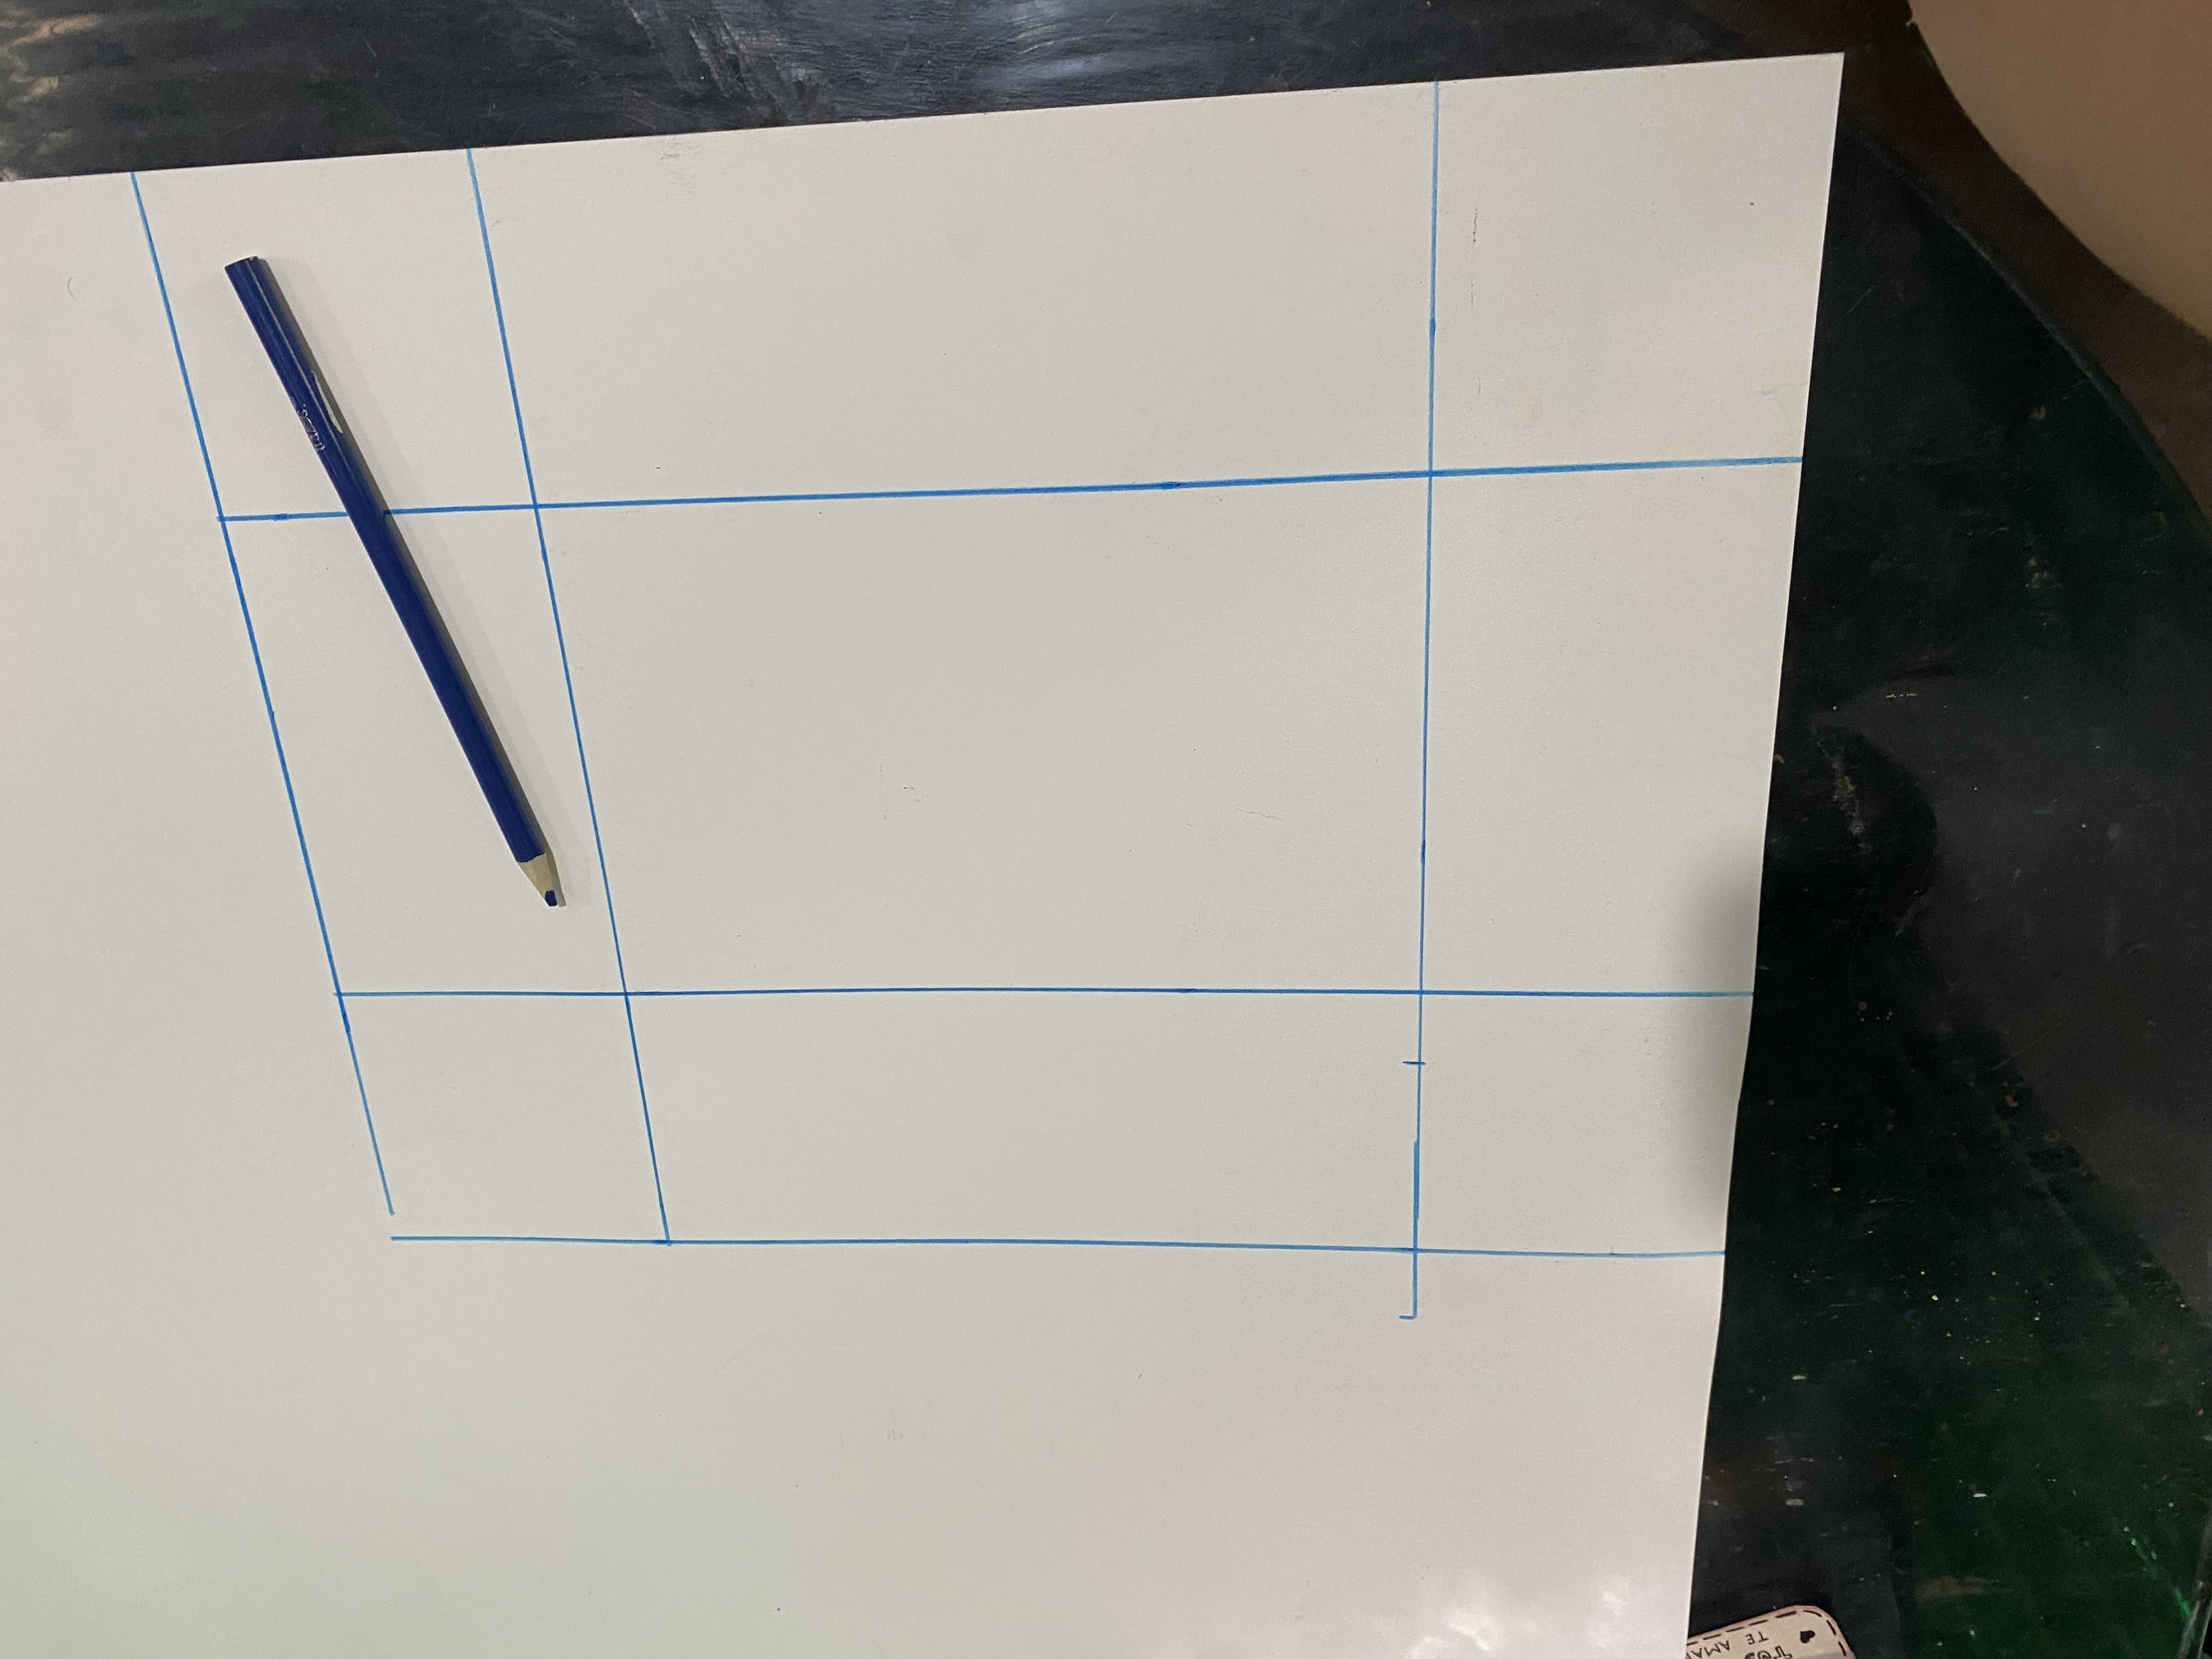
Para el siguiente paso vamos a dibujar la tapa de la caja, para esta el borde de la tapa será de 3 cm y la base de 21 cm, luego al lado contrario marcamos 3 cm por 13 cm.
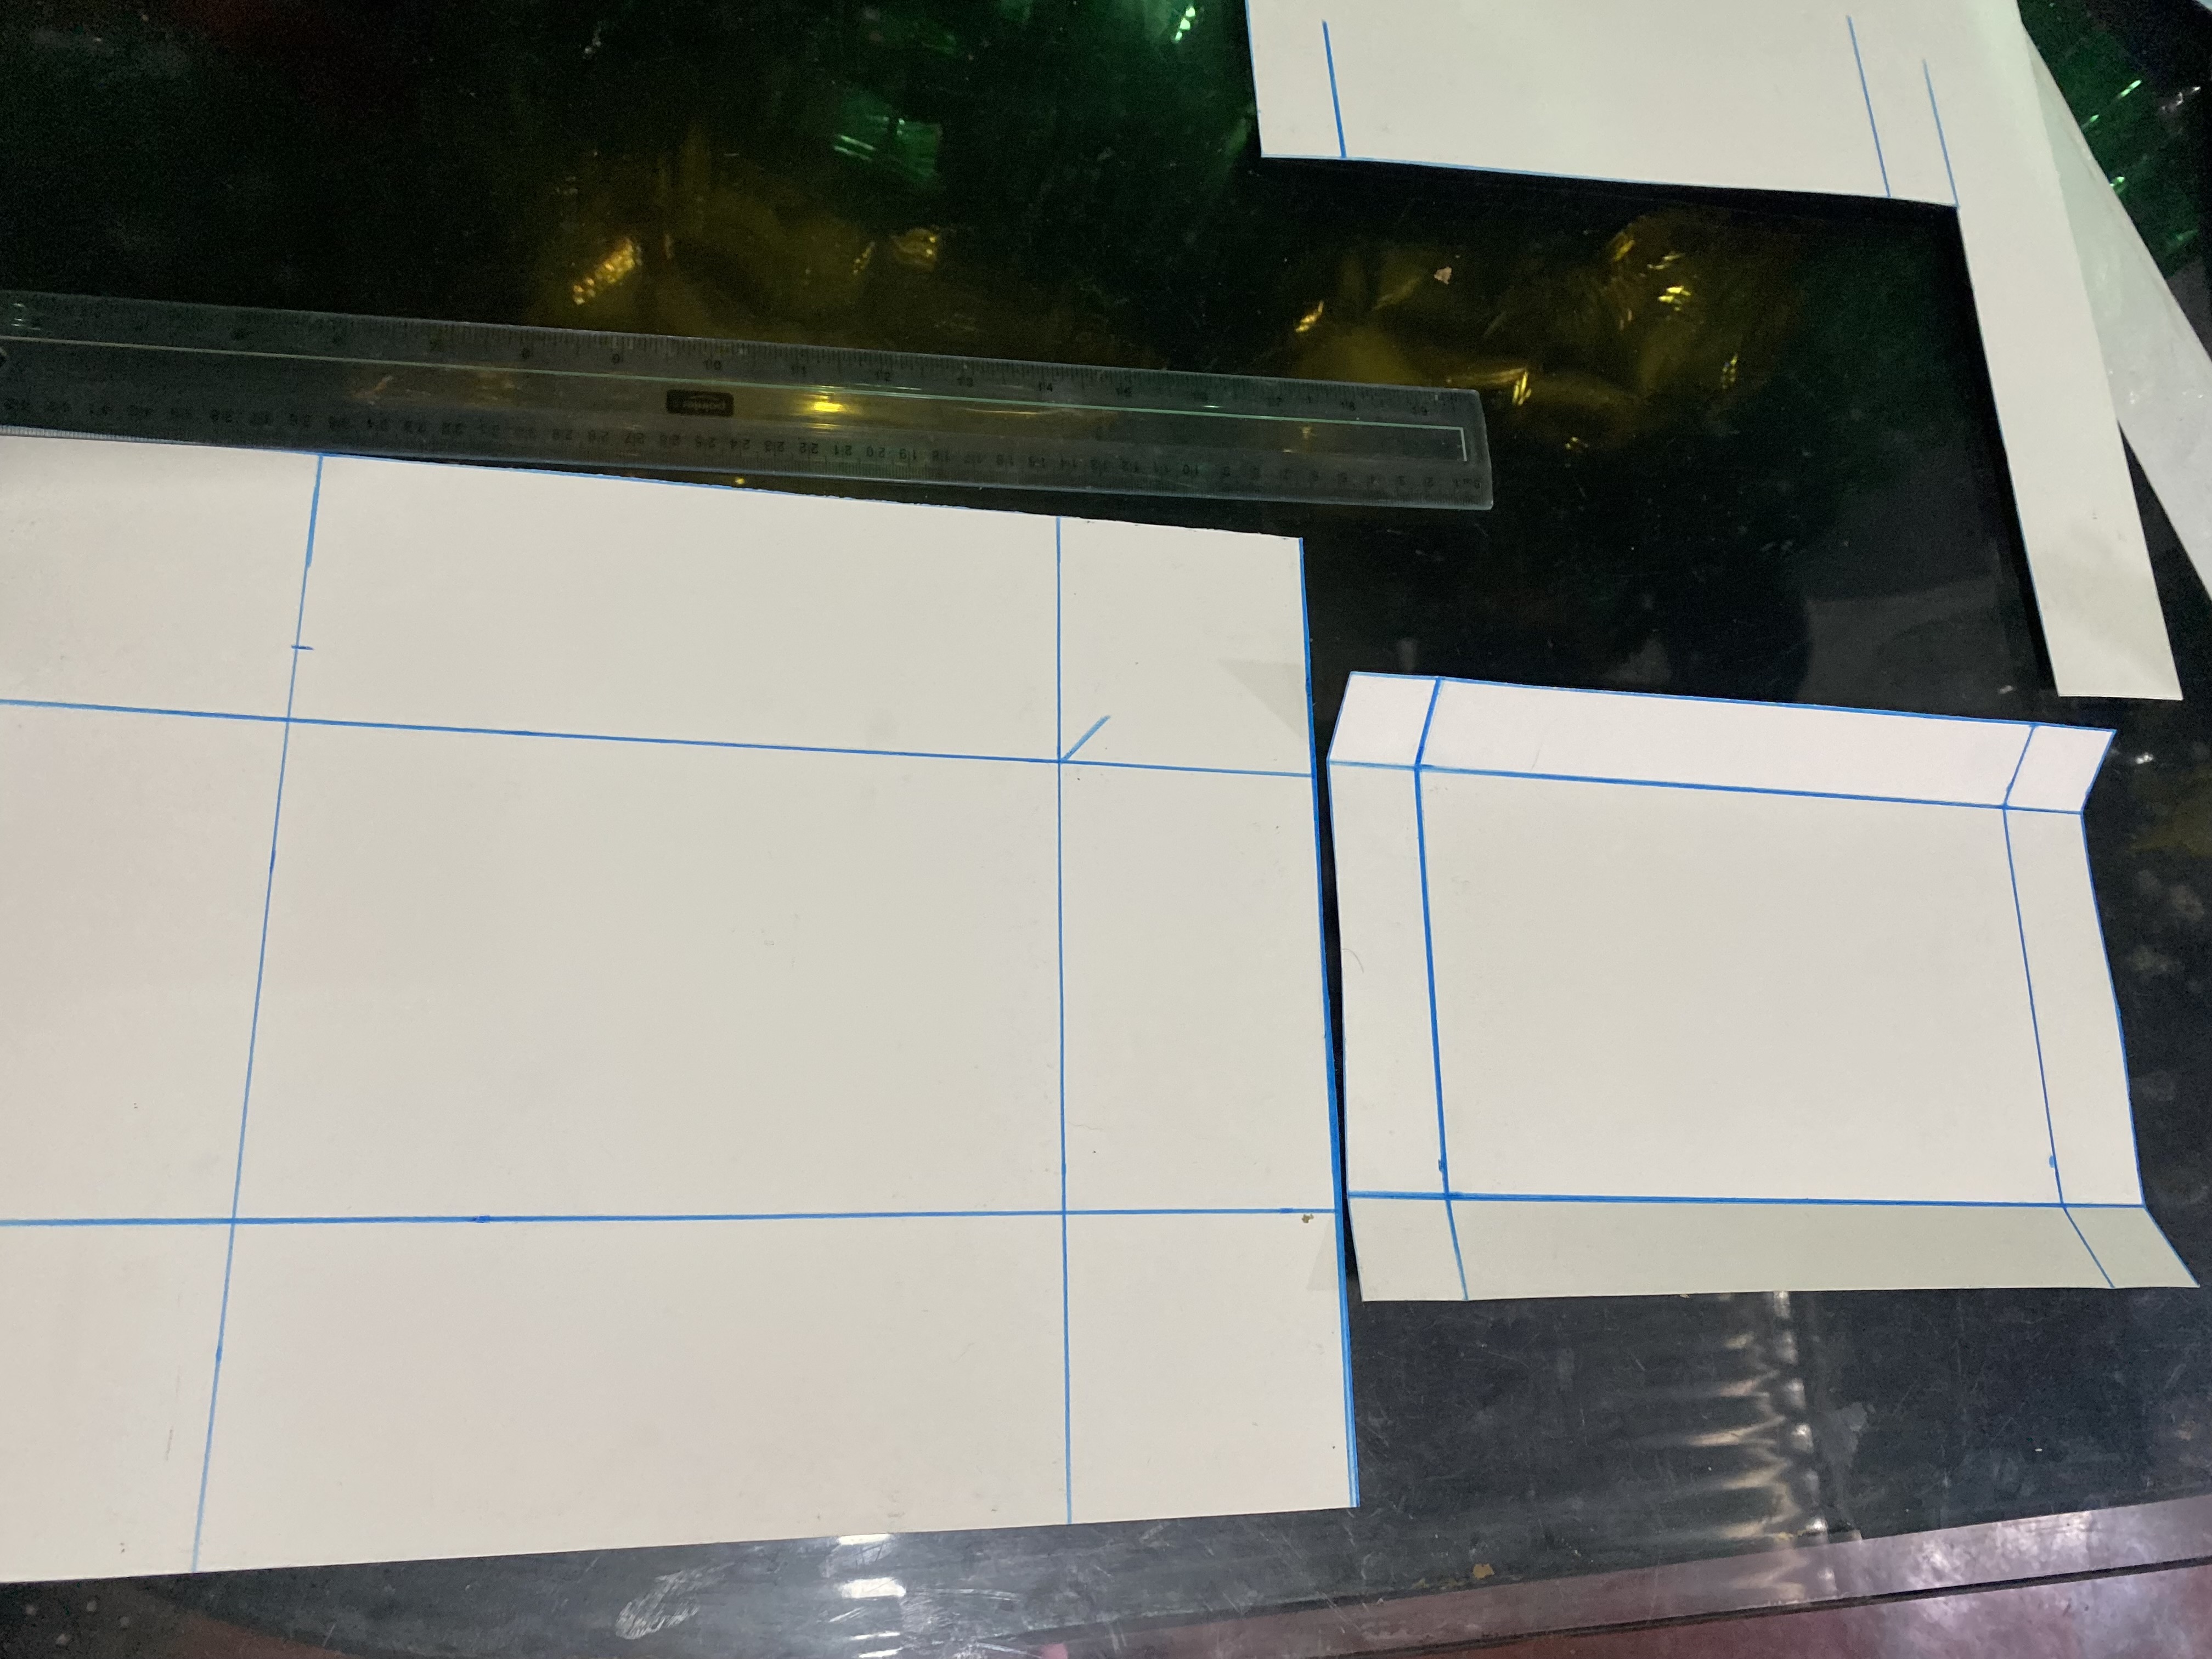
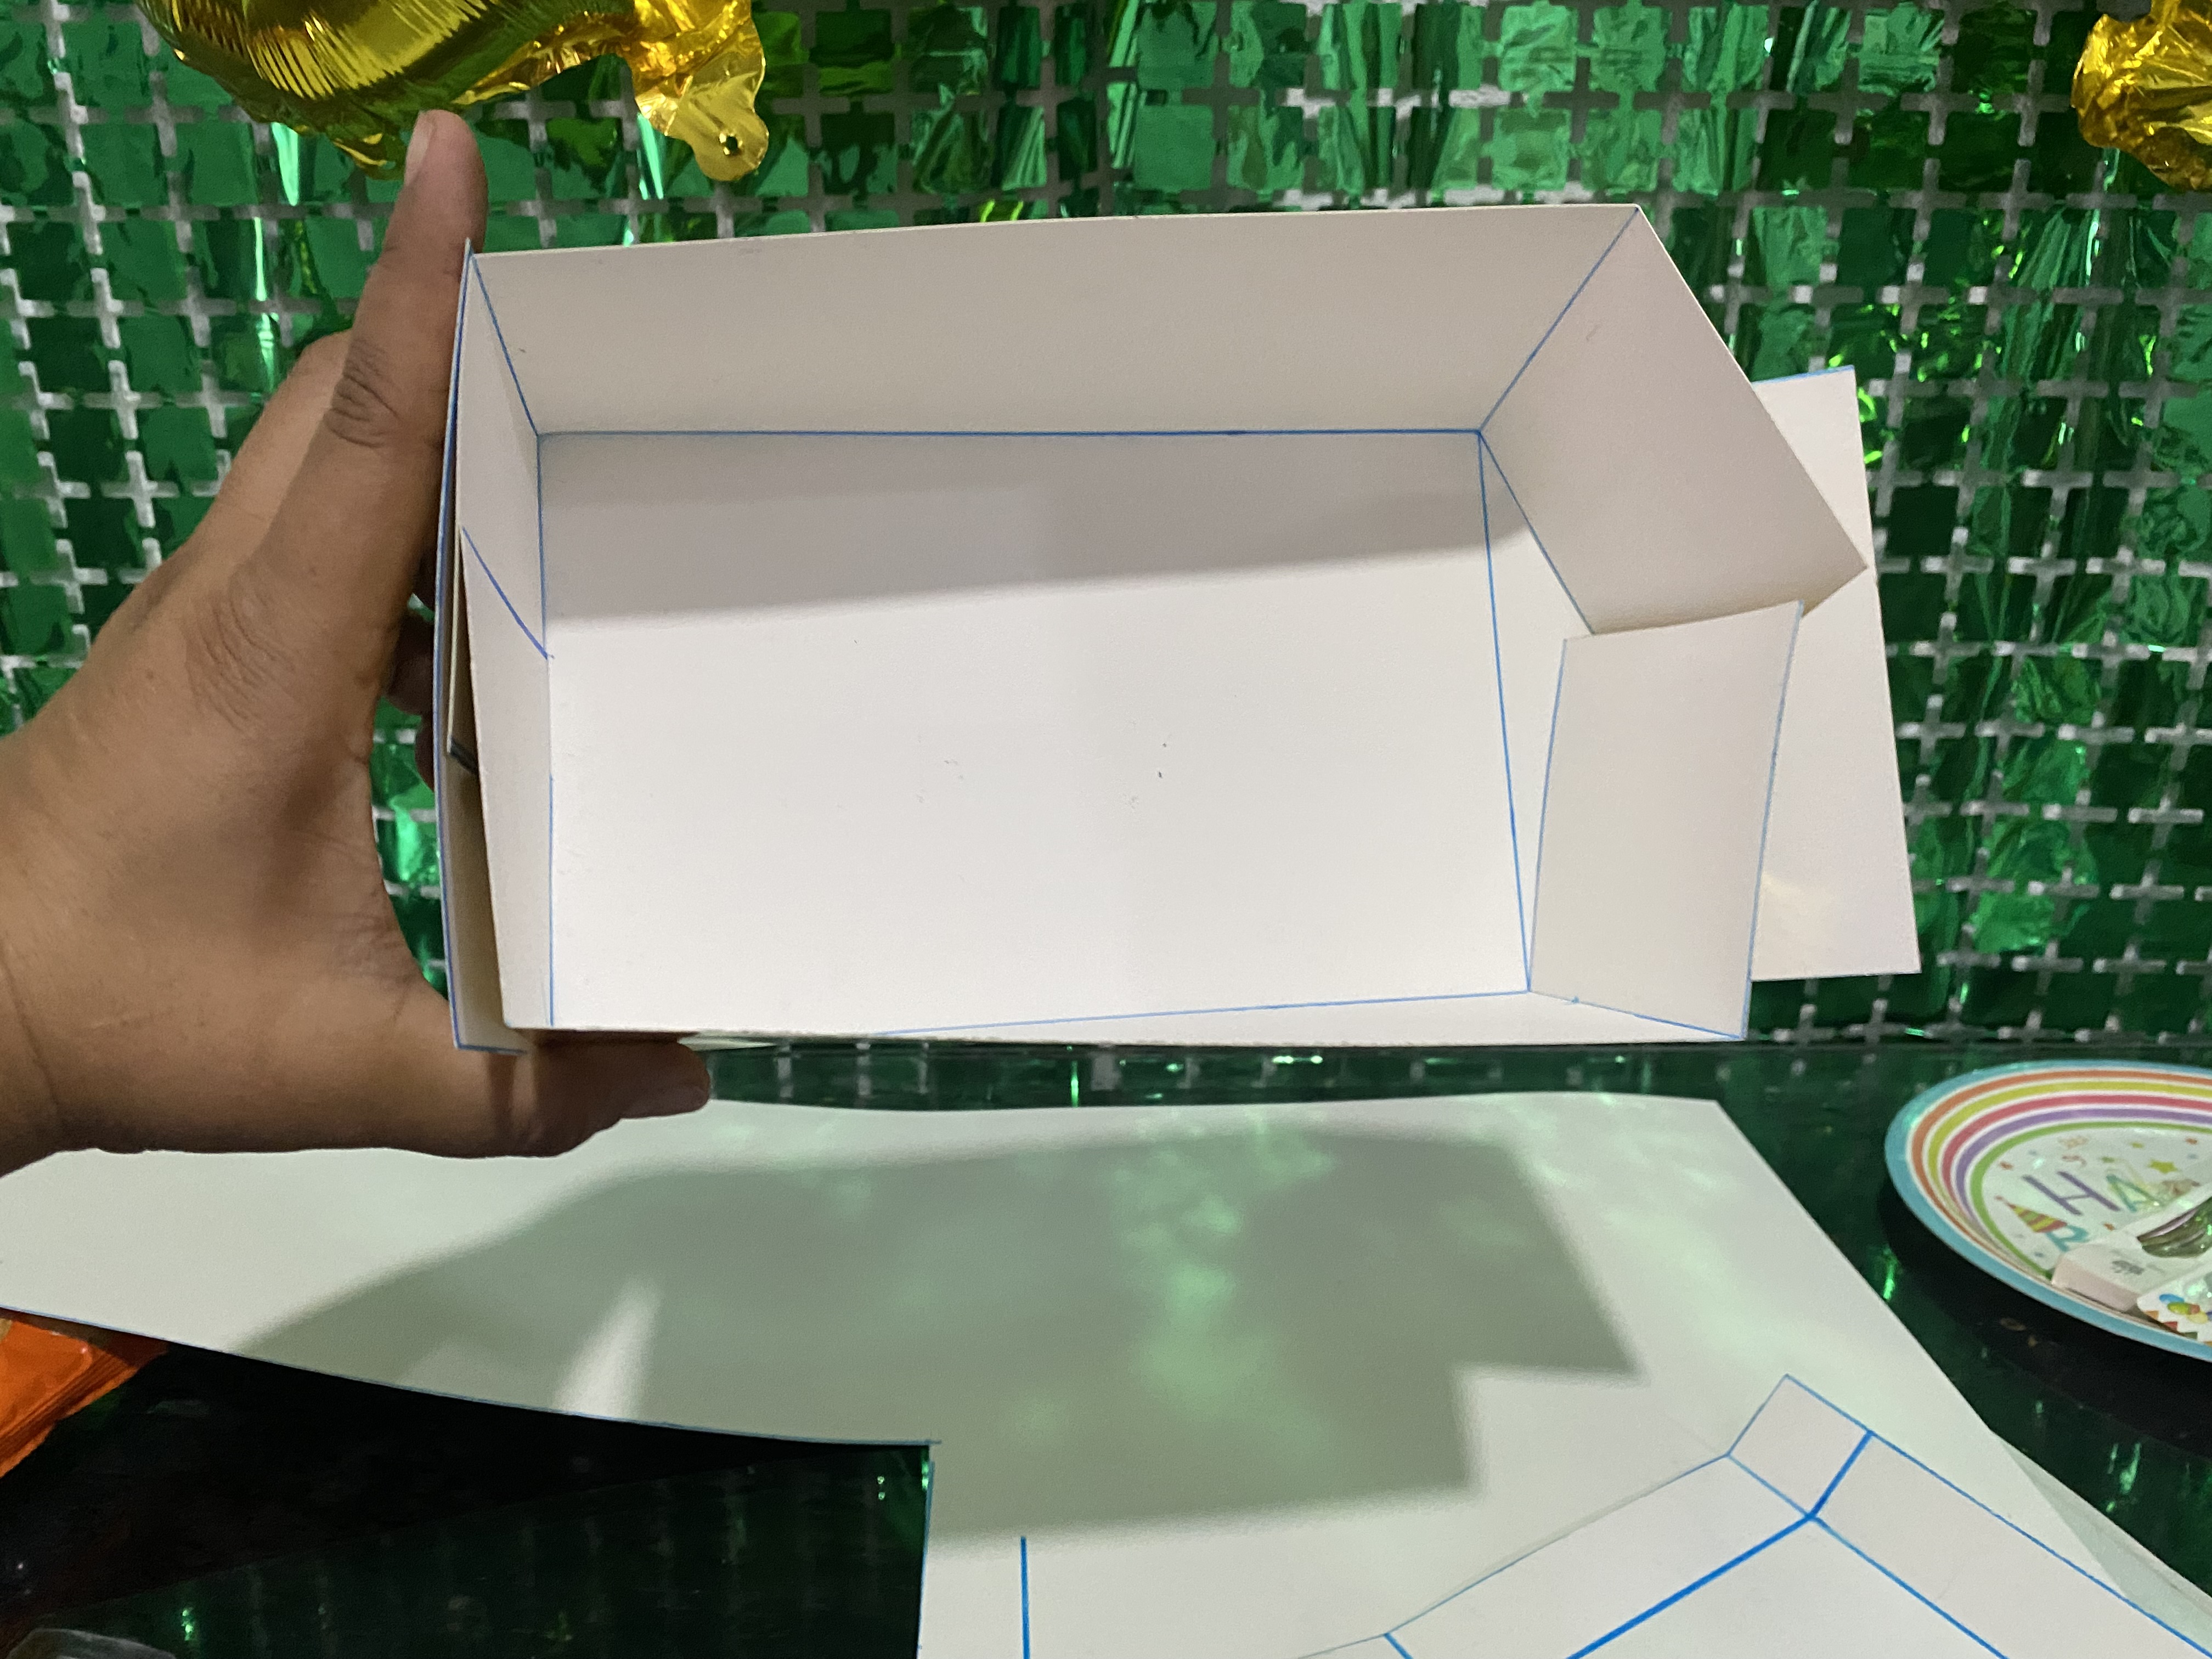
Luego de dibujar las dos partes de nuestra caja vamos a cortar por toda la orilla y luego marcamos con el borde de una tijera para poder doblar y que se nos haga más fácil, cortamos en una de las marcas de las esquinas para doblar la pestaña y pegar tanto la base de la caja como la tapa, sólo que la tapa la pegaremos al finalizar el procedimiento
> For the next step, we'll draw the box lid. The edge of the lid will be 3 cm and the base 21 cm. Then, on the opposite side, we'll mark 3 cm by 13 cm.
>
> After drawing the two parts of our box, we'll cut along the entire edge and then mark with the edge of a pair of scissors to make folding easier. We'll cut along one of the corner marks to fold the tab and glue both the base of the box and the lid. We'll only glue the lid after finishing the procedure.
|||
|---|---|
|||
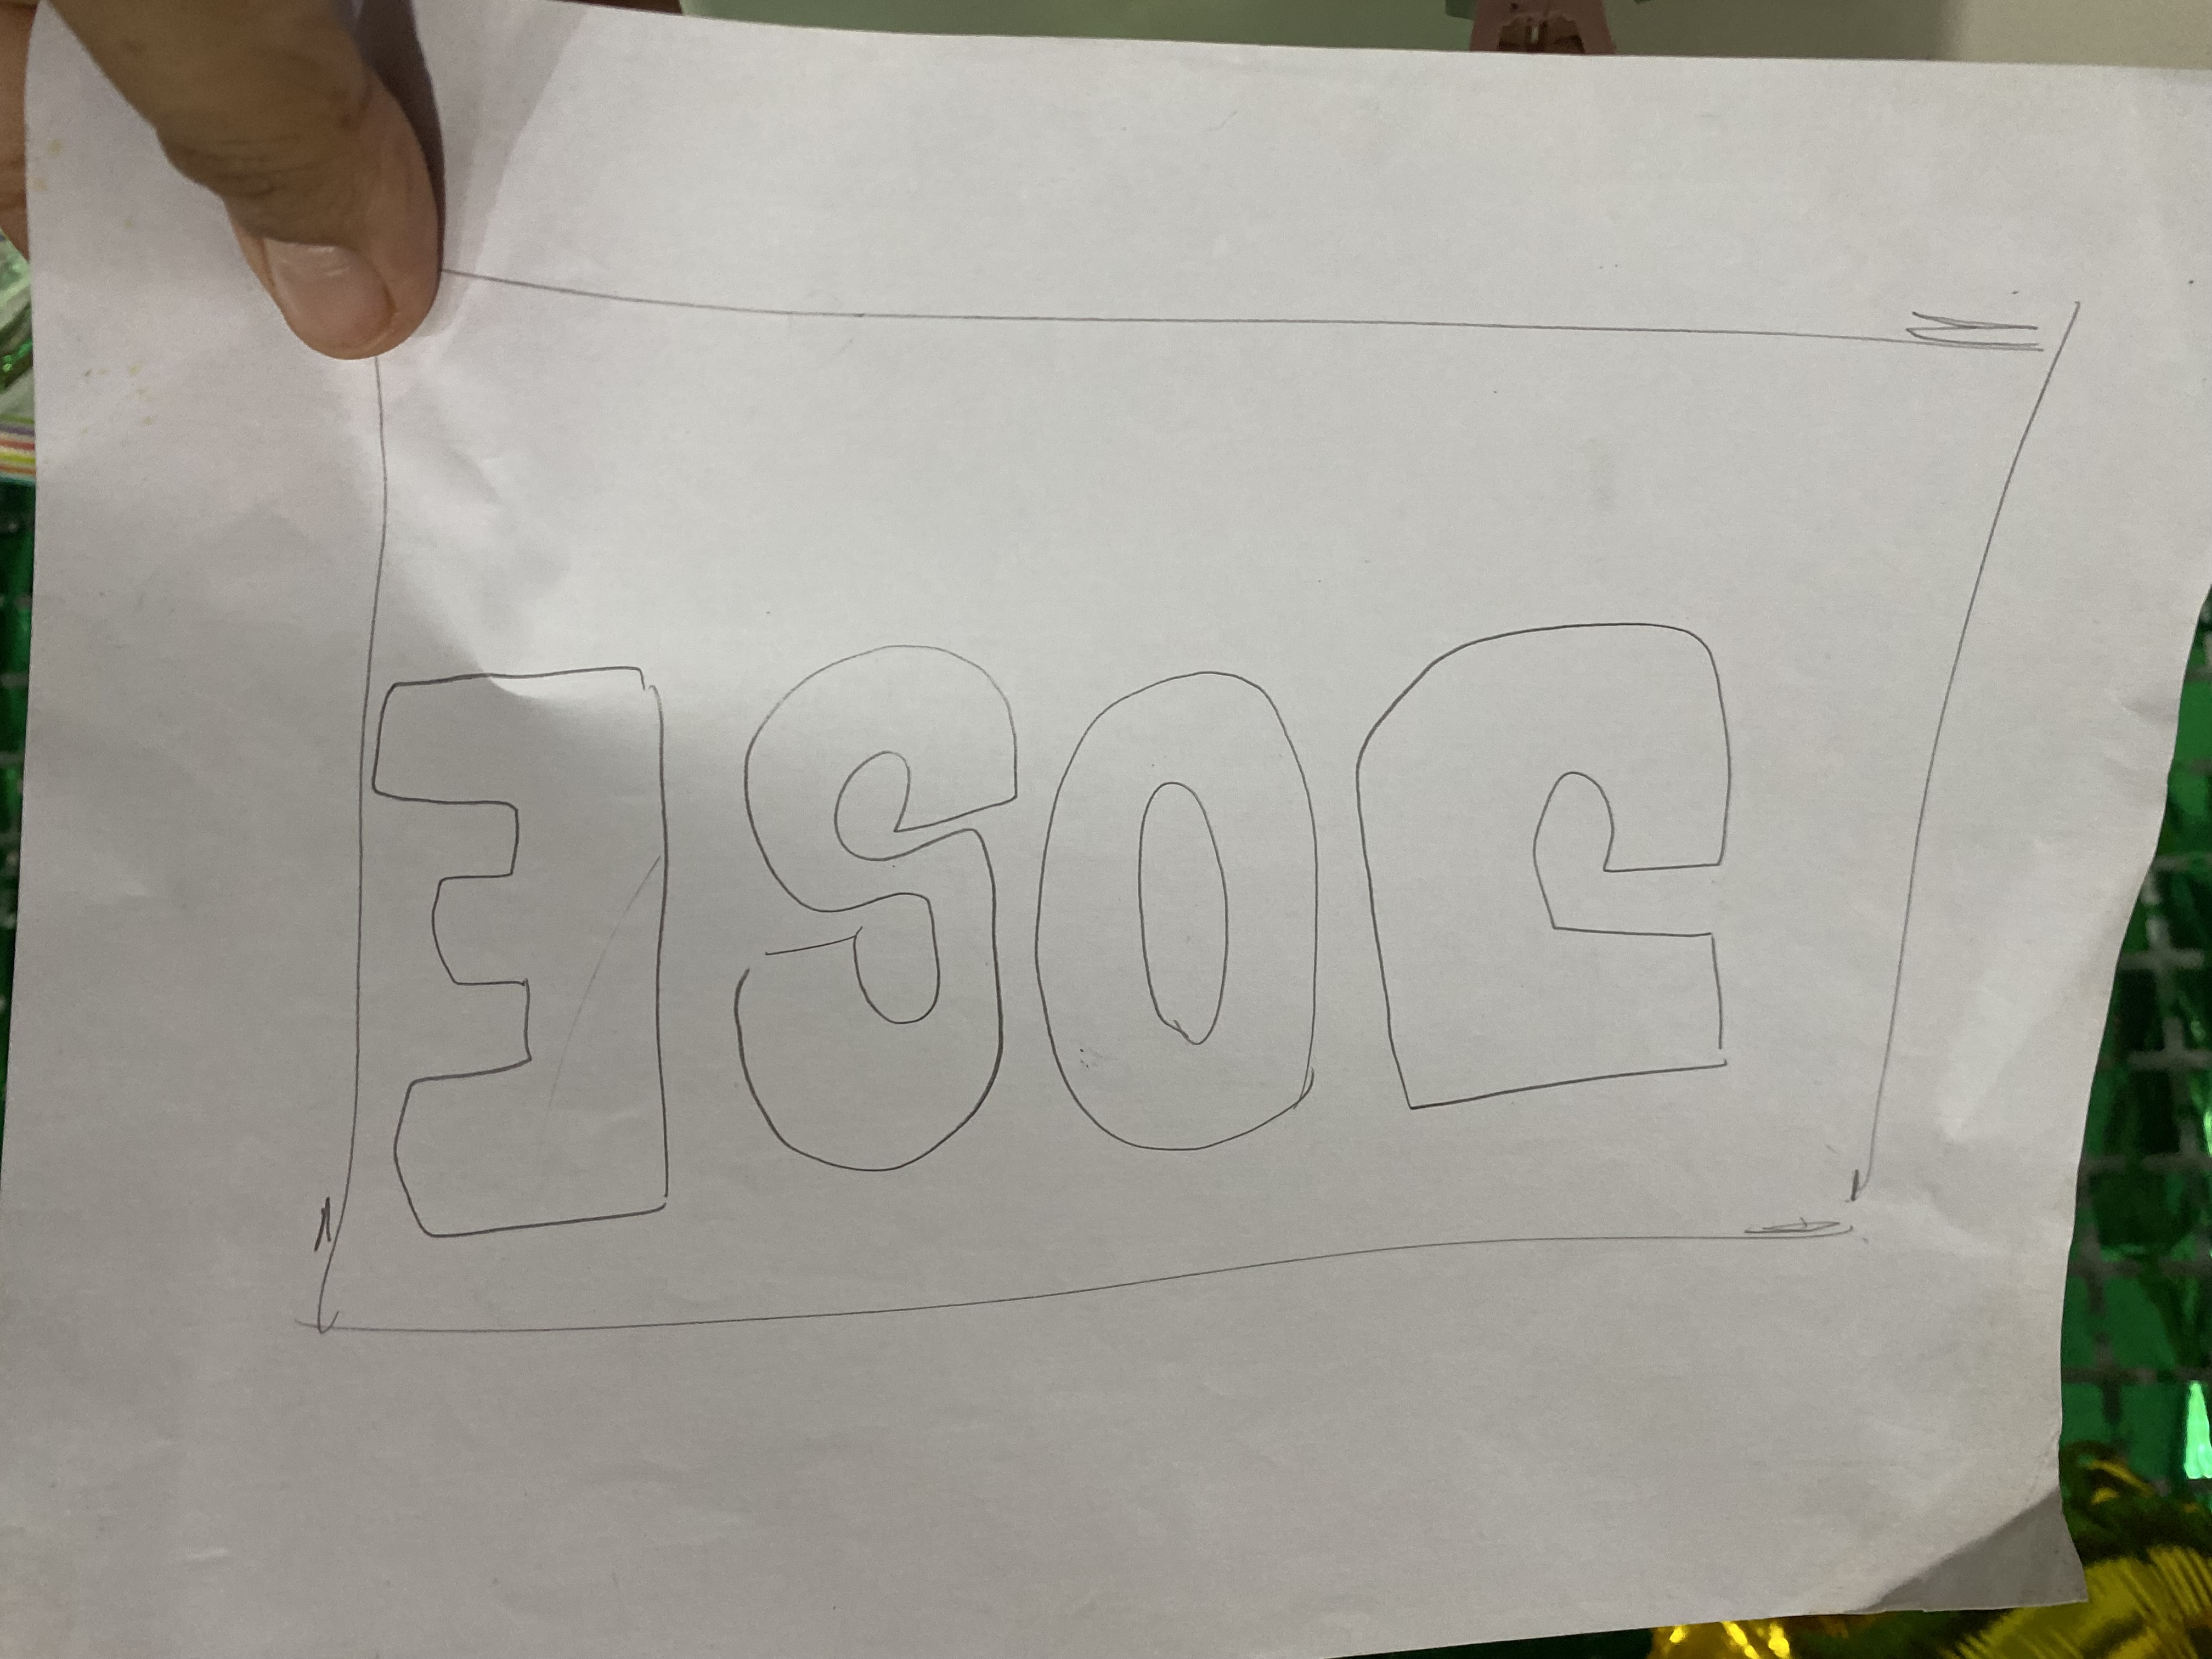
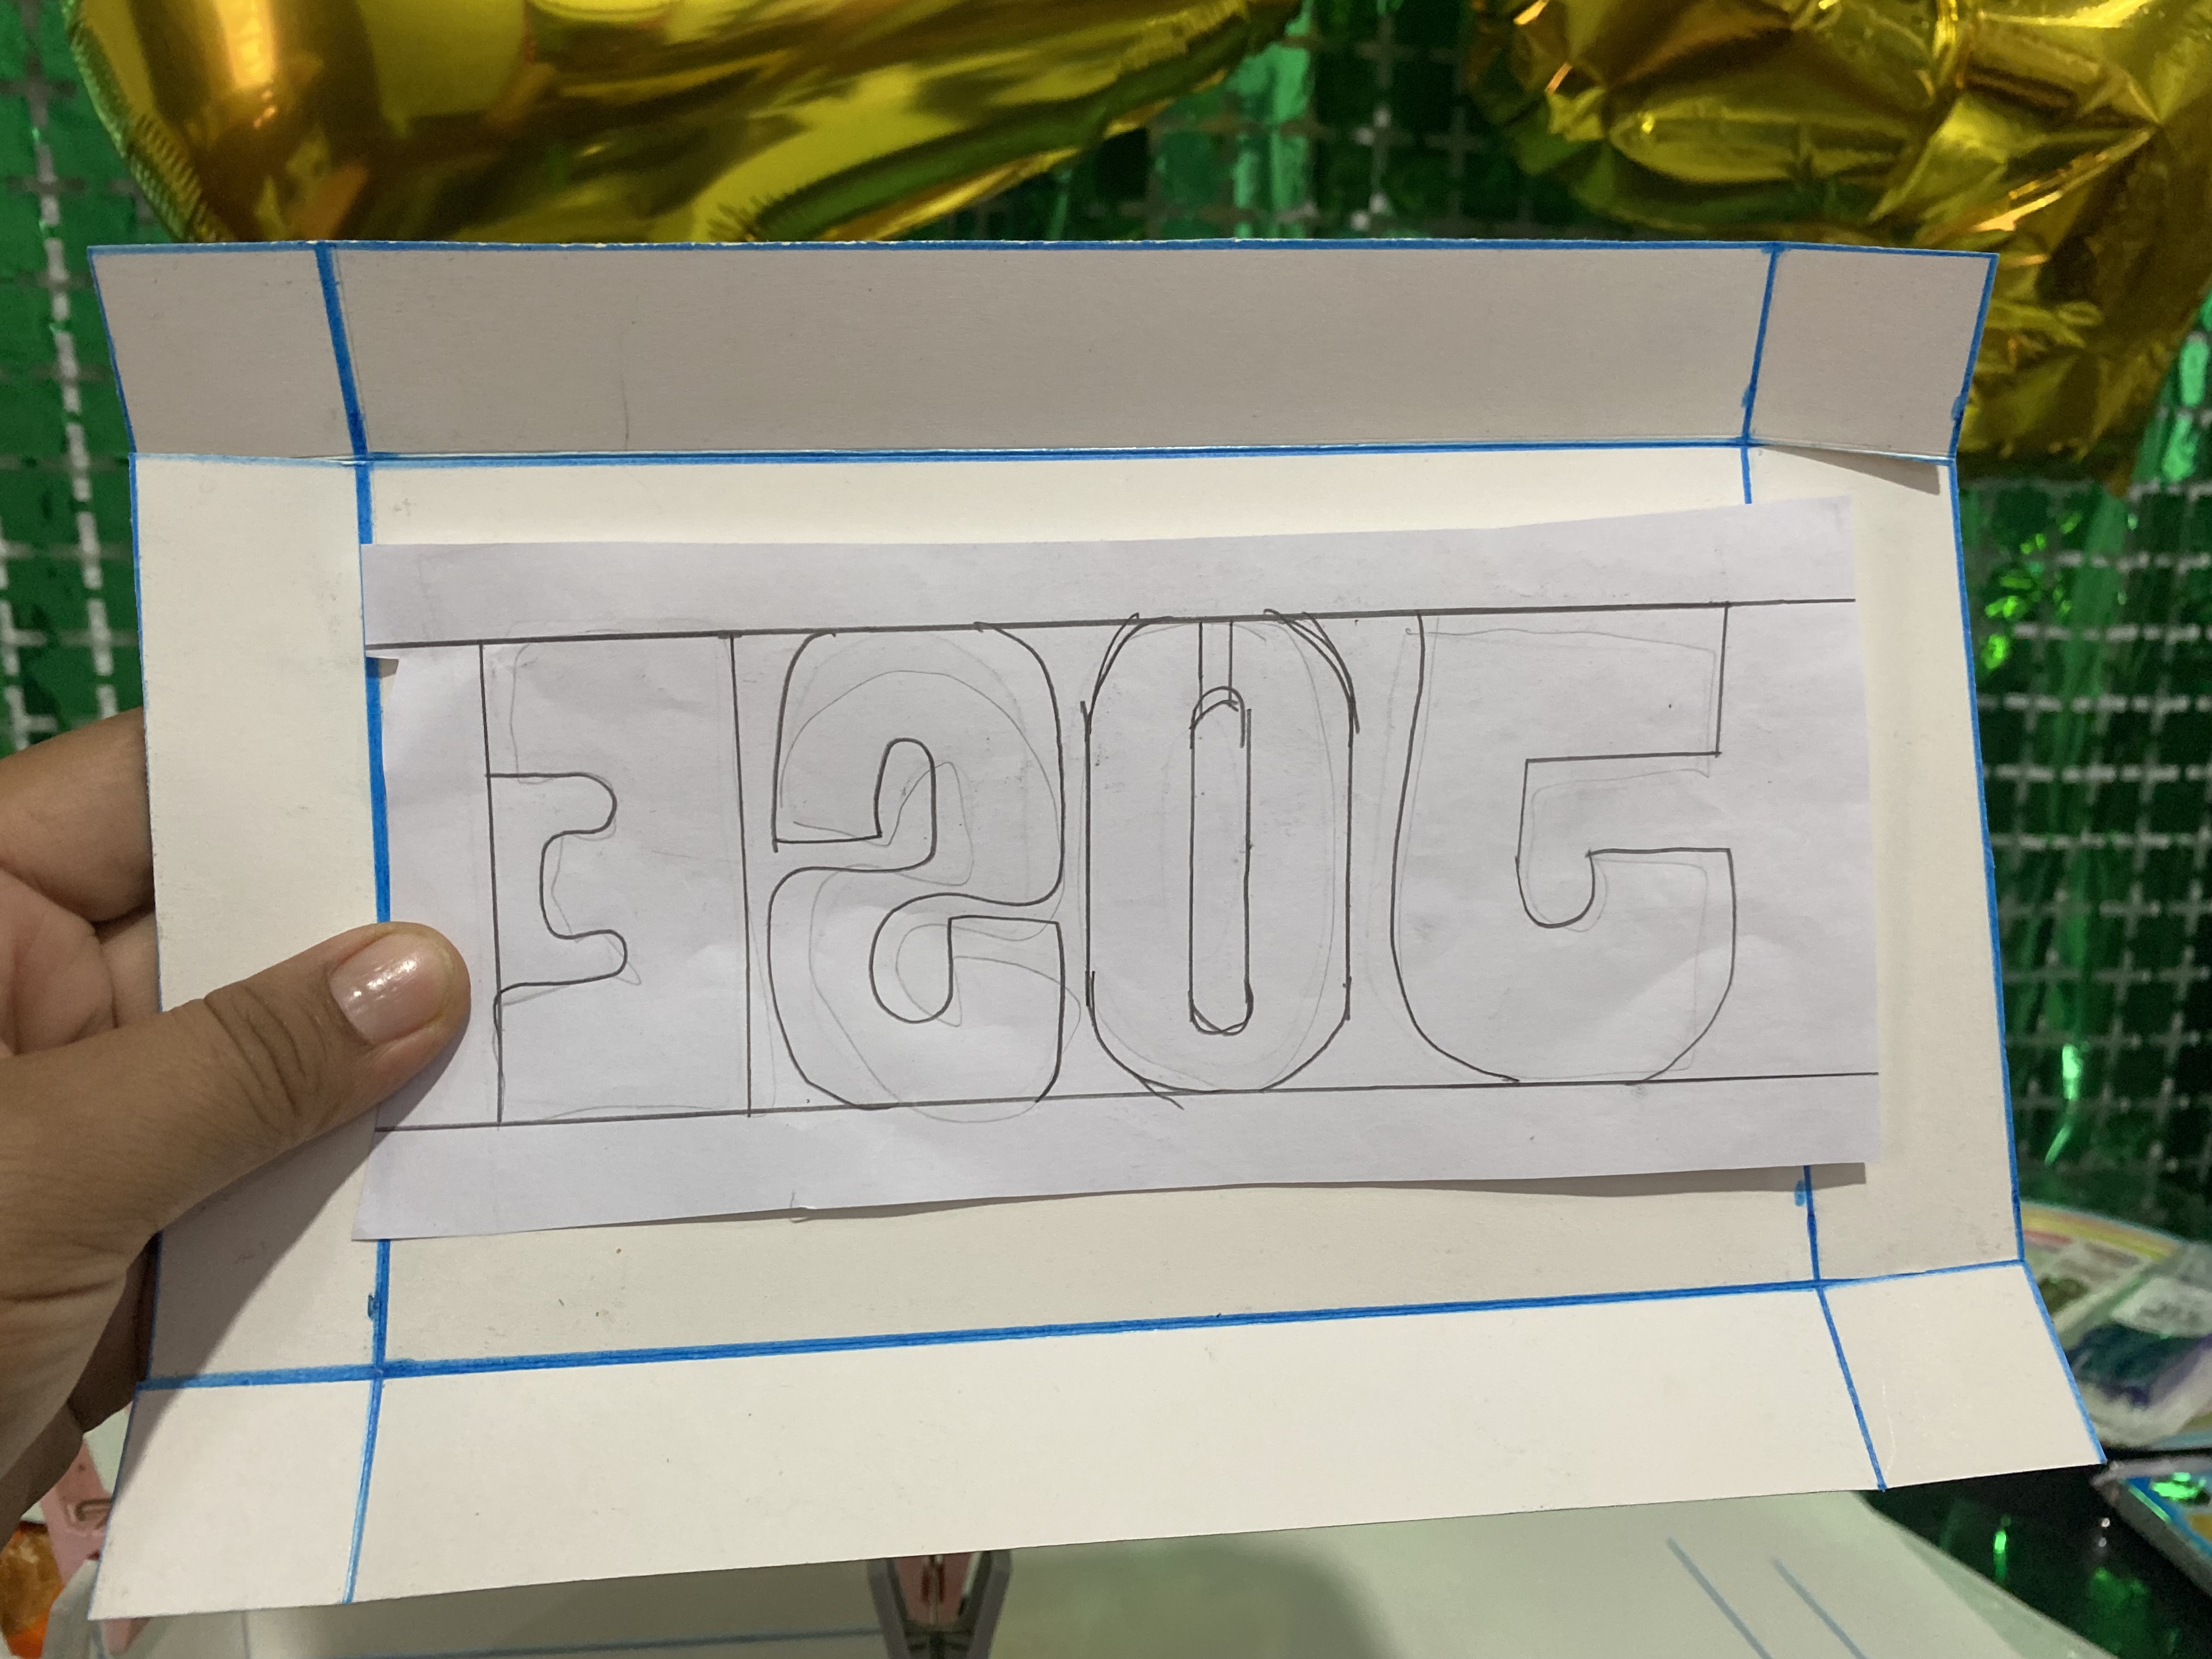
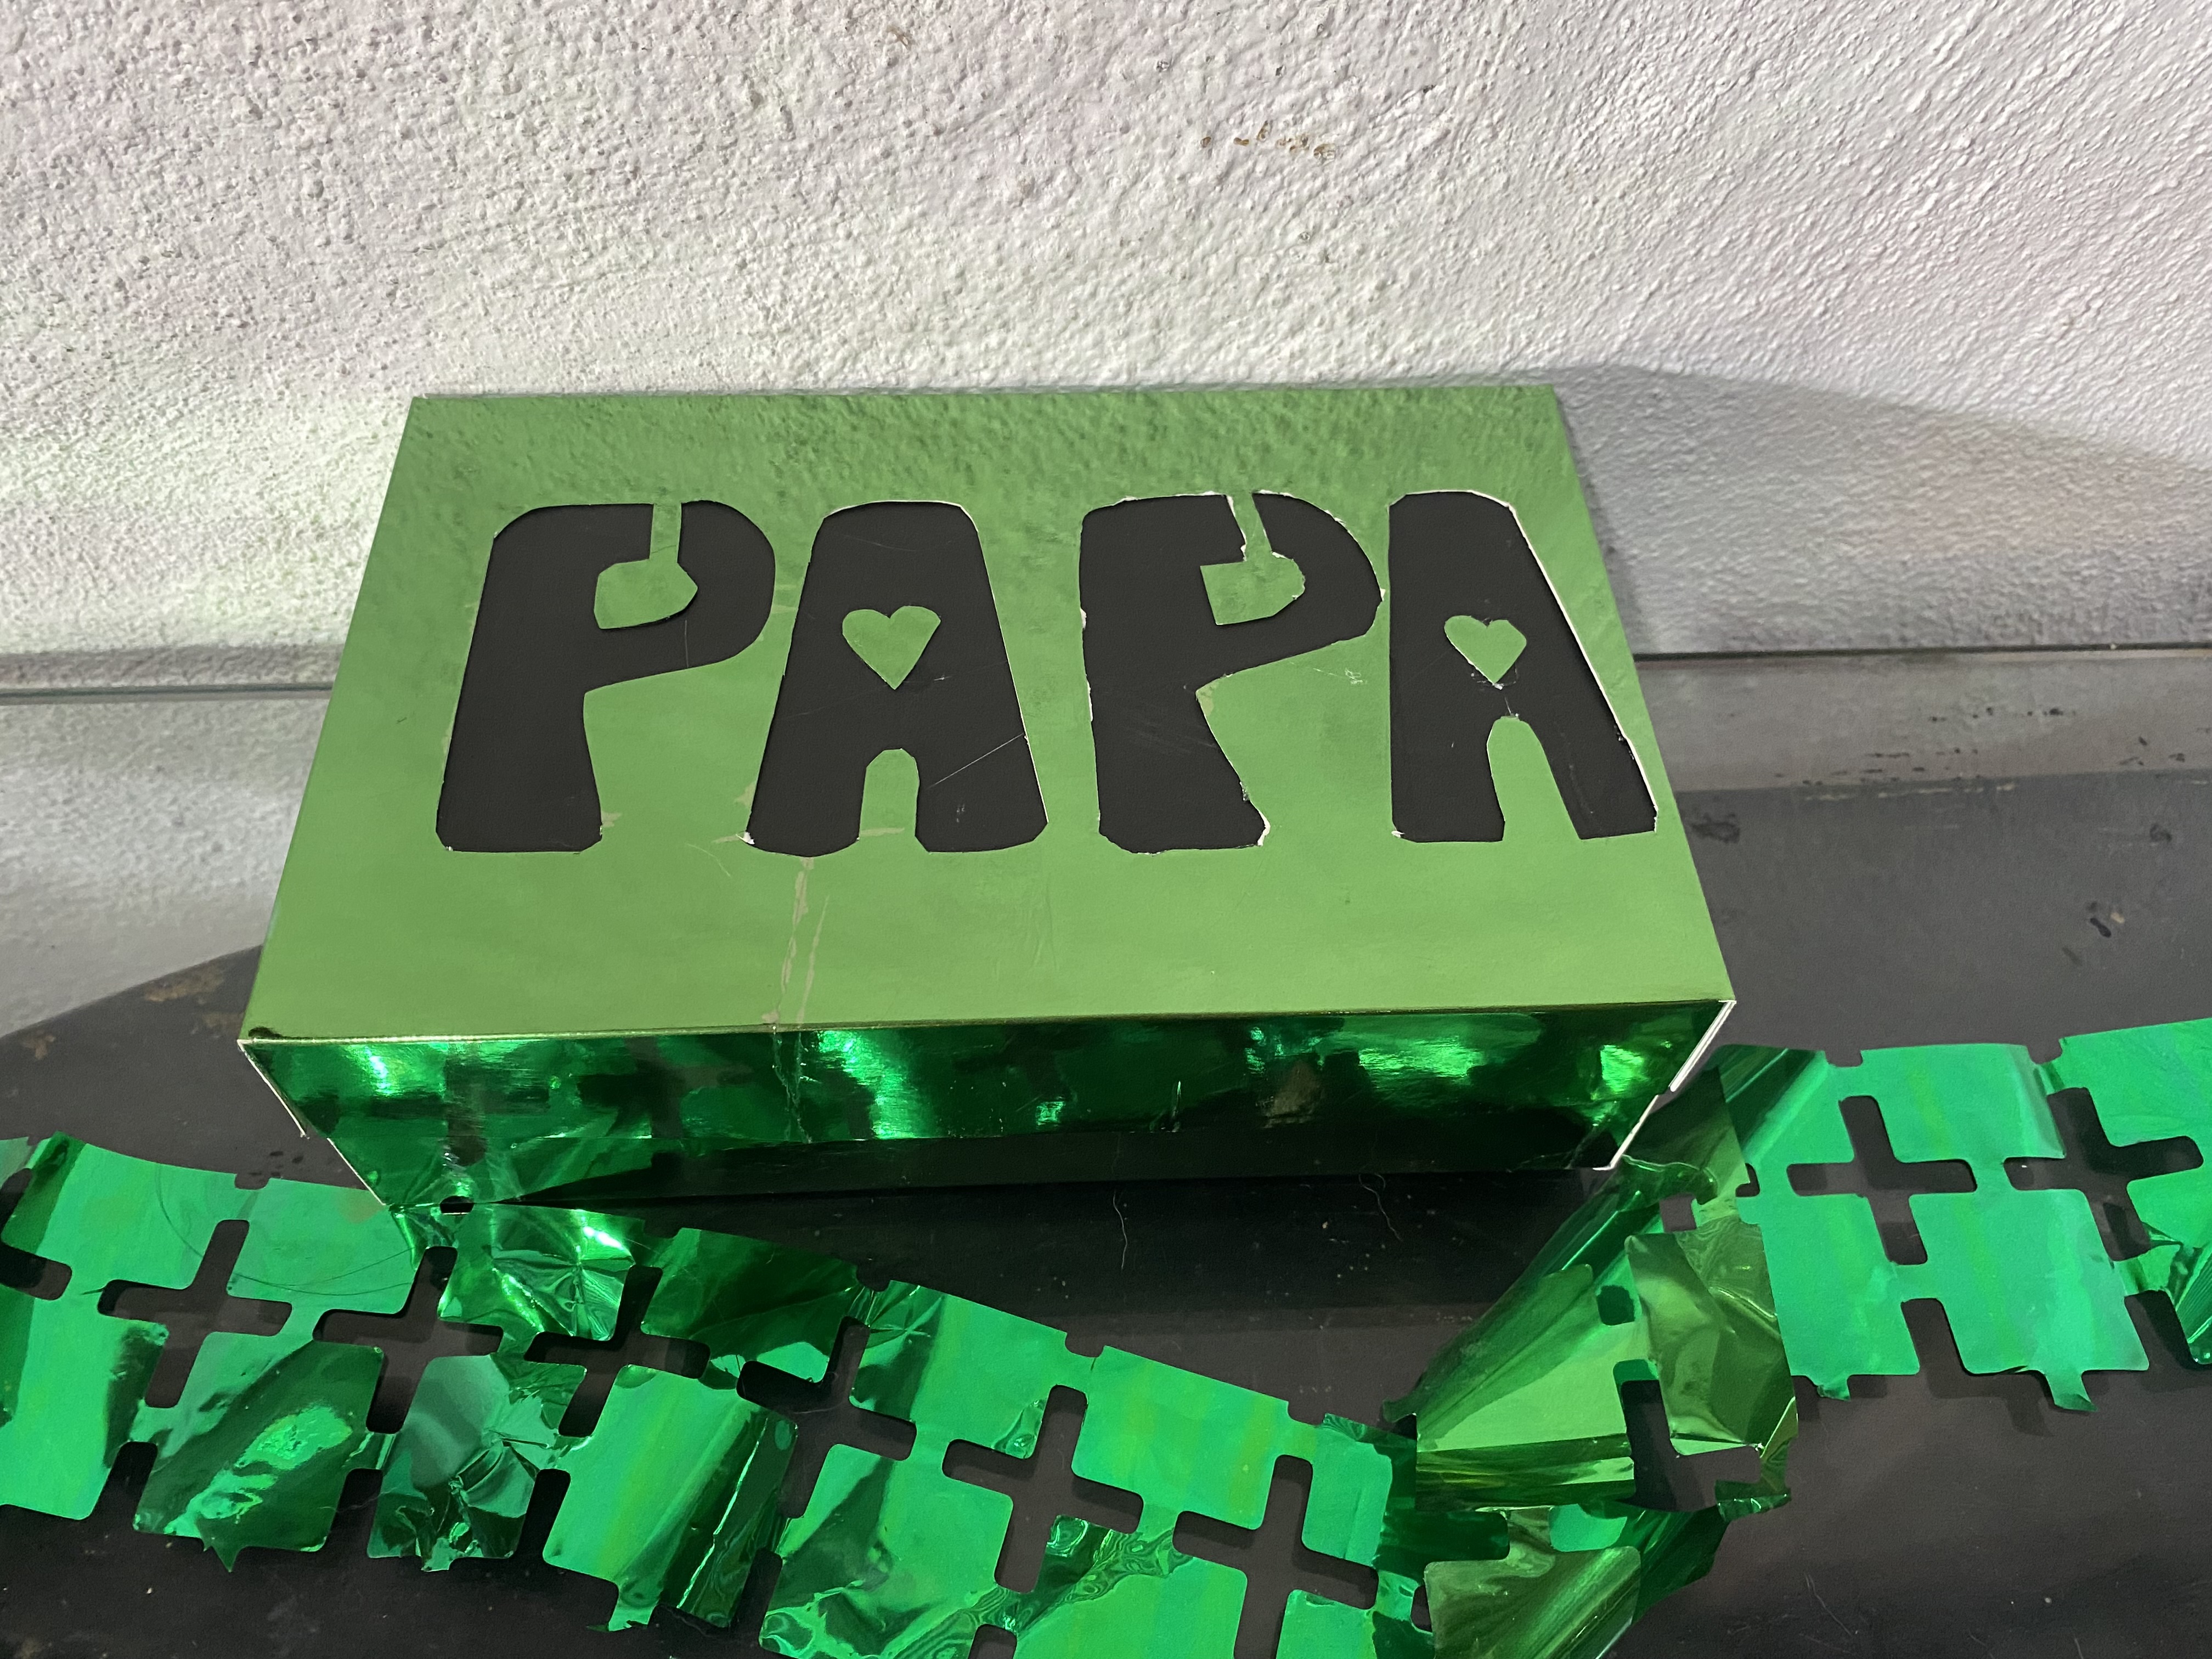
Para el siguiente paso vamos a personalizar nuestra caja, en una hoja vamos a dibujar el tamaño de la tapa de la caja y adentro vamos a hacer el nombre que queremos plasmar, luego volteamos la hoja y tratamos de dibujar el nombre por el lado del revés, es necesario que el nombre nos quede al revés ya que esto lo dibujaremos igual por el lado del revés de la cartulina y al cortar nos quede bien por el lado derecho.
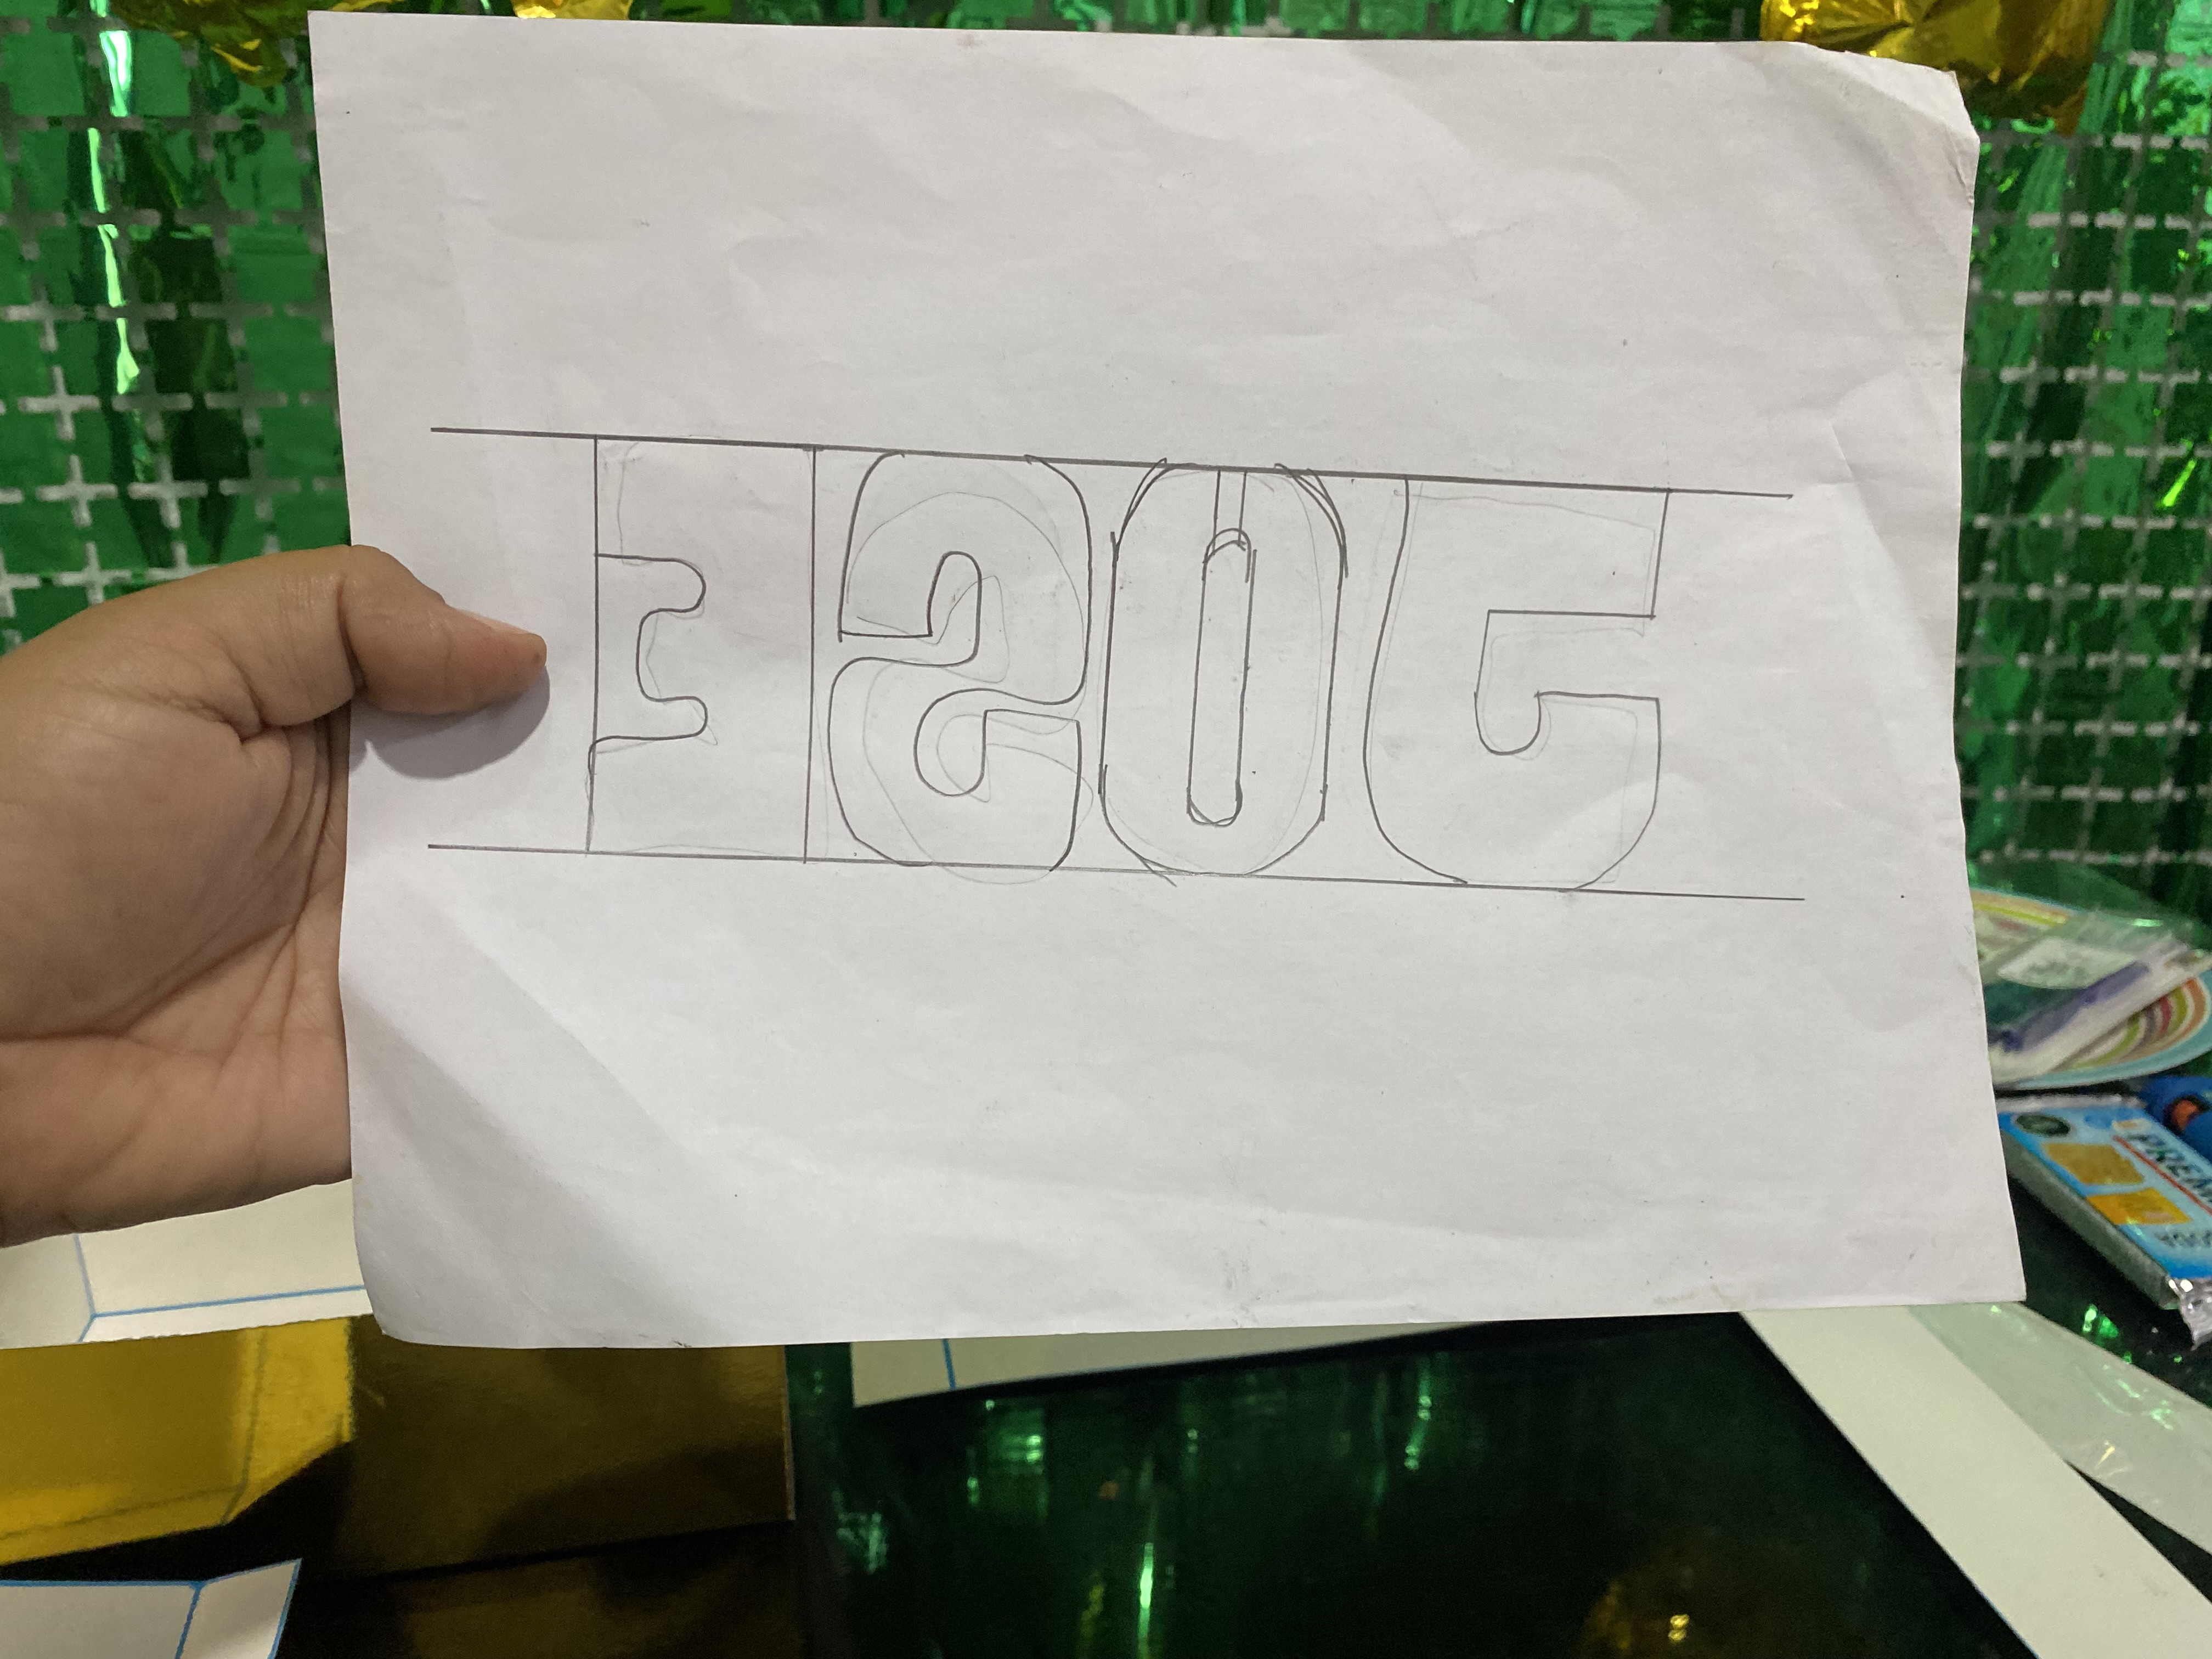
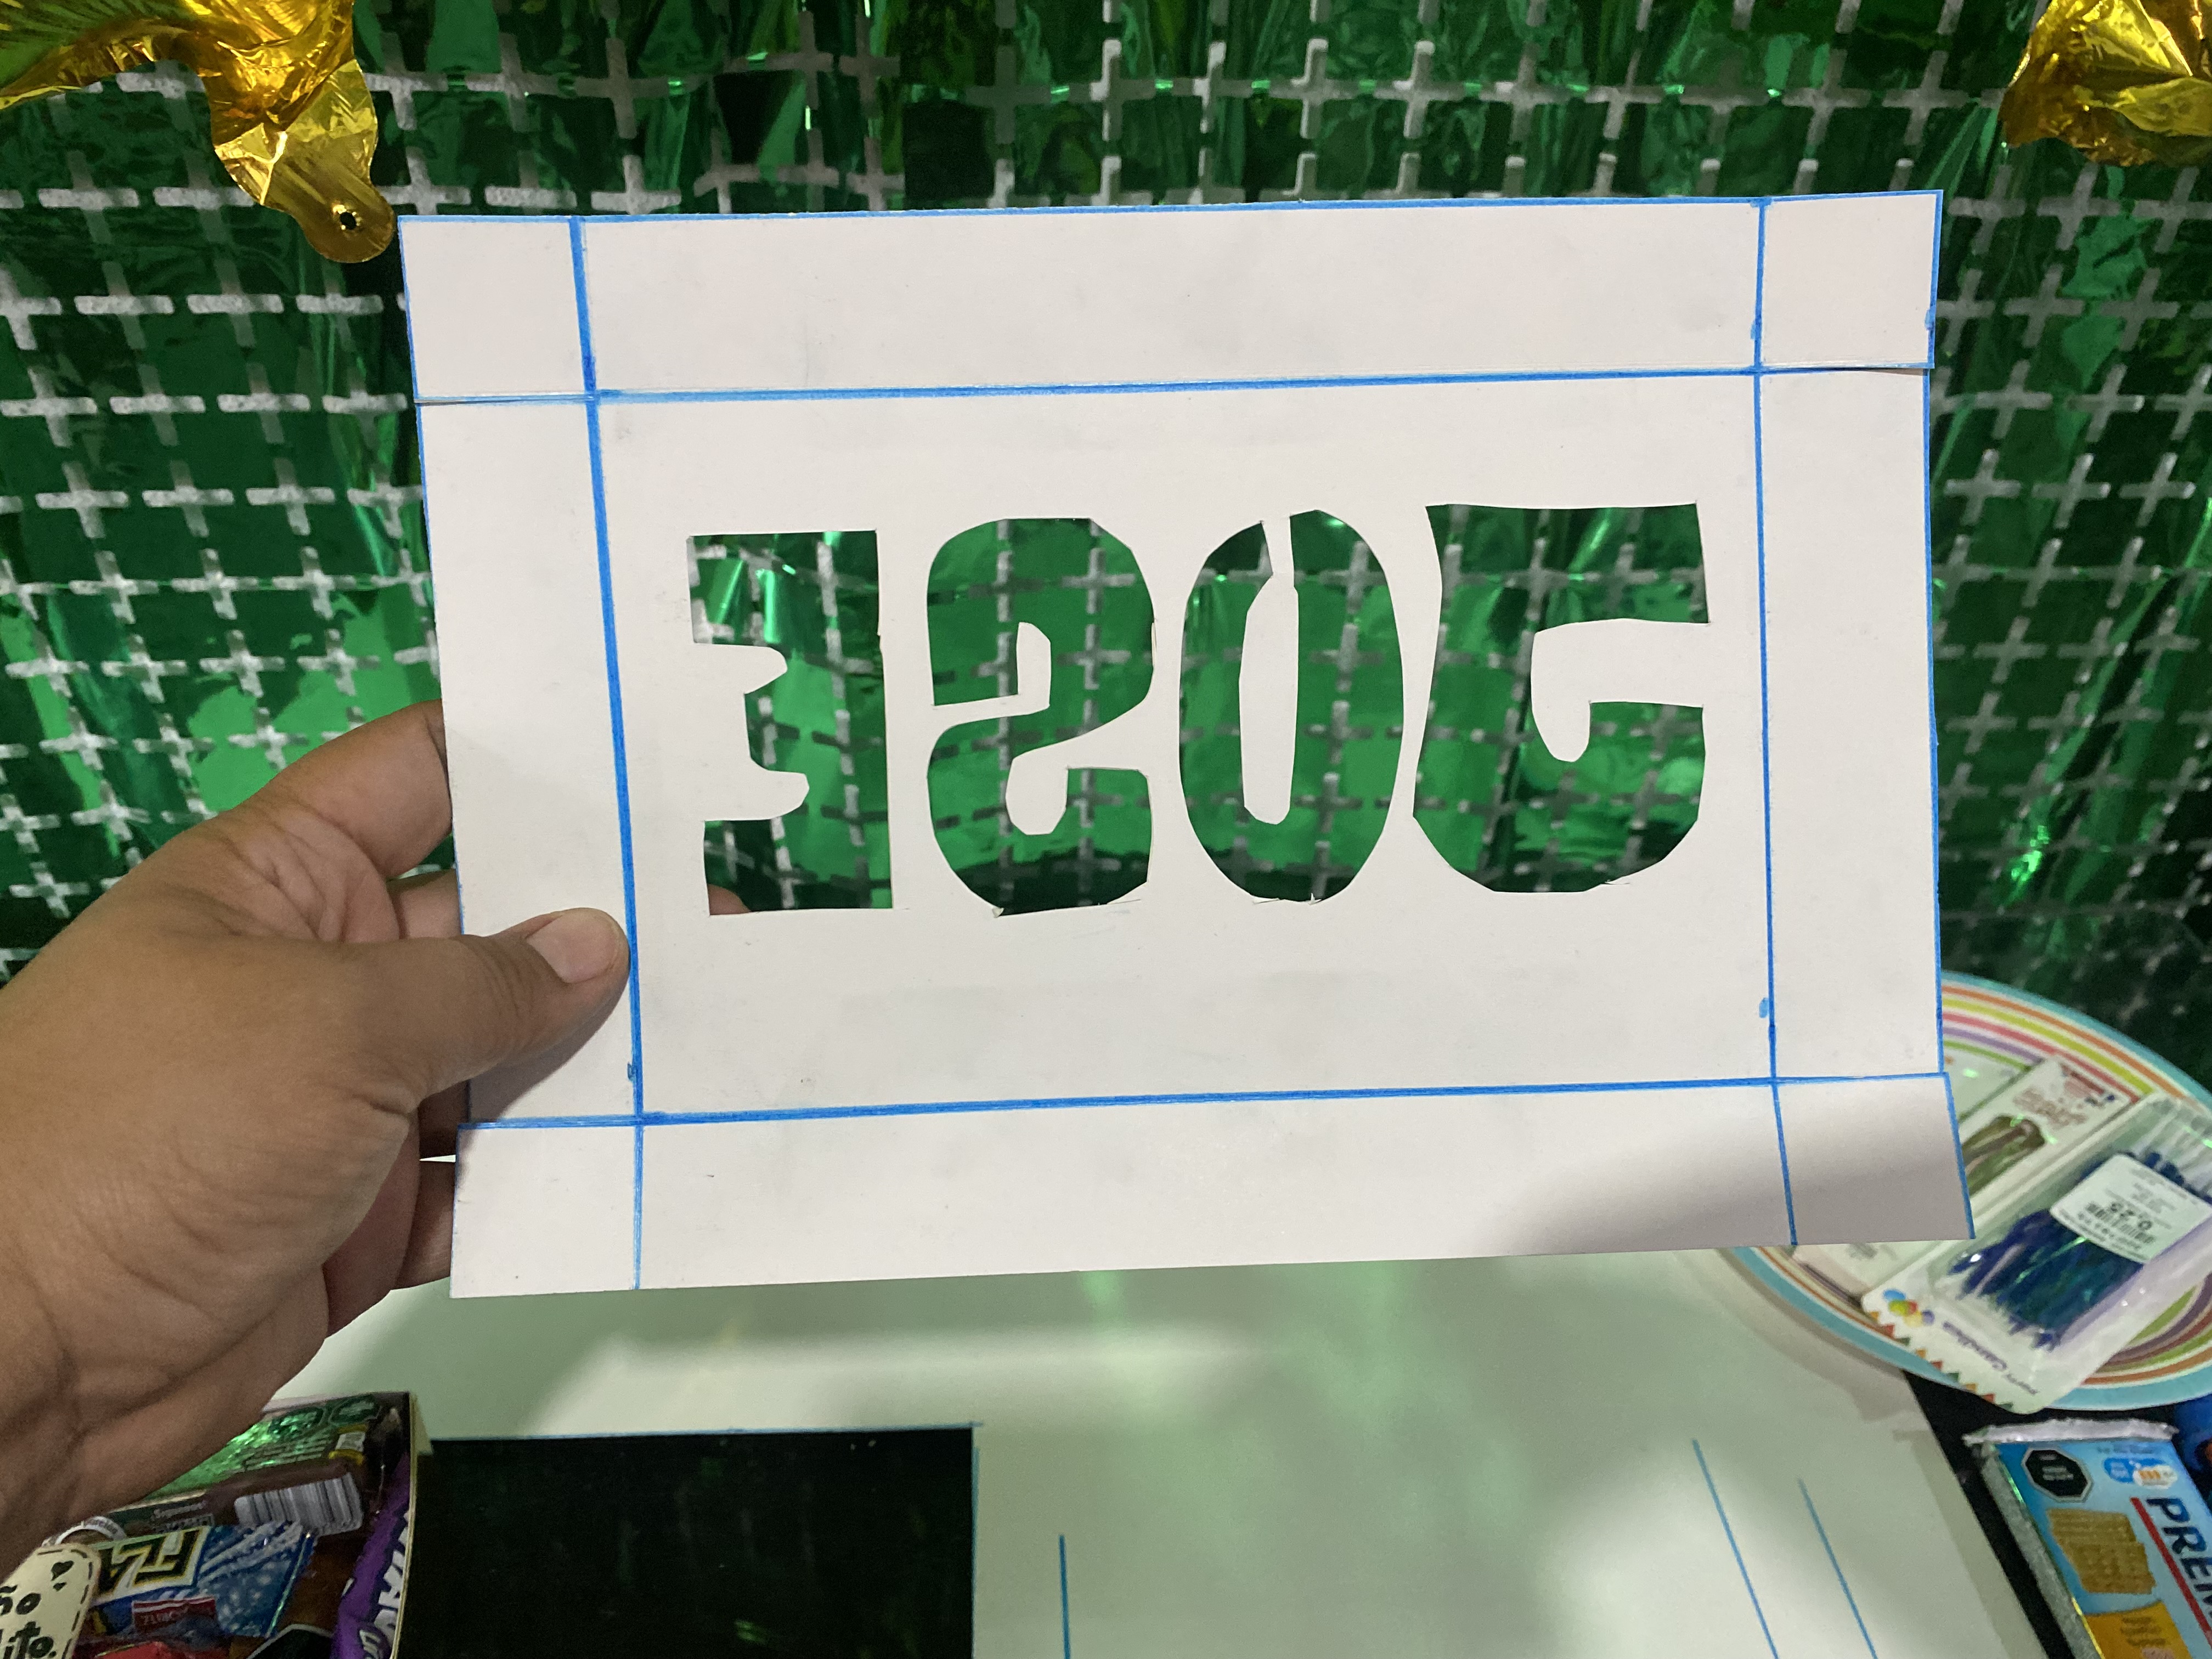
colocamos el nombre por la parte interna de la tapa de la caja y con un exacto de precisión vamos cortando con mucho cuidado para extraer cada letra, luego le podemos colocar cartulina de otro color o si prefieres le puedes colocar papel celofán de colores para que se vea diferente.
> For the next step, we're going to personalize our box. On a piece of paper, we're going to draw the size of the box lid and inside, we're going to draw the name we want to print. Then, we turn the paper over and try to draw the name on the back side. It's necessary that the name is upside down, since we'll draw it on the back side of the cardstock, and when we cut it, it will fit correctly on the right side.
>
> We place the name on the inside of the box lid and, with precision, we cut very carefully to extract each letter. Then, we can cover it with cardstock of a different color, or if you prefer, you can cover it with colored cellophane paper to make it look different.
|||
|---|---|
|||
|---|---|
|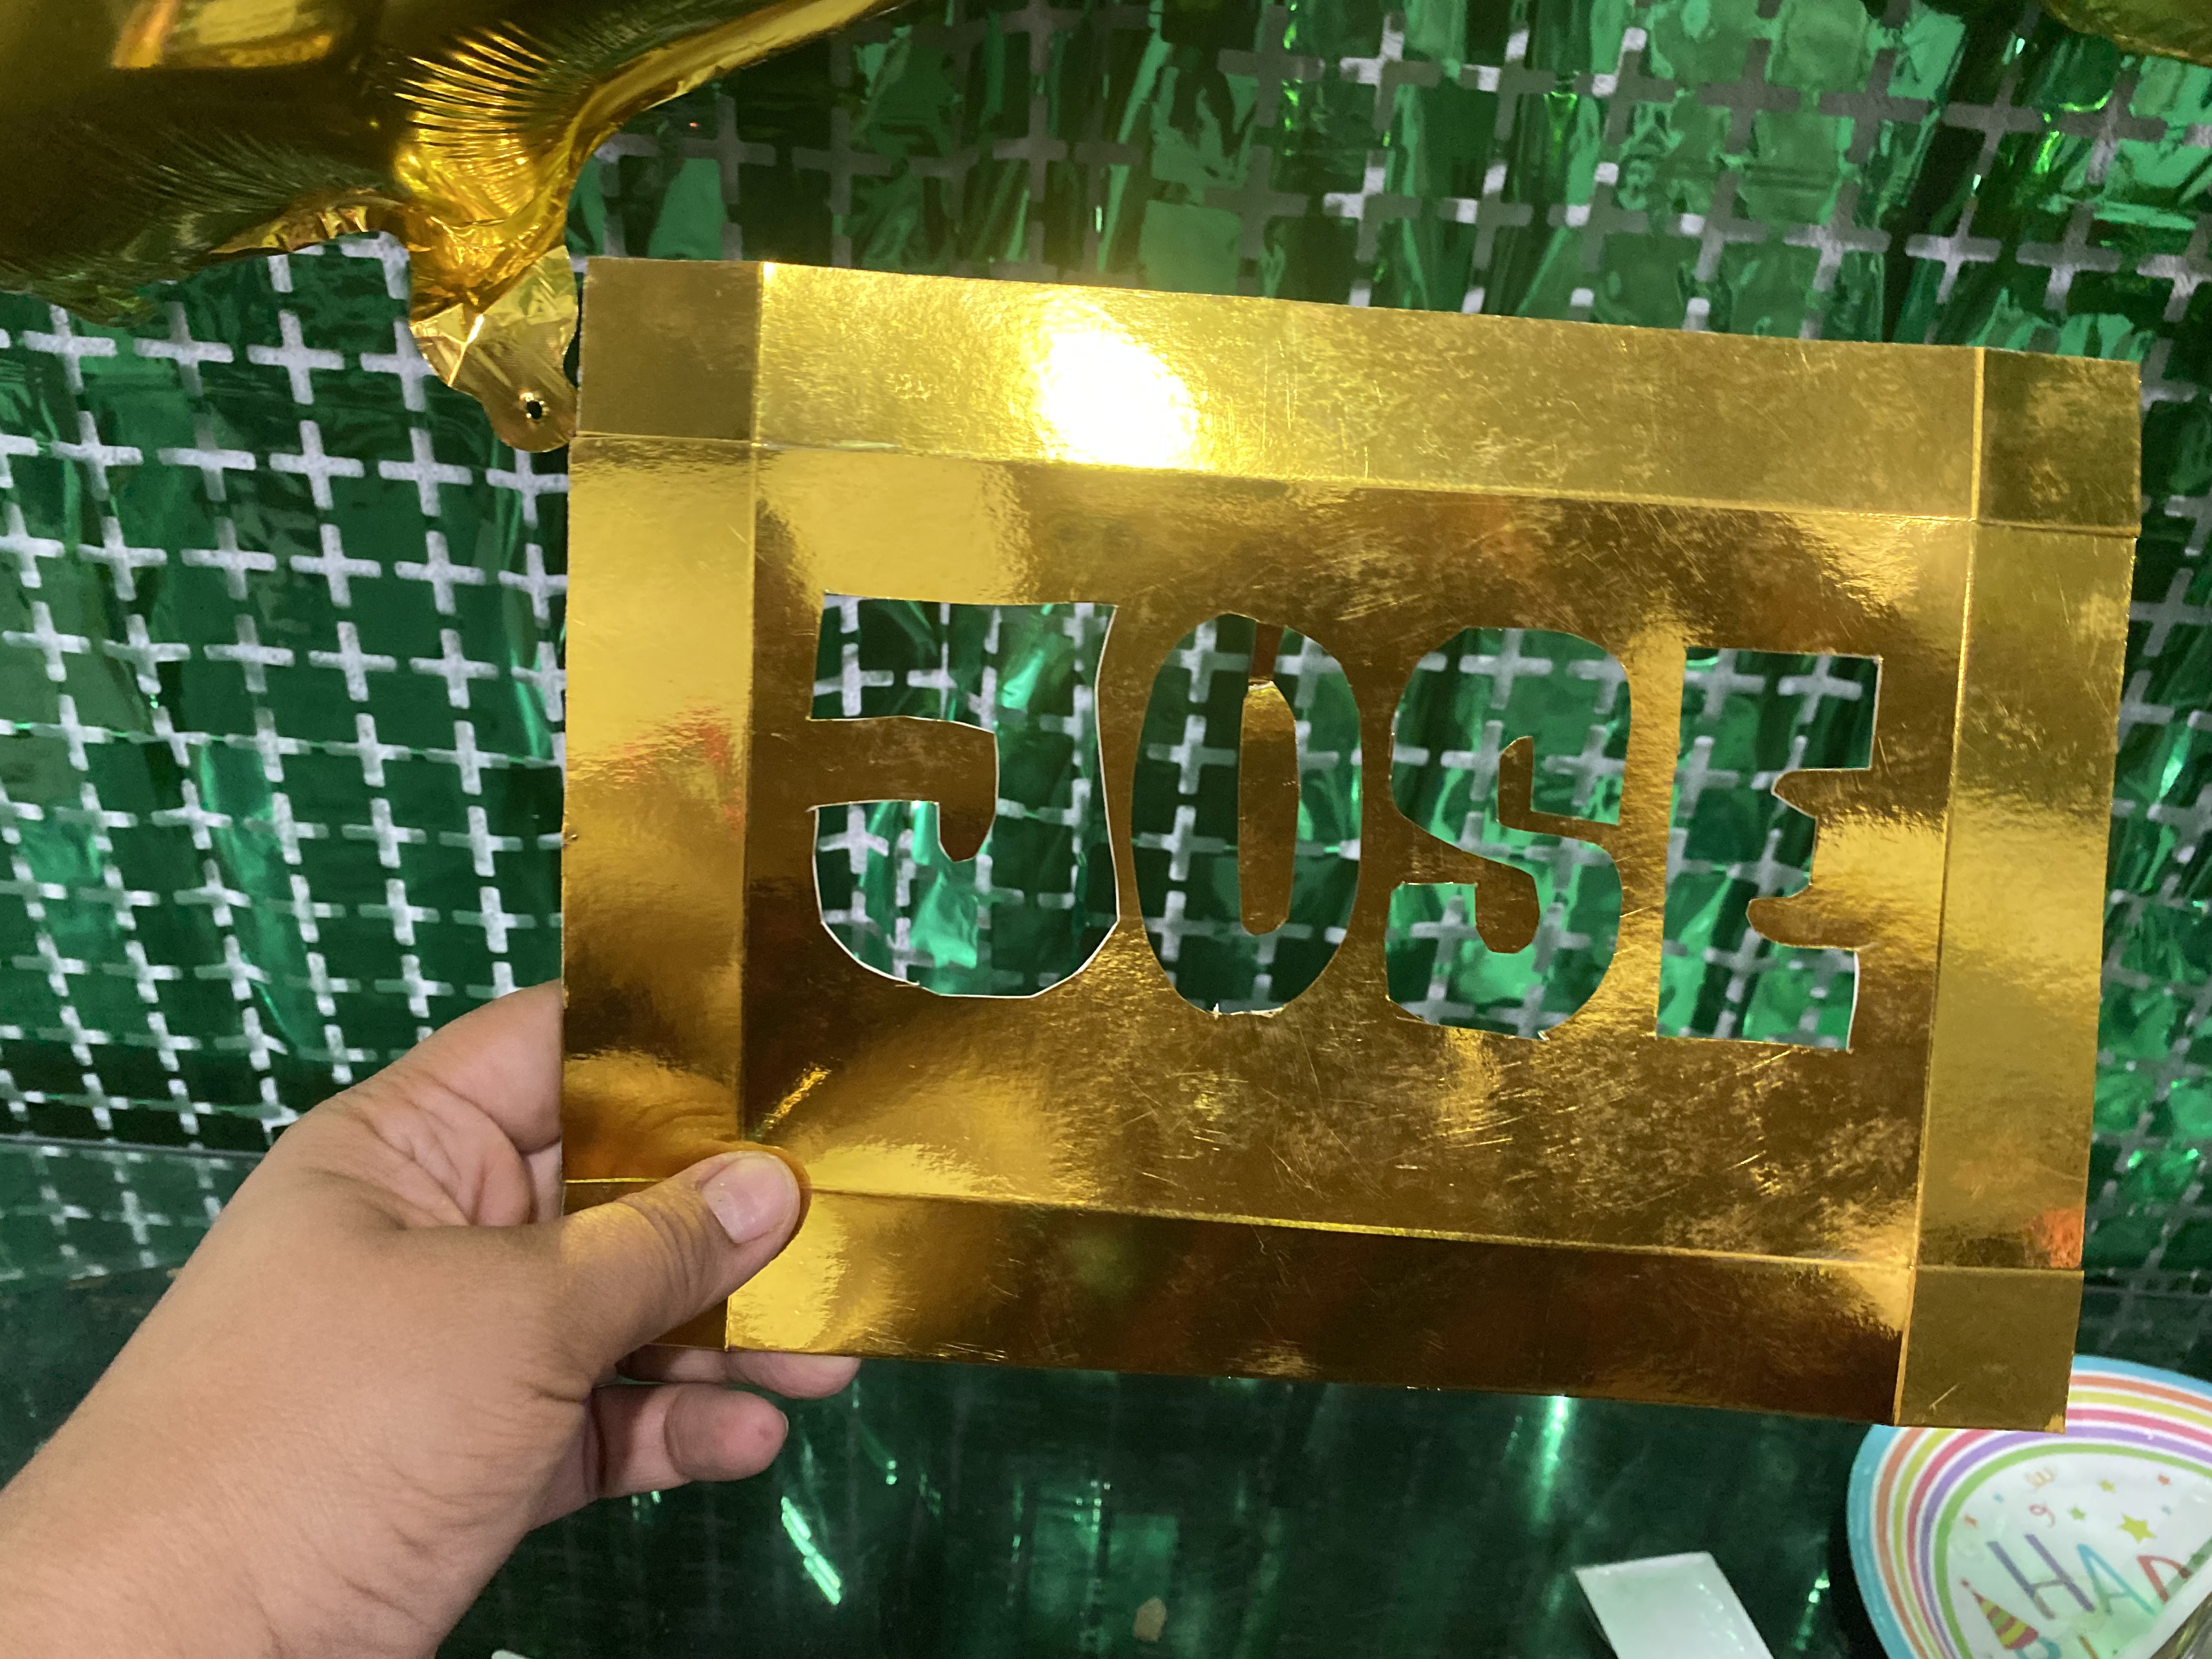|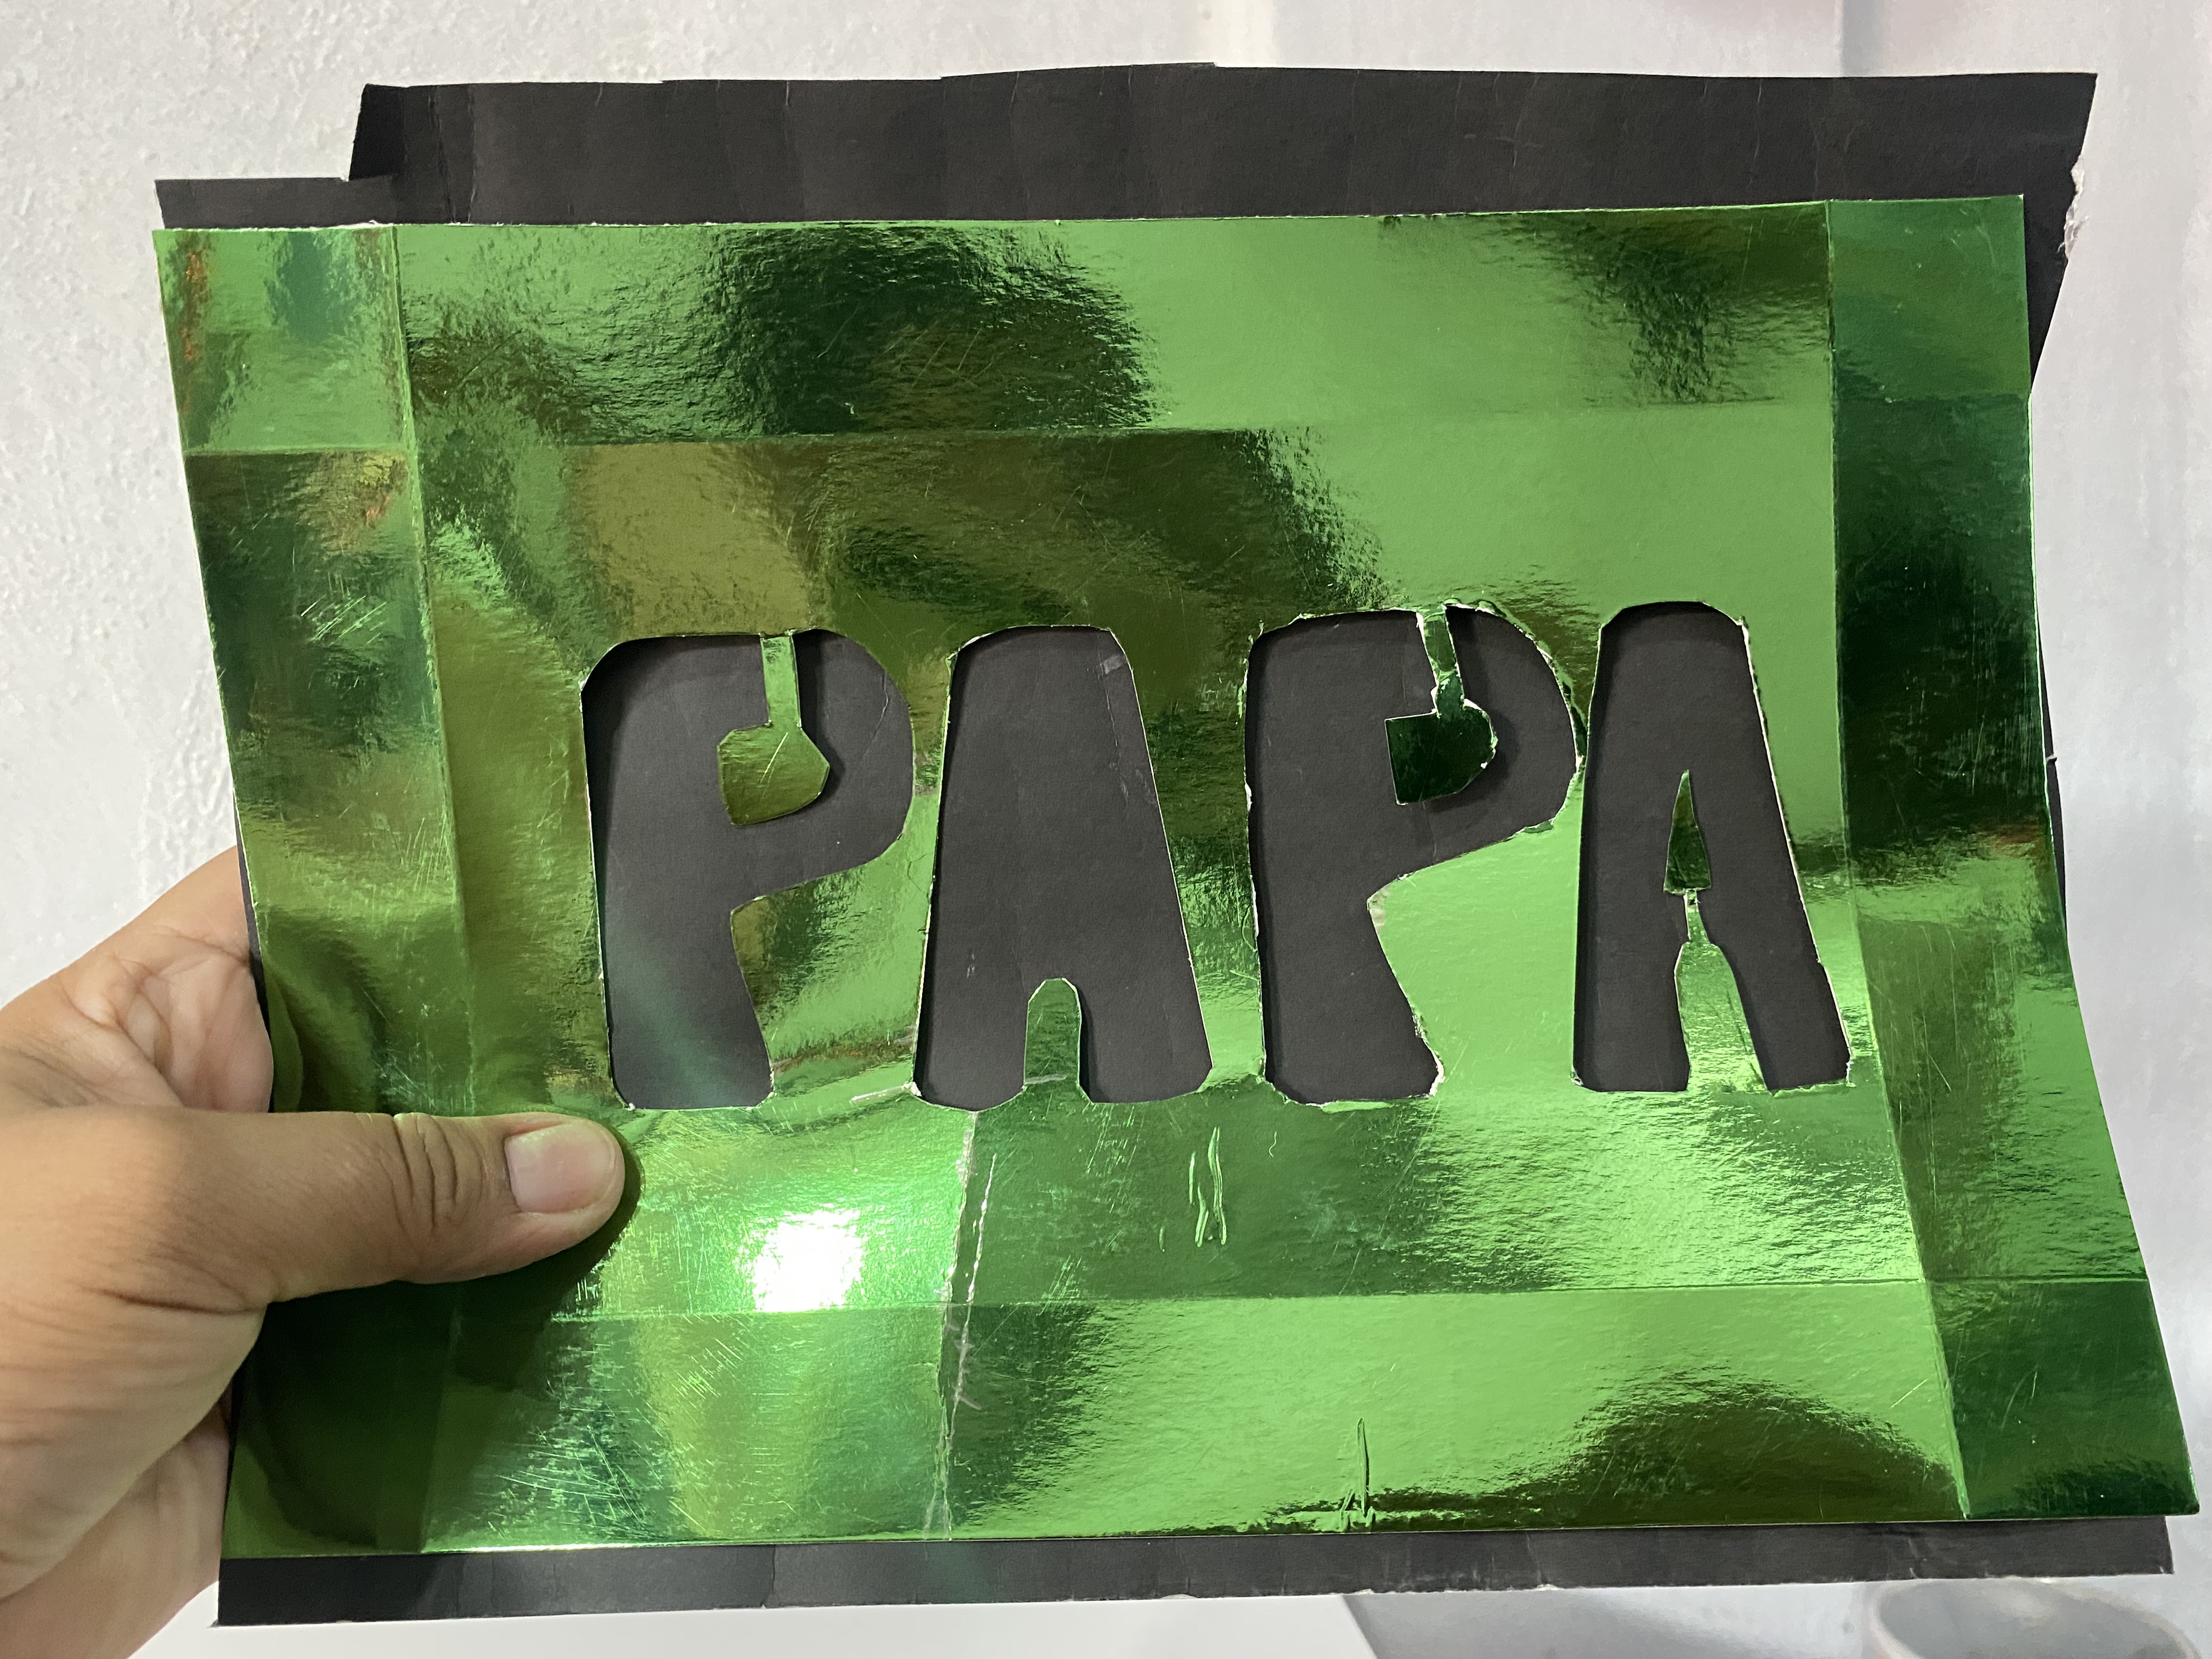|
Para finalizar pegamos la cartulina por el lado del revés luego pegamos la tapa de la caja y así ya es estar lista esta linda caja personalizada para dar obsequios, espero les haya gustado
|||
|---|---|
|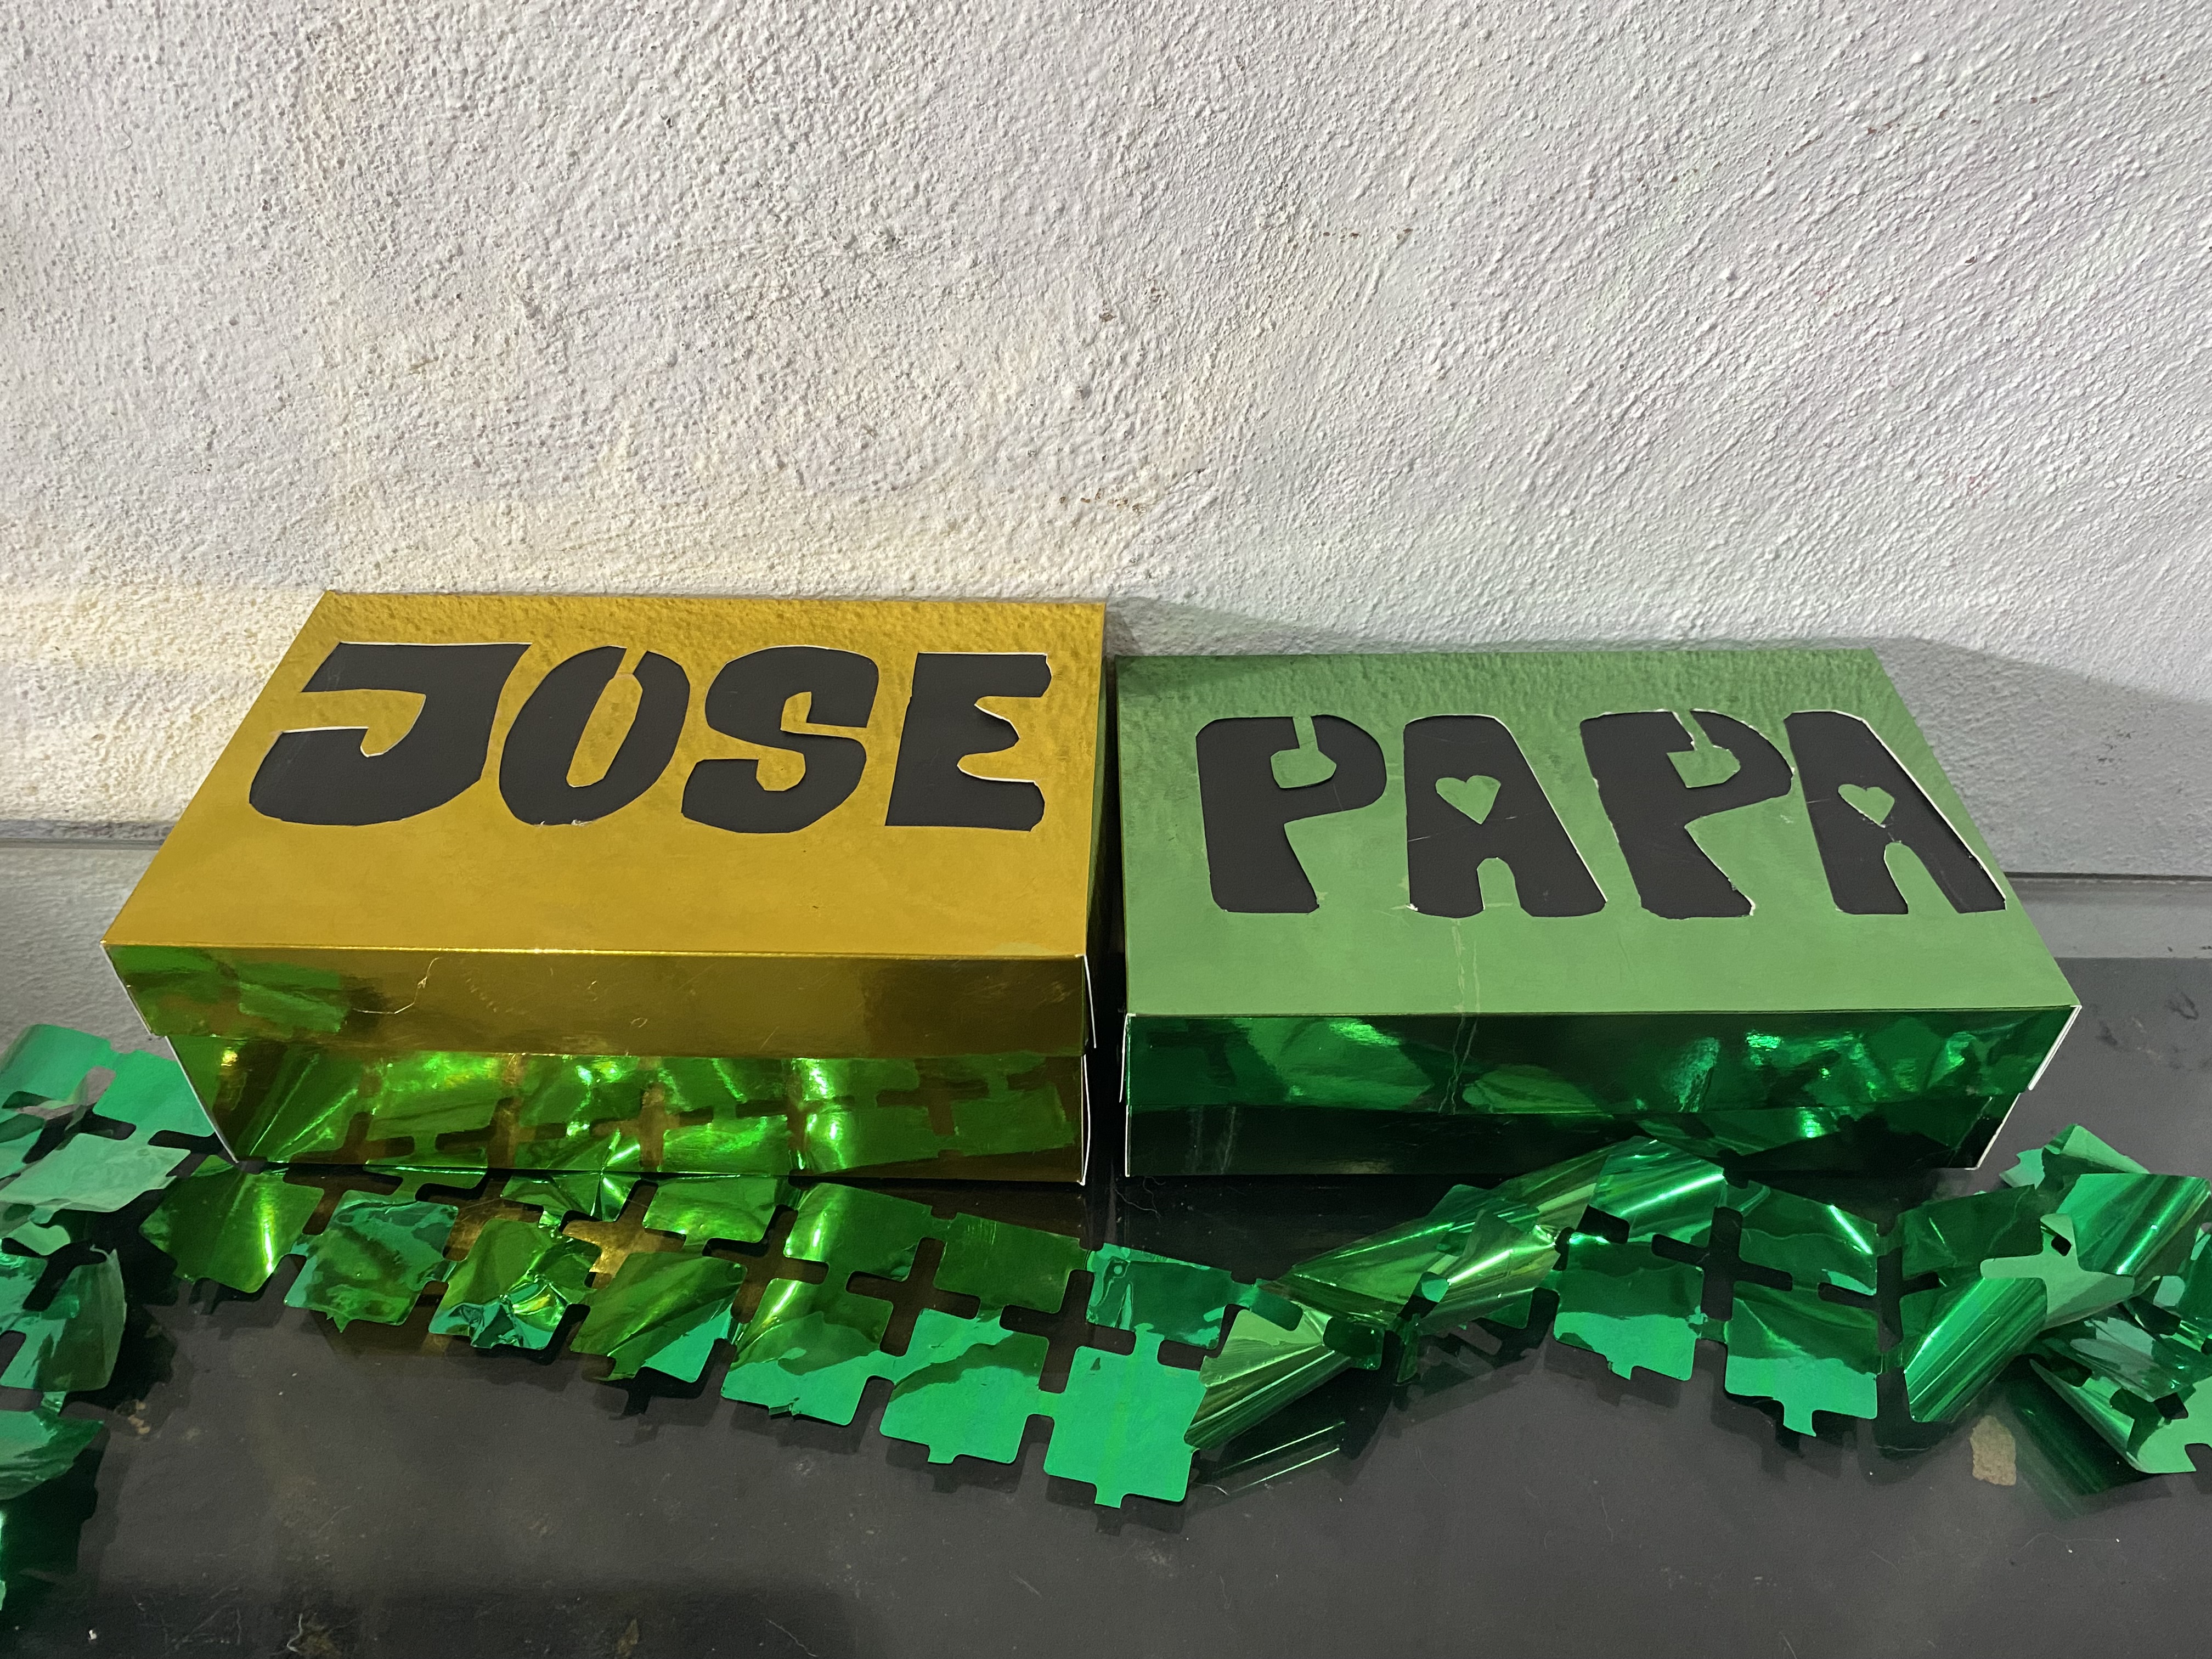|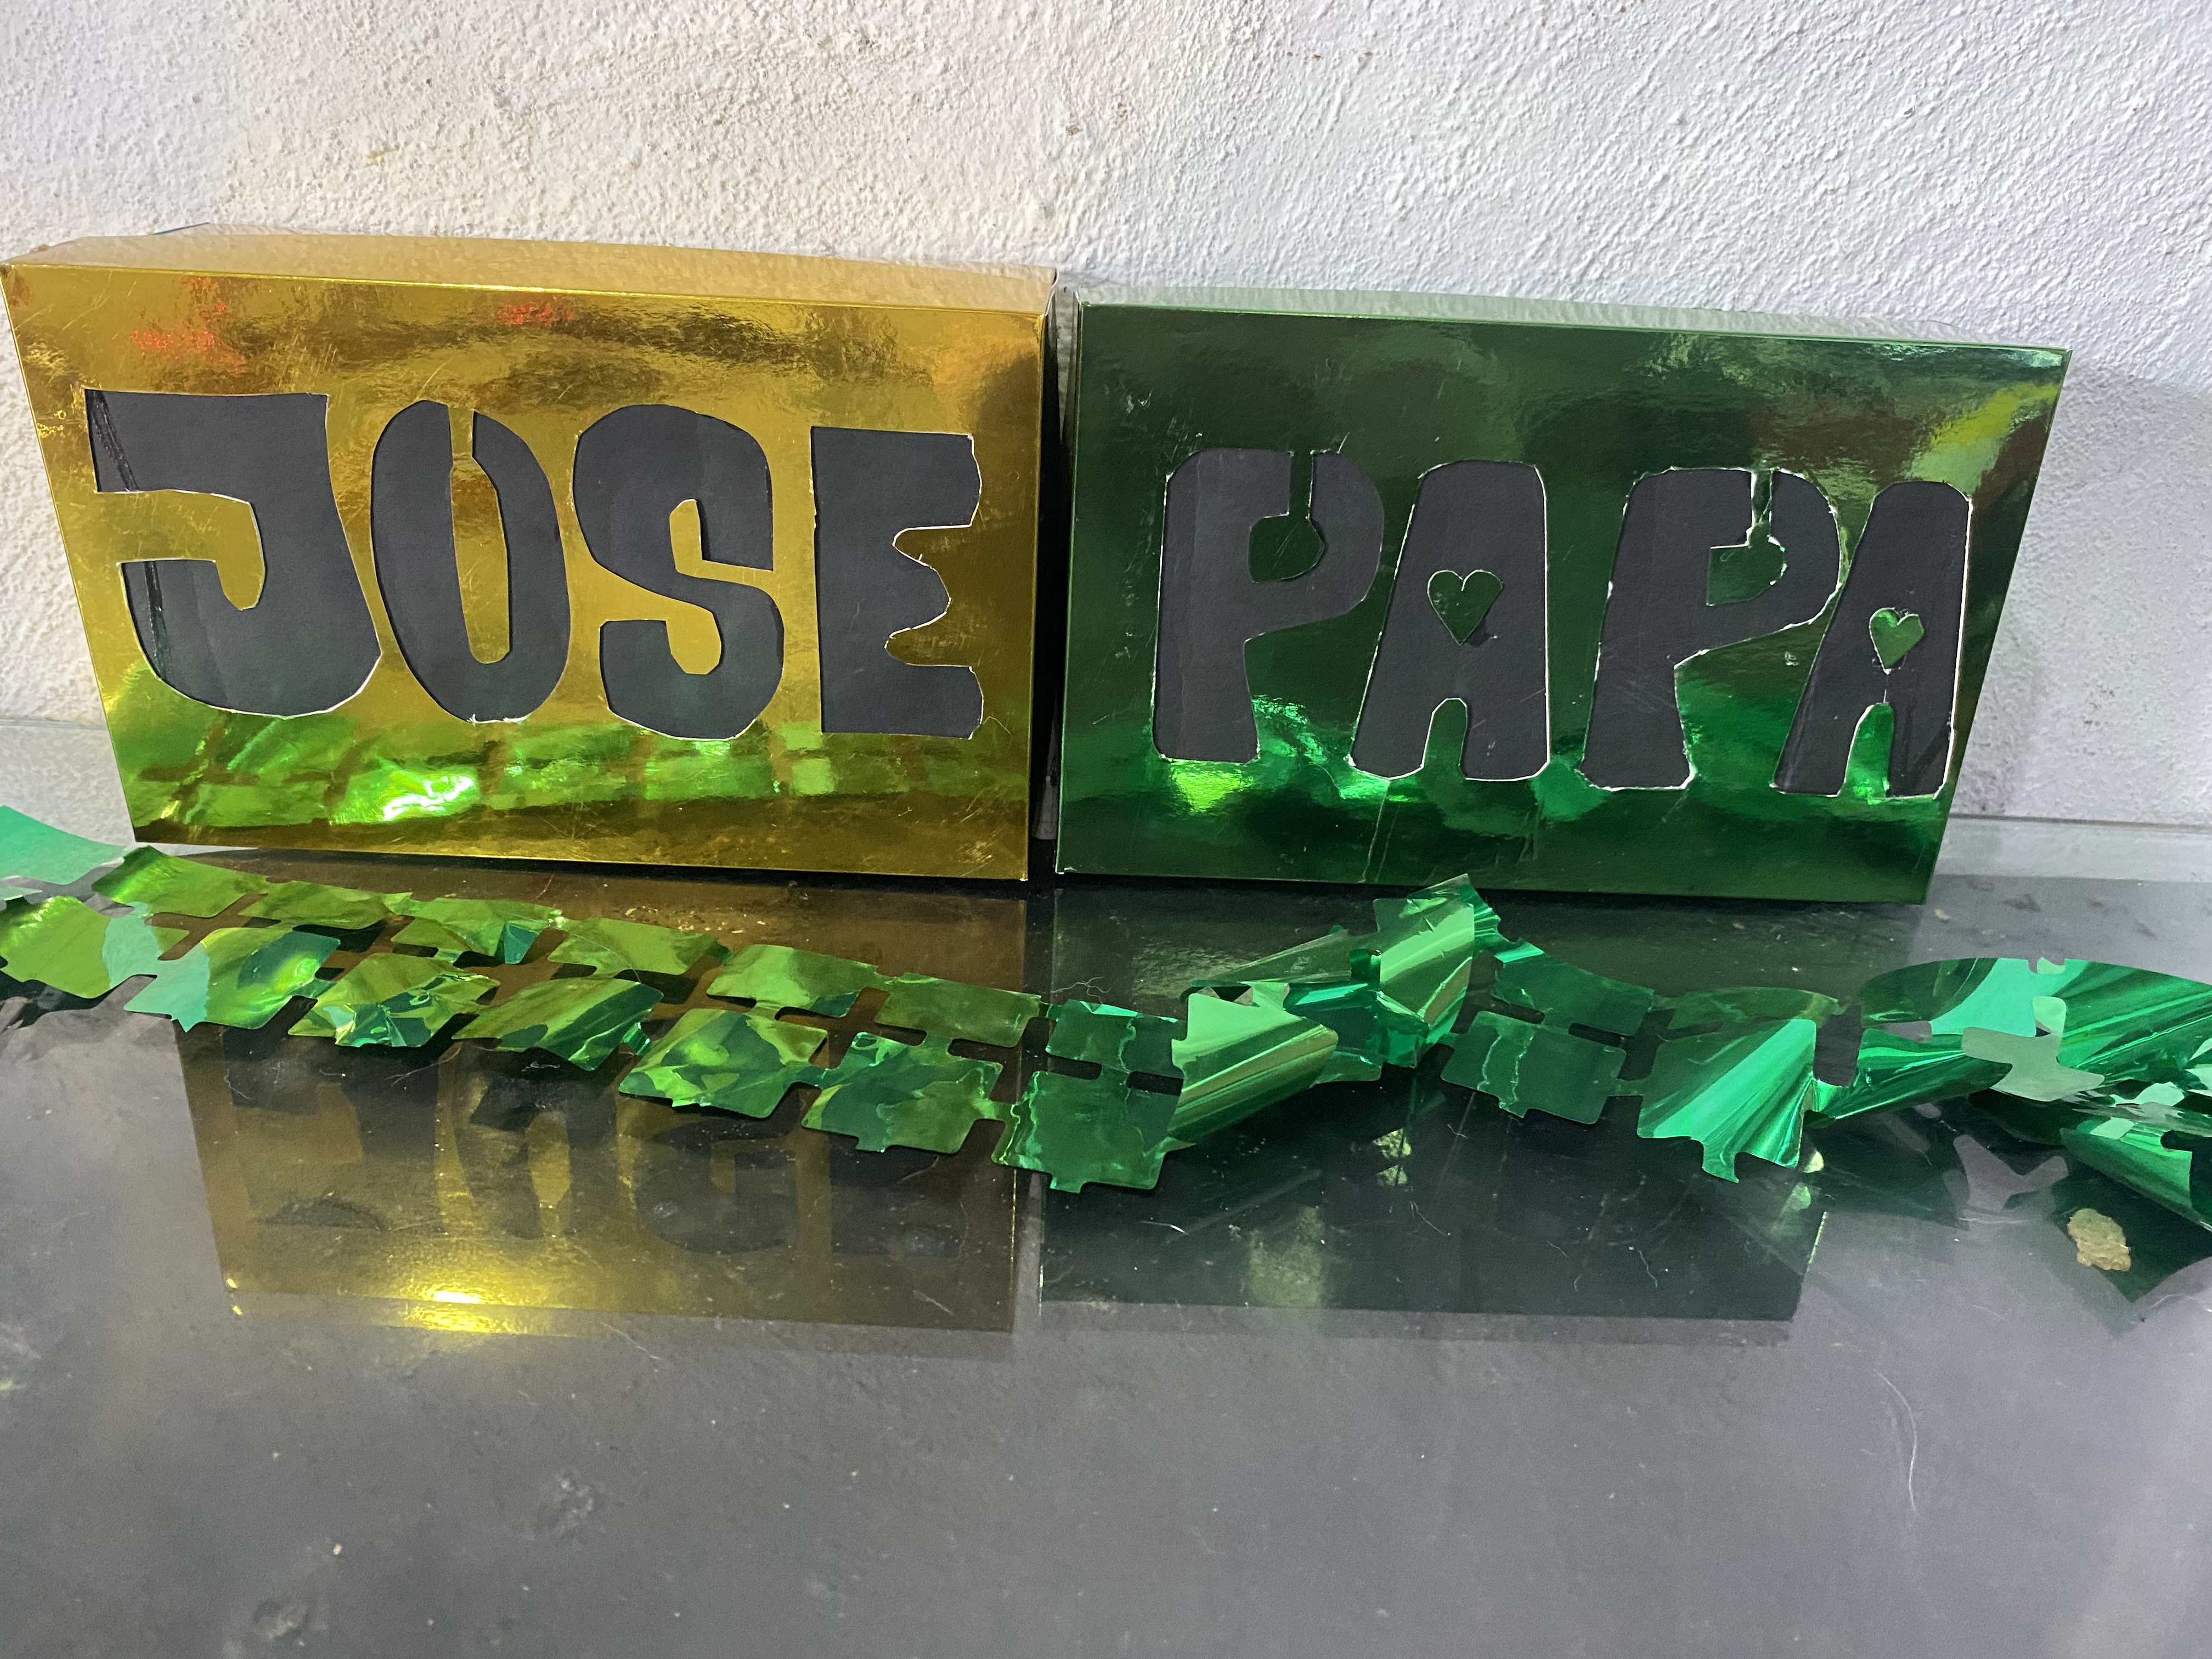|
Este modelo de caja es bastante sencillo de hacer, puedes personalizarle el tamaño, los colores de cartulina, y el nombre que le vayas a hacer y te quedará hermosa para que des los obsequios a tus personas especiales, eso es todo por hoy me despido deseándoles muchos éxitos y bendiciones, hasta otra oportunidad
> This box model is quite simple to make, you can customize the size, the colors of the cardboard, and the name you are going to make and it will be beautiful for you to give gifts to your special people, that's all for today I say goodbye wishing you much success and blessings, until another opportunity


***las fotos aquí compartidas son de mi propiedad tomadas con mi teléfono iPhone 11, la edición fue hecha en Canva, para la traducción del inglés utilice el traductor de Google***
