Buenas noches tengan todos los amigos , espero que hayan disfrutado de un fin de semana agradable , les quiero compartir un carro de madera que realicé a mi hijo , a mi hijo le gustan mucho los carros y sobre todo los del color rojo , por eso quise ser muy detallista en cada parte del carro y me siento feliz de haber logrado que le gustará.
Good evening, everyone. I hope you had a pleasant weekend. I want to share with you a wooden car I made for my son. My son really likes cars, especially red ones, so I wanted to pay close attention to every detail of the car, and I'm happy that he likes it.
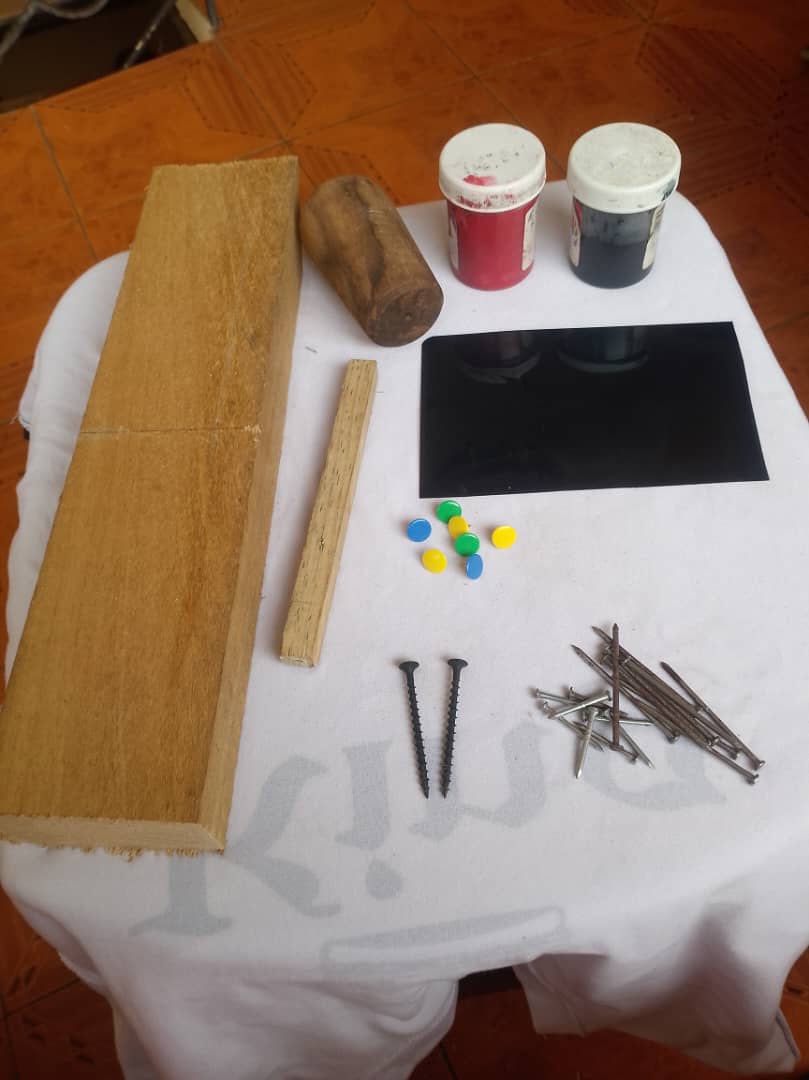
Materiales qué utilice :
-Madera
-Serrucho
-Martillo
-Clavos
-Tornillo
-Pintura
-Papel de placa
-Taladro
Materials I used:
-Wood
-Handsaw
-Hammer
-Nails
-Screws
-Paint
-Sandpaper
-Drill
A continuación los pasos a seguir:
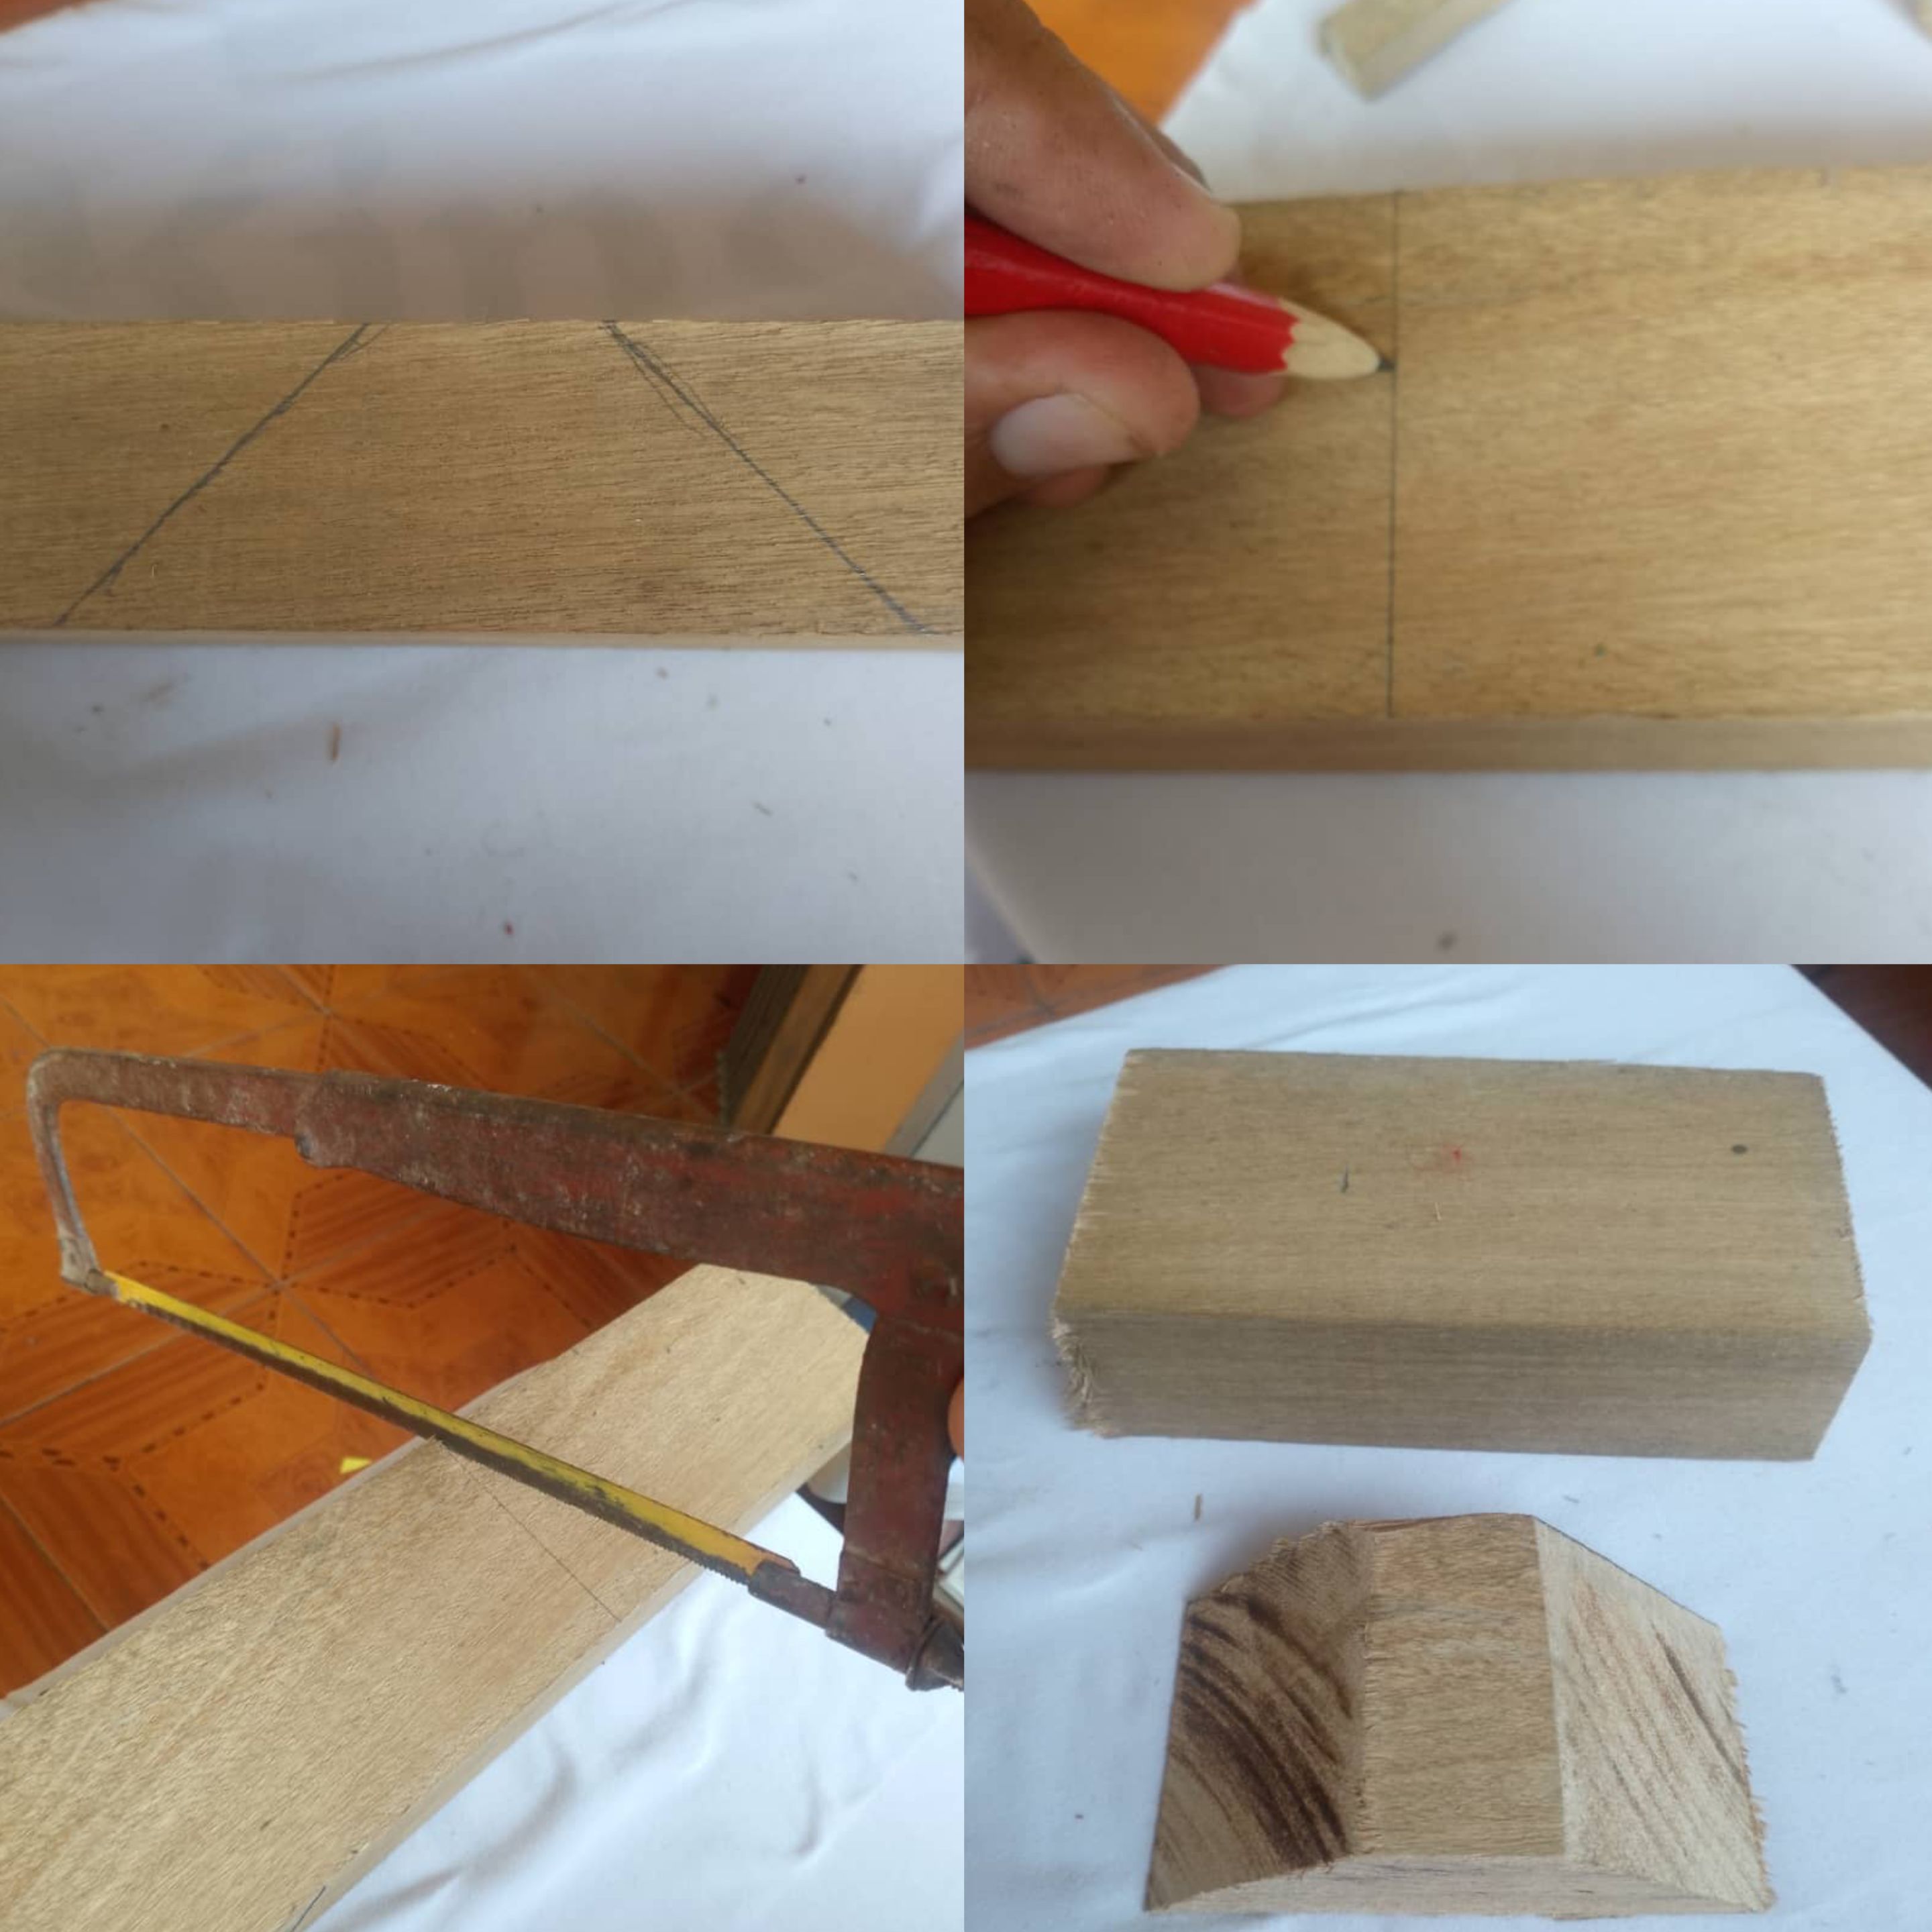
Iniciaremos primeramente realizando las piezas que formarán el cuerpo del carro, marcamos la parte de abajo una pieza tipo rectangular de 14 cm de largo y 6 cm de ancho, también marcamos la parte de arriba similar a un triángulo sólo que la parte de arriba es cuadrada, una vez que tuve mis piezas marcadas continúe sacándolas con la ayuda de un serrucho, que fue bastante trabajoso ya que las piezas de madera son bastante gruesas
Here are the steps to follow:
First, we will start by making the pieces that will form the body of the car. We mark the bottom part as a rectangular piece 14 cm long and 6 cm wide. We also mark the top part similar to a triangle, except that the top part is square. Once I had my pieces marked, I continued to cut them out with the help of a handsaw, which was quite laborious since the pieces of wood are quite thick.
Luego continúe tomando unas piezas que eran las patas de una mesa , con la ayuda de un serrucho las recorté y realicé 4 cauchos , luego con un taladro le realicé un agujero a cada caucho en todo el centro
Then I continued by taking some pieces that were the legs of a table. With the help of a handsaw, I cut them and made four rubber pieces. Then, with a drill, I made a hole in the center of each rubber piece.

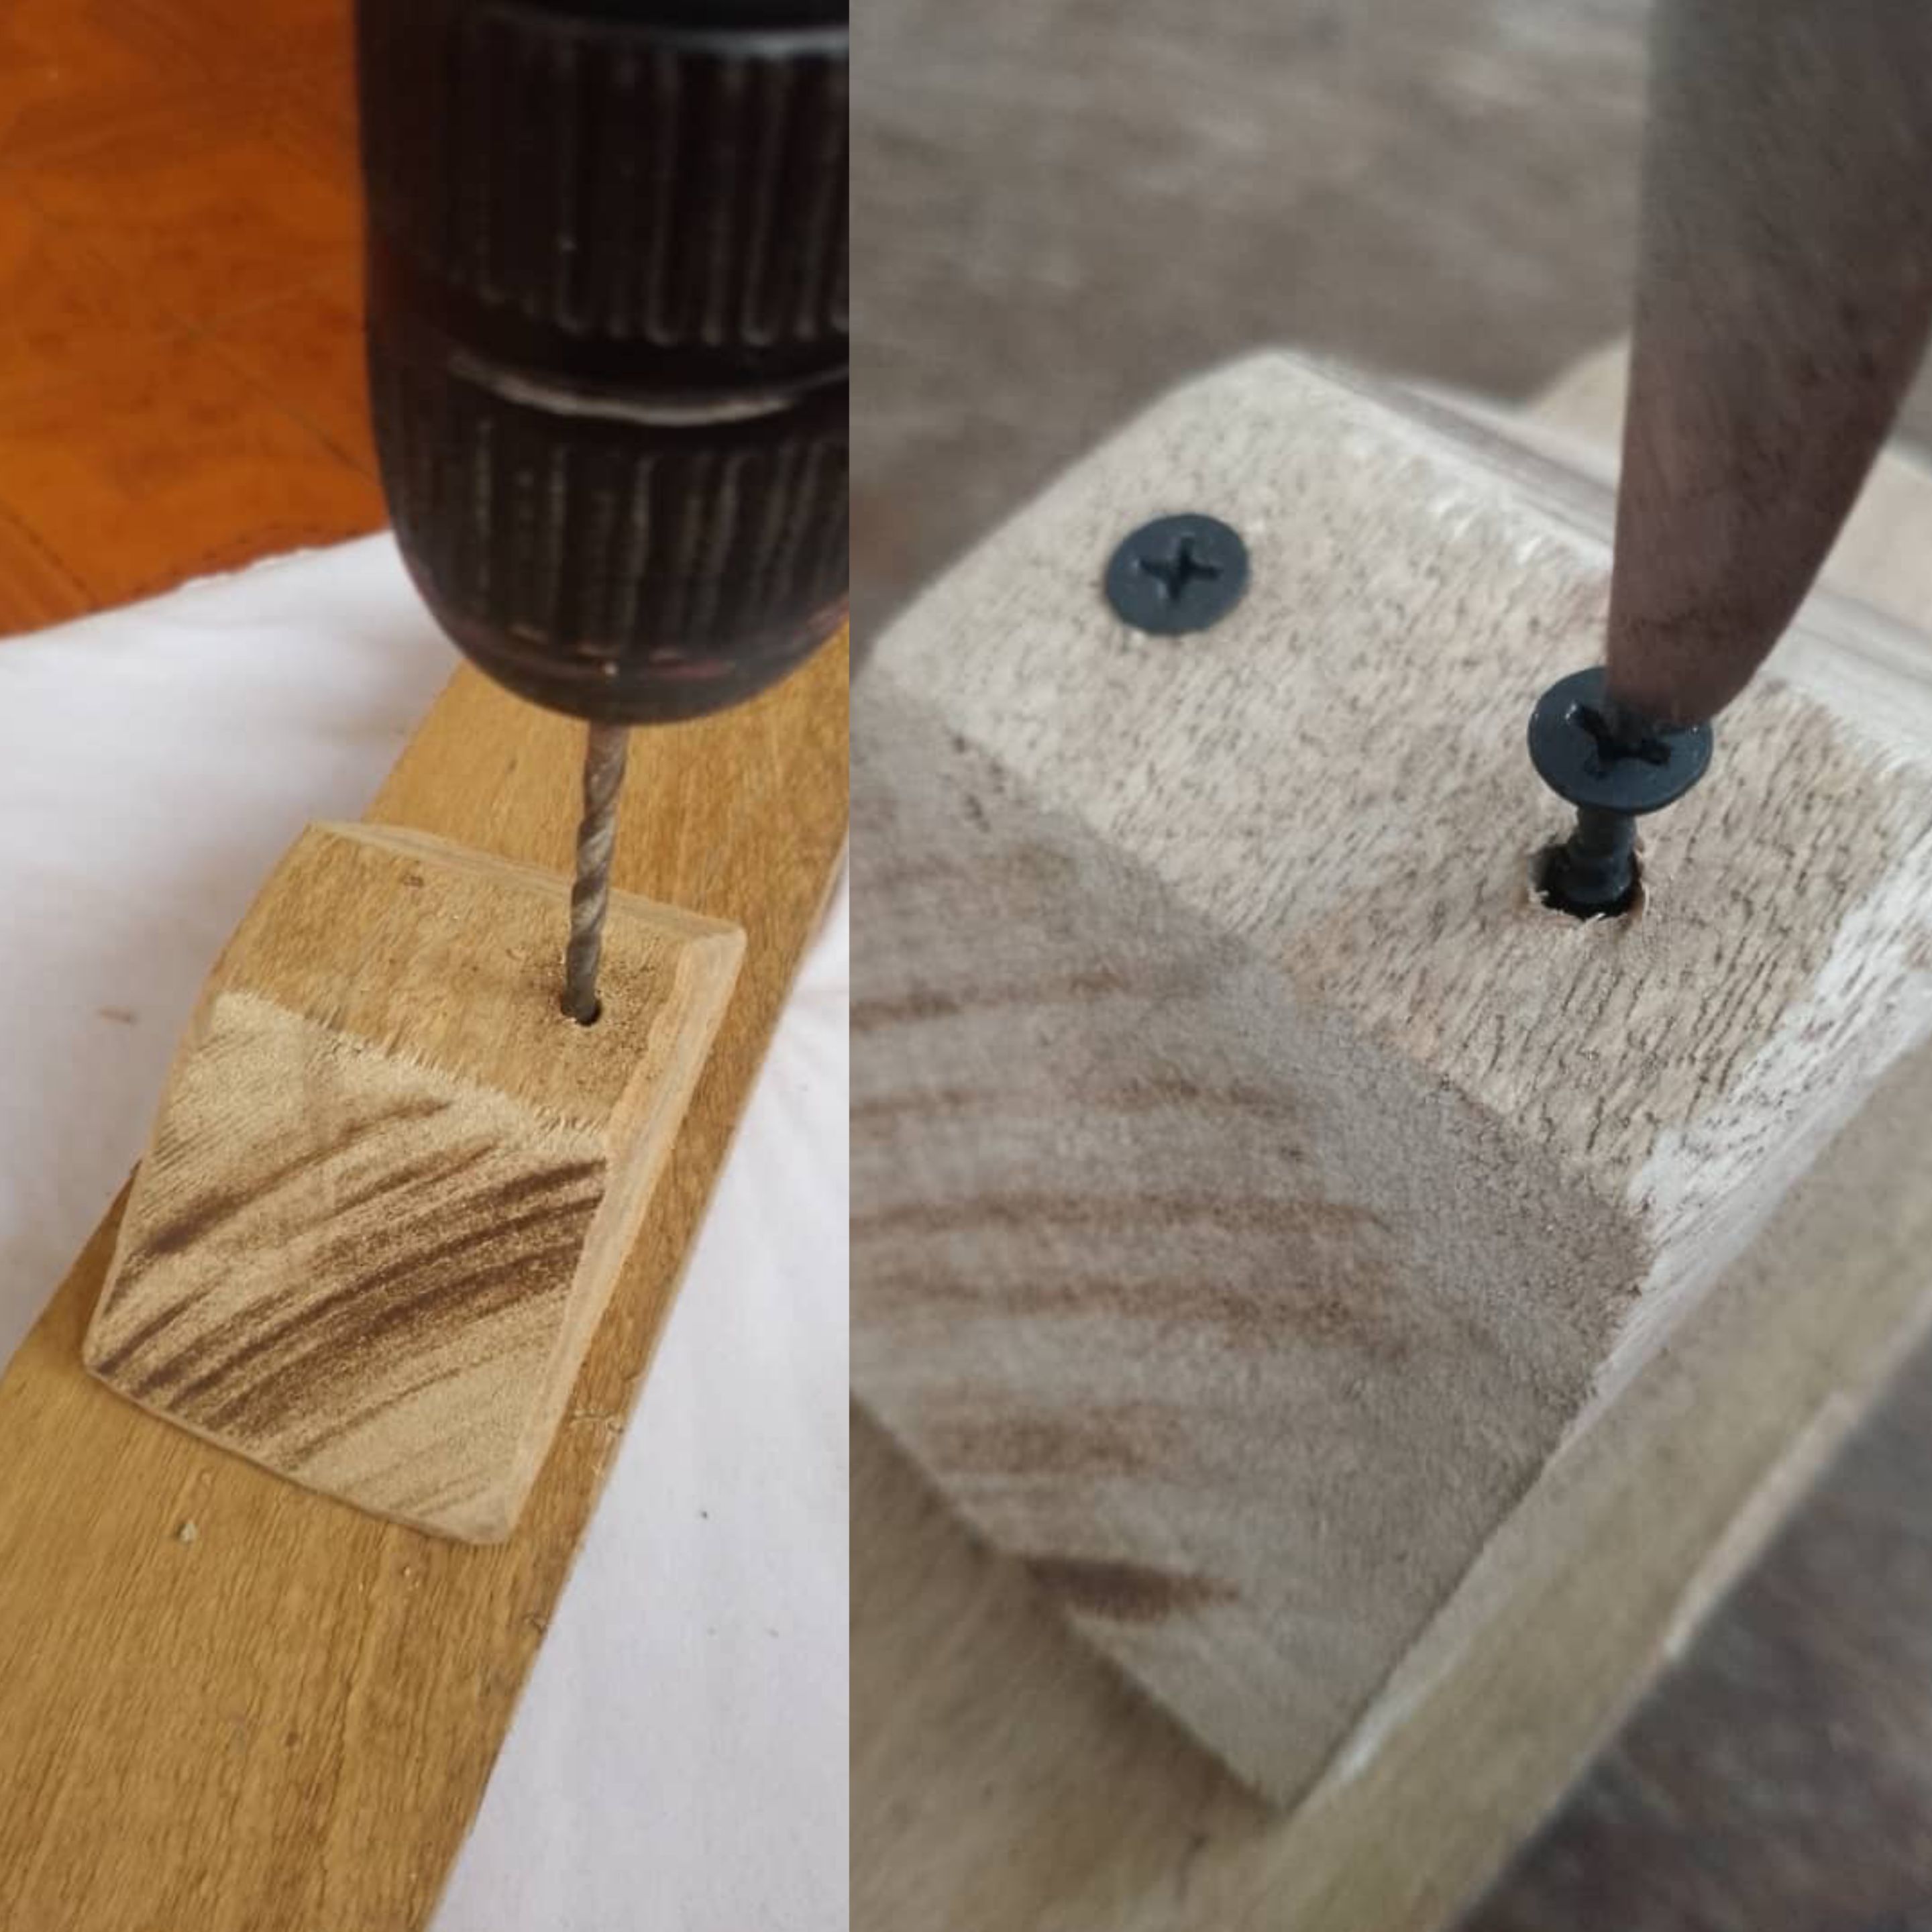
Seguidamente continúe tomando la parte de arriba donde se ubica el vidrio frontal y trasero junto con las ventanas, con el taladro le realicé dos agujeros , en esos dos agujeros introduje dos tornillos para sujetar la parte de arriba a la pieza de abajo del carro así armando el cuerpo del carro
Next, I continued by taking the top part where the front and rear windows are located, along with the side windows. Using the drill, I made two holes, and into those two holes I inserted two screws to attach the top part to the bottom part of the car, thus assembling the body of the car.
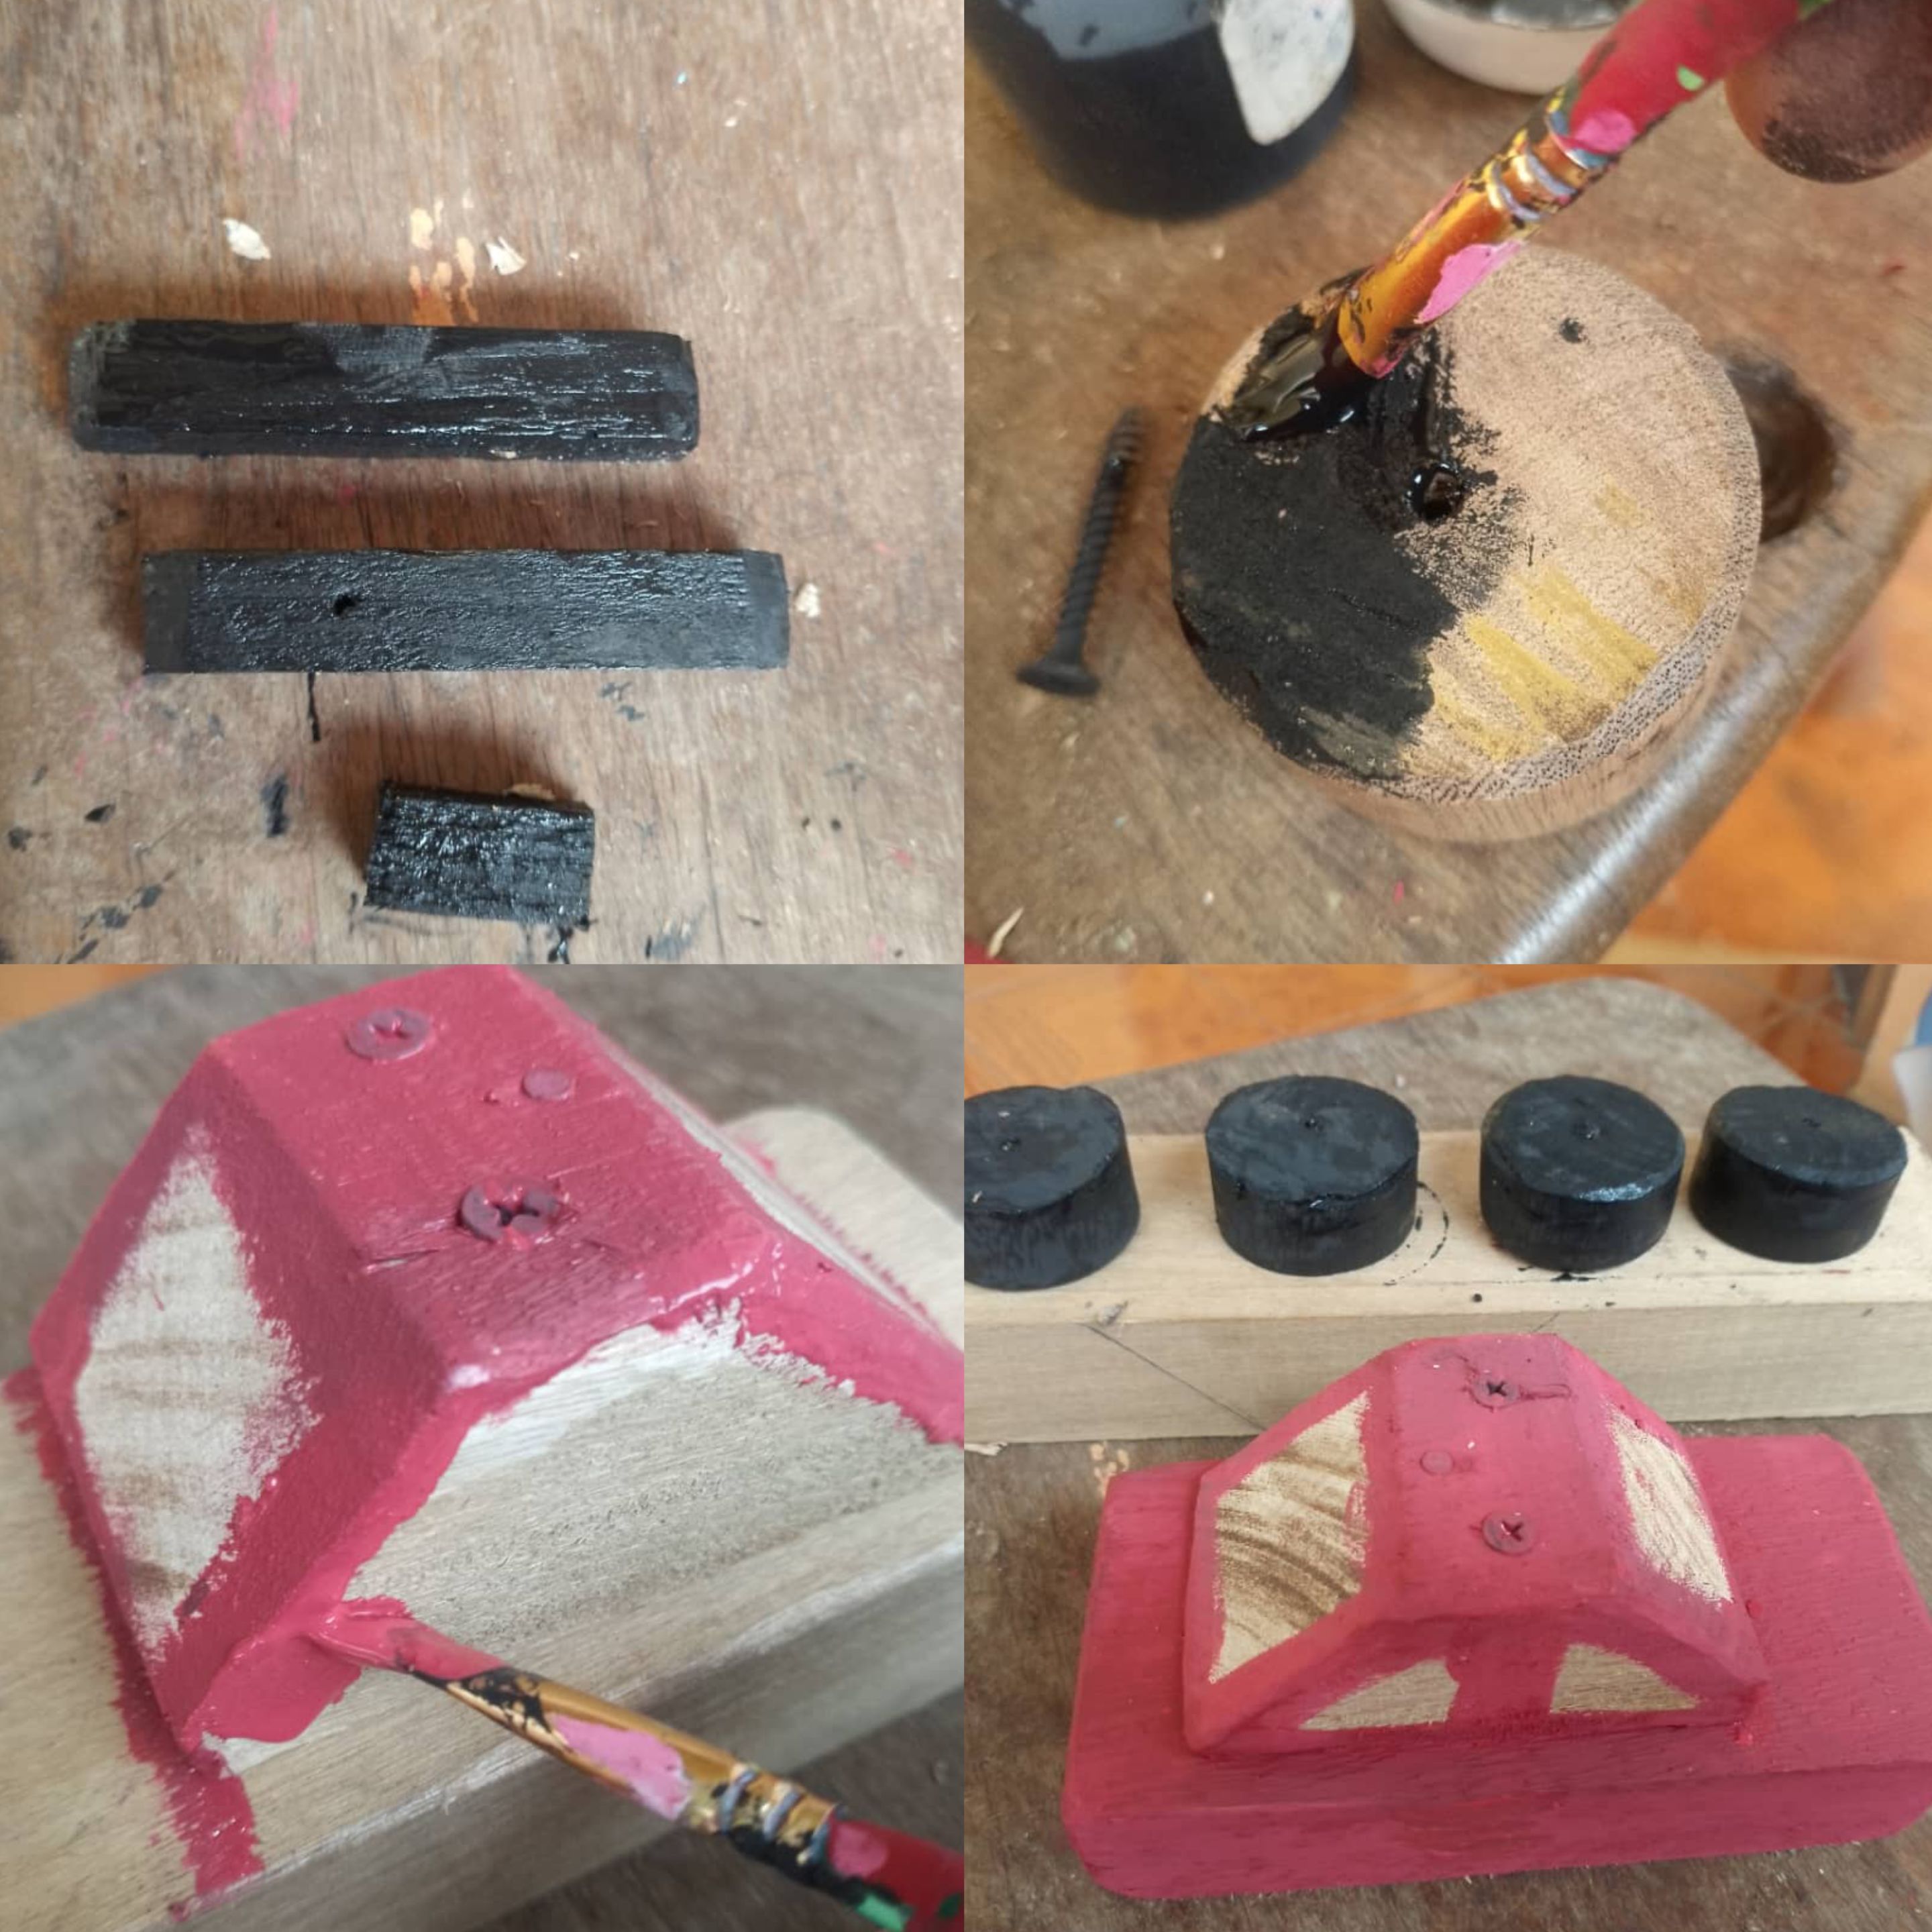
Seguidamente continúe pintando las piezas del carro ,inicie pintando de negro el parachoque y los cauchos, el carro lo pinte color rojo a preferencia de mi hijo , aplicamos la primera parte de pintura y llevamos al sol unos minutos hasta que seque
Next, I continued painting the car parts, starting with painting the bumper and tires black. I painted the car red, as my son preferred. We applied the first coat of paint and left it in the sun for a few minutes to dry.
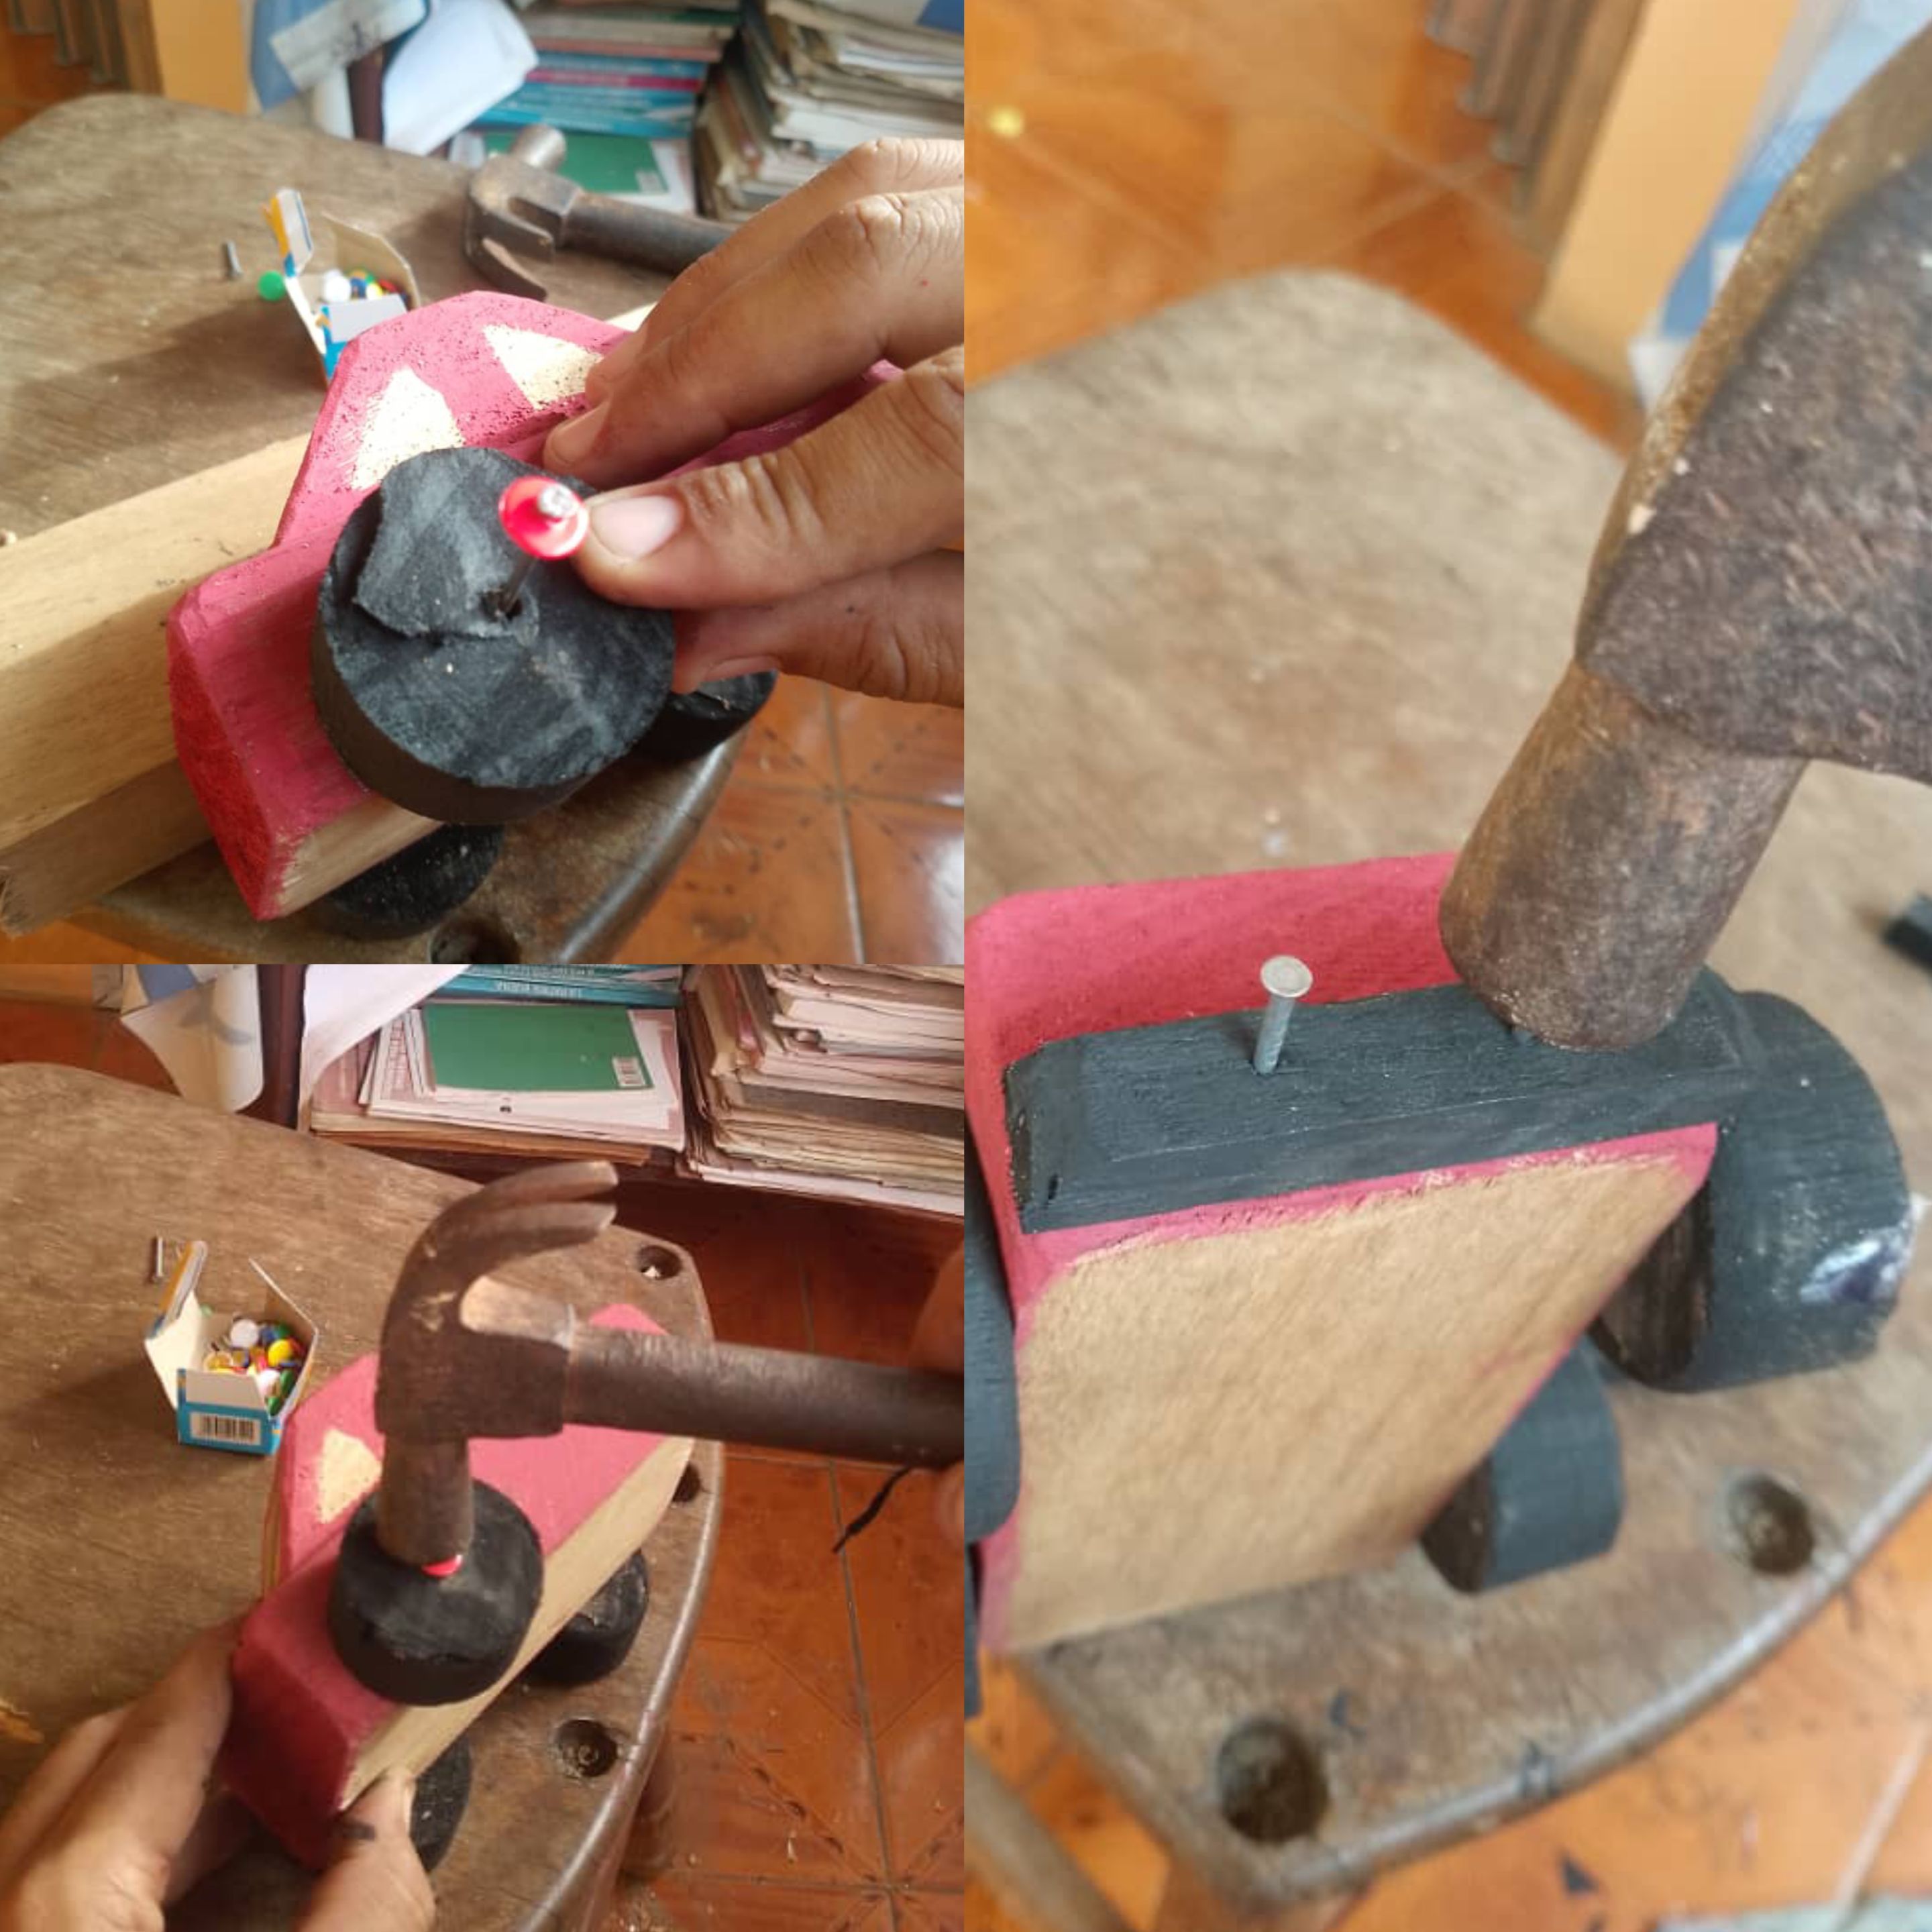
Luego continúe colocando los cauchos al carro , con tornillos y tapitas de colores , al mismo tiempo continúe colocando los parachoques, el delantero y trasero del carro
Then I continued to attach the tires to the car with screws and colored caps, while also attaching the front and rear bumpers.
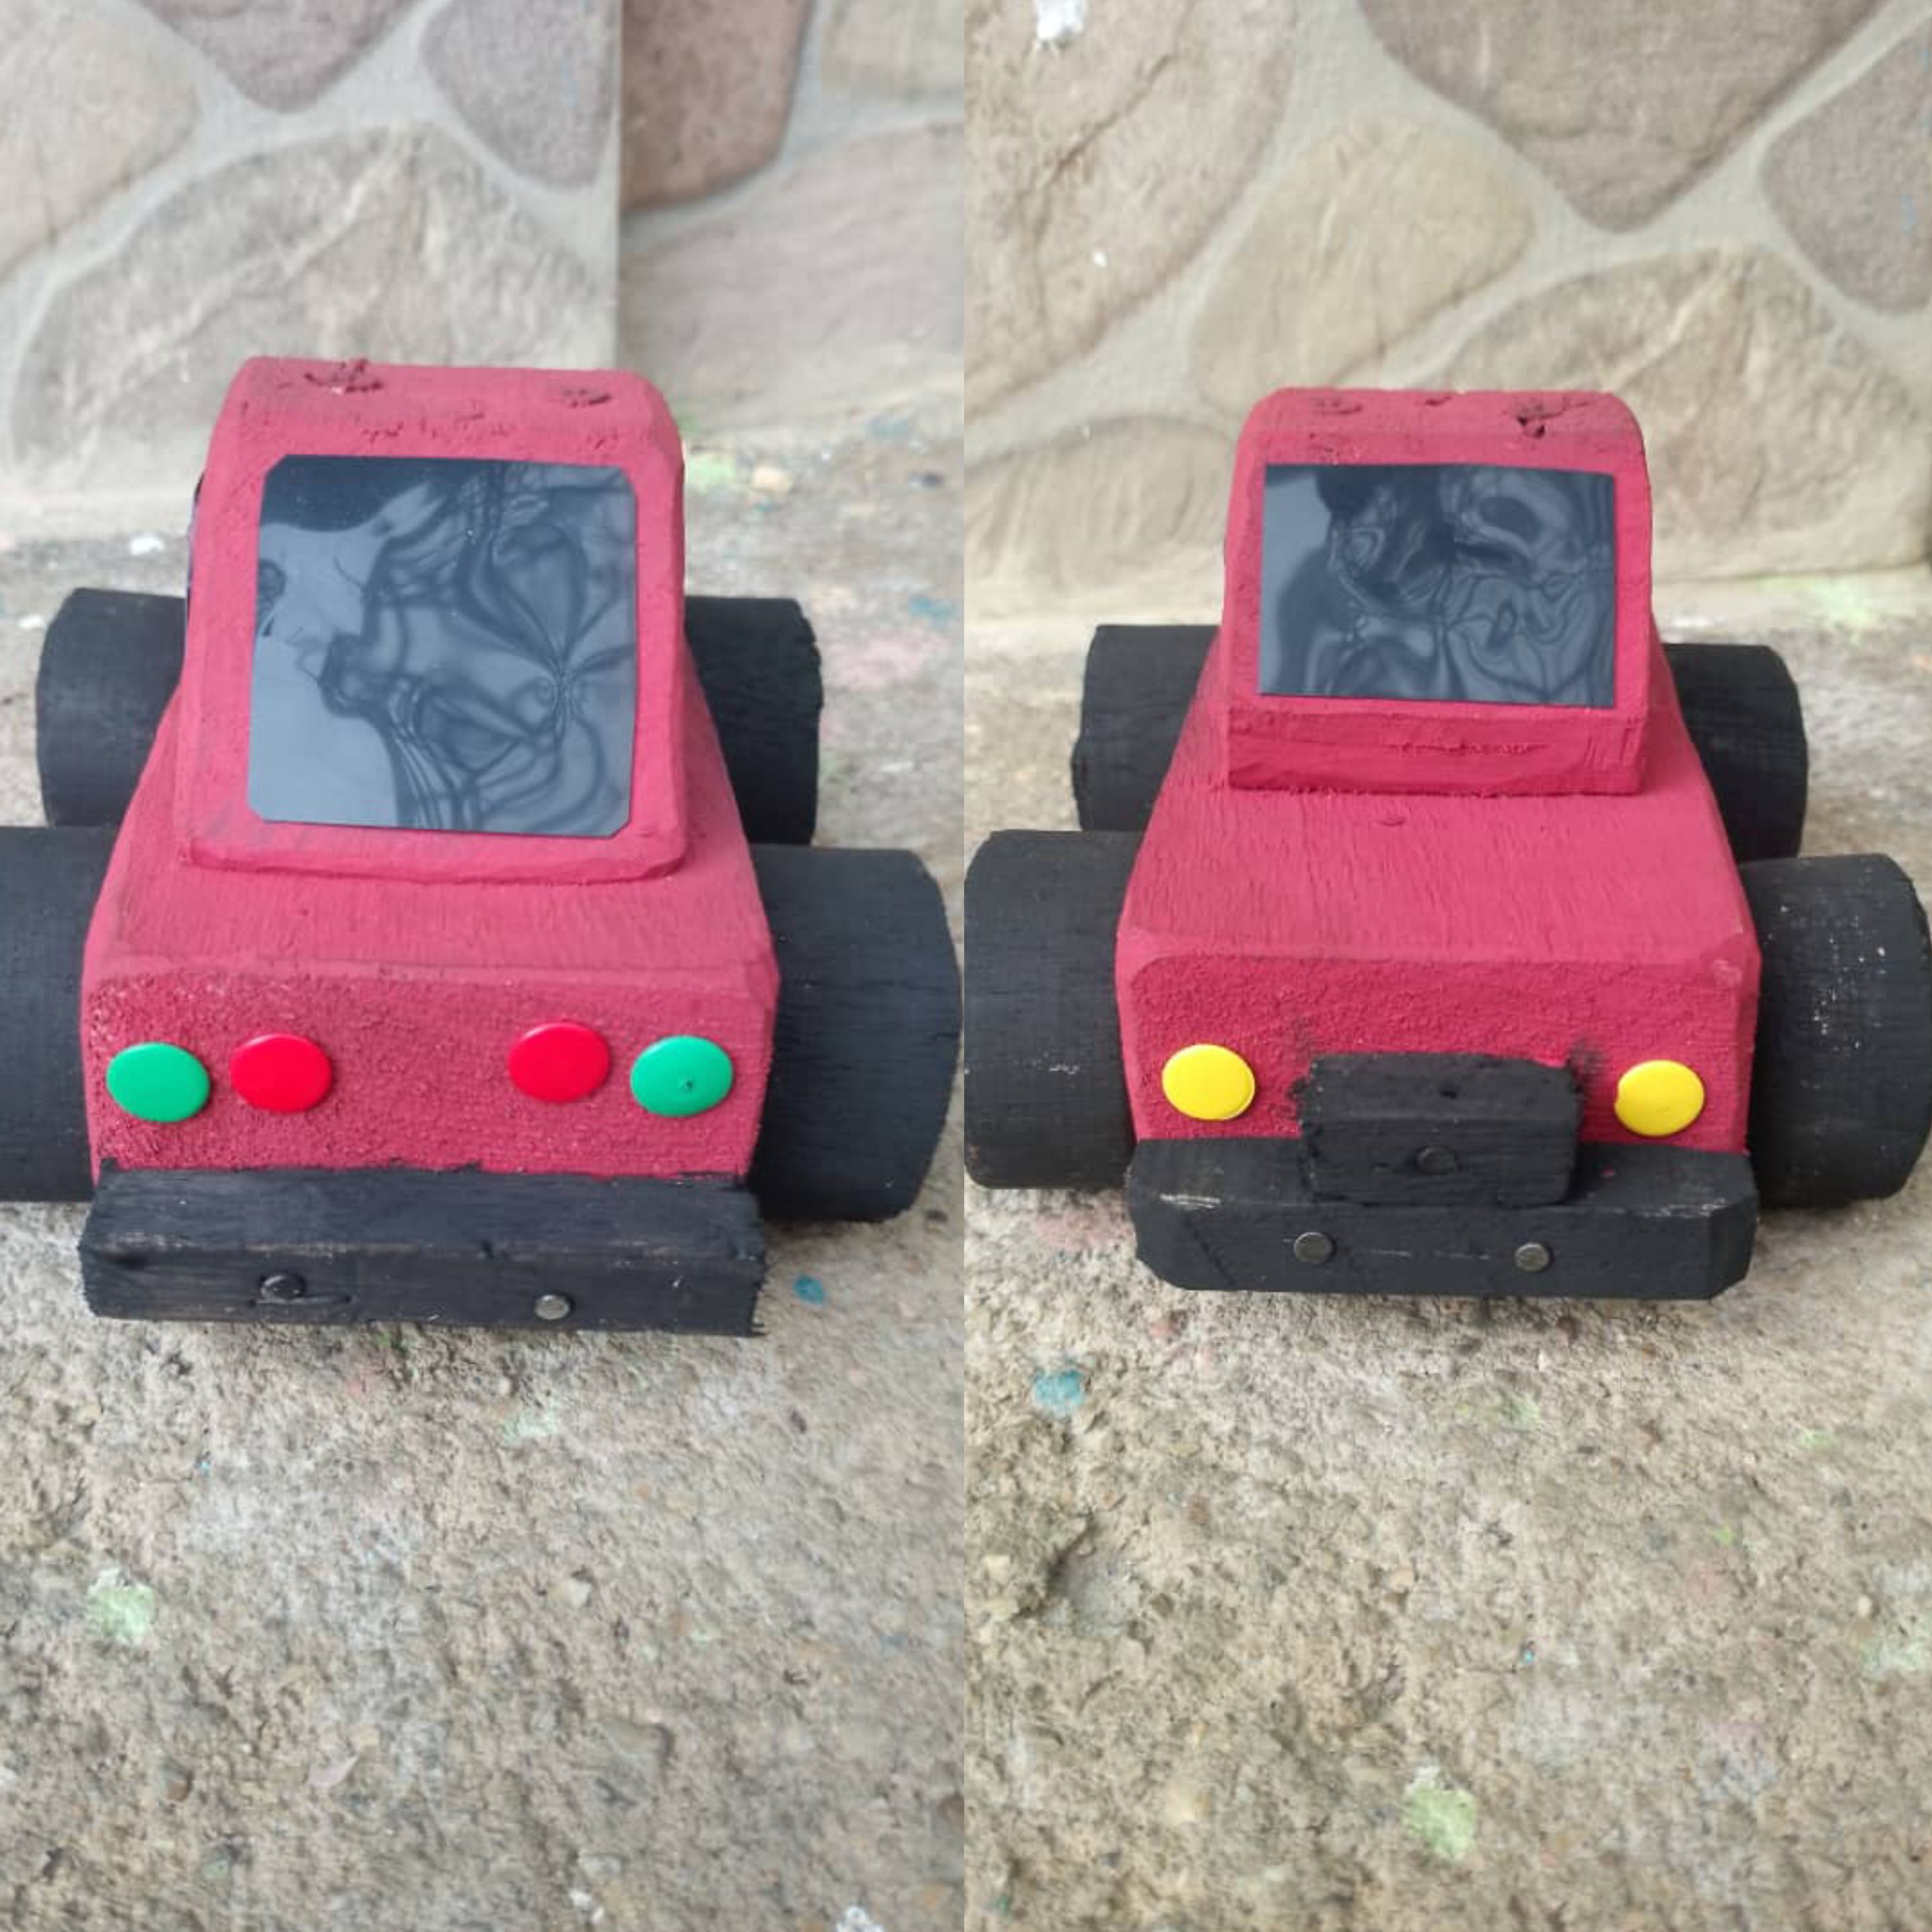
Por último continúe tomando la placa reciclada y con ella realicé los vidrios del carro , como pueden apreciar el vidrio del frente y el de atrás y por supuesto las ventanas también . Más adelante coloque luces o focos adelante y atrás , culminando así nuestra creación
Finally, I took the recycled license plate and used it to make the car windows, as you can see the front and rear windows and, of course, the side windows as well. Next, I added lights or headlights to the front and back, thus completing our creation.
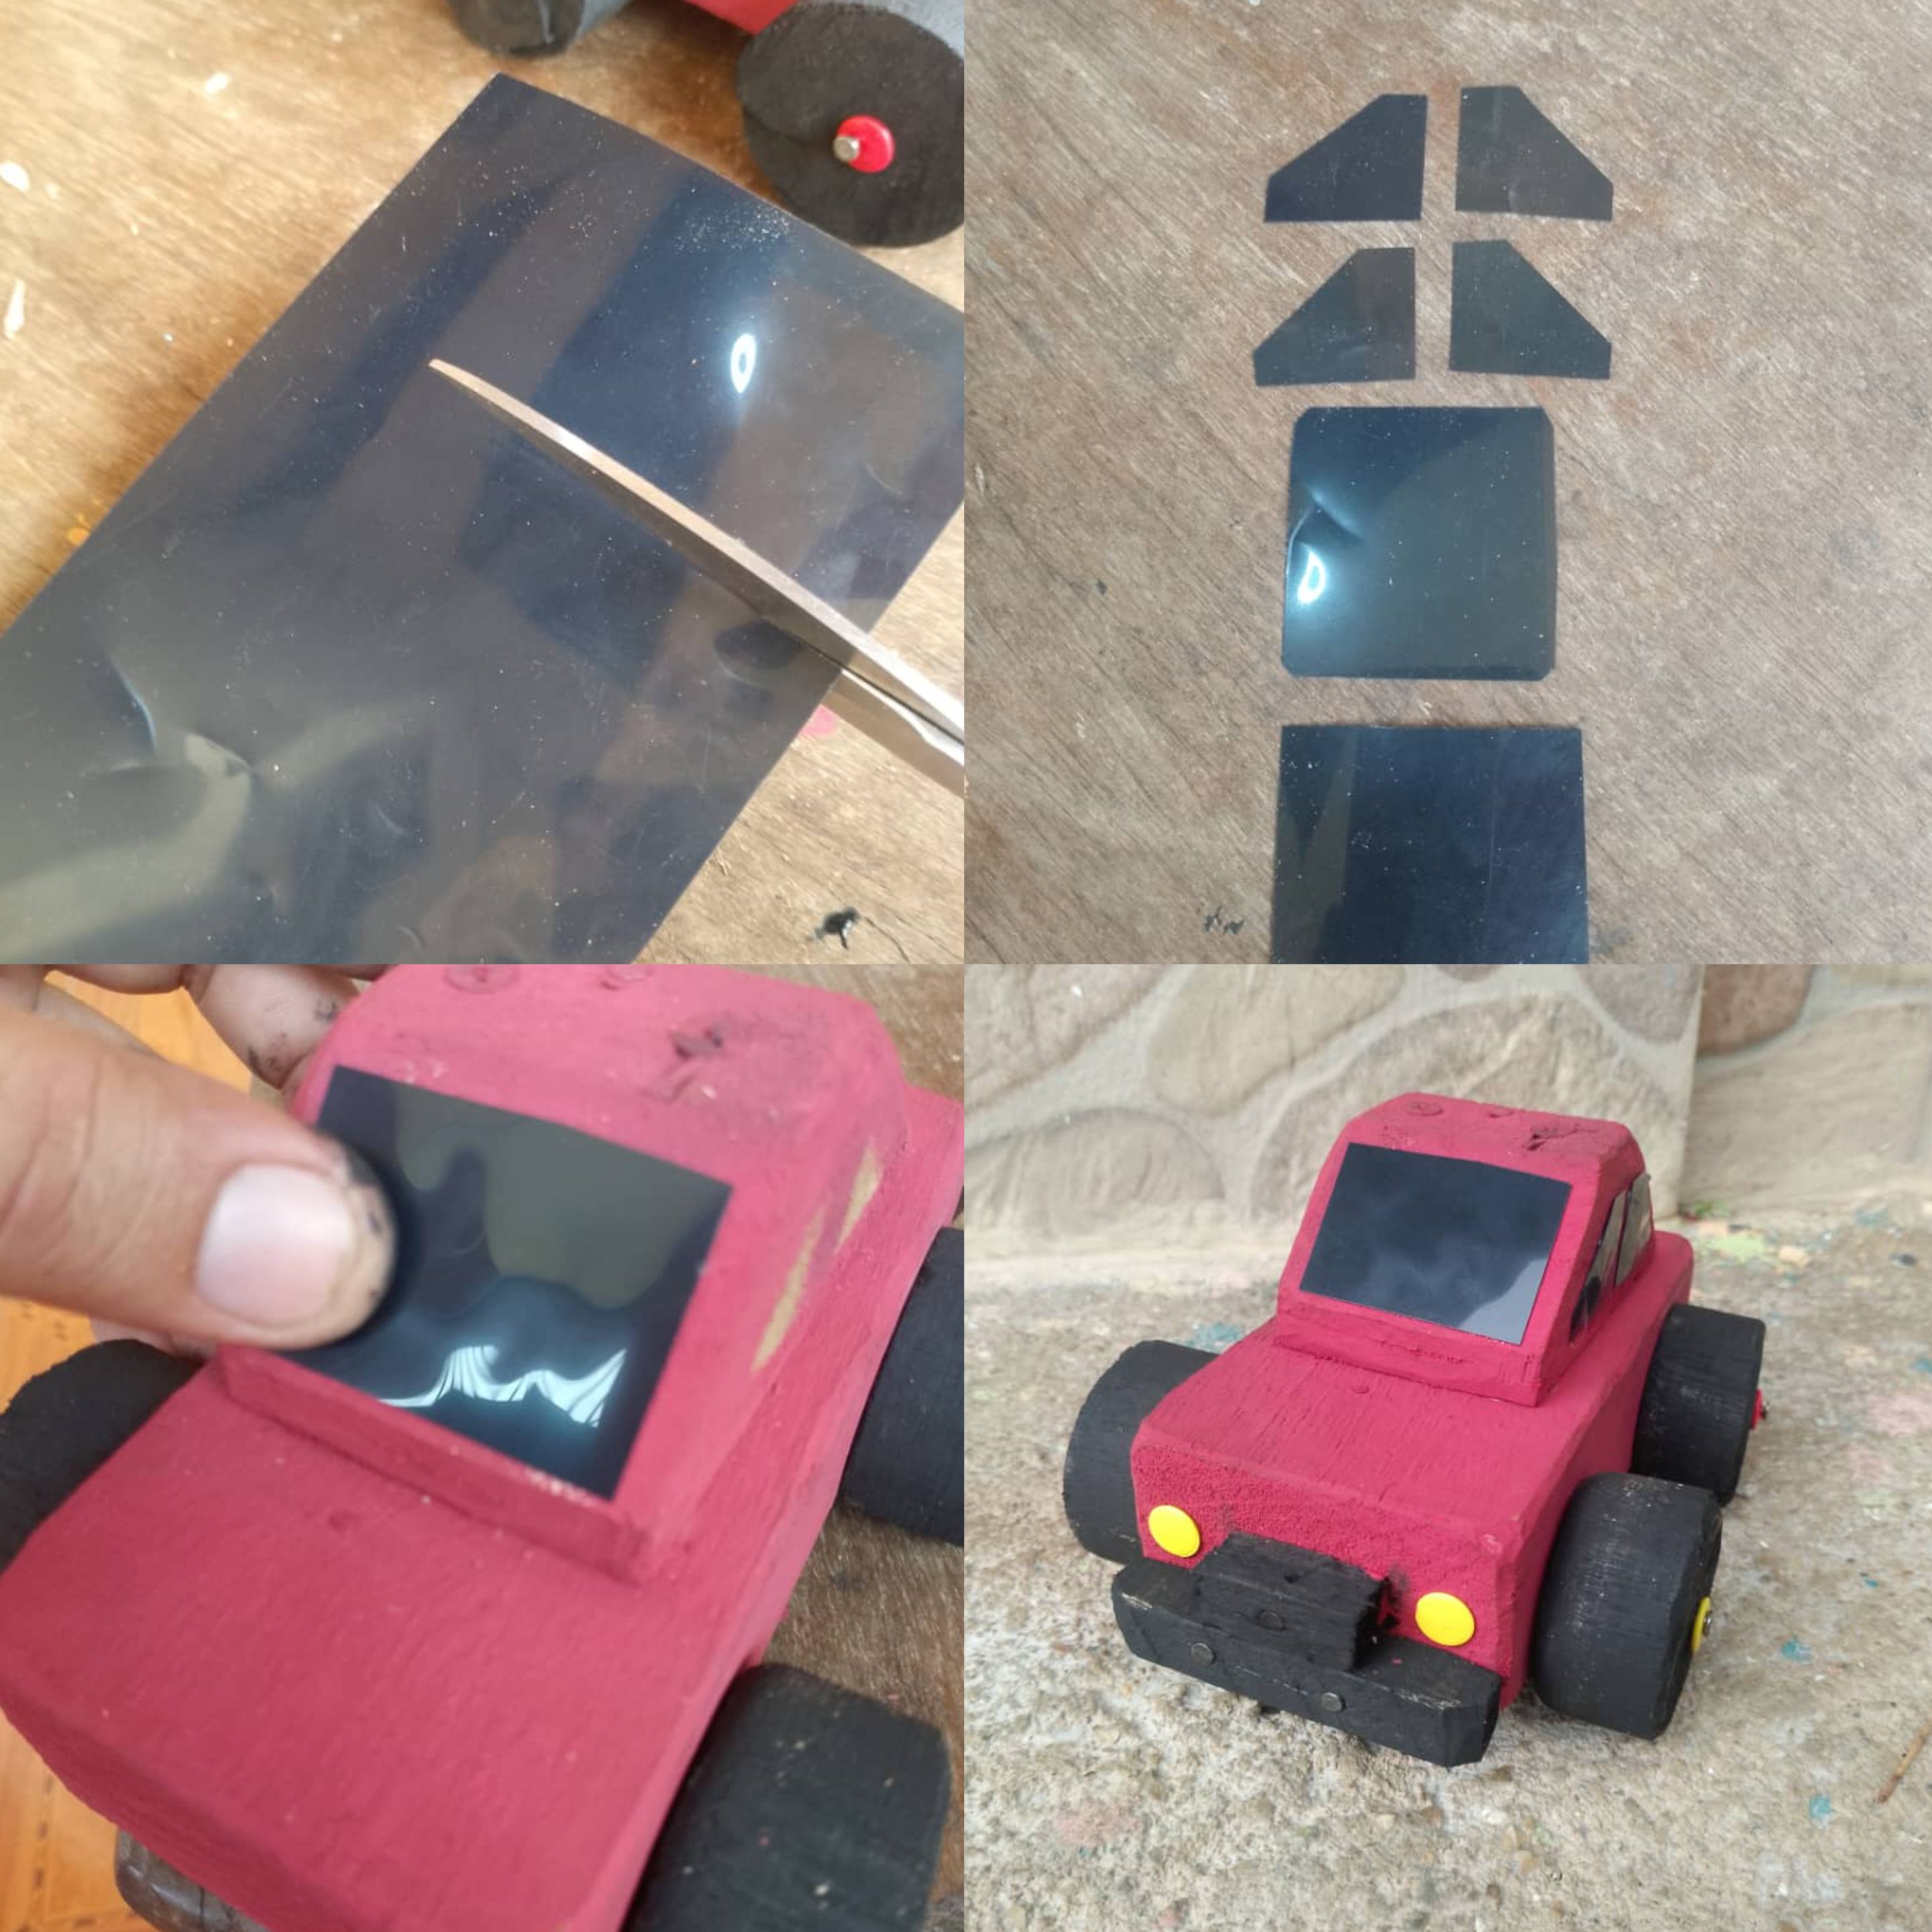
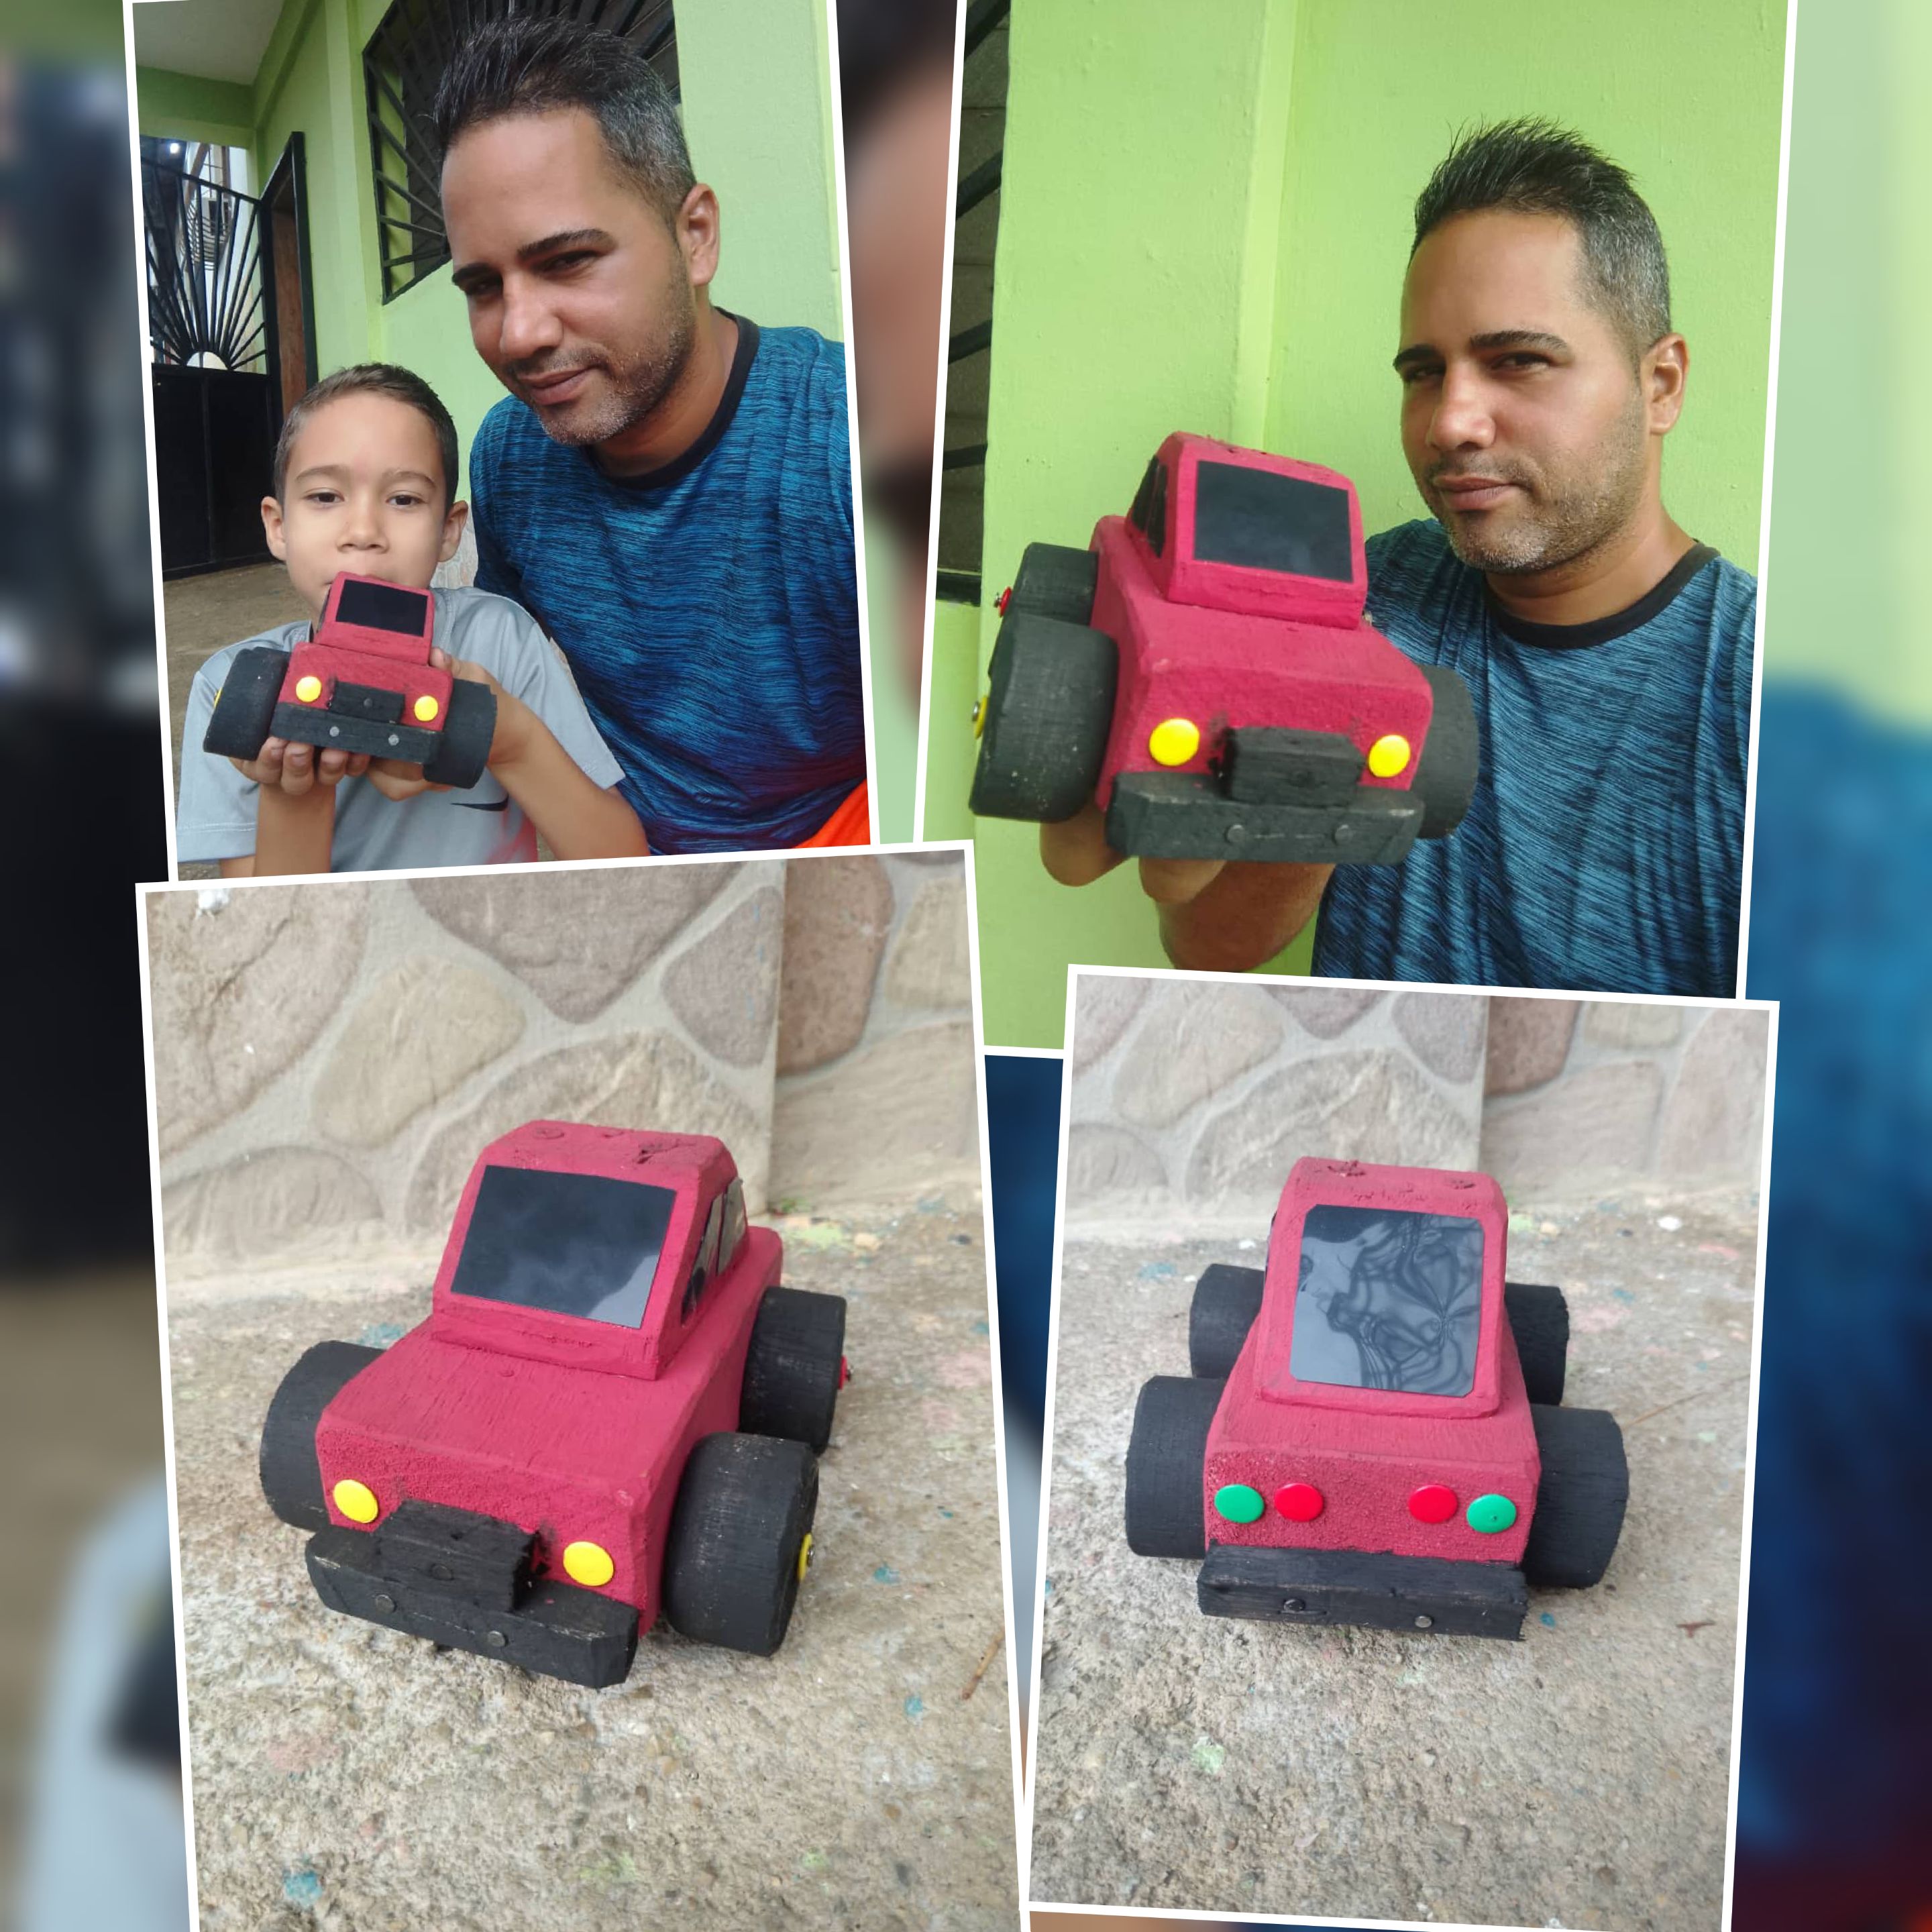
Este es el resultado final de mi hermoso carro de madera , para mí hijo amado , espero les sea de utilidad y sorprendan a sus hijos , familiares o amigos . Gracias por brindarme su bella atención, hasta luego
This is the final result of my beautiful wooden car for my beloved son. I hope you find it useful and that you surprise your children, family, or friends. Thank you for your kind attention. See you later.