Hello Hive
Happy Sunday to my beloved creative friends and beloved people of this community. We are happy to see the light of a new day. Sundays are usually a resting day for everyone including myself. I'm always happy to get some rest every Sunday after church.

Today ought to follow the same routine except that one of my client turn friend begged to interrupt my peaceful rest. She needs an outfit made ready for the coming weekend and I thought to start up with making the outfit early enough as my weekdays may may have me too busy in the farm to attend to much sewing and the outfit she wanted to sew was a design I wasn't too familiar with. It is going to be a hand-on process where I will working and learning at thesame time.
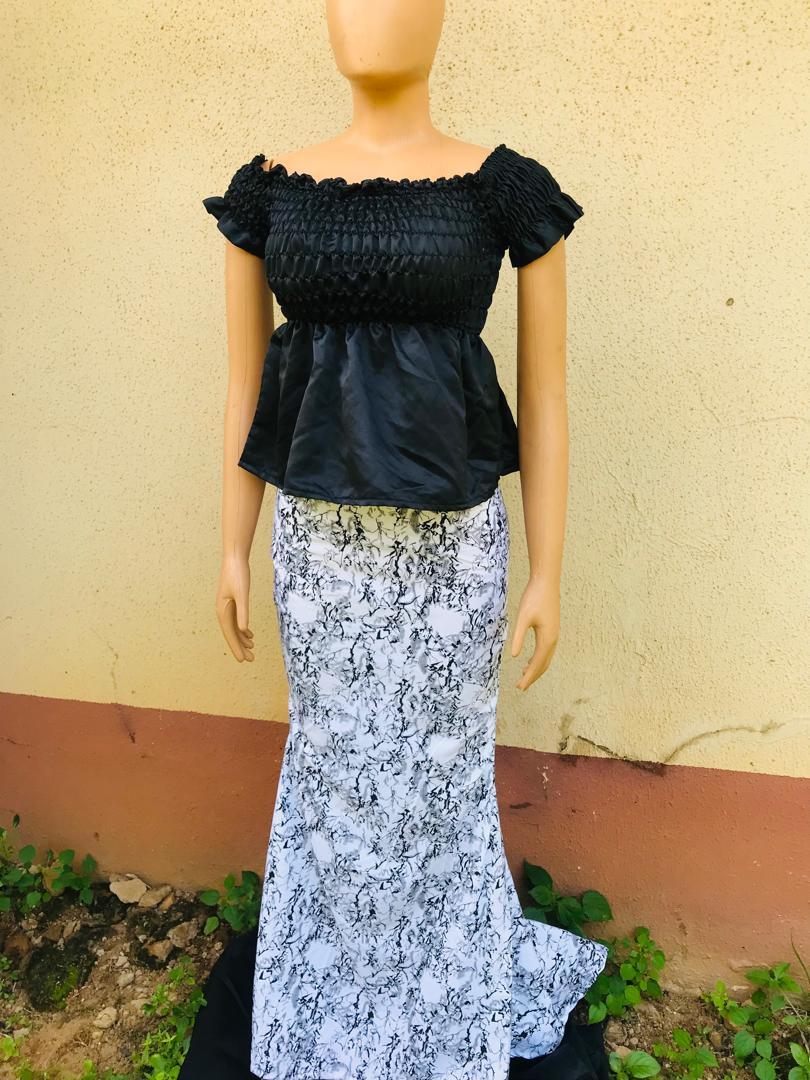
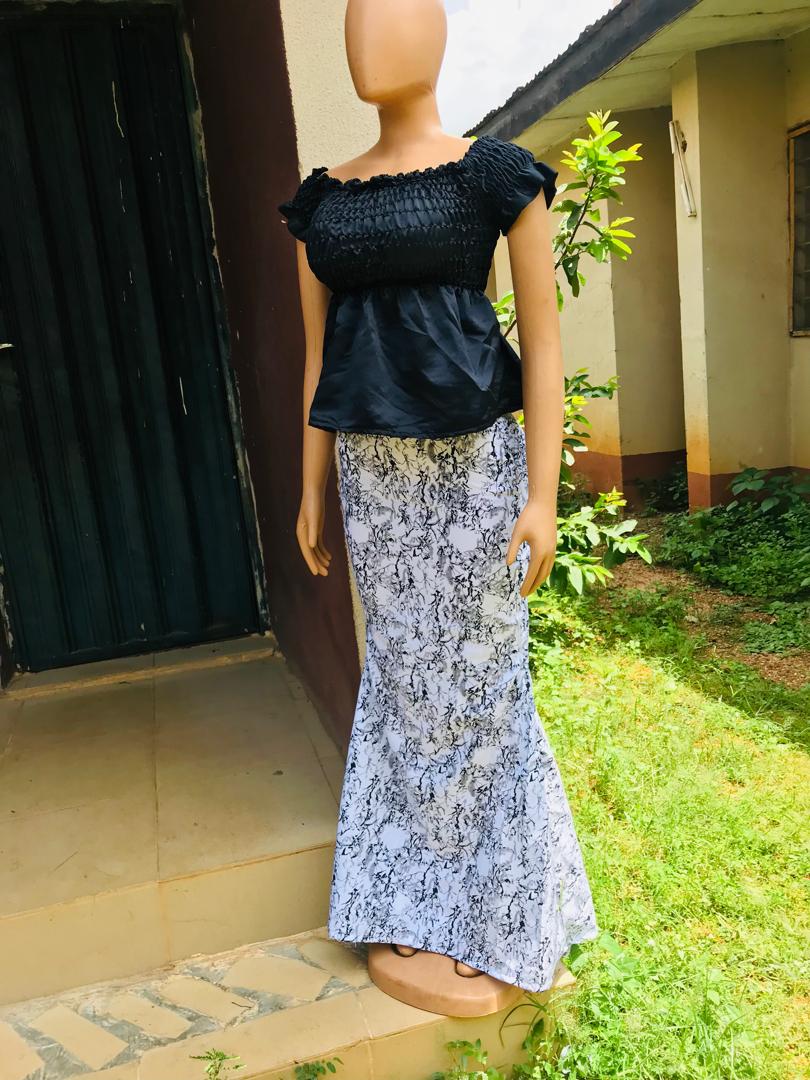
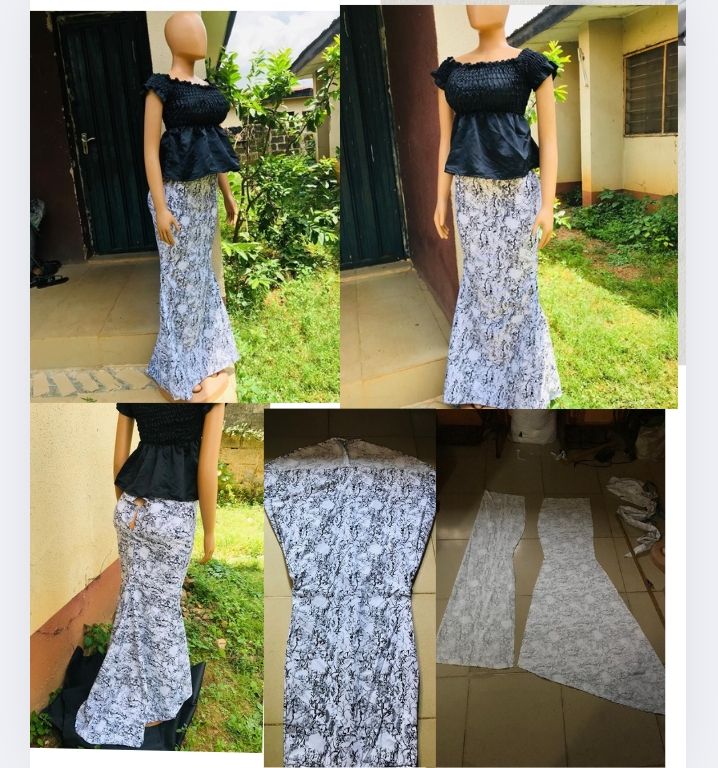
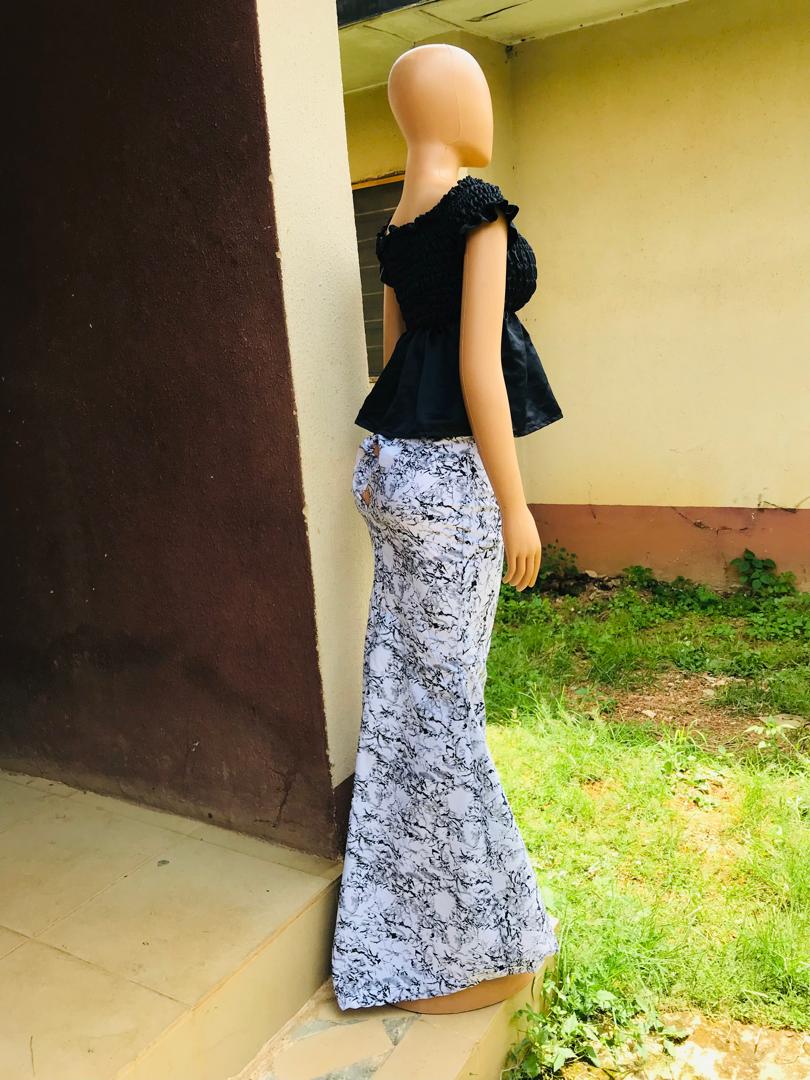
This will be my very first attempt at sewing a mermaid skirt. An unusual wide skirt at the hem mimicking the shape of a mermaid.
Right after service she approach me in church, I took her measurements right there at the church premises and got the fabric from her.
Upon reaching the house some few hours ago I barely had breakfast before I began working on the outfit. I am so afraid of making mistakes with the skirt and wanted to get it done in time, call her over to try it on and see how this will turn out on her
Nevertheless right after sewing the skirt I was already happy with the shape I got and the outcome of
My first trial of sewing a mermaid skirt really came out nice. I believe that this will sit very well on her just like it did on the body form here
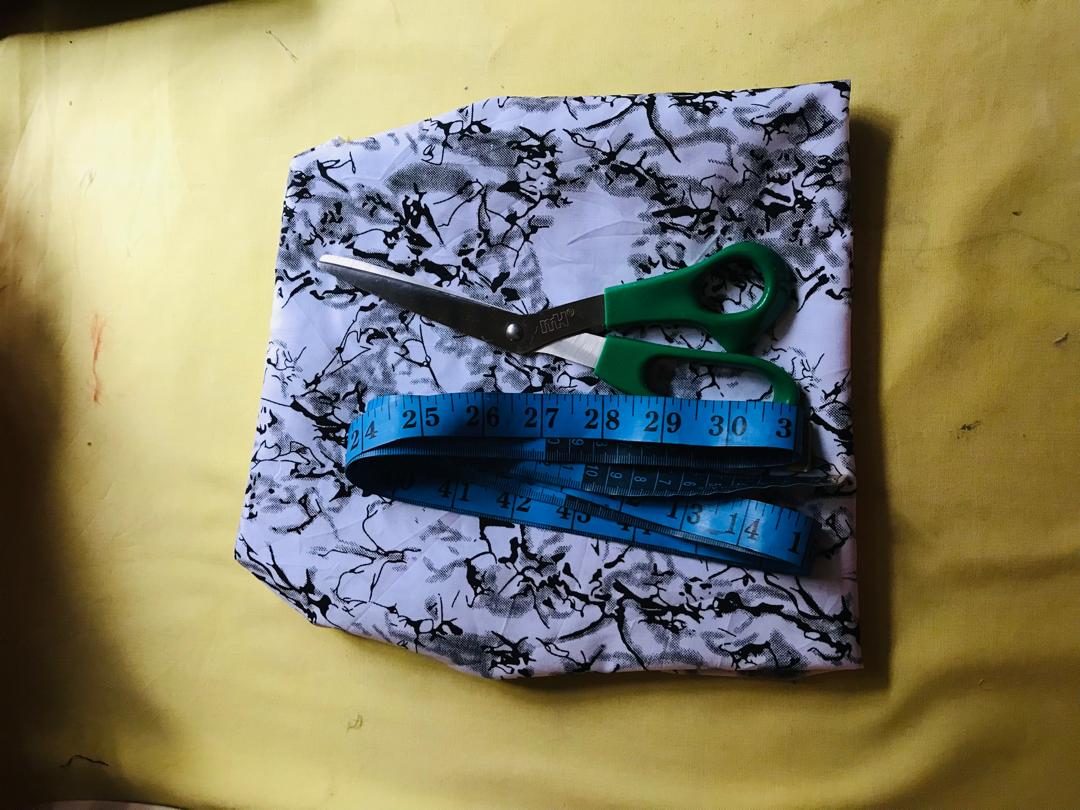
Cutting
To start with I got the following materials for making the skirt.
- Fabric
- Zippers and thread
- Scissors and tailors chalk
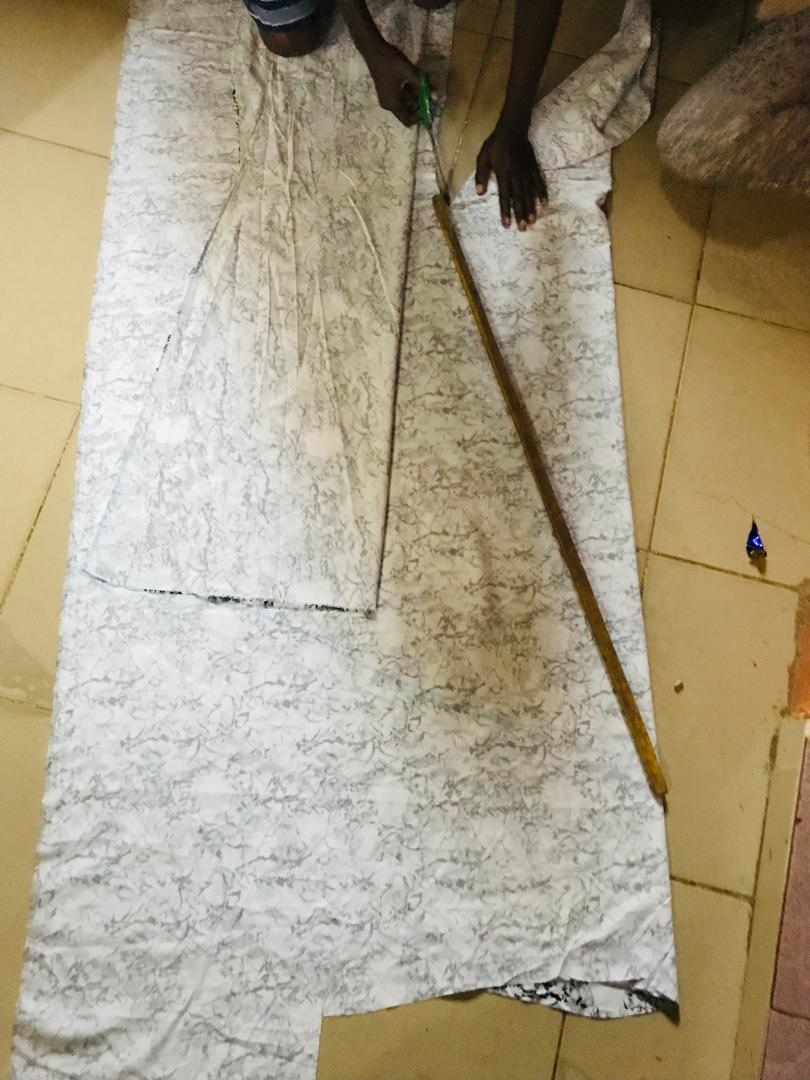
I folded the fabric into 2 and used about 15" as the base. I measured out her waist, hip and knee length. Connected these lines than using a ruler, I creates a A ship line to the hem of the fabric.
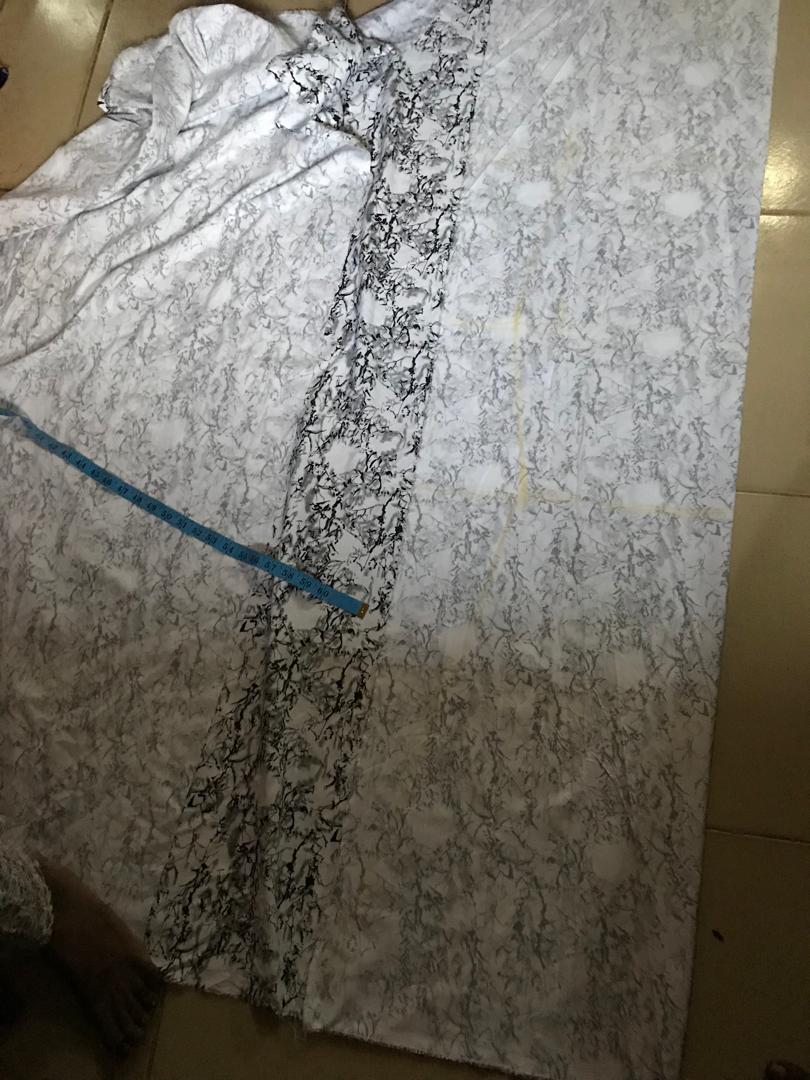
After cutting this out as the front piece I placed it on another fabric
Added some zipper allowance at the back and some extra allowance that will create a godget at the back of the skirt.

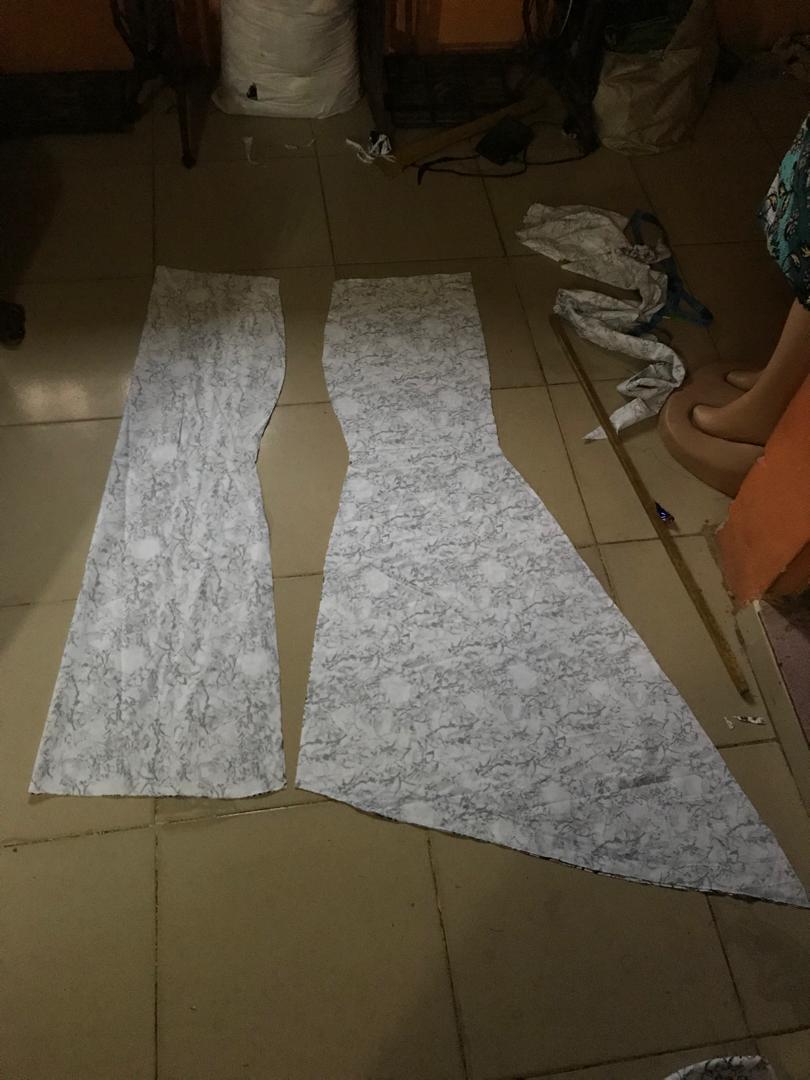
I added some extra 5" allowance to the back skirt pattern to give me some more fullness and overflow
Stitching
After cutting i started stitching the skirt starting with the side seams

Next was the Hem stitches that kept folding because it was in a somewhat circular form.
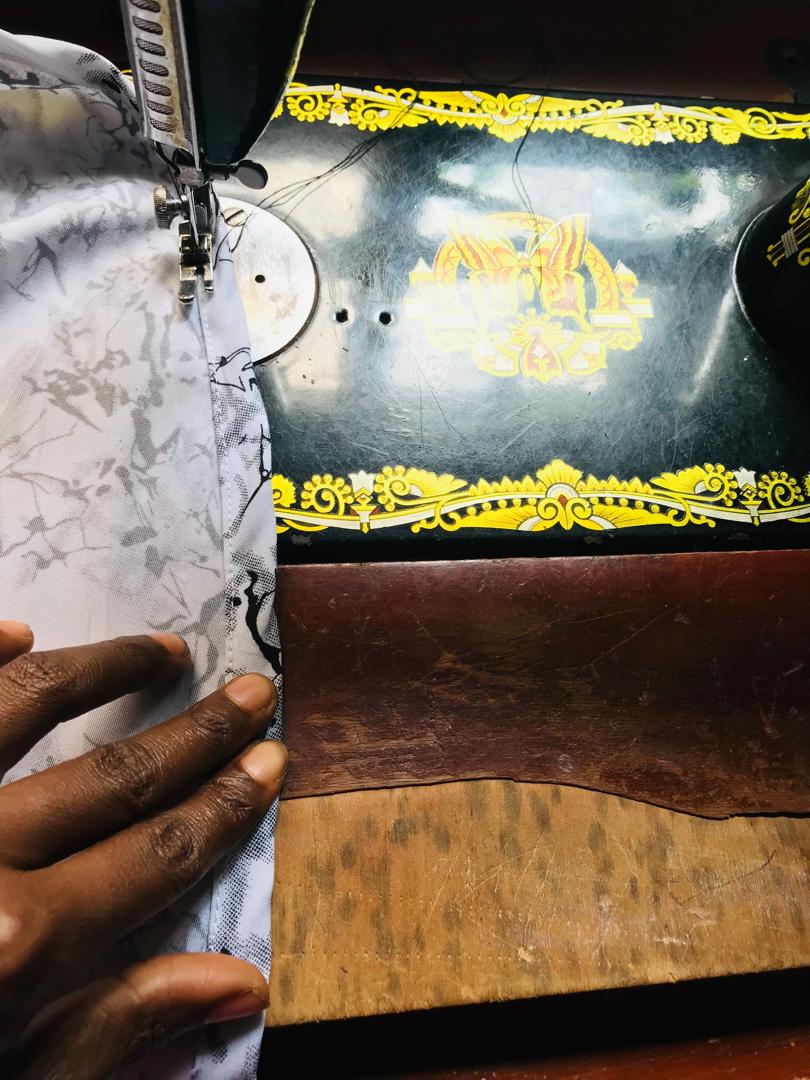
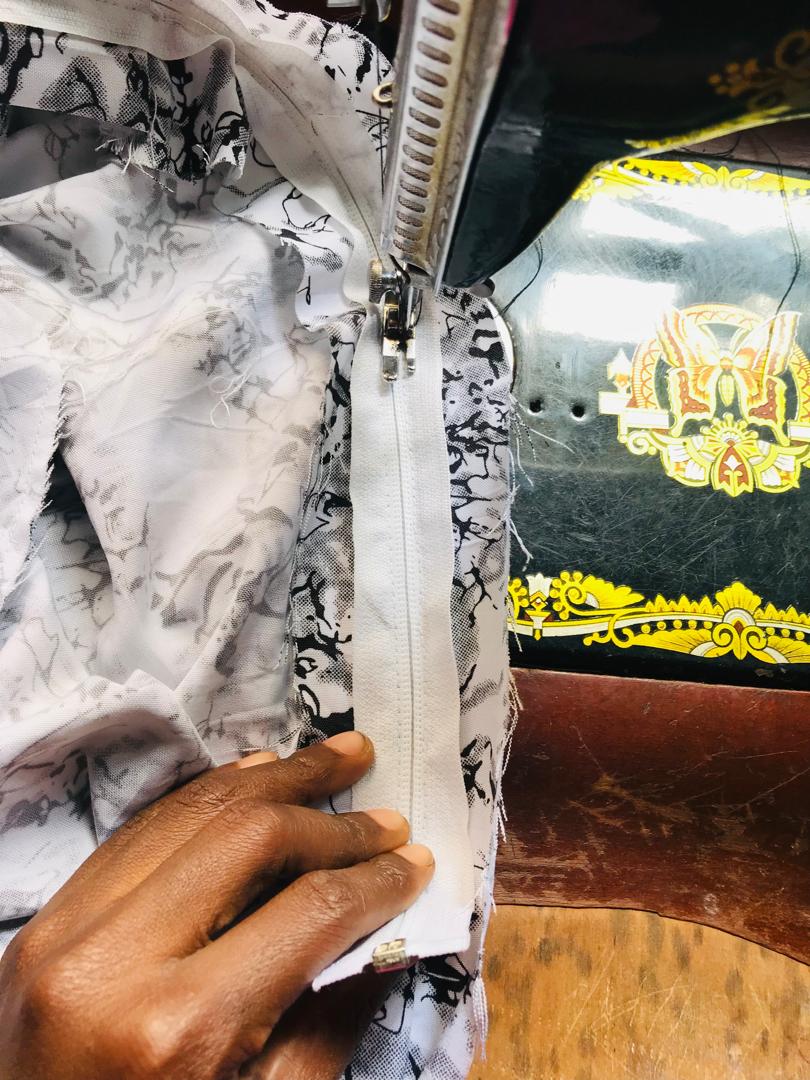
A clean press and then a skirt zipper was attached
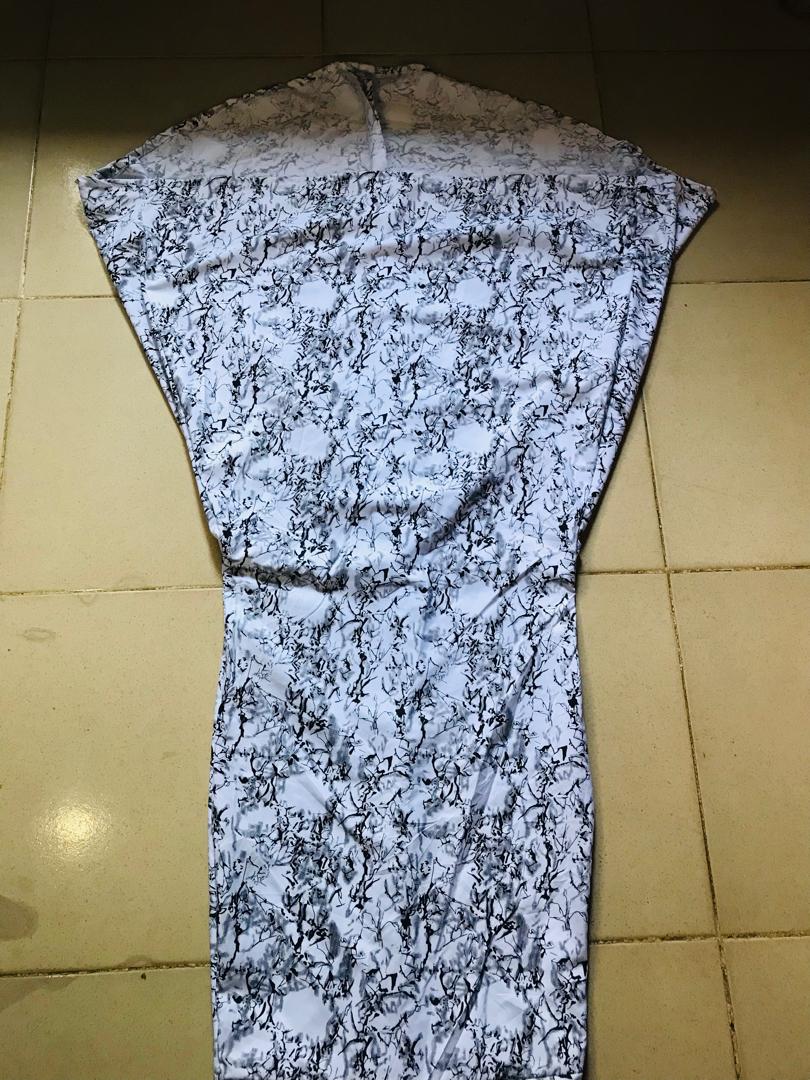
This was done and here is the outcome of how i have sewn this mermaid skirt.
 .
.
I had to remove the zipper for the body form to try it on first since her hip was much bigger than my clients hip.
I have finally learnt how to sew a mermaid skirt while working on this client cloth and you can imagine how happy I am right now.