Saludos gente linda de #HiveDIY. Acá sigo inspirada con todo tipo de 💜 **Corazones** 💜, en esta ocasión les traigo un **Corazón de Eslabones**. Vi esta imagen por Pinterest y me dio la impresión de ser como un *candado de corazón*, pero para expresarlo de manera correcta, son más bien eslabones entrelazados que forman un corazón. Me gustó mucho la idea, así que se las comparto. La Imagen que usé de guía fue la siguiente:


𝐏𝐚𝐬𝐨 𝐚 𝐏𝐚𝐬𝐨

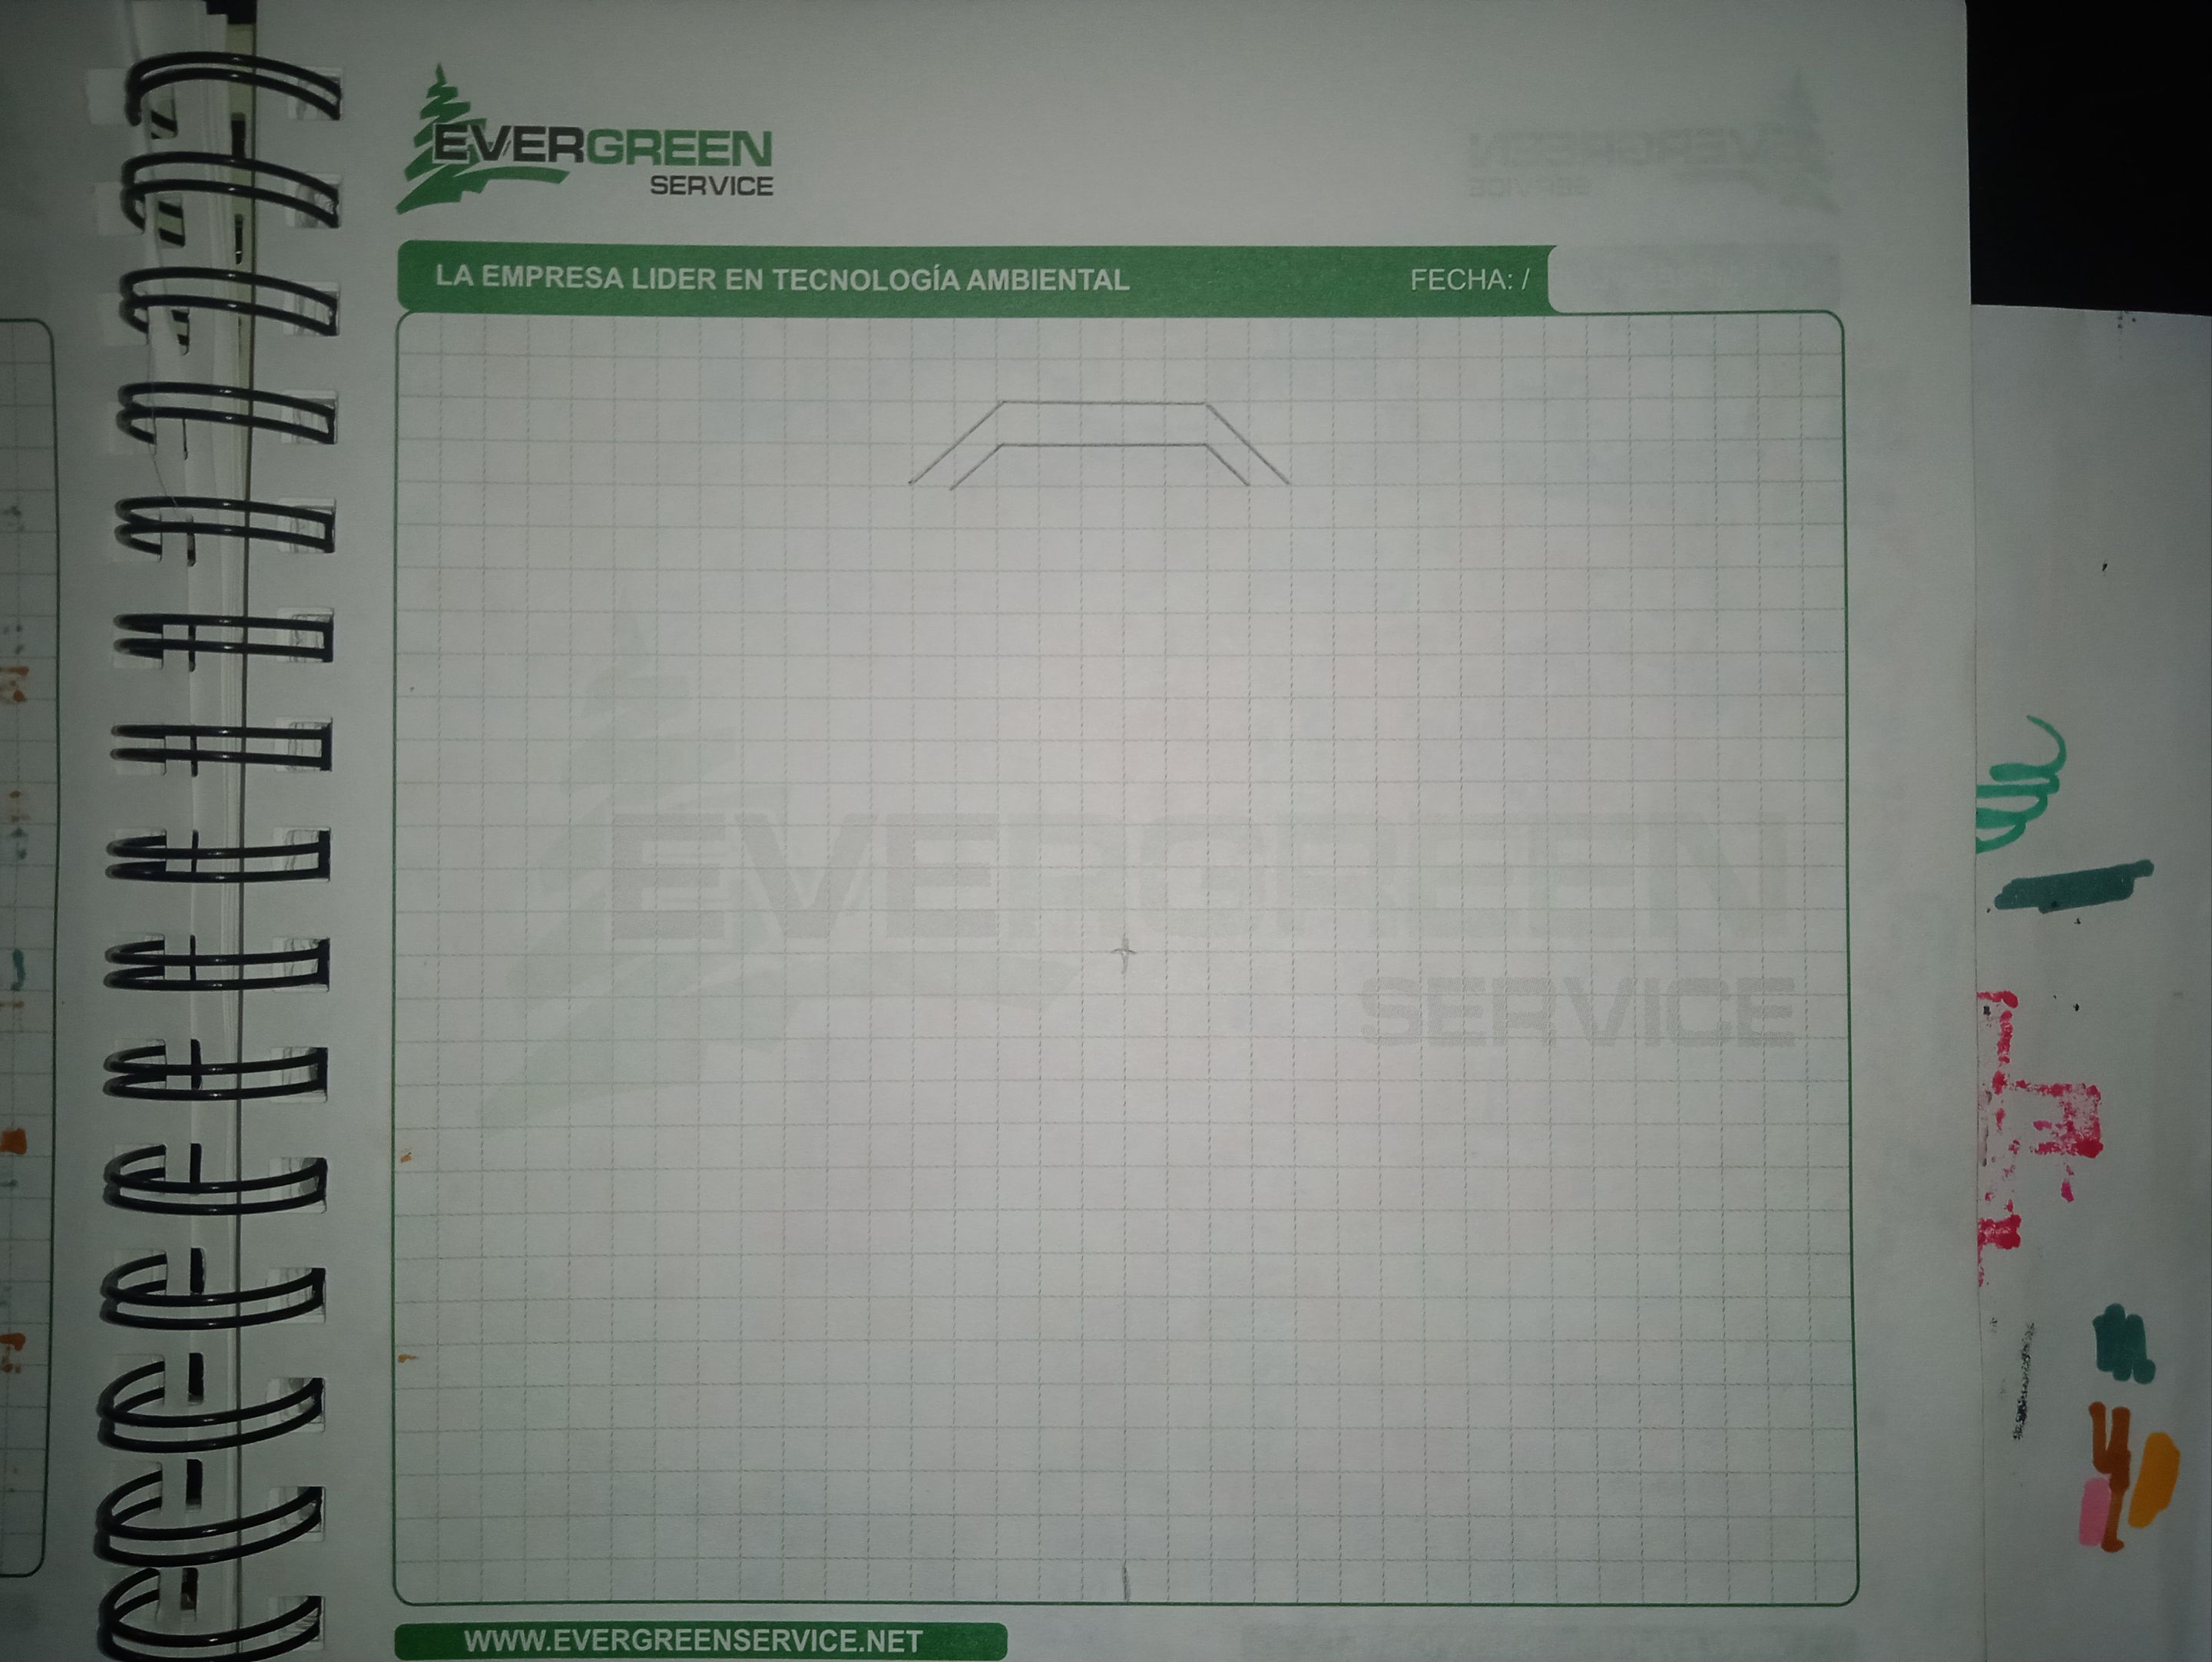
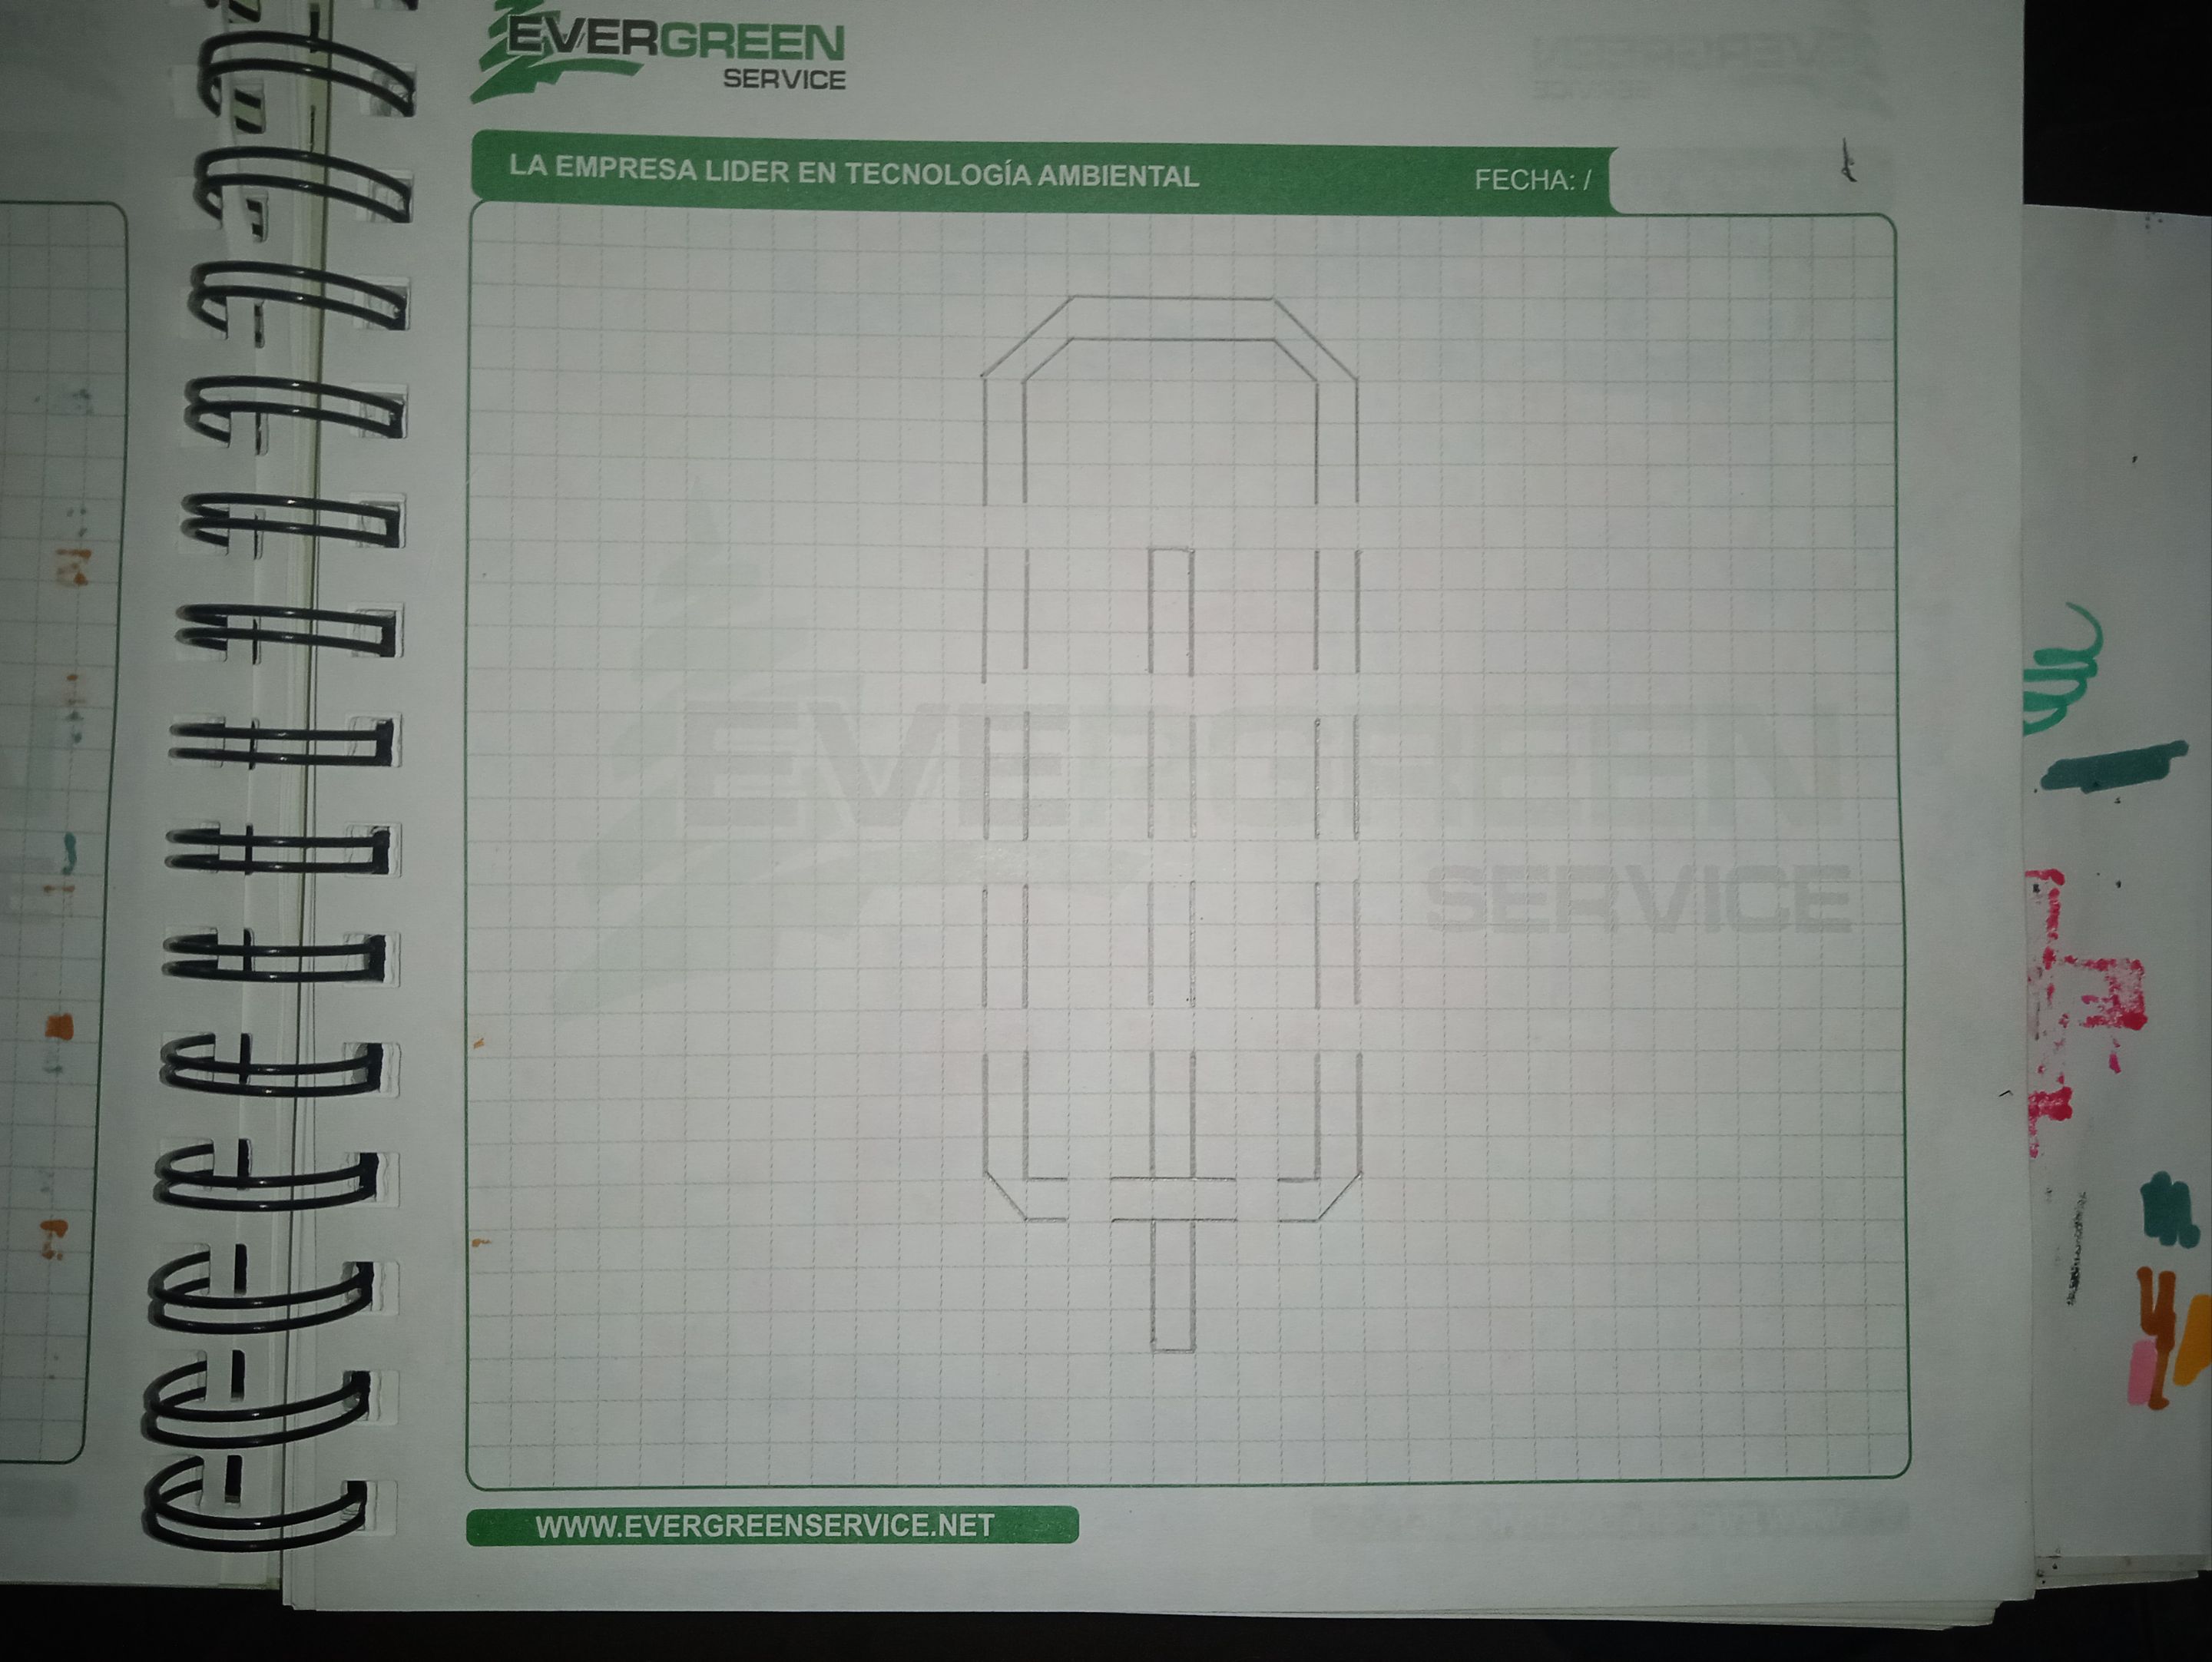
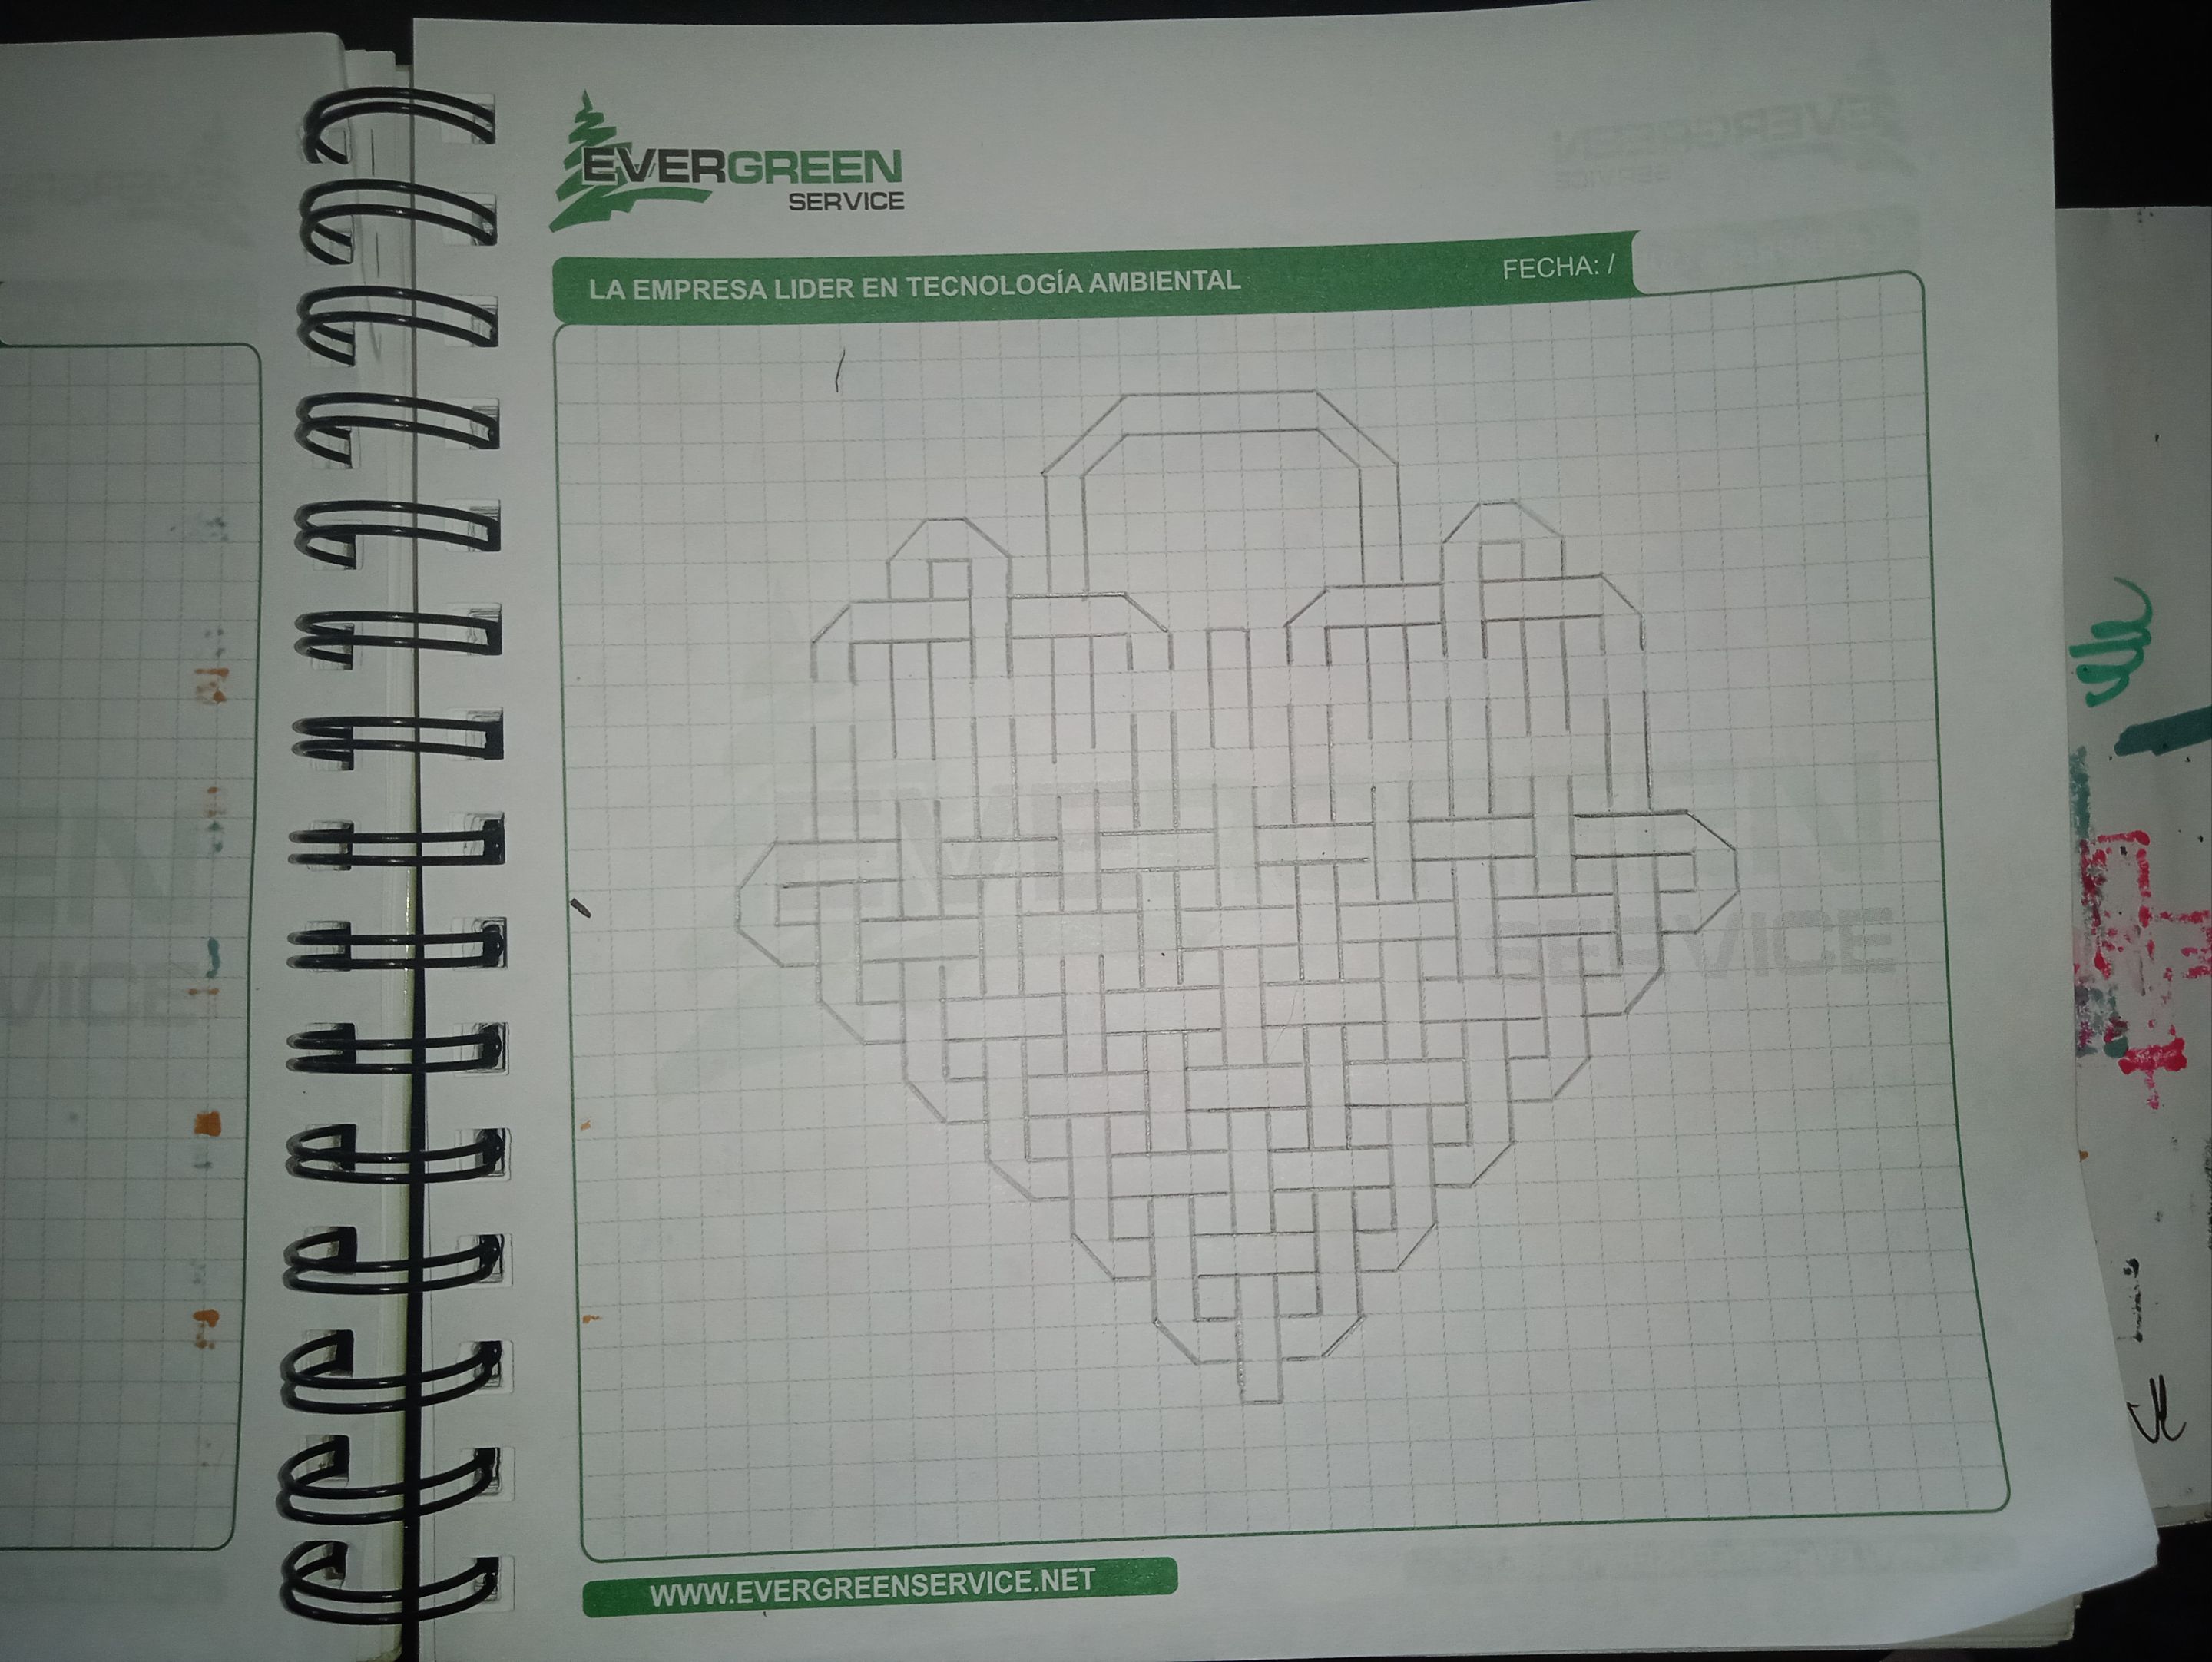
Saben que la clave de estos dibujos es contar los recuadros que abarca. En esta ocasión empecé desde la parte superior, contando 5 cuadritos para hacer el aza del corazón. También tracé 2 líneas inclinadas, una con 2 espacios y otra con uno. Al hablar de espacios, me refiero a los cuadraditos de la hoja.
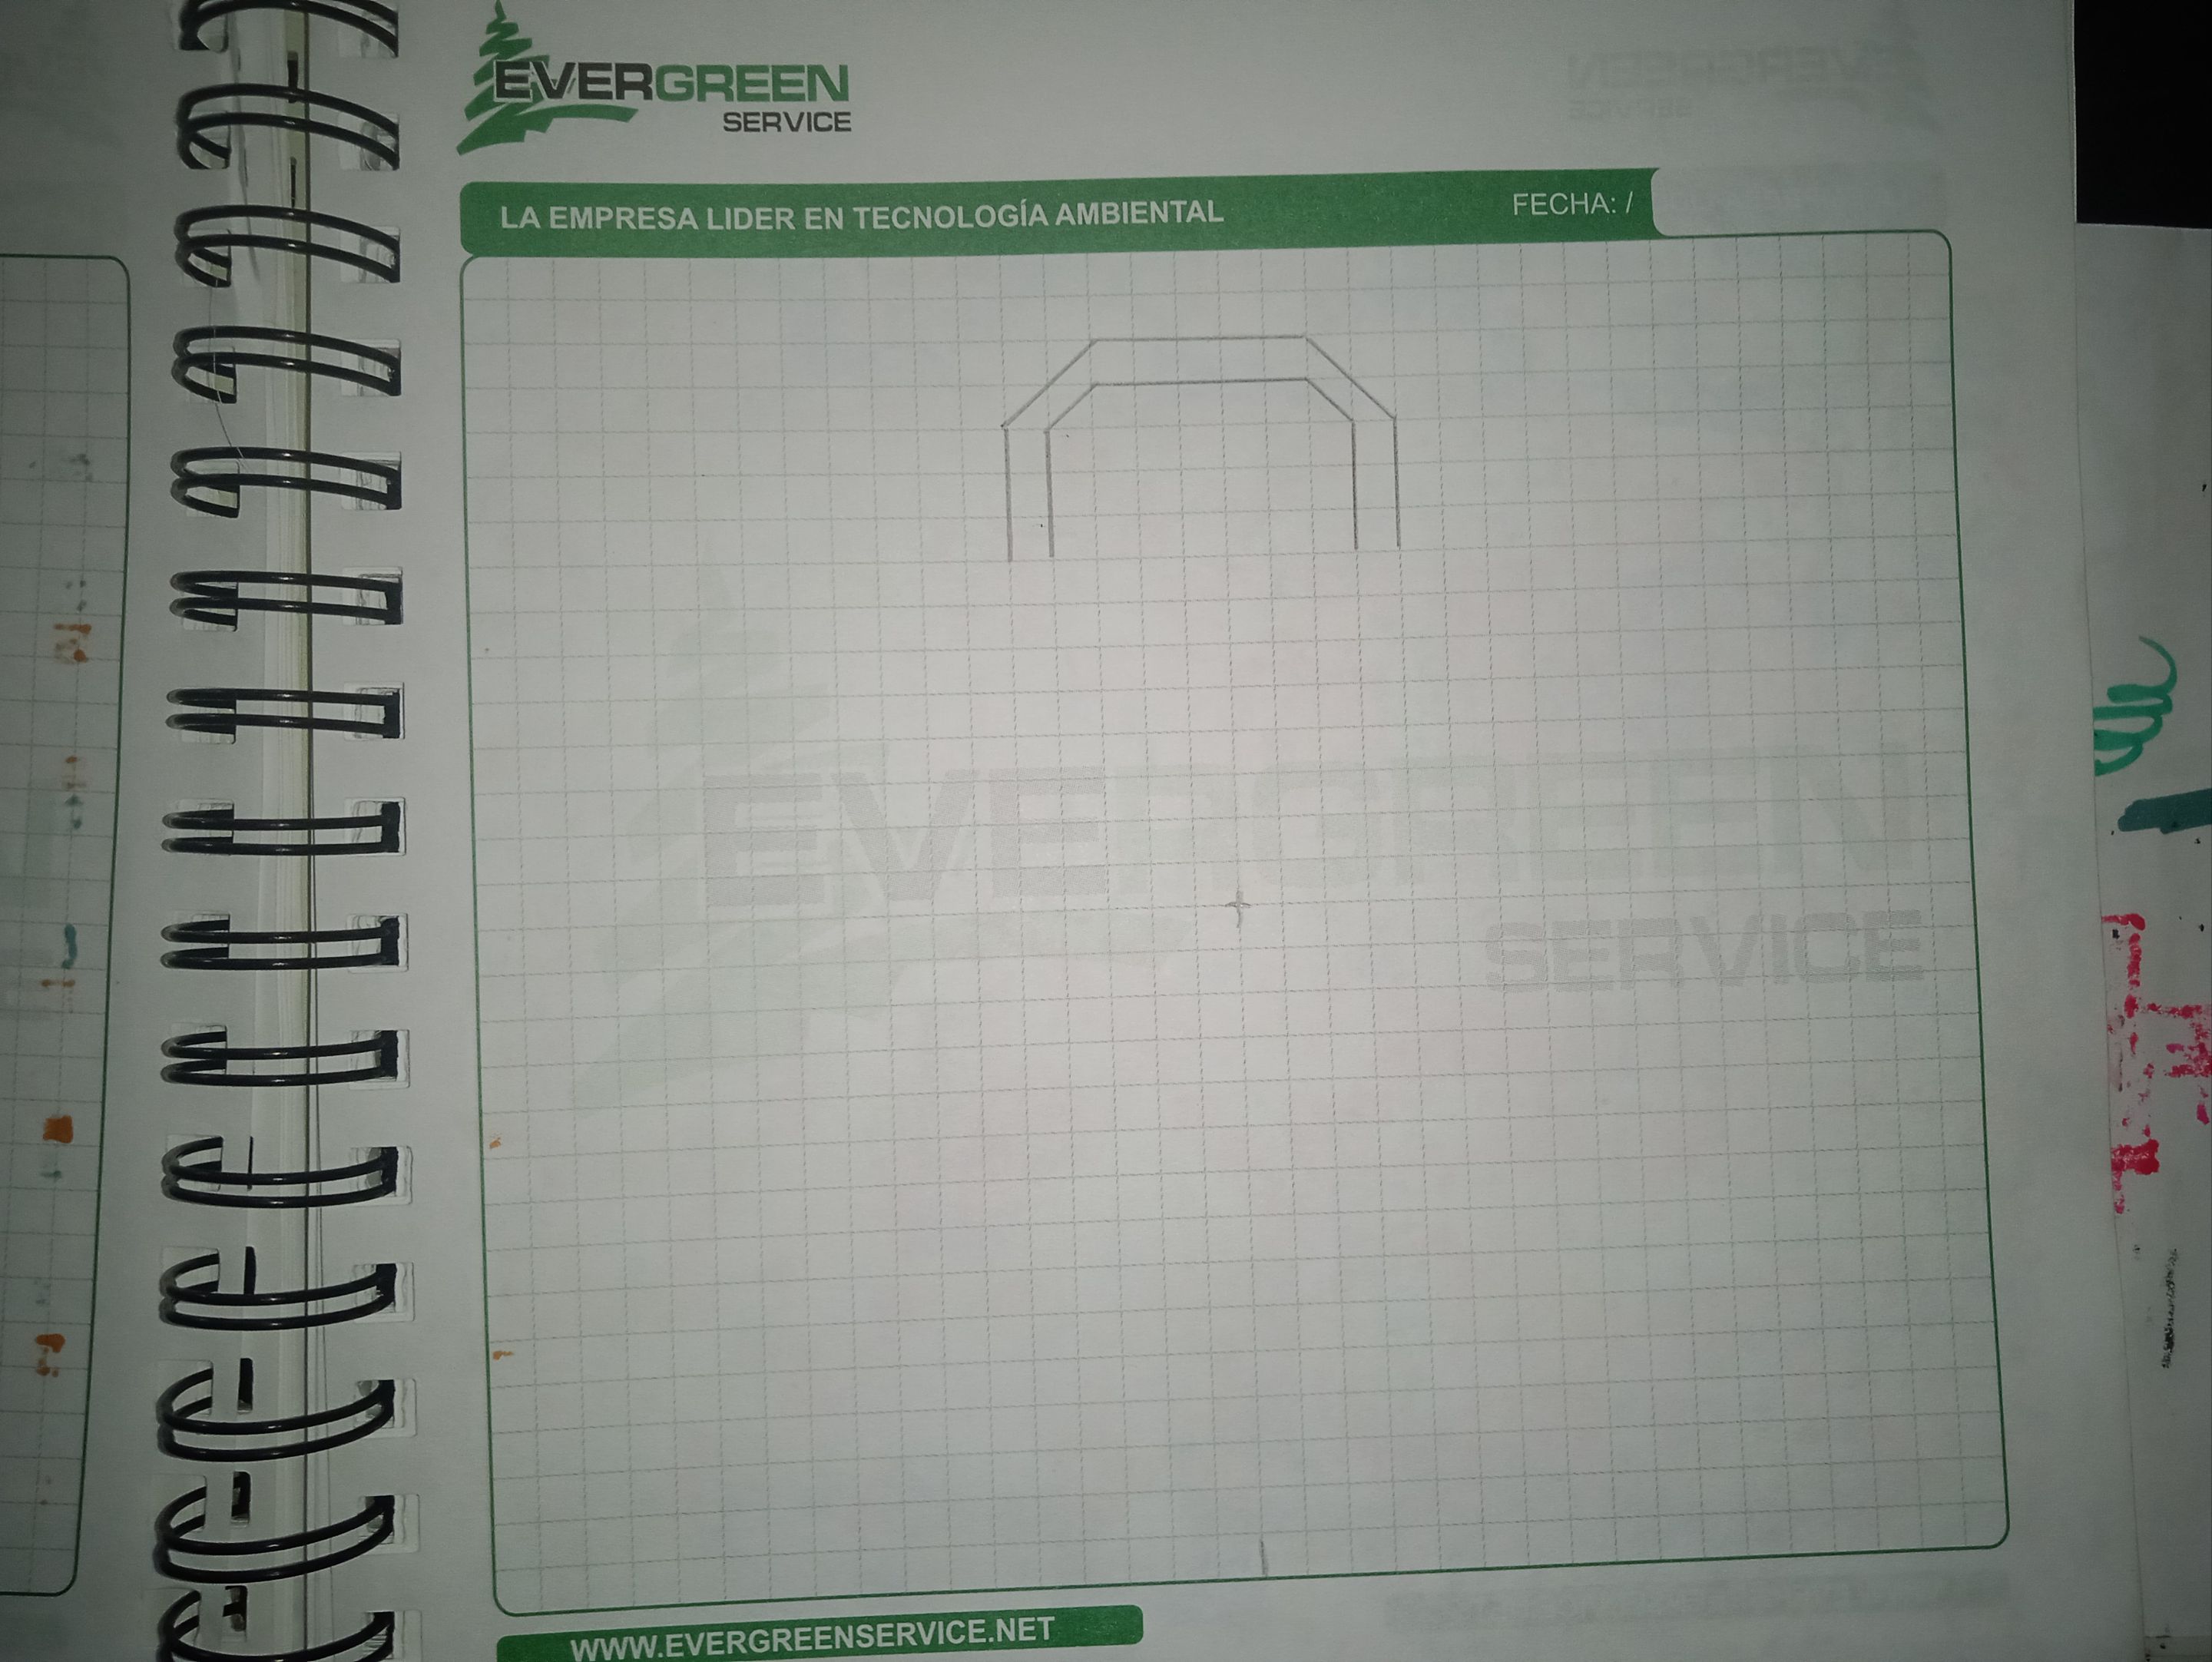
Luego terminé trazando las líneas correspondientes de manera vertical del primer eslabón o del eslabón central del corazón. Así que empiezo con los primeros 3 cuadraditos remarcados de manera vertical.
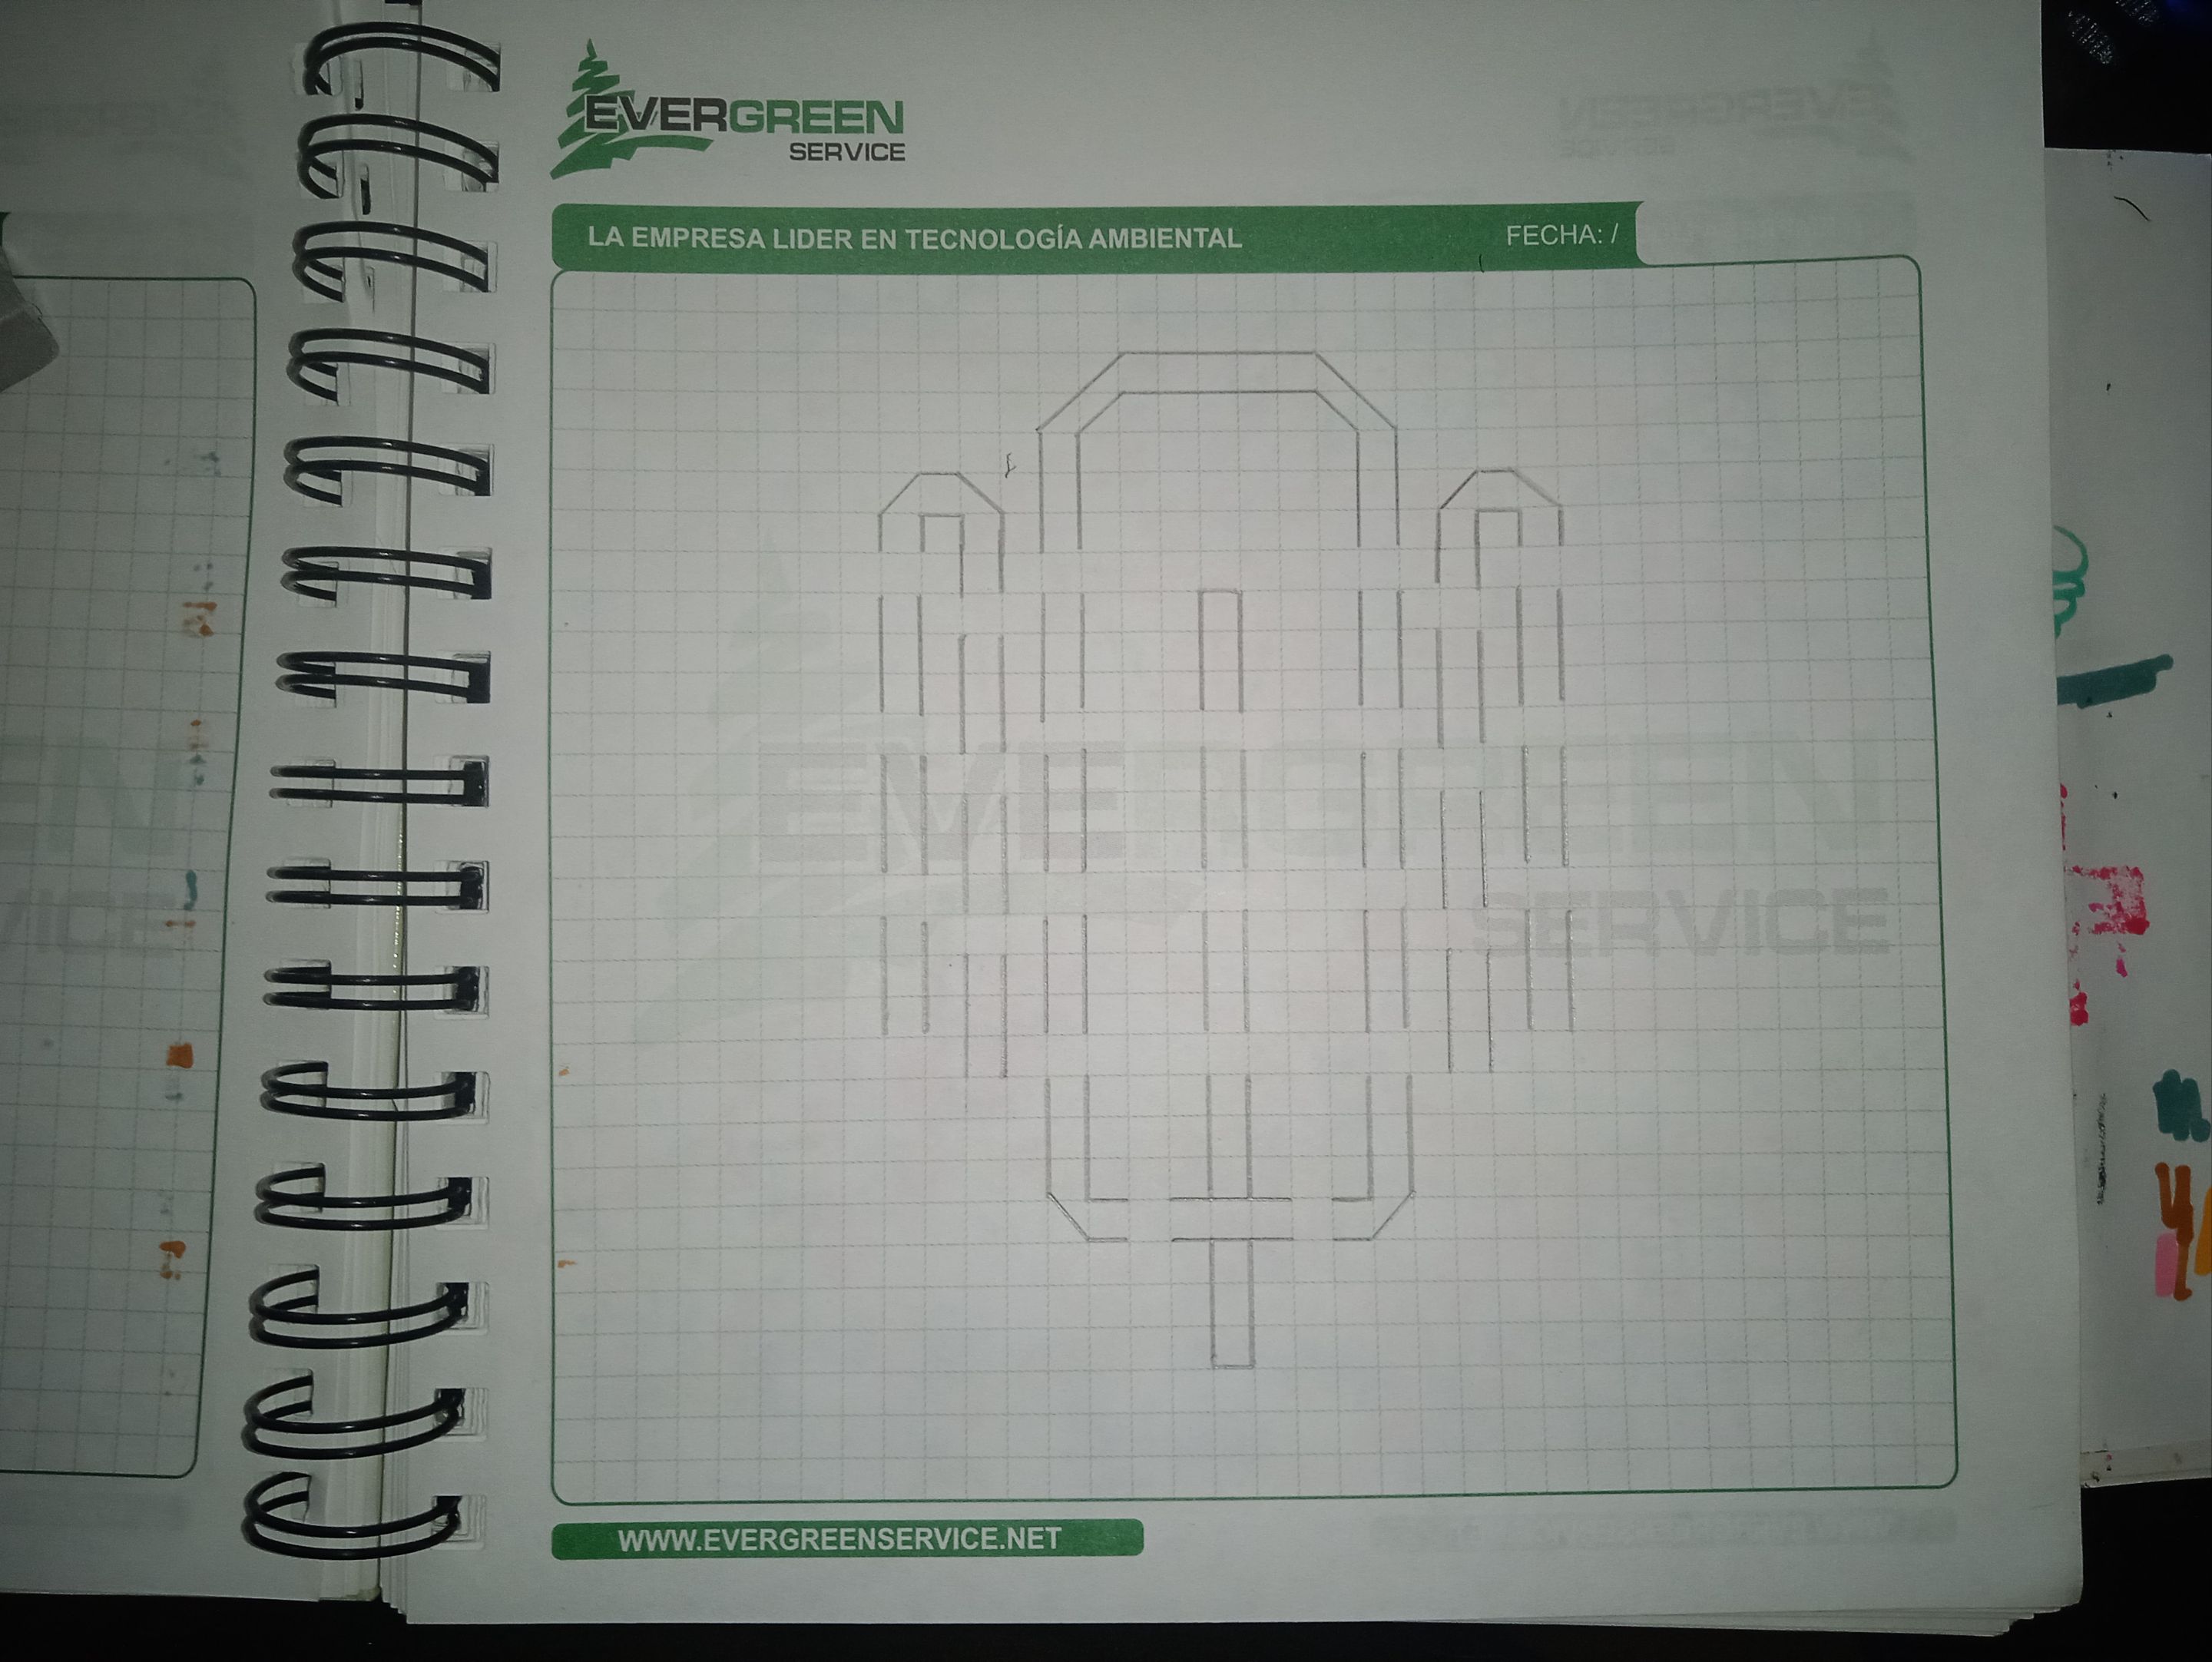
Ahora dejo un espacio intermedio y continúo haciendo 2 líneas paralelas de 3 cuadraditos cada una. Esto lo repito 4 veces y al final cierro de manera horizontal, siempre dejando un cuadrito intermedio.
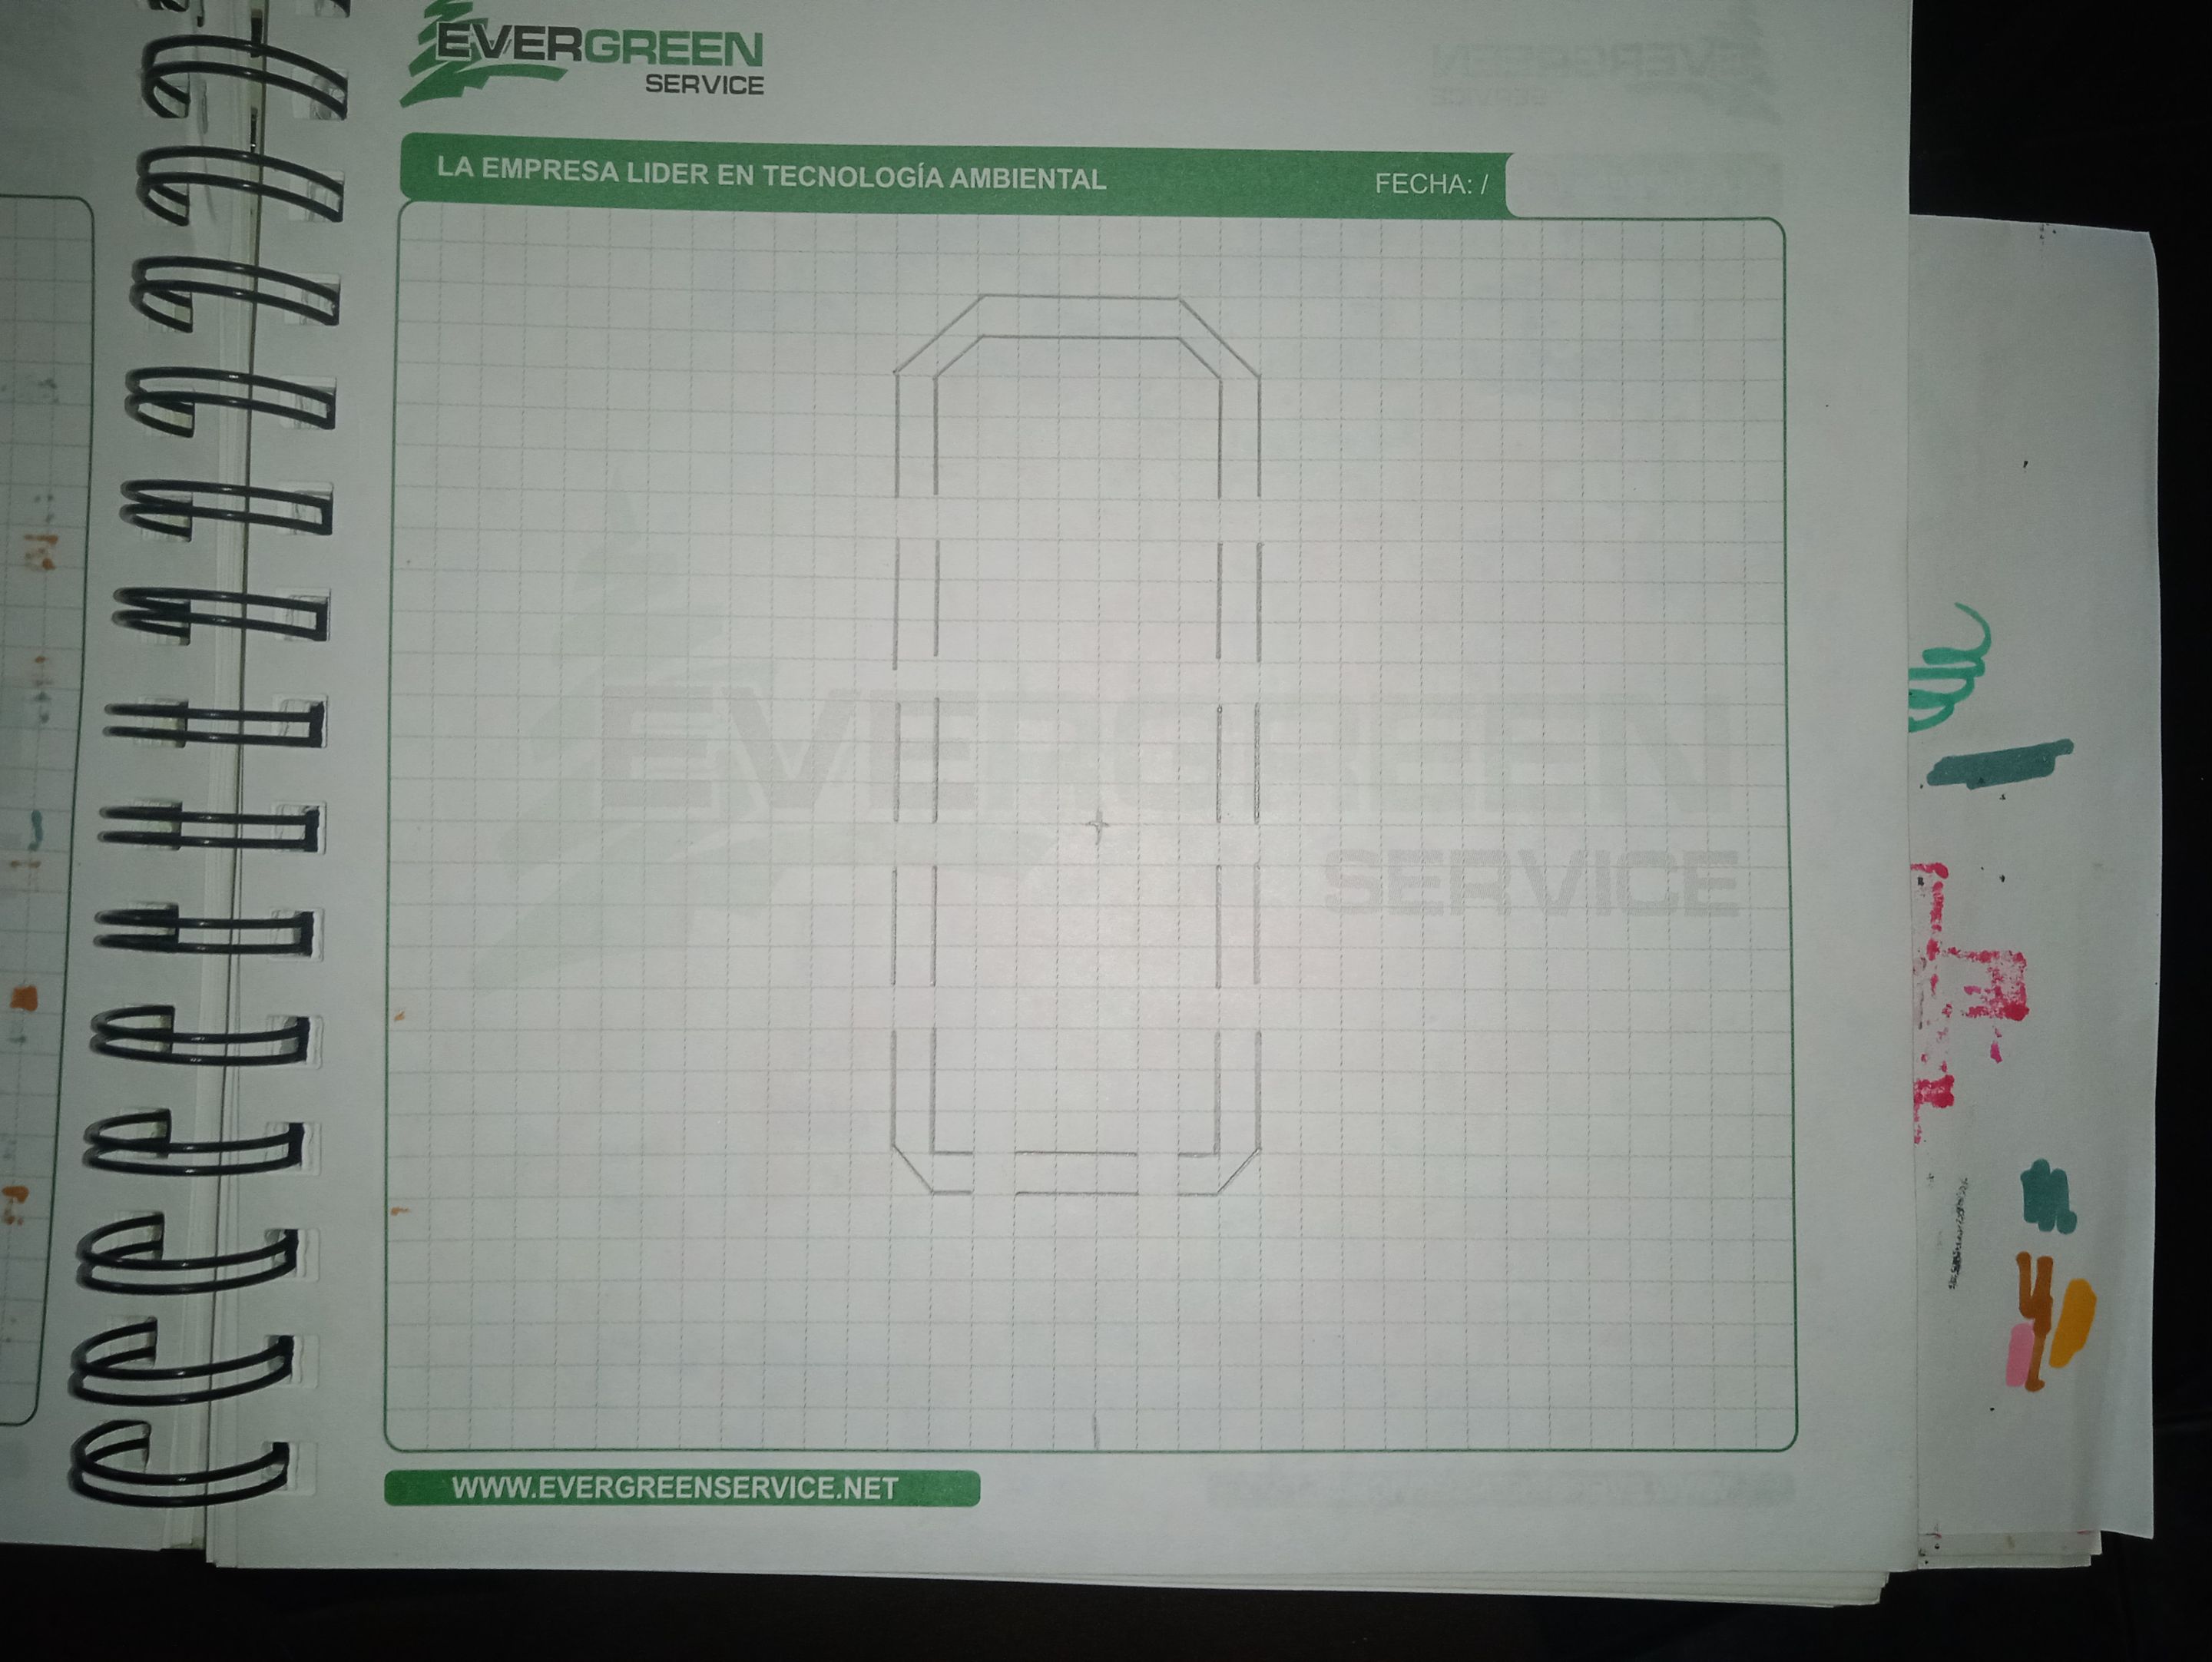
Para el segundo eslabón, hice el que está más en el medio, también de manera vertical. Nótese que dejé os mismos espacios entre cada 3 recuadros.
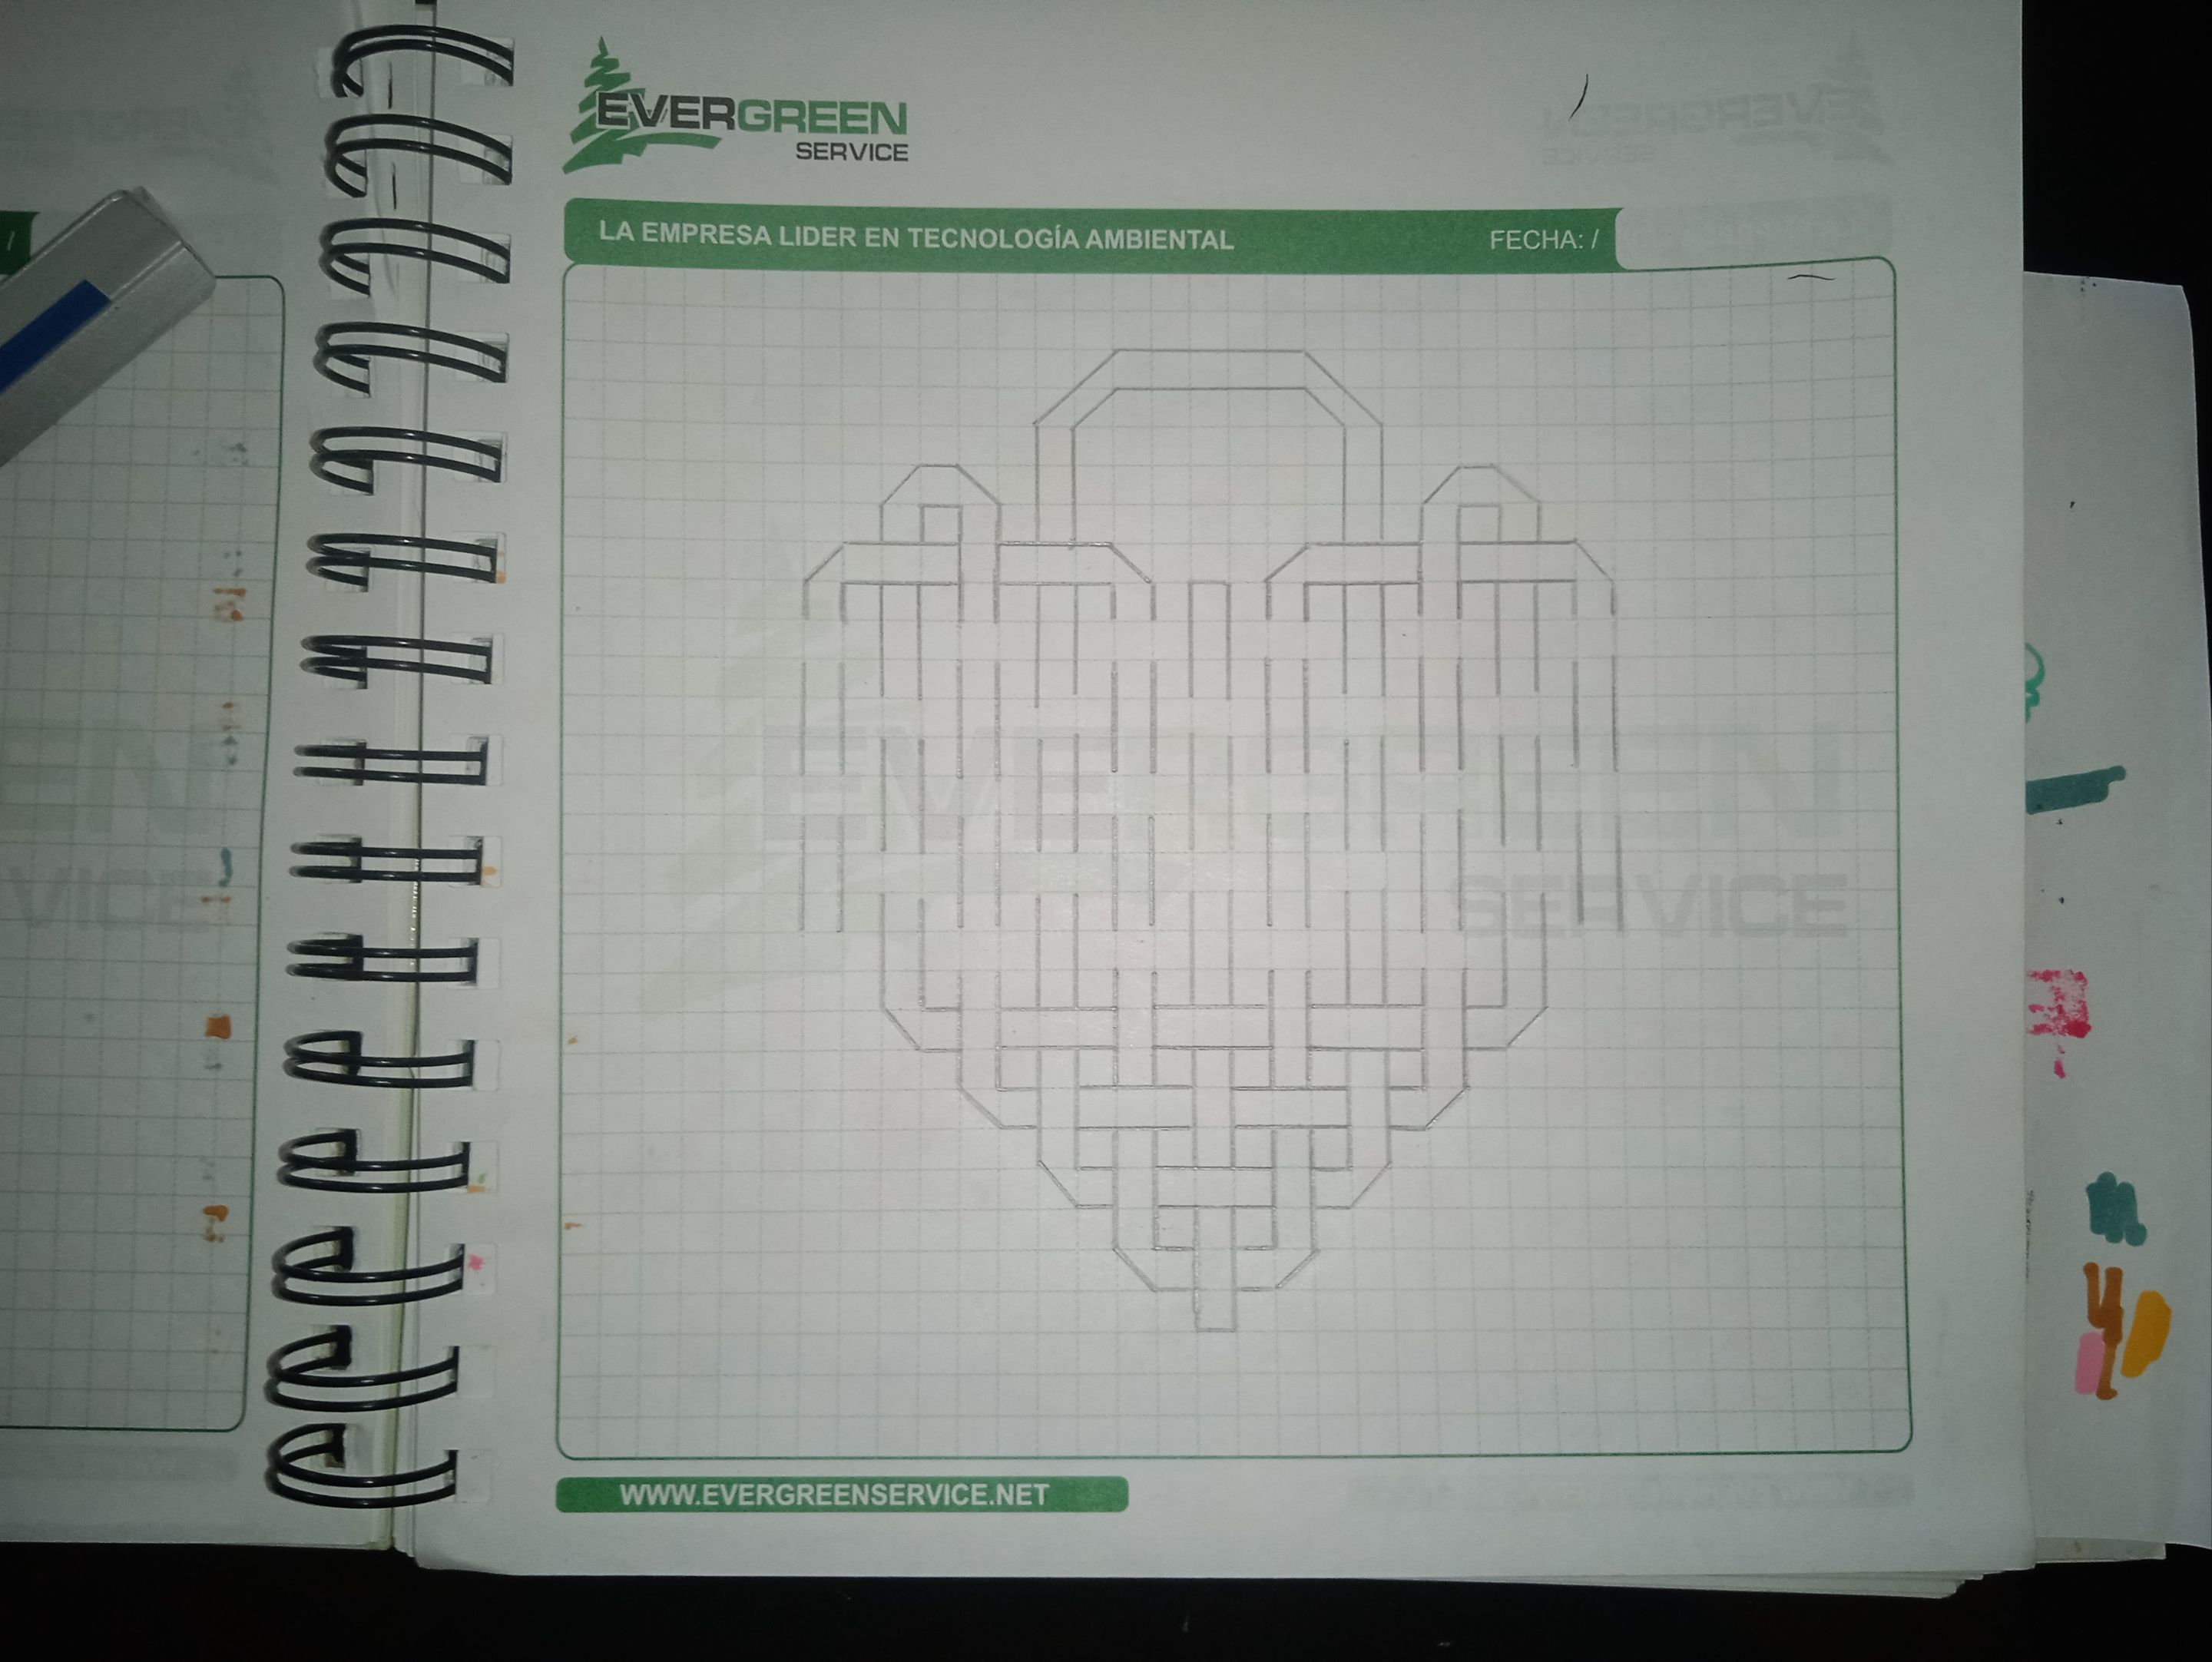
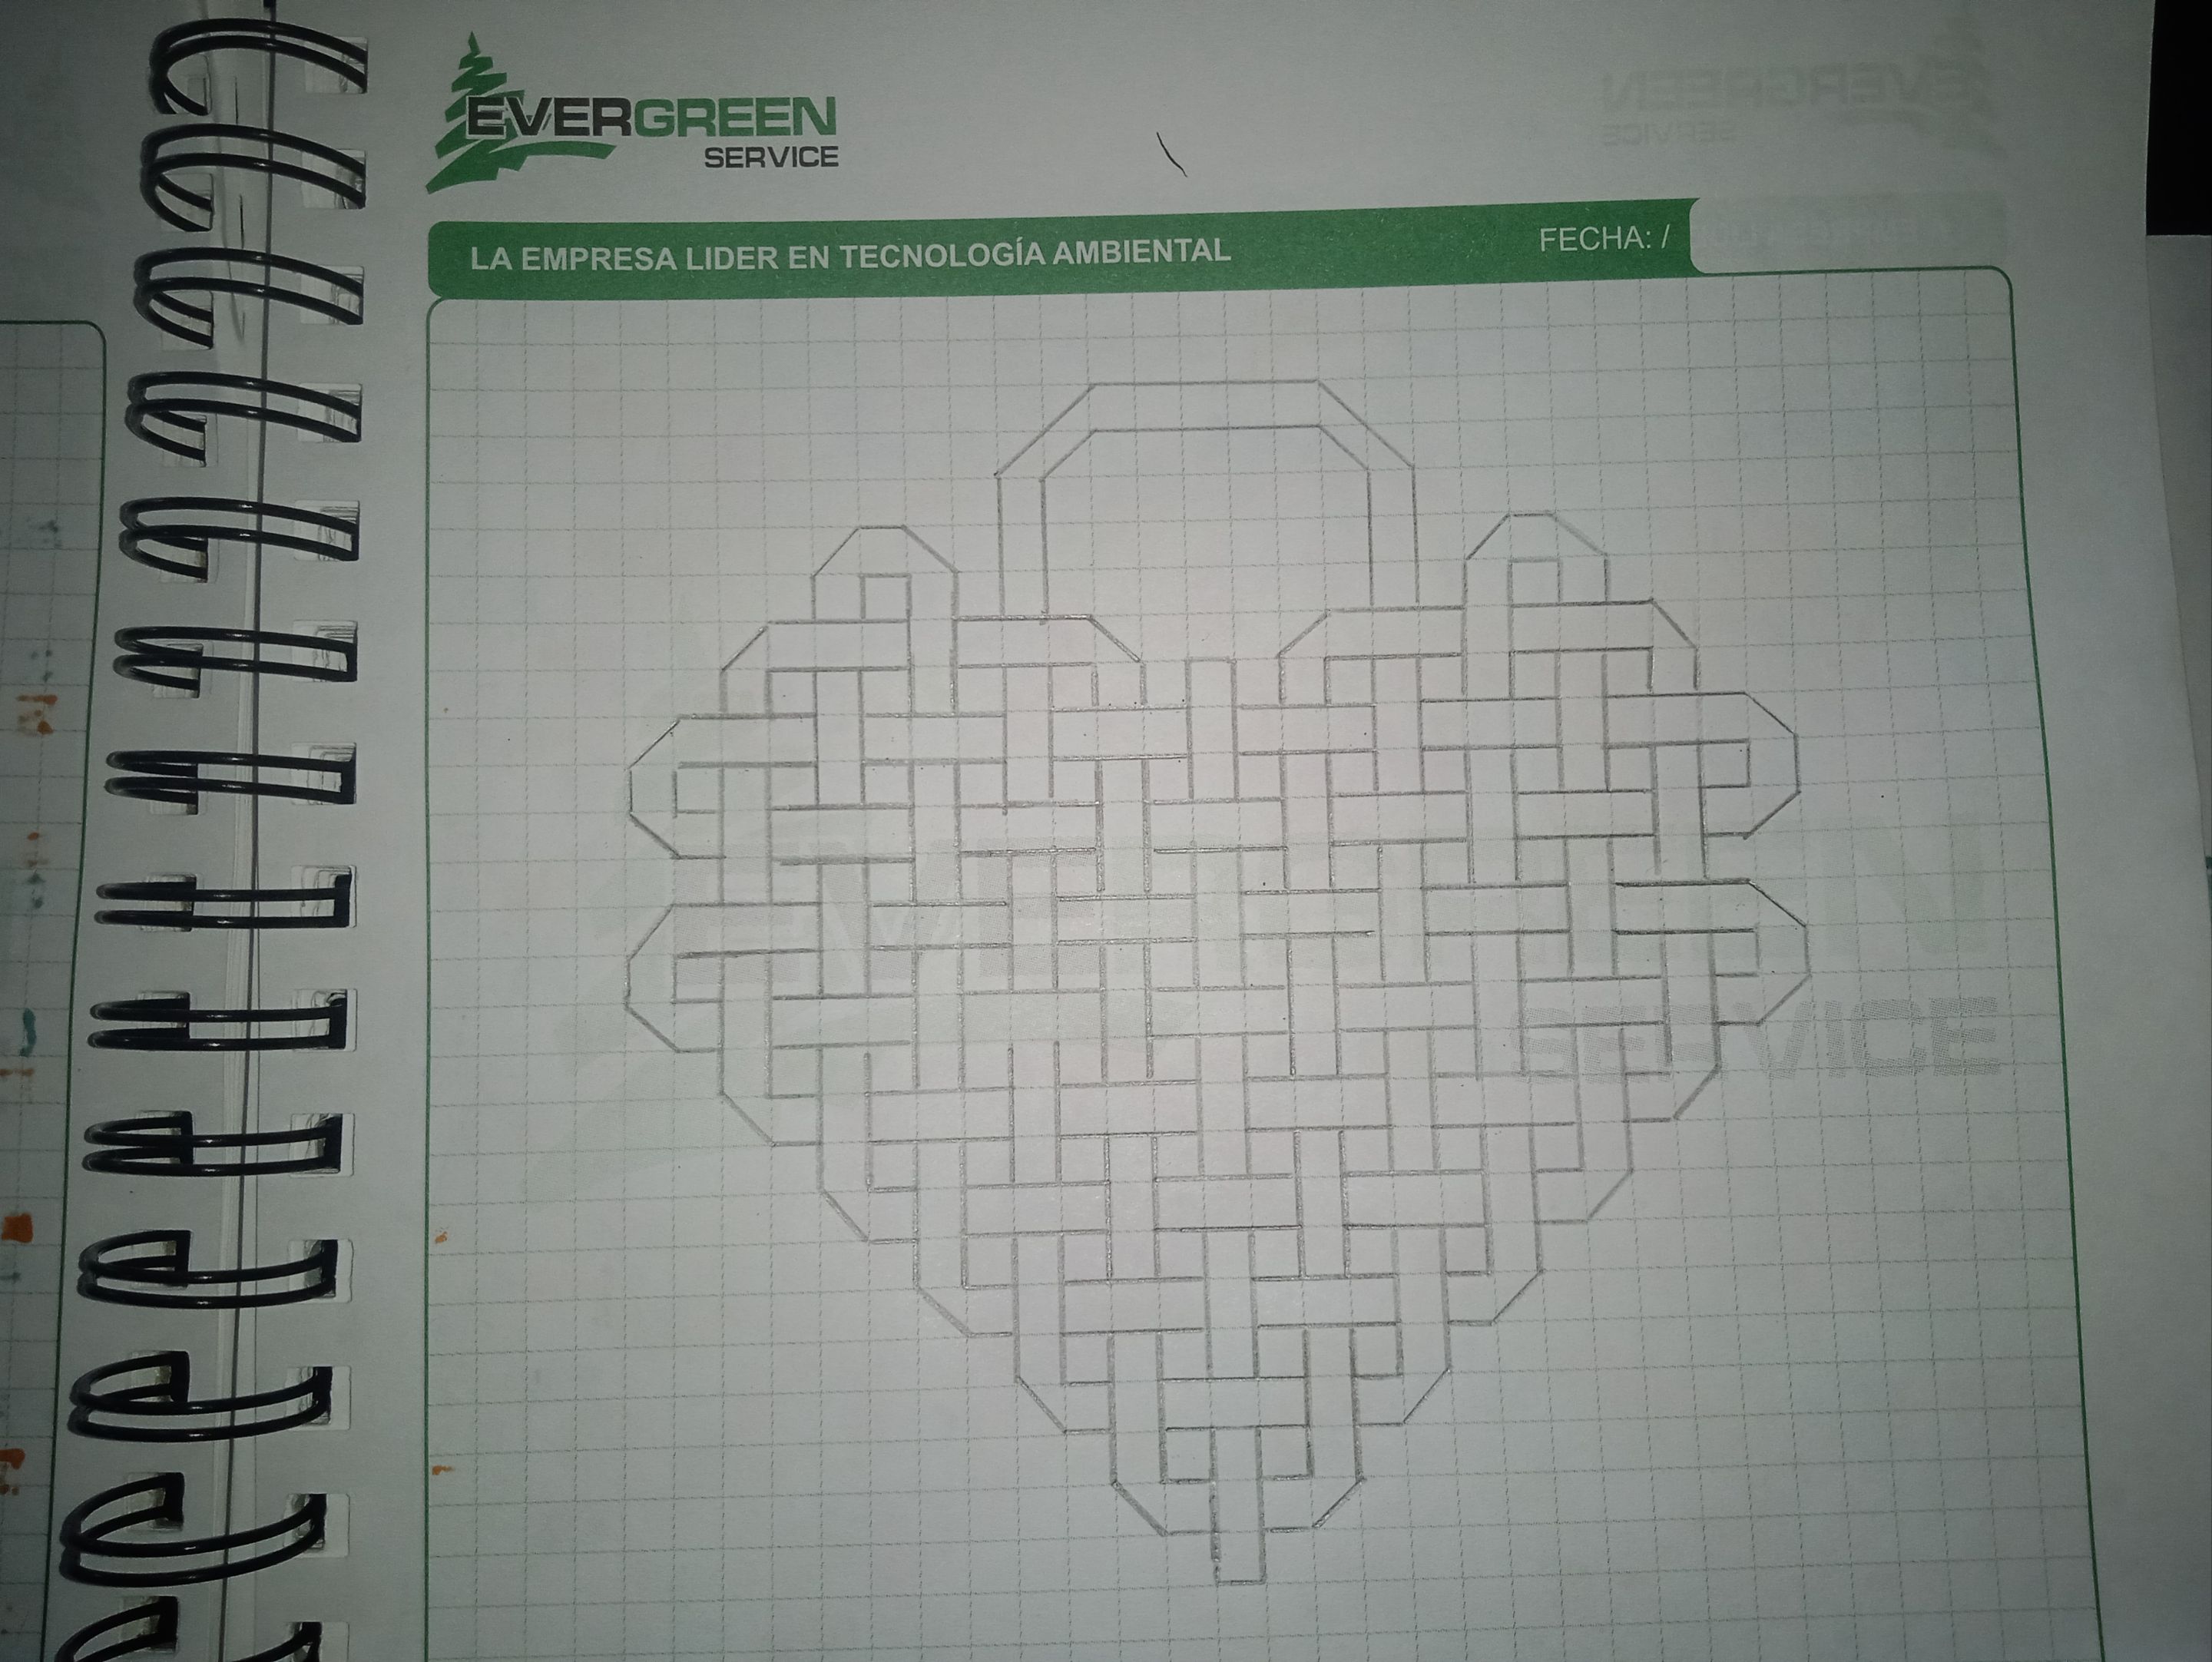
Continúo ahora con los eslabones laterales, tomando como guía la imagen del inicio. Esta parte se me hizo algo engorrosa, de hecho, me equivoqué en un punto, pero ya les aviso cuándo corregí mi error.
Continué así para mi cuarto eslabón. Si notan una leve diferencia entre mi dibujo y el que uso de guía, es que estoy dejando un espacio más afuera de los eslabones laterales tanto en la parte superior como a cada lado cuando me toque hacerlo de manera horizontal. En este punto aún no había visto el error.

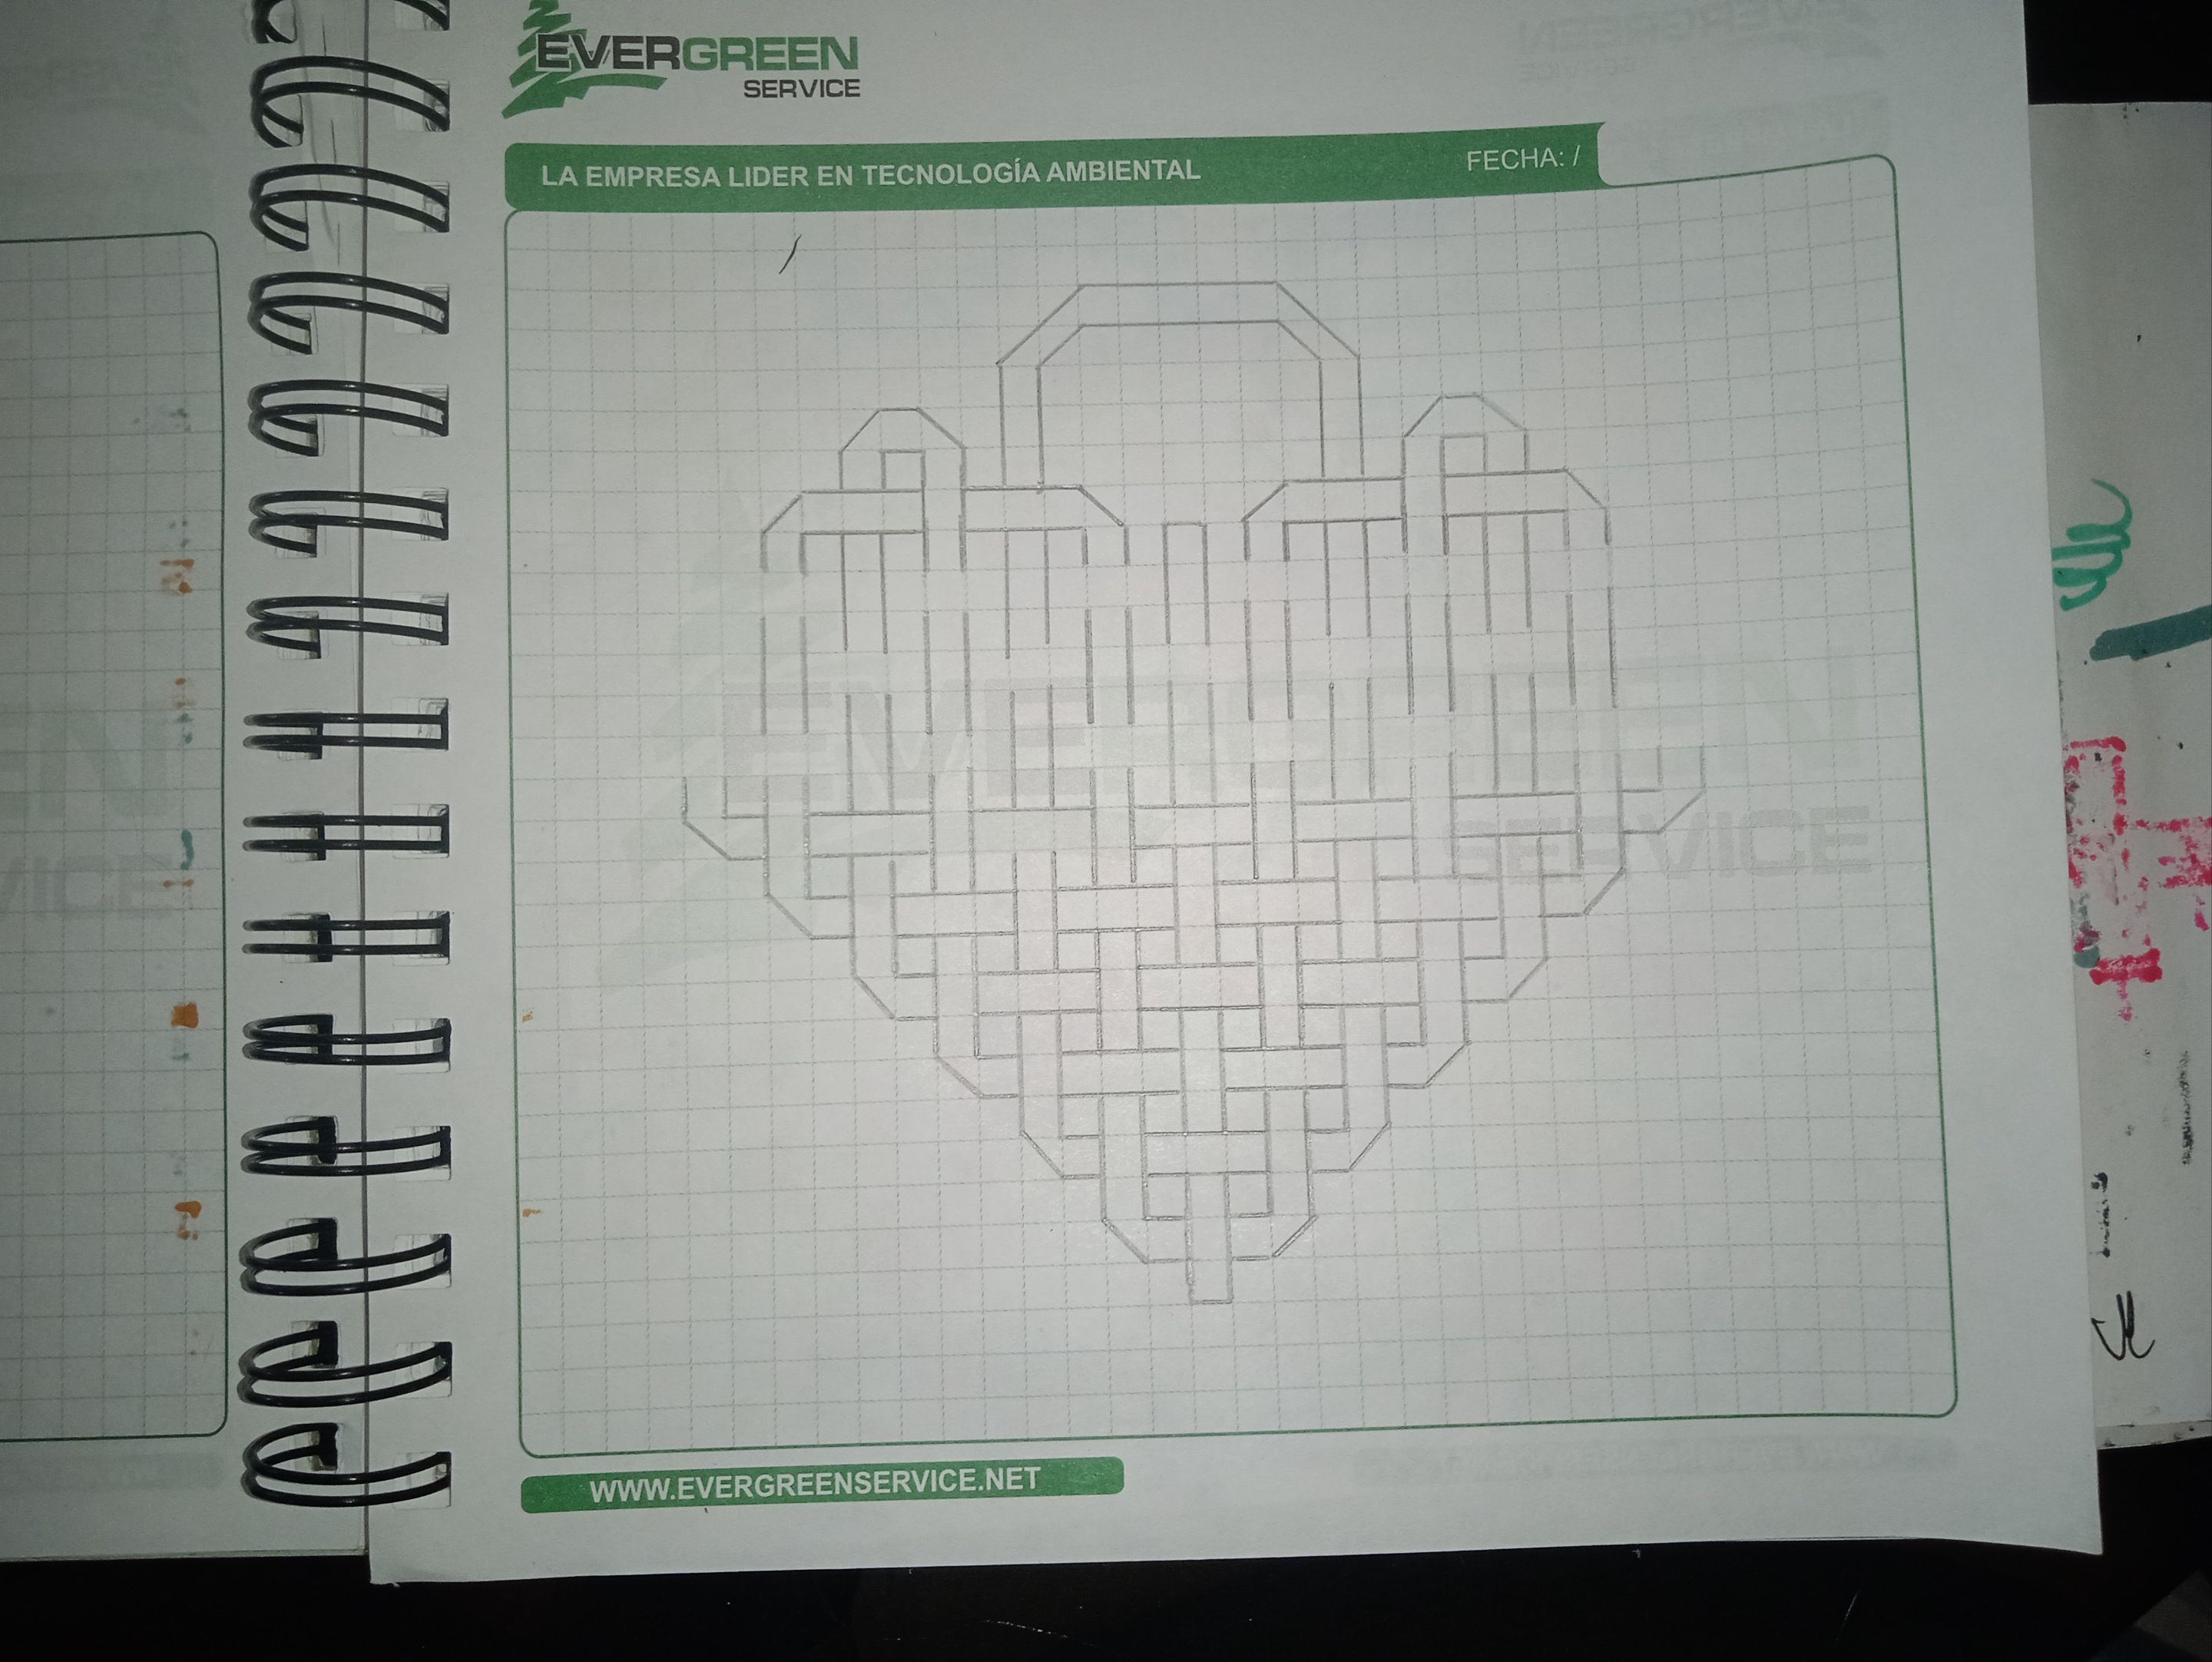
Fue en este paso que noté el error con el *tercer eslabón*. Si comparan la foto de arriba con esta que le sigue notarán que el tercer eslabón debía estar un espacio más abajo. Es decir, empezaba con la misma guía 3 recuadros, y espacio, 3 recuadros más y otro espacio, así y así 4 veces.
Si lo hacen bien, notarán que el tercer eslabón debería dejar una de sus líneas justo al medio del eslabón del centro y estar a la par en cuanto al espaciado del eslabón del centro con su segunda línea.
Este error lo vi poque como agregué un espacio más en la parte superior, no lo vi sino después de empezar las líneas horizontales. y para este punto voy a agrupar las imágenes para que vean más sencillo el paso a paso.
|
**Primero terminé las líneas superiores y luego me fui para las de abajo.**
|
**Esta es la continuación**
|
**Acá faltan pocas líneas horizontales para completar el Corazón**
|
|-|-|-|
||||
|
**En esta imagen ya sólo falta agregar el último eslabón**
|
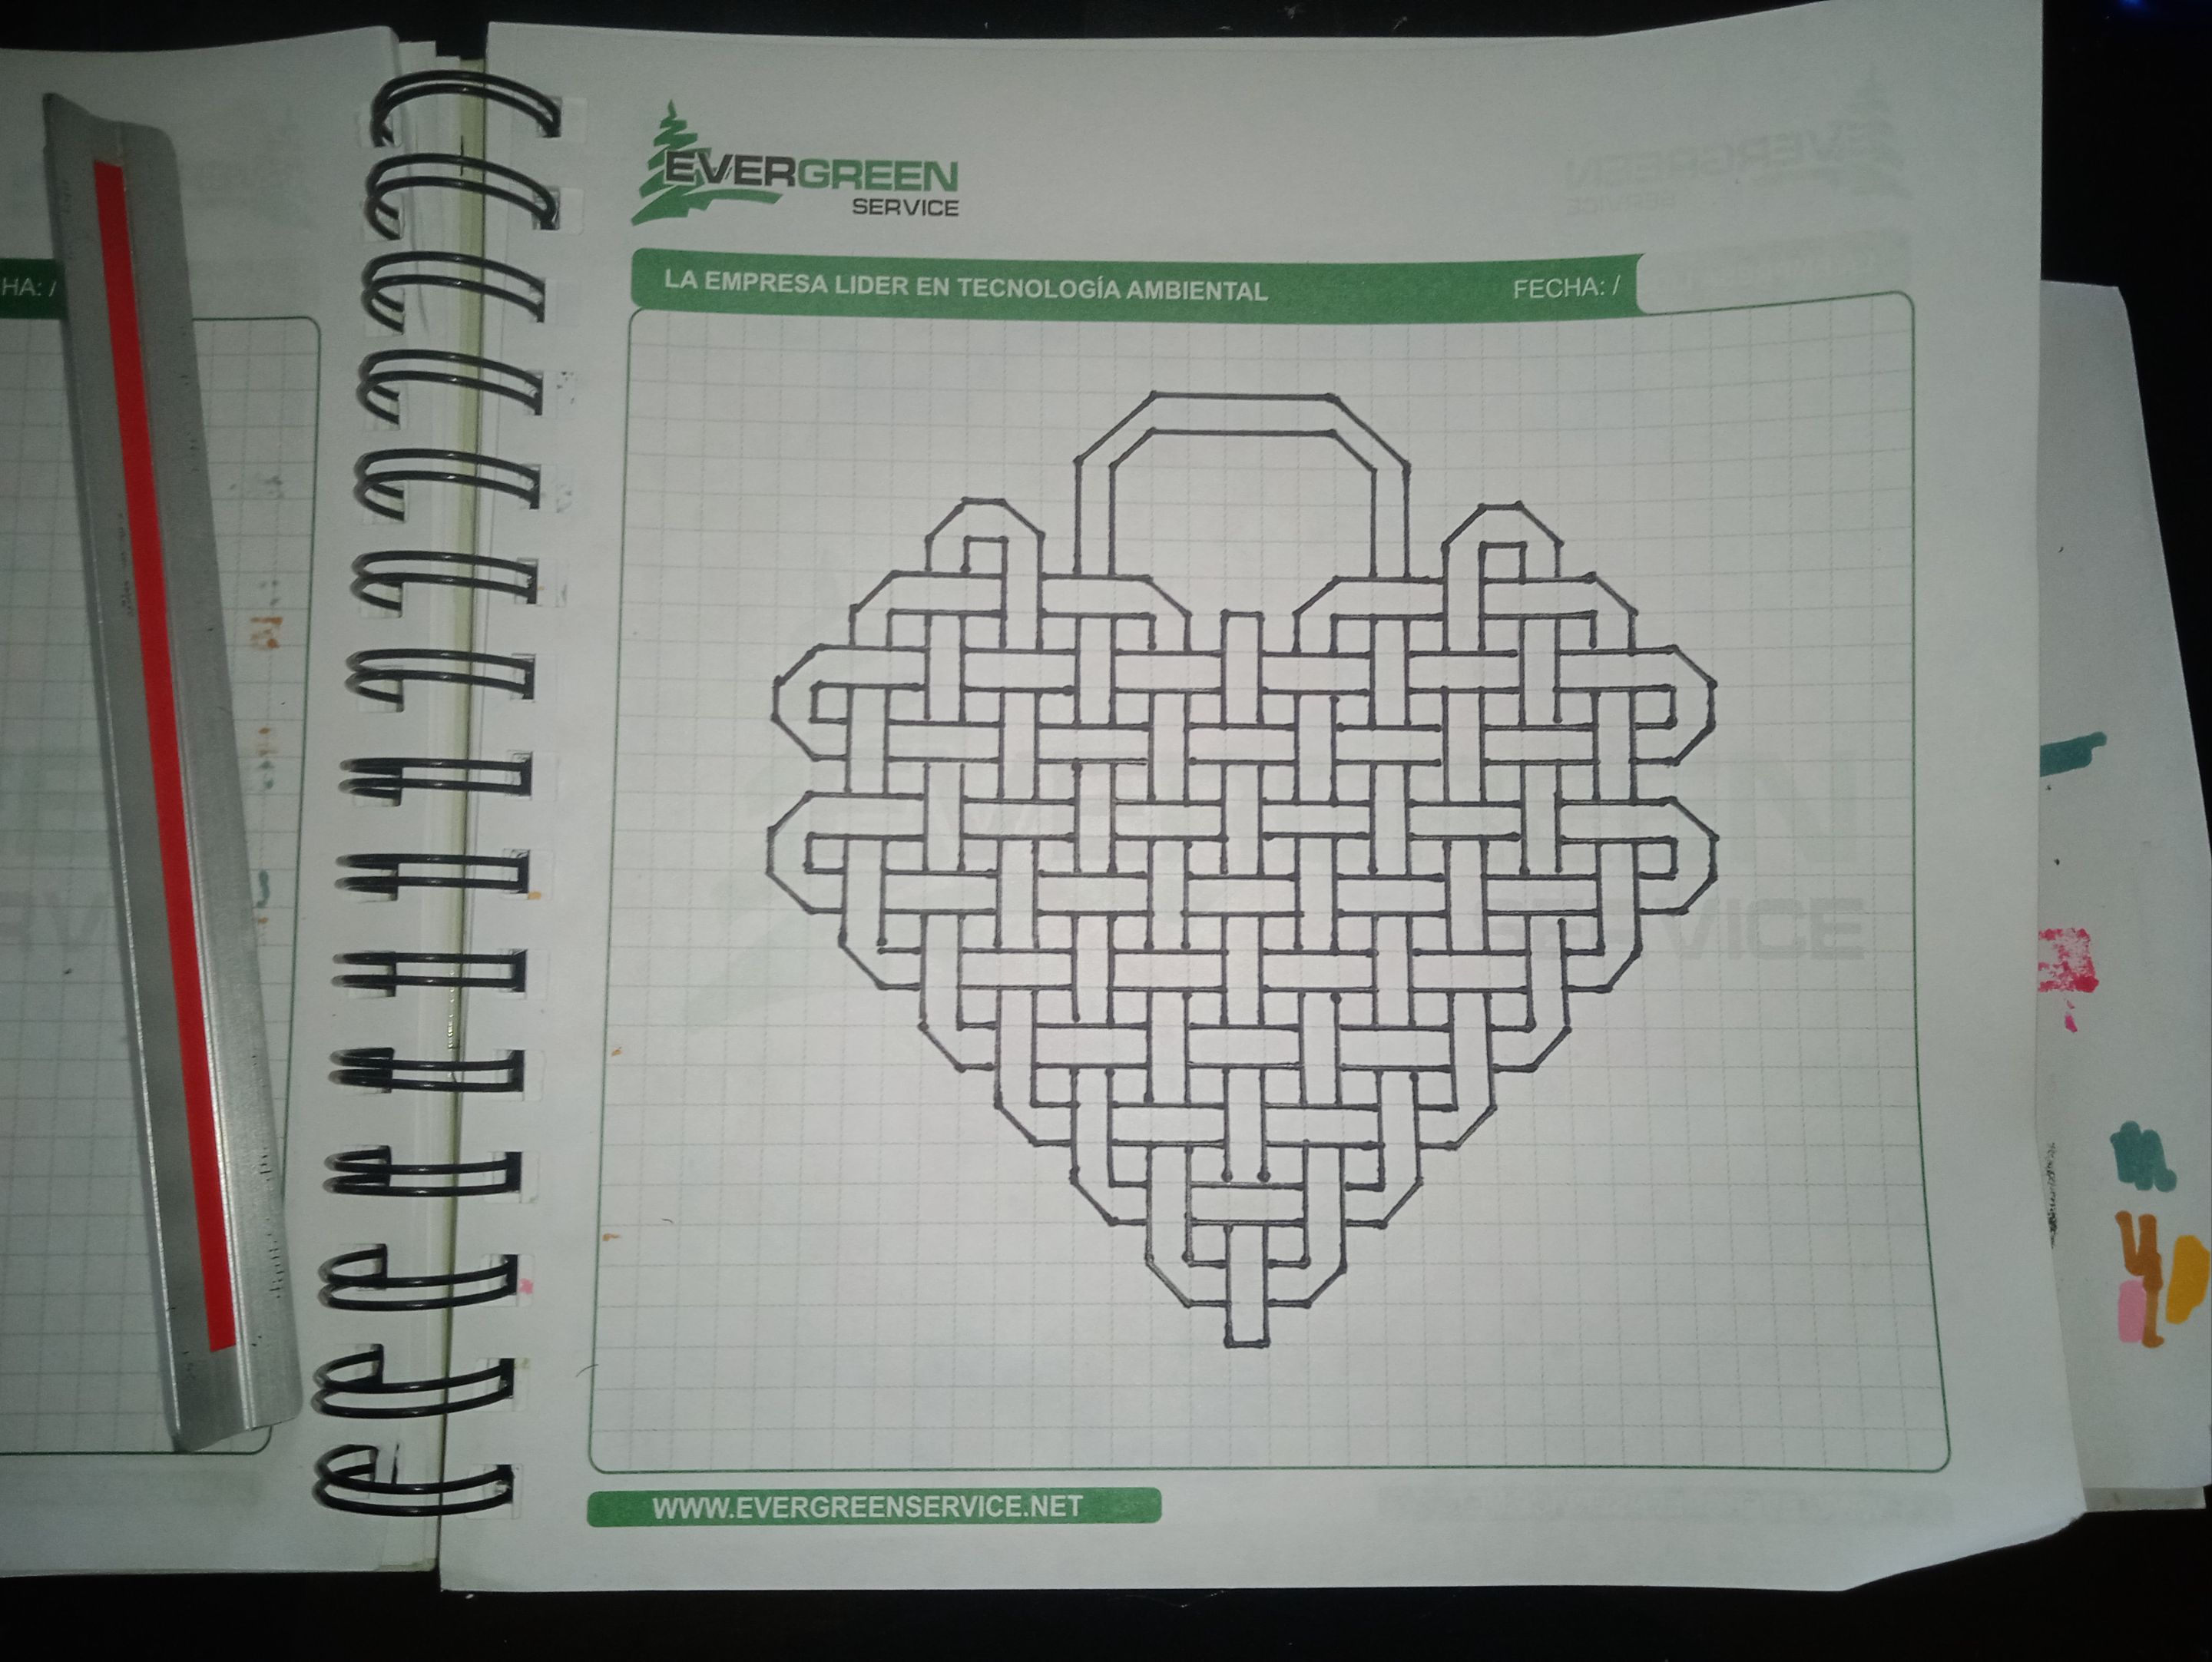
**Acá ya están todos los eslabones**
|
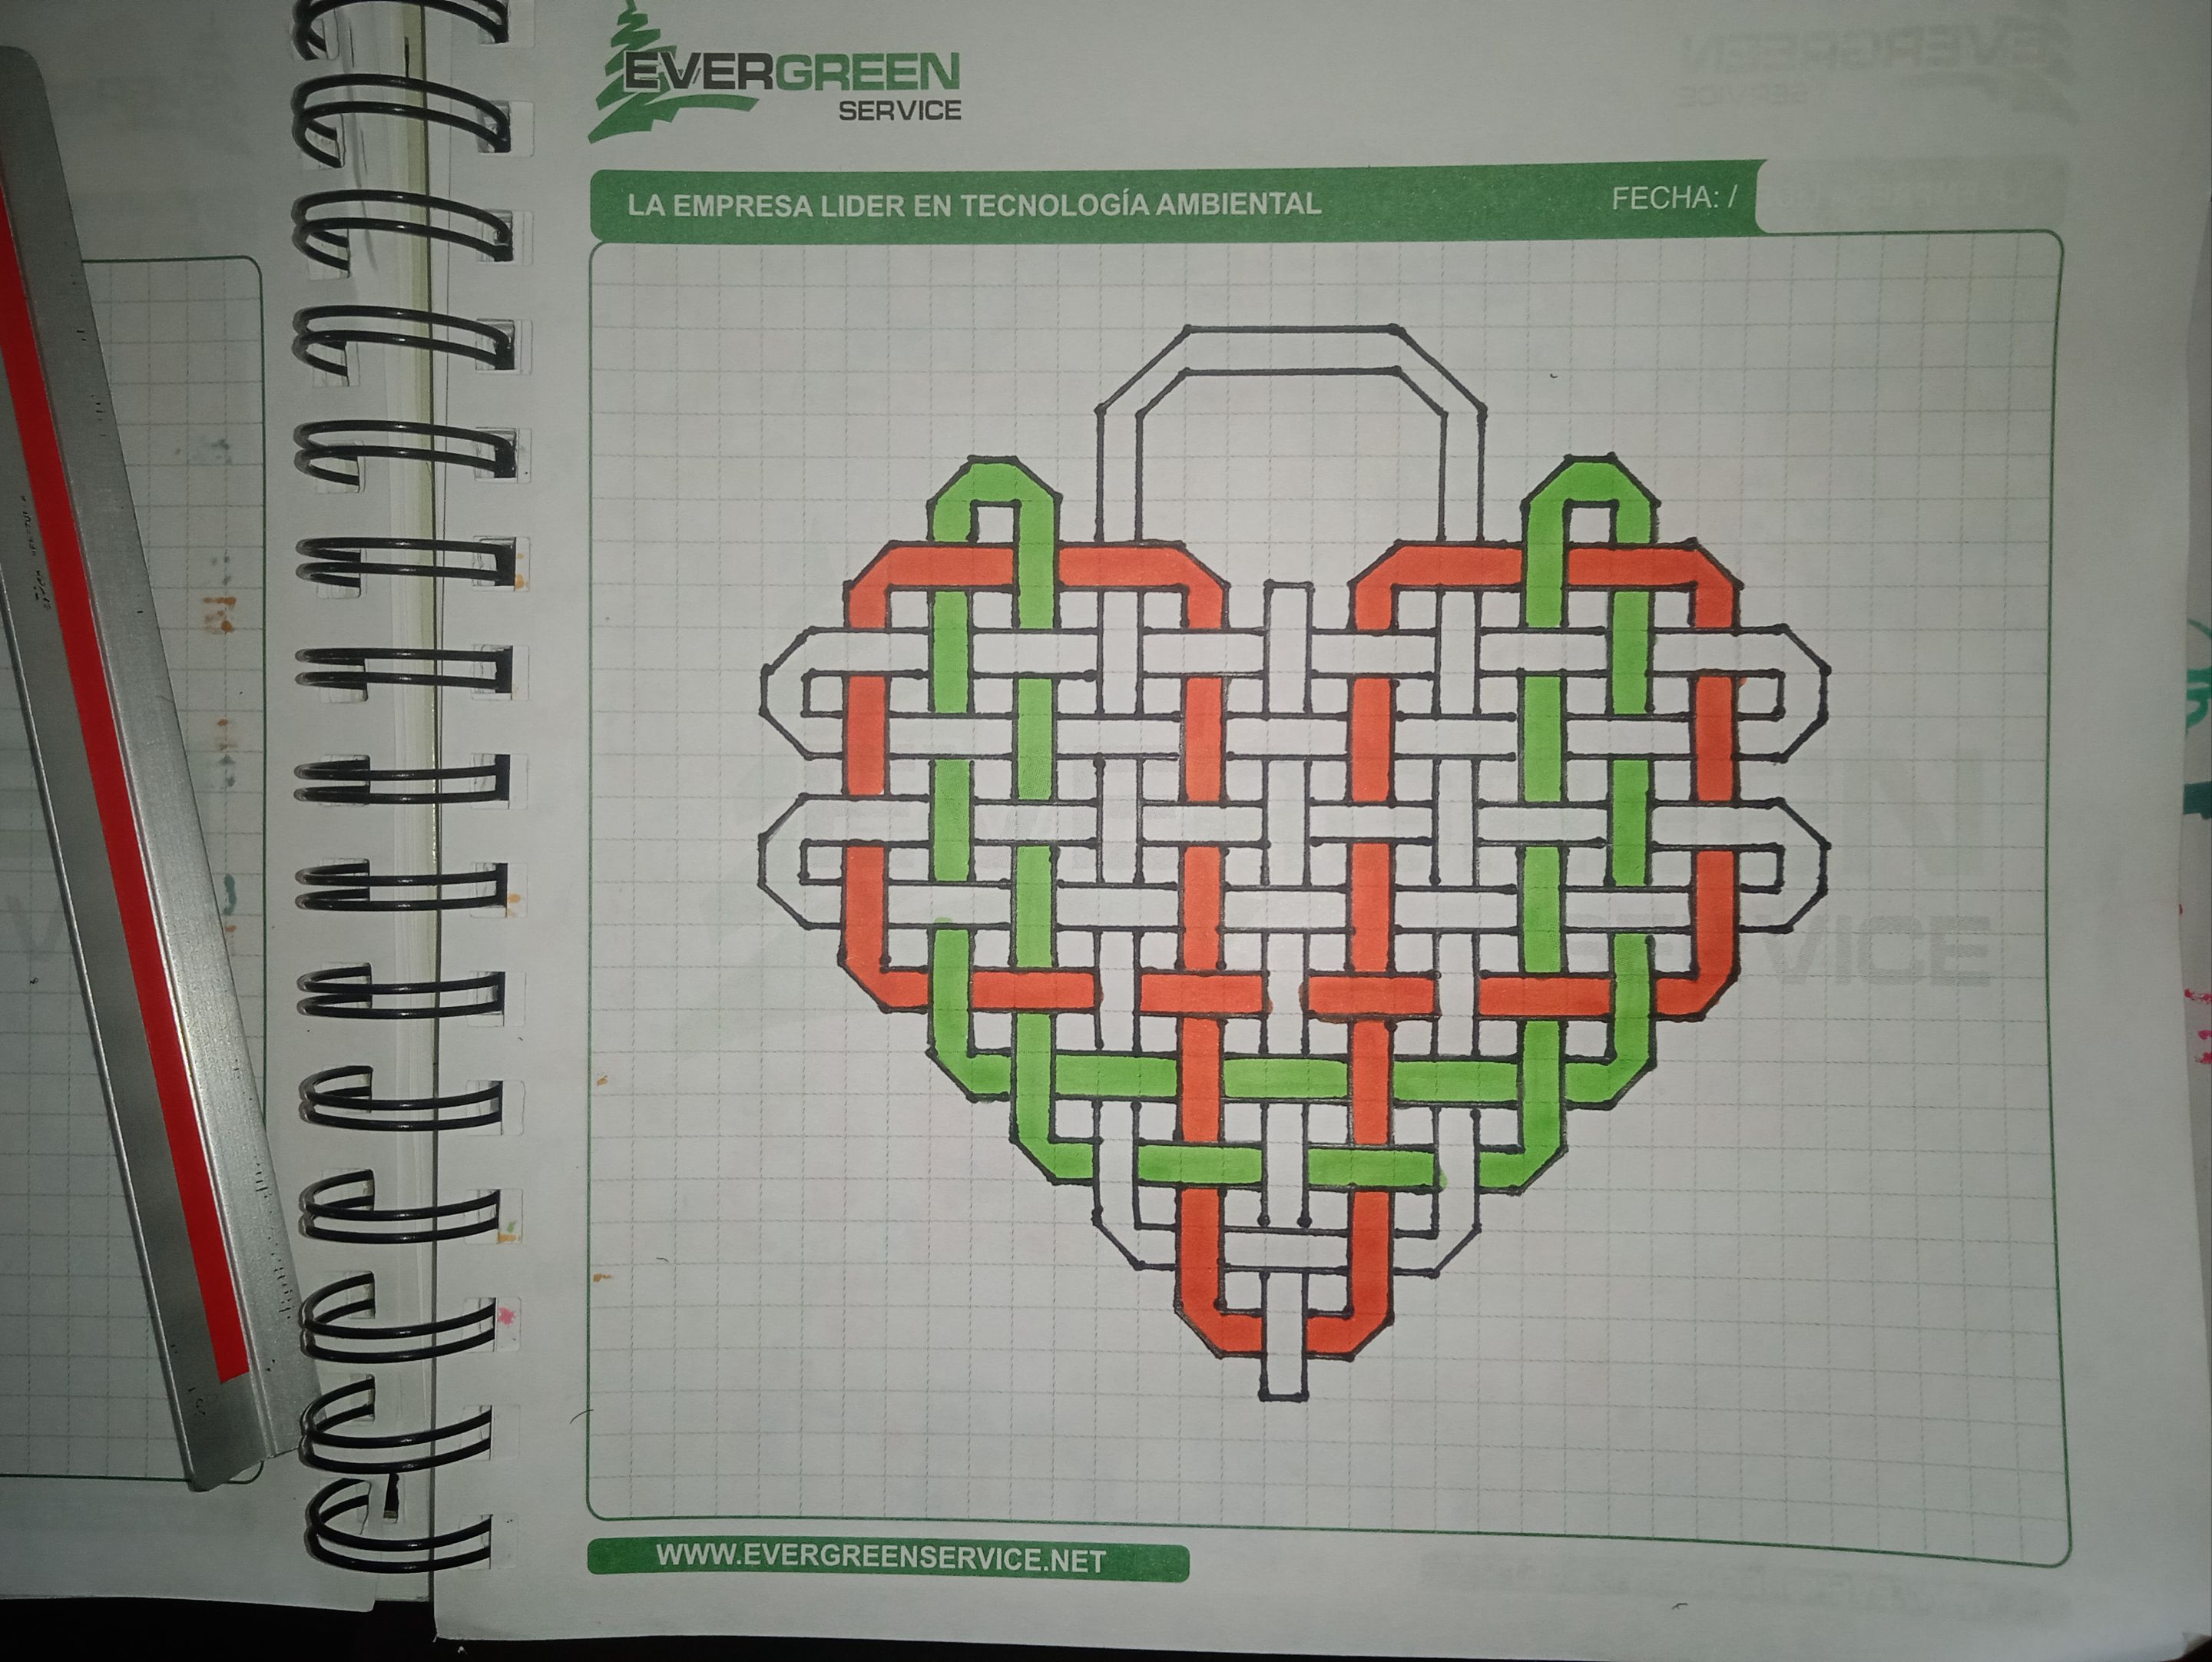
**Y aquí lo que hice fue resaltar todas las líneas en negro, para un mejor contraste**
|
||||
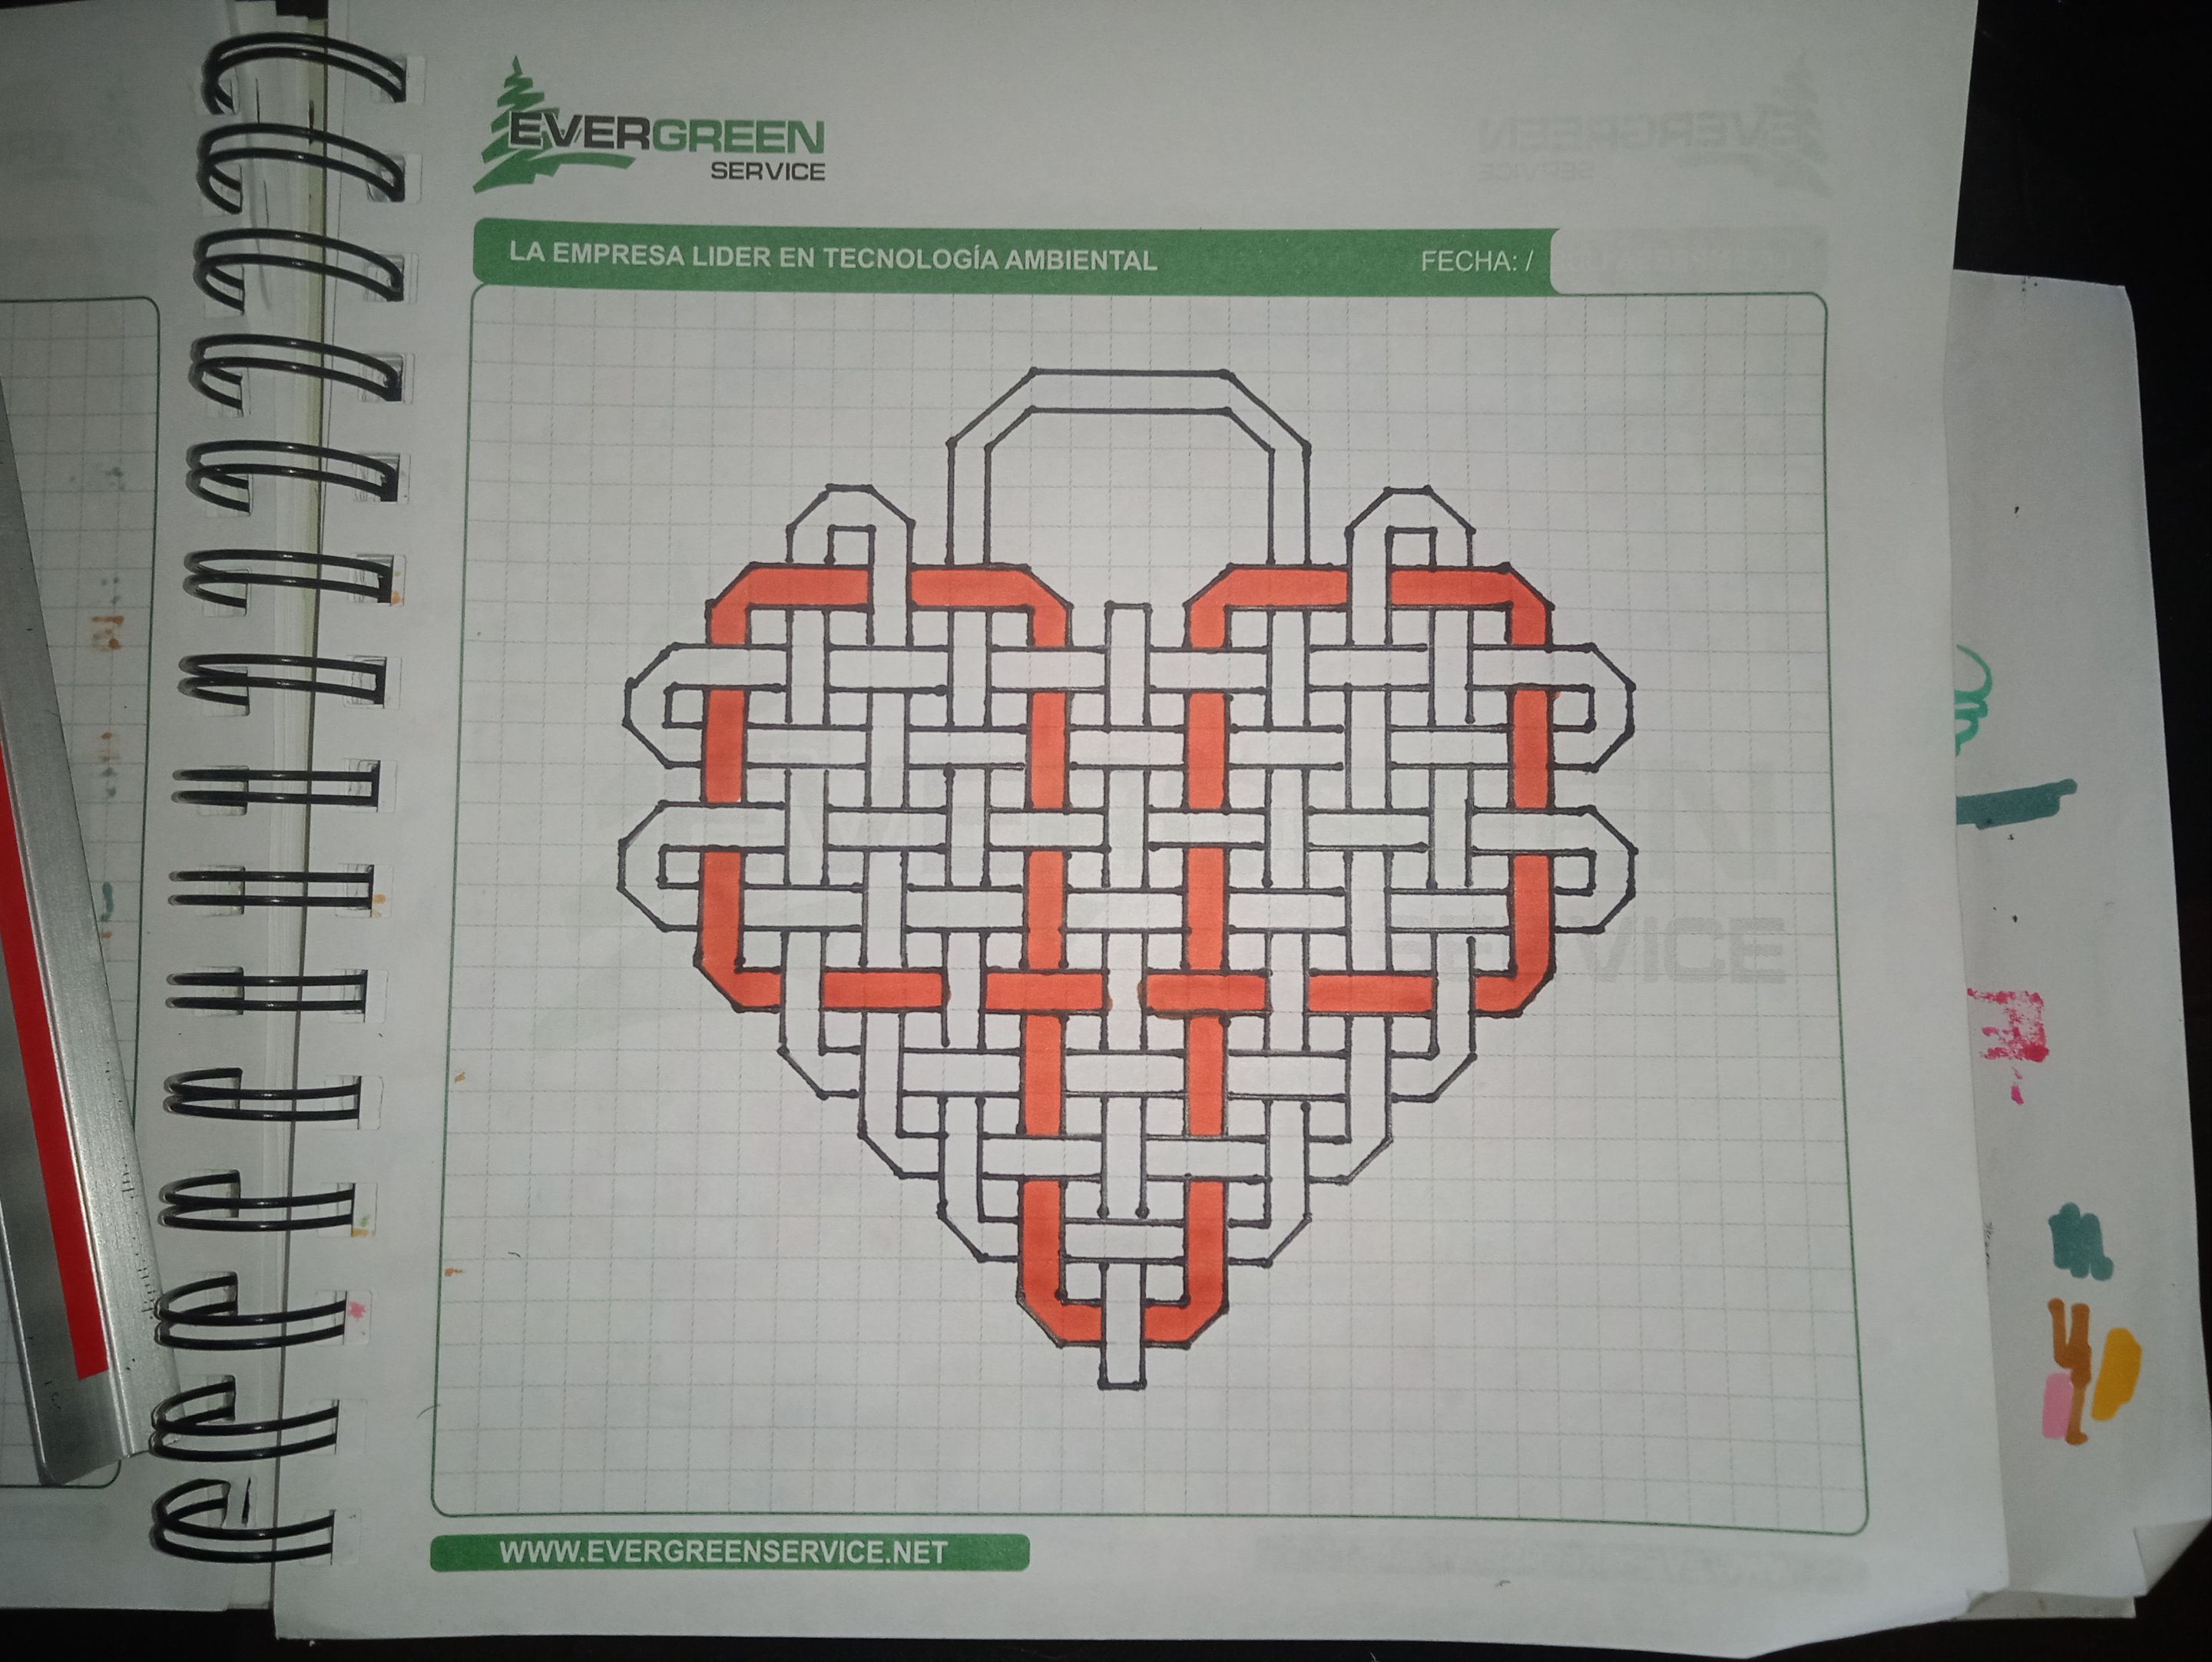
Ahora lo que sigue es el coloreado. Para colorearlo es más sencillo y en total usé 6 colores: Rosado, Fucsia, Naranja, Rojo, Verde y Azul Claro.
Para una mejor explicación, dejaré las imágenes en un cuadro y así ustedes ven cómo es que lo iba pintando. Esta parte fue realmente sencilla ya que sólo tienes que seguir el eslabón desde que empieza hasta que termina. No hay pérdida.
|
**Naranja**
|
**Verde**
|
|-|-|
|||
|
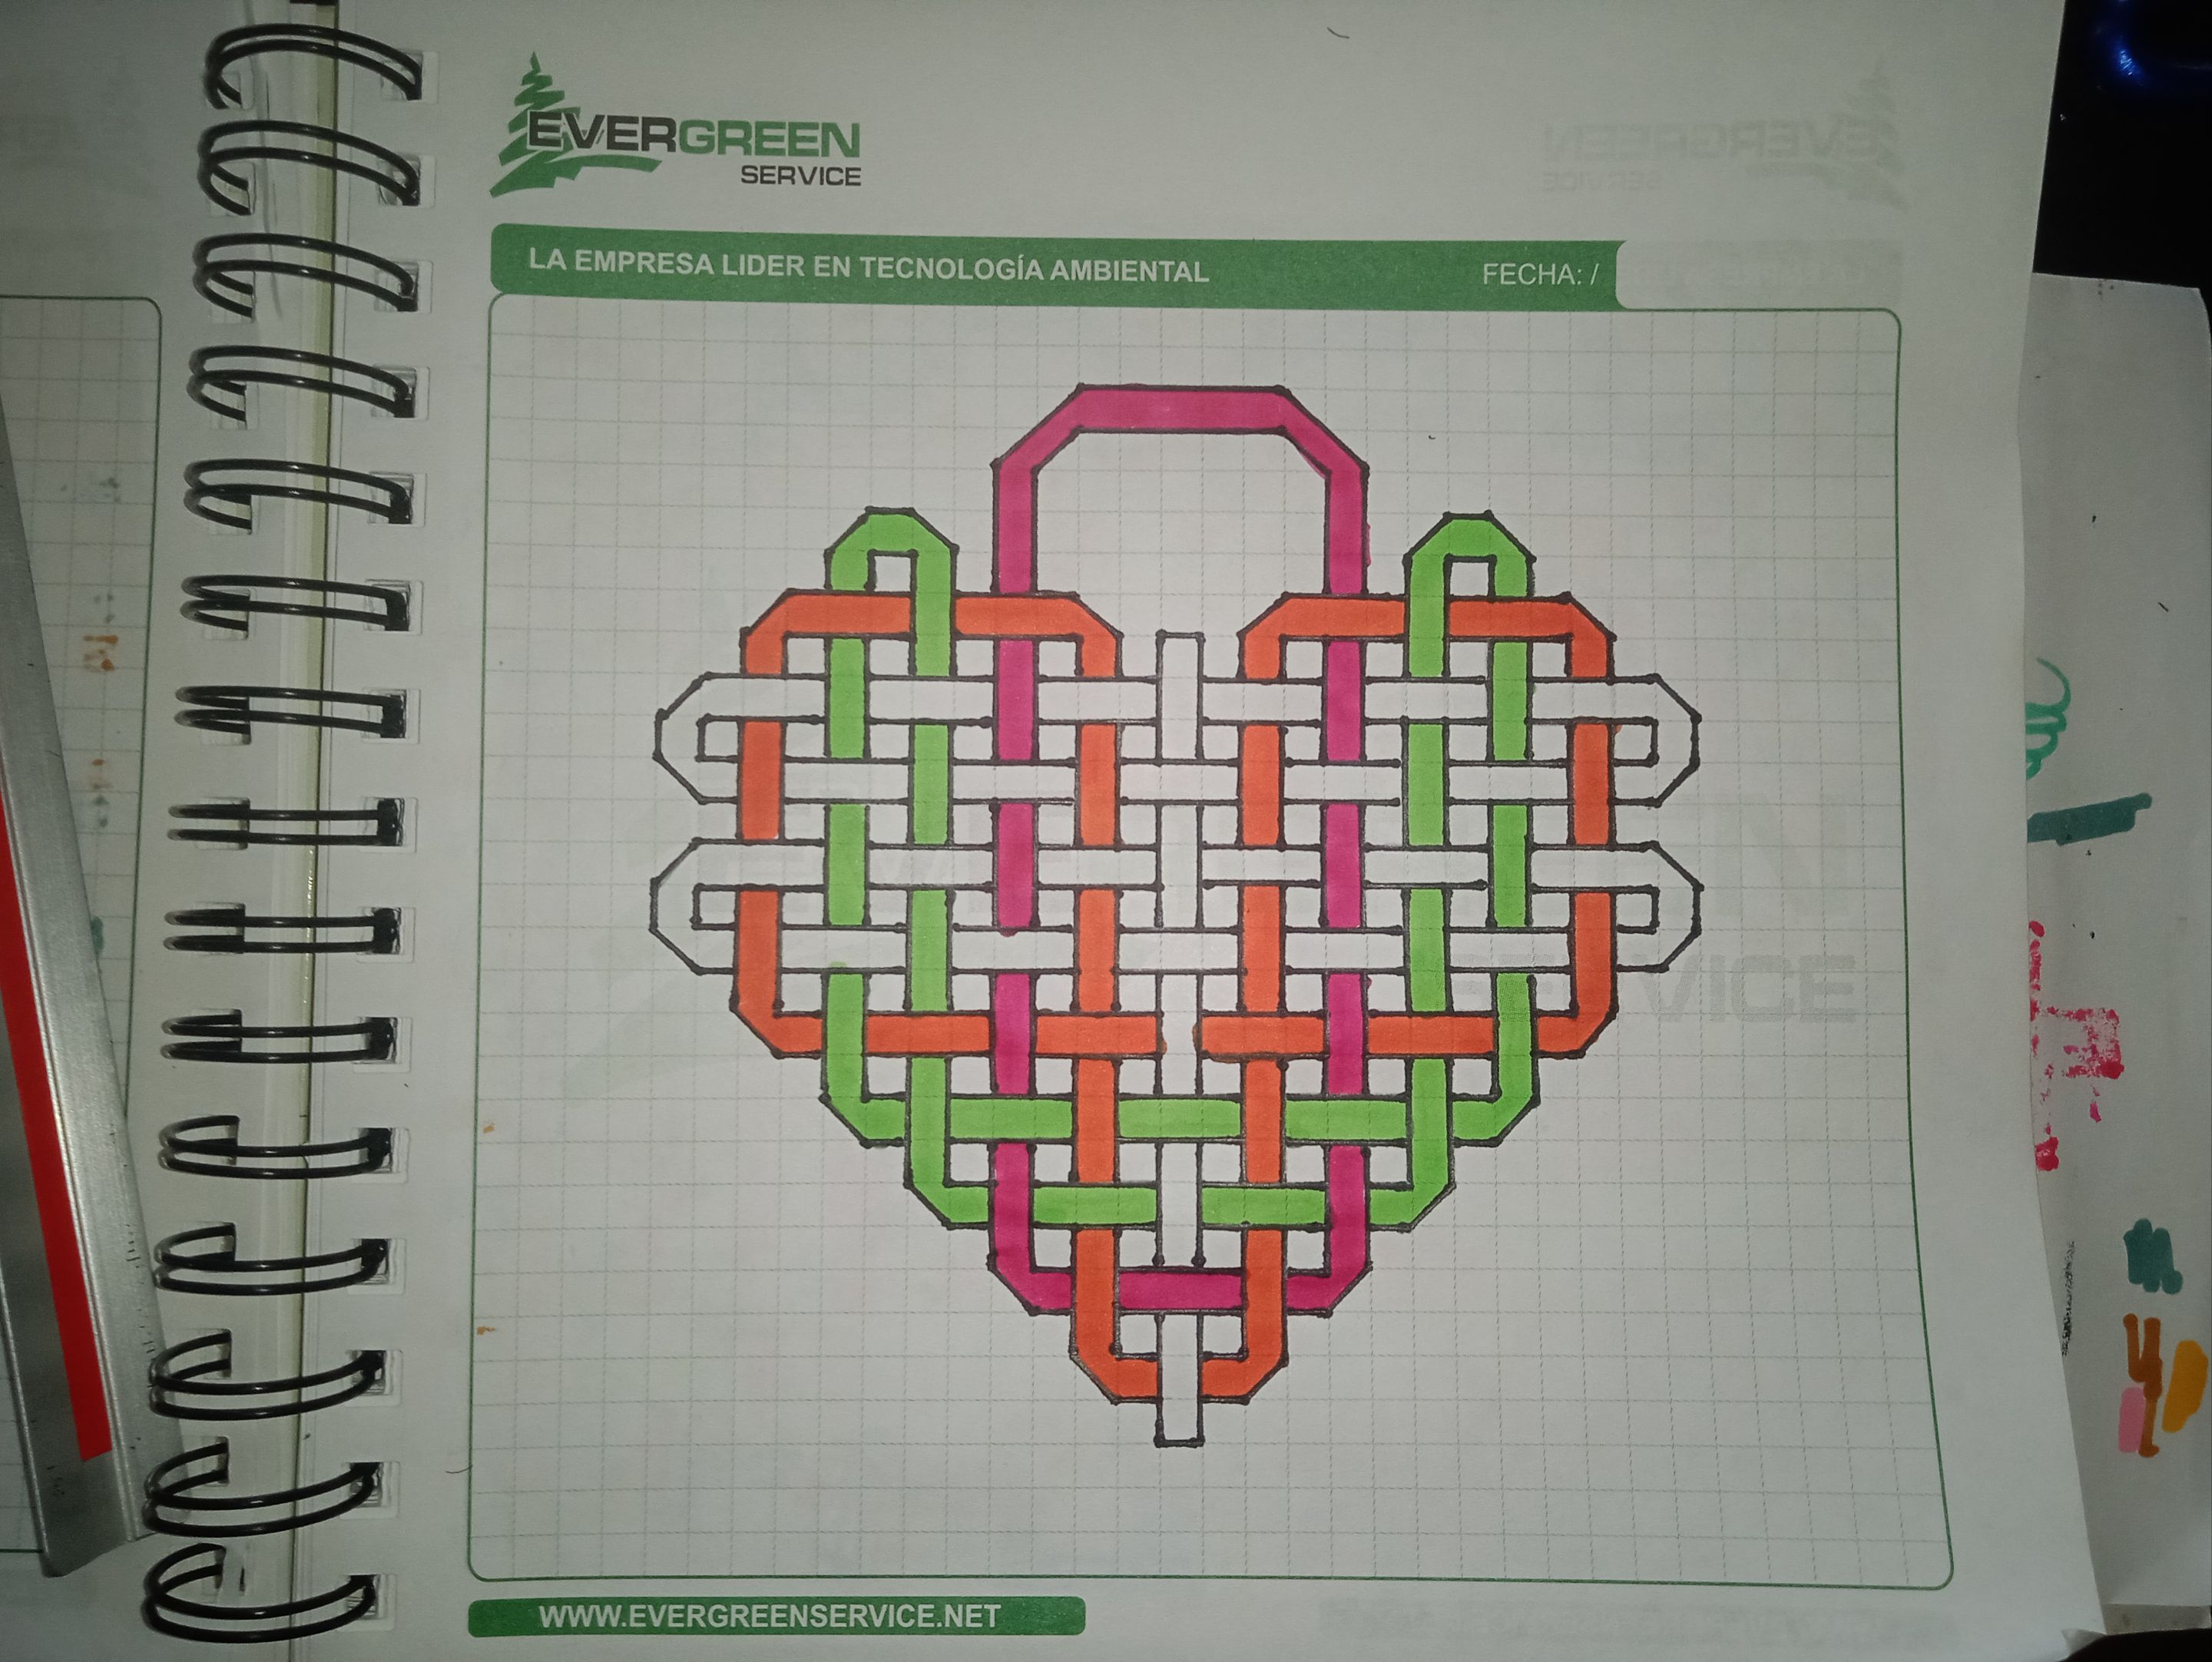
**Fucsia**
|
**Rosado**
|
||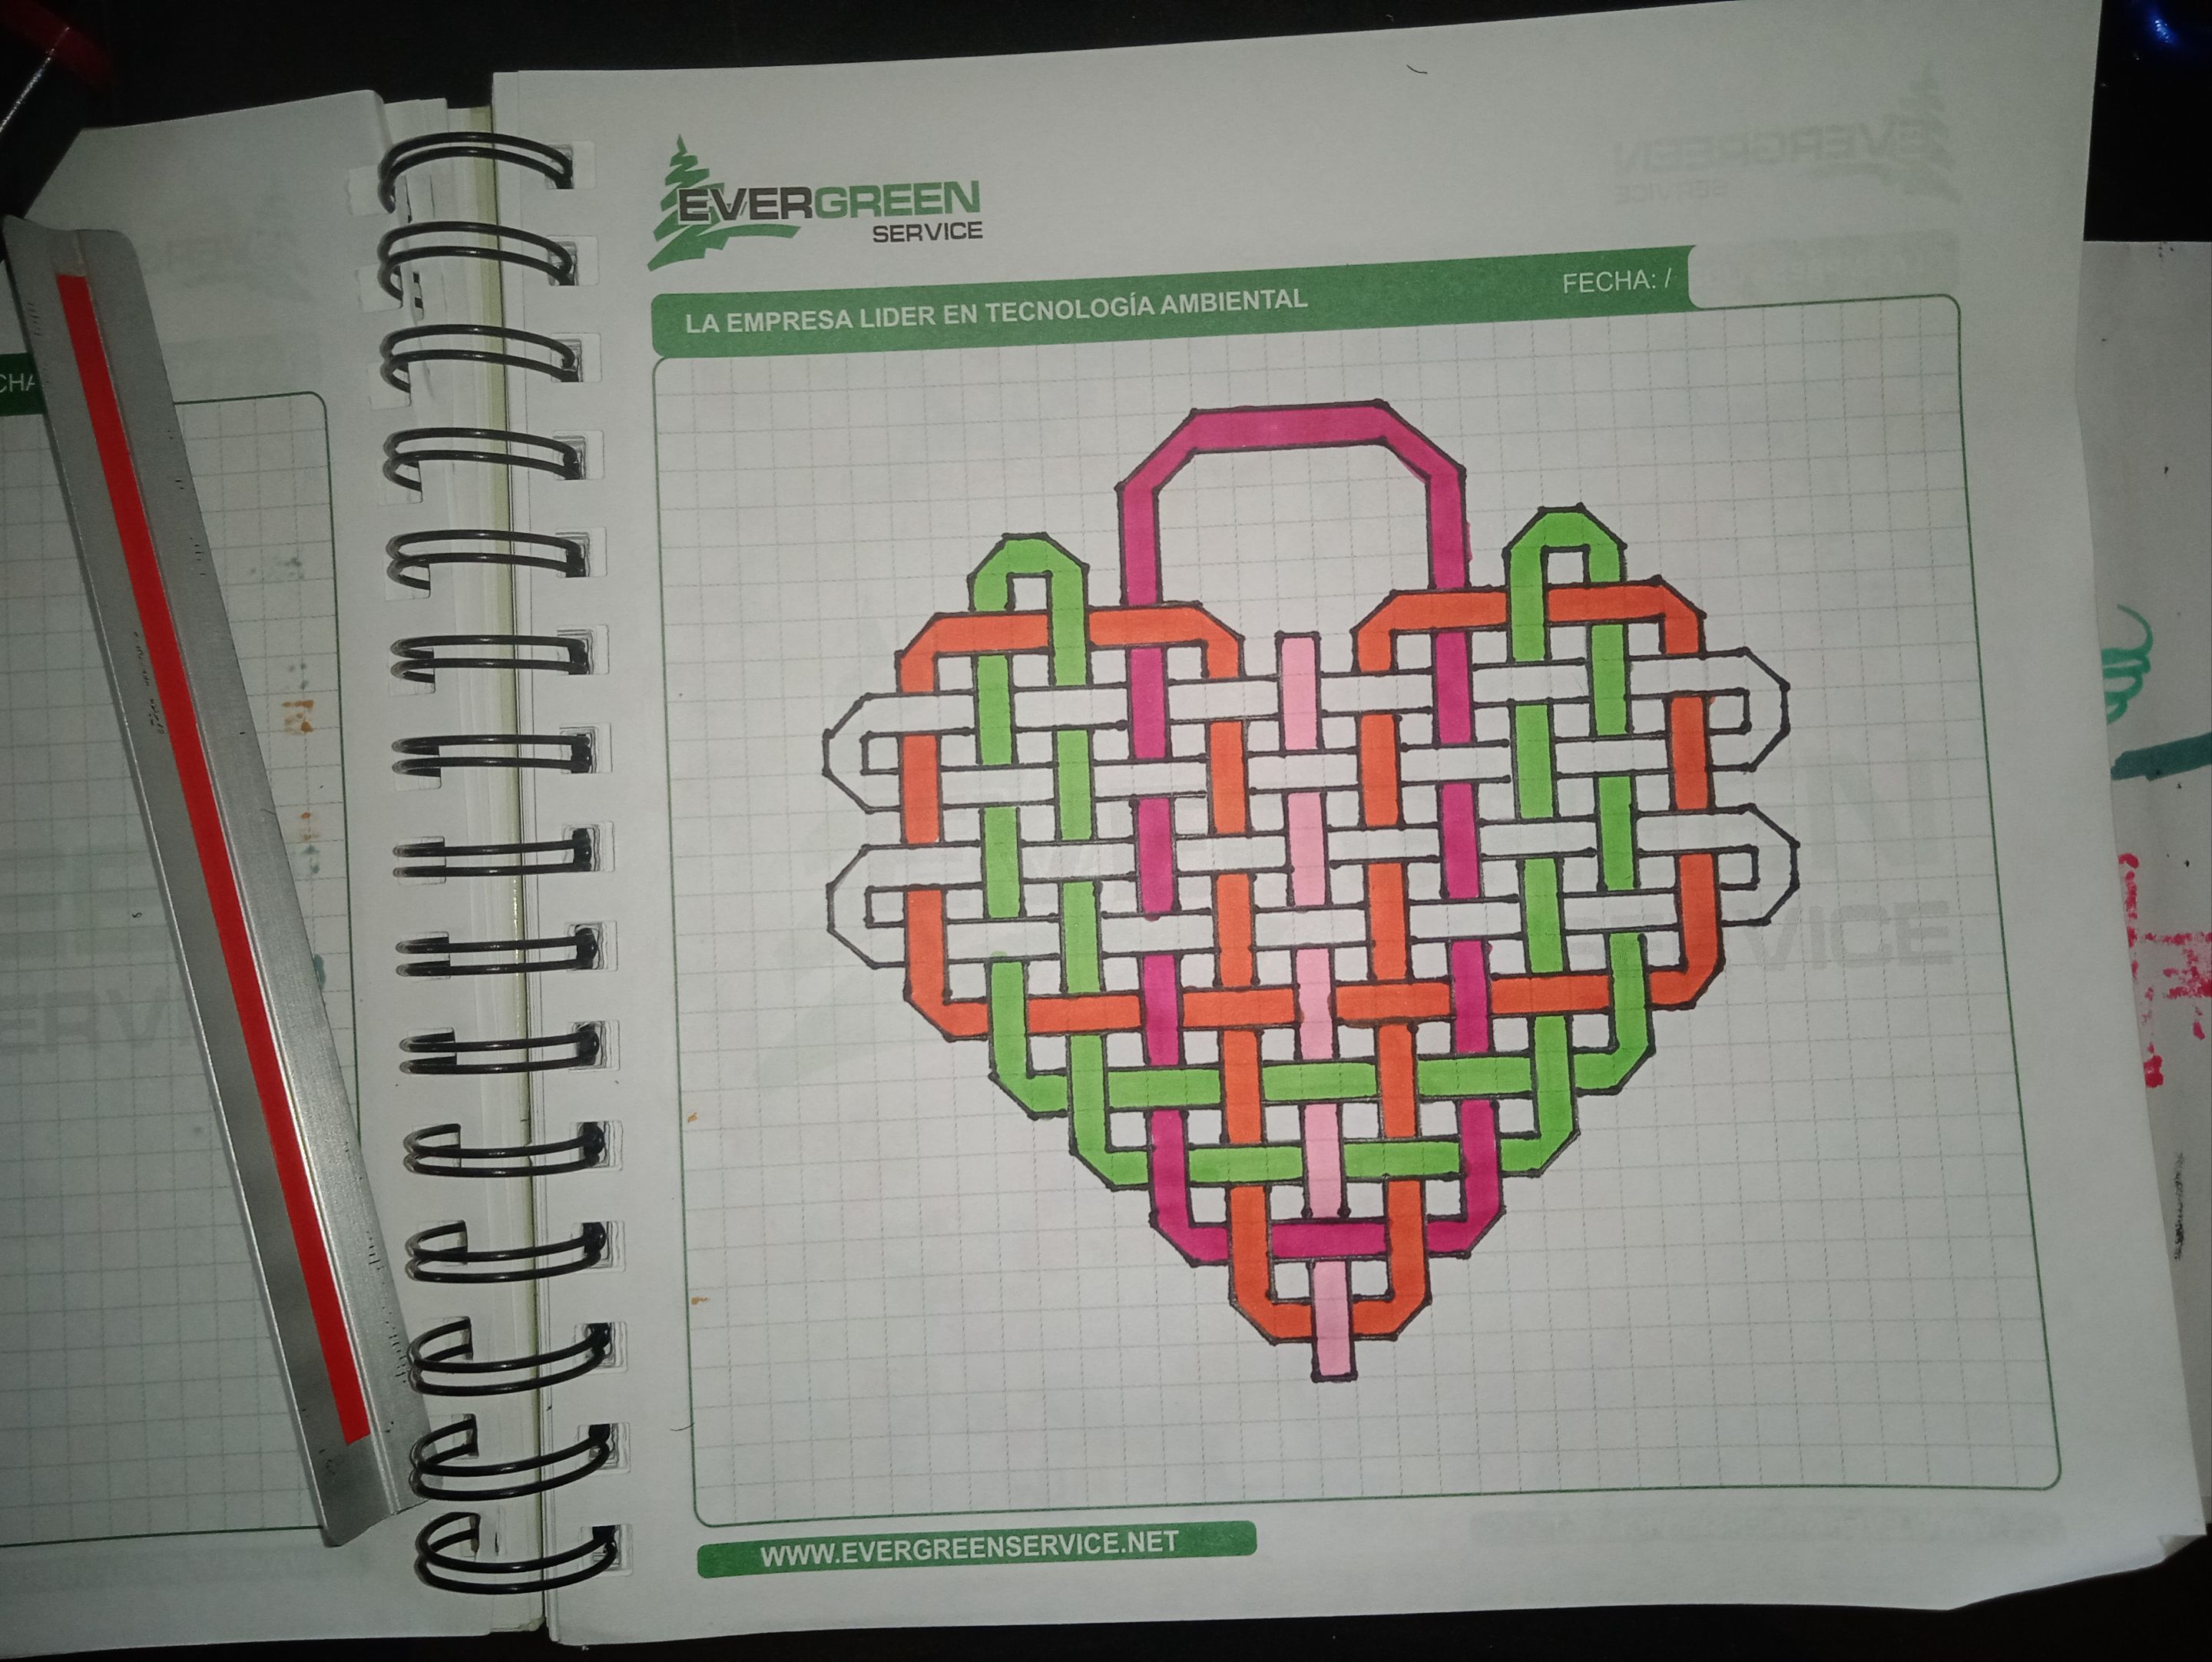|
Ahora le sigue el color Rojo, quedando de la siguiente manera:
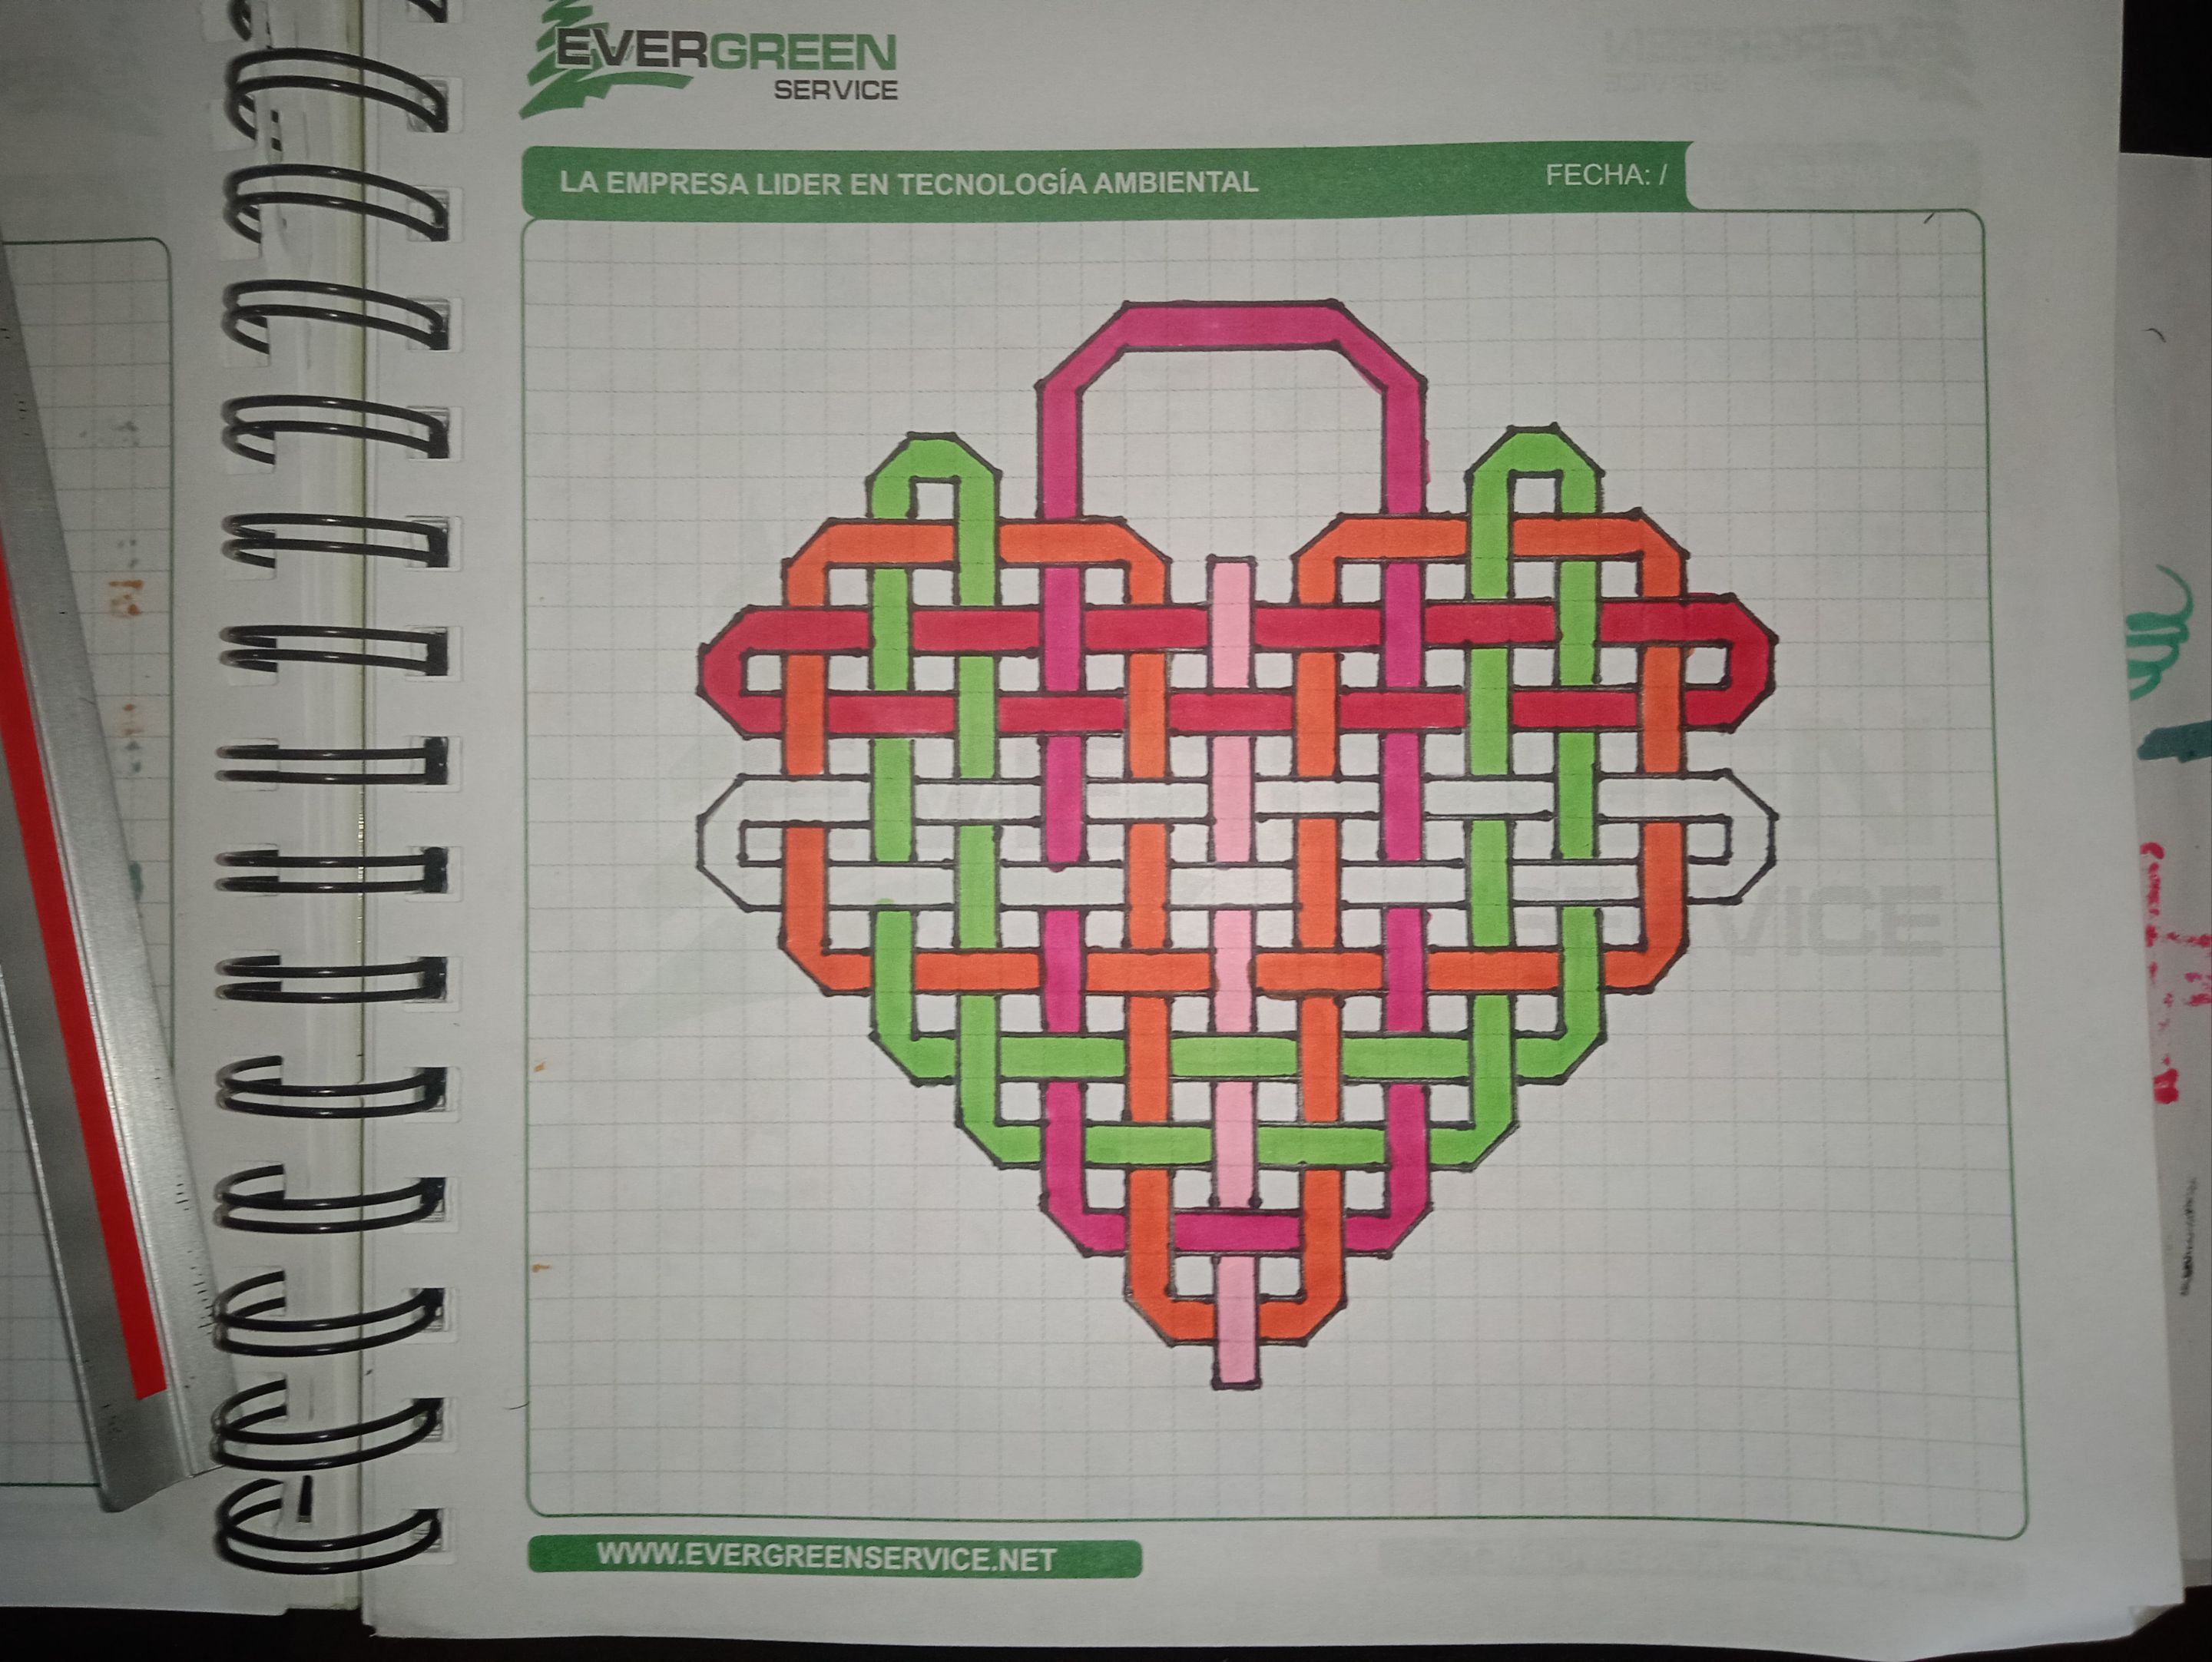
Terminé con el azul, quedando como resultado final el siguiente:

𝐑𝐞𝐬𝐮𝐥𝐭𝐚𝐝𝐨 𝐅𝐢𝐧𝐚𝐥
SepDesarrollo2025.gif (https://files.peakd.com/file/peakd-hive/pannavi/23zbRzBQFjur1wRN6tmU6e5jtdvZieJDTNhcu9DniPHHq4UDK1Fya29bWKv26s8MDwgda.gif)
1754082669499.jpg (https://files.peakd.com/file/peakd-hive/pannavi/Eo6LQ5bfFUqCGA1omiLMCuY3d4sa6s22Yzzhbzjy2LgewCvNF3JNvSWz6pjR38oxWJV.jpg)
Si bien saben, no me gusta dejar en blanco mis dibujos, sino que todo tenga algún color. En este caso, los colores que usé entre los eslabones chocan a la vista, entre el naranja, el rojo y el fucsia. Es decir, no se detallan como yo quisiera.
Así que decidí echarle color negro a una parte. Pero quedé a mitad de camino, así que el resultado final se los debo para una segunda parte. Por ahora se los comparto así. Espero que les haya gustado. ¿A ustedes qué les pareció? ¡Los leo en los comentarios! ¡Hasta mi siguiente post! 💚
SepInicio2025.gif (https://files.peakd.com/file/peakd-hive/pannavi/23qrNeVpJurnyUoCaFwKFJd89y59KT6s6pxqswm5WPXFNLwFGFhZyRitReBZLeJ1jEJVG.gif)
𝐂𝐨𝐧𝐬𝐢𝐝𝐞𝐫 𝐣𝐨𝐢𝐧𝐢𝐧𝐠 𝐨𝐮𝐫
𝐓𝐫𝐚𝐢𝐥 𝐨𝐫
𝐃𝐢𝐬𝐜𝐨𝐫𝐝 𝐆𝐫𝐨𝐮𝐩. 𝐖𝐞 𝐚𝐩𝐩𝐫𝐞𝐜𝐢𝐚𝐭𝐞 𝐞𝐯𝐞𝐫𝐲 𝐜𝐨𝐧𝐭𝐫𝐢𝐛𝐮𝐭𝐢𝐨𝐧 𝐭𝐨 𝐭𝐡𝐞 𝐟𝐮𝐥𝐥𝐞𝐬𝐭, 𝐞𝐯𝐞𝐧 𝐢𝐟 𝐢𝐭 𝐢𝐬 𝐥𝐢𝐭𝐭𝐥𝐞, 𝐢𝐭 𝐜𝐨𝐮𝐧𝐭𝐬 𝐚 𝐥𝐨𝐭!
𝐂𝐨𝐧𝐬𝐢𝐝𝐞𝐫𝐚 𝐮𝐧𝐢𝐫𝐭𝐞 𝐚 𝐧𝐮𝐞𝐬𝐭𝐫𝐨 𝐓𝐫𝐚𝐢𝐥 𝐨 al 𝐆𝐫𝐮𝐩𝐨 𝐝𝐞 𝐃𝐢𝐬𝐜𝐨𝐫𝐝. 𝐀𝐠𝐫𝐚𝐝𝐞𝐜𝐞𝐦𝐨𝐬 𝐚𝐥 𝐌á𝐱𝐢𝐦𝐨 𝐂𝐚𝐝𝐚 𝐀𝐩𝐨𝐫𝐭𝐞, 𝐪𝐮𝐞 𝐚𝐬í 𝐬𝐞𝐚 𝐩𝐨𝐜𝐨, 𝐜𝐮𝐞𝐧𝐭𝐚 𝐲 𝐦𝐮𝐜𝐡𝐨!
BolkuraLogo.png (https://files.peakd.com/file/peakd-hive/pannavi/48UH6meLu5wRqVaf4DCon1TfY4n3KPGHSjJYx12N8sgJK78ZcNir5RTLe2KHTQ1G7z.png)
SepInicio2025.gif (https://files.peakd.com/file/peakd-hive/pannavi/23qrNeVpJurnyUoCaFwKFJd89y59KT6s6pxqswm5WPXFNLwFGFhZyRitReBZLeJ1jEJVG.gif)
¿𝐐𝐮é 𝐎𝐩𝐢𝐧𝐚𝐬 𝐝𝐞 𝐦𝐢 𝐂𝐨𝐧𝐭𝐞𝐧𝐢𝐝𝐨? 𝐌𝐞 𝐞𝐧𝐜𝐚𝐧𝐭𝐚𝐫í𝐚 𝐥𝐞𝐞𝐫𝐭𝐞. 𝐇𝐚𝐬𝐭𝐚 𝐮𝐧 𝐏𝐫ó𝐱𝐢𝐦𝐨 𝐏𝐨𝐬𝐭!🧡
𝐖𝐡𝐚𝐭𝐬 𝐲𝐨𝐮𝐫 𝐨𝐩𝐢𝐧𝐢𝐨𝐧 𝐚𝐛𝐨𝐮𝐭 𝐦𝐲 𝐜𝐨𝐧𝐭𝐞𝐧𝐭?
𝐈 𝐰𝐨𝐮𝐥𝐝 𝐥𝐨𝐯𝐞 𝐭𝐨 𝐫𝐞𝐚𝐝 𝐟𝐫𝐨𝐦 𝐲𝐨𝐮.
𝐒𝐞𝐞 𝐲𝐨𝐮 𝐢𝐧 𝐚 𝐧𝐞𝐱𝐭 𝐩𝐨𝐬𝐭! 🧡
[LA_FirmaGeneral2025.gif (https://files.peakd.com/file/peakd-hive/pannavi/246b2psCcdTm9iQm6mUfCC8gjmaxDyu1AZ68AzcXMo31Z1fY7aD6gbyeDZBS7zBE3Njuk.gif)](https://linktr.ee/pannavi)
|**𝐄𝐥𝐞𝐦𝐞𝐧𝐭𝐨𝐬 (𝐄𝐥𝐞𝐦𝐞𝐧𝐭𝐬)**|**𝐇𝐞𝐫𝐫𝐚𝐦𝐢𝐞𝐧𝐭𝐚𝐬 (𝐓𝐨𝐨𝐥𝐬)**|
|---|---|
|*Las Fotos Utilizadas a lo largo del Post son de mi galería (Photos used throughout the post are from my gallery)*|*Cámara del Teléfono Redmi Note 9A (Redmi Note 9A Phone Camera)*|
|*Contenido y Texto Original de mi Autoría (Content and Original Text of my Authorship)*|
*DeepL*|
|
*Imagen Usada de Inspiración (Image Used for Inspiration)*|
*CANVA*|
|
🧡
|
*Grammarly*|