Hello lovelies, I wish you a wonderful and benevolent evening on this upcoming weekend! Have you been working so hard and are now looking forward to a cool drink? Then treat yourself - I've also treated myself to one in the garden after work.
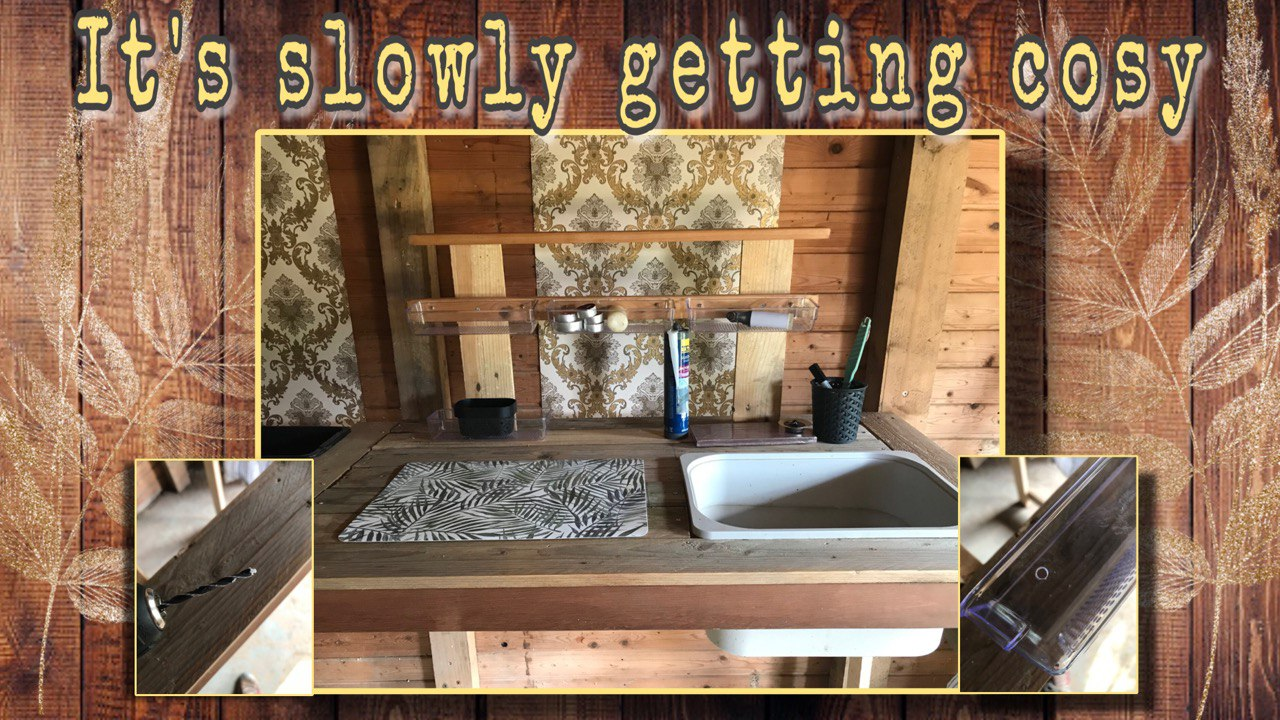
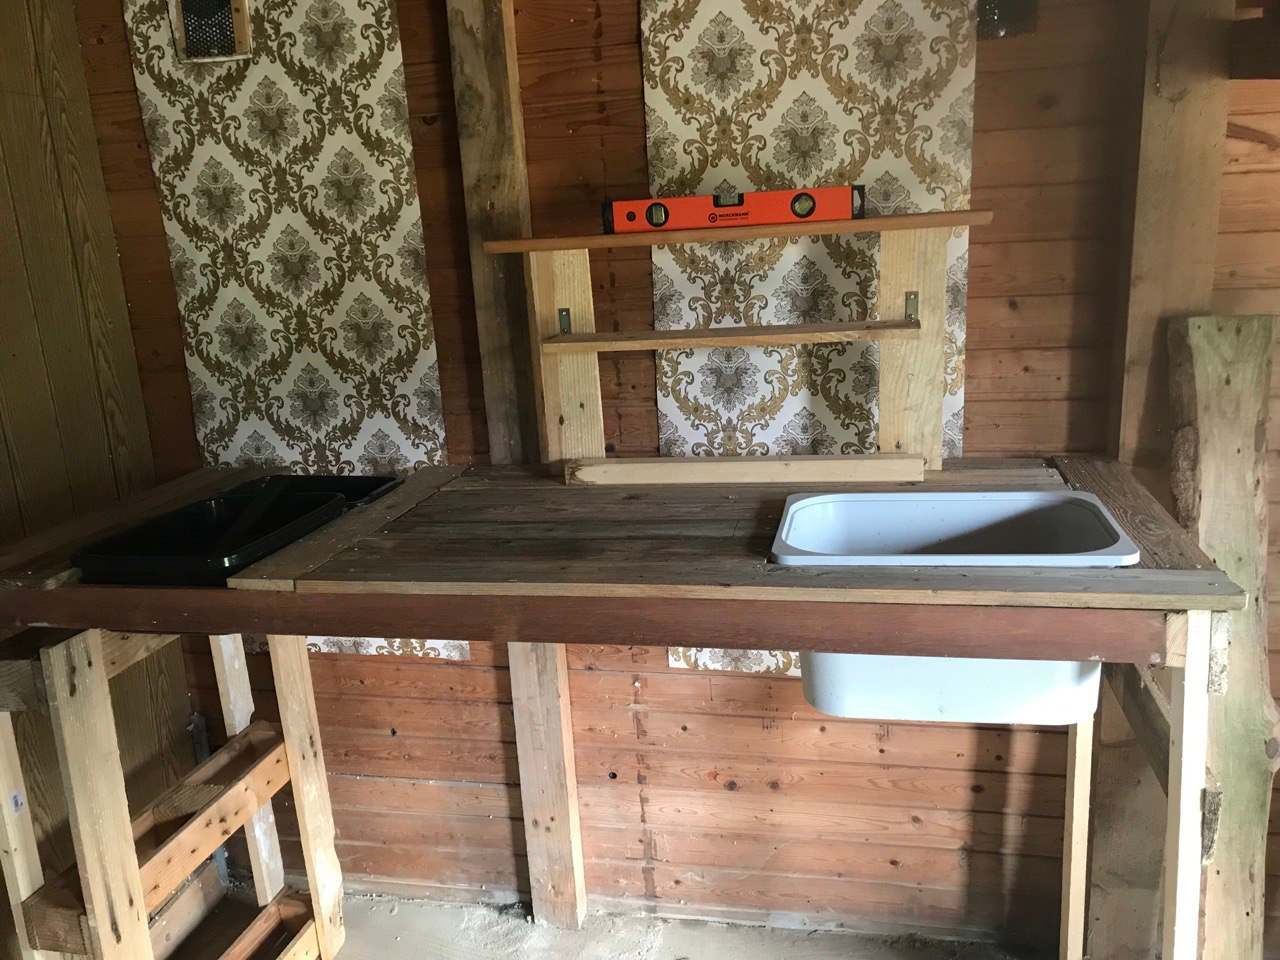
I've been playing Tetris with fence scraps for two days now, as I've finished building my garden sink - many of you will already know it from my previous posts. This time I didn't have any high-quality wood like I did for my first project, but only old pieces of fence that I've collected over the years. The whole thing was a real game of patience: I had to sort out each piece, check it for stability and install it in the right shape. Many of the boards were crooked, too short or had very specific dimensions - it was really one piece of the puzzle after another.
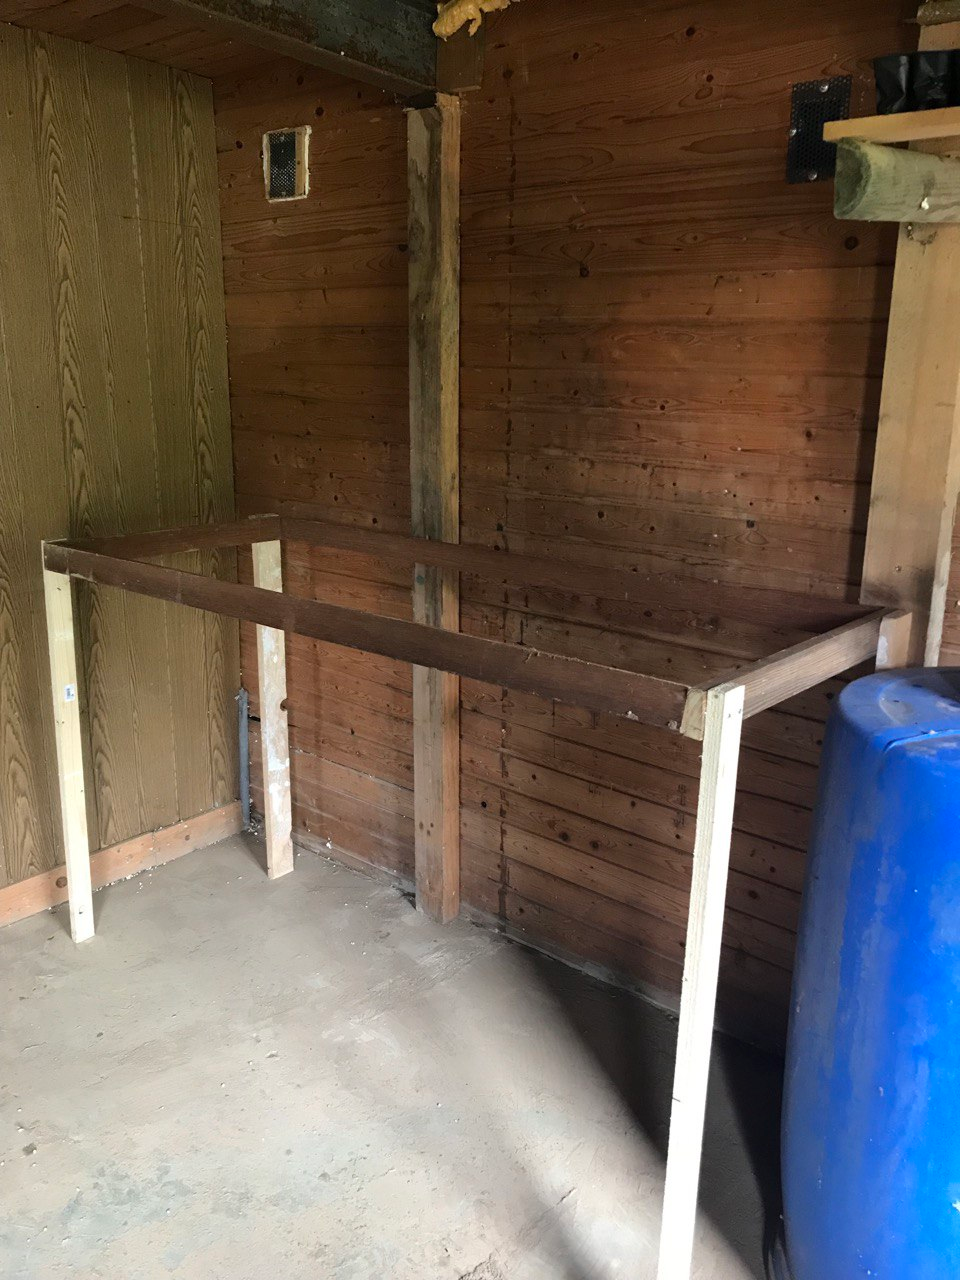
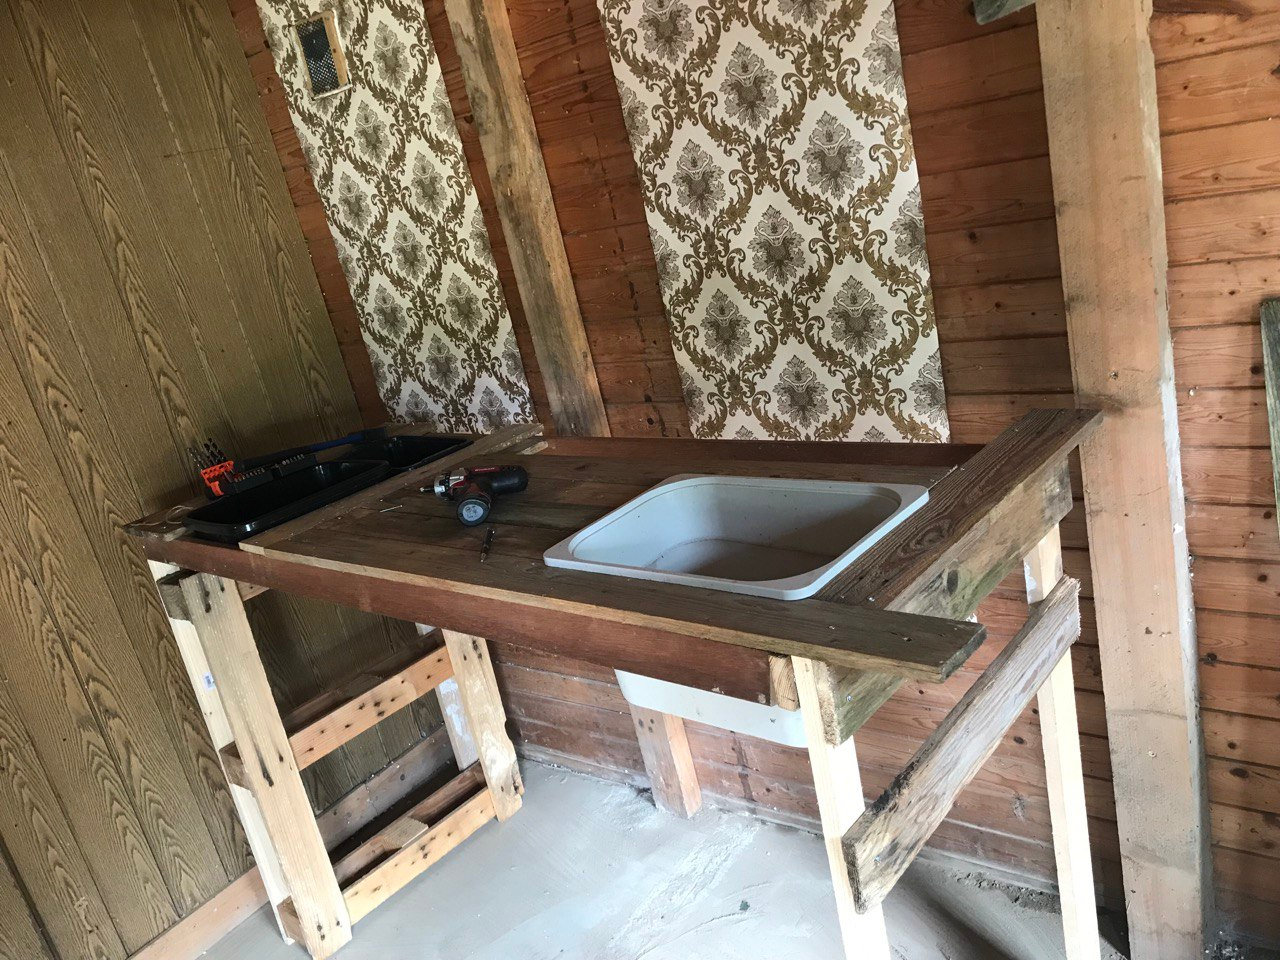
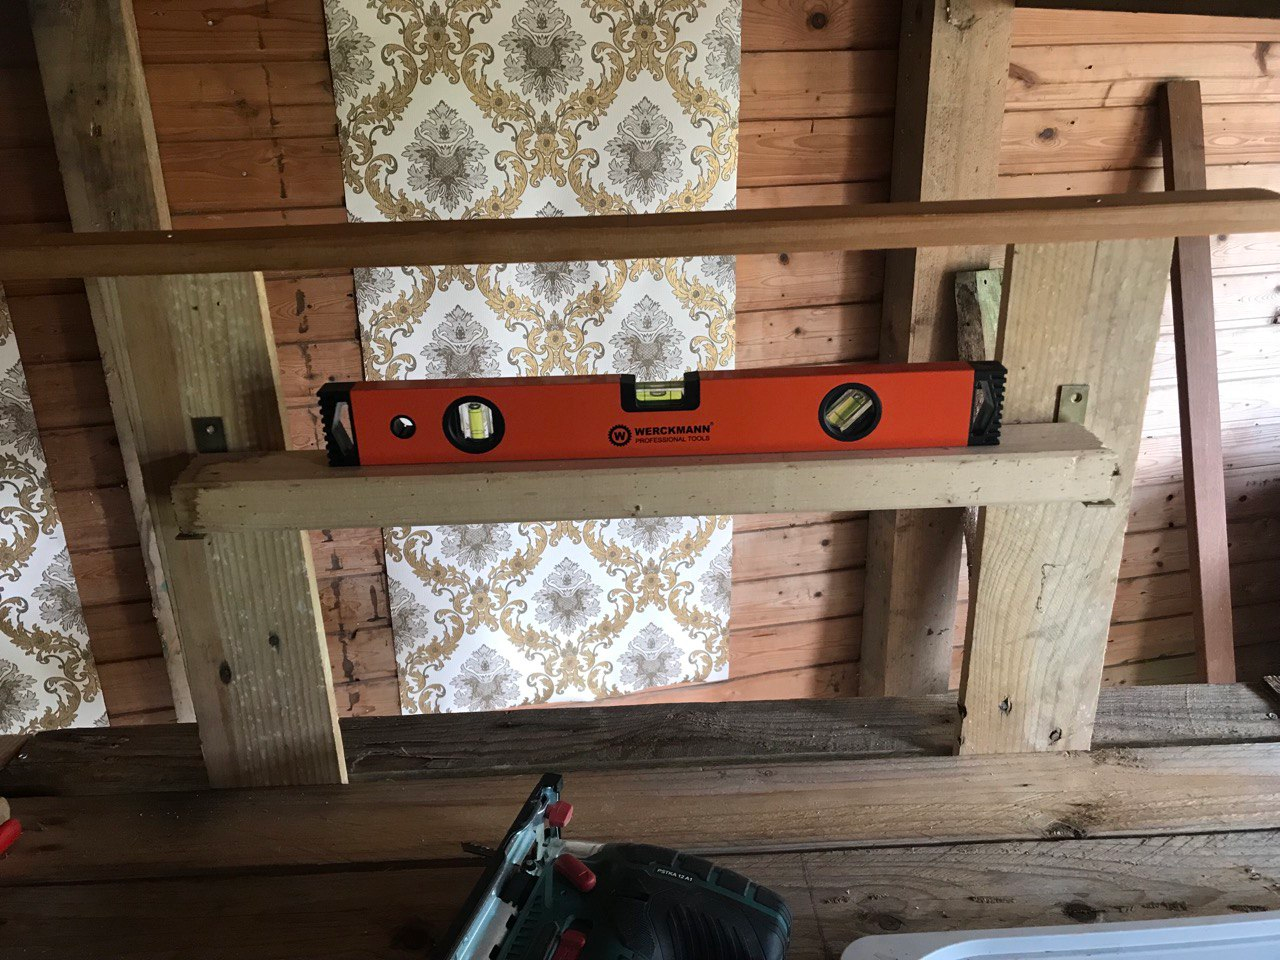
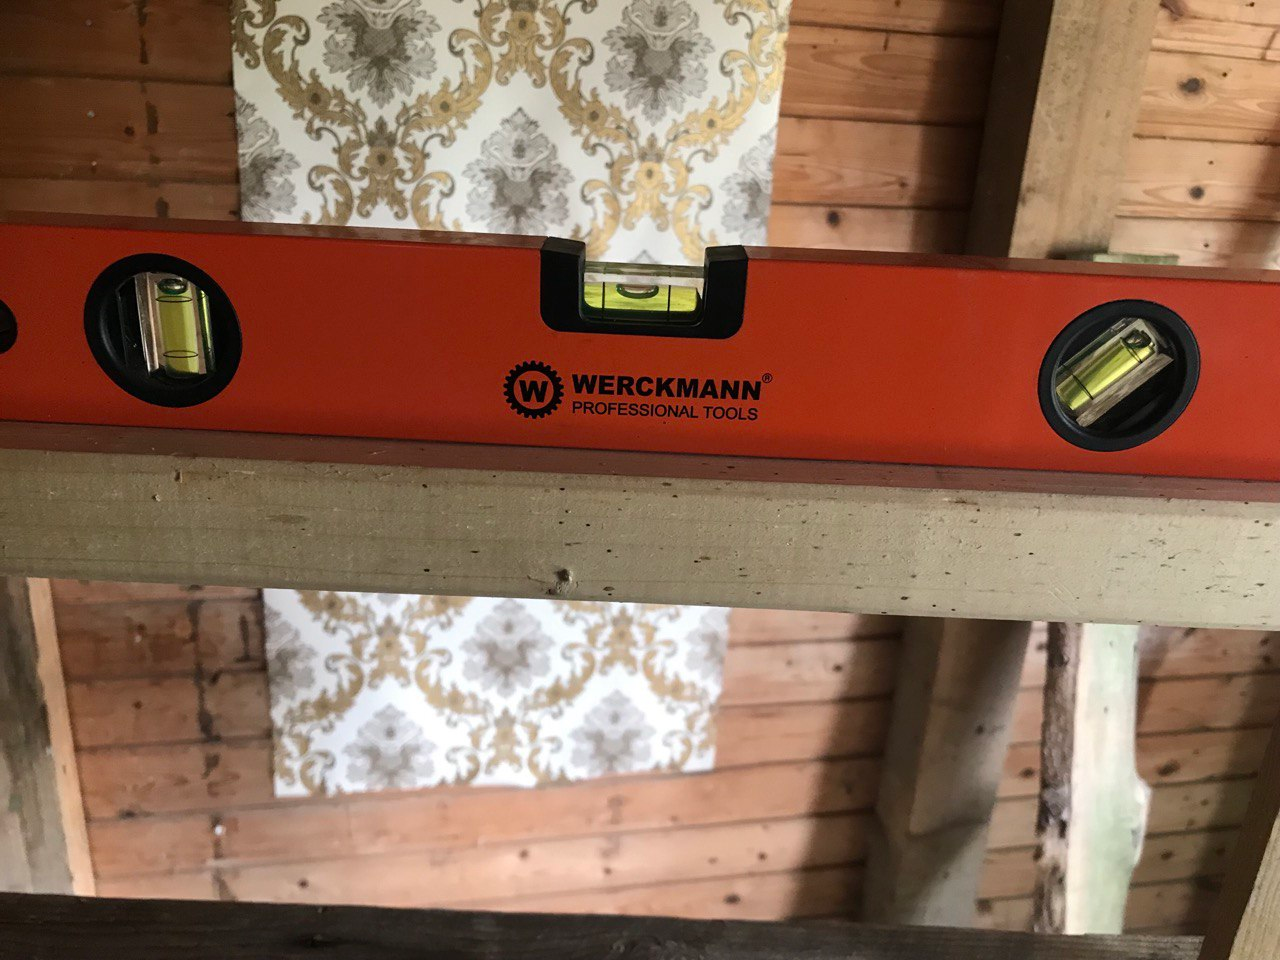
It was important to me that the new washbasin was at standing height so that I didn't have to bend down all the time when gardening. The construction was tedious and full of small adjustments, but step by step it became a functional piece that I am really proud of. It may not have the elegance of my first model, but this rustic look is charming. It's not quite finished yet, but I'm learning with every step I take.
I still need to sand a few sharp edges - sandpaper is already on my list. I also had the idea of decorating some elements with peroxide resin, but unfortunately the material is quite expensive. That will have to wait - first up is my chicken project. I'll soon be building a laying box so that the girls have a cosy nest and can lay their eggs in more peace and quiet.
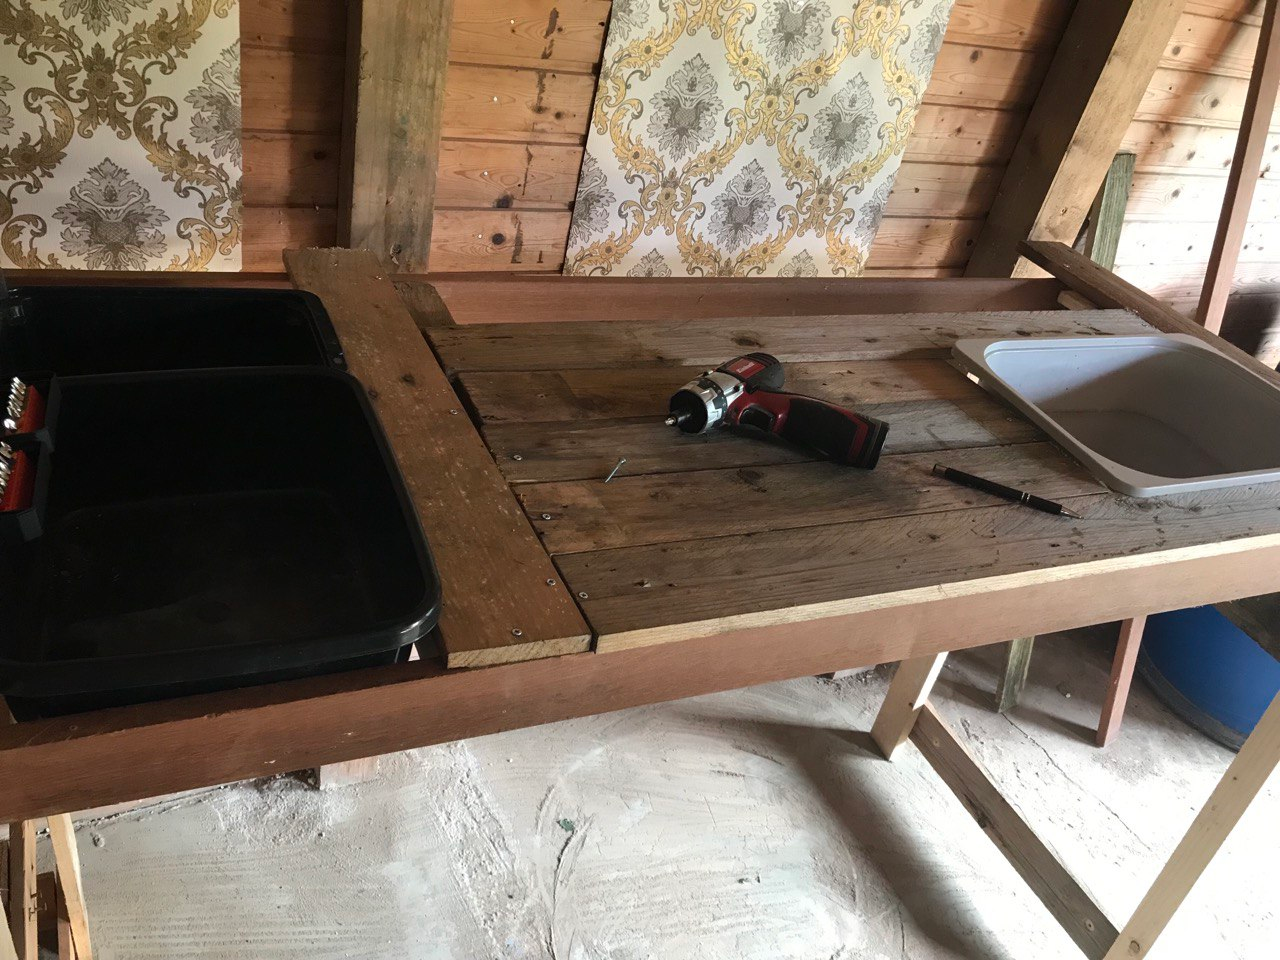
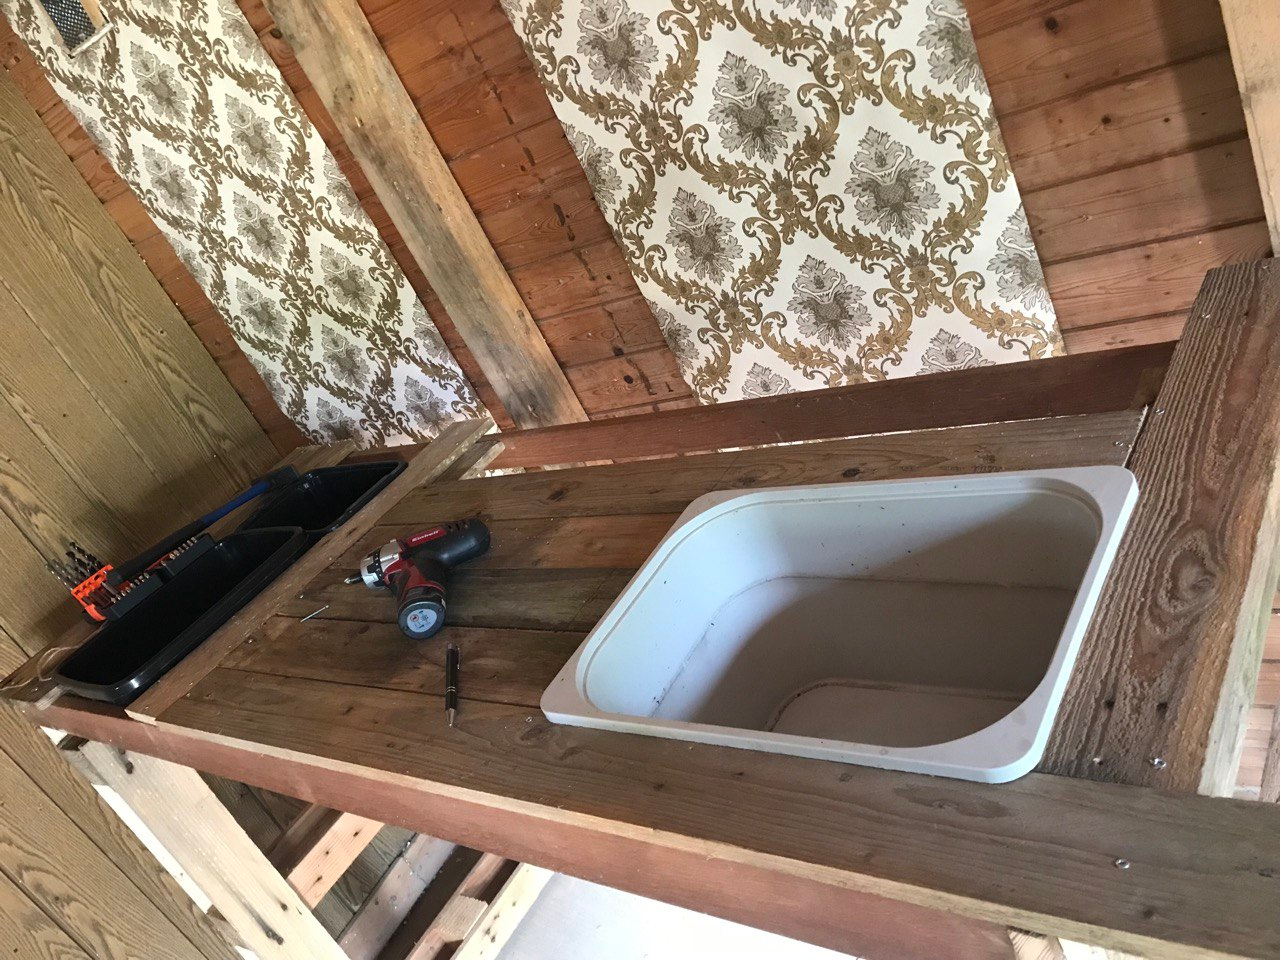
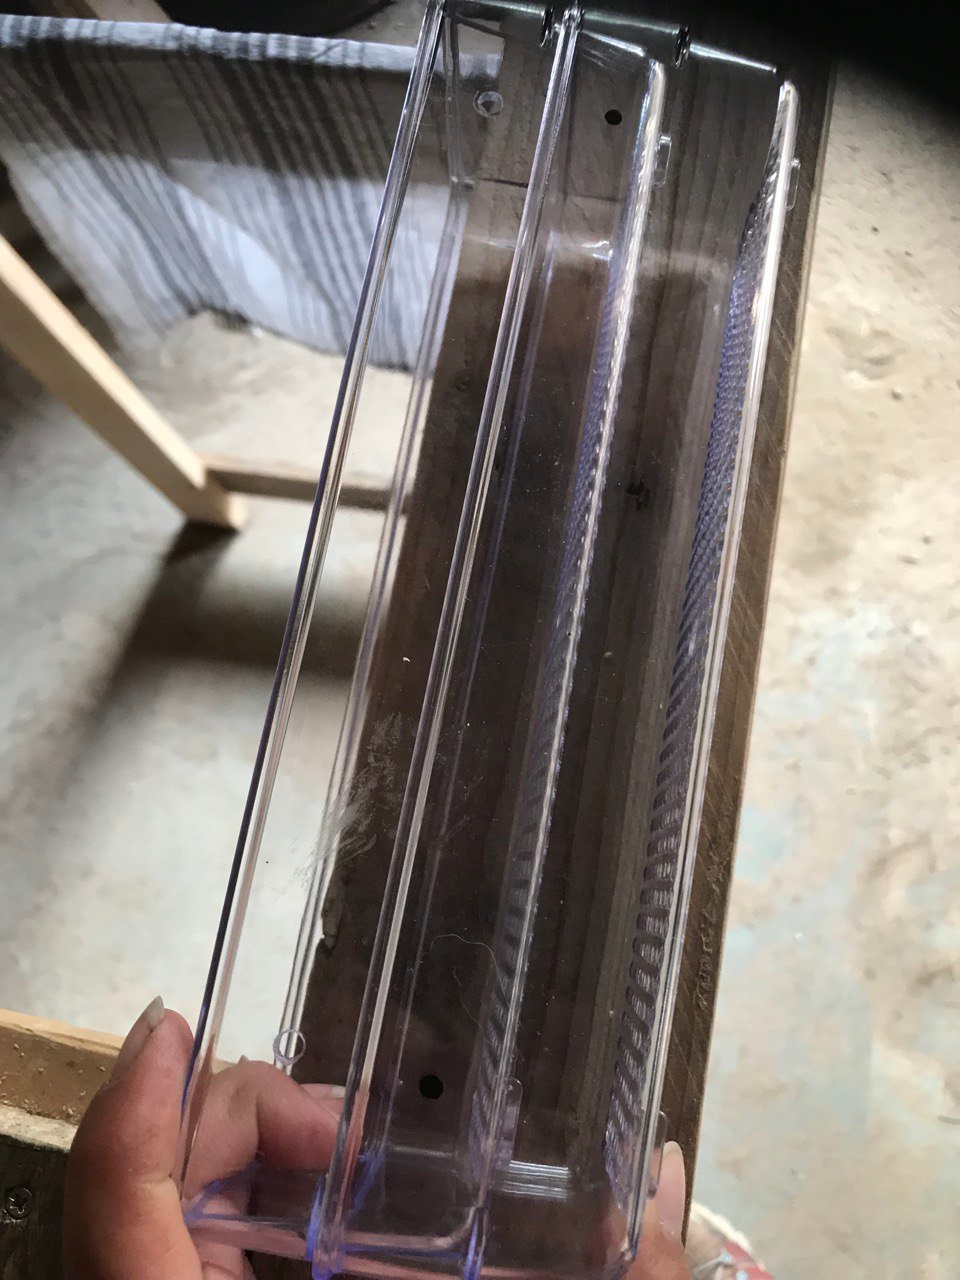
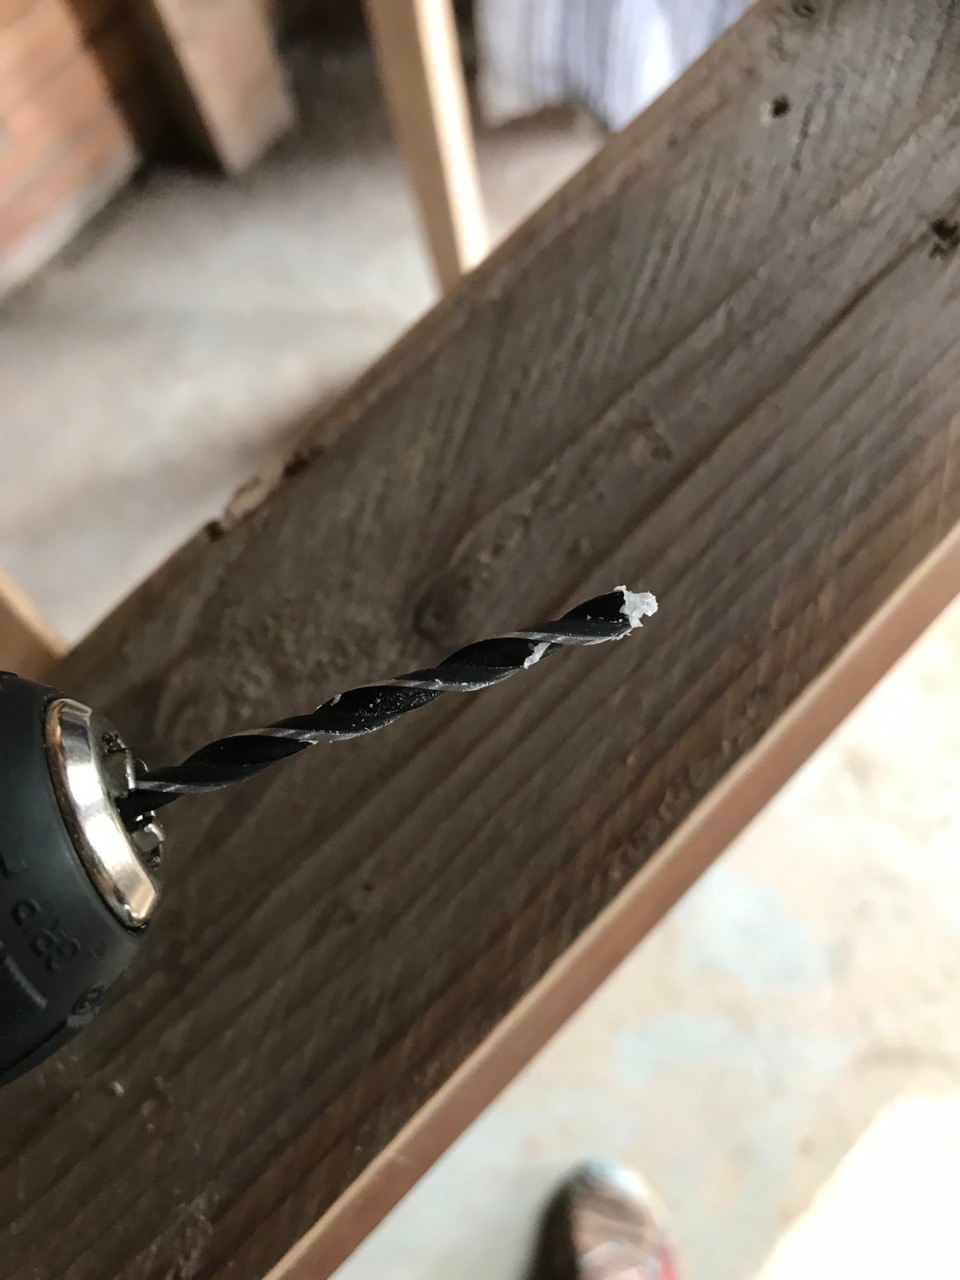
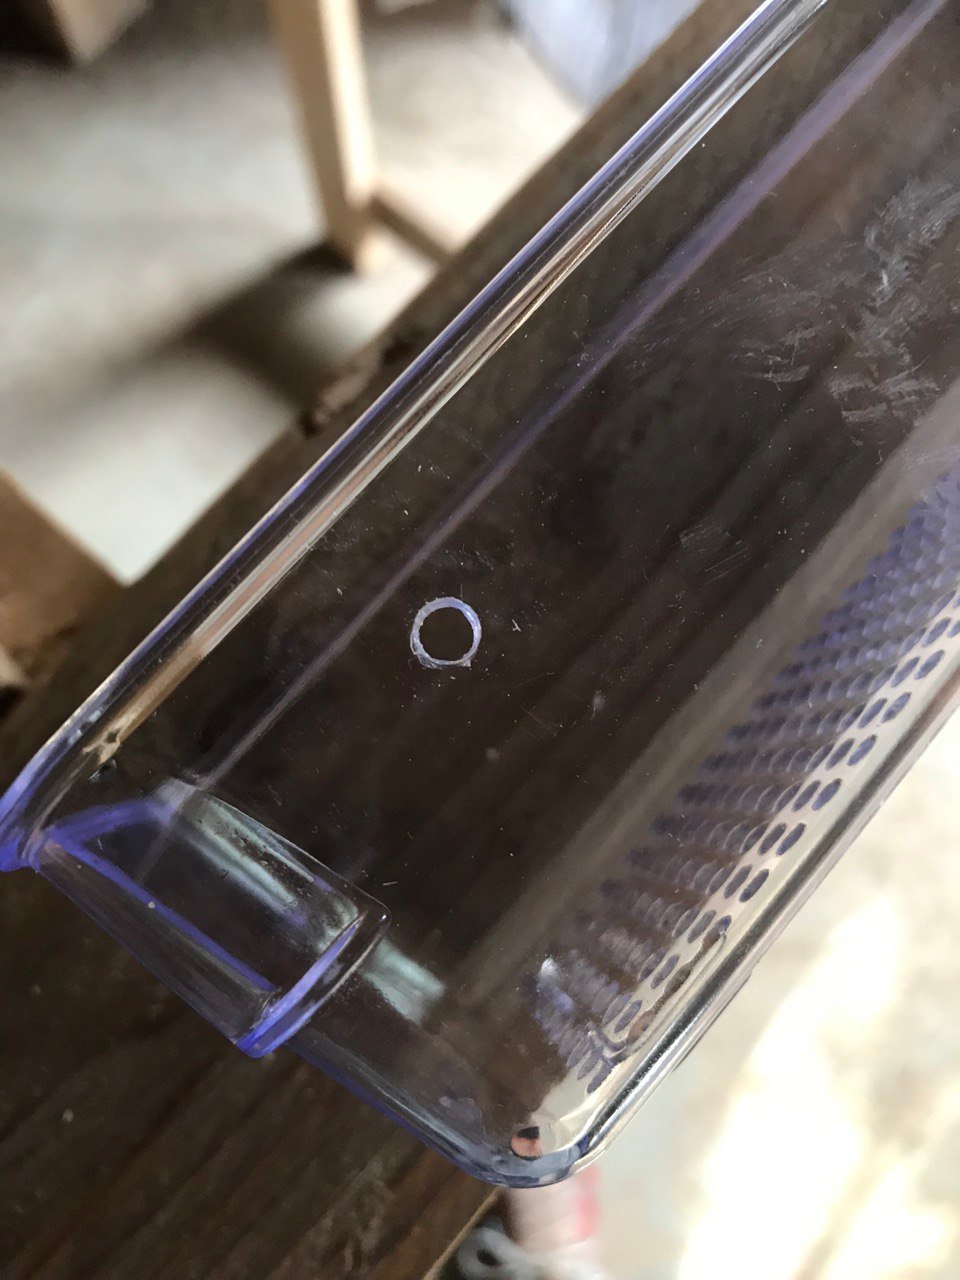
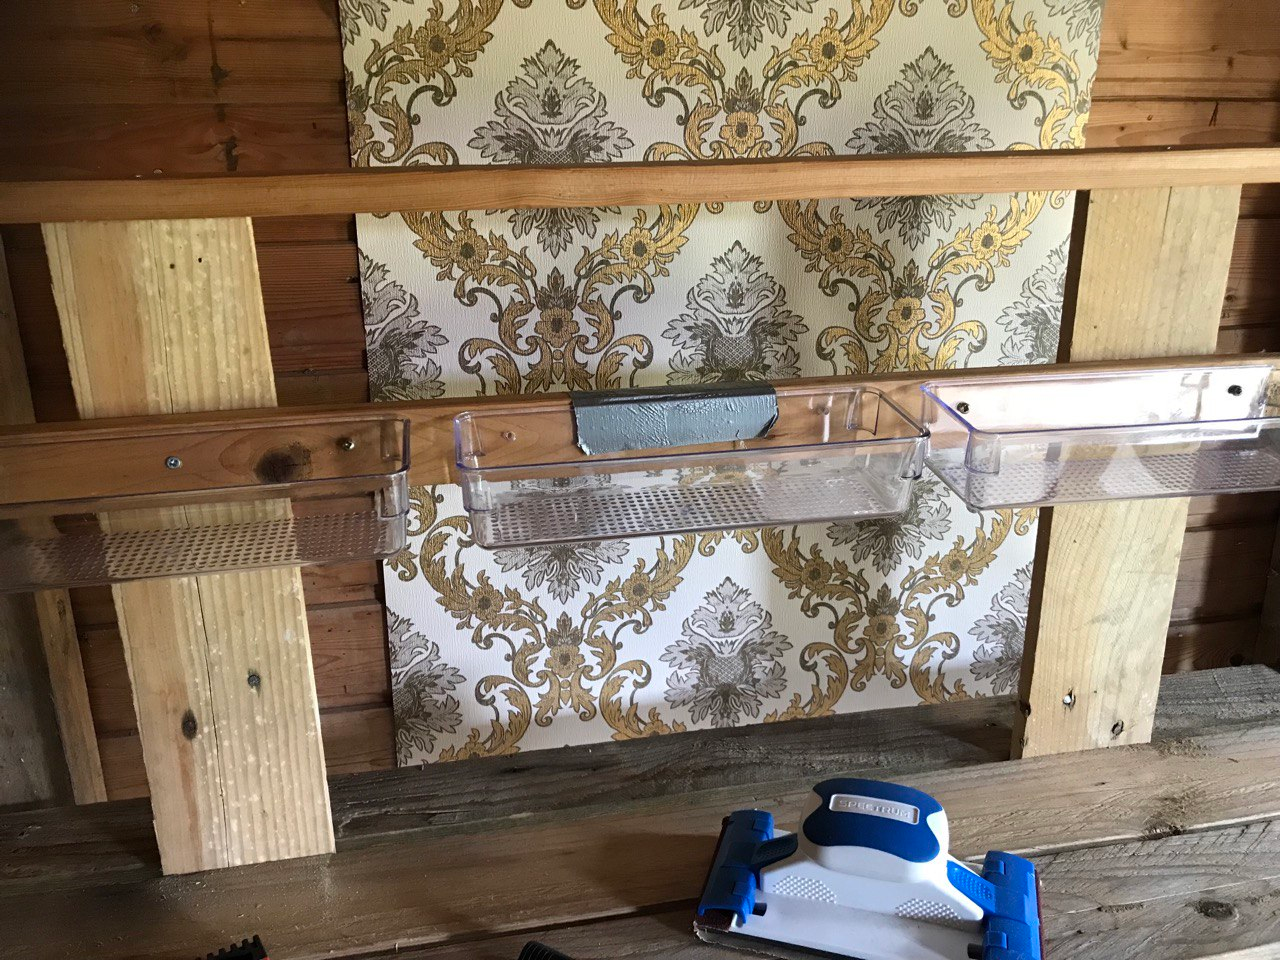
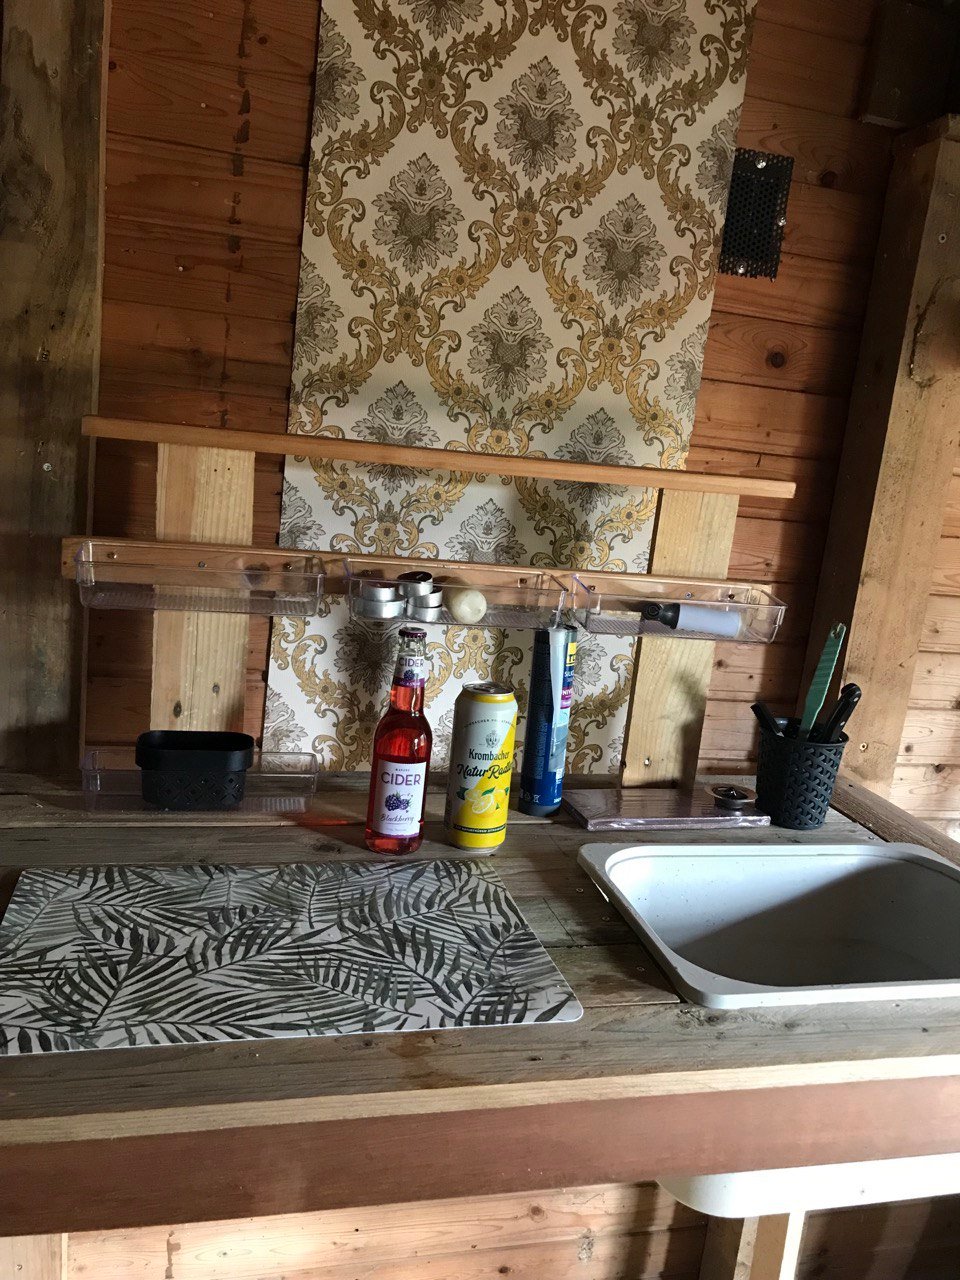
Back to the sink: it has three basins - a deep basin for washing fruit and vegetables, a second for draining and a small one for cutting waste. A grid will be added on top next week, then the whole thing will be ready for use above. Today I added a few extra trays so that I can store small items without losing anything. I discovered a few additional trays today and fitted them straight away. This makes it easy to store small items without losing anything. I attached the small raised shelf to the back with brackets so that I could also gain a little storage space in height. I carefully drilled small holes in the plastic trays so that they wouldn't be damaged when I attached them with screws.
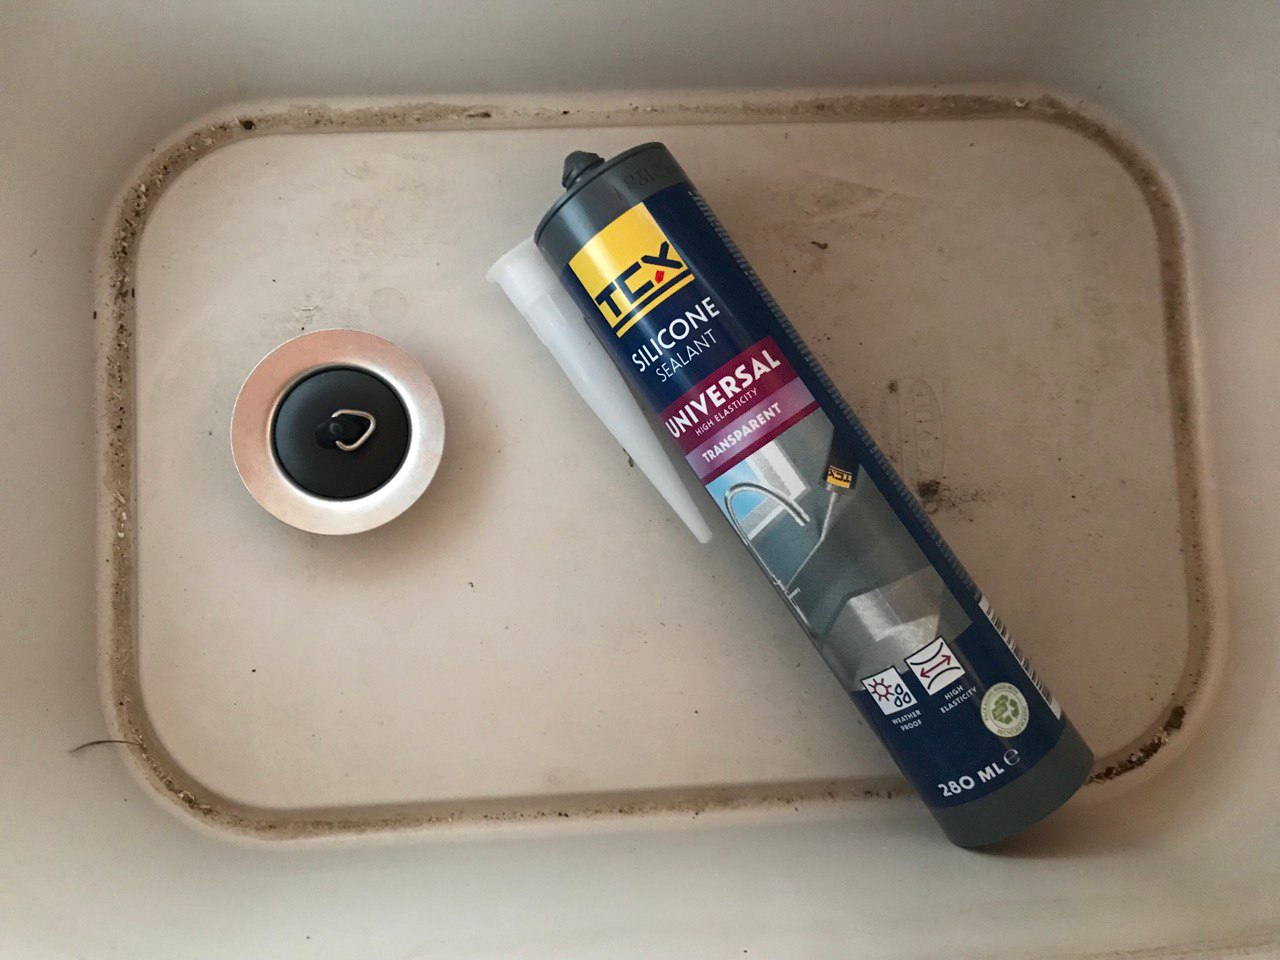
I'm happy with the result - and there are still expansion plans: I've already organised a drain for the large tub, including a plug. The silicone is ready, I just need a little more time to fit it.
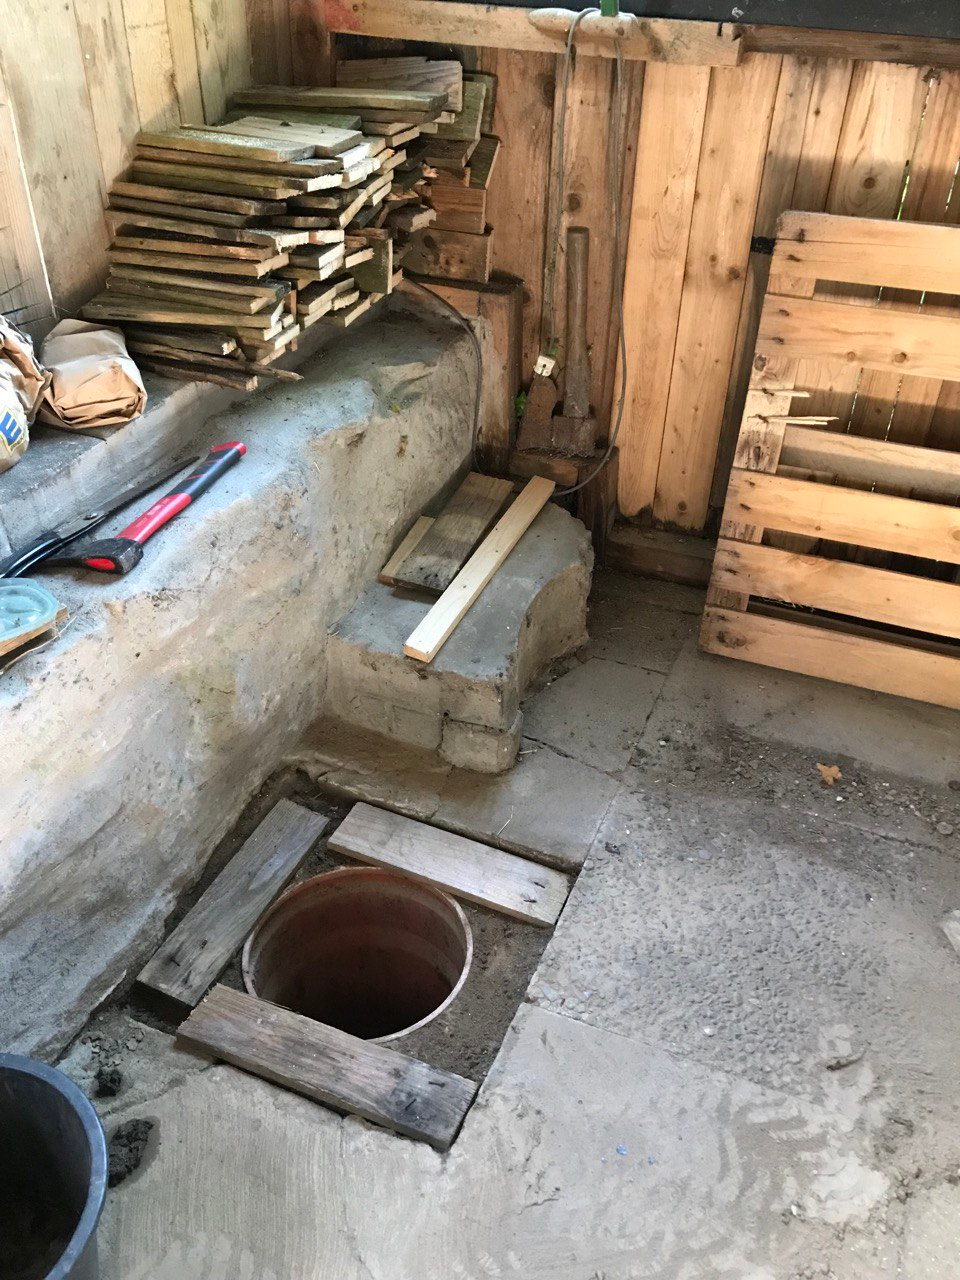
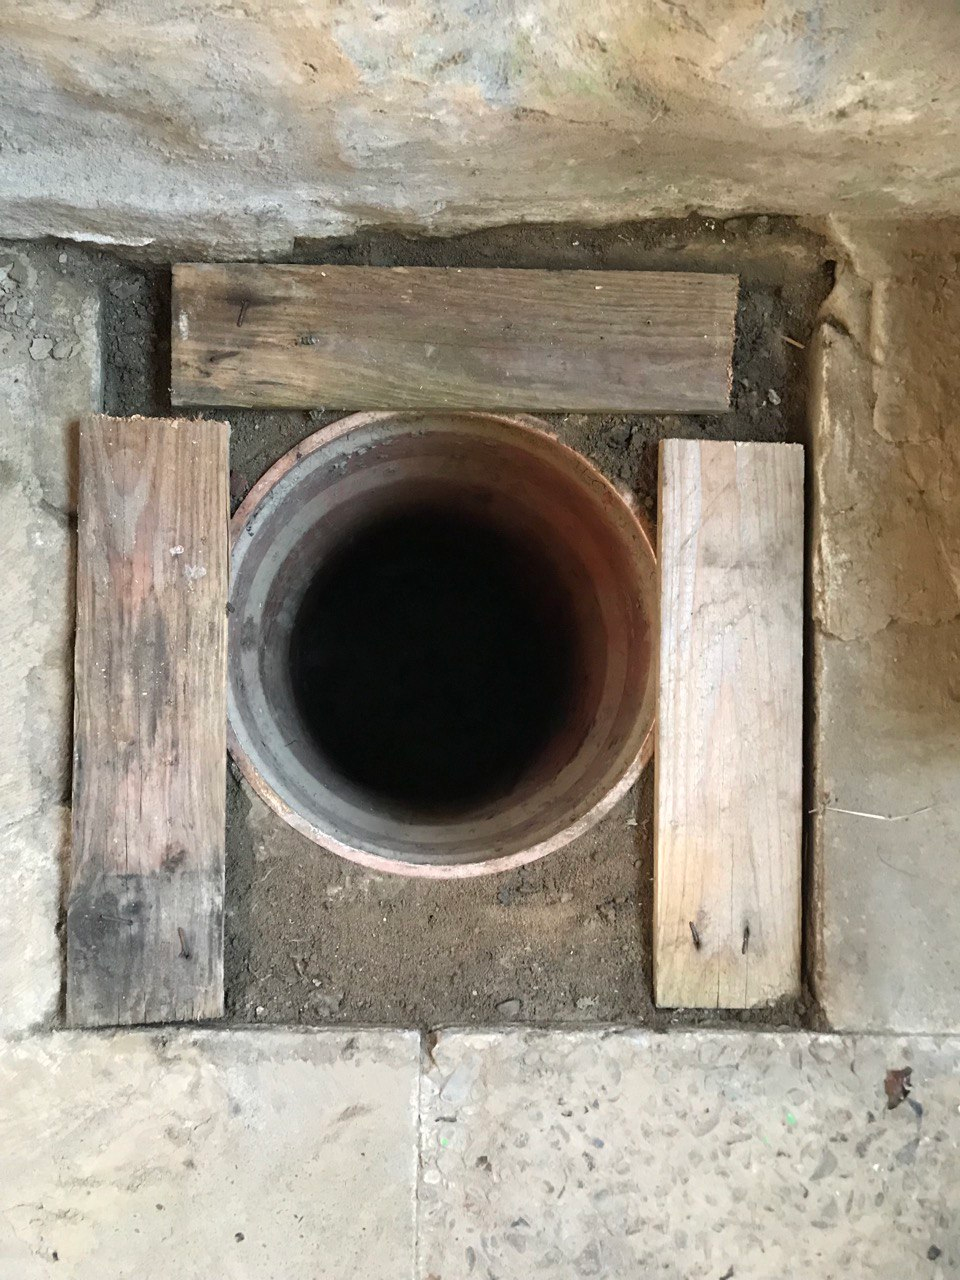
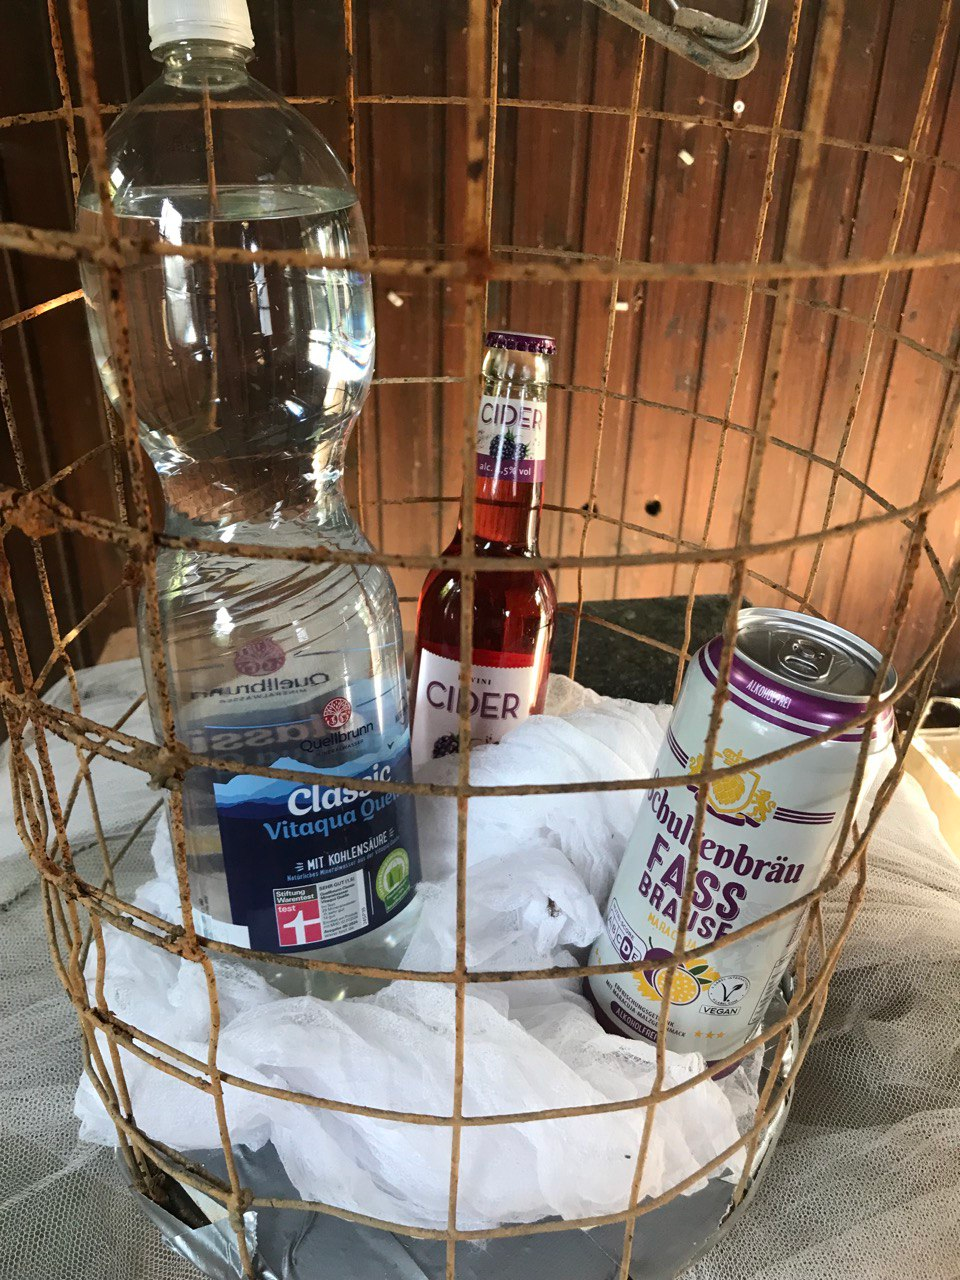
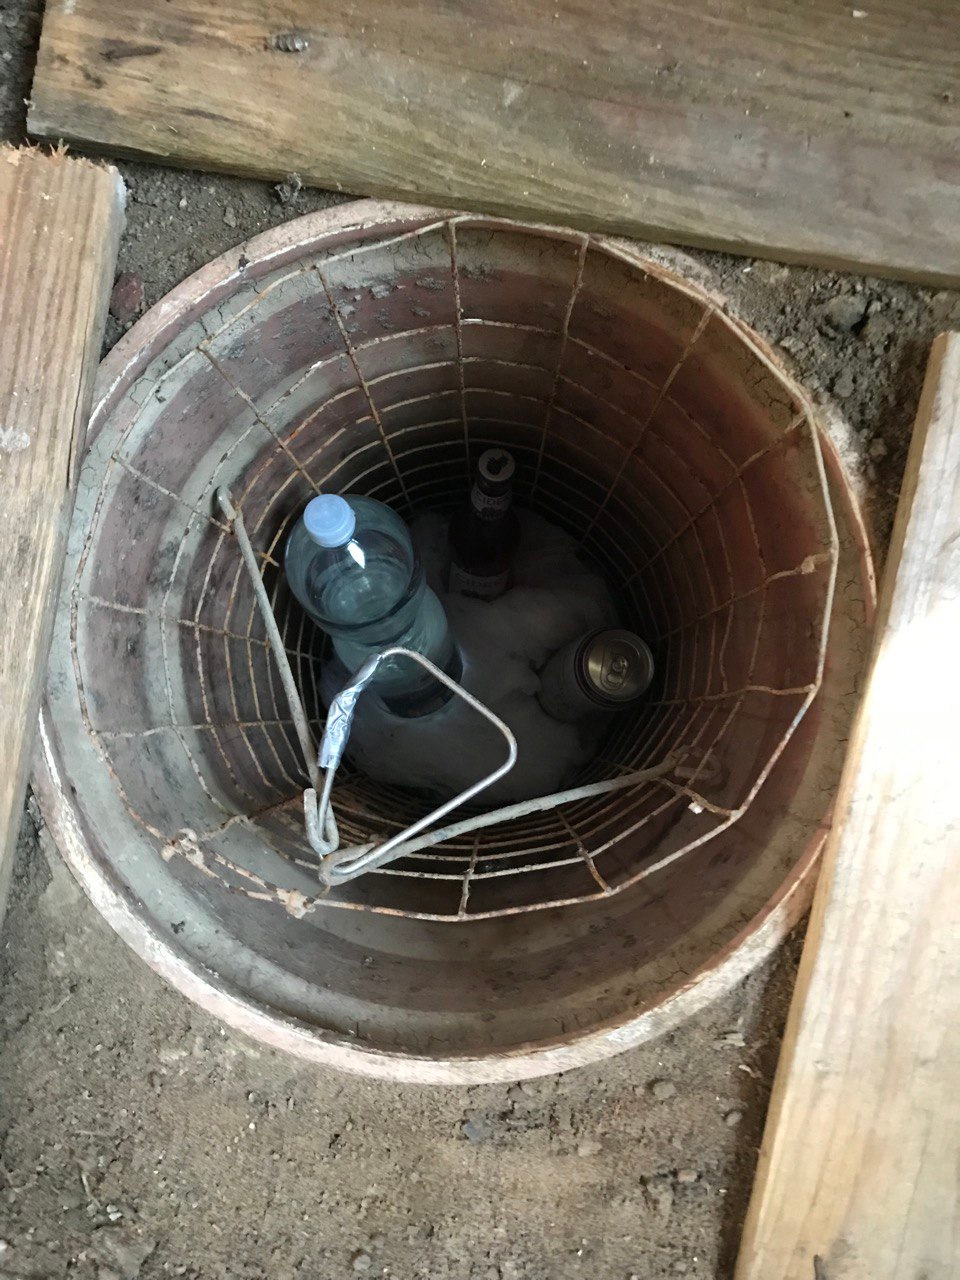
And then I discovered another surprise: an old hole in the ground that had been completely silted up by flooding. I came across it by chance while stacking wood - an inconspicuous lid at the bottom... and a real natural cooler underneath! I removed the mud, drained everything and filled in some gravel to prevent waterlogging. I cleaned the basket and padded it - now the first drinks are already in it. Maybe I'll find a suitable bottle rack, but for now it's perfect.
Who knows what else is hiding under the stones and paving slabs - I'm excited! 😄 And the most important thing: I'm slowly tidying up the garden. I'm no longer searching quite so often for the tools that I've put away ‘somewhere with space’.
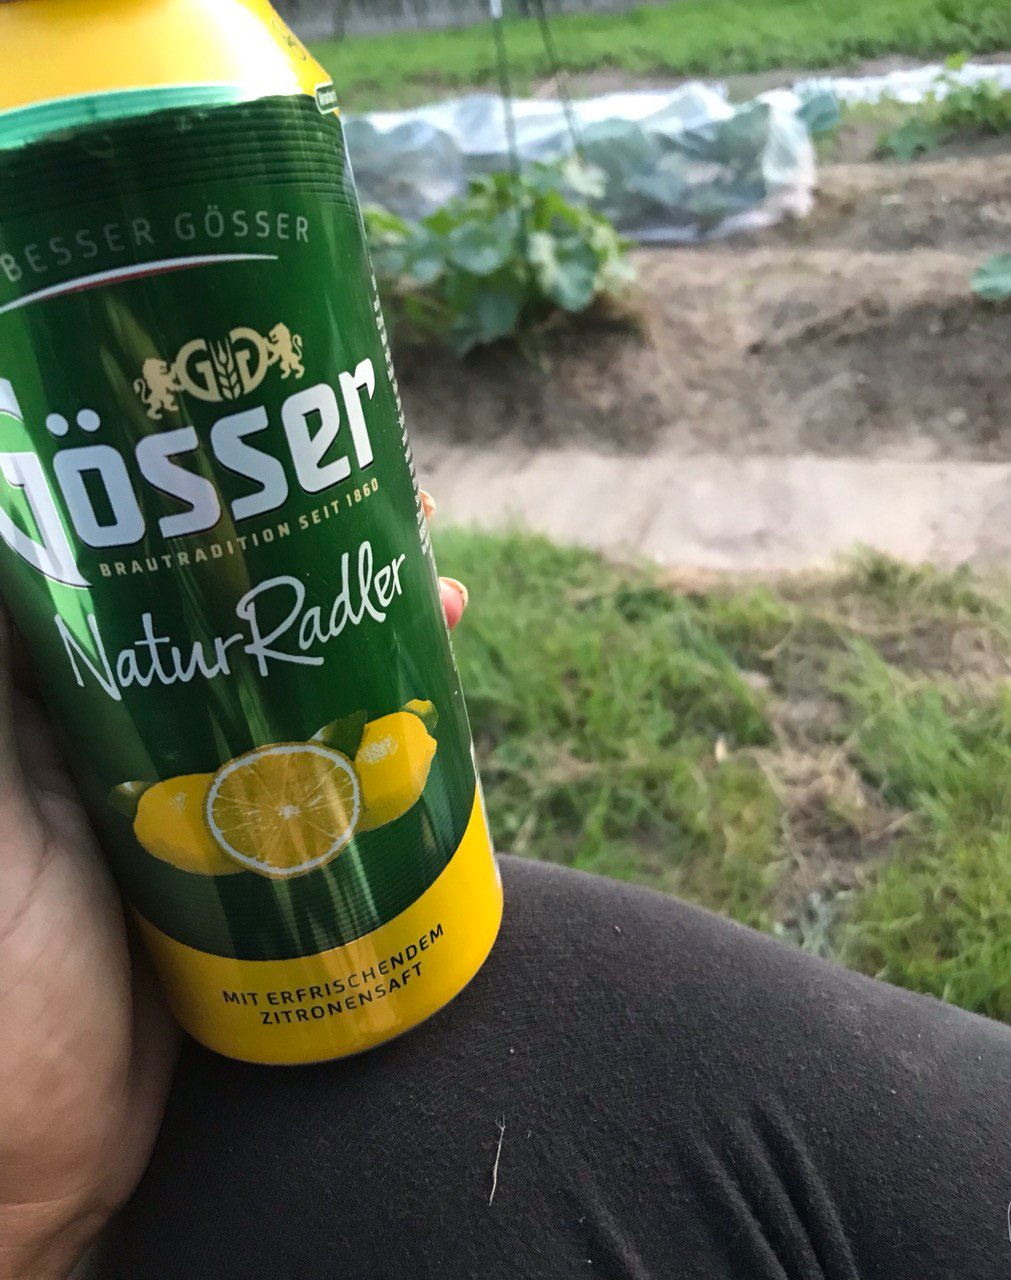
After all that: a sparkling drink in hand, feet up - let the evening begin. I wish you a great start to Saturday. Feel richly blessed - see you next time! 💚

----
DE
Hallo ihr Lieben, ich wünsche euch einen wundervollen und wohlwollenden Abend an diesem bevorstehenden Wochenende! Habt ihr auch so fleißig gewerkelt und freut euch jetzt auf ein kühles Getränk? Dann gönnt es euch – ich habe mir nach getaner Arbeit auch eins im Garten genehmigt.
Seit zwei Tagen spiele ich quasi Tetris mit Zaunresten, denn ich habe mein Gartenwaschbecken fertig gebaut – viele von euch kennen es ja schon aus meinen vorherigen Beiträgen. Dieses Mal hatte ich kein hochwertiges Holz wie bei meinem ersten Projekt, sondern nur alte Zaunstücke, die über die Jahre zusammengekommen sind. Das Ganze war ein echtes Geduldsspiel: Ich musste jedes Stück aussortieren, auf Stabilität prüfen und in passender Form einbauen. Viele Bretter waren krumm, zu kurz oder hatten ganz eigene Maße – wirklich ein Puzzlestück nach dem anderen.
Mir war wichtig, dass das neue Waschbecken auf Stehhöhe ist, damit ich mich beim Gärtnern nicht ständig bücken muss. Der Aufbau war mühsam und voller kleiner Anpassungen, aber Schritt für Schritt wurde daraus ein funktionales Stück, auf das ich richtig stolz bin. Es mag vielleicht nicht die Eleganz meines ersten Modells haben, aber genau diese rustikale Optik hat Charme. Es ist noch nicht ganz fertig, doch ich lerne bei jedem Handgriff dazu.
Ein paar scharfe Kanten muss ich noch schleifen – Schleifpapier steht bereits auf meiner Liste. Ich hatte auch die Idee, einige Elemente mit Peroxydharz zu verzieren, aber das Material ist leider ziemlich teuer. Das muss warten – zuerst steht mein Hühnerprojekt an. Ich baue demnächst einen Legekasten, damit die Mädels ein gemütliches Nest bekommen und ihre Eier mit mehr Ruhe legen können.
Zurück zum Waschbecken: Es hat drei Becken – eine tiefe Wanne zum Waschen von Obst und Gemüse, eine zweite für das Abtropfen und eine kleine für Schnittabfälle. Ein Gitter kommt nächste Woche noch obendrauf, dann ist das Ganze auch oberhalb voll einsatzbereit. Heute habe ich ein paar zusätzliche Schalen angebracht, so lässt sich Kleinkram wunderbar ablegen, ohne dass etwas verloren geht. Ein paar zusätzliche Schalen habe ich heute entdeckt und direkt angebracht. So lässt sich Kleinkram ganz unkompliziert ablegen, ohne dass etwas verloren geht. Die kleine Regalerhöhung habe ich mit Winkeln an der Rückseite befestigt, sodass ich auch ein wenig Stauraum in der Höhe gewinnen konnte. In die Plastikschalen habe ich vorsichtig kleine Löcher gebohrt, damit sie beim Befestigen mit Schrauben nicht beschädigt werden.
Ich bin zufrieden mit dem Ergebnis – und es gibt noch Ausbaupläne: ein Ablauf für die große Wanne ist schon besorgt, inklusive Stöpsel. Das Silikon liegt bereit, ich brauche nur noch ein wenig Muße, um es zu montieren.
Und dann hab ich noch eine Überraschung entdeckt: Ein altes Erdloch, das durch Hochwasser völlig verschlammt war. Zufällig stieß ich darauf beim Holzstapeln – ein unscheinbarer Deckel am Boden… und darunter ein echter Naturkühler! Ich habe den Schlamm entfernt, alles trocken gelegt und etwas Kies eingefüllt, damit sich keine Staunässe bildet. Den Korb habe ich gereinigt und gepolstert – jetzt liegen schon die ersten Getränke darin. Vielleicht finde ich noch einen passenden Flaschenständer, aber fürs Erste ist es perfekt.
Wer weiß, was sich noch alles unter Steinen und Bodenplatten verbirgt – ich bin gespannt! 😄 Und das Wichtigste: Langsam kommt Ordnung in die Gartensache. Ich bin nicht mehr ganz so oft auf der Suche nach dem Werkzeug, das ich „irgendwo mit Platz“ abgelegt habe.
Nach all dem: ein spritziges Getränk in der Hand, Füße hoch – der Abend darf beginnen. Ich wünsche euch einen schönen Start in den Samstag. Fühlt euch reichlich gesegnet – bis zum nächsten Mal! 💚