###### ✨¡Hola amigos amantes de la creatividad! Espero que estén todos bien.✨
¡Buenas tardes, amigos! Espero estén pasando una excelente semana. Por mi parte, contenta de pasar por acá a compartir una linda idea con ustedes. En esta ocasión, les comparto el paso a paso para elaborar unos lindos imanes para el refrigerador. Se me ocurrió la idea de compartirles algo diferente a lo que suelo elaborar para imanes e irme por algo un poco más obvio, como un helado y un chocolate. Seguramente pronto les comparta una hamburguesa, cosas que tengan más que ver con la cocina.
**🔸Sin más que añadir, a continuación los dejo con el paso a paso:**
> ###### ✨¡Hello friends who love creativity! I hope you are all well.✨
> Good afternoon, friends! I hope you're having a great week. For my part, I'm happy to stop by to share a lovely idea with you. This time, I'm sharing the step-by-step instructions for making some cute refrigerator magnets. I had the idea to share something different from my usual magnet designs and go for something a little more obvious, like ice cream and chocolate. I'll probably share a hamburger soon, or something more cooking-related.
> **🔸Without more to add, then I leave you with the step by step:**
---
https://img.leopedia.io/DQmXpez8MjshRoFeznyeT6LsLj3kmZ4Kgo6TDSsffWPDwVL/portada%20defi.jpg
---


|||
|-|-|


|||
|-|-|


|||
|-|-|


|||
|-|-|

✨Así es como pueden crear estos lindos imanes, pero recuerden que pueden elaborarlos con la temática de preferencia. En lo personal, han sido mis imanes favoritos hasta ahora, aunque no les miento cuando digo que no los recuerdo todos de tantos que he elaborado, jaja, pero al menos de este año, creo que lo son. Espero que les haya gustado el paso a paso y se animen a elaborarlo.
❤️Hasta la próxima publicación.
> ✨This is how you can create these cute magnets, but remember that you can make them with any theme you prefer. Personally, these have been my favorite magnets so far, although I'm not lying when I say I don't remember all of them from so many I've made, haha, but at least from this year, I think they are. I hope you enjoyed the step-by-step instructions and are inspired to try them out.
> ❤️Until the next post.


|||
|-|-|
---
https://img.inleo.io/DQmUT3hN2sUD6hkDacVDeWh6cxJbEXreWY9qypQ1qJJTLGT/gracias%20por%20leer.png
---
**!TE DESEO UN GRAN DÏA¡**
Todas las fotografías son de mi propiedad.
Separador y Fotos editadas en [Canva](https://www.canva.com/)
**!I WISH YOU A GOOD DAY**
All photographs are my property.
Photos edited in [Canva](https://www.canva.com/)
Posted Using [INLEO](https://inleo.io/@valenpba/espeng-lindos-imanes-para-el-refrigerador-cute-refrigerator-magnets-crv)
**♥️ESPERO QUE TE GUSTE,
¡Empecemos!**
**♥️I HOPE YOU LIKE IT,
Let's start!**
---
# ✂️ MATERIALES | ✂️ MATERIALS
- Foamis escarchados.
- Foami rosa.
- Foami amarillo.
- Foami marrón.
- Foami azul.
- Foami crema.
- Foami blanco.
- Pinturas y marcadores.
- Pegamento.
- Tijeras.
- Regla.
- Hoja blanca.
- Lápiz.
- Frosted foami.
- Pink foami.
- Yellow foami.
- Brown foami.
- Blue foami.
- Cream foami.
- White foami.
- Paints and markers.
- Glue.
- Scissors.
- Ruler.
- White paper.
- Pencil.
# 🌟 PROCEDIMIENTO | 🌟 PROCESS
###### ✨PASO 1:
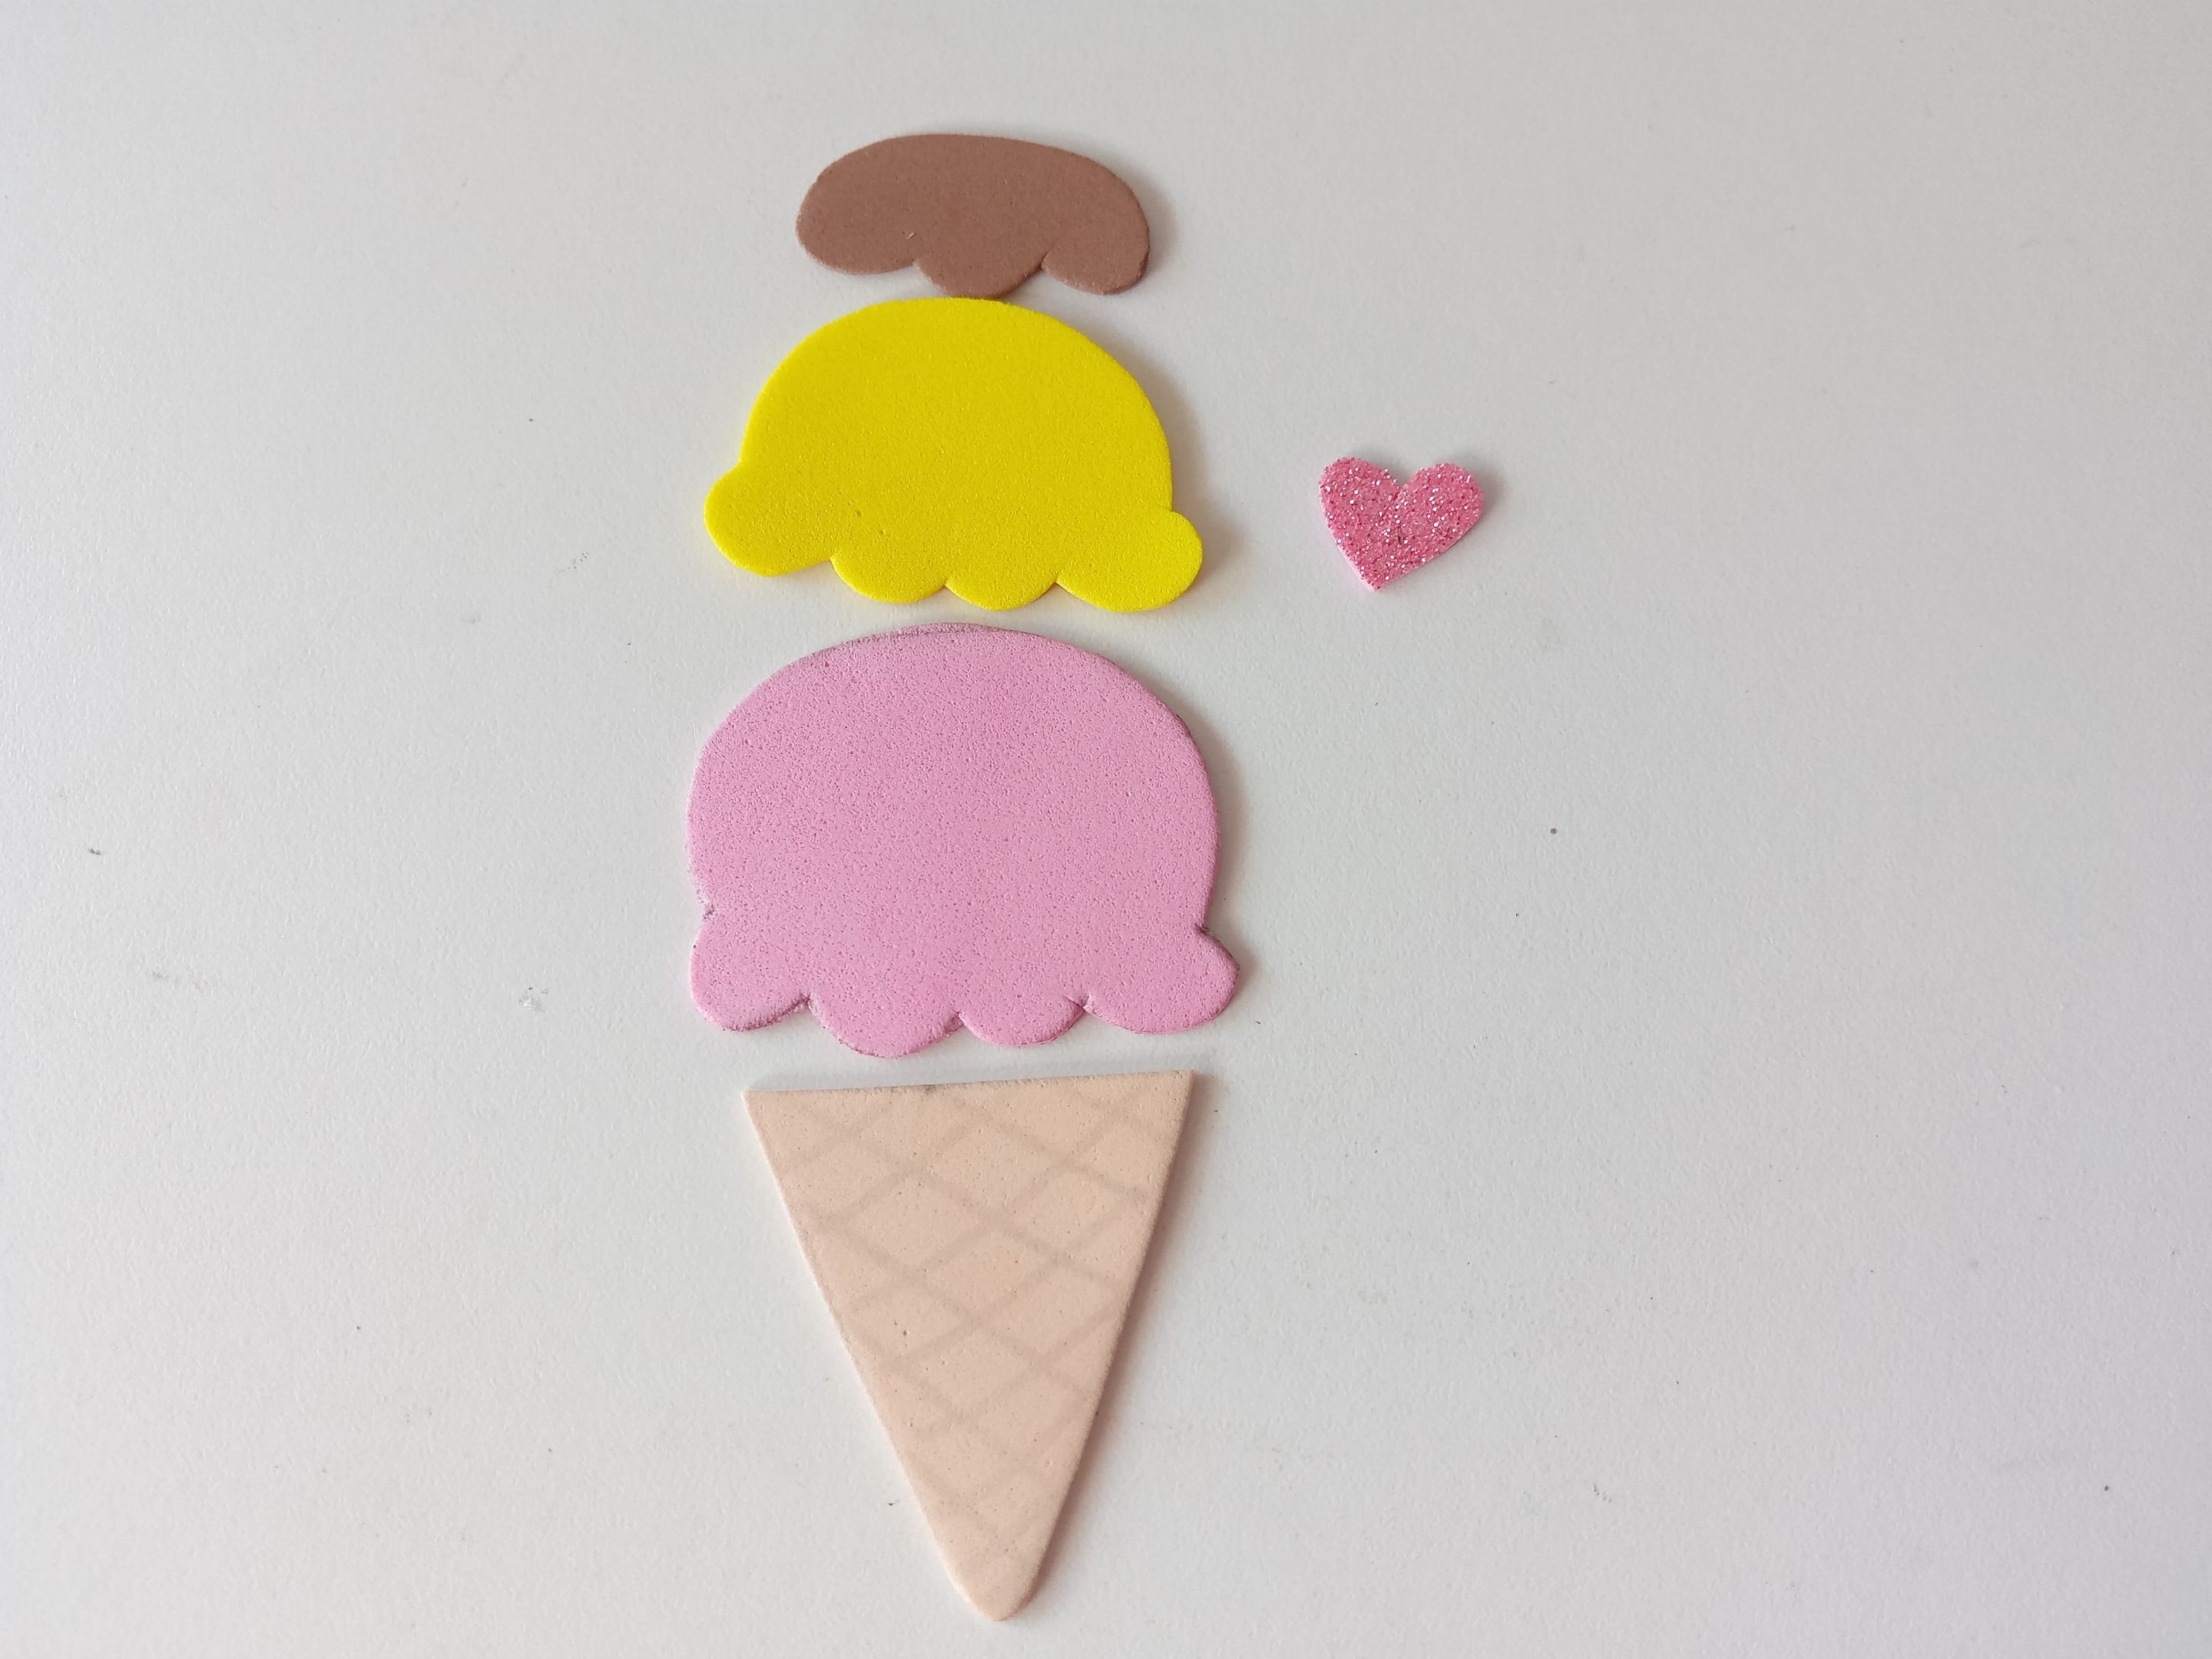
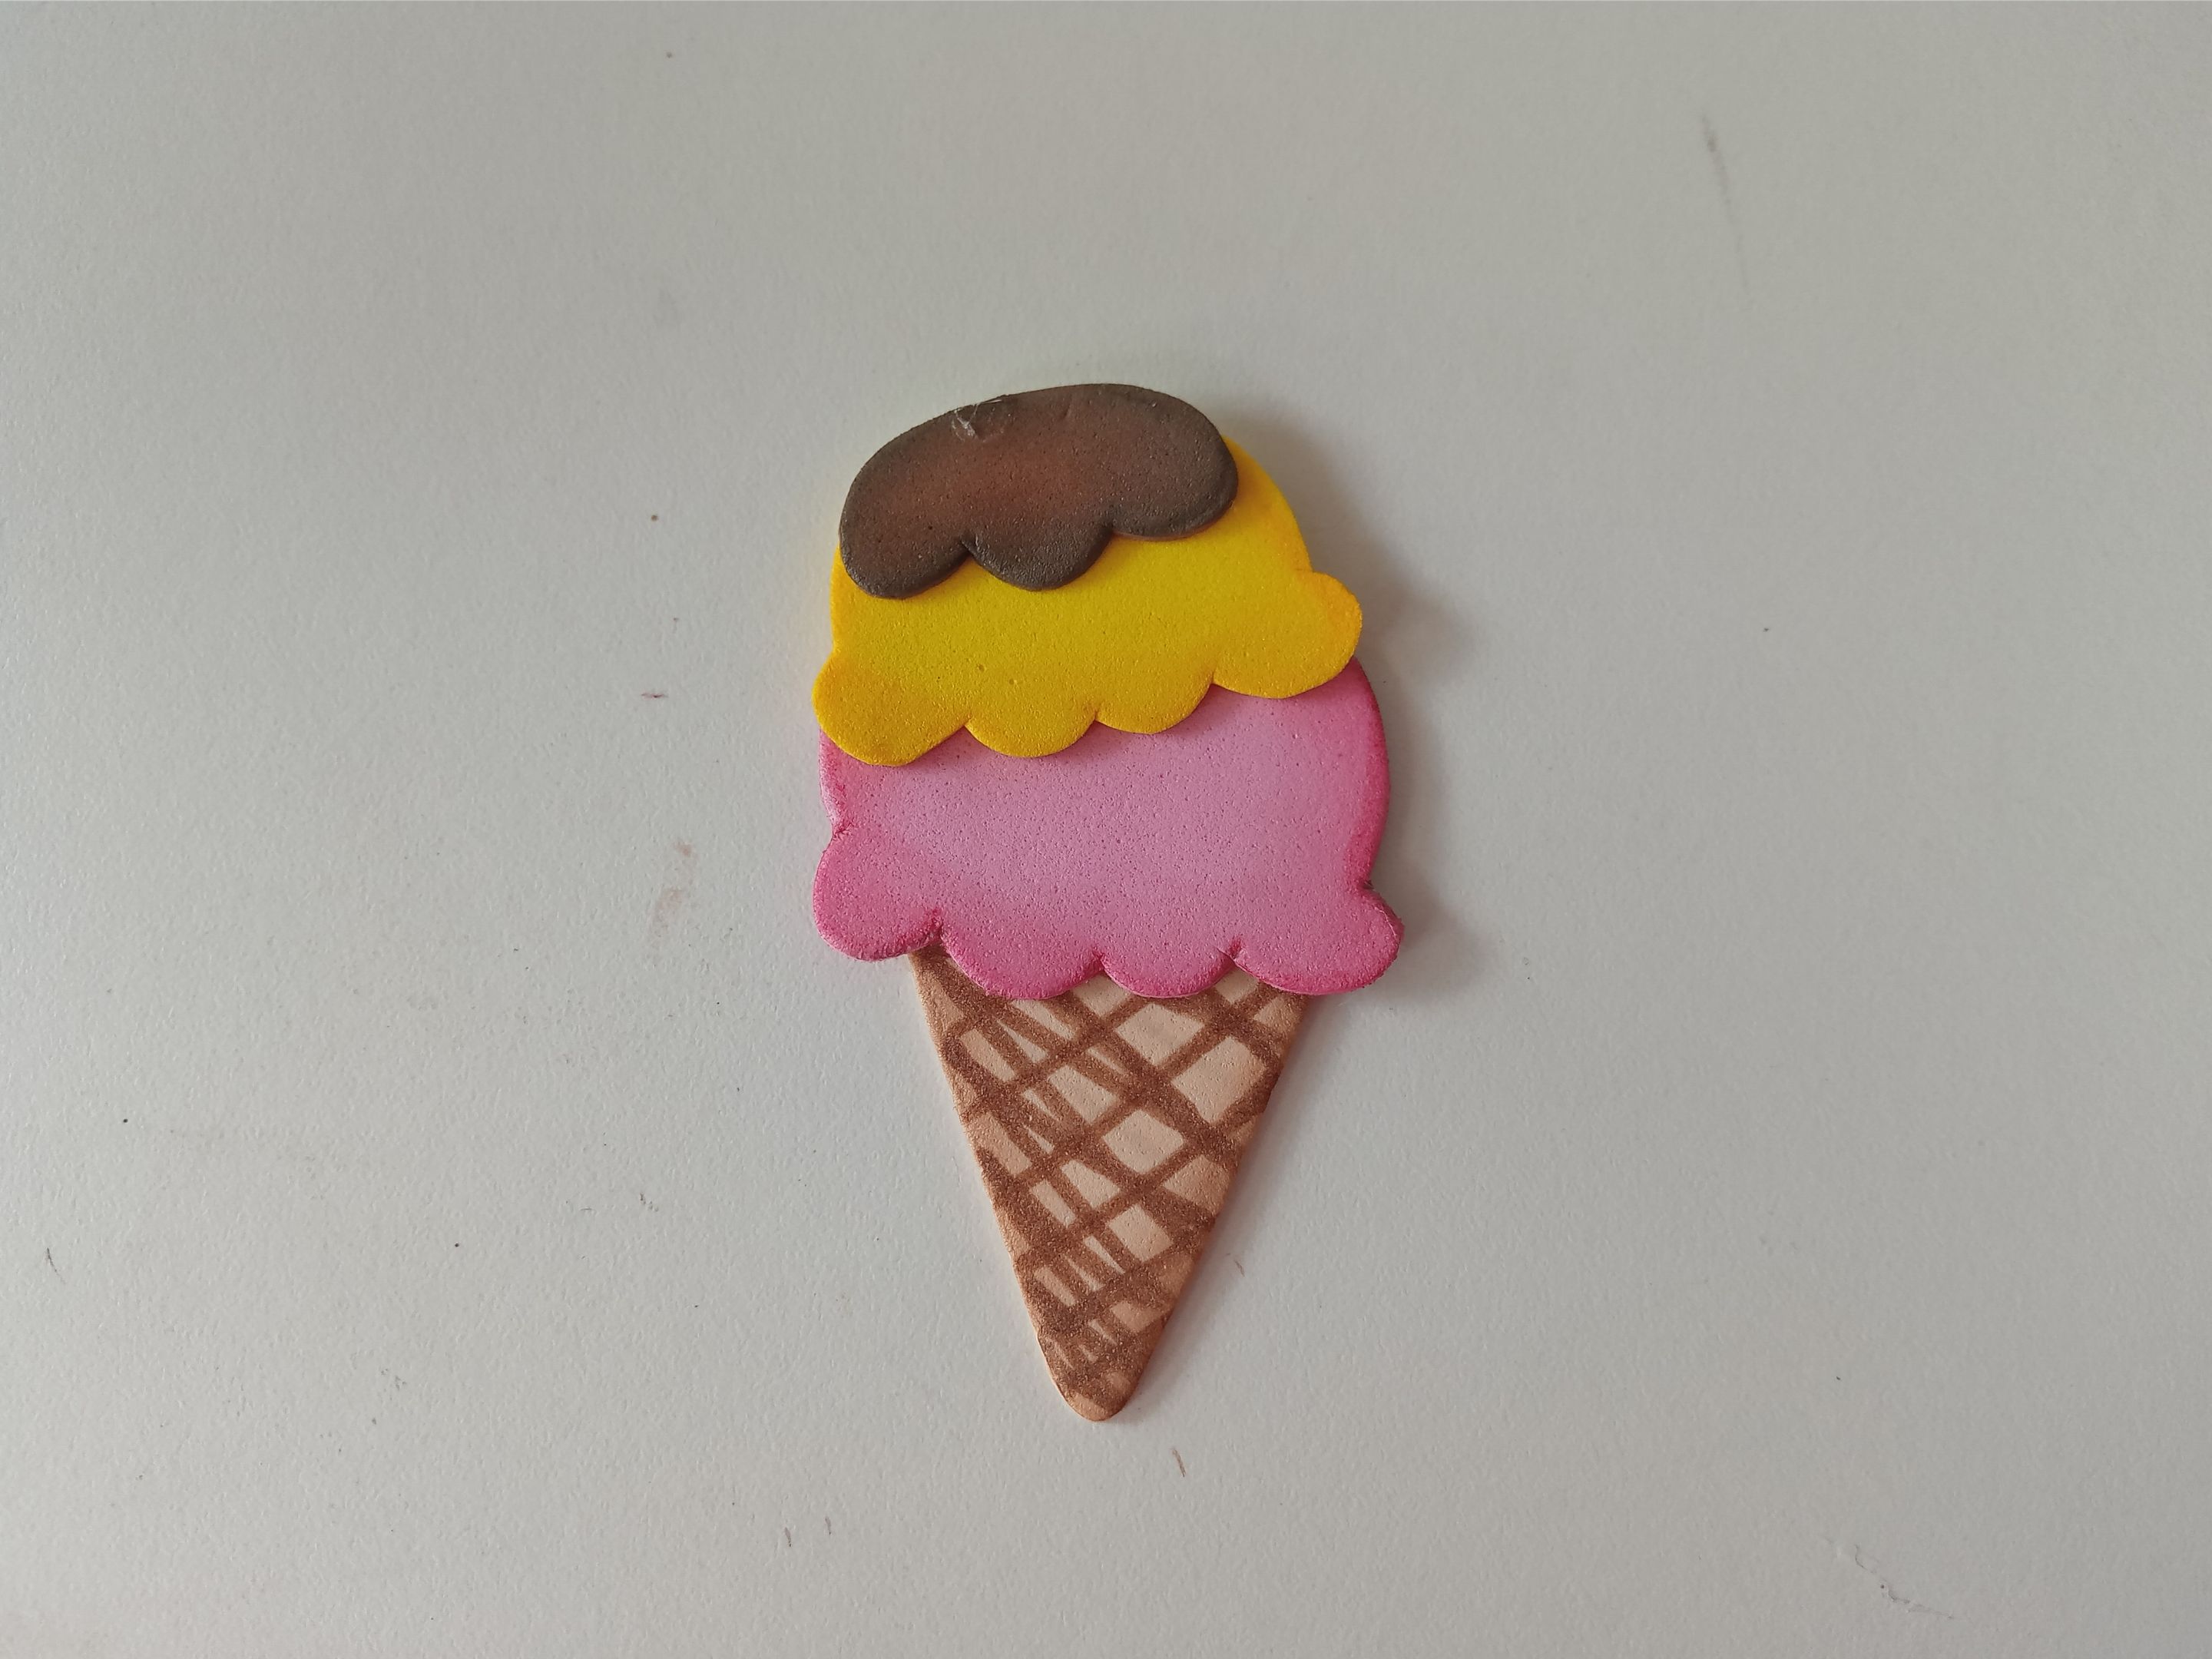
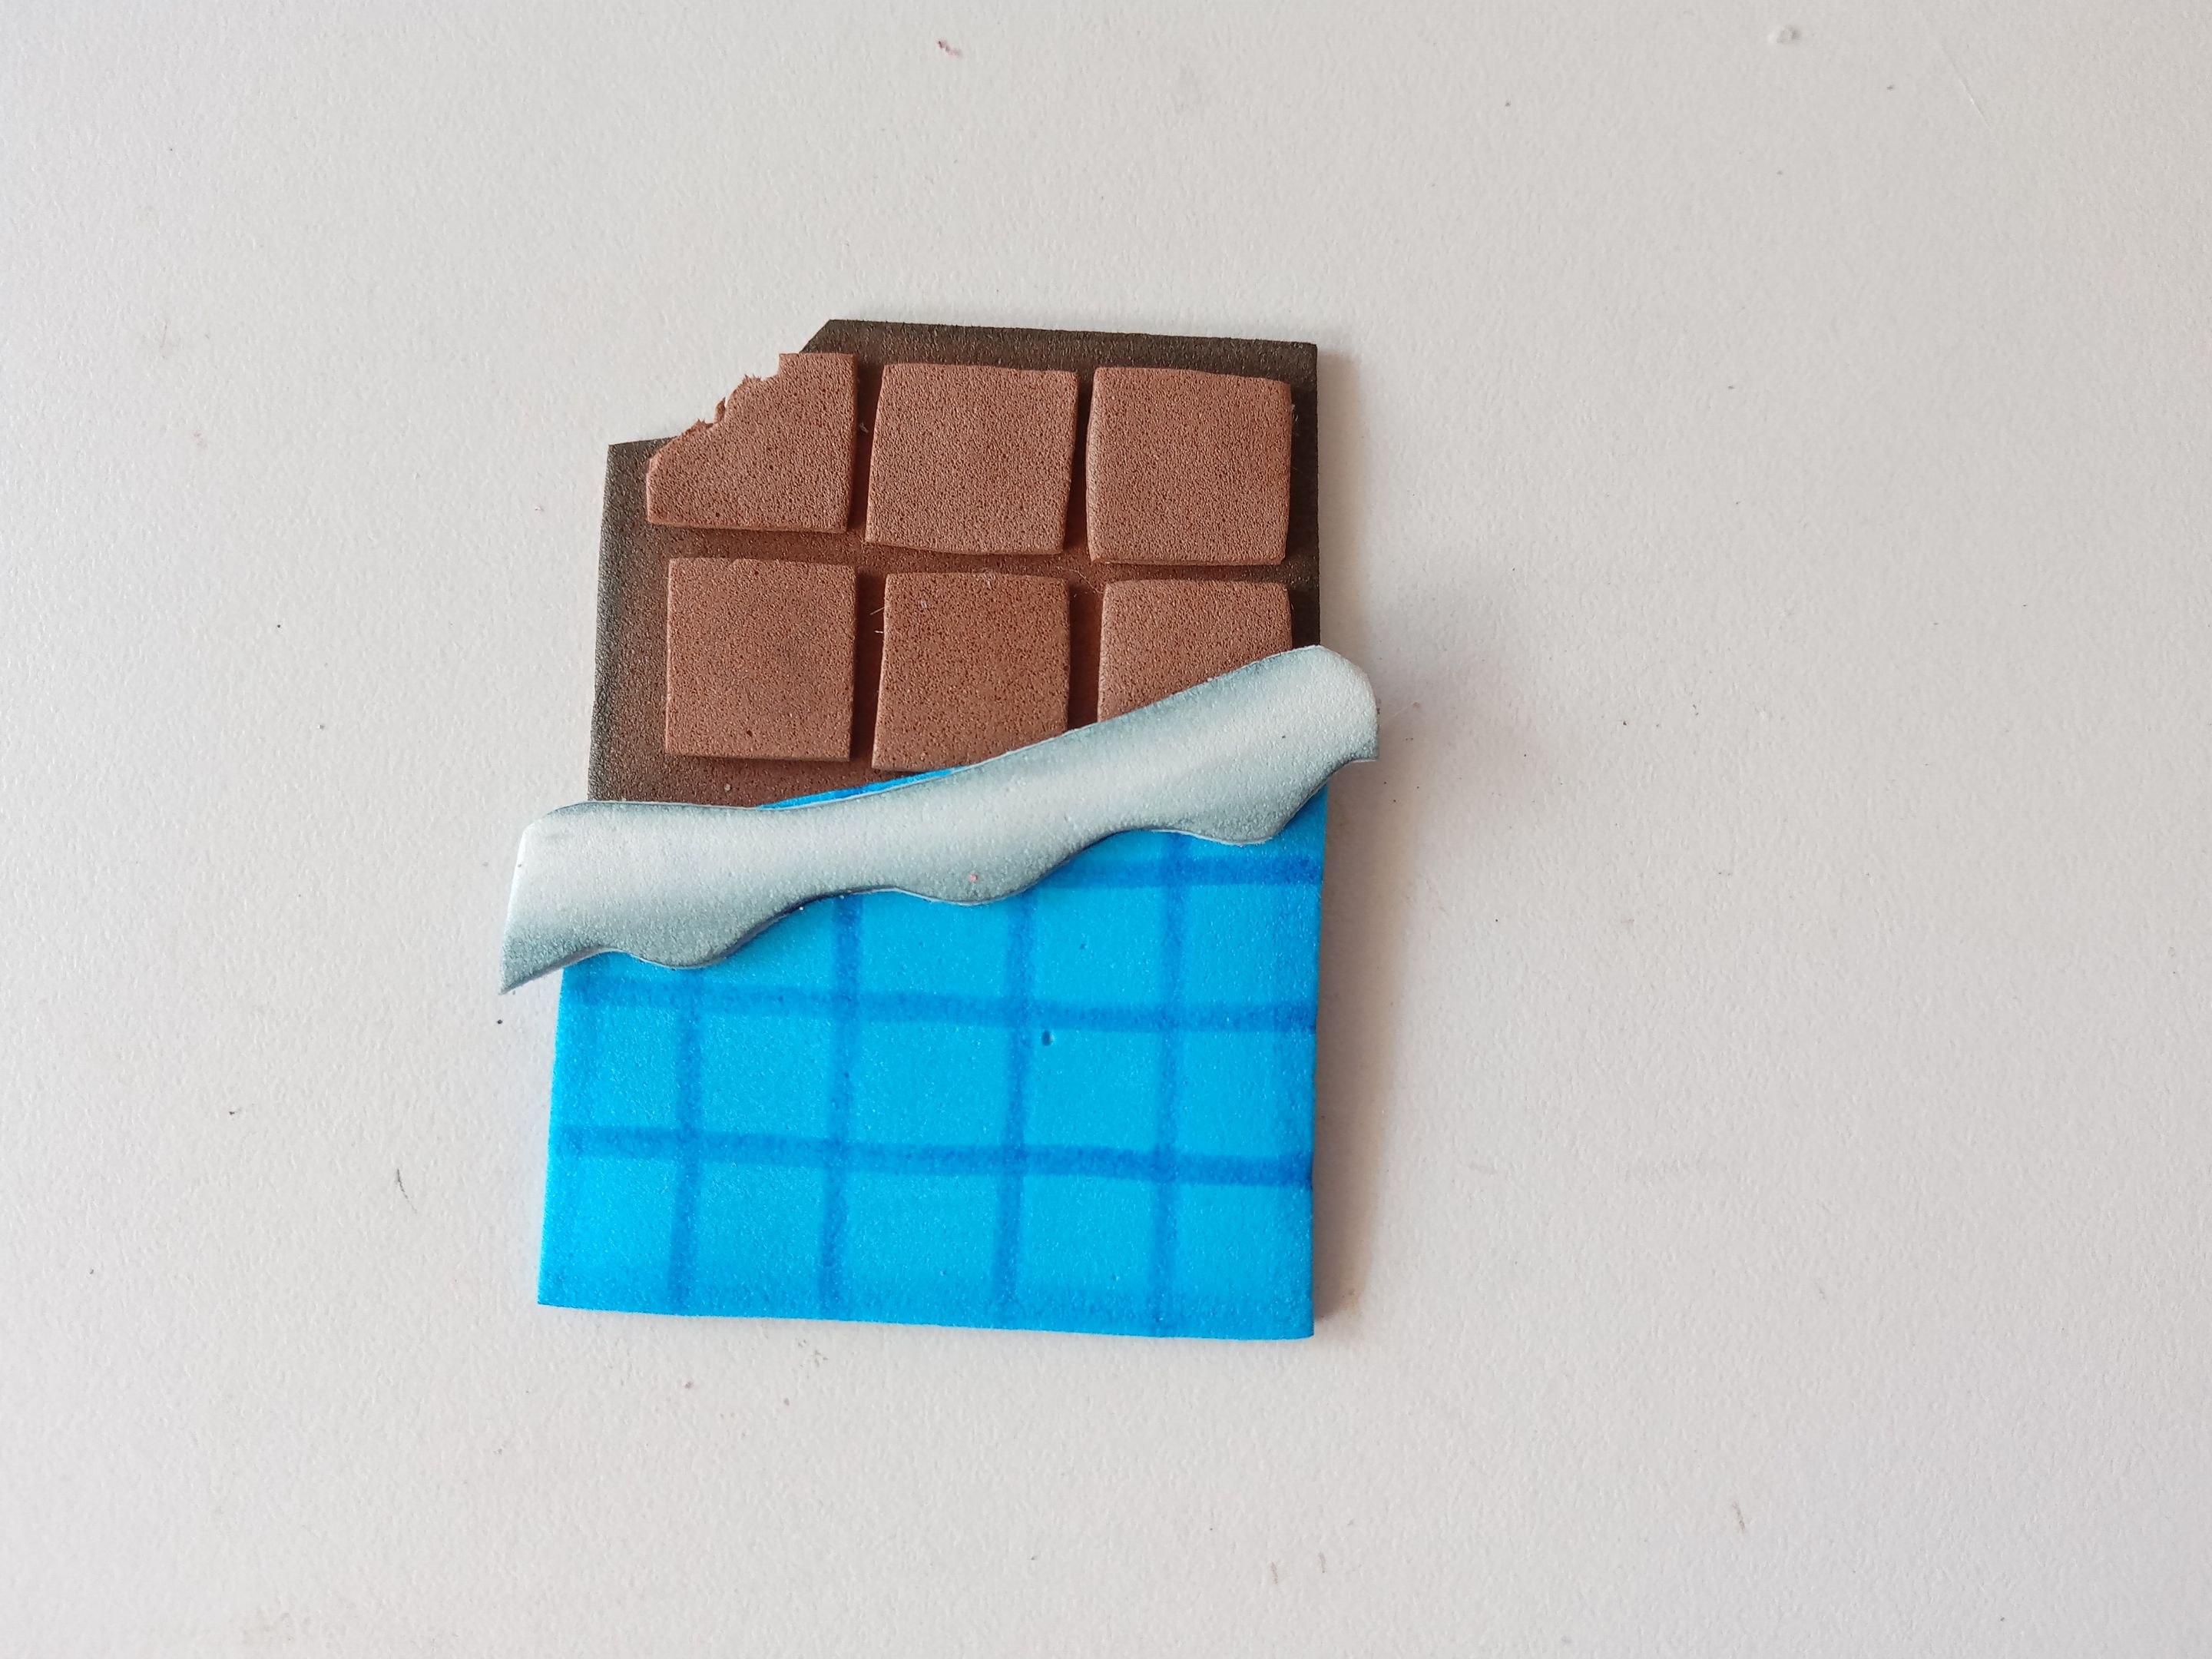
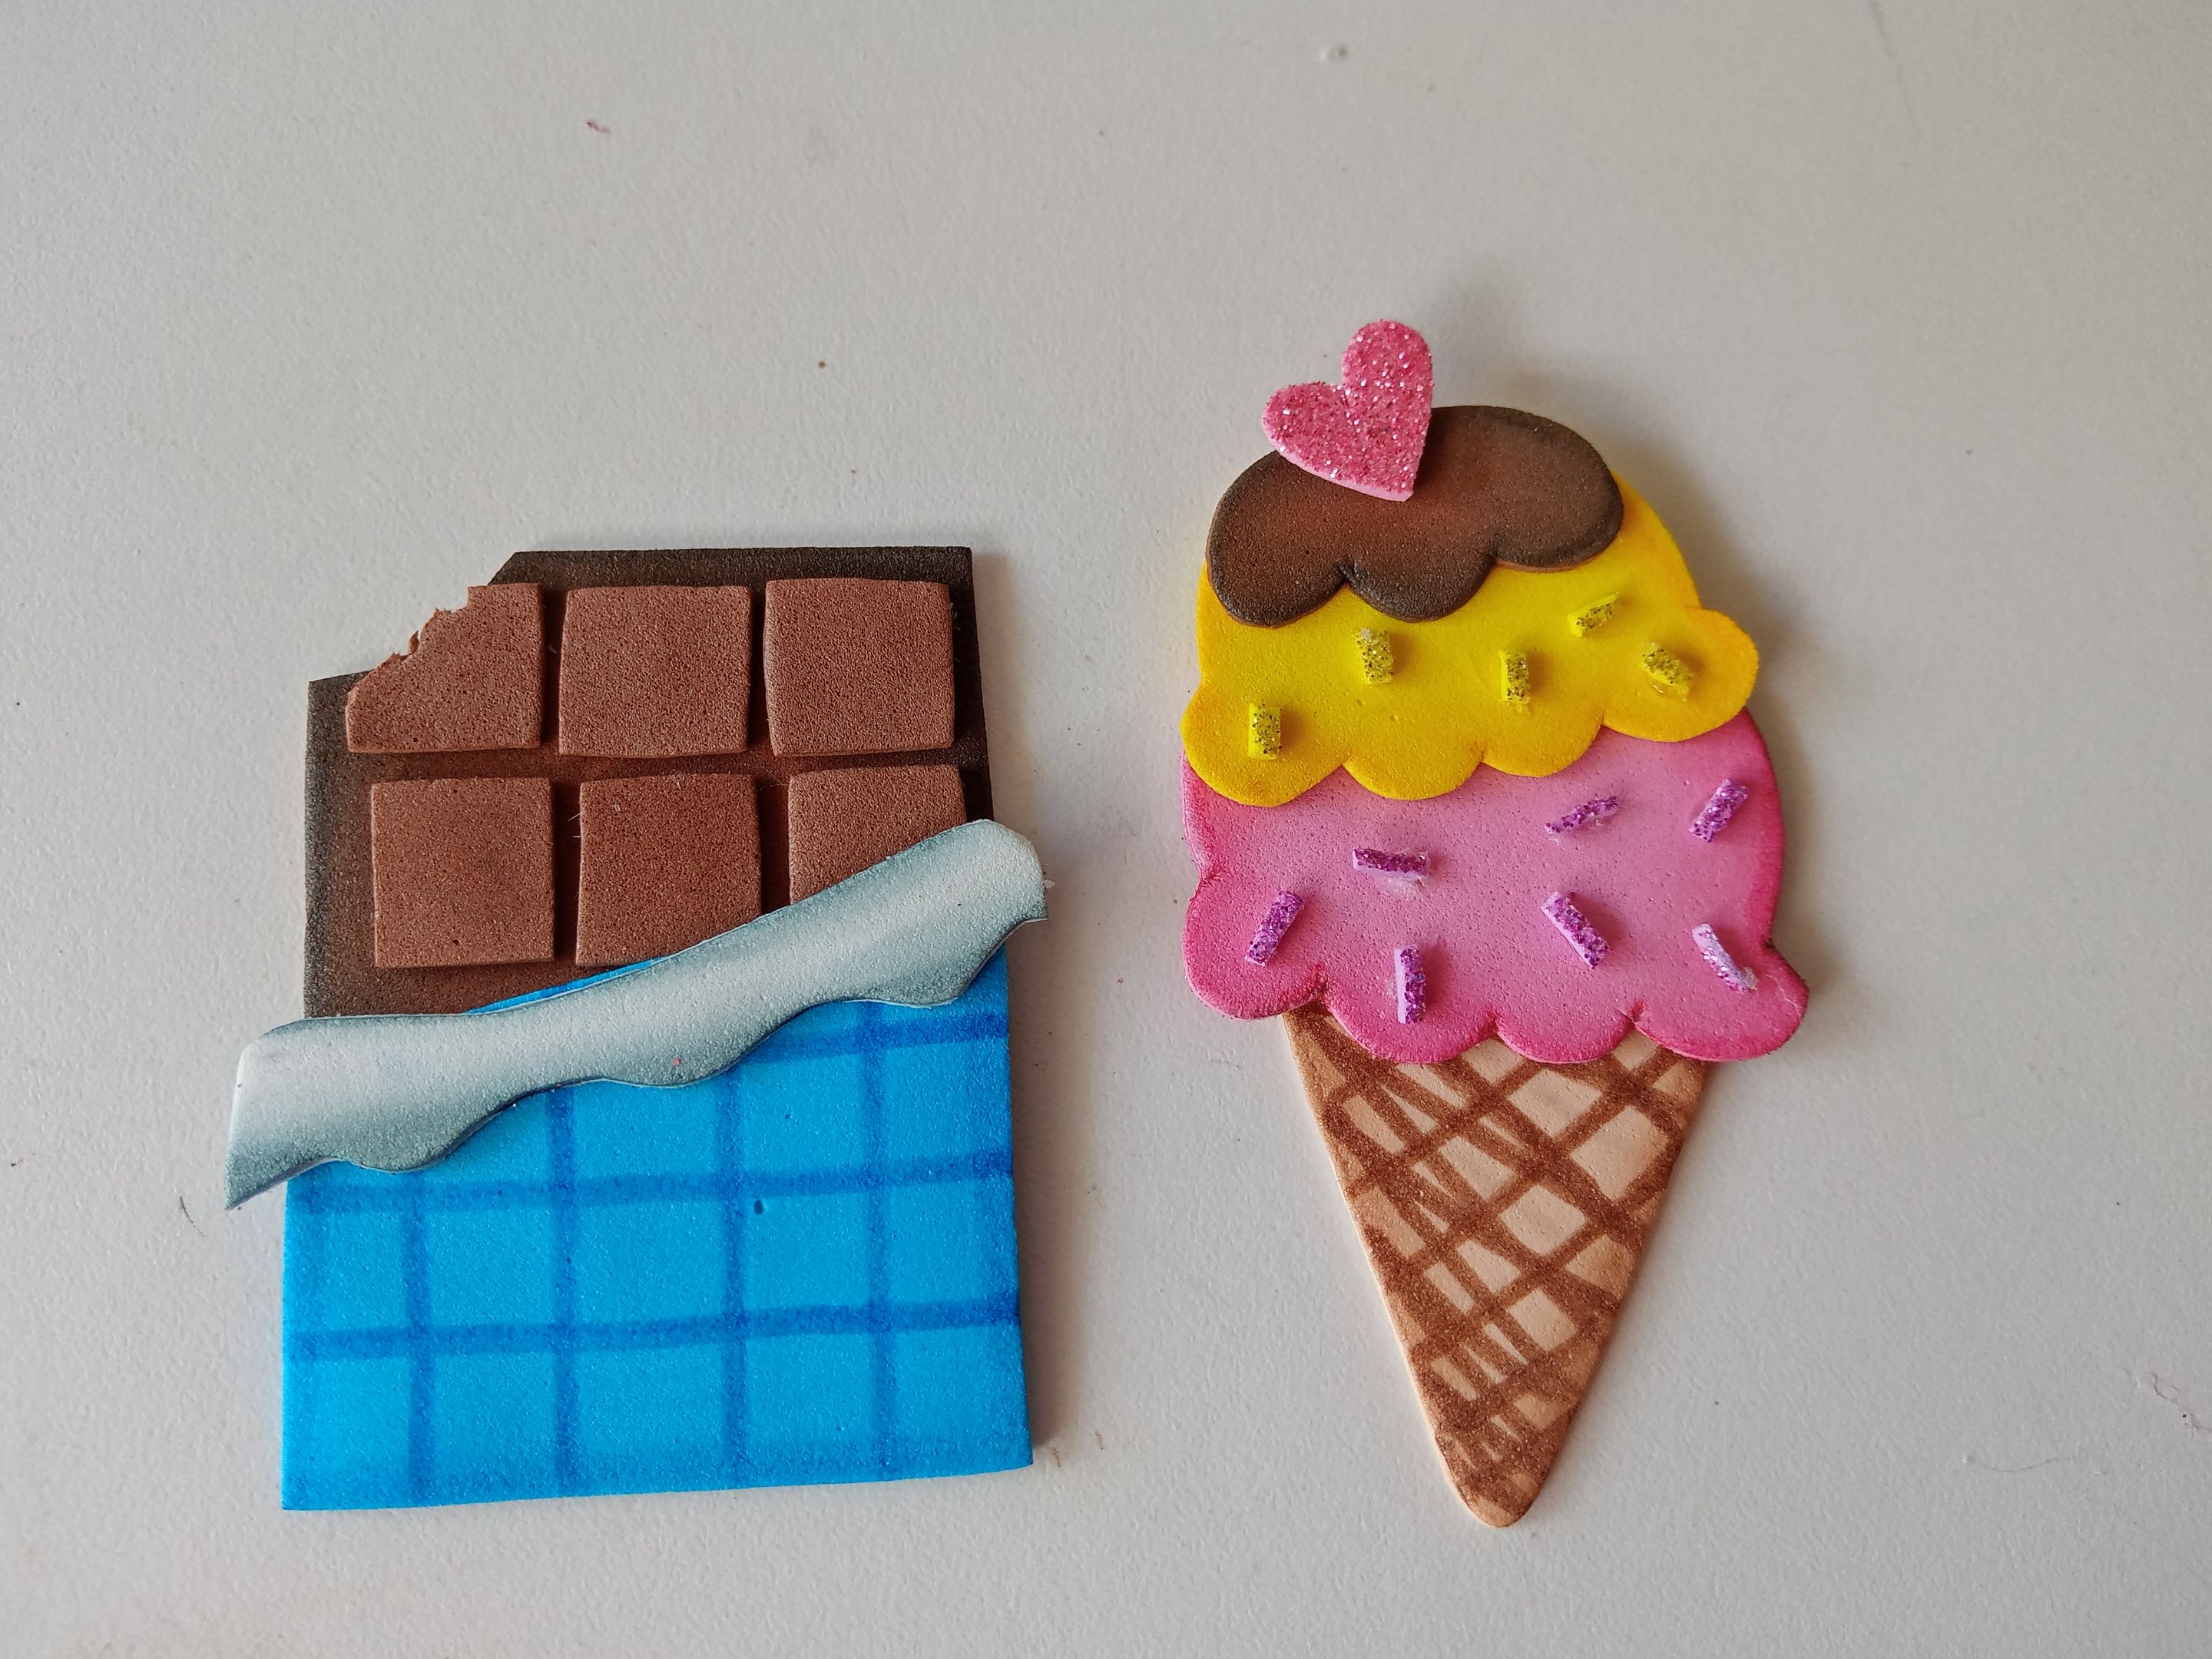
Lo primero que hice fue dibujar en una hoja blanca el diseño que quería para mi helado y el chocolate. Al tener la idea lista, transferí cada una de las piezas a los colores correspondientes de foami, como explico a continuación:
**Para el helado:**
✨Cono del helado: 4.5 cm x 3.5 cm en foami crema.
✨Primera porción: 5 cm x 3.5 cm en foami rosa.
✨Segunda porción: 4.5 cm x 3 cm en foami amarillo.
✨Chocolate: 3.3 cm x 1.7 cm en foami marrón.
✨Corazón: 1.5 cm x 1.3 cm en foami rosa escarchado.
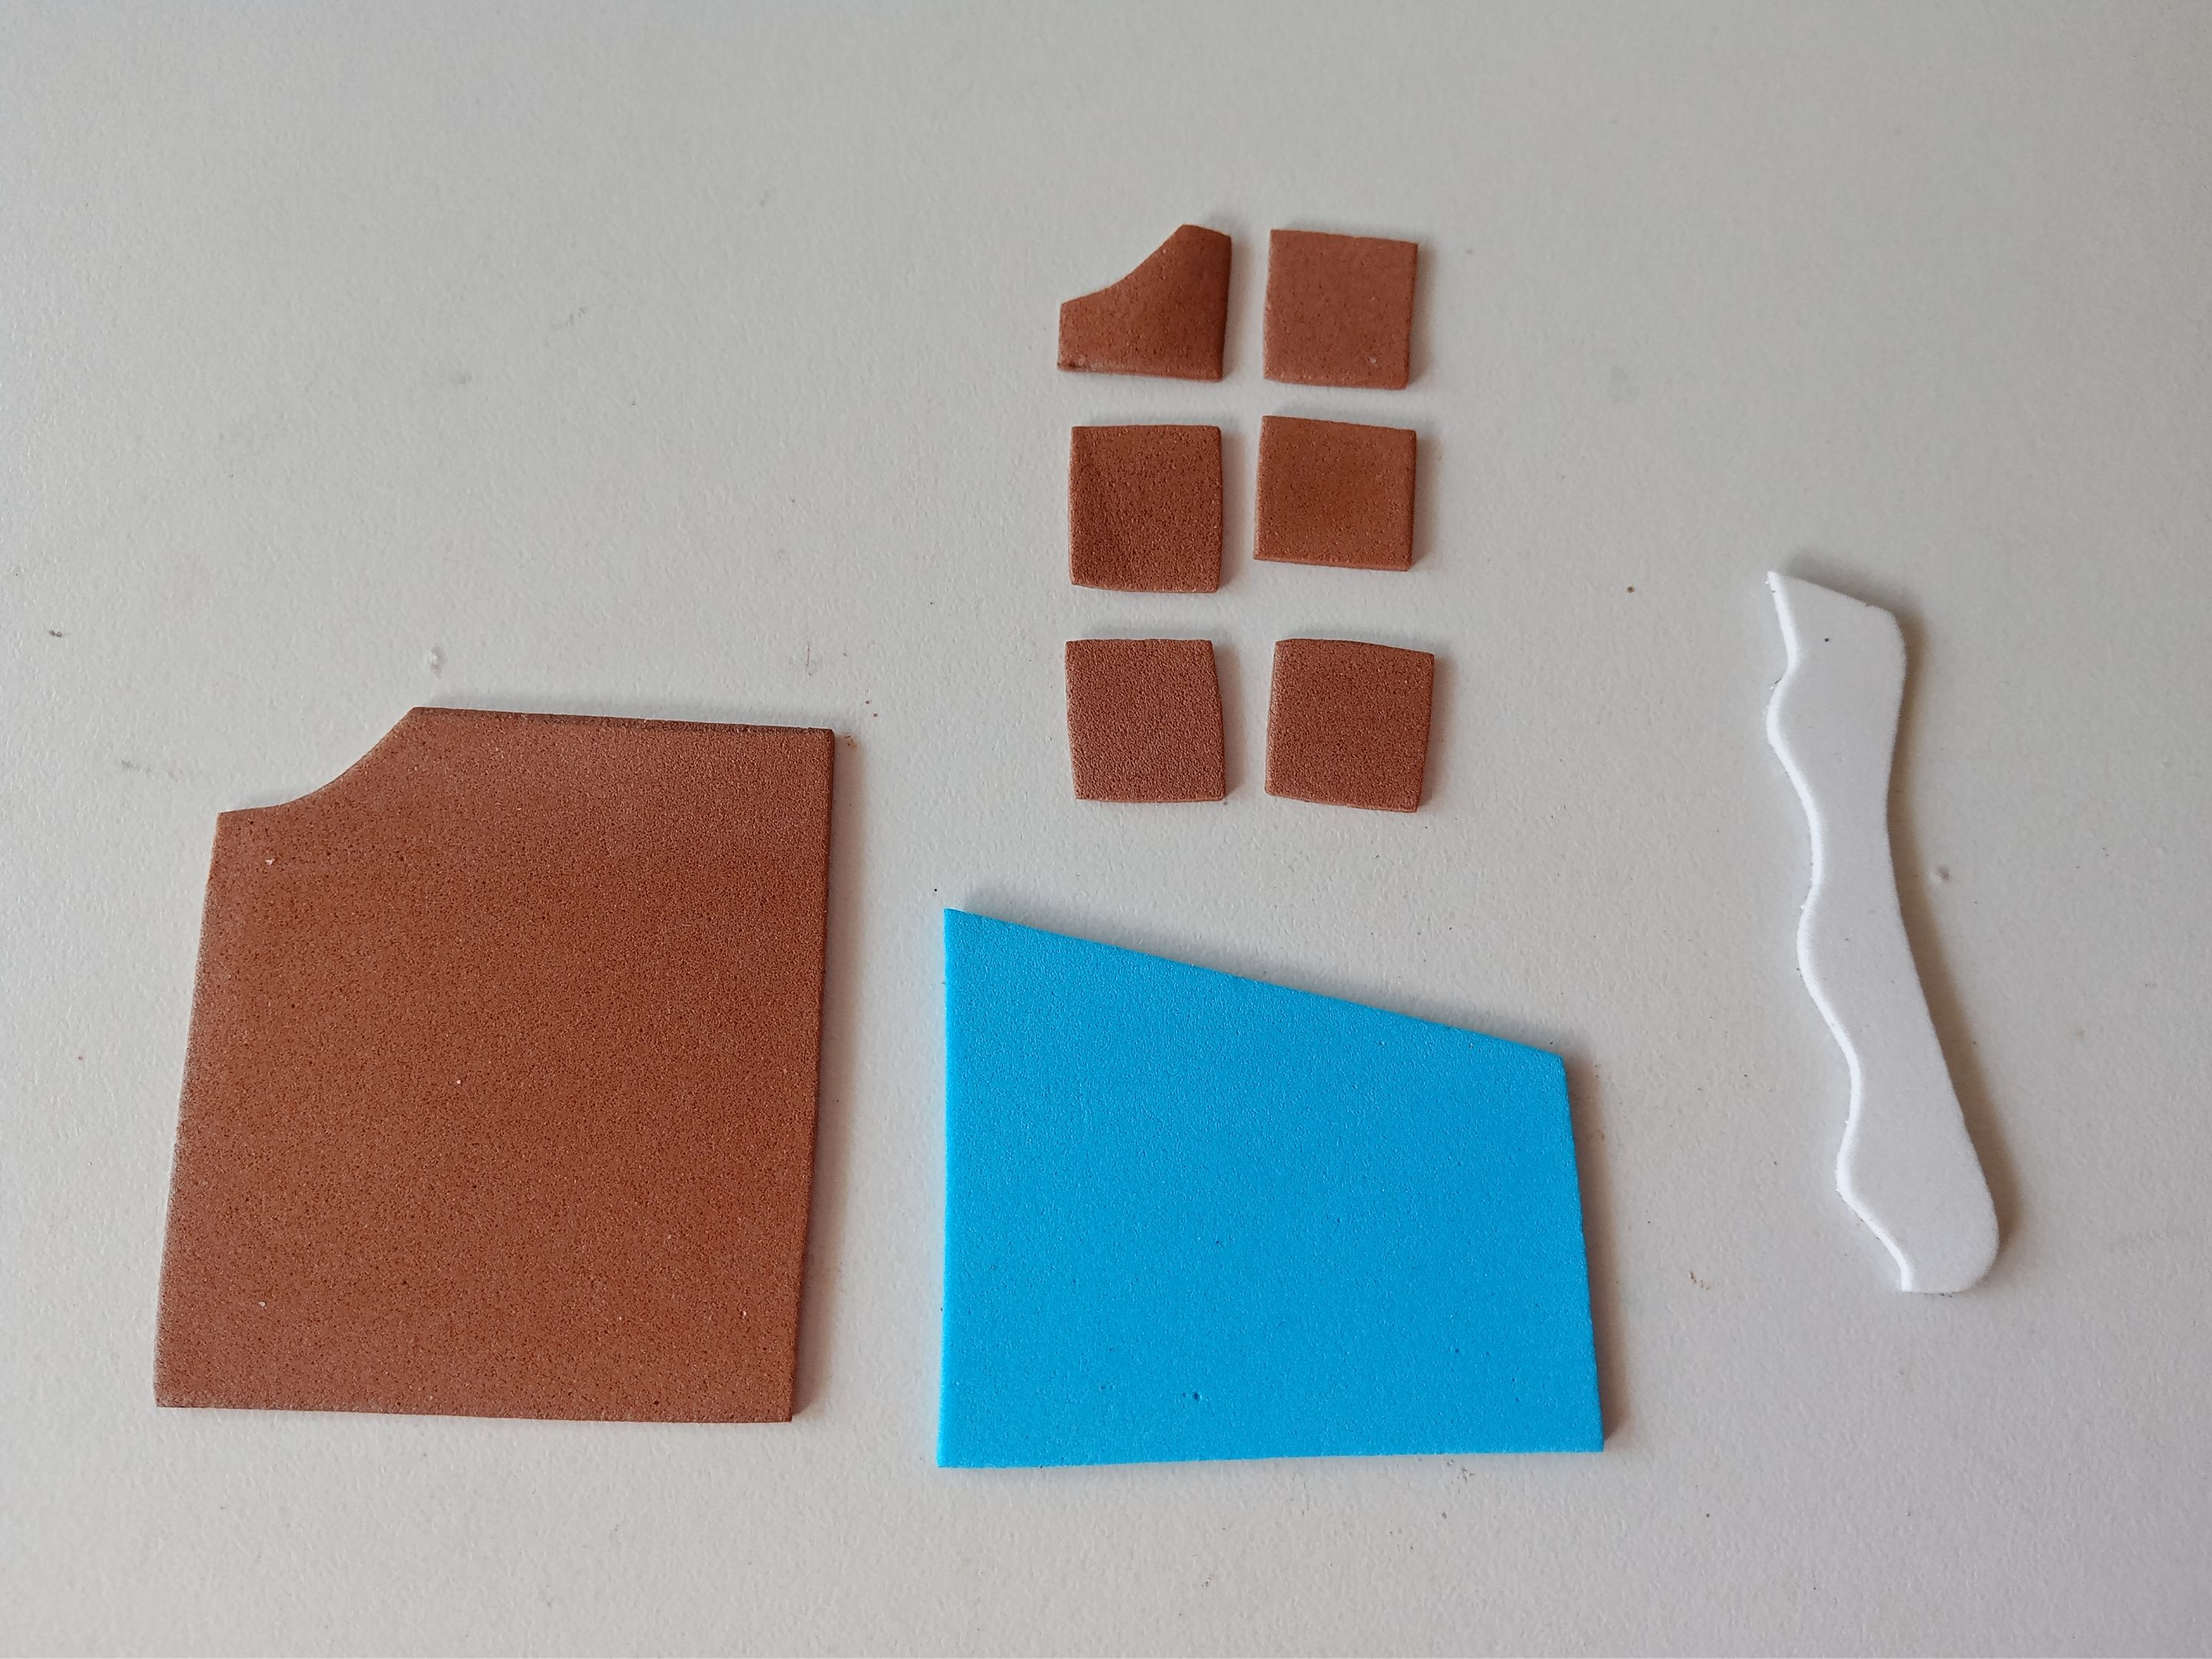
**Para el chocolate:**
✨Chocolate: 5 cm x 4 cm en foami marrón.
✨Cuadritos: 1.3 cm x 1.3 cm en foami marrón.
✨Empaque: 5.2 cm x 4.2 cm en foami azul.
✨Parte interna del empaque: 6 cm x 1 cm en foami blanco.
###### ✨STEP 1:
The first thing I did was draw the design I wanted for my ice cream and chocolate on a white sheet of paper. Once I had the idea ready, I transferred each of the pieces to the corresponding colors of foam, as explained below:
**For the ice cream:**
✨Ice cream cone: 4.5 cm x 3.5 cm in cream foam.
✨First portion: 5 cm x 3.5 cm in pink foam.
✨Second portion: 4.5 cm x 3 cm in yellow foam.
✨Chocolate: 3.3 cm x 1.7 cm in brown foam.
✨Heart: 1.5 cm x 1.3 cm in frosted pink foam.
**For the chocolate:**
✨Chocolate: 5 cm x 4 cm in brown foam.
✨Squares: 1.3 cm x 1.3 cm in brown foam.
✨Packaging: 5.2 cm x 4.2 cm in blue foam.
✨Packaging inside: 6 cm x 1 cm in white foam.
###### ✨PASO 2:
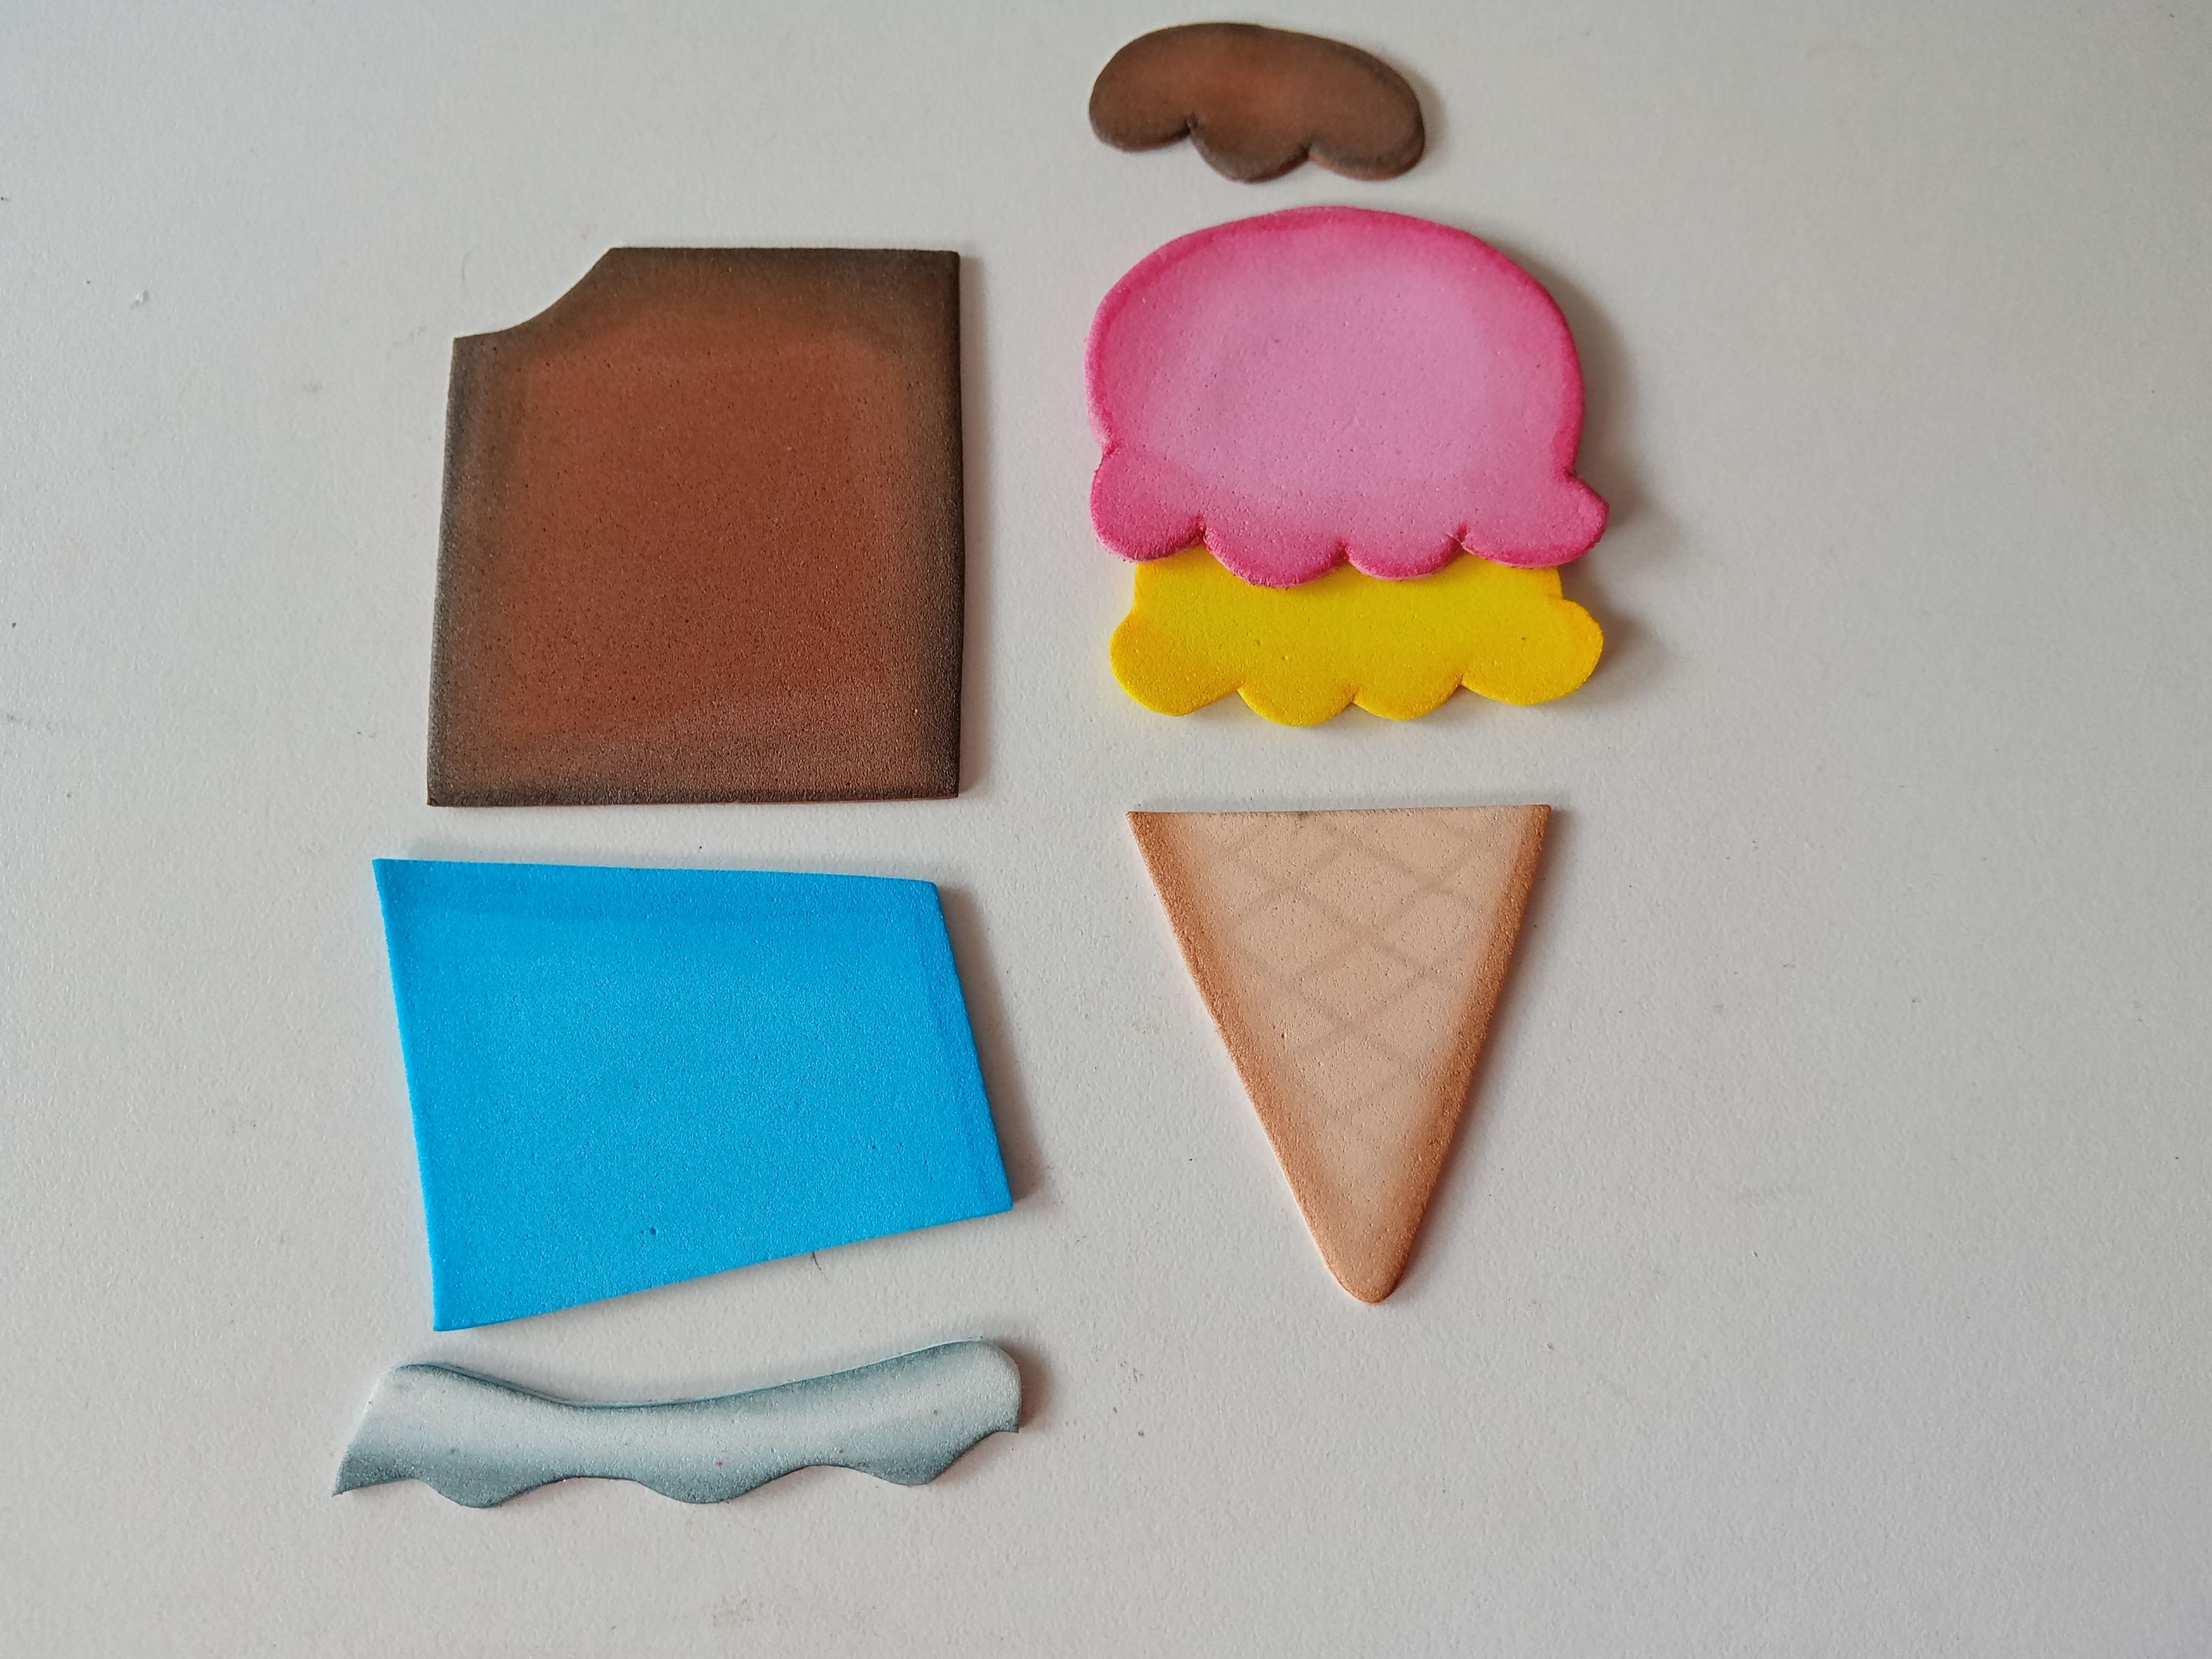
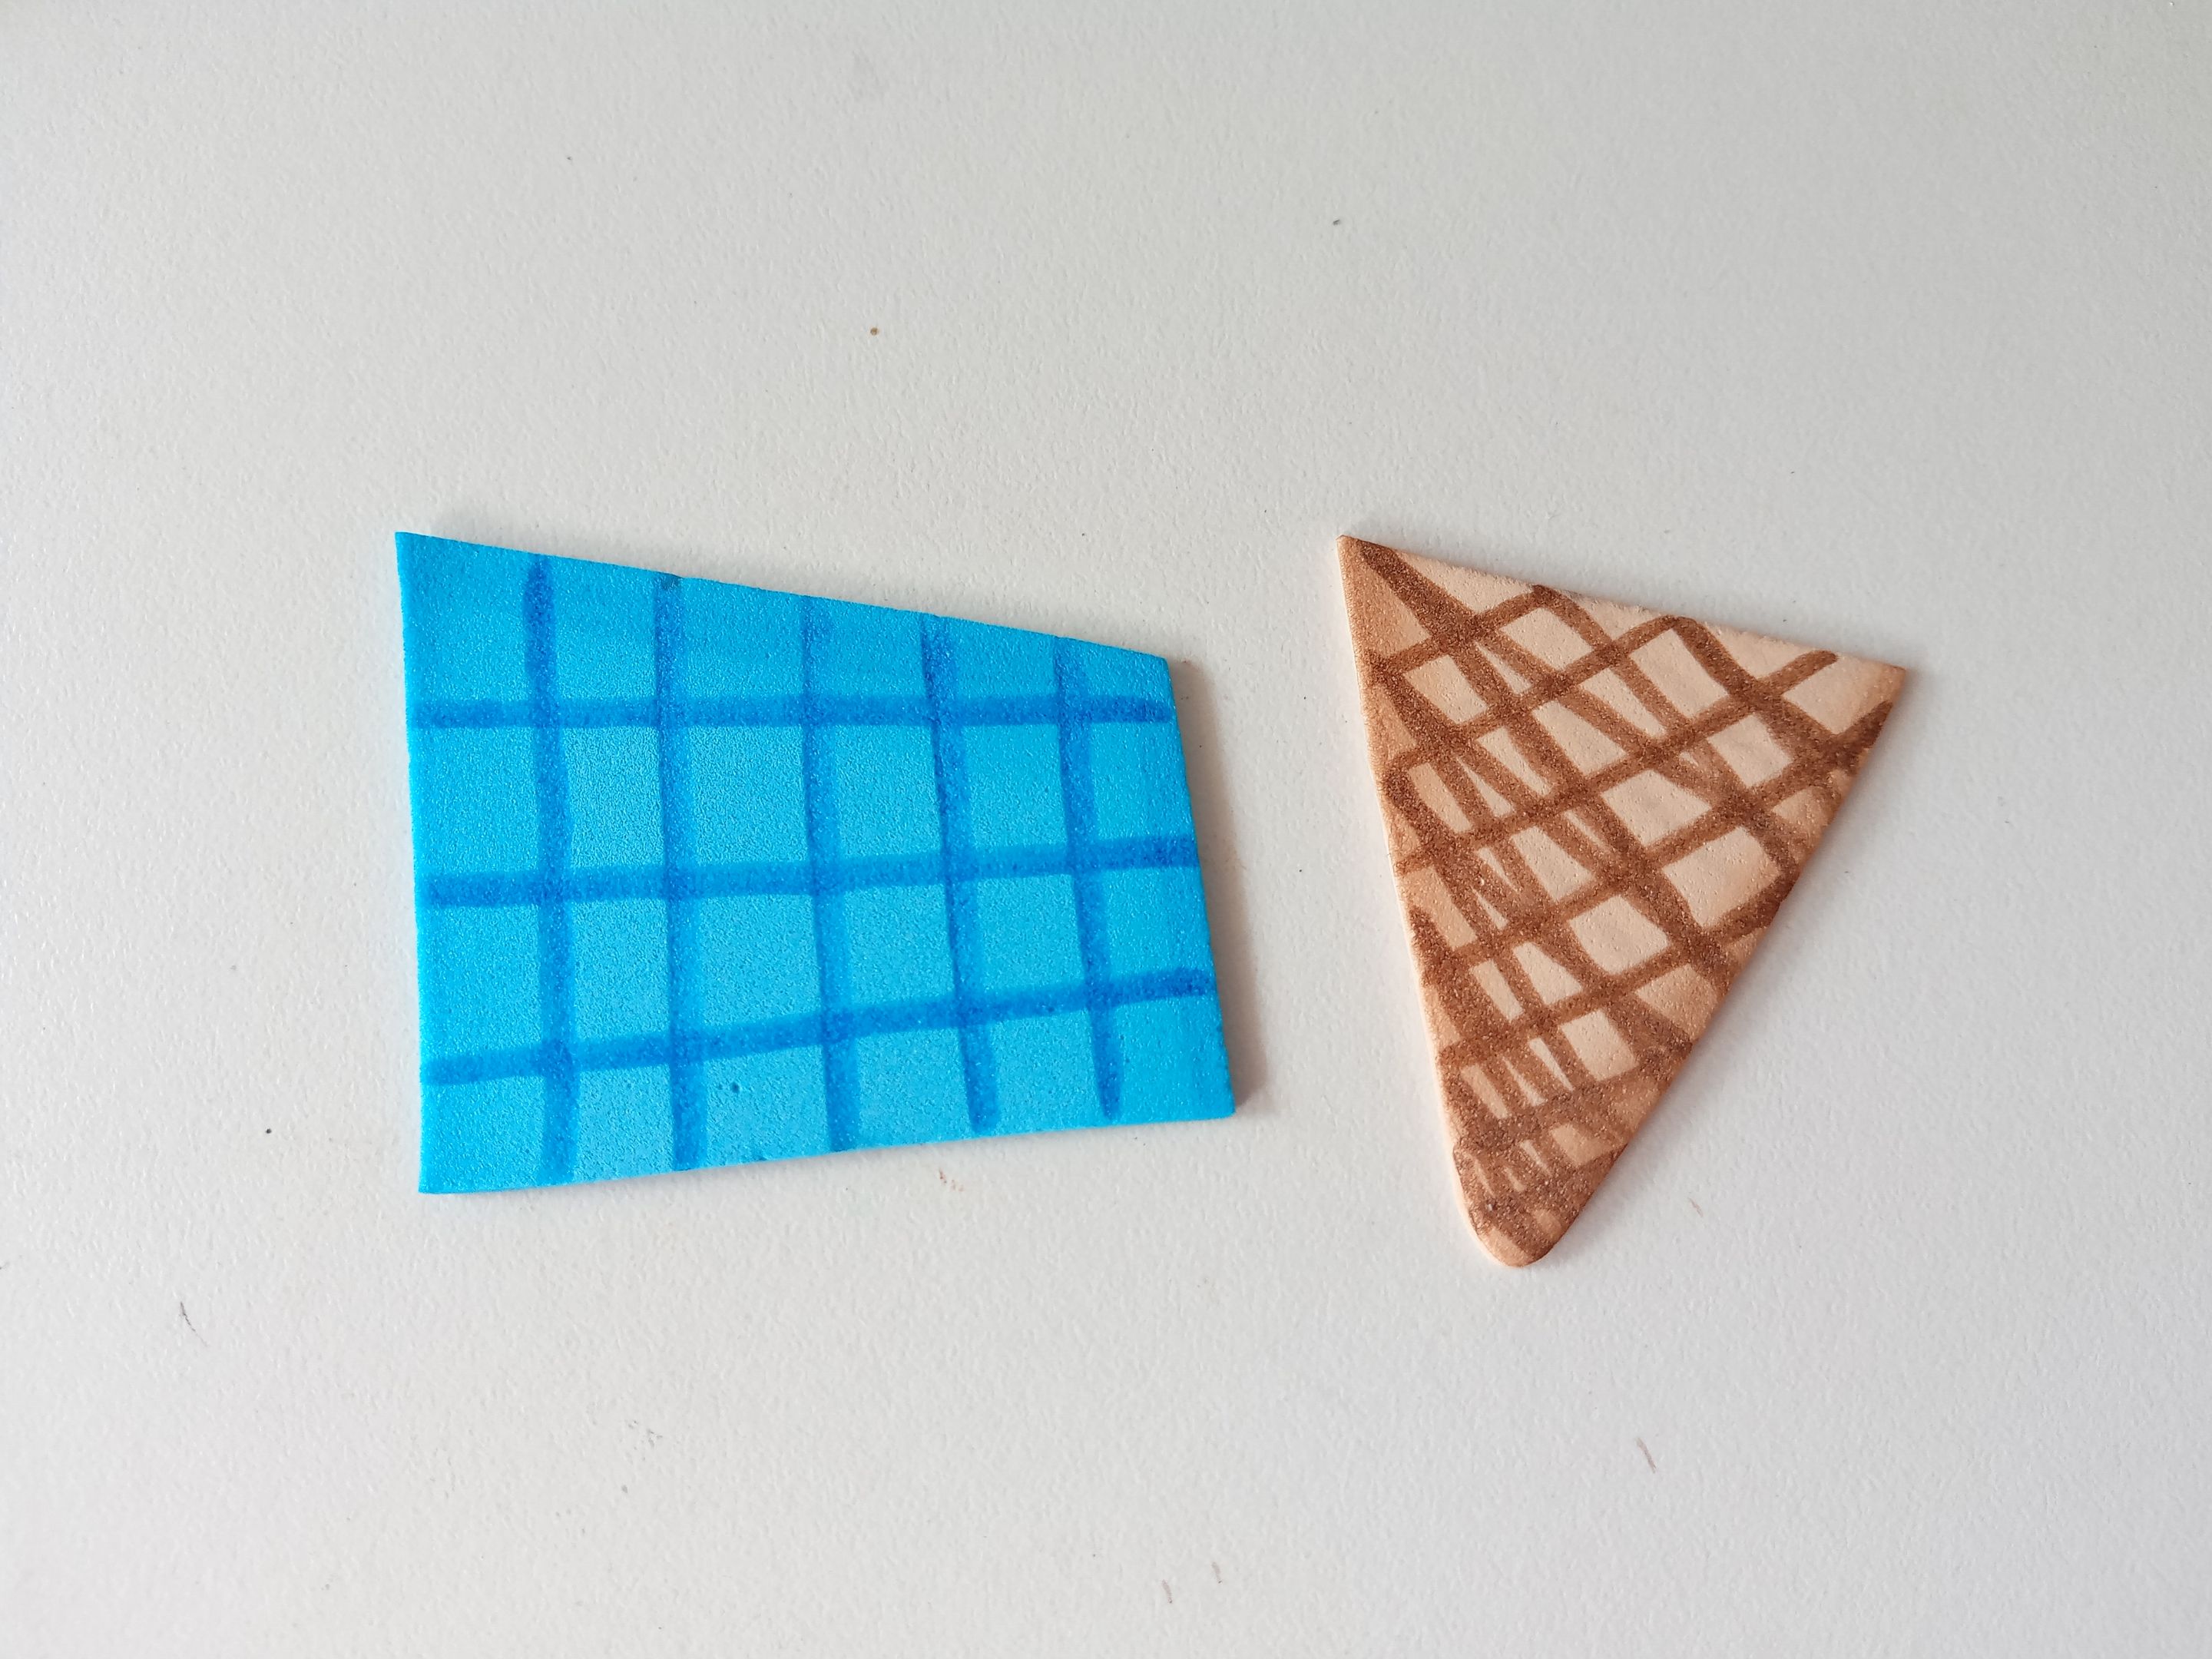
Al tener recortadas todas las piezas, es momento de dar color a los bordes con pinturas o marcadores. Para todas las piezas, utilicé solamente un tono más oscuro que el tono de la pieza. Al estar seco, comencé a dar detalles más específicos con marcadores, como al cono del helado y al empaque del chocolate.
###### ✨STEP 2:
Once all the pieces are cut out, it's time to color the edges with paints or markers. For all the pieces, I used only a shade darker than the color of the piece. Once it was dry, I began adding more specific details with markers, such as the ice cream cone and the chocolate packaging.
###### ✨PASO 3:
Al estar listas y secas las piezas, es momento de comenzar a pegar en orden cada una. En el caso del helado, comencé pegando el cono junto con la primera porción encima, pero un poco más inclinada la segunda porción: el chocolate sobre el mismo y encima el corazón en foami escarchado, junto con más topping que agregué en ambas porciones, recortando pequeñas tiras en foamis escarchados que combinaran con el helado.
###### ✨STEP 3:
Once the pieces were ready and dry, it was time to start gluing each one in order. For the ice cream, I started by gluing the cone together with the first portion on top, but at a slightly more slanted angle for the second portion: the chocolate on top, and on top of that, the frosted foam heart, along with more topping that I added to both portions, cutting small strips of frosted foam that matched the ice cream.
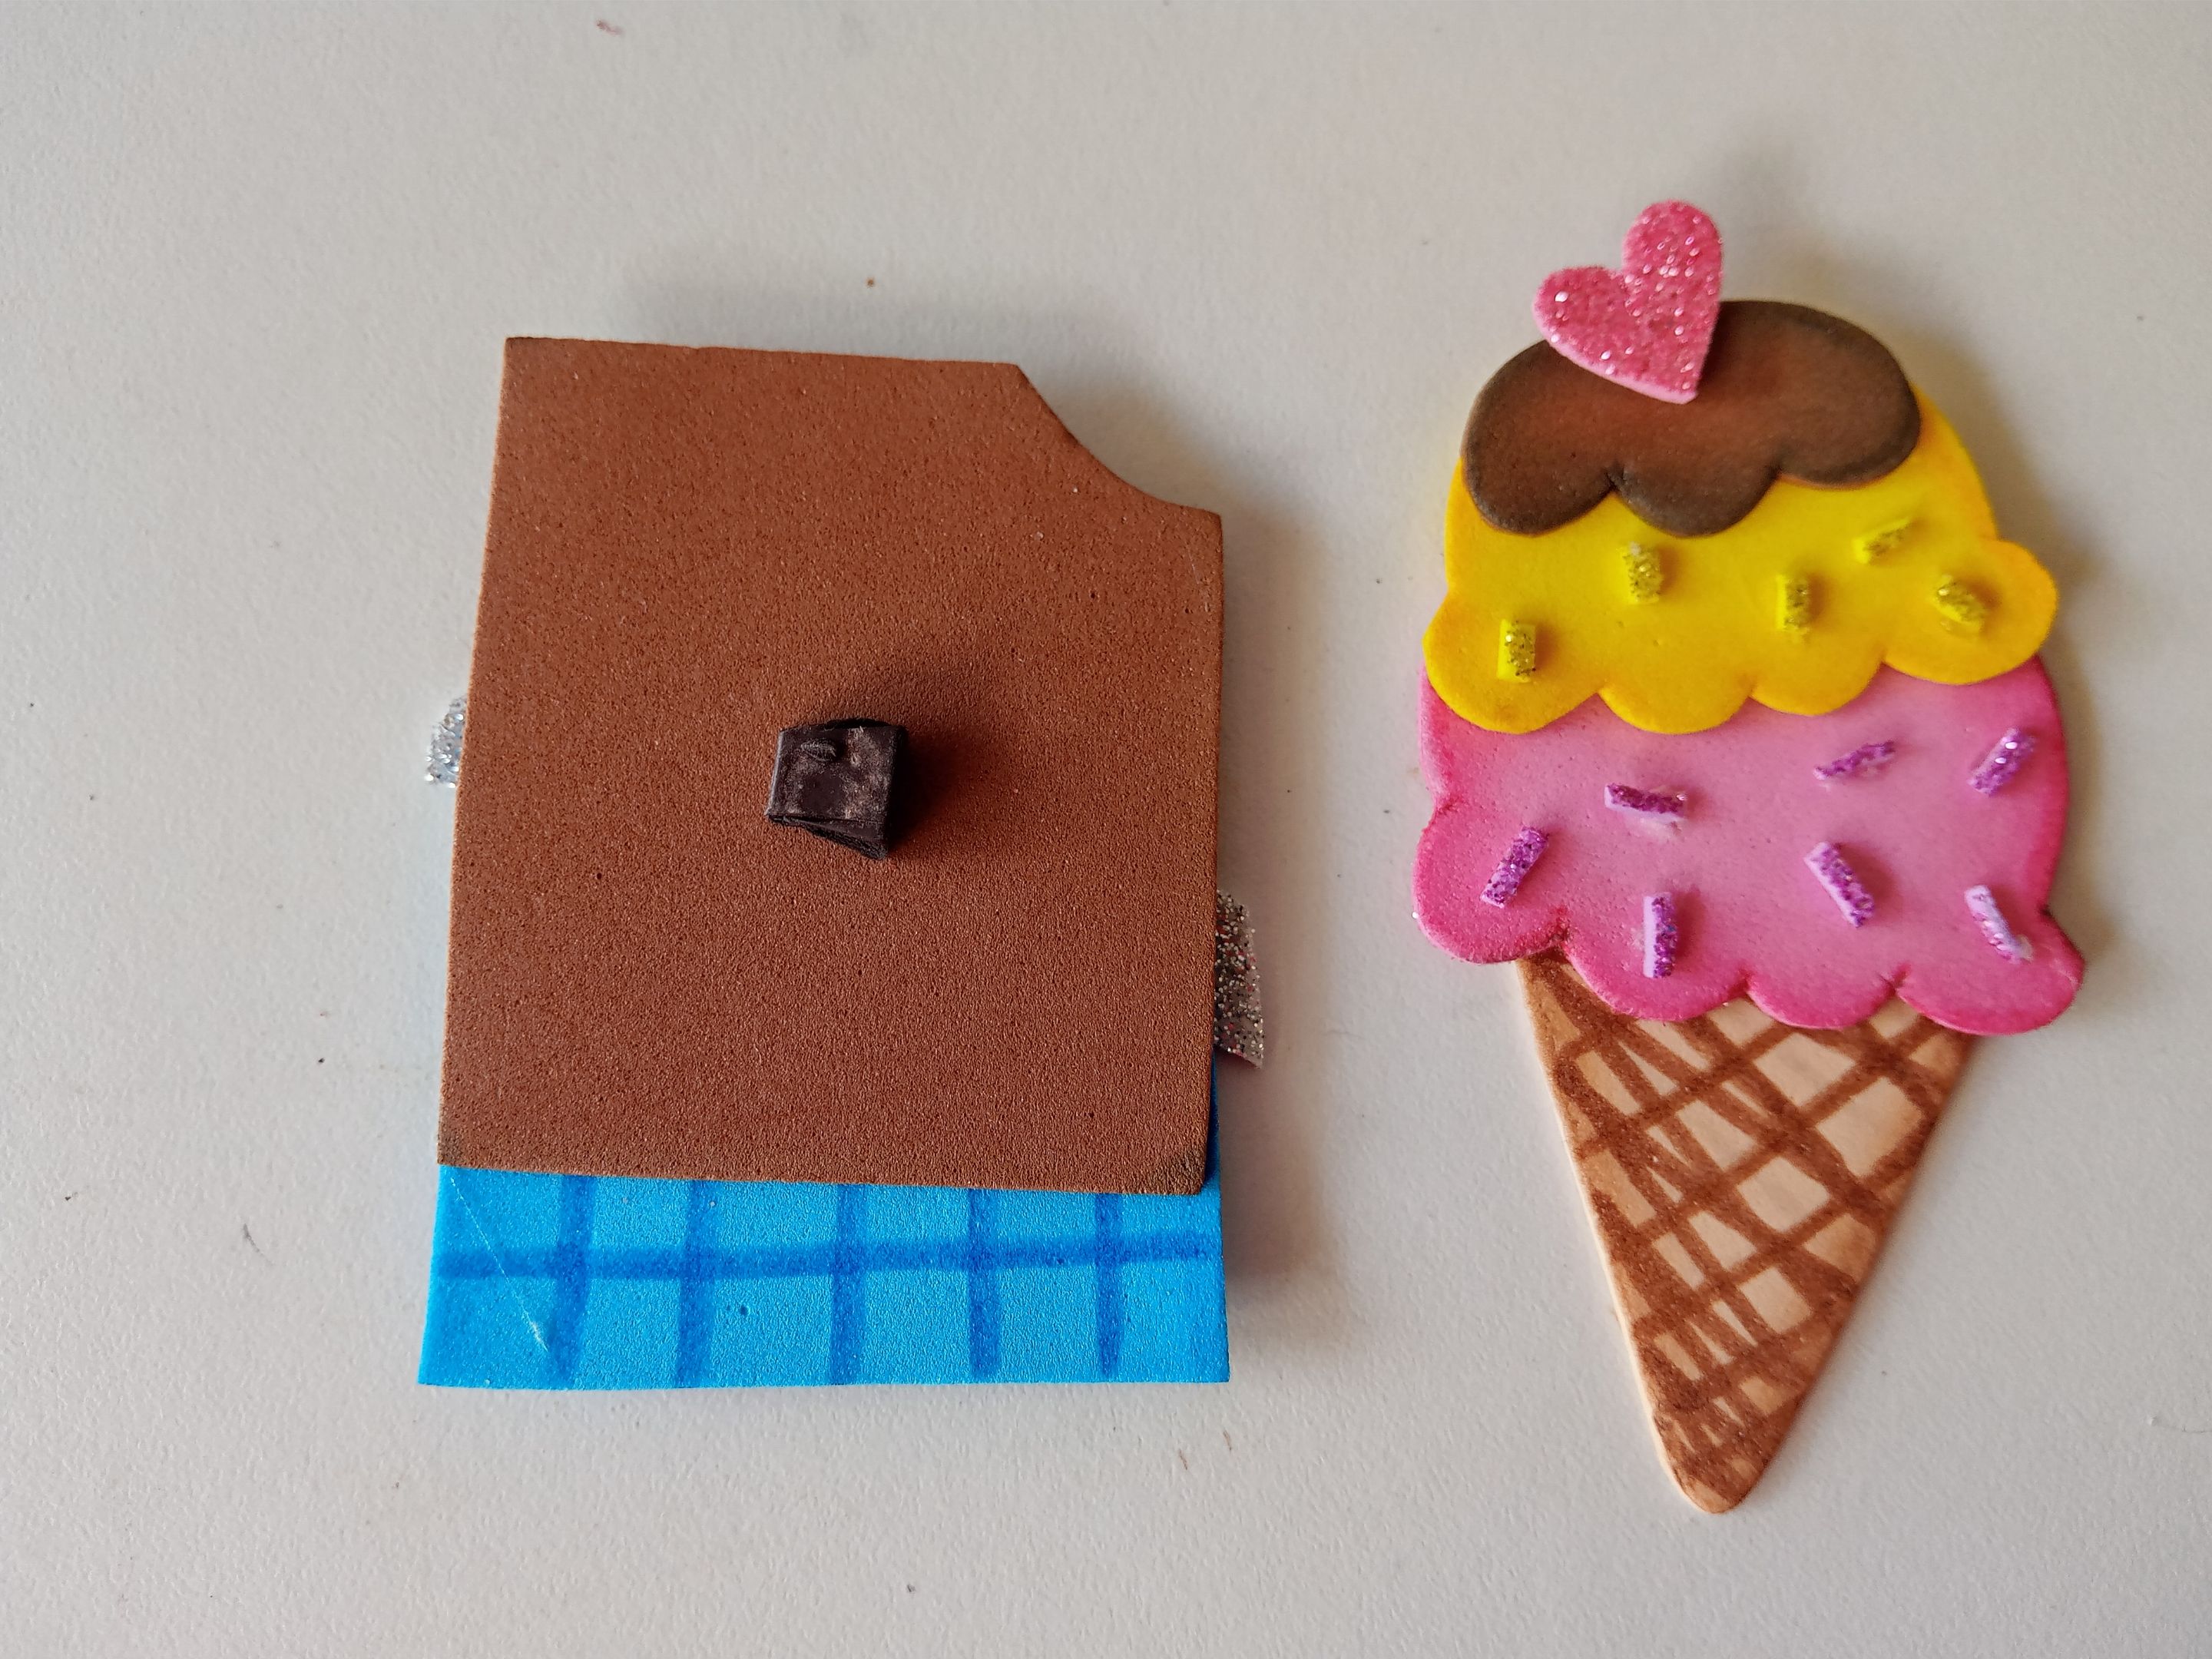
###### ✨PASO 4:
Seguidamente, comencé a pegar las piezas del chocolate. Tomé la pieza marrón, encima pegué los cuadritos, dejando un poco de espacio entre cada uno para que se aprecie mejor la forma y justo en la parte baja donde ya no hay más cuadritos, pegué el empaque y justo en el borde superior, la parte interna del mismo. Al tener ambas piezas listas, es momento de pegar los imanes en la parte trasera.
###### ✨STEP 4:
Next, I began gluing the chocolate pieces. I took the brown piece and glued the squares on top, leaving a little space between each one so the shape could be better appreciated. Right at the bottom where there were no more squares, I glued the packaging, and right at the top edge, the inside of the chocolate. Once you have both pieces ready, it's time to glue the magnets to the back.
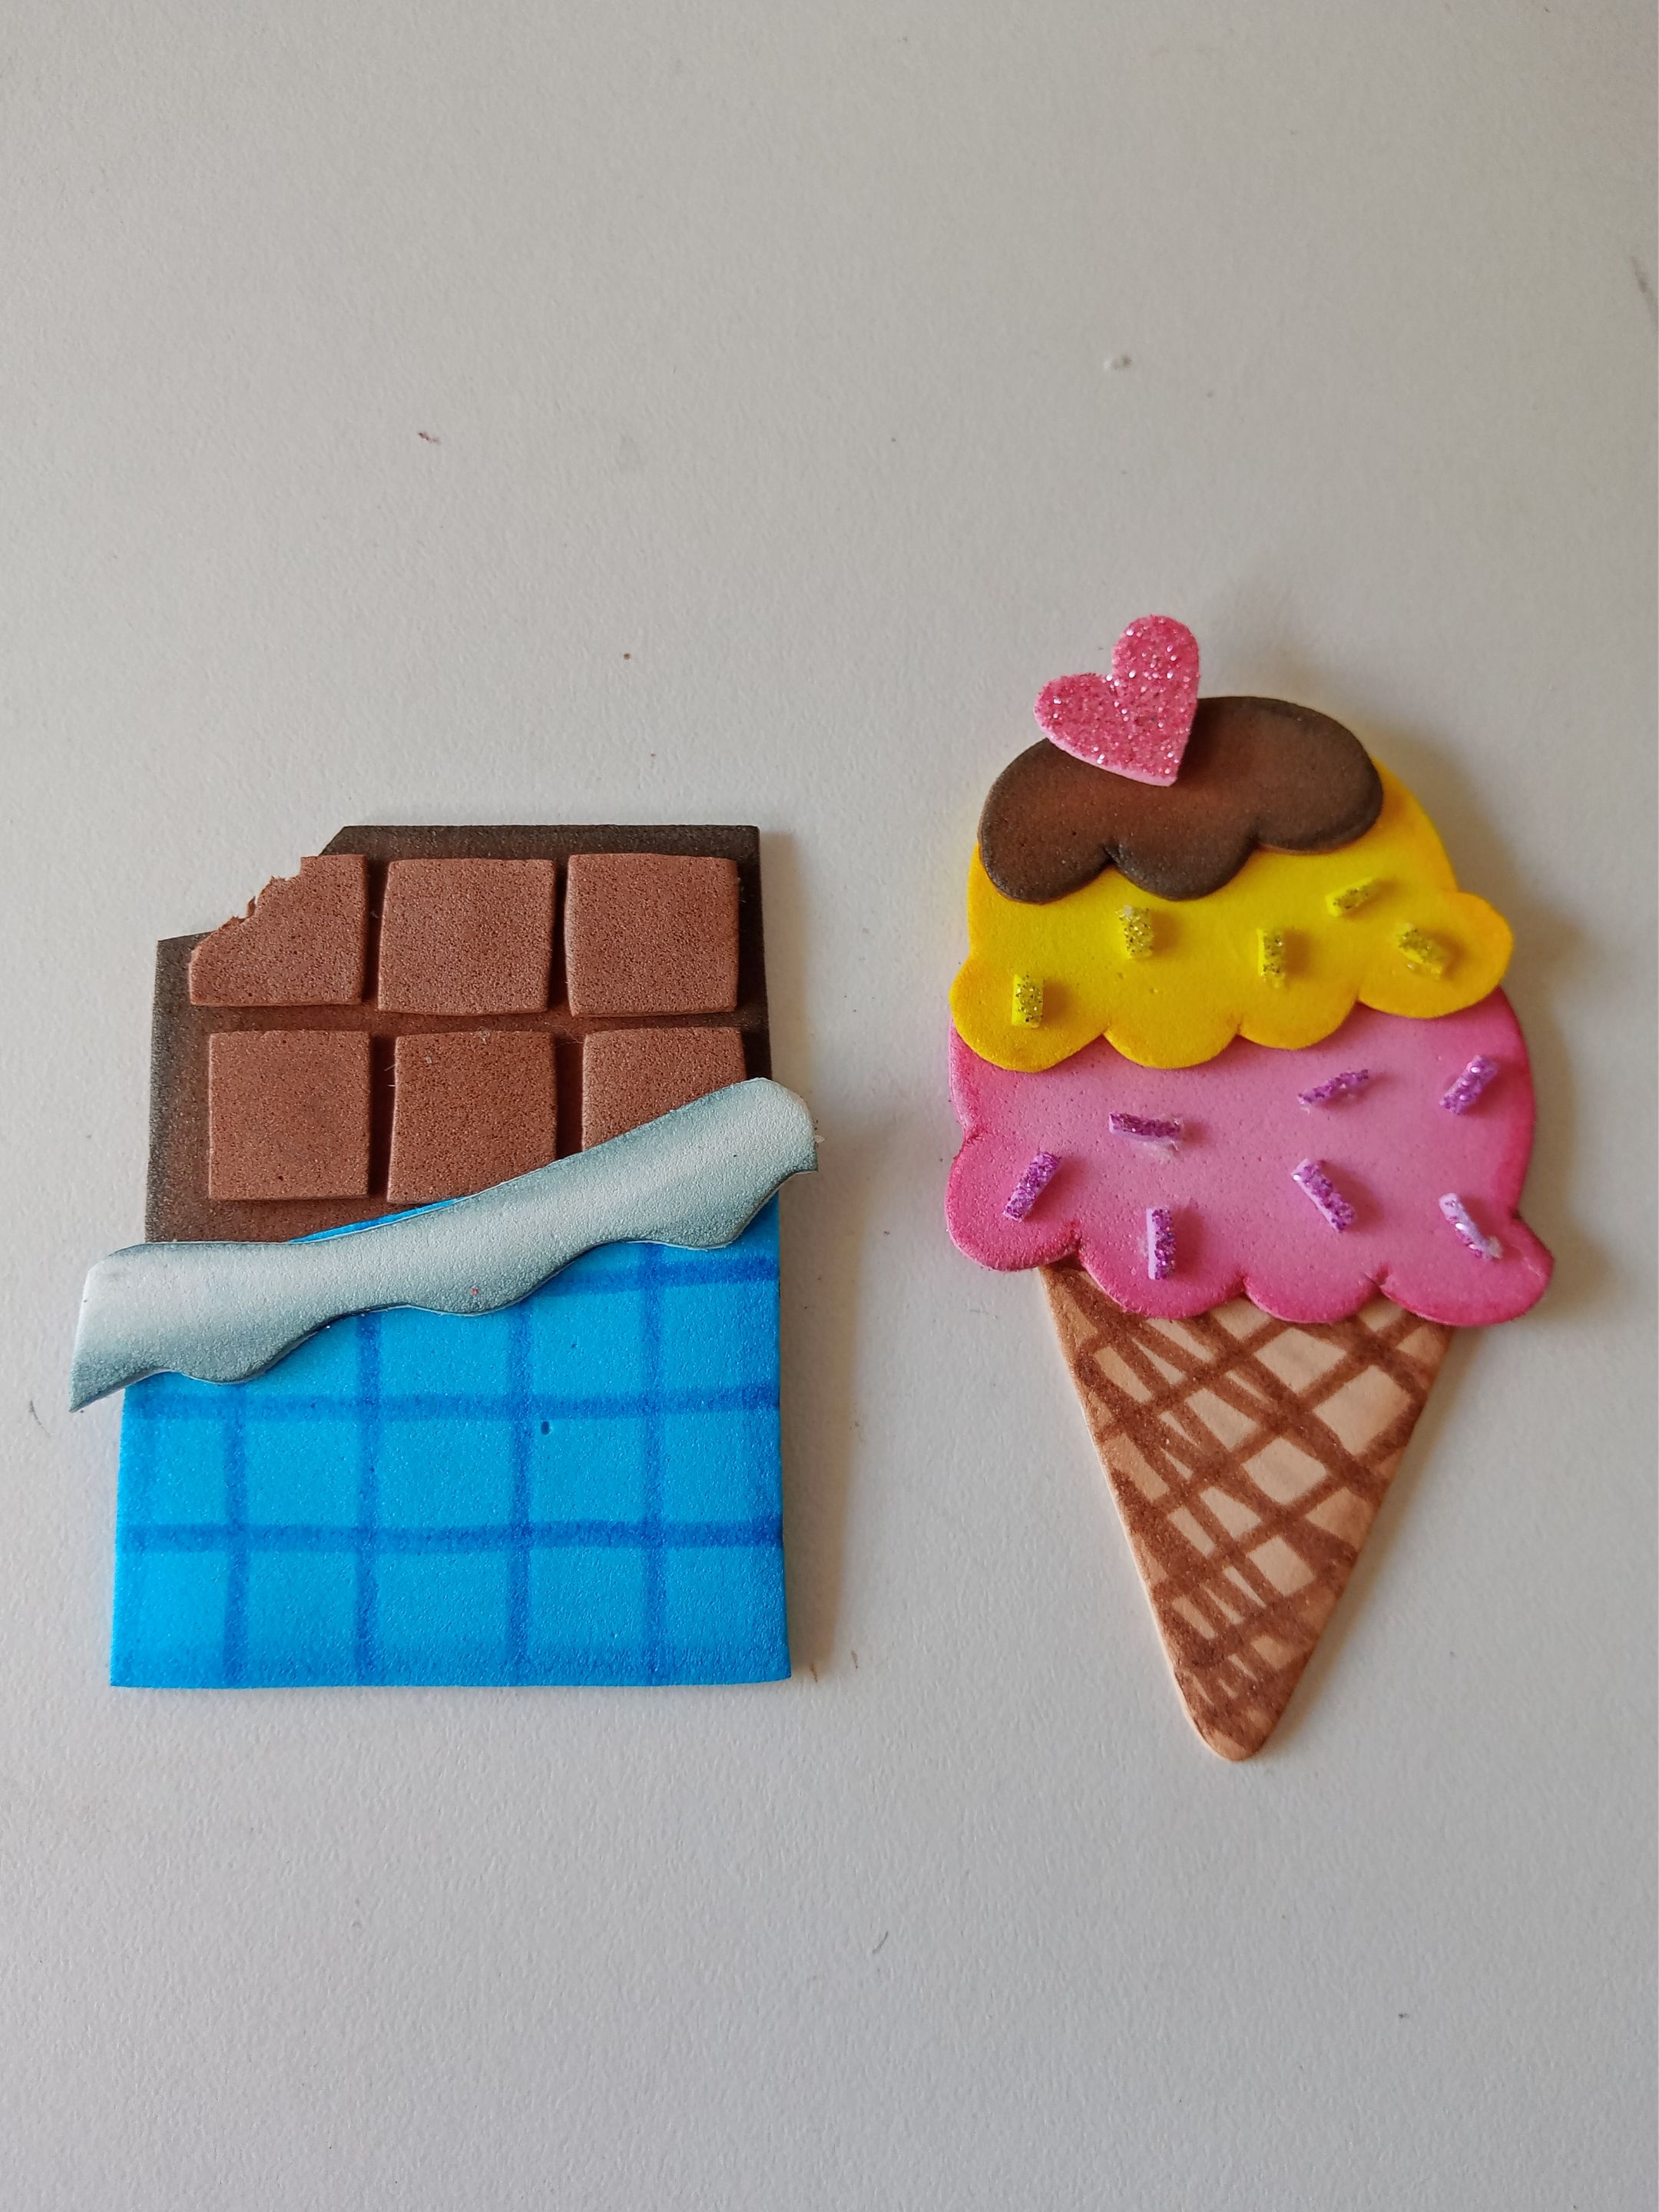
# ✨RESULTADO: | ✨RESULT: