**♥️ESPERO QUE TE GUSTE,
¡Empecemos!**
**♥️I HOPE YOU LIKE IT,
Let's start!**
---
# ✂️ *MATERIALES* | ✂️ *MATERIALS*
- Foami escarchado dorado.
- Foami crema.
- Foami marrón (diferentes tonos).
- Foami rosa.
- Foami verde.
- Foami amarillo.
- Pinturas y marcadores.
- Pegamento.
- Tijeras.
- Regla.
- Hoja blanca.
- Lápiz.
- Gold frosted foami.
- Cream foami.
- Brown foami (different shades).
- Pink foami.
- Green foami.
- Yellow foami.
- Paints and markers.
- Glue.
- Scissors.
- Ruler.
- White paper.
- Pencil.
# ✨ *PROCEDIMIENTO* | ✨ *PROCESS*
###### ✨ PASO 1:
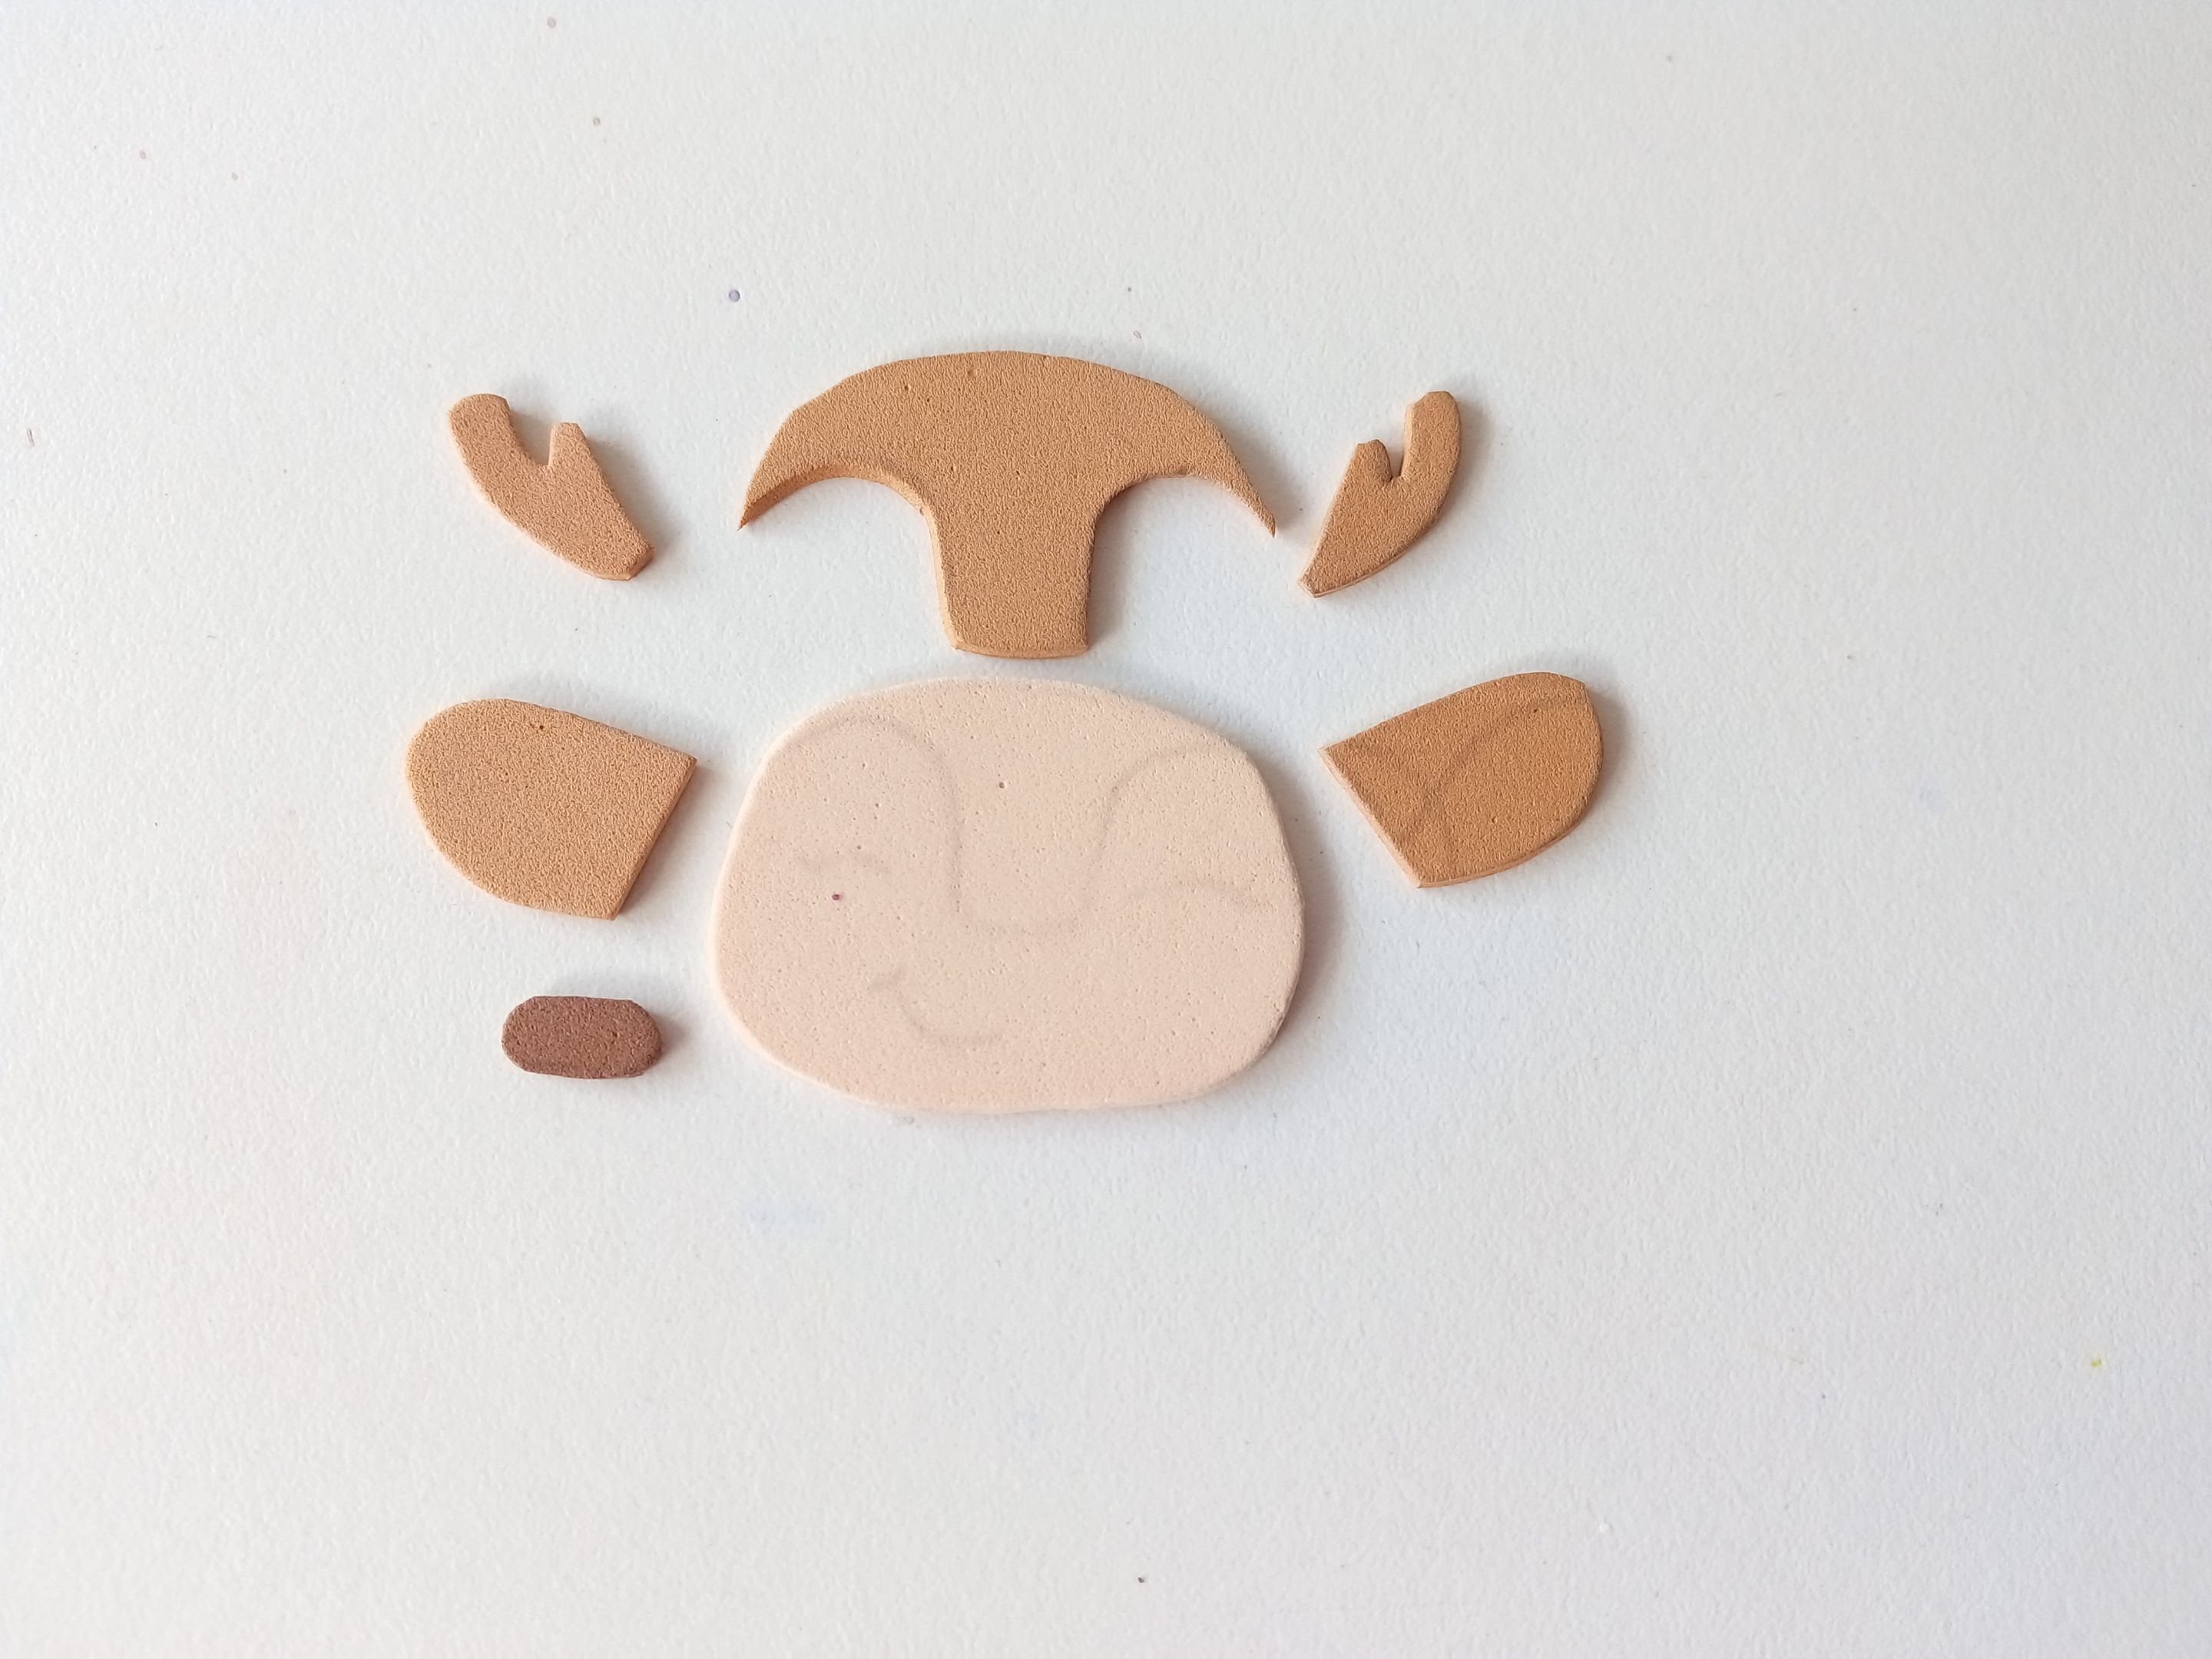
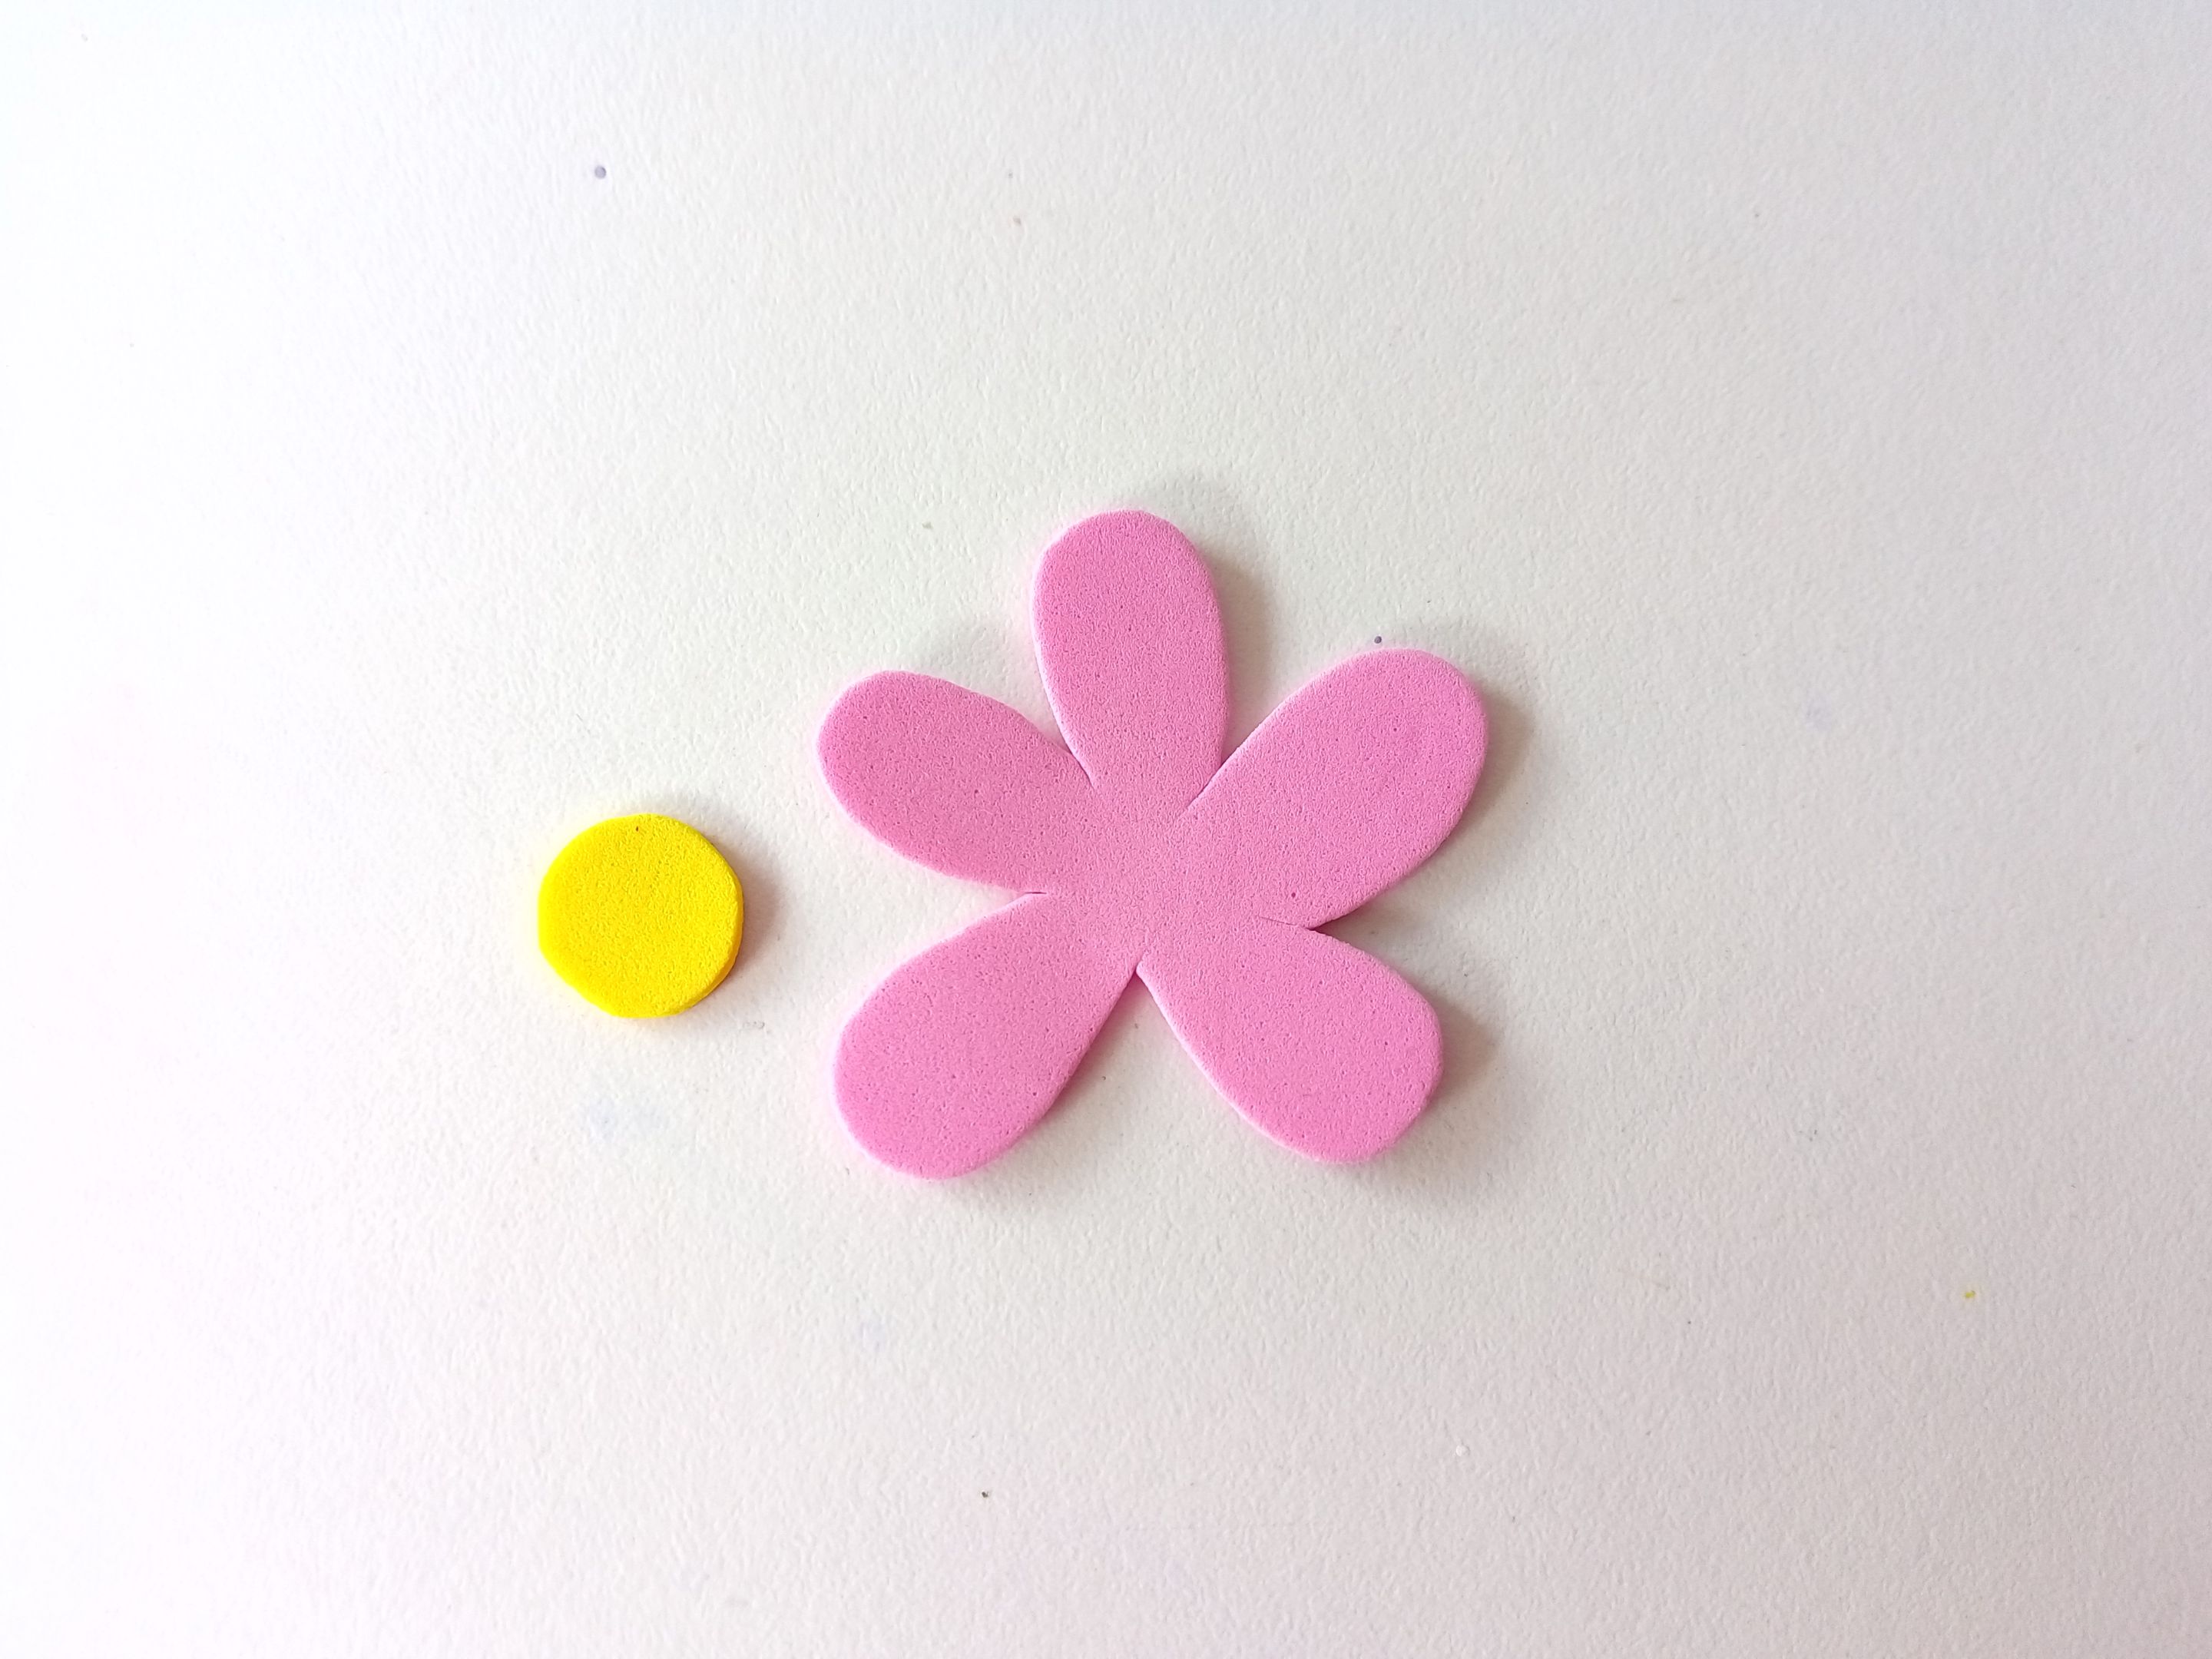
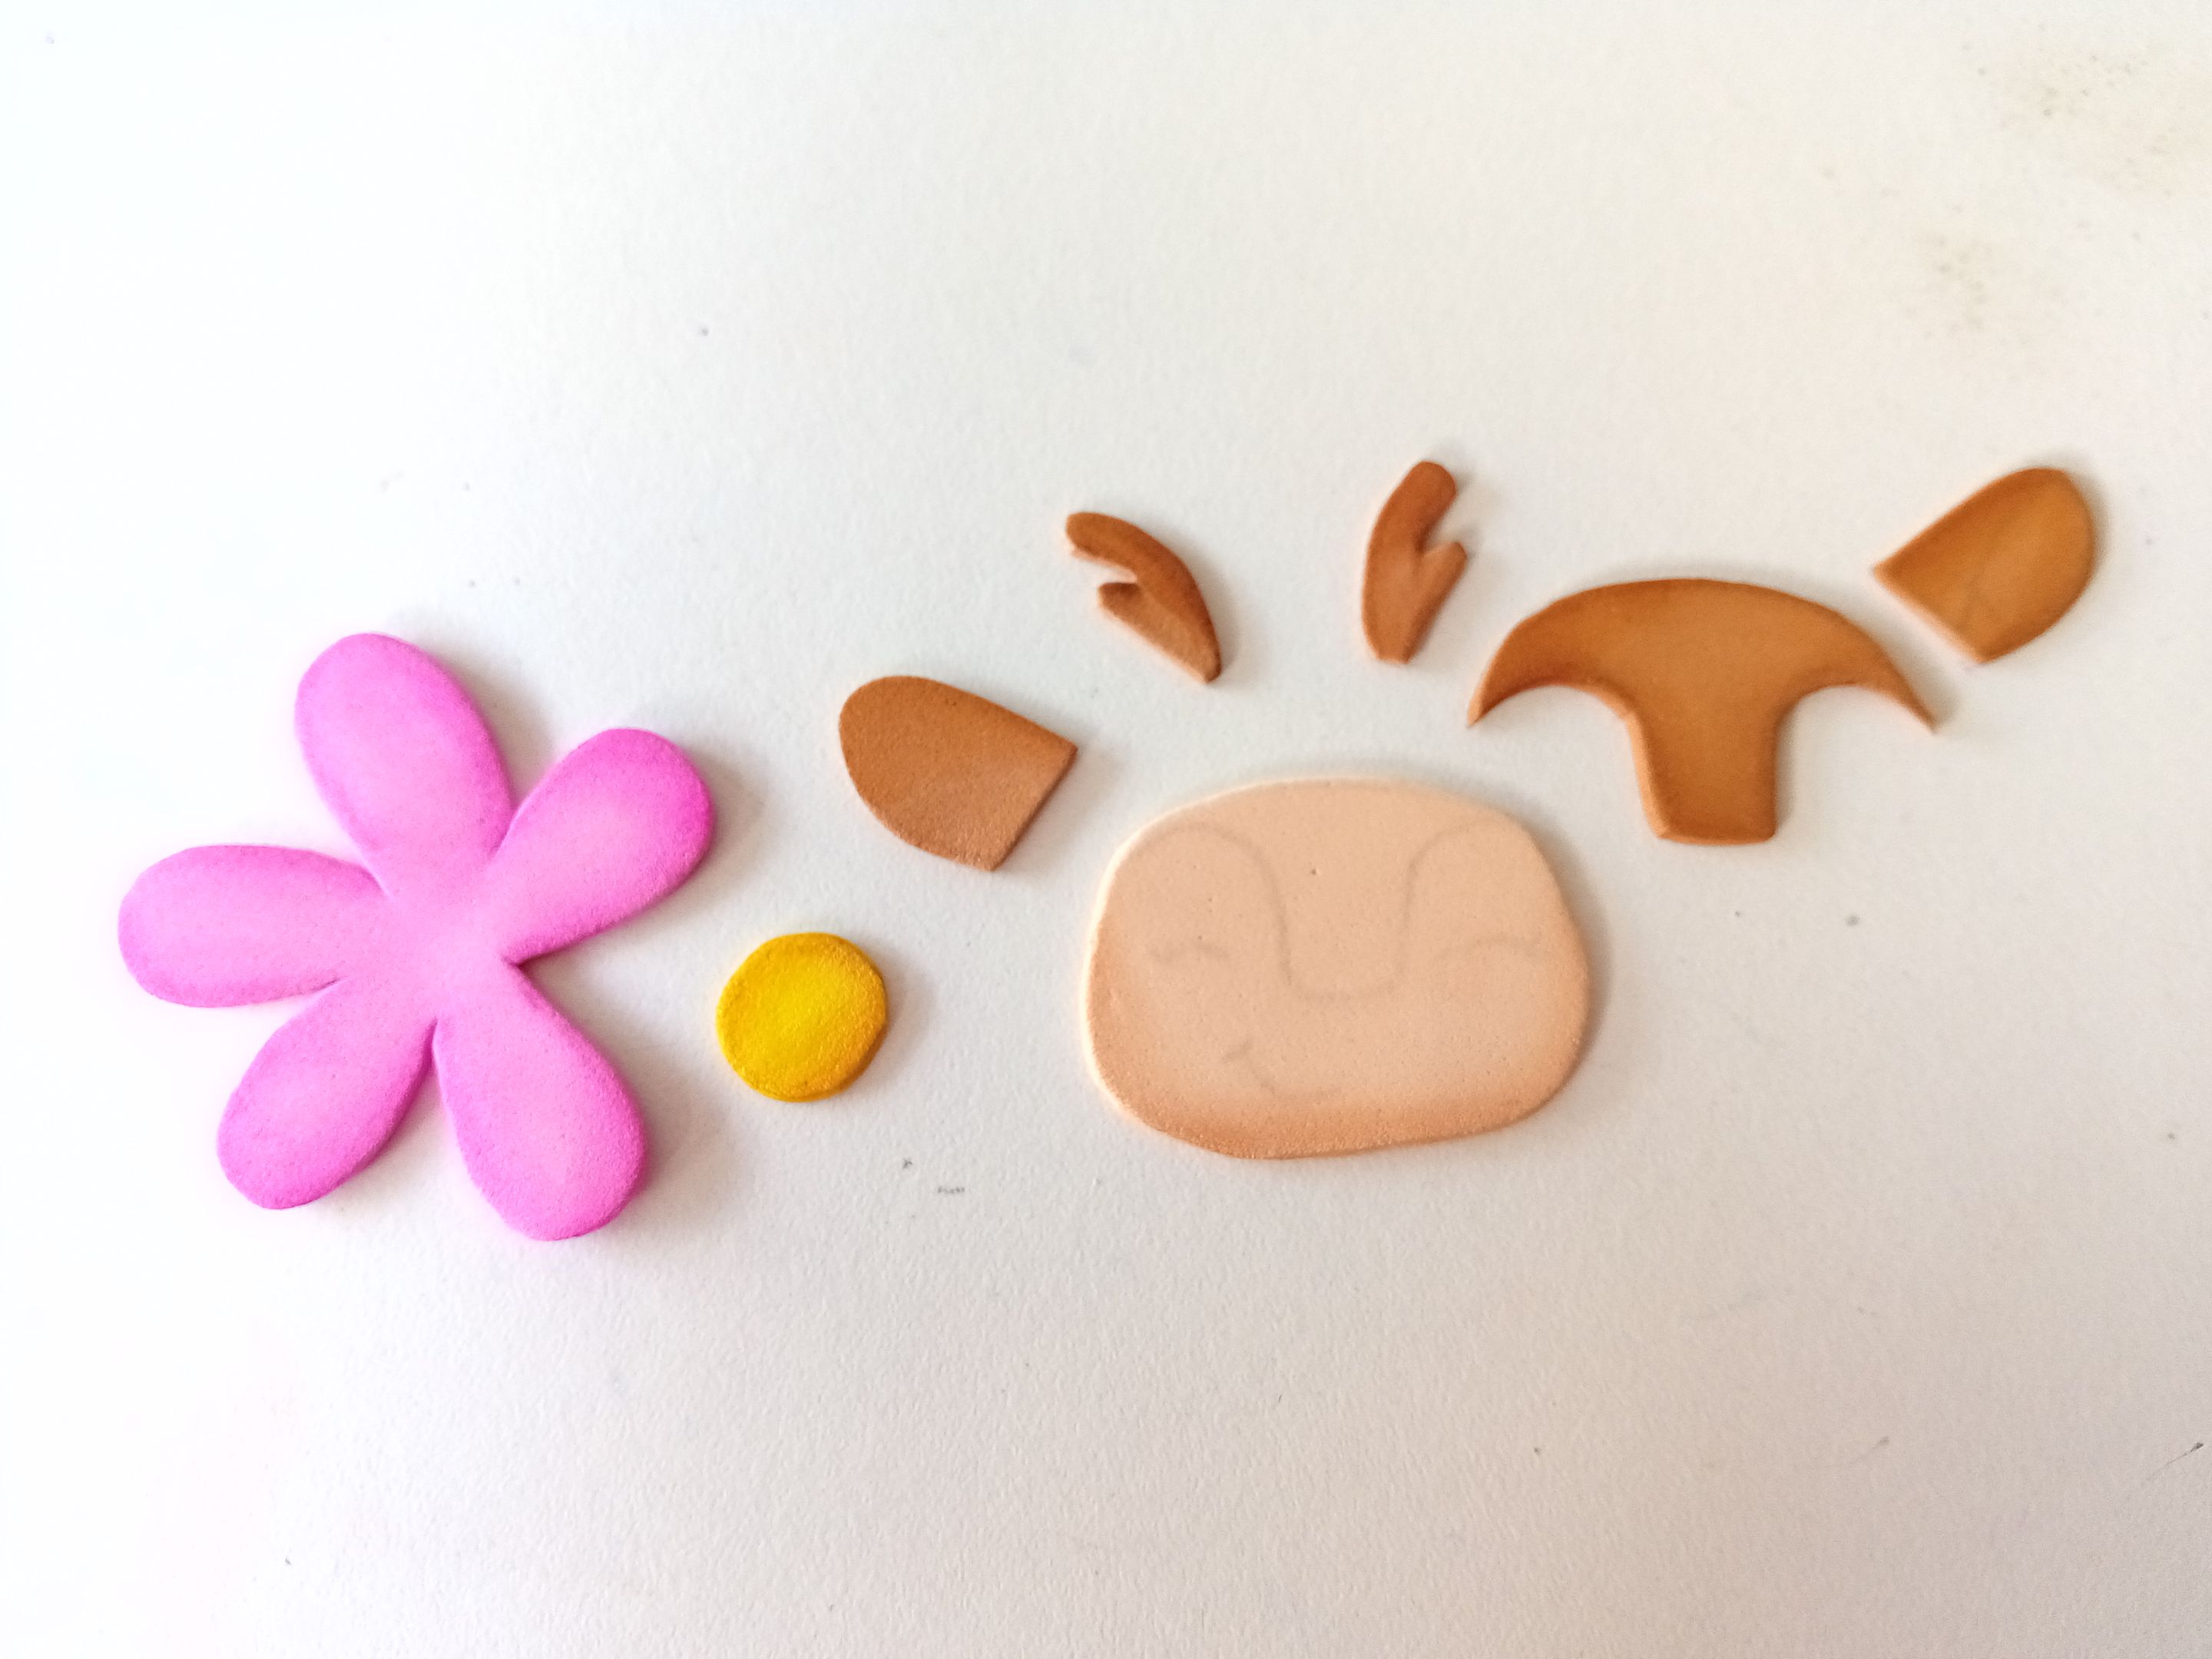
Comenzamos dibujando a Naara en una hoja blanca; además, en vez de las flores en su cabeza, decidí dibujar una más o menos del tamaño de Naara para que sea parte de la decoración de toda la idea. Al estar listos los dibujos, los transferimos a los colores correspondientes de foami, como explico a continuación:
✨Parte superior de la cabeza: 4 cm x 2.5 cm en foami marrón claro.
✨Cabeza: 4 cm x 3 cm en foami crema.
✨Orejas: 2 cm x 1.5 cm en foami marrón claro.
✨Cuernos: 2 cm en foami marrón claro.
✨Nariz: 1 cm en foami marrón oscuro.
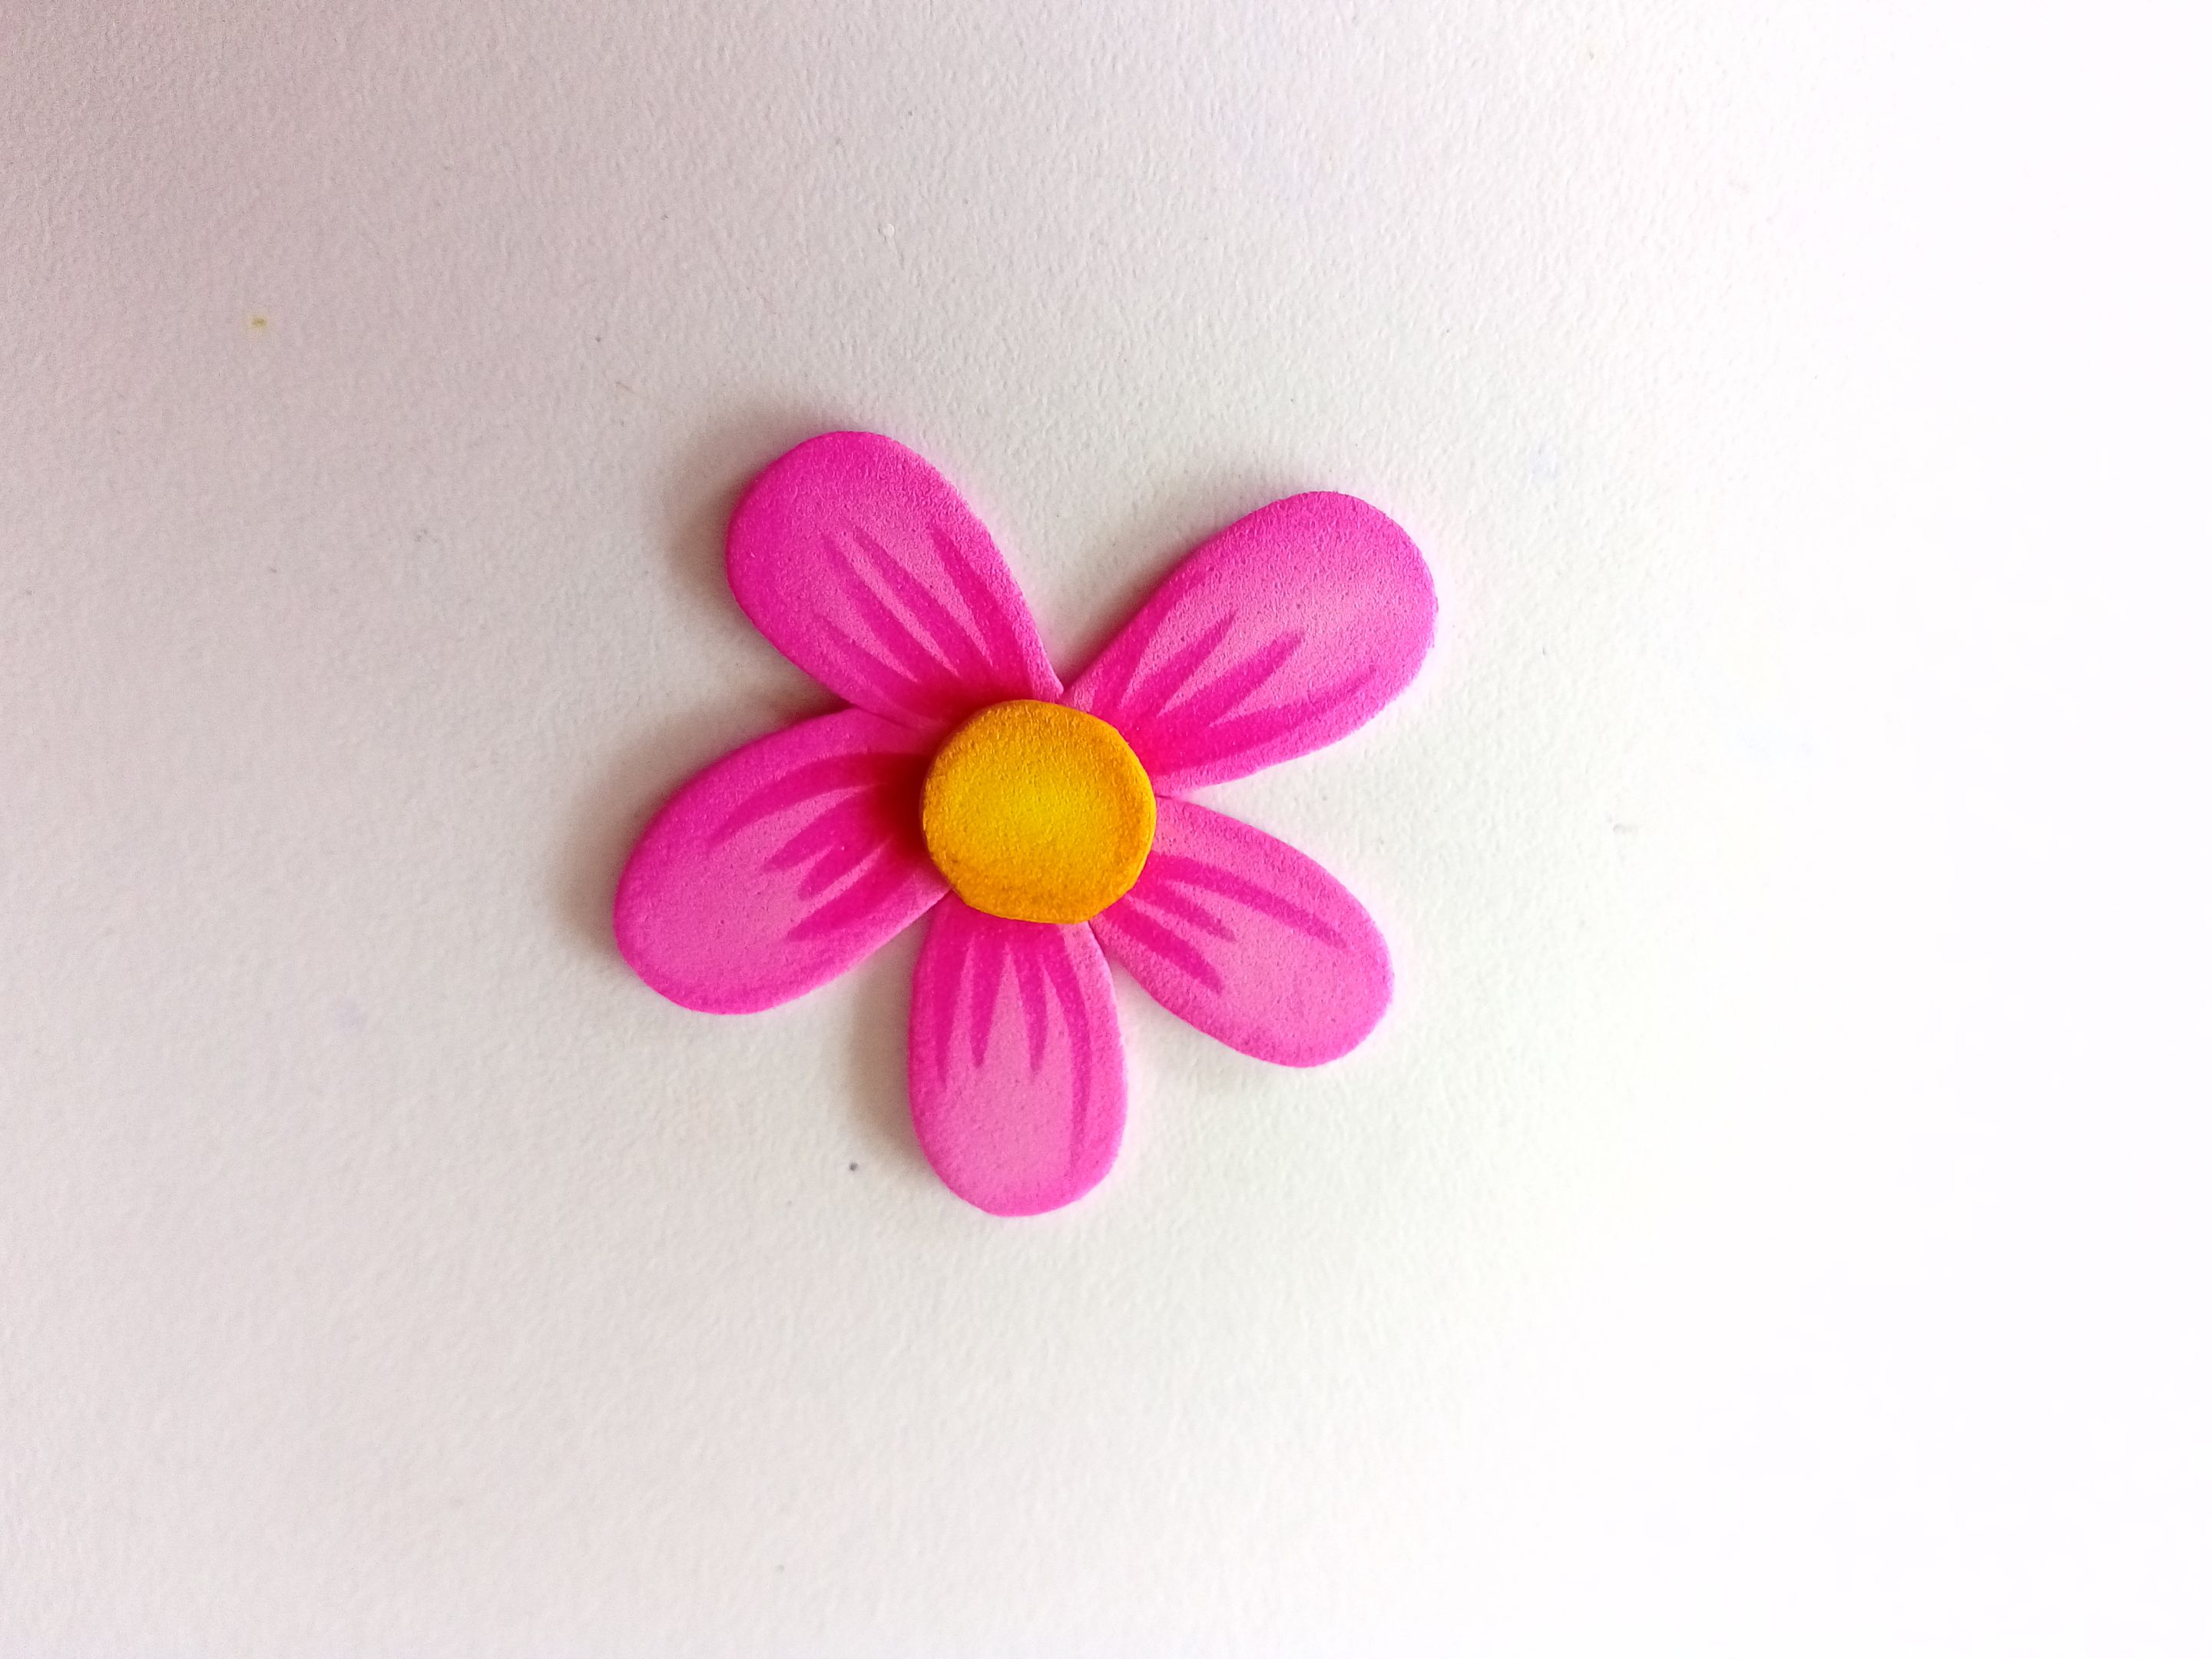
✨Flor: 5 cm x 5 cm en foami rosa.
✨Centro de flor: 1.5 cm de circunferencia en foami amarillo.
###### ✨ STEP 1:
We started by drawing Naara on a white sheet of paper. Instead of flowers on her head, I decided to draw one roughly the size of Naara to form part of the overall decoration. Once the drawings are ready, we transfer them to the corresponding colors of foam, as explained below:
✨Top of the head: 4 cm x 2.5 cm in light brown foam.
✨Head: 4 cm x 3 cm in cream foam.
✨Ears: 2 cm x 1.5 cm in light brown foam.
✨Horns: 2 cm in light brown foam.
✨Nose: 1 cm in dark brown foam.
✨Flower: 5 cm x 5 cm in pink foam.
✨Flower center: 1.5 cm circumference in yellow foam.
###### ✨ PASO 2:
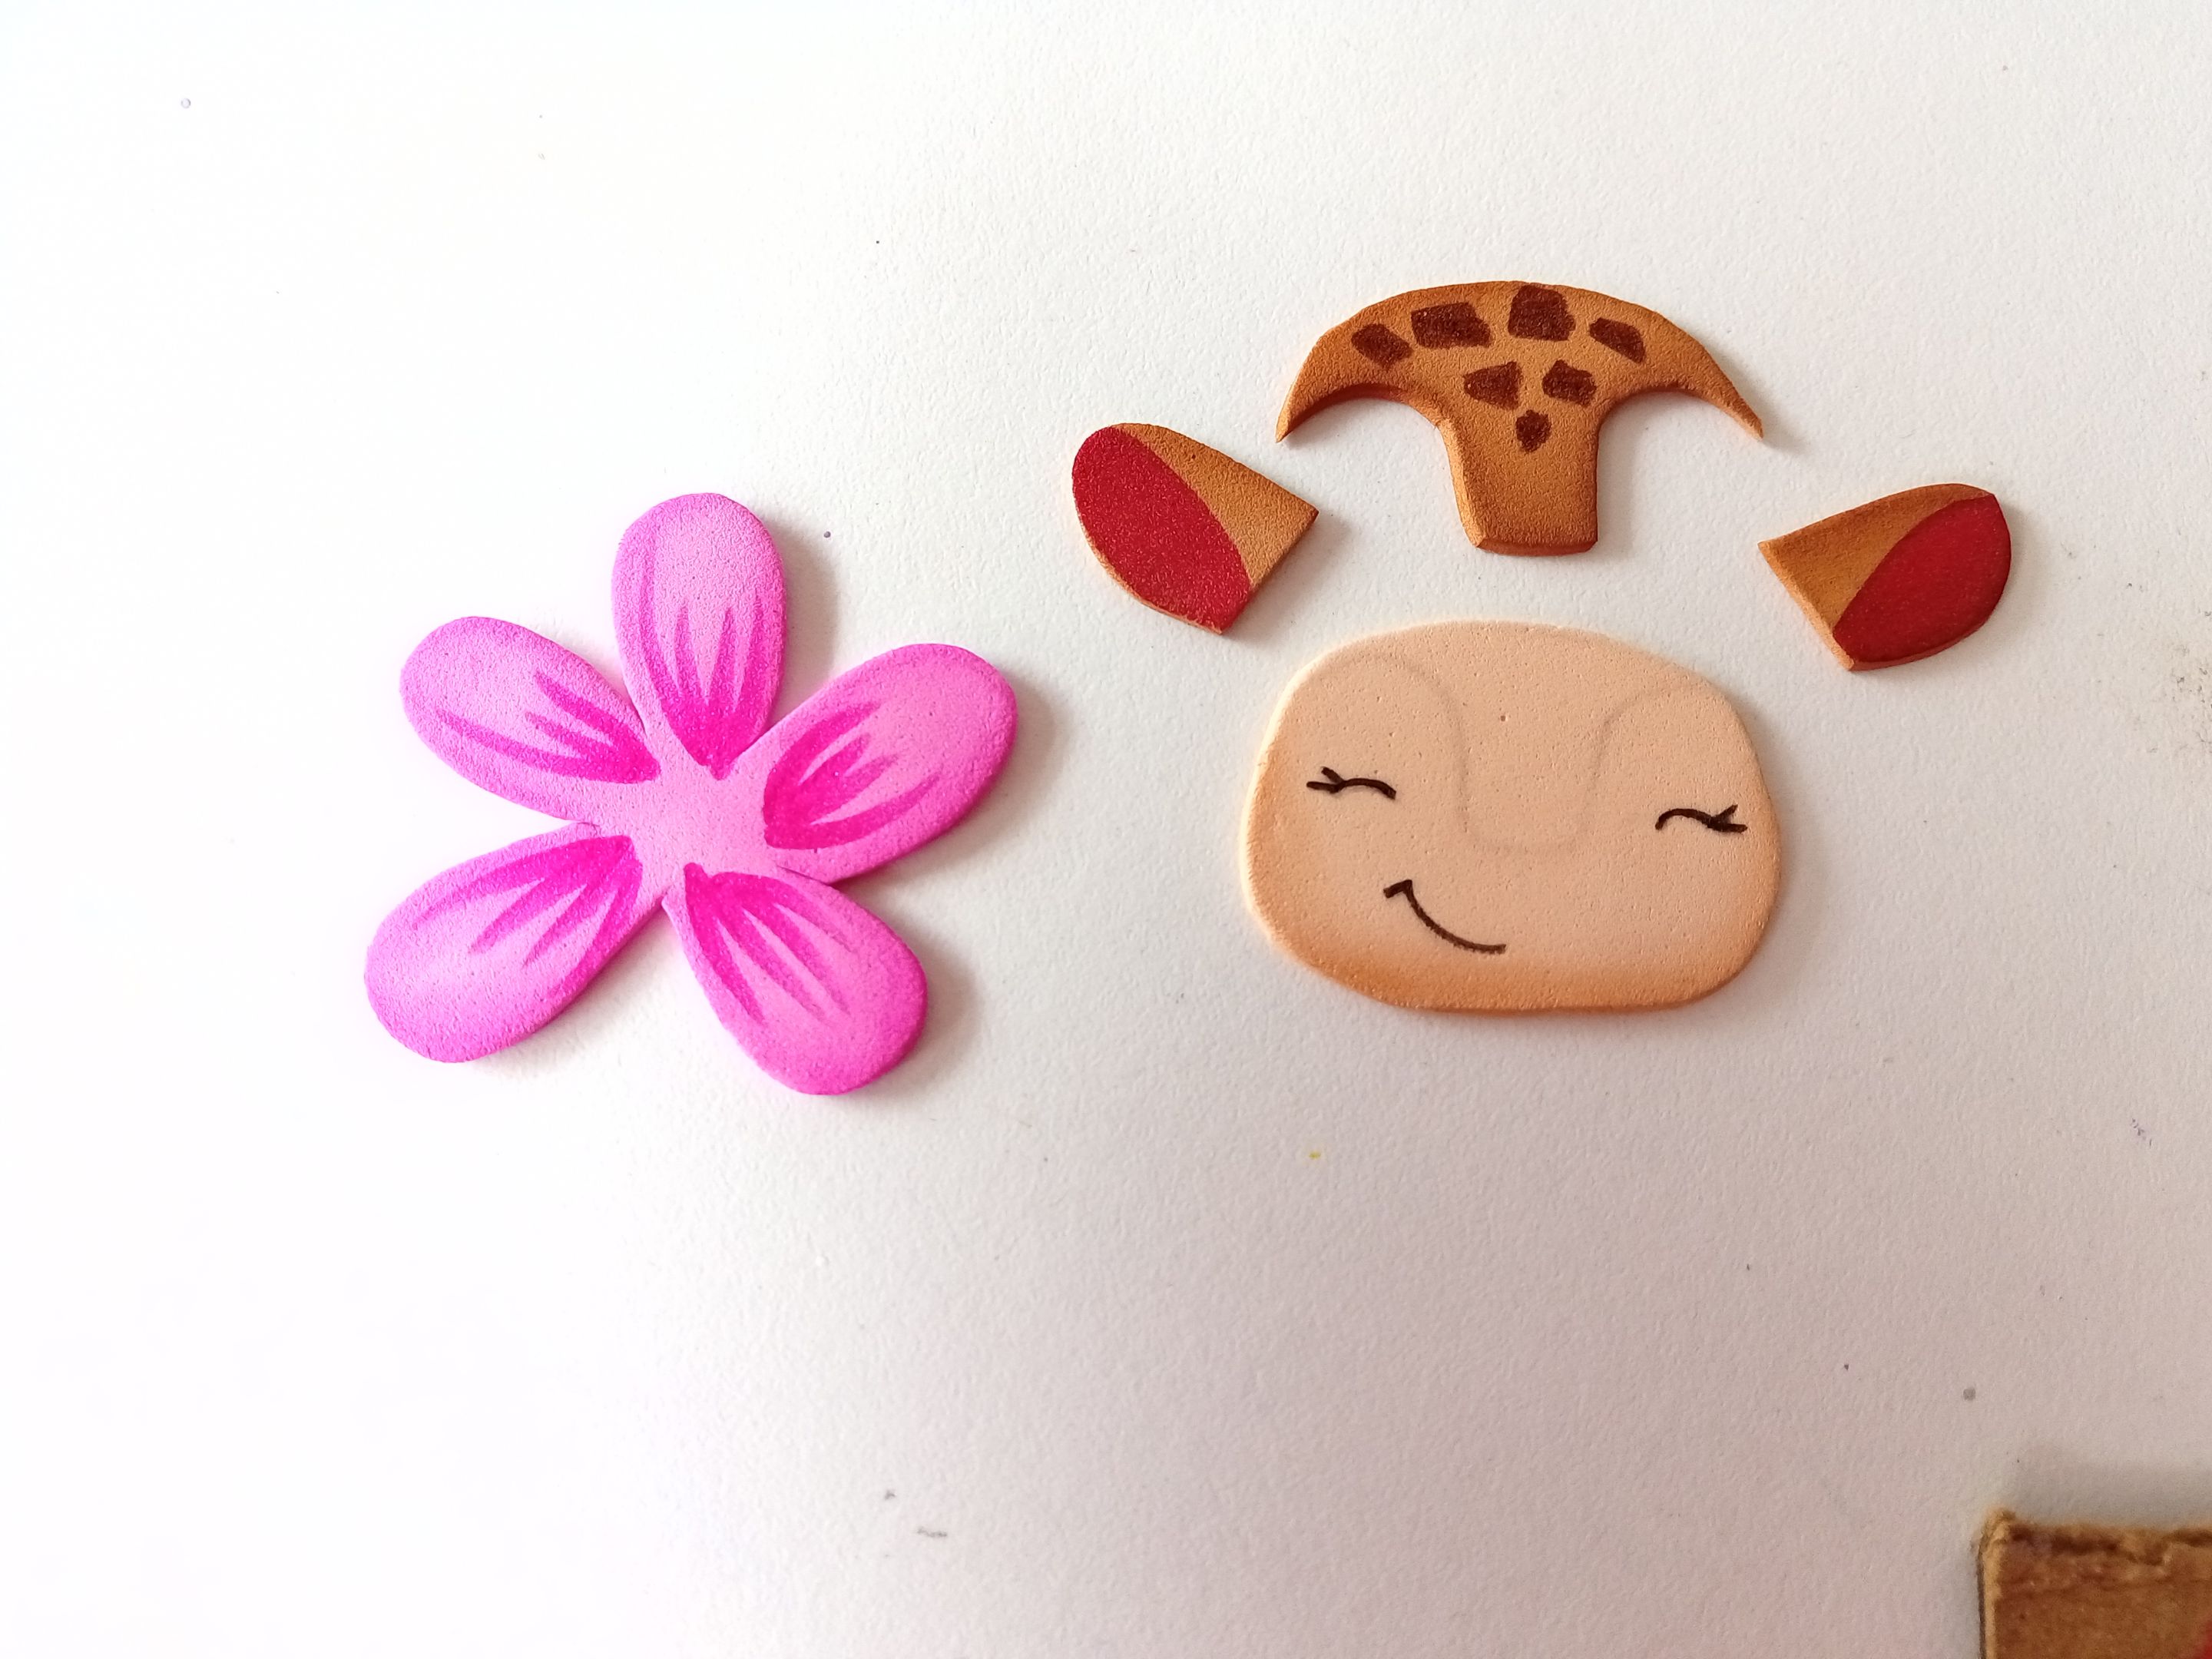
Al estar recortadas y listas las piezas, tomamos las pinturas o marcadores y comenzamos a dar color a los bordes de cada una de las piezas con un tono más oscuro que cada pieza. En este caso, para la cabeza también utilicé un tono de marrón claro, para dar contraste. Al estar secas las piezas, es momento de dar detalles más específicos con marcadores, como el rostro, algunas manchas en la parte superior, la parte interna de las orejas con rosa y los detalles de los pétalos.
###### ✨ STEP 2:
Once the pieces are cut and ready, we take the paints or markers and begin coloring the edges of each piece with a darker shade than the other. In this case, for the head, I also used a light shade of brown to provide contrast. Once the pieces are dry, it's time to add more specific details with markers, such as the face, some spots on the top, the inside of the ears with pink, and the details of the petals.
###### ✨ PASO 3:
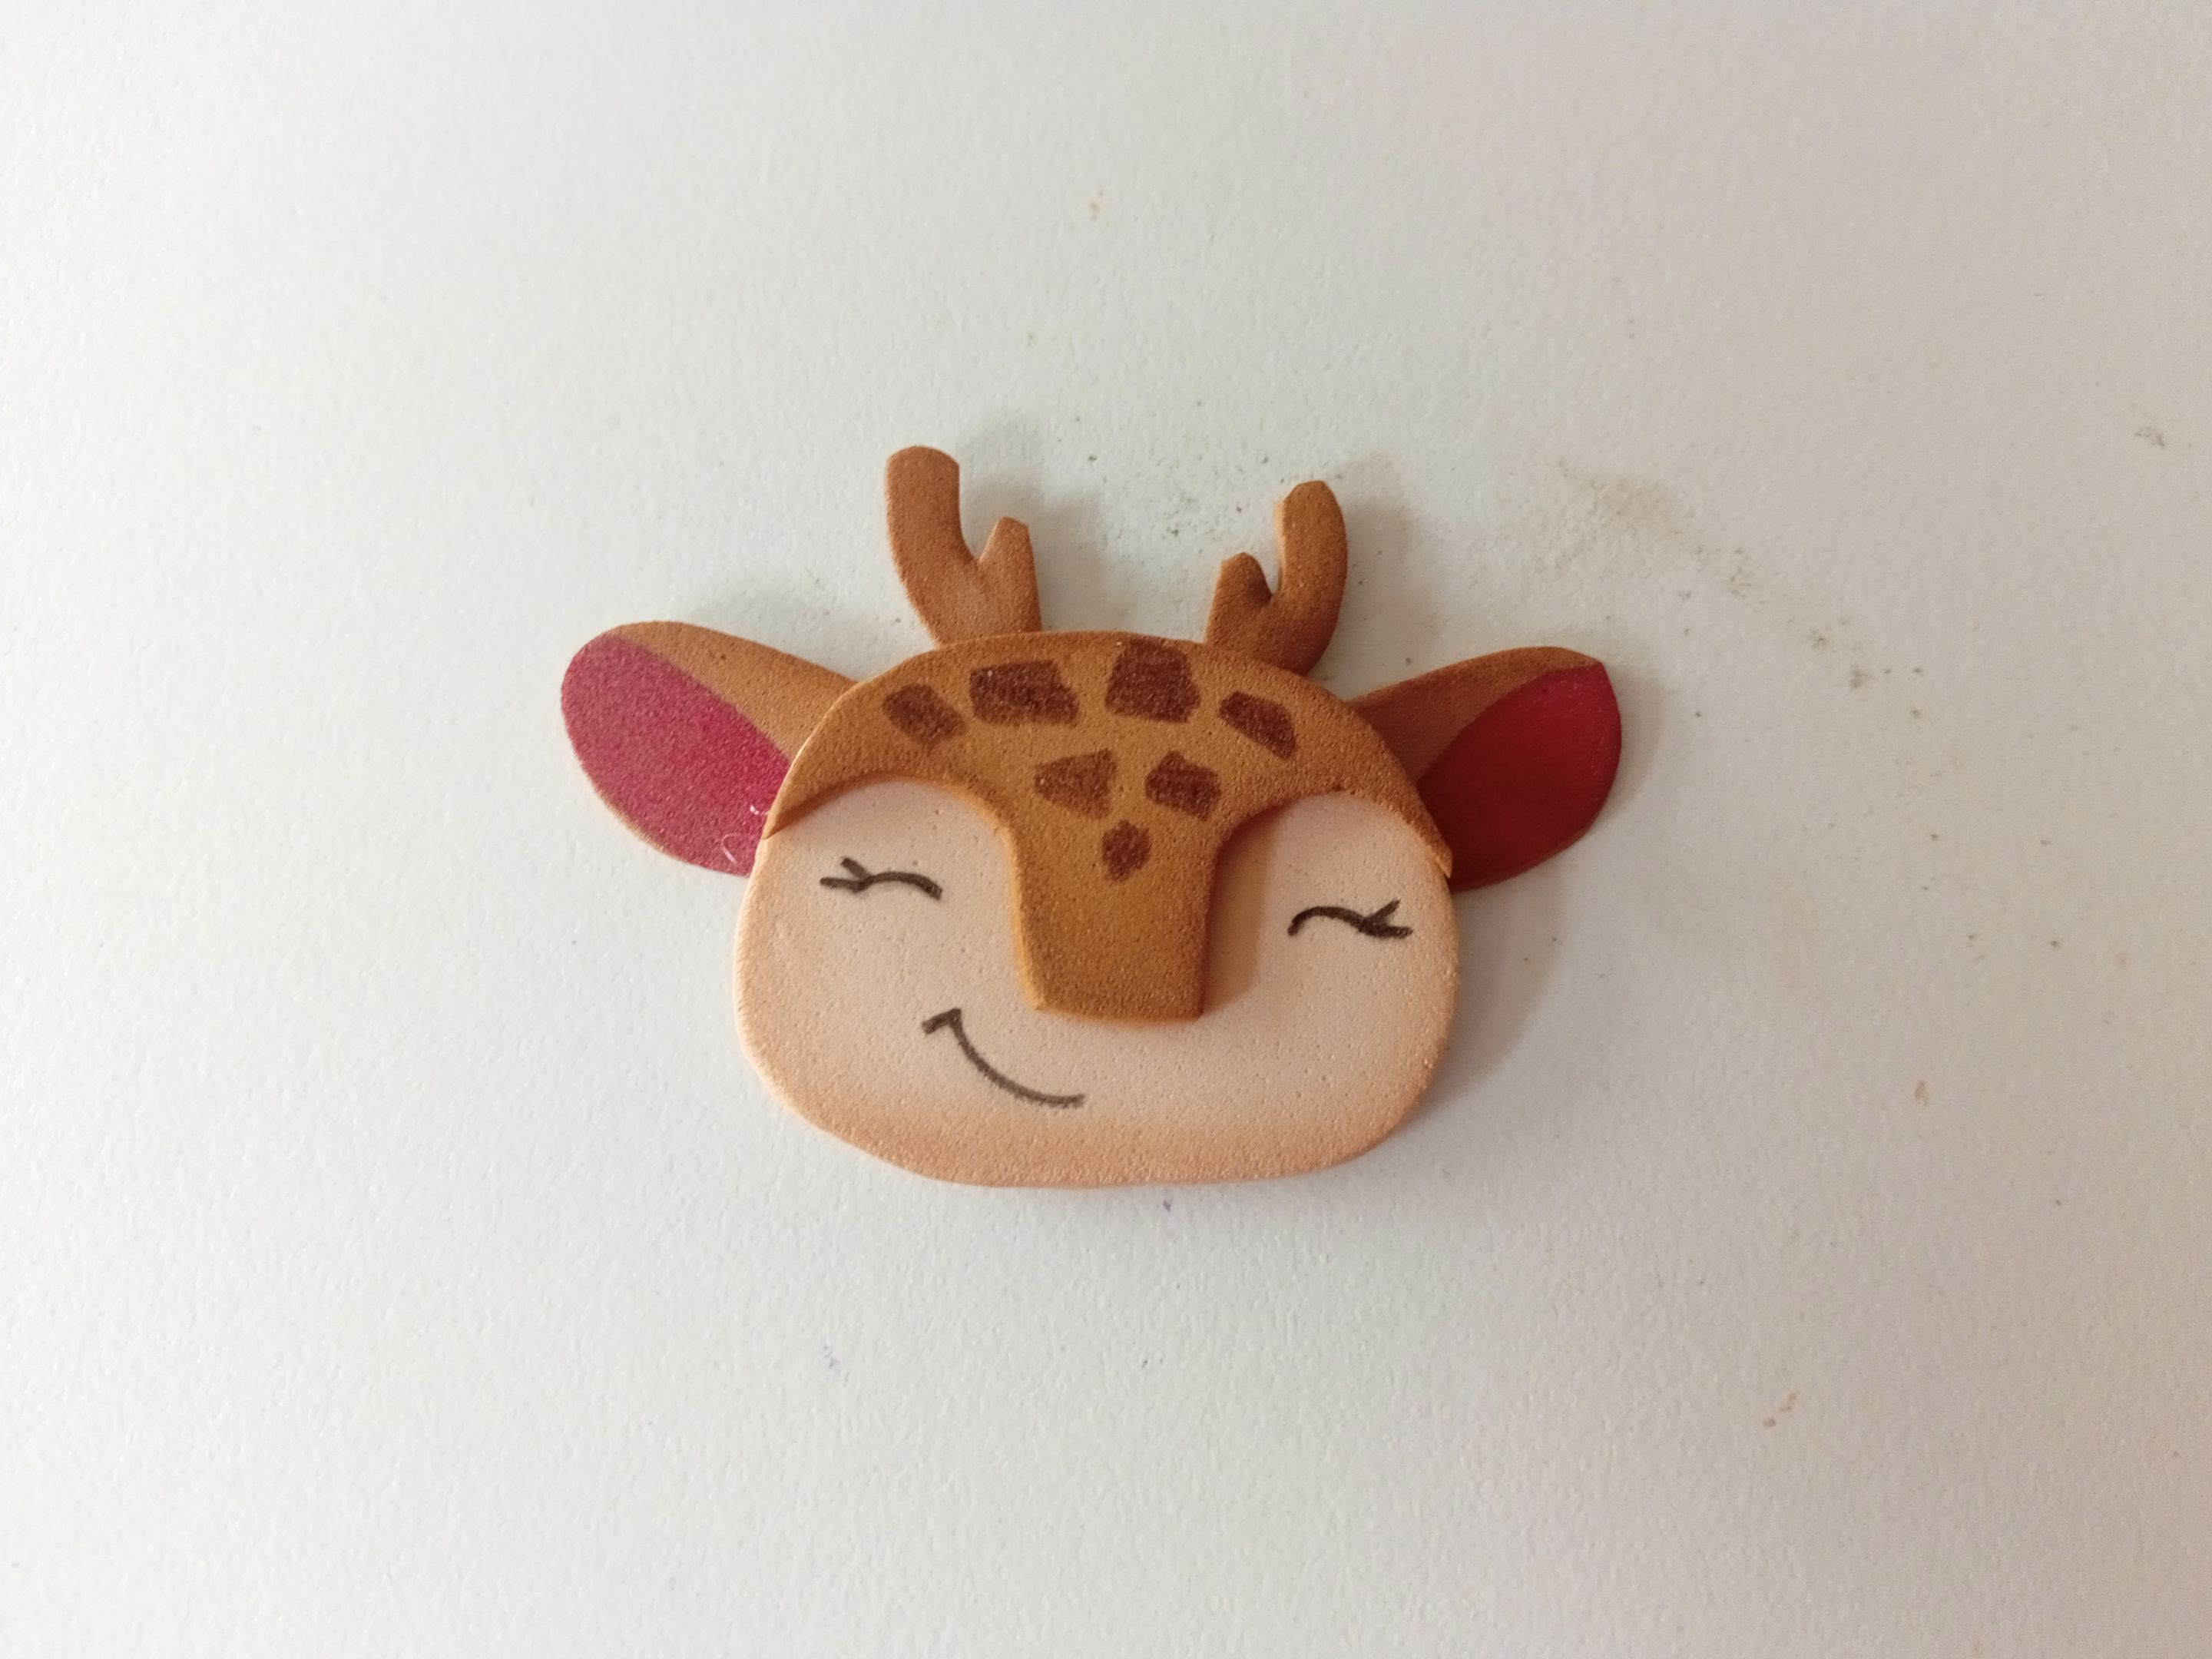
Al estar secas las piezas, es momento de comenzar a pegarlas, comenzando con la cabeza, luego la parte superior, seguido de las orejas, por último, los cuernos y el centro de la flor en medio de la misma.
###### ✨ STEP 3:
Once the pieces are dry, it's time to start gluing them, starting with the head, then the top, followed by the ears, finally, the horns, and the center of the flower in the middle.
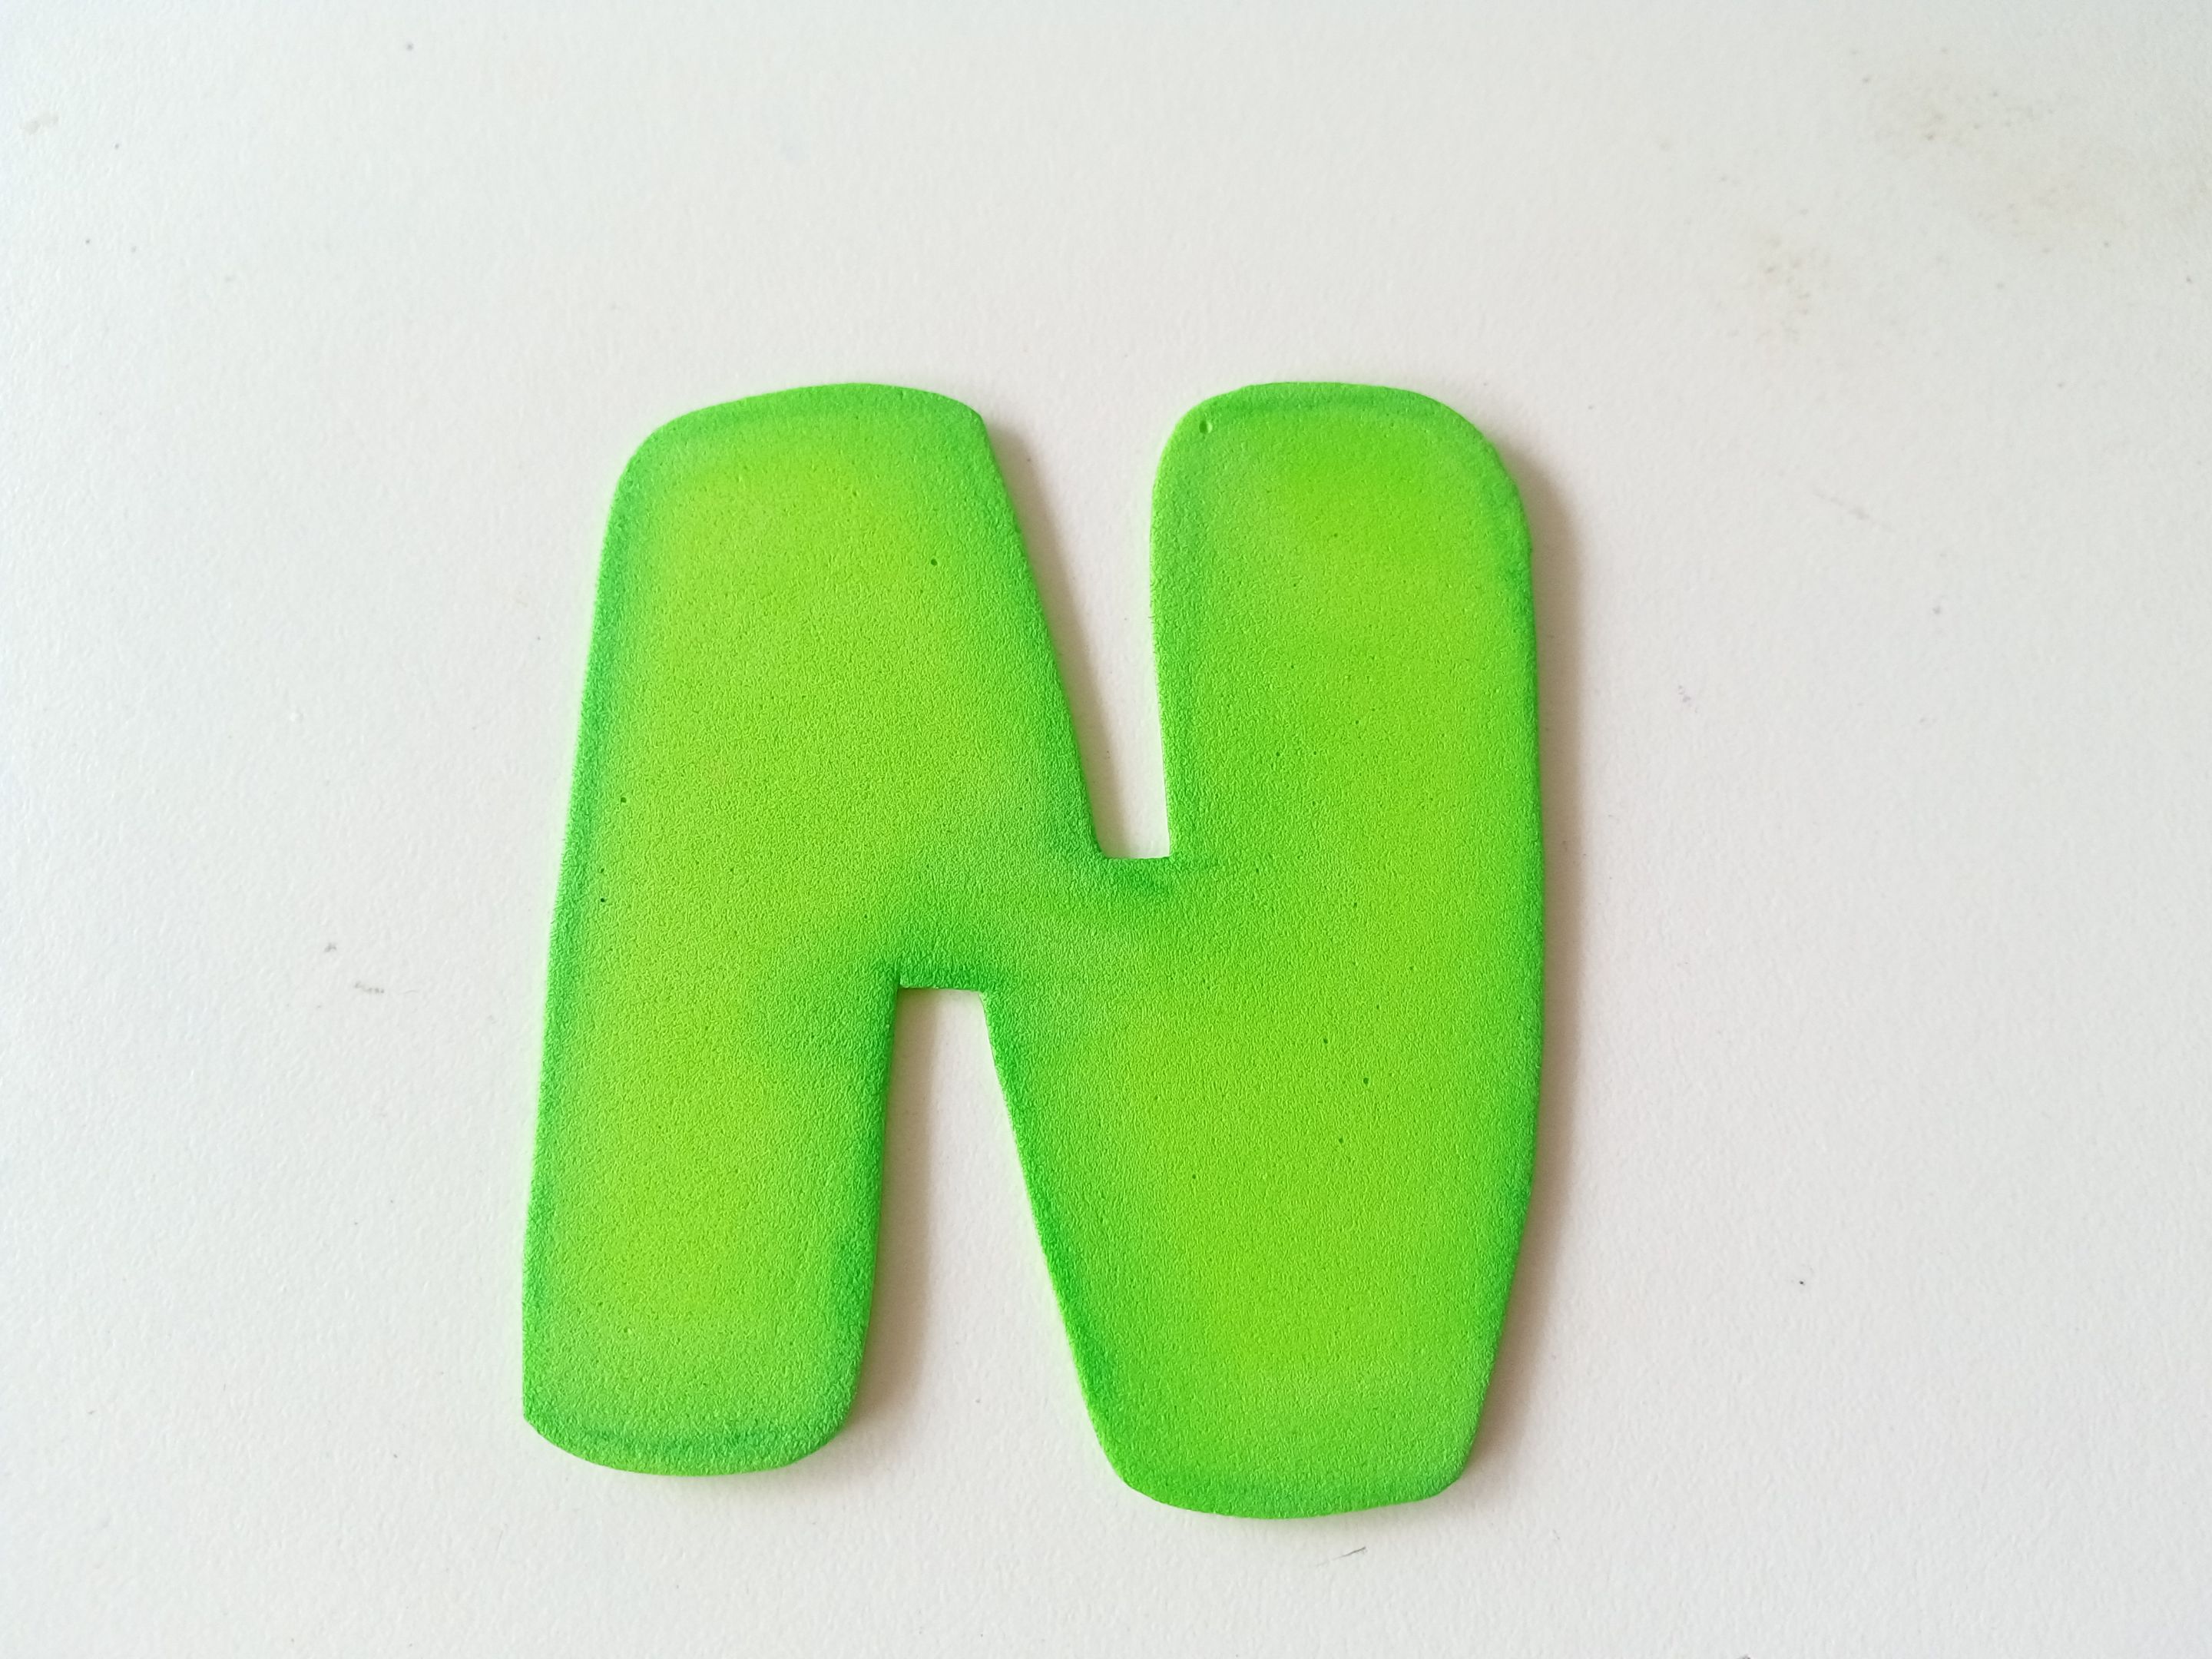
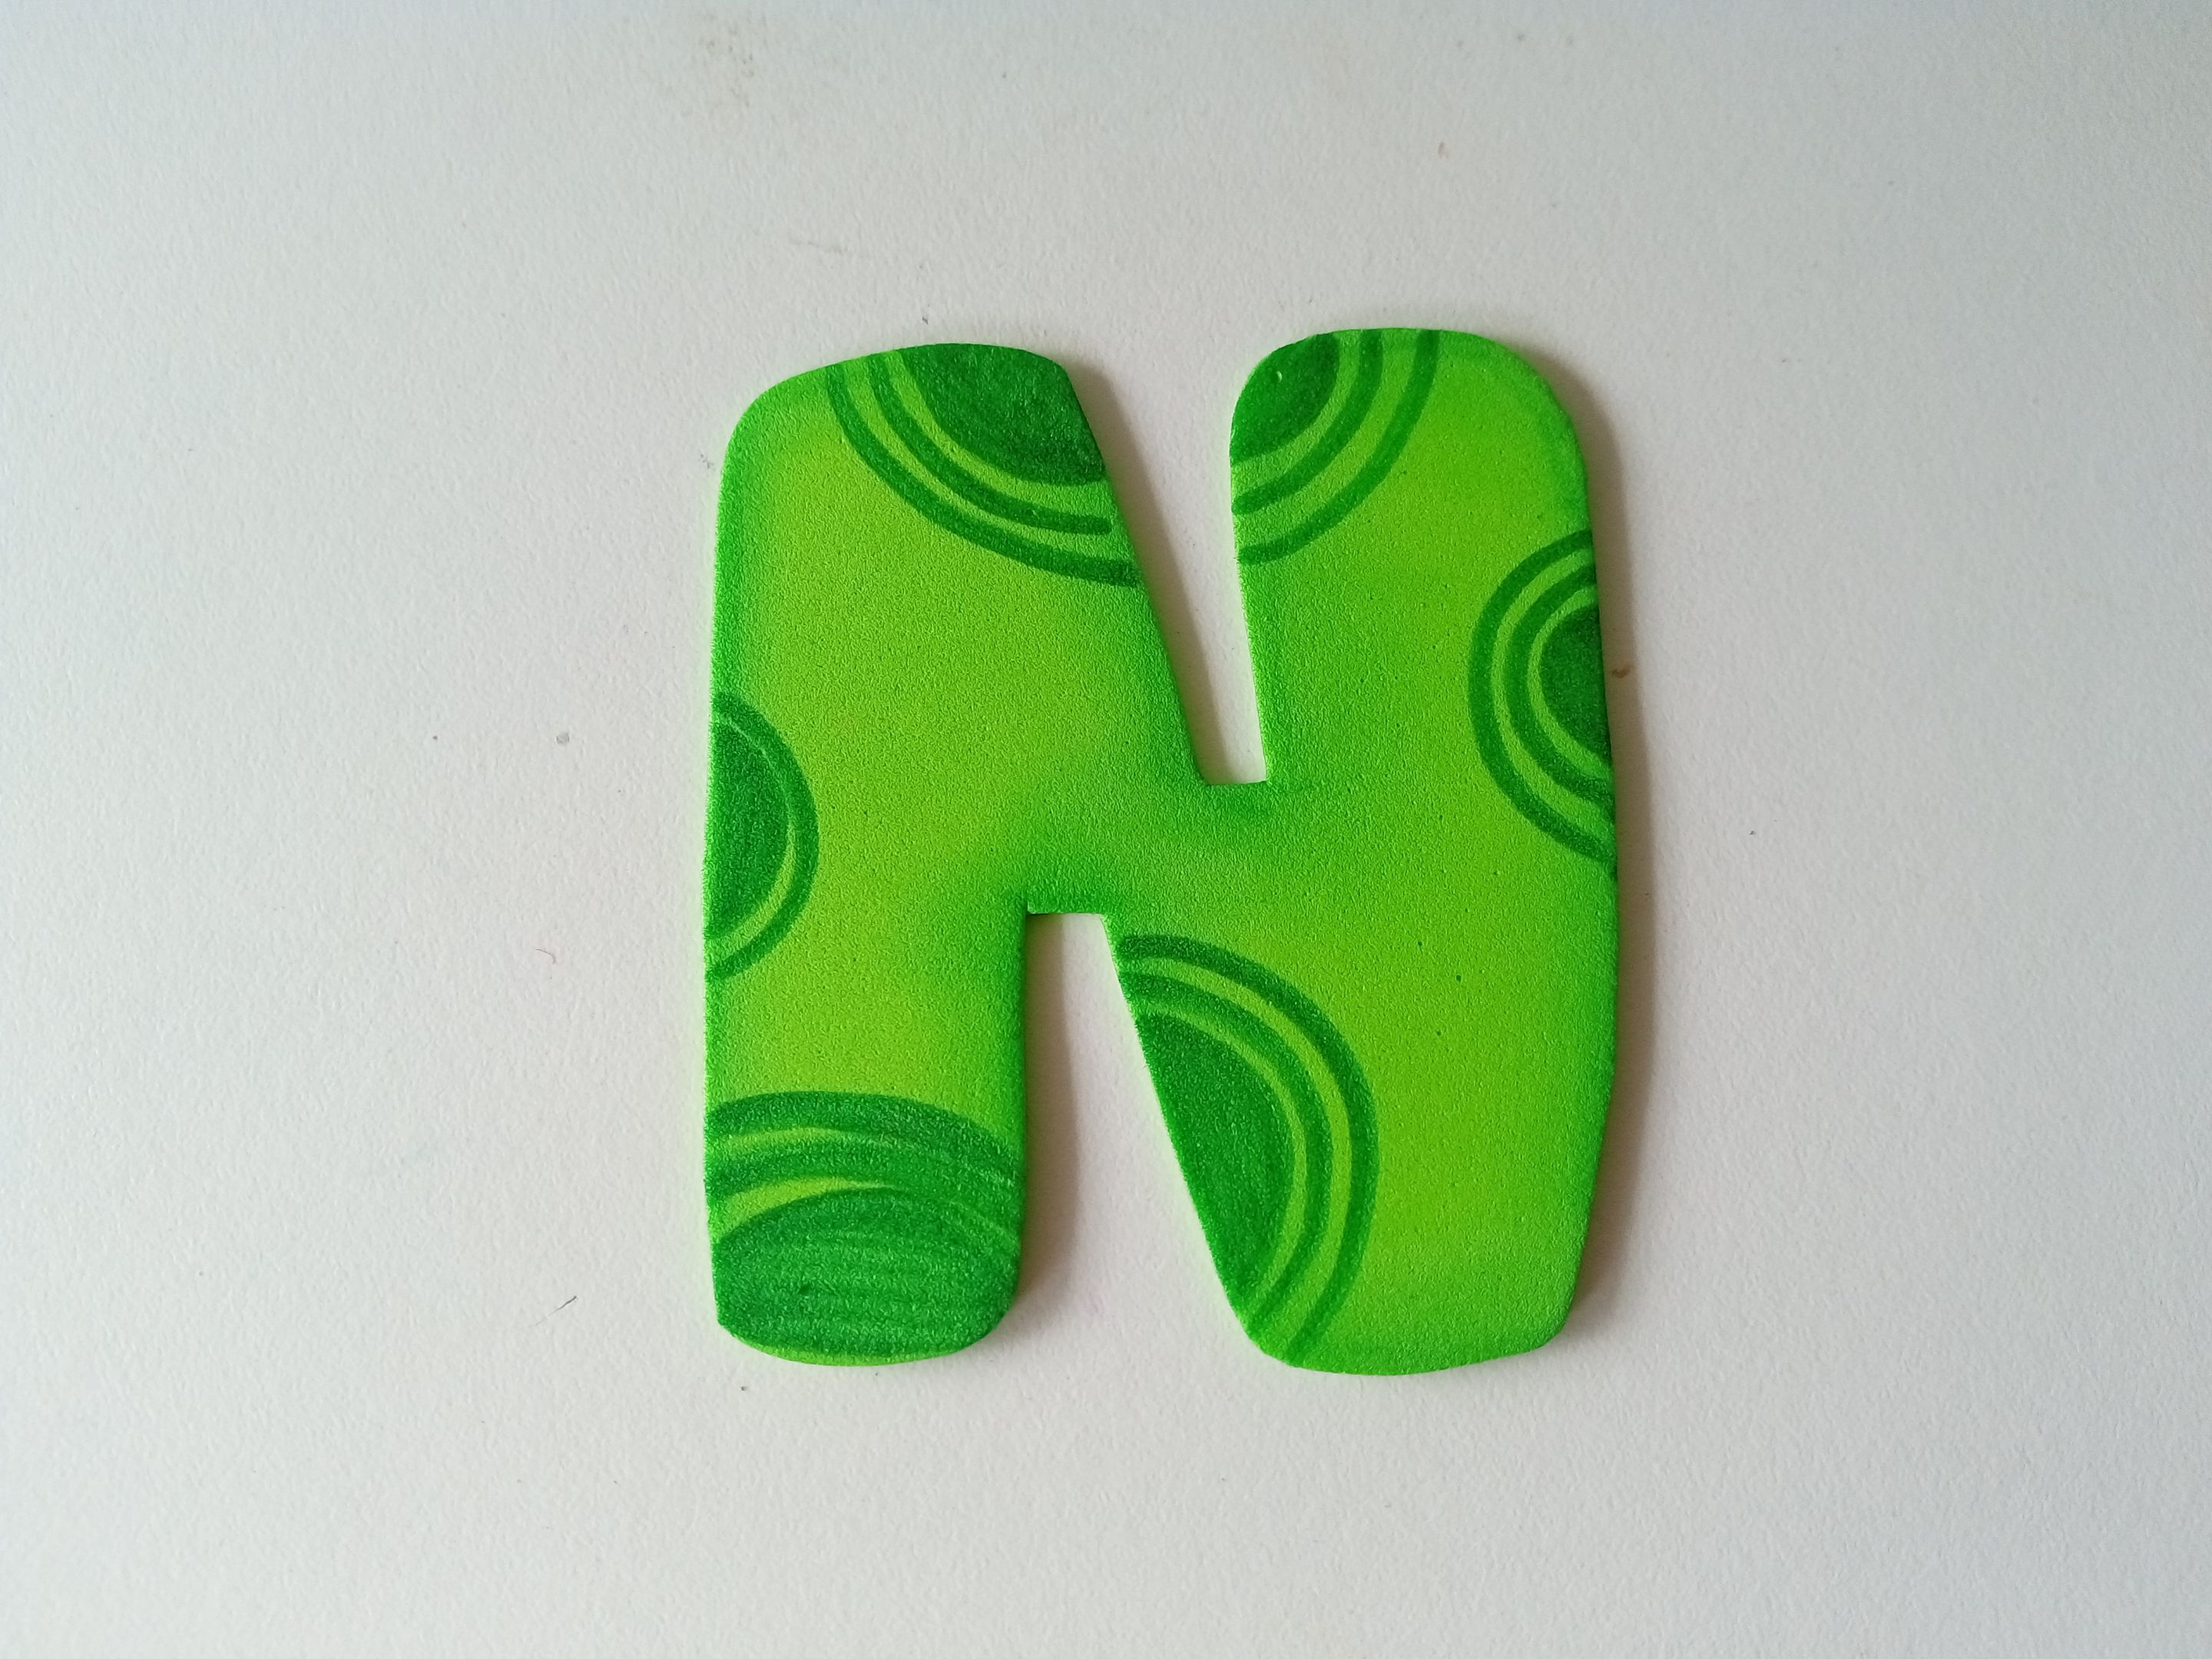
###### ✨ PASO 4:
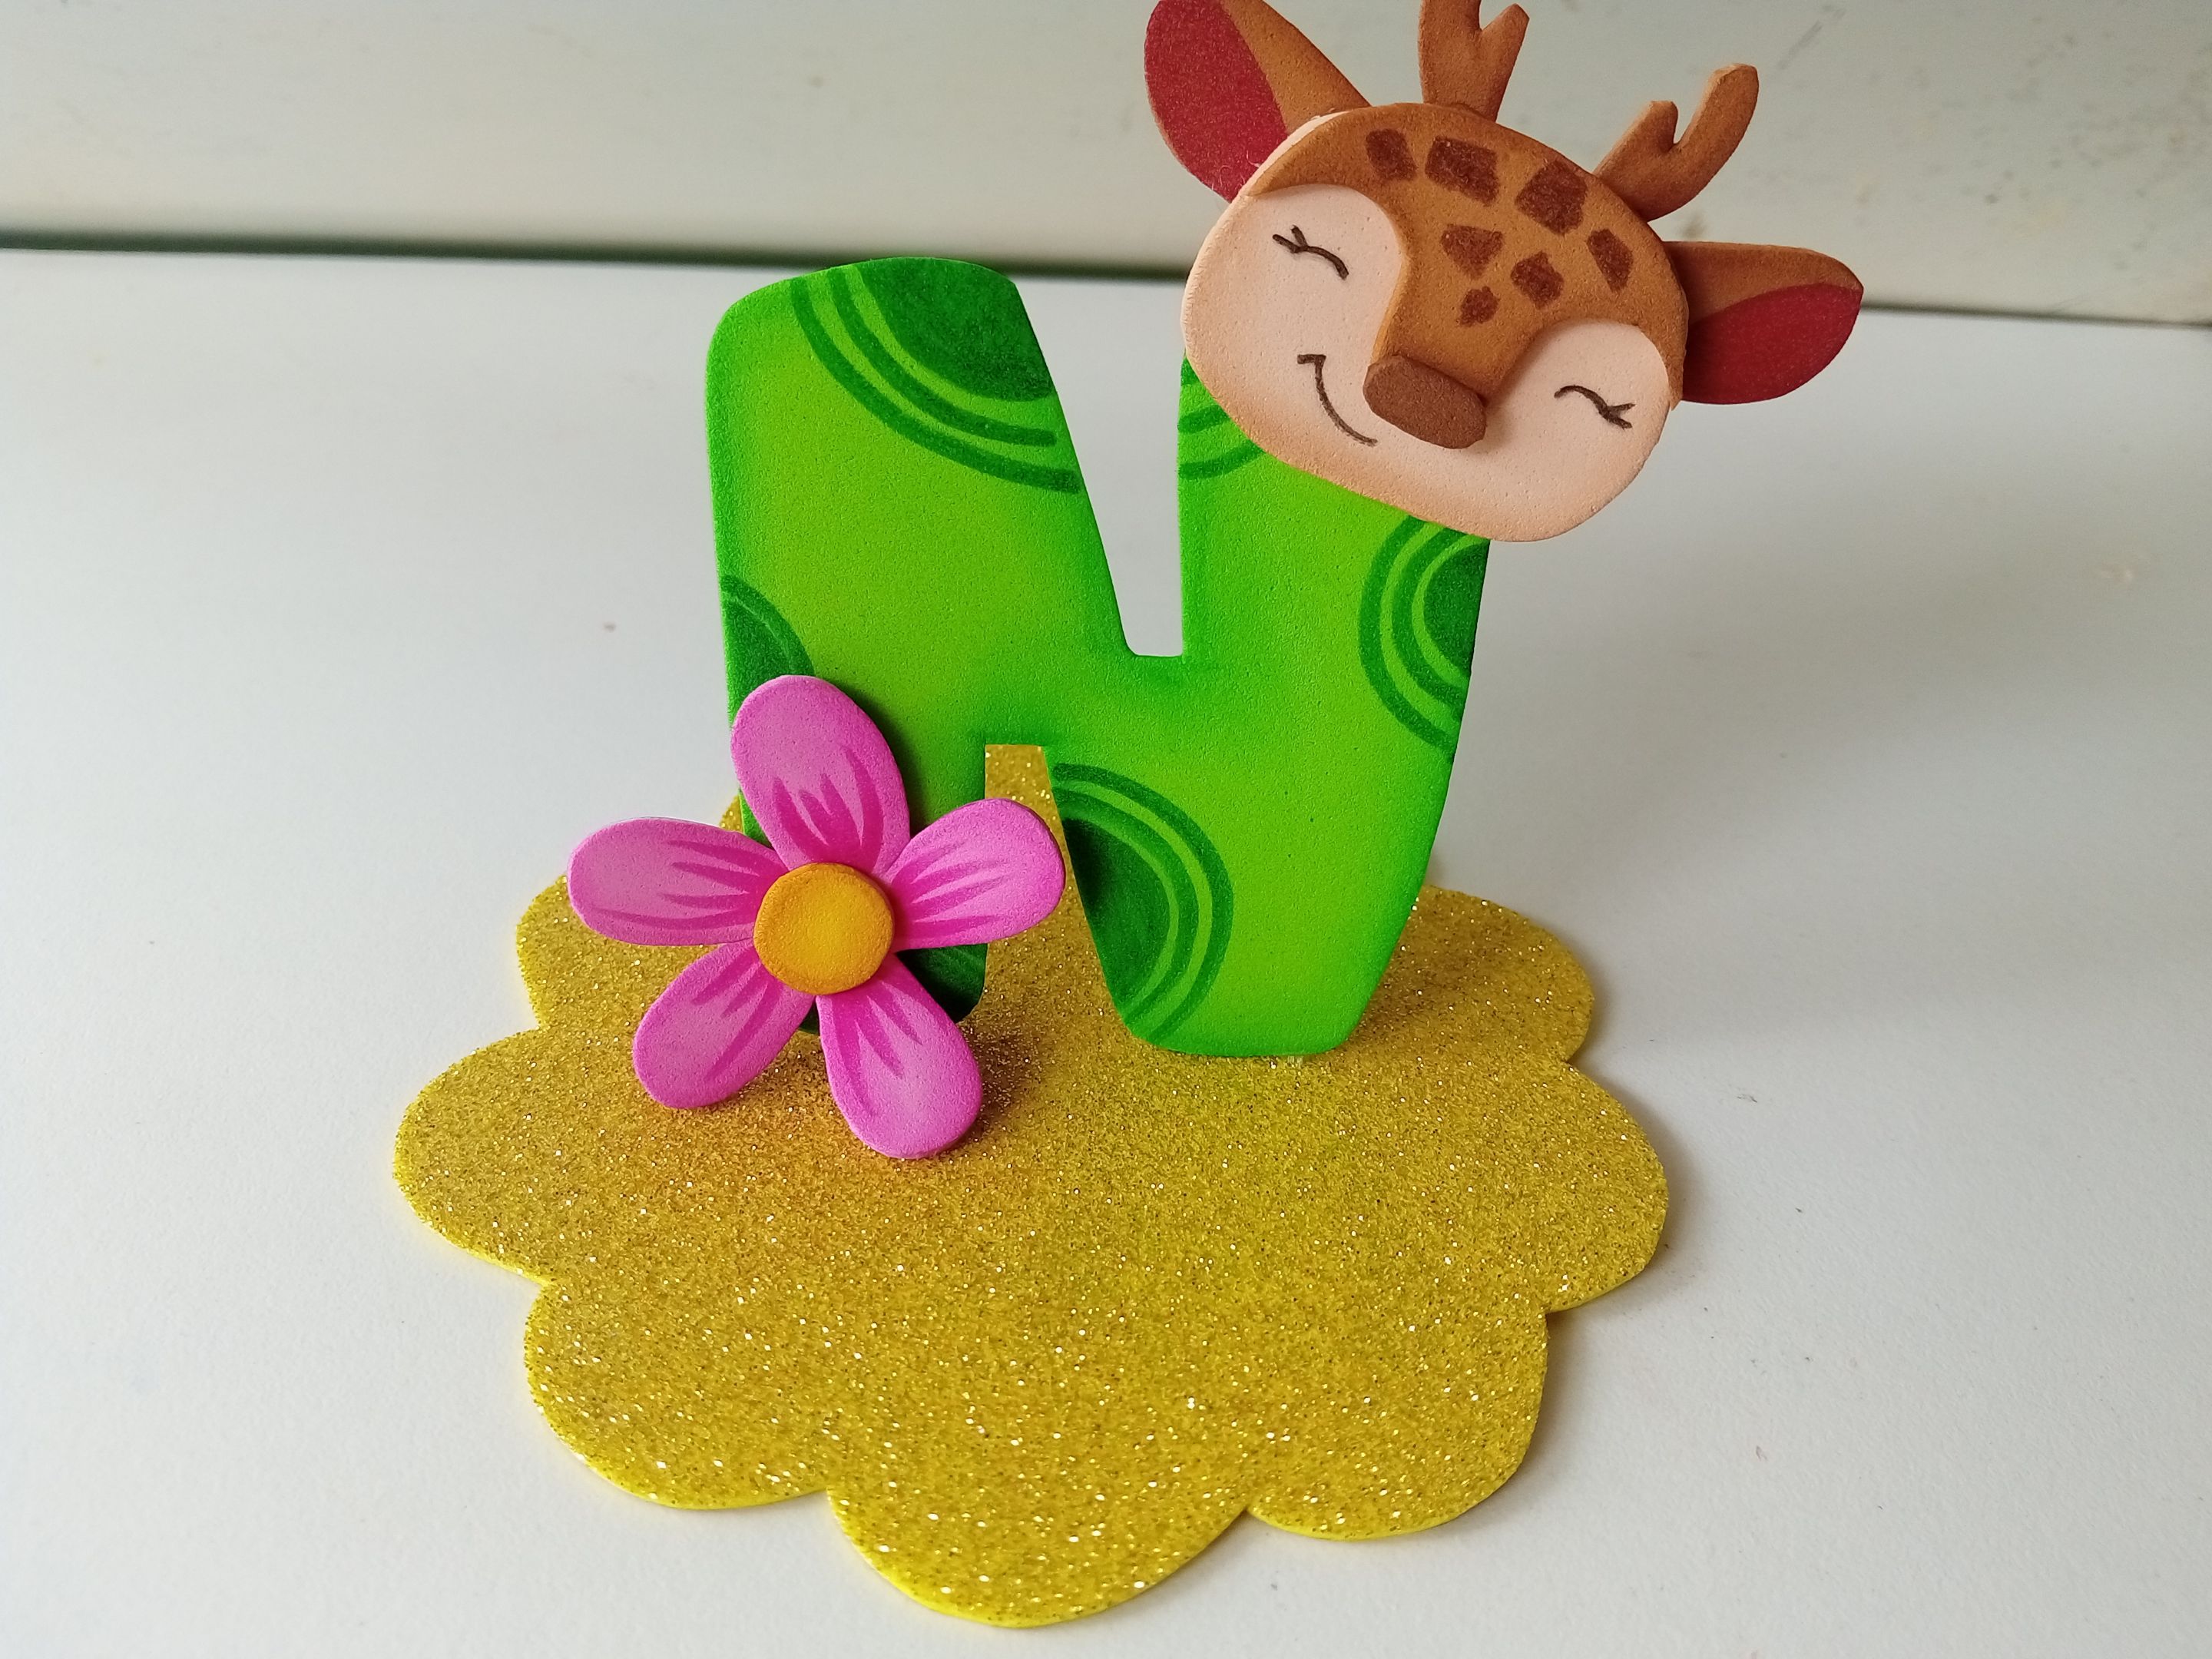
Ahora vamos con la inicial, que en este caso era una N, la cual hacemos primero en una hoja blanca y luego pasamos a foami color verde de 7.5 cm x 7 cm. Le damos color a los bordes con un tono más oscuro y le hacemos el diseño deseado por dentro; en mi caso hice algunos círculos.
###### ✨ STEP 4:
Now we move on to the initial, which in this case was an N, which we first made on a white sheet and then moved on to green 7.5 cm x 7 cm foam. We colored the edges with a darker shade and made the desired design inside; in my case, I made some circles.
###### ✨ PASO 5:
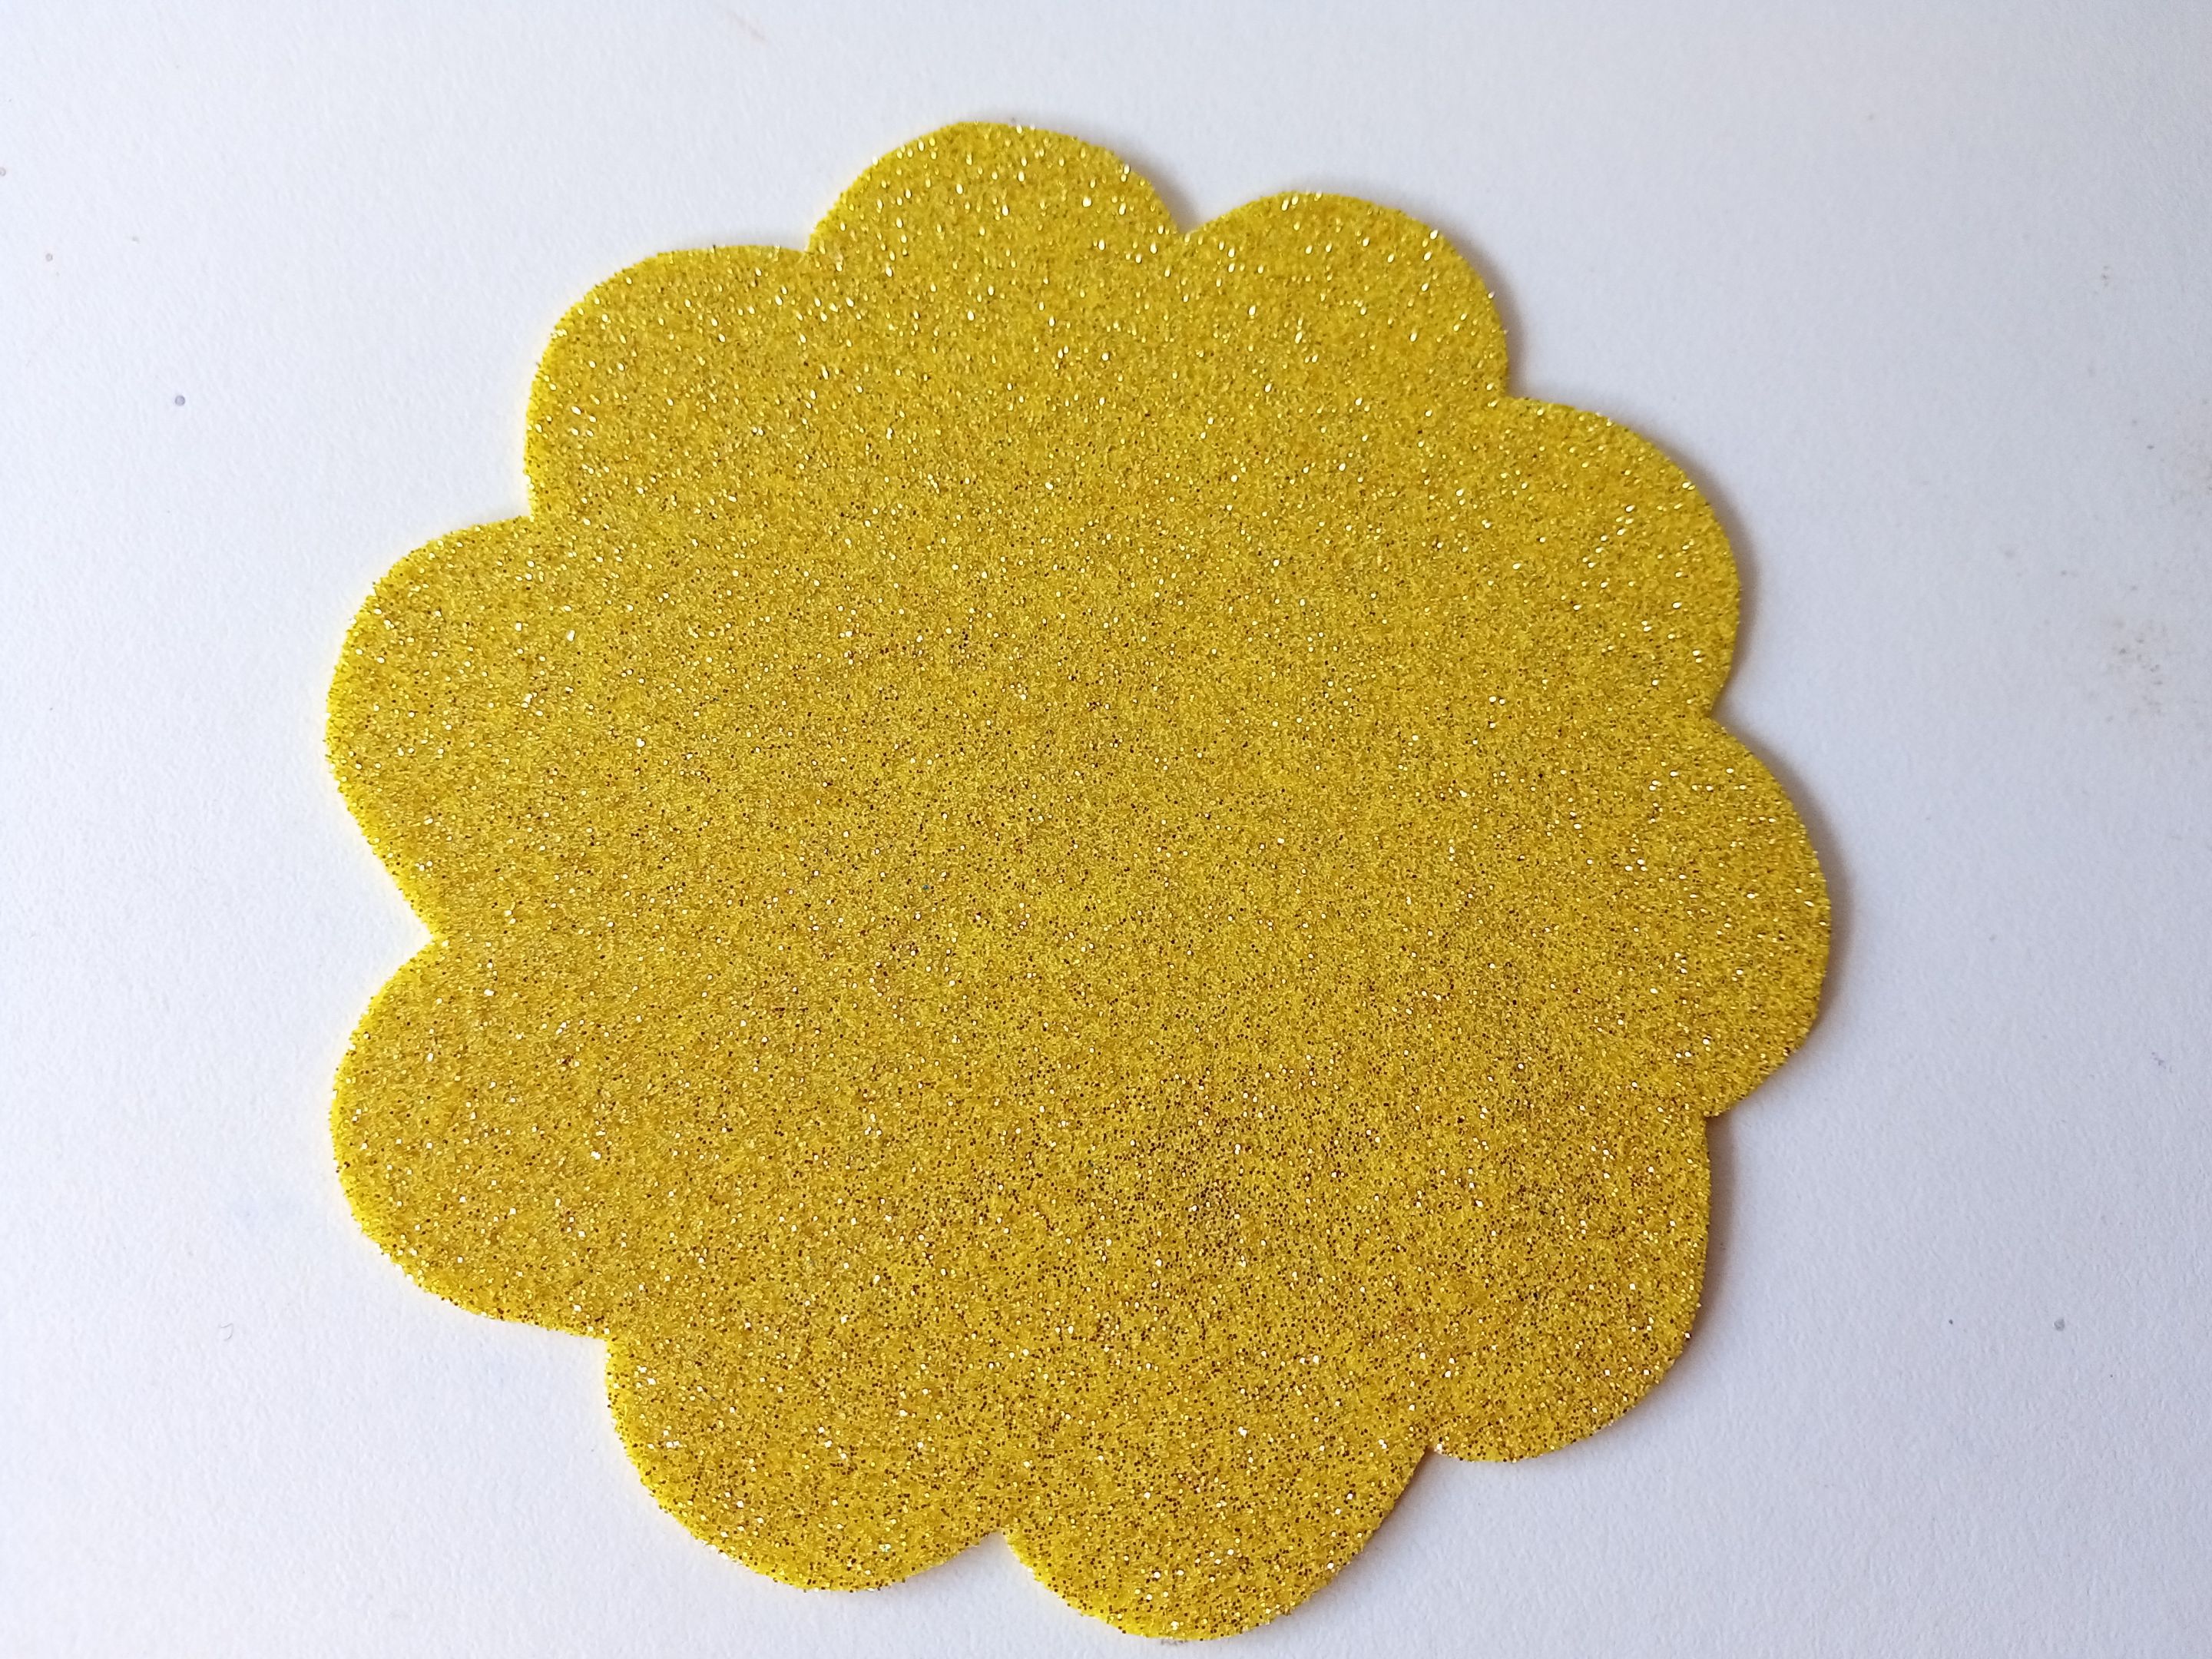
Mientras seca la inicial, es momento de recortar la base para la decoración. Así que recorté una circunferencia de 12 cm en foami escarchado dorado y a la cual le recorté un borde con formas ovaladas, dando una apariencia a una flor. Luego, pegué a Naara y la flor en esquinas diferentes de la inicial y esta al centro de la base.
###### ✨ STEP 5:
While the initial dries, it's time to cut out the base for the decoration. So I cut a 12 cm circle out of gold frosted foam and cut an oval-shaped border around it, giving it the appearance of a flower. Then, I glued Naara and the flower in different corners of the initial and this one to the center of the base.