Hello to my dear Hivers and the dear community of artists,#Jewelry as always very pleased and excited to be here again, showing you my work made with love and especially for you.
Greetings to the Splinterlands community, and everyone who lives there, I'm here to join the Splinterlands Art Contest
Today I am here with you again to show you my art. I love spending each week in that wonderful world of magic, color, and many Splinterlands characters, looking for new elements or characters to build various crafts, whether jewelry, accessories, 3D figures, or other things that motivate, inspire, and activate my creativity so that I can create for you.
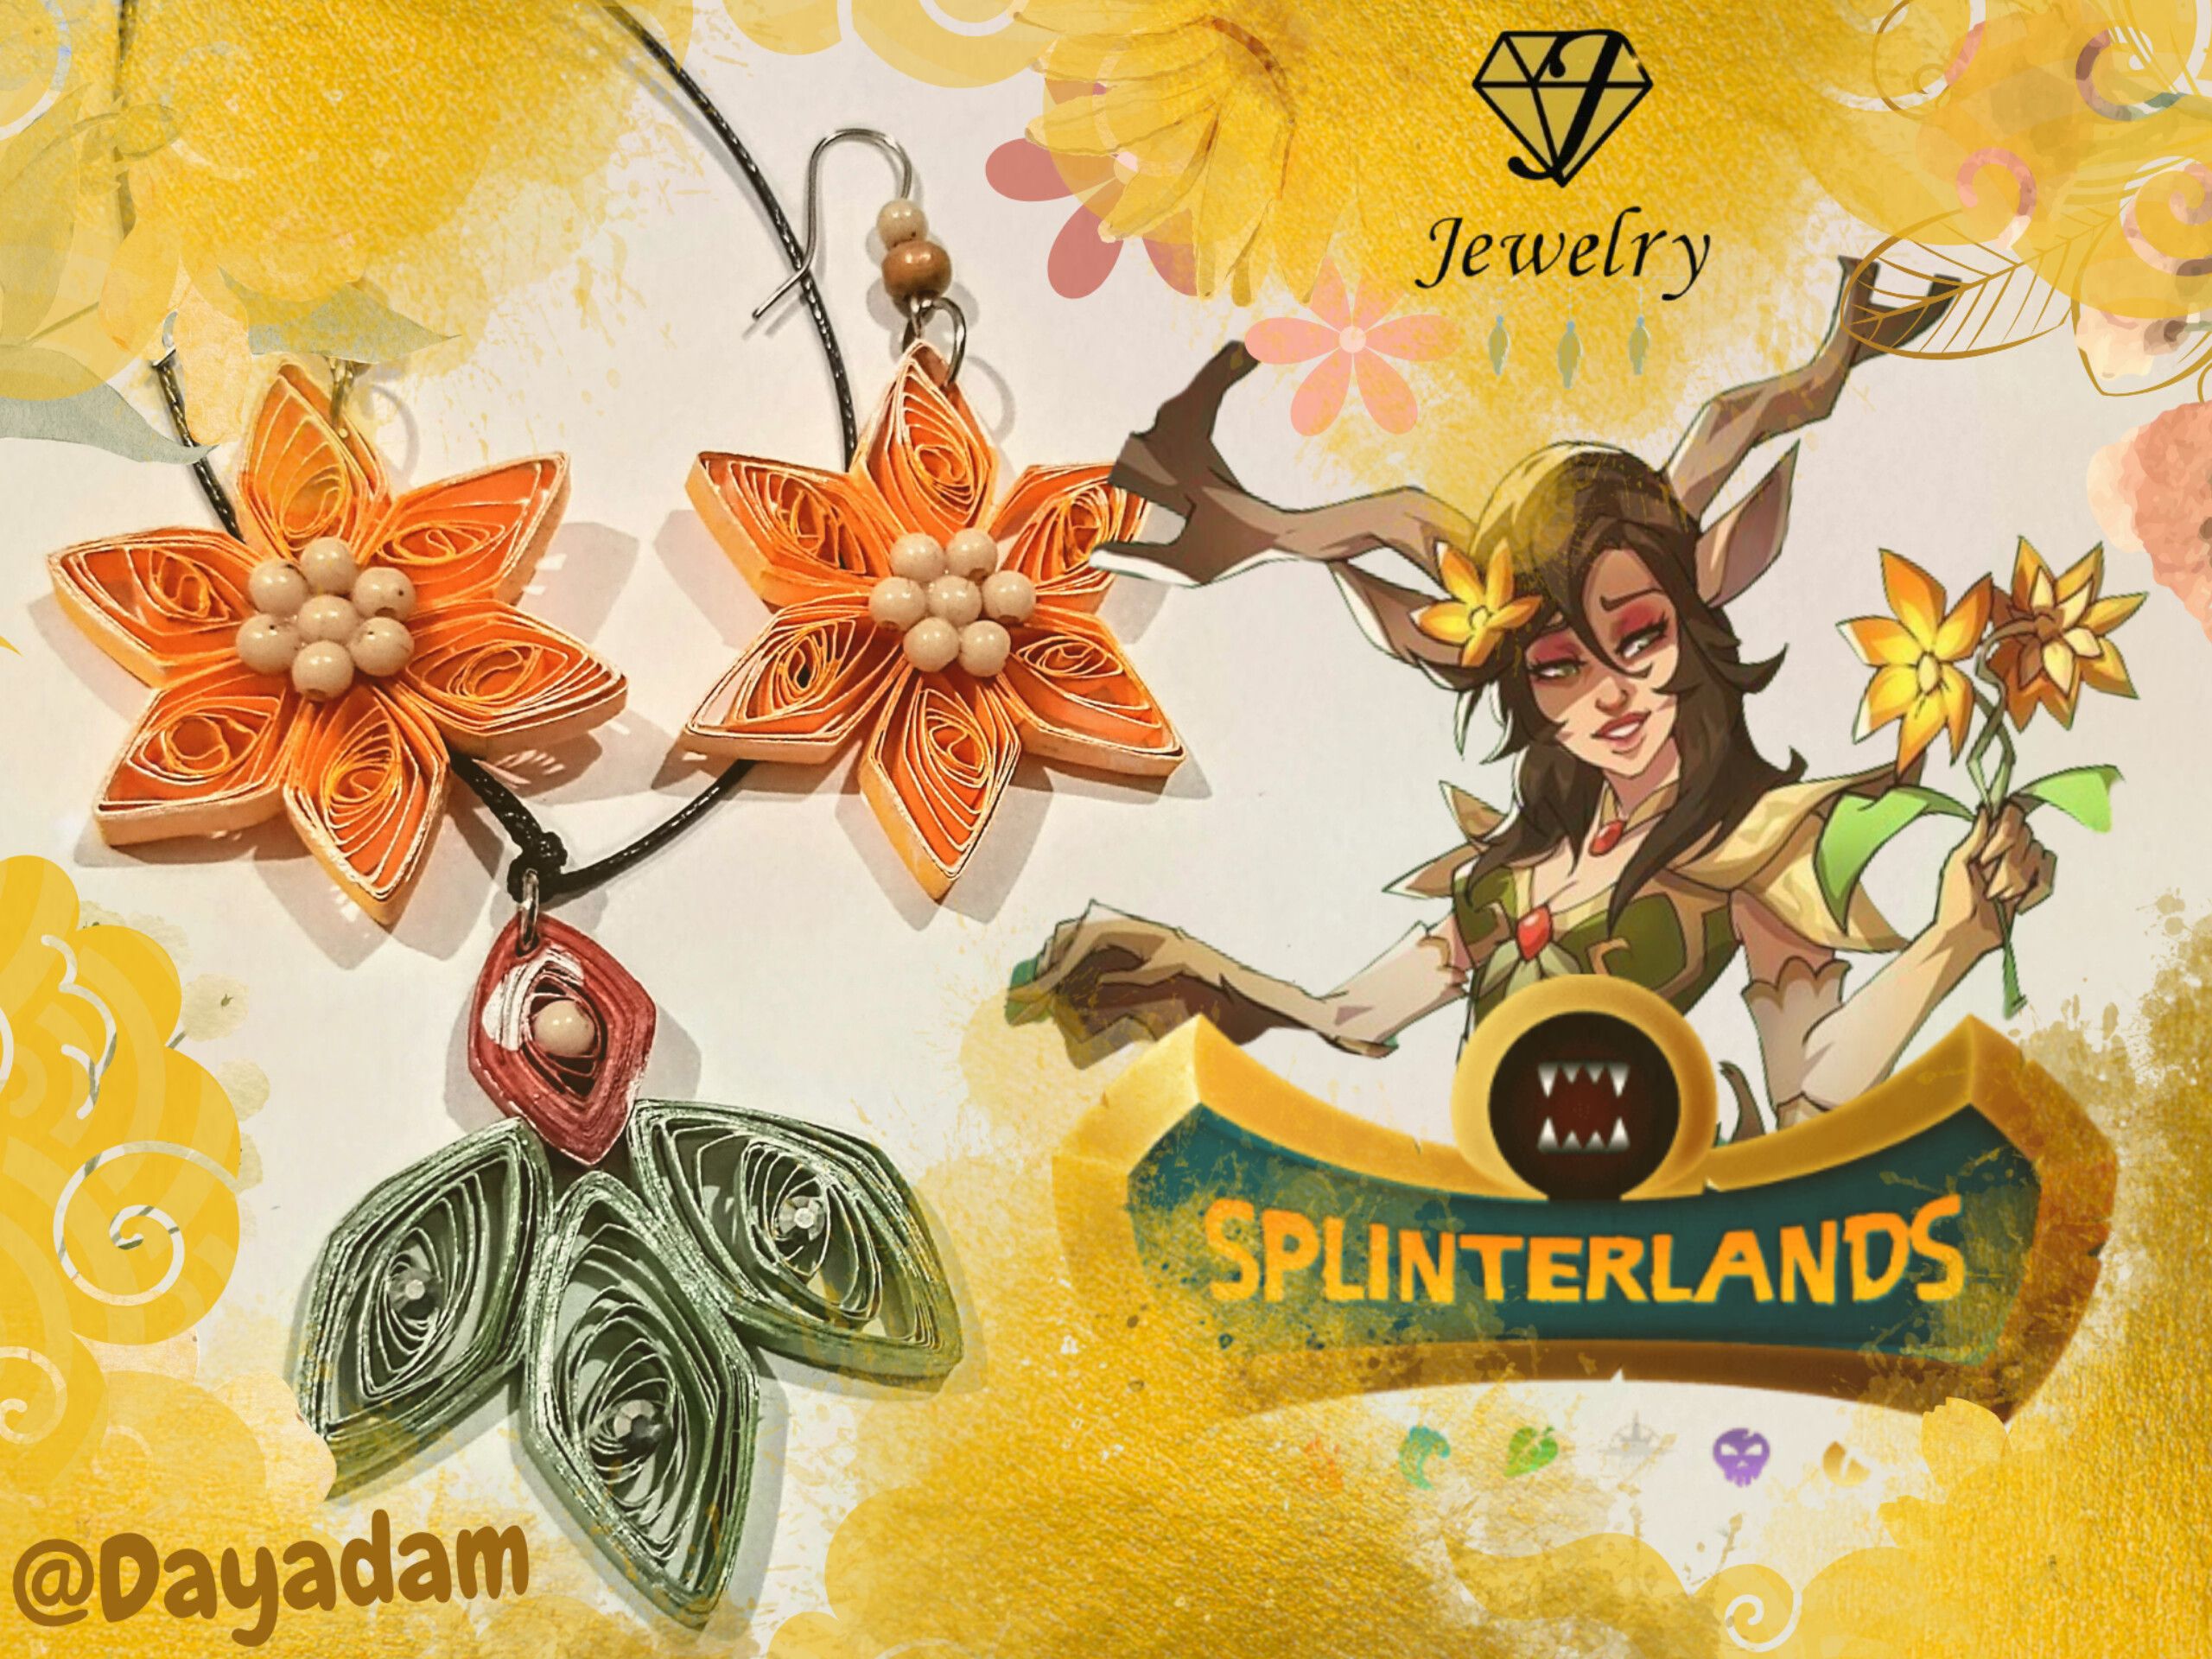
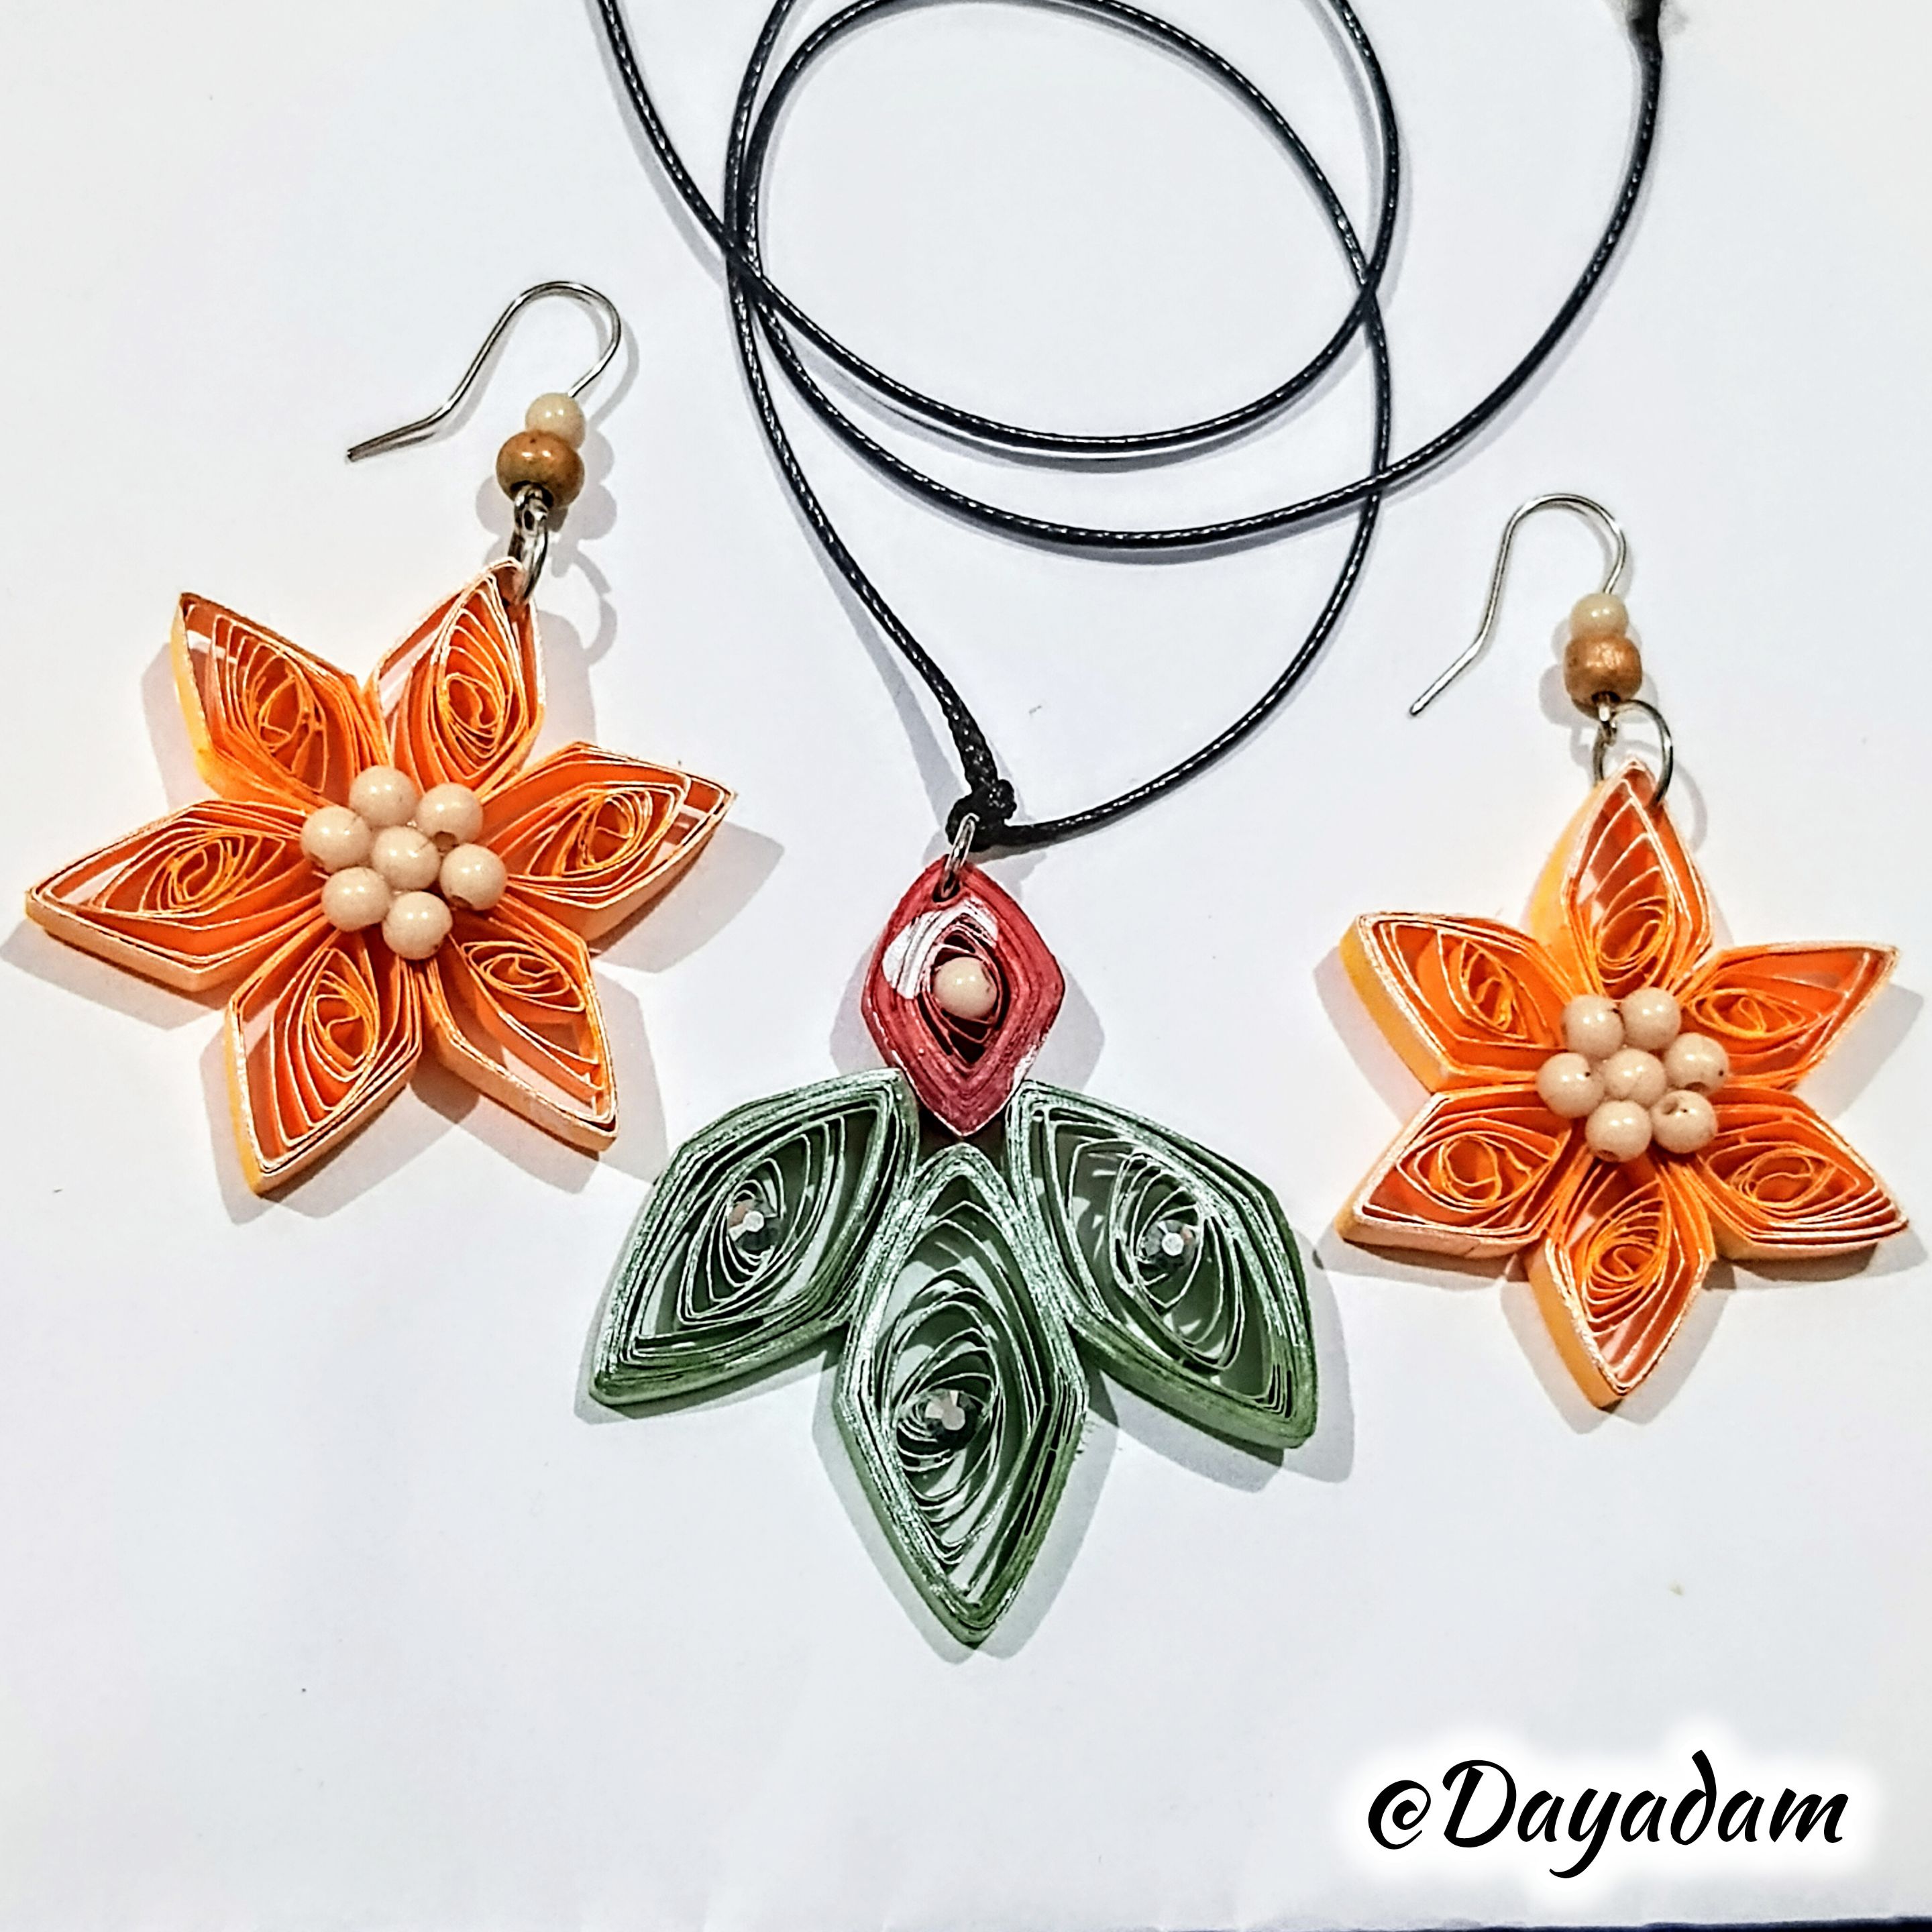
Today I bring you a new work of art. Last week I made a pair of dangling earrings inspired by elements from the card “Buttercup Mauler” using the quilling technique. Today I wanted to follow up by completing a set of accessories with a necklace pendant.
If you want to know more about the game, I leave you my reference link to enter it and navigate through this wonderful world: https://splinterlands.com?ref=dayadam
Hoping you like my work, without further ado, I leave you with my creative process.
Let's start:😃

Hola a Todos...✨
Hola a mis queridos Hivers y a la querida comunidad de artistas #Jewelry, como siempre muy complacida y emocionada de encontrarme por acá nuevamente, mostrándole mi trabajo hecho con mucho amor y especialmente para ustedes.
Un saludo para la comunidad de Splinterlands, y todos los que hacen vida por allí, estoy por acá para unirme al Splinterlands Art Contest.
Hoy estoy con ustedes nuevamente para mostrarles mi arte, me encanta semana a semana pasar por ese maravilloso mundo de magia, color, y muchísimos personajes de Splinterlands para buscar nuevos elementos o personajes para construir diversas manualidades bien sean bisutería, accesorios, figuras en 3D entre otras cosas que me motiven, inspiren y activen mi creatividad y de esa manera poder crear para ustedes.
Para hoy les traigo un nuevo trabajo de arte, la semana pasada lleve a cabo un par de zarcillos colgantes inspirados en elementos de la carta, "Buttercup Mauler" en la técnica de quilling, para hoy quise hacer un seguimiento completando un set de accesorios realizando un dije para collar.
Si quieren saber más con respecto al juego les dejo mi enlace de referencia para que ingresen en él, y naveguen por este maravilloso mundo: https://splinterlands.com?ref=dayadam
Esperando les guste mi trabajo, sin más preámbulos, les dejo mi proceso creativo.
Comencemos:😃
 |
 |
|


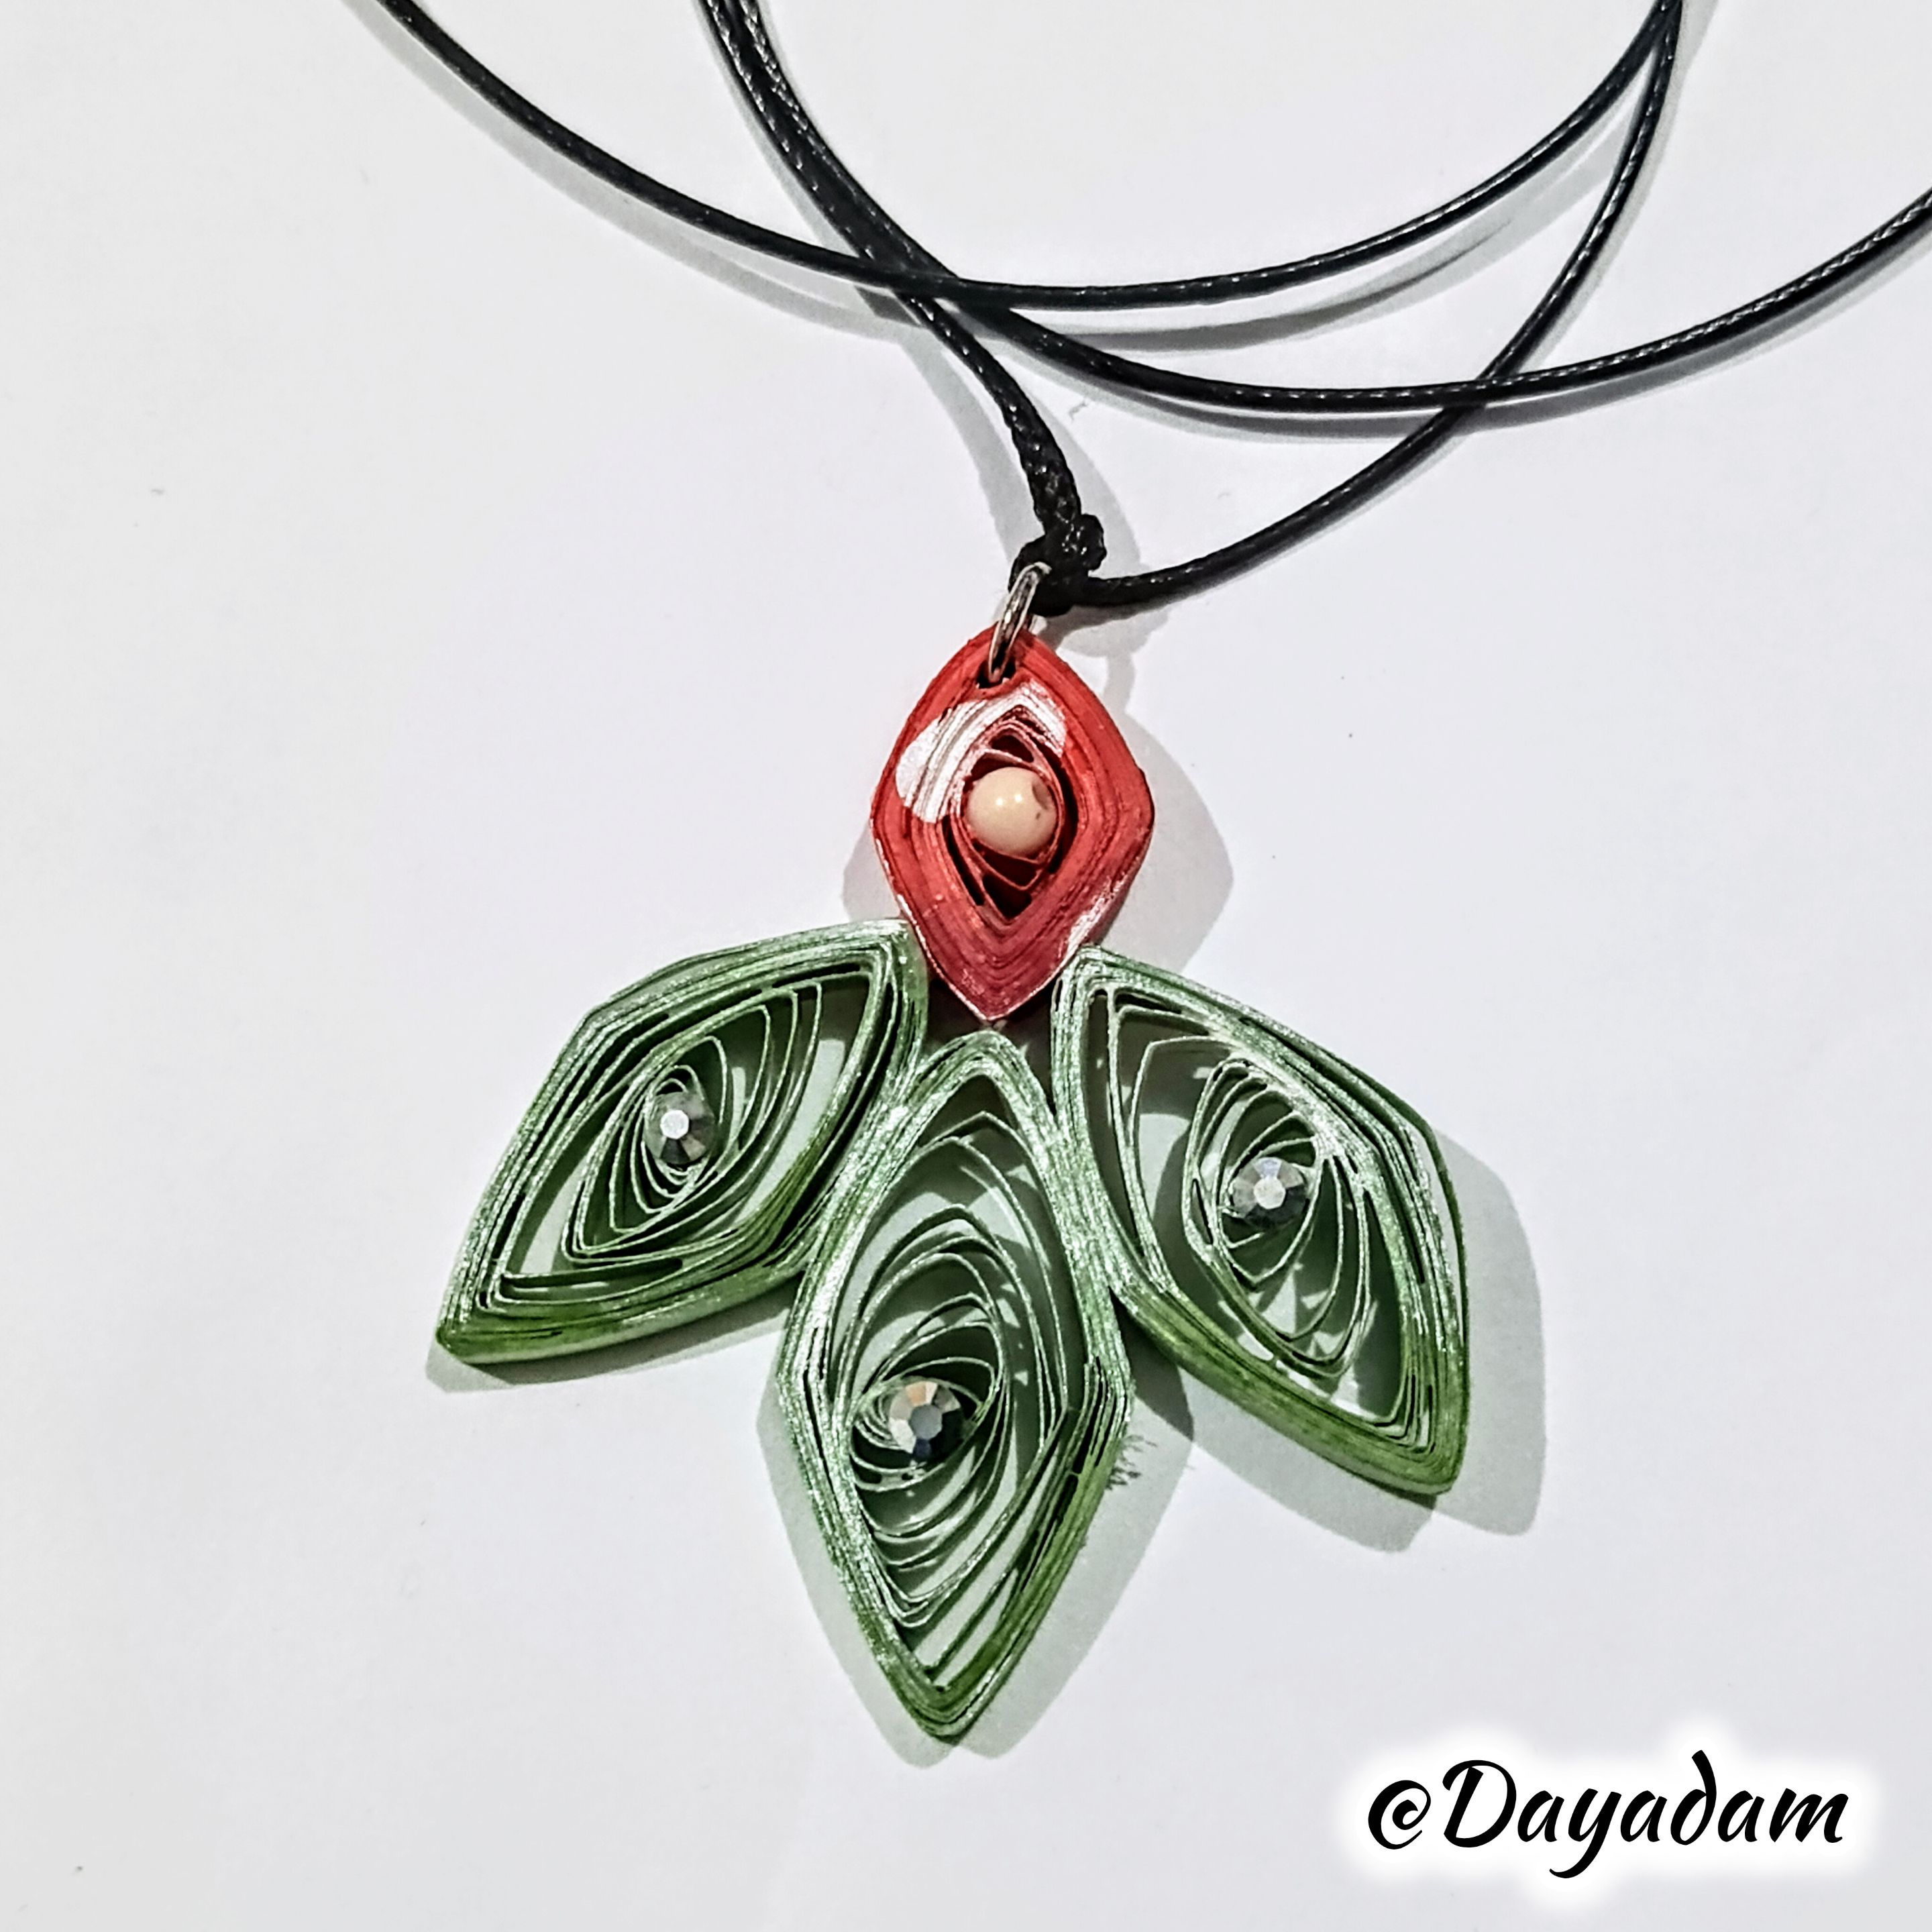
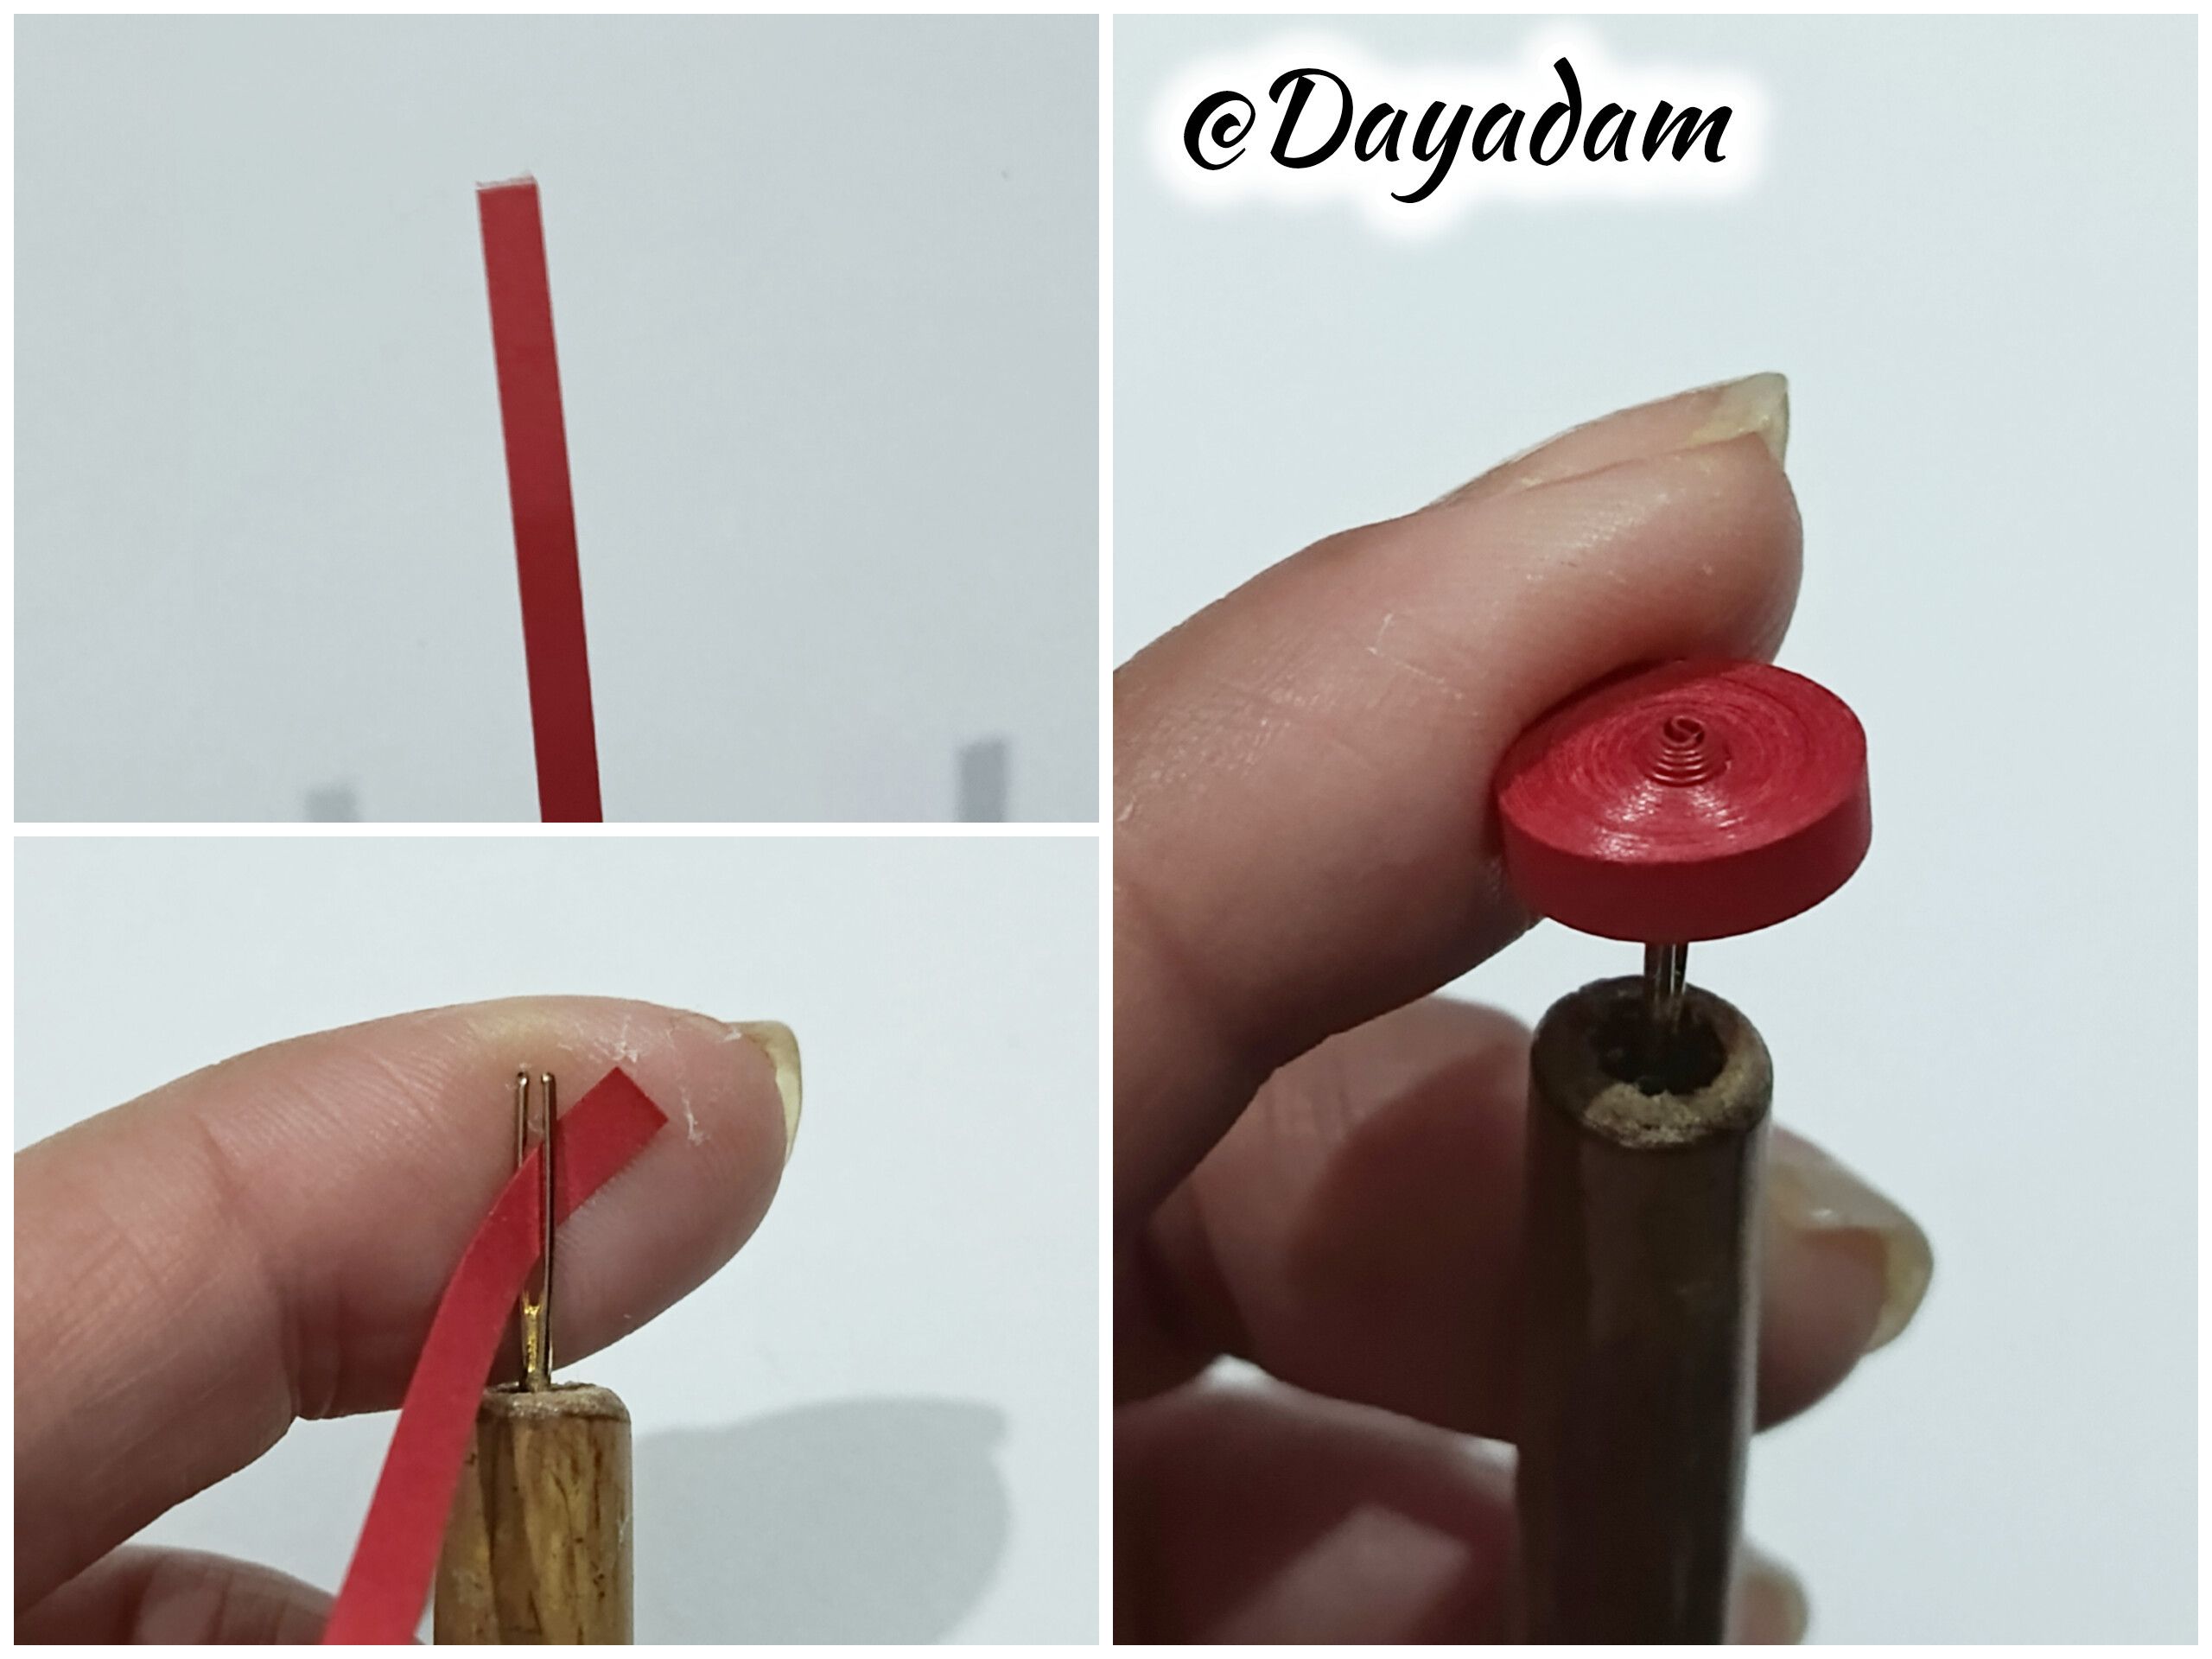
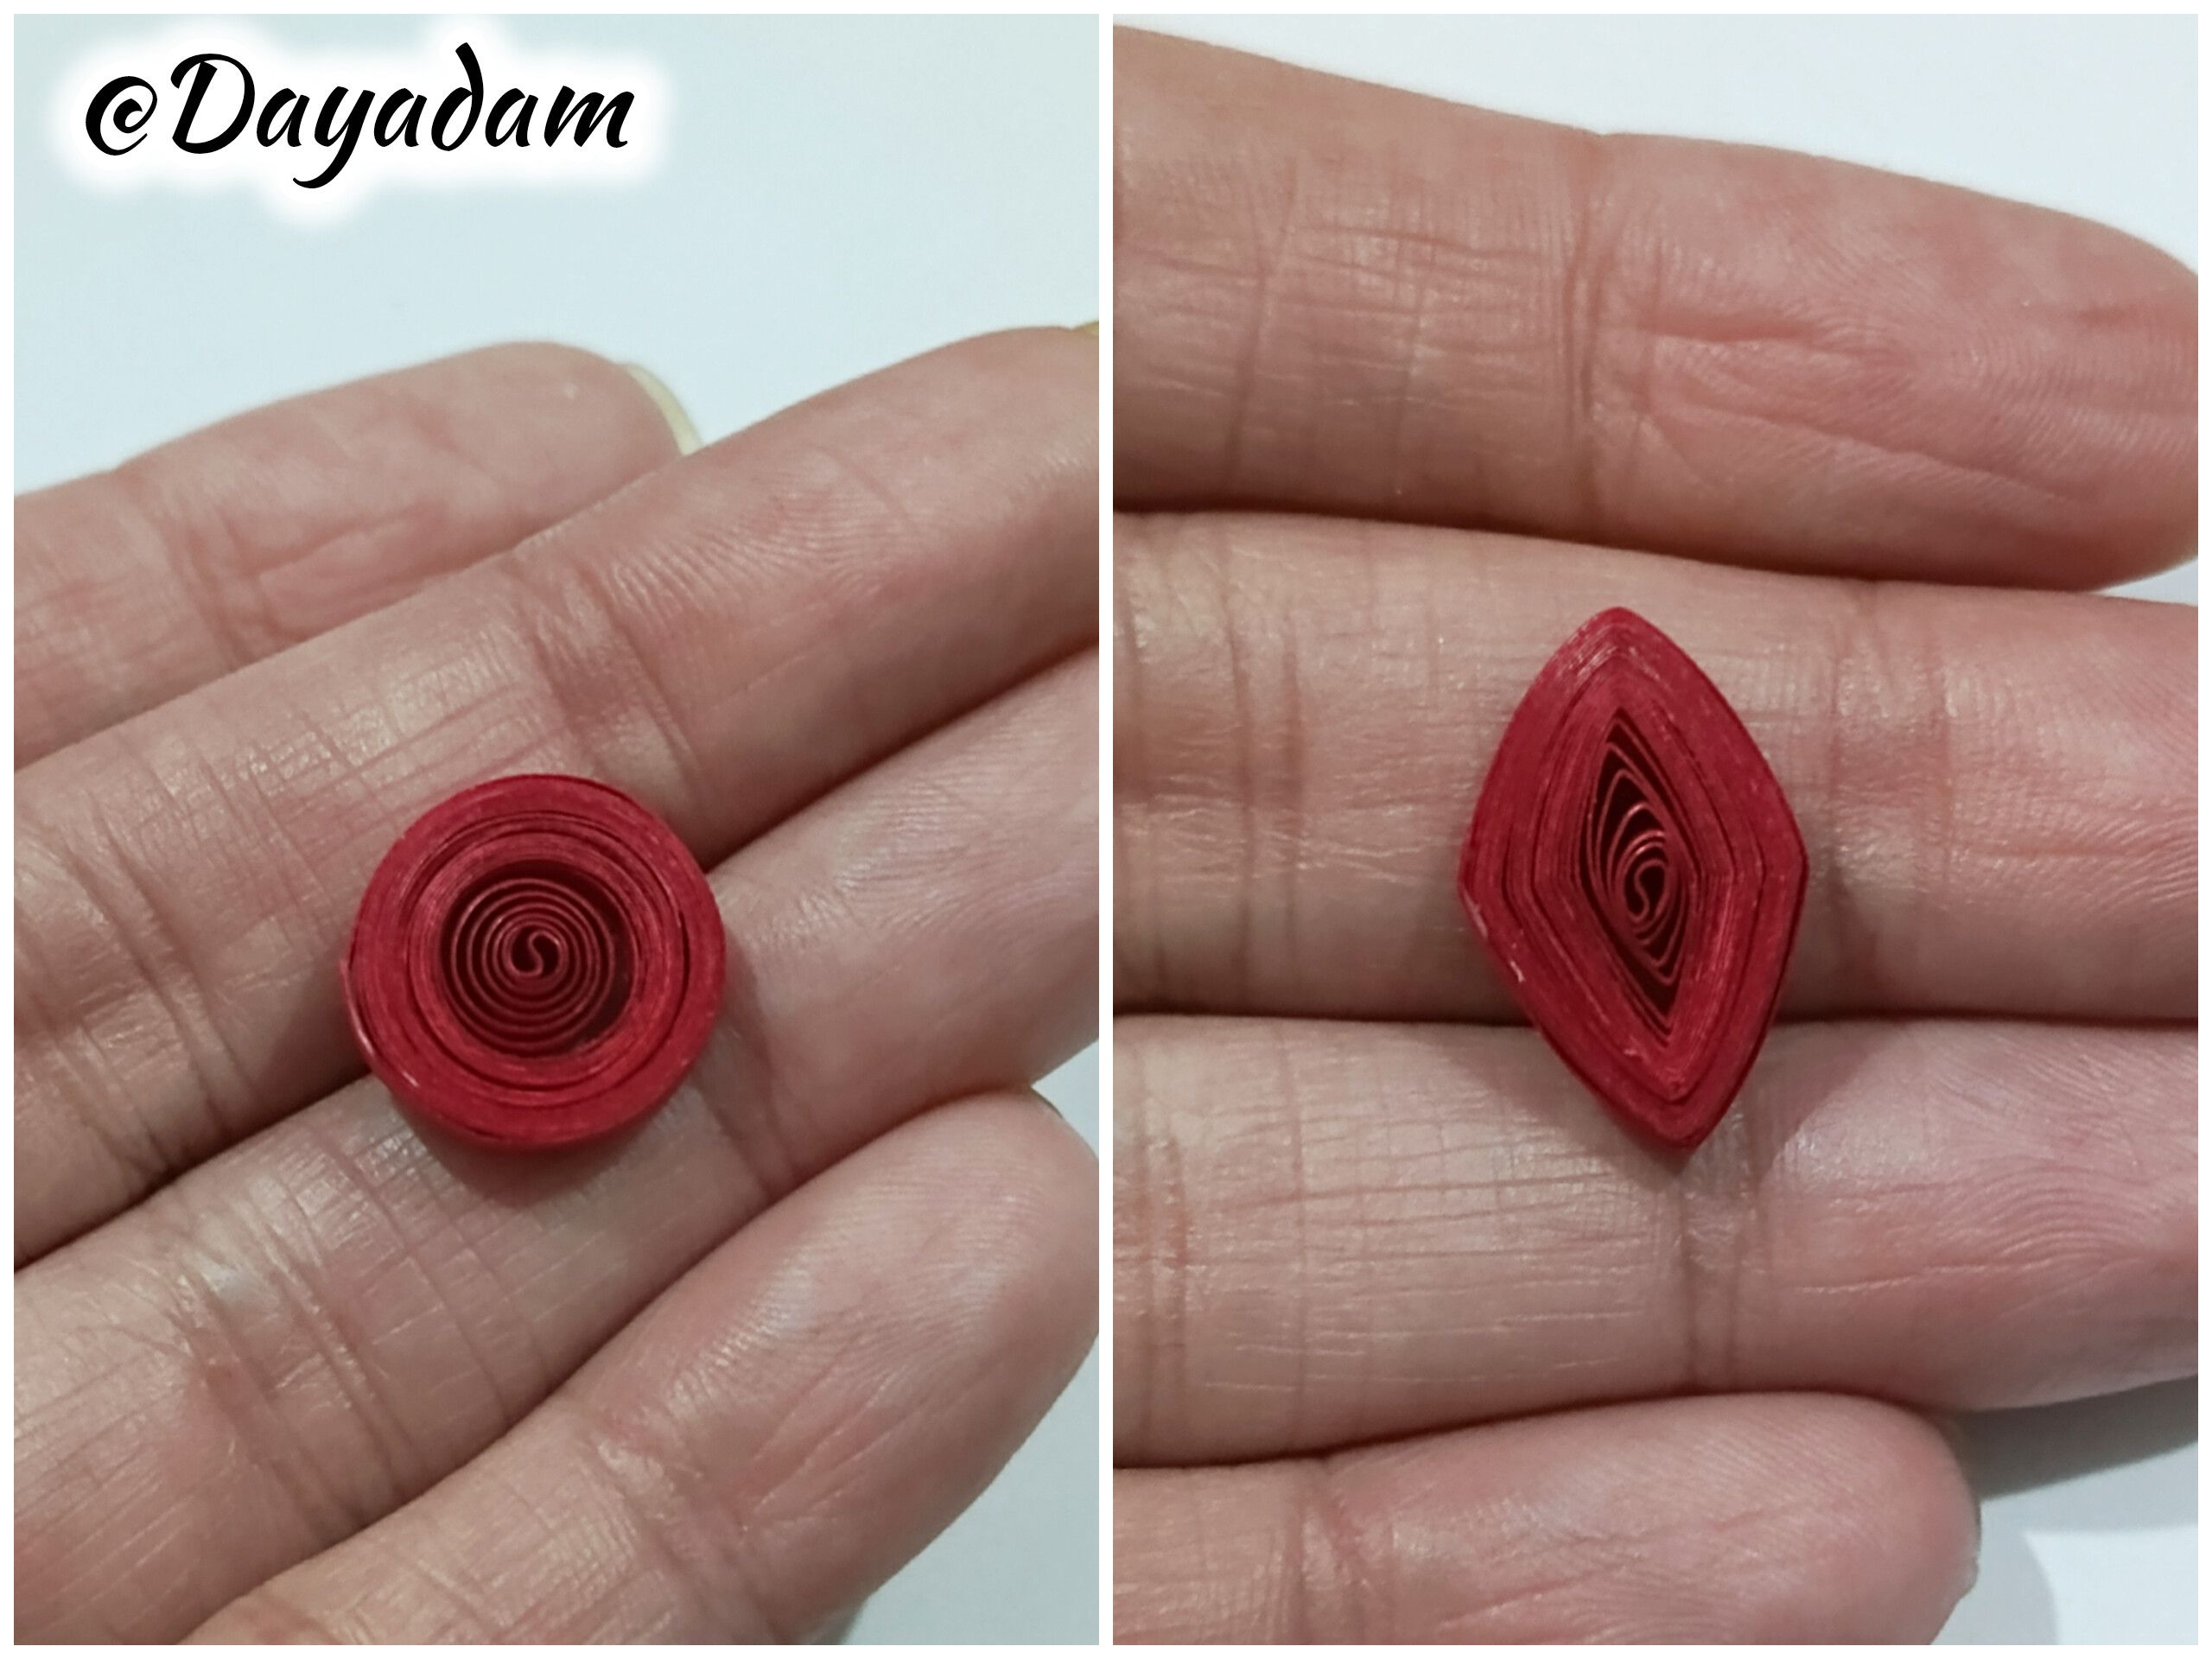
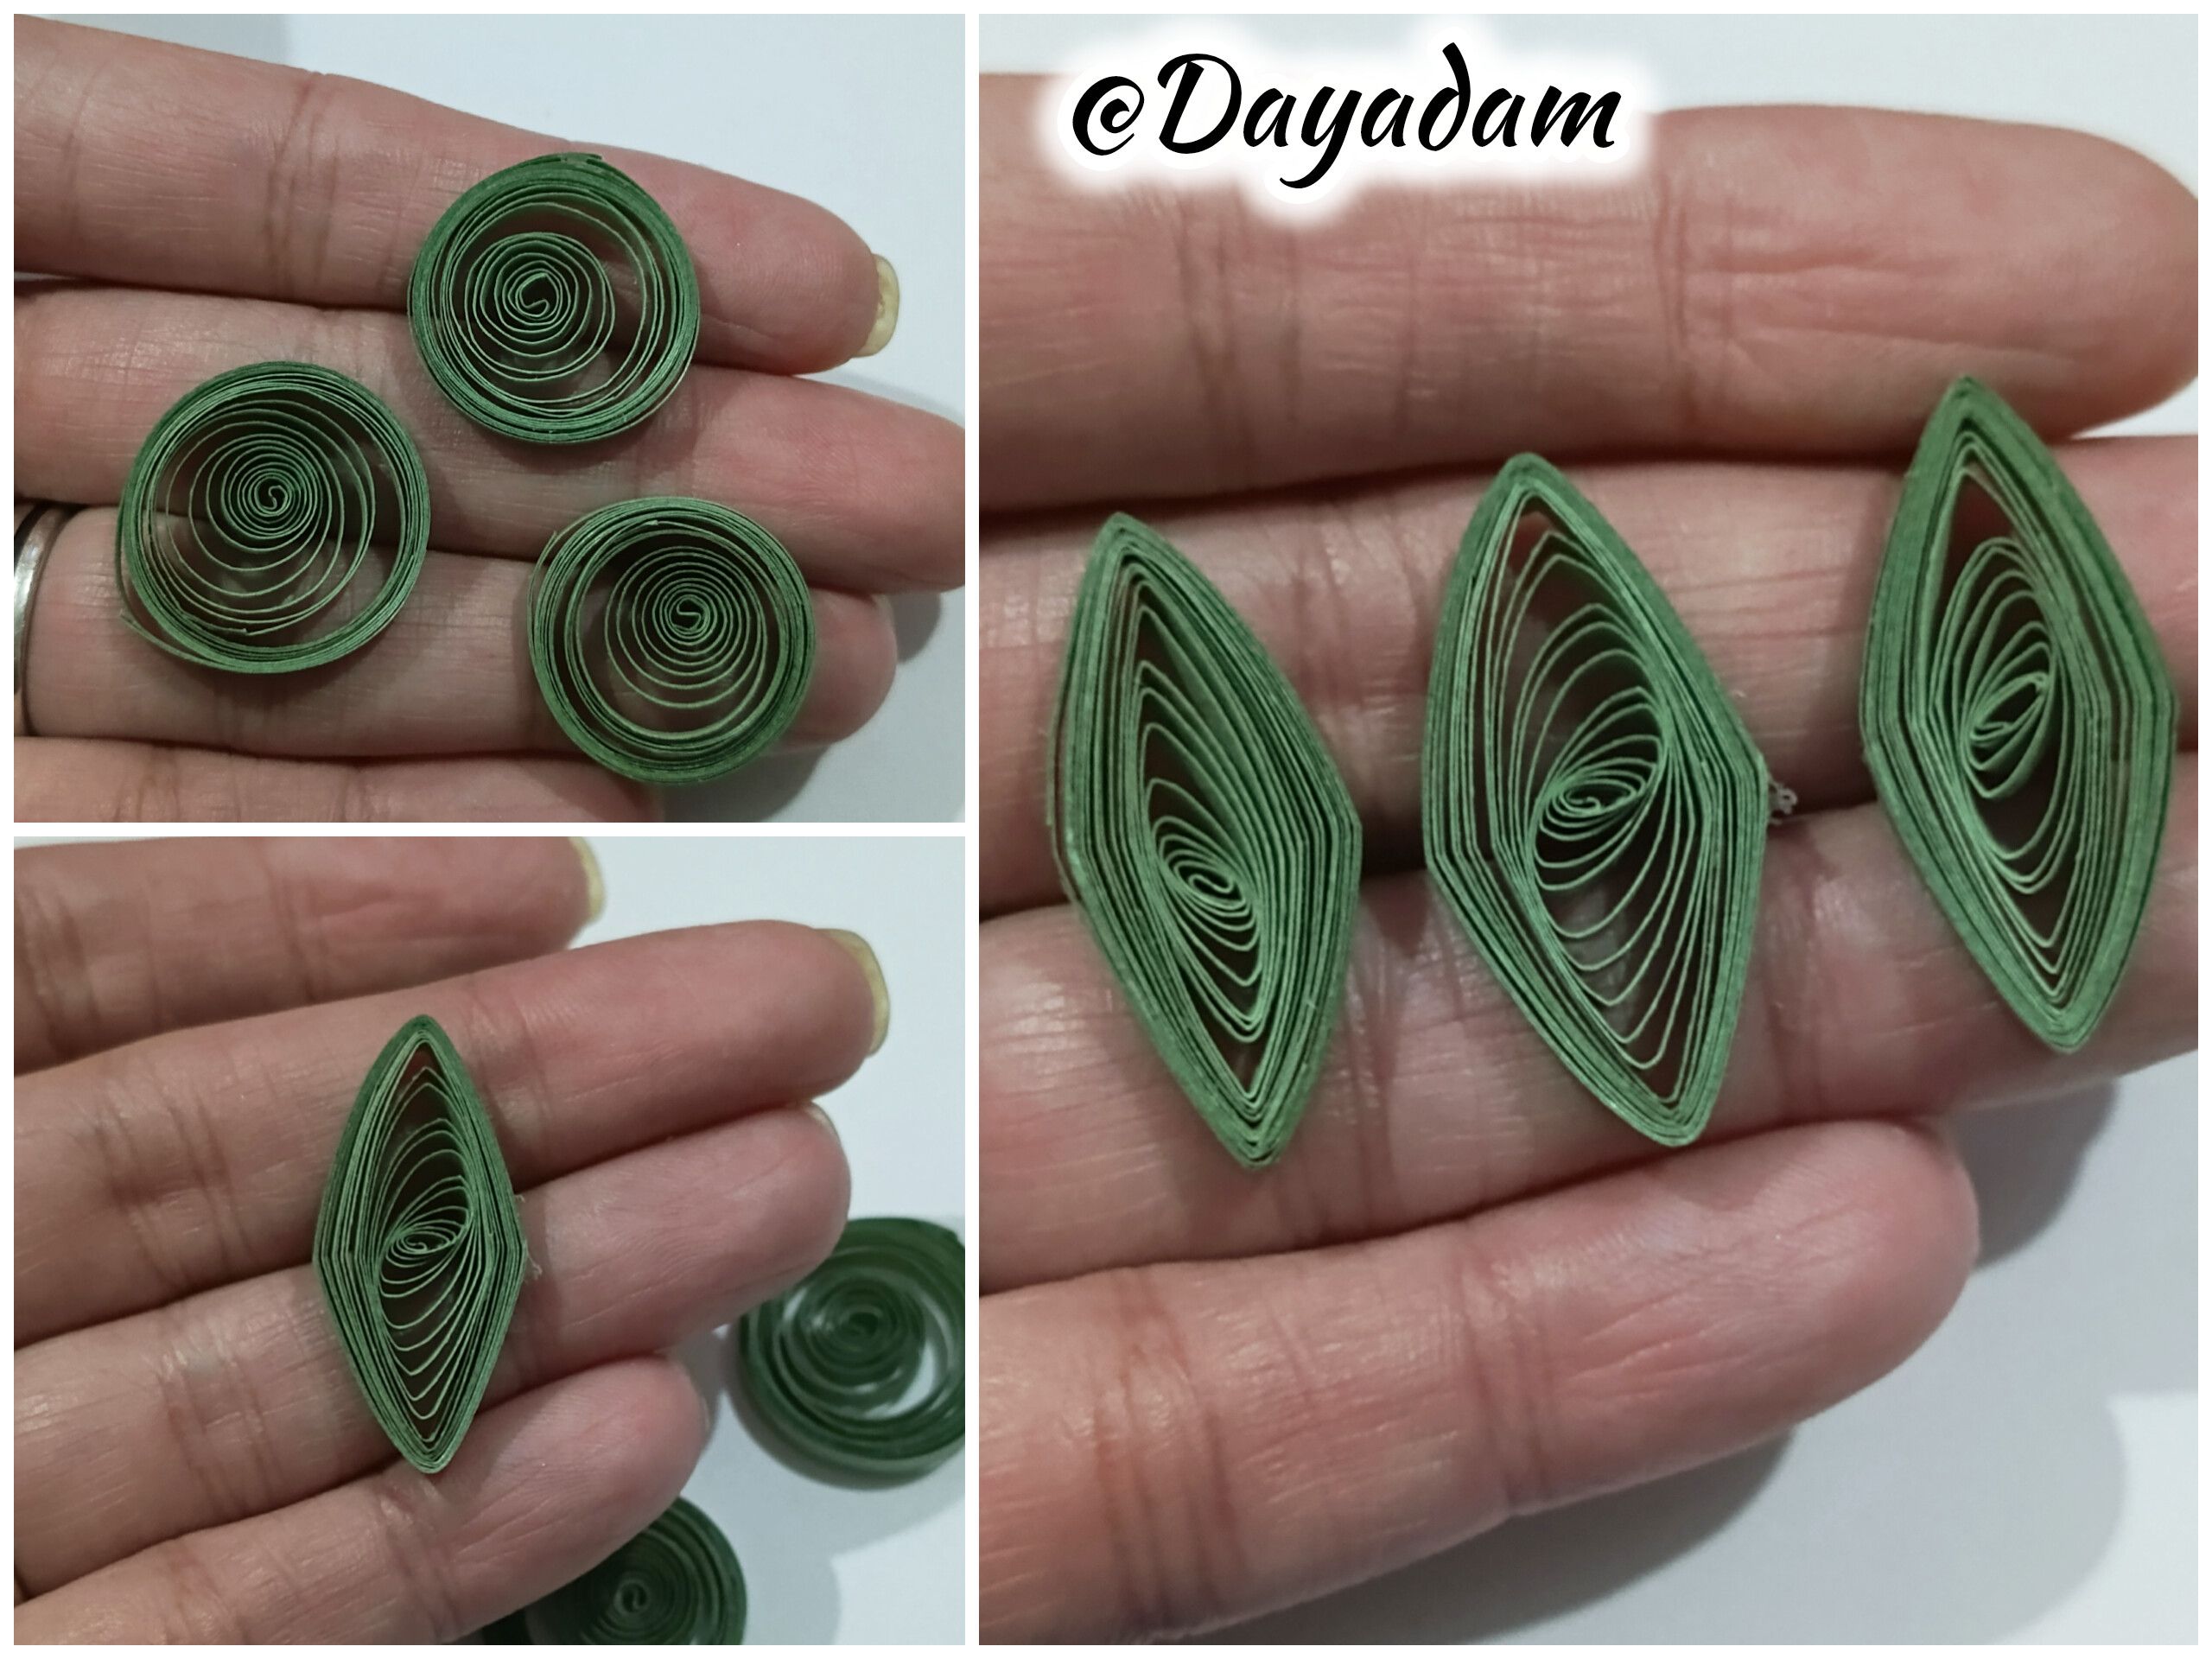
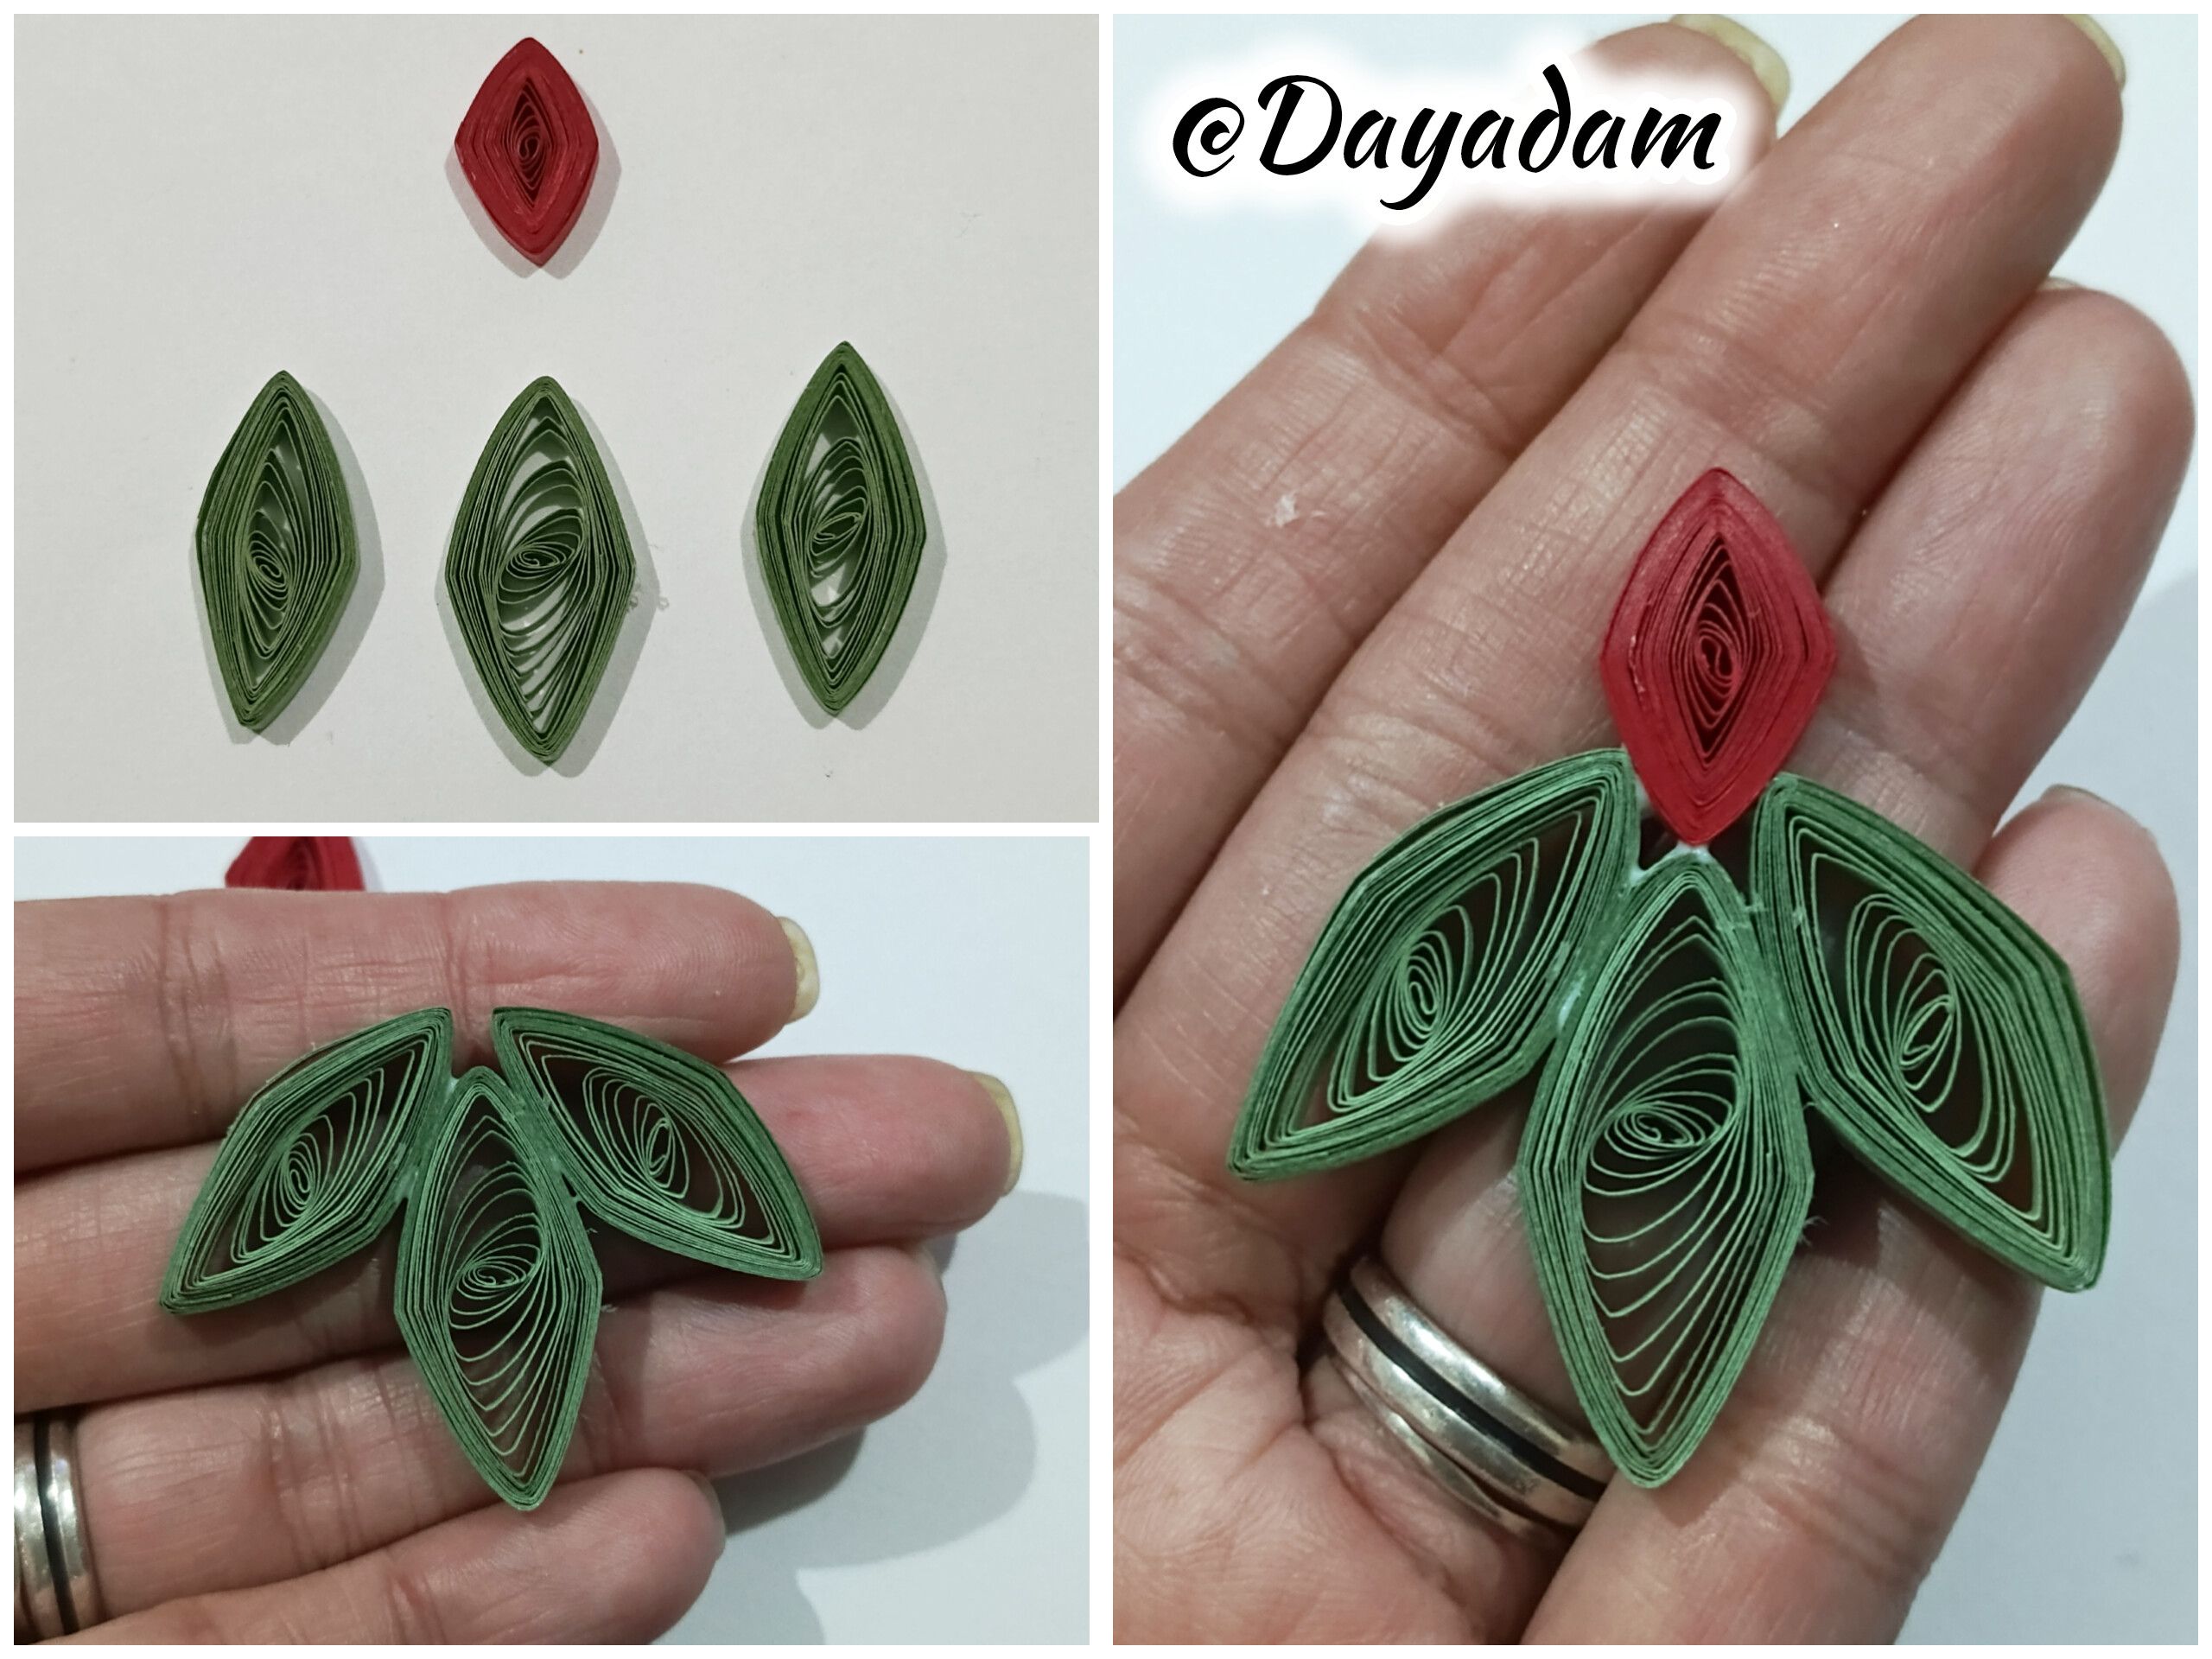
• Let's start by taking a 3mm wide red quilling strip. Using the quilling needle, roll it up until you reach the end of the strip, remove it from the needle, loosen it a little, and seal it with extra-strong white glue to form an open circle. We will shape this into a diamond.
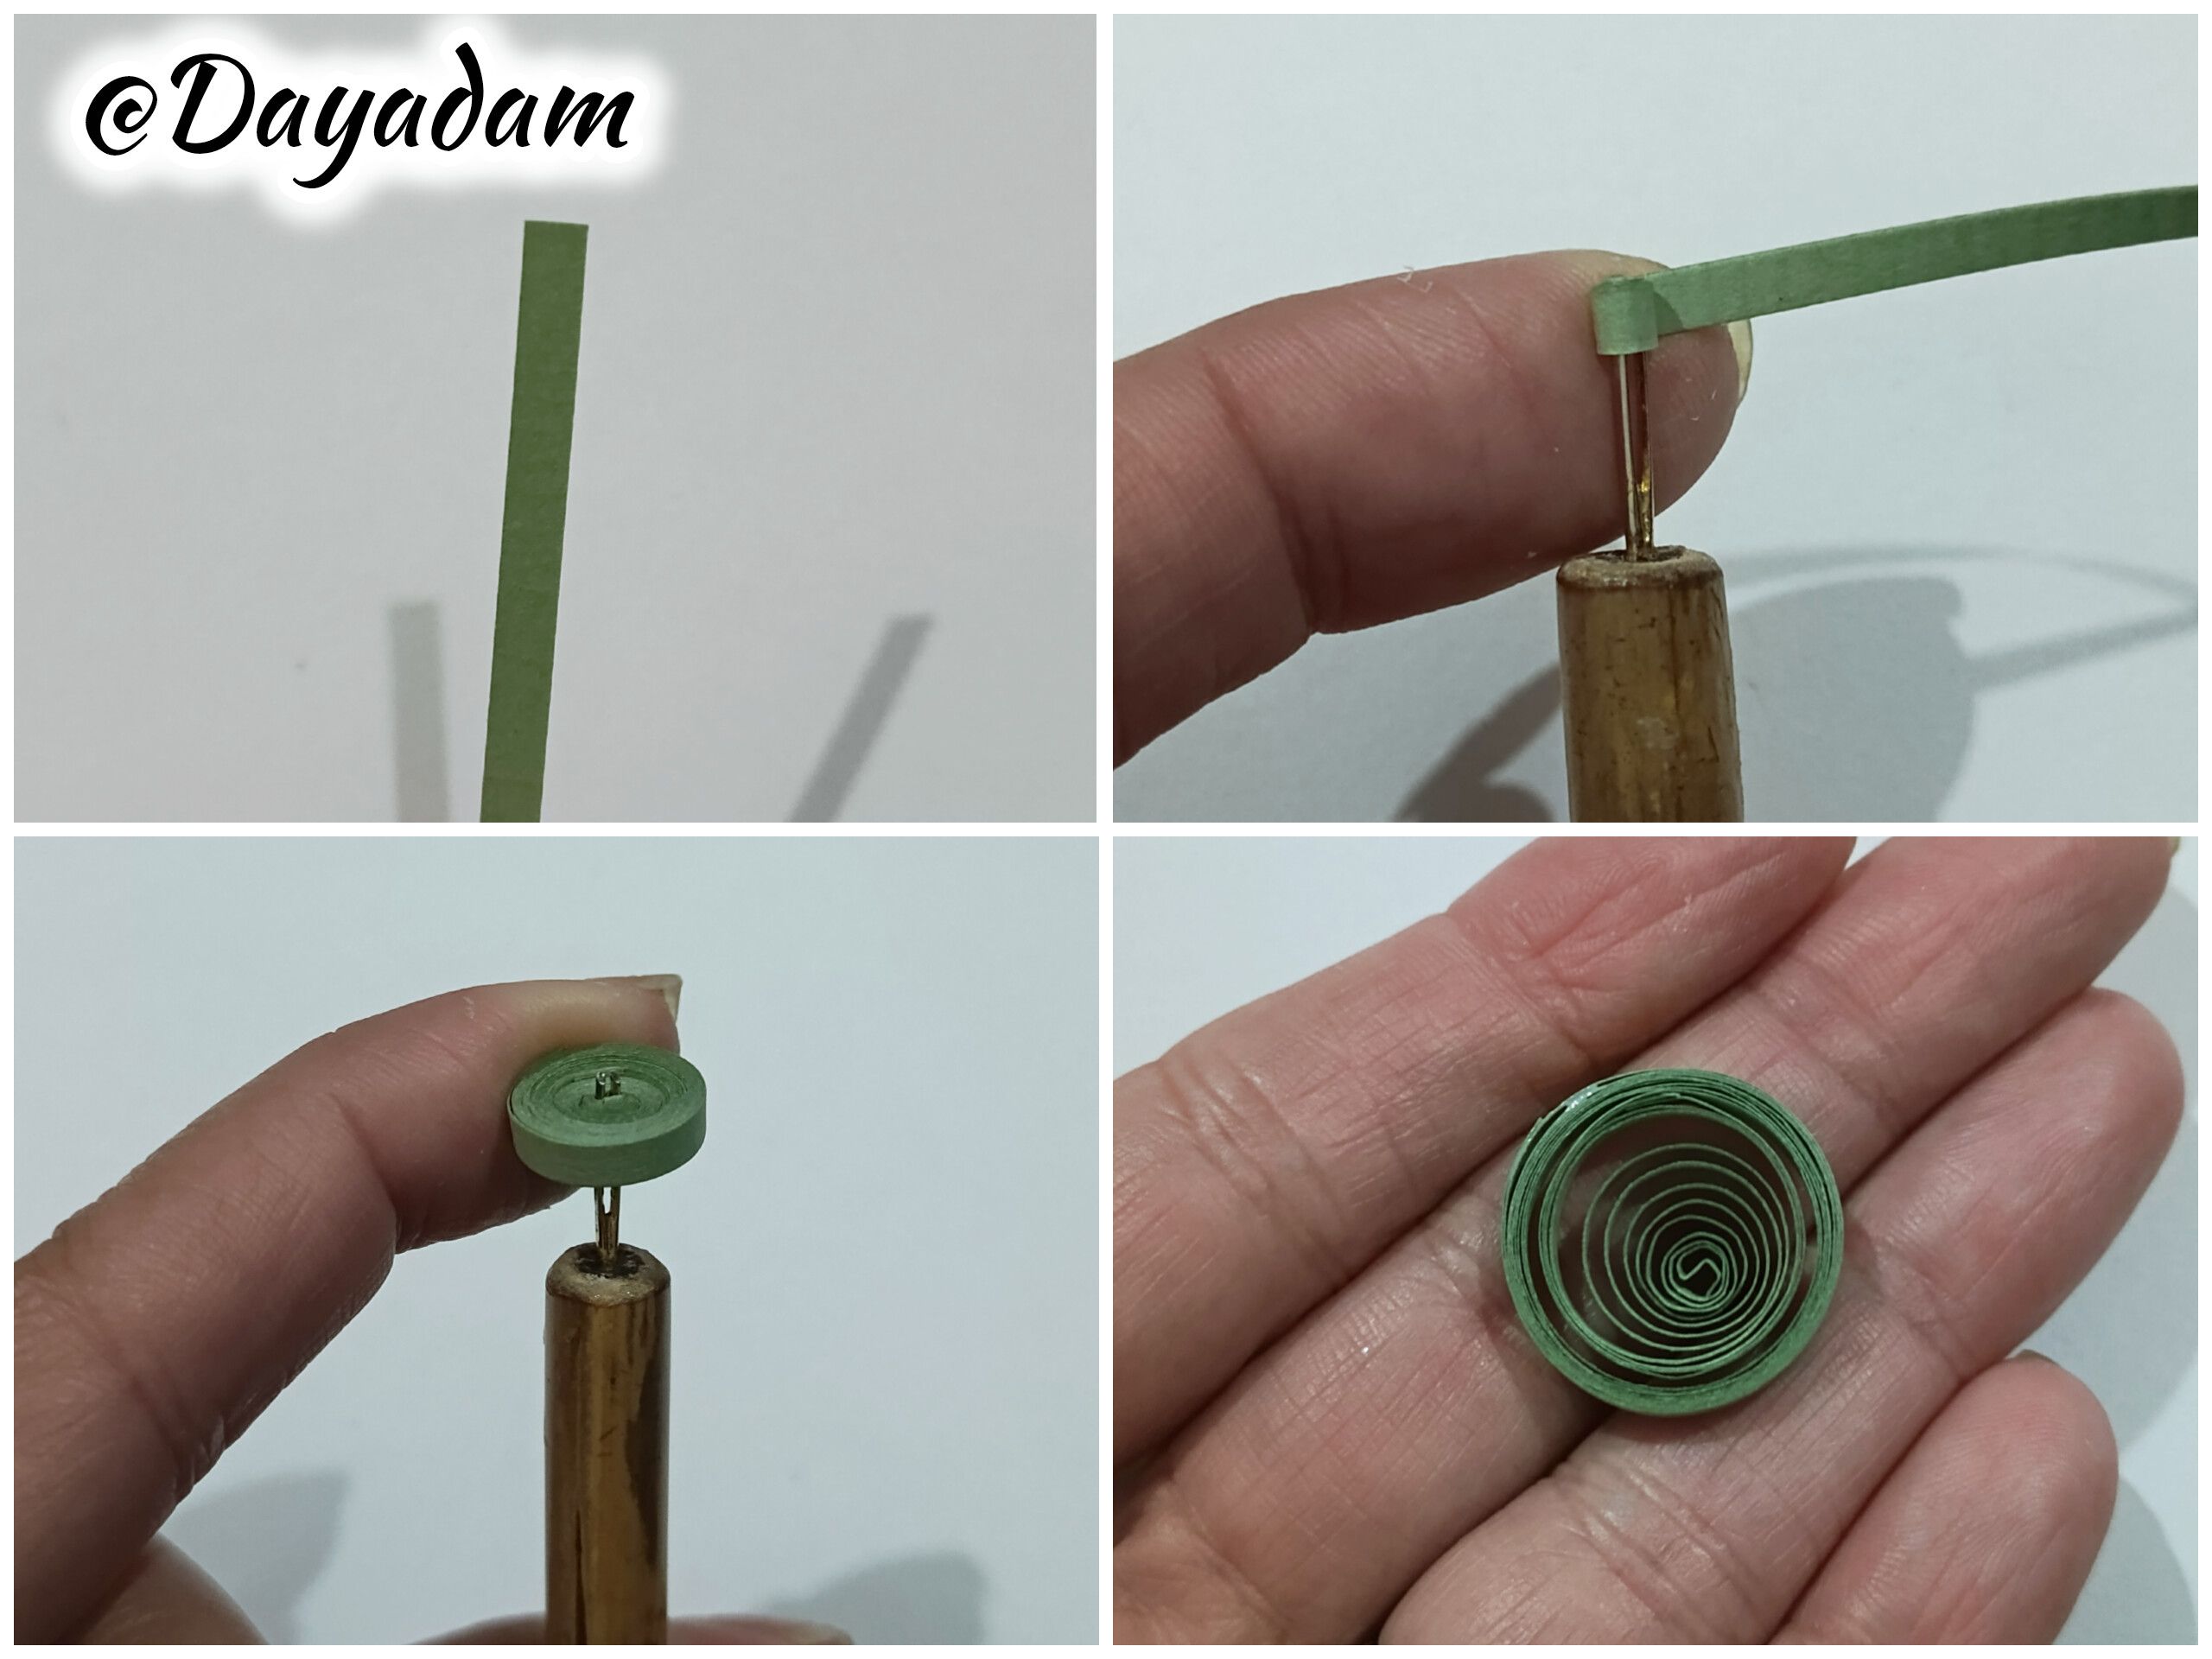
• Now take a 3mm wide green strip and, following the same steps as before, make three open circles that are larger and looser than the previous one. Shape them into slightly flatter diamonds.
• Join the three diamonds together with extra-strong white glue and place the red piece you made at the top.

• Vamos a comenzar tomando cinta para quilling de color rojo de 3mm de ancho, con la aguja para quilling enrollaremos hasta llegar al final de la cinta, sacamos de la aguja soltamos un poco, sellamos con pega blanca extra fuerte para obtener un círculo abierto, este lo moldearemos en forma de rombo.
• Ahora tomaremos cinta de color verde de 3 milímetros de ancho, bajos los mismos parámetros anteriores realizaremos 3 círculos abiertos estos más grande y sueltos que el anterior, los moldearemos en forma de rombos un poco más aplanados.
• Uniremos los 3 rombos con pega blanca extra fuerte, y en la parte de arriba coloque la pieza que realice de color rojo.
 |
 |
 |
 |
 |
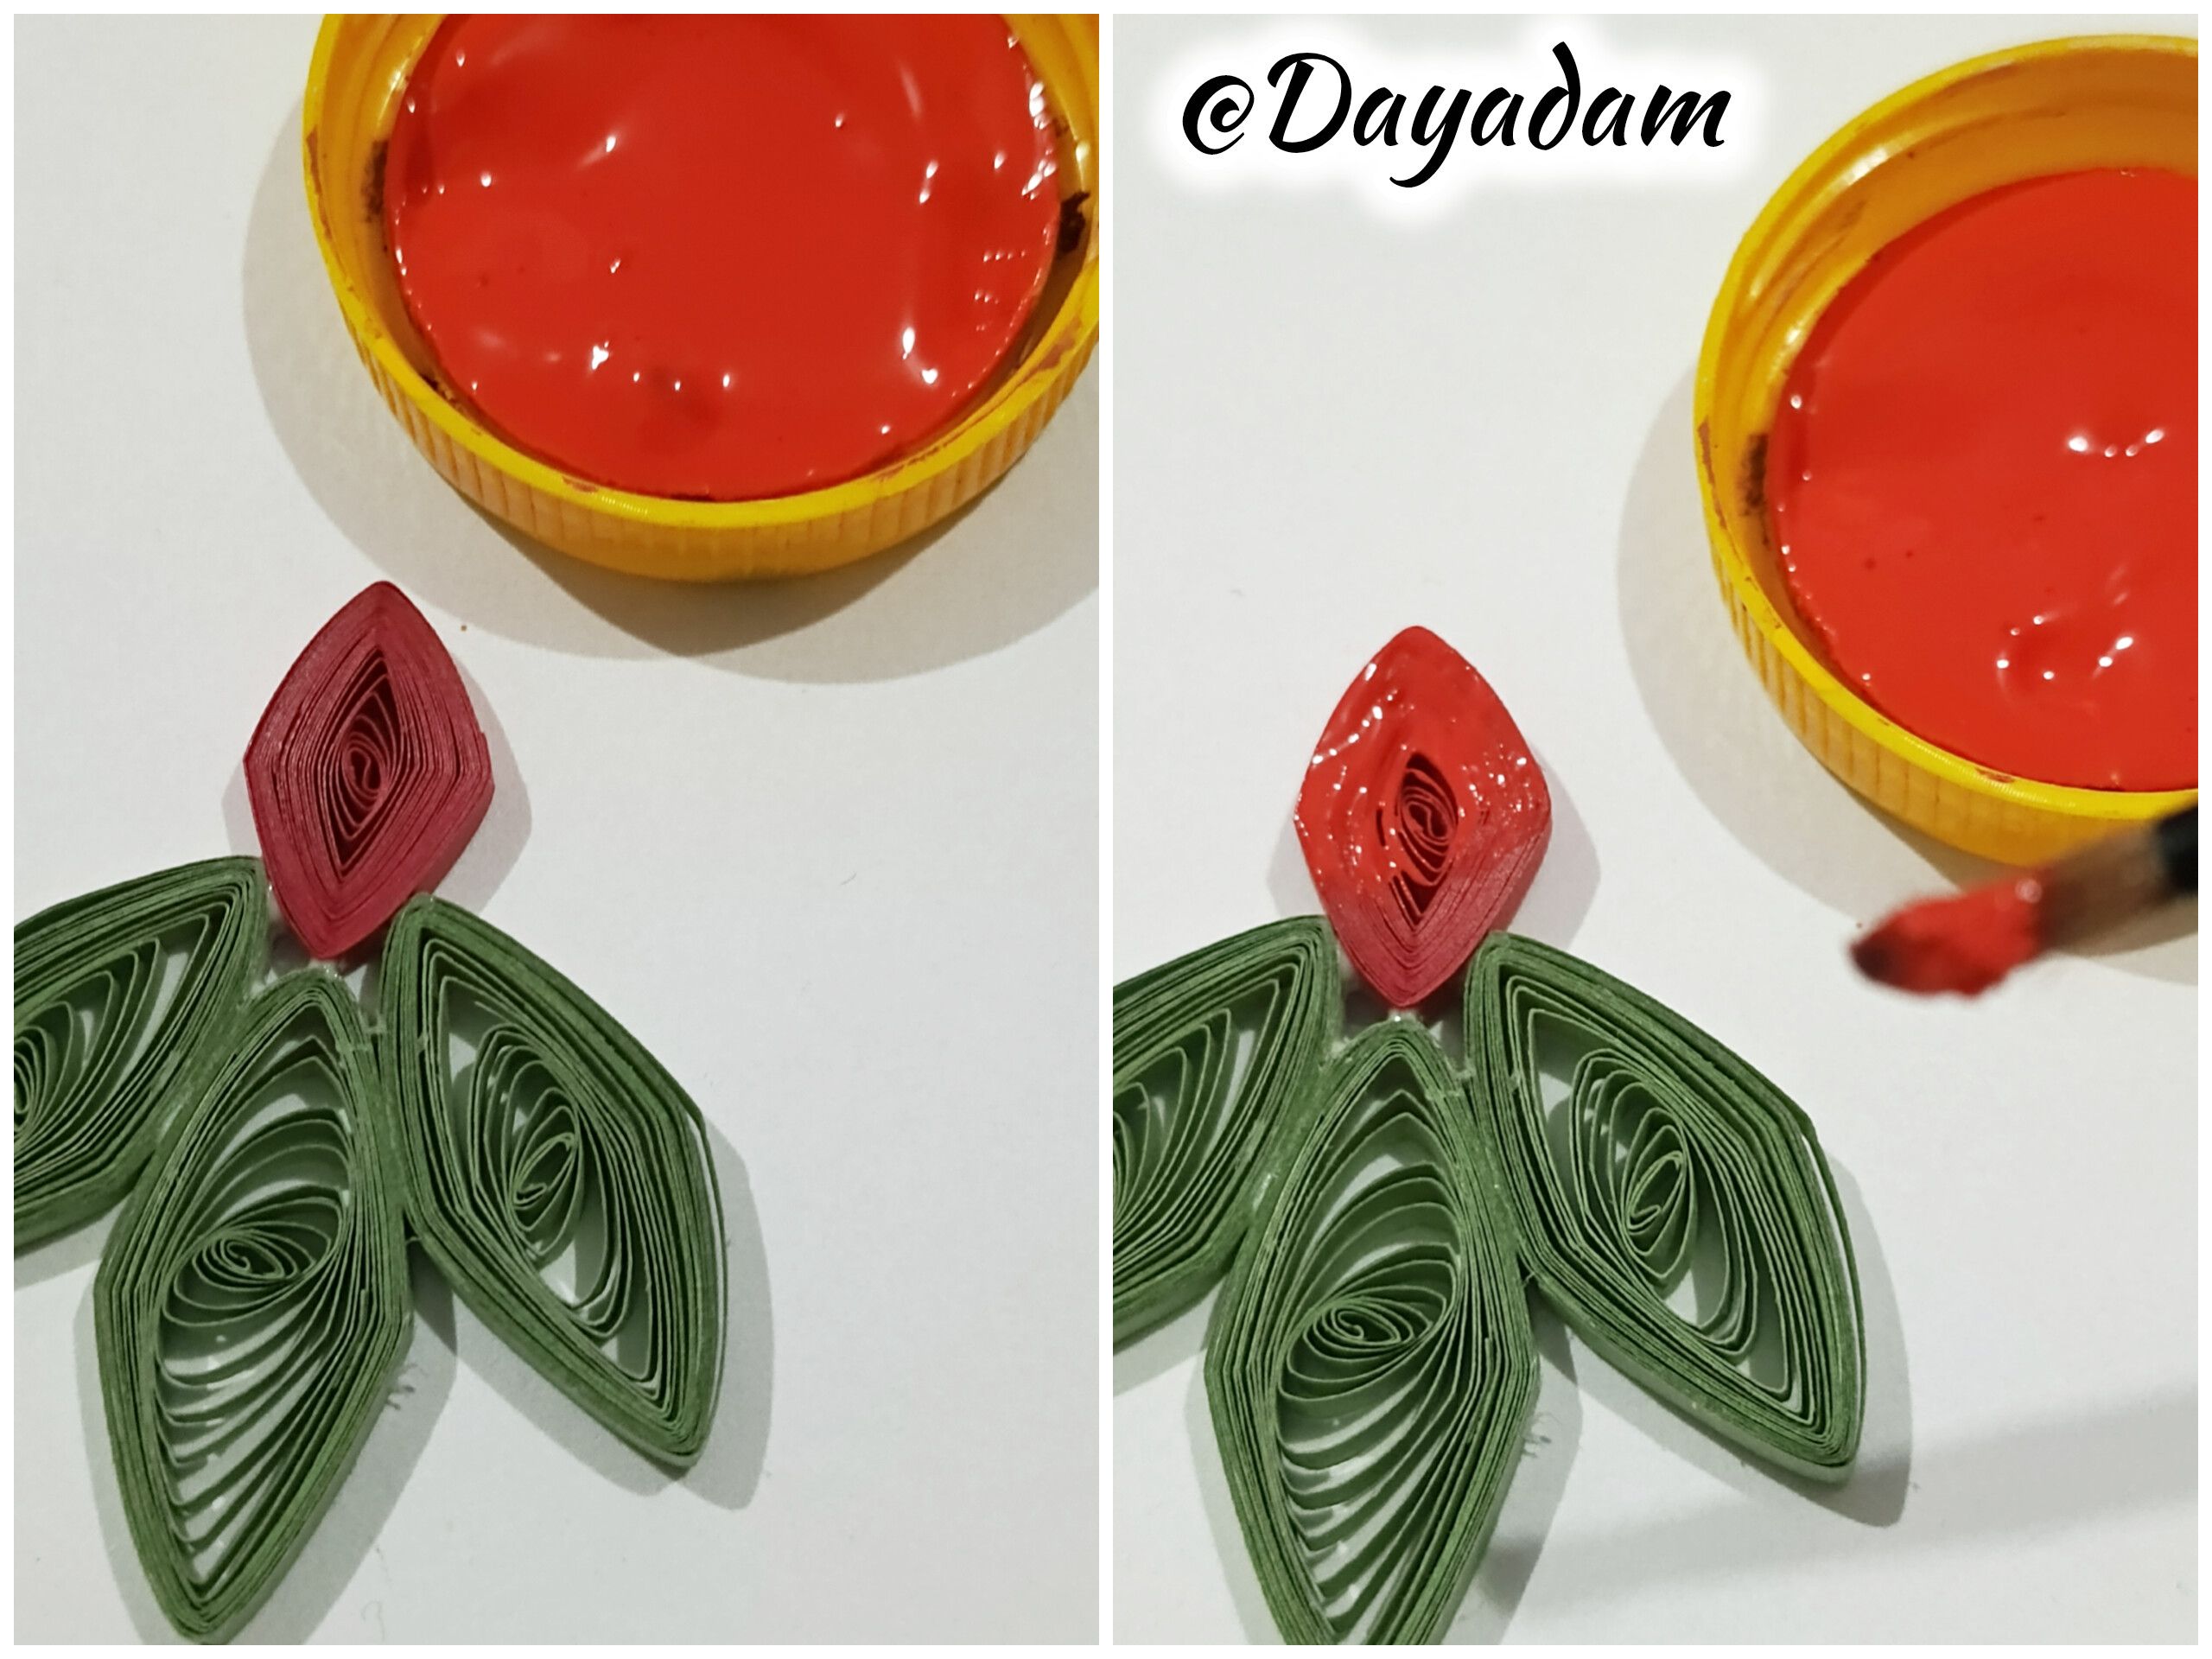
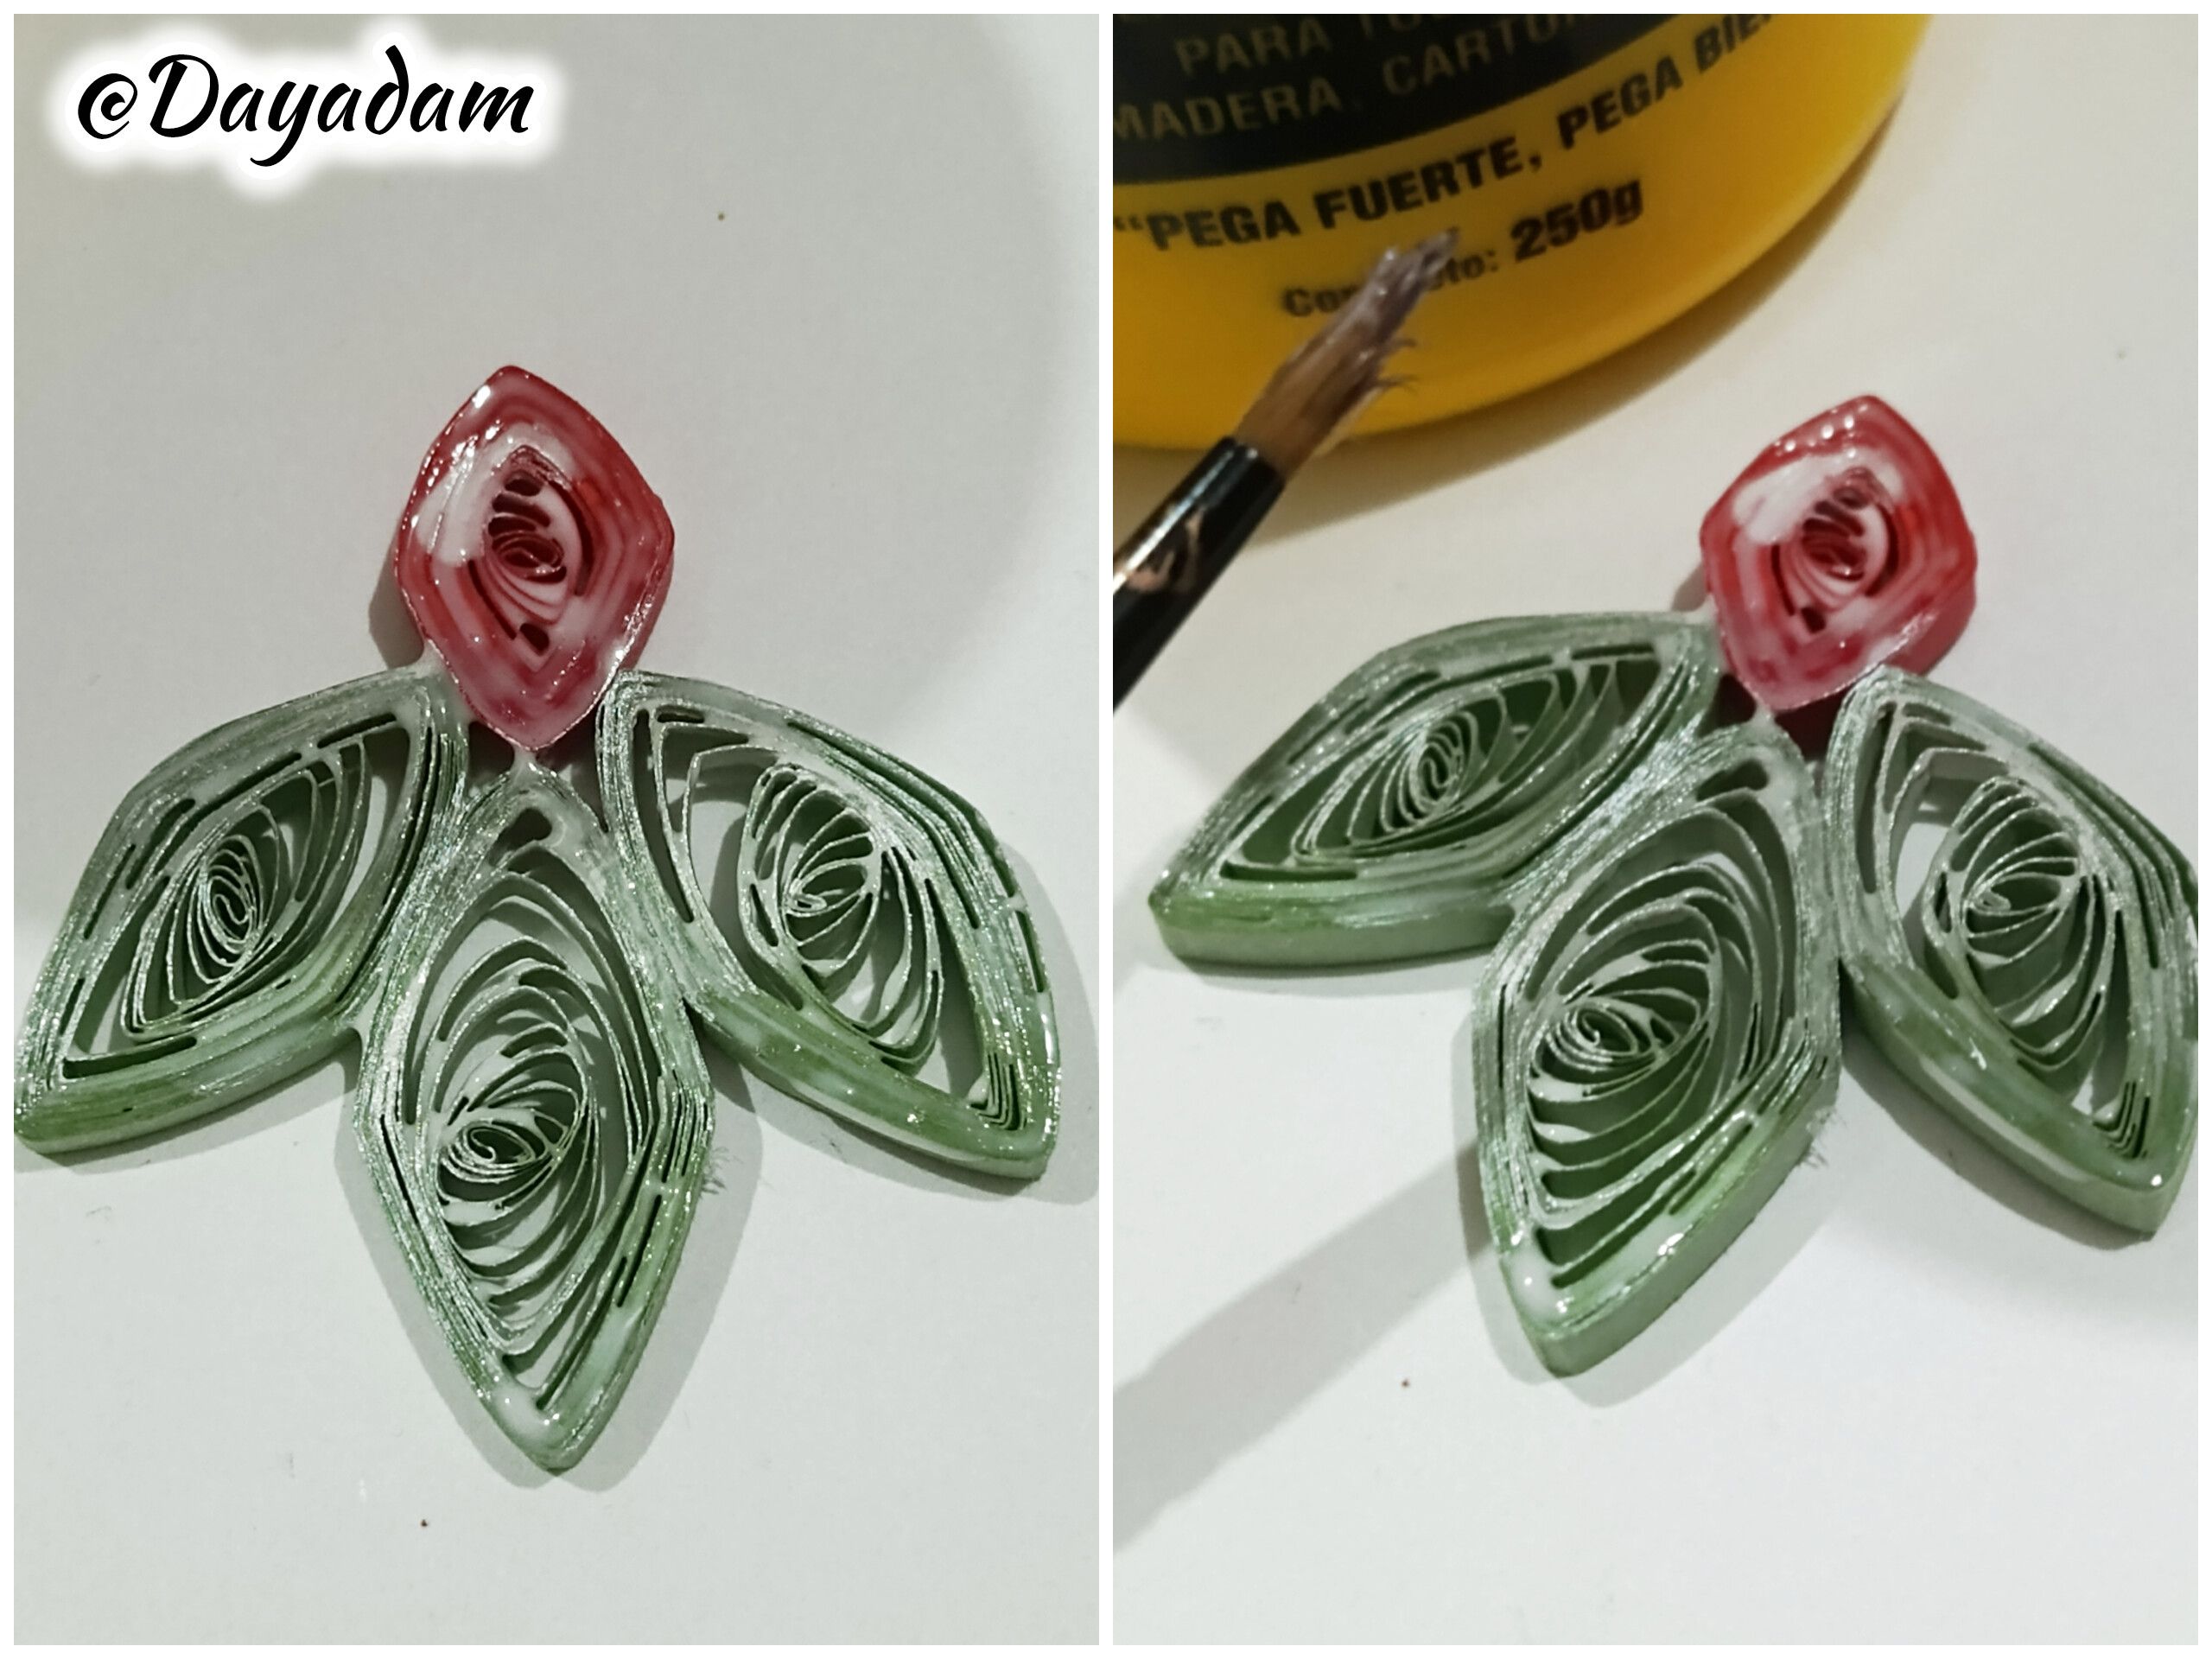
• I took red paint and applied a brushstroke to the red piece, then used pearl-colored paint to add some details to the green and red leaves.
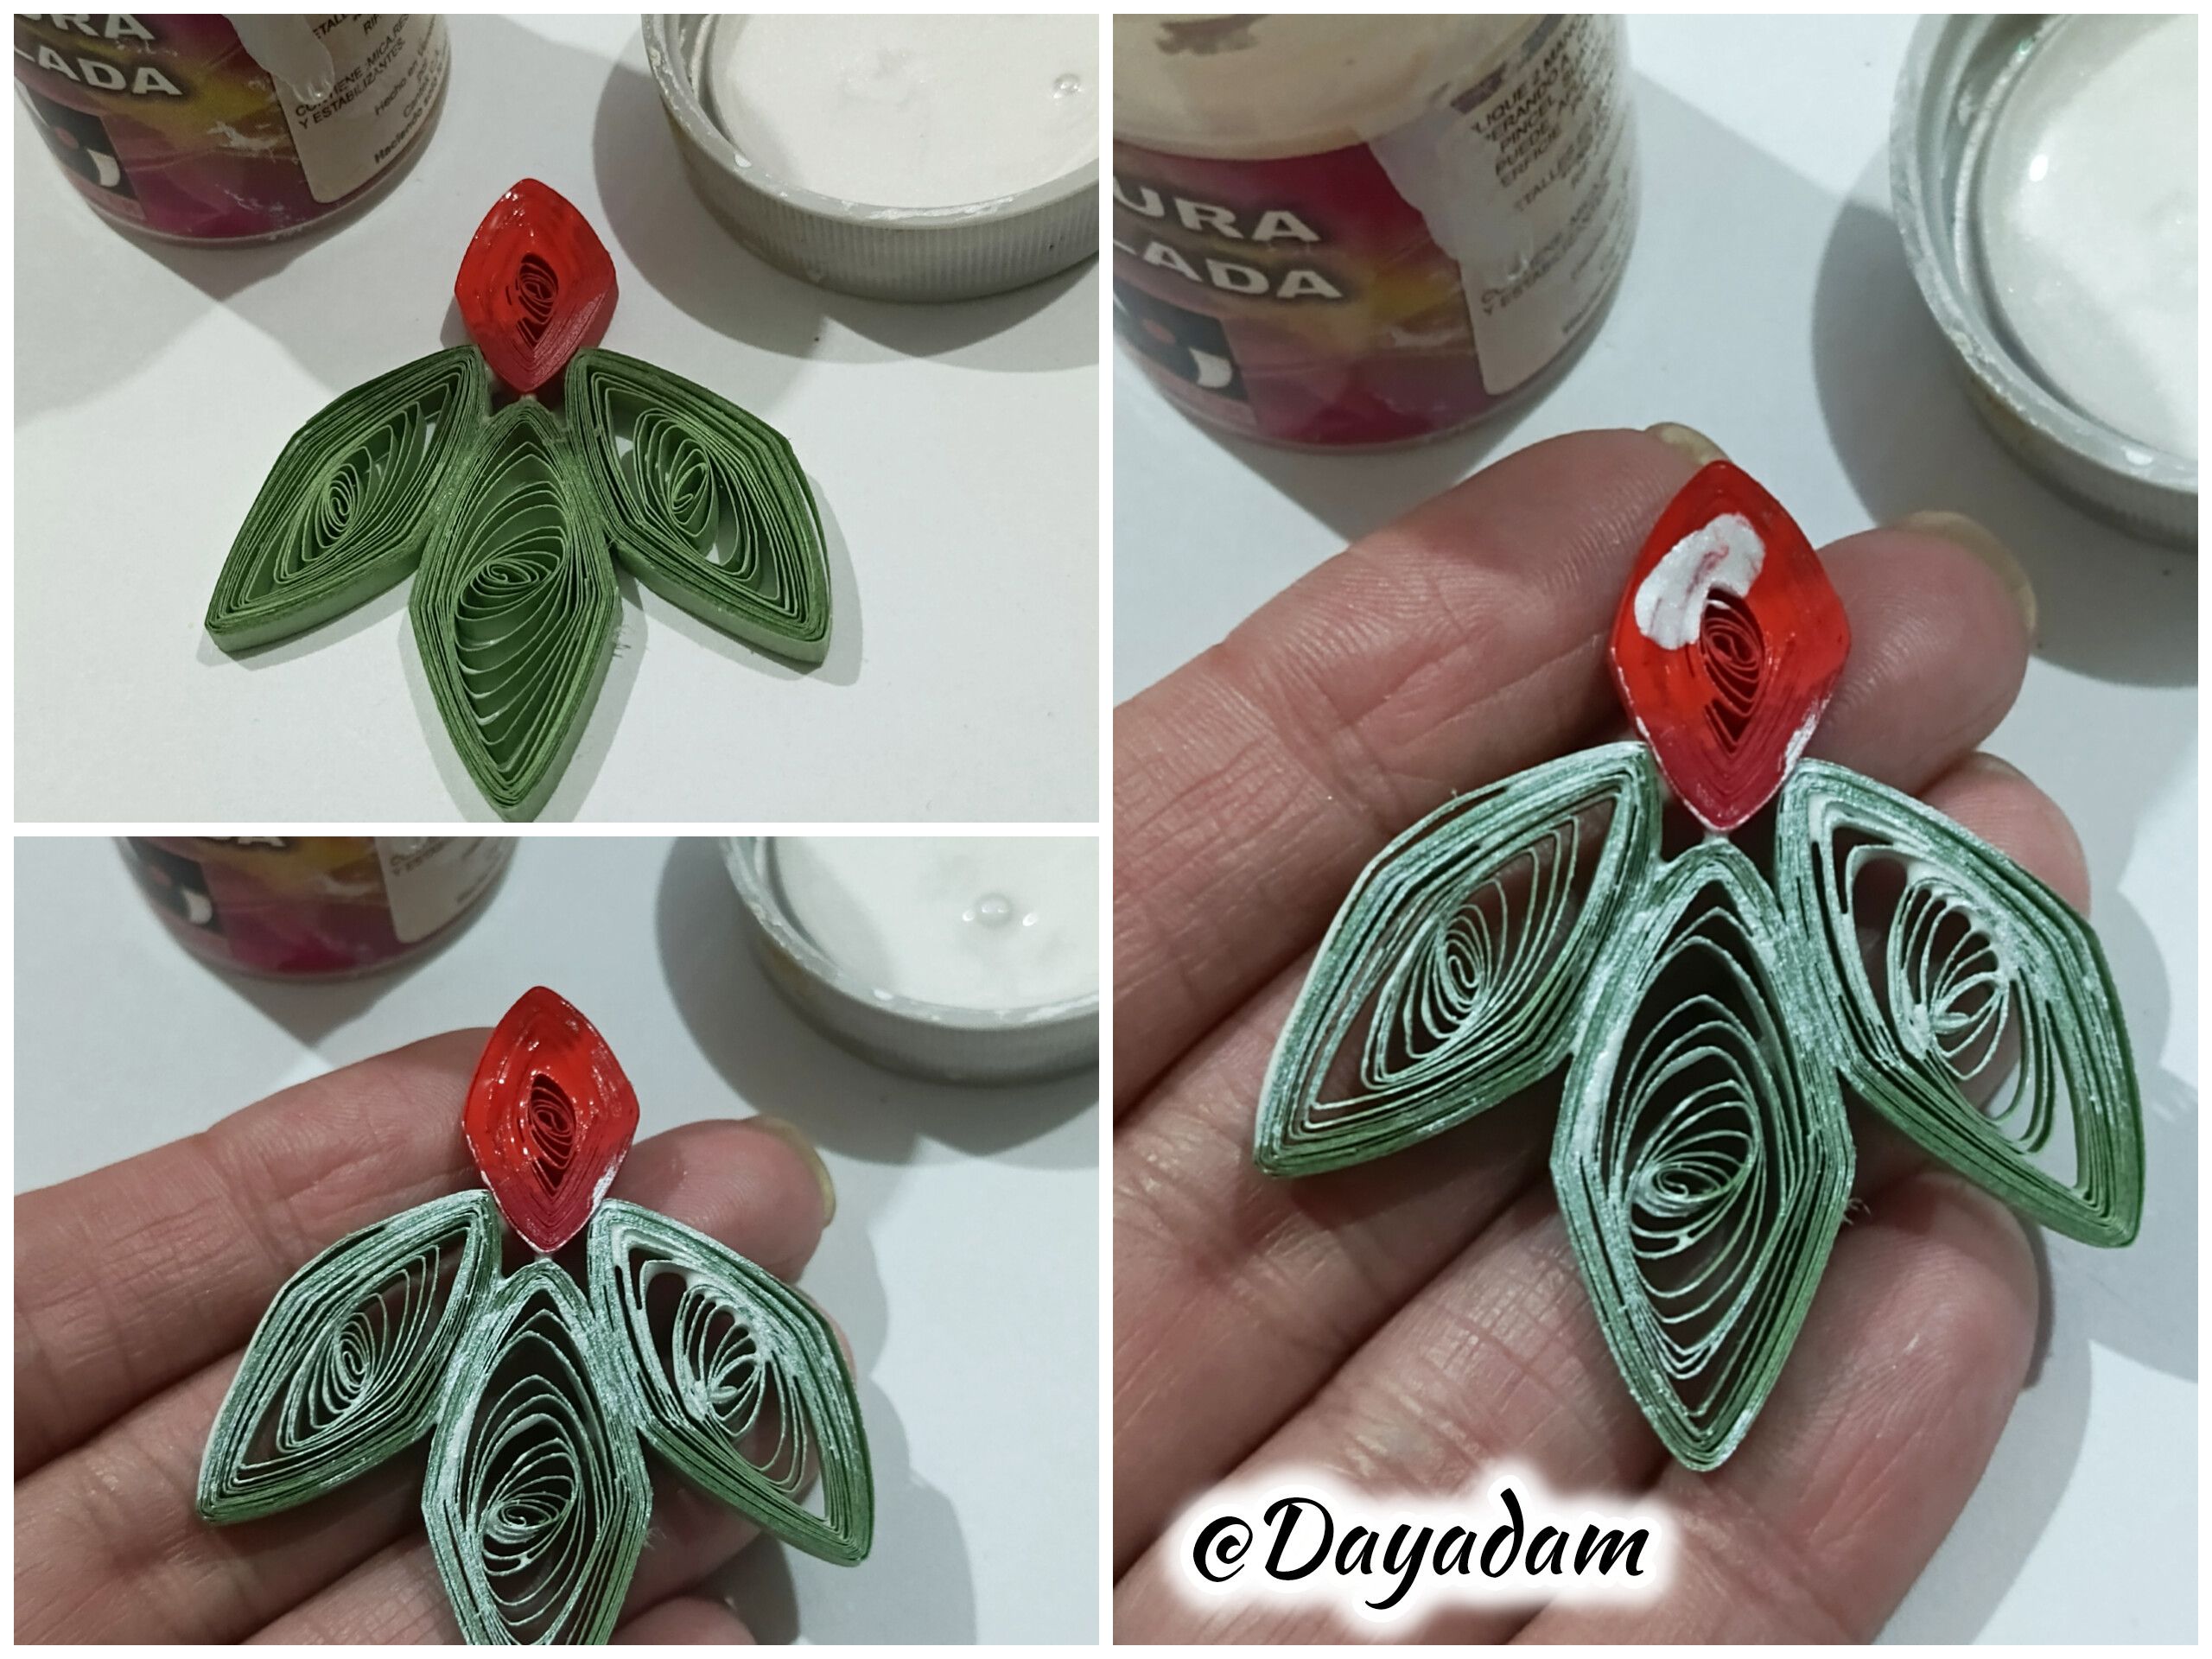
• To protect the pendant, I applied several coats of extra-strong white glue, allowing each coat to dry before applying the next, in order to harden it, give it plasticity, and add a little shine.
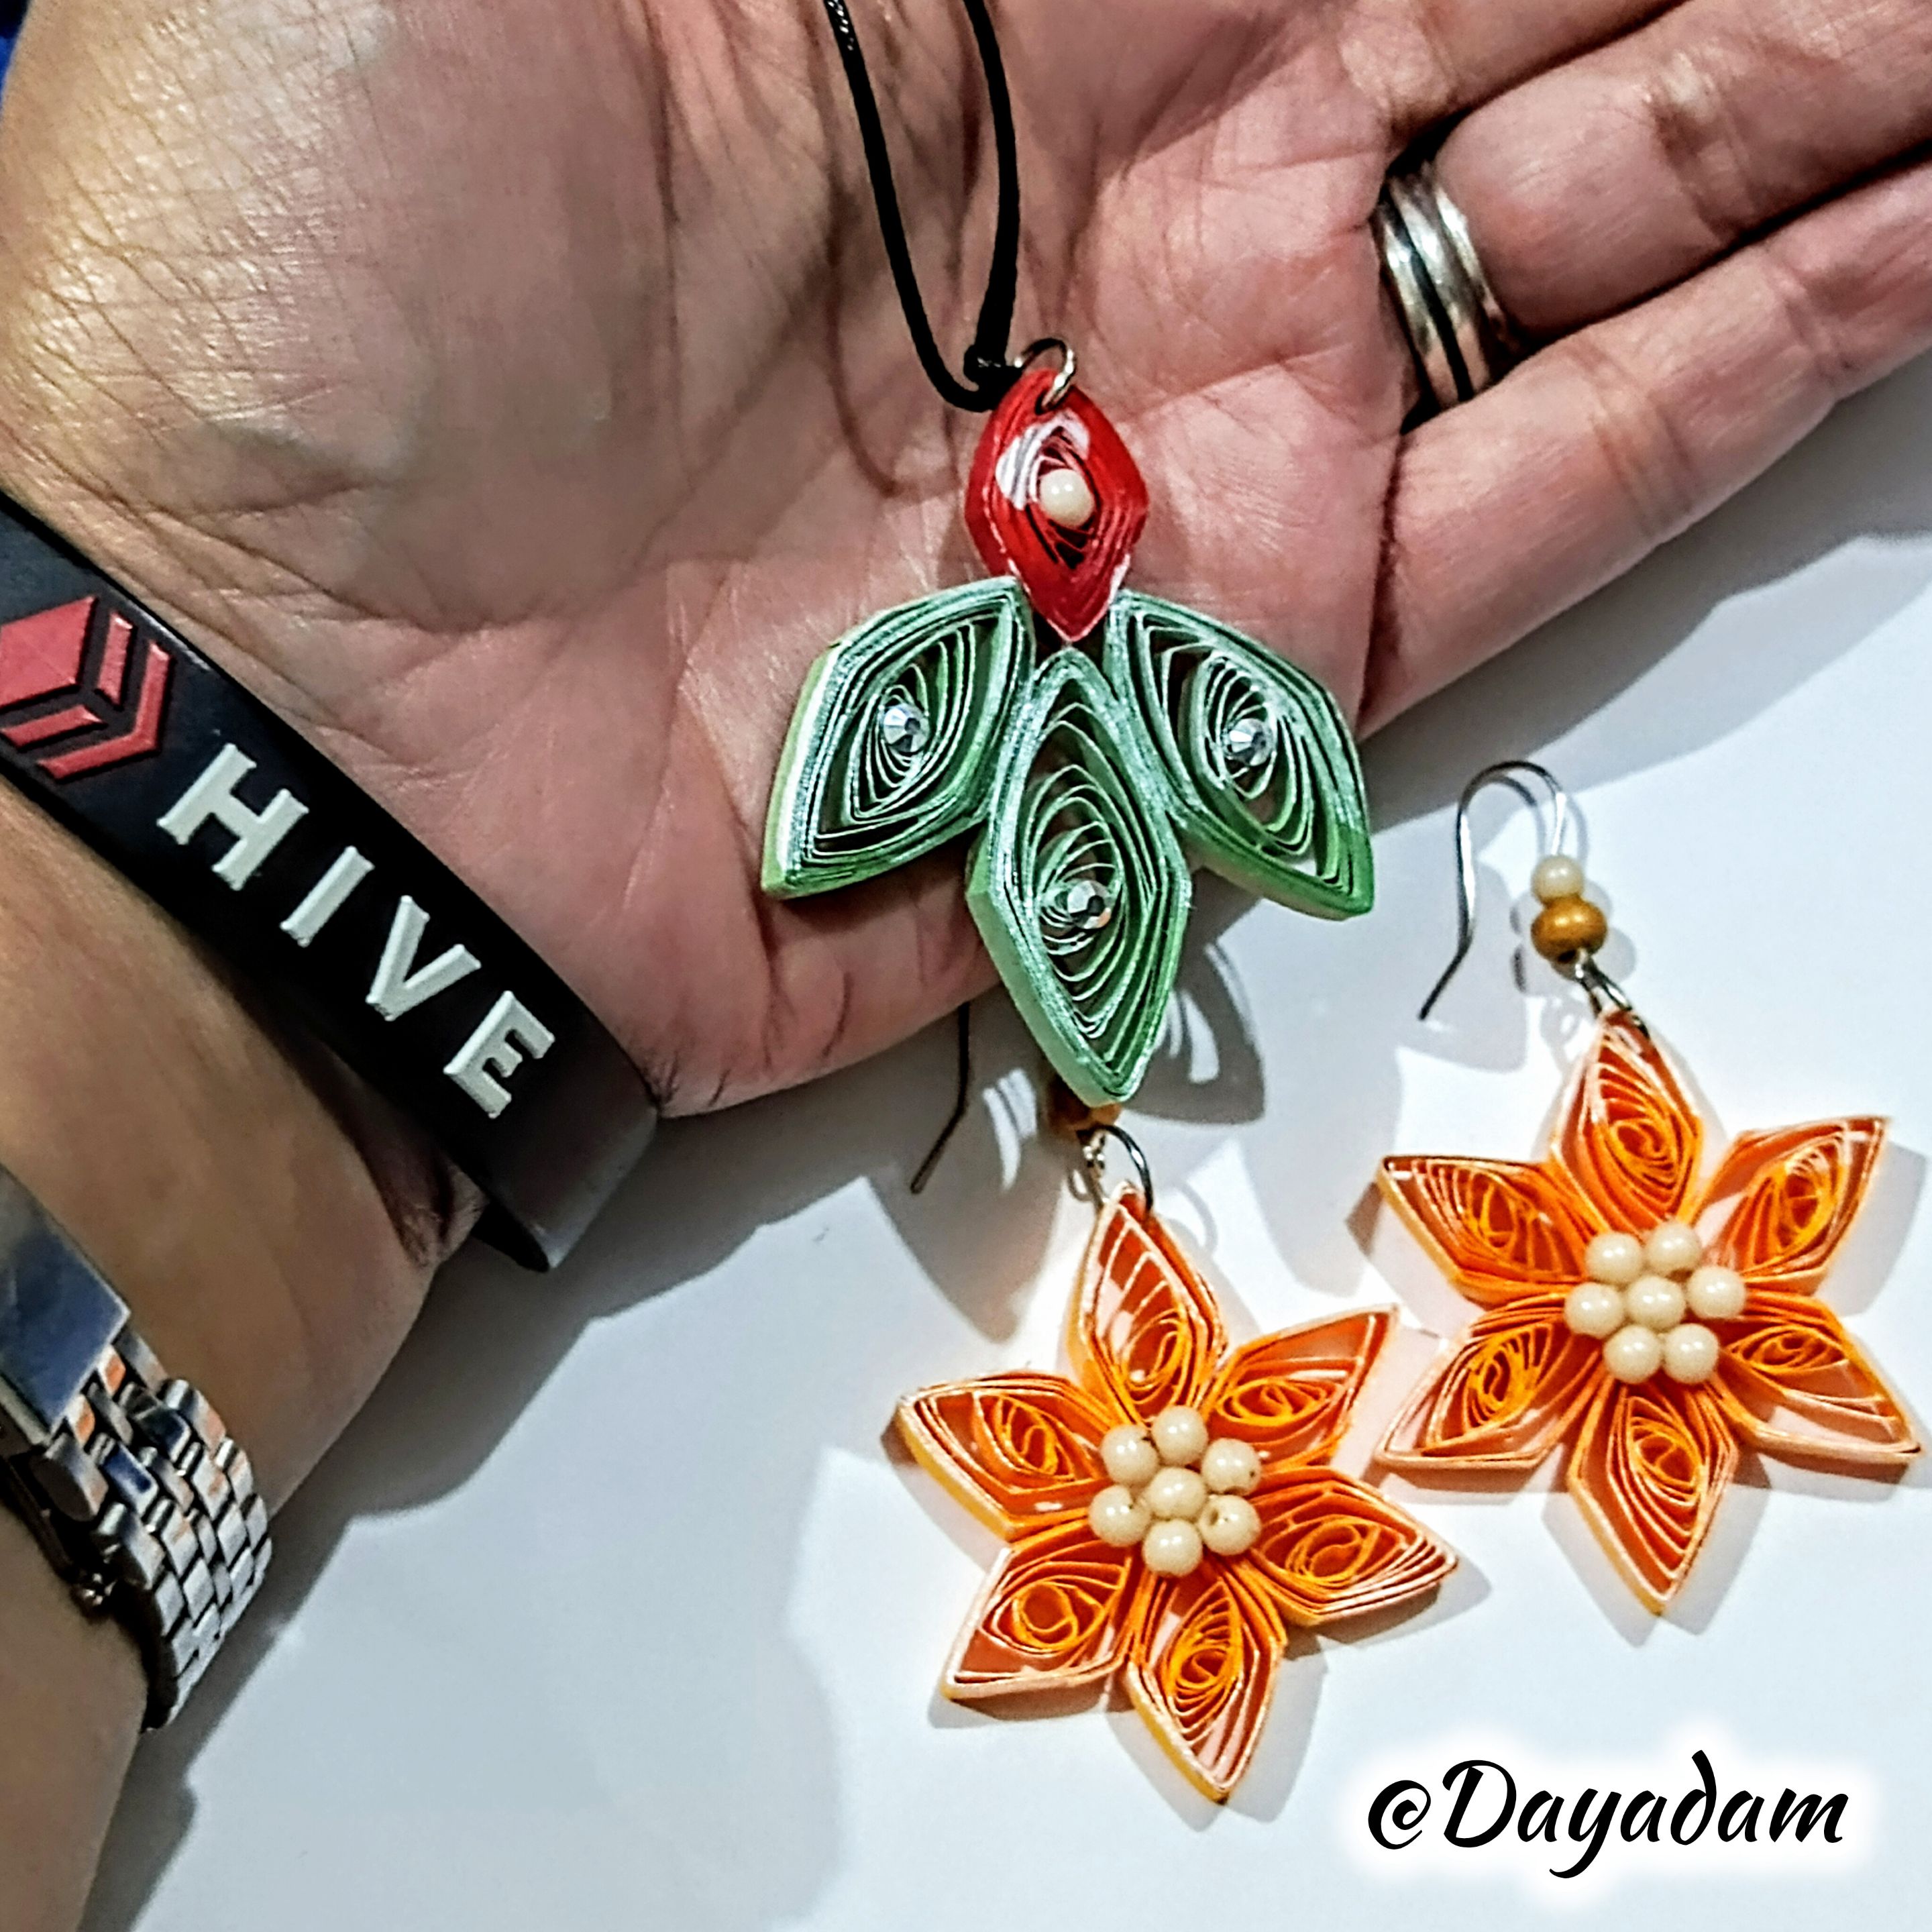
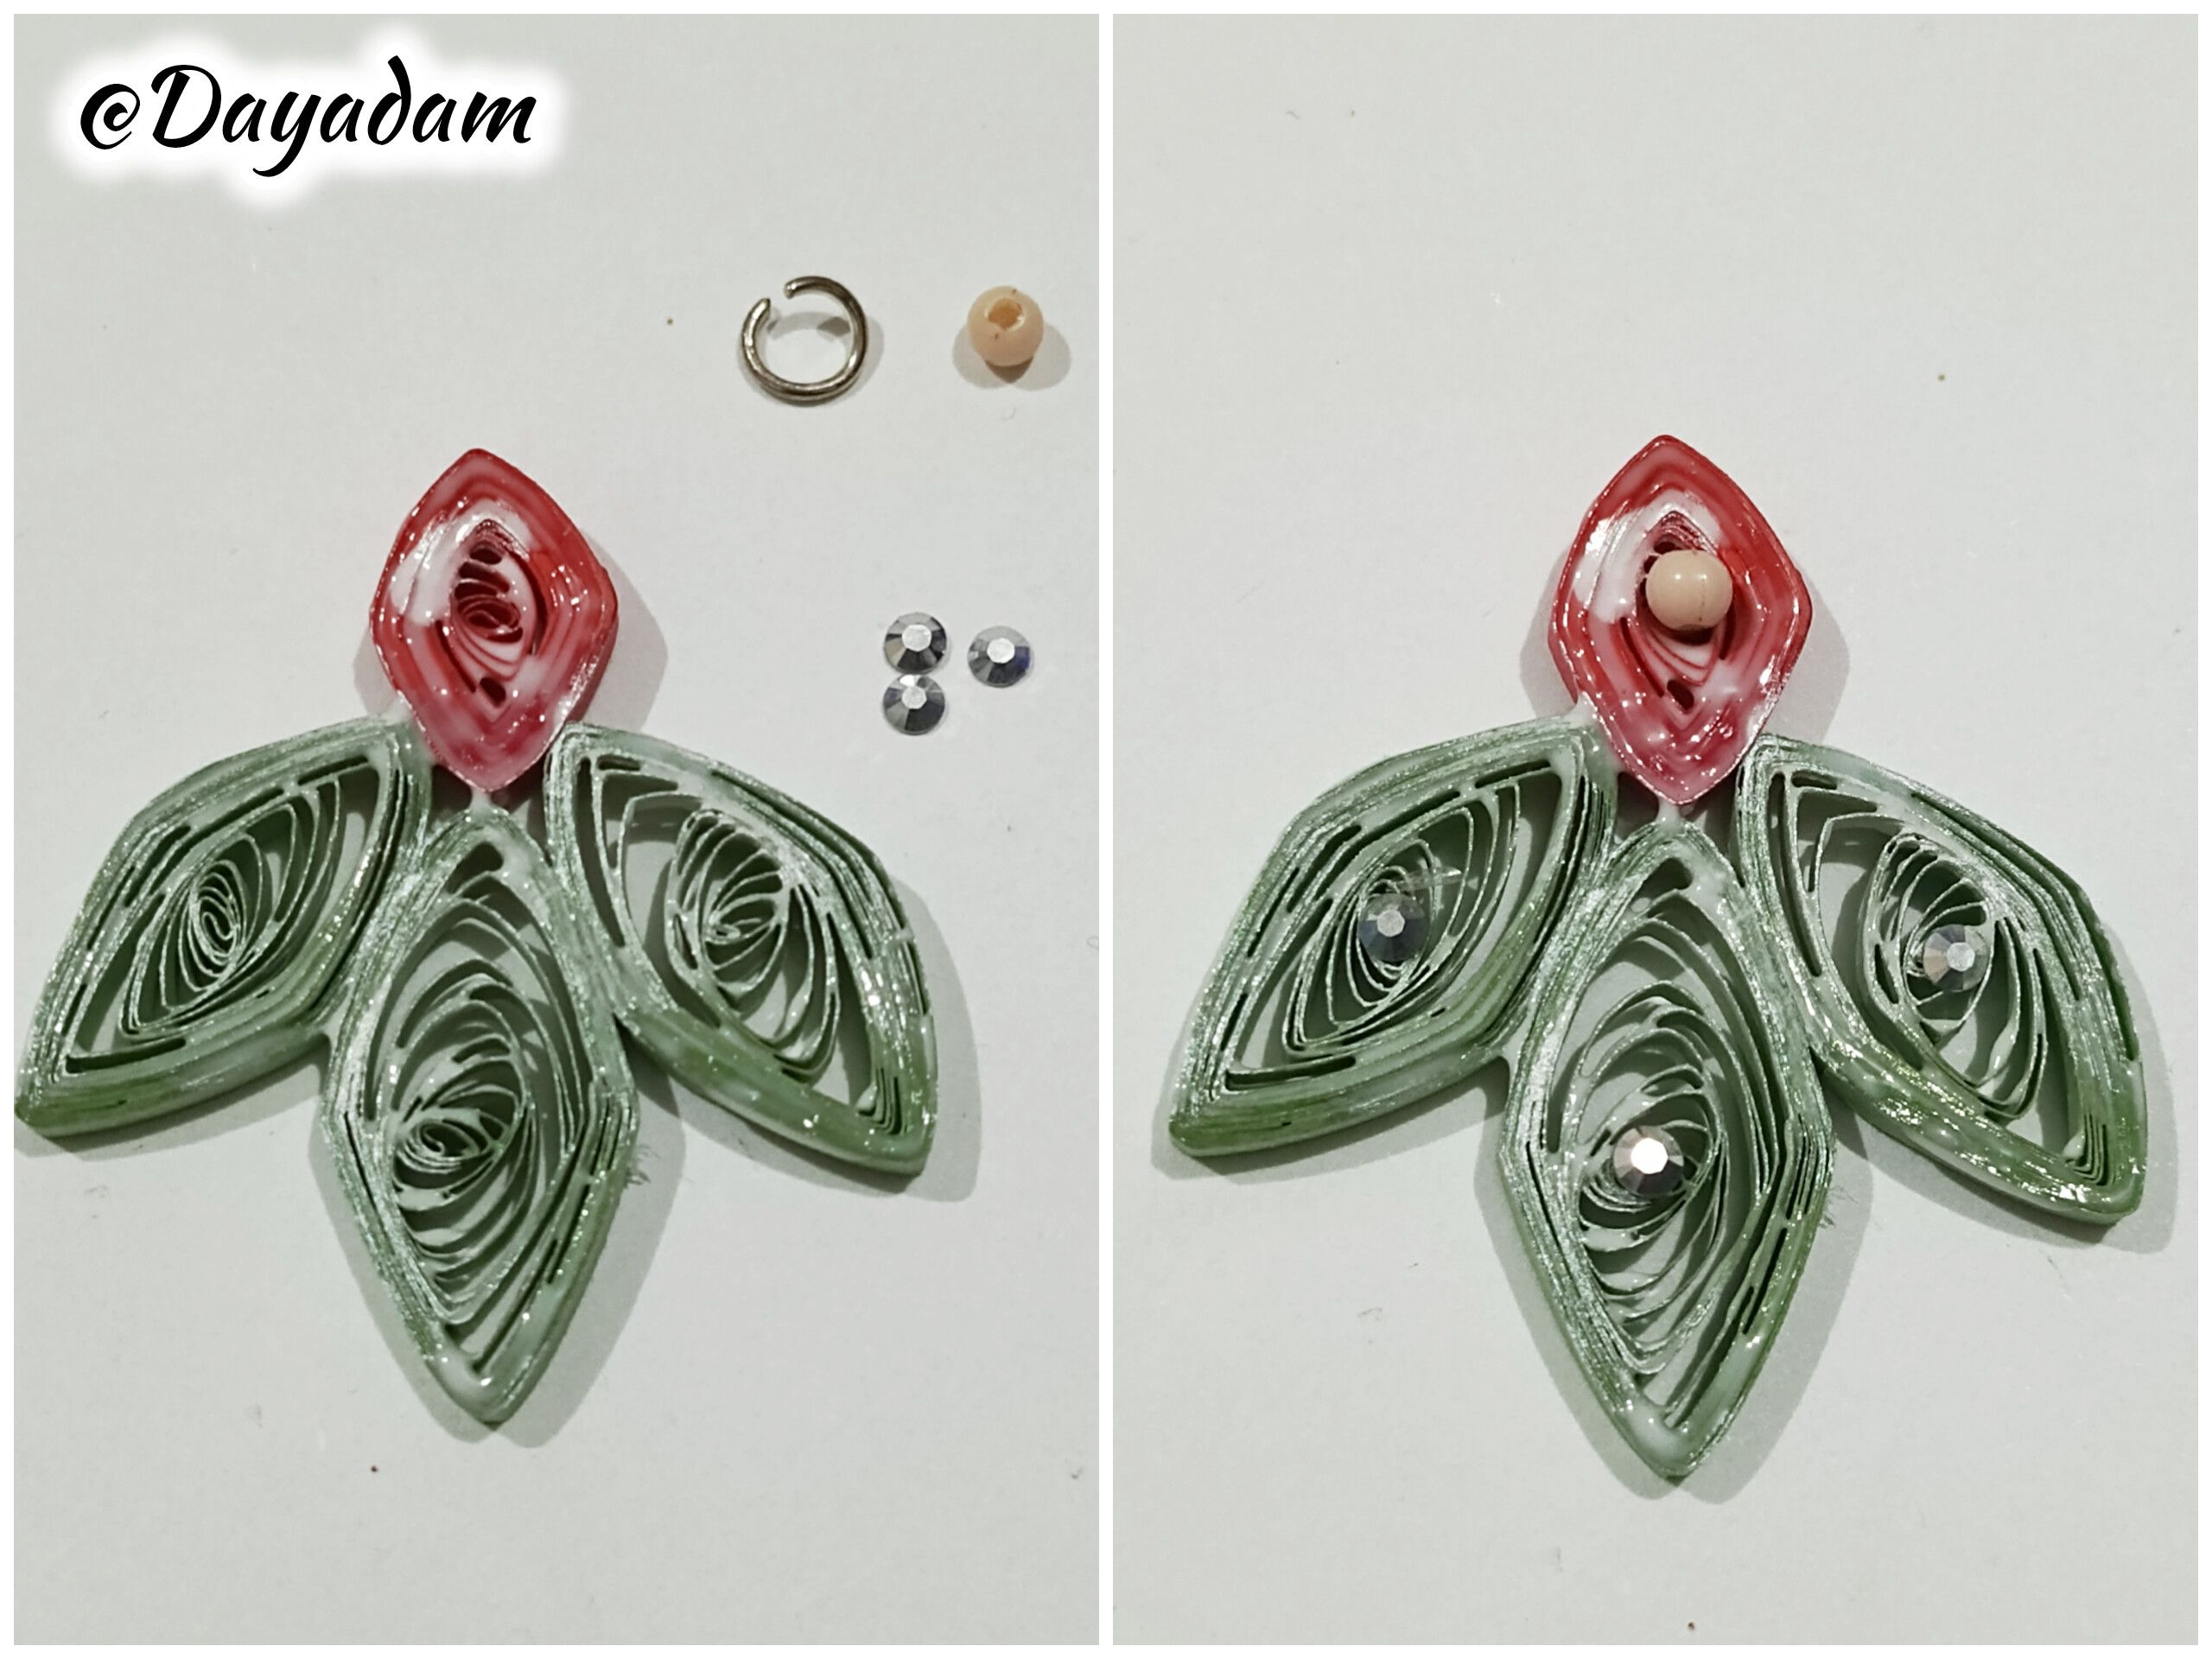
• While the pendant was still wet, I placed some silver jewelry crystals on the green leaves and a beige bead on the red diamond.
• To finish, I attached a jewelry ring.
• And so we have finished this set of accessories that I made, inspired by elements of the character from the card “Buttercup Mauler”.
• Tomé pintura de color rojo y apliqué una pincelada en la pieza de color rojo, luego con pintura color perlada realicé algunos detalles en las hojas verdes y en la roja.
• Para proteger el dije, apliqué algunas capas de pega blanca extra fuerte, dejando secar entre una capa y otra, con en objetivo de endurecer, darle plasticidad y un poco de brillo.
• Estando aún húmedo el dije coloqué en las hojas verdes unos cristales plateados de bisutería, y en el rombo rojo una cuenta de color beige.
• Para finalizar coloque una argolla de bisutería.
• De esta manera tenemos listo este set de accesorios que elabore, inspirado en elementos del personaje de la carta "Buttercup Mauler".
 |
 |
 |
 |

|
|
 |
 |
|
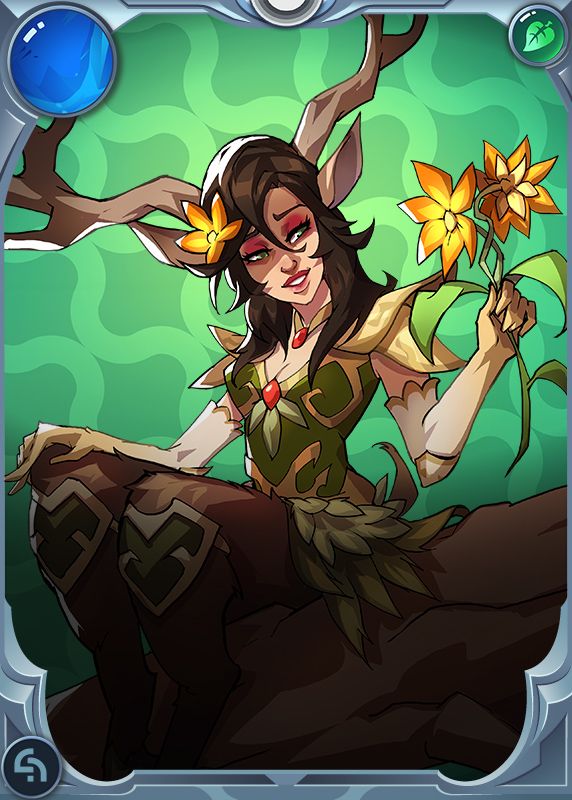
Fuente carta / Charter Source // Buttercup Mauler
What did you think, did you like it?
I hope you did, I hope you liked my explanation, procedure and photos, I made them with love for you.
"Let out that muse that inspires you, and let your imagination fly".
Thank you all, see you next time.
¿Qué les pareció, les gustó?
Espero que sí, que les haya gustado mi explicación, procedimiento y fotos, los hice con mucho cariño por y para ustedes."Deja salir esa musa que te inspira, y deja volar tu imaginación".
Gracias a todos, nos vemos en la próxima.
All photos used in this post are of my authorship and have been taken on my personal cell phone a Redmi 9T and edited in Canva and in Inshot
Fuente carta / Charter Source // Buttercup Mauler
Banner and separator made by me in Canva
Translated with the help of DeepL
Todas las fotos usadas en este post son de mi autoría y han sido sacadas en mi celular personal un Redmi 9T y editadas en Canva y en Inshot
Fuente carta / Charter Source // Buttercup Mauler
Banner y separador hecho por mí en Canva
Traducido con la ayuda de DeepL