Today I am with you again to show you my art, I love every week to go through this wonderful world of magic, color, and lots of Splinterlands characters to look for new elements or characters to build different crafts such as jewelry, accessories, 3D figures and other things that motivate me, inspire me and activate my creativity and thus be able to create for you.
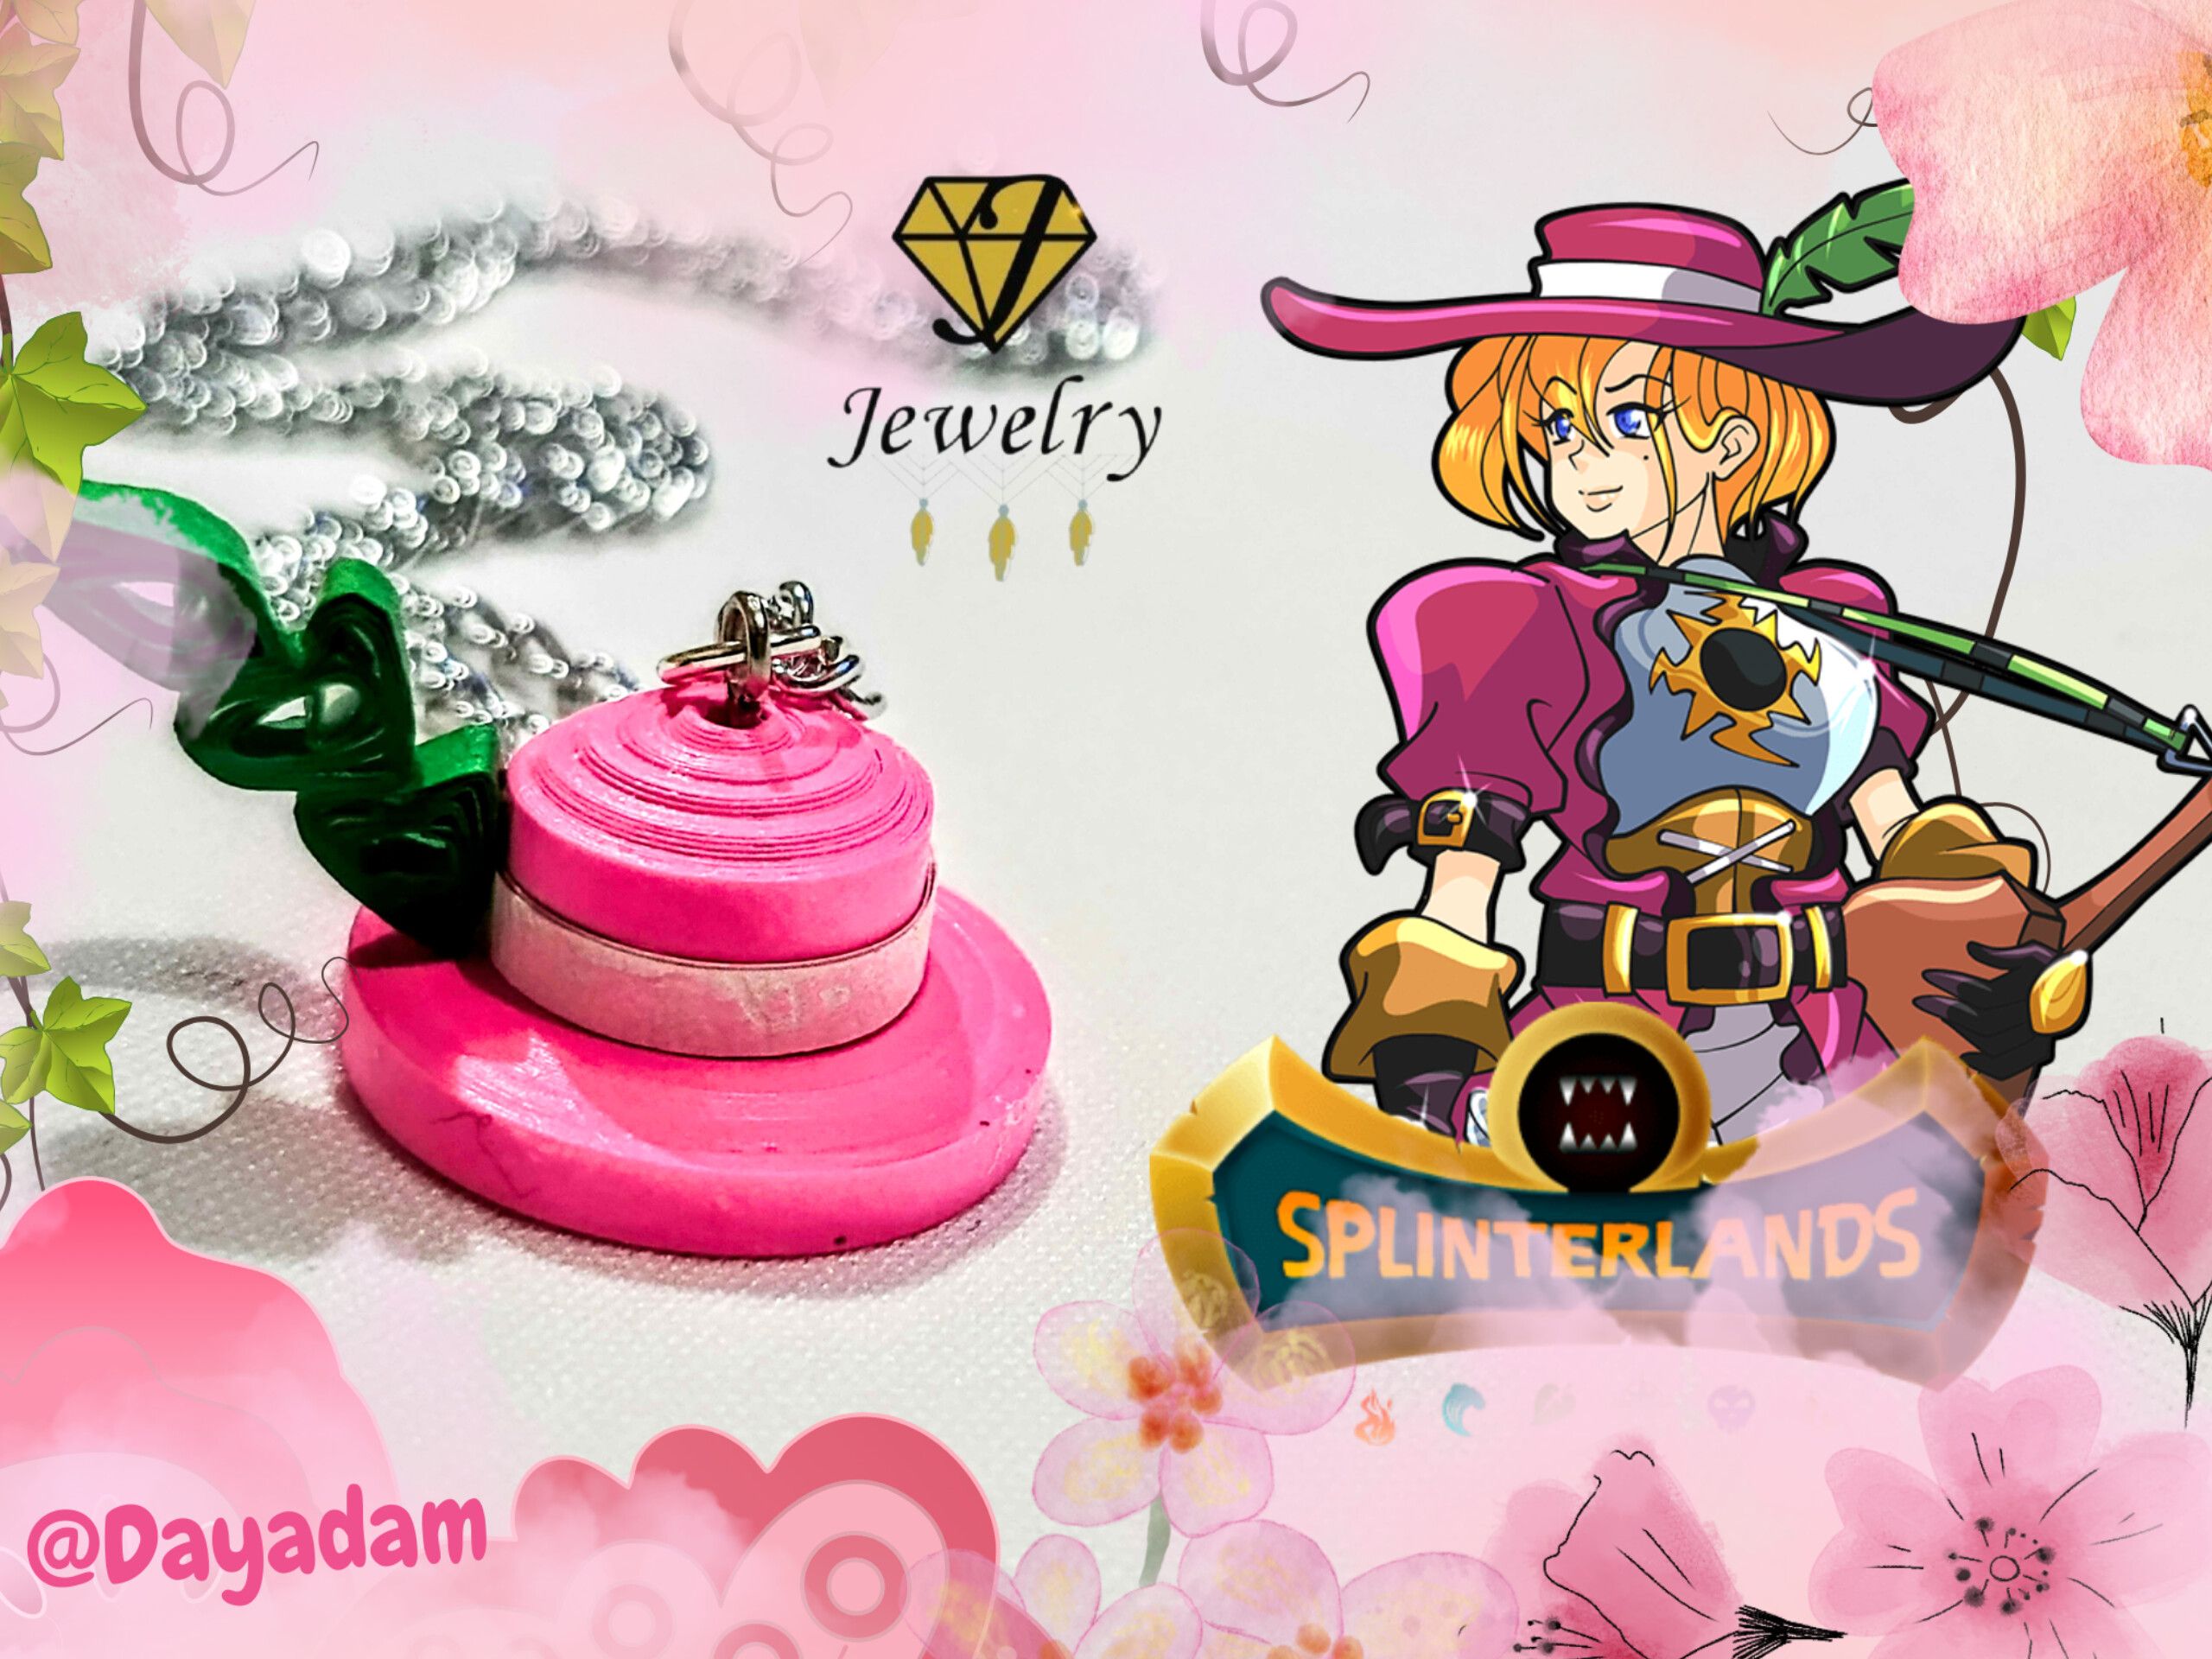
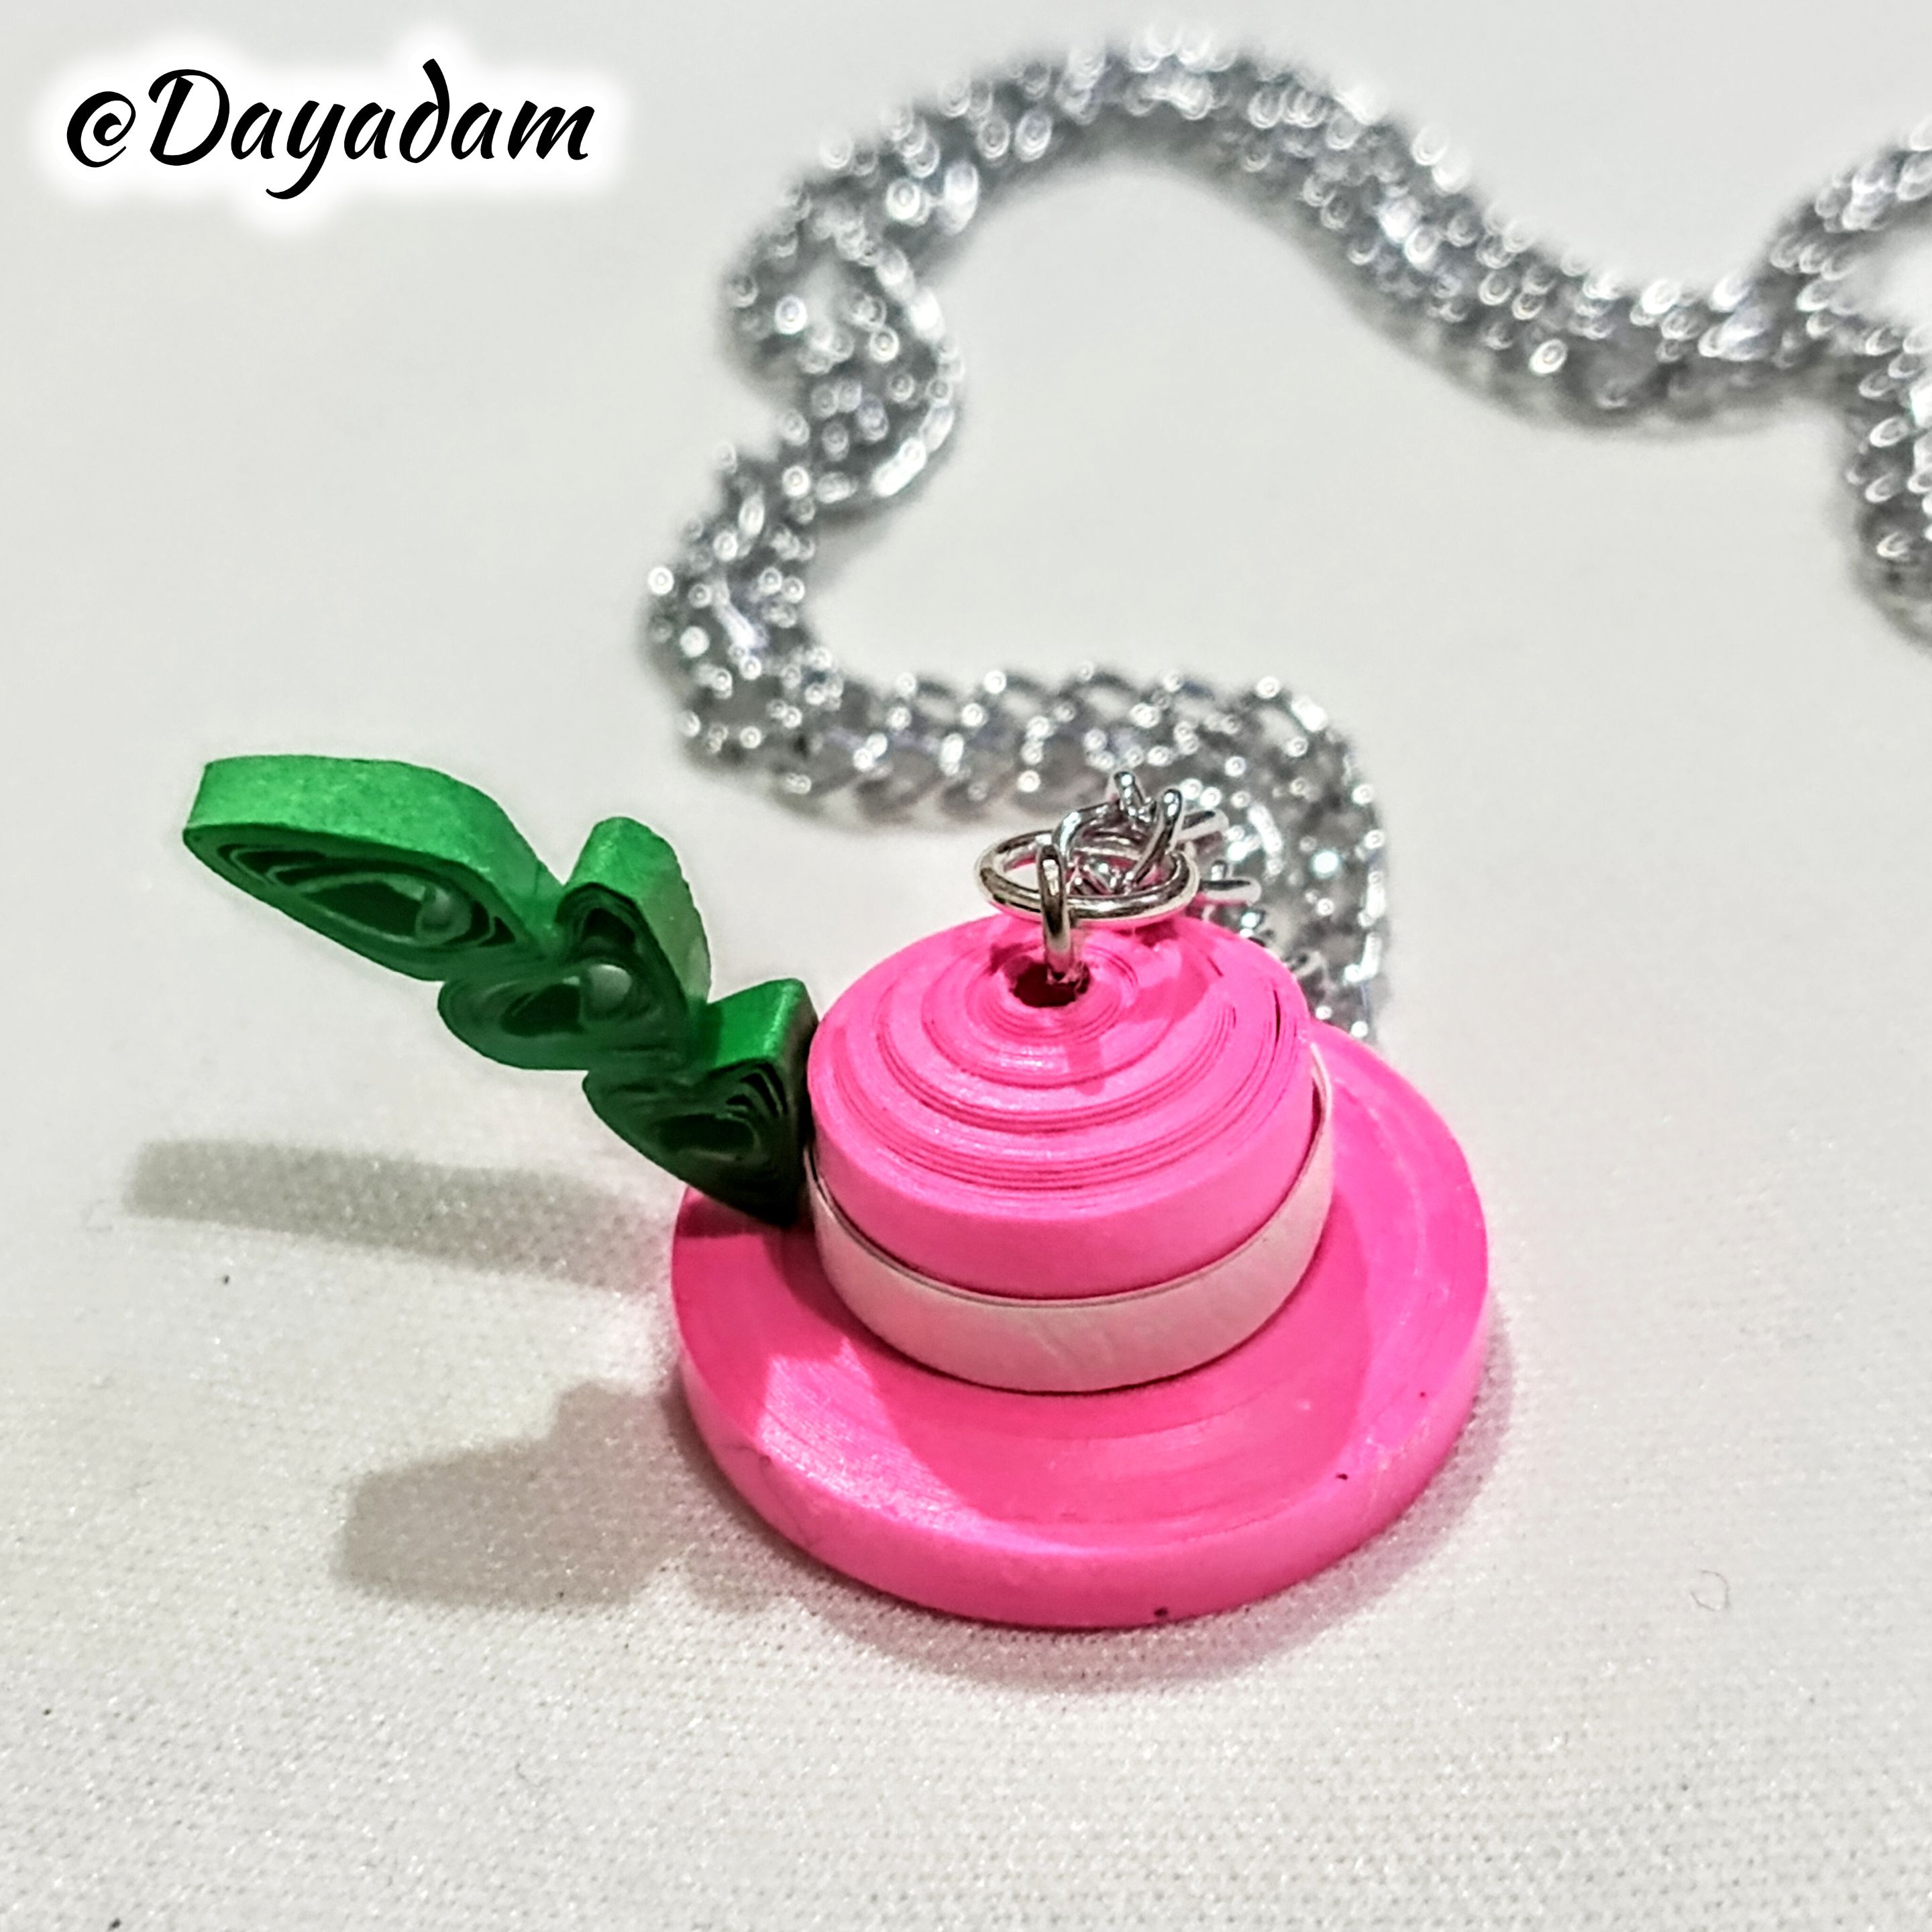
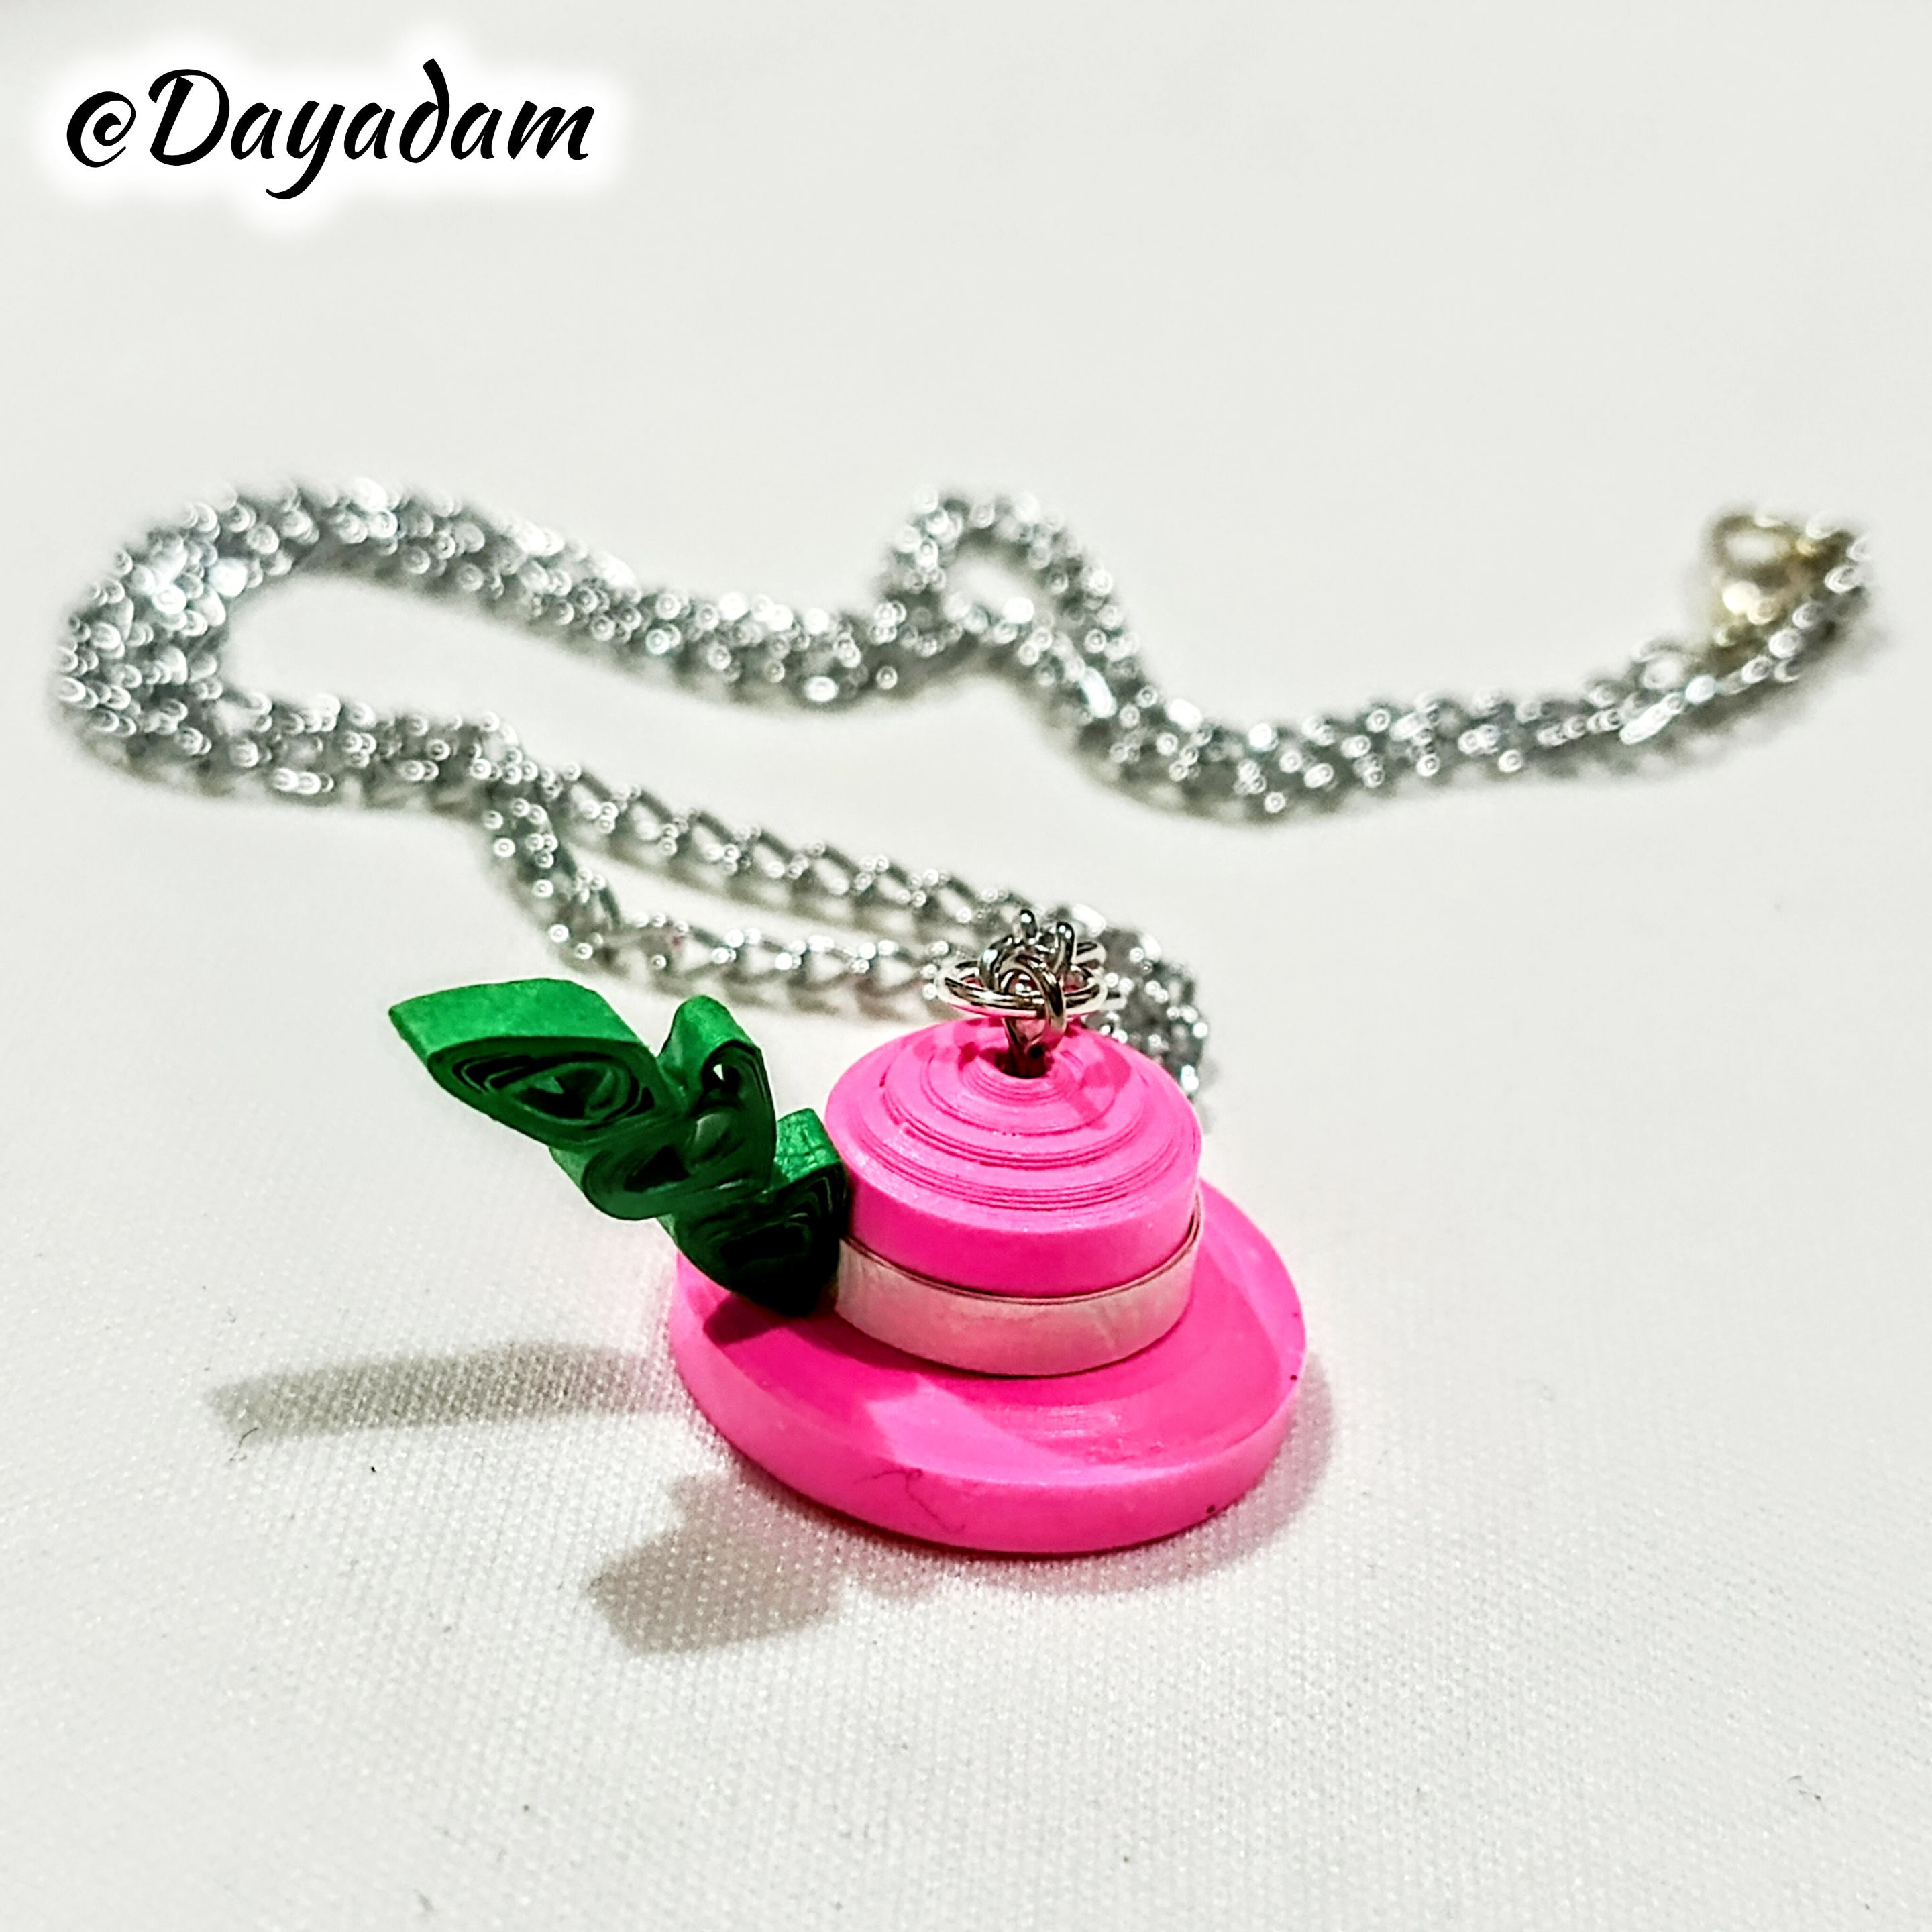
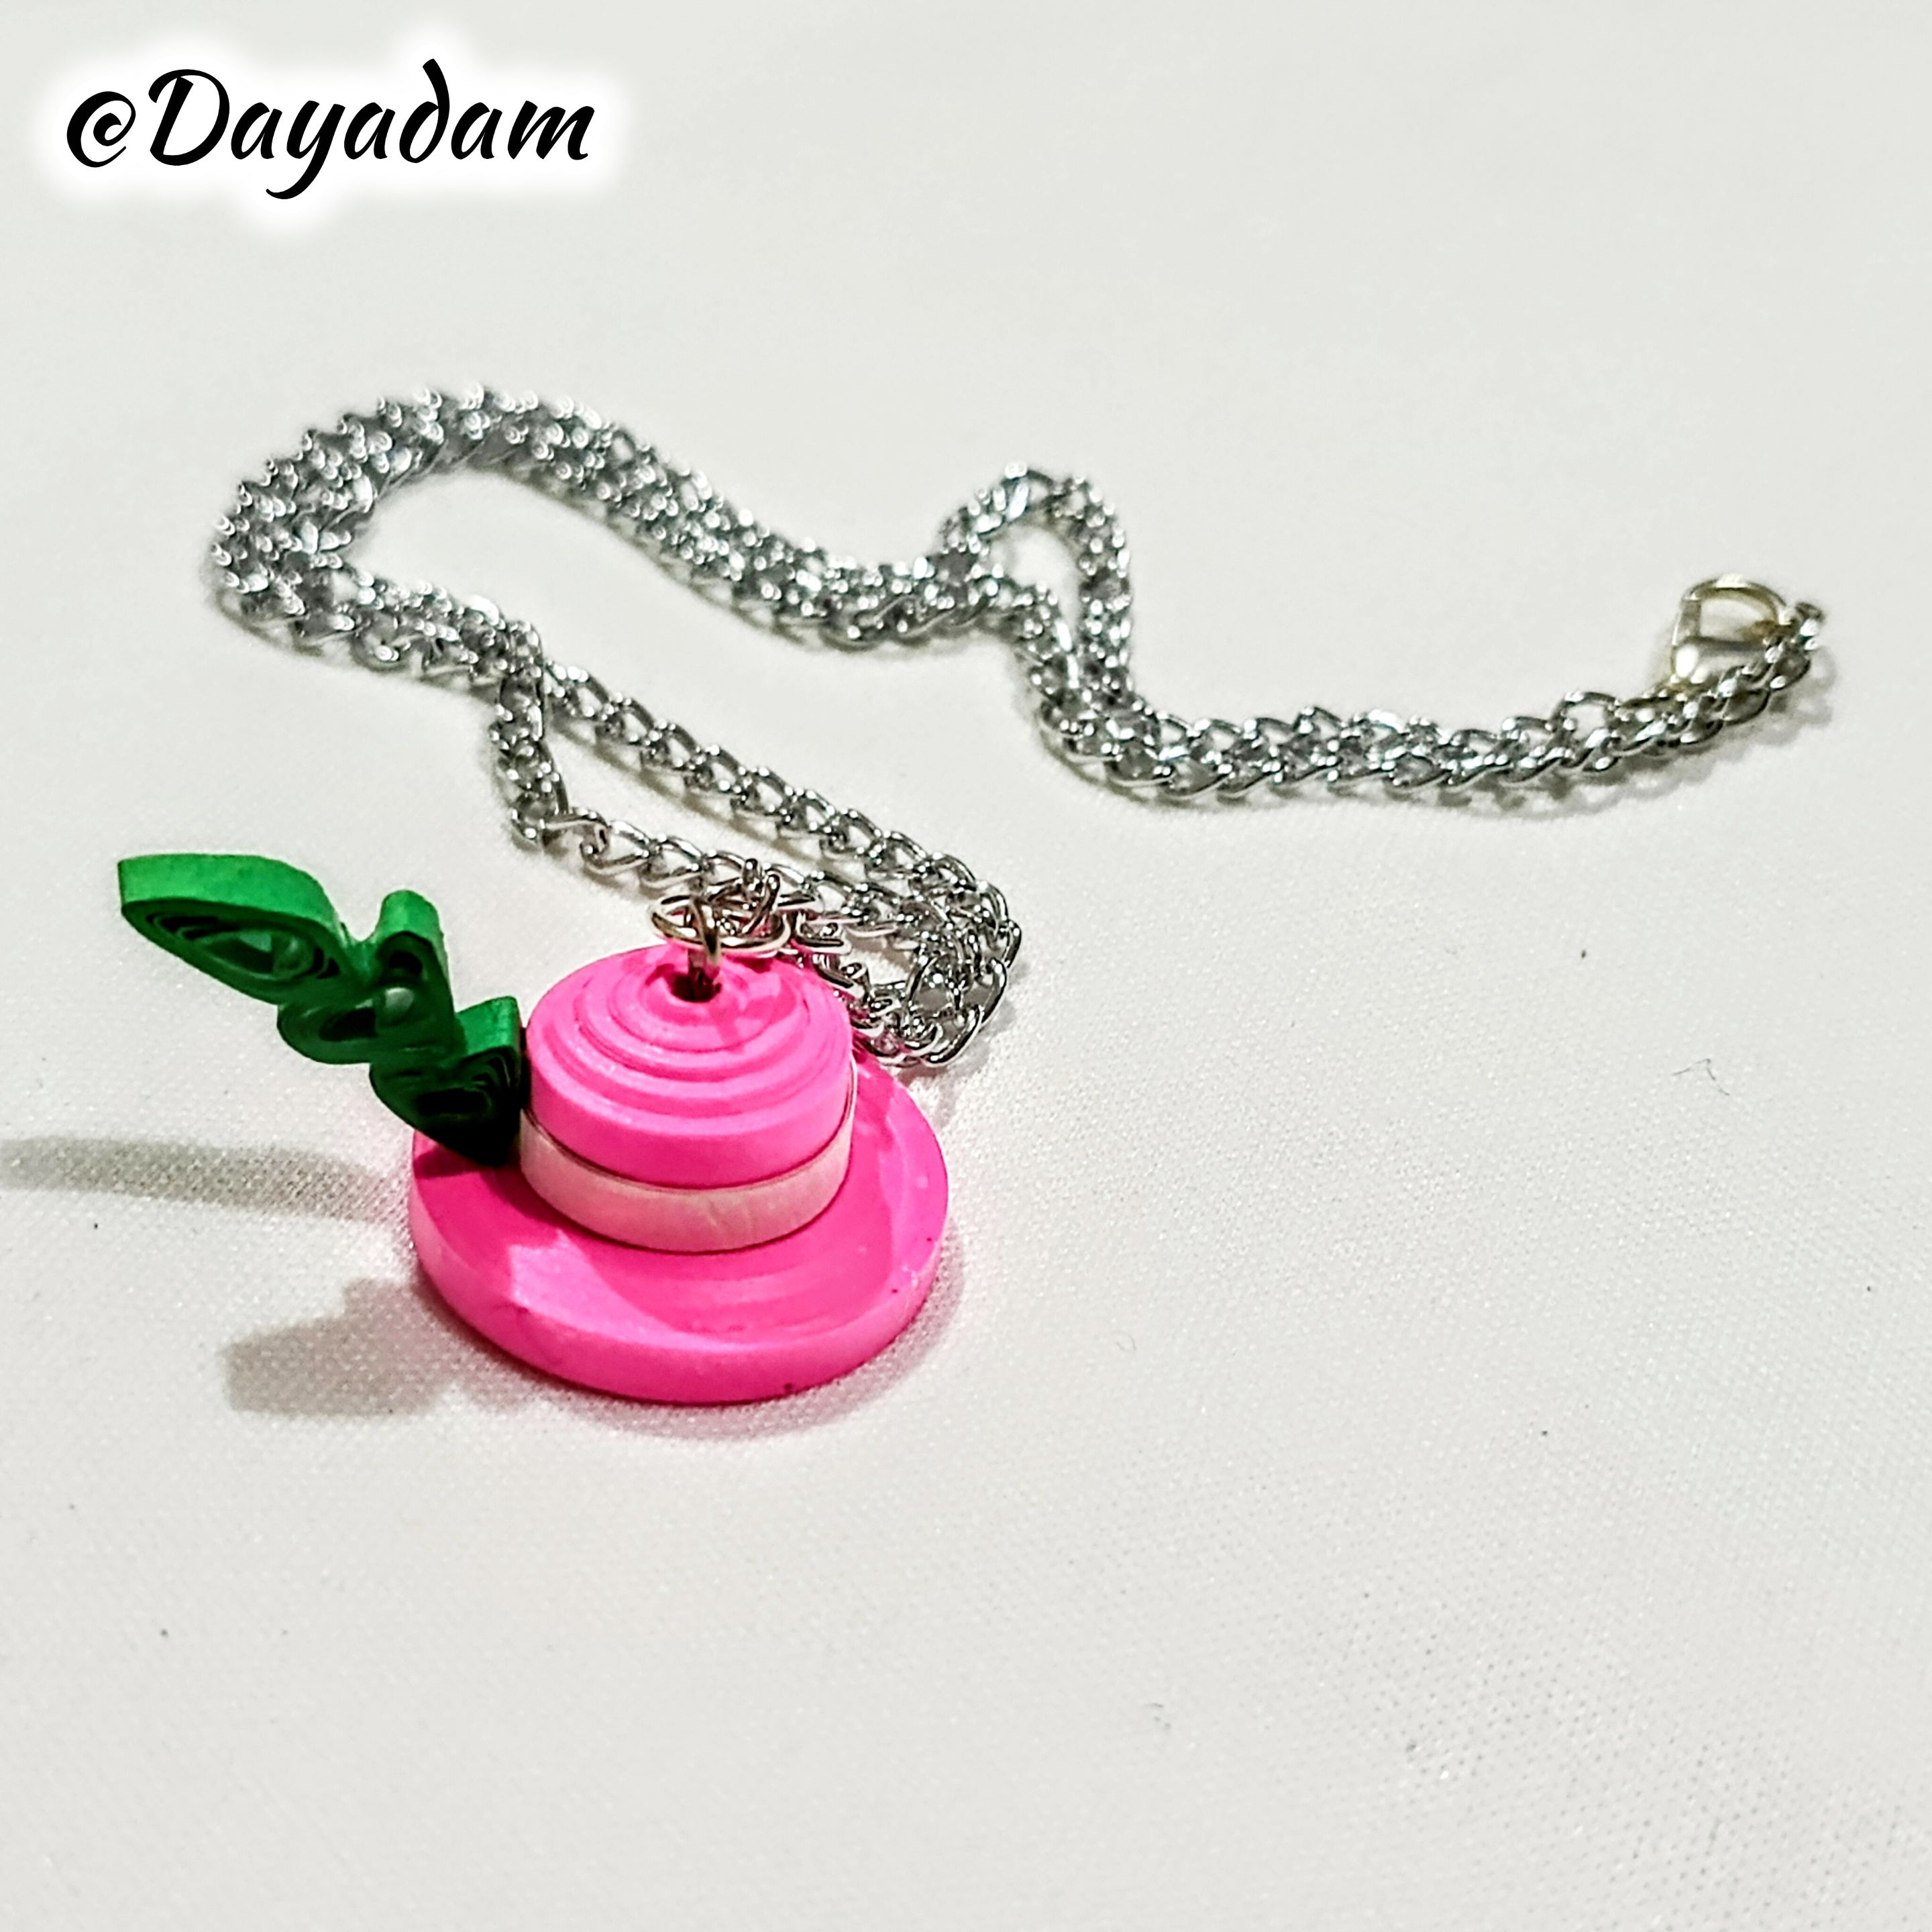
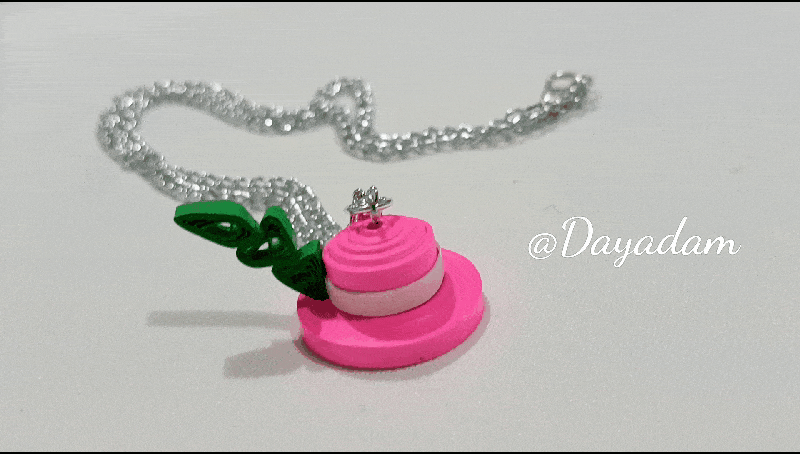
Today I'm joining the Splinterlands Art Contest. I bring you a new work of art. I wanted to make a 3D necklace pendant inspired by the card Silvershield Bard using the quilling technique.
If you want to know more about the game, I leave you my reference link to enter it and navigate through this wonderful world: https://splinterlands.com?ref=dayadam
Hoping you like my work, without further ado, I leave you with my creative process.
Let's start:😃

Hola a toda mi gente de Hive... 🐱
Hoy estoy con ustedes nuevamente para mostrarles mi arte, me encanta semana a semana pasar por ese maravilloso mundo de magia, color, y muchísimos personajes de Splinterlands para buscar nuevos elementos o personajes para construir diversas manualidades bien sean bisutería, accesorios, figuras en 3D entre otras cosas que me motiven, inspiren y activen mi creatividad y de esa manera poder crear para ustedes.
Para hoy me uno al Splinterlands Art Contest. les traigo un nuevo trabajo de arte, quise realizar un dije para collar en 3D inspirado en la carta, Silvershield Bard en la técnica de quilling.
Si quieren saber más con respecto al juego les dejo mi enlace de referencia para que ingresen en él, y naveguen por este maravilloso mundo: https://splinterlands.com?ref=dayadam
Esperando les guste mi trabajo, sin más preámbulos, les dejo mi proceso creativo.
Comencemos:😃
 |
 |
|


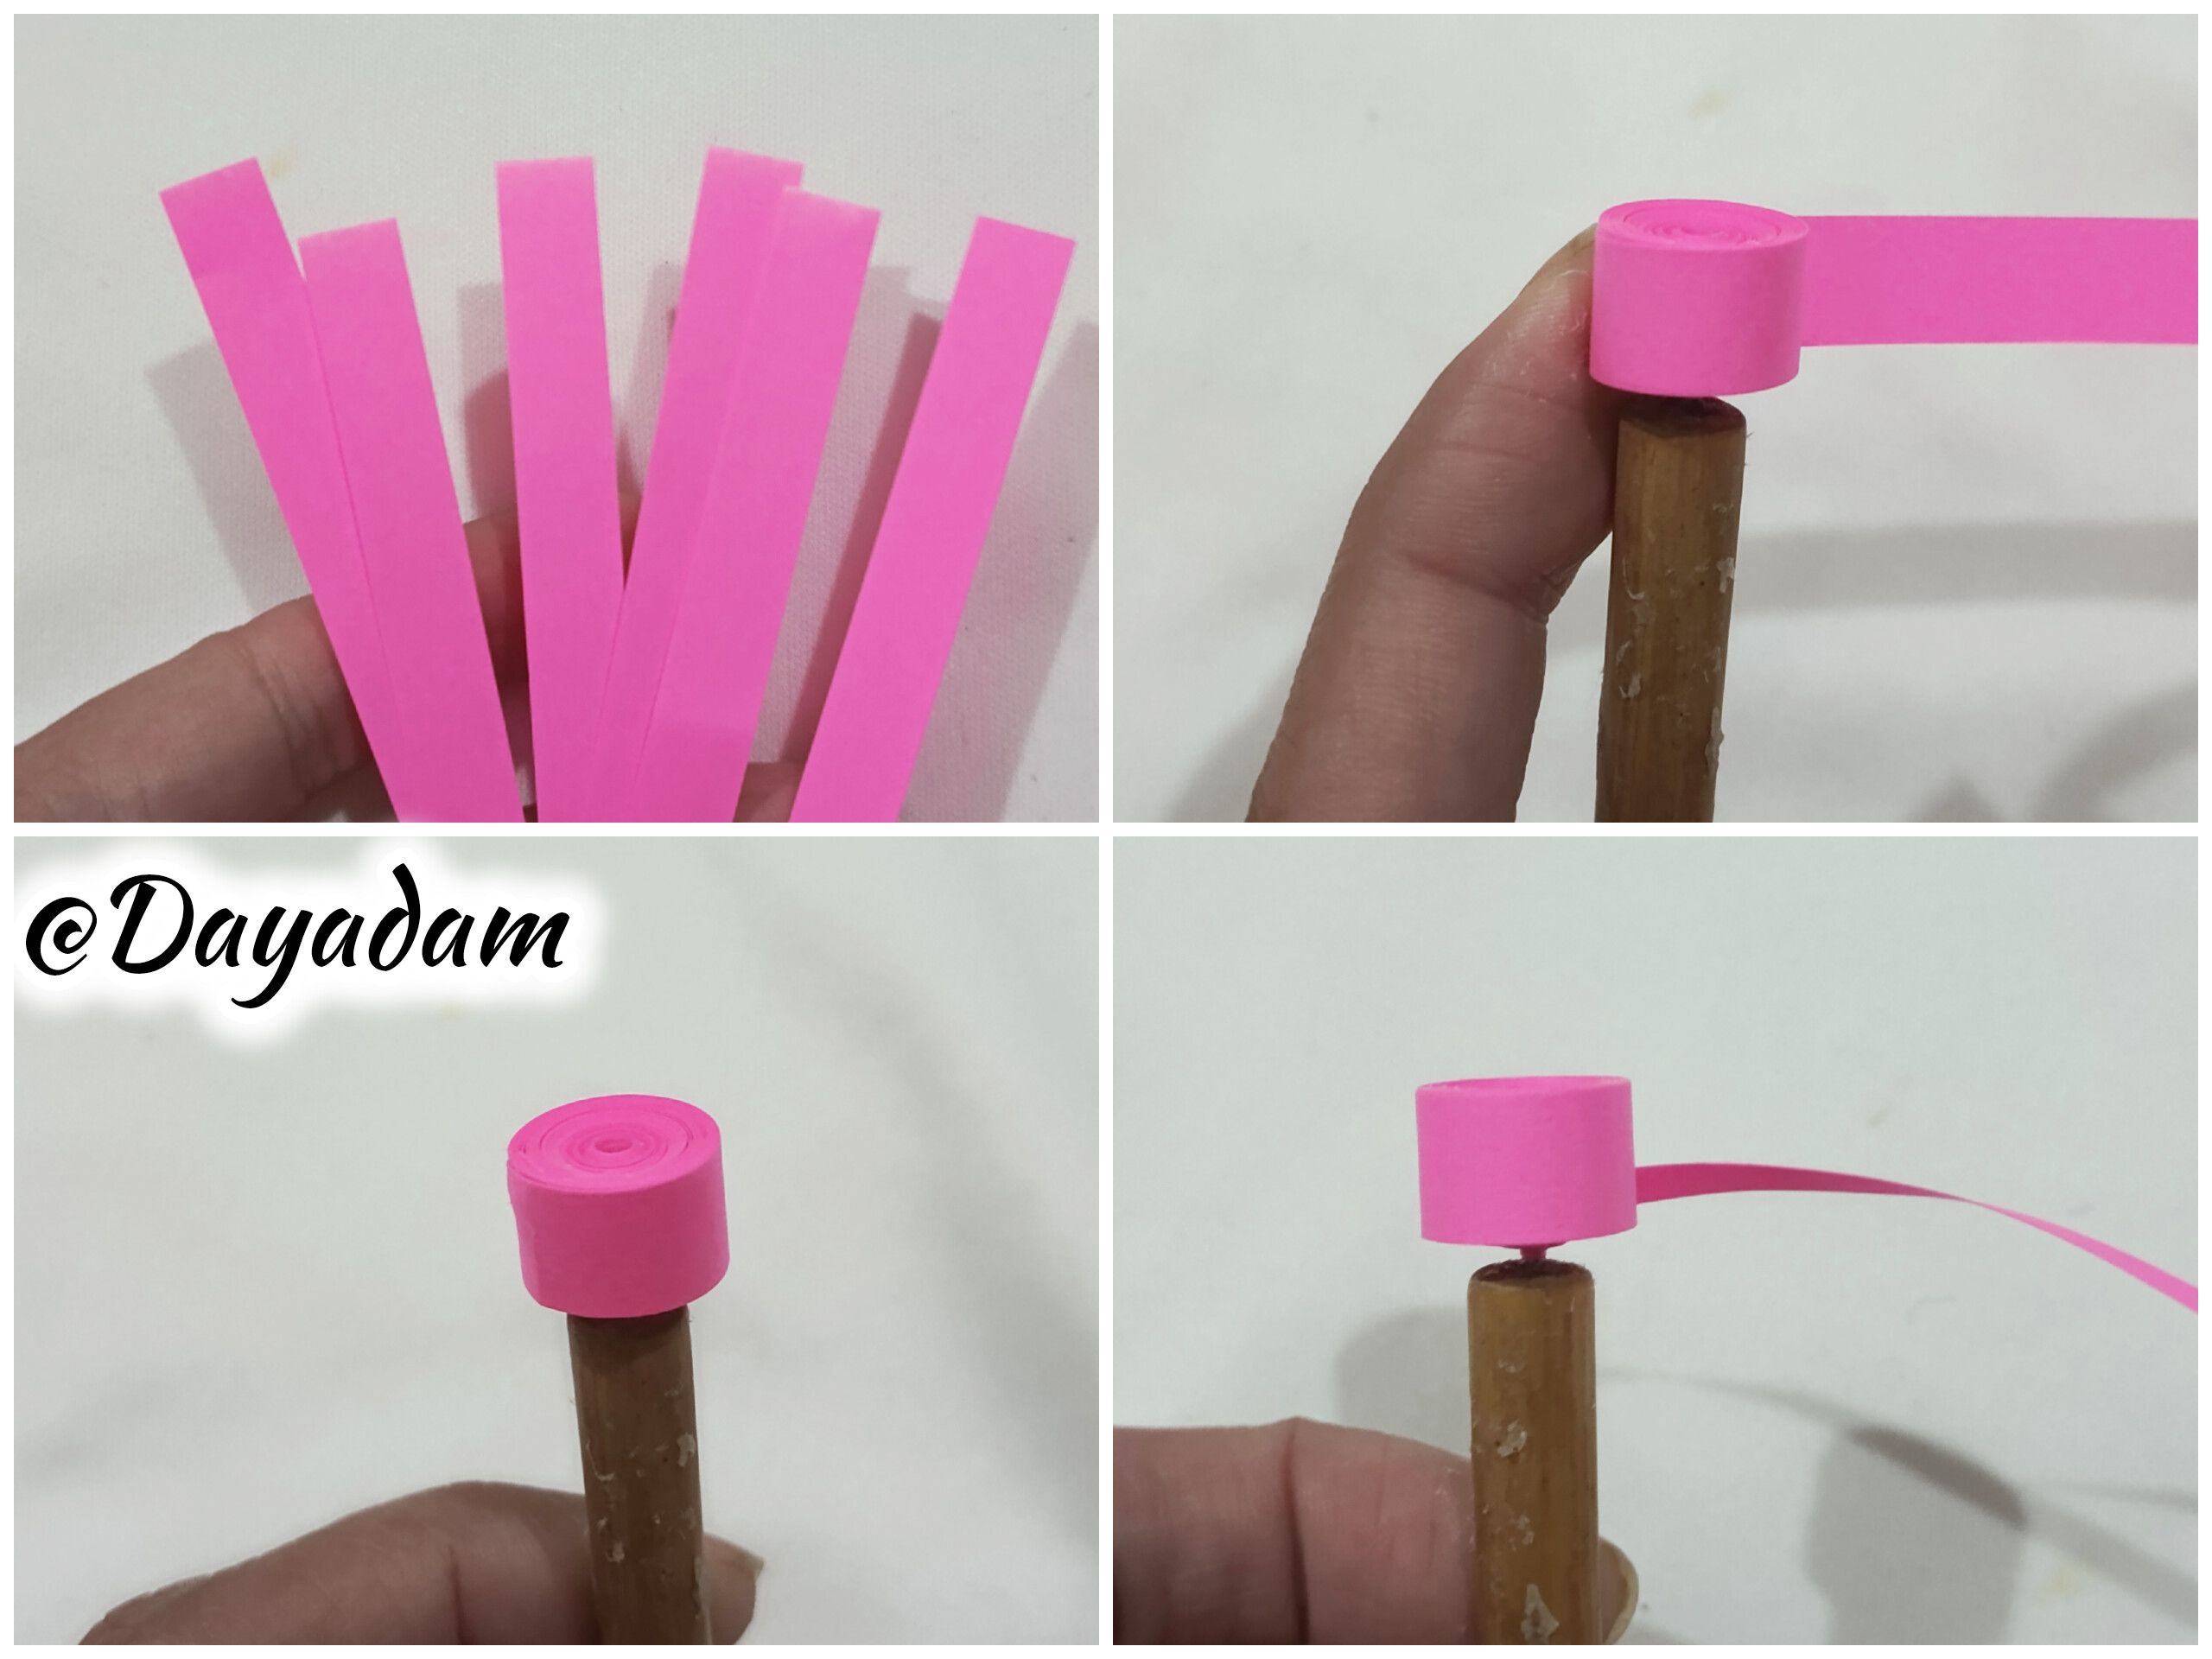
• I started by taking a 5mm wide fuchsia quilling ribbon and using the needle to roll up the entire ribbon until I reached the end, sealing it with extra-strong white glue. I left the piece on the needle.
• I took a piece of fuchsia ribbon 3 mm wide and glued it to the bottom of the 5 mm ribbon. I began to roll it up until I had a rim wide enough to form the hat, sealed it with white glue, and removed it from the needle.
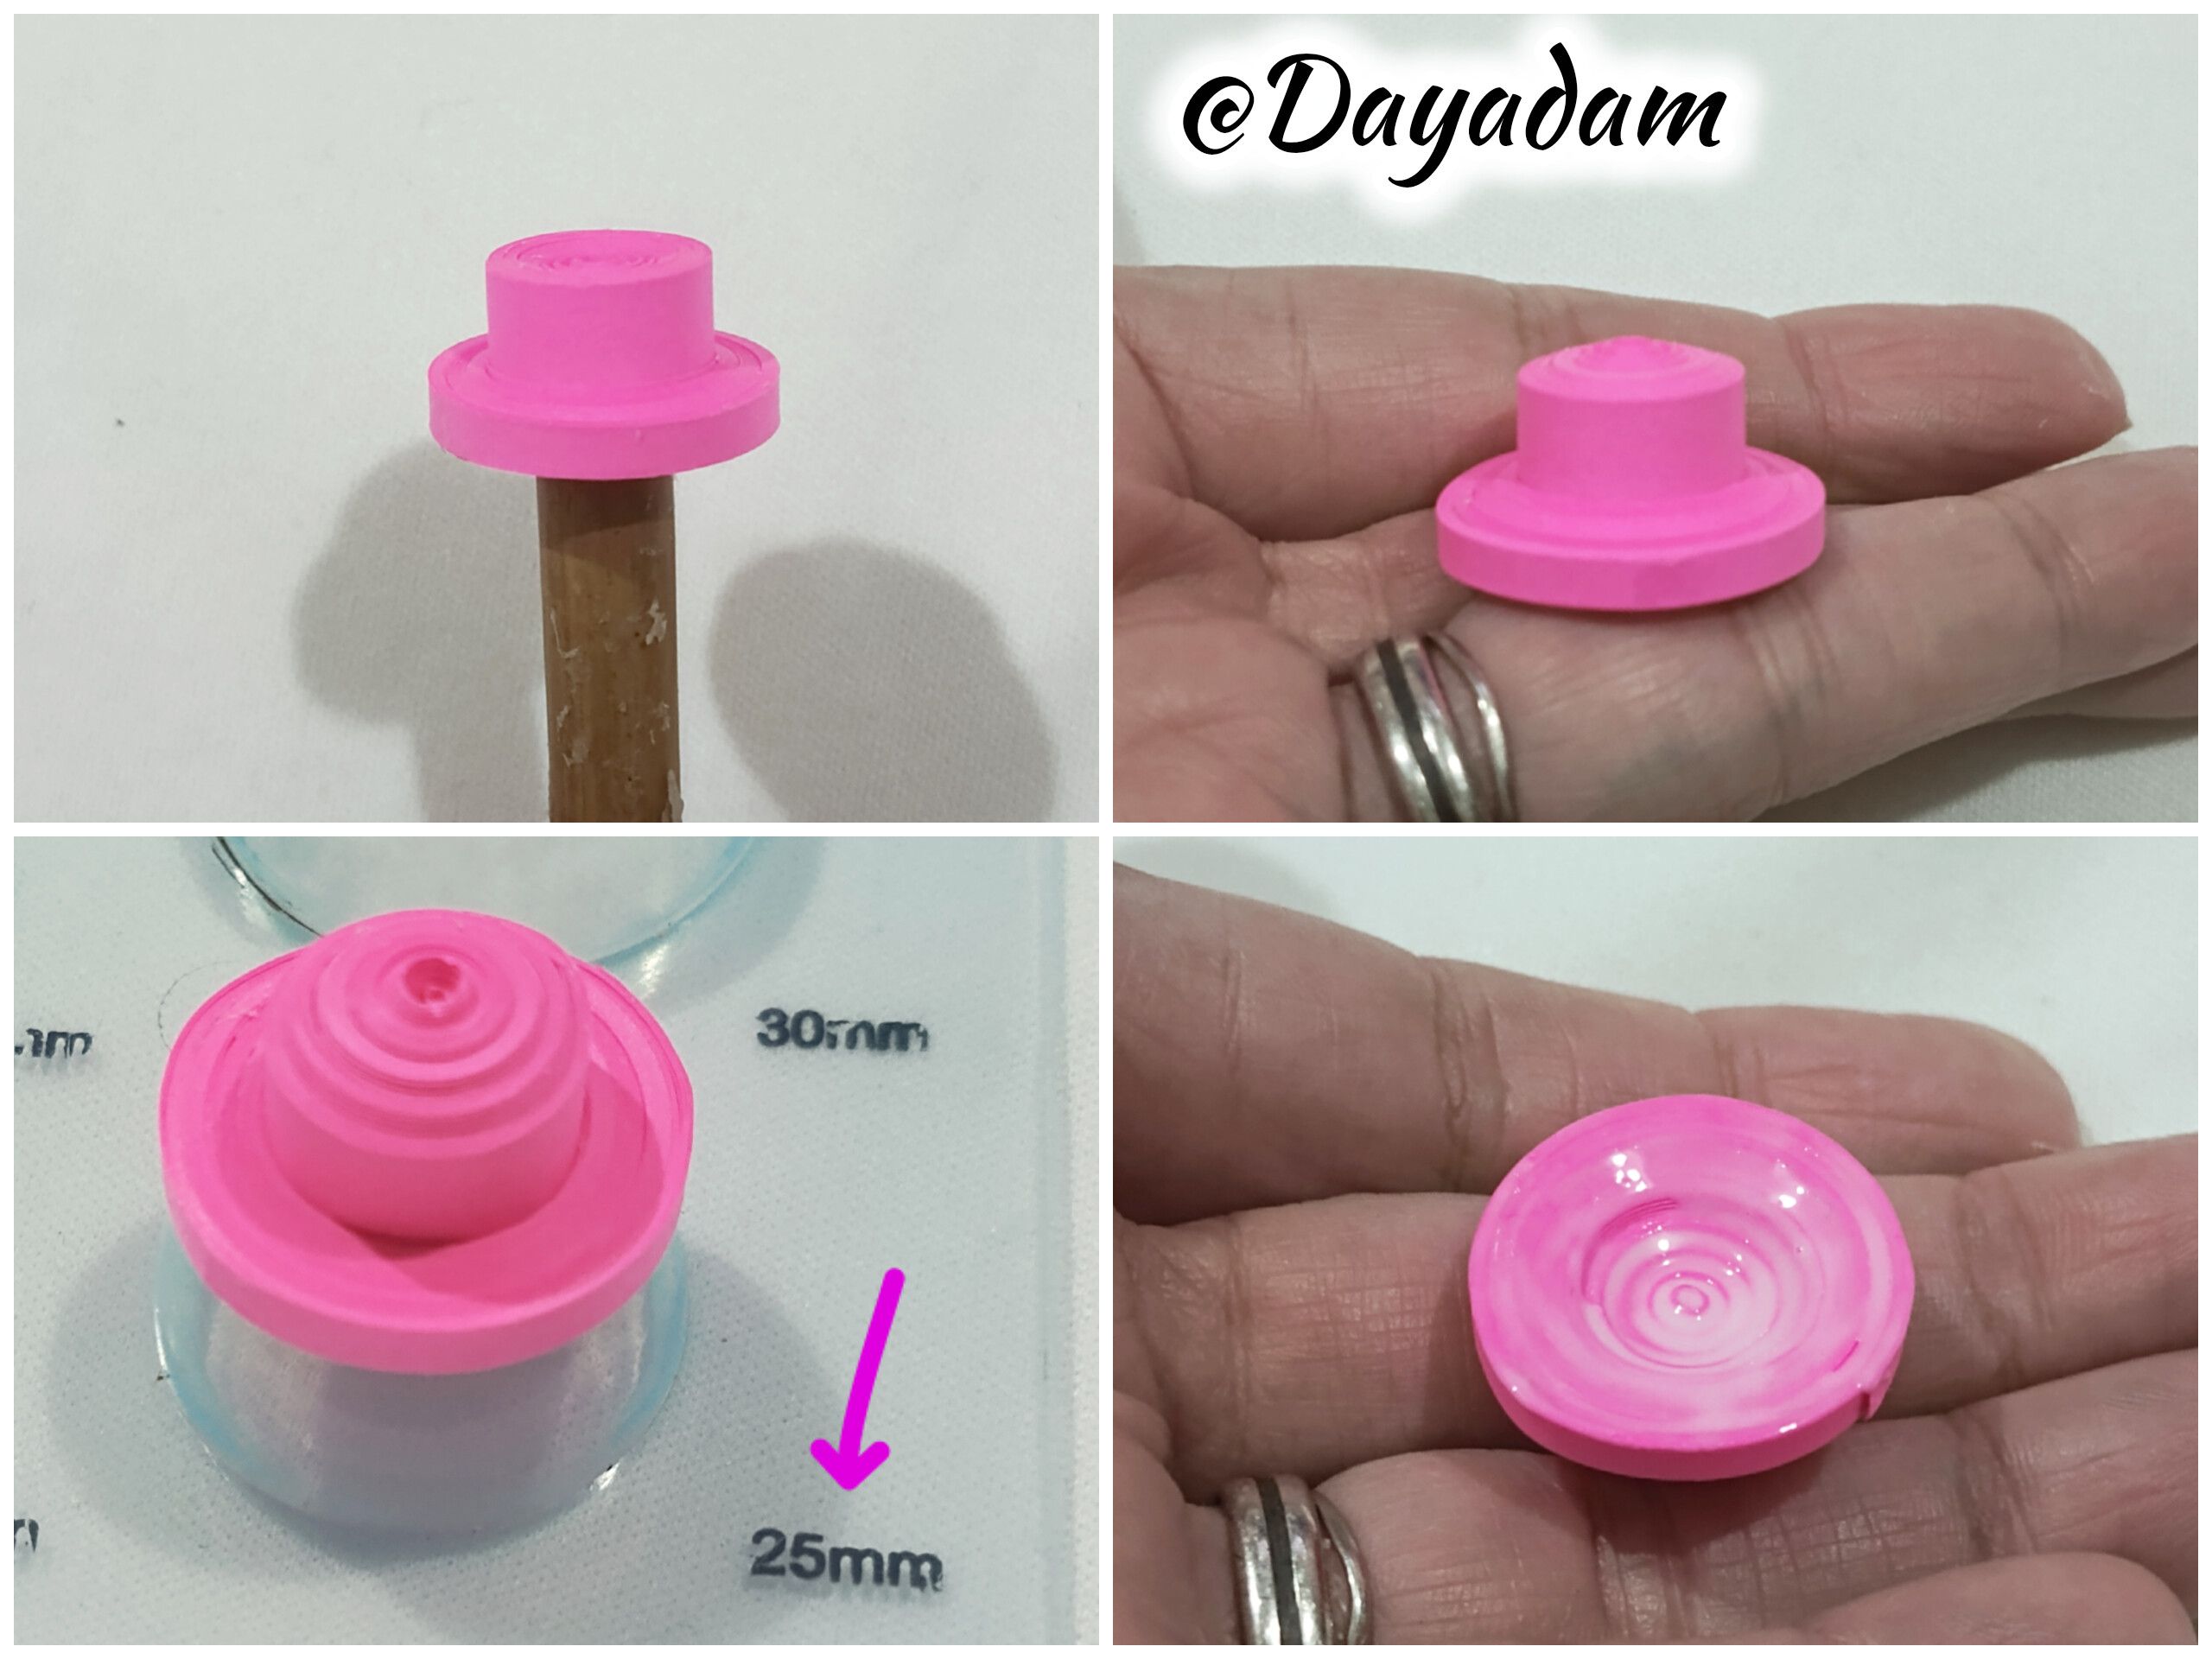
• Using a circle template, I set it to 25mm to form a slight circle at the top, removed it from the template, and applied extra-strong white glue to the bottom, both on the molded part and on the 3mm ribbon.
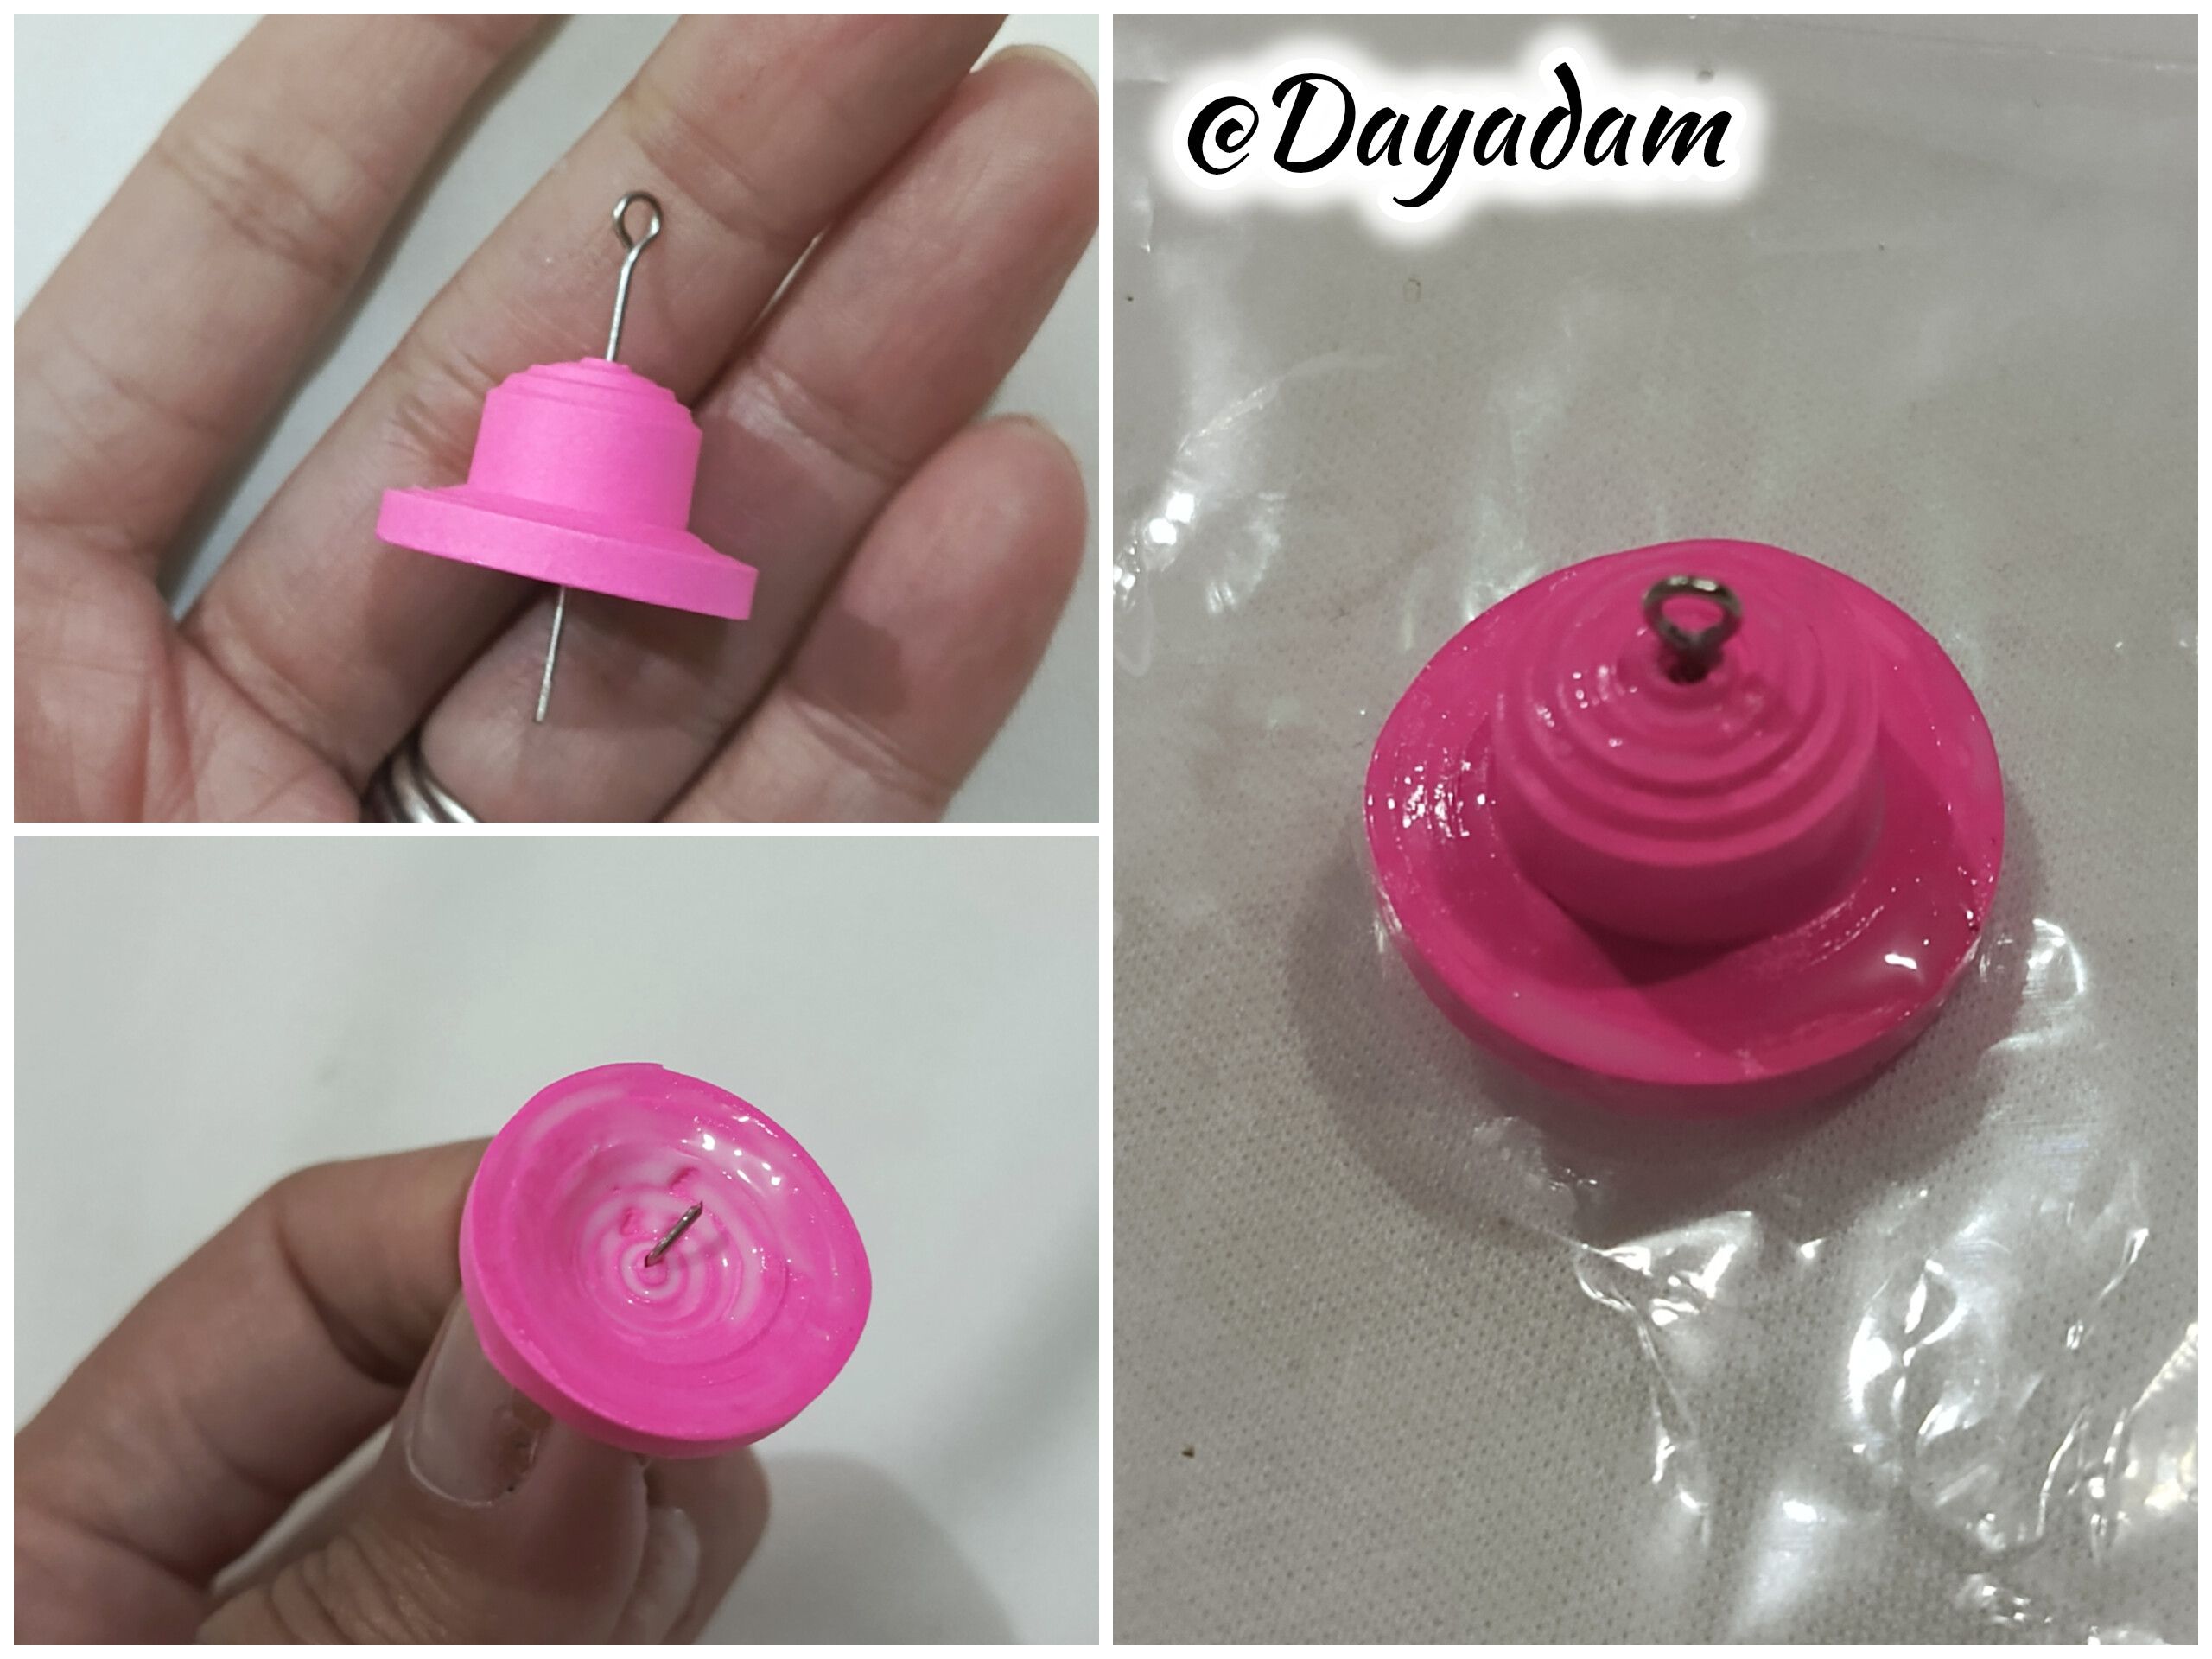
• While the glue was still wet, I took a jewelry pin and inserted it through the middle of the hat, applied more glue, and placed a small piece of ribbon that I had cut into a rounded shape. I let it dry thoroughly.
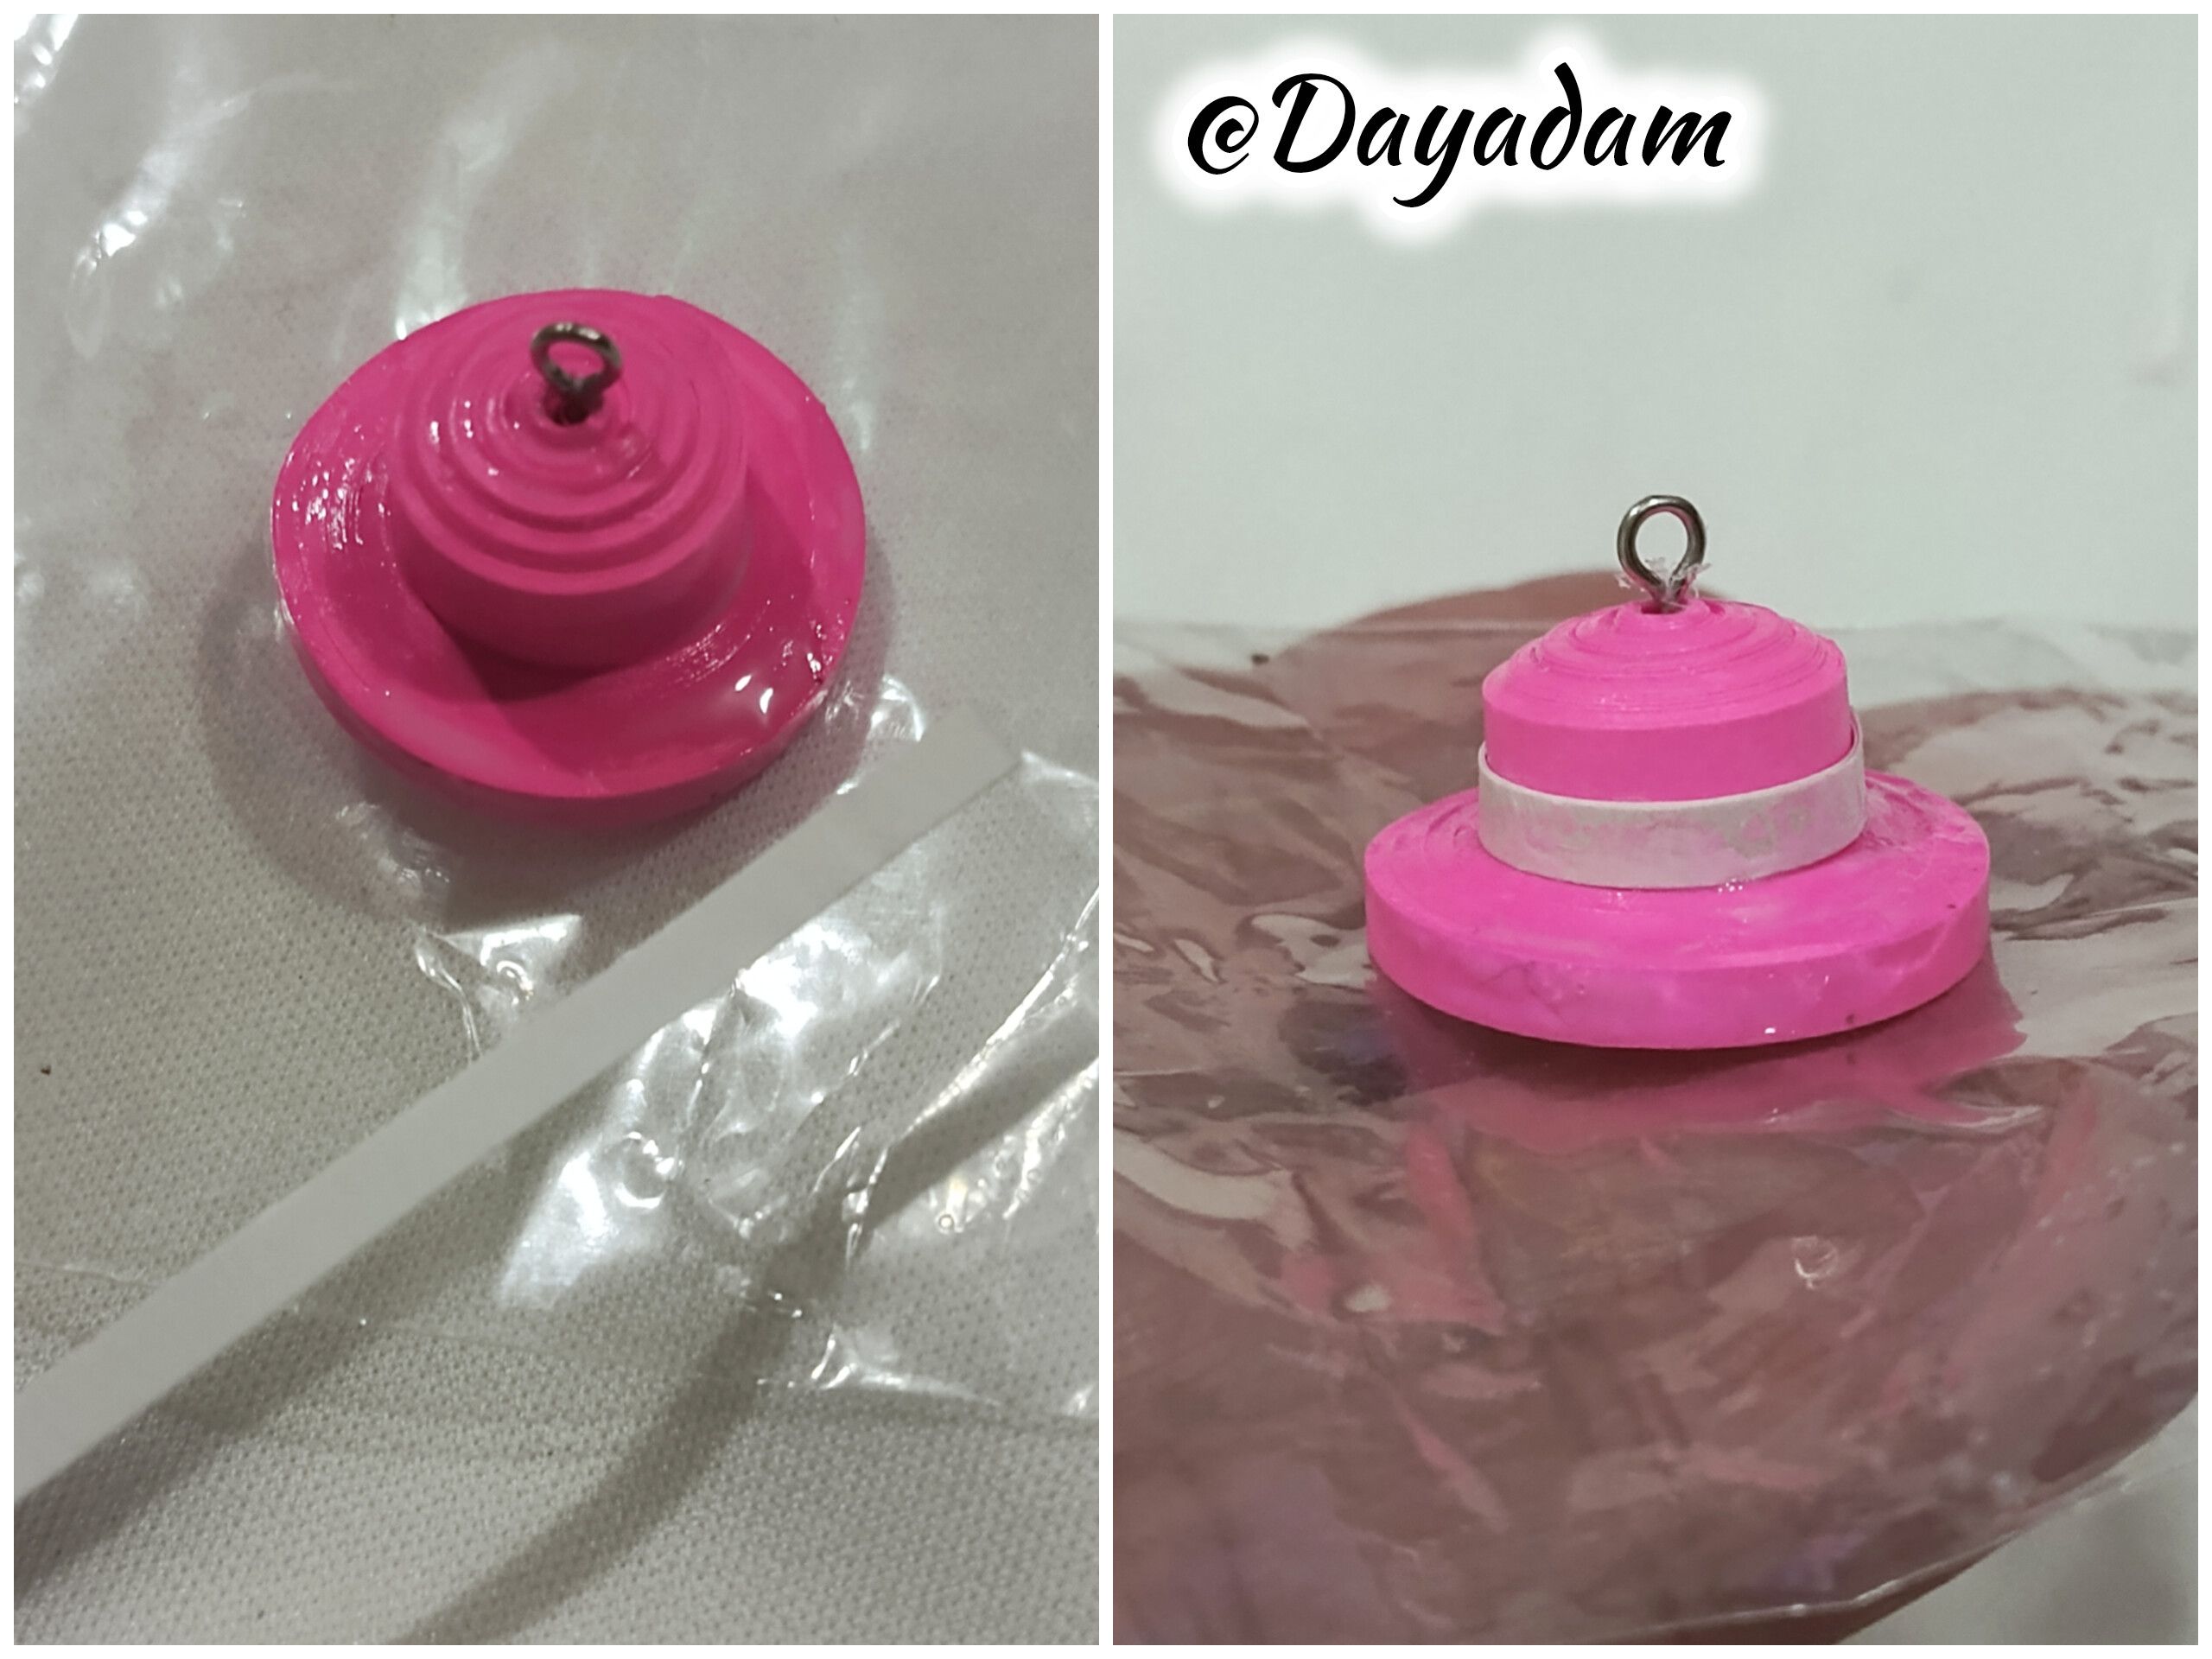
• I took a small piece of white pearl ribbon and wrapped it around the hat to make the band.

• Comencé tomando cinta para quilling de color fucsia de 5mm de ancho, con la aguja enrollé toda la cinta hasta llegar al final de la misma, sellé con pega blanca extra fuerte. Deje la pieza en la aguja.
• Tomé un trozo de cinta de color fucsia de 3mm de ancho y pegué en la parte de abajo de la cinta de 5mm, comencé a enrollar hasta hacer un borde lo suficientemente ancho para formar el sombrero, sellé con pega blanca y sacamos de la aguja.
• En un plantilla para moldear círculos coloqué en la medida número 25mm para formar un ligero circulo en la parte de arriba, saqué de la plantilla y aplique pega blanca extra fuerte por la parte de abajo, tanto en la parte moldeada como en la parte de la cinta de 3mm.
• Aún con la pega fresca tomé un alfiler de bisutería y lo introduje por el medio del sombrero, aplica más pega y coloque un pequeño trozo de cinta el cual recorte de forma redondeado, deje secar muy bien.
• Tomé un pedazo pequeño de cinta blanca perlada y lo pase alrededor del sombrero, para hacer la franja que lleva el mismo.
 |
 |
 |
 |
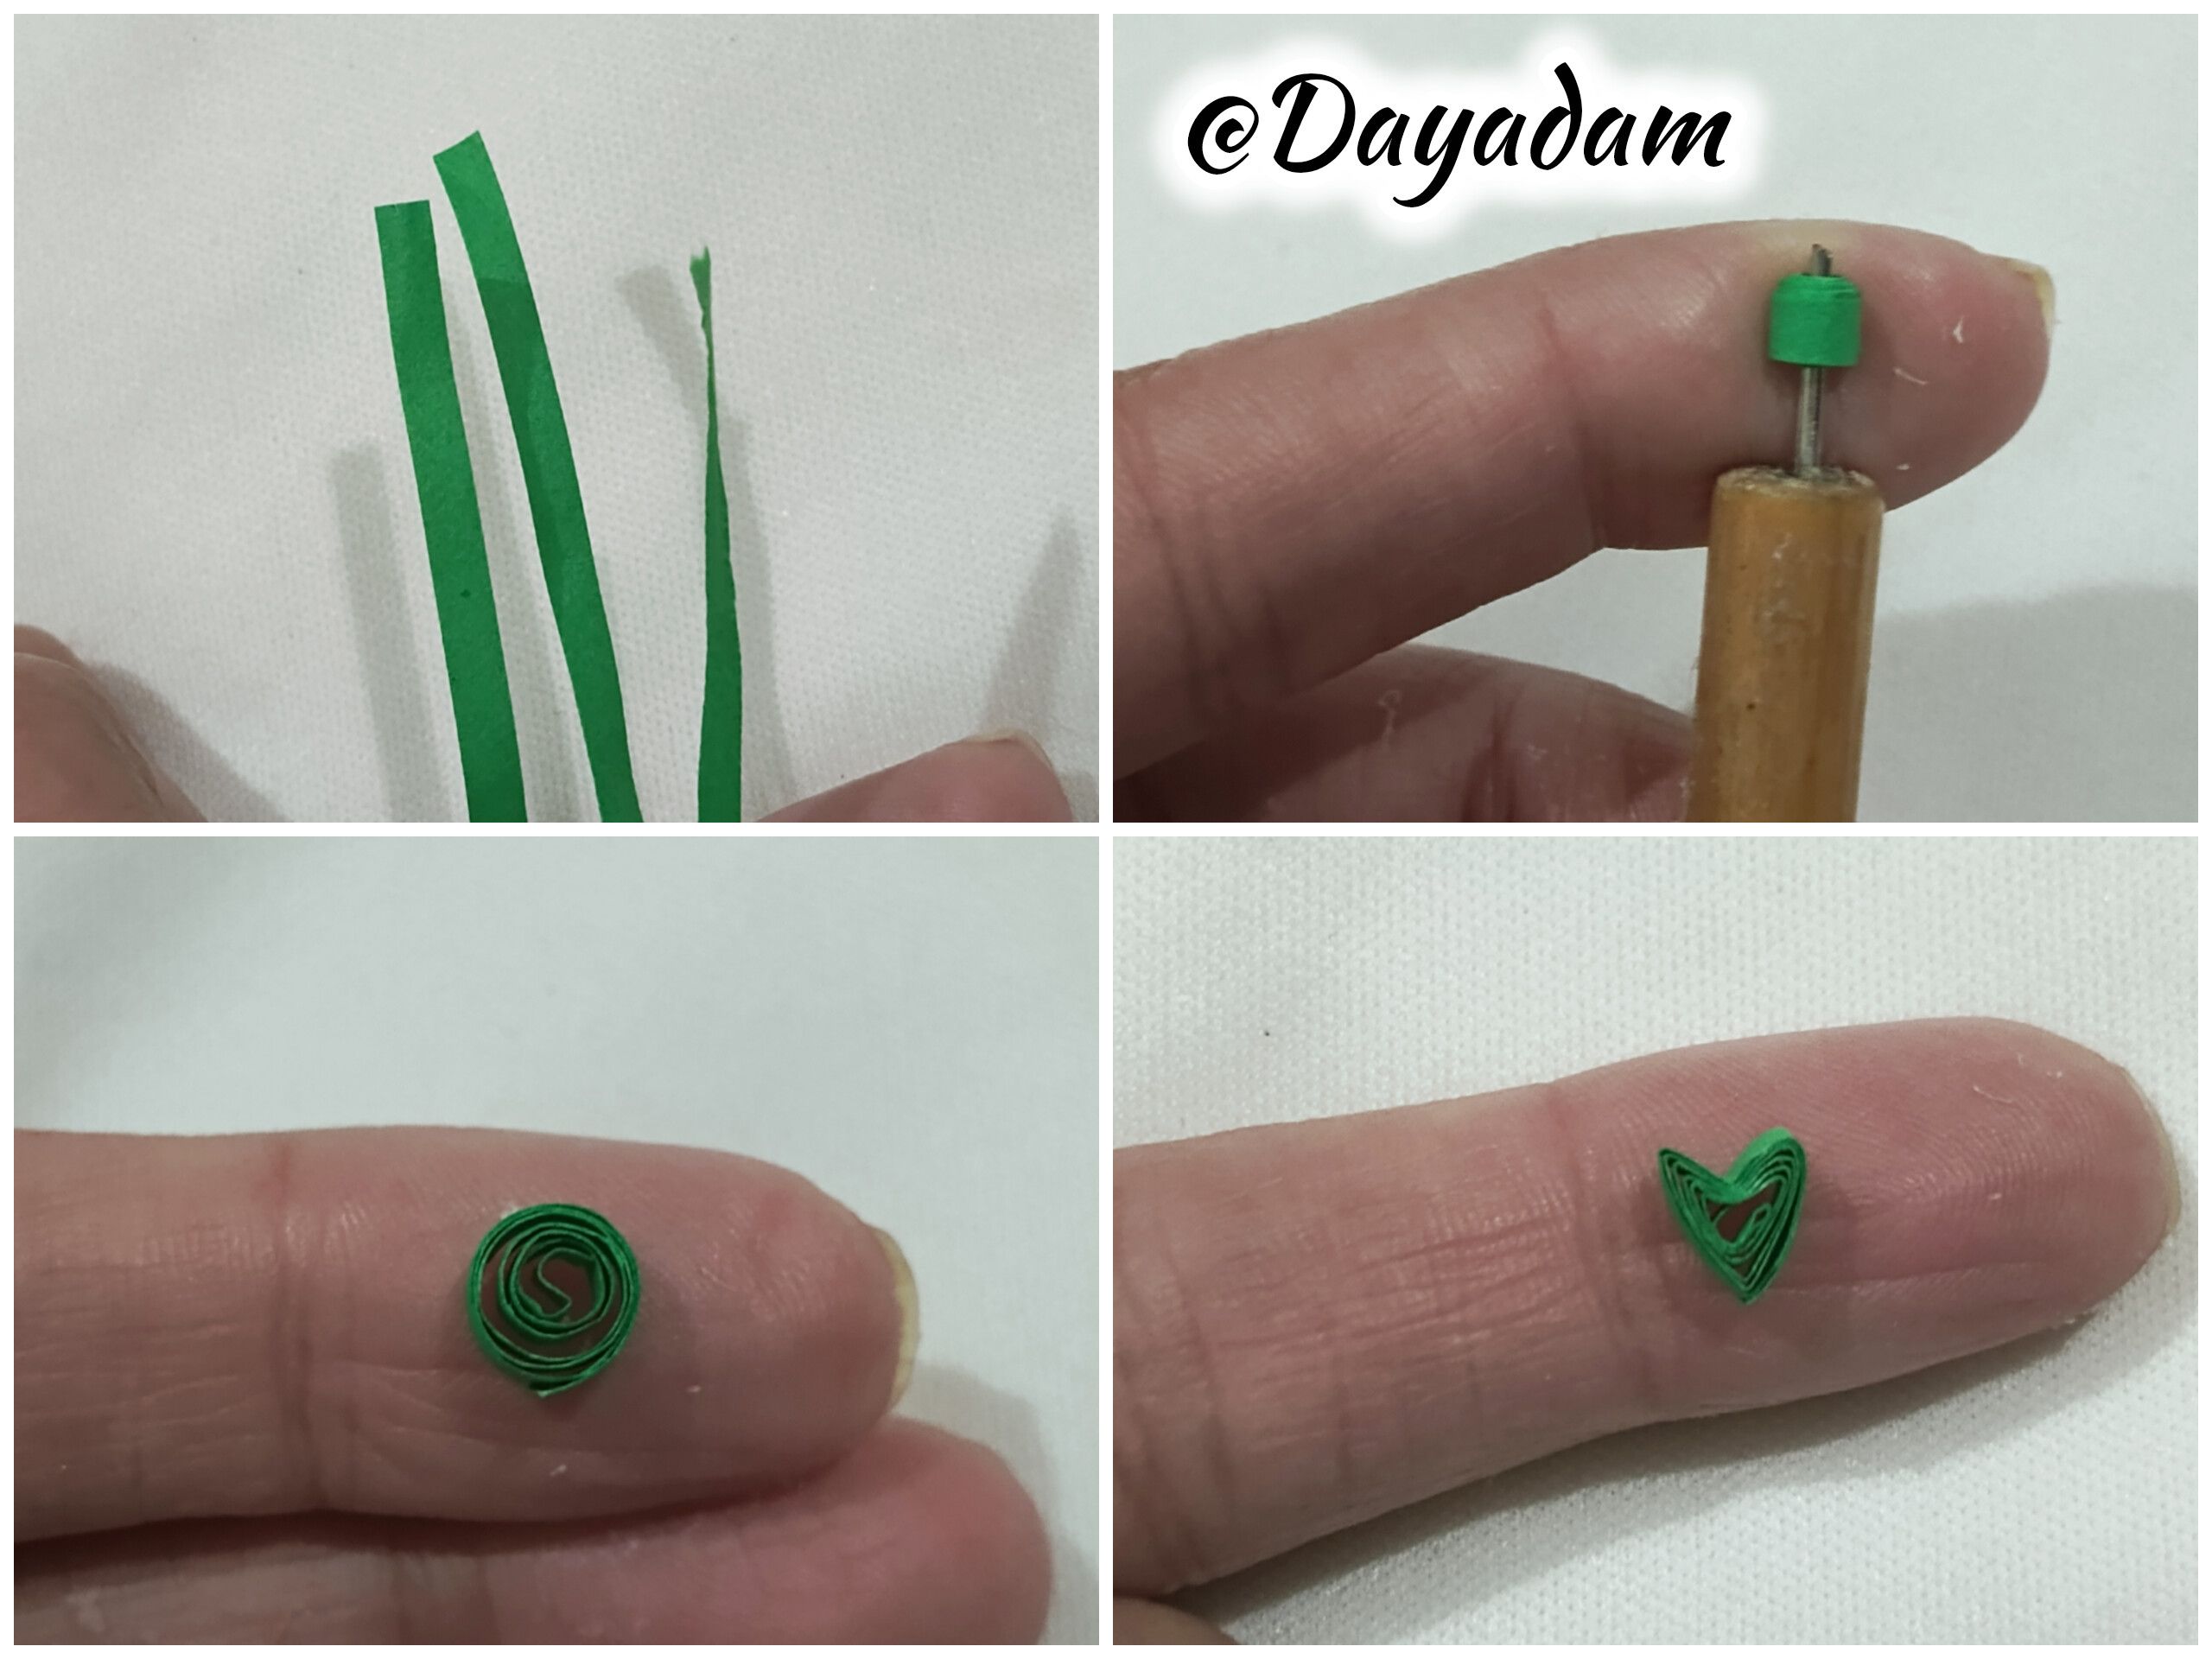
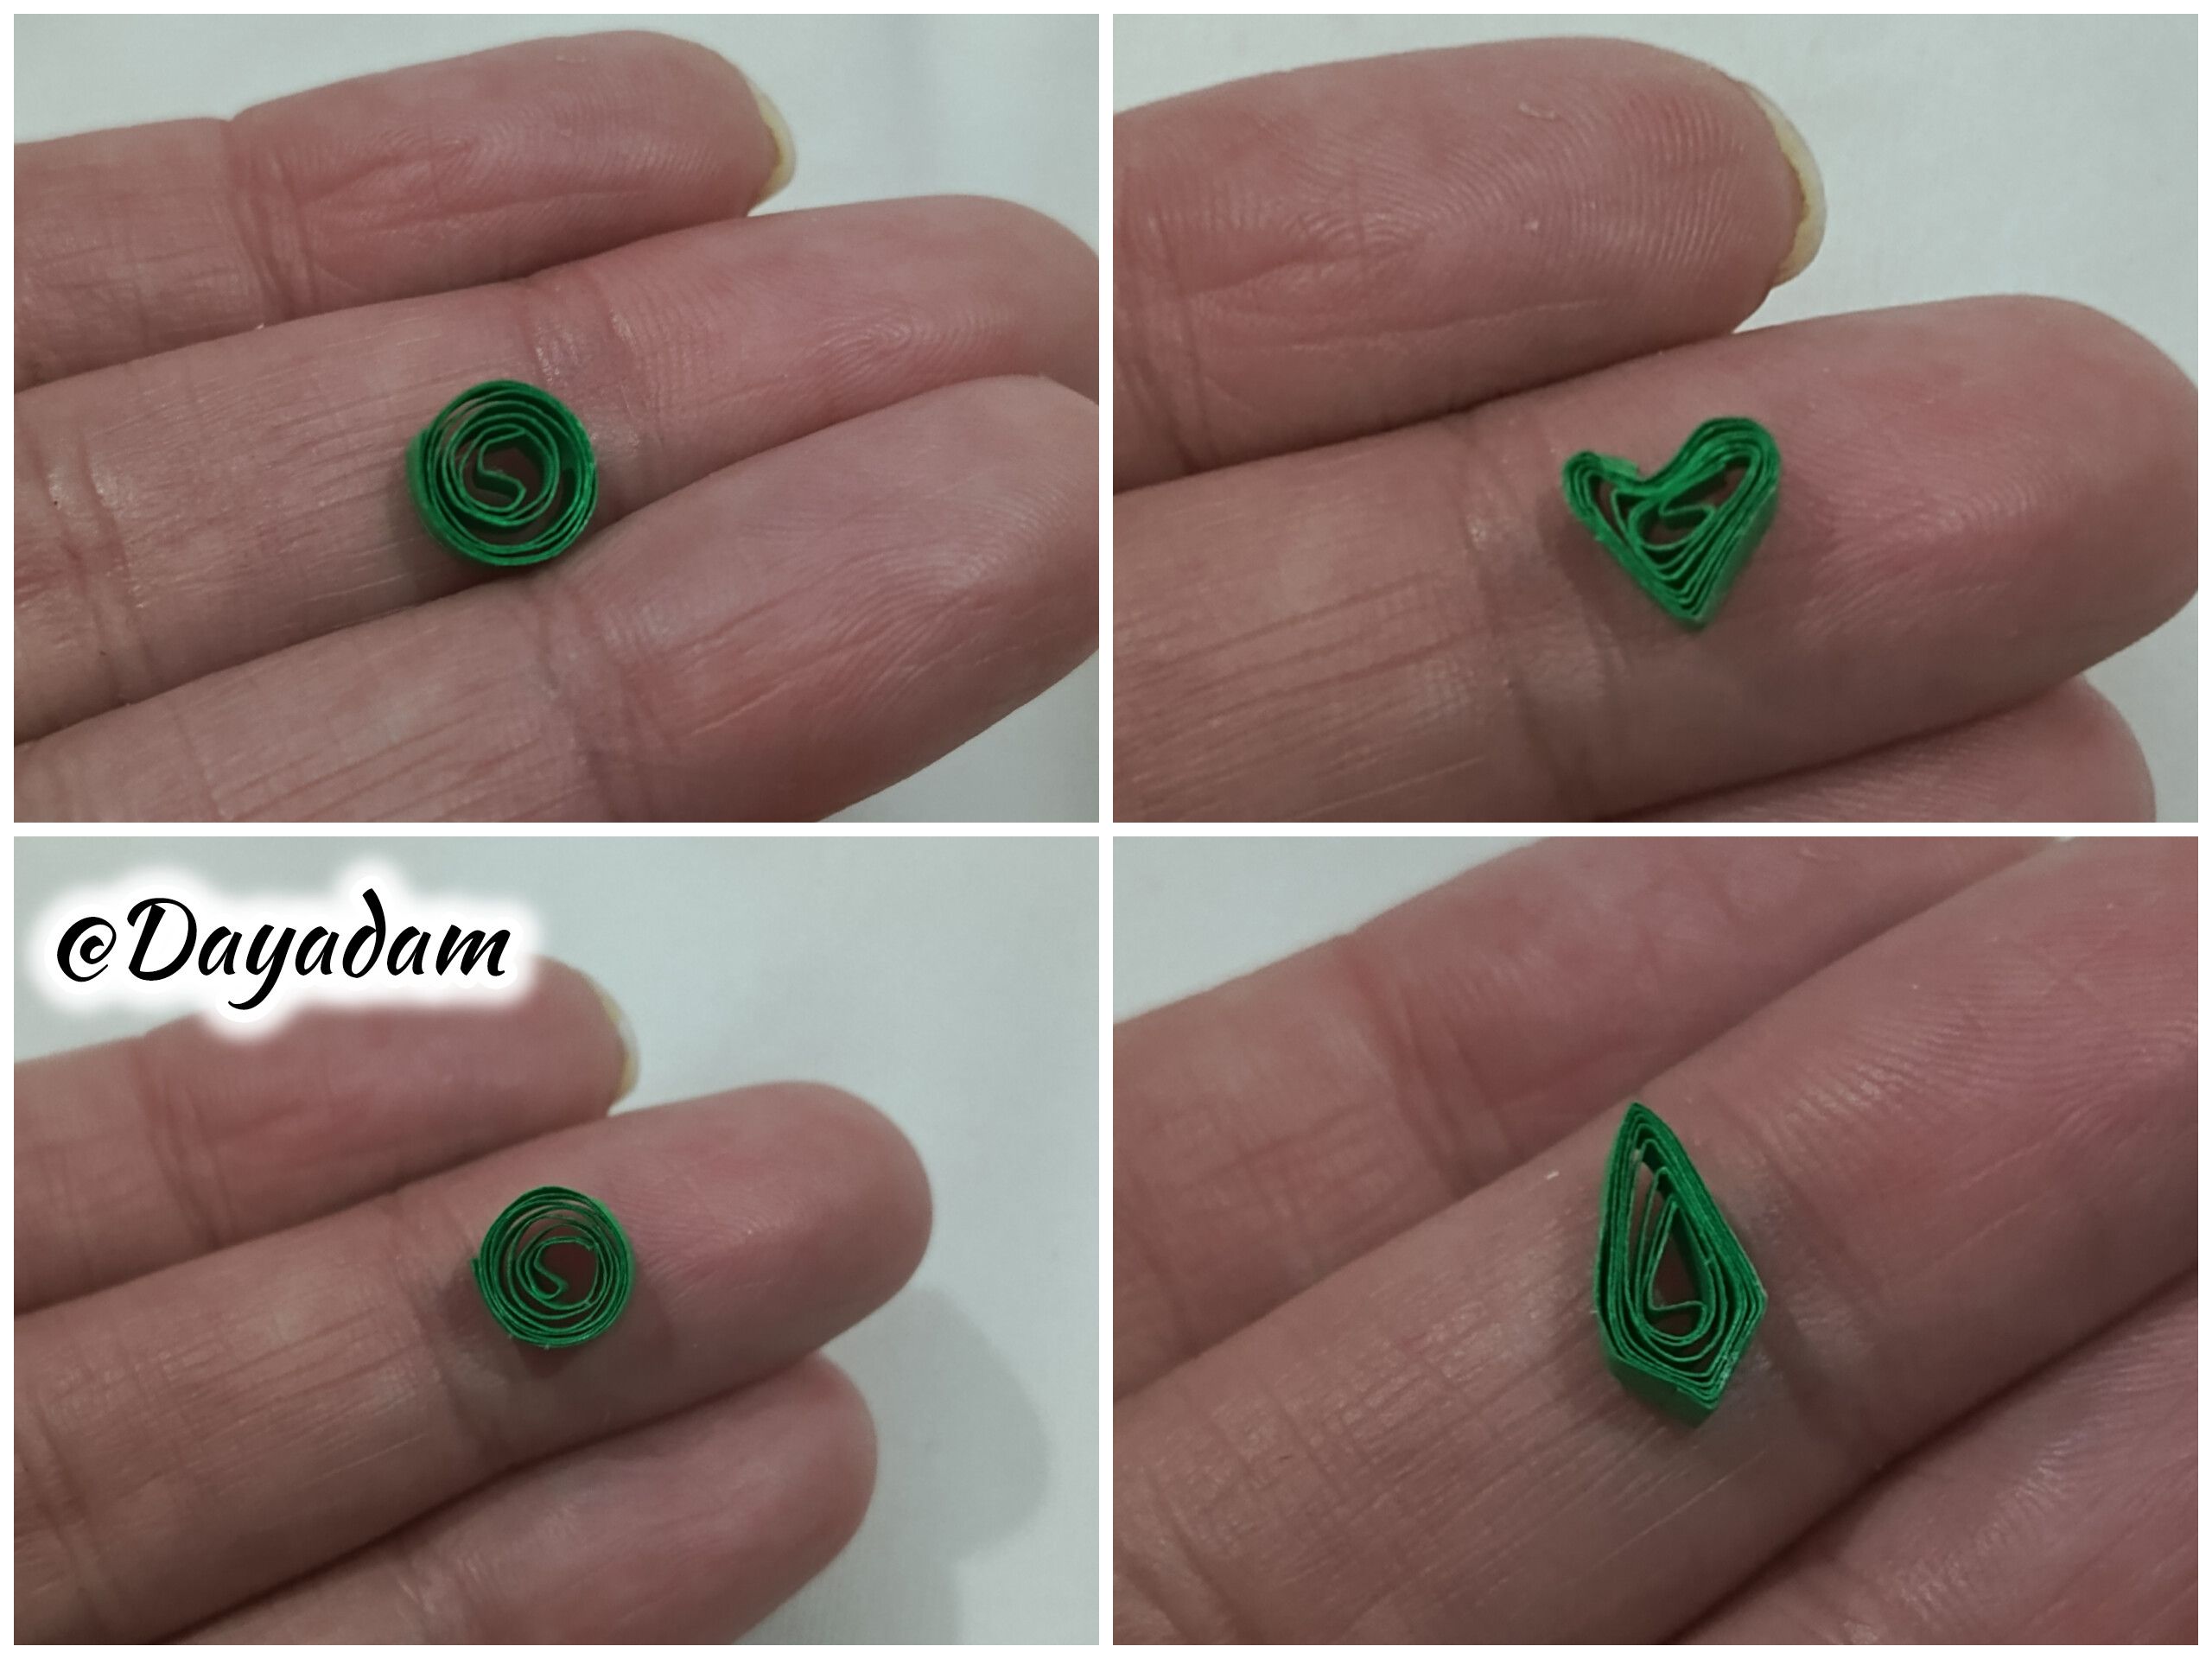
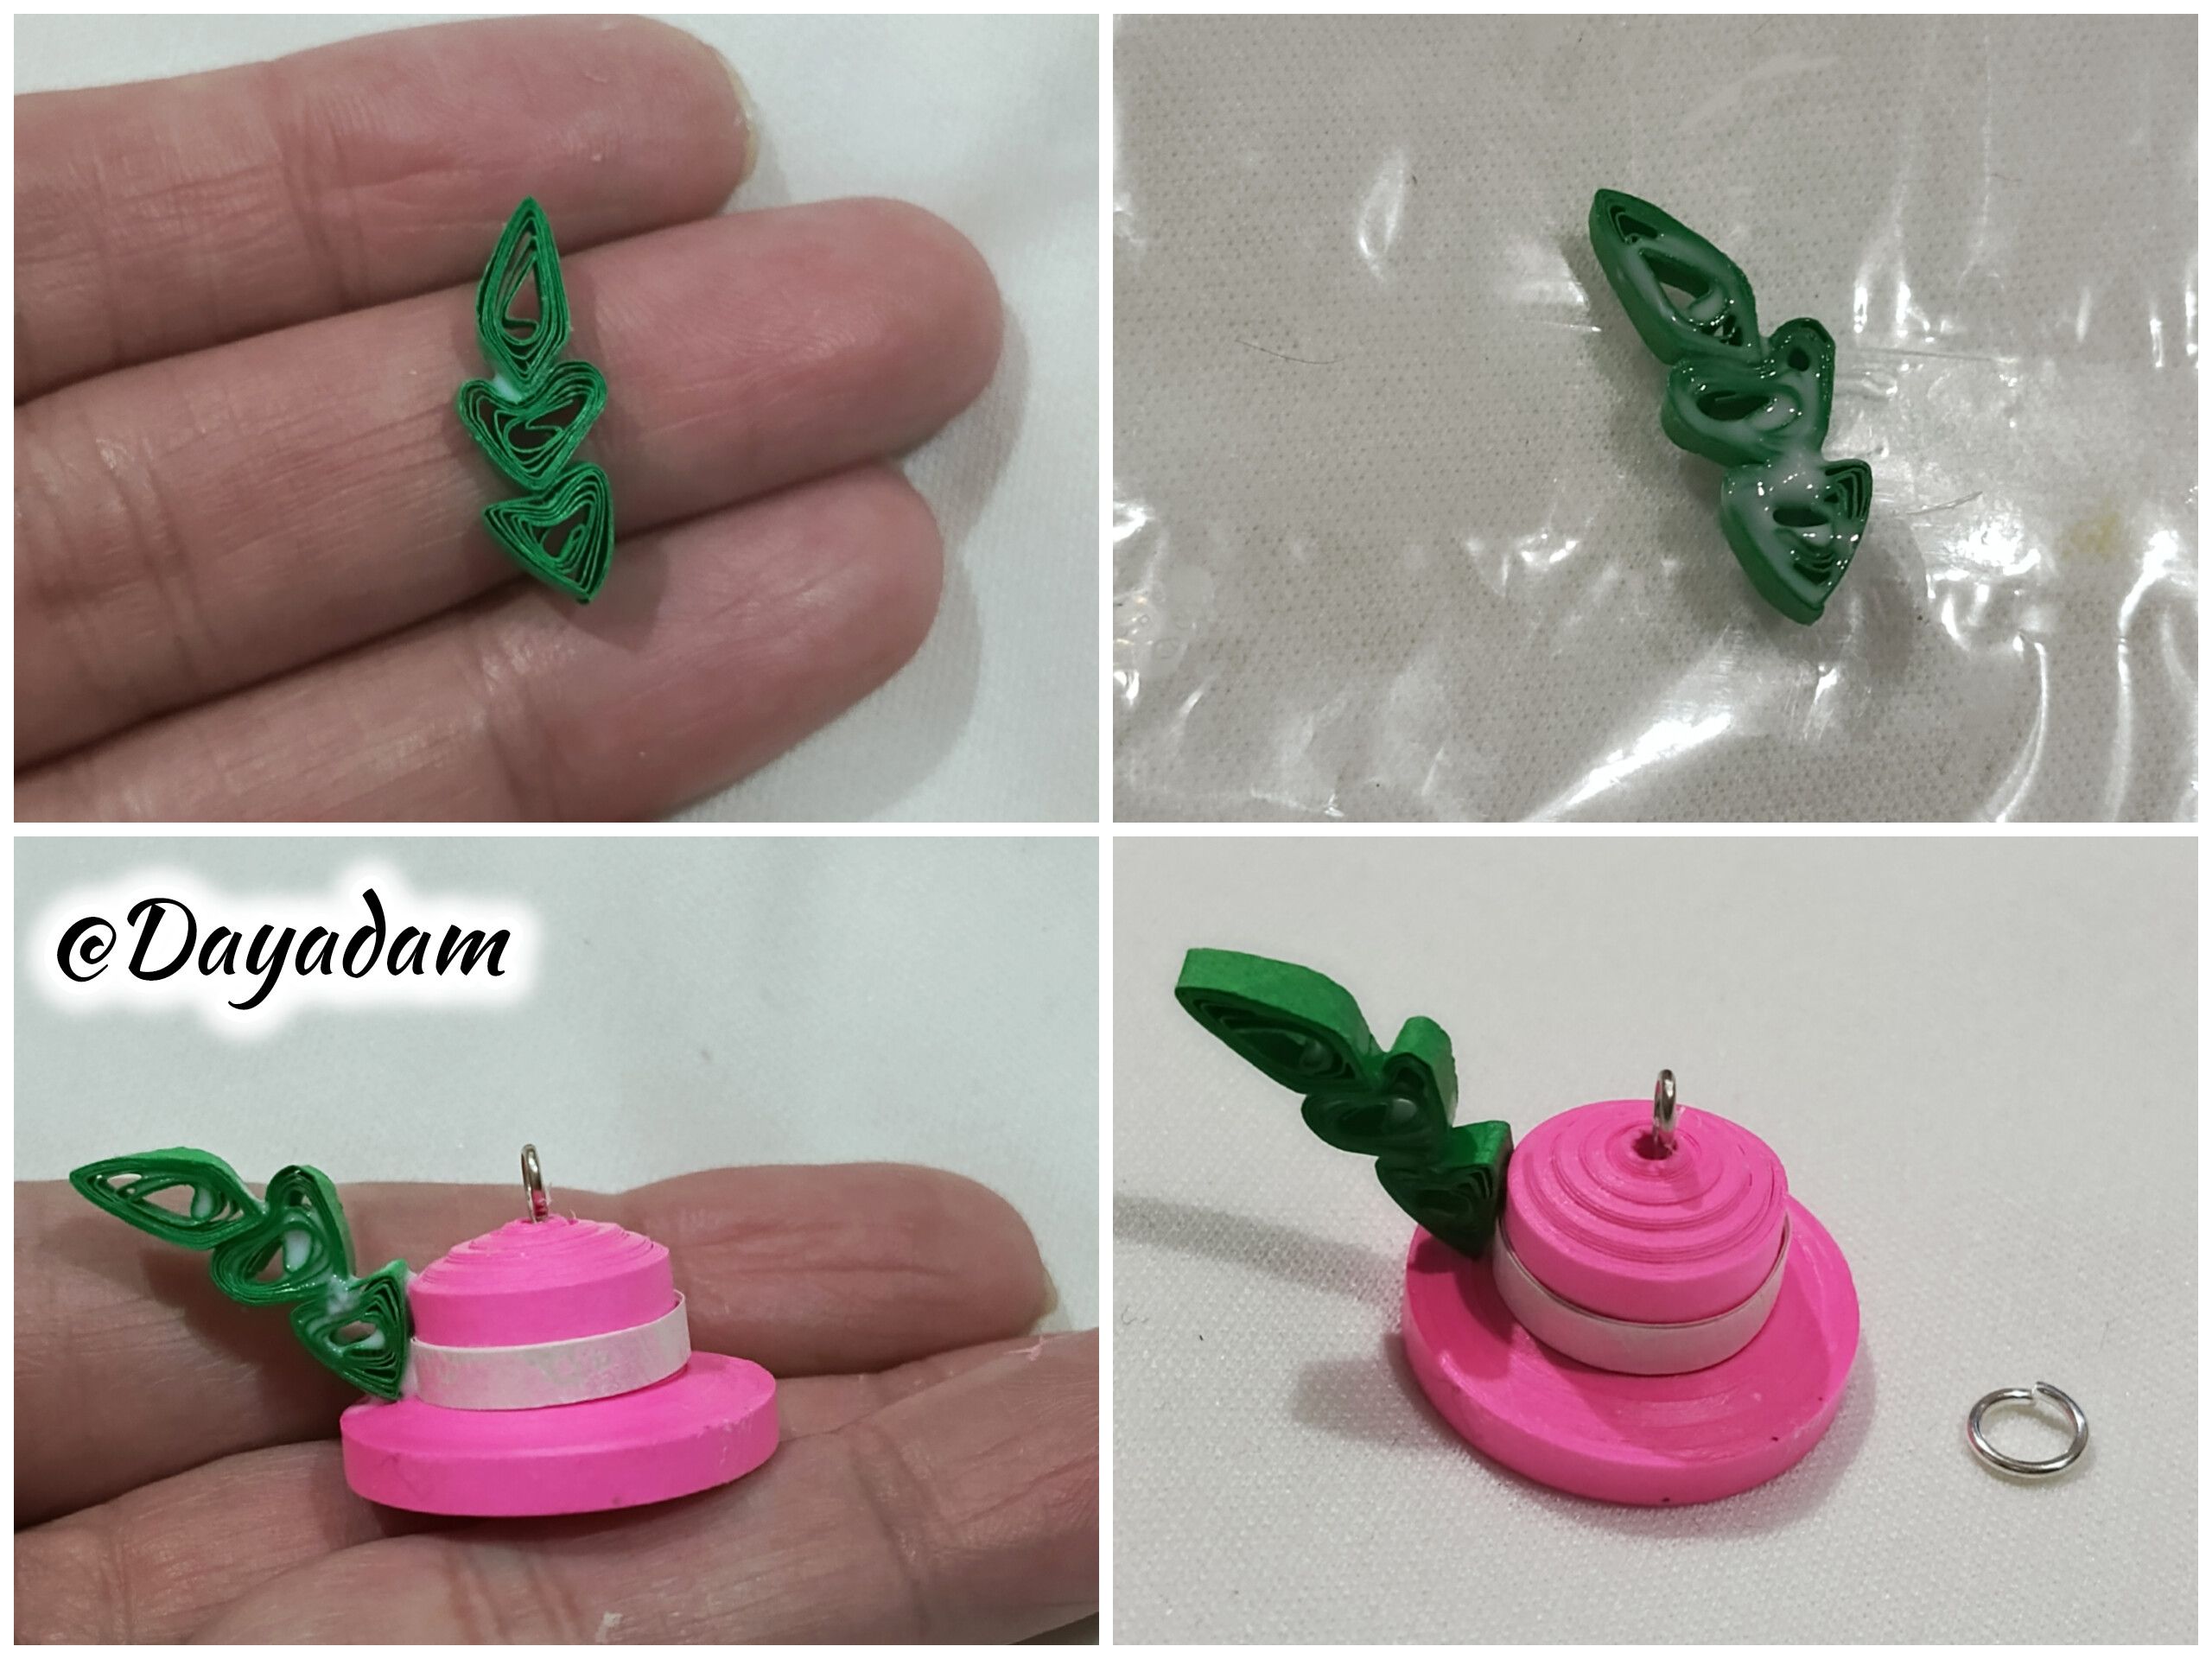
• At this point, I started with the decorative leaf on one side of the hat. I made this by cutting out three open circles in grass green using 3 mm wide ribbon. I then shaped each leaf, referring to the card I used as a template. Once I had the three pieces, I glued them together, applied a coat of extra-strong white glue, and left them to dry thoroughly.
• Once dry, glue the leaf in the corresponding place on the hat and place the respective jewelry ring on top.
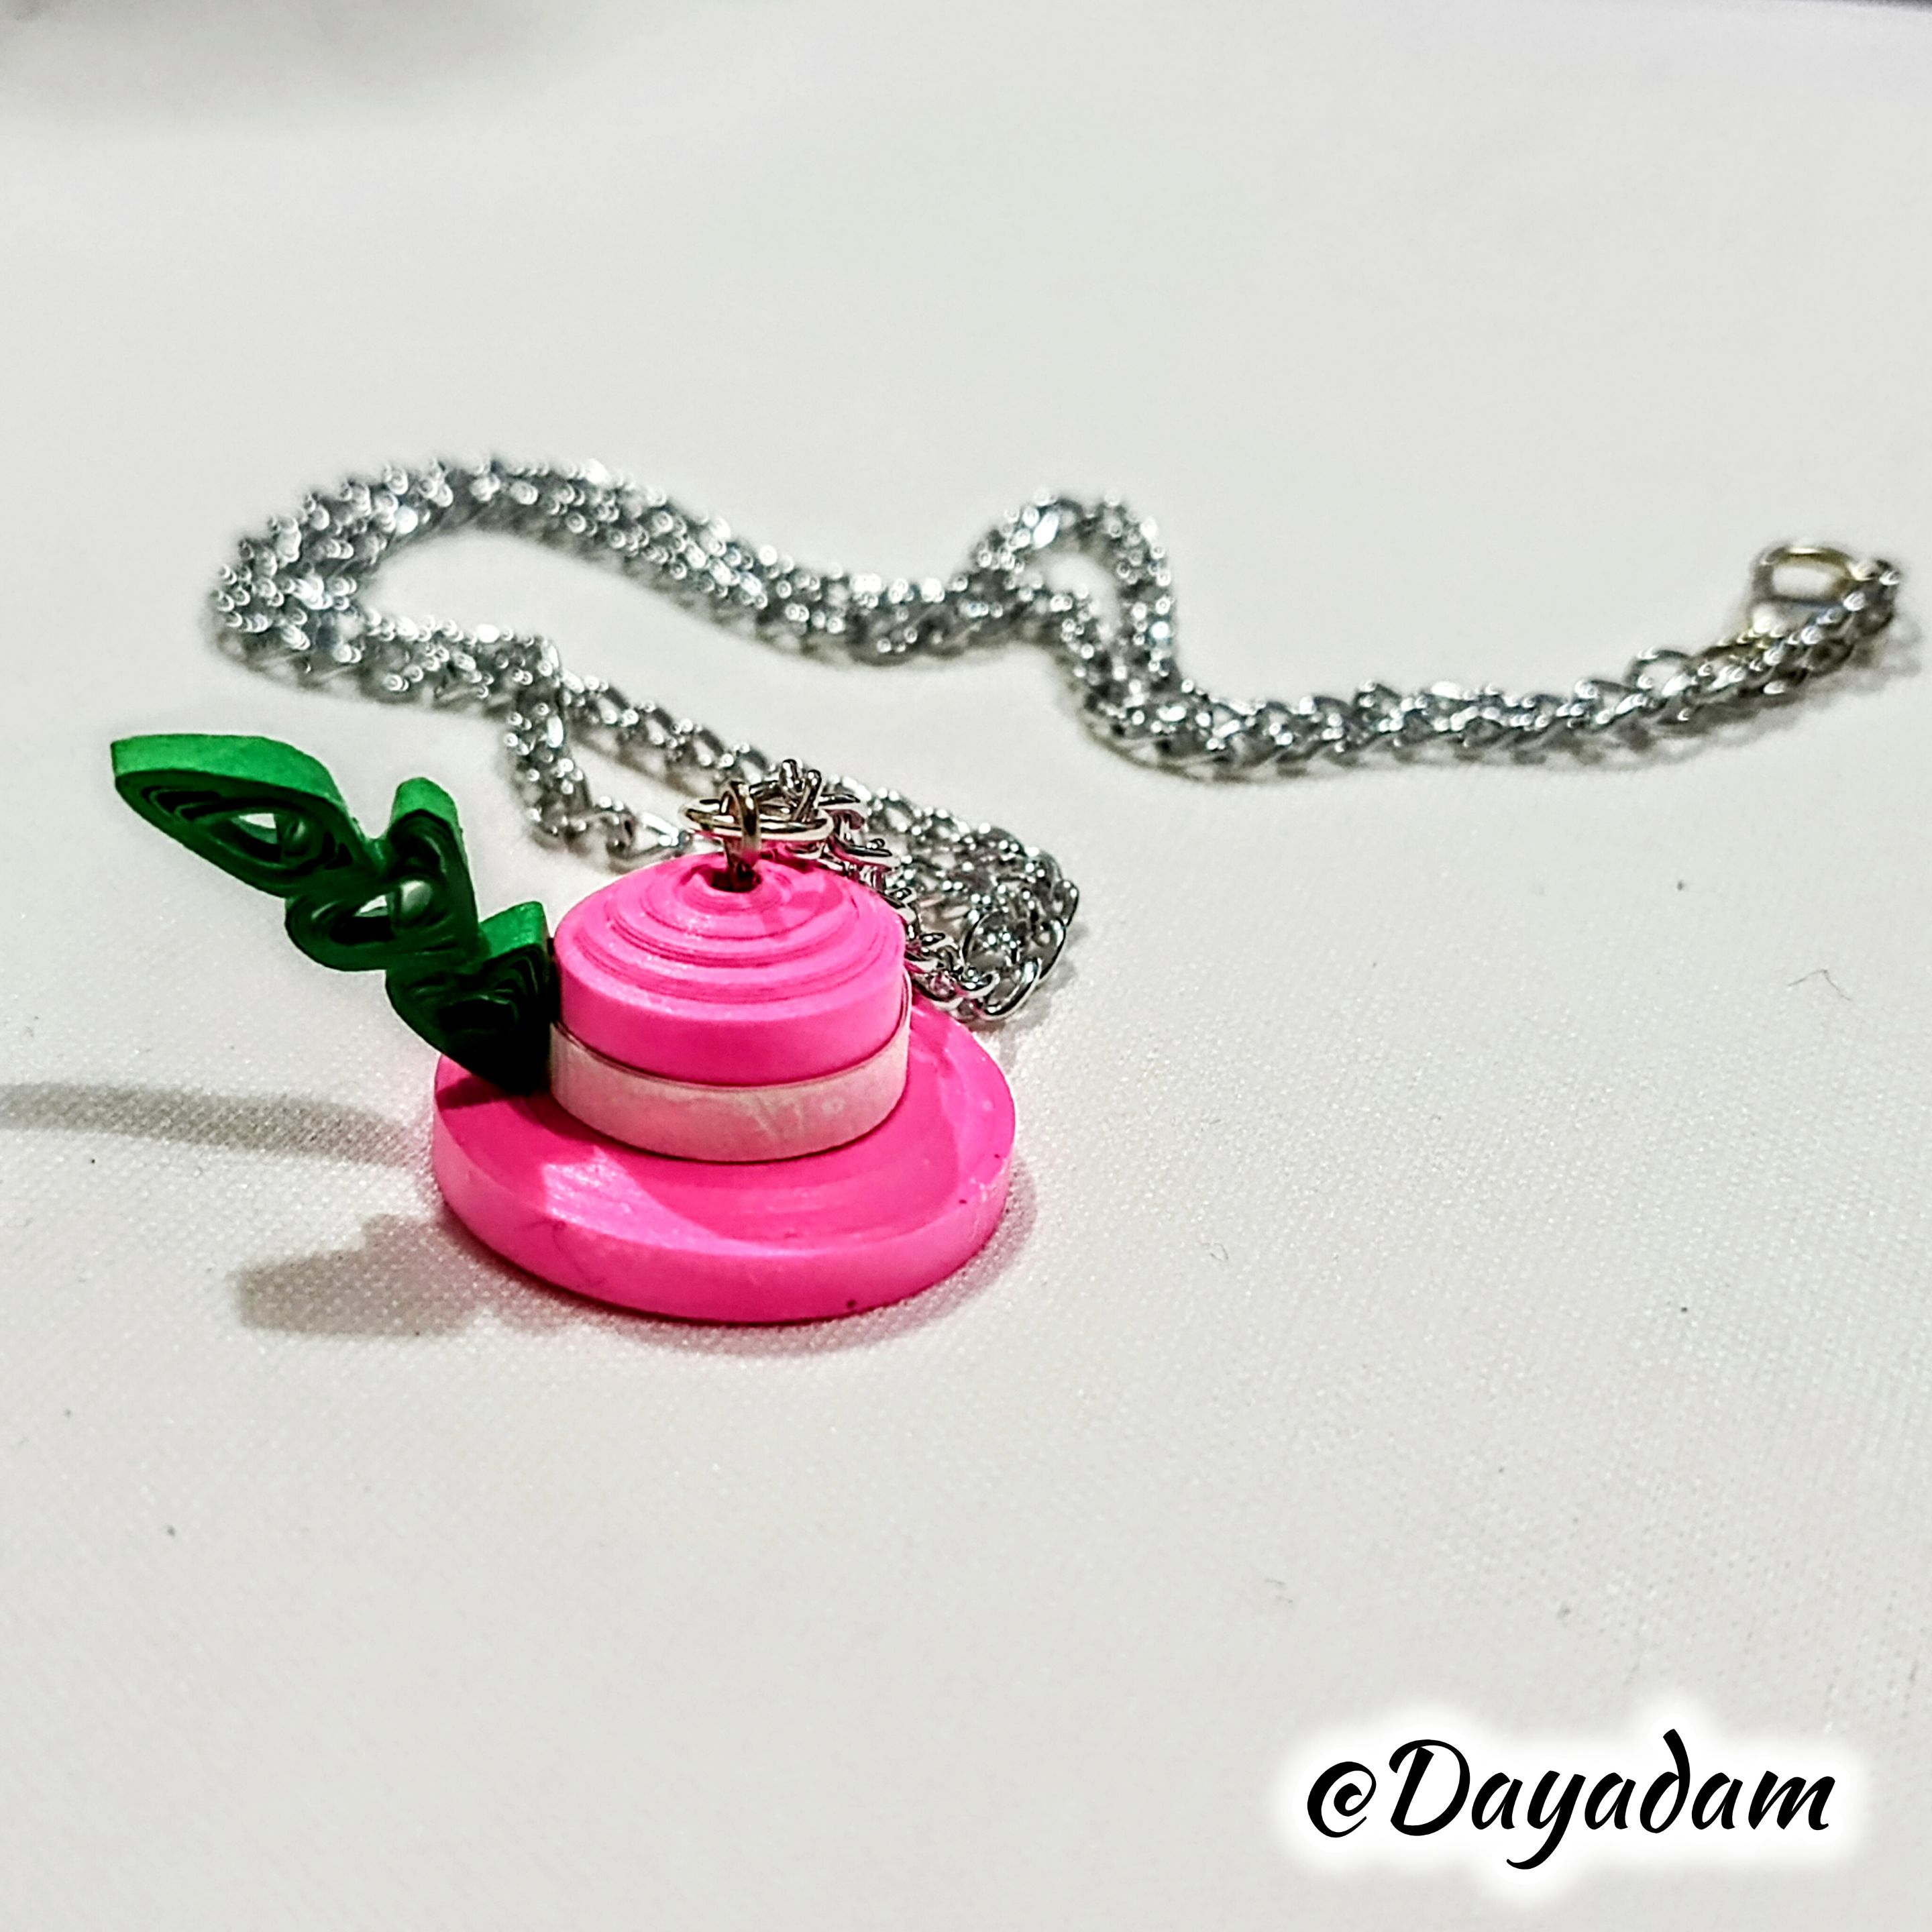
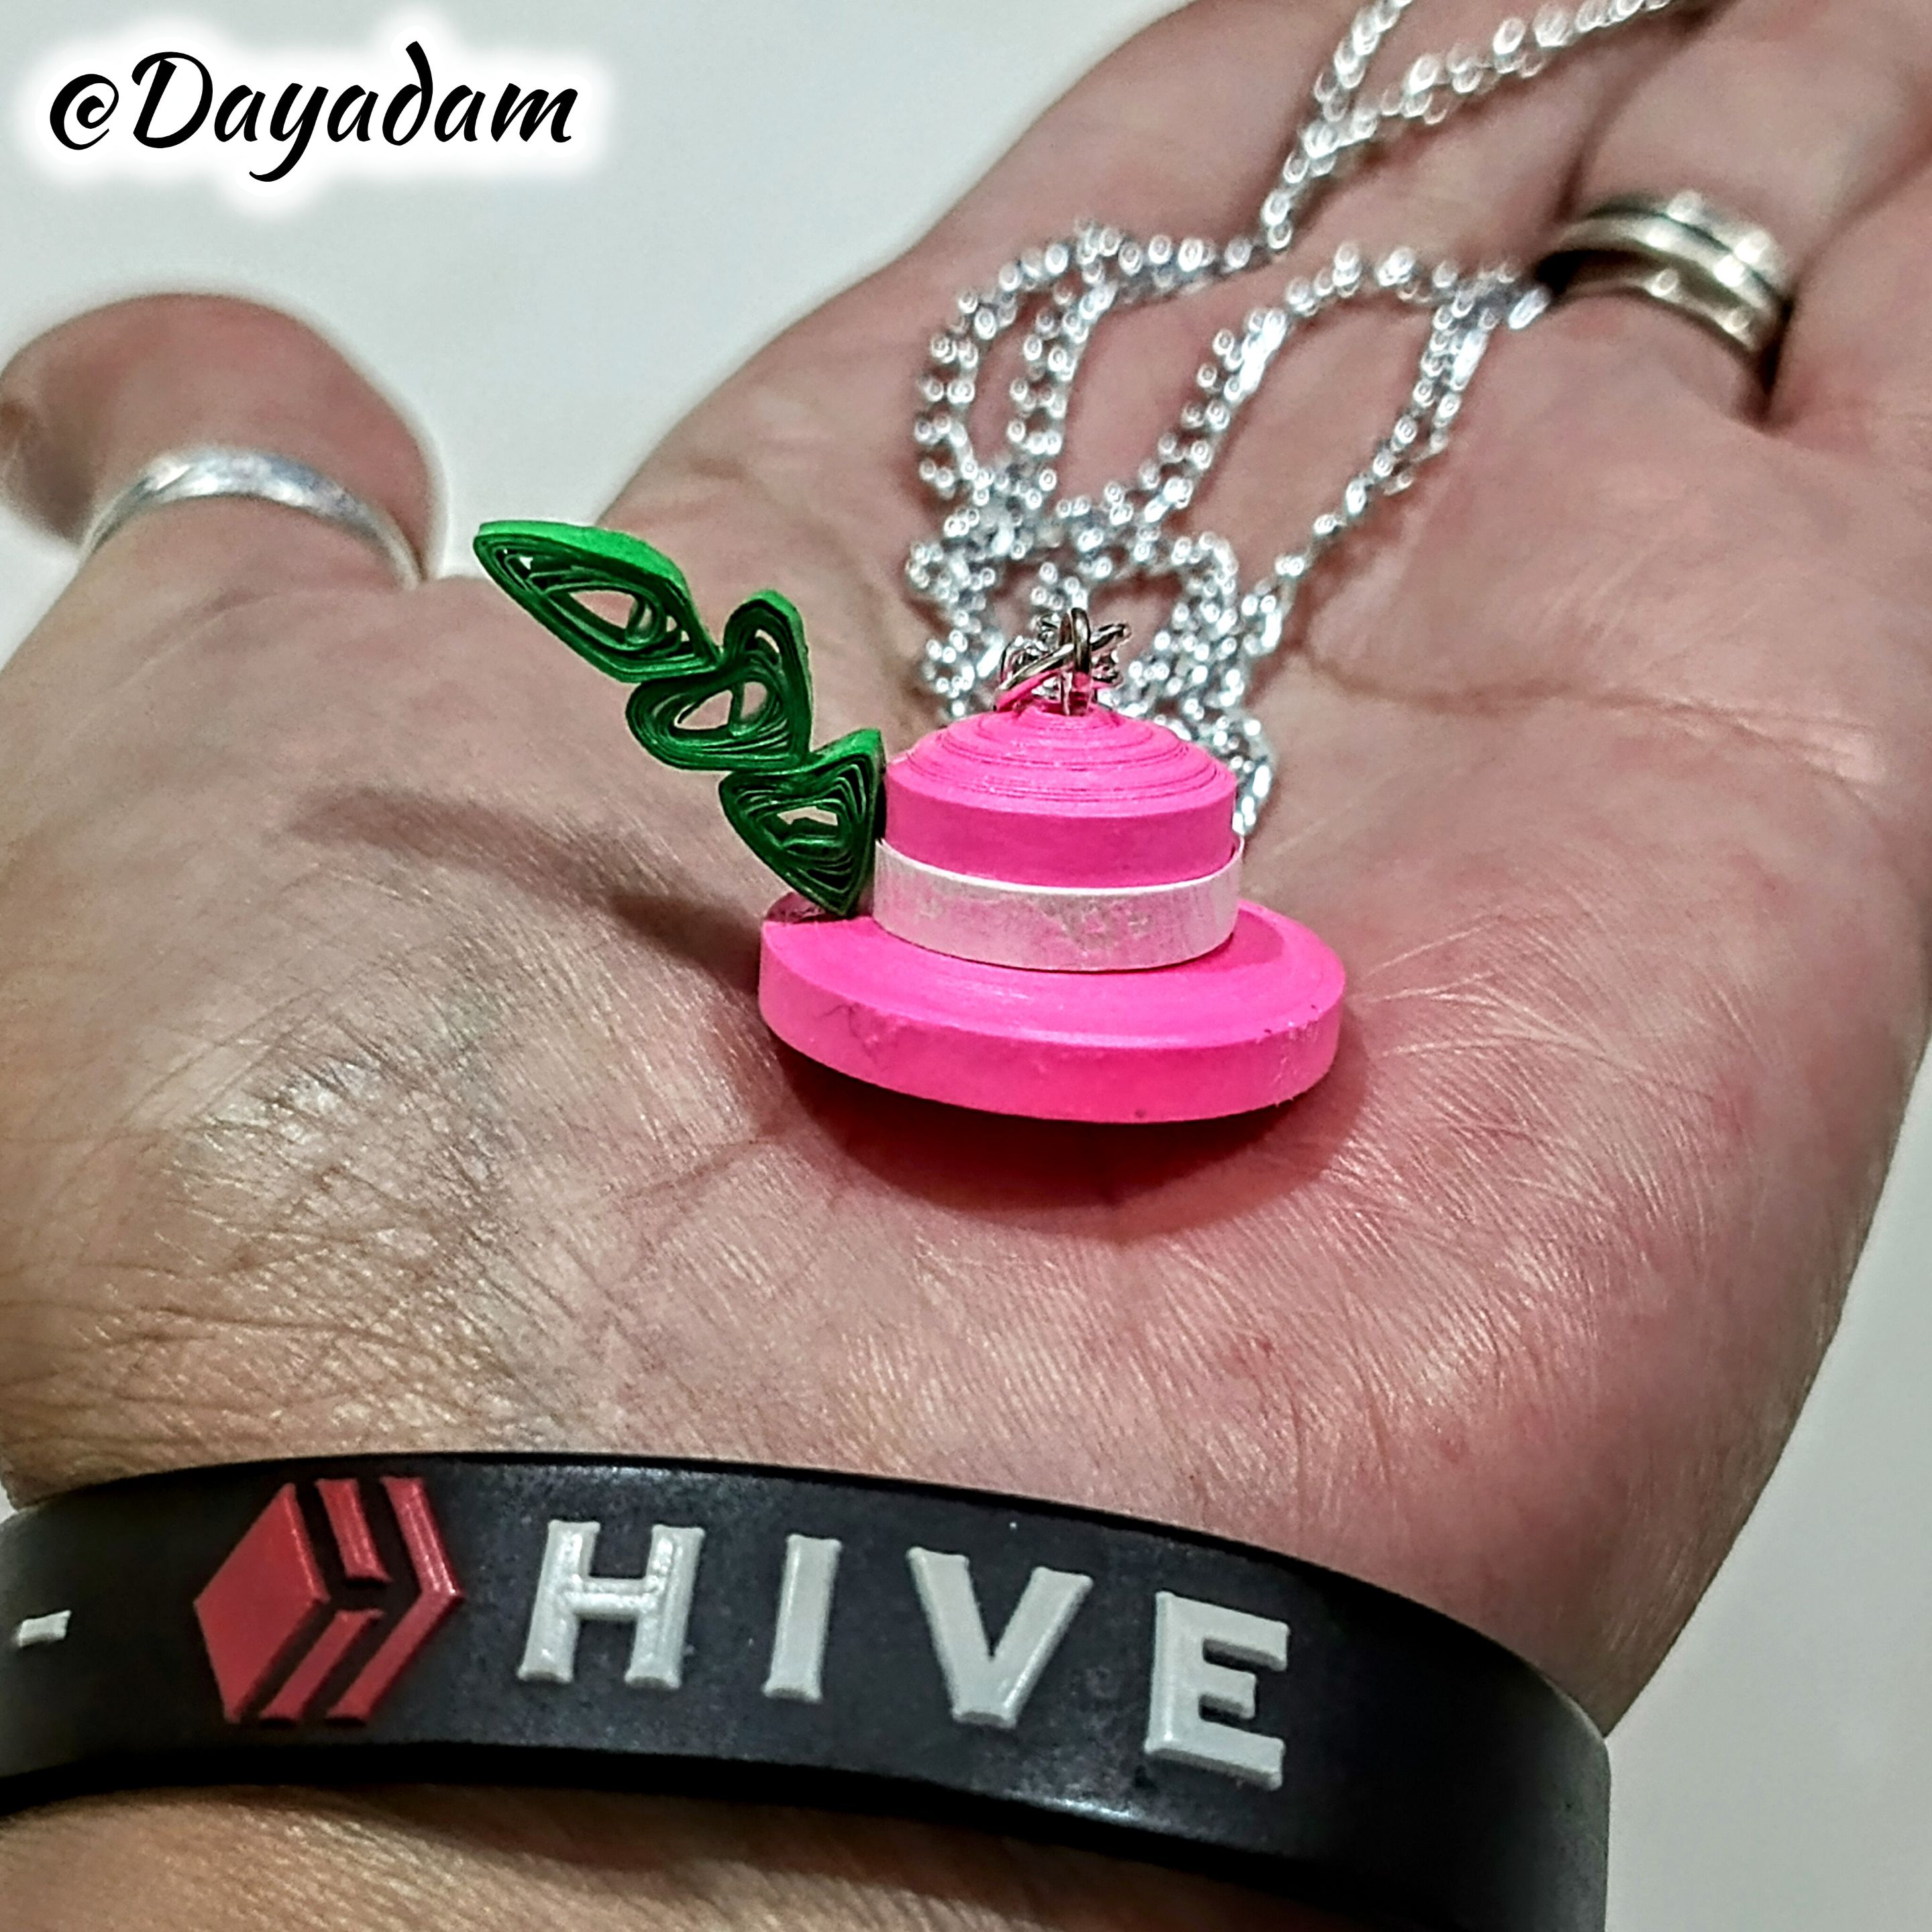
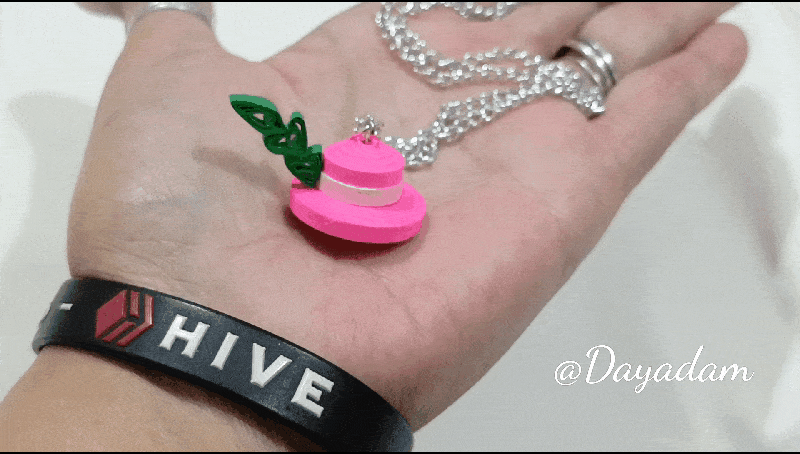
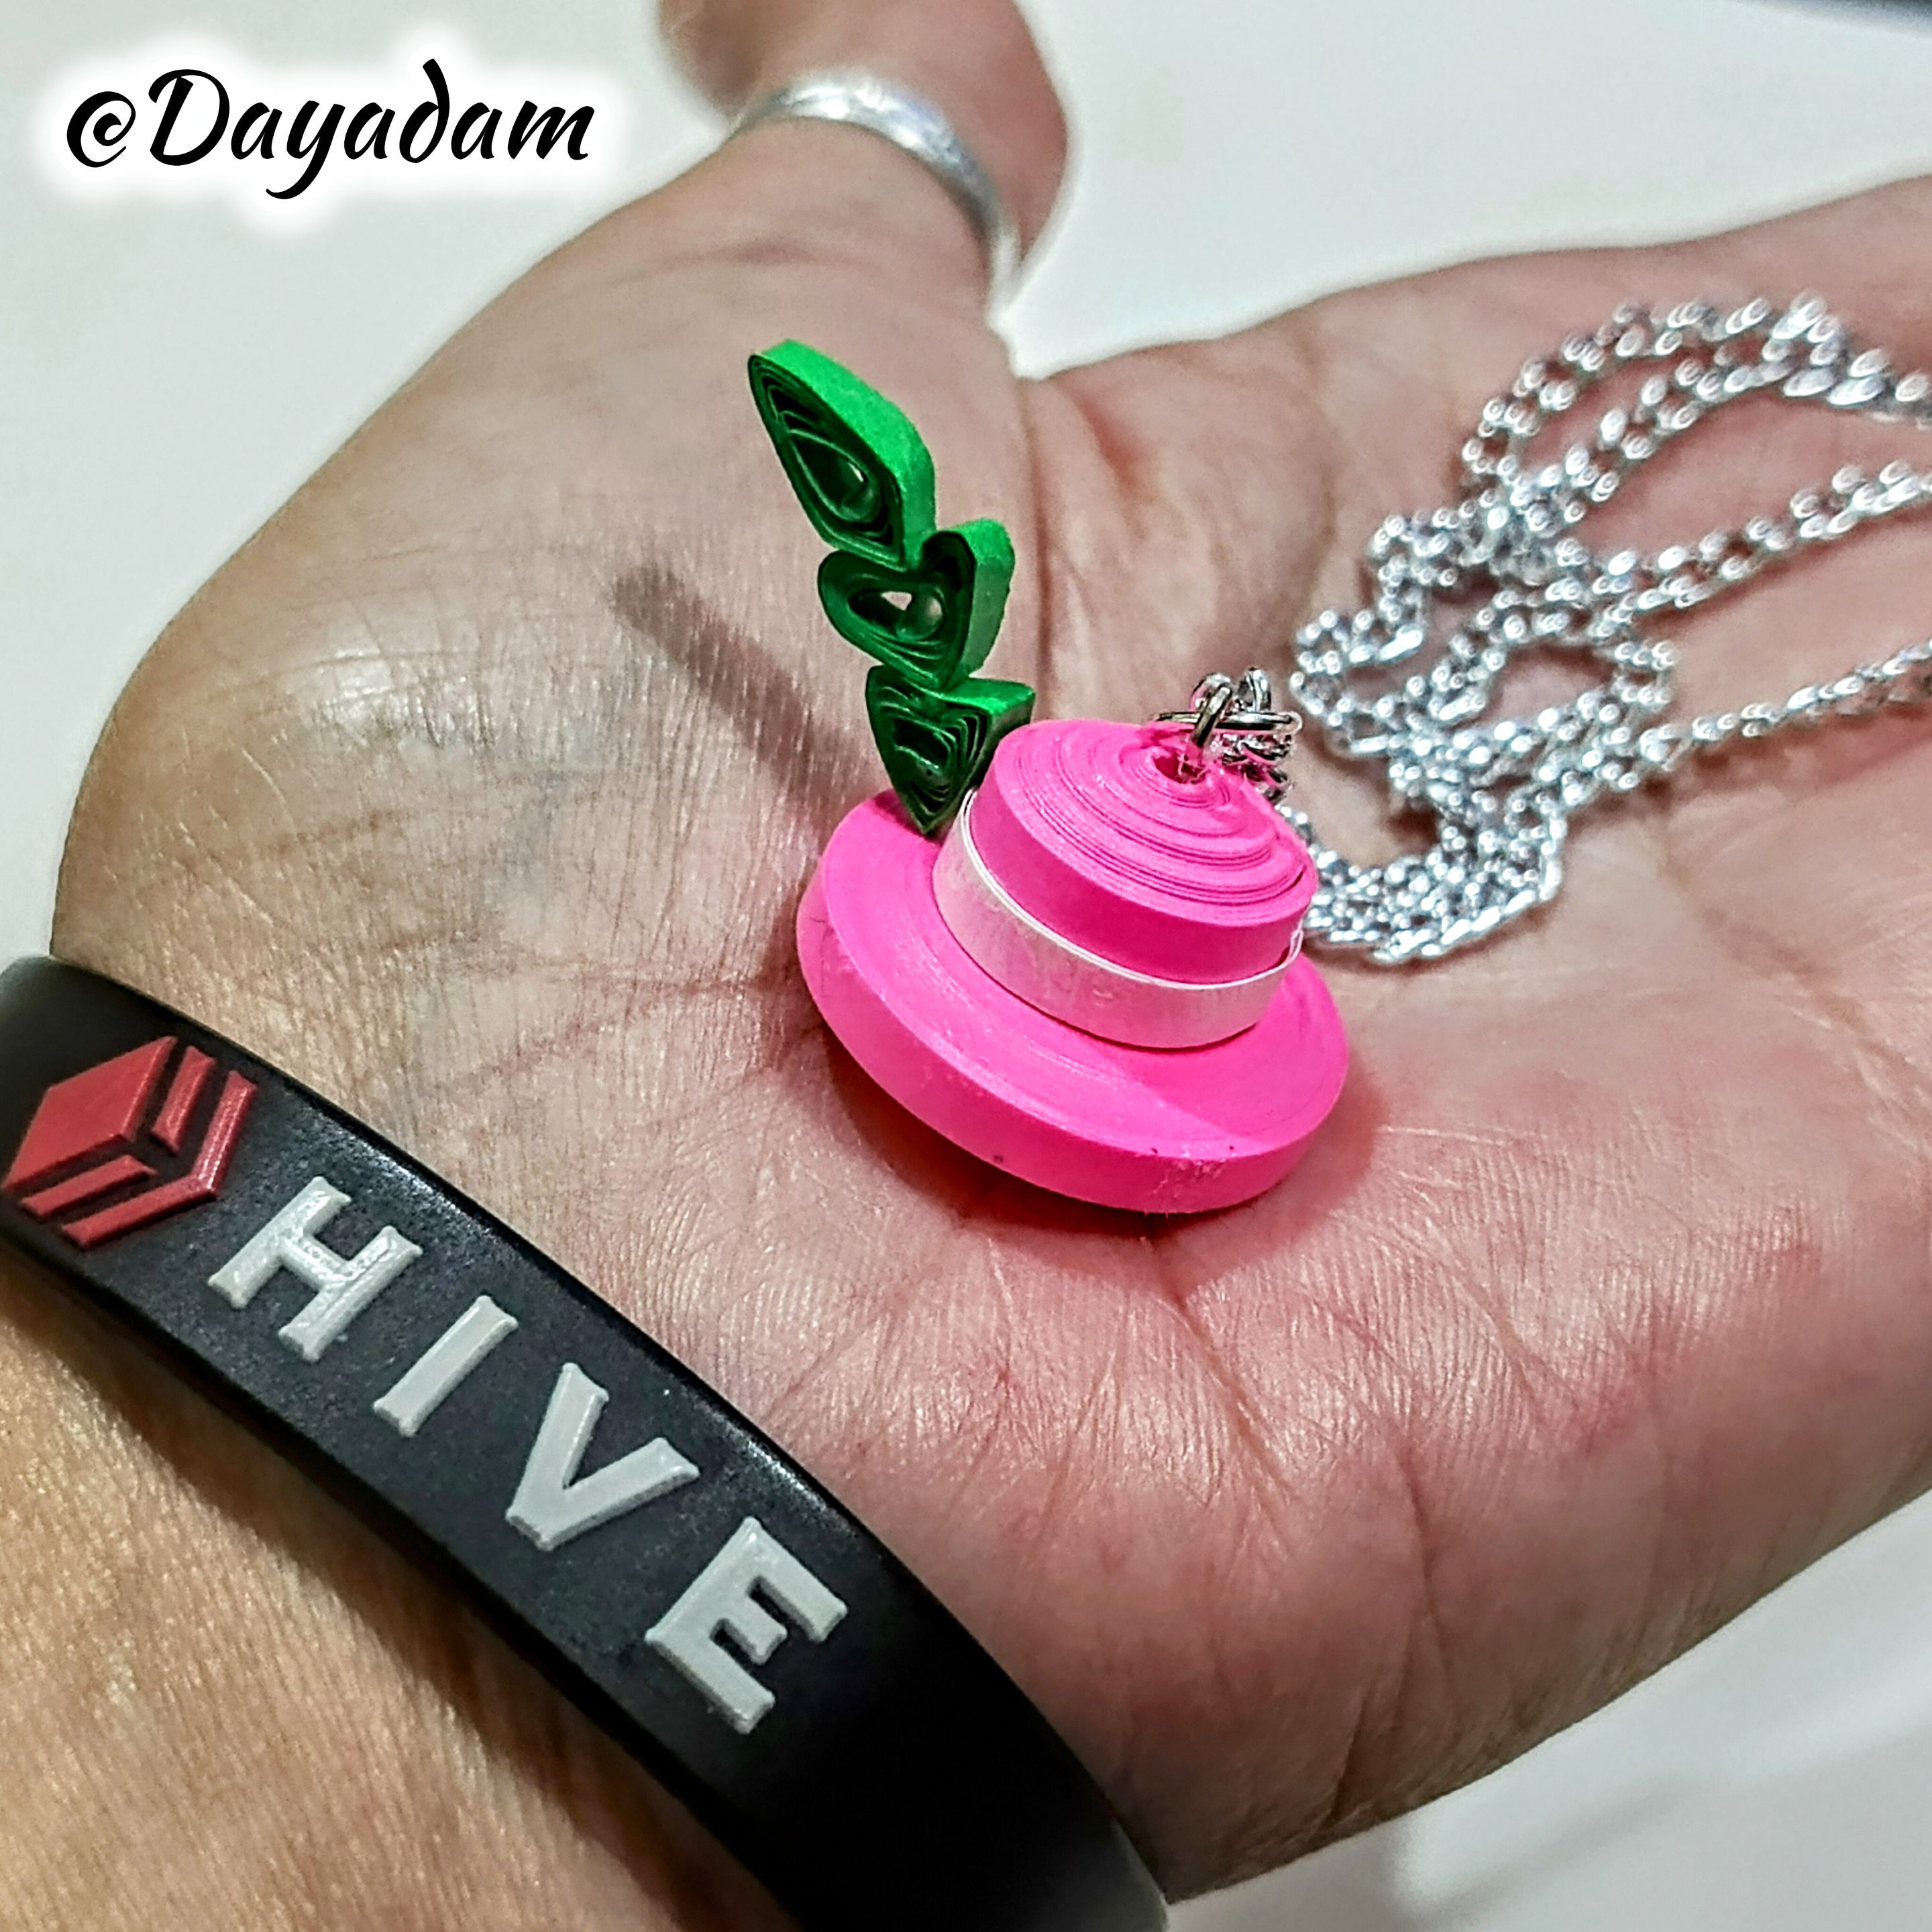
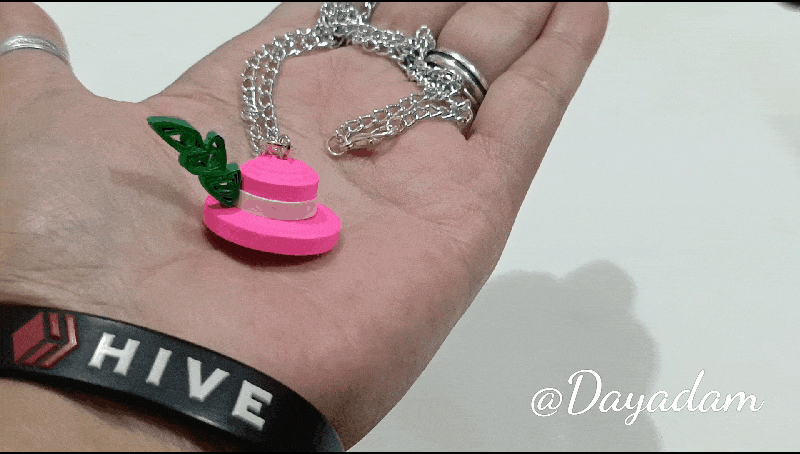
• And now we have finished this 3D necklace pendant that I made, inspired by the character from the card “Silvershield Bard”.
• En este punto comencé con la hoja decorativa que tiene el sombrero a un lado, este lo realicé haciendo 3 círculos abiertos de color verde grama, con cinta de 3mm de ancho, procedí a moldear cada hoja fijándome en la carta que usé como fuente, después de tener las 3 piezas las pegué y le apliqué una capa de pega blanca extra fuerte y deje secar muy bien.
• Seca la hoja la pega en el sitio correspondiente del sombrero y coloque en la parte de arriba su respectiva argolla de bisutería.
• De esta manera tenemos listo este dije para collar en 3D que elabore, inspirado en el personaje de la carta "Silvershield Bard".
 |
 |
 |

 |
 |
 |
|
 |
|
|

Fuente carta / Charter Source // Silvershield Bard
What did you think, did you like it?
I hope you did, I hope you liked my explanation, procedure and photos, I made them with love for you.
"Let out that muse that inspires you, and let your imagination fly".
Thank you all, see you next time.
¿Que les pareció, les gustó?
Espero que sí, que les haya gustado mi explicación, procedimiento y fotos, los hice con mucho cariño por y para ustedes."Deja salir esa musa que te inspira, y deja volar tu imaginación".
Gracias a todos, nos vemos en la próxima.
All photos used in this post are of my authorship and have been taken on my personal cell phone a Redmi 9T and edited in Canva and in Inshot
Fuente carta / Charter Source // Silvershield Bard
Banner and separator made by me in Canva
Translated with the help of DeepL
Todas las fotos usadas en este post son de mi autoría y han sido sacadas en mi celular personal un Redmi 9T y editadas en Canva y en Inshot
Fuente carta / Charter Source // Silvershield Bard
Banner y separador hecho por mí en Canva
Traducido con la ayuda de DeepL