#### ¡Bienvenidos a mi blog!
Buenas noches a todos los miembros de esta linda comunidad de #diyhub , feliz Jueves, Dios les bendiga.
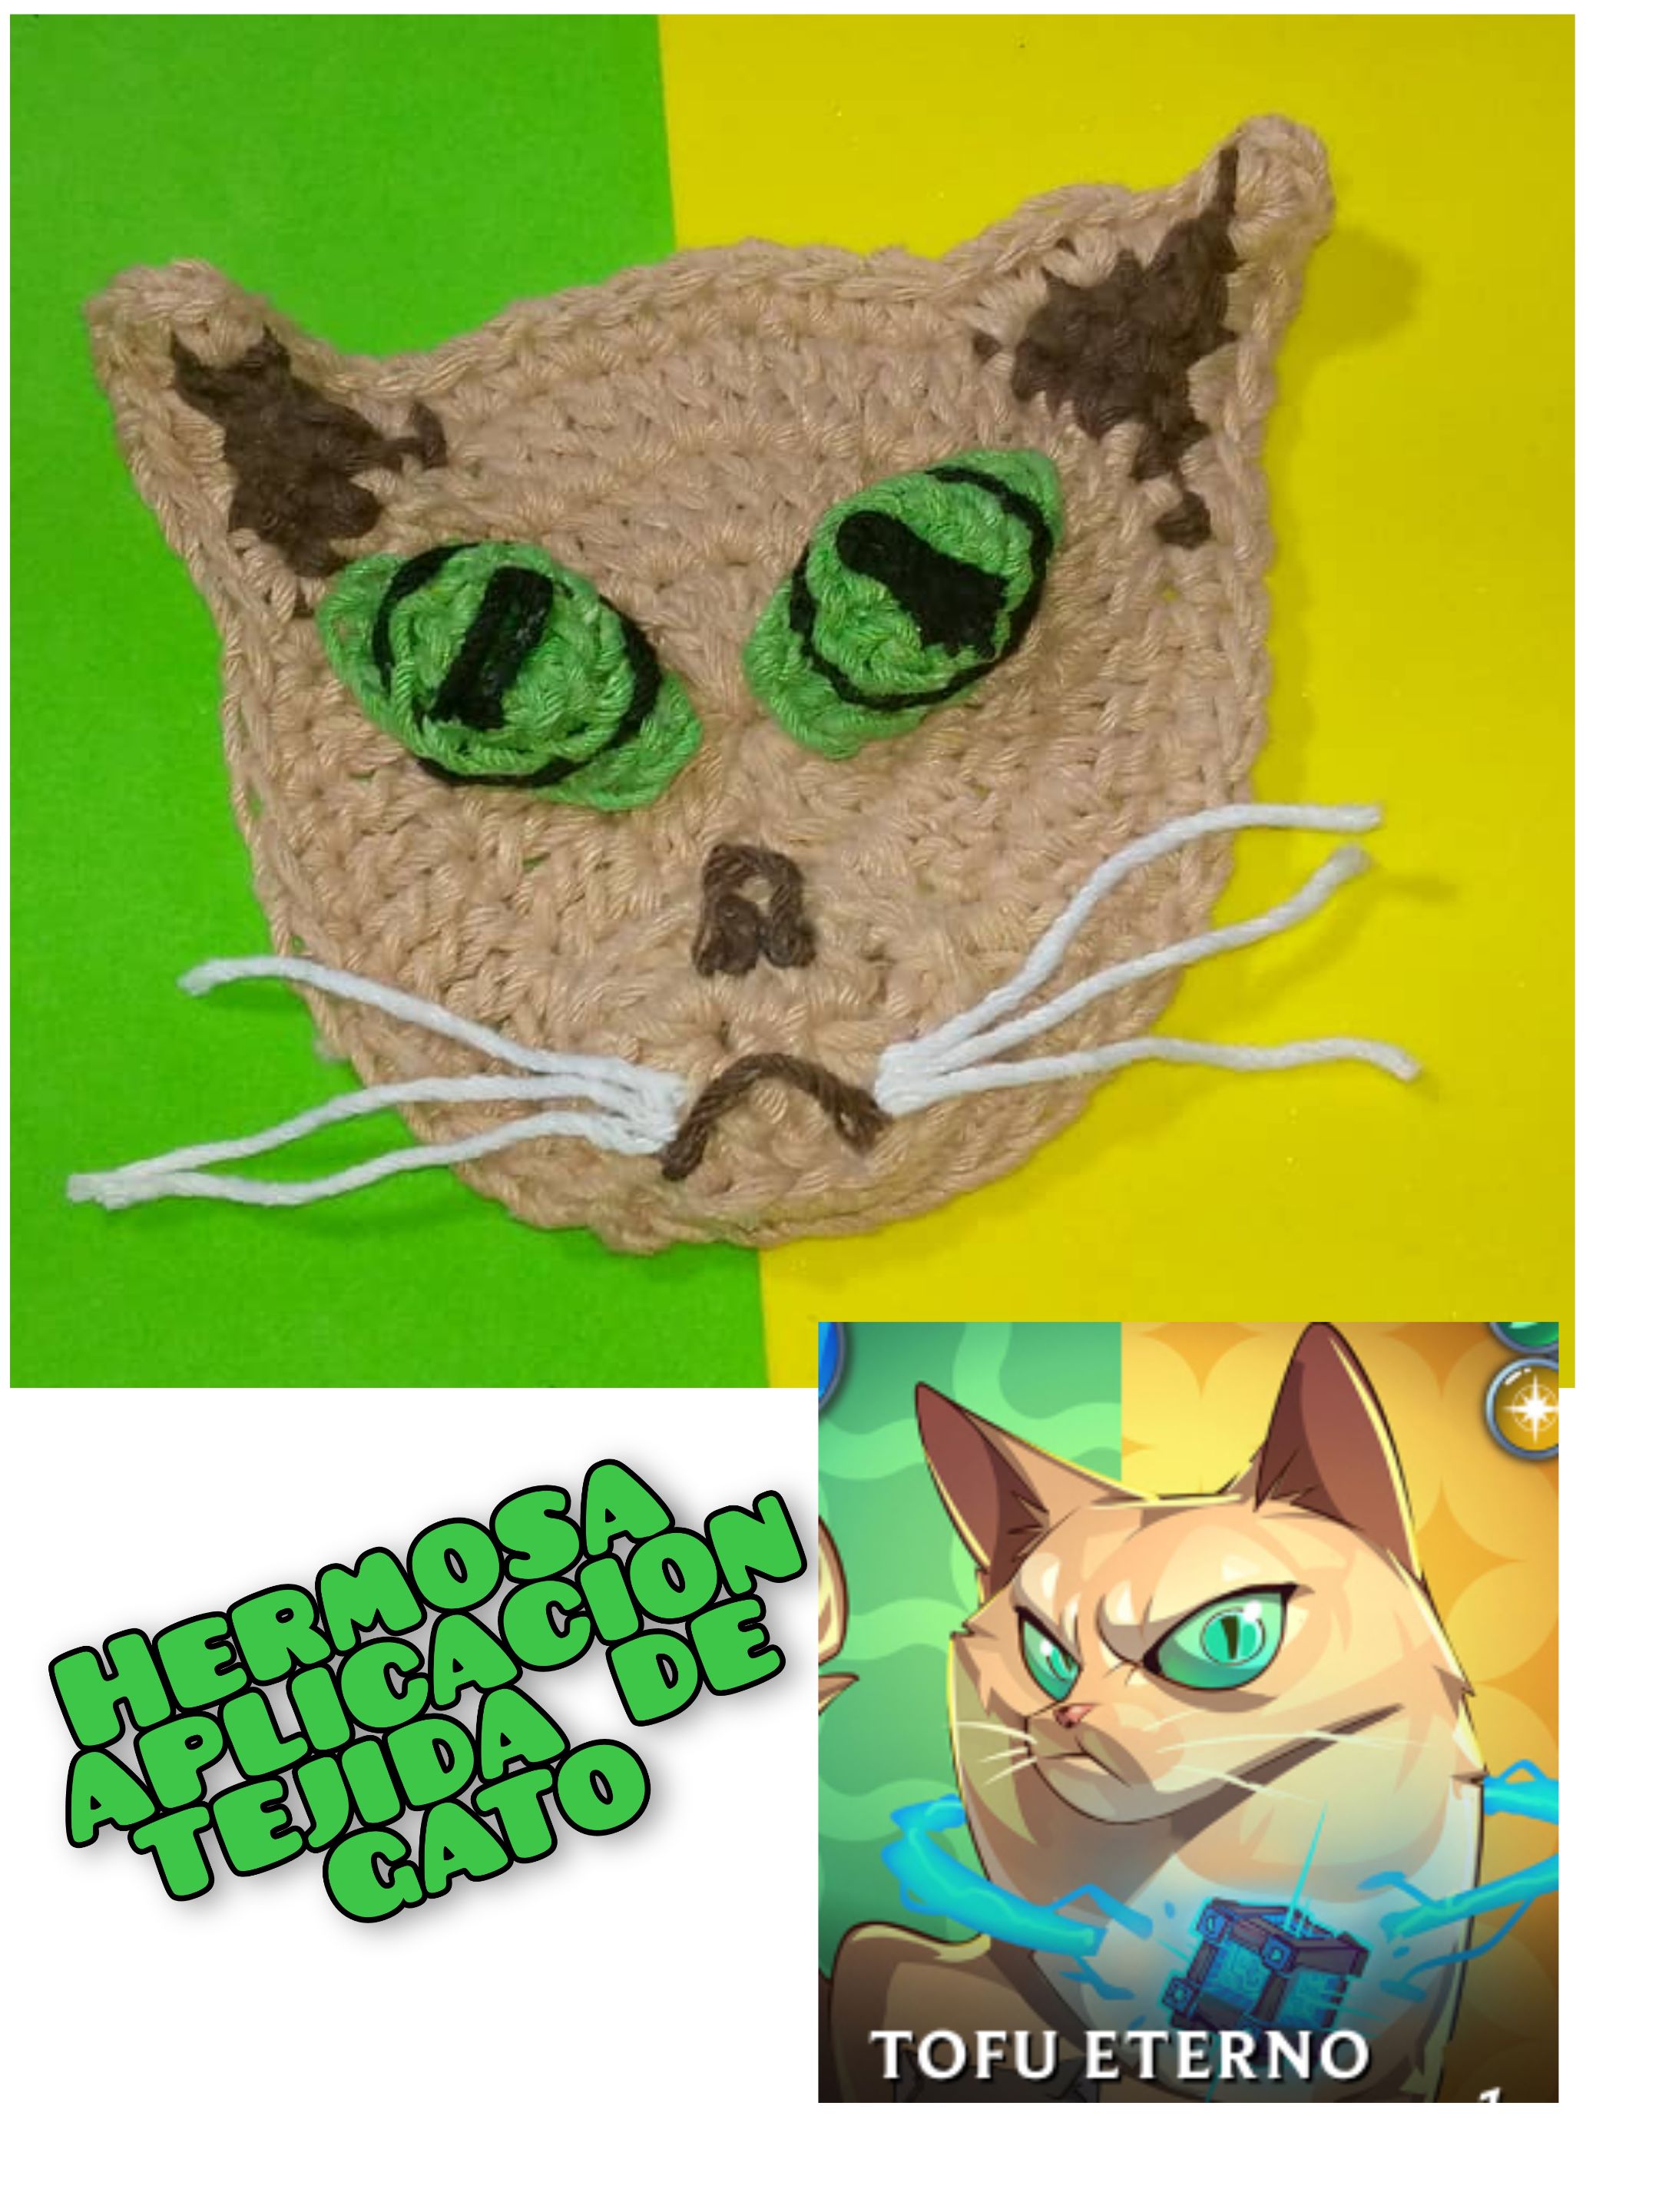
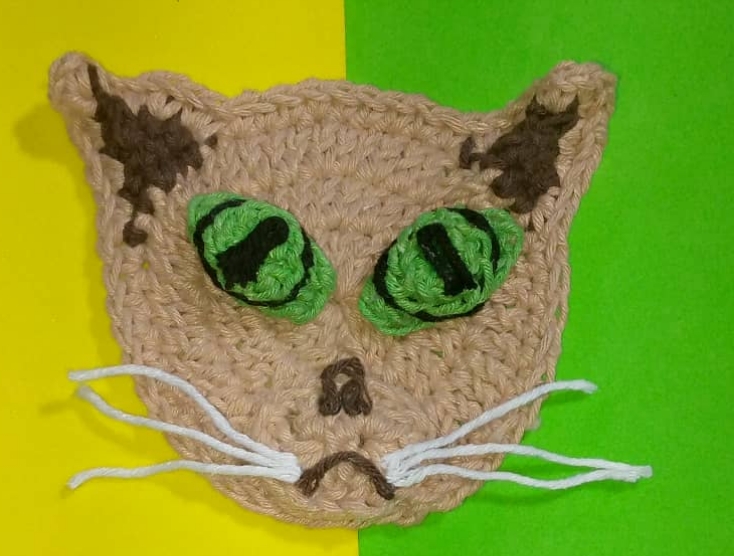
**Hoy quiero mostrar a través de un tutorial , cómo hacer una linda aplicación tejida a crochet de gatito, inspirada en [Tofu eterno](https://splinterlands.com/card-detail/656/regular/12/?tab=for-sale), inspirada en Tofu eterno,
en el concurso de arte 342 de @splinterlands**
Está aplicación sirve para adornar la habitación de los niños, para temática de cumpleaños, para adornar ropas, entre otras.
Espero que sea de su agrado, la hice con todo el cariño y amor del mundo.
>#### Welcome to my blog!
>**Good evening to all members of this cute #diyhub community , happy Thursday, God bless you.
>**Today I want to show through a tutorial , how to make a cute crocheted kitten applique, inspired by [Eternal Tofu](https://splinterlands.com/card-detail/656/regular/12/?tab=for-sale), inspired by Eternal Tofu,
in the art contest 342 of @splinterlands**
>This application serves to decorate the children's room, for birthday theme, to decorate clothes, among others.
>I hope you like it, I made it with all the love and affection in the world.
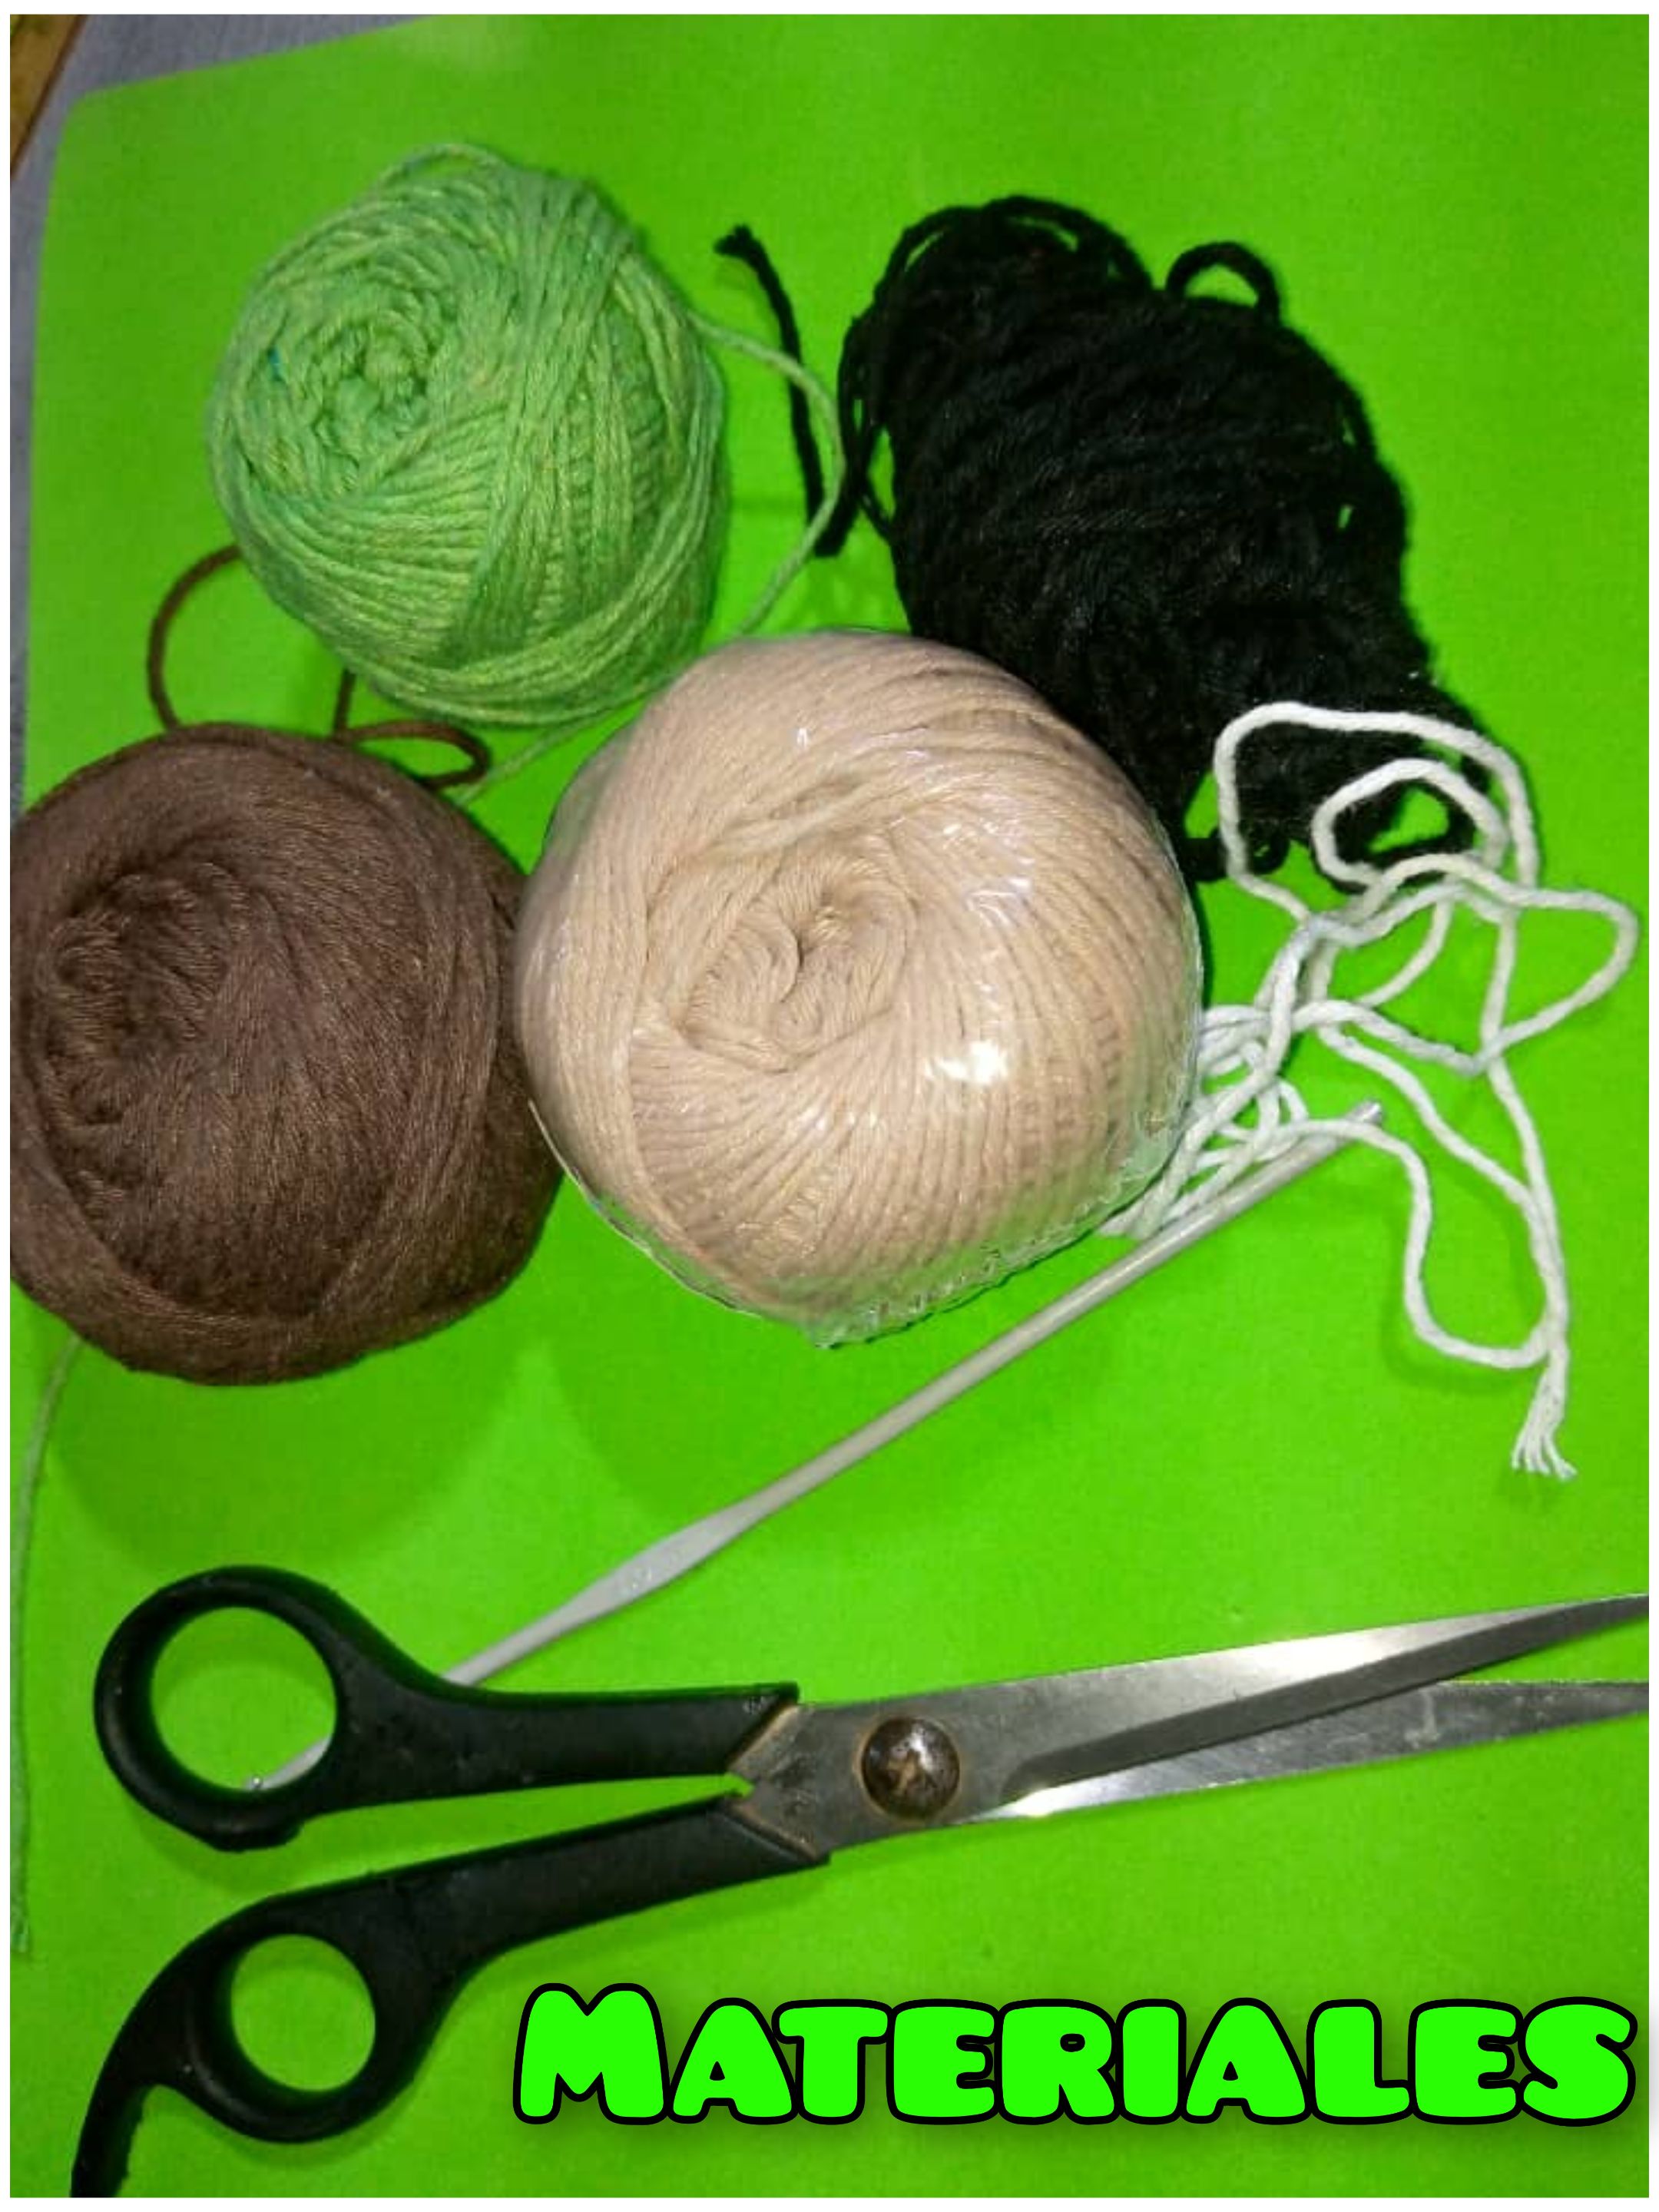
#### Materiales que se necesitan para la realización del hermoso aplique tejido de gatito:
- Hilo de tejer de colores: negro, marrón,beige y blanco.
- Aguja de tejer
- Aguja lanera.
- Tijera.
- Silicona líquida.
>#### Materials needed for the realization of the beautiful woven applique kitten:
>- Knitting yarn colors: black, brown, beige and white.
>- Knitting needle
>- Wool needle.
>- Scissors.
>- Liquid silicone.
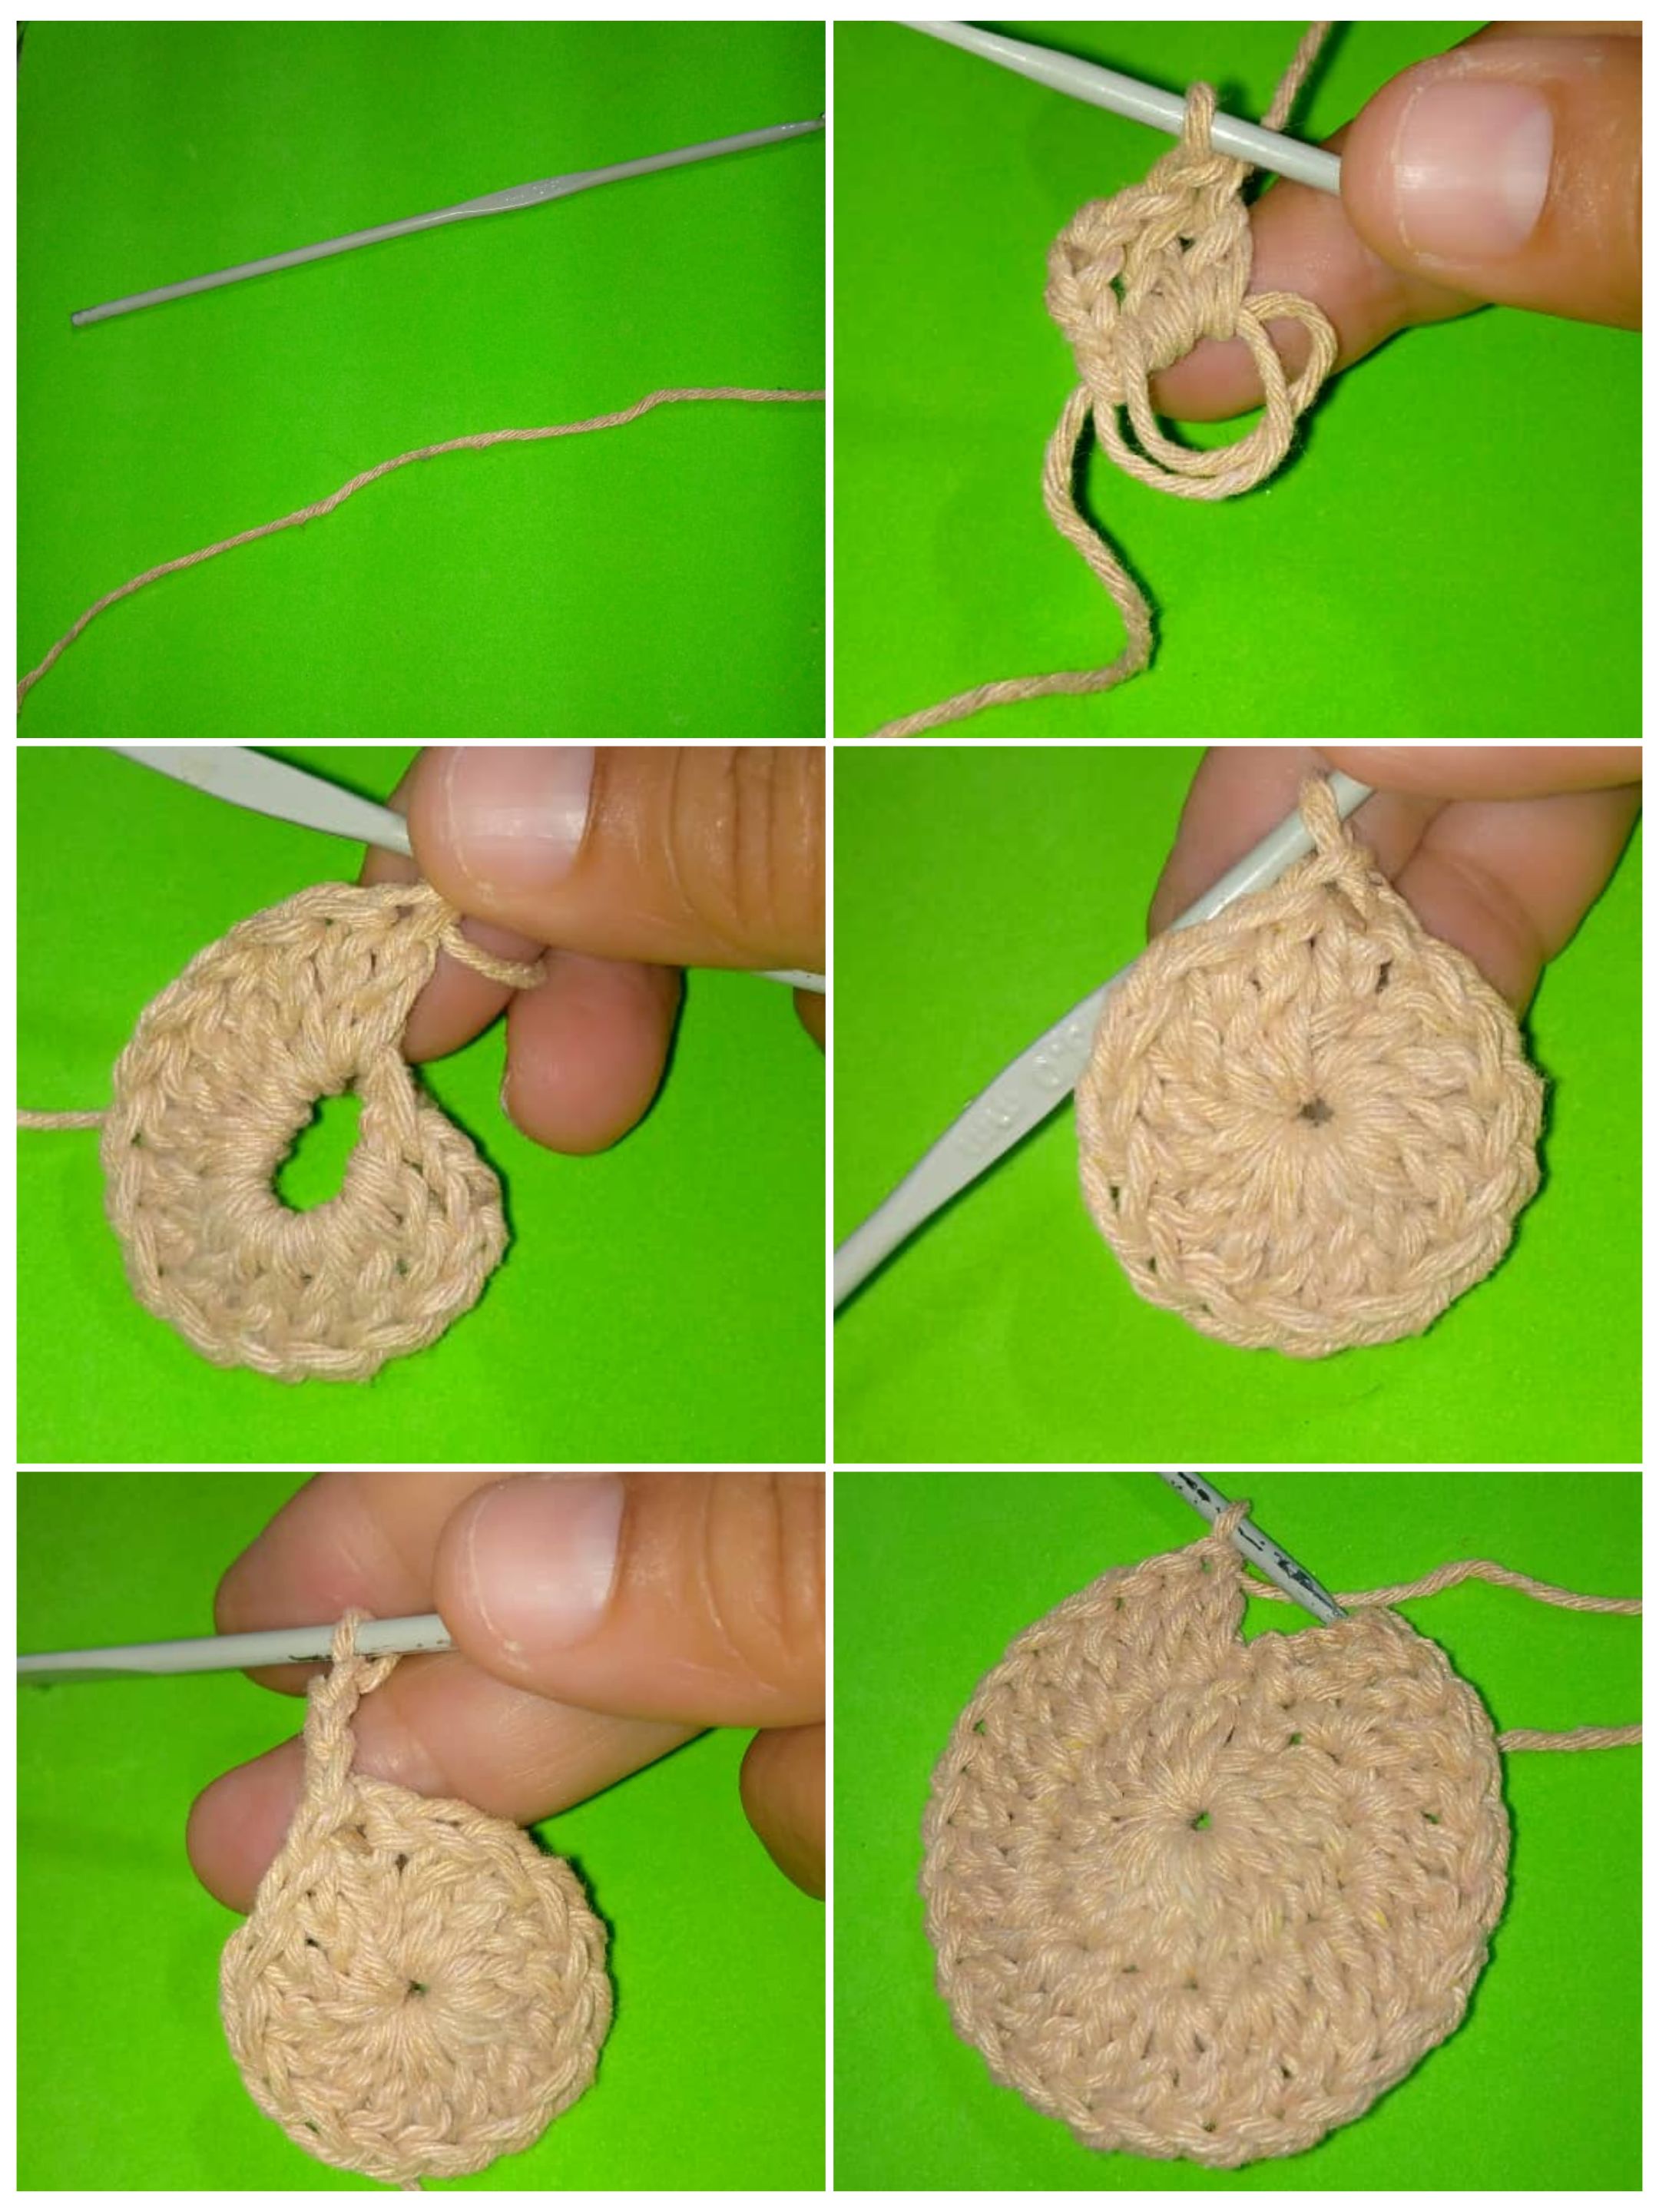
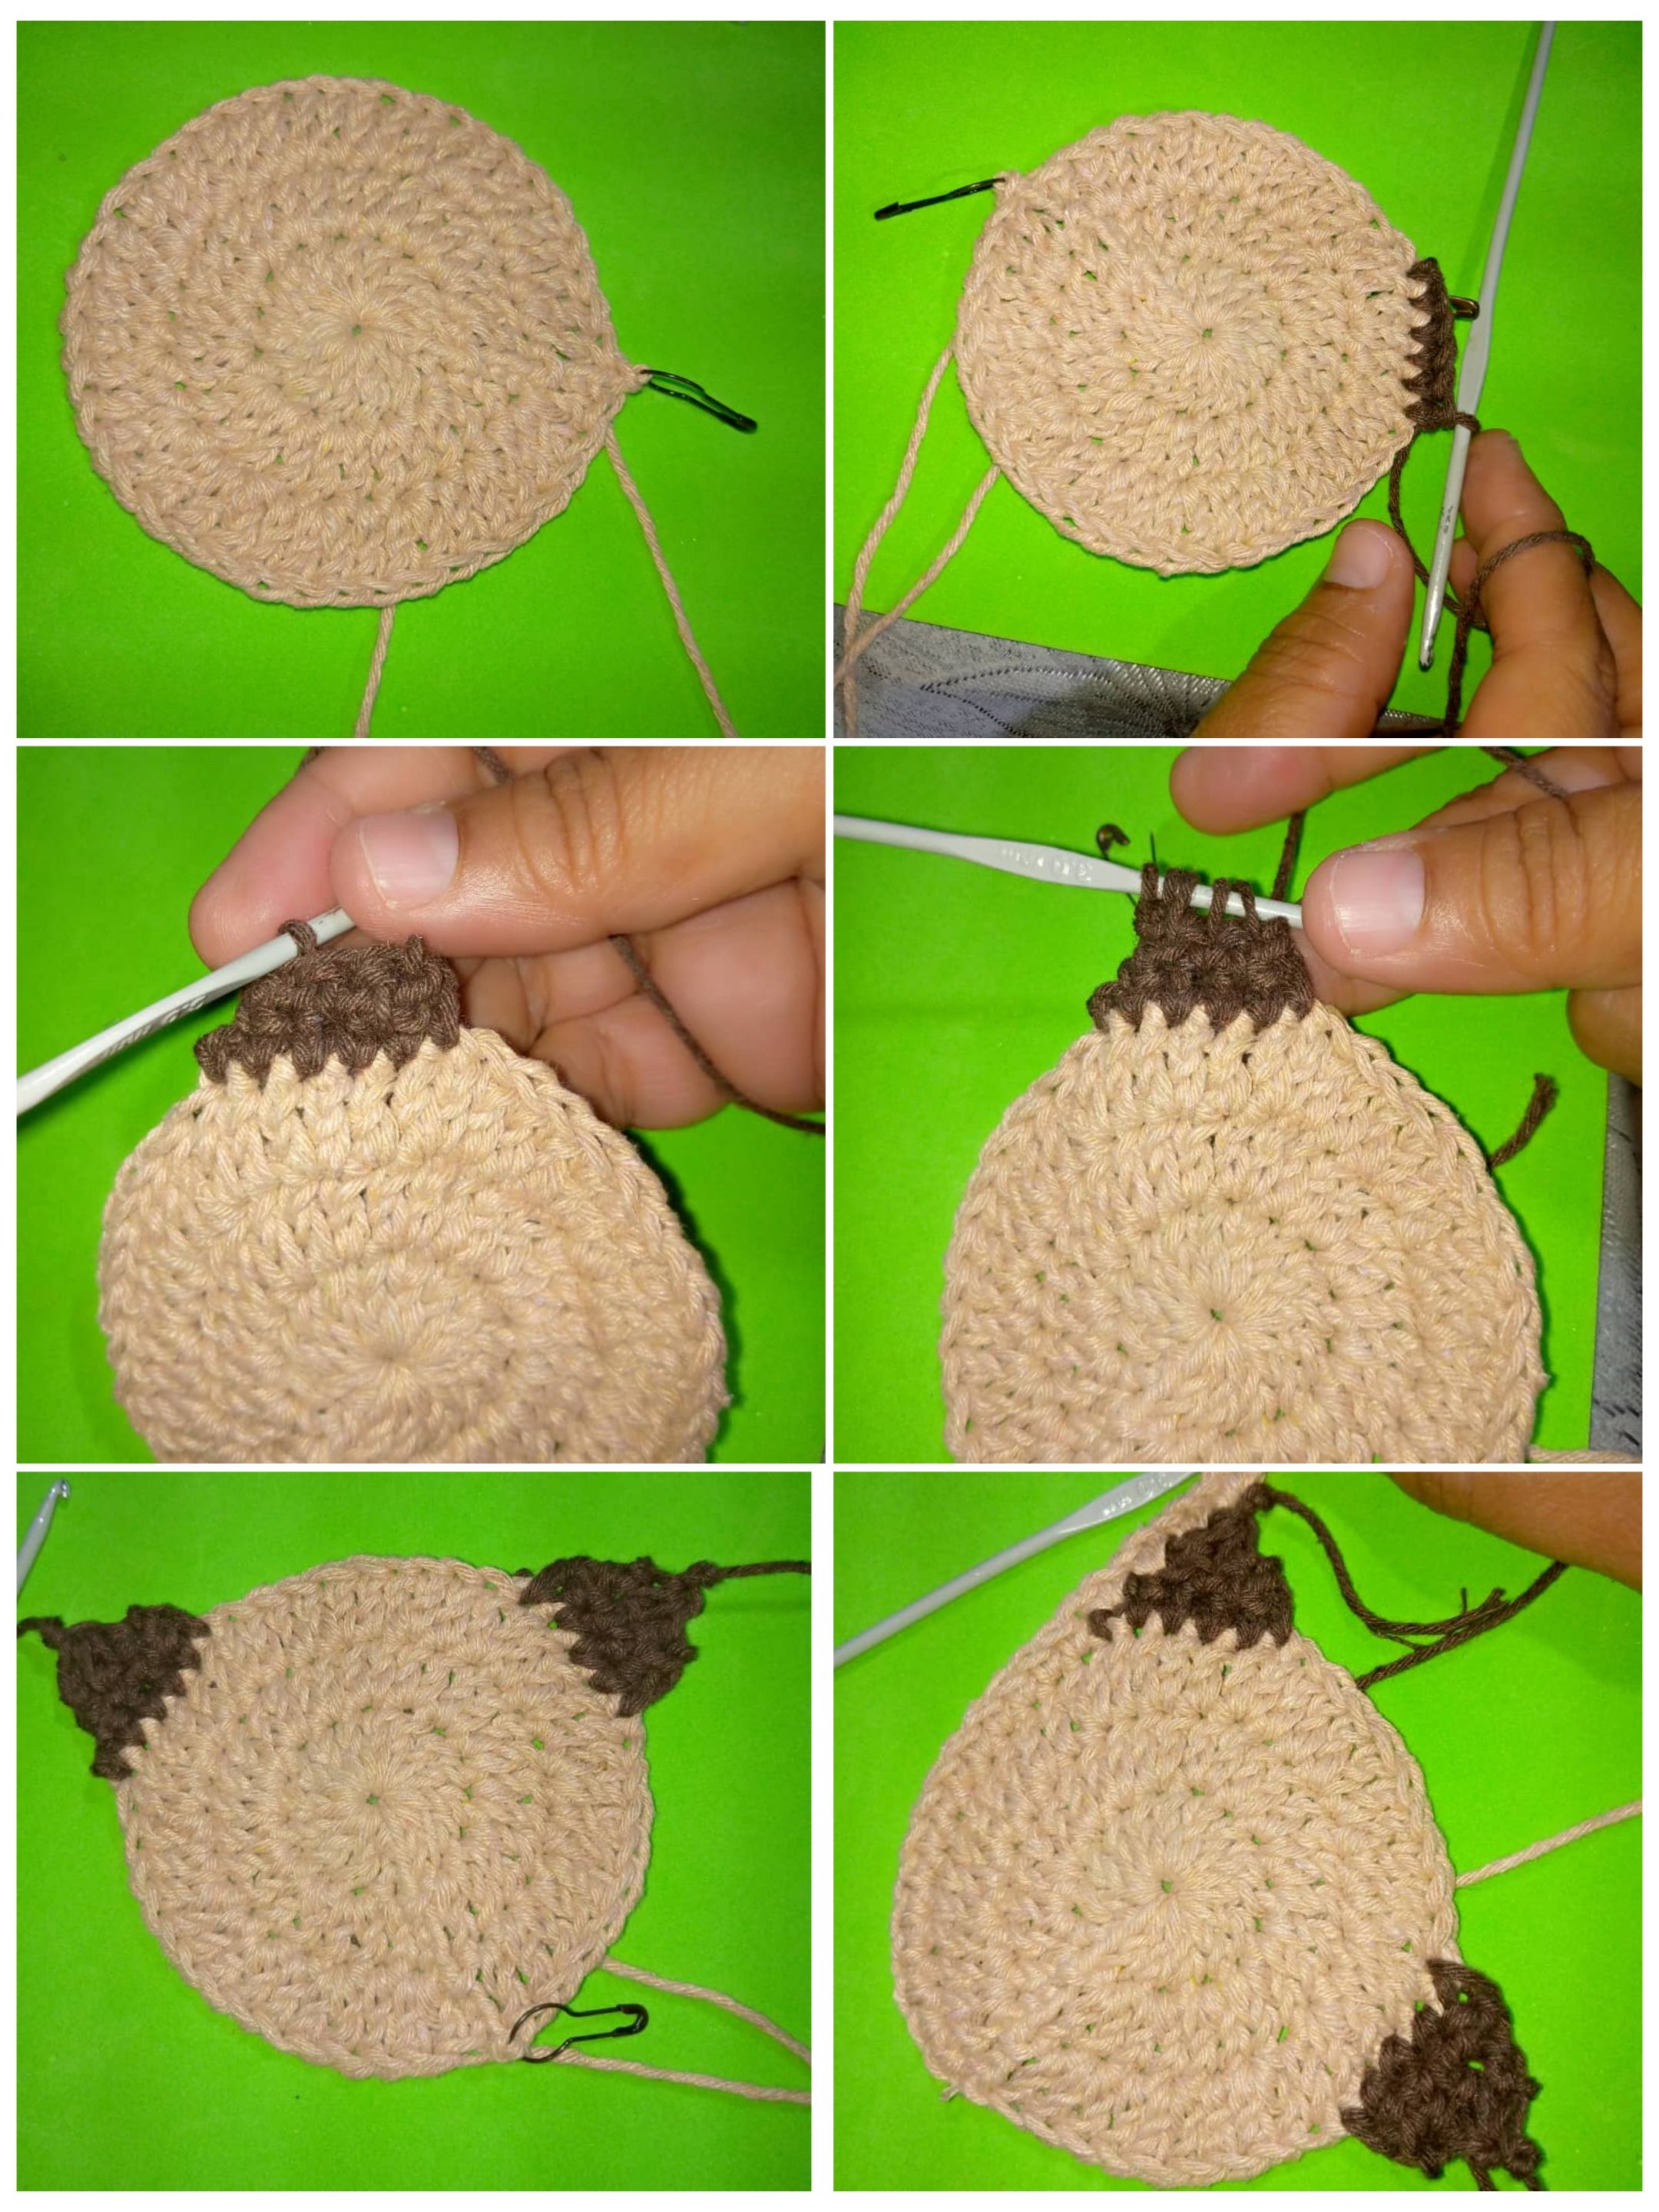
#### Paso a paso de la realización:
- Tomamos el hilo de color beige y la aguja, hacemos un anillo mágico , dentro del anillo metemos 15 puntos altos. Terminamos la vuelta con punto deslizado.
- Para la segunda vuelta: levantamos tres cadenas, metemos dos puntos alto en cada punto, para un total de 30 puntos. Cerrar con punto deslizado.
- Para la tercera vuelta:levantamos tres cadenas, en el siguiente punto metemos un punto alto, para el otro puntos hacemos un aumento. Y luego el otro sería un punto, en total son 45 puntos altos.
- Ahora con el marcador lo colocamos en el punto 15 y luego contamos 12 puntos y colocamos el otro marcador.
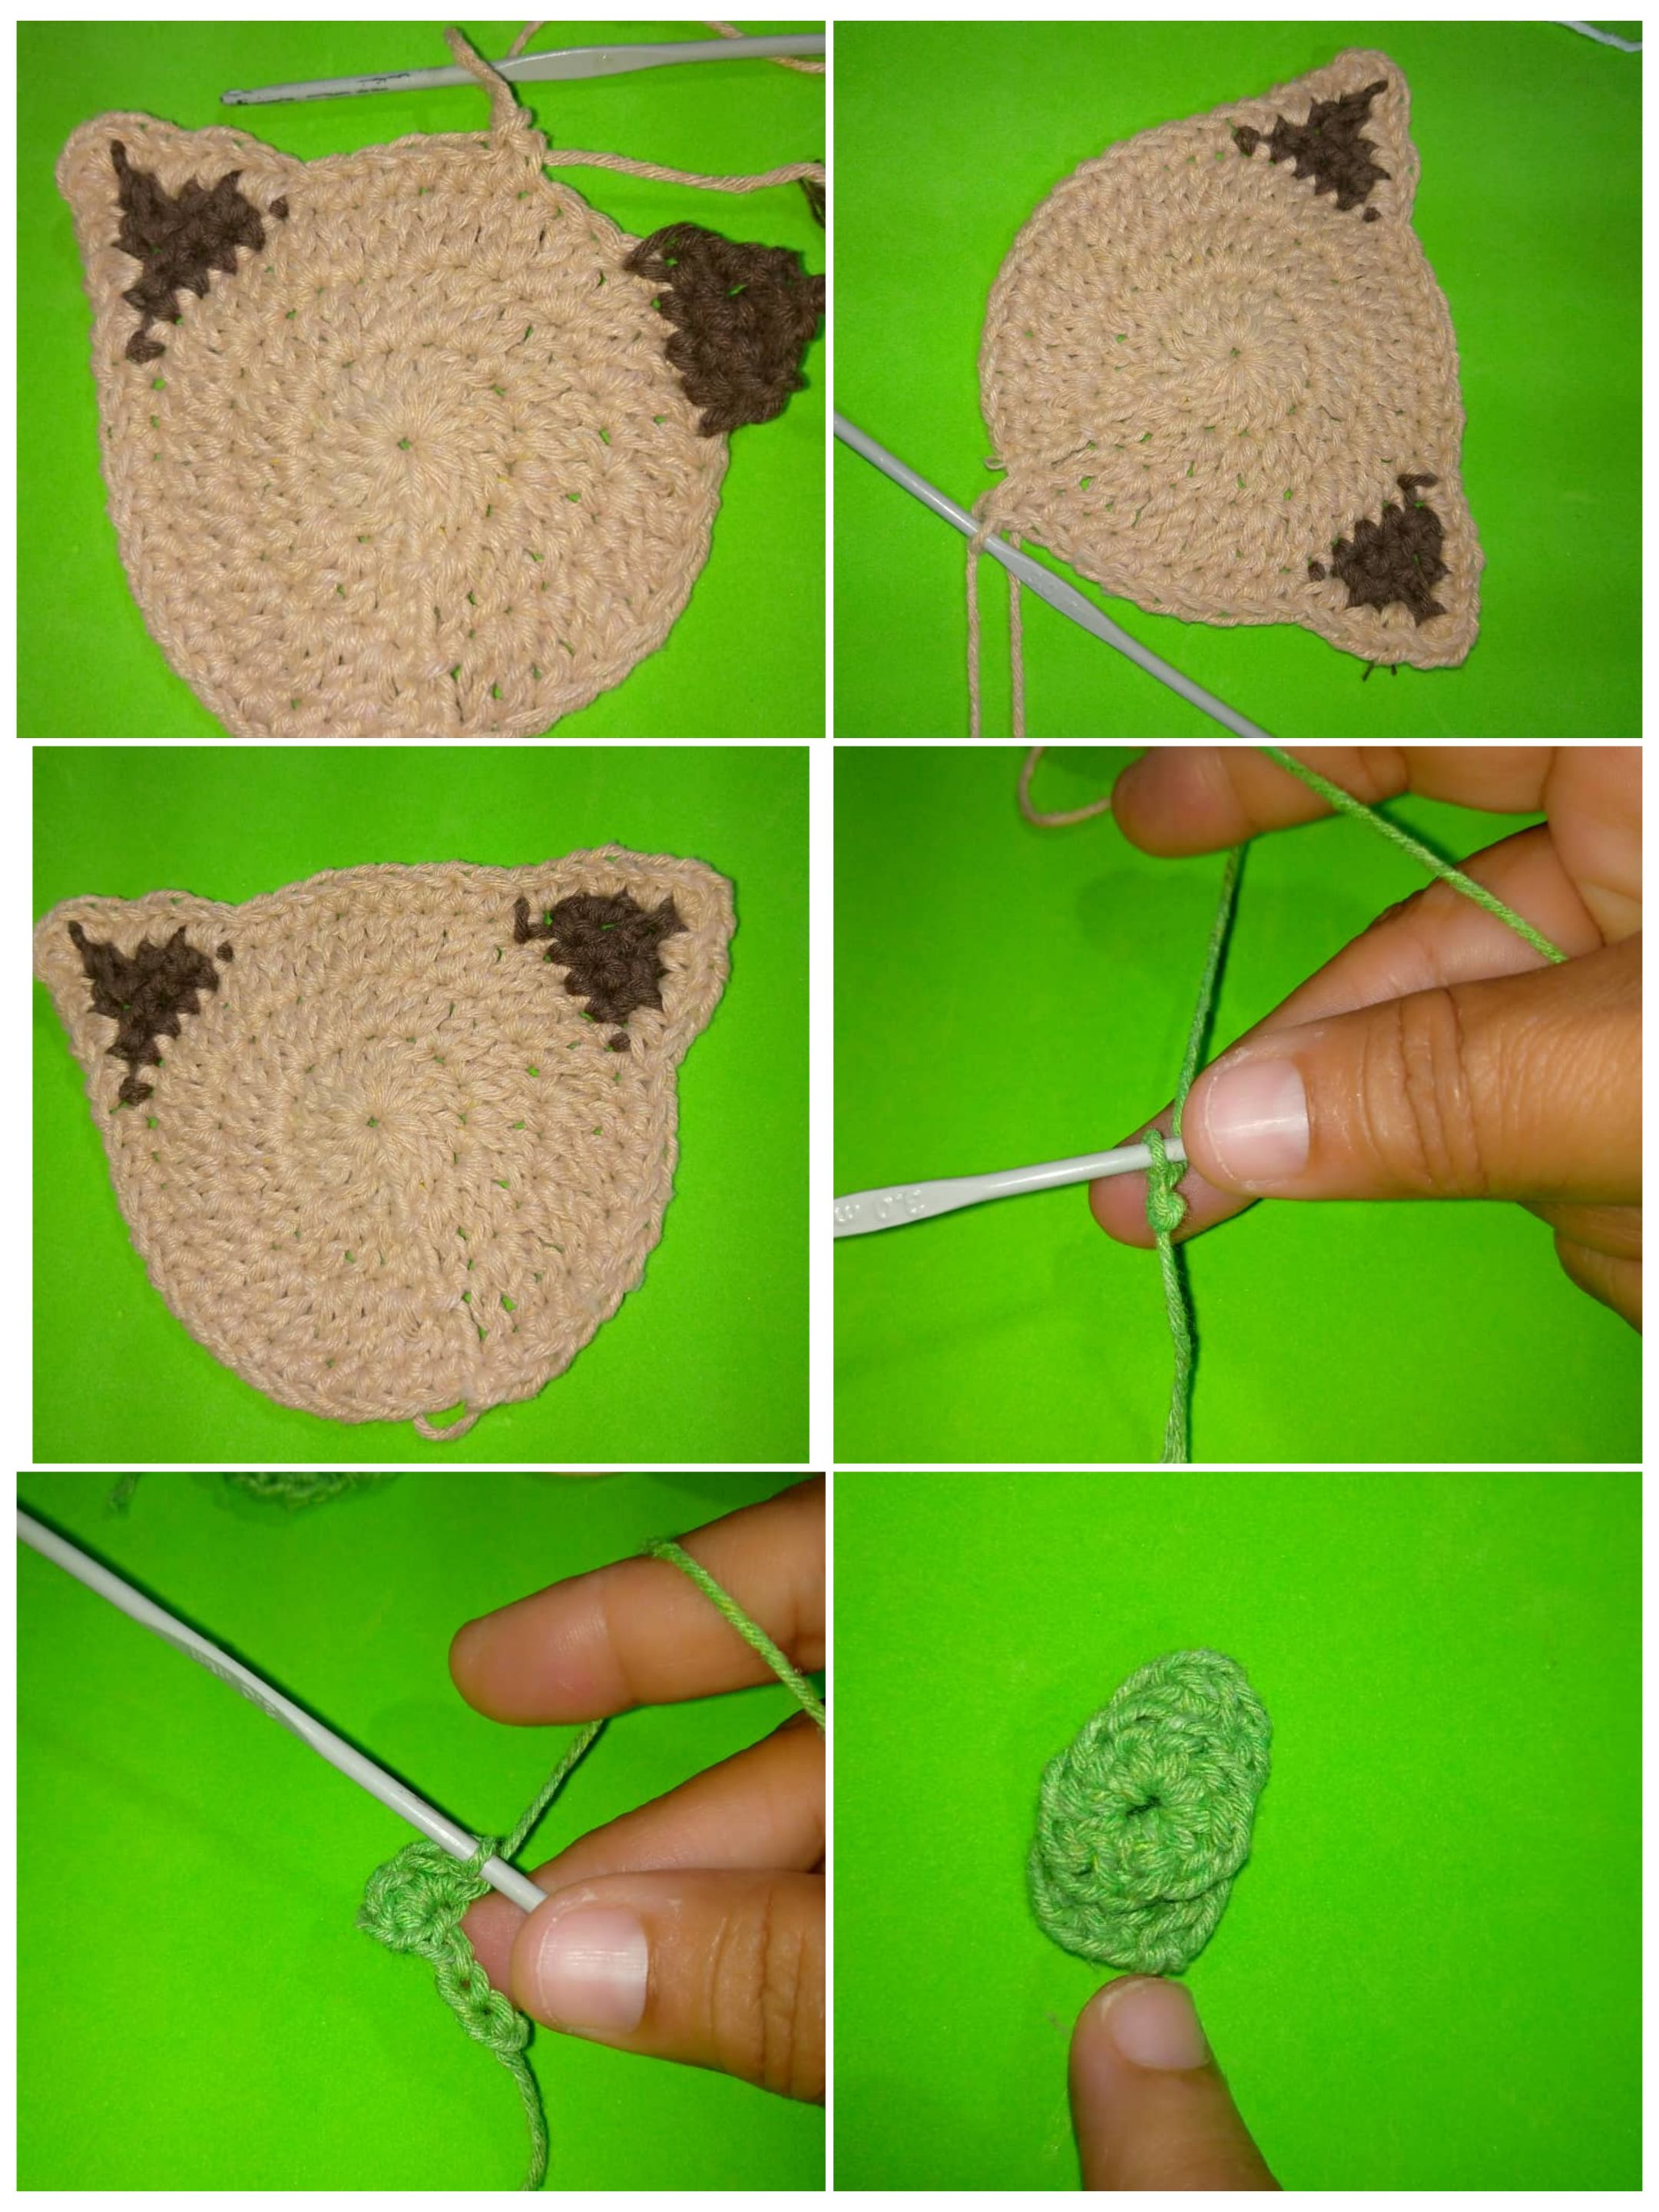
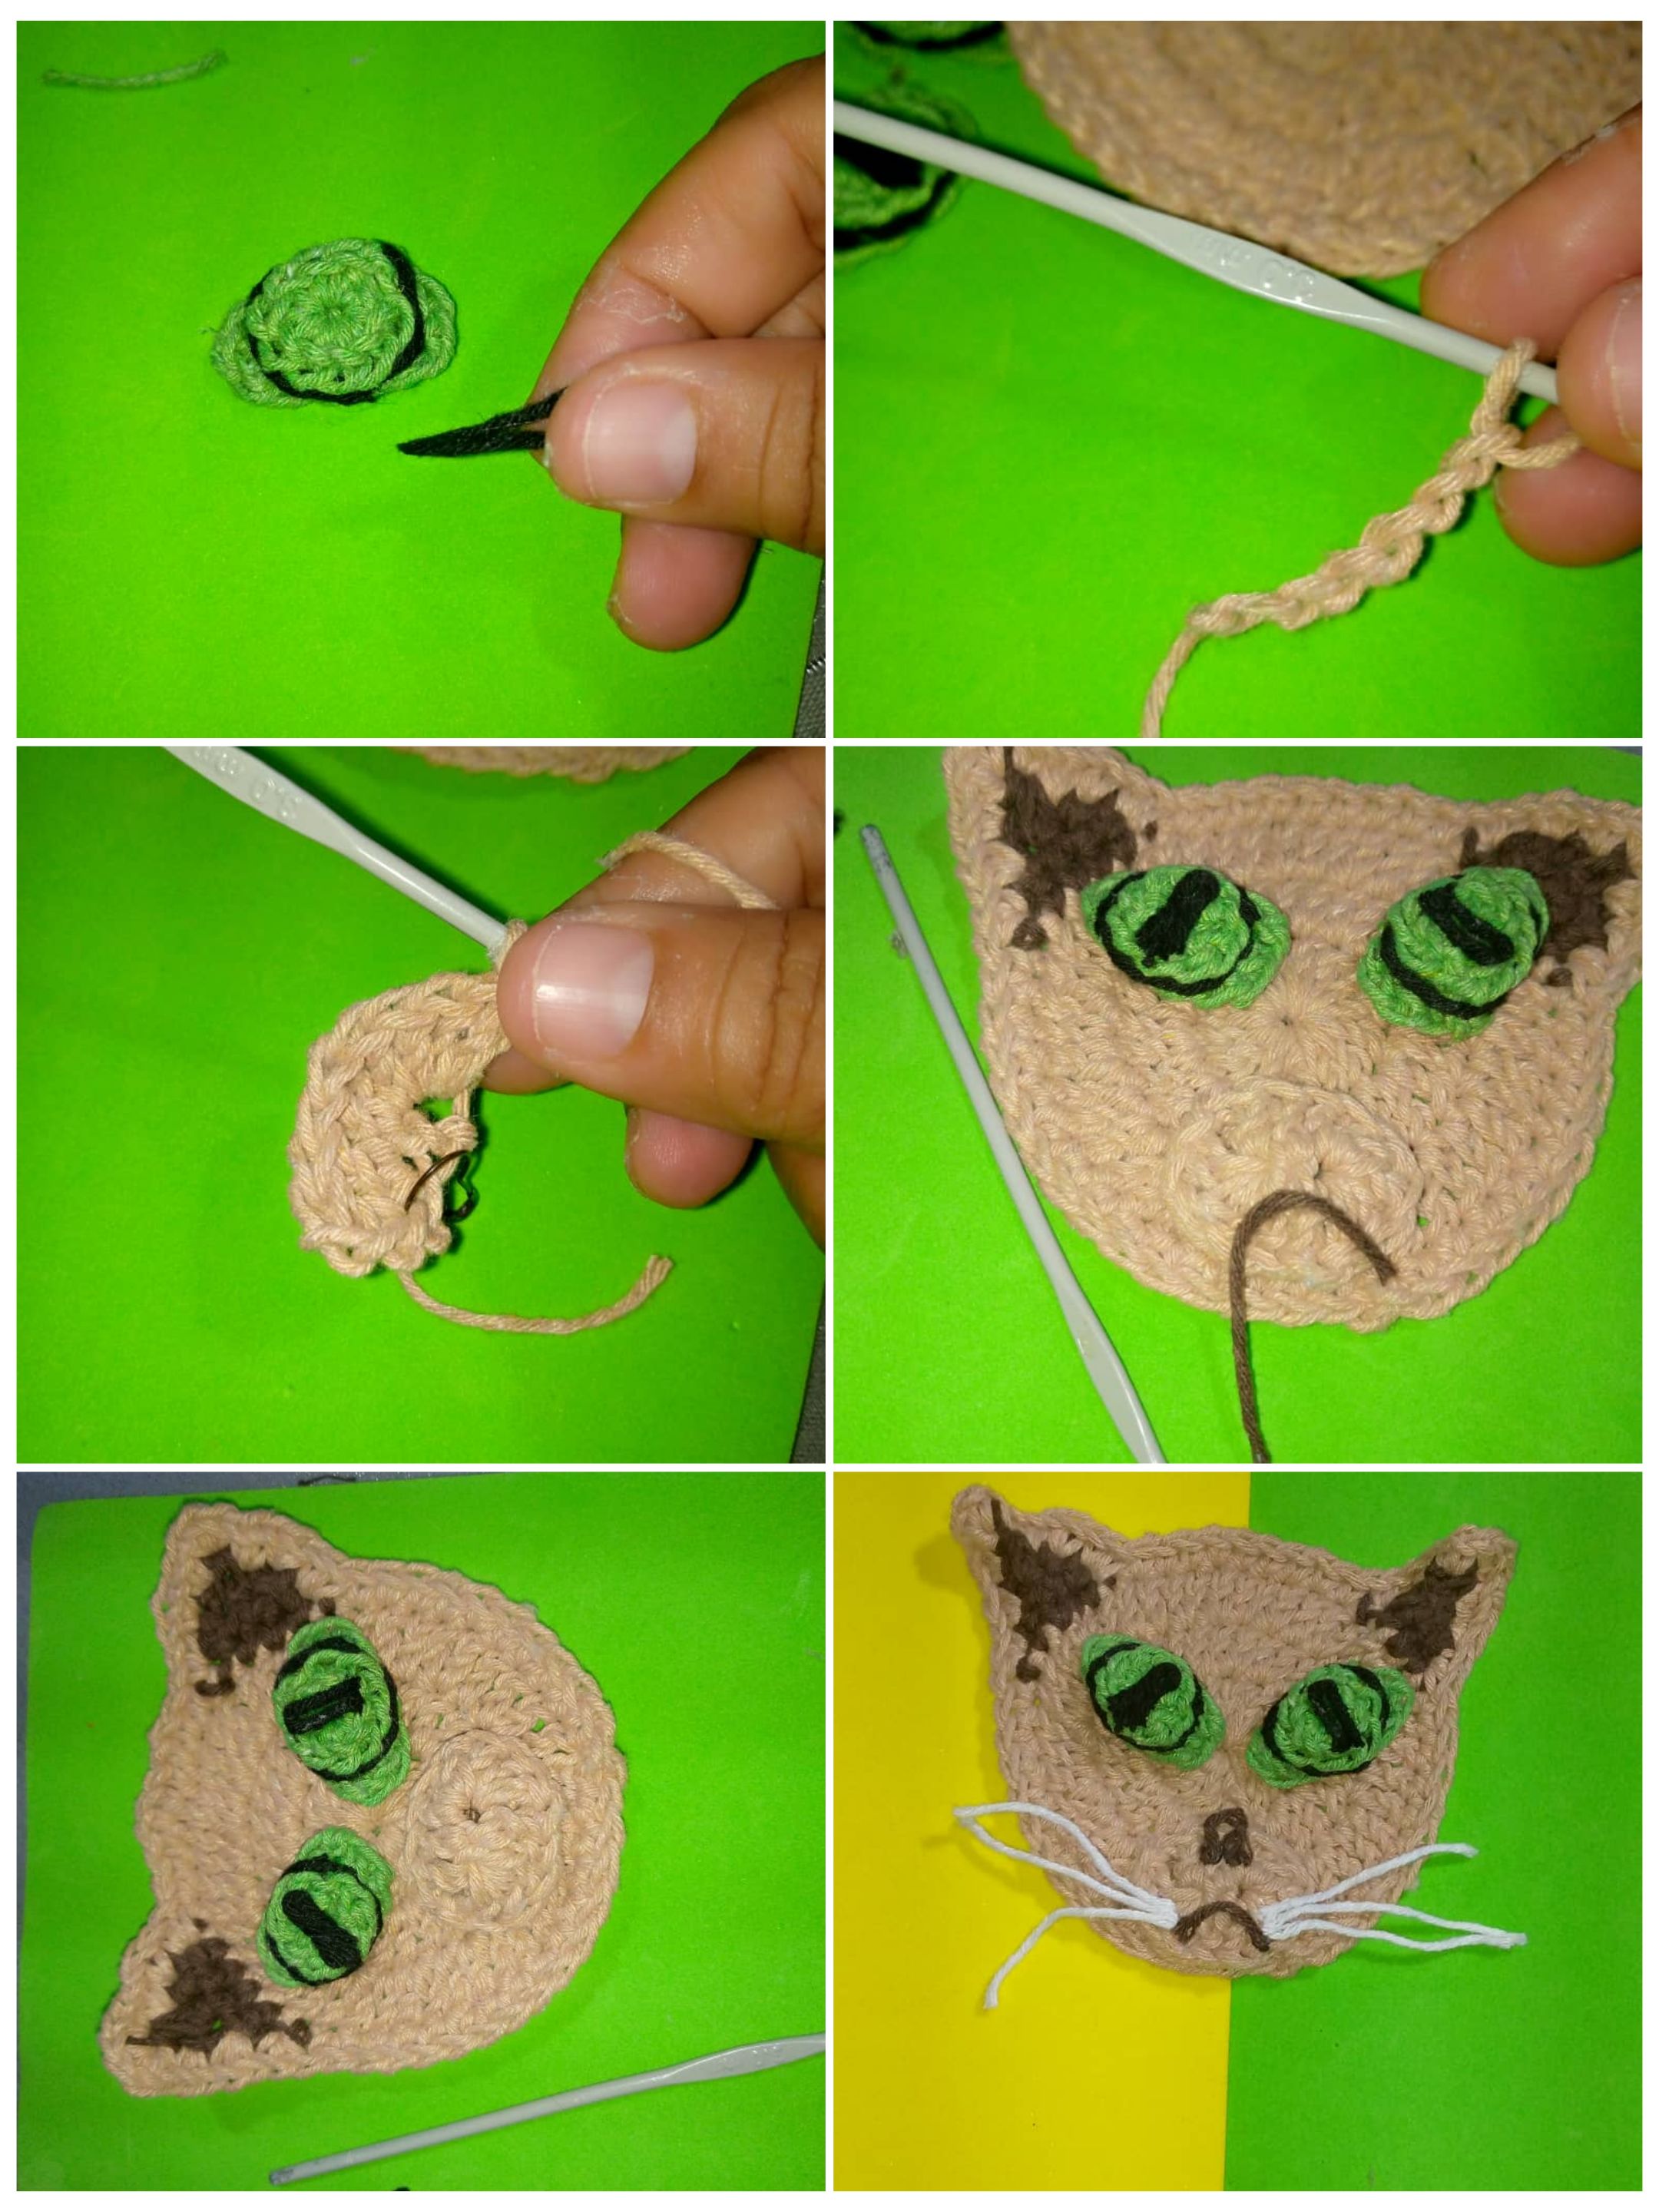
- Continuamos tejiendo la base, con puntos bajos, hasta llegar a las orejas, Al llegar a las orejas: en el primer punto haremos un punto bajo , al siguiente punto otro punto alto.Al llegar al punto de arriba , tejemos 4 puntos bajos, luego iremos tejiendo en cada punto. - Tejemos los ojos ,la primera parte del ojo: hacemos una cadena de 5 y en ambos extremos tejimos 4 en el mismo punto. Luego hacemos un tejido con anillo mágico: metemos 6 puntos bajos. Y cerramos. Así se harán los dos ojos .
- Para el hocico ,hacemos un anillo mágico, levantamos 7 cadenas puntos bajó, otra vuelta de 7 cadenas y ahora hacemos cuatro disminuciones. - Se termina en puntos deslizados.
- Luego se preparan para colocar los demás detalles, pueden guardar por la imagen.
>#### Step by step of the realization:
>- We take the beige yarn and the needle, we make a magic ring, inside the ring we put 15 double crochet stitches. We finish the row with slip stitch.
>- For the second row: we pick up three chains, we put two double crochet stitches in each stitch, for a total of 30 stitches. Close with slip stitch.
>- For the third row: we pick up three chains, in the next stitch we put a double crochet, for the other stitch we make a double crochet. And then the other one would be a stitch, in total there are 45 high stitches.
>- Now with the marker we place it in the 15th stitch and then we count 12 stitches and place the other marker.
>- We continue knitting the base, with low stitches, until we get to the ears, When we get to the ears: in the first stitch we will knit a low stitch, in the next stitch another high stitch, when we get to the top stitch, we will knit 4 low stitches, then we will knit in each stitch. - We weave the eyes ,the first part of the eye: we make a chain of 5 and at both ends we weave 4 in the same stitch. Then we knit the magic ring: we knit 6 single crochet stitches. And close. This is how the two eyes will be made.
>- For the muzzle, we knit a magic ring, we knit 7 chains of dropped stitches, another round of 7 chains and now we knit four decreases. - We finish in slipped stitches.
>- Then get ready to place the other details, you can save by the image.
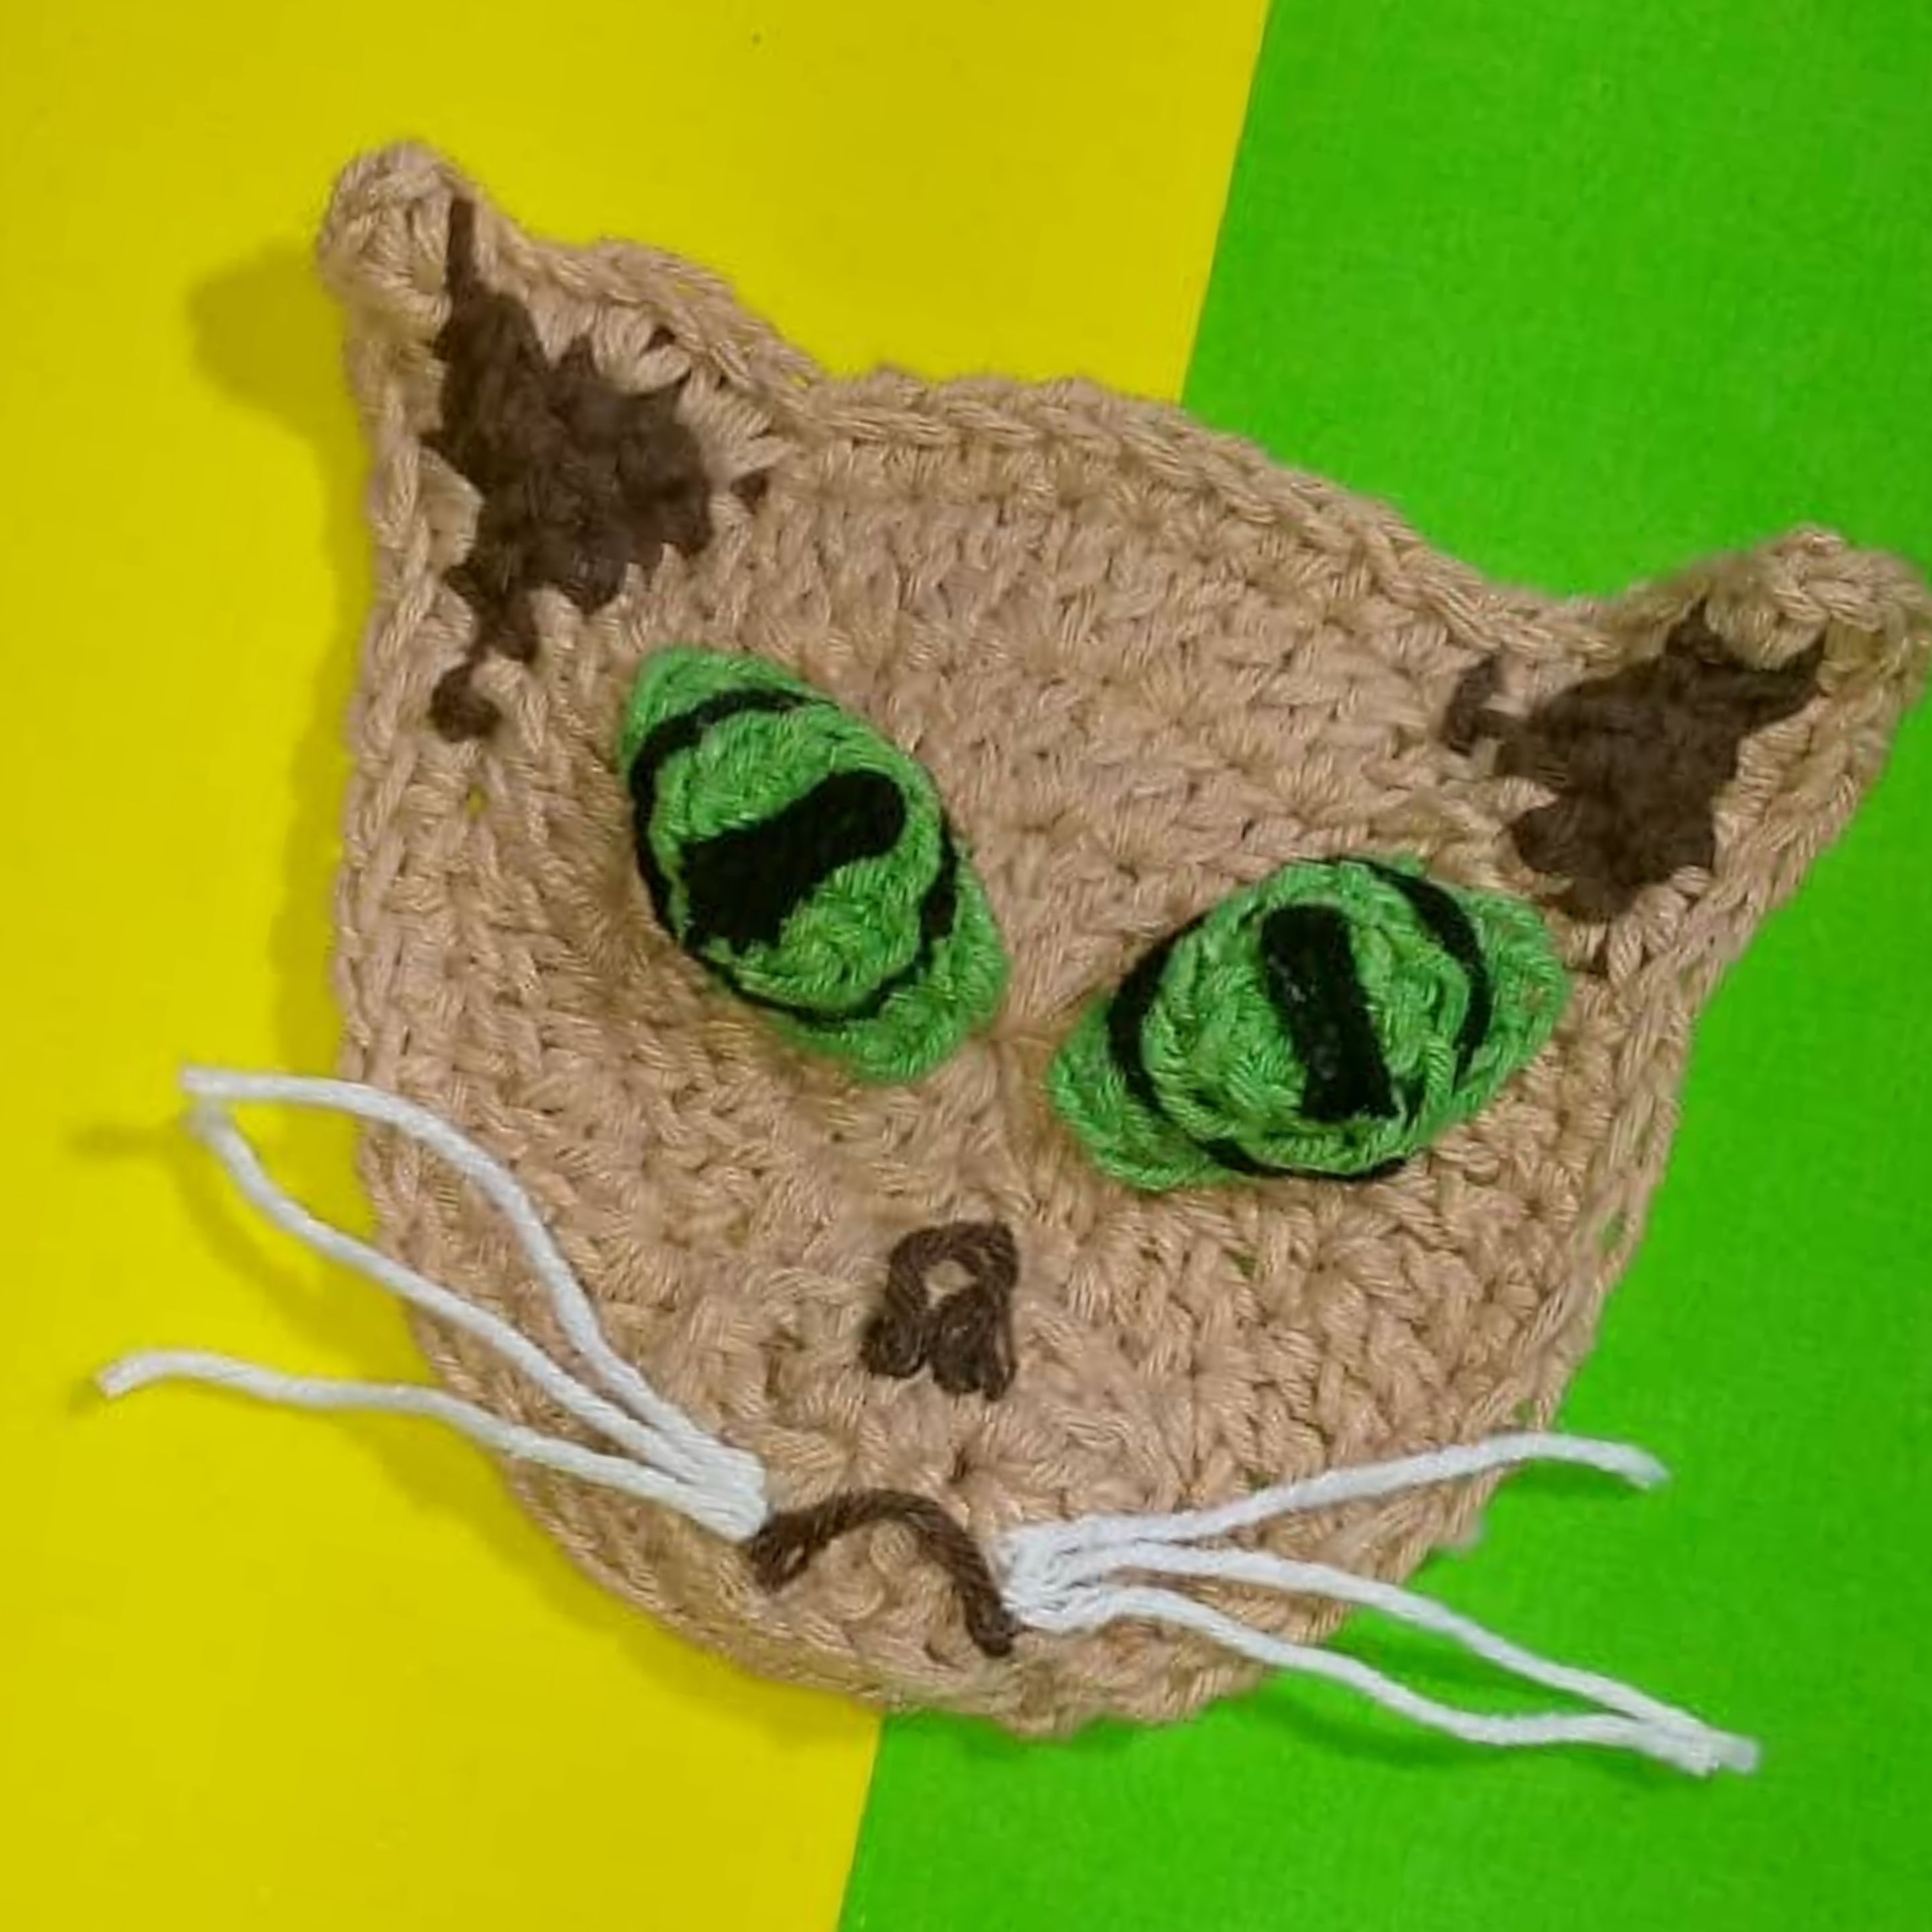
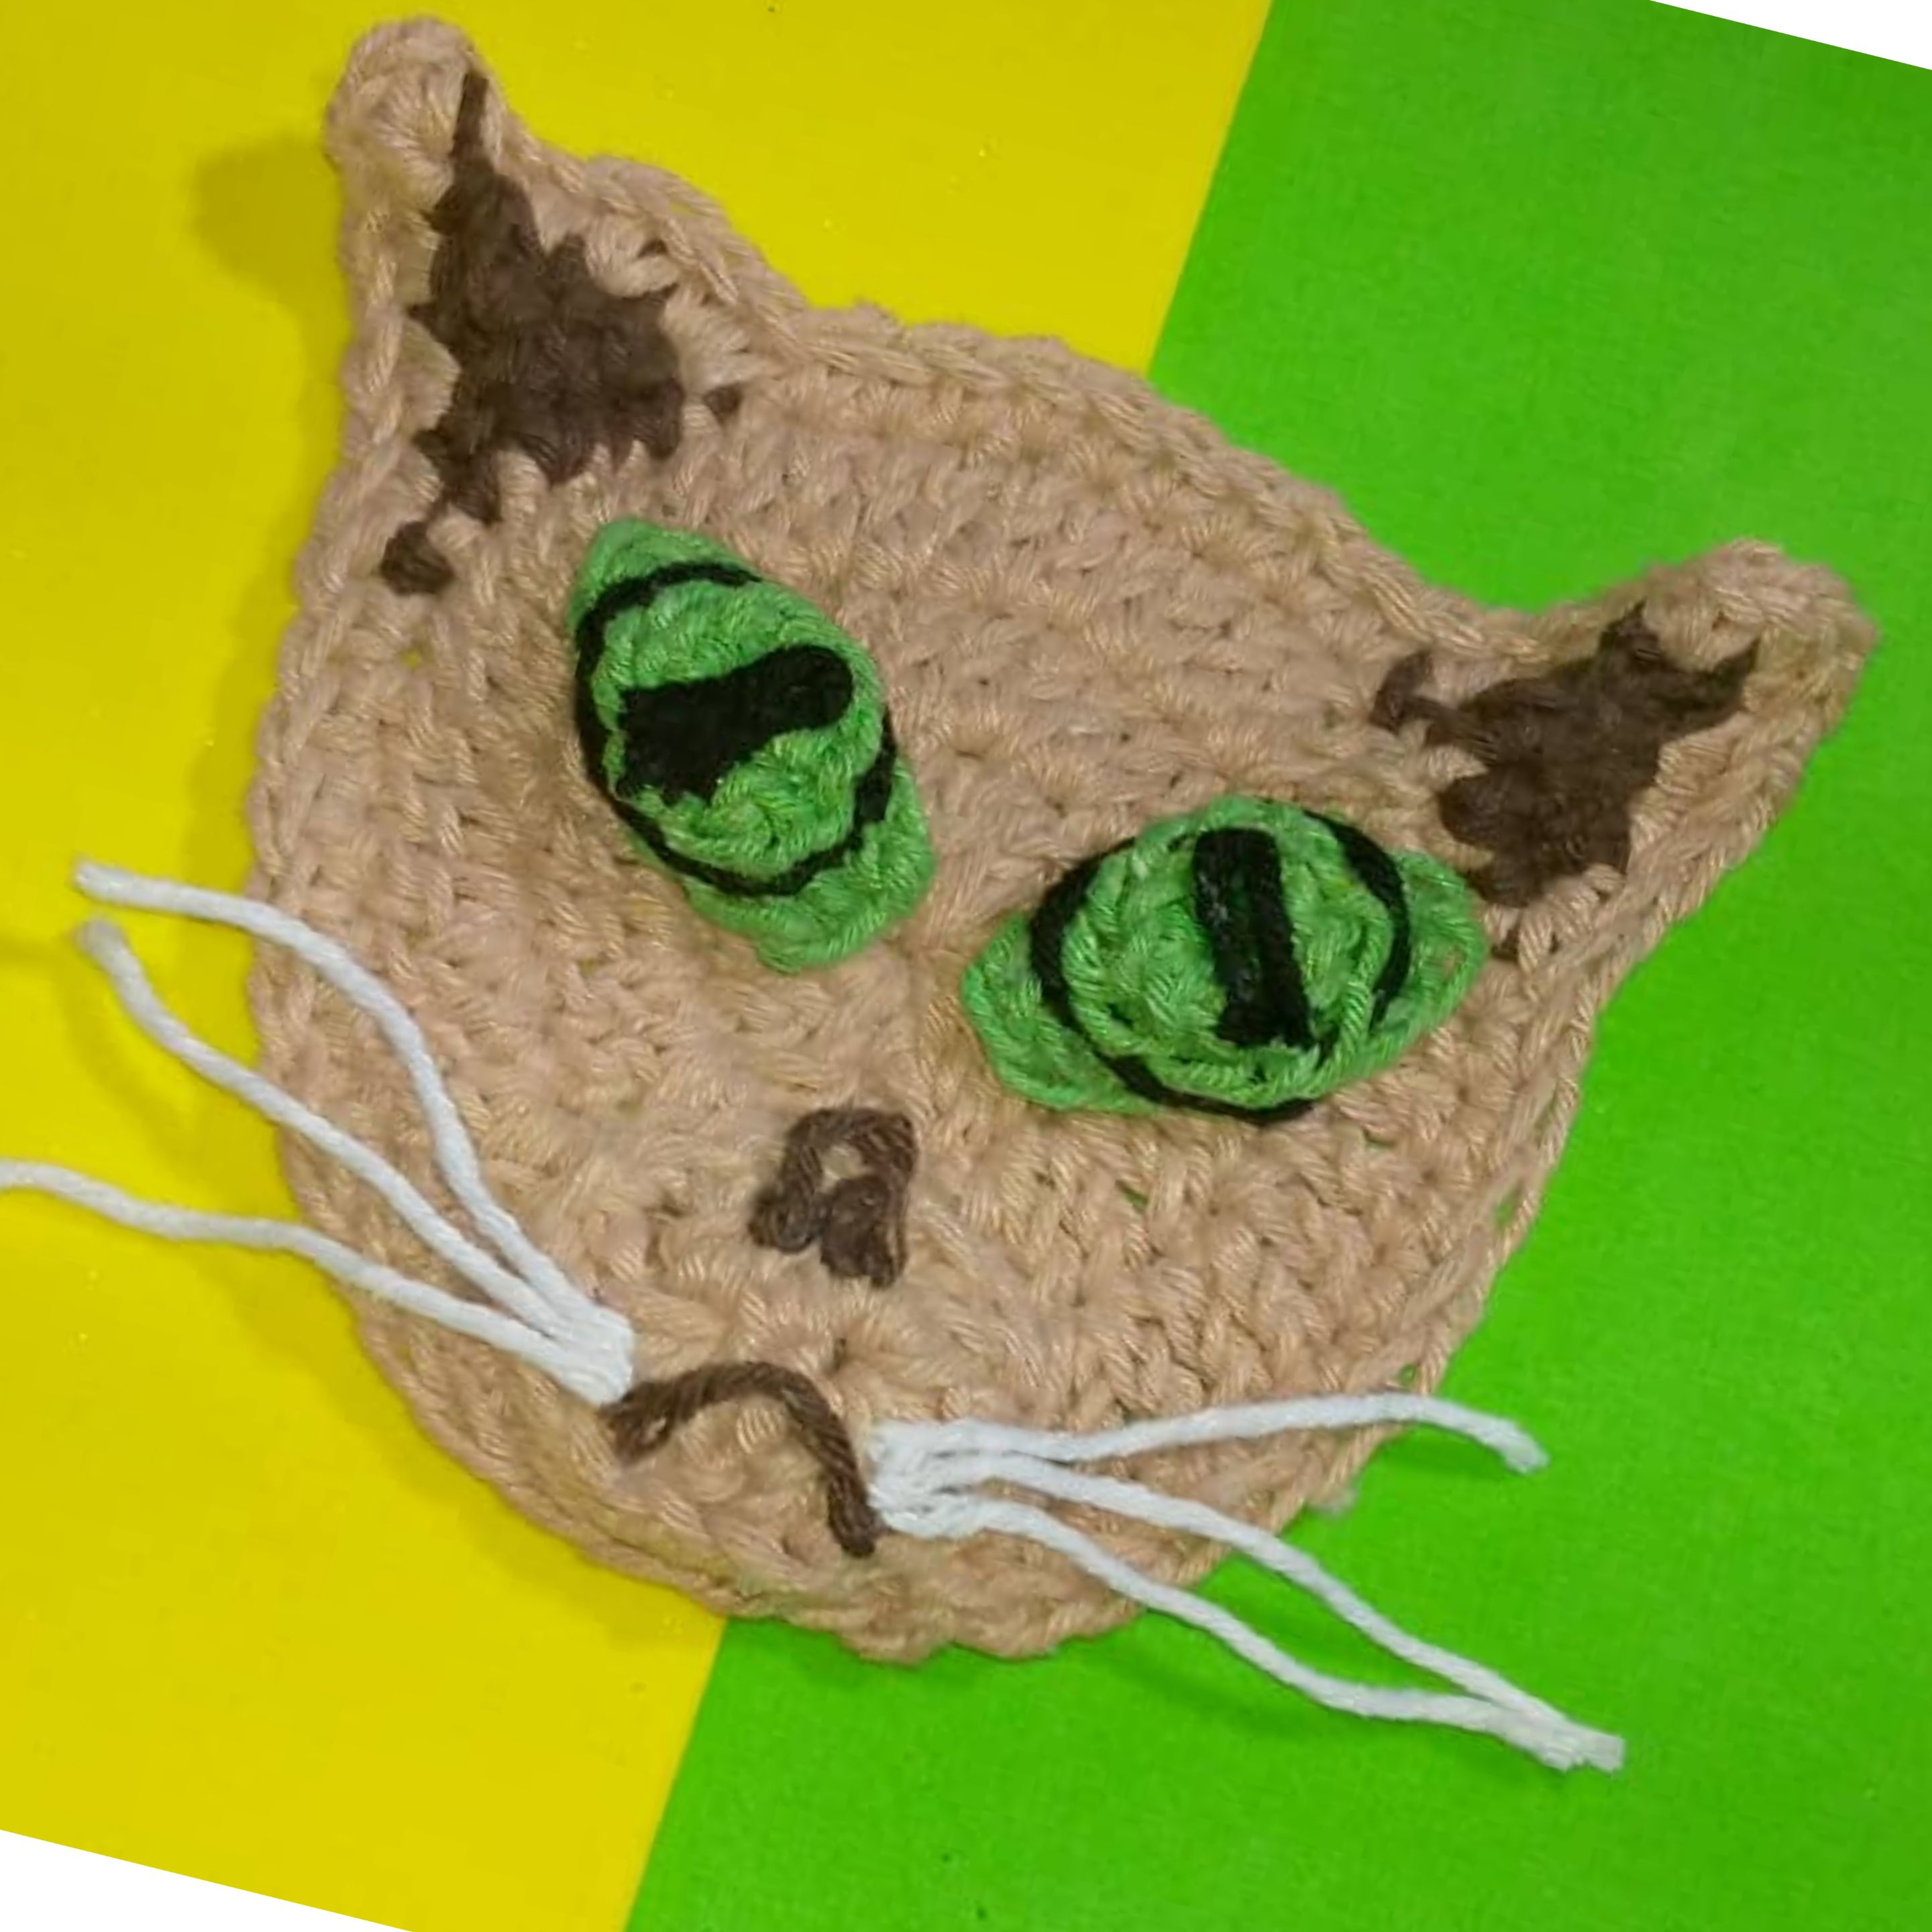
**Aquí el resultado final del lindo aplique de gatito tejido a crochet.**
**Here is the final result of the cute crocheted kitten applique.
Gracias por leer y comentari post, las fotos son mias , tomadas con teléfono Infinix, editadas con incollage y traducida con Deepl
>Thank you for reading and commenting post, the pictures are mine, taken with Infinix phone, edited with incollage and translated with Deepl

(Esp/Eng)Tutorial : Cómo hacer una linda aplicación tejida de gatito, inspirada en tofu eterno /Tutorial : How to make a cute knitted kitty applique, inspired by eternal tofu
@josdelmi
· 2025-04-25 03:01
· hive-189641
#diyhub
#spanish
#splinterlands
#bricolaje
#handmade
#tutorial
#crearivo
#manualidades
#crochet
#neoxian
Payout: 0.000 HBD
Votes: 339
More interactions (upvote, reblog, reply) coming soon.