(ENG)
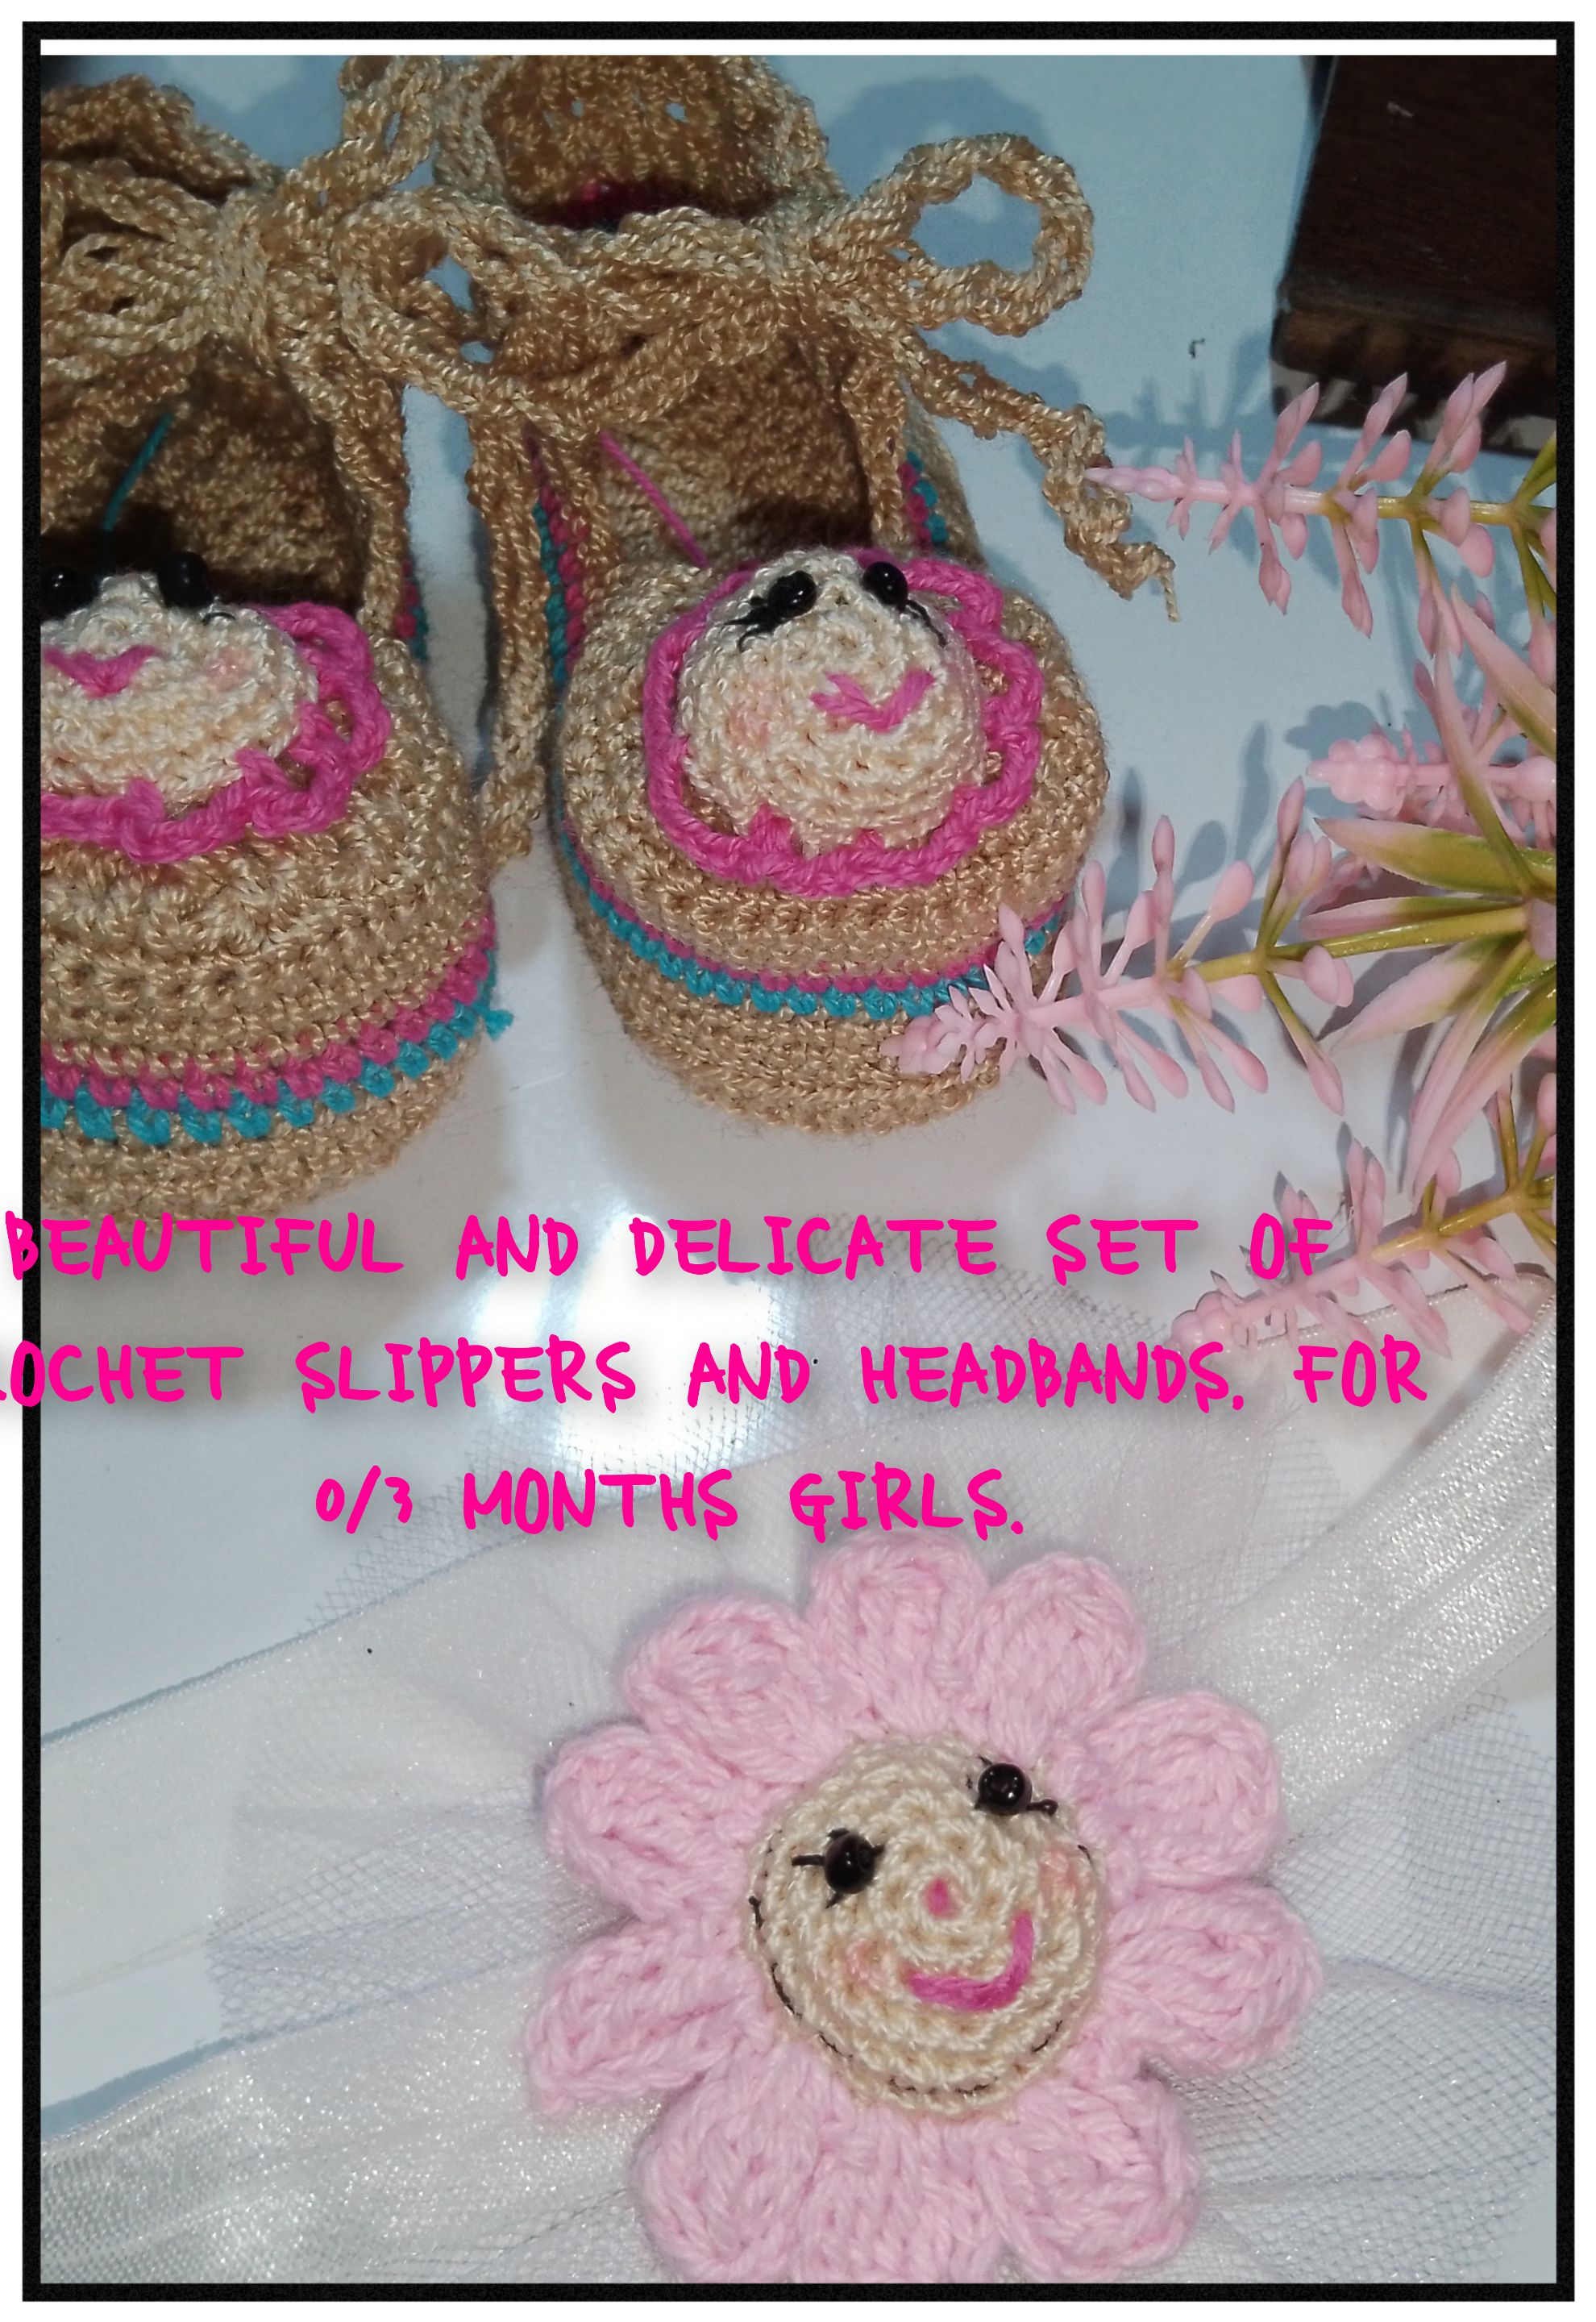
Hello everyone, may this be a great day full of good things, may the light of day and night illuminate you and always guide you for good. I am pleased to be with you once again on this occasion, I come to show you something very tender, made with the crochet technique, it is a beautiful and very striking Set, of Headband and Zapaticos, for a sweet and tender girl, who will soon will come into the world, they are ideal to compare your first creation. I told you, I invite you to follow me and you will see the great result of this project. I wish you enjoy it.
Materials:
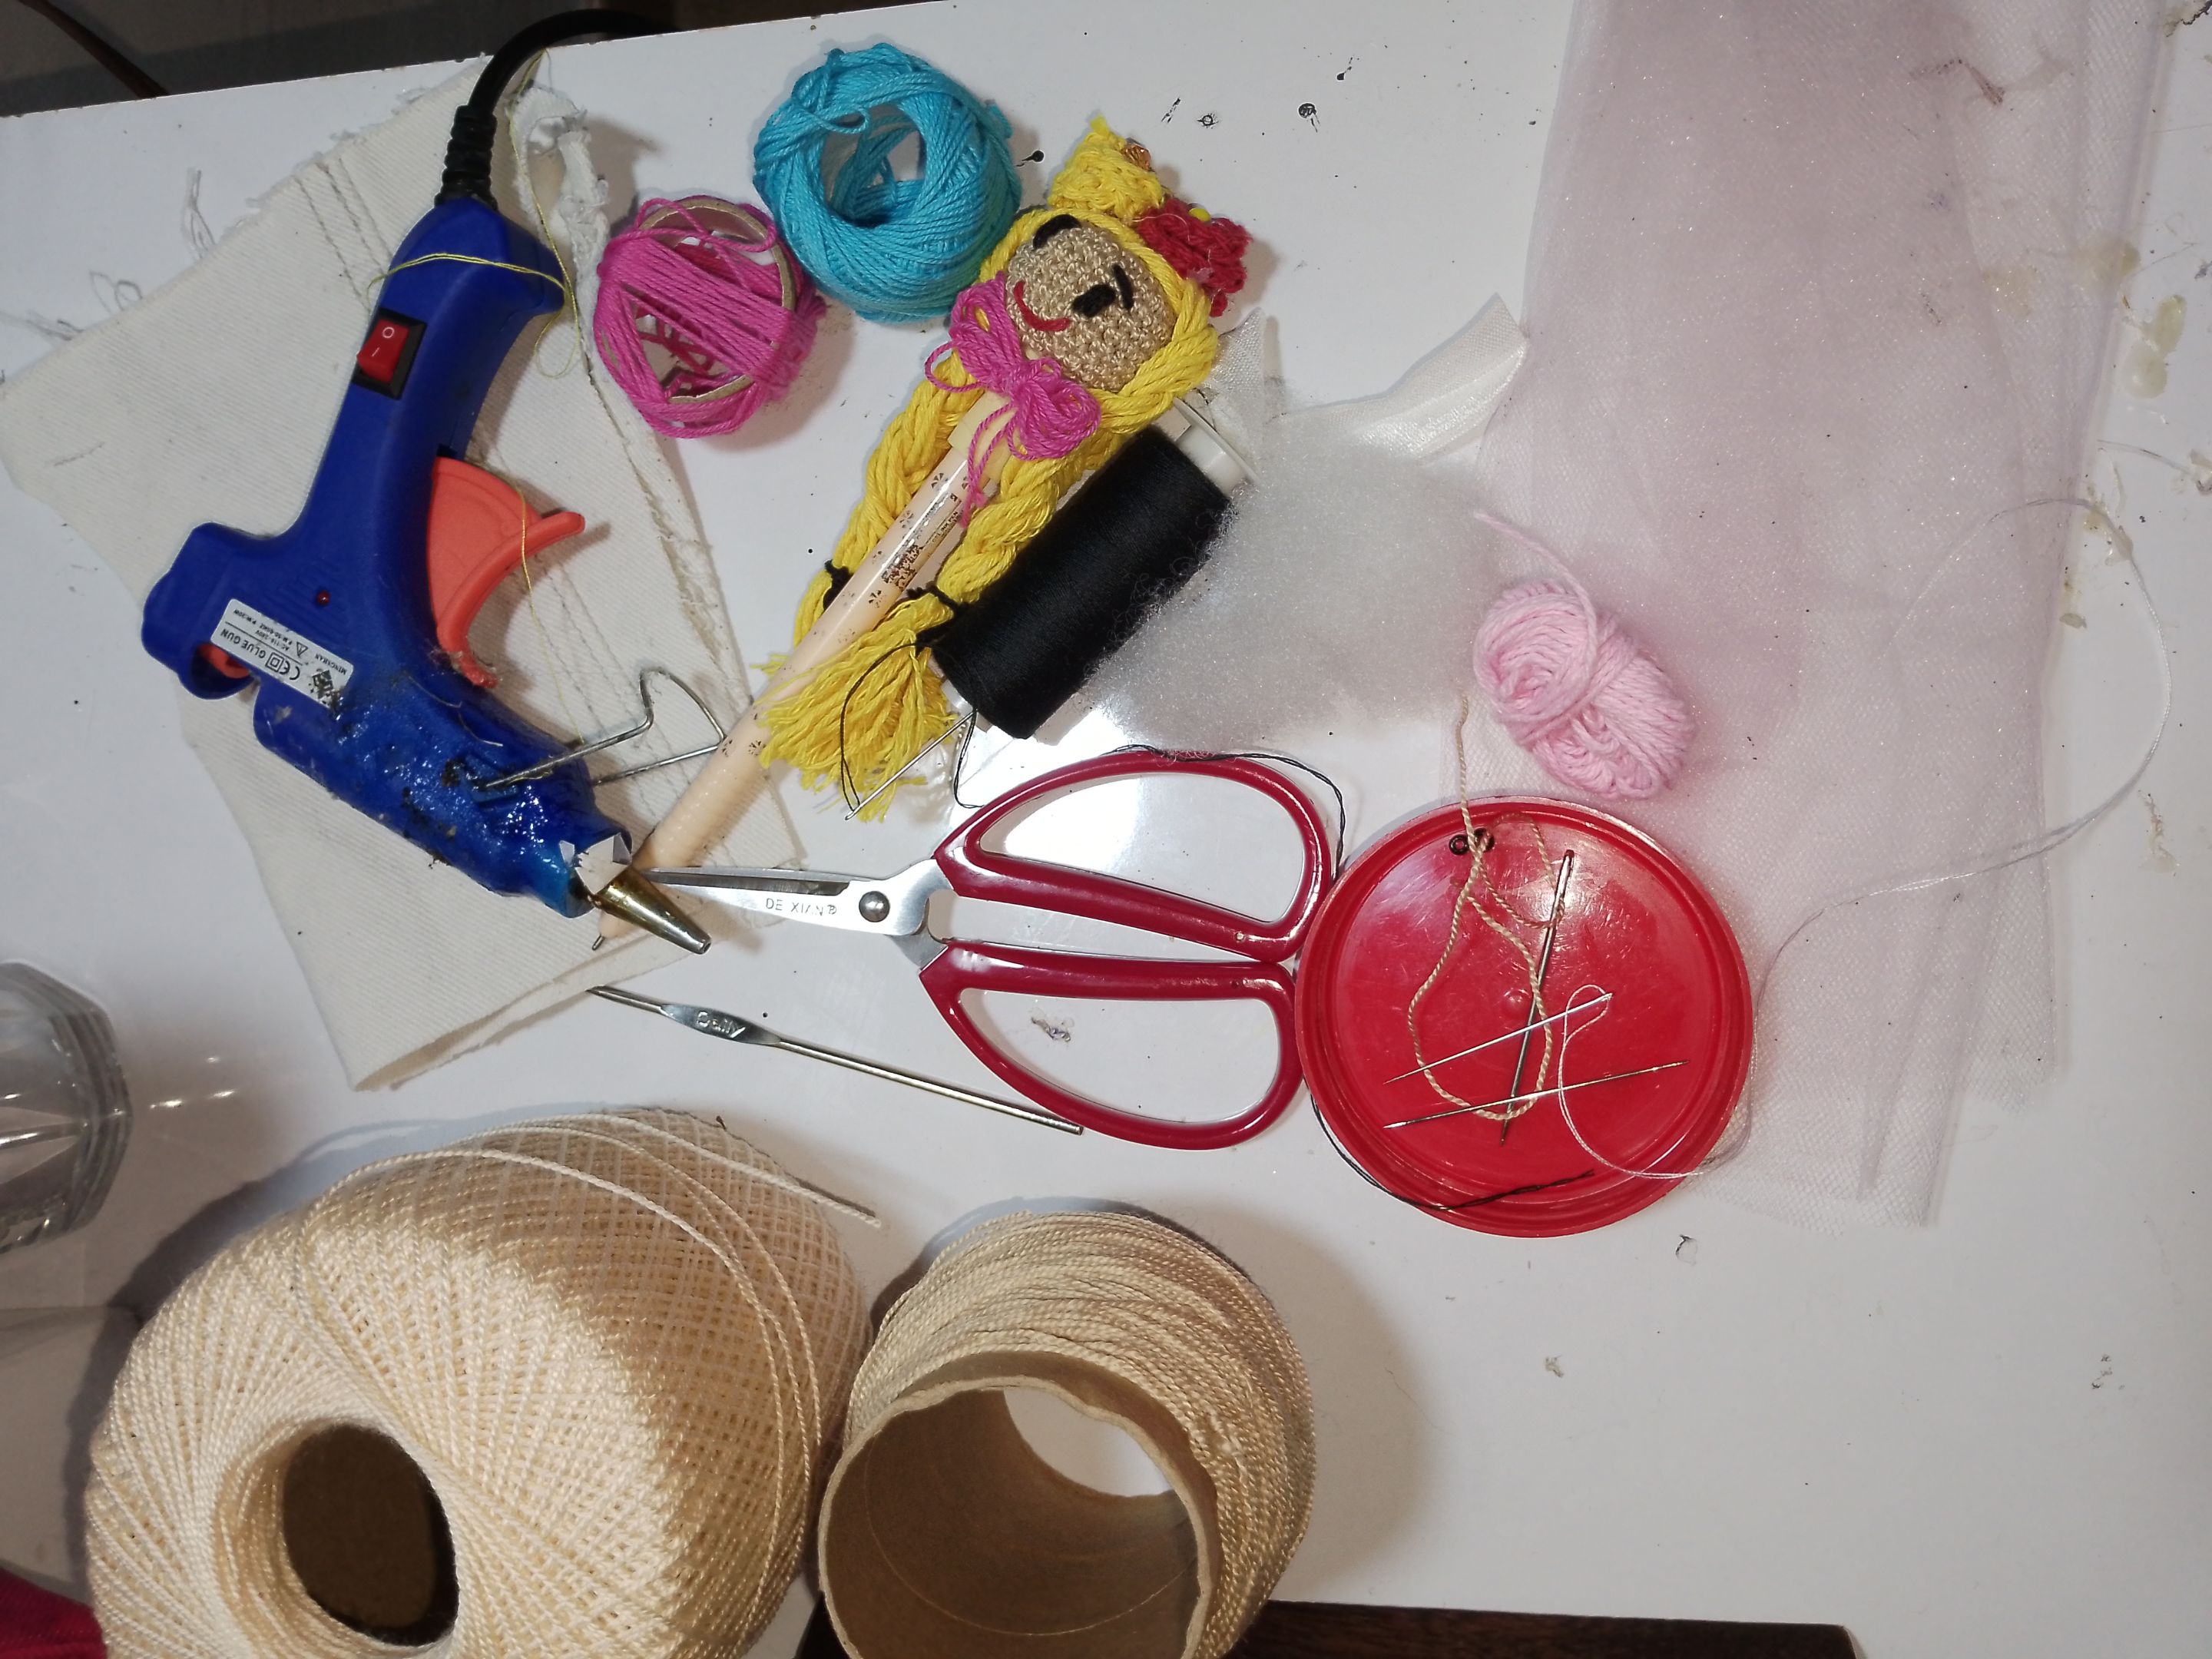
. Threads for knitting colors (beige, brown, blue, fuchsia.)
. Knitting needle. . Sewing needles. . Black bead. . Black sewing thread. . Stuffed. . Elastic. . Glue silicone. . Scissors. . Piece of jeans. . Marking pencil. . Pink tulle.
Elaboration process:
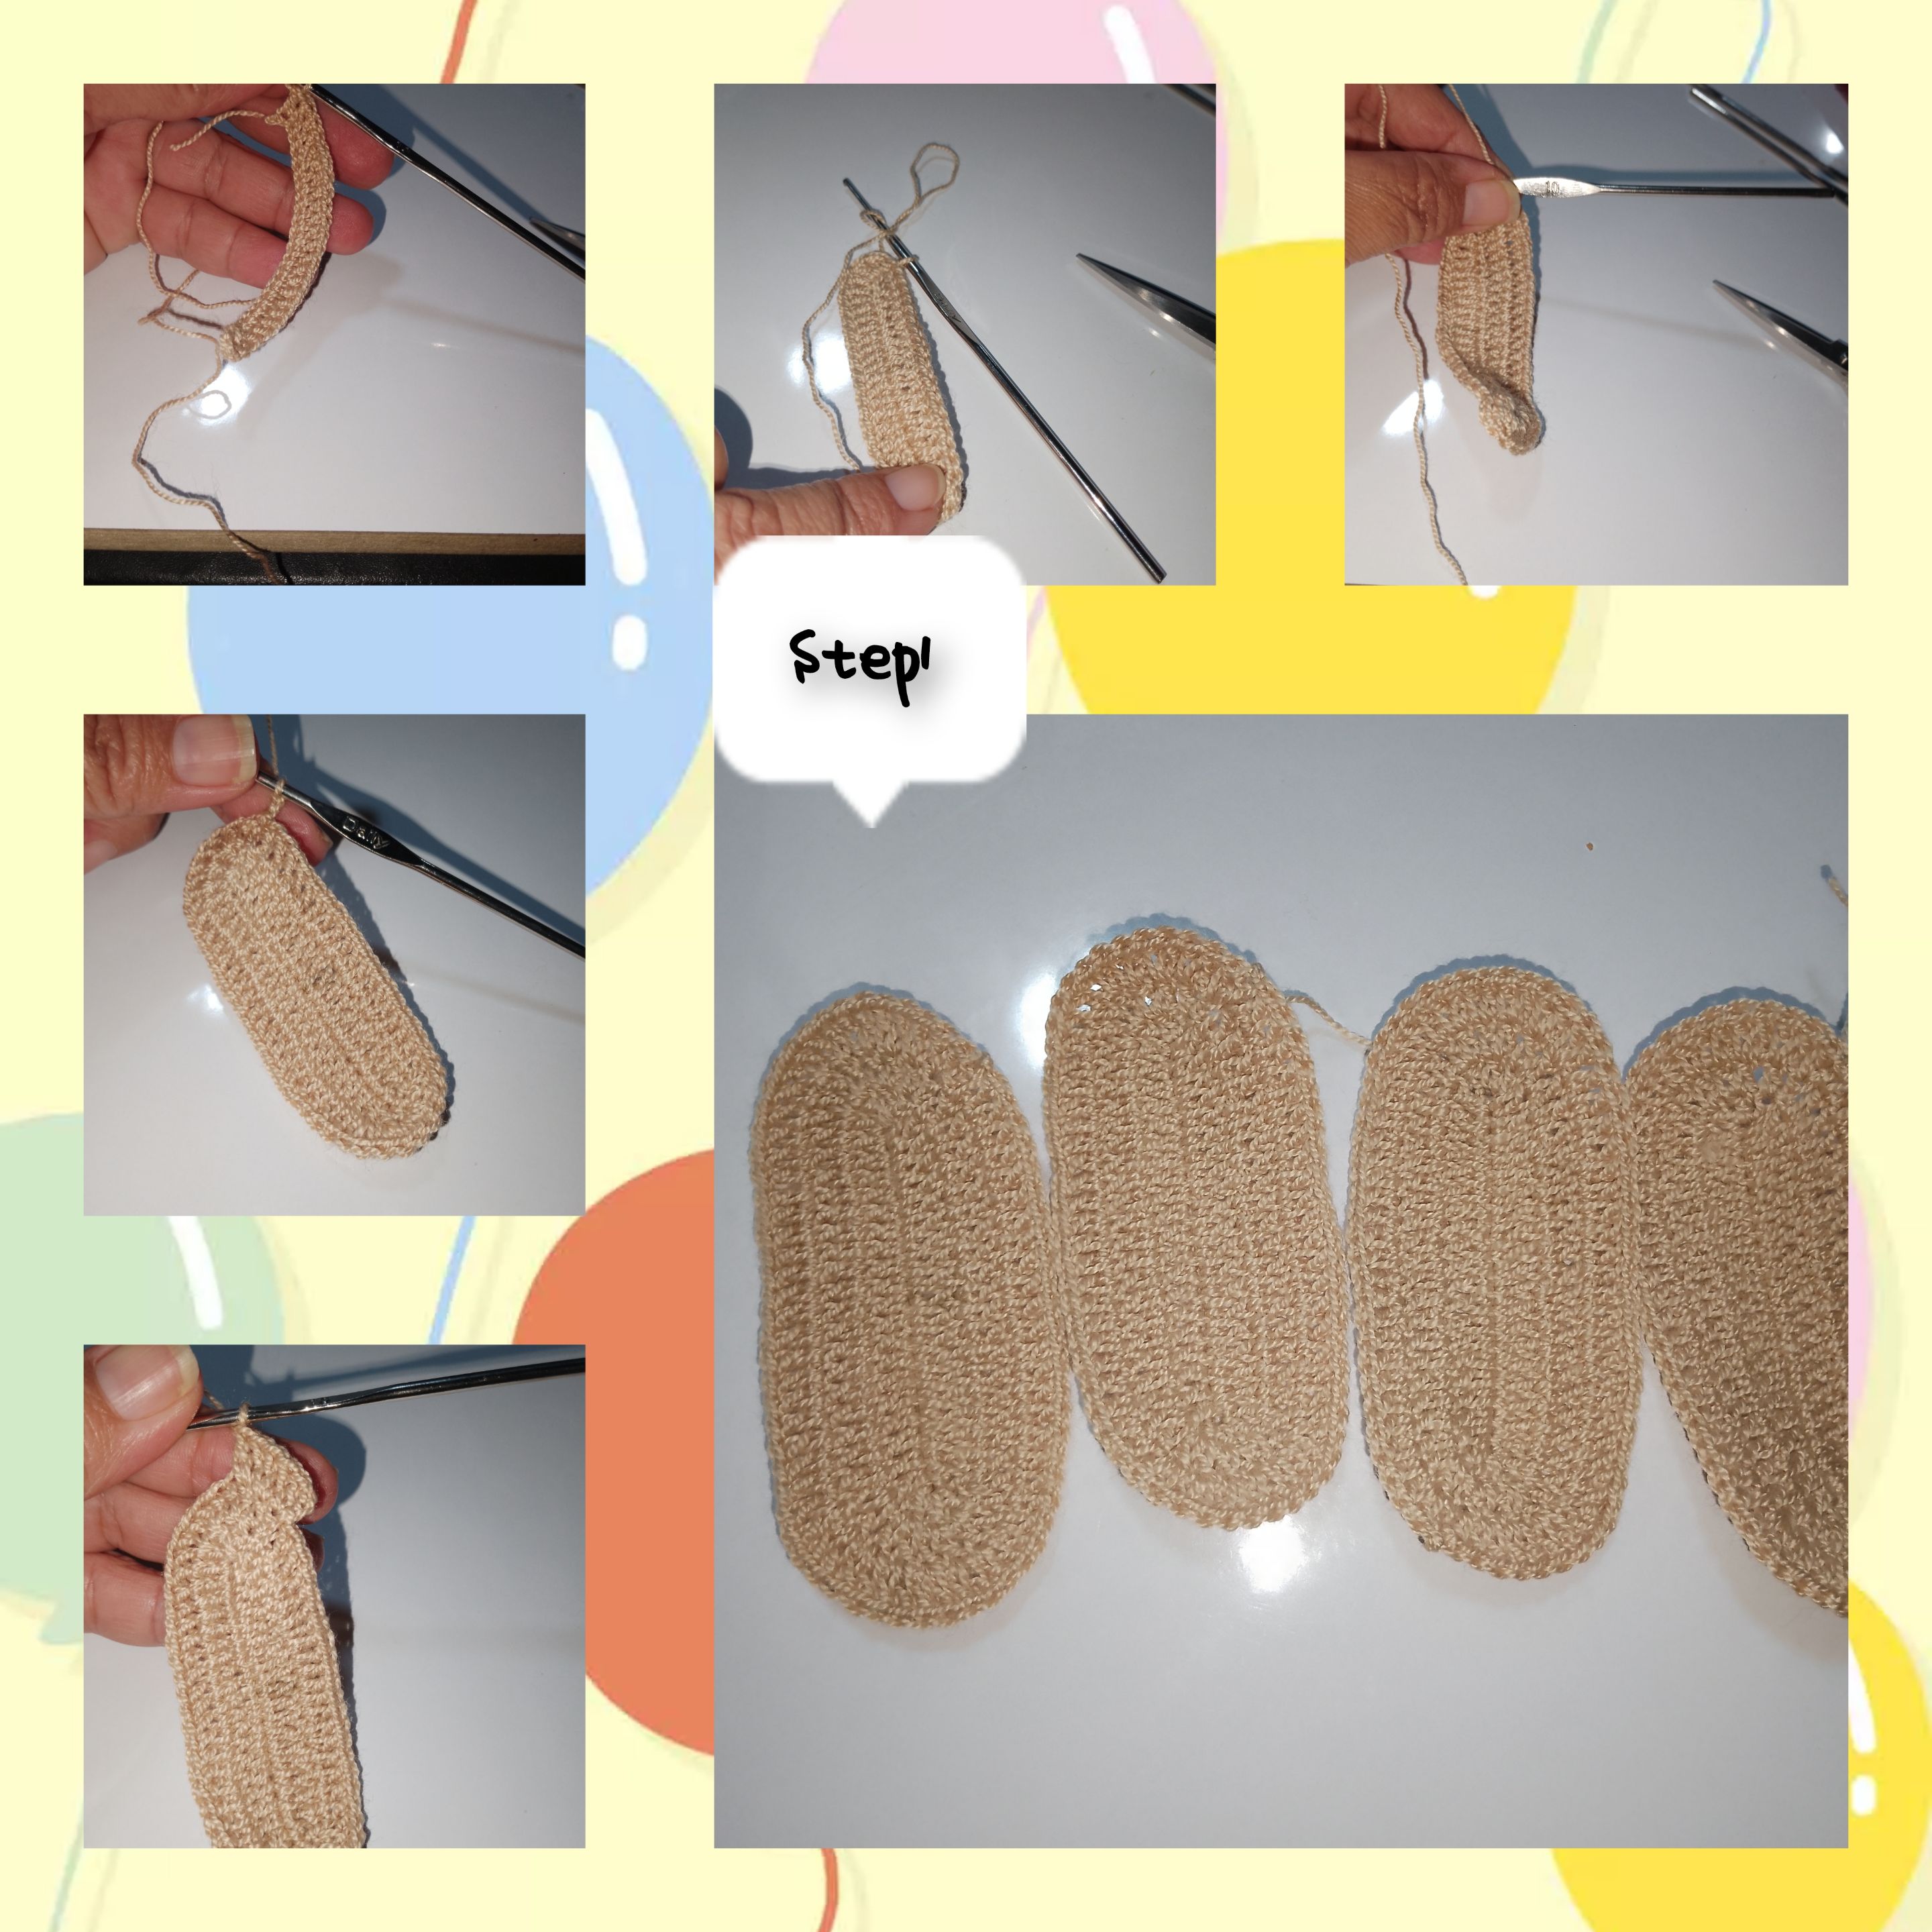
1.) with the thread, to knit brown color, I raise 22p.c), in each (pc) I will knit a (p.a), at each end that is to say in the pc) number one and in number 22, I will make an increase of three (dc), and I will close with slipped stitches, on the next round, I will knit a new (dc) in each dc, but in each increase point of the previous round, I will knit an increase, that is, in this round, there will be six points of increase and on the next round there will be twelve increase points. Once this is done, the shoe insole is woven. I repeat the process three more times, for a total of four insoles.
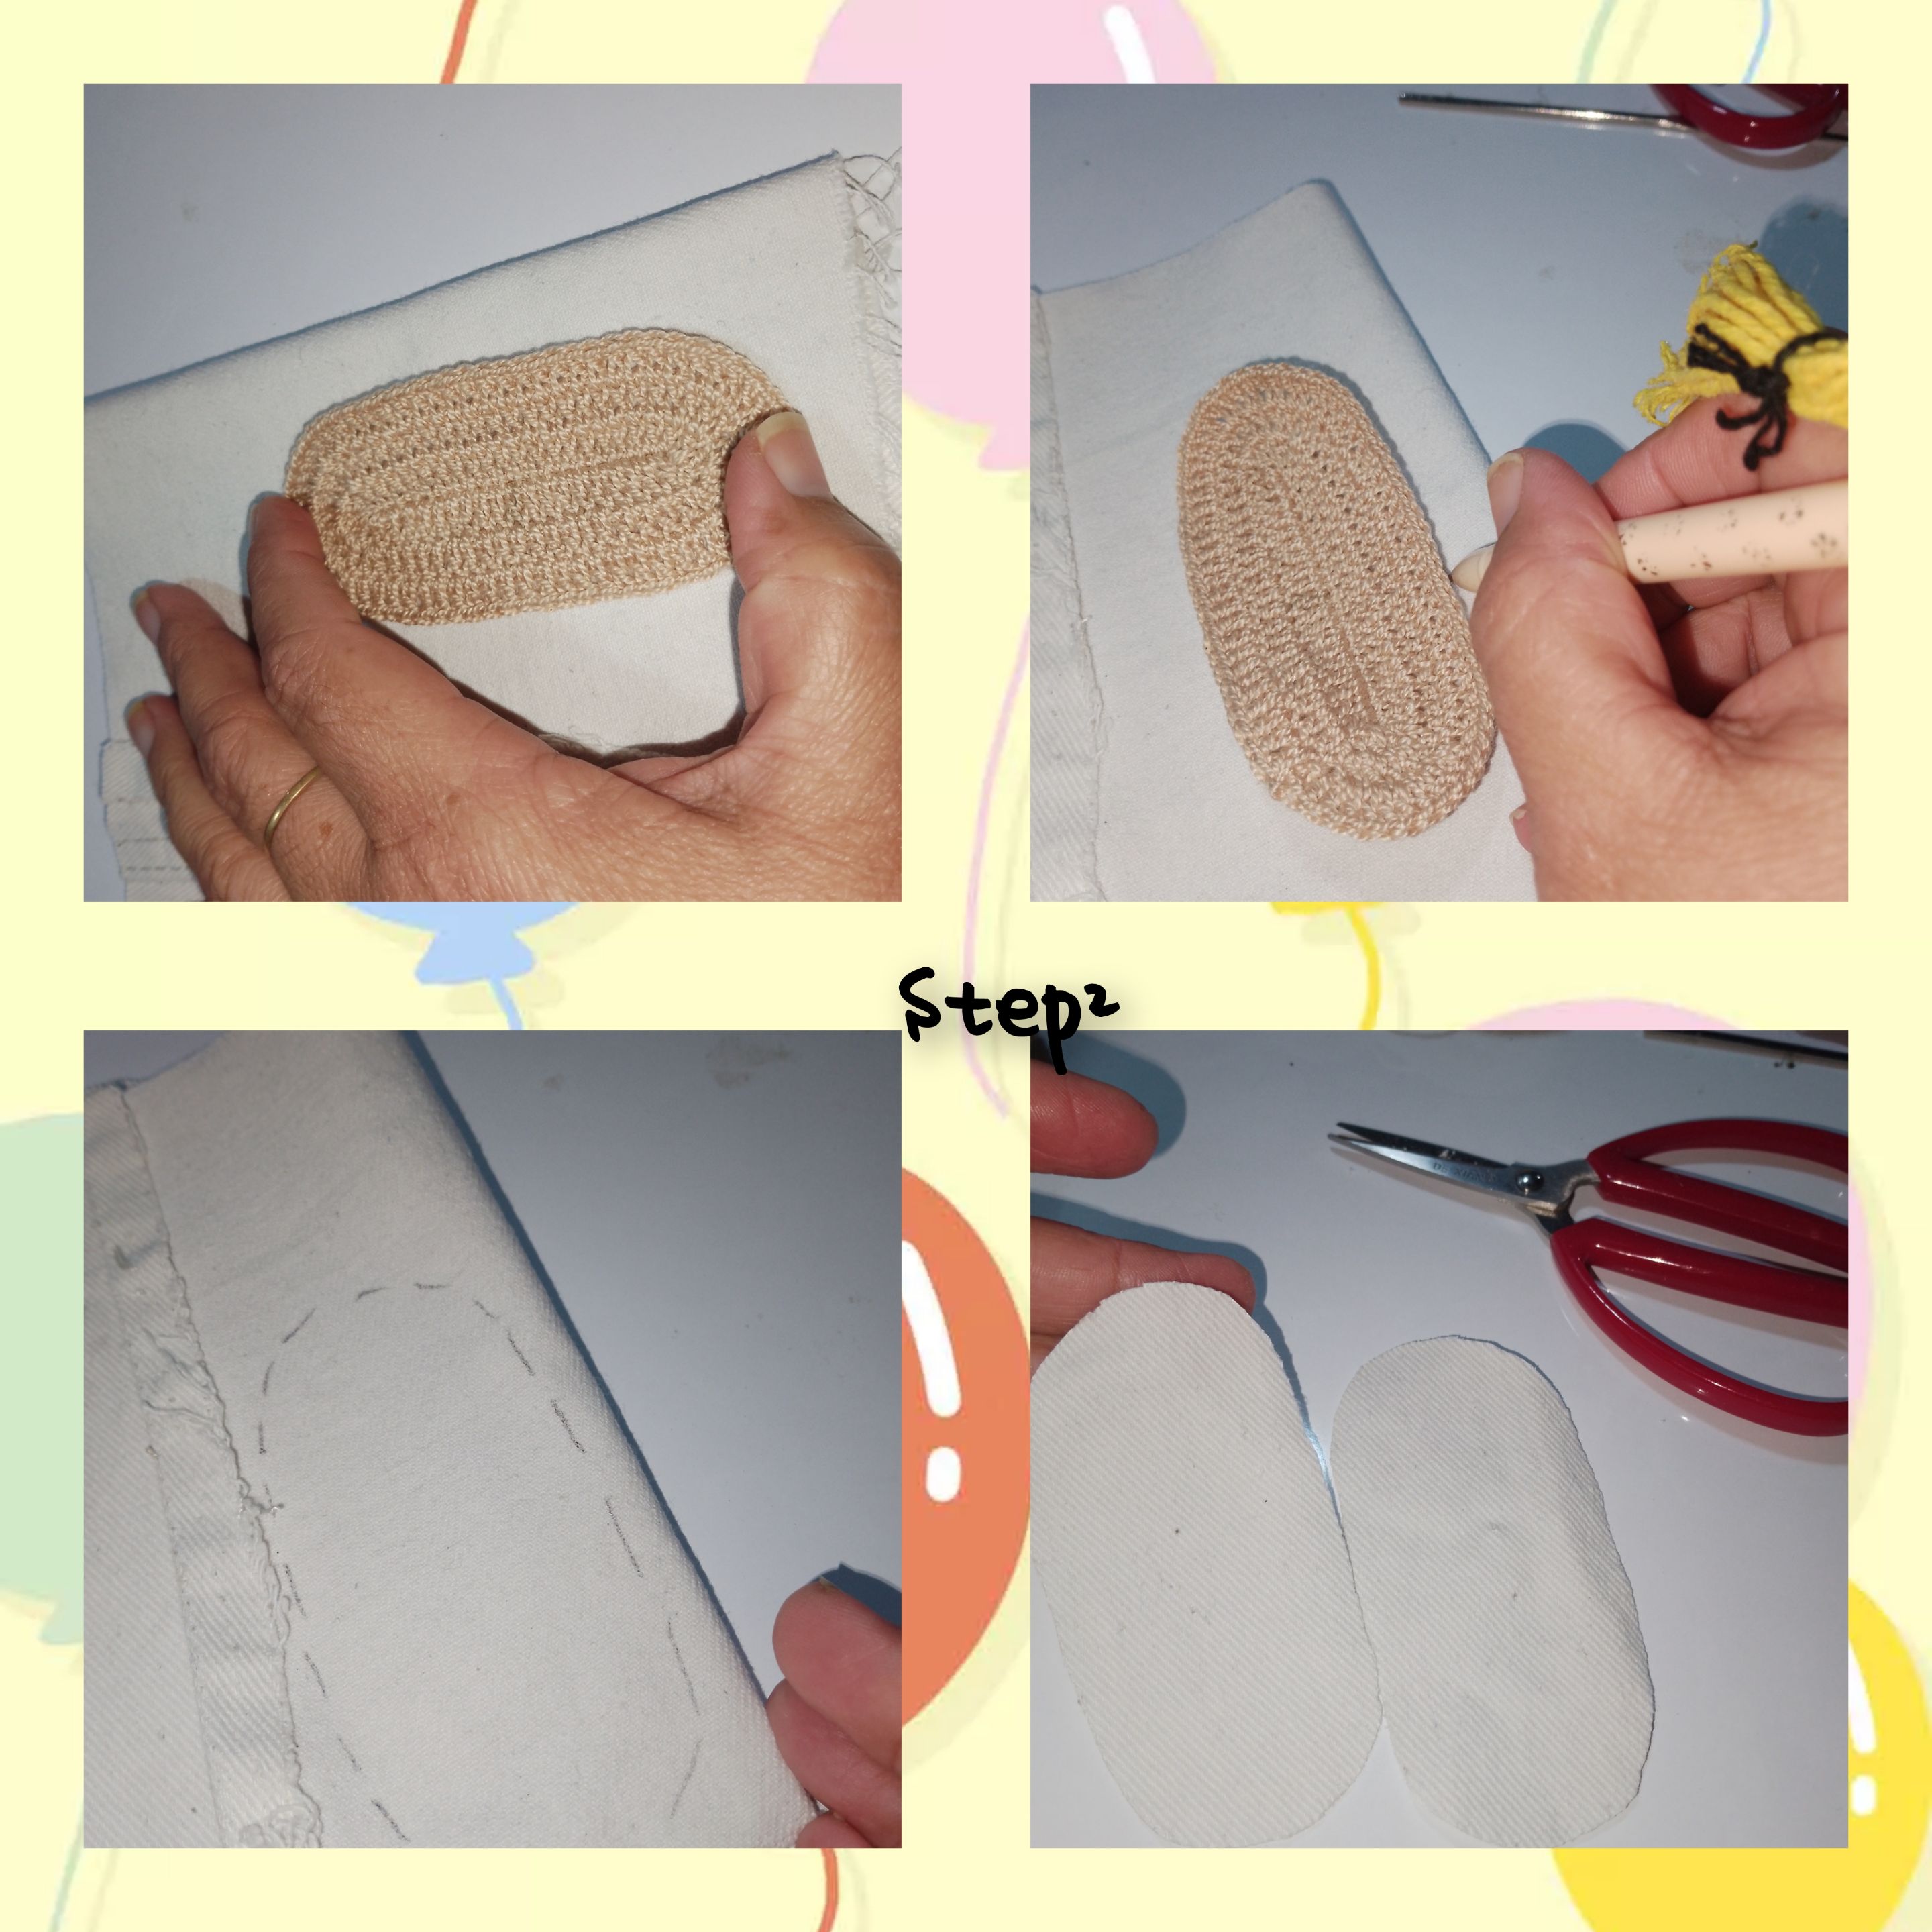
2.) On the piece of recycled jeans tile, I will mark the templates, and cut it out with the scissors, I will need two templates, so I mark it double, folding the fabric, before marking.
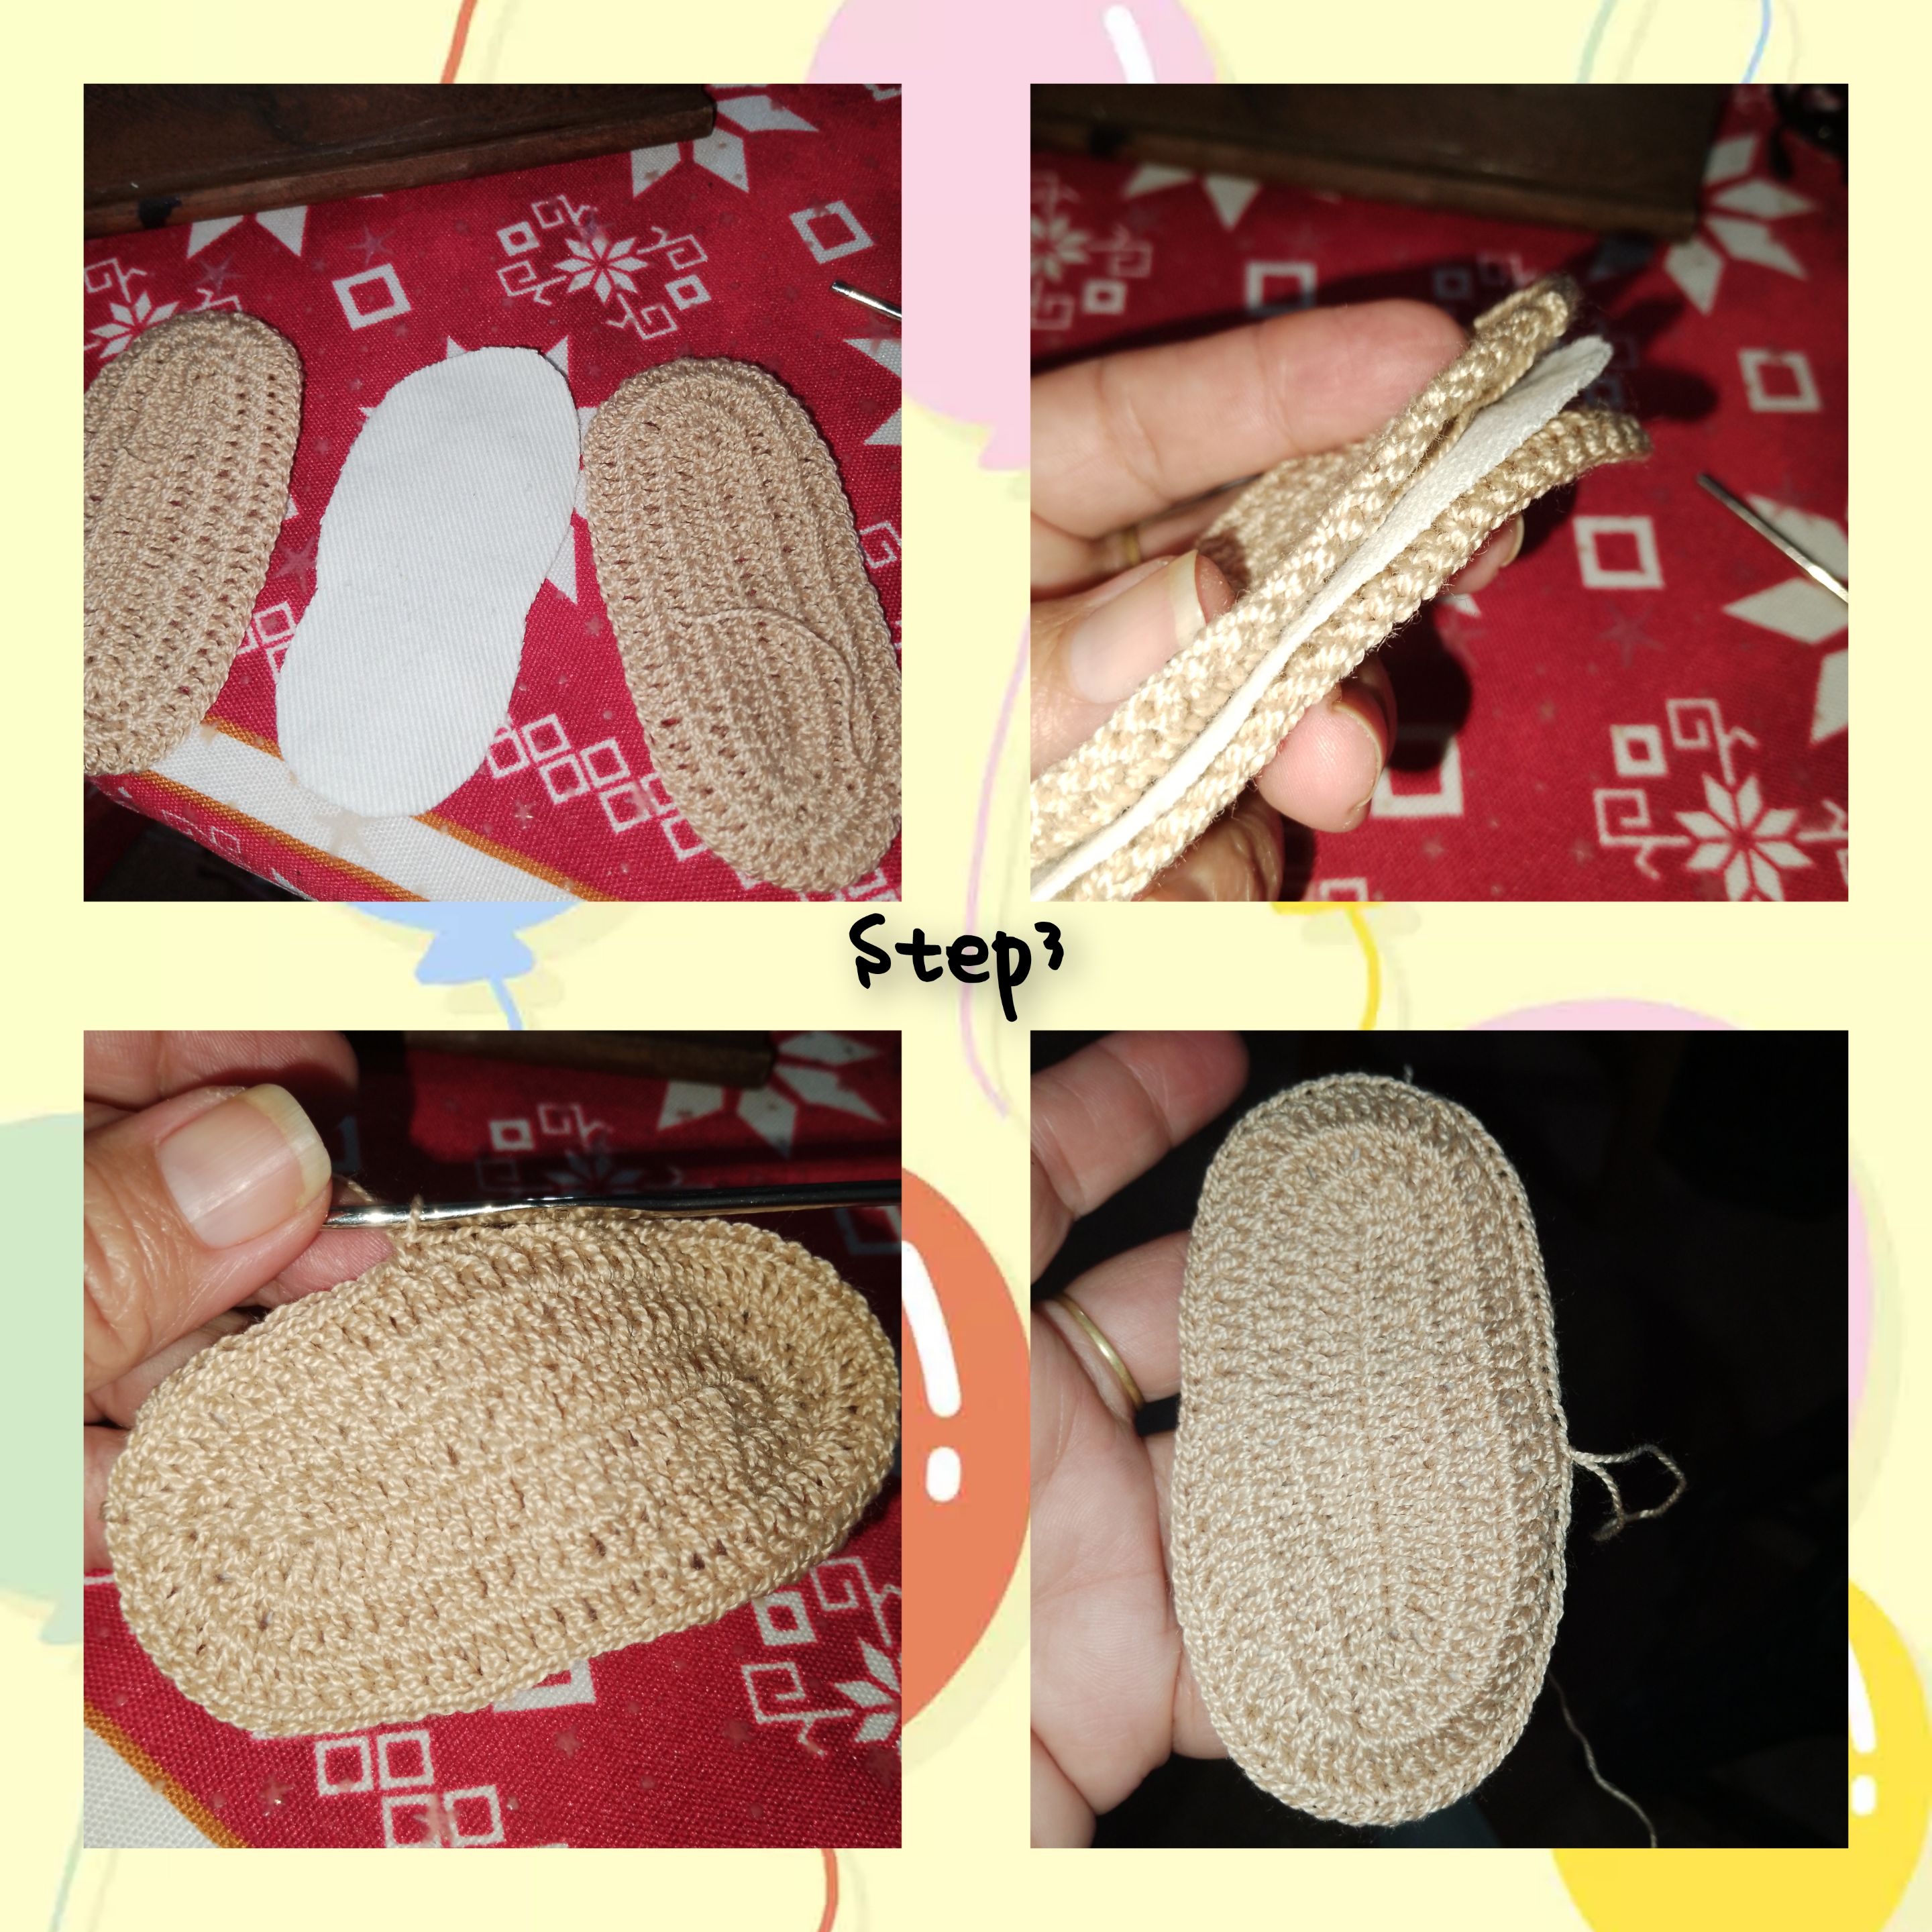
3.) For each shoe, I will need two crocheted insoles and one made of jeans, the latter, I will place it in the middle of two knitted fabrics found face to face on the wrong side. After squaring, appropriately, I will knit (mp) all around, until they are completely united.
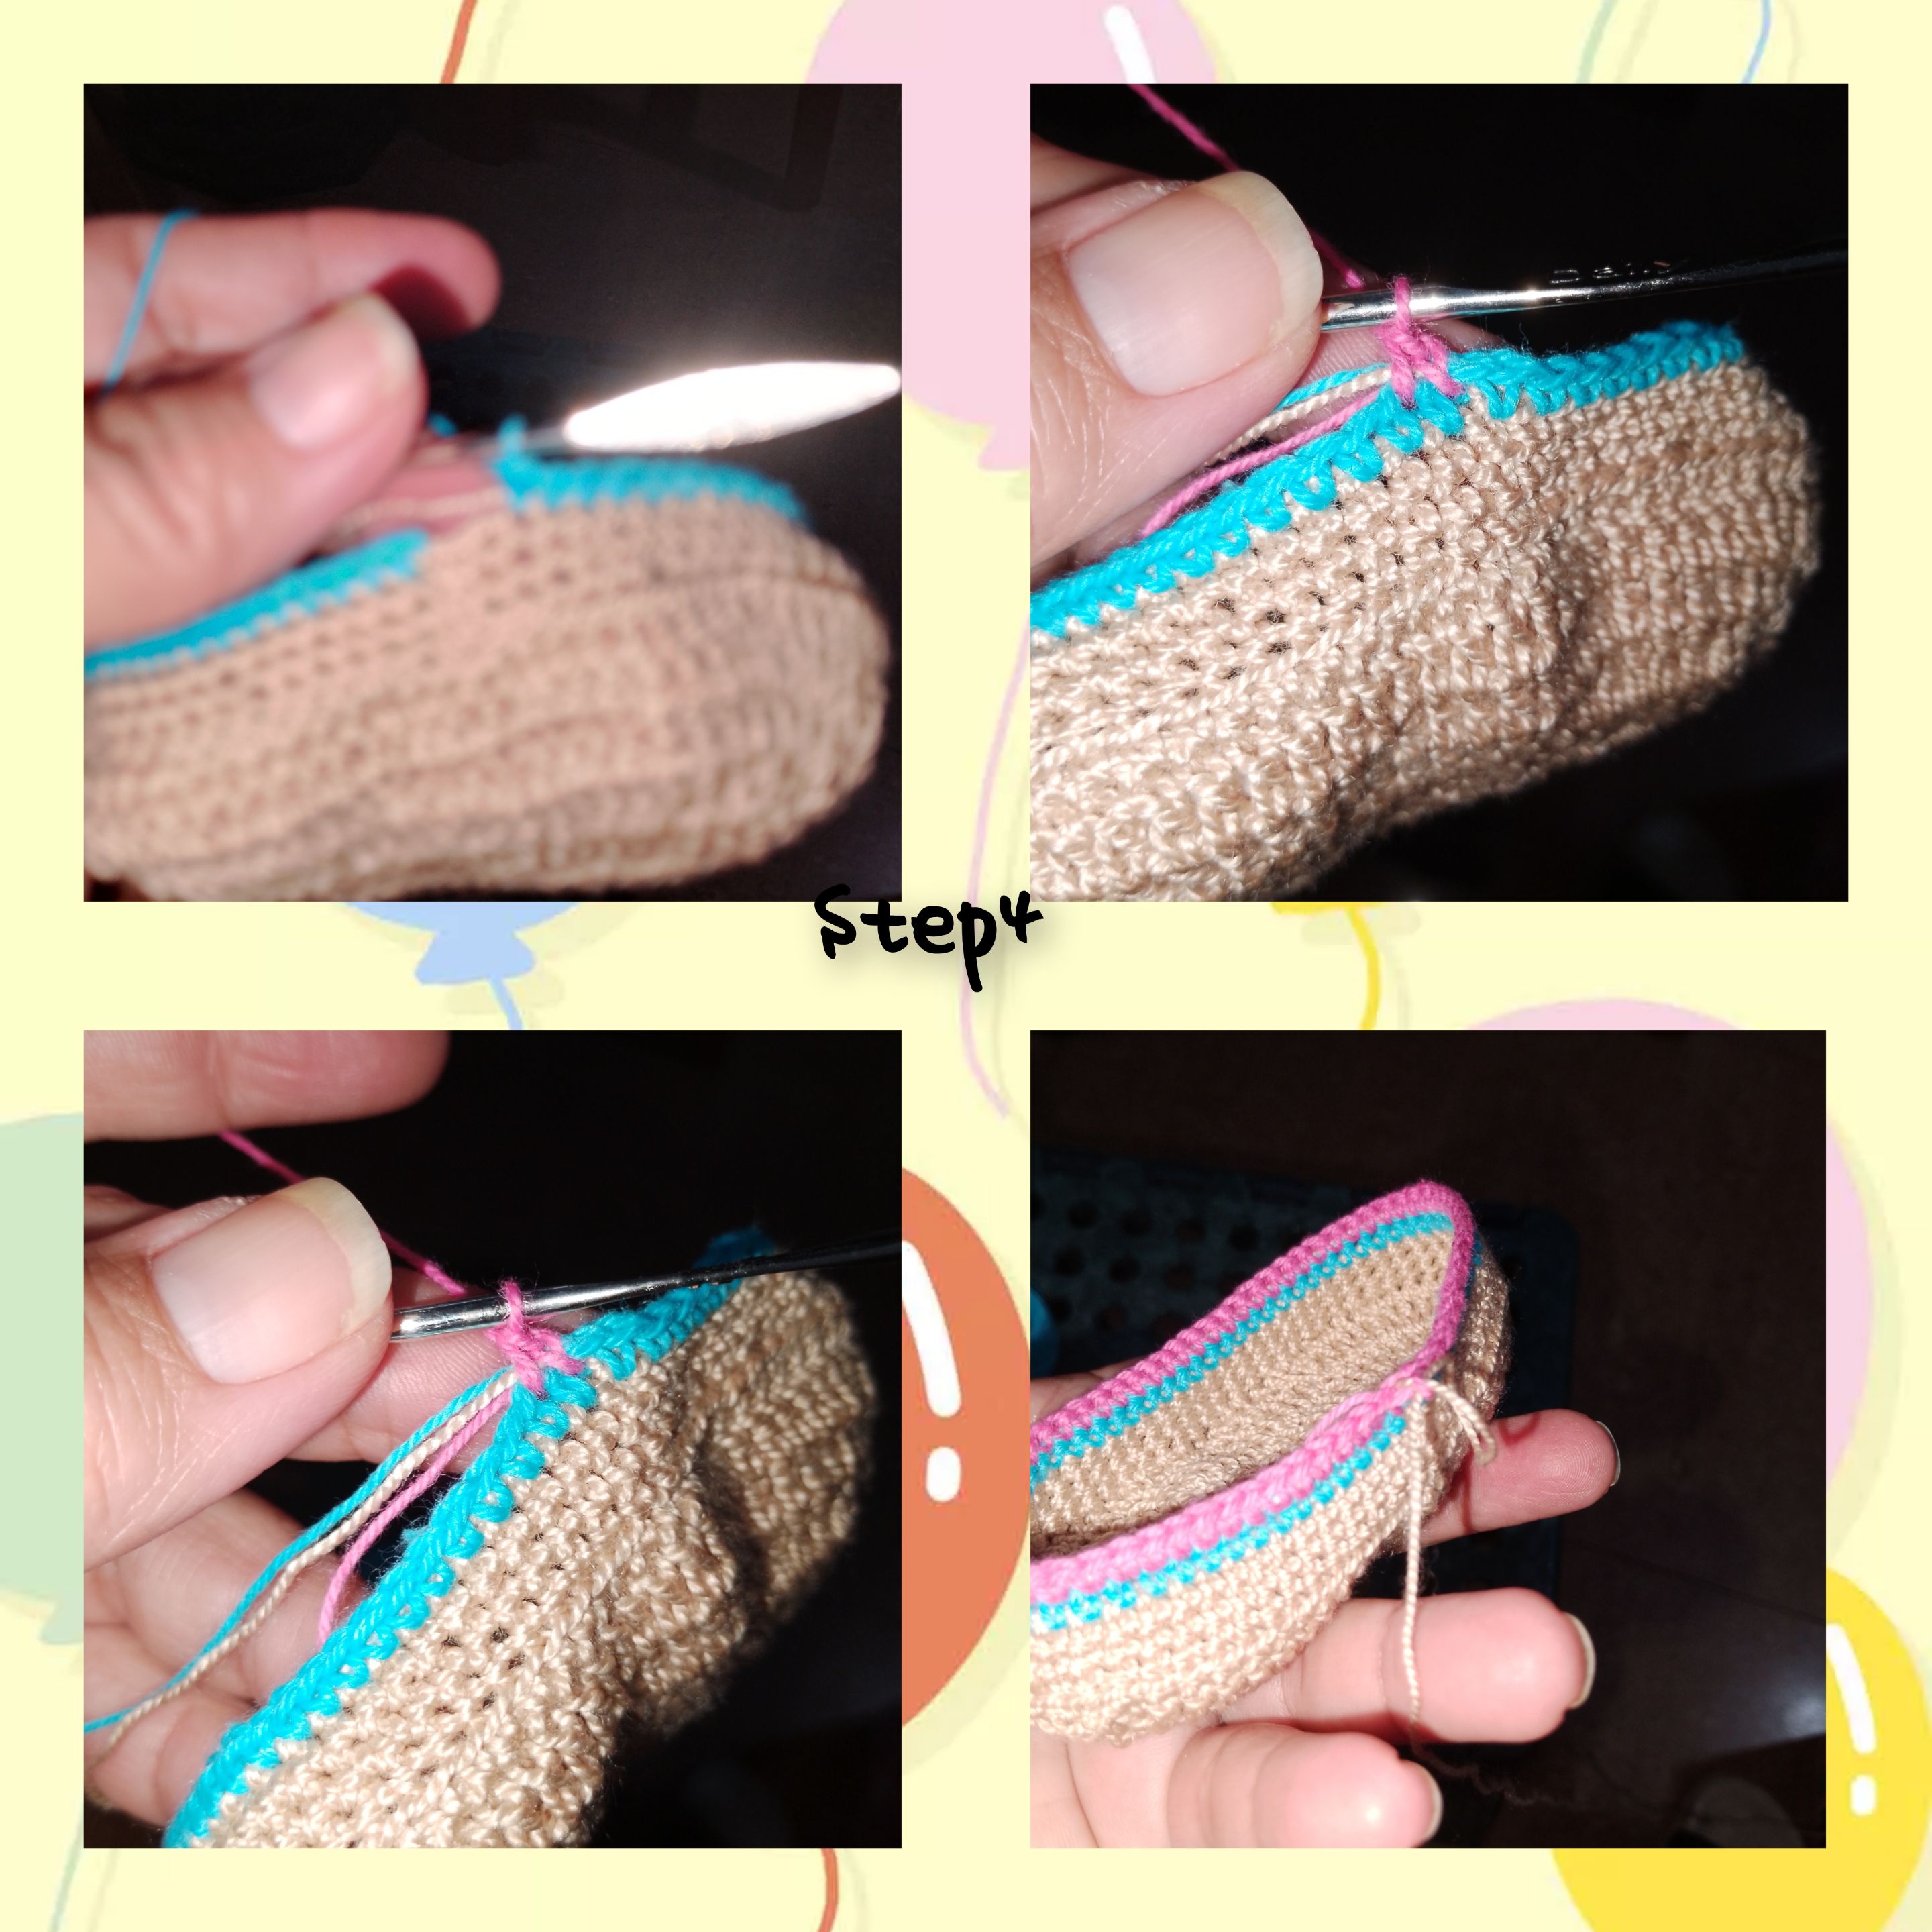
4.) Having the template ready, I fold it in half, tie the knitting thread, and knit four consecutive rounds of (m.p), giving height to the small zuela. The next round, I will knit with blue thread and the one that continues, with fuchsia, the colored threads, all three, cutting and rolling the remainder, inside the stitches of the following rounds, the brown one, I will not cut, I will roll it inside the points, on the inside
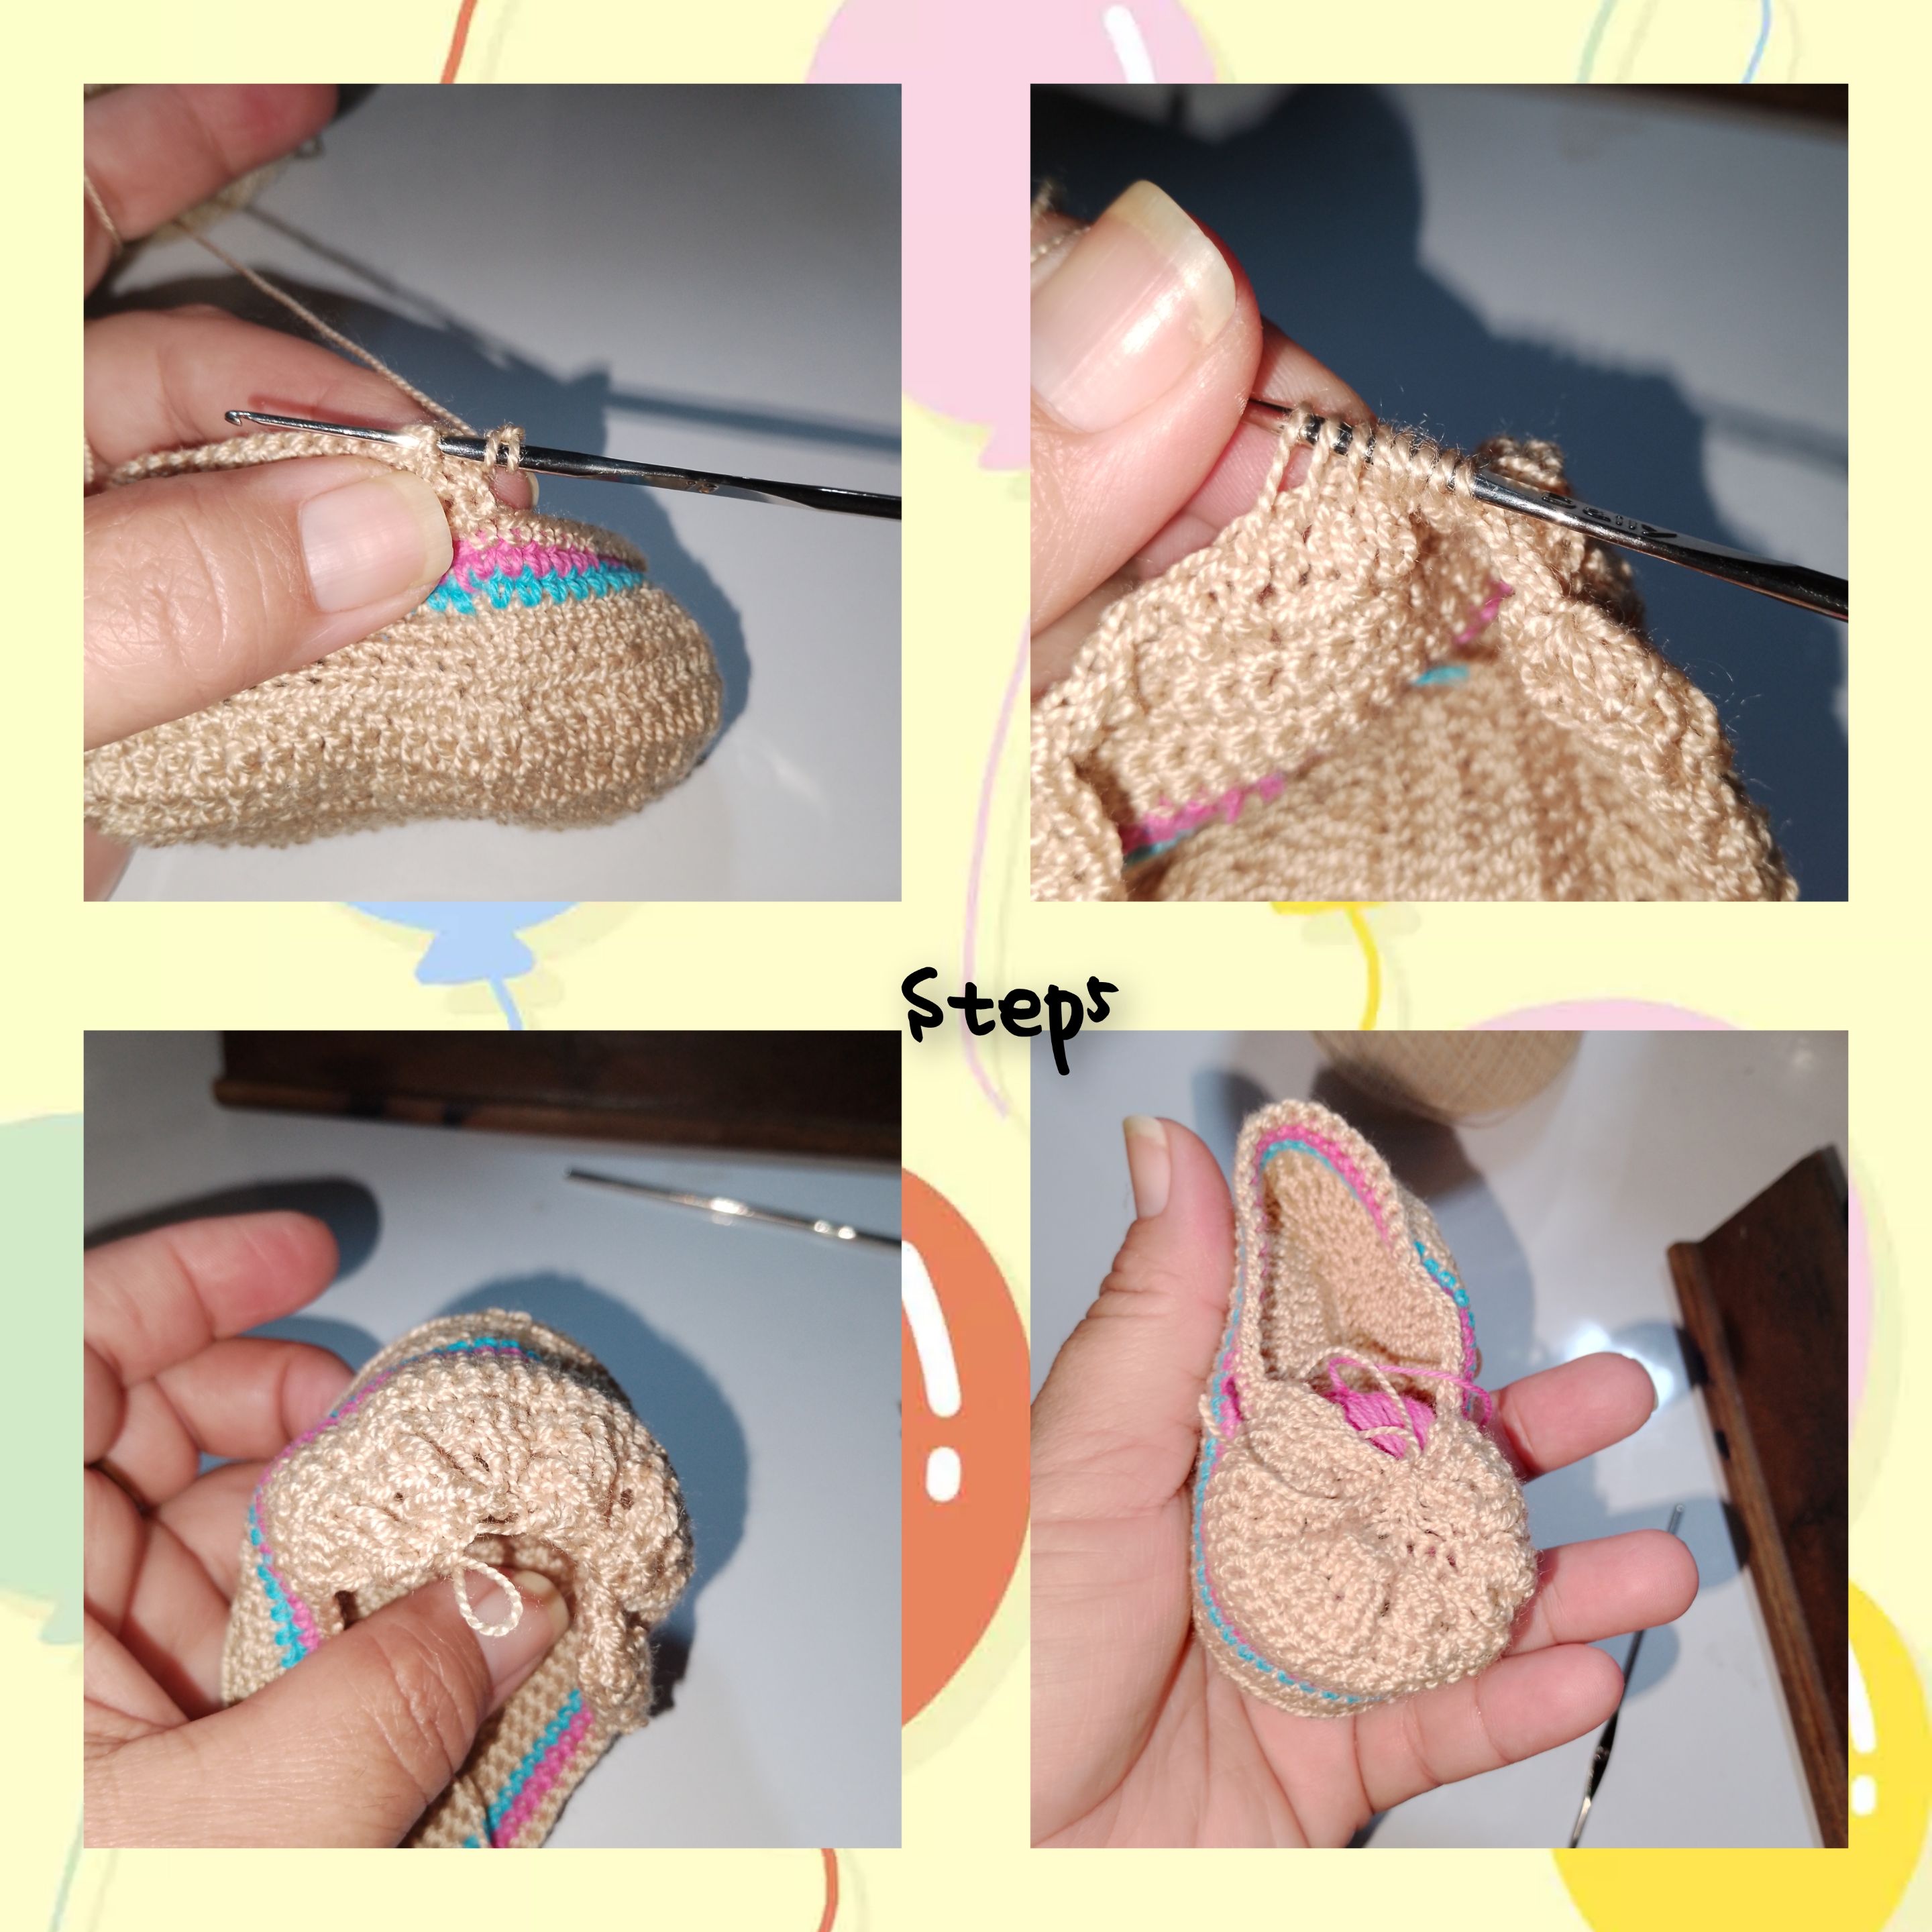
5.) I make a stop, to knit the front part of the Zapaticos, so the next thing will be, just knit in the front part, I start this, knitting two stitches, gradients on the inside and two on the outside, done the route, I turn and repeat, let's not forget, that now it will be, where I knit the stitches on the outside, I will knit them, on the inside. Having done the above, I will then knit seven slipped stitches, closed together, in this way I make the route, and I close the front part of it.Zapaticos.
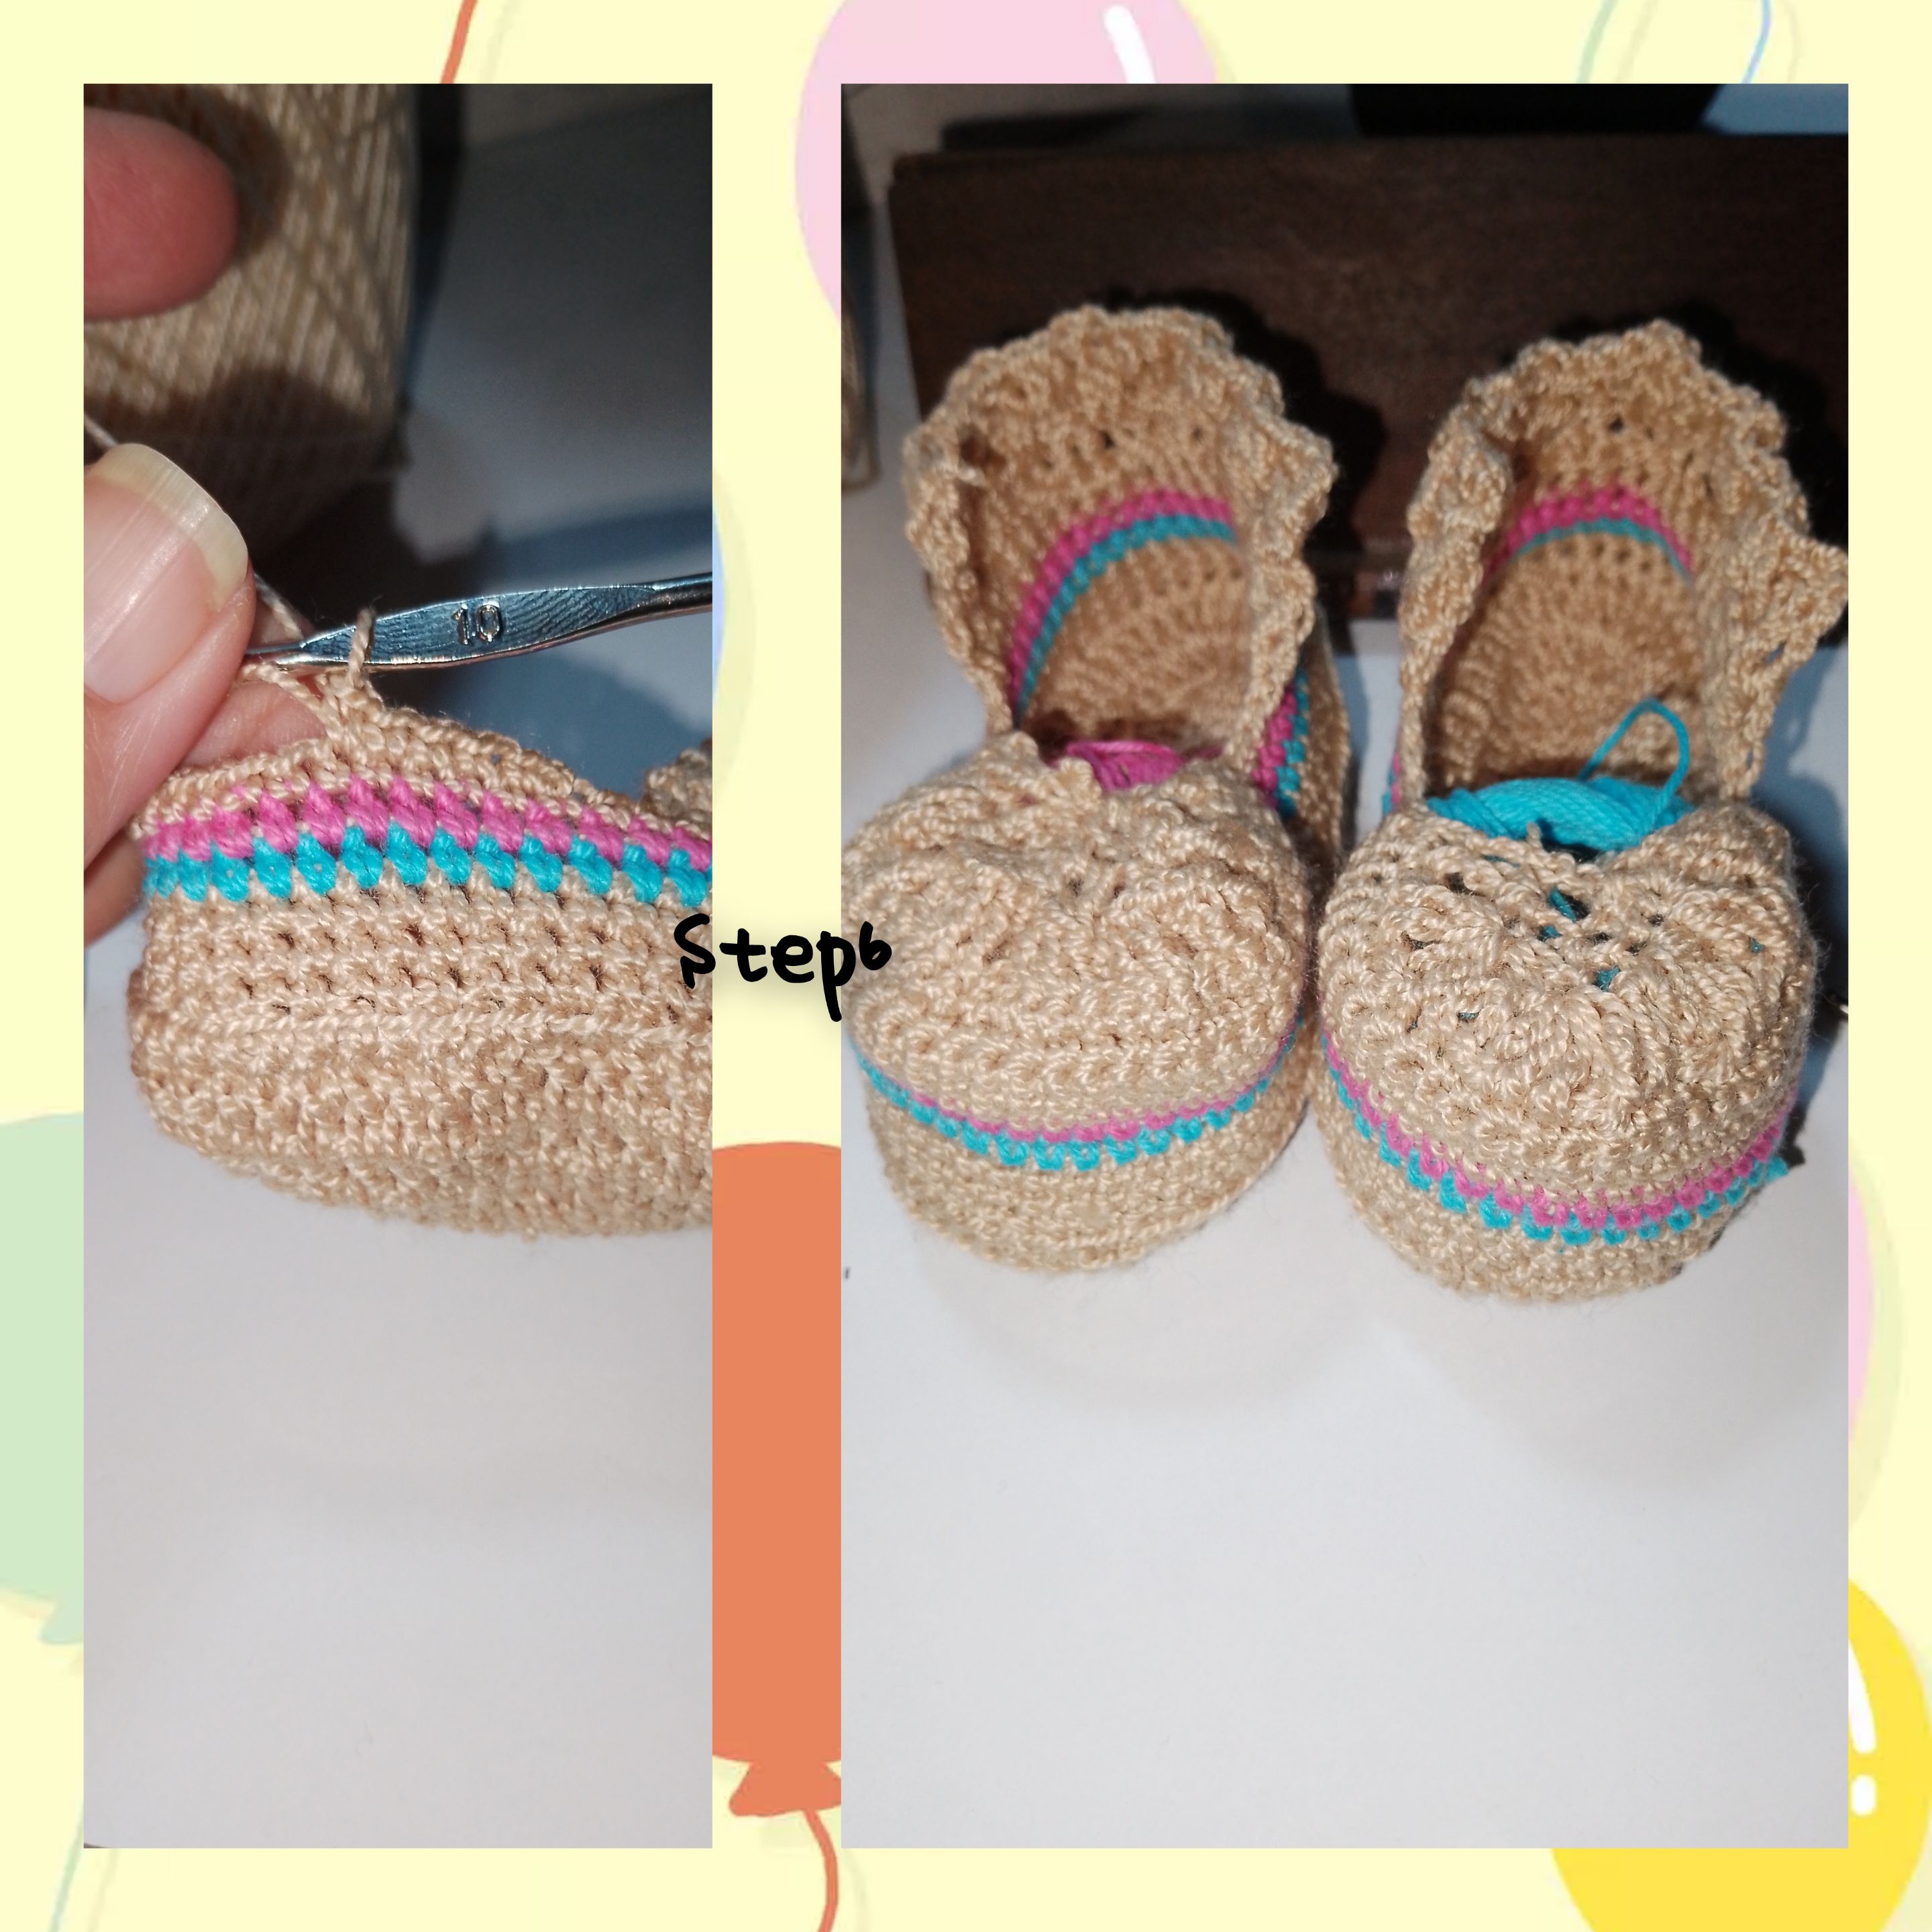
6.) For the back part of the Zapaticos, I will only knit three rows, with stitches in a group of two, in a gradient way.
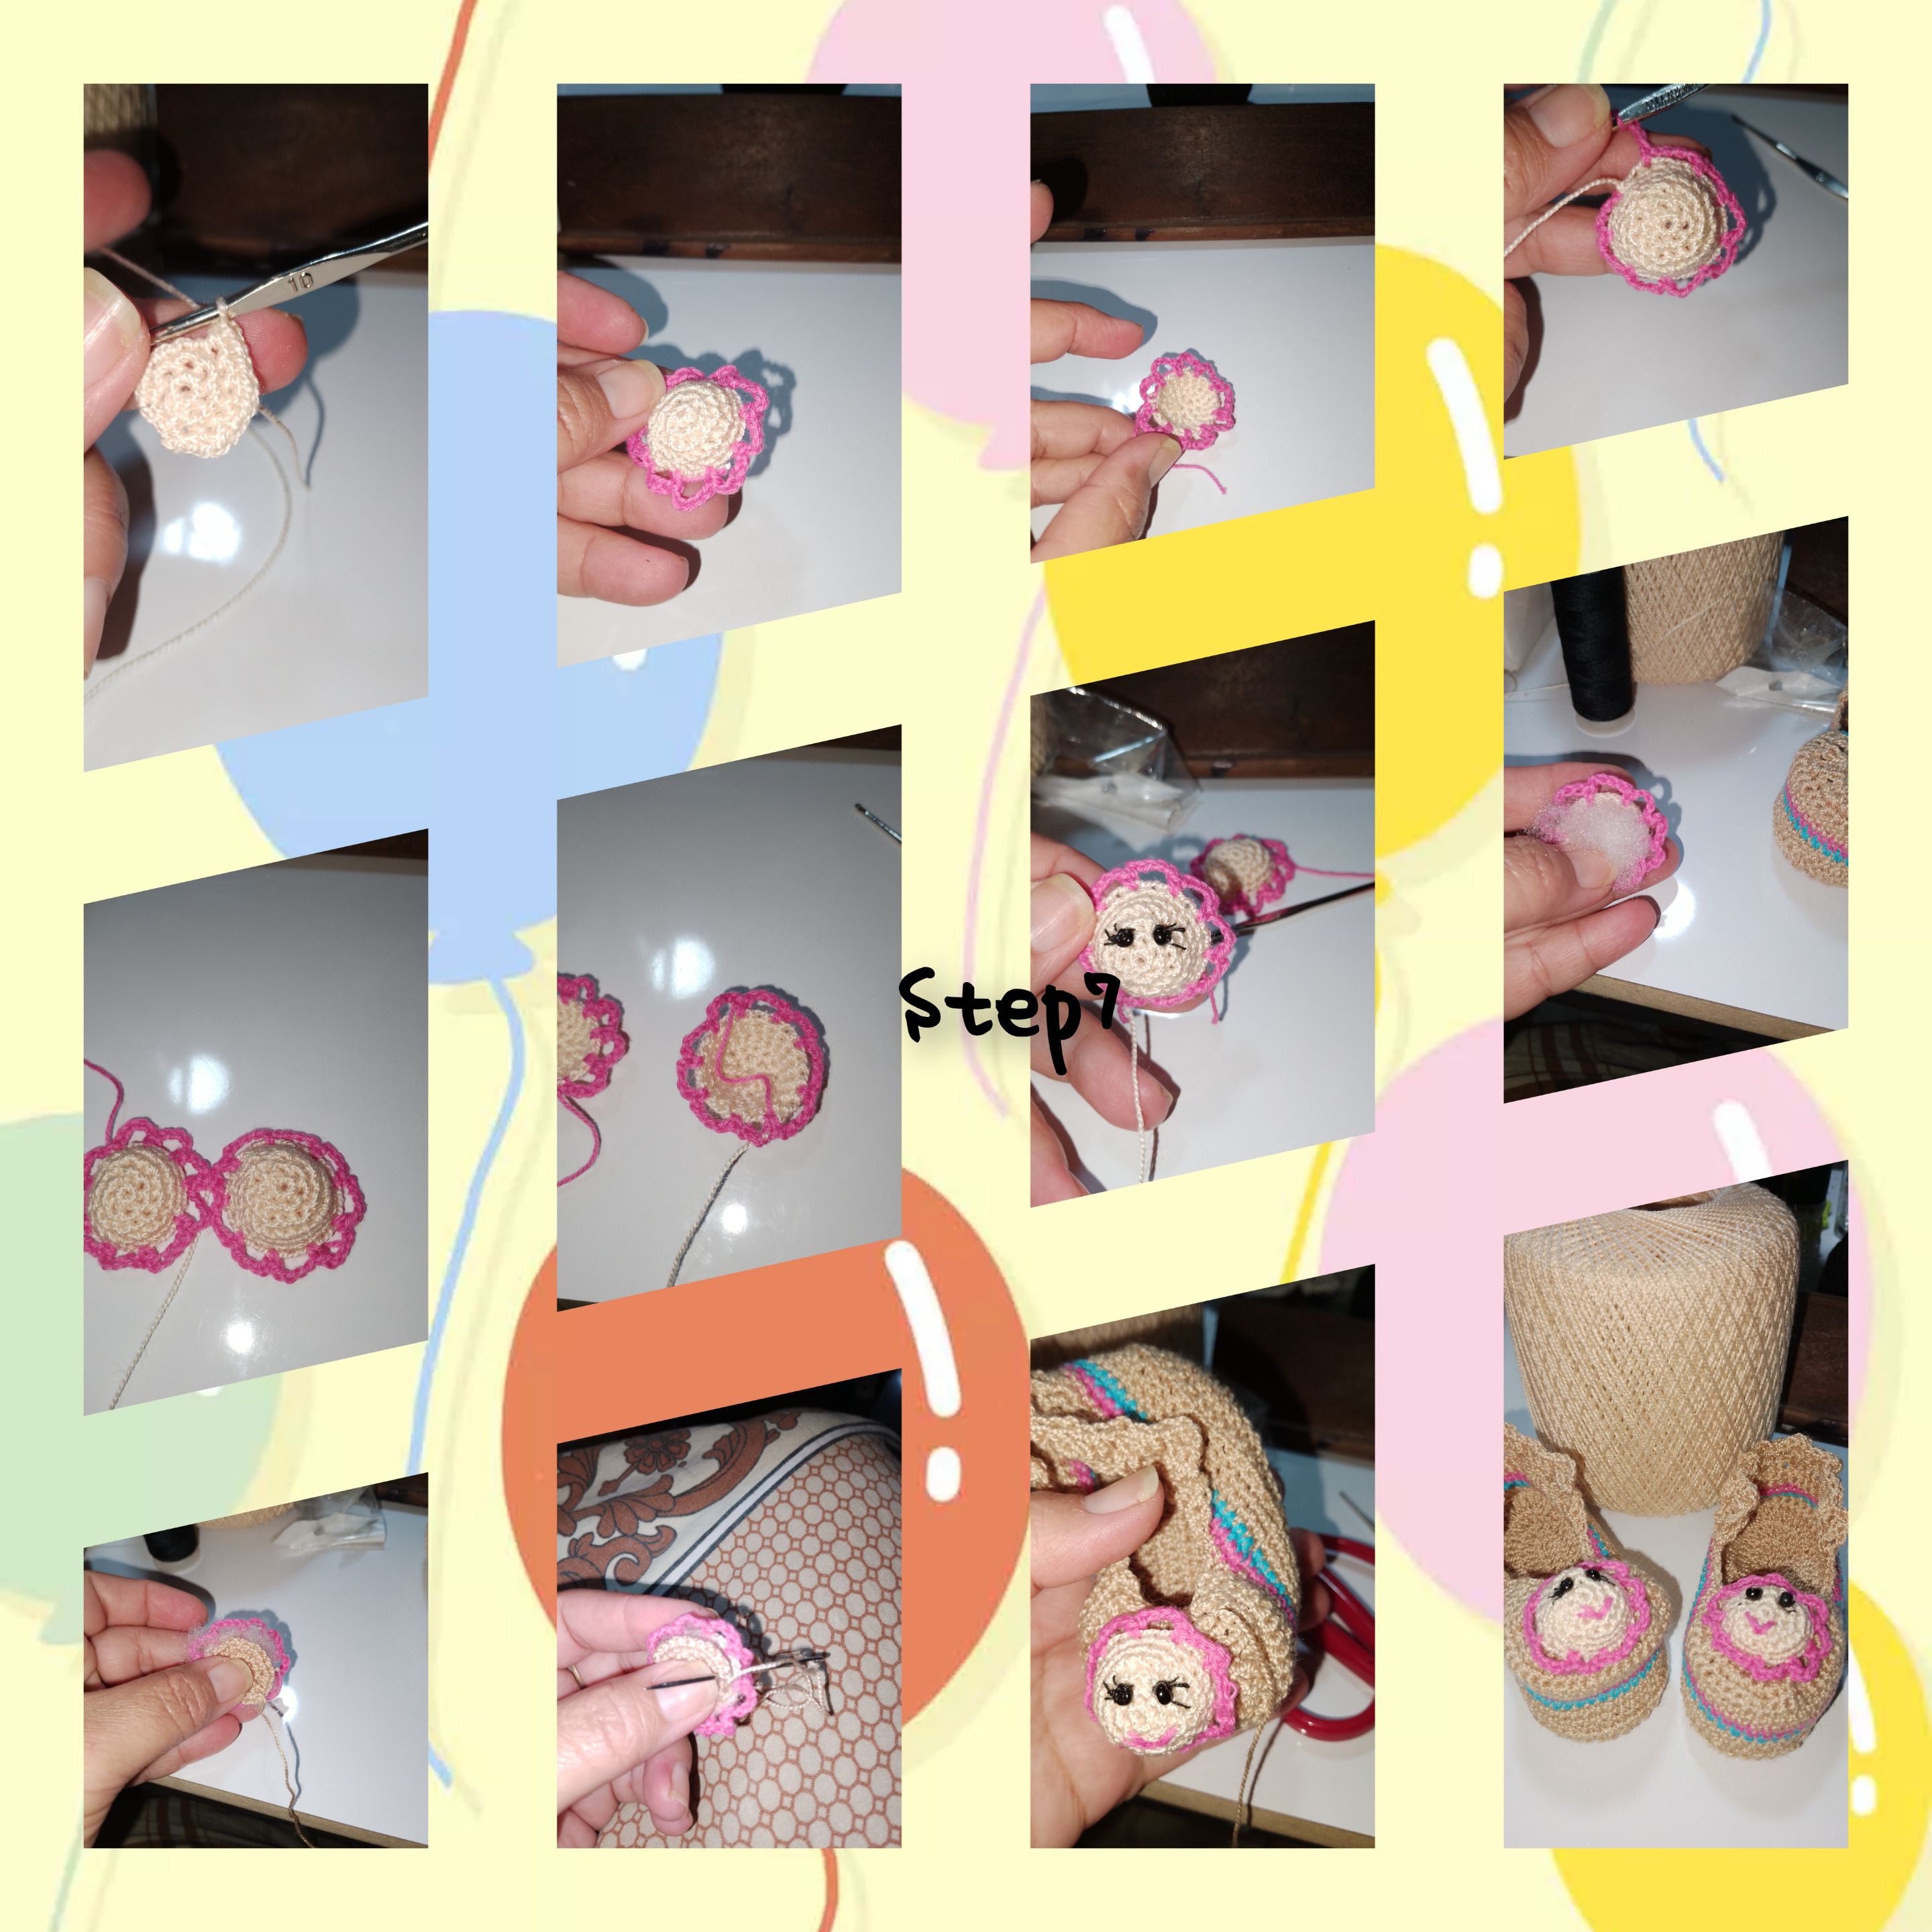
7.) with the beige thread, I make a magic ring and inside it, I knit six (sc), I close the ring and now I will knit, six increases, the third pass, I will knit 1 sc +1umen), reaching 16 (sc). ) I knit four rounds of 16 sc). I also knit a small cap, starting with a magic ring and six increases. With the fuchsia-colored thread, I pick up five sc), leave two sc) and knit a (sp), thus continuing the journey, shaping a delicate little flower. Inside the small initial circle, I place a little bit of filling and glue it with a needle and thread. Once this is done, I glue the beads to simulate the eyes of the flower, and I embroider eye-catching eyelashes, and to conclude it, I gold it with the thread. fuchsia a pleasant smile. Once all this is done, all that remains is to decorate by sewing, on the front of the Zapatico.
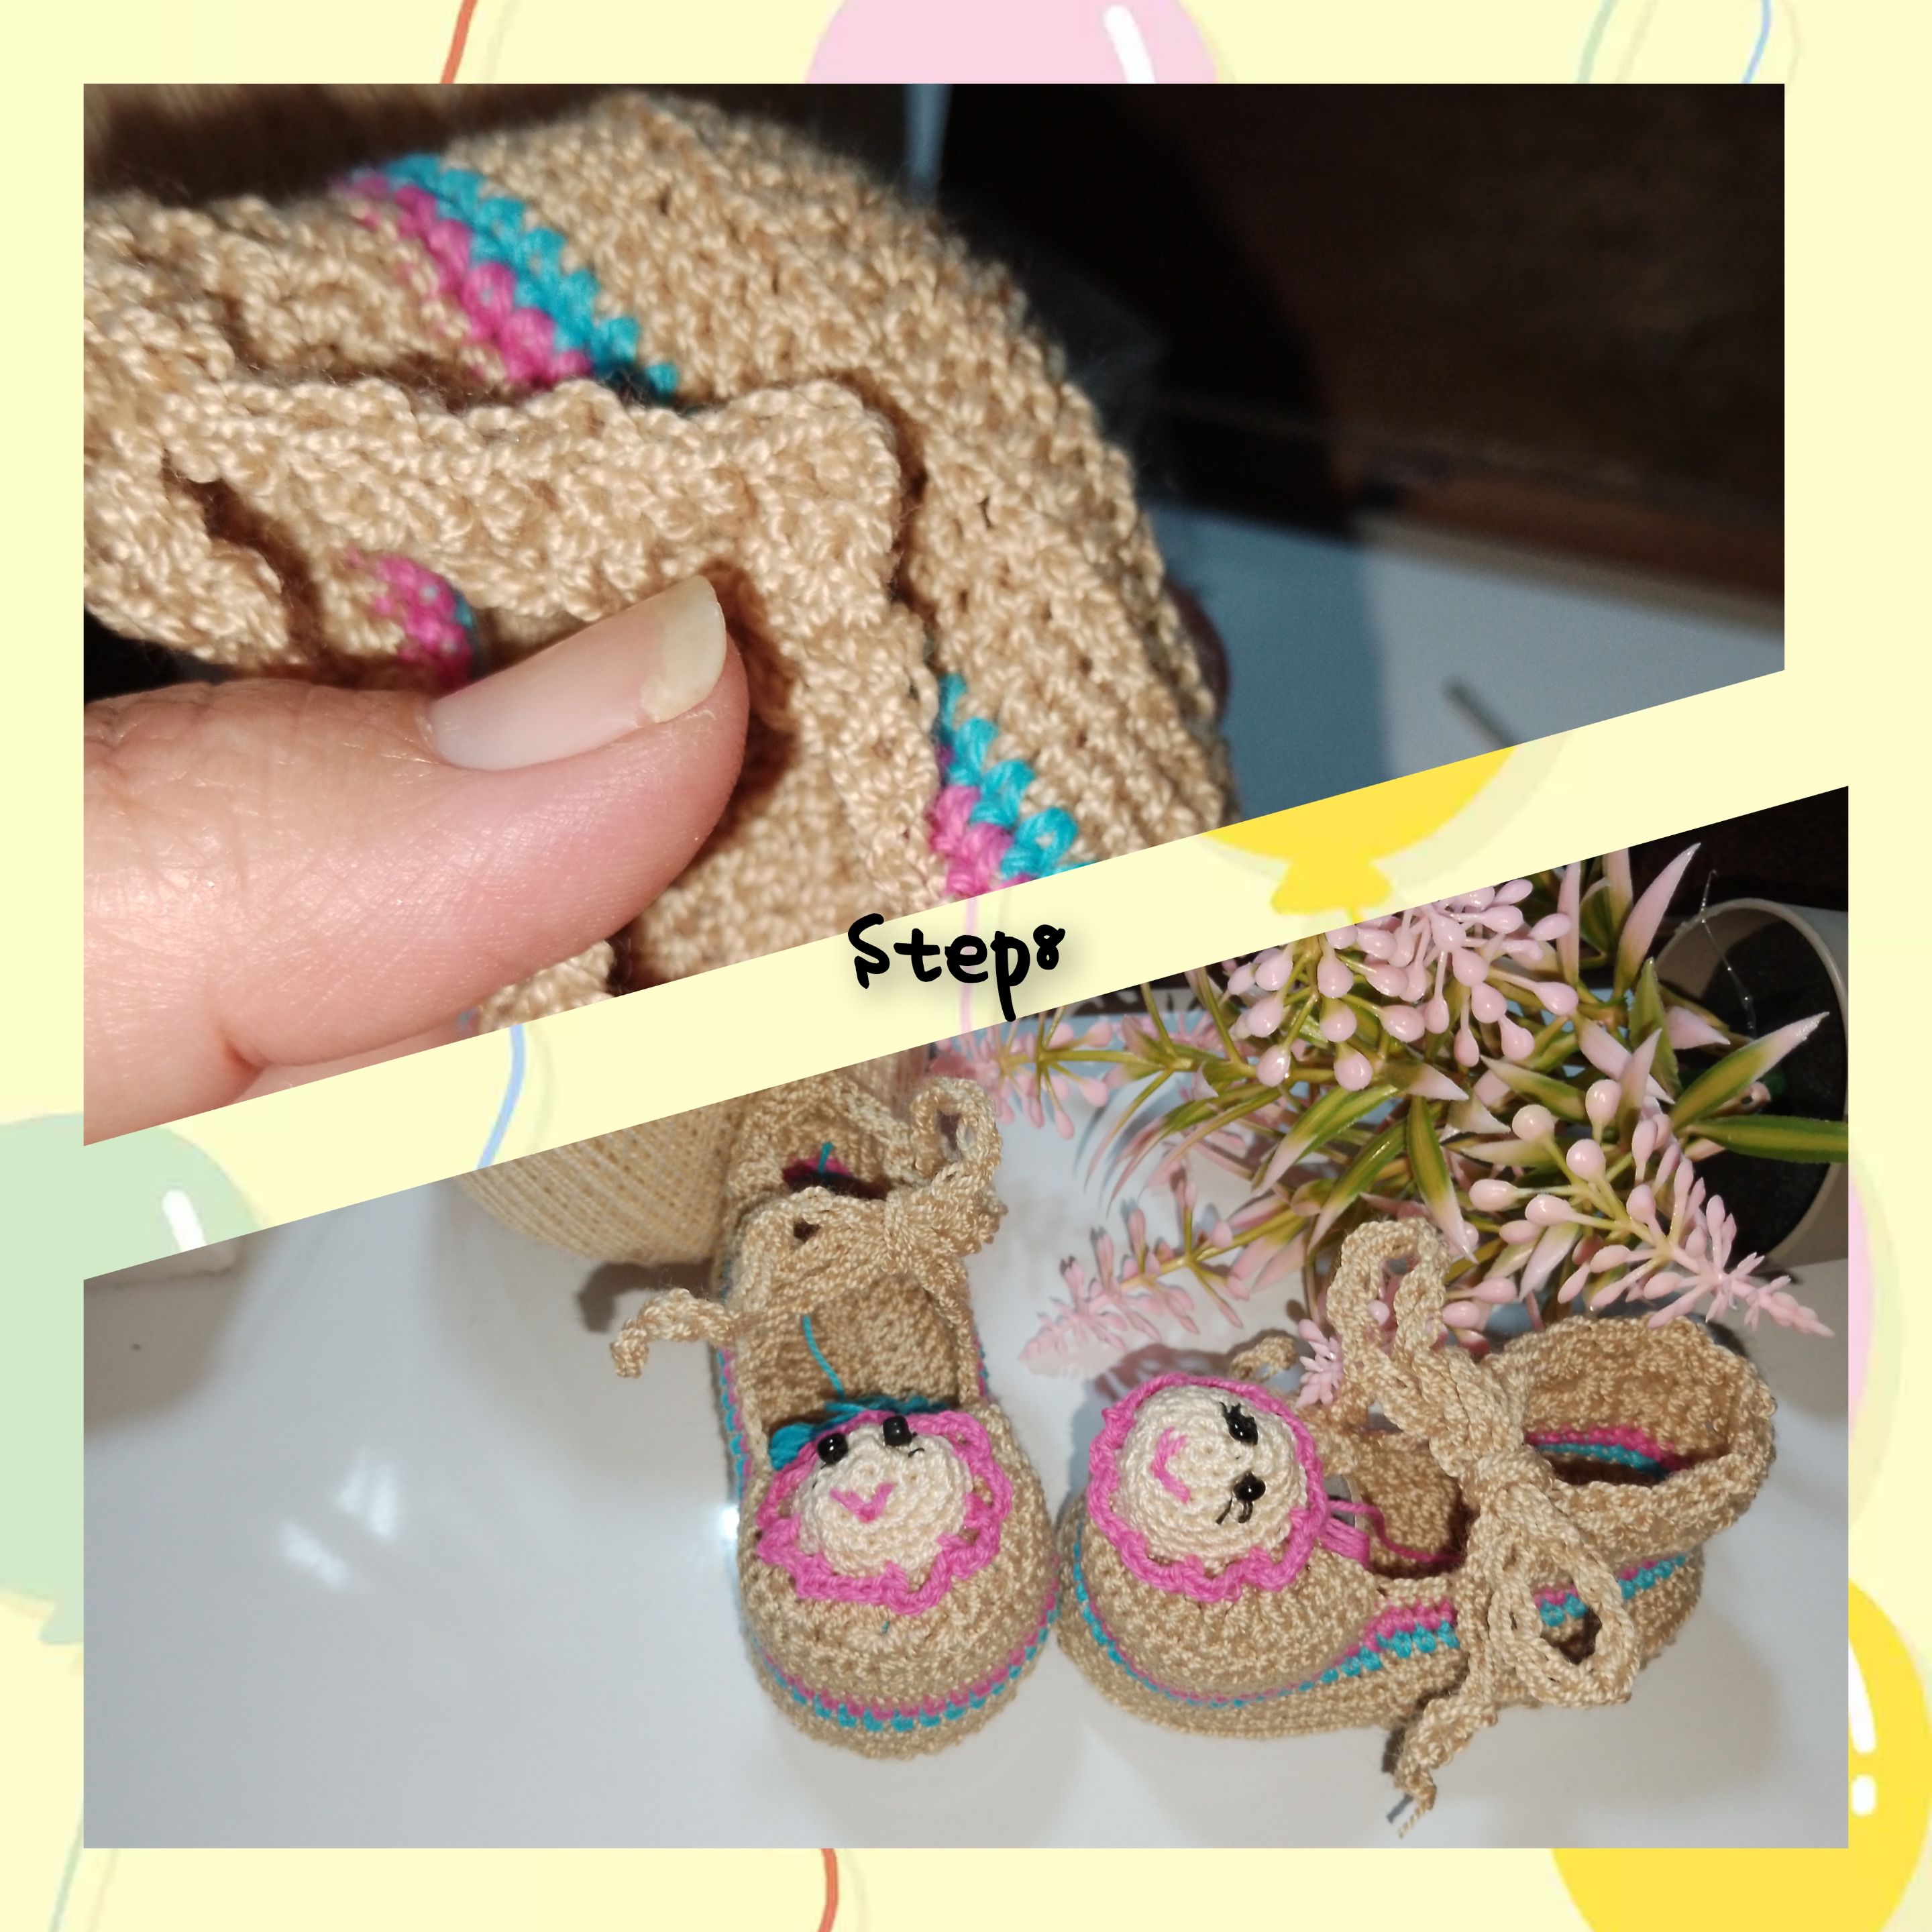
8.) To braid and tie to the princess's foot, I knit a cord on each side of the back part, making twenty consecutive turns of two double crochets. Just enough to make a nice bow.
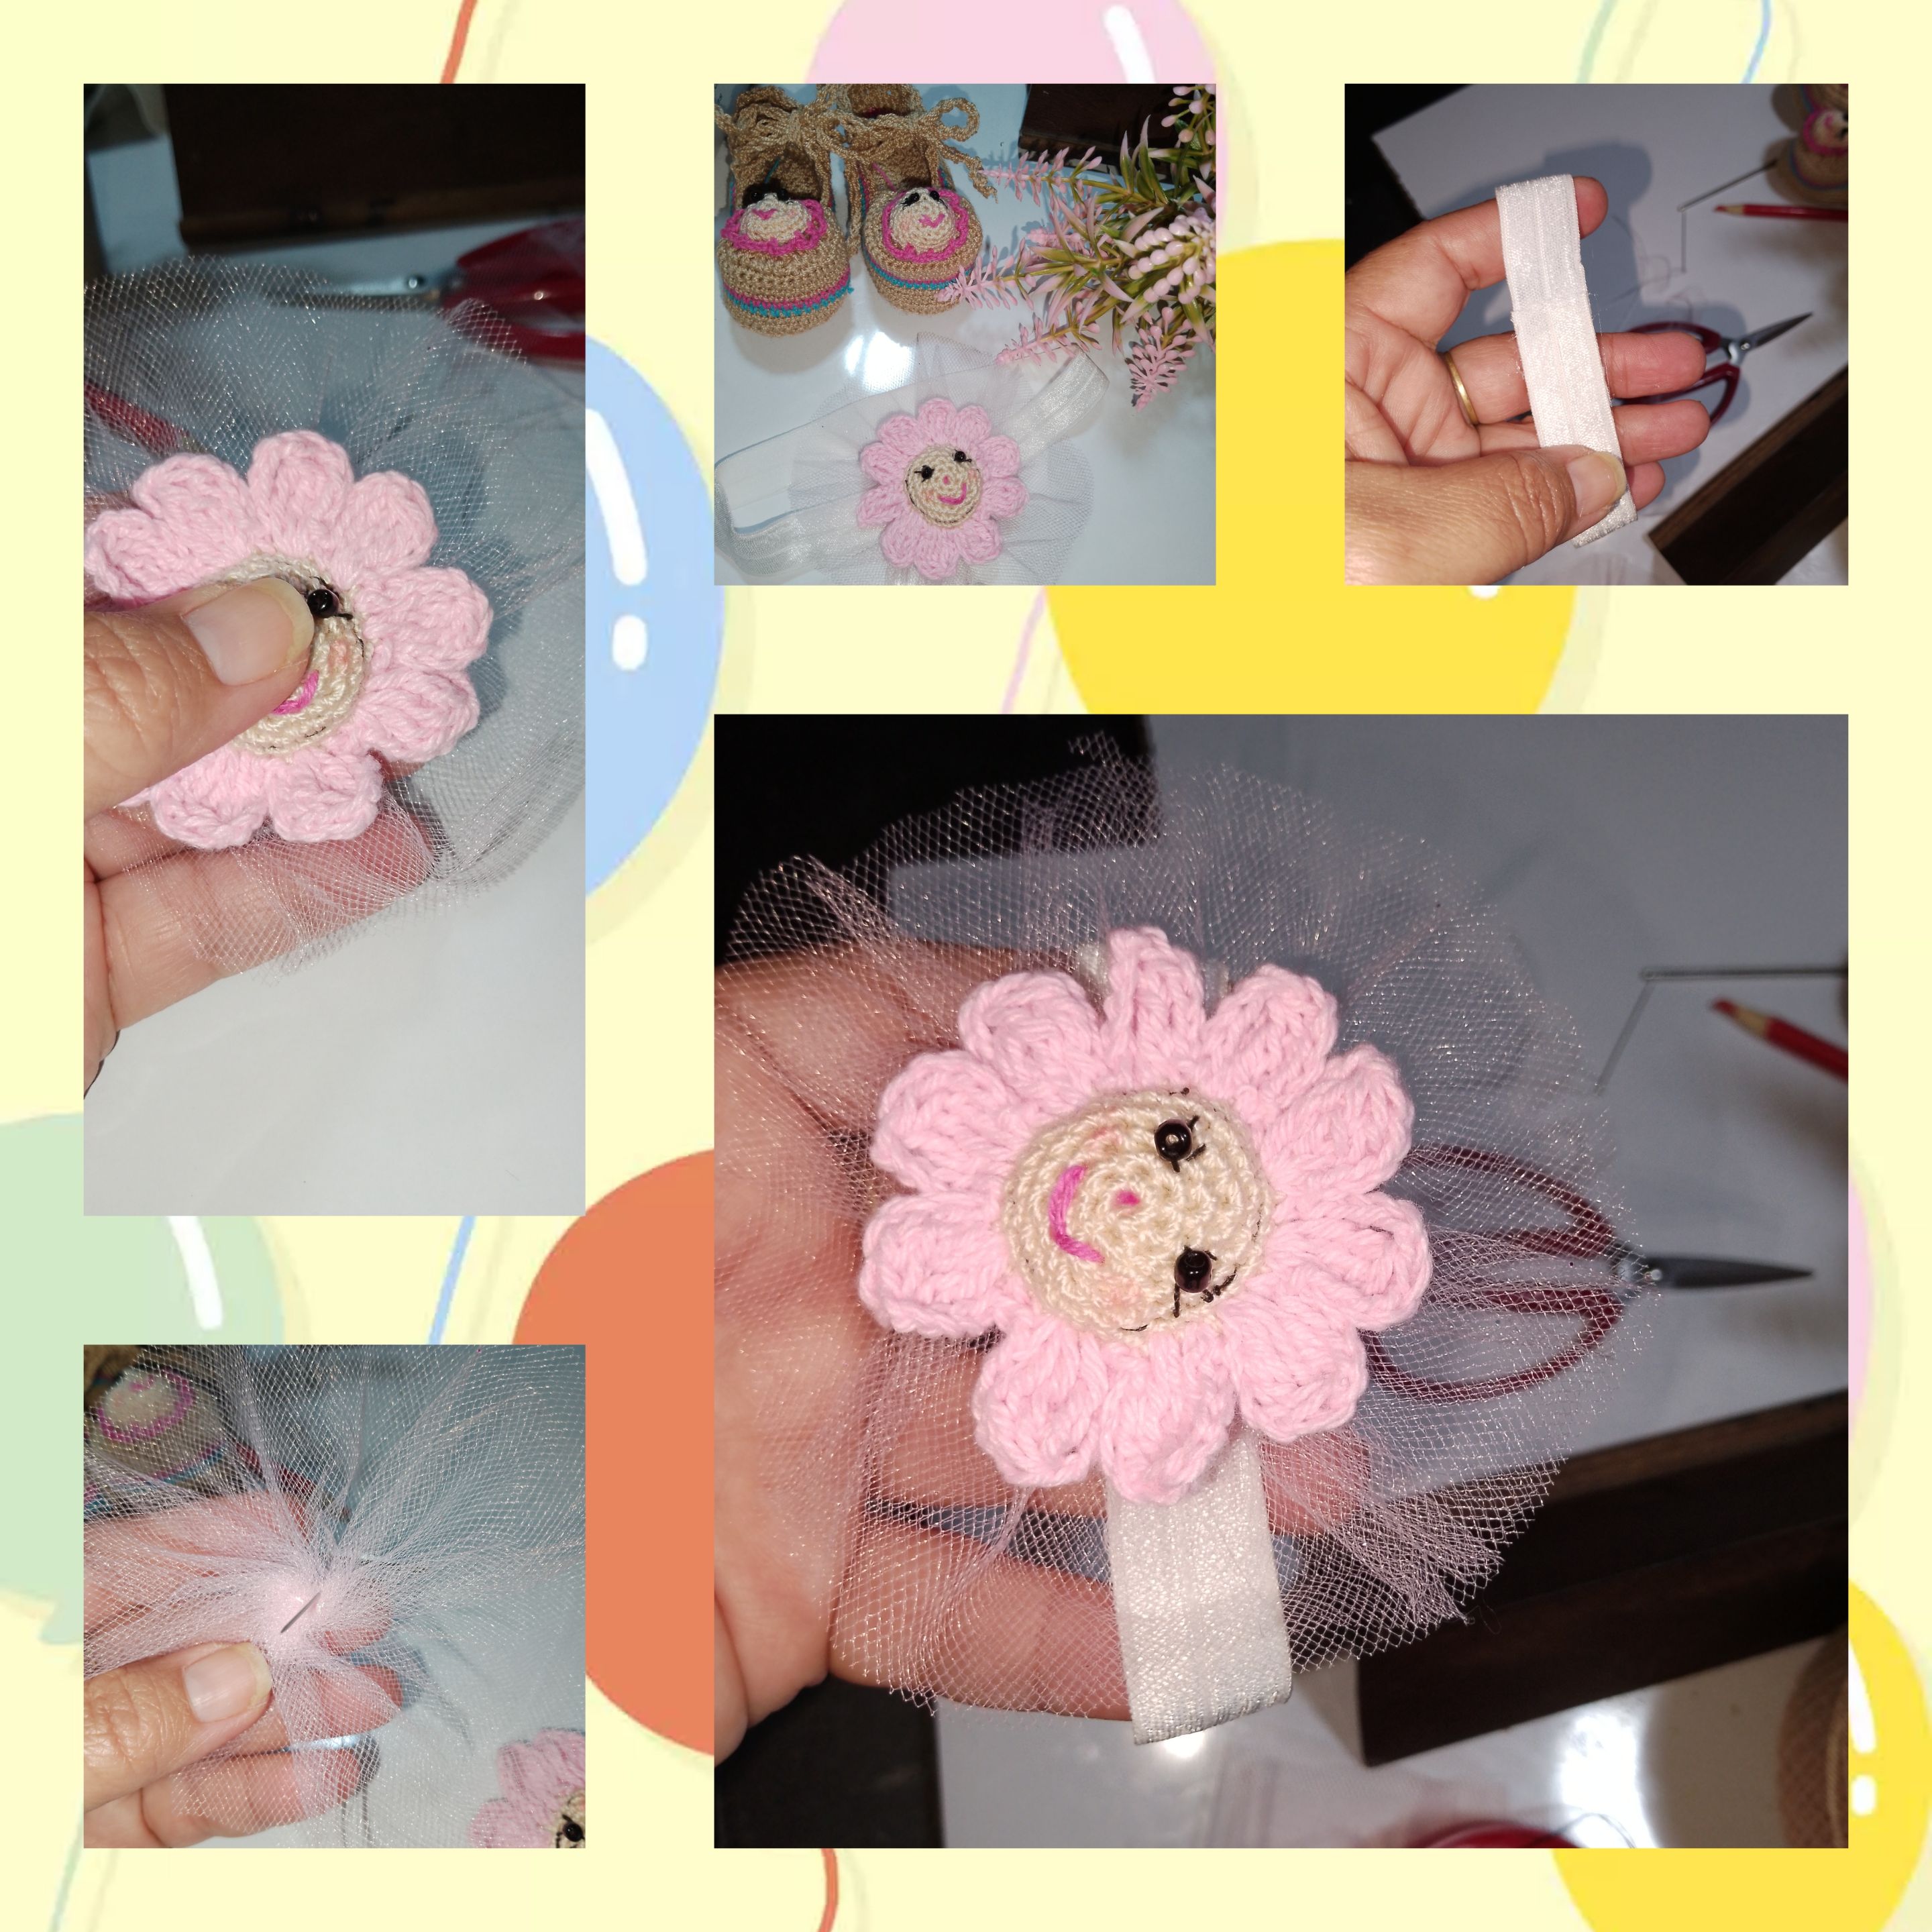
9.) for the headband, I repeat the process, for the pretty flower, unlike the petals of it, they will be signed, by four p.a) closed together and go down to the sphere with cutri chain stitches. I glued the elastic at the ends with silicone stitches, I put together a bow with the tulle fabric and on top of it I glued the woven flower, and finally on the elastic I glued it.
. All photos. They are my property. . Use incollage . Use language translator .
Grateful, you followed me to the end. You are always welcome to my blog. Hst still approaches opportunity.
(ESP)
Hola a todos, que este sea un gran día lleno de cosas buenas, que la luz de el día y la noche les ilumine y guíen siempre por el bien. Me complace estar una vez más con ustedes en est oportunidad, vengo a mostrarles algo muy tierno, hecho con la técnica de crochet, se trata de un hermoso y muy llamativo Set, de Cintillo y Zapaticos, para una dulce y tierna niña, que pronto vendrá a el mundo, son ideales para comparar su primera puesta. Les dije invito a seguirme y verás el gran resultado, de este proyecto. Deseo lo disfruten.

Materiales:
. Hilos para tejer colores, (beige, marrón, azul, fucsia.) . Aguja para tejer. . Agujas para coser. . Chaquira de color negra. . Hilo de coser color negro. . Relleno. . Elástico. . Pega silicón. . Tijeras. . Trozo de jeans. . Lápiz para marcar. . Tull rosado.

Proceso de elaboración:
1.) con el hilo, par tejer color marrón, levanto 22p.c), en cada (pc) tejere un ( p.a), en cada extremo es decir en el pc) número uno y en numero 22, haré un aumento de tres (pa), y cerraré con puntos deslizado, en la vuelta siguiente, tejere en cada p.a) un nuevo (p.a), pero en cada punto de aumento de la vuelta anterior, tejere un aumento, es decir en esta vuelta, serán seis puntos de aumento y en la vuelta siguiente serán doce puntos de aumento, hecho esto, queda tejida, la plantilla de la zapatilla, repito el proceso tres veces más, par un total de, cuatro plantillas.

2.) En el trozo de teja de jeans reciclada, marcare la plantillas, y recortó con las tijeras, necesitaré dos plantillas, así que lo marco doble, doblando la tela, antes de marcar.

3.) Para cada zapato, necesitaré, dos plantillas tejidas a crochet y una de jeans, está última, la colocaré en medio de dos tejidas encontradas cara a cara por el revés. Luego de cuadrar, apropiada mente, tejere (mp) por todo el alrededor, hasta unirlas en su totalidad.

4.) Al tener la plantilla lista, doblo a la mitad, ato el hilo para tejer, y tejo, cuatro vueltas consecutivas de (m.p), dando altura, a la pequeña zuela. La siguiente vuelta, tejere con hilo de color azul y la que continúa, de color fucsia, los hilos de colores, los tres, recortando y rodando el residuo, dentro de los puntos de la siguientes vueltas, el de color marrón, no cortaré, iré rodandolo dentro de los puntos, por la parte de dentro

5.) Hago un alto,para tejer la parte delantera de el Zapaticos, así que lo siguiente sera, solo tejer en la parte de adelante, esto lo inicio, tejiendo dos puntos, degradados por dentro y dos por fuera, hecho el recorrido, doy vuelta y repito, no olvidemos, que ahora sera, dónde teji los puntos por fuera,.los tejere, por dentro. Hecho lo anterior, tejere a continuación, siete puntos deslizados, cerrados juntos, de esta manera hago el recorrido, y cierro la parte delantera de el Zapaticos.

6.) para la parte tracera de el Zapaticos, solo tejere tres vueltas, con puntos en grupo de dos, de forma degradado.

7.) con el hilo de color beige, hago un anillo mágico y dentro de el, tejo seis (mp), cierro el anillo y ahora tejere, seis aumentos, la tercer pasada, tejere 1mp +1umen), llegado a 16(mp) tejo cuatro vueltas de 16mp). Tejo además una pequeña tapita, iniciando en un anillo mágico y seis aumento. Con el hilo de color fucsia, levanto cinco p.c), dejo dos mp) y tejo un (pd), así continuo el recorrido, dando forma, a una delicada florecita. Dentro de el pequeño círculo inicial, coloco un poquito, de relleno y pego la para con aguja e hilo, hecho esto, pego las mostacillas para simular, los ojos de la flor, y bordo llamativas pestañas, y para concluirla, dorado con el hilo fucsia una agradable sonrisa. Hecho todo esto, no queda más que decorar cosiendo, en la parte delantera de el Zapatico.

8.) Para trenzar y atar a el pie de la princesa, tejo un cordón en cada lado de la parte tracera, dando veinte vueltas consecutivas de dos puntos altos. Justo suficiente para hacer un lindo lazo.

9.) para el cintillo, repito el proceso, de la linda flor, a diferencia que sus pétalos, estarán firmados, por cuatro p.a) cerrados juntos y bajo a la esfera con cutri puntos cadenas. El elástico lo pego en los extremos con puntadas de silicón, armó un moño con la tela de tul y sobre ell pego la flor tejida, y finalmente sobre el elástico la pego.

. Todas las fotos. Son de mí propiedad. . Use incollage . Use traductor lenguaje.
Agradecida, me hayas seguido hasta el final. Siempre eres bienvenido a mí blog. Hst aún aproxima oportunidad.